When you know how to zoom out on Mac, you can make it easier to see what you’re doing. Depending on which way you go, zooming lets you see the screen close up but it also lets you get a wider view. And, thanks to the wonderful nature of macOS, you actually have quite a lot of control at your fingertips
In this guide, we’re going to take a look at the various options available to you. We’ll be explaining the different ways you can zoom, whether that’s via a keyboard shortcut or using a mouse or trackpad. And we’ll also take a look at zooms specifically for text. By the end of this short tutorial, you’ll be using your Mac like a pro.
So let’s take a look at how to zoom out on Mac.
How to zoom out on Mac
This quickest way to zoom out on Mac is to press Option-Command-Minus (—).
There are multiple ways of zooming out, though. Let's cover them.
1. Go to System Settings
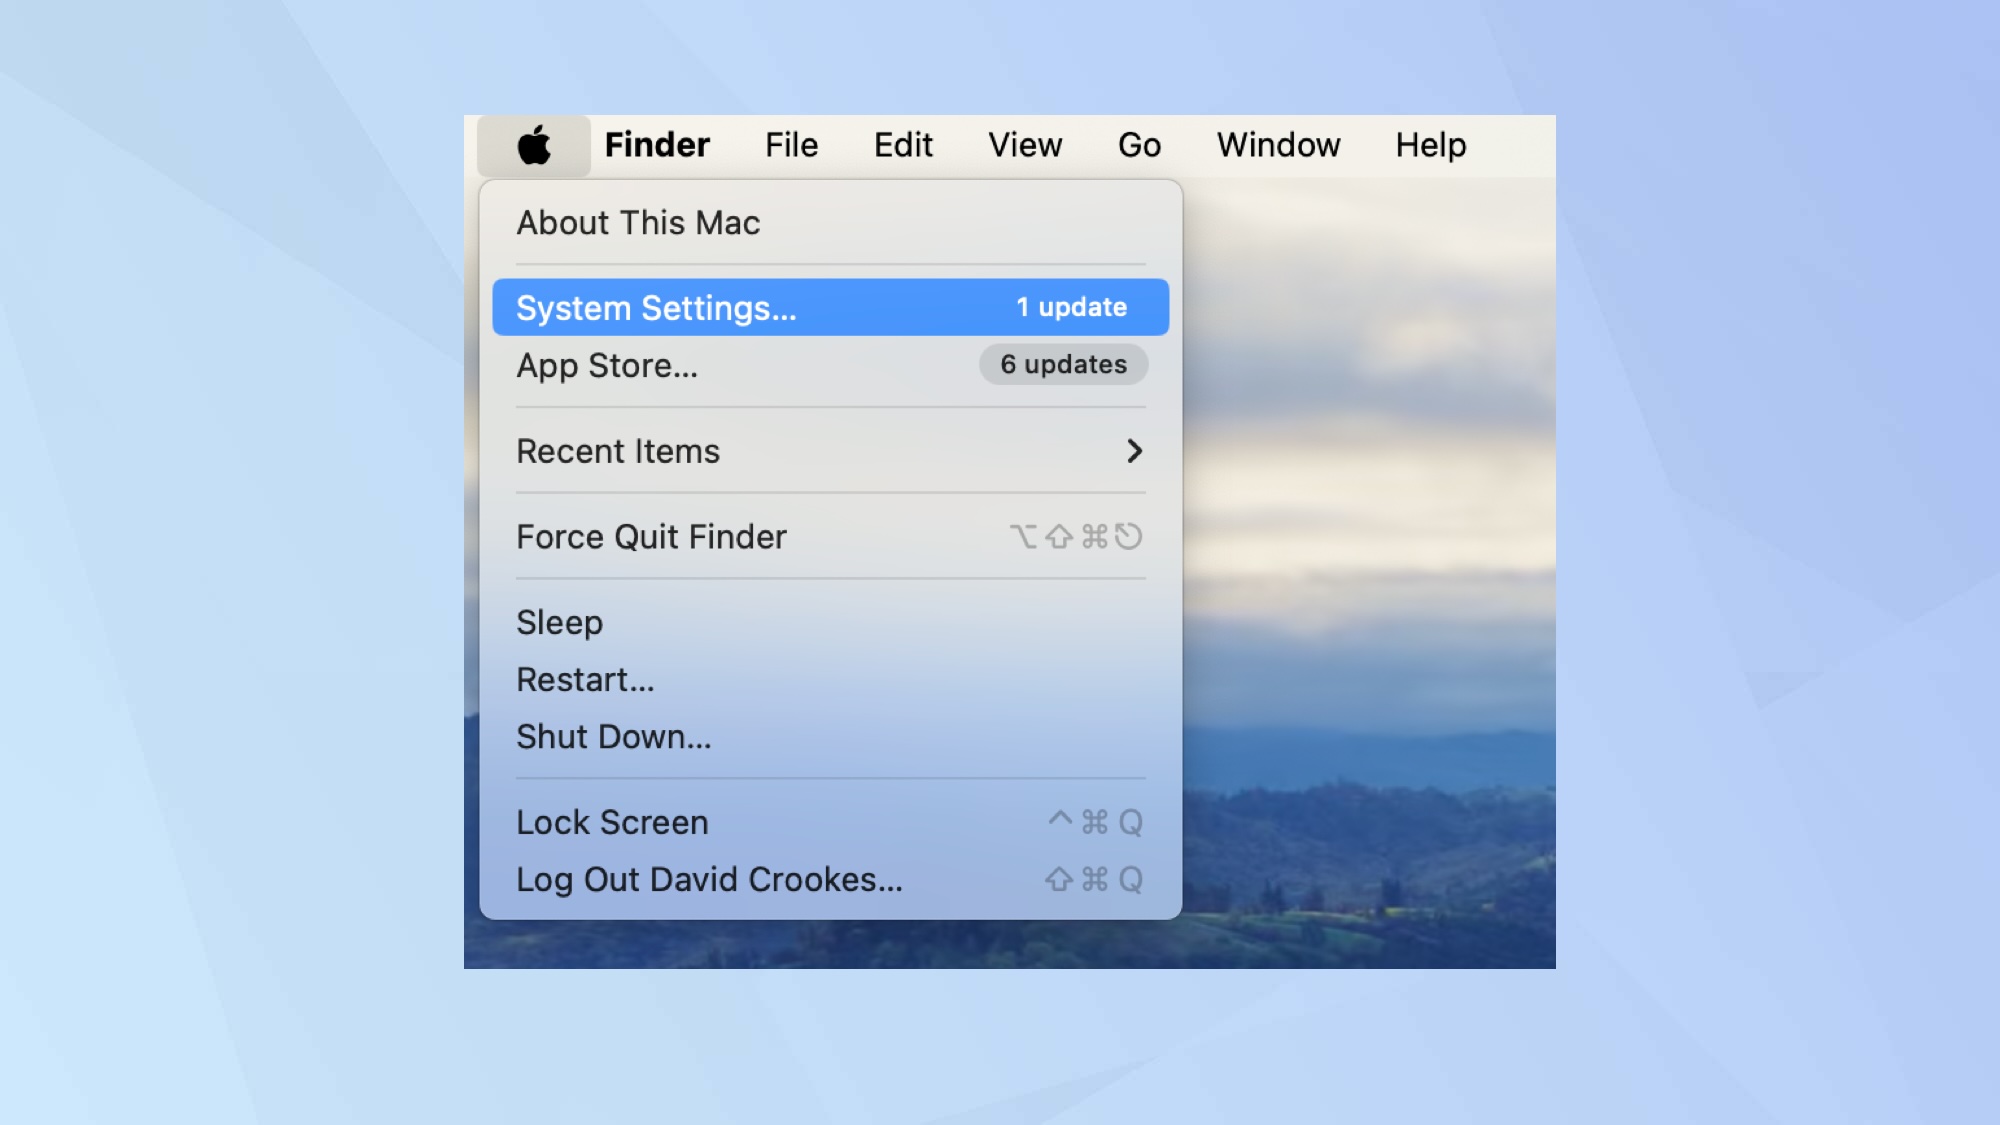
The zoom feature can be activated using multiple methods and you need to turn them on. Click the Apple Menu and select System Settings.
2. Select Accessibility
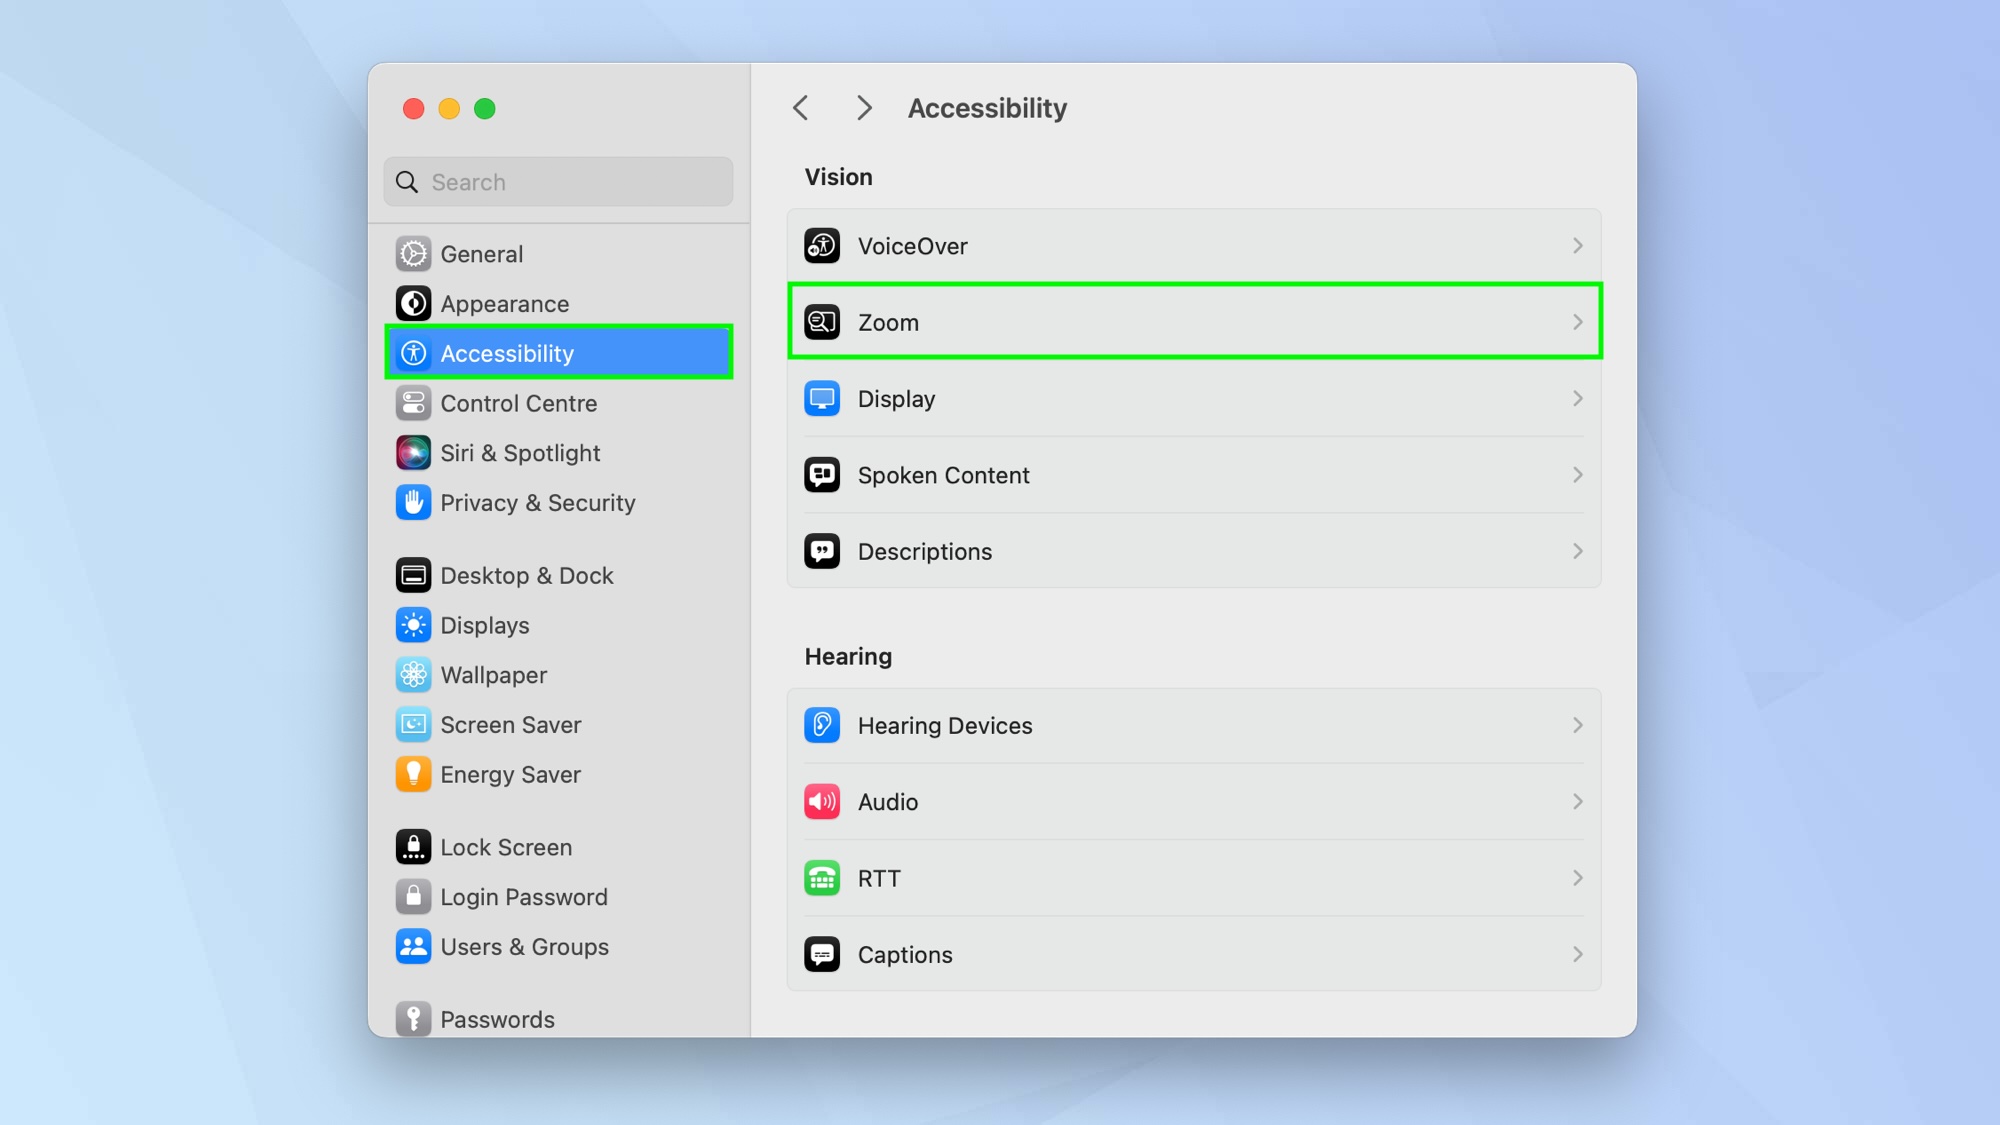
Next, click Accessibility from the left-side menu and select Zoom which you’ll find under Vision in the right-side pane.
3. Use keyboard shortcuts to zoom
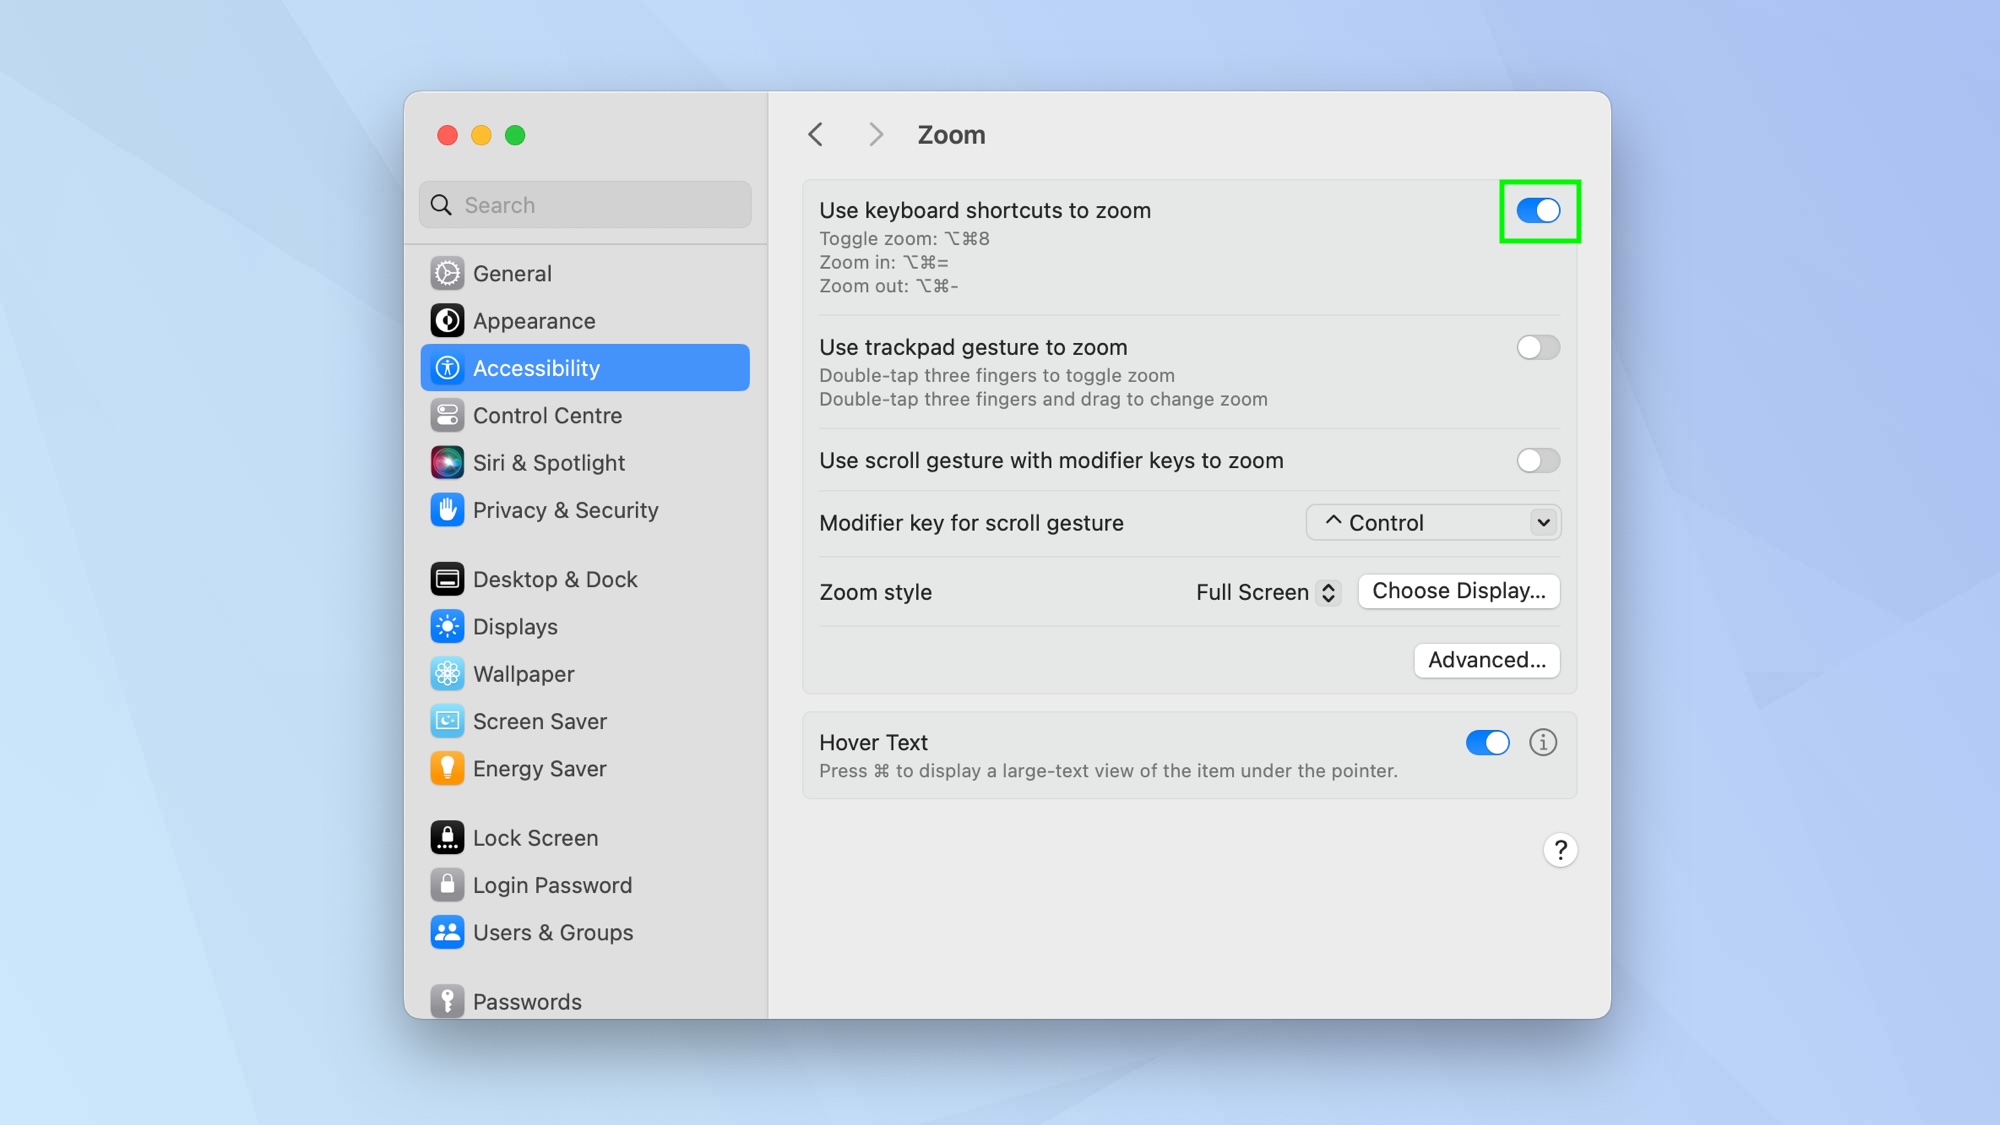
Toggle the switch next to Use keyboard shortcuts to zoom so that it turns green. After doing so, you can make use of three different keypresses.
Hold down the option key at the same time as you press Command and the equal sign (+) and you will be able to zoom in.
Hold down Option, Command and the minus sign (–) and you can zoom out.
Hold down Option, Command and the 8 key and you can switch between a zoom in and zoom out.
4. Use trackpad gestures to zoom
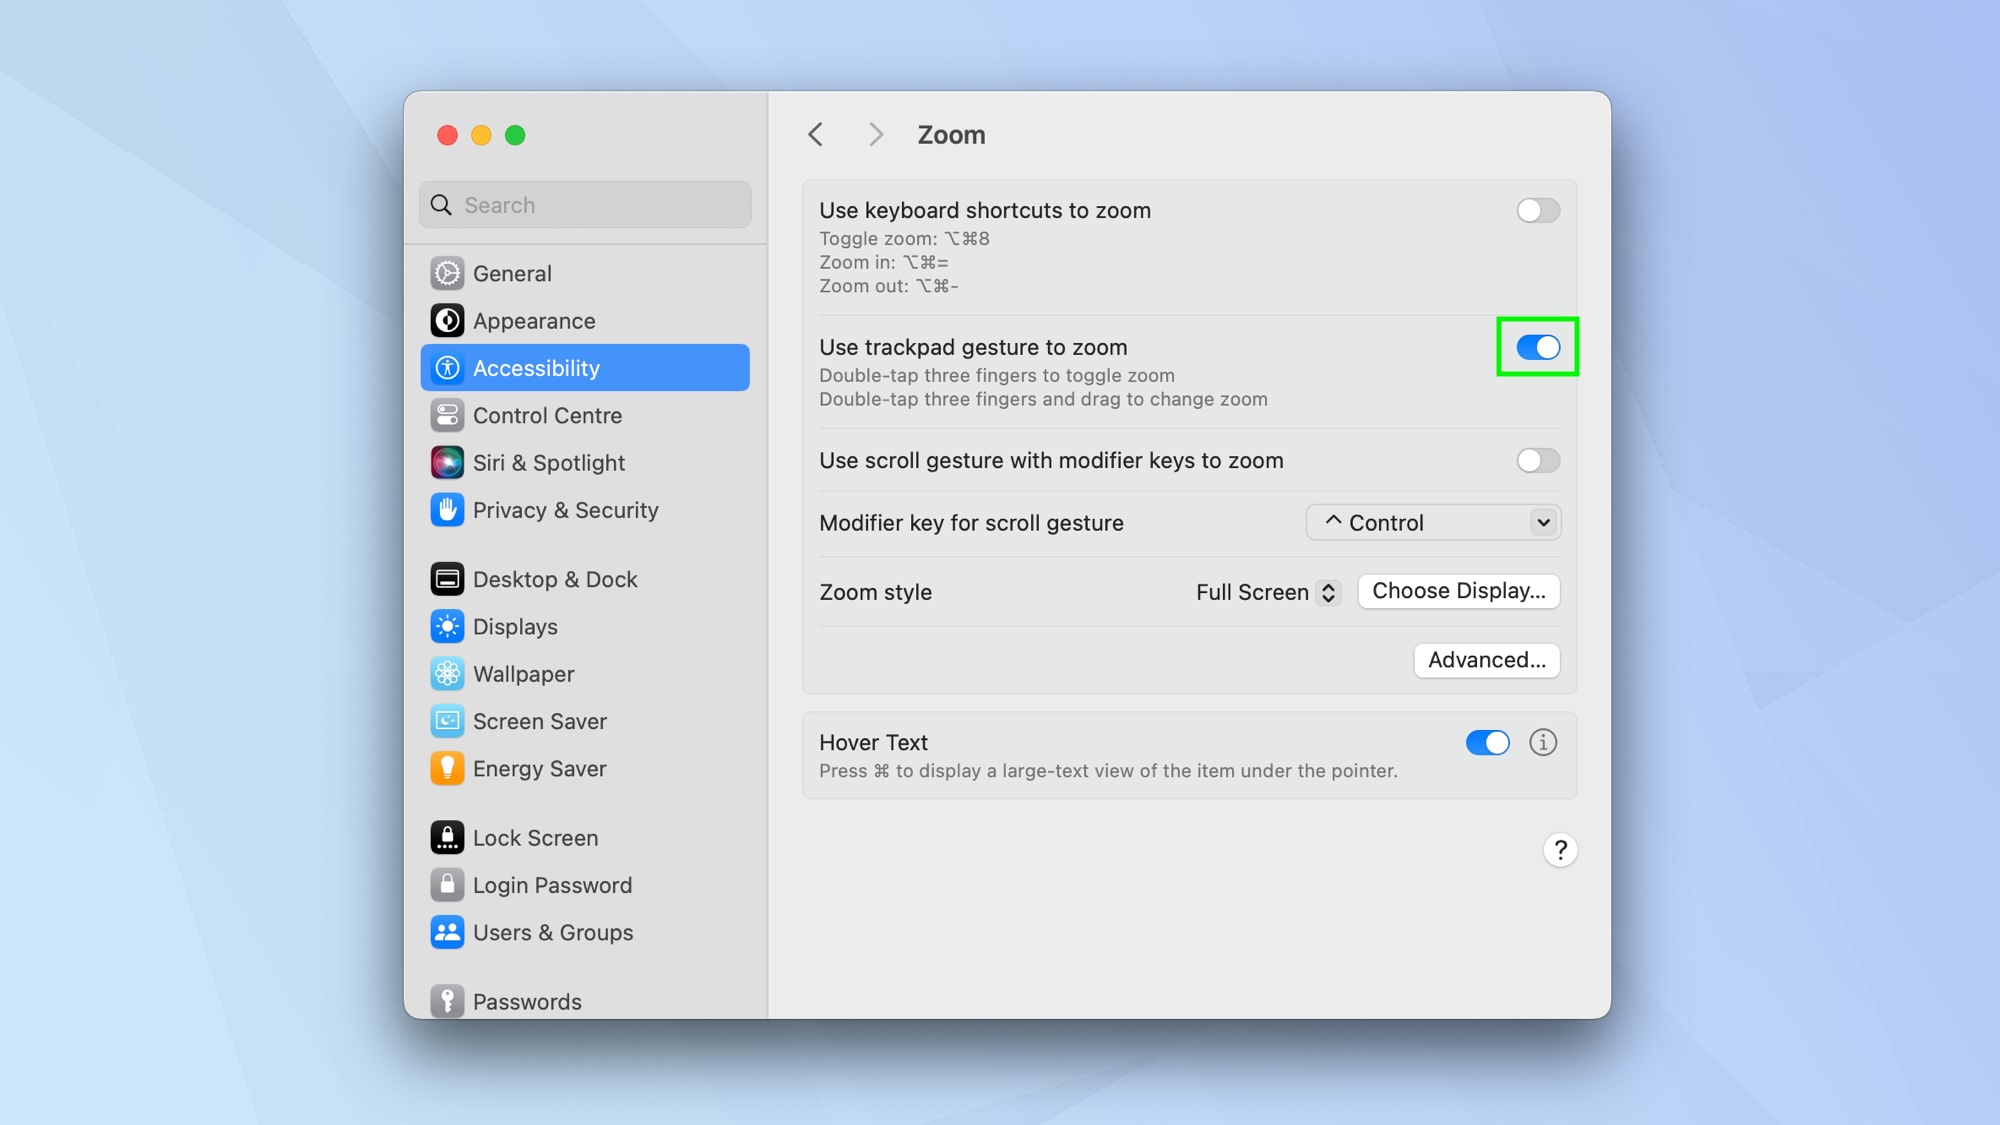
Toggle the switch next to Use scroll gesture with modifier keys to zoom so that it turns green. After doing so, you can use the trackpad to zoom in and out.
Just double tap using three fingers to switch between a zoom in and zoom out.
You can change the zoom if you double tap using three fingers then drag them.
5. Scroll using your mouse or trackpad
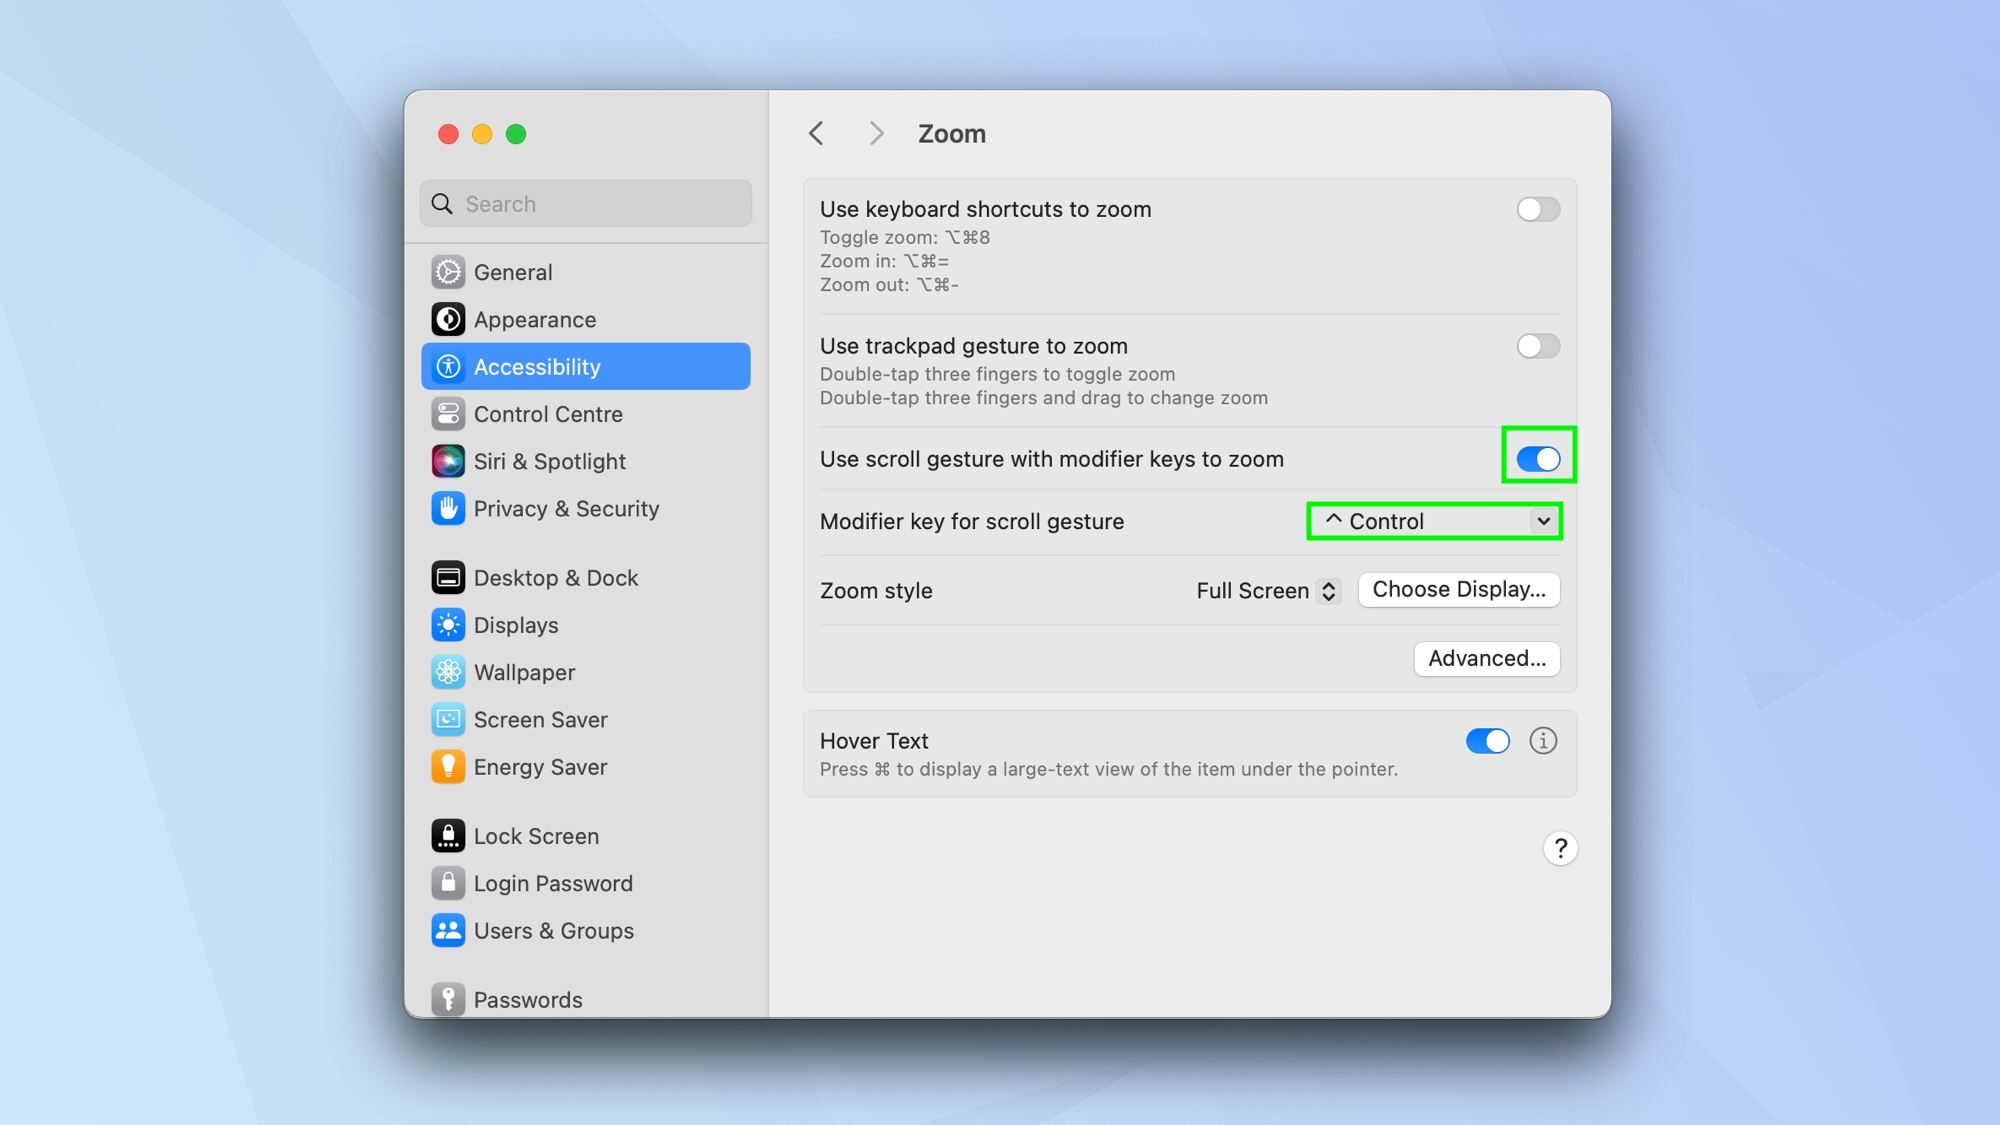
If you would like to use the scrolling function on your mouse or trackpad to zoom in and out, toggle the switch next to Use scroll gesture with modifier keys to zoom.
When doing this, make a note of the key selected next to Modifier key for scroll gesture. The idea is that you’ll press and hold the Modifier key when scrolling with your mouse or trackpad to zoom in and out. You can select the dropdown menu next to the Modifier key to change it.
6. Select the zoom style
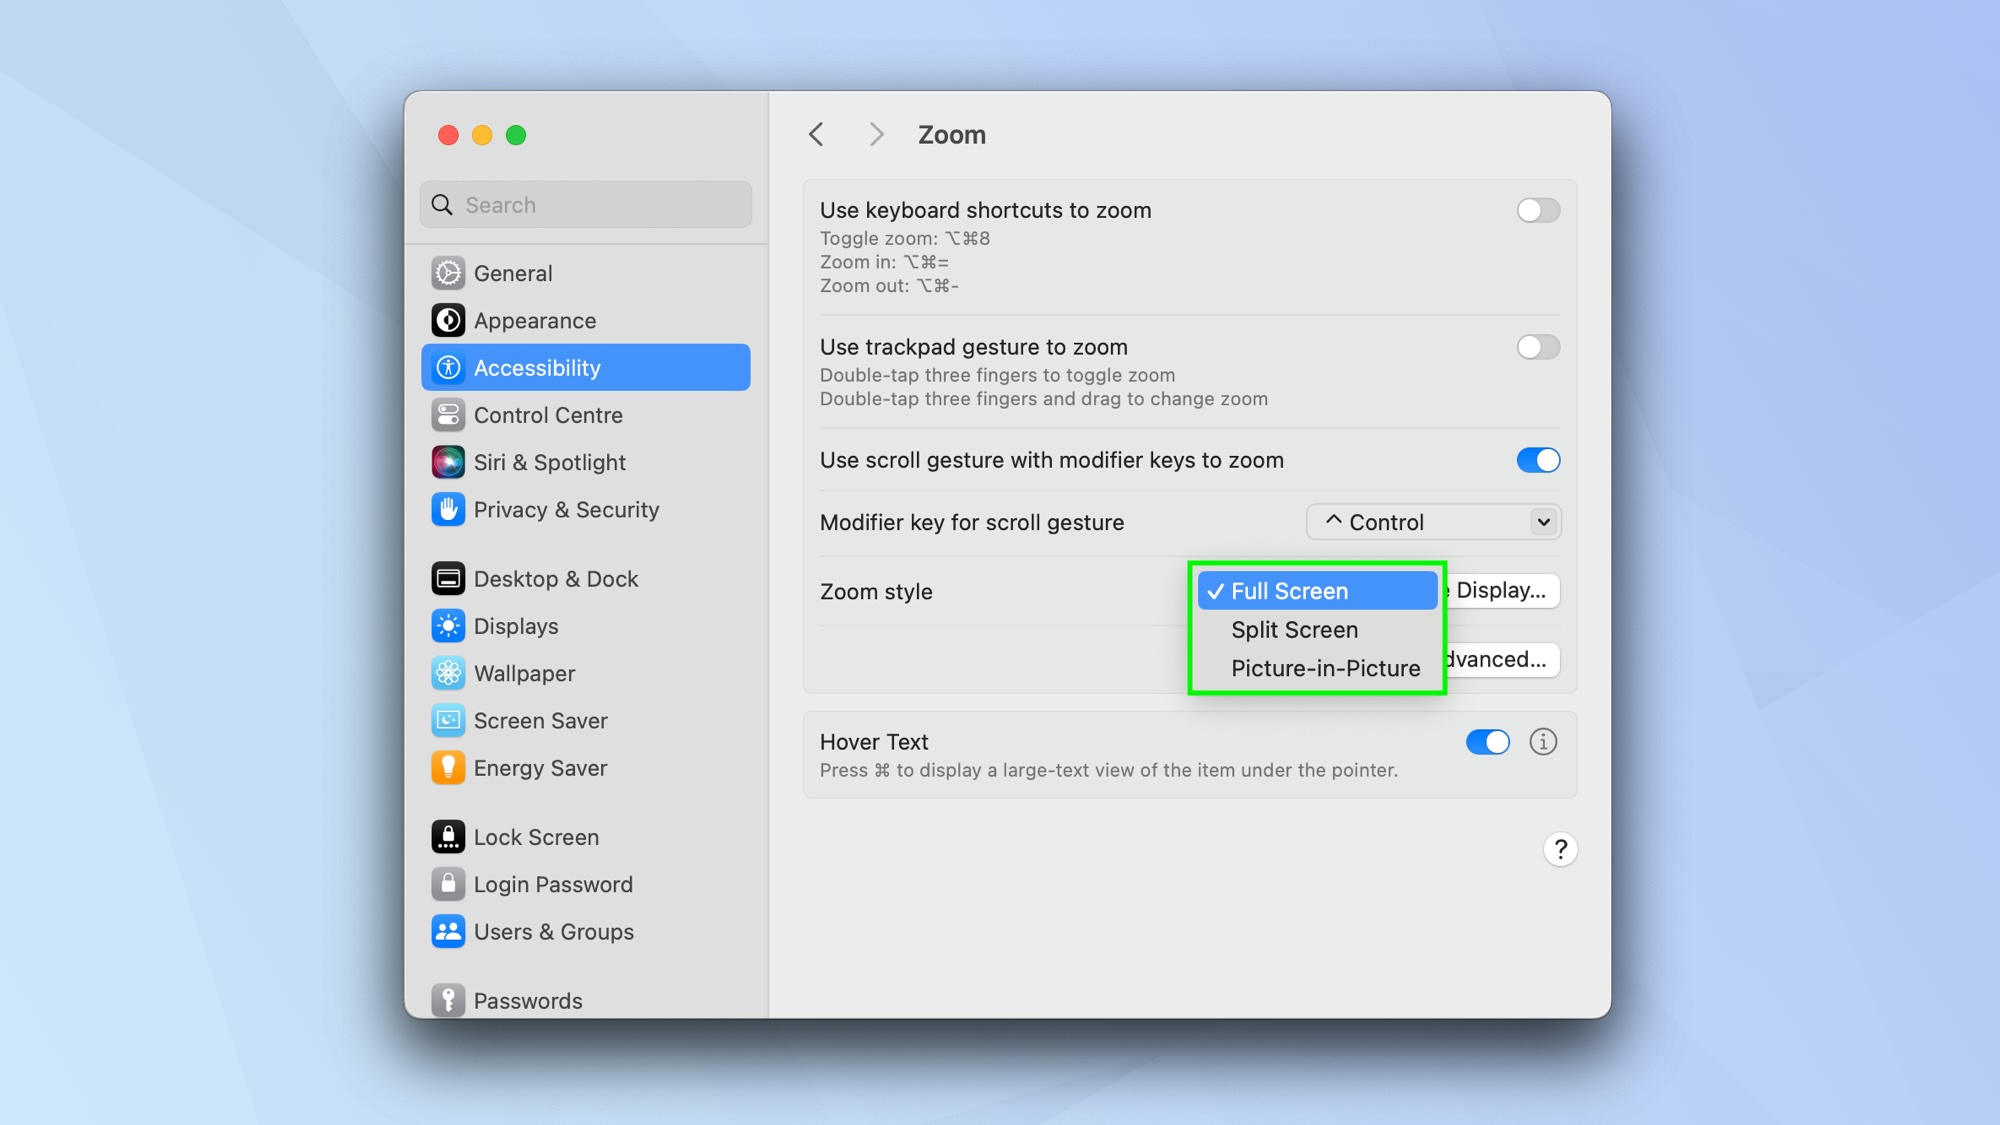
You can also choose how you want the zoom to appear on screen.
Select the dropdown menu next to Zoom style and choose Full Screen if you want the zoom to fill the display, select Split Screen if you want the zoom to only show on one side of the display or click Picture-in-Picture if you want the zoom to be highlighted around your pointer.
For the latter two options, you can click Size and Location and decide how much of the screen should be taken up by the zoom.
7. Display a larger version of text
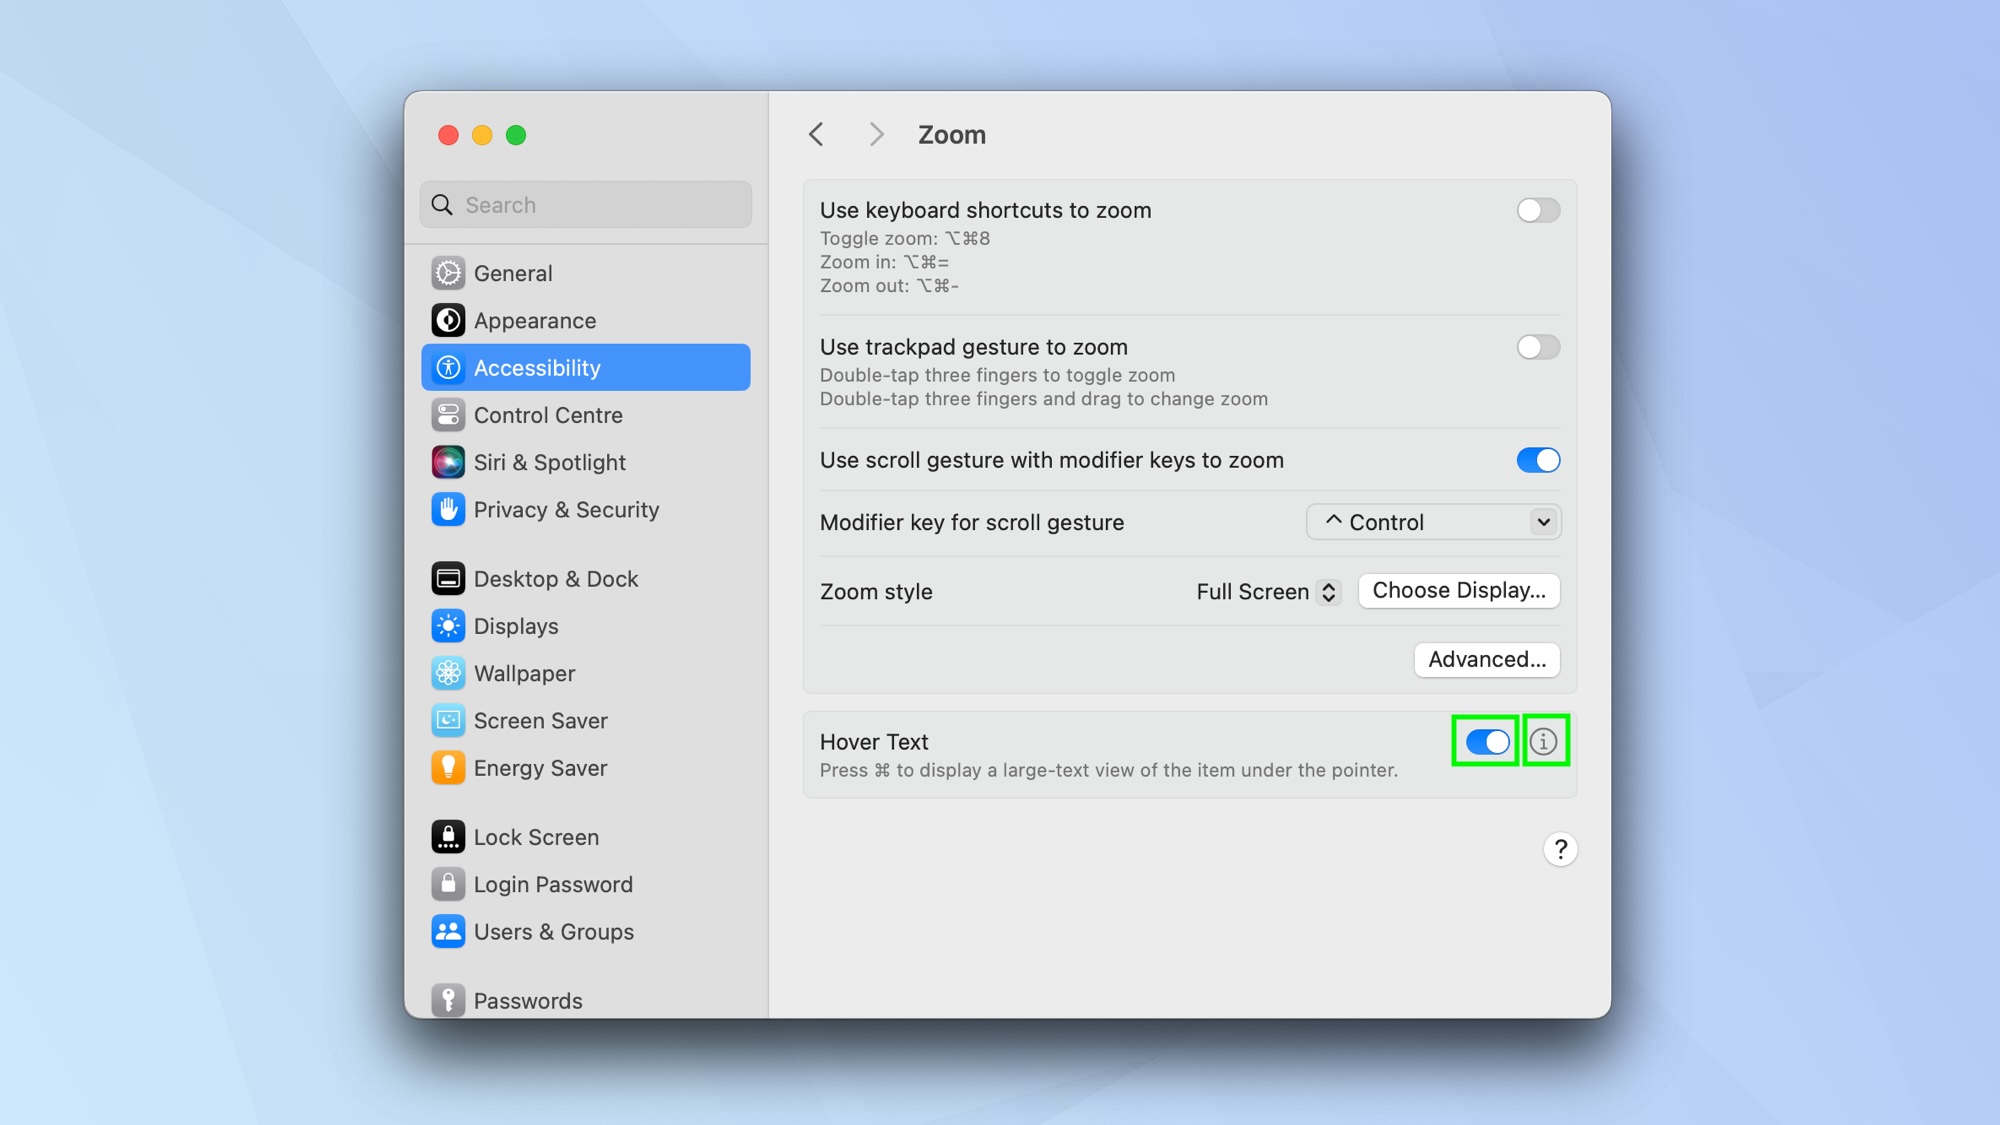
If you want text to appear larger as you press Control and move your pointer across the words, then toggle Hover Text so that it turns green. You can select the i icon next to Hover Text to fine tune this feature, for example, by changing the text side of zoomed text.
And there you go. You now know how to zoom out on Mac. There are lots of other macOS features you may want to discover, too. Find out how to to split your screen on Mac, for instance, or how to select multiple files on Mac. You can also discover how to use the Automator on Mac or how to change the screenshot location on Mac.


