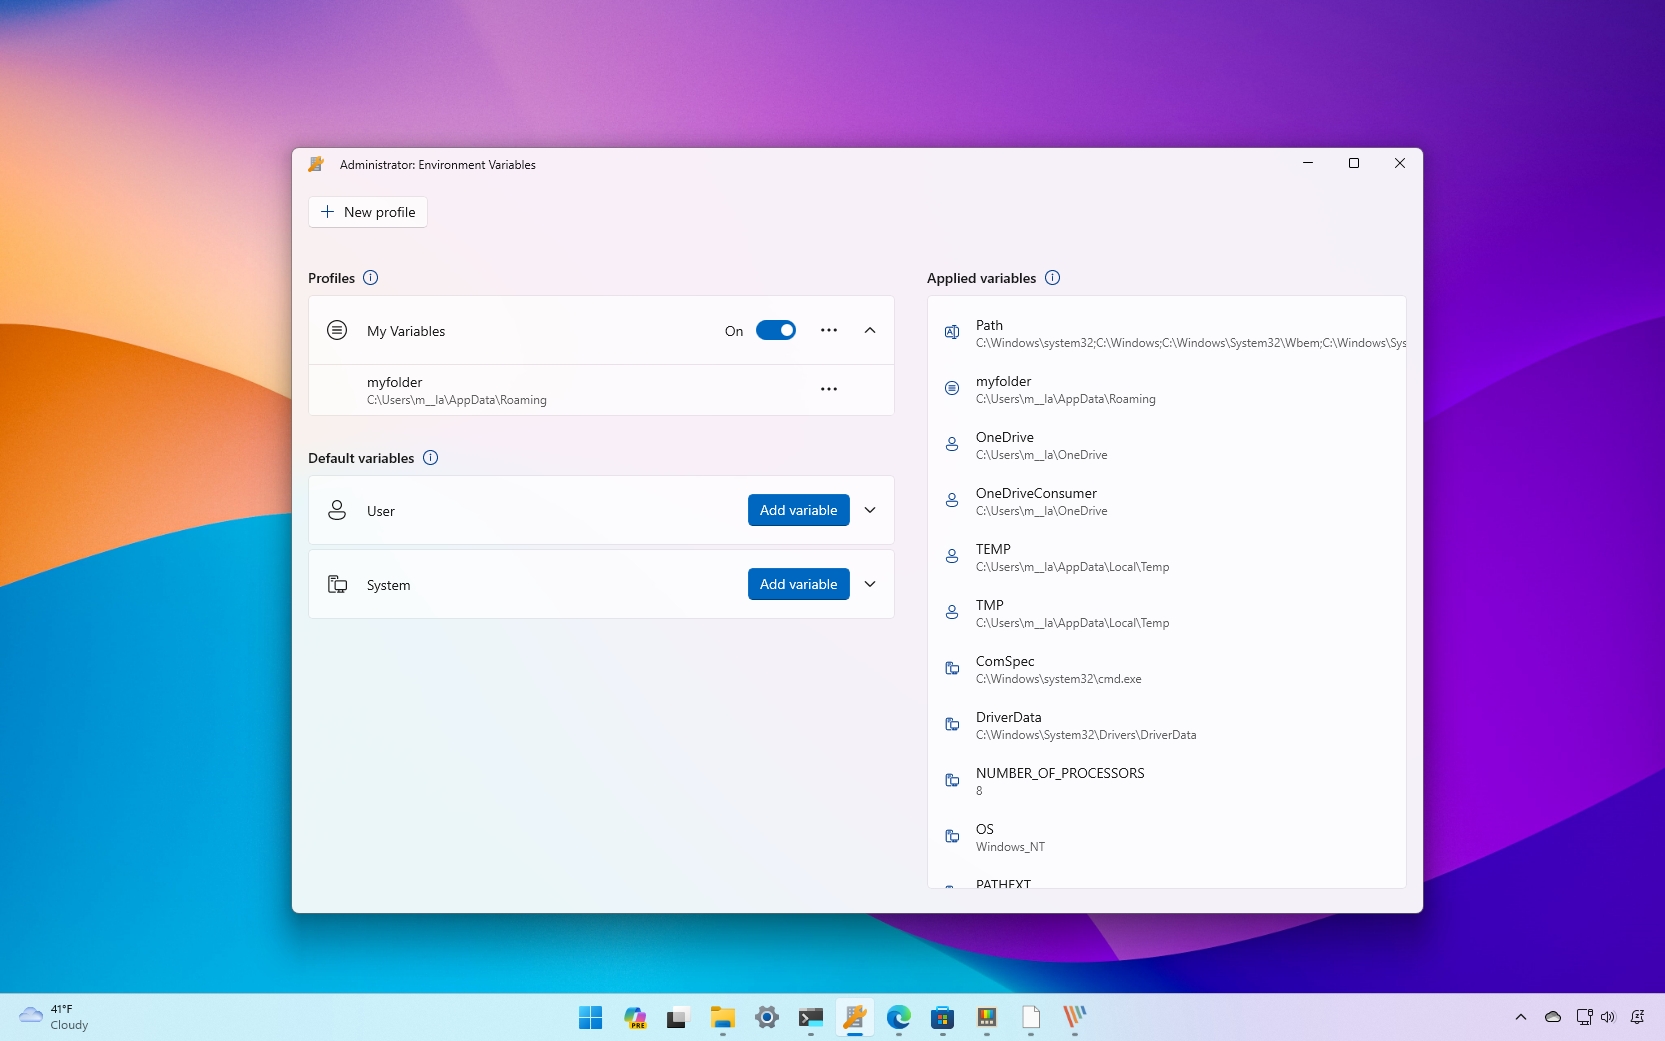
On Windows 11, Microsoft has updated its PowerToys app with a new "Environment Variables" tool, which, as the name implies, allows you to manage environment variables on your computer.
In a nutshell, environment variables are values that can store specific information for a system configuration, such as the location of an application, the path to a temporary folder, and the user profile. For example, the "windir" variable name contains the "C:\Windows" value.
The operating system supports at least two types of variables, including "User" and "System." As you probably figured out, the "User" variables apply to the user account, while the "System" variables apply globally to all users.
Although you have been able to manage environment variables in the operating system for a long time, the PowerToys app brings a friendly and modern interface to view and manage variables on Windows 11.
In this how-to guide, I'll walk you through the steps to leverage PowerToys to view, add, edit, and delete variables on your computer.
How to manage variables with PowerToys
Before you can manage environment variables, you first have to install PowerToys on your computer. At the time of this writing, the tool in question is available in the latest preview version of PowerToys. As a result, it's recommended to download the installer from GitHub.
Install PowerToys
To install PowerToys on your computer, use these steps:
- Open GitHub on the browser.
- Under the "Assets" section, click the "PowerToysSetup" file to download the installer on your computer.
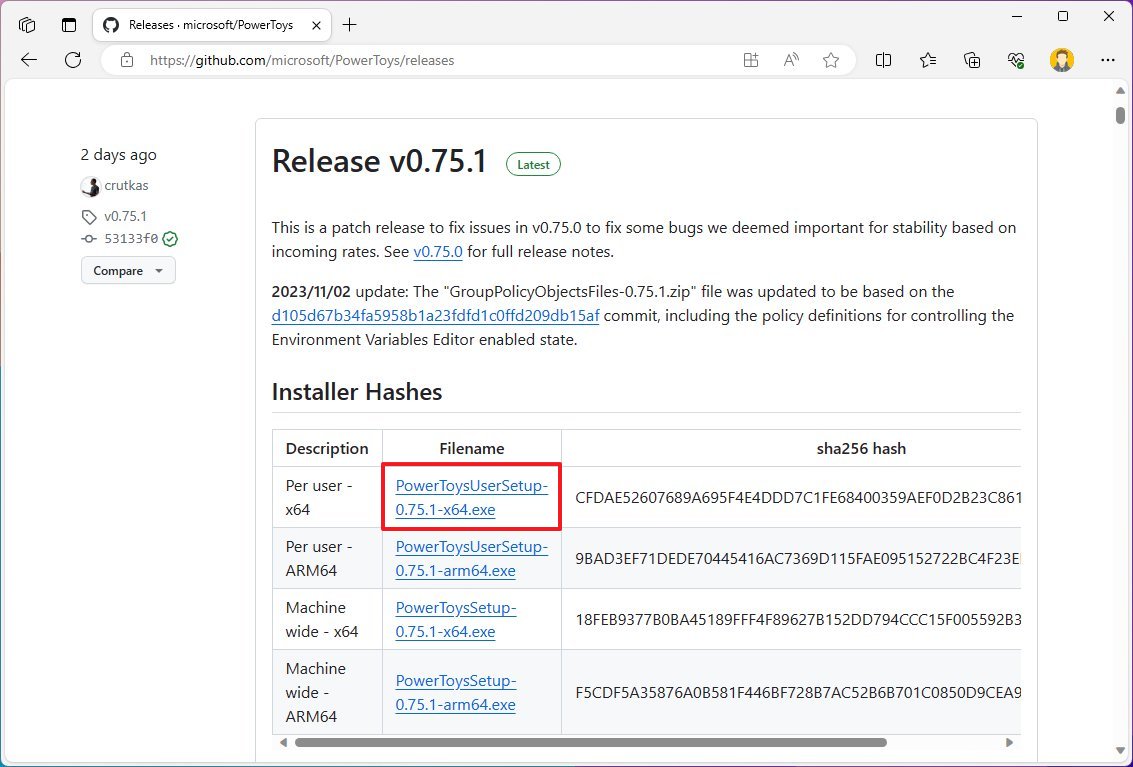
- Double-click the file to launch the setup.
- Check the option to agree to the terms.
- Click the Install button.
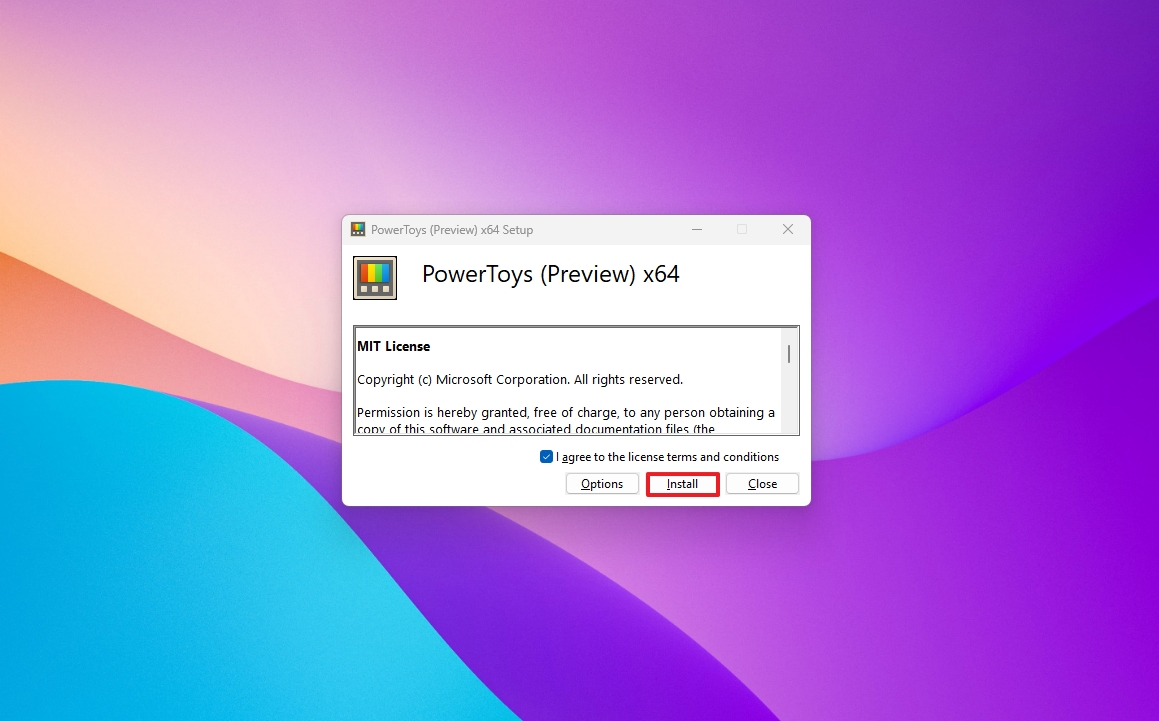
After you complete the steps, you can enable and start using the "Environment Variables" tool on your computer.
How to edit environment variables with PowerToys
Using the "Environment Variables" tool through PowerToys, you can add, edit, and delete user and system variables, and here's how.
Add new user variable
To manage variables on Windows 11 through PowerToys, use these steps:
- Open Start.
- Search for PowerToys, right-click the top result, and choose the Run as administrator option.
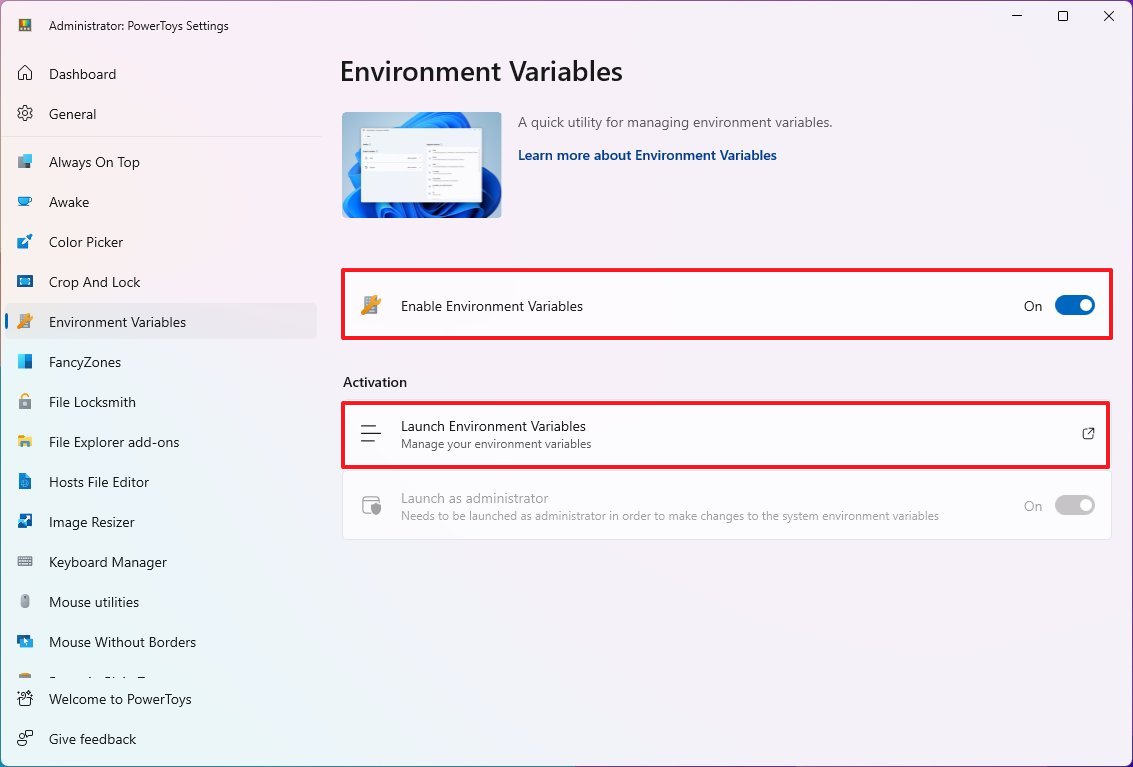
- Click on Environment Variables from the left pane.
- Turn on the toggle switch to enable the tool (if applicable).
- Click the "Launch Environment Variables" setting.
- Click the New profile button.
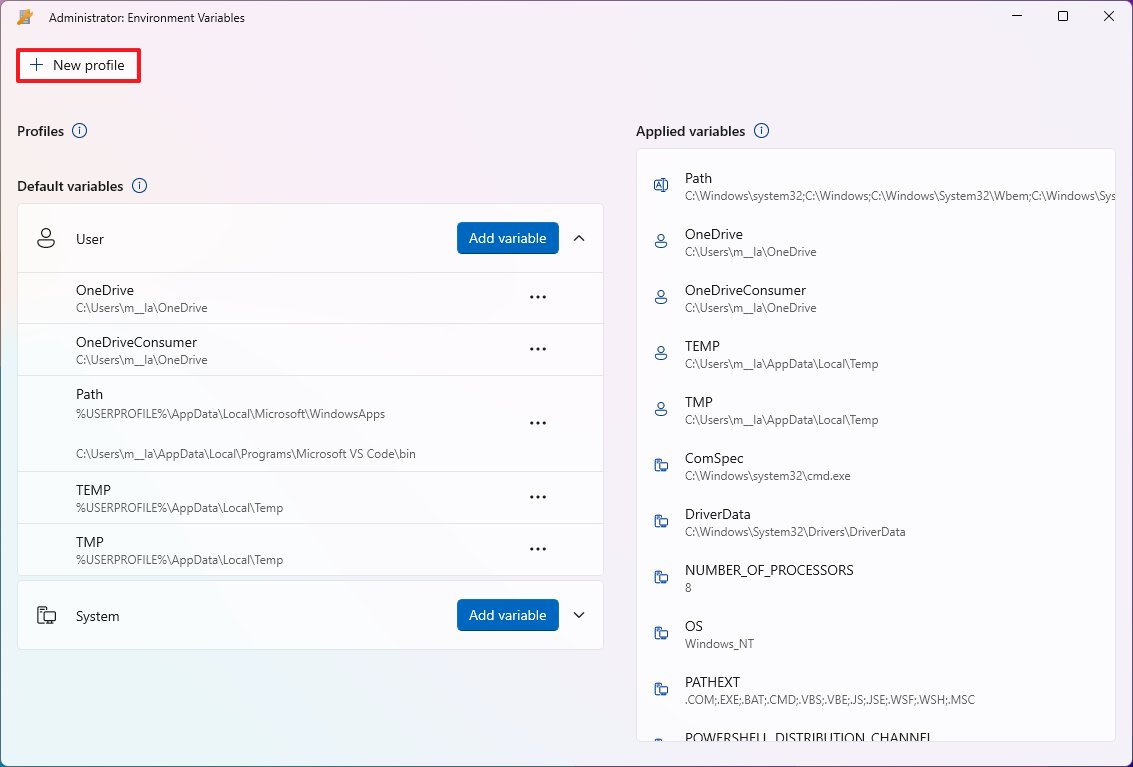
- Quick note: This is not a requirement, but it's recommended, since a profile allows you to turn variables on or off quickly without affecting the default settings. If you don't want to create a profile, then click on "User" to add a new environment variable.
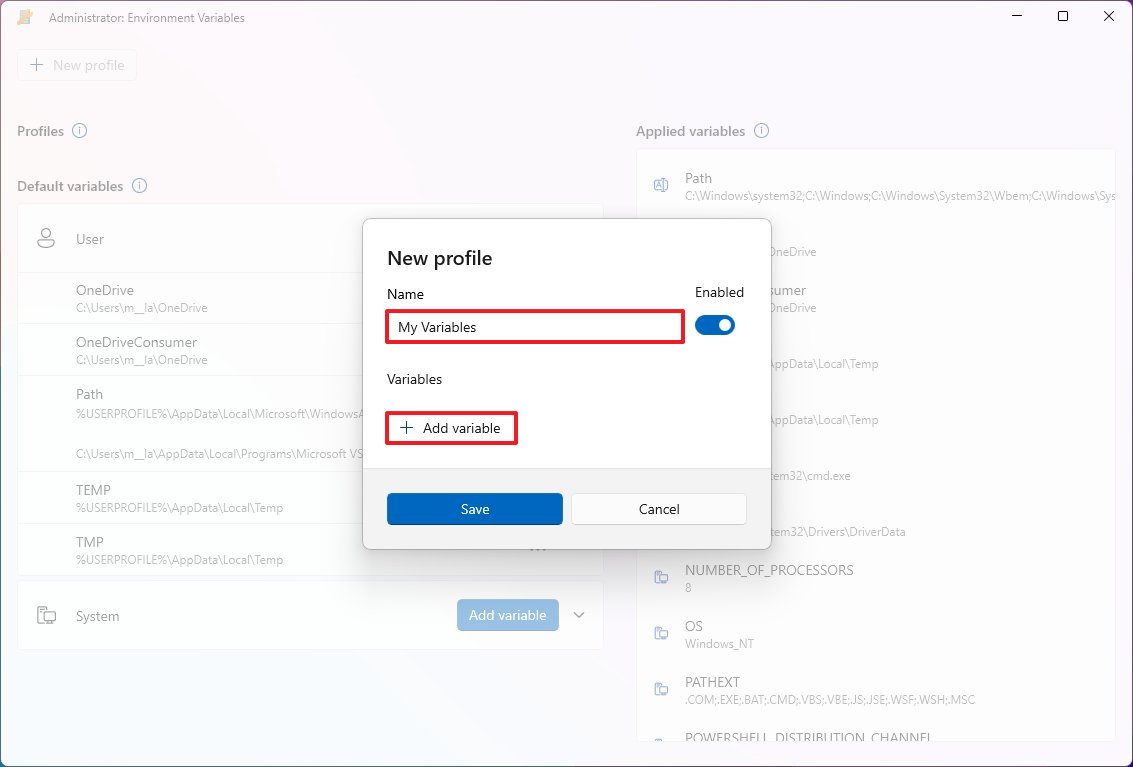
- Confirm a name for the profile, such as "My Variables."
- Turn on the Enabled toggle switch.
- Click the Add variable button.
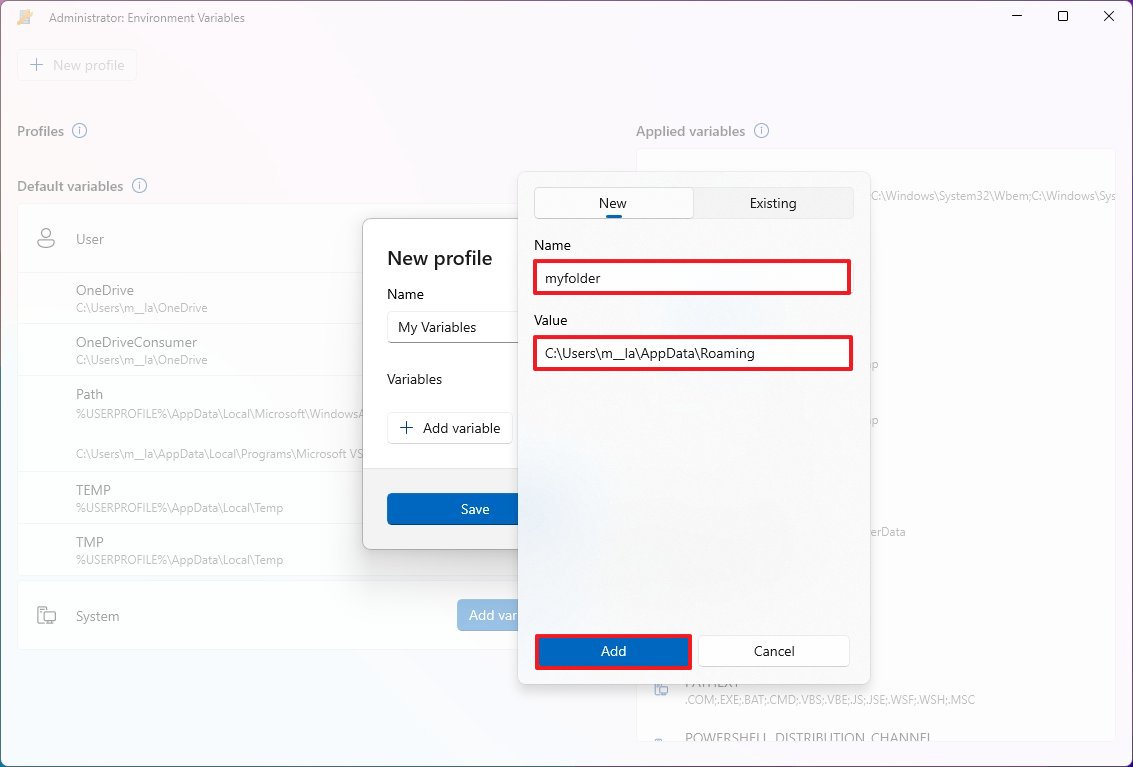
- Click the New tab.
- Quick note: The "Existing" tab allows you to work with existing variables you can control through the new profile.
- Confirm a name for the variable in the "Name" setting.
- Confirm the location you want to use with the variable in the "Value" setting.
- Click the Add button.
- Click the Save button.
Once you complete the steps, the variable will apply to the current user. You can test it out by opening the "Run" command (Windows key + R), typing the variable name between percentage signs (for example, %myfolder%), and clicking the "OK" button. If everything is working, File Explorer should open in the location for the variable.
Add new system variable
To manage system variables through PowerToys, use these steps:
- Open Start.
- Search for PowerToys, right-click the top result, and choose the Run as administrator option.
- Click on Environment Variables from the left pane.
- Turn on the toggle switch to enable the tool (if applicable).
- Click the "Launch Environment Variables" setting.

- Click the "Add variable" button in the "System" setting.
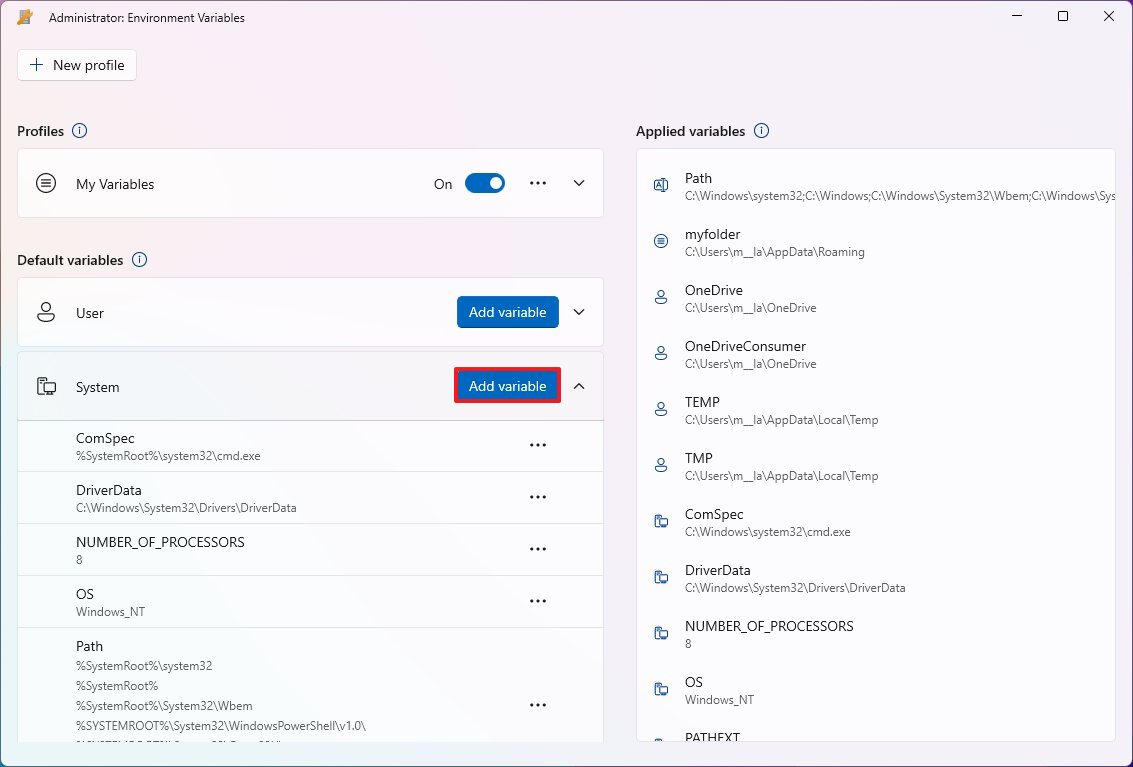
- Confirm a name for the variable in the "Name" setting.
- Confirm the location you want to use with the variable in the "Value" setting.
- Click the Save button.
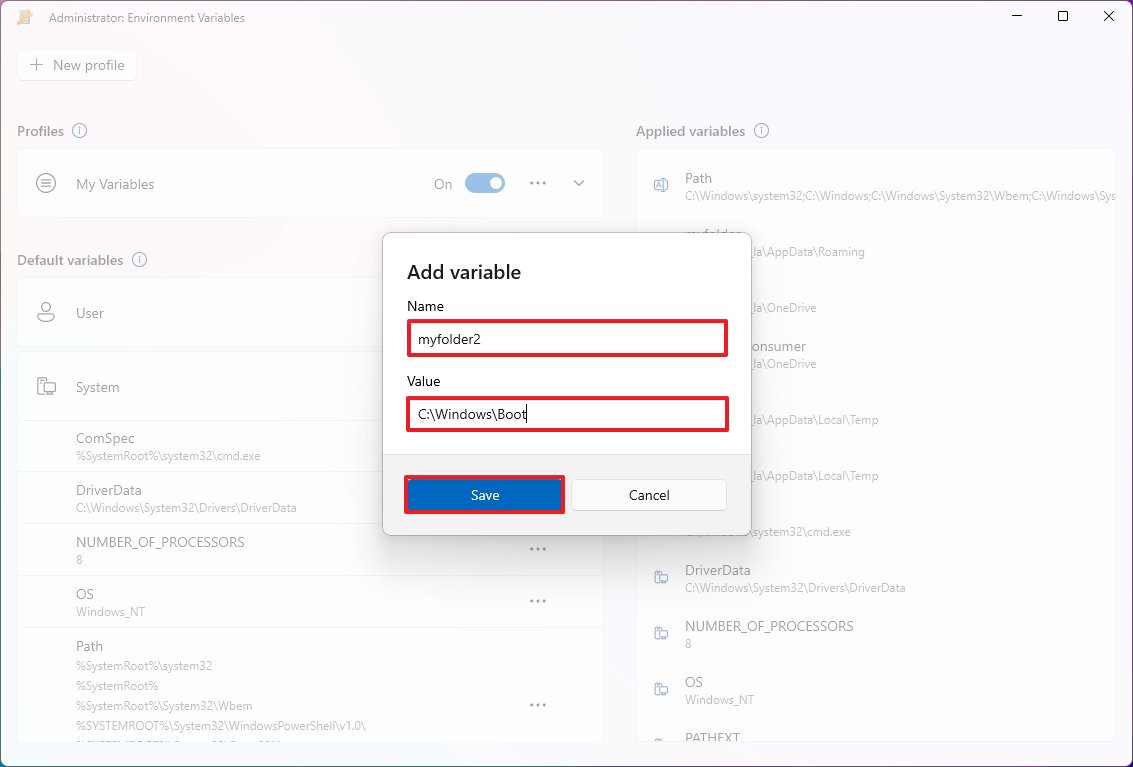
After you complete the steps, the new environment variable will apply globally for all users on the computer.
Modify existing variable
To edit or delete an environment variable on Windows 11, use these steps:
- Open Start.
- Search for PowerToys, right-click the top result, and choose the Run as administrator option.
- Click on Environment Variables from the left pane.
- Turn on the toggle switch to enable the tool (if applicable).
- Click the "Launch Environment Variables" setting.

- Click on "User," "System," or the profile containing the variable to modify.
- Click the menu button next to the item and choose the "Edit" option to modify or the "Remove" option to delete the variable.
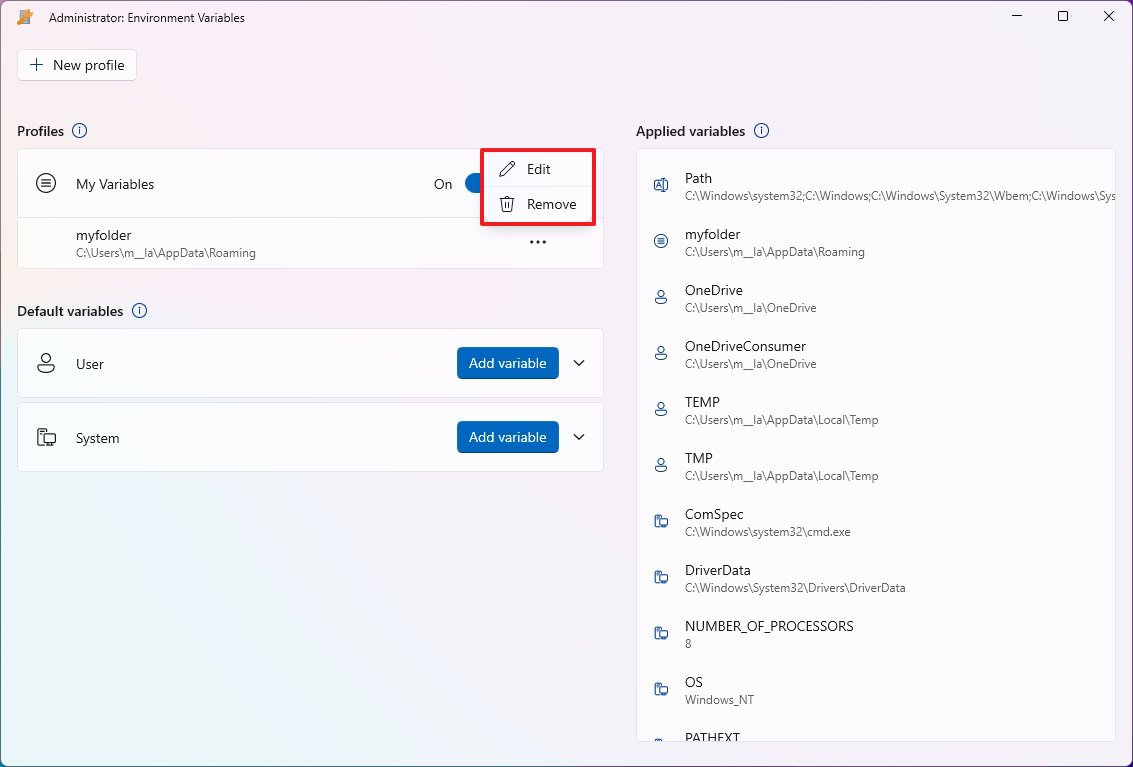
Once you complete the steps, the PowerToys tool will apply the configuration to Windows 11.
More resources
For more helpful articles, coverage, and answers to common questions about Windows 10 and Windows 11, visit the following resources:


