
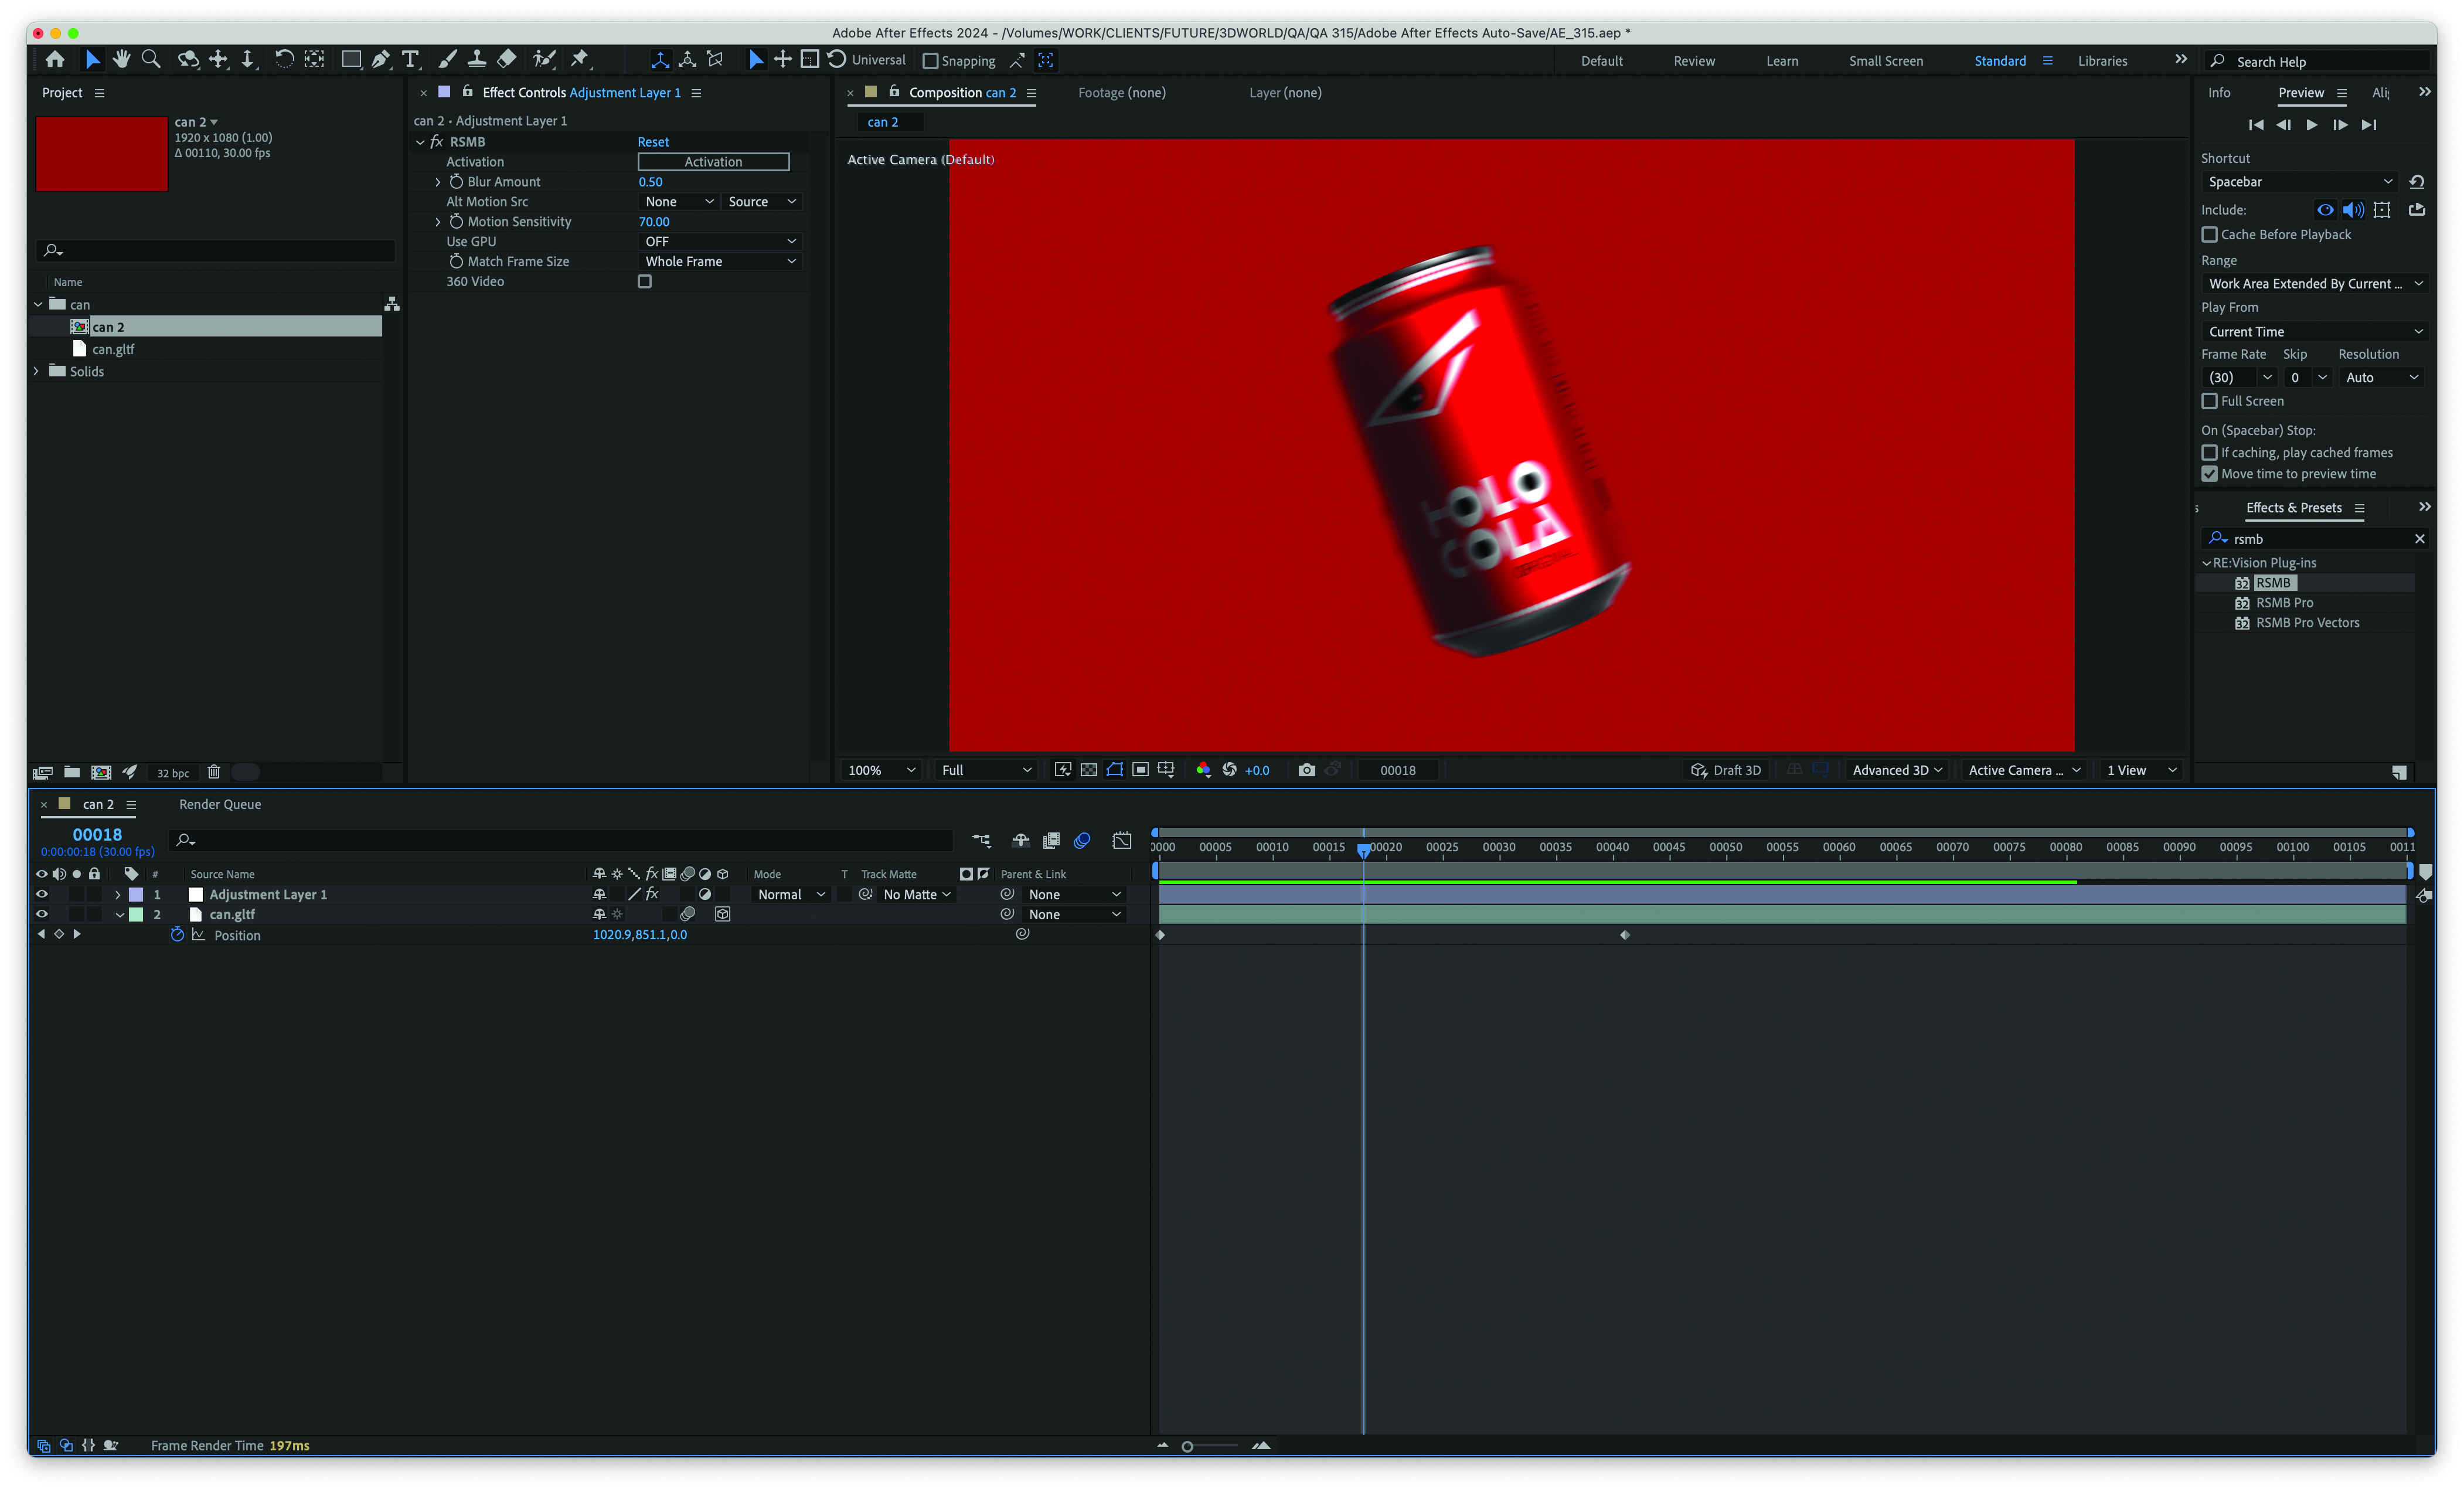
At the time of publication, Motion 4 isn’t available for After Effects’ Advanced 3D renderer. However, plugins such as ReelSmart Motion Blur from RE:Vision Effects are applied either as an adjustment layer or if the scene is pre-comped.
With After Effects’ new Advanced 3D render system, artists can work with models directly in their scenes as if it were an existing video or still an asset. For the first version, the new Advanced 3D renderer offers a great way to augment existing 3D renders in the compositing stage of production, without the artist needing to go back to the main 3D scene and re-render.
This is especially true if the artist’s primary 3D content creation software is Cinema 4D, as After Effects and Cinema 4D have a long and storied history of working together through native tools such as Maxon Cineware and excellent third-party plugins such as AEC4D PRO, which make syncing 3D animations as easy as it is in compositing applications that have always had true 3D pipelines.
Of course, what a 3D engine in After Effects doesn’t solve is the creation of actual 3D content. So for After Effects artists unfamiliar with 3D creation, how do they make their assets with all the associated materials and textures?
What a 3D engine in After Effects doesn’t solve is the creation of actual 3D content
Adobe does offer the Substance 3D Collection (read our Substance 10.0 review). However, that’s an additional expense besides the Adobe Creative Cloud license, especially if artists already have a Maxon One license, which offers Cinema 4D and sculpting application ZBrush. Also, the Adobe offering doesn’t have a complete 3D application with all the animation and simulation tools that come with Maxon’s software.
Thankfully, Cinema 4D possesses an extensive asset library of its own, including scenes, models and textures, allowing an artist without much knowledge of 3D asset creation to shortcut that issue in a matter of minutes. For many artists, learning on a project is the best way to work. Having pre-existing assets, especially for items such as packaging, can be a massive time-saver, even for the more experienced artists out there.
The best format for exporting files from Cinema 4D to After Effects is GLTF, which allows the embedding of textures and materials. It can be imported as if it were any other type of After Effects asset. This tutorial is aimed at those After Effects artists who are new to Cinema 4D.
1. Searching for an asset
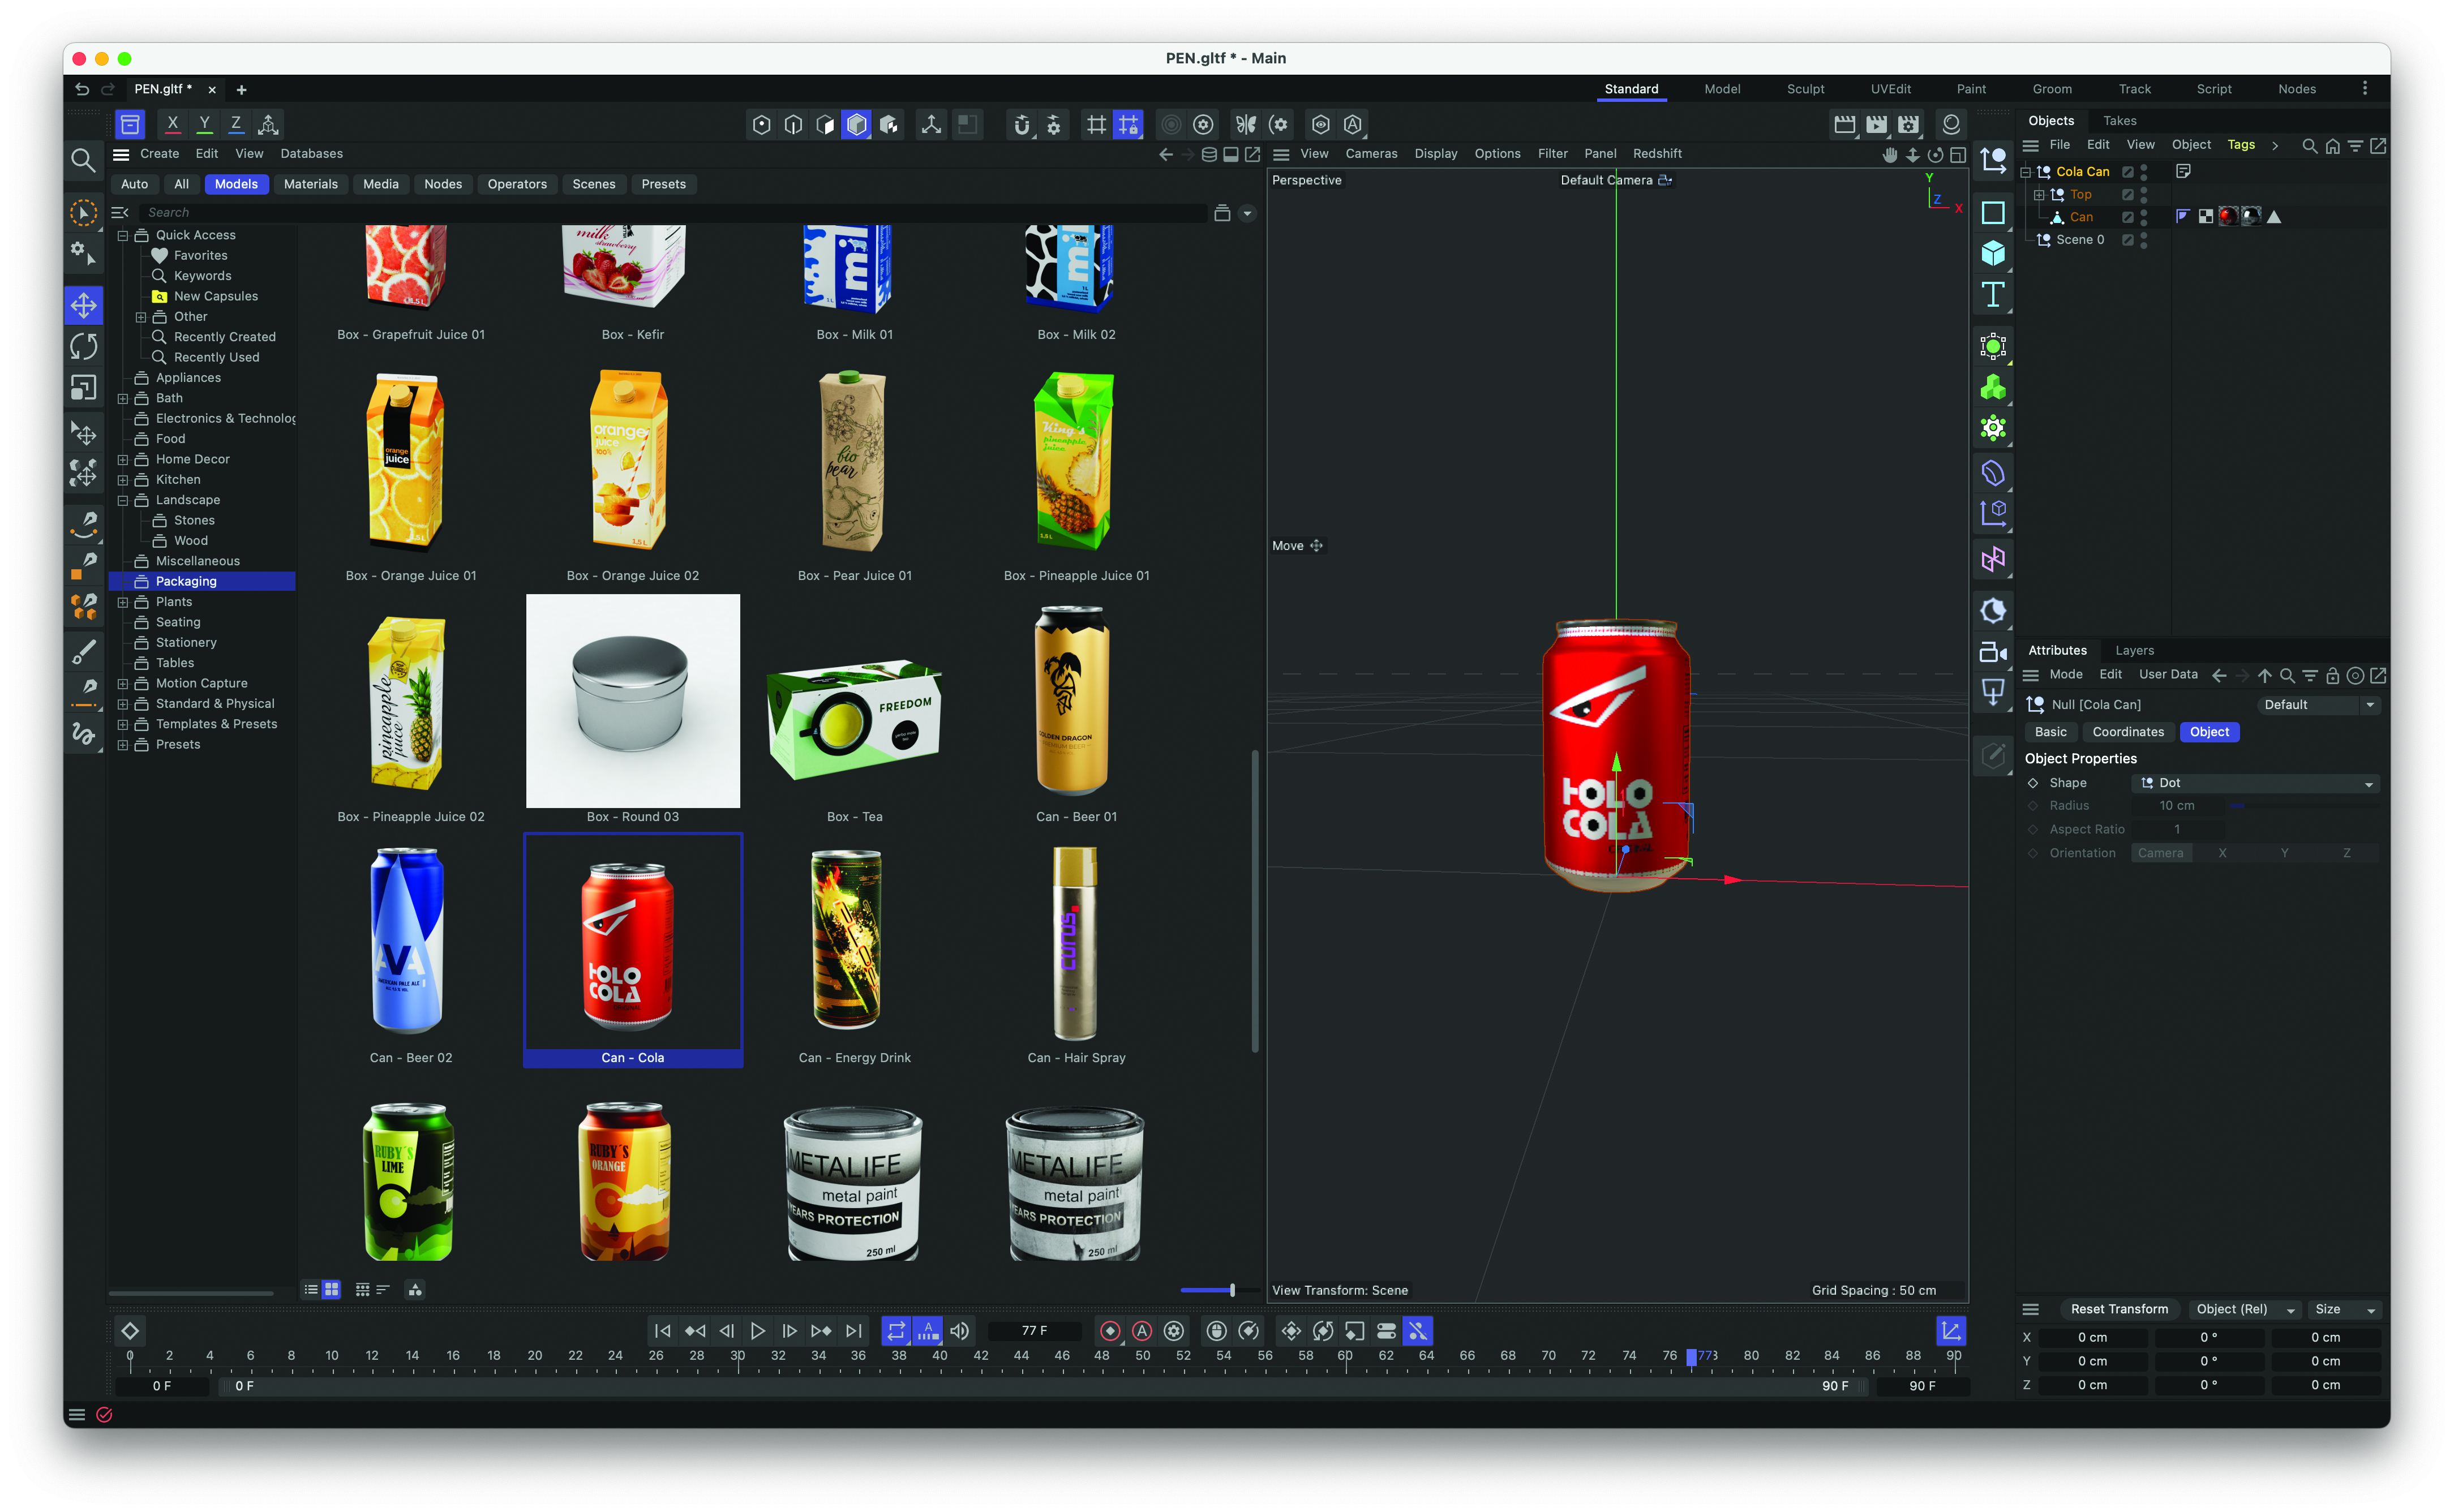
To find an asset in Cinema 4D, press on the Asset Browser icon, which looks like a packaging box and is found at the top-left of the UI. This will present the full range of Assets available in Cinema 4D. To focus on the 3D assets available, click on the Model tab at the top and go hunting for a suitable model.
2. Downloading the model
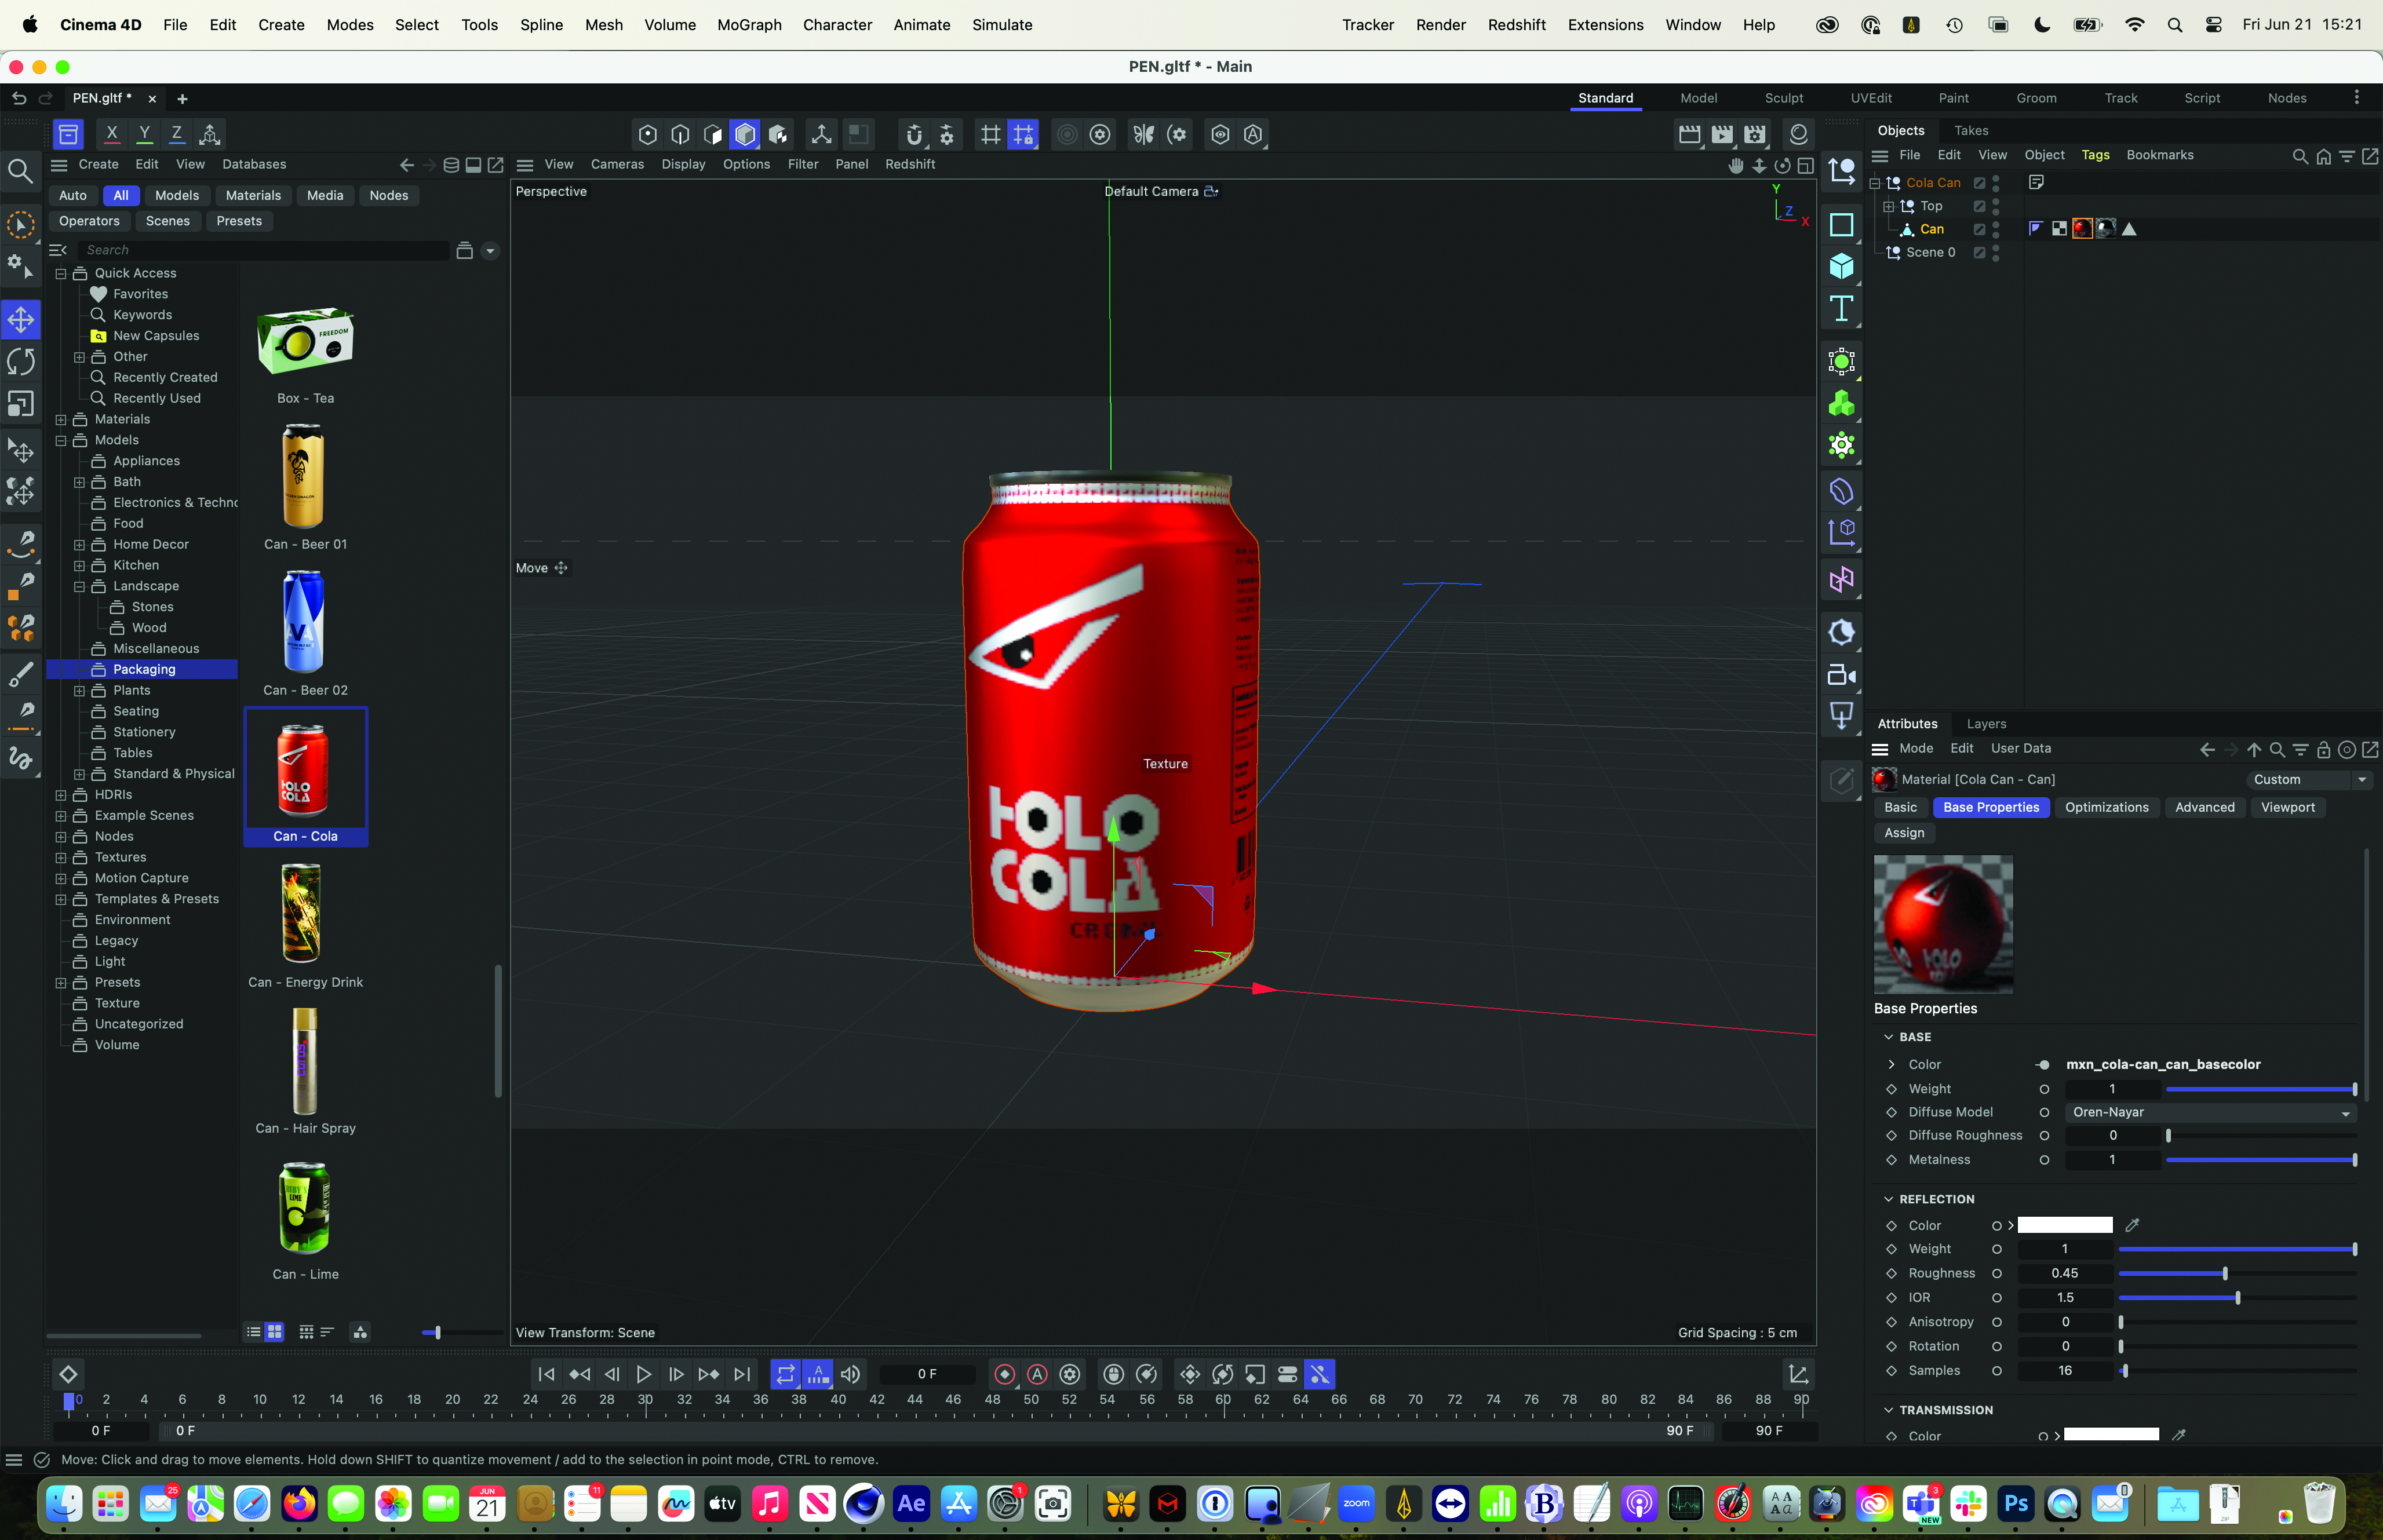
When an asset is selected, it’s downloaded from the Maxon server and appears as a model in the Cinema 4D Object list on the right-hand side of the UI. It should show the entire structure of the model with a variety of nulls and geometry elements along with all the associated materials, which are placed as small spherical tags on the right-hand side of the Object list.
3. Exporting the asset
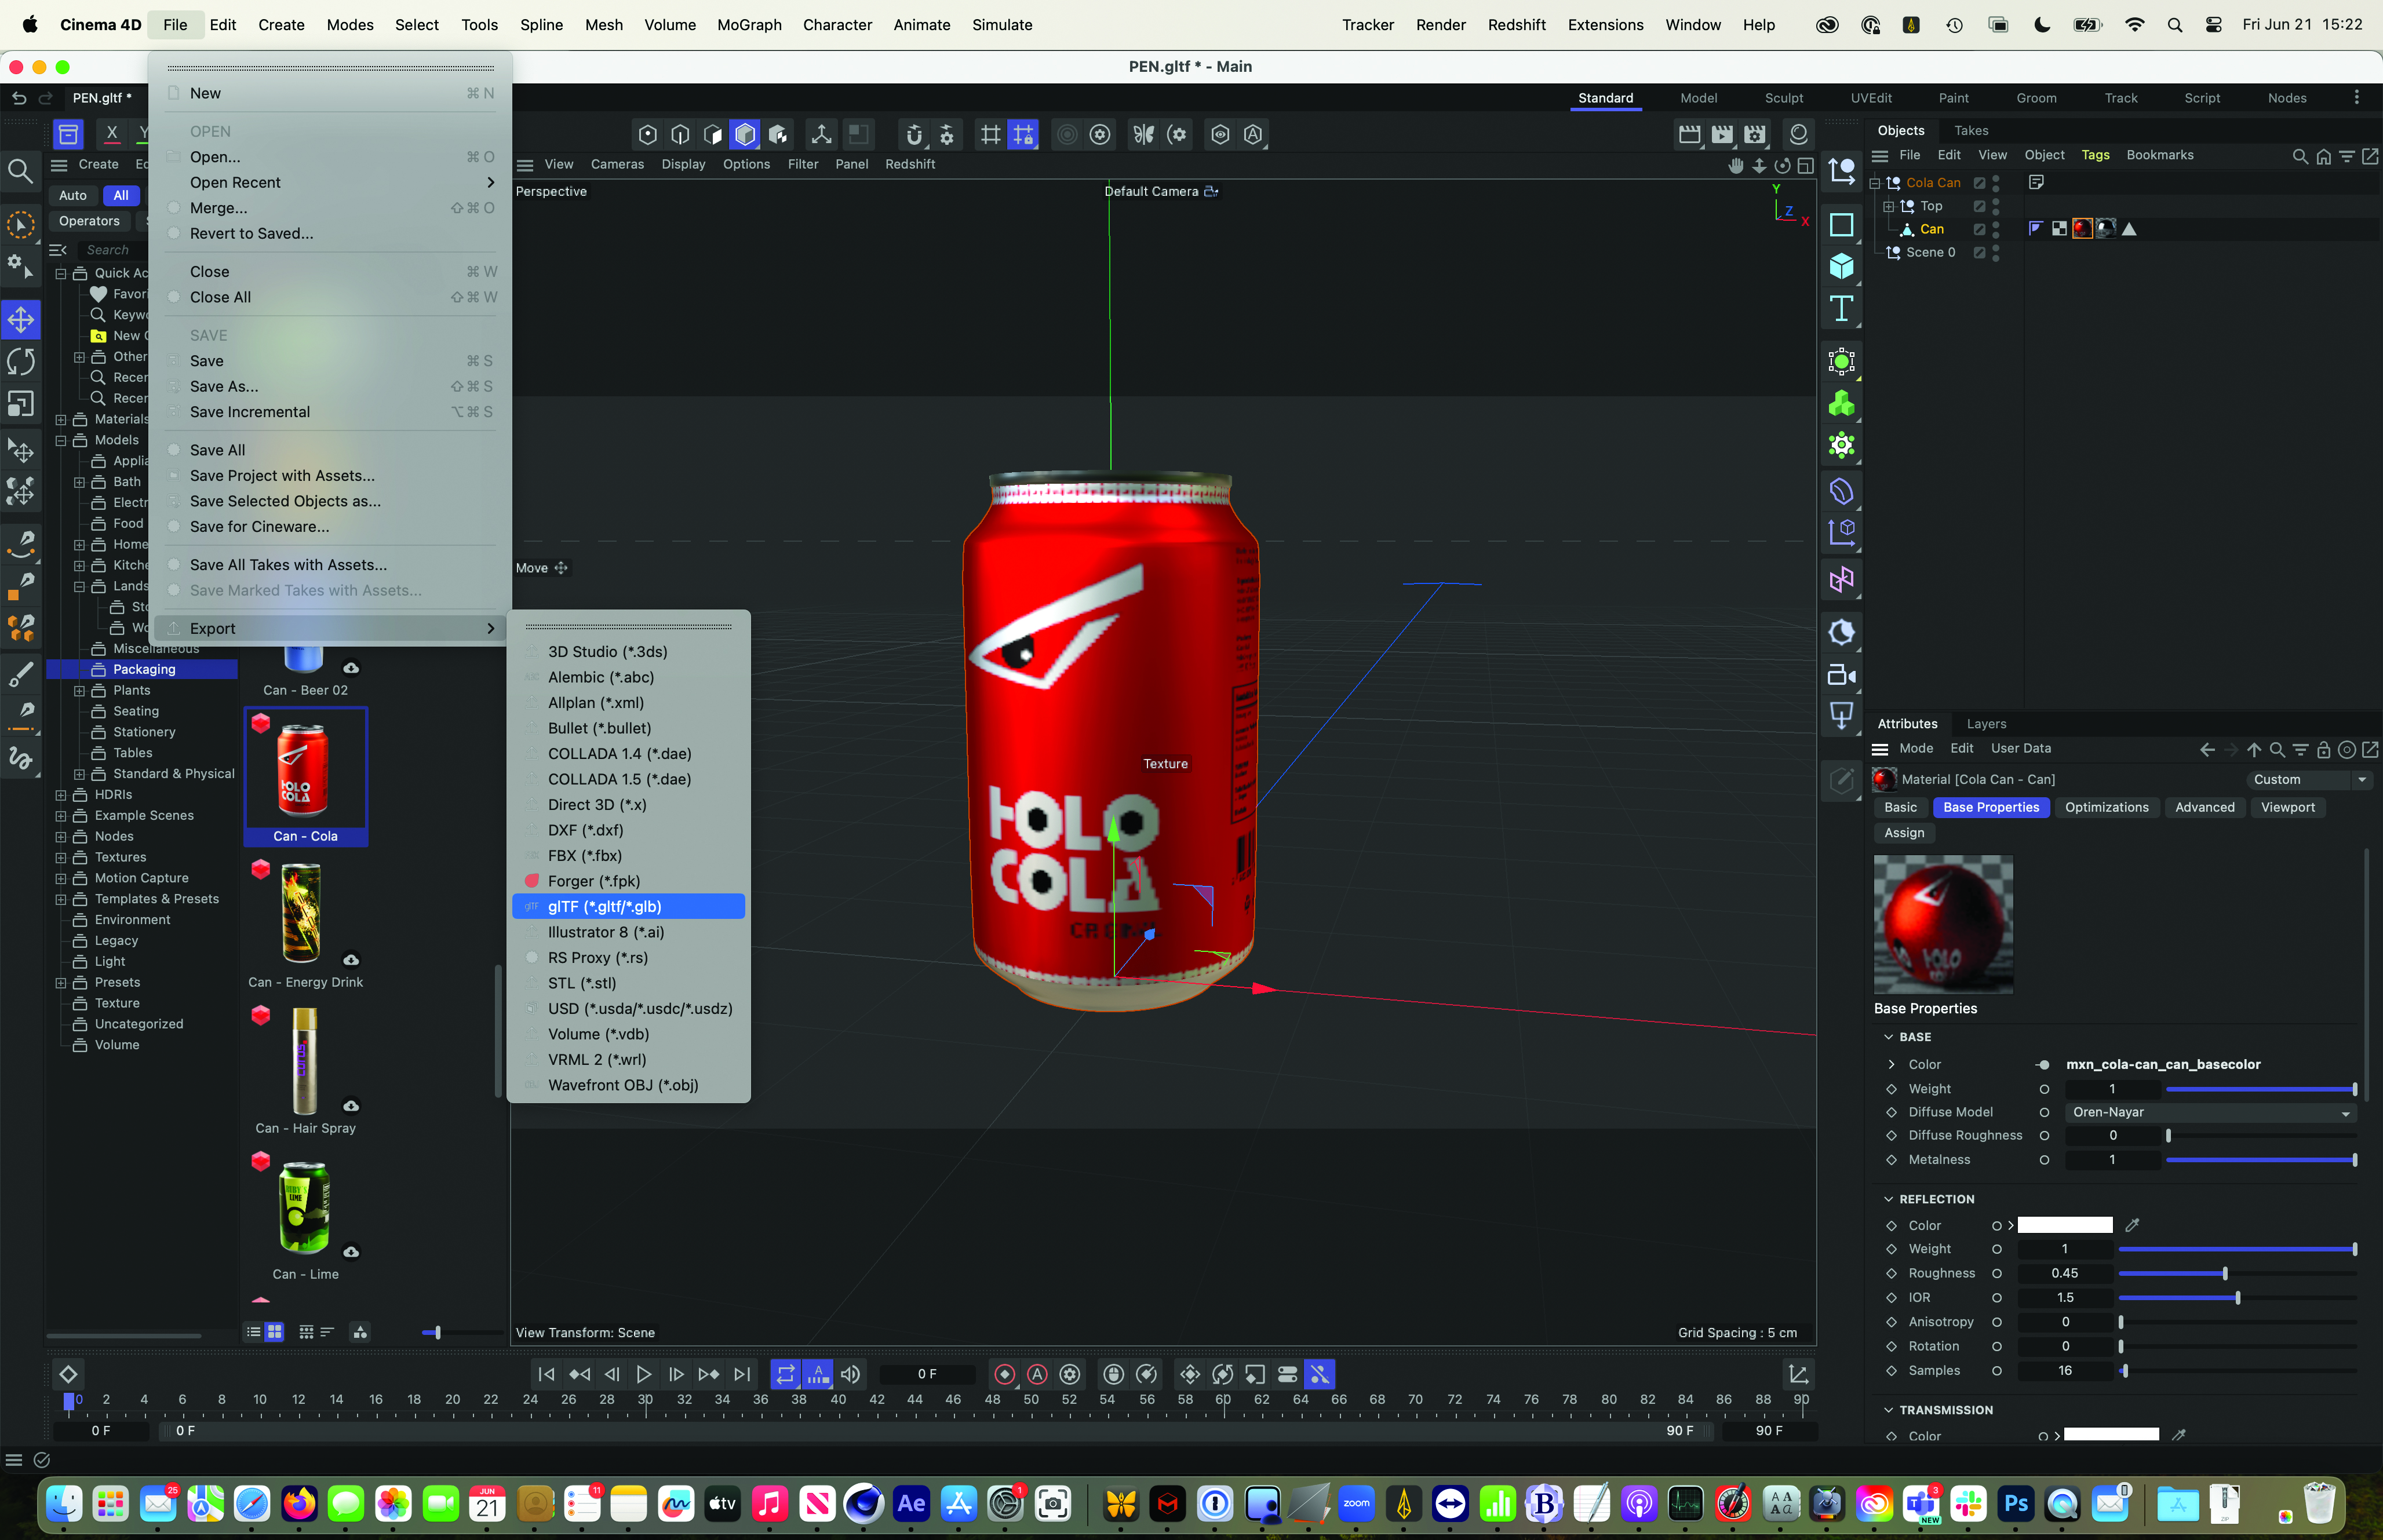
To get the model ready for After Effects, it needs to be exported in an appropriate 3D file format. The preferred format for the new After Effects render engine is GLTF. This format can import textures with the 3D model data, which isn’t always the case with some formats that will separate the exports into models and textures.
4. Importing the file
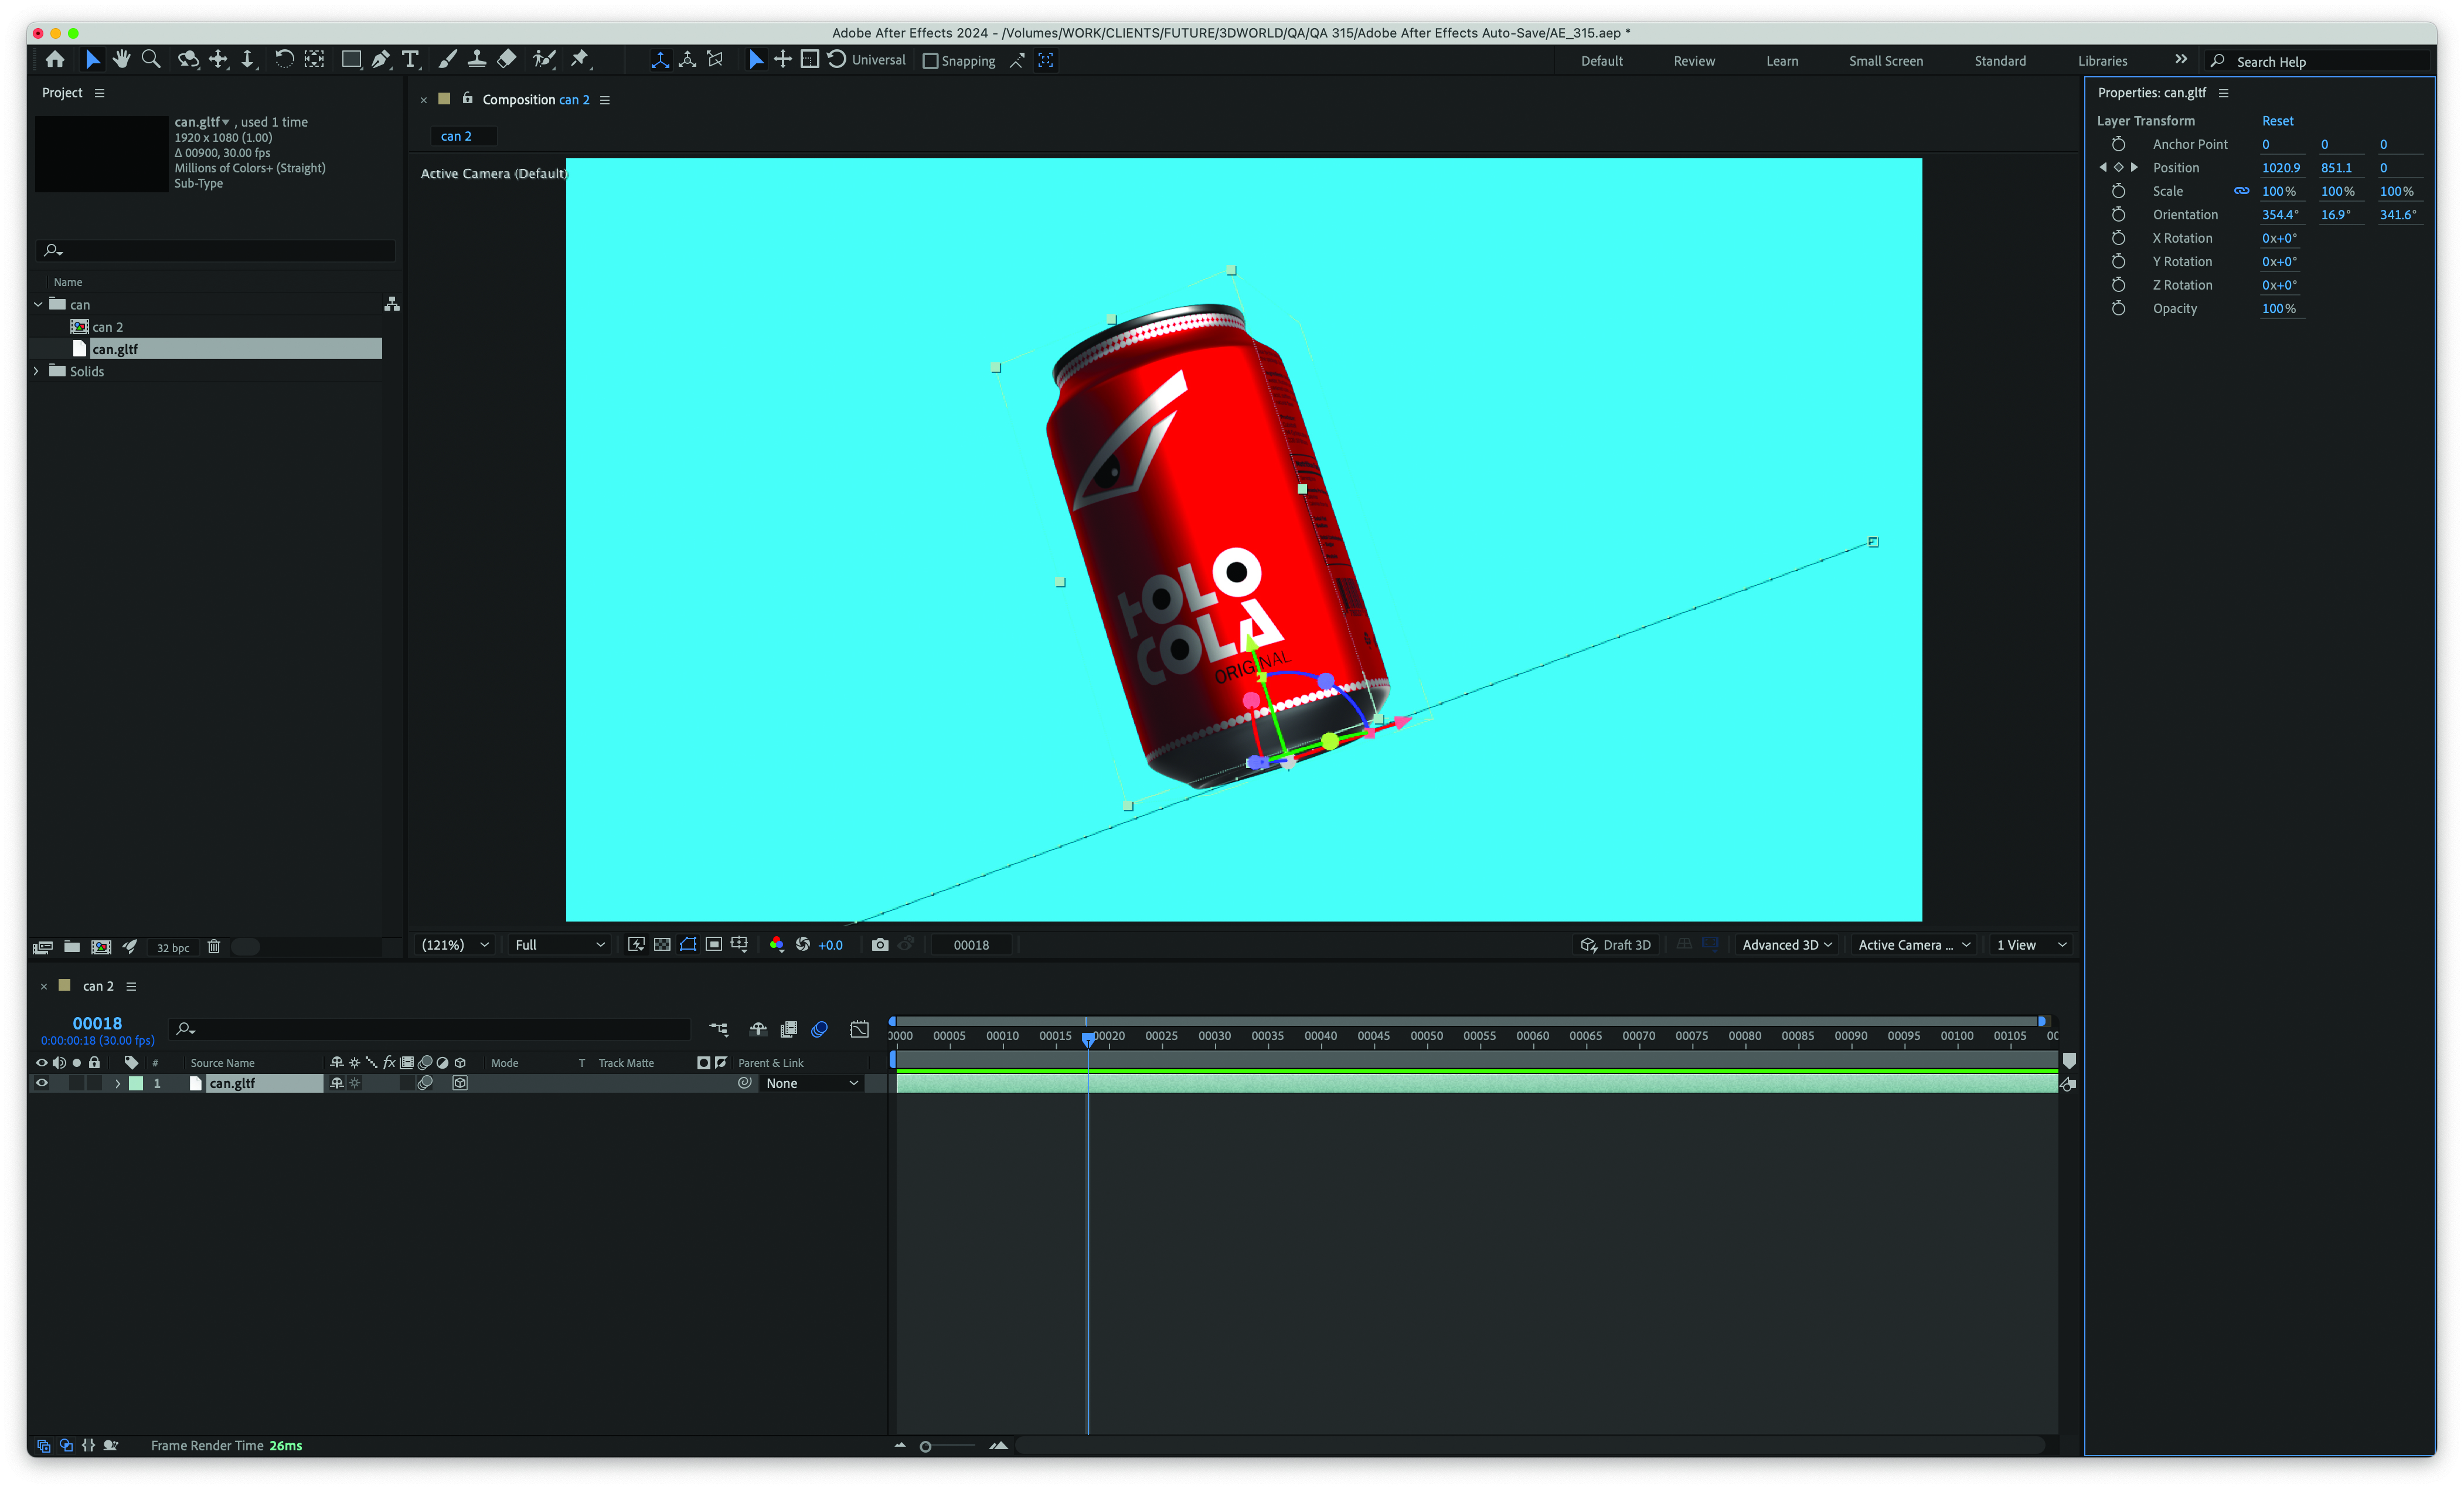
The easiest way to import the file is to drag it directly into the After Effects Project window, or go to File>Import File. The GLTF can then be used like any other typical After Effects file, such as using it to create a new composition. Don’t worry if the model is too small, it can be scaled up or changed in the units in the file export from Cinema 4D.
This content originally appeared in 3D World magazine. Subscribe to 3D World at Magazines Direct.


