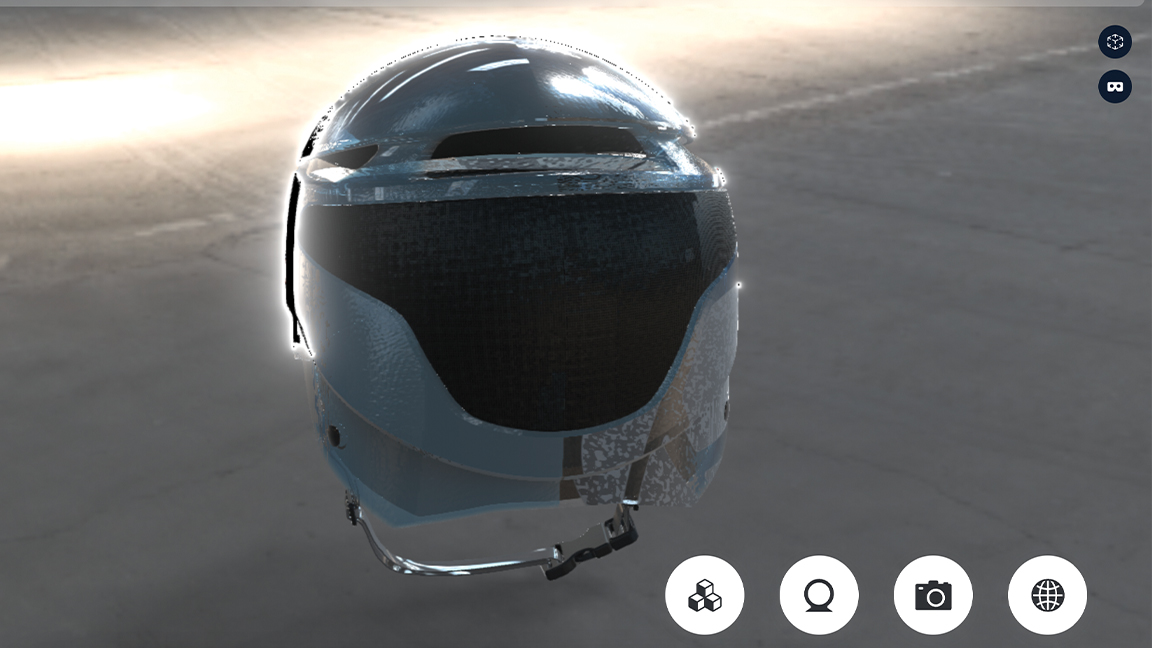
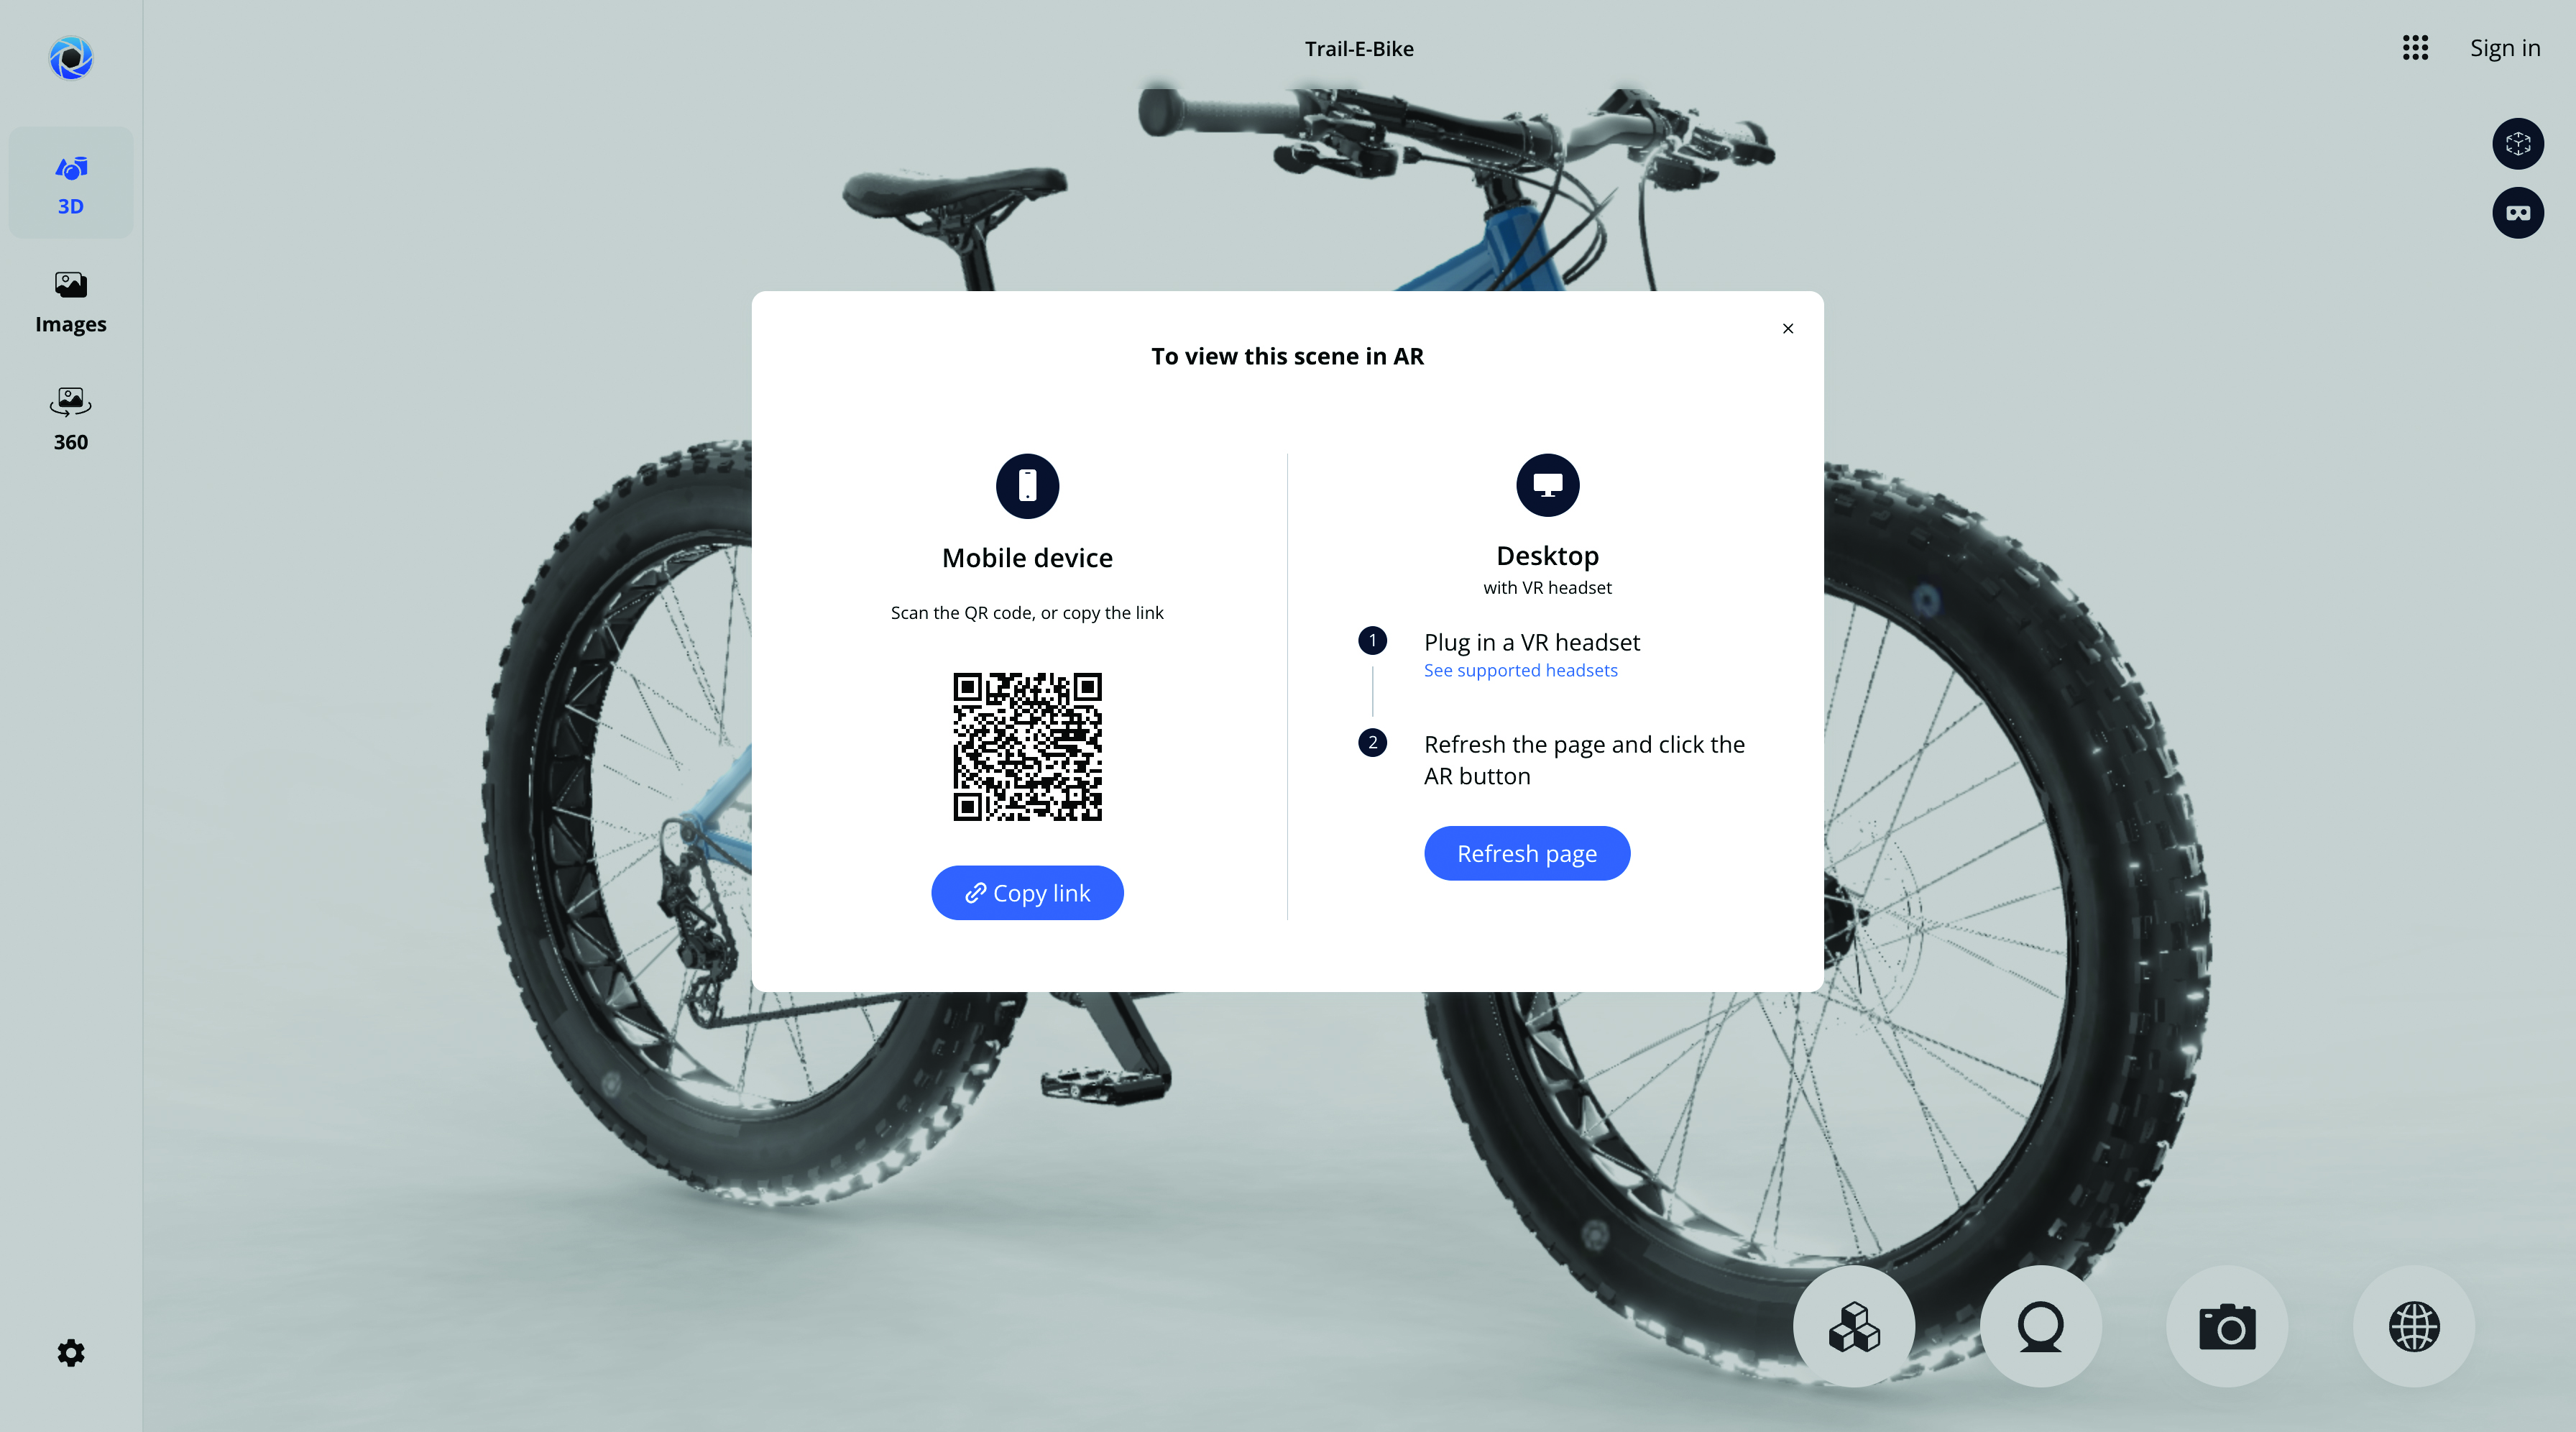
Use the Web Viewer’s augmented reality feature to place your 3D model in any physical environment. This requires a phone or tablet and is perfect for seeing what an object, such as a chair, would look like in a living room environment.
I remember the first time it became possible to visualise my 3D models inside a web browser. What was previously a task restricted to dedicated content creation apps was suddenly visible and interactively available inside the same interface you write your emails in. Remarkable!
One of KeyShot’s selling points has been its Web Viewer functionality, which enables users to transfer their models out of the KeyShot interface and into any browser on any device, including a smartphone. (Read our Keyshot review for the latest on this renderer.)
This technology isn’t just incredibly fun, but also amazingly useful for commercial reasons. I’ve sent products, walkthroughs and smaller setups to clients, who have then been able to instantly visualise the progress and provide comments and feedback. This speeds up the review phase of a project and reduces the amount of back and forth that inevitably happens on jobs.
KeyShot provides a range of features that take it beyond a simple Web Viewer. The first is the ability to upload images, including high-quality renderings. This shows clients the direction of travel without having to spend time doing this for the whole project. 3D models can be explored with both augmented reality and virtual reality, assuming your client has the necessary hardware.
KeyShot provides a range of features that take it beyond a simple Web Viewer
Having the ability to embed various configurations into the viewer is another win. This includes materials, environments, camera locations and more. Rather than sending dozens of separate images and videos showcasing different setups, simply set it all up in KeyShot and let the end user switch through the various options. This gives a lot more power to the client and generally enables them to communicate what they like and don’t like much more clearly and succinctly.
As with a lot of these things, customers are required to pay extra for the benefit of these features. Thankfully, KeyShot provides an initial 10GB of free storage, which is more than enough, especially if you’re diligent at keeping on top of your files and removing any outdated models. They’ve gone down the Google language route and called it KeyShot Drive, offering similar sharing functionality for inviting others to view content.
Below I'm going to take a 3D model of a helmet from the KeyShot Cloud library, and will run through the process of taking it from KeyShot and into the Web Viewer.
1. Setting-up your scene
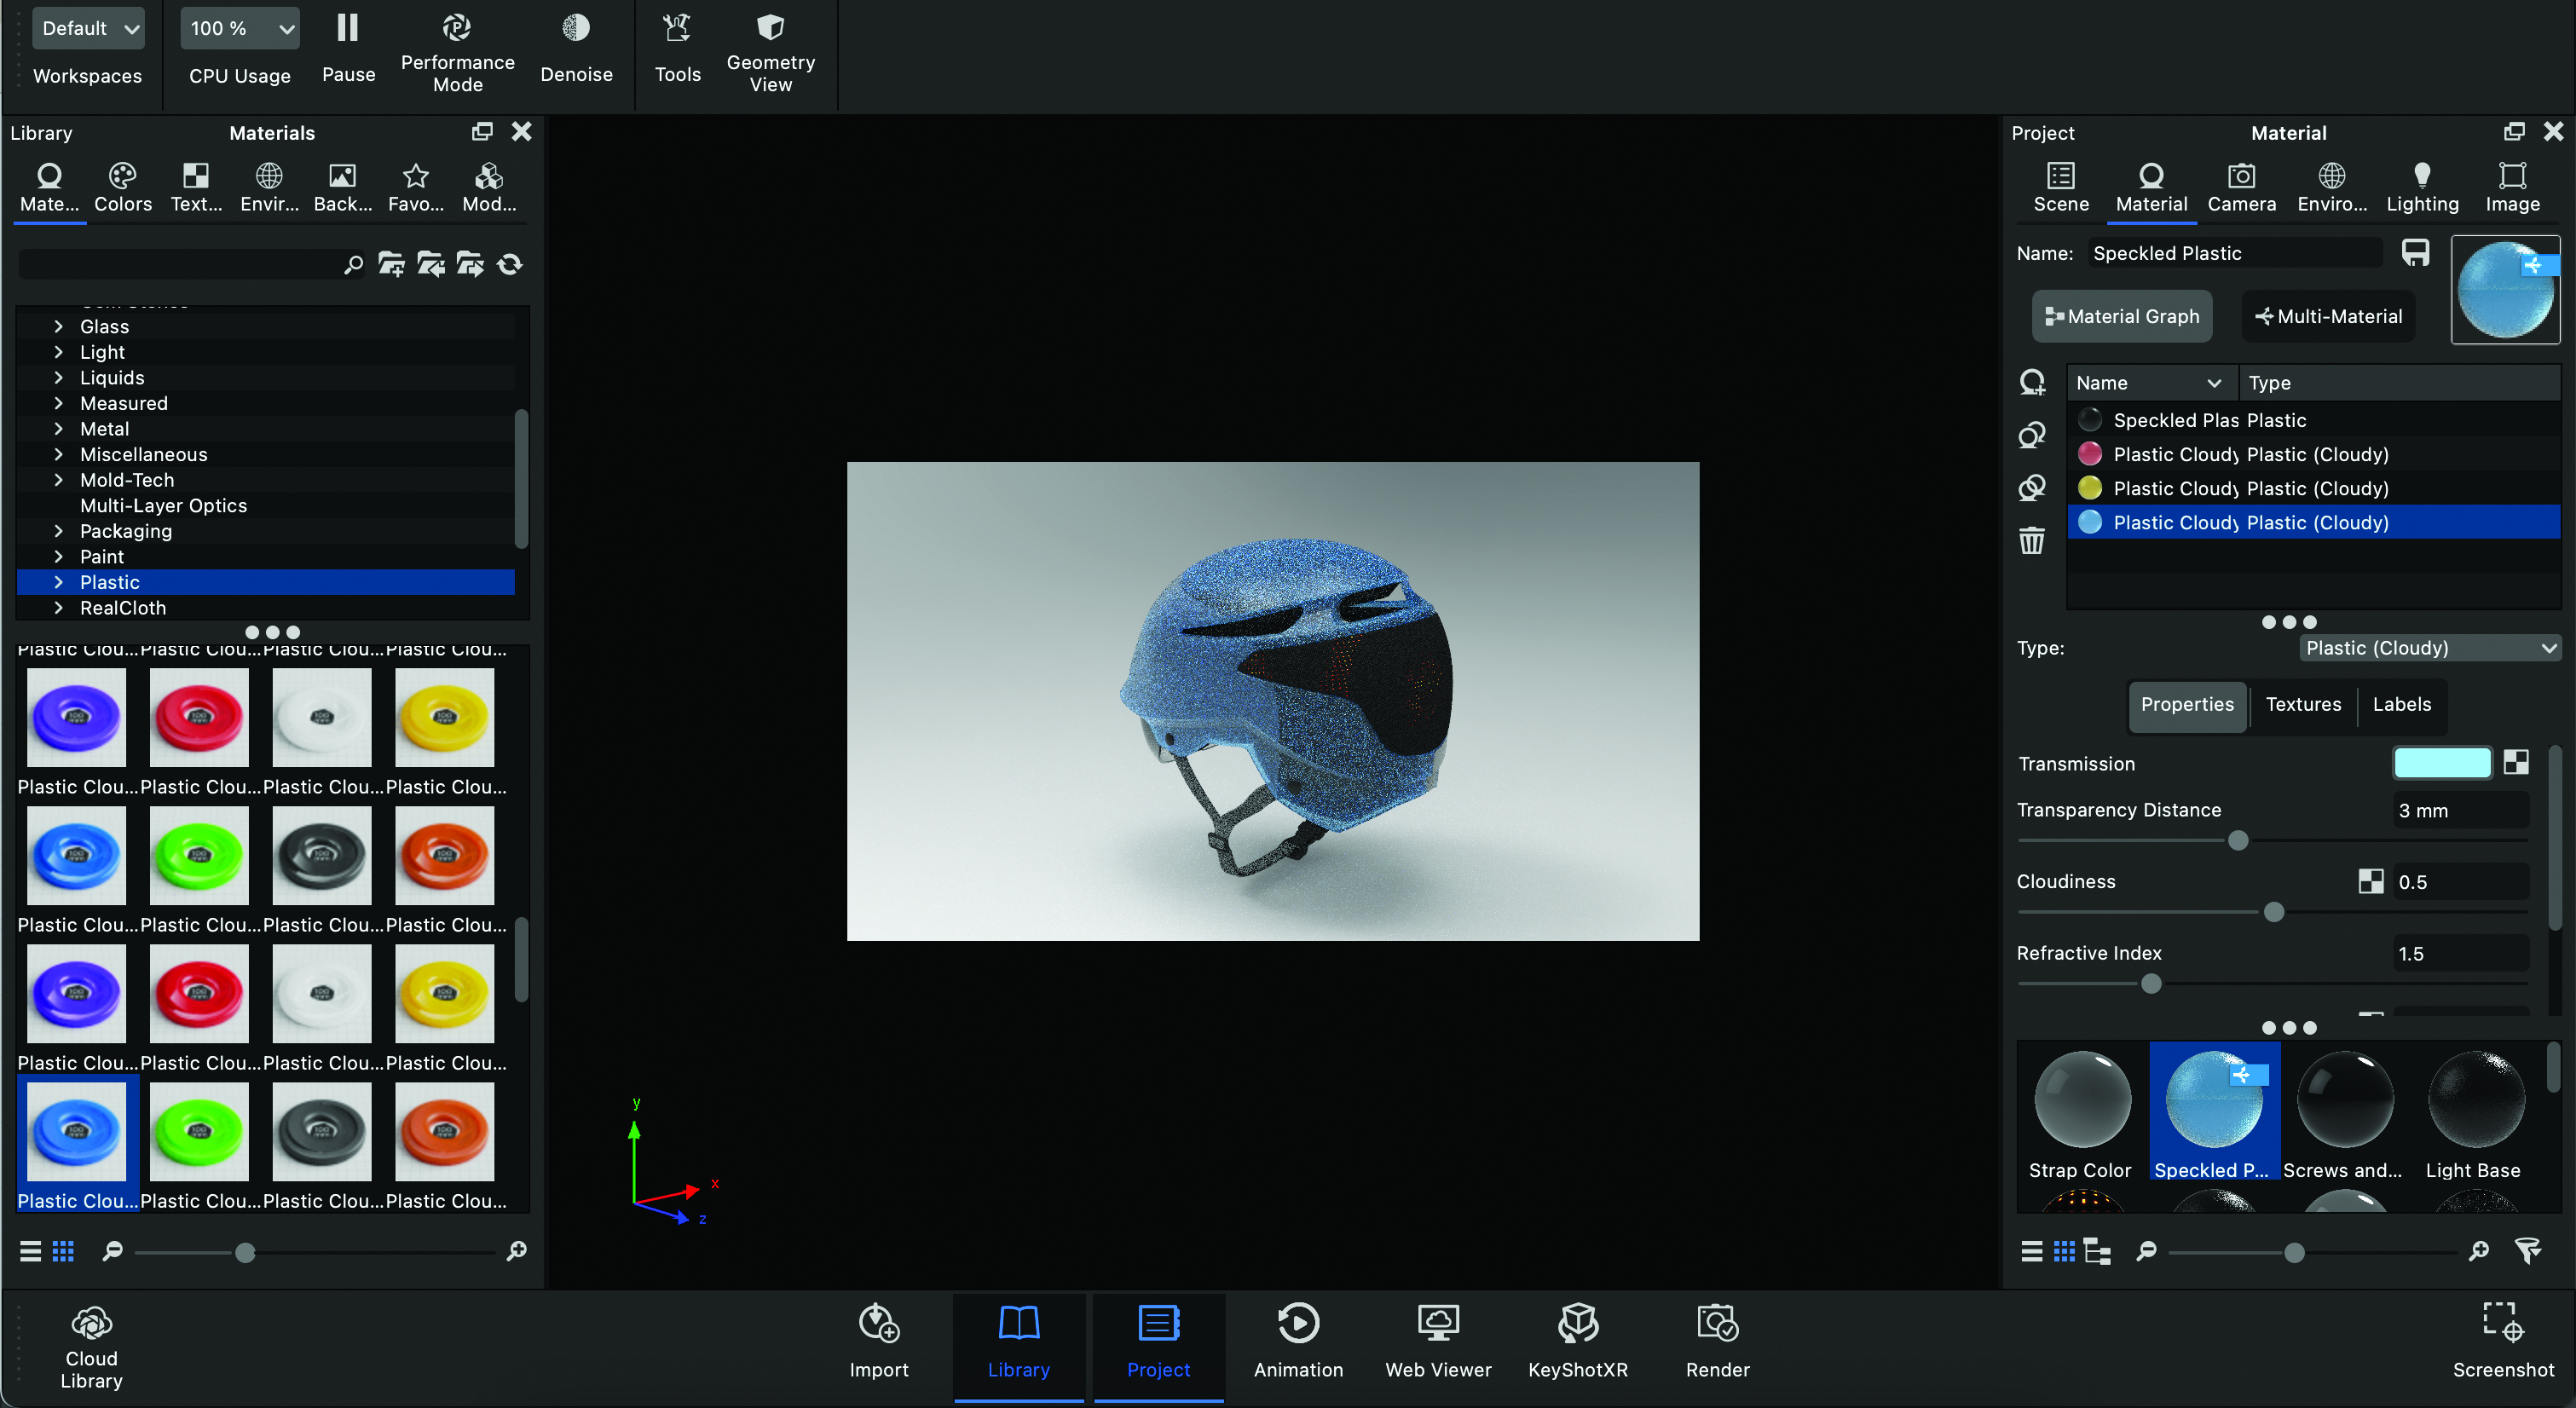
With your model built or downloaded, create a set of cameras that reflect the various angles you want visible in the final Web Viewer. Next, create a Multi-Material and apply it to your model. All of the materials inside the Multi-Material will be visible and applicable to the viewer. You can also add a set of environments so the end user can dictate what lighting and background are visible.
2. Launching Web Viewer
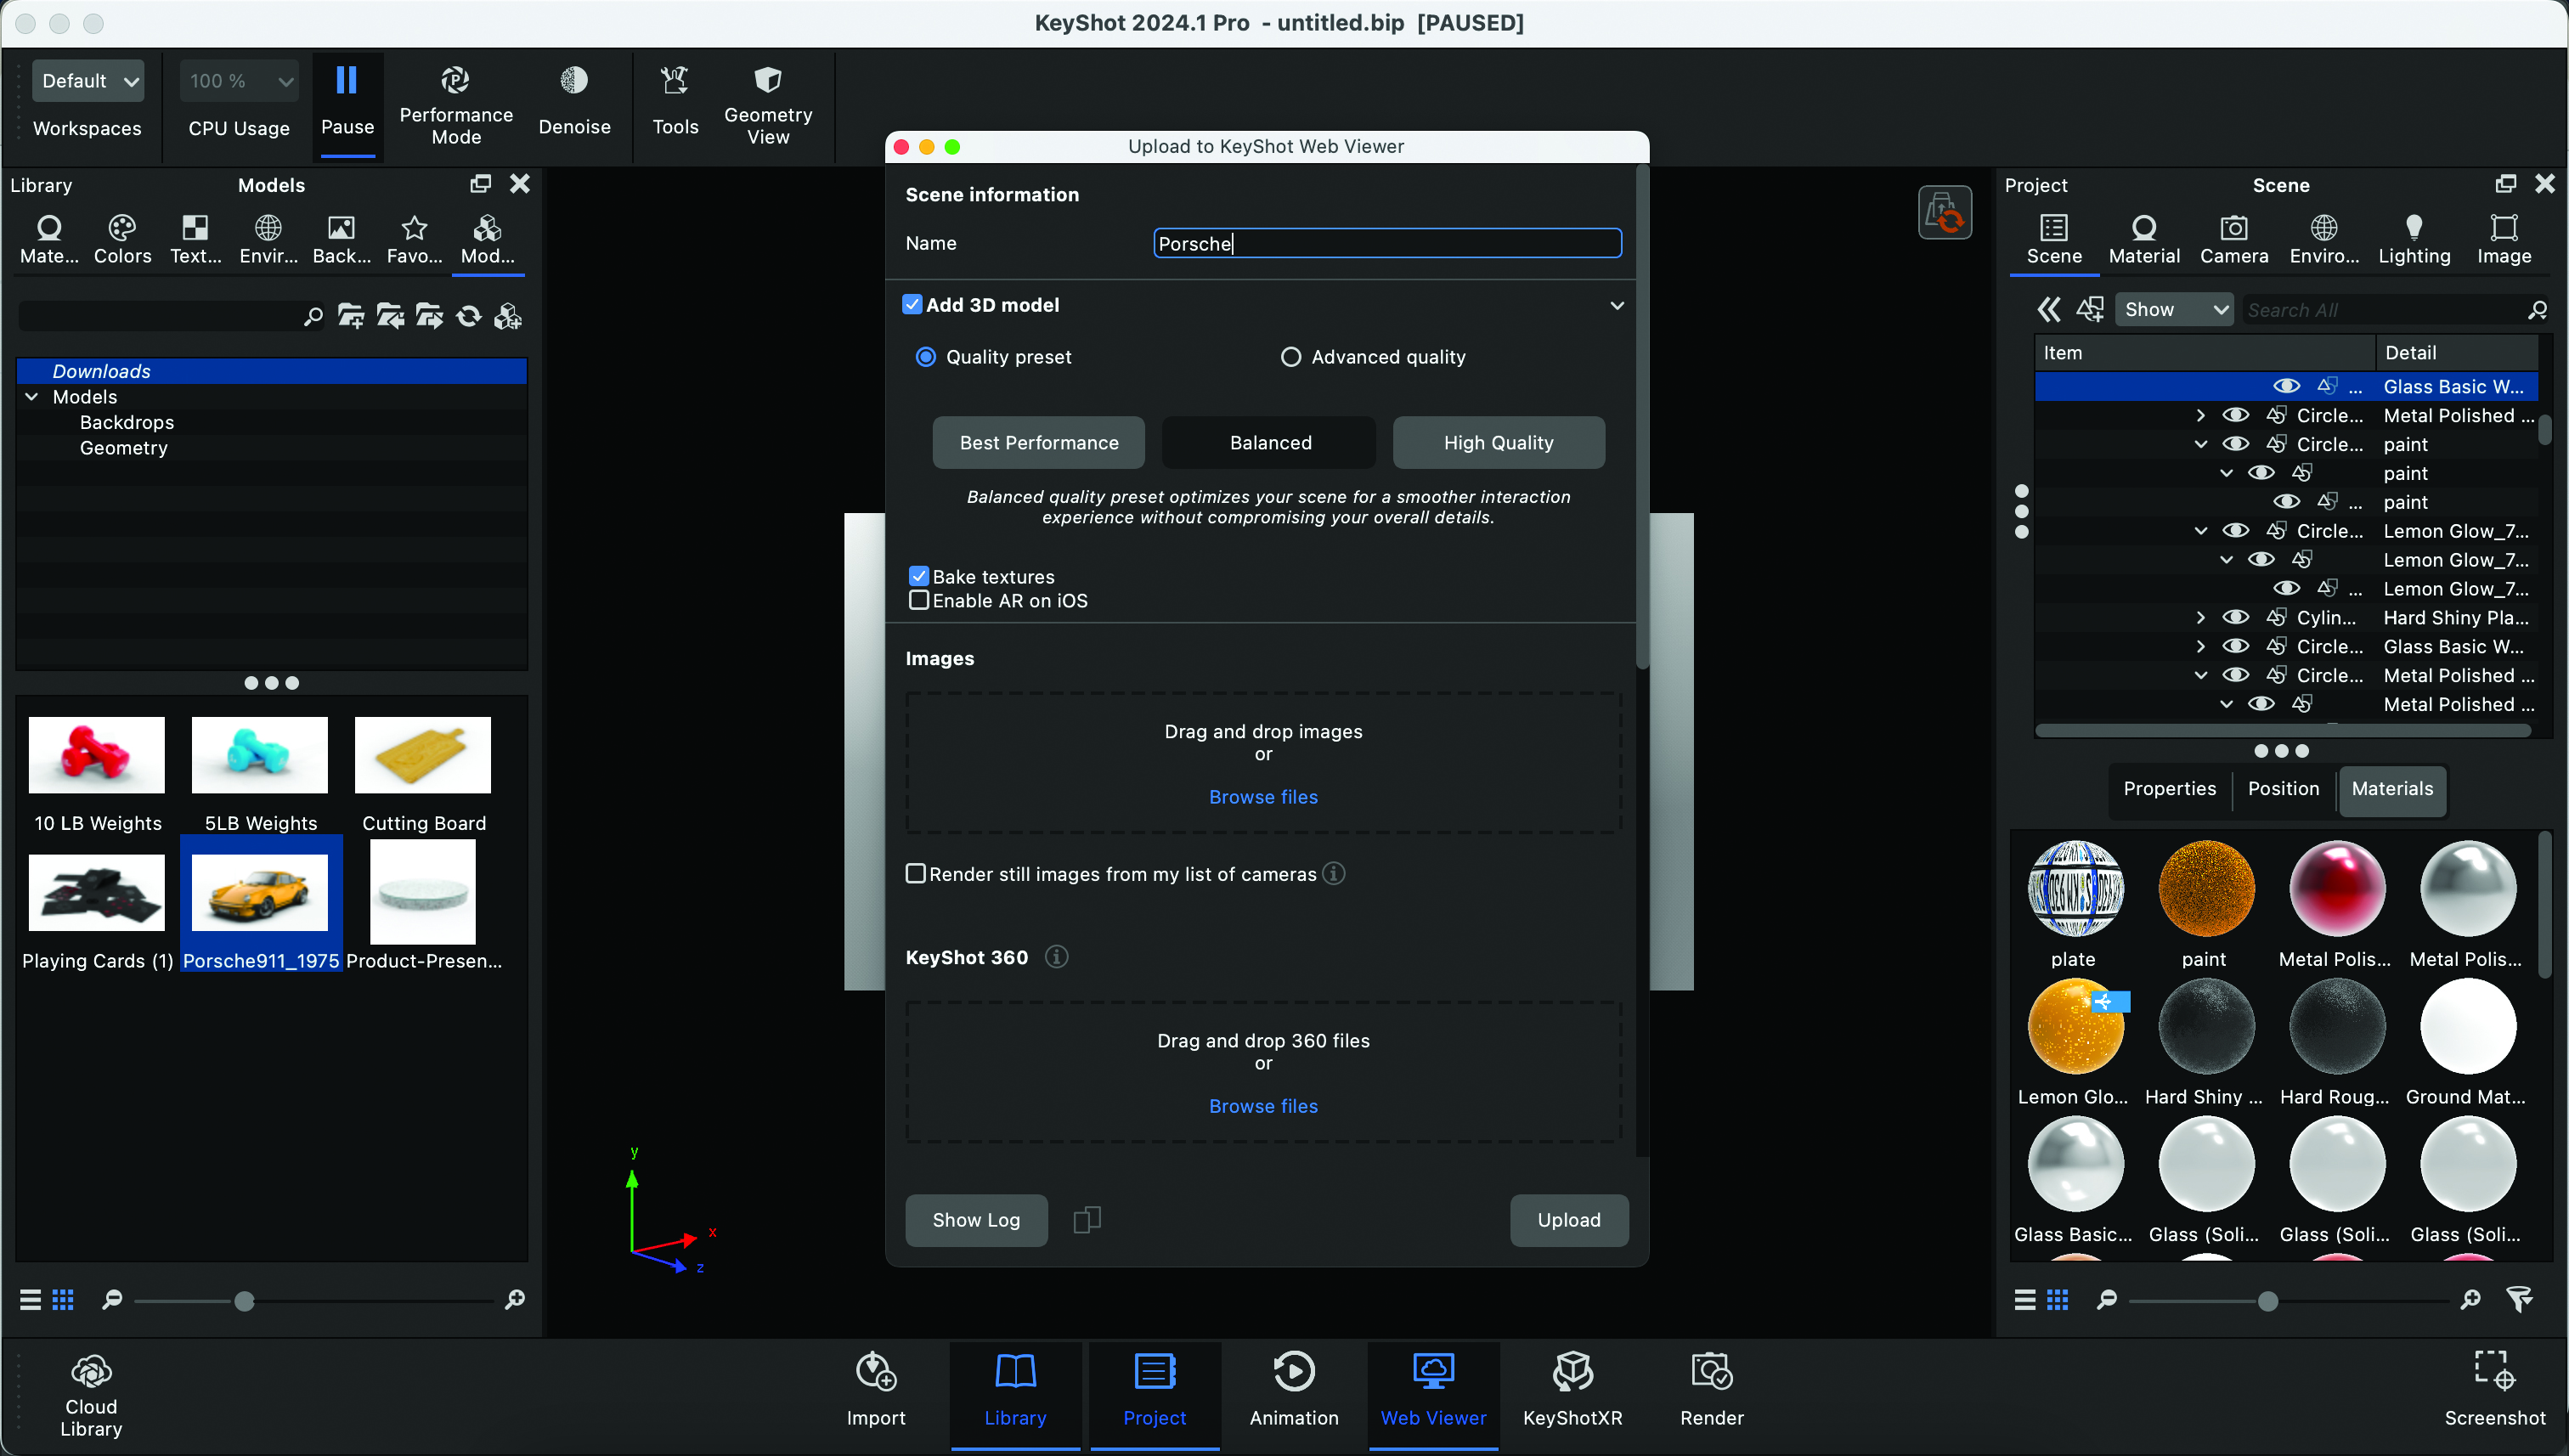
With everything in your scene set up, use the ‘V’ shortcut to launch the Web Viewer settings dialog box, which gives you a few rudimentary settings for customising the experience. The first is the quality preset, which offers three different options. The higher the quality, the longer it’ll take to generate and upload, and also require more resources on the end user’s computer.
3. More settings
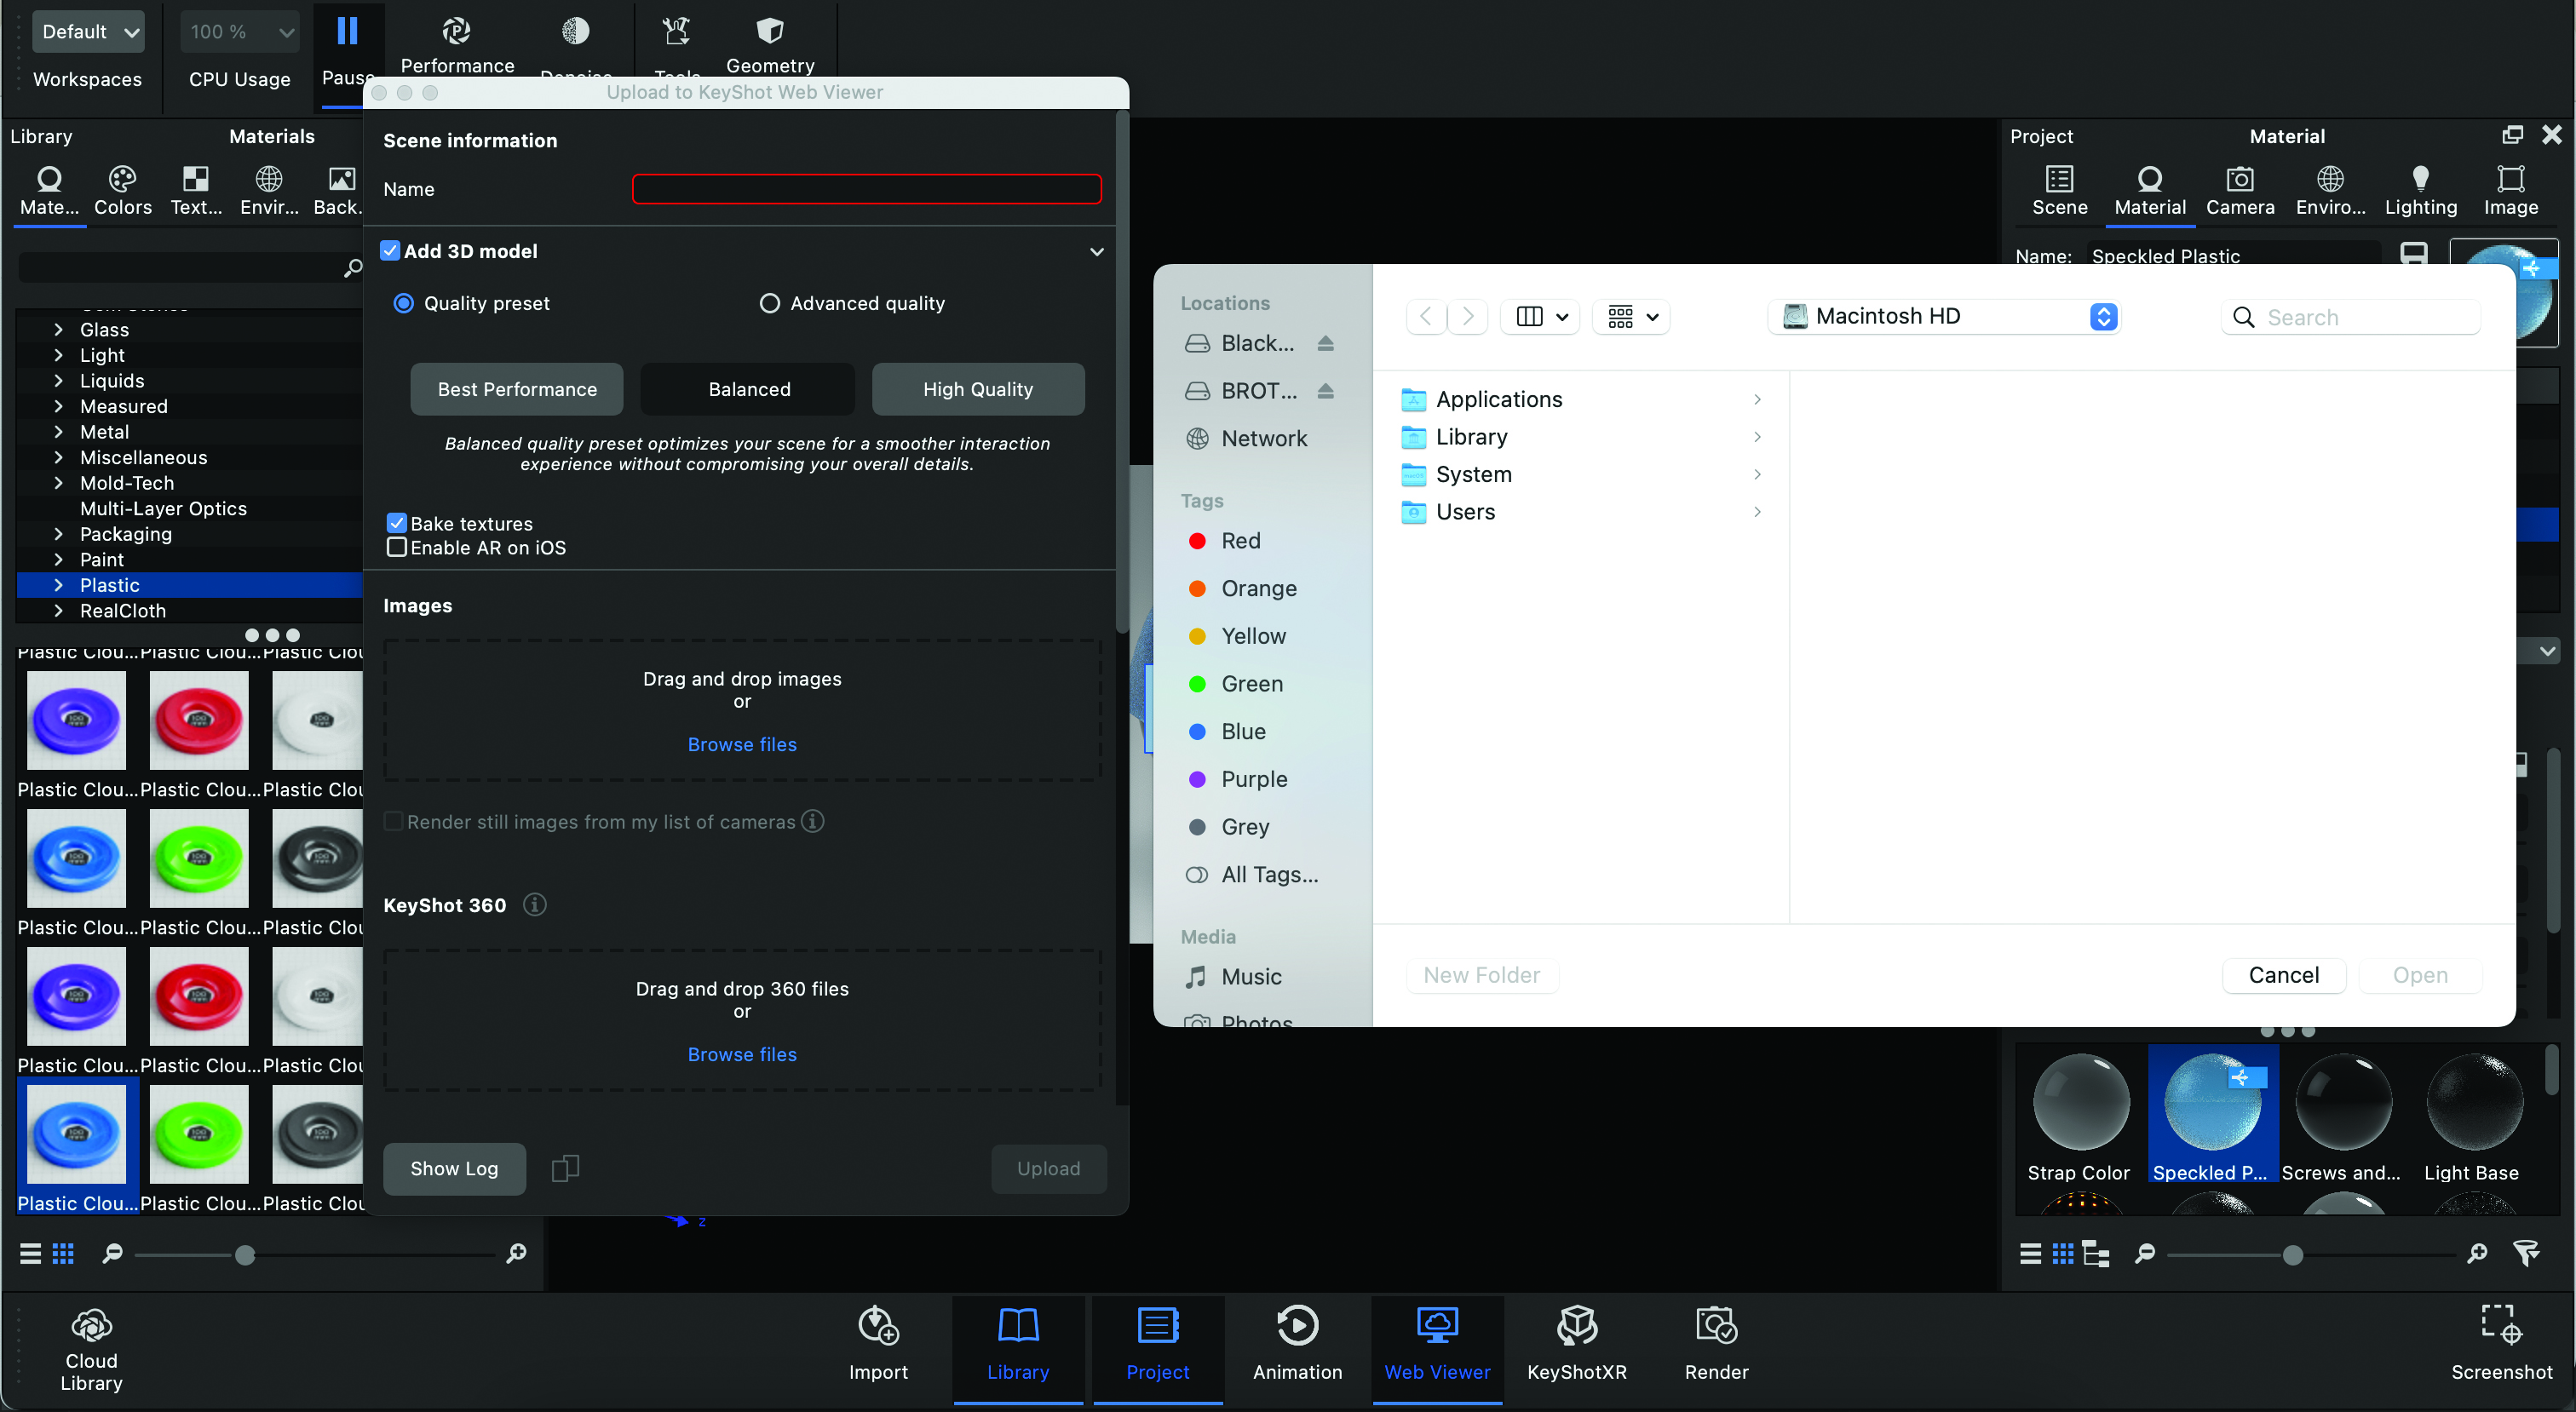
You’ll want all your textures baked into the model, so make sure the ‘Bake Textures’ option is selected. It’s also possible to include a set of still images that are viewable inside the Web Viewer. These can be dragged and dropped into the dialog box, or if you just want these to be renders from your cameras, make sure you tick that checkbox.
4. Navigating the Web Viewer
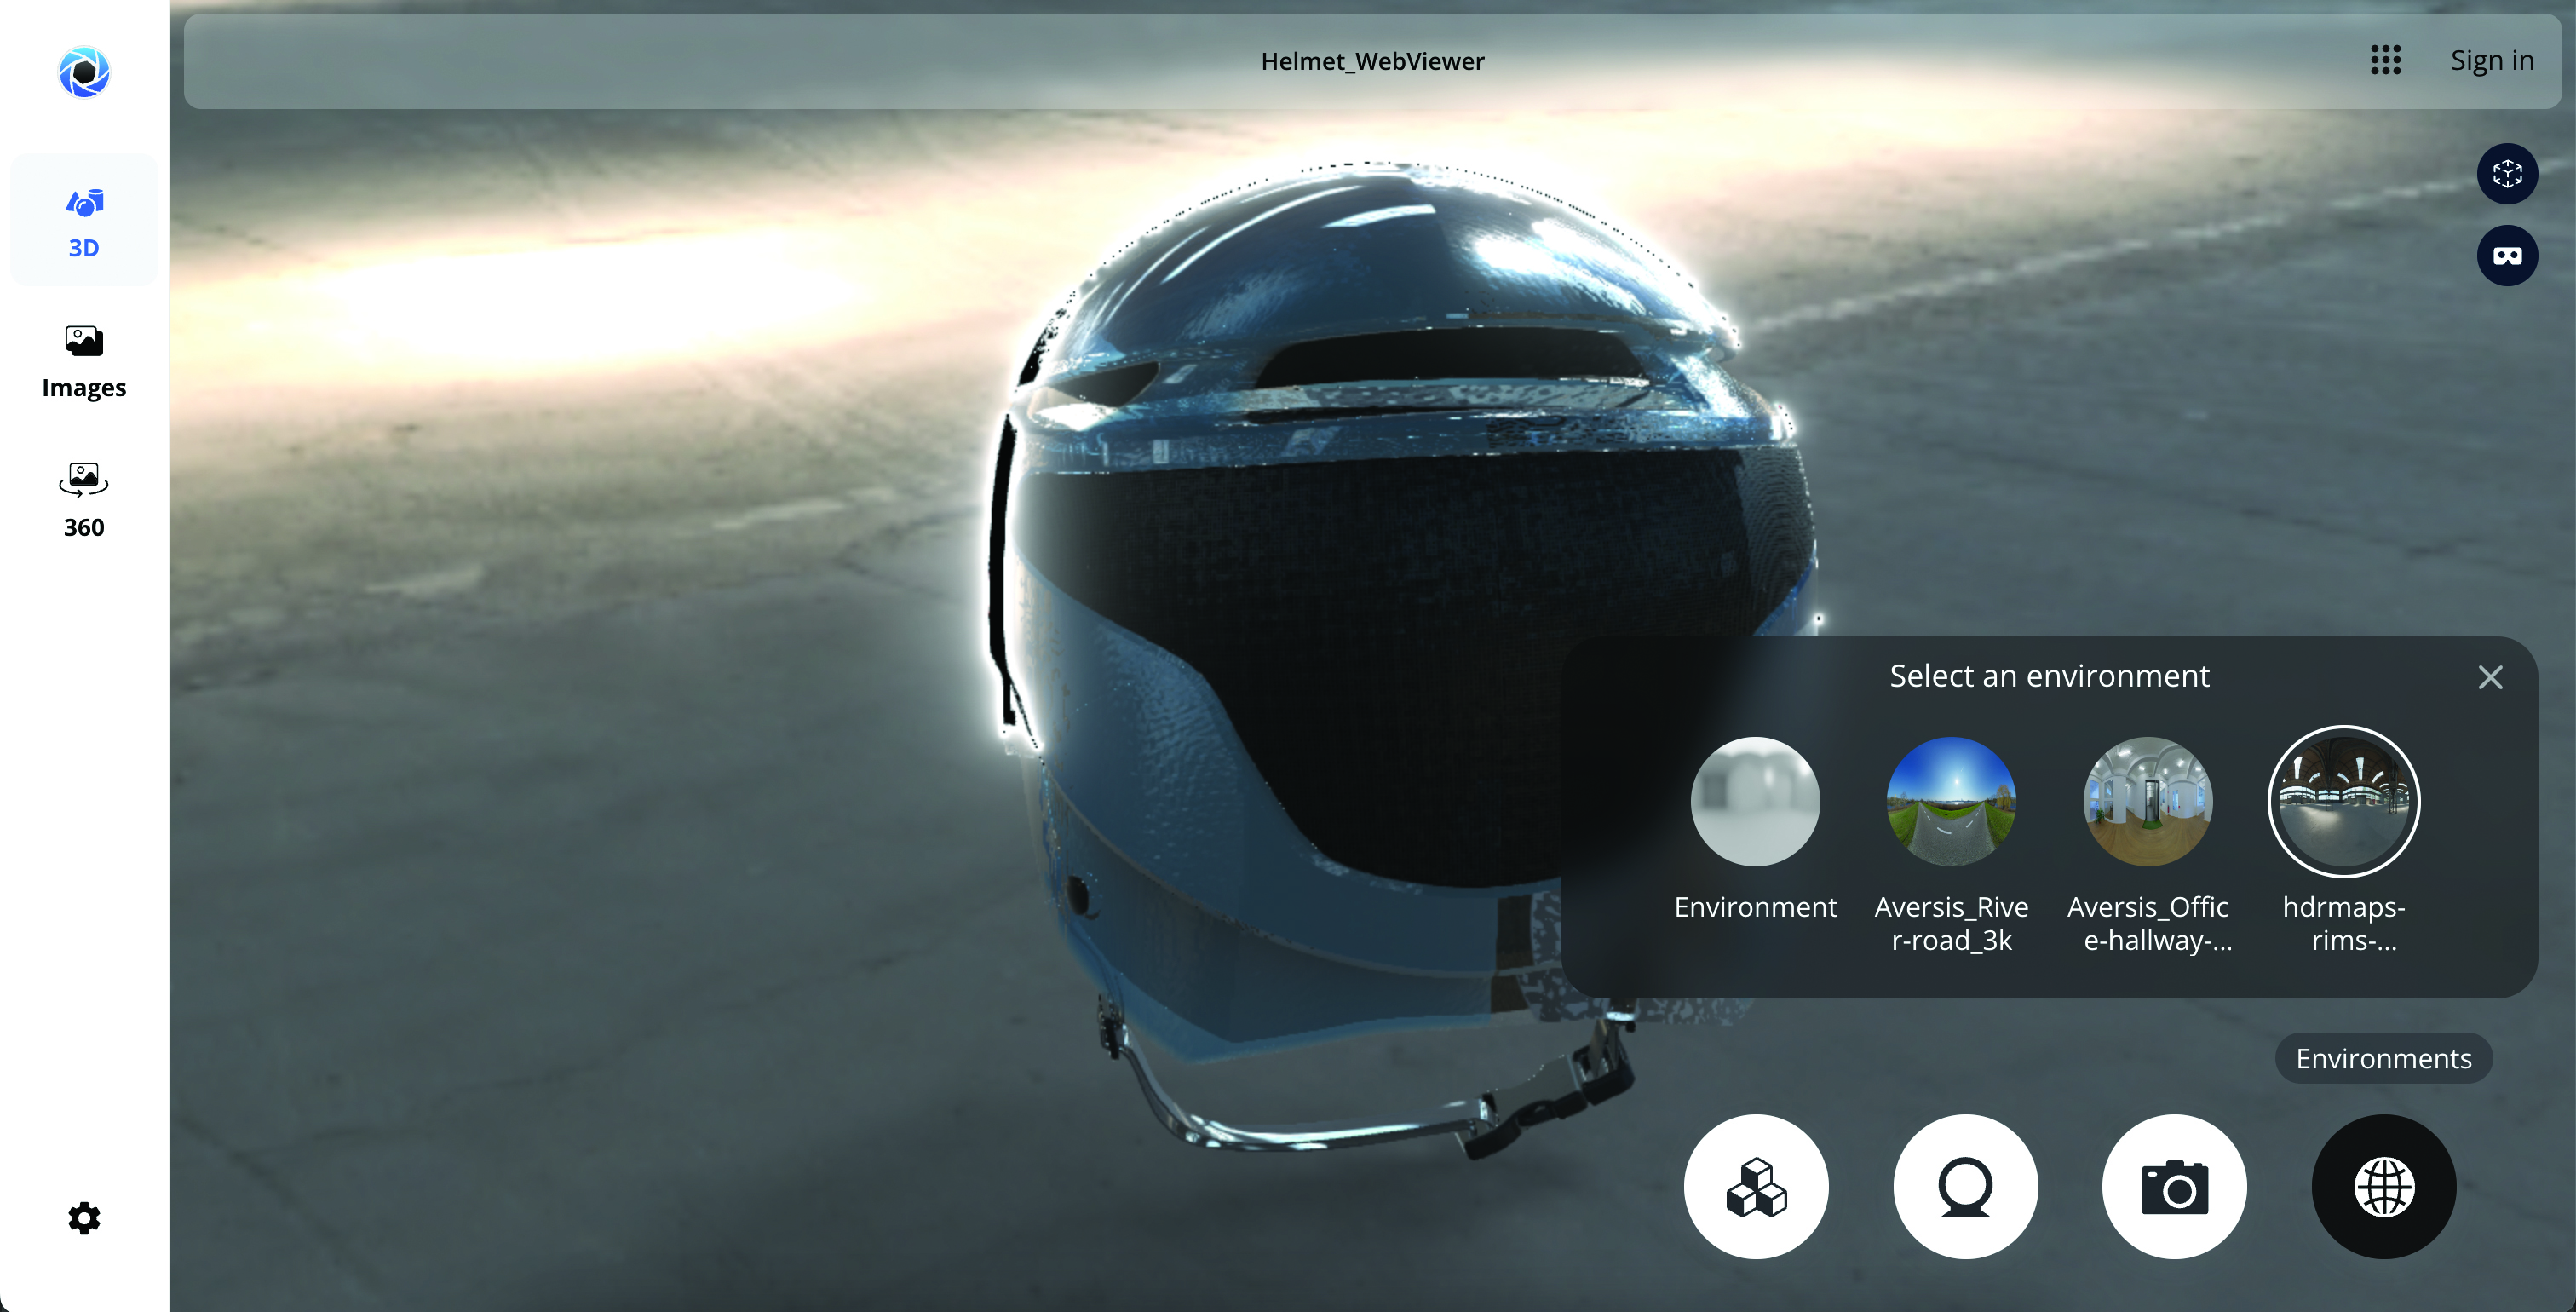
Use the bottom-right menu to customise the scene. The contents of these menus reflect the materials, cameras and environments set up within the KeyShot editor. Making changes in the viewport is as simple as going into one of these three sections and selecting a specific option. The Materials option is perfect for quickly swapping materials in and out, customising the model and displaying the various possibilities.
This content originally appeared in 3D World magazine. Subscribe to 3D World at Magazines Direct.
