Overclocking your graphics card can improve its performance by 5% to as much as 15% (or more), depending on the particular card model. Of course, as with any overclocking, care should be taken to avoid running your GPU at unsafe settings. But if you have one of the best graphics cards and you're looking to eke out a bit more performance, we'll discuss how we go about overclocking and determining "safe" settings.
Before overclocking, it's useful to get a baseline measurement of how your graphics card performs. You want to be able to see how much faster your PC runs after tuning, after all — if performance doesn't improve, you'll want to know. Check our guide on how to test graphics card performance, and you'll also want to check your graphics card temperatures and clock speeds.
Once you have your baseline stock performance data, it's time to start overclocking. There are a variety of utilities, but we're going to focus on MSI Afterburner, which is one of the most popular and commonly used GPU overclocking tools. The same basic process can be used with other utilities, including EVGA Precision X1, Asus GPU Tweak, and other graphics card vendor utilities. It's also possible to overclock AMD and Nvidia GPUs using the built-in utility in AMD's drivers or Nvidia's GeForce Experience, which we'll cover below, but we'll start with the universal approach to overclocking your GPU.
Please note that overclocking very much depends on the "silicon lottery." Just because one person with a "HappyGPUs RTX 4090 X-Factor-Wow" model card (that's a made up name, if you couldn't tell) managed a 20% core overclock and a 25% memory overclock doesn't mean that every RTX 4090 card will hit those same clocks, or even that the same model will reach similar clocks. Case in point: Even though all the RTX 4090 cards we've seen so far appear to use Micron 21Gbps GDDR6X memory ("D8BZC" labeled chips), we've seen maximum stable memory overclocks range from 22.6Gbps to as high as 25Gbps.
Overclocking With MSI Afterburner
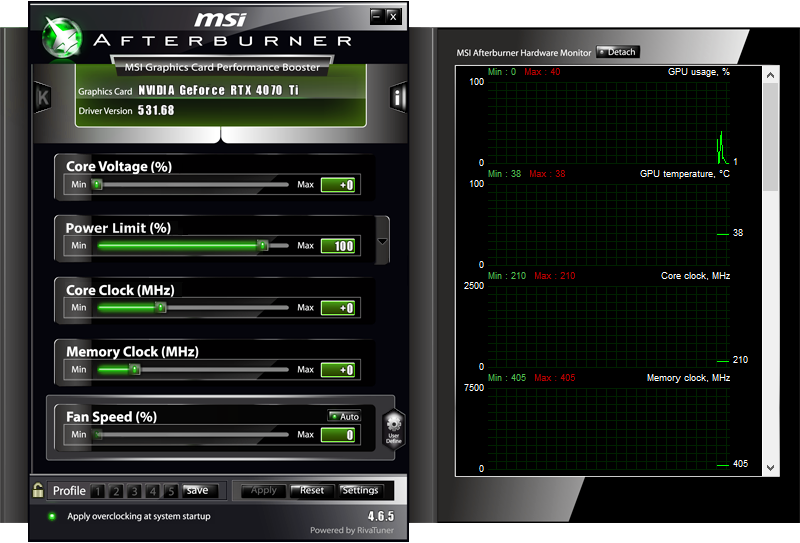
Here's the main interface for MSI Afterburner, using the v3 skin. It shows sliders for core voltage, power limit, core clock, memory clock, and fan speed. By default, Afterburner locks out voltage adjustments. If you want to play with that option, go into the settings and check the box for "Unlock voltage control." You can try setting it to reference design, standard MSI, extended MSI, or third party — some cards will only allow voltage adjustments with the correct mode, and some might not allow it at all.
One option for overclocking is to use the automatic OC scanner tool. Press Ctrl+F, then click the OC Scanner button in the top-right corner and let it do its thing. This is supposed to make overclocking easier, but as with most auto-tuning utilities, your mileage may vary. We've had it crash, we've had it generate unstable overclocks, and sometimes it doesn't even match a quick and dirty +150 MHz (or whatever) manual overclock. It doesn't do anything for memory clocks either, so you'll likely end up going the manual route. The OC scanner can take 20 minutes to run, and most of the time, you can get a quick and easy overclock much faster on your own.
My approach is to fire up a graphically intense game or benchmark that will run in a window, then I run the game at 1920x1080 or 2560x1440 (depending on the GPU I'm using) and get to a spot where nothing is going to kill me. From there, I switch over to Afterburner and start trying some adjustments. Note that you'll want a game or test that doesn't stop rendering when you leave focus (so if it shows the menu when you Alt+Tab, that's not going to work).
There are four primary points of interest when overclocking a graphics card: GPU core clock, memory clock, GPU voltage, and fan speed. (In some cases, you can also adjust memory voltage.) I start by finding the maximum "stable" core clock, then I find the maximum "stable" memory clock, and then I try to find a blend of the two that results in optimal performance.
Note that "stable" is in quotation marks because even if the initial testing seems to work fine, there will often be exceptions where some games or applications crash while others work. When that happens, you'll have to go back to tune the settings and see if you can find some that allow the game to run properly. As you can probably guess, the more demanding the game (i.e., if it uses ray tracing or other advanced features), the more likely it is to require additional fine tuning and lower clocks.
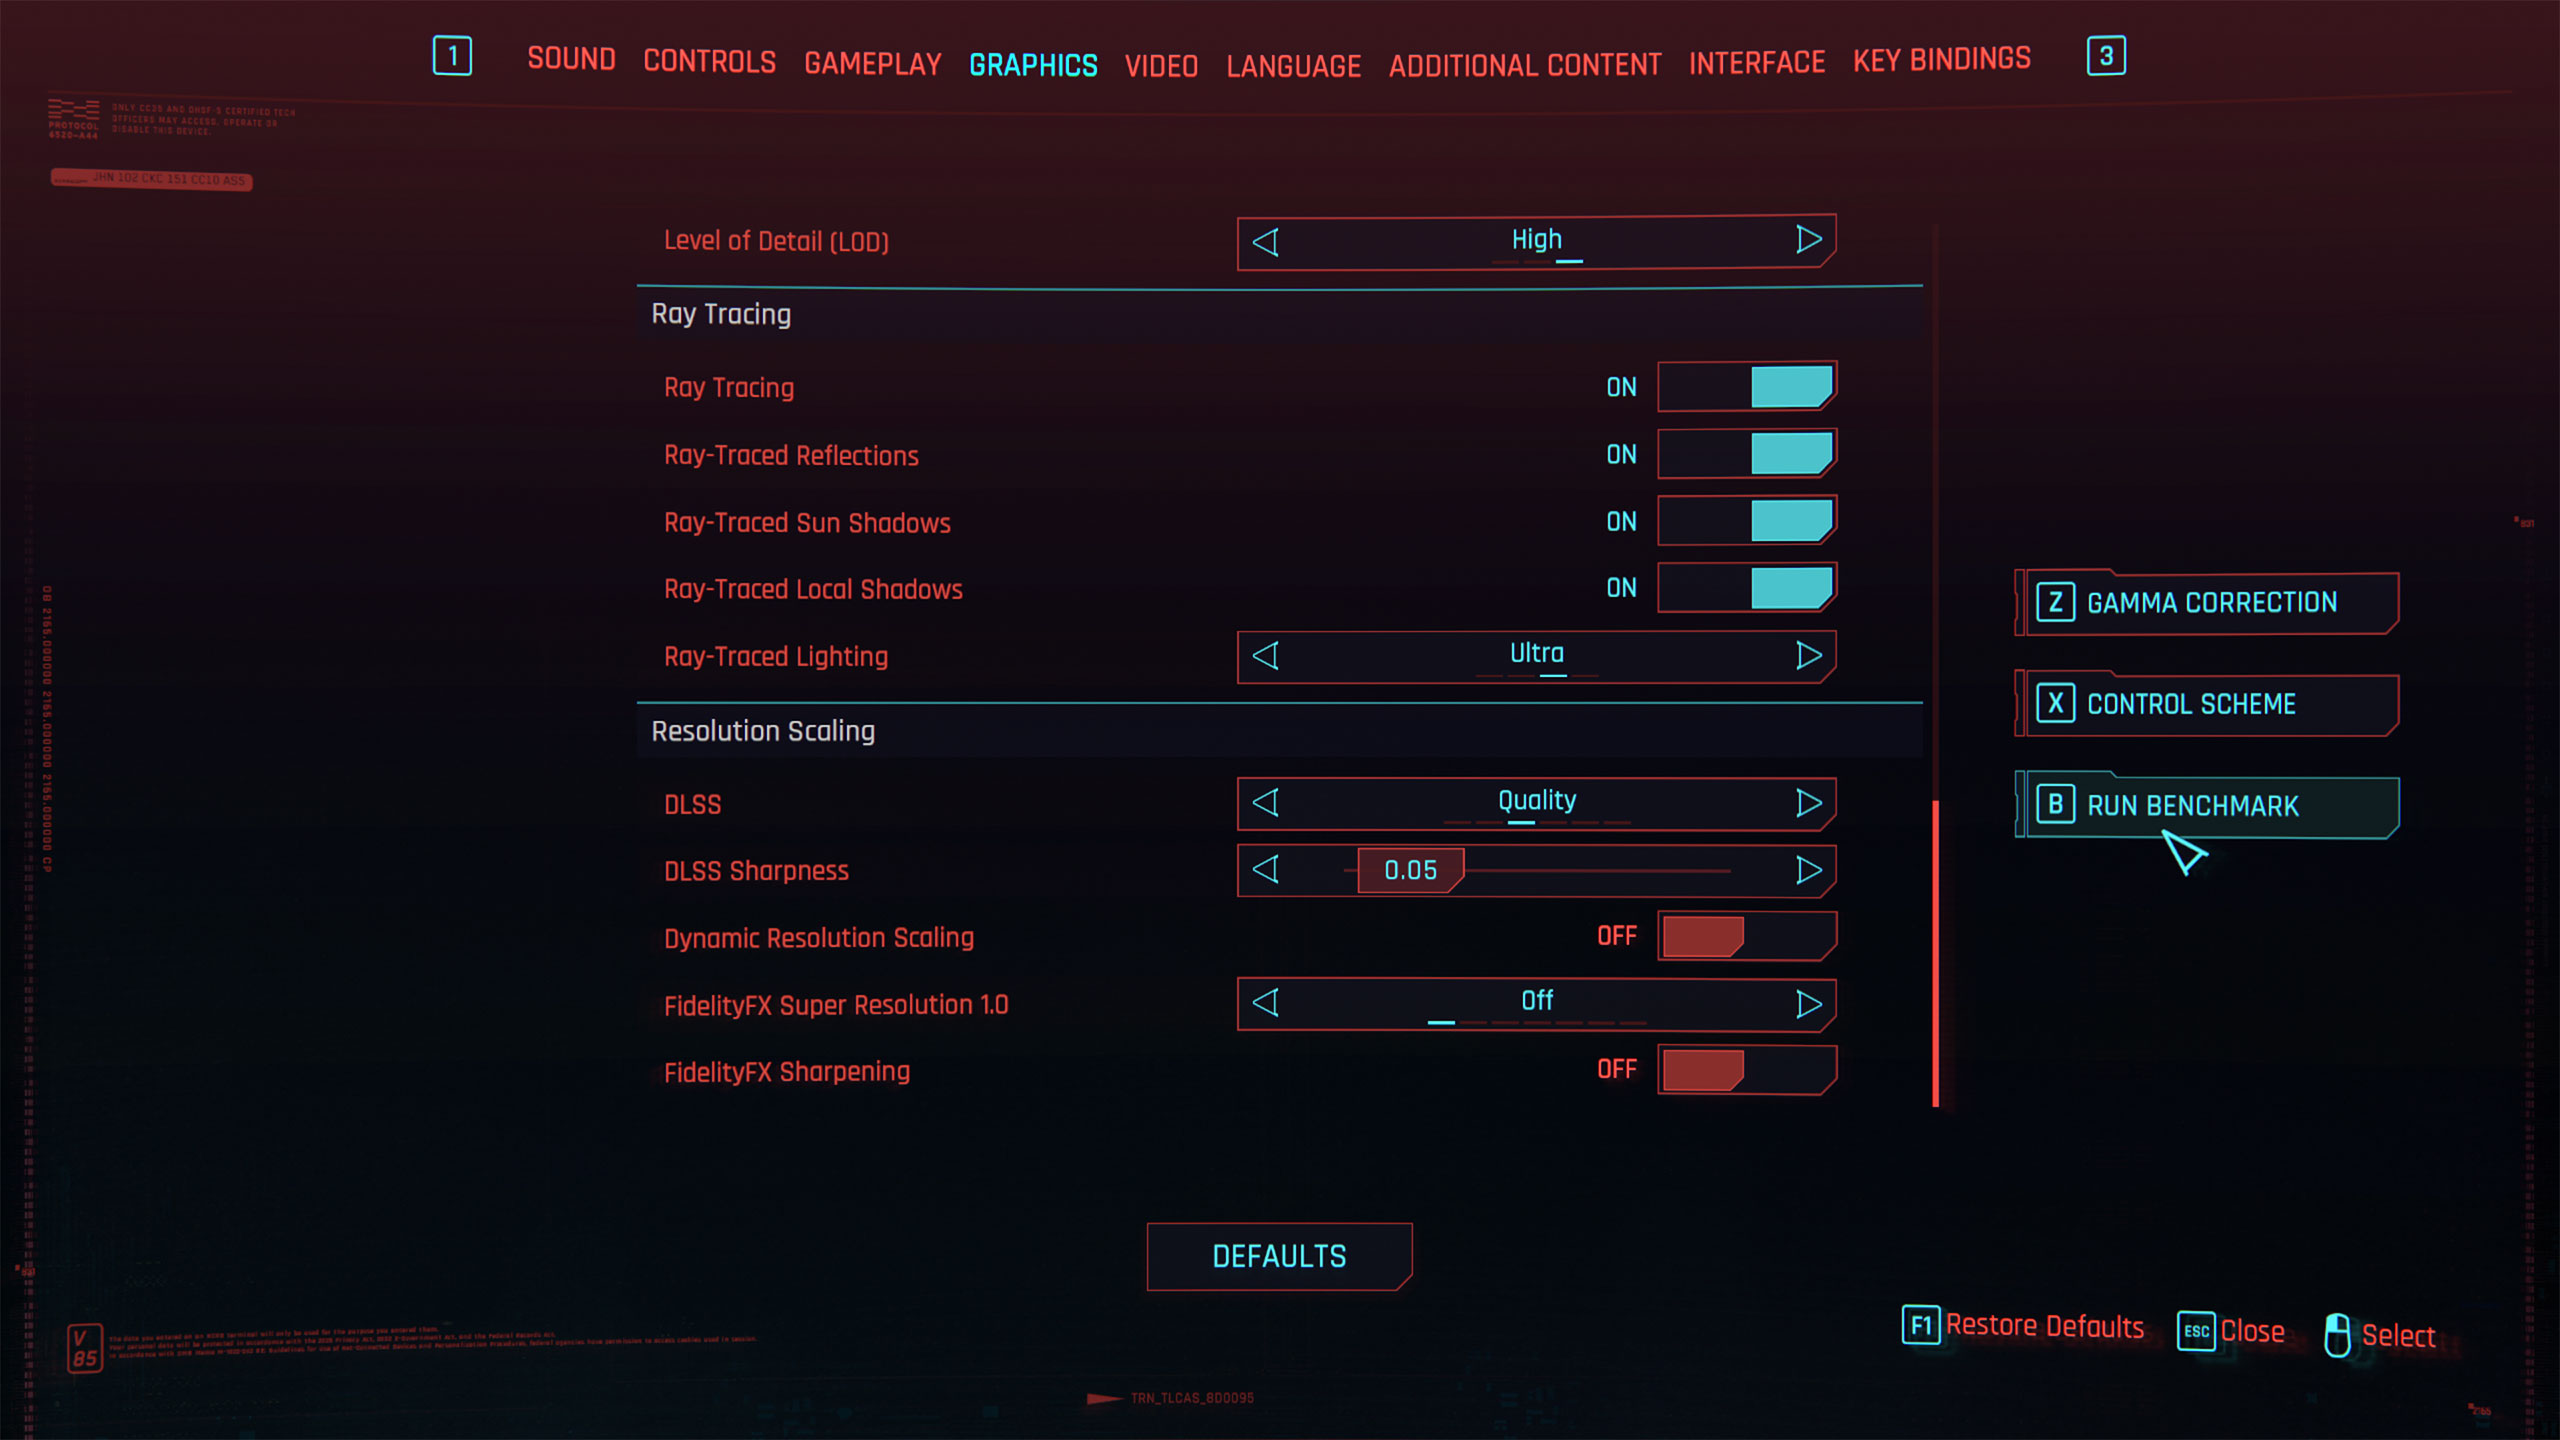
For this tutorial, we'll use Cyberpunk 2077, running in a window at 2560x1440 with RT-Ultra settings and DLSS Quality mode, to find a reasonable overclock for a GeForce RTX 3090 Founders Edition card. That ticks all the boxes for a demanding game that will likely push the GPU to its limits, and it also has a built-in benchmark that will let us see what happens to performance after tuning.
We started with a GPU core overclock. After loading the game and applying the appropriate settings, we maxed out the power limit and set the fan speed to 80% to ensure the GPU and memory stayed cool. Everything was fine so far, and we applied a 100 MHz offset to the GPU core. That worked okay, which is almost always the case — if you can't get at least a 100 MHz core overclock, you probably shouldn't worry about going any further with your particular graphics card.
With that initial performance boost in play, we then tried a 150 MHz core overclock… and Cyberpunk 2077 almost immediately crashed. We tried maxing out the core voltage after restarting the game, and it still crashed, which means a 150 MHz offset won't work. We split the difference and dropped to 125 MHz, which also crashed. It appeared reasonably stable after maxing out the core voltage at +100 but still crashed after several minutes.
Ultimately, +100 MHz on the GPU cores appears to be as far as we're likely to get with this particular card, though do note that the increased power limit means we're running quite a bit faster than at stock — GPU clocks hovered around 1755 MHz at stock, compared to 1905 MHz with our overclock. A big chunk of that comes thanks to the increased power limit, as even with a 0 MHz GPU overclock, we saw average clocks of 1875 MHz in our testing.
Next, we worked on a memory overclock. We dropped the GPU core clock back to +0 MHz but left the power limit at the maximum (114% on this card). There's usually a fair amount of headroom, so we started with a +750 MHz offset on the GDDR6X memory. That gives an effective memory clock of 21Gbps, and after several minutes of running around in the game, we figured it was working fine. +1000 MHz (21.5Gbps) also appeared stable, as did +1250 MHz (22Gbps), but +1500MHz immediately crashed our PC and forced a system restart. Did we mention overclocking can be a trial and error process?
After additional tinkering and testing, we combined the GPU and VRAM overclocks to end up with +100 MHz on the GPU core and +1000 MHz on the GDDR6X memory. Note that Nvidia's RTX 30-series GPUs have "error detect and retry" (EDR) on the memory, which can sometimes obscure borderline unstable overclocks, and we figured 21.5Gbps was sufficiently fast.
GPU Overclocking Performance
What did the above do for performance? Here's how the stock, GPU core only, VRAM only, and GPU plus VRAM overclocks fared at 4K RT-Ultra with DLSS Quality in the built-in Cyberpunk 2077 benchmark. We also tested a second game, Borderlands 3, at 4K and Badass settings with the same four GPU settings.
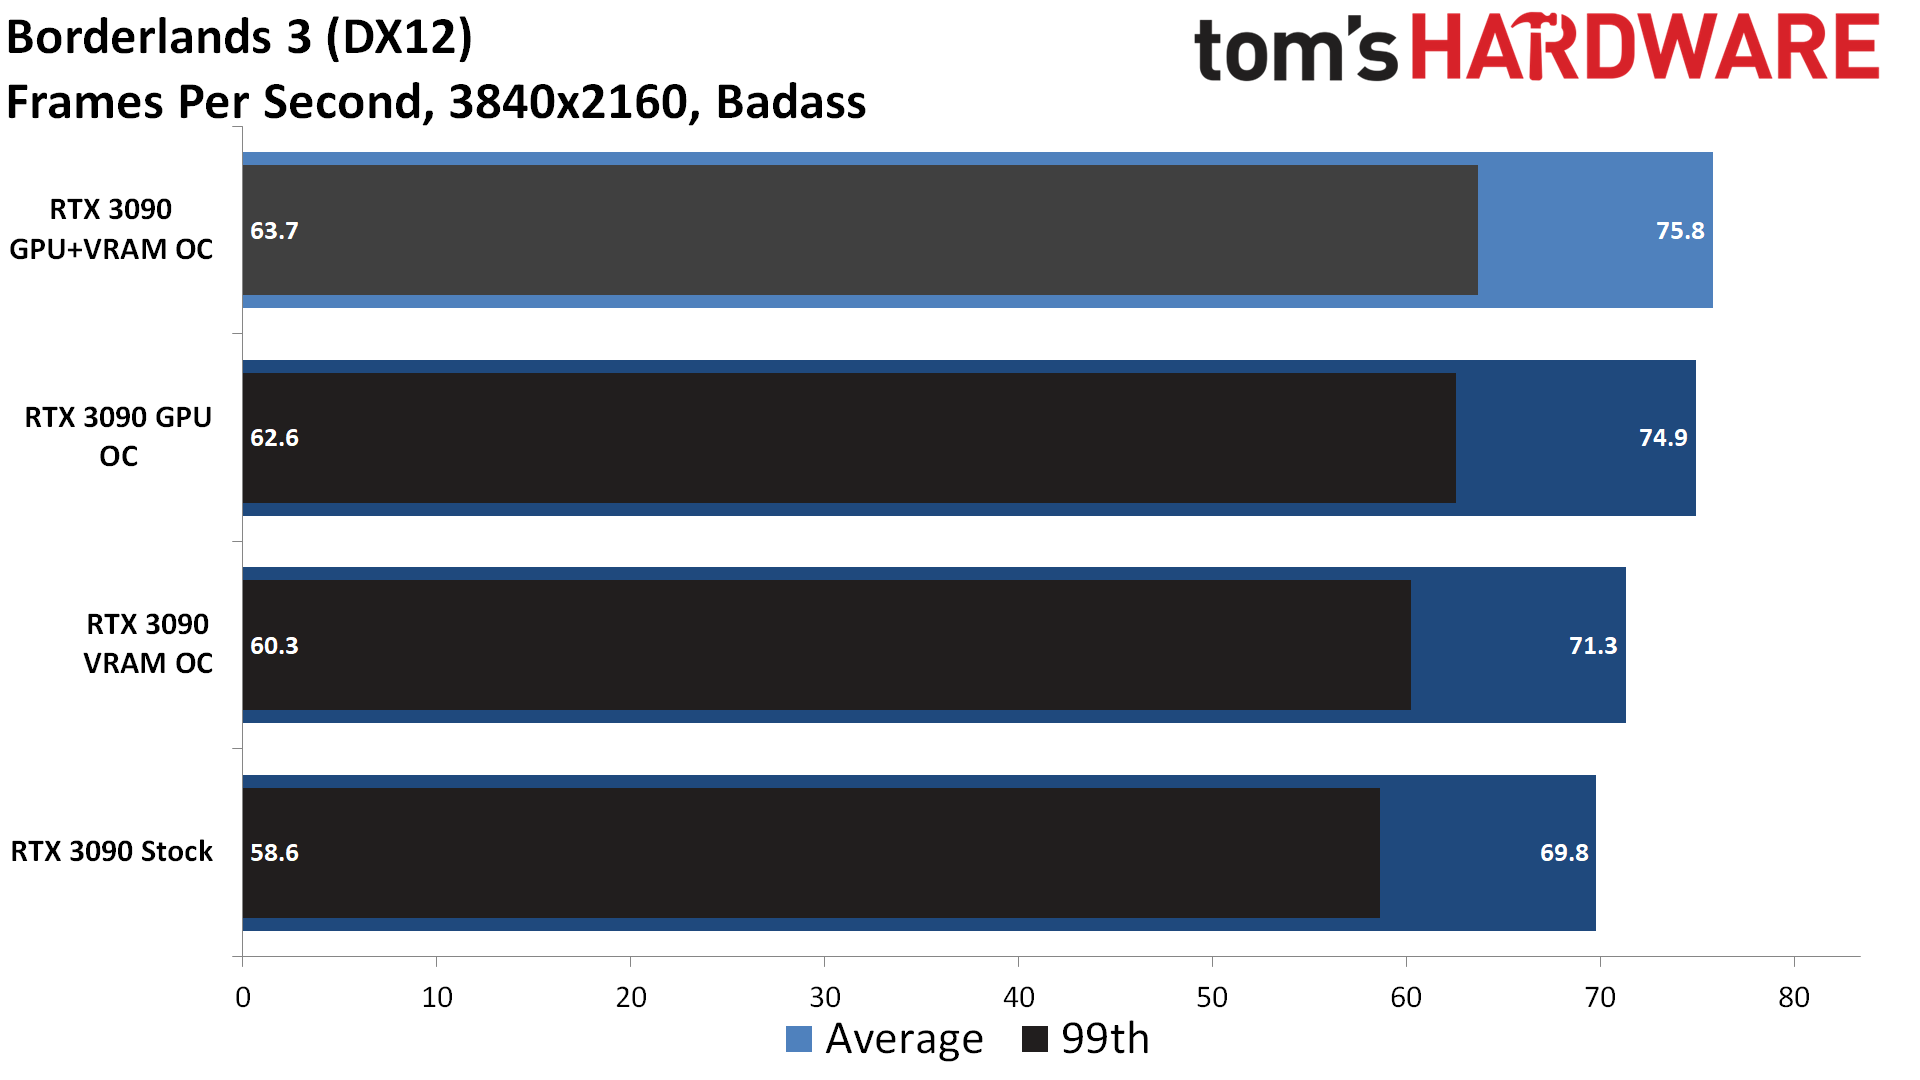
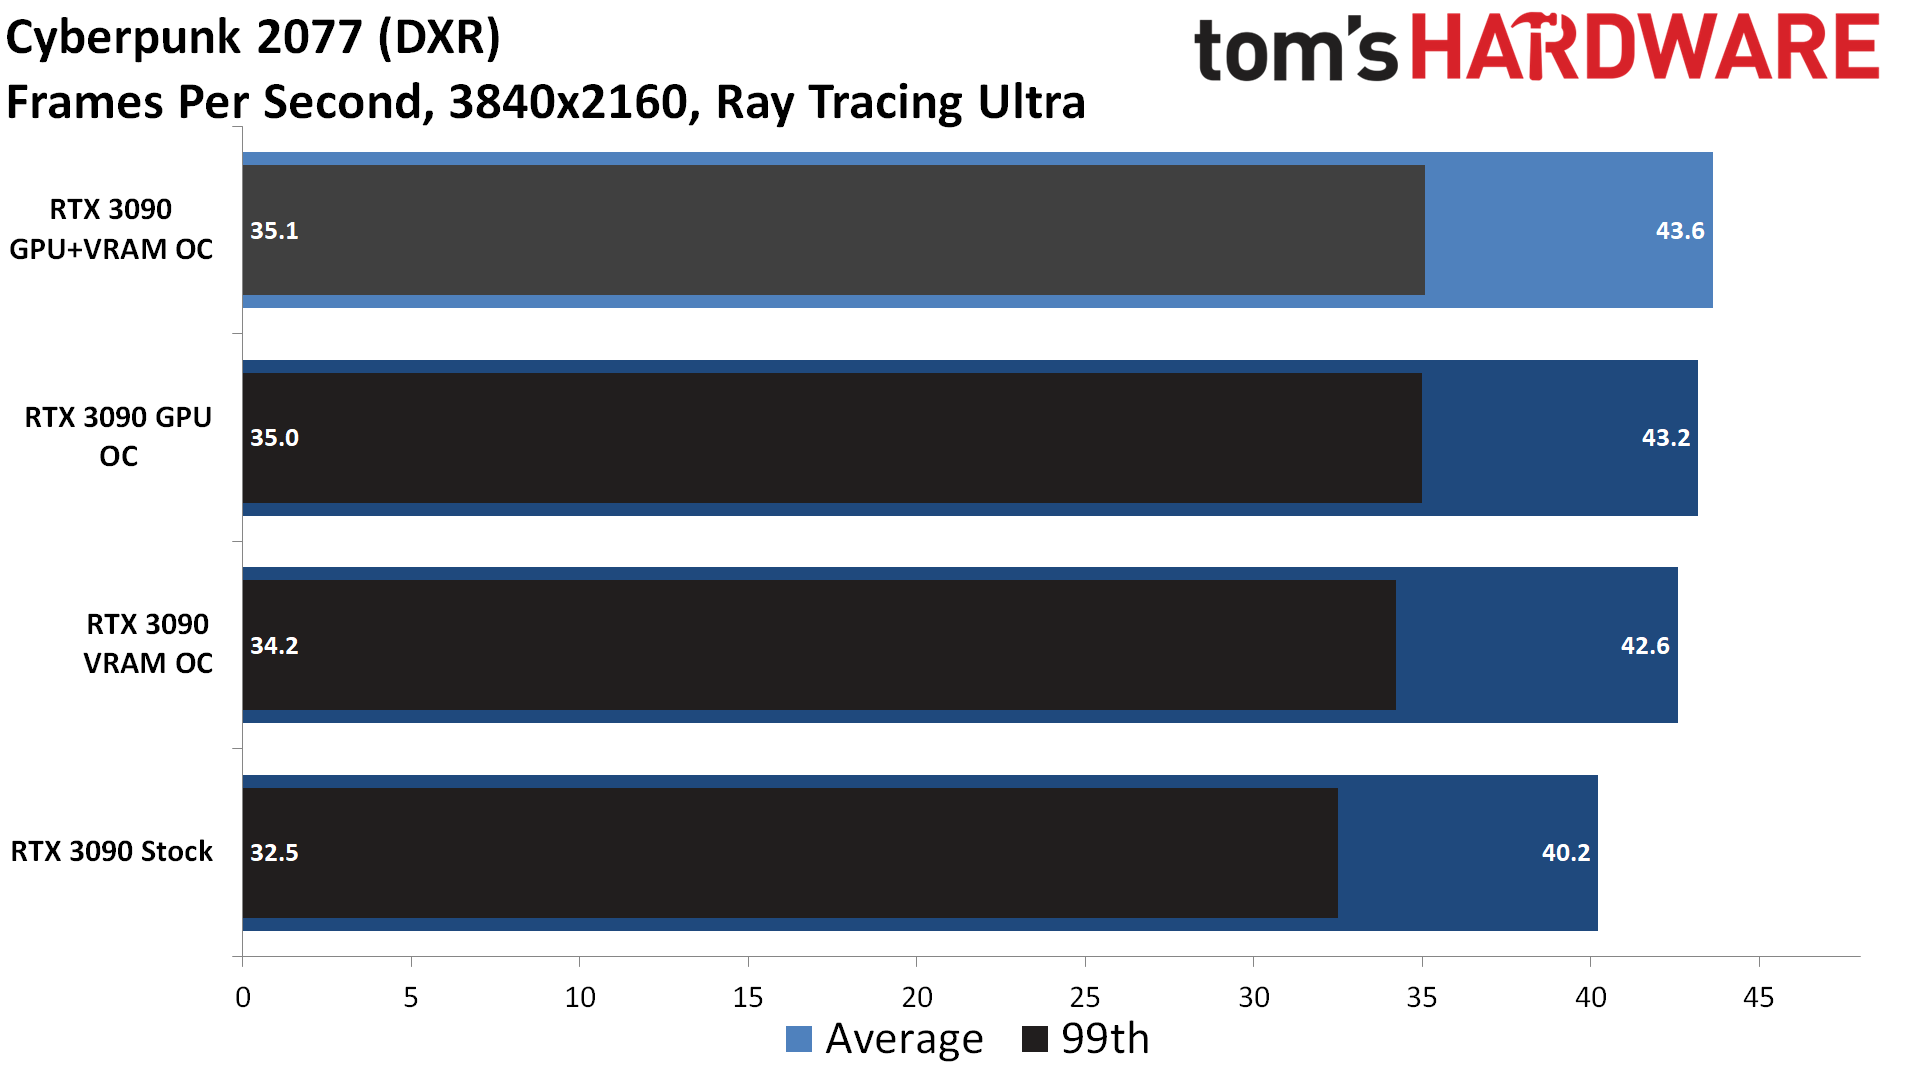
We'll forgive you if that feels underwhelming. Ultimately, our maximum GPU overclock improved performance on the RTX 3090 by 8.6% in Borderlands 3 and 8.5% in Cyberpunk 2077. Most of those gains came from the GPU core overclock, which improved performance by 7.3% in Borderlands 3 and 7.5% in Cyberpunk 2077. Meanwhile, just overclocking the VRAM improved performance by 2.1% in Borderlands 3 and 6.0% in Cyberpunk 2077.
Your actual gains can vary a lot, depending on your graphics card. For example, the RTX 3090 isn't known for being memory bandwidth starved in most cases, but the reference model definitely runs into power limits at stock. That's why the core overclock mattered more than the VRAM overclock. Still, the results we've shown above aren't atypical for graphics card overclocking, and we usually see about a 5–10% improvement in performance.
AMD and Nvidia "Built-In" Overclocking
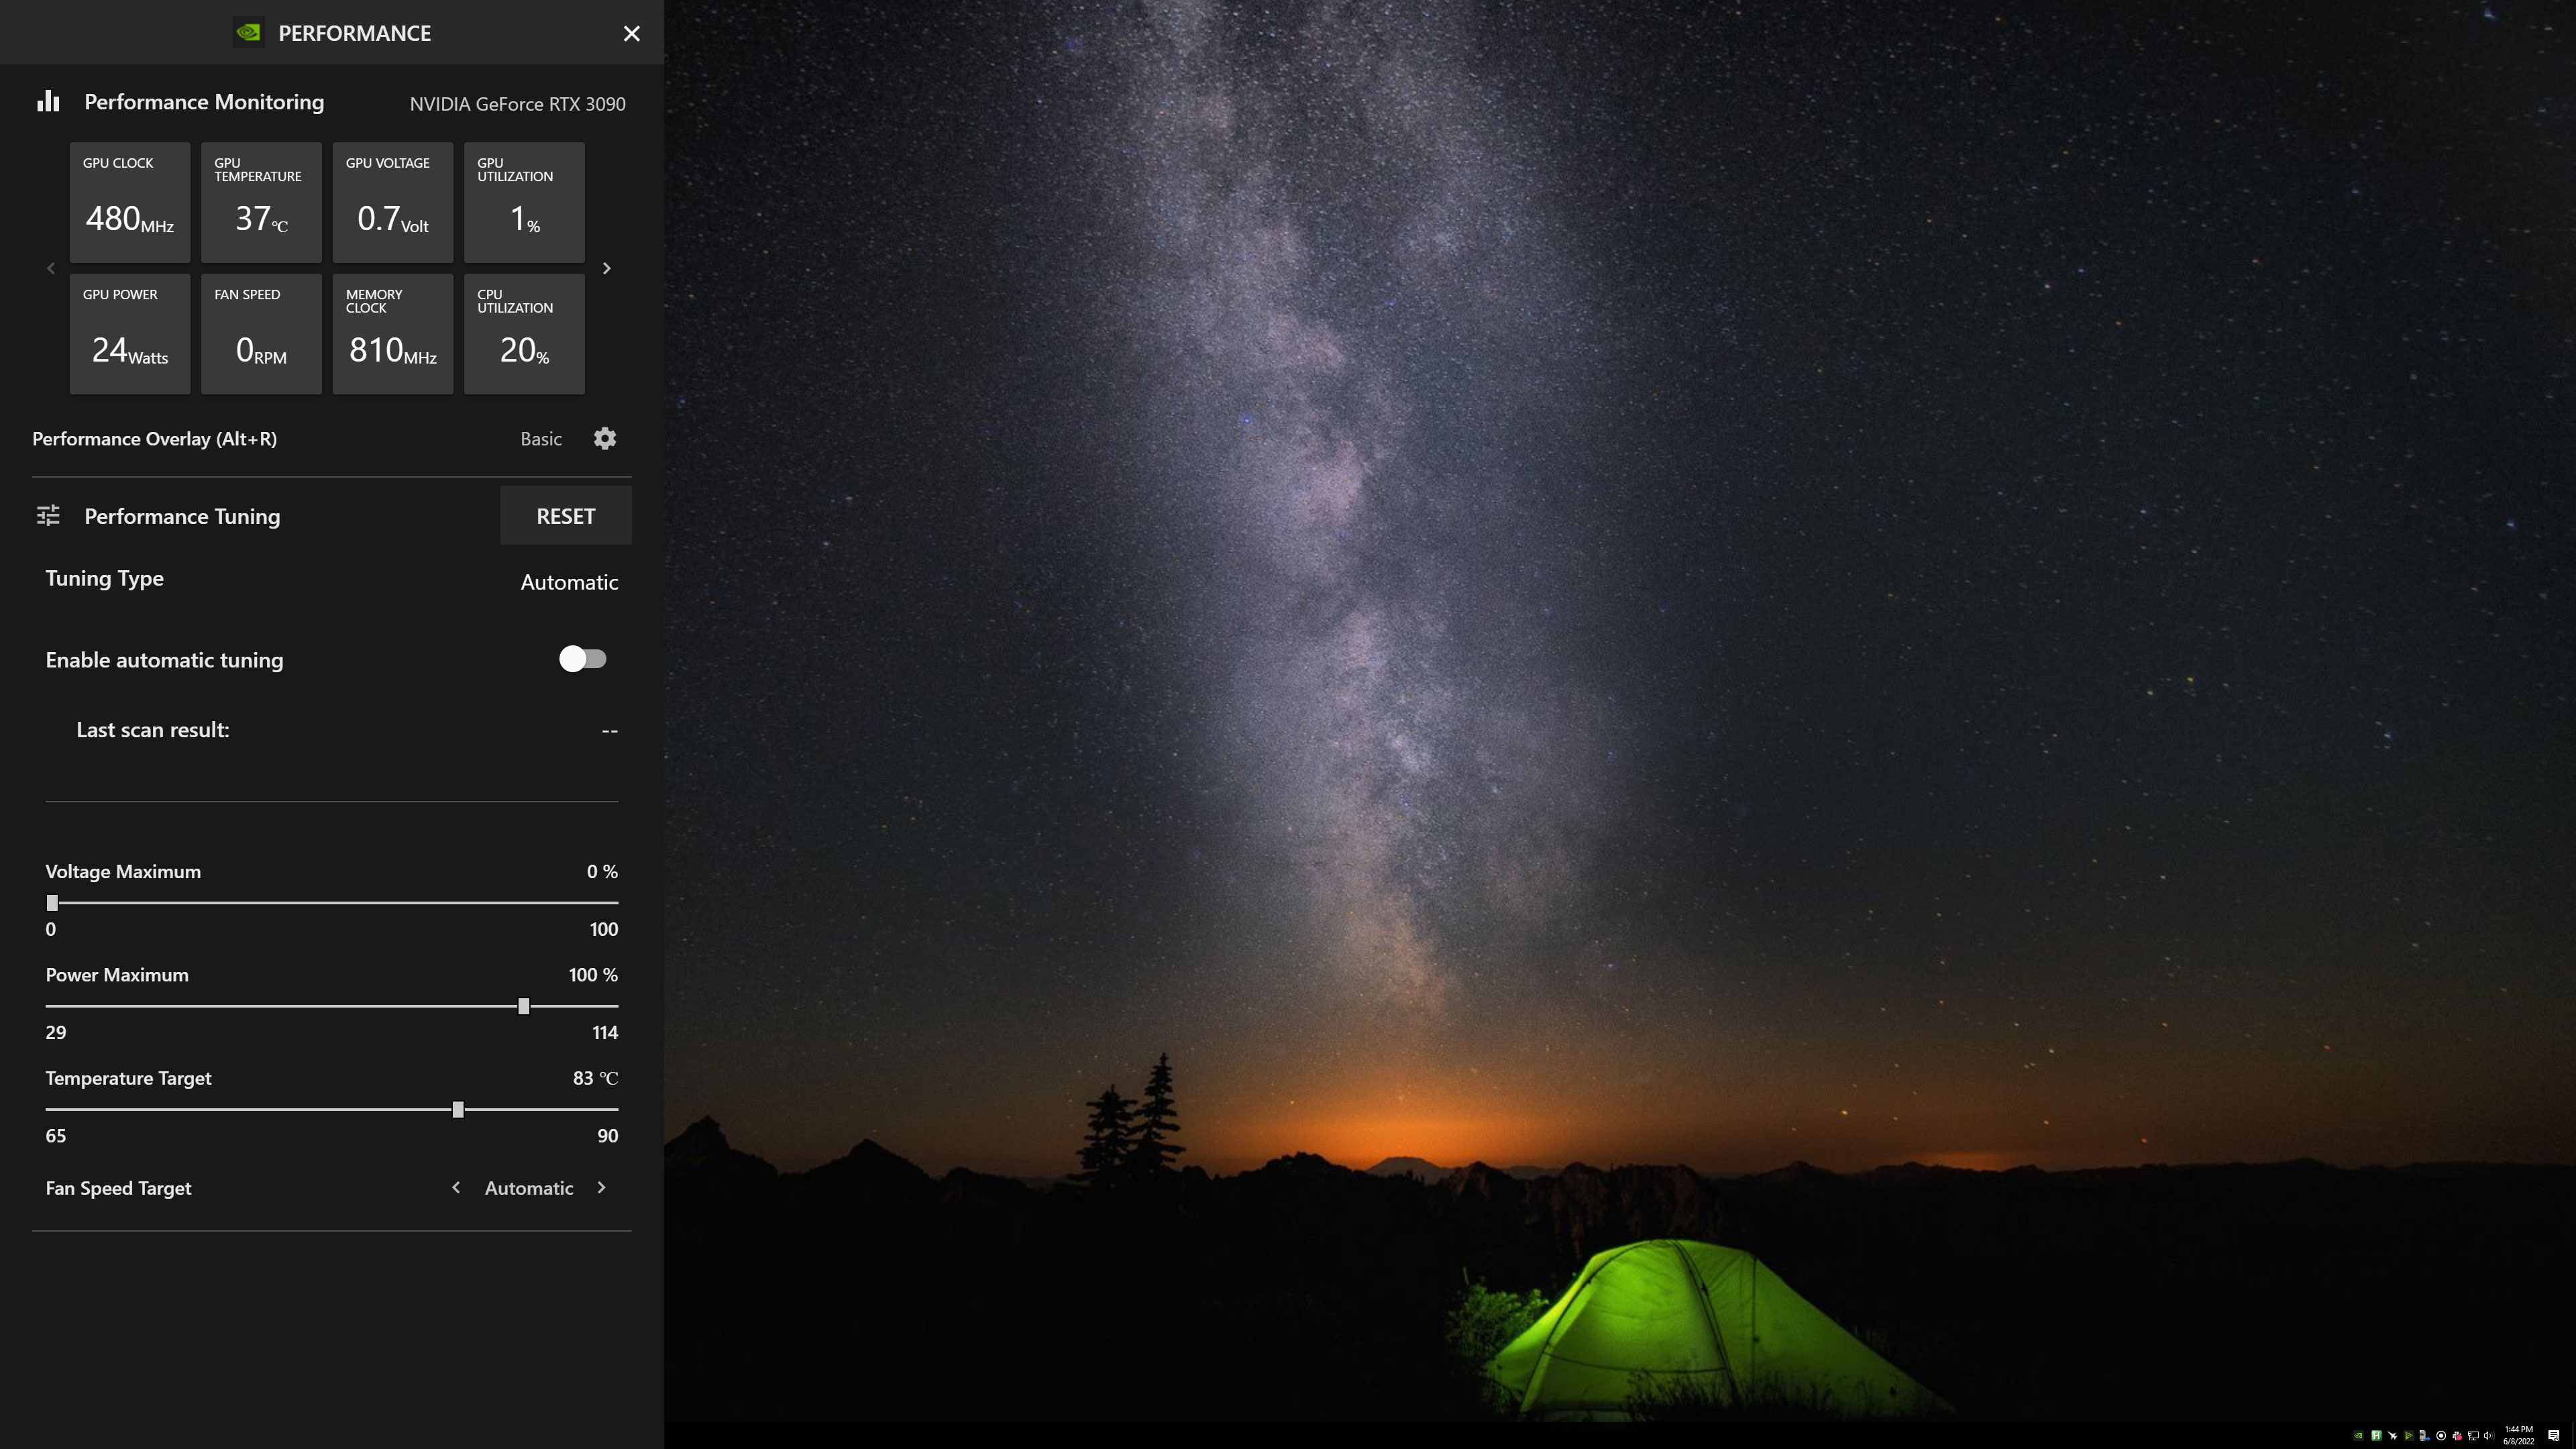
You can use other utilities to overclock your GPU, but if you don't want to bother with MSI Afterburner, you should probably just use the built-in tools provided by AMD and Nvidia. Nvidia provides an auto-tuning tool and you can specify voltage and power limits, a temperature target, and a fan speed target. After that, you just leave it up to the drivers, which will overclock the GPU cores — but not the VRAM, so you're potentially missing out on a decent chunk of untapped performance.
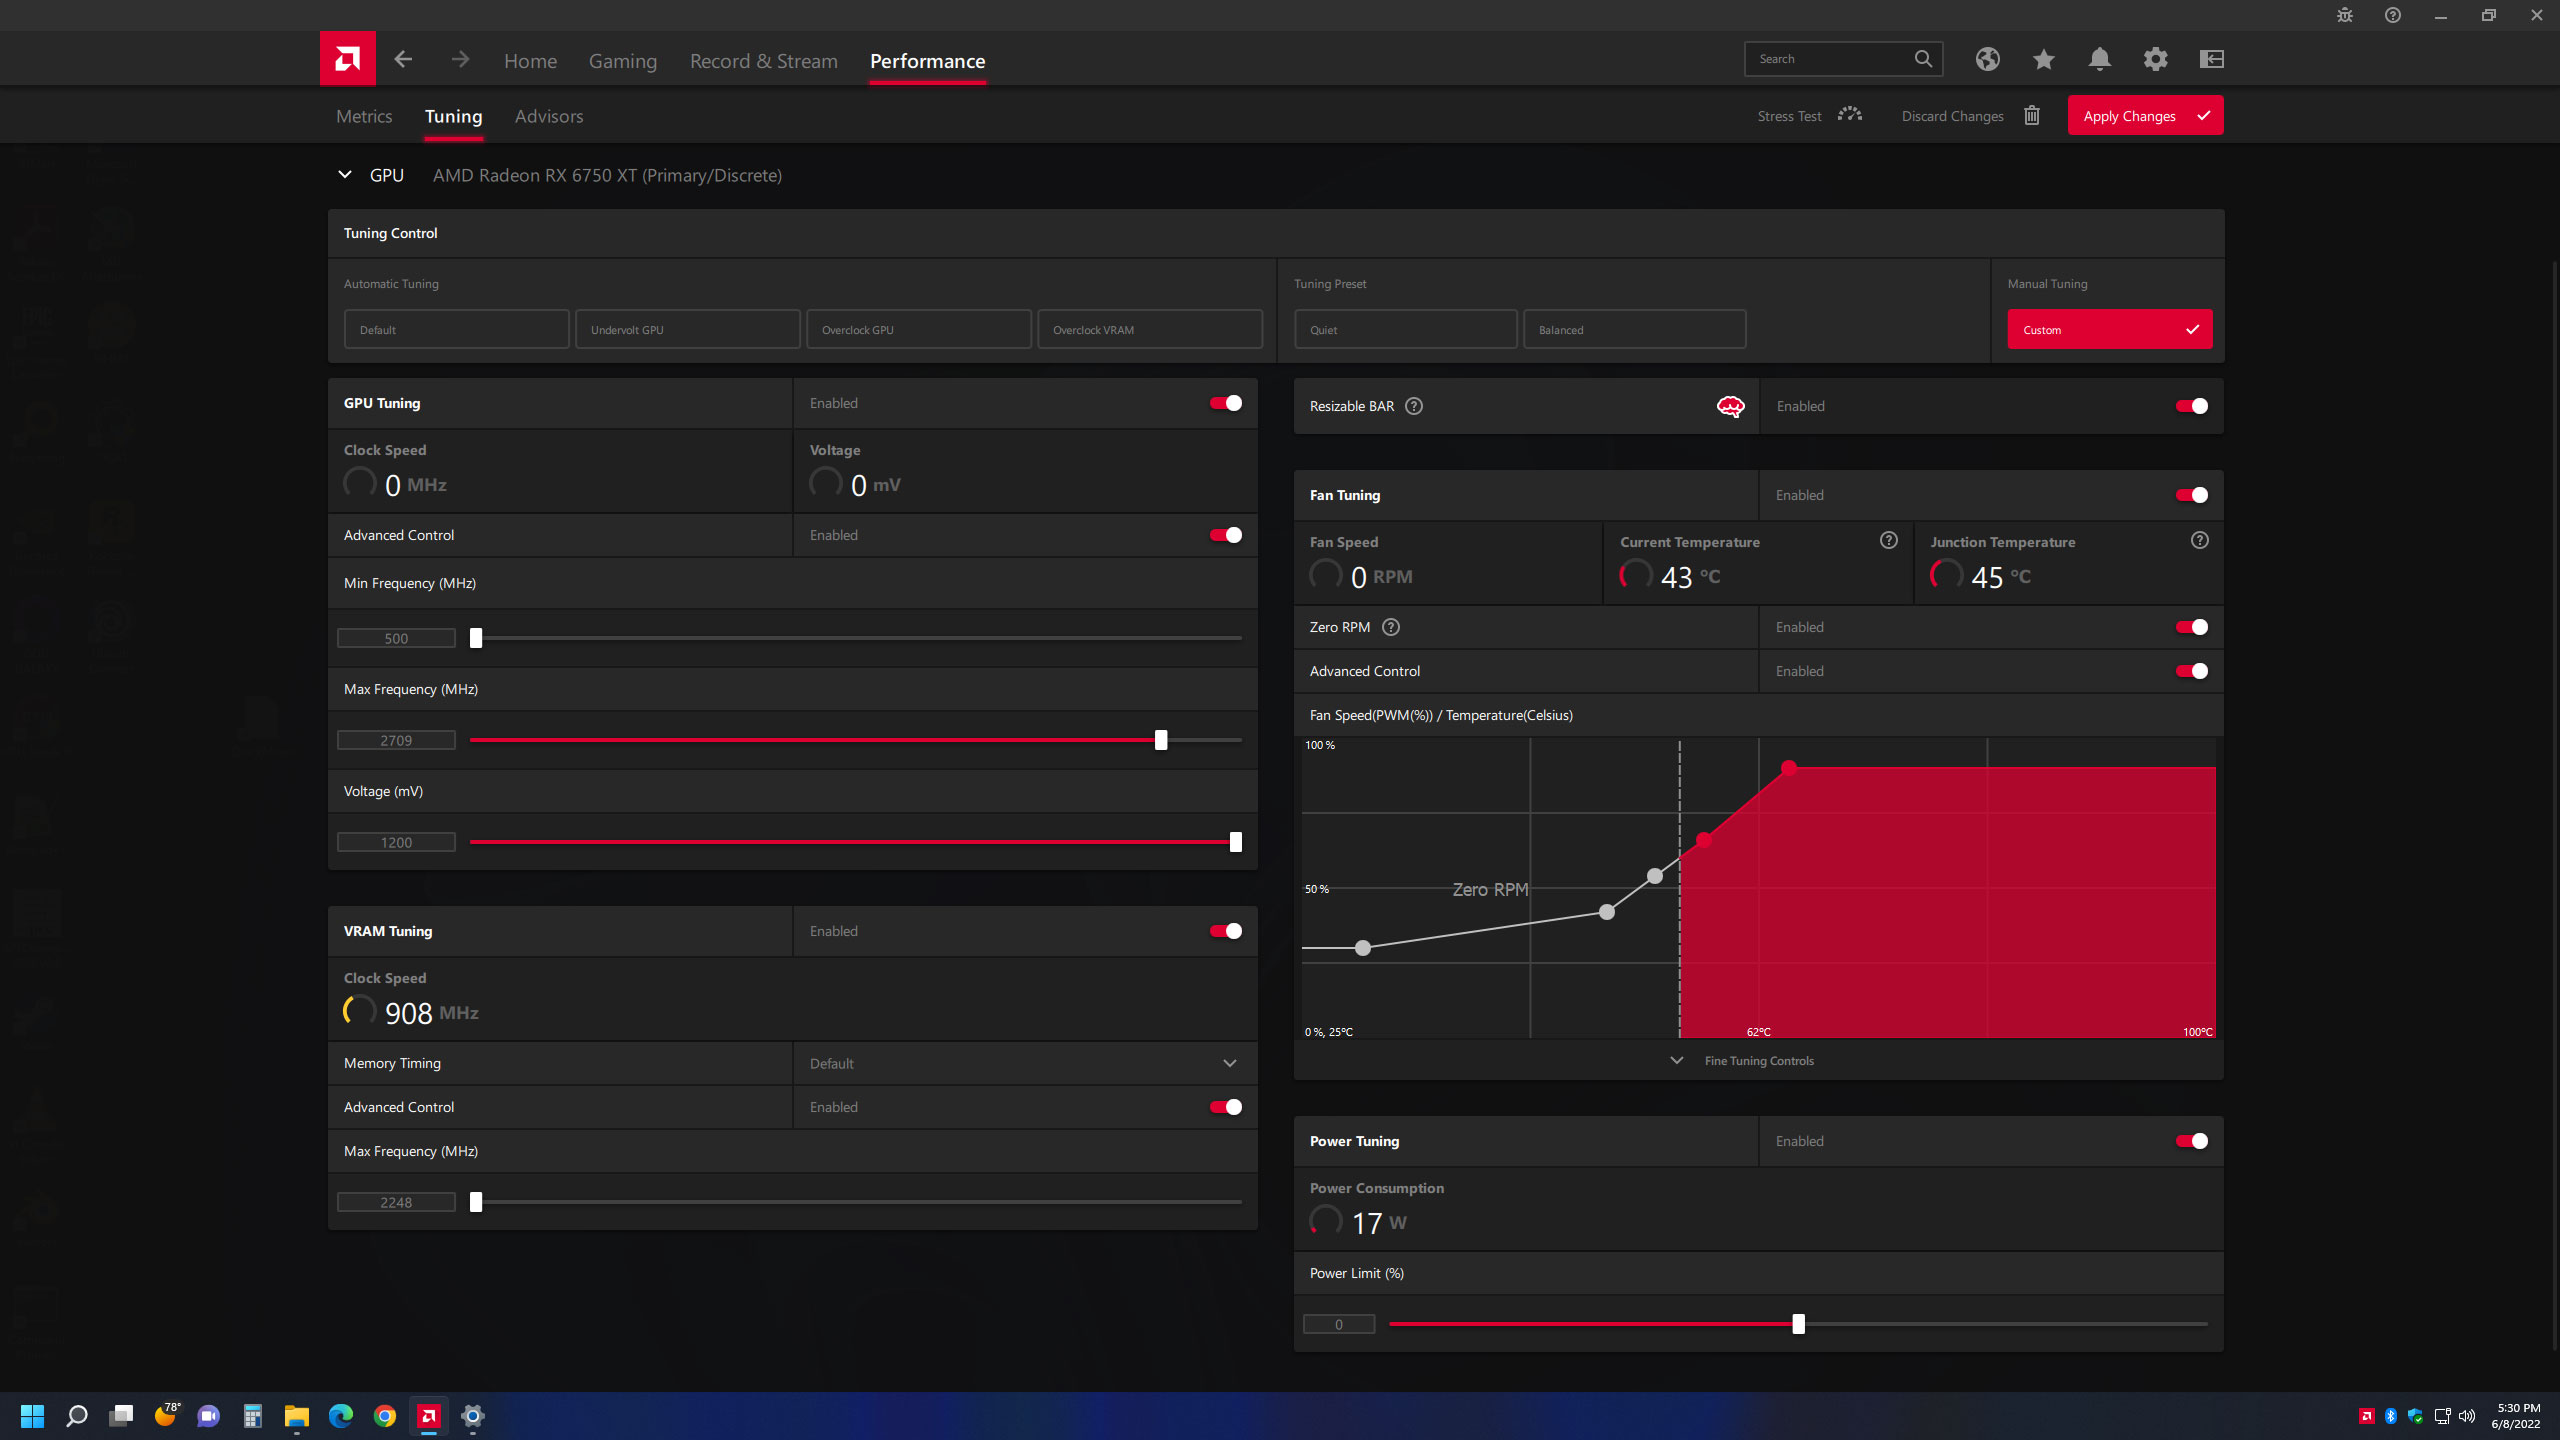
AMD's overclocking tools built into Radeon Settings are far more useful. You can do everything you need, specifying voltages, clock speeds, fan speeds, memory speeds, and more. You can also ask the drivers to overclock the VRAM or the GPU — but not both. Alternatively, it can auto-undervolt the GPU, which reduces performance a bit but also tends to lower temperatures and power use. Basically, you don't need a separate GPU overclocking utility, though we still generally find MSI Afterburner to be more familiar and easier to use.
One big benefit of AMD's overclocking tools is that you can specify per-game OC profiles. Maybe one game isn't as intense and you can push clocks higher, or maybe you have a game that just needs the extra oomph to provide a smoother gameplay experience. It can be as complex or as simple as you want to make it, though ultimately, it will often still come down to trial and error.
Bottom Line: GPU Overclocking
Should you overclock your graphics card? We could be cheeky and say that if you need to ask, you should probably just leave well enough alone. The reality is that AMD and Nvidia — and their graphics card partners — tend to bin the chips and push performance nearly to the limit. Overclocking also increases the power use and often the temperature of your graphics card, which can cause it to wear out sooner. But perhaps even worse than that is the fact that overclocking usually only improves performance by 5–10%.
That might be noticeable, to some people, without running a bunch of benchmarks. In practice, there's usually not enough headroom that it's worth the hassle. You can give the auto-tuning options in the AMD and Nvidia drivers a shot, and that will probably get you at least half of what you'd get with manual tuning. Plus, it's a simple flip of a switch rather than something that requires a lot of trial and error.
As someone who has done a lot of overclocking over the years, I can say that one of the worst feelings is when you're in the middle of a game and it suddenly crashes due to a formerly "stable" overclock. You're then in the unenviable position of wondering if there's a bug in the game, if your overclock pushed things too far, or if there's something else wrong with your PC. I've lost countless hours troubleshooting my PCs, and these days I just don't find GPU overclocking to be particularly important. Applying upscaling of some form (DLSS, FSR2, XeSS, or even just a spatial upscaling filter) can provide a much larger performance improvement without increasing power use or affecting system stability.
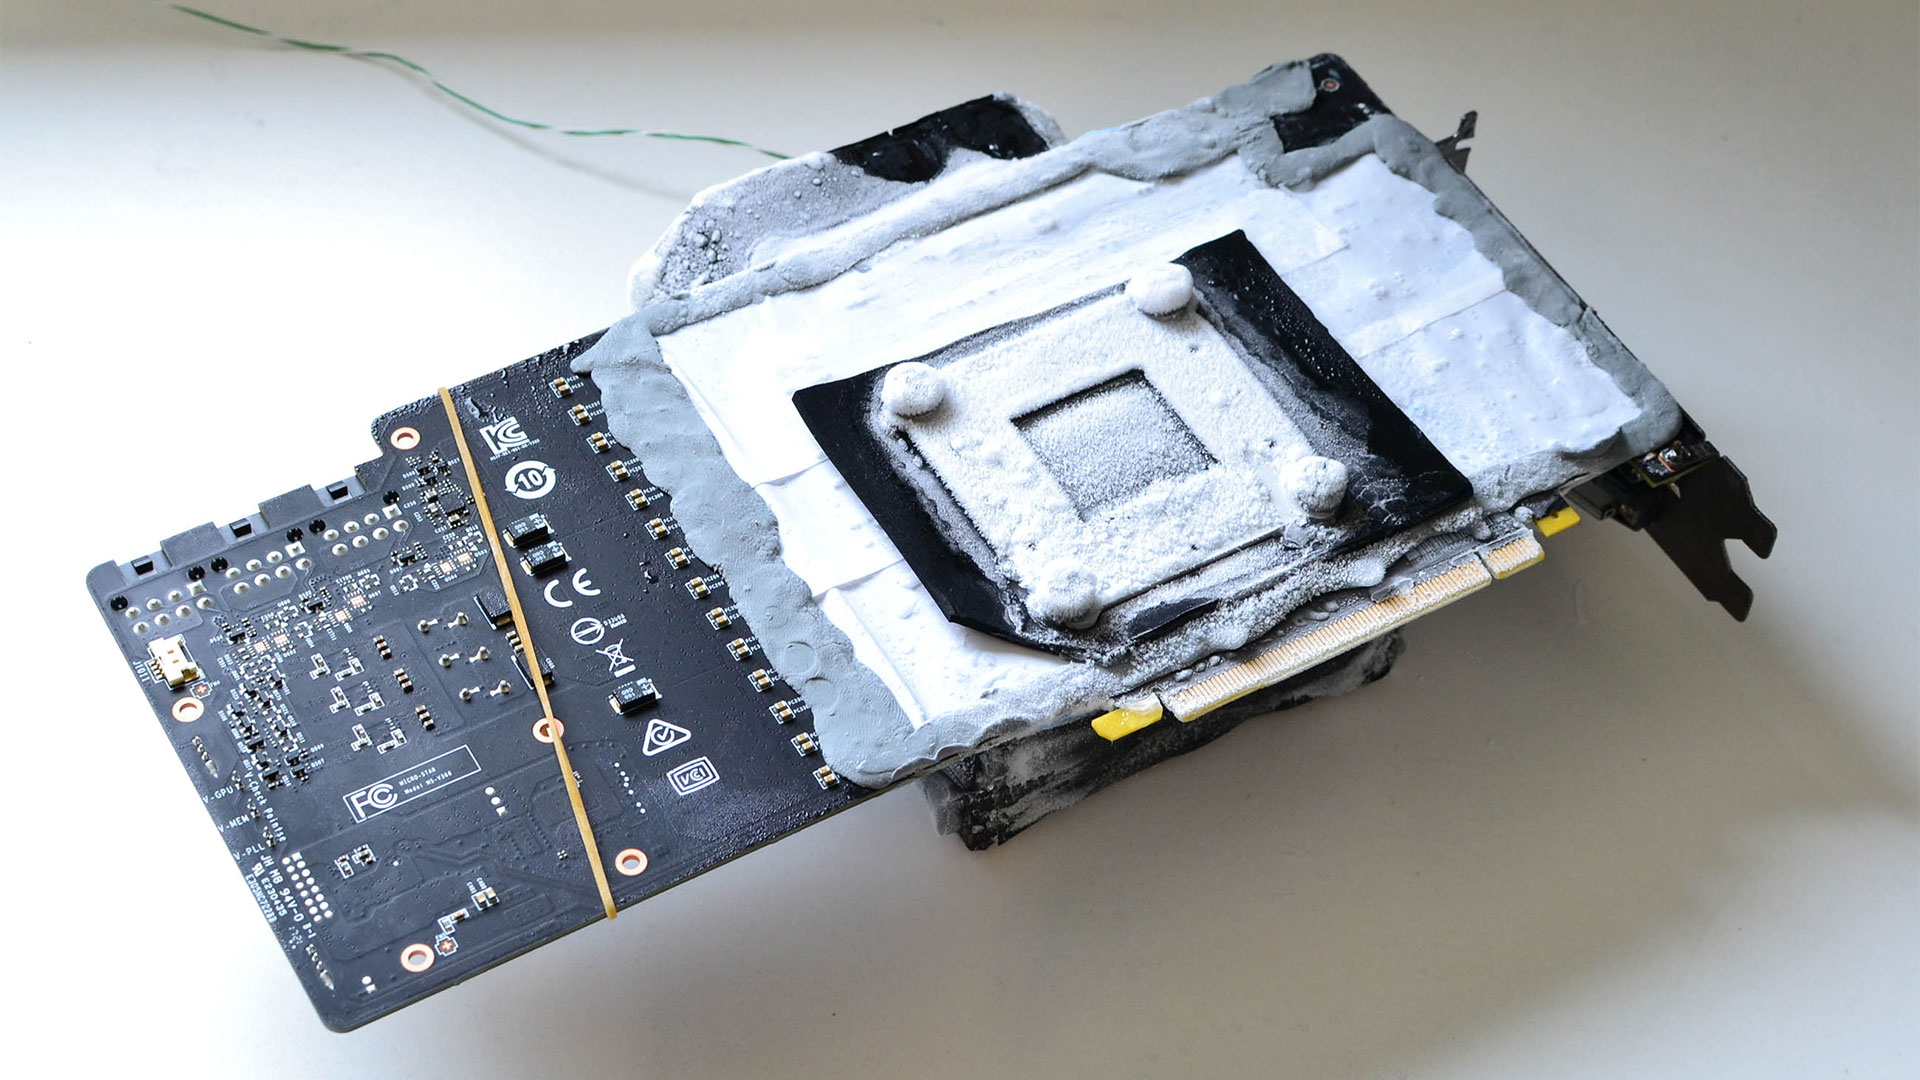
You don't have to agree with me, however; perhaps your particular hardware will deliver a bigger boost in performance after tuning. Just keep an eye on your GPU and VRAM temperatures, and don't forget to give your PC a regular cleaning to keep it running smoothly. Also, don't go into GPU overclocking expecting a 20% improvement or more in performance, because those days are far in the past — unless you use liquid nitrogen.
- MORE: Best Graphics Cards
- MORE: GPU Benchmarks and Hierarchy
- MORE: All Graphics Content


