Even the most responsible folks can end up misplacing or accidentally damaging their phones, which is why it’s crucial to understand how to backup photos on your iPhone.
A complete photo backup ensures all your mundane and important pictures are stored safely, and it’s convenient doing it with iCloud or iTunes, and more so with a Mac.
In this guide, we’ll walk you through how to backup your iPhone photos using iCloud or a computer. And in case you’re running out of space on your smartphone and laptop, we’ve rounded up the best external hard drives for Mac.
Tools and requirements
- iPhone
- iCloud subscription
- Windows or Mac computer
- Lightning to USB-A, Lightning to USB-C, or USB-C to USB-C
Steps for how to backup photos on iPhone using iCloud
- Open Settings.
- Tap your name.
- Tap iCloud.
- Tap Photos.
- Toggle on 'Sync this iPhone'.
Step-by-step guide to backup photos on iPhone using iCloud
1. Open Settings > Tap your name
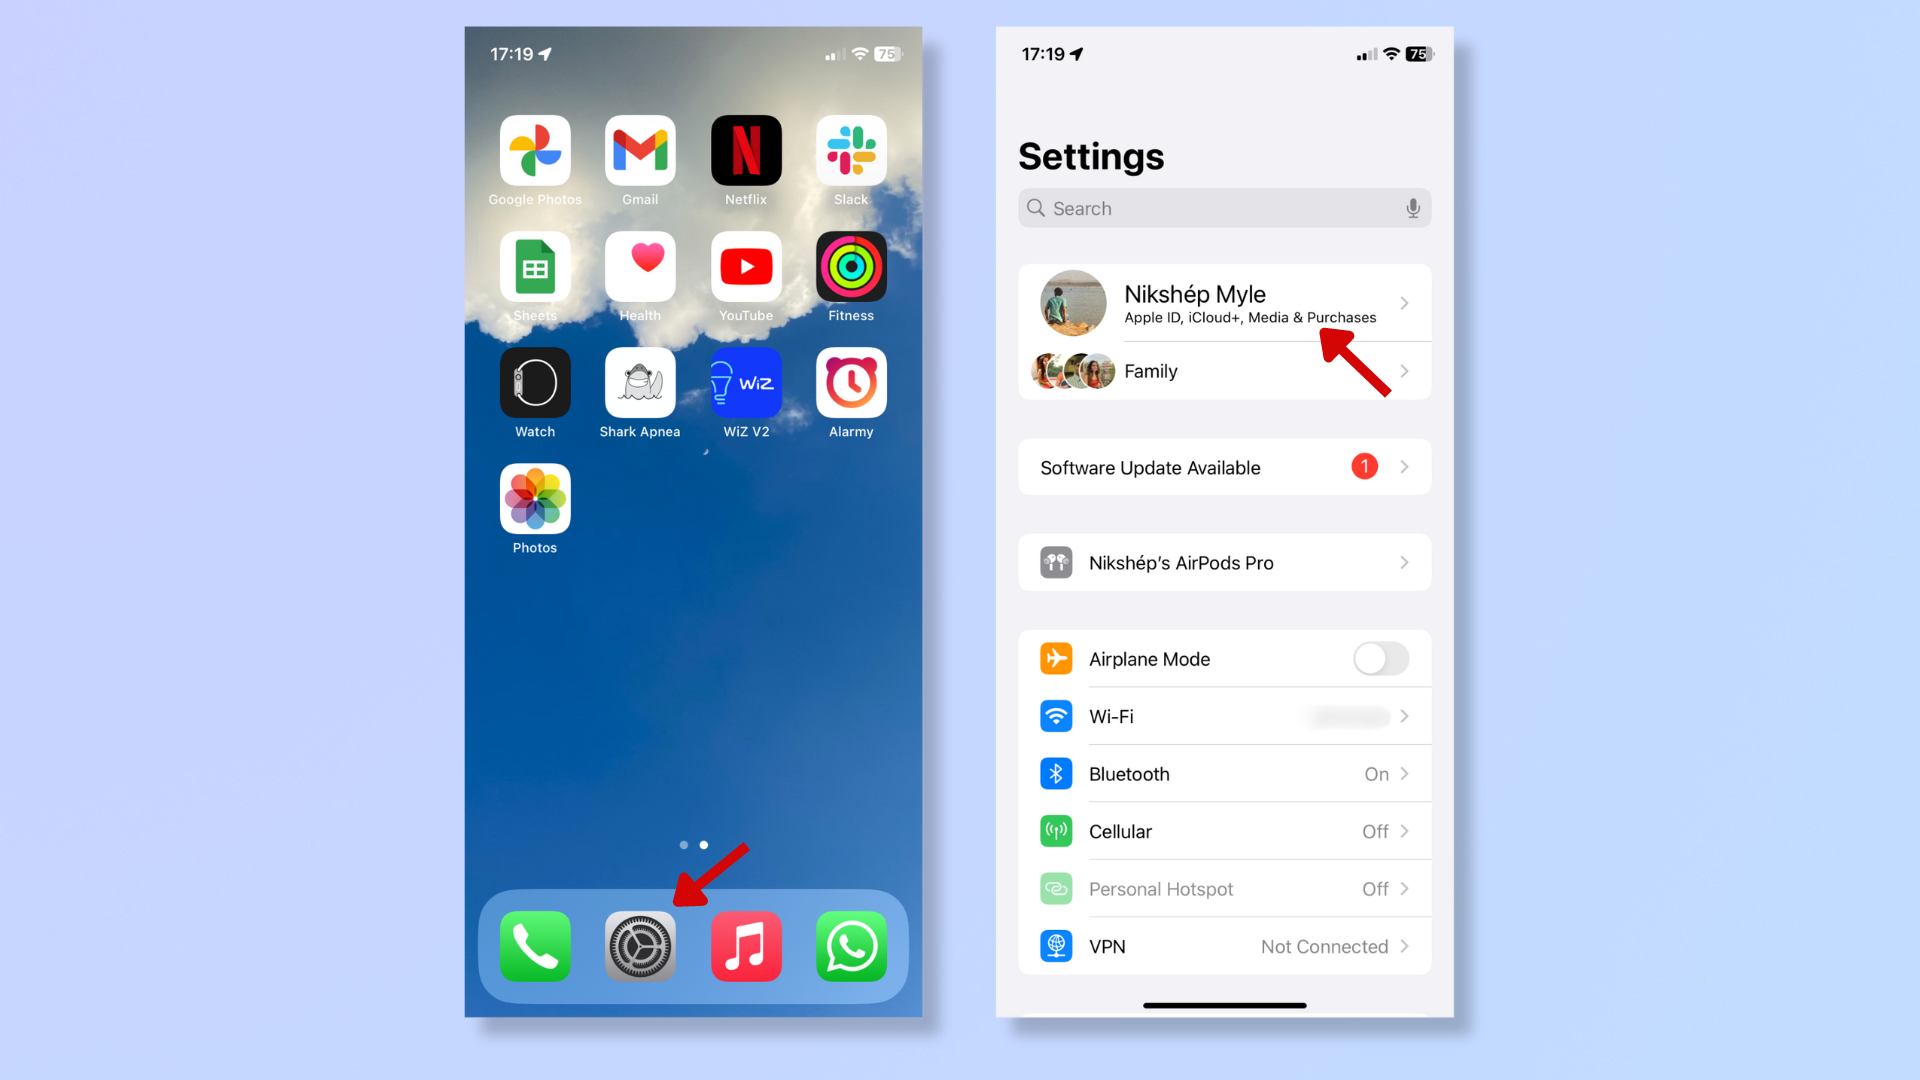
To start, open Settings and then tap your name at the top.
2. iCloud > Photos
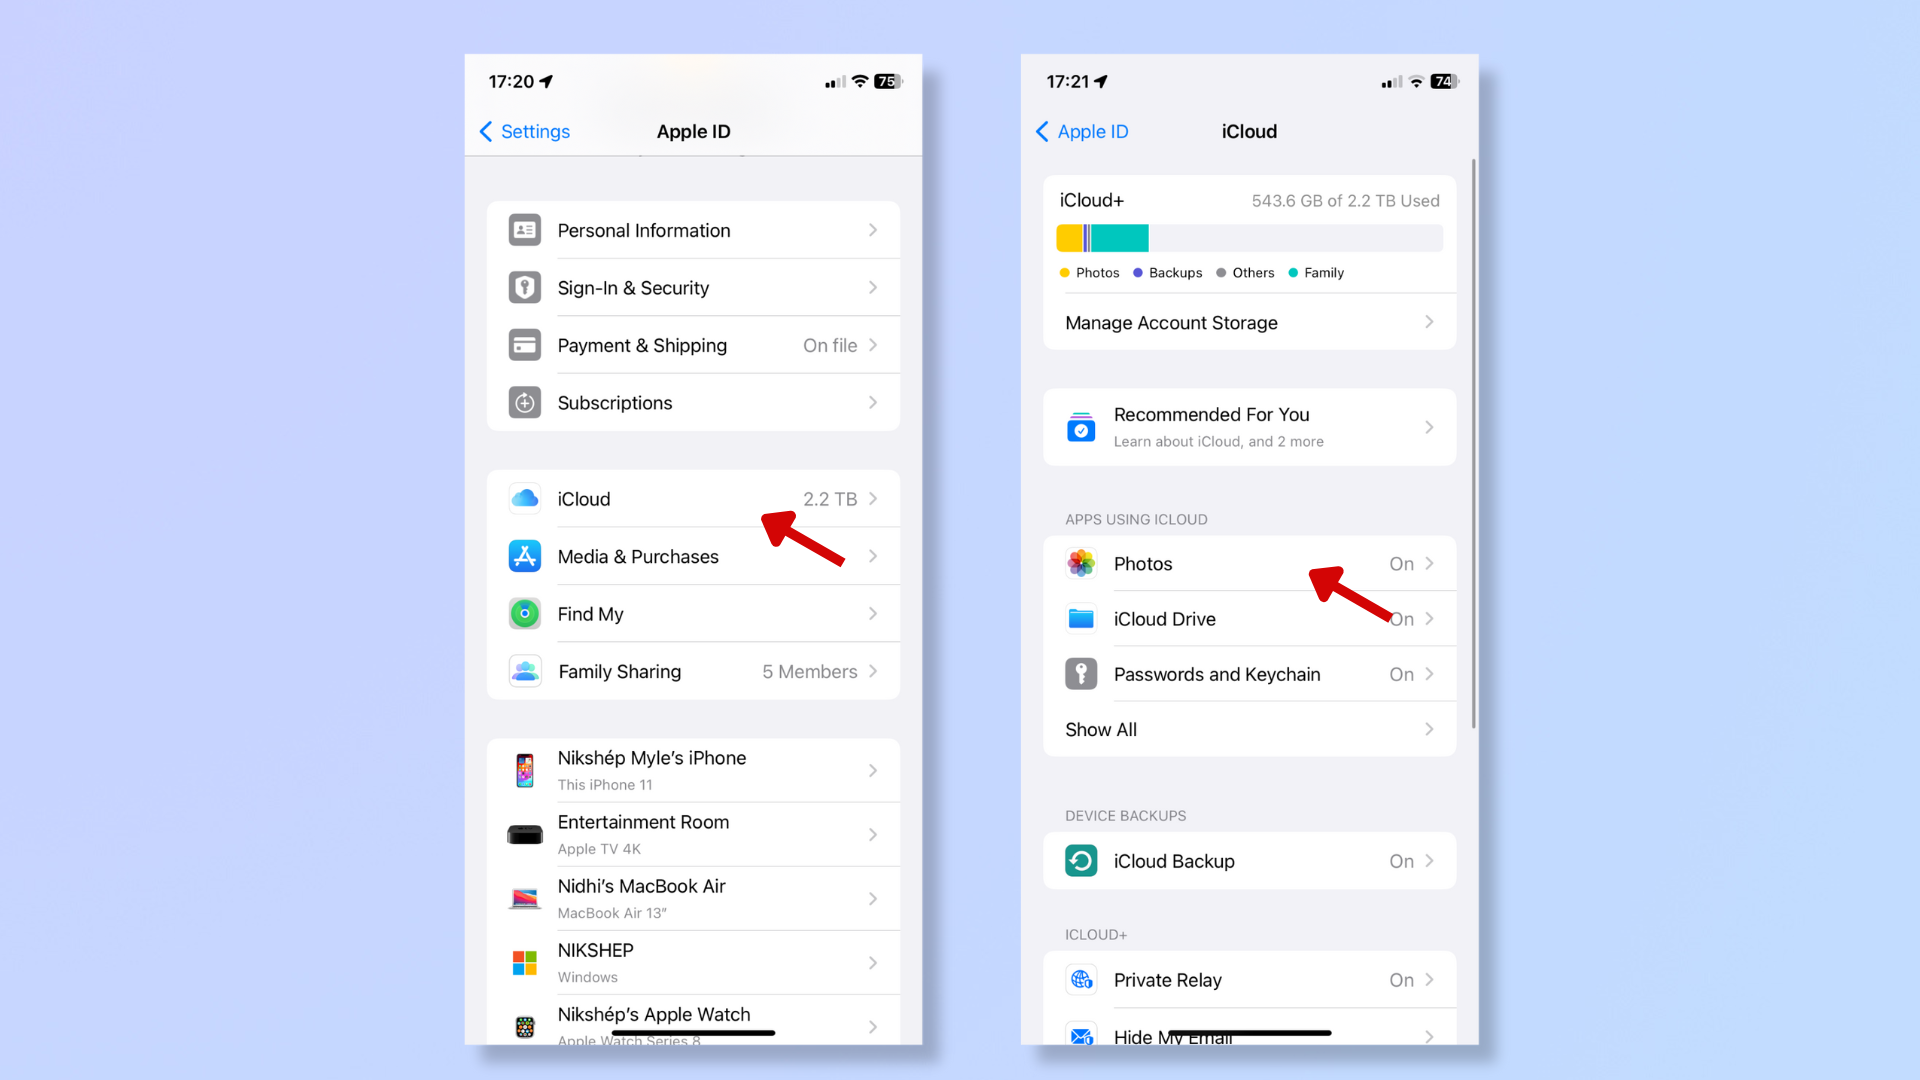
Tap iCloud and then select Photos under 'Apps Using iCloud'.
3. Toggle on Sync this iPhone
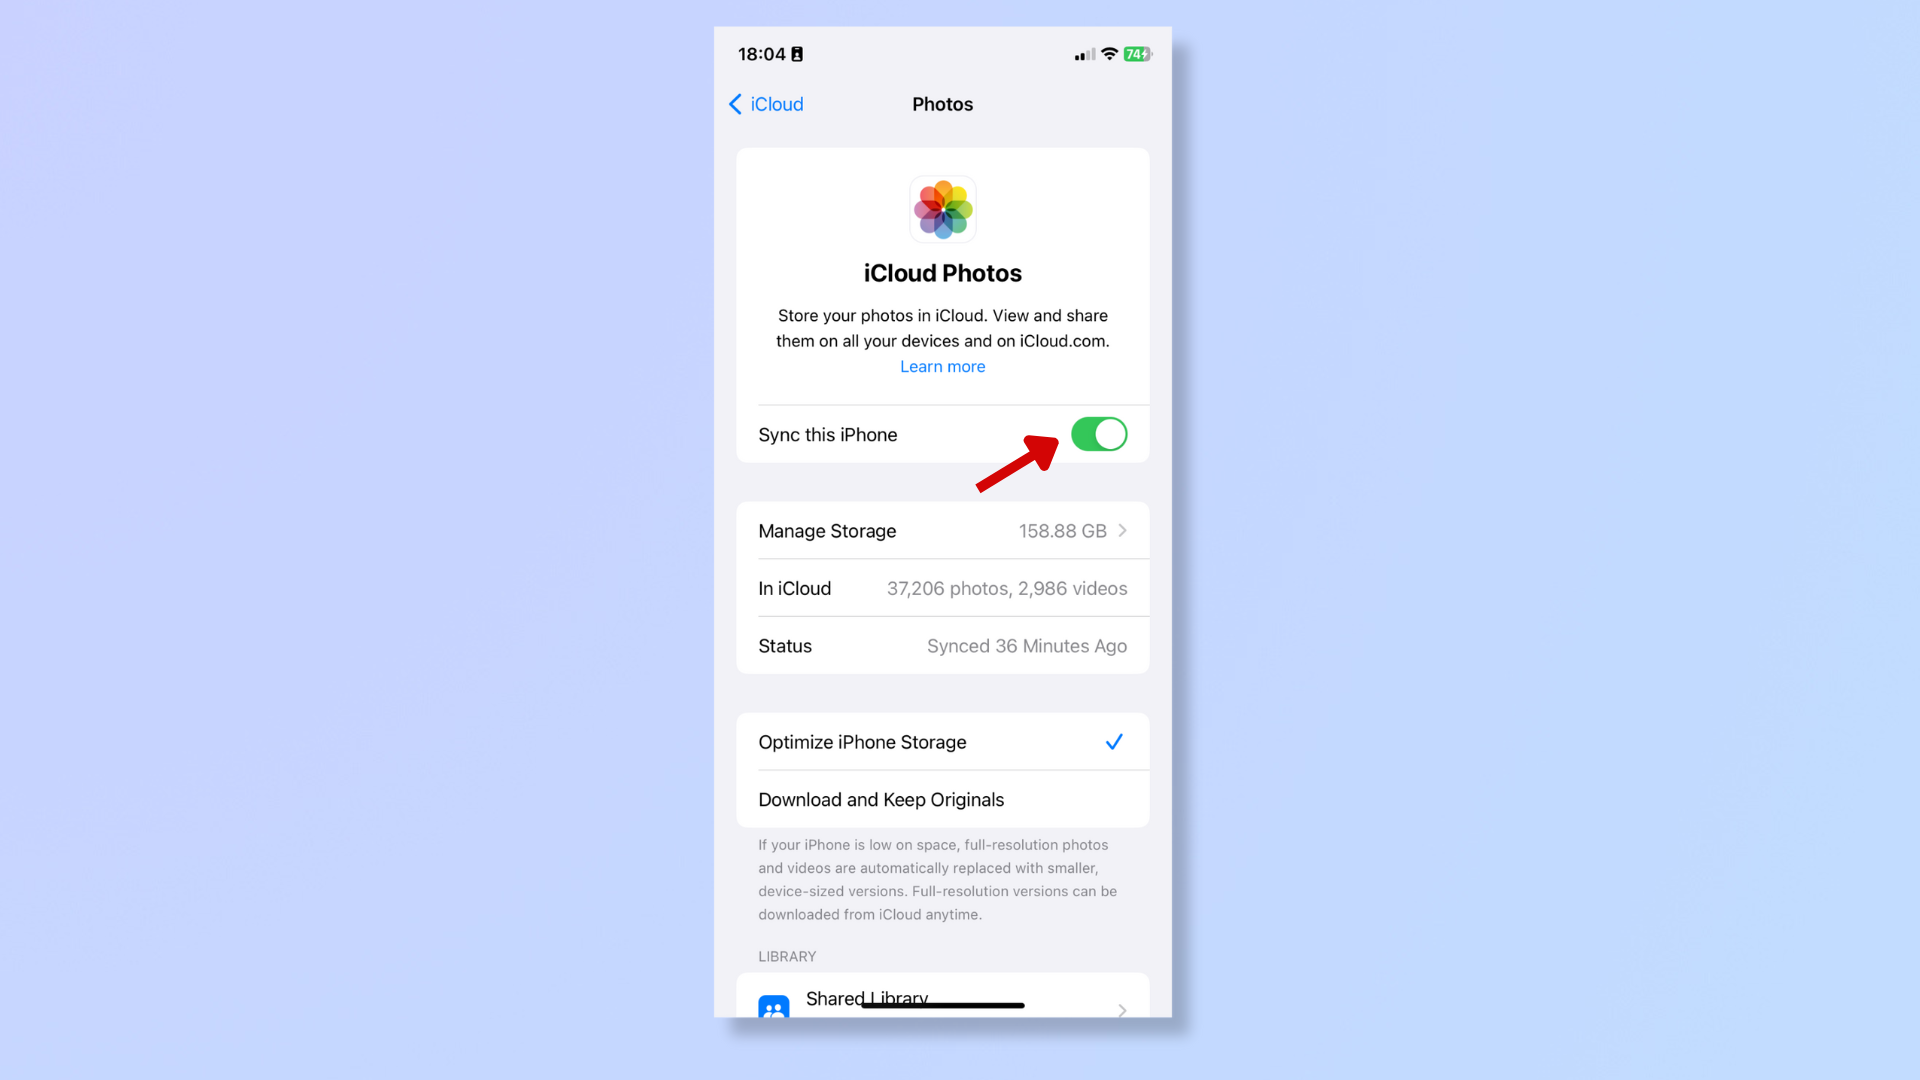
Toggle on 'Sync this iPhone'.
You can also backup your iPhone to the iCloud by going back to the iCloud menu, tapping iCloud Backup under Device Backups, and then toggling on 'Back Up This iPhone'.
Steps for how to backup photos on iPhone using Windows
- Connect your iPhone to the Windows computer with a cable.
- Launch iTunes.
- Click the iPhone icon (top left).
- Under Summary, scroll down to 'Backups and select This Computer'.
- Click 'Back Up Now'.
Step-by-step guide to backup photos on iPhone using Windows
Below, we cover the steps to backup iPhone photos using Windows.
To replicate the steps on Mac, connect your phone to the computer > Open Finder > Click on your phone’s name under Locations > Select where to backup the data > Click Back Up Now.
For more detailed coverage across Windows and Mac, read our guide on how to back up an iPhone.
1. Connect your iPhone to the computer
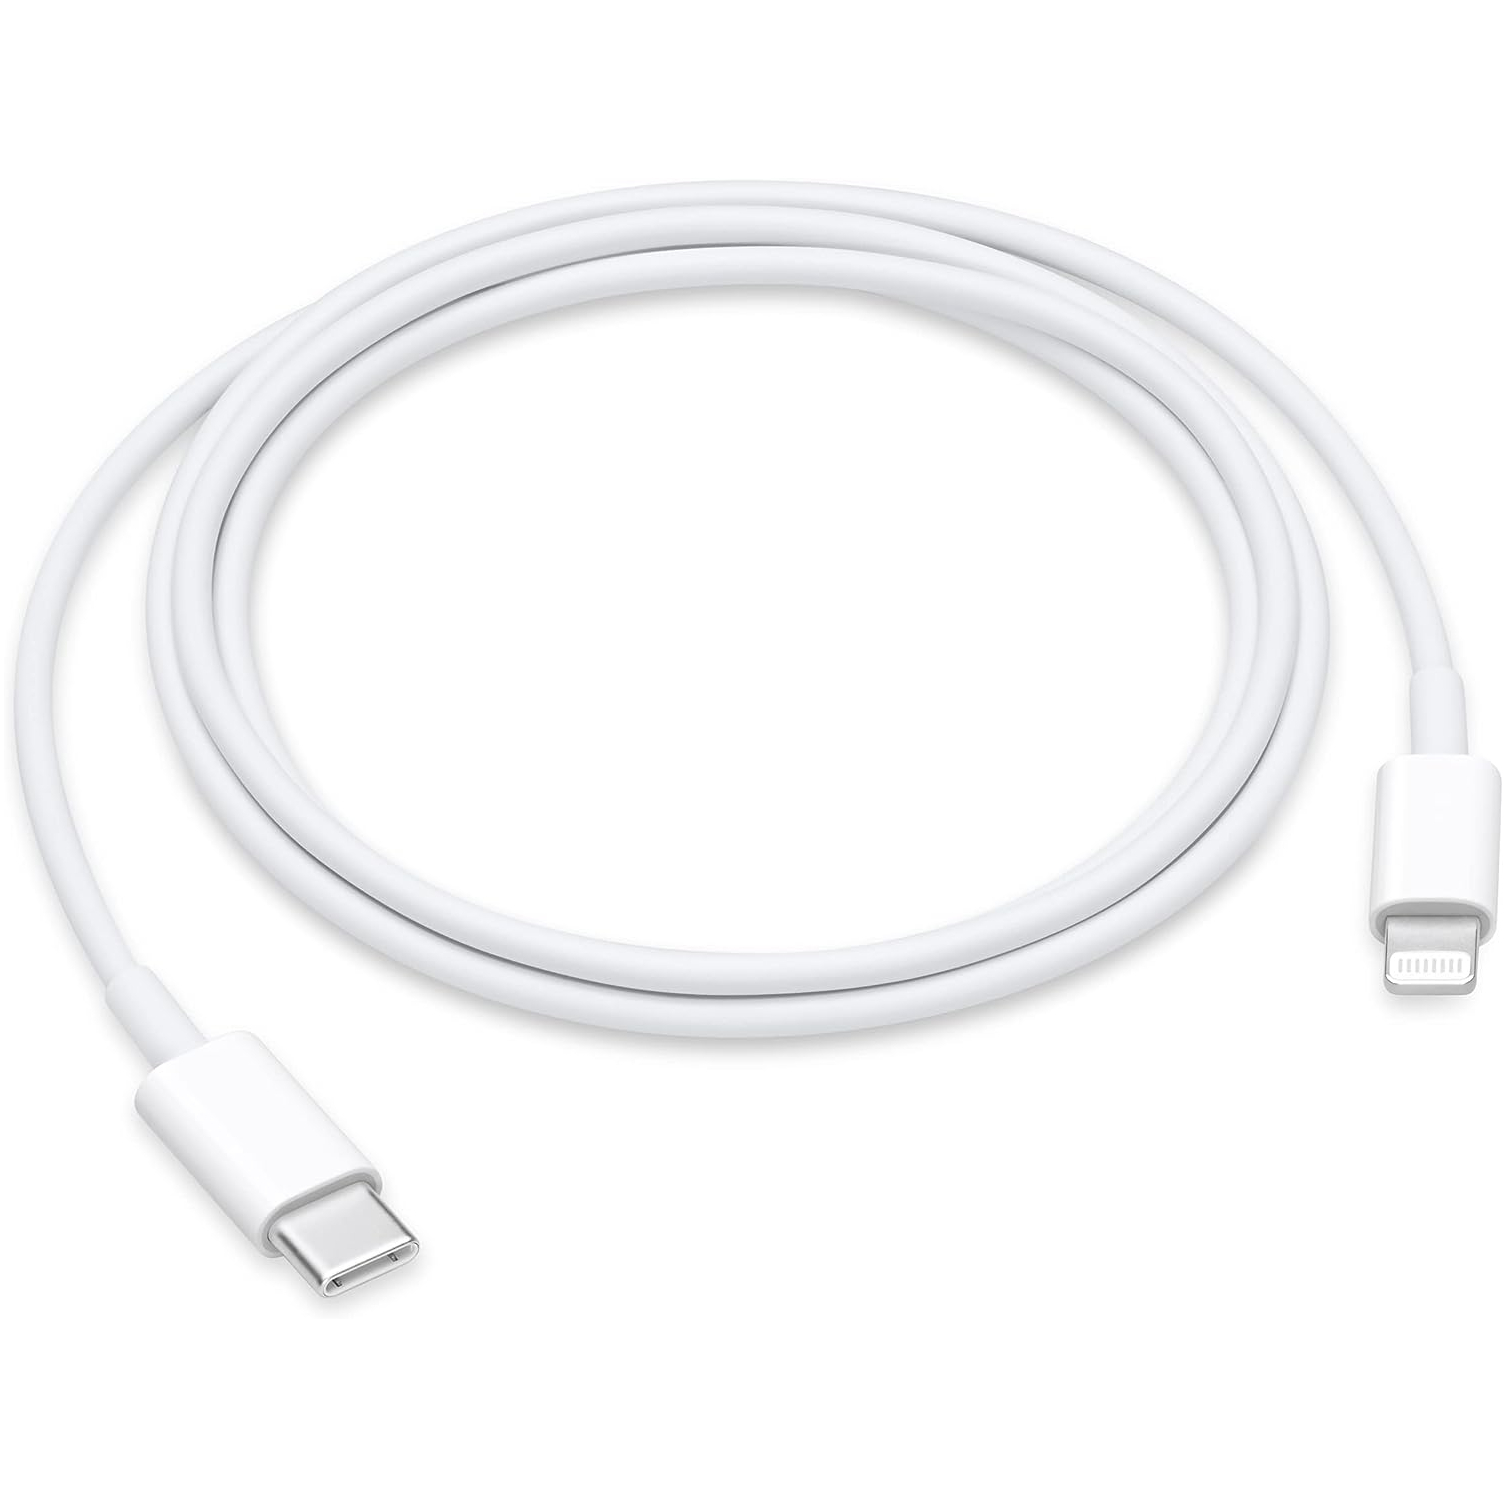
Connect your iPhone to your computer using a Lightning to USB-C, Lightning to USB-A, or USB-C to USB-C connector.
2. Launch iTunes and click the iPhone icon

Launch iTunes if it hasn’t auto-launched, and click the iPhone icon at the top left.
3. Click Back Up Now
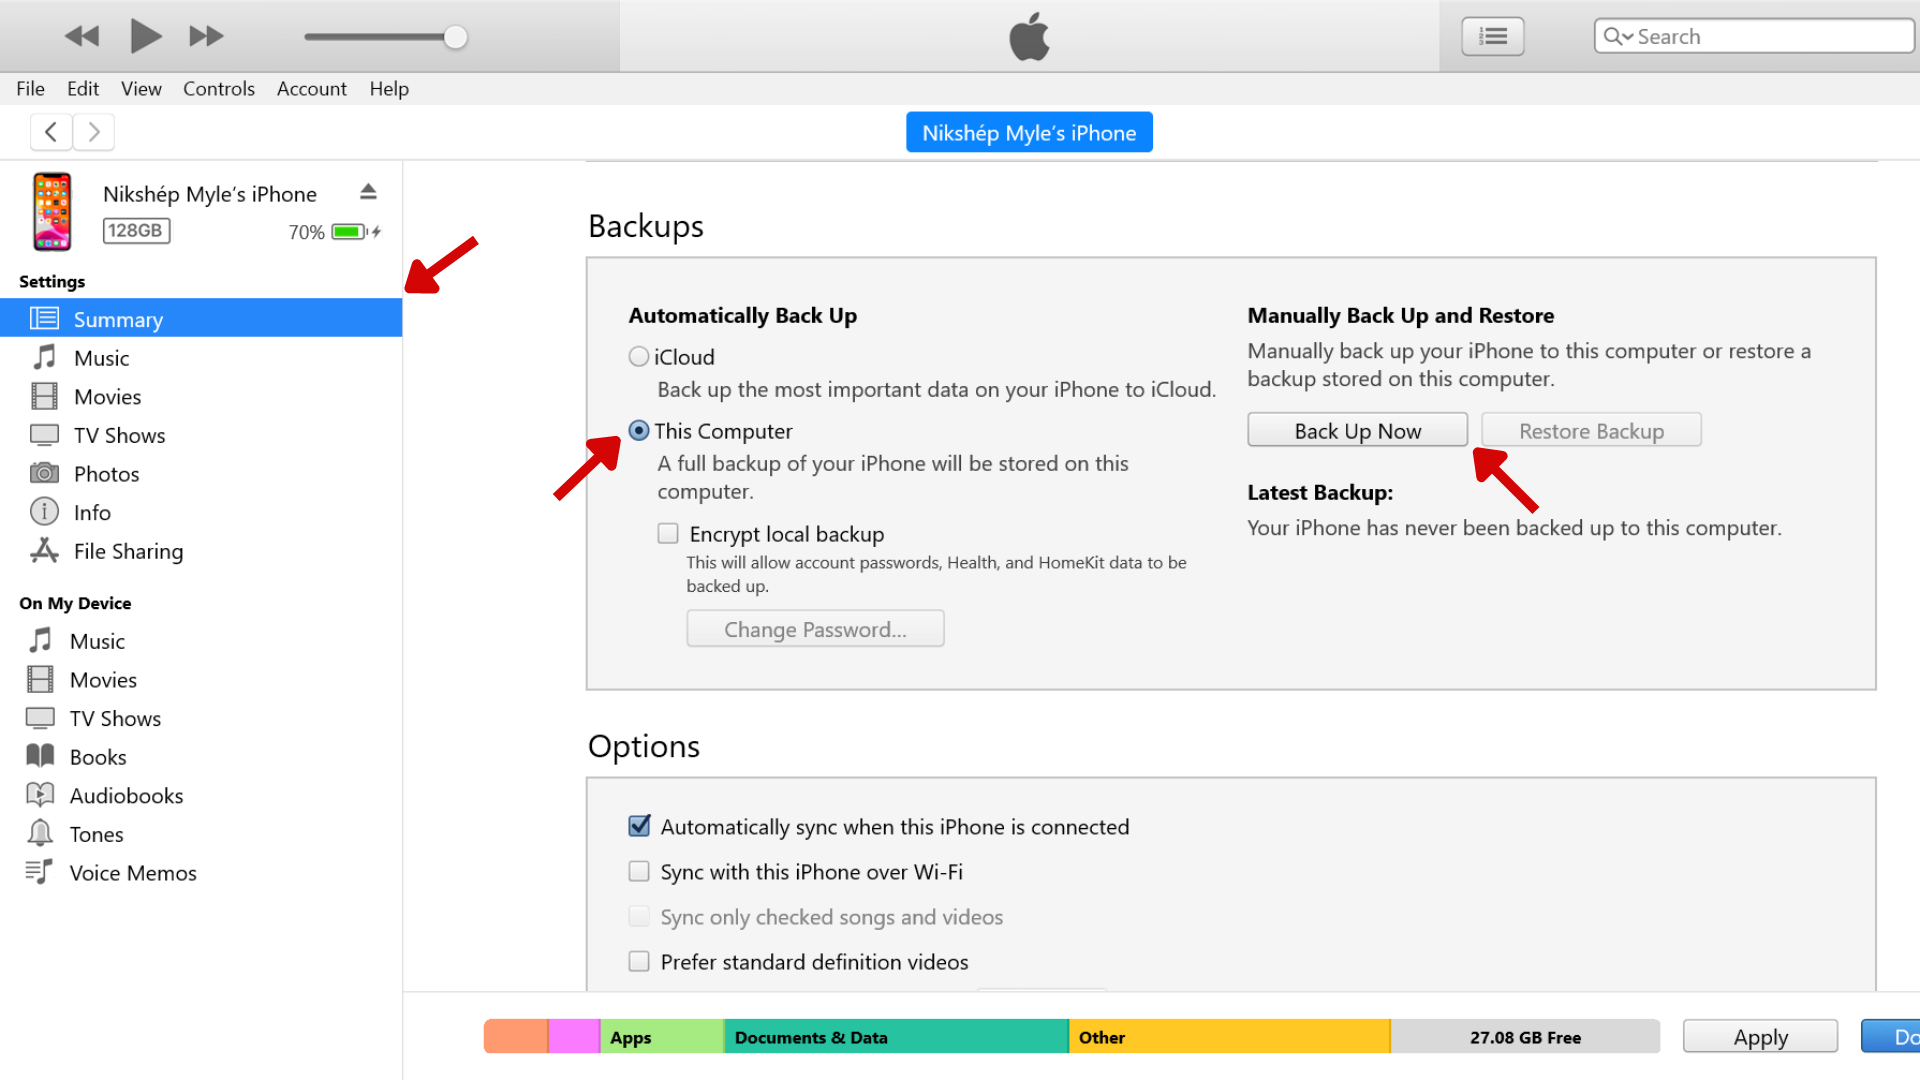
Under Summary, scroll down to Backups. Select 'This Computer', and then click 'Back Up Now'.
To encrypt the backup, select 'Encrypt local backup' and set a password.
Final thoughts
Securing your memories with a photo backup on an iPhone is pretty straightforward. Whether you prefer iCloud's convenience or a physical computer backup, your photo backup will be safe and retrievable. Photo backups aren’t restricted to the options we’ve covered above — many third-party backup options are also available, including Google Photos and Dropbox.
For more guides on iPhone, check out how to copy and paste edits on iPhone, how to take different aspect ratio images on your iPhone, and how to block text messages on iPhones.


