Over the past few decades, music technology has come on in leaps and bounds, leading to the rise of tools such as stem separators or complex spectral editors that were the stuff of sci-fi dreams when this website was launched. The way we record, sequence and consume music has radically changed in that time, with DAWs replacing digital recorders and hardware sequencers, and tapes and CDs giving way to streaming.
Certain things don’t change, though. However we opt to create and record music, certain things will always separate a well-crafted mixdown from a poor one – bloated frequency ranges, poorly controlled dynamics, a lack of consideration over the stereo field. It’s these aspects, and more, we’re addressing in this article, and to that end, we’ve curated some of the most timeless and essential advice from our team of experts.
Before we dig into some specifics, we’ll leave you with some facts that will always remain true when it comes to mixing electronic music. Firstly, never try to ‘fix it in the mix’; a bad sound is always a bad sound, and the best route to a great mix is to start with the best possible source material. Secondly, there’s no such thing as ‘magic ears’ or ‘dark arts’ when it comes to mixing or mastering. Anyone can learn the necessary skills with practice and dedication.
Thirdly, you do not need thousands of pounds of high-end gear and a top-end studio to create a great track. The tools in your DAW are more than sufficient – and where possible, we’ve focused on those here. That being said, a good listening environment will go a long way, so invest in your monitors or headphones to improve your mixes, and do what you can to make your studio a good-sounding – and comfortable – space.
1. Gain staging
Back in the days of recording using analogue gear such as tape recorders and mixing consoles, it was crucial to get the gain structure right as running signals too cold would give a high signal to noise ratio, meaning that the noise present in the equipment being used was too loud compared to the actual signal being recorded. Equally, running signals too hot in the analogue domain can introduce unwanted distortion, giving unpleasant end results when aiming for a clean, crisp sound.
Although modern DAW software offers over 140dB of headroom with virtually no noise floor, it’s still vital to apply the same principles that studio engineers have been using for decades in order to make the most of that headroom. A common mistake made by lots of producers in the digital domain is to keep the levels of individual channels low to avoid clipping. Although this helps avoid digital distortion when mixing, it actually reduces the resolution (and therefore quality) of the final mix.
With 6.02dB corresponding to 1-bit of digital information, an overly quiet mix will lack detail as the effective bit depth has been reduced by not using the headroom on offer effectively – a good rule of thumb is to get the average (RMS) volume levels of your mix to around -17dB. In a well-balanced and controlled mix, this will give a peak loudness of around -3dB which will avoid digital clipping while leaving breathing room for mastering later on.
A common mistake producers make is to keep the levels of individual channels low to avoid clipping
The other mistake producers often make with in the box production/mixing is running the levels too hot – this will not only introduce digital distortion when the individual channels are summed together, but will also typically induce clipping and other nastiness from overloading any DSP processing being used. This will lead to an unpleasant, fatiguing sound that will only be magnified by master bus processing such as compression or digital clipping/limiting.
So, what’s the best way to keep your levels in check? Many people will just adjust the master output to achieve an optimum volume level – this does help a lot but still runs the risk of adding unwanted distortion from overloaded plugins or clipping of individual channels if the mix is too loud or a lack of detail if the mix is too quiet. A better solution is to leave the master output at unity gain (0dB) before adjusting the levels of each channel individually to achieve the same end result. This gives all the processors used in the production/mix process room to breathe while ensuring
that the headroom on offer is used effectively.
2. Avoiding mid-range clutter
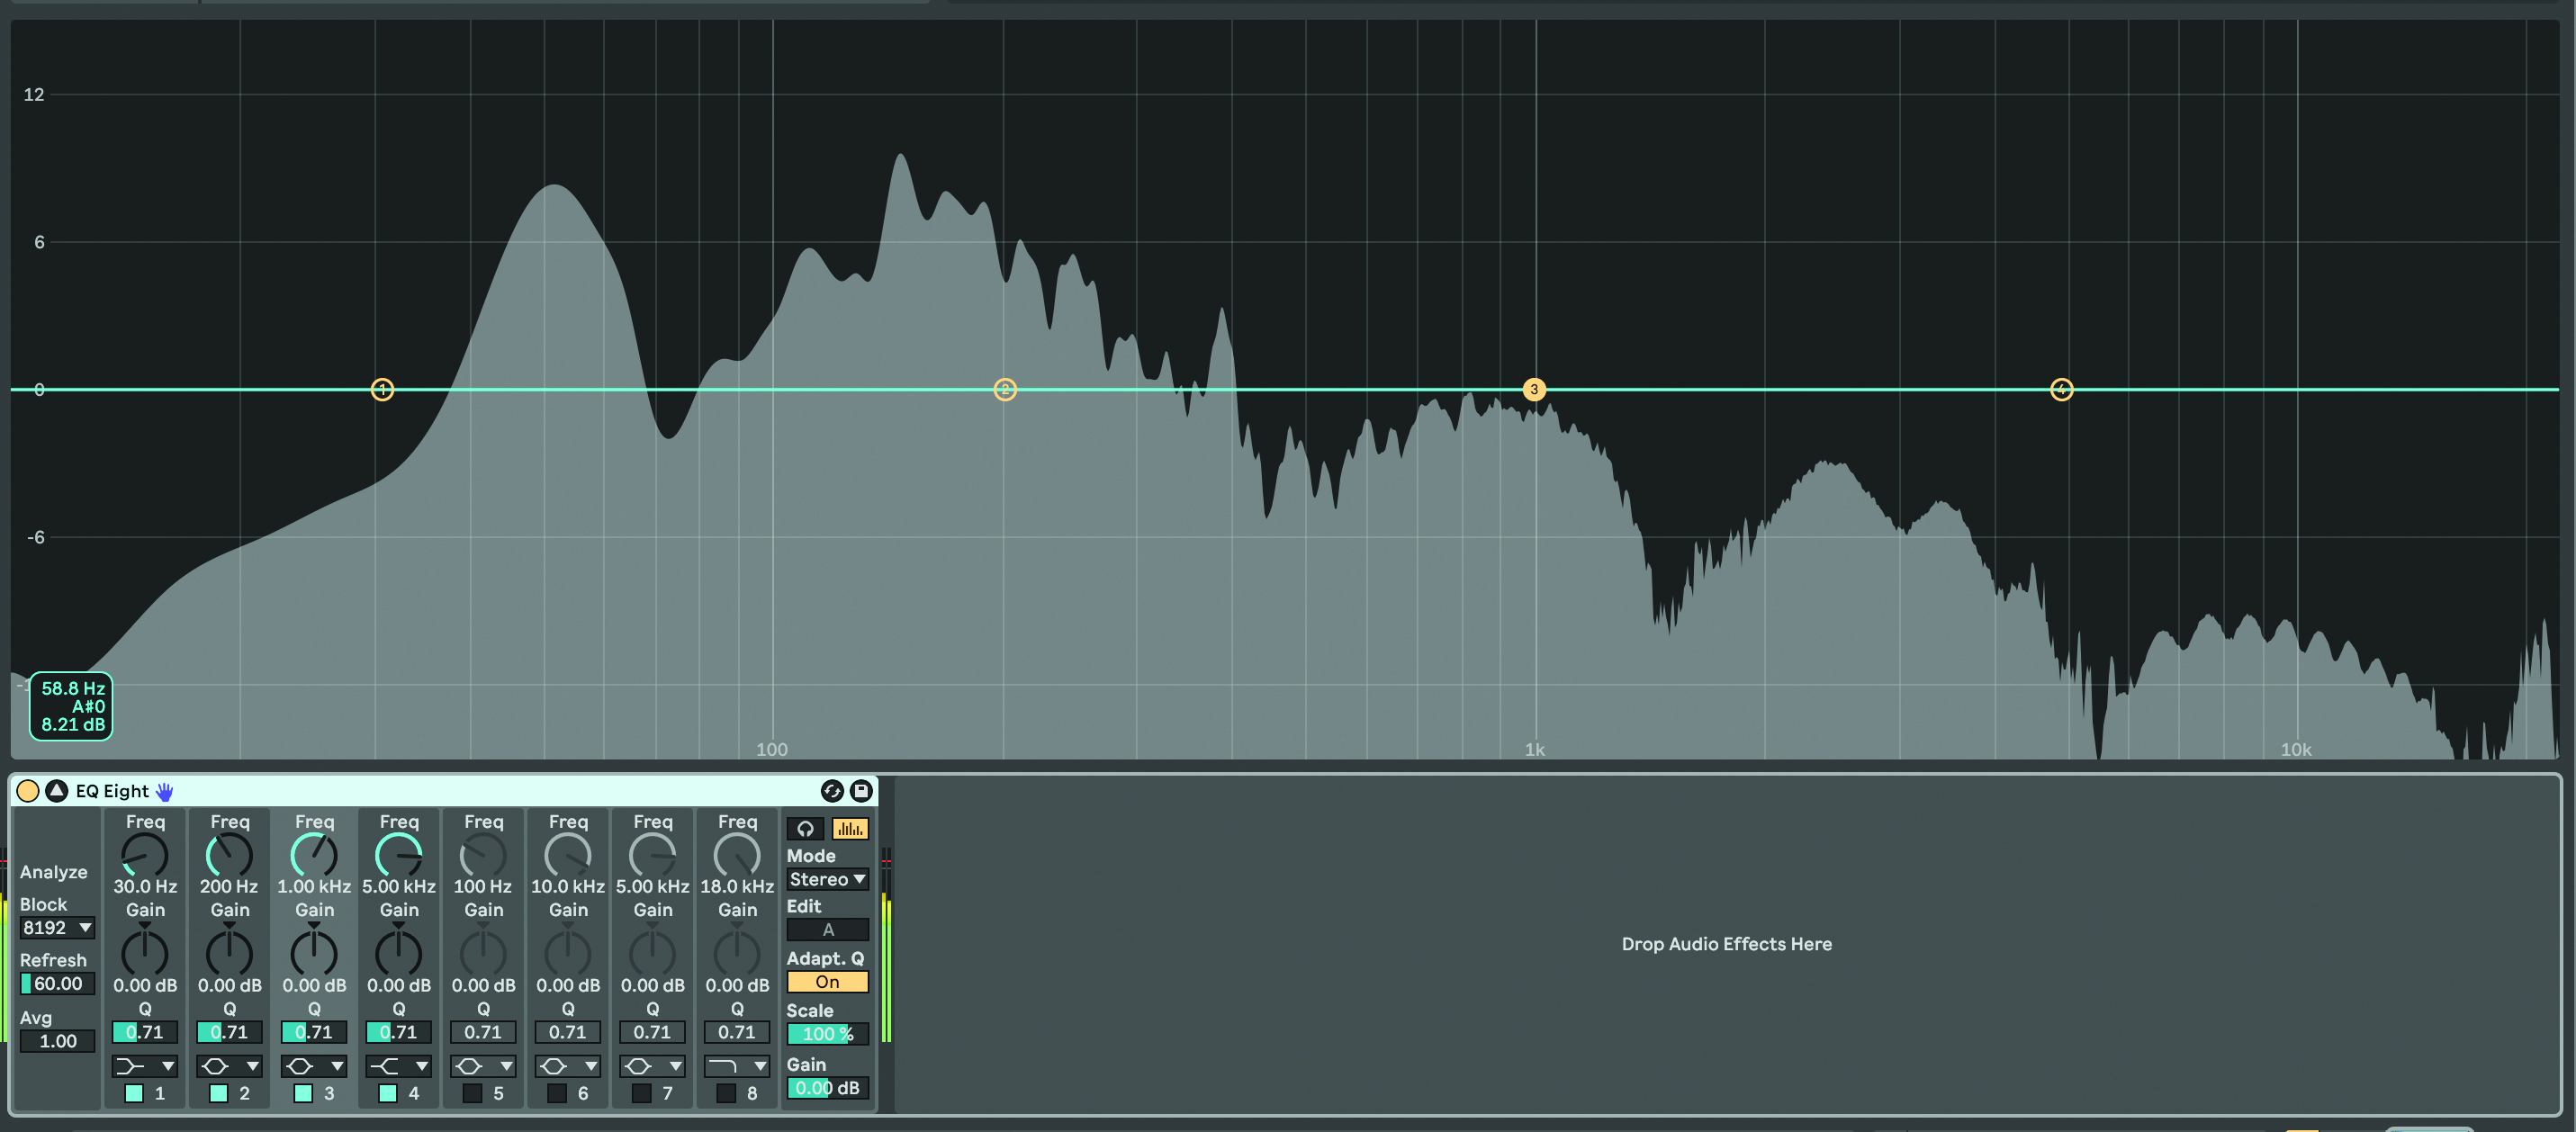
It’s tempting to think that the only requirement when it comes to the latter stages of sprucing a mix, ready for its final bounce, is to pay attention to the treble end. Yet mixes require equal attention paid to all frequency bands.
When you hear a mix which sounds properly balanced, this is in part due to the huge care paid to the mid-range, which expands from just above the fundamental frequency of kick drums and basslines though to the meat of low treble and the fizz and sparkle which comes further up. This area, from approximately 200Hz to 1kHz can be further broken down into bands – low mid-range, mid-range, upper mid-range etc. This range provides the meat and ‘substance’ of a mix, without which the bass won’t sound powerful and the top end won’t sound clear.
It’s all too easy when you’re programming to bring power to a mix by copying bass parts and even leads to multiple instruments to create stacks of sounds which bristle with intent, yet you can suddenly find your mix awash with sounds competing for space.
There’s no point adding sounds to a mix without a specific purpose, so it’s almost worth imagining the individual sounds within your track as characters with separate personalities and looking to bring these individual characteristics to the fore when it comes to the mix.
Here’s an example. Let’s suppose you’ve chosen a subby bassline. This will, no doubt, fill up the bass nicely, but it might not join the bass to the rest of the track, due to the limited frequency content of sub basses. So, you might make the decision to double the bass part to a second sound with more bite at higher frequencies. However, there’ll be an overlap – a set of frequencies which feature in both sounds and here, the frequency content will force a dramatic upsurge in volume.
Let’s suppose that frequency band is also enhanced with some harmonics from your kick drum and that your mid-range sequence or arpeggiated part is also contributing in this area. Now you’ve got at least four sounds playing around that frequency area, meaning it’ll start to poke through the mix, with the combined energy of all of these sounds congregating in one place.
3. Banishing build-up
This frequency build-up will only be exaggerated when it comes to adding compression and limiting at the output stage, so it needs addressing before you get to that point. This is where the idea of personalities can help.
After all, you added that second bassline to add ‘bite’ in the mid-range, so you can scoop the sub-bass and overlapping frequency content from the first sub-bass part out of that second part using EQ. This will help reduce the inflated frequency and you could also reduce some of the volume of the same frequency area from your kick and mid-range sequence too.
EQ will prove a major weapon in your bid to avoid frequency build-up, which will promote clarity in other frequency areas
EQ will prove a major weapon in your bid to avoid frequency build-up, which will promote clarity in other frequency areas. However, it’s not the only plugin which can help here. Going back to our example, it could be that frequencies only overload when the kick joins with the bass and sequence parts – in the gaps between kicks, the mix sounds good.
So, it might make sense to ‘punch a hole’ in the mix whenever the kick plays to avoid this build-up, by dropping the level of all sounds when the kick hits. You can achieve this with compression, using the kick as a sidechain source to drop the output level of the compressor on all sounds with competing frequencies.
You can set up a compressor on one sound, with its sidechain assignment looking at the kick signal and then copy this to any other sounds which would benefit from having the mid-range ‘ducked’ in this way. If you set a good recovery time with the attack and release controls in your compressor, the combined energy from your pitched instruments will return to normal between each kick.
4. Maintaining mid-range clarity
If you need to weed out frequency content, both EQ and compression can play critical roles as you seek to bring clarity to mixes.
Of all of the frequency areas most likely to become congested within a busy mix, the mid-range is that band. This is partly because so many sounds provide frequency content within that range, including kicks and basslines which are often rich enough in content to ensure they’ll fill up bands higher than bass alone.
EQ can be a hugely powerful weapon if you find the mid-range is overloading and it can be used to reduce volume of frequencies in some parts whilst pushing the volume of frequencies in others.
However, compression can play a key role too, as we’ll see in the following walkthrough. Ducking the volume of mid-range parts, triggered from another part of the mix, can provide extra power and reduce problem frequencies at the same time.
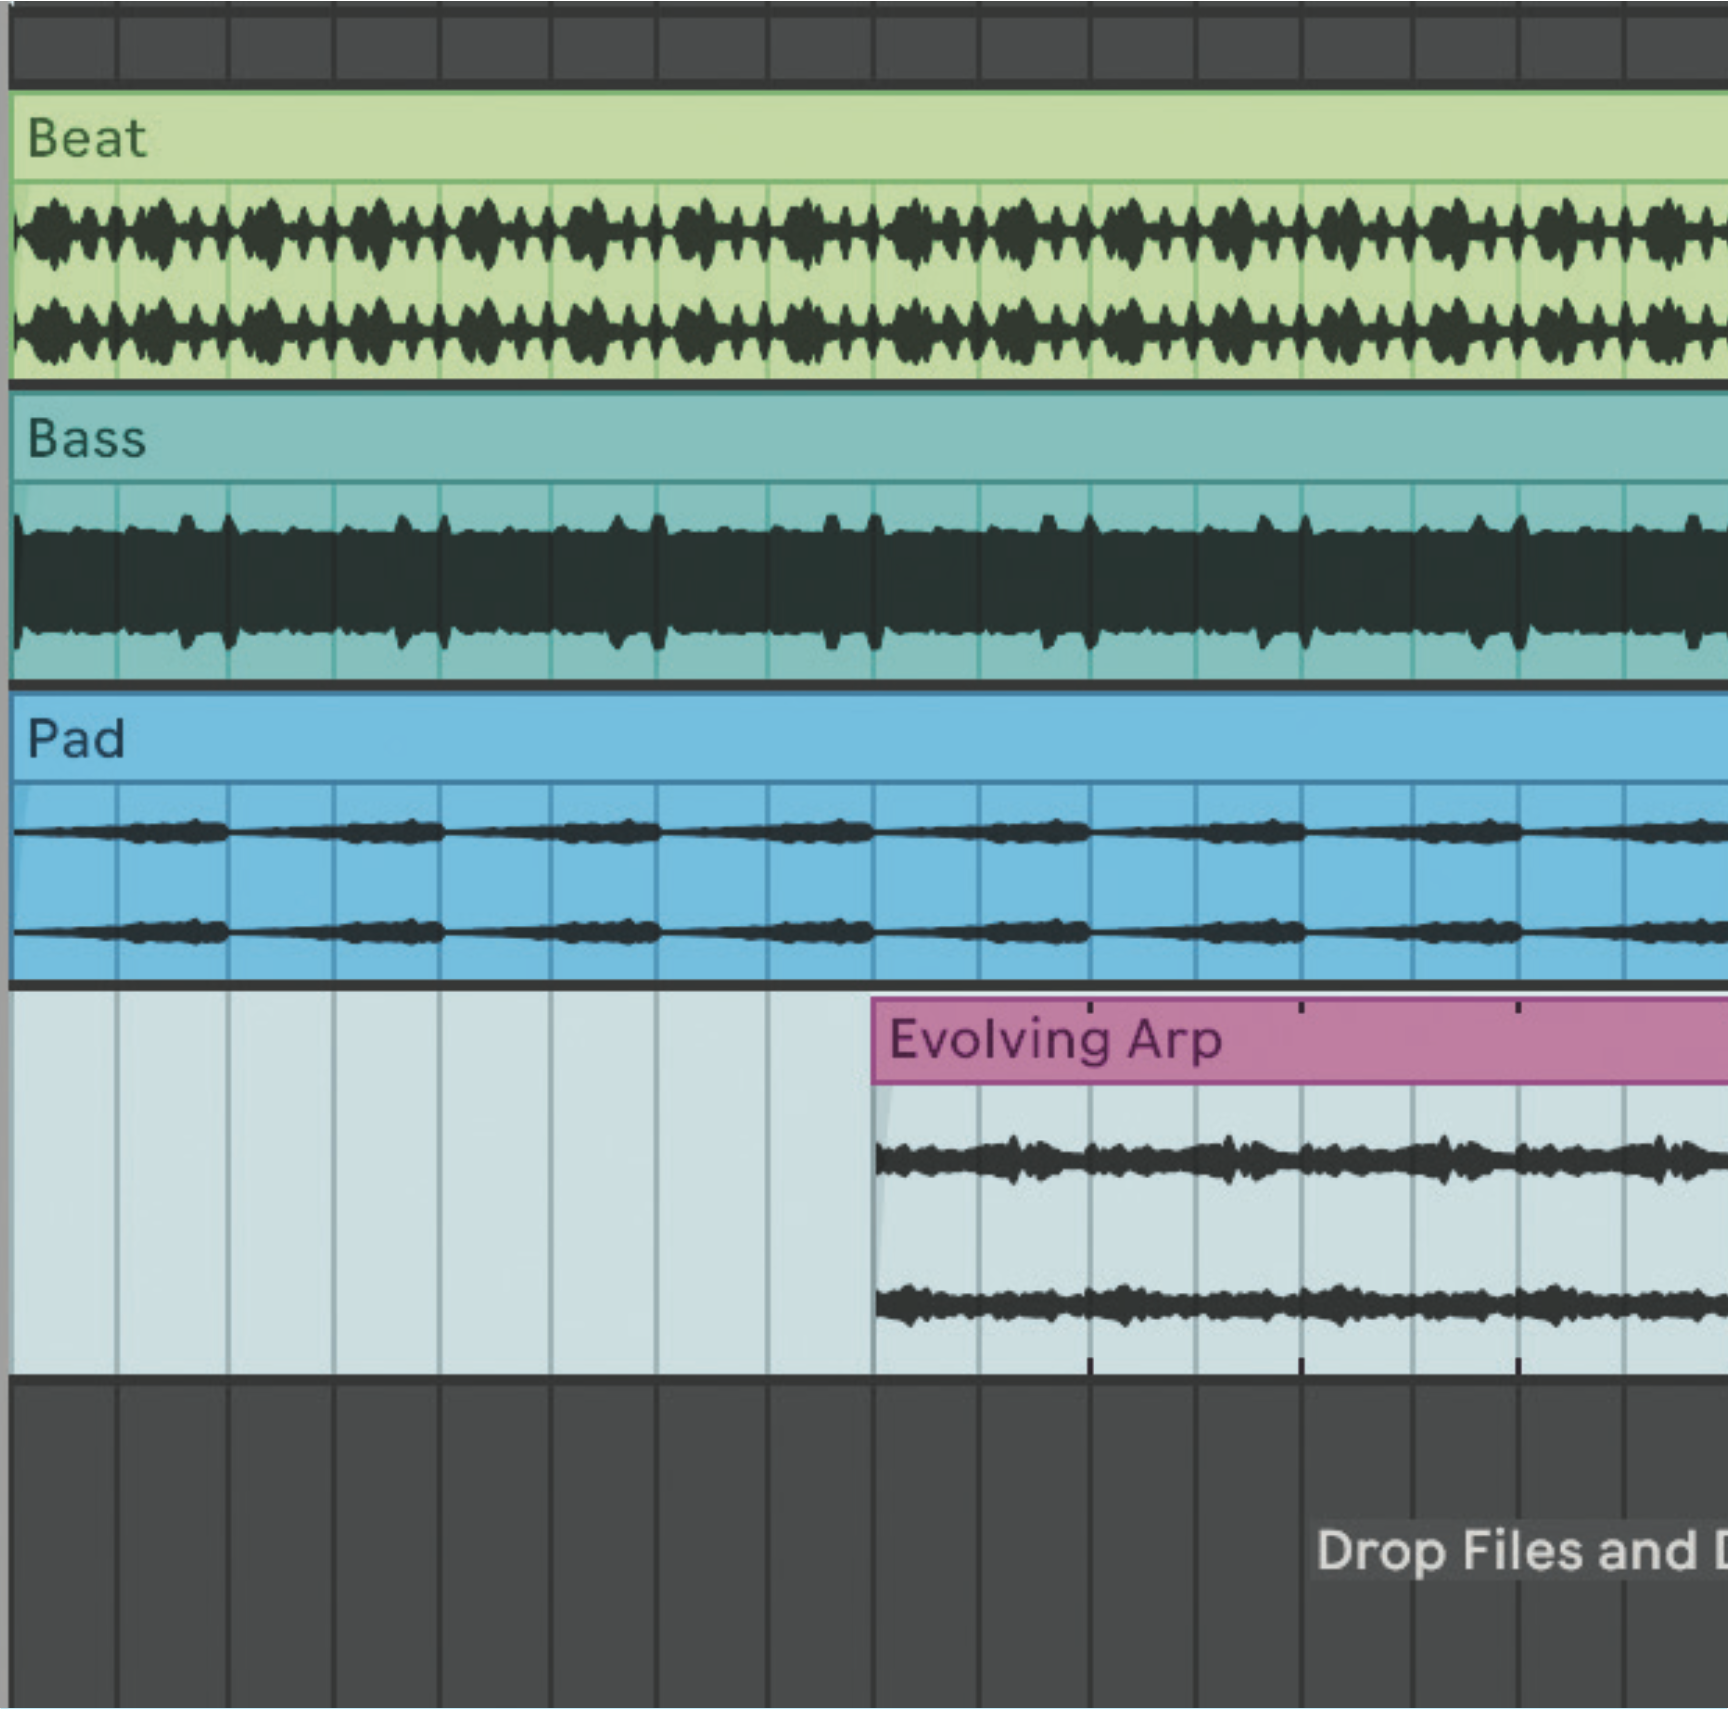
Our mix doesn’t have too many instruments but all sounds are contributing heavily to a congested mid-range. The mix is okay until the Evolving Arp is introduced in Bar 9. Then the whole mix sounds cluttered as too many sounds offer overlapping frequency content.
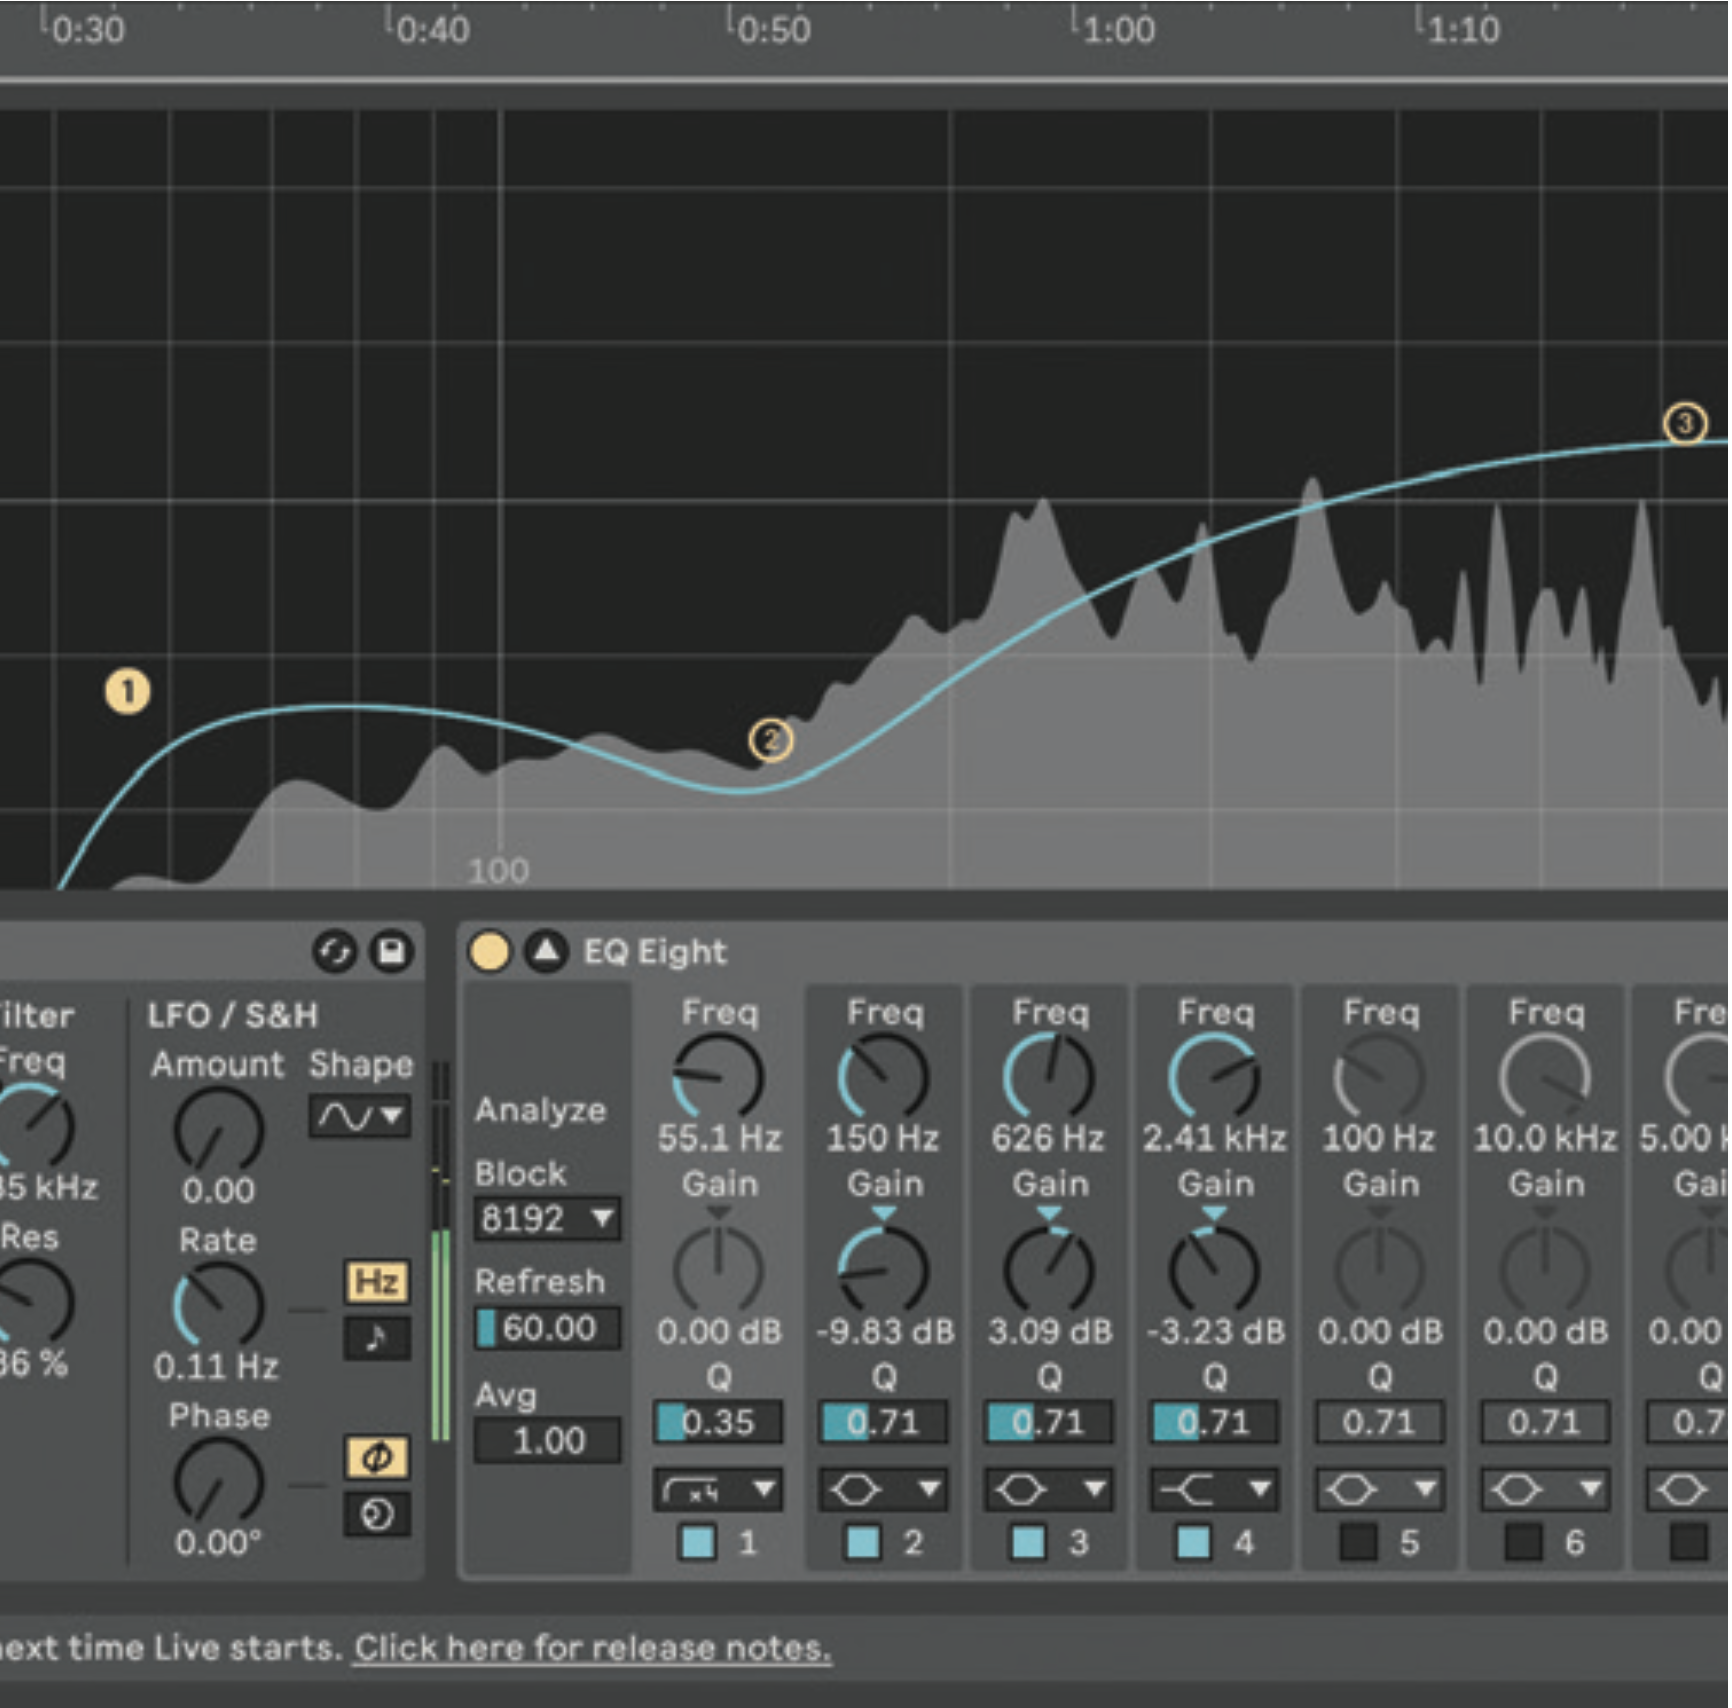
We’ve automated the cutoff on this sound and you can hear that it fits better towards the end of the sequence where the cutoff point is more open. But there’s still too much low mid-range and bass towards the beginning, so we scoop this out with a fairly extreme EQ.
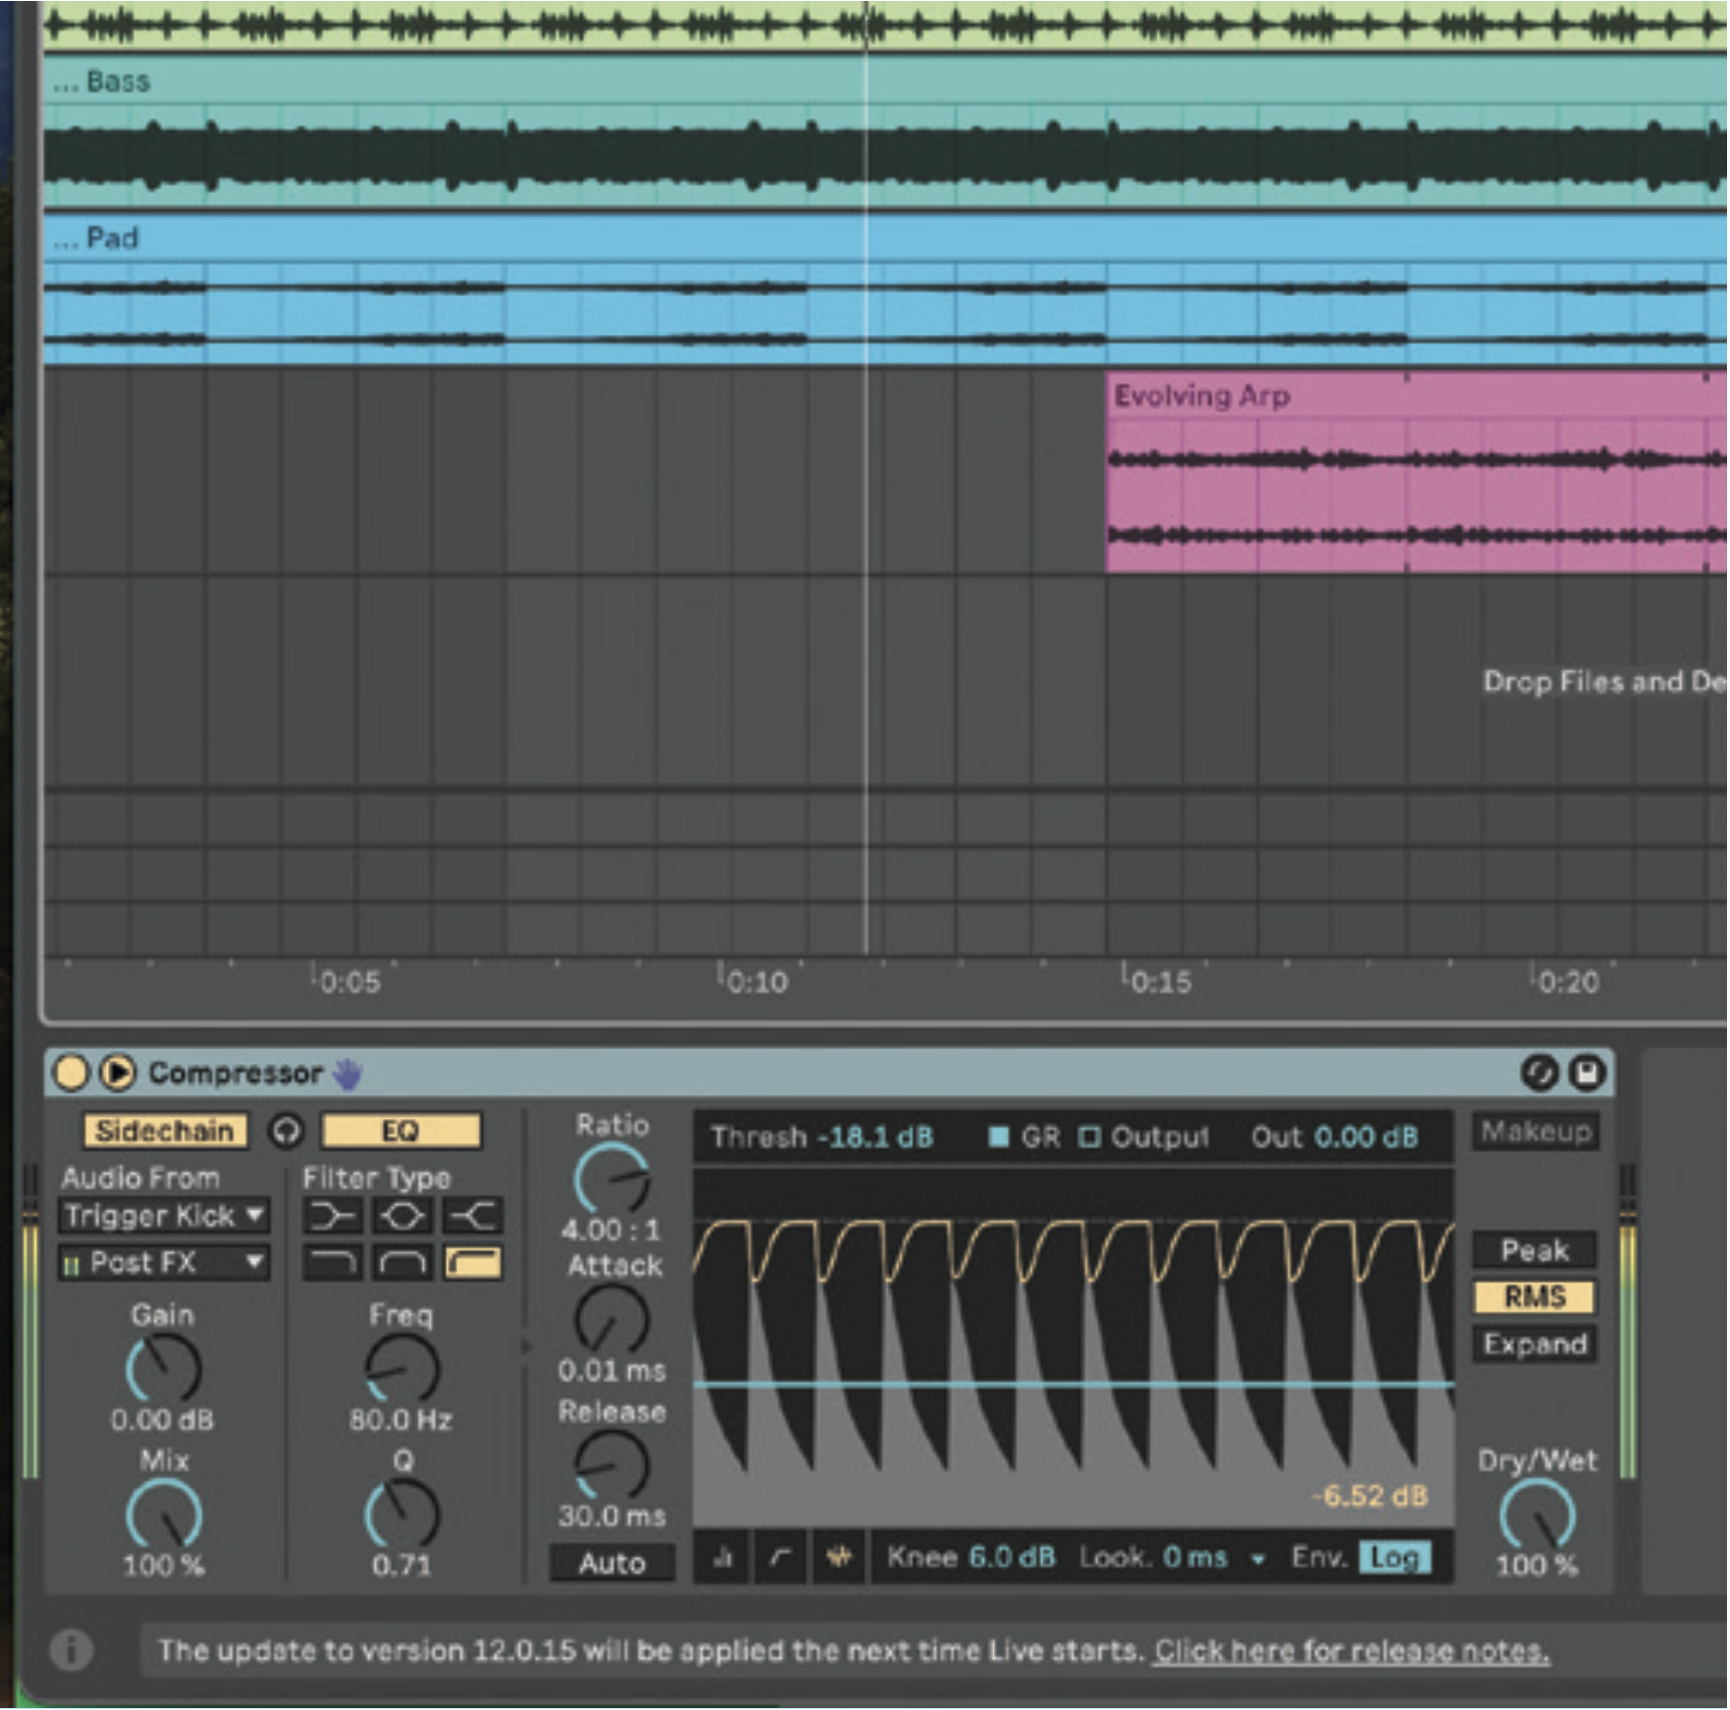
We 909 kick sample to create a trigger kick, the output of which is switched off. We use this as a sidechain trigger within a compressor which is copied to all parts except the drums. Now, the volume of each part ‘ducks’ every time the kick plays, adding greater mid-range mix clarity.
5. Perfecting dynamic range
The dynamic range (difference between the loudest and quietest passages) of a piece of music can really affect how the listener reacts to it. Classical music is a superb example – the wide dynamic range of an orchestra allows soft playing to become incredibly loud and impactful in an instant.
However, as the human ear naturally prefers louder sounds to quieter ones, most modern music sacrifices dynamic range for overall loudness by using processing such as compression and limiting to reduce the dynamic range, increasing overall average loudness (RMS) levels. This can make the music stand out more initially but, when overused, typically makes it fatiguing to listen to over an extended period of time – and less impactful to boot.
Applying compression using a variety of techniques as opposed to one fat smash of gain reduction will usually give better results
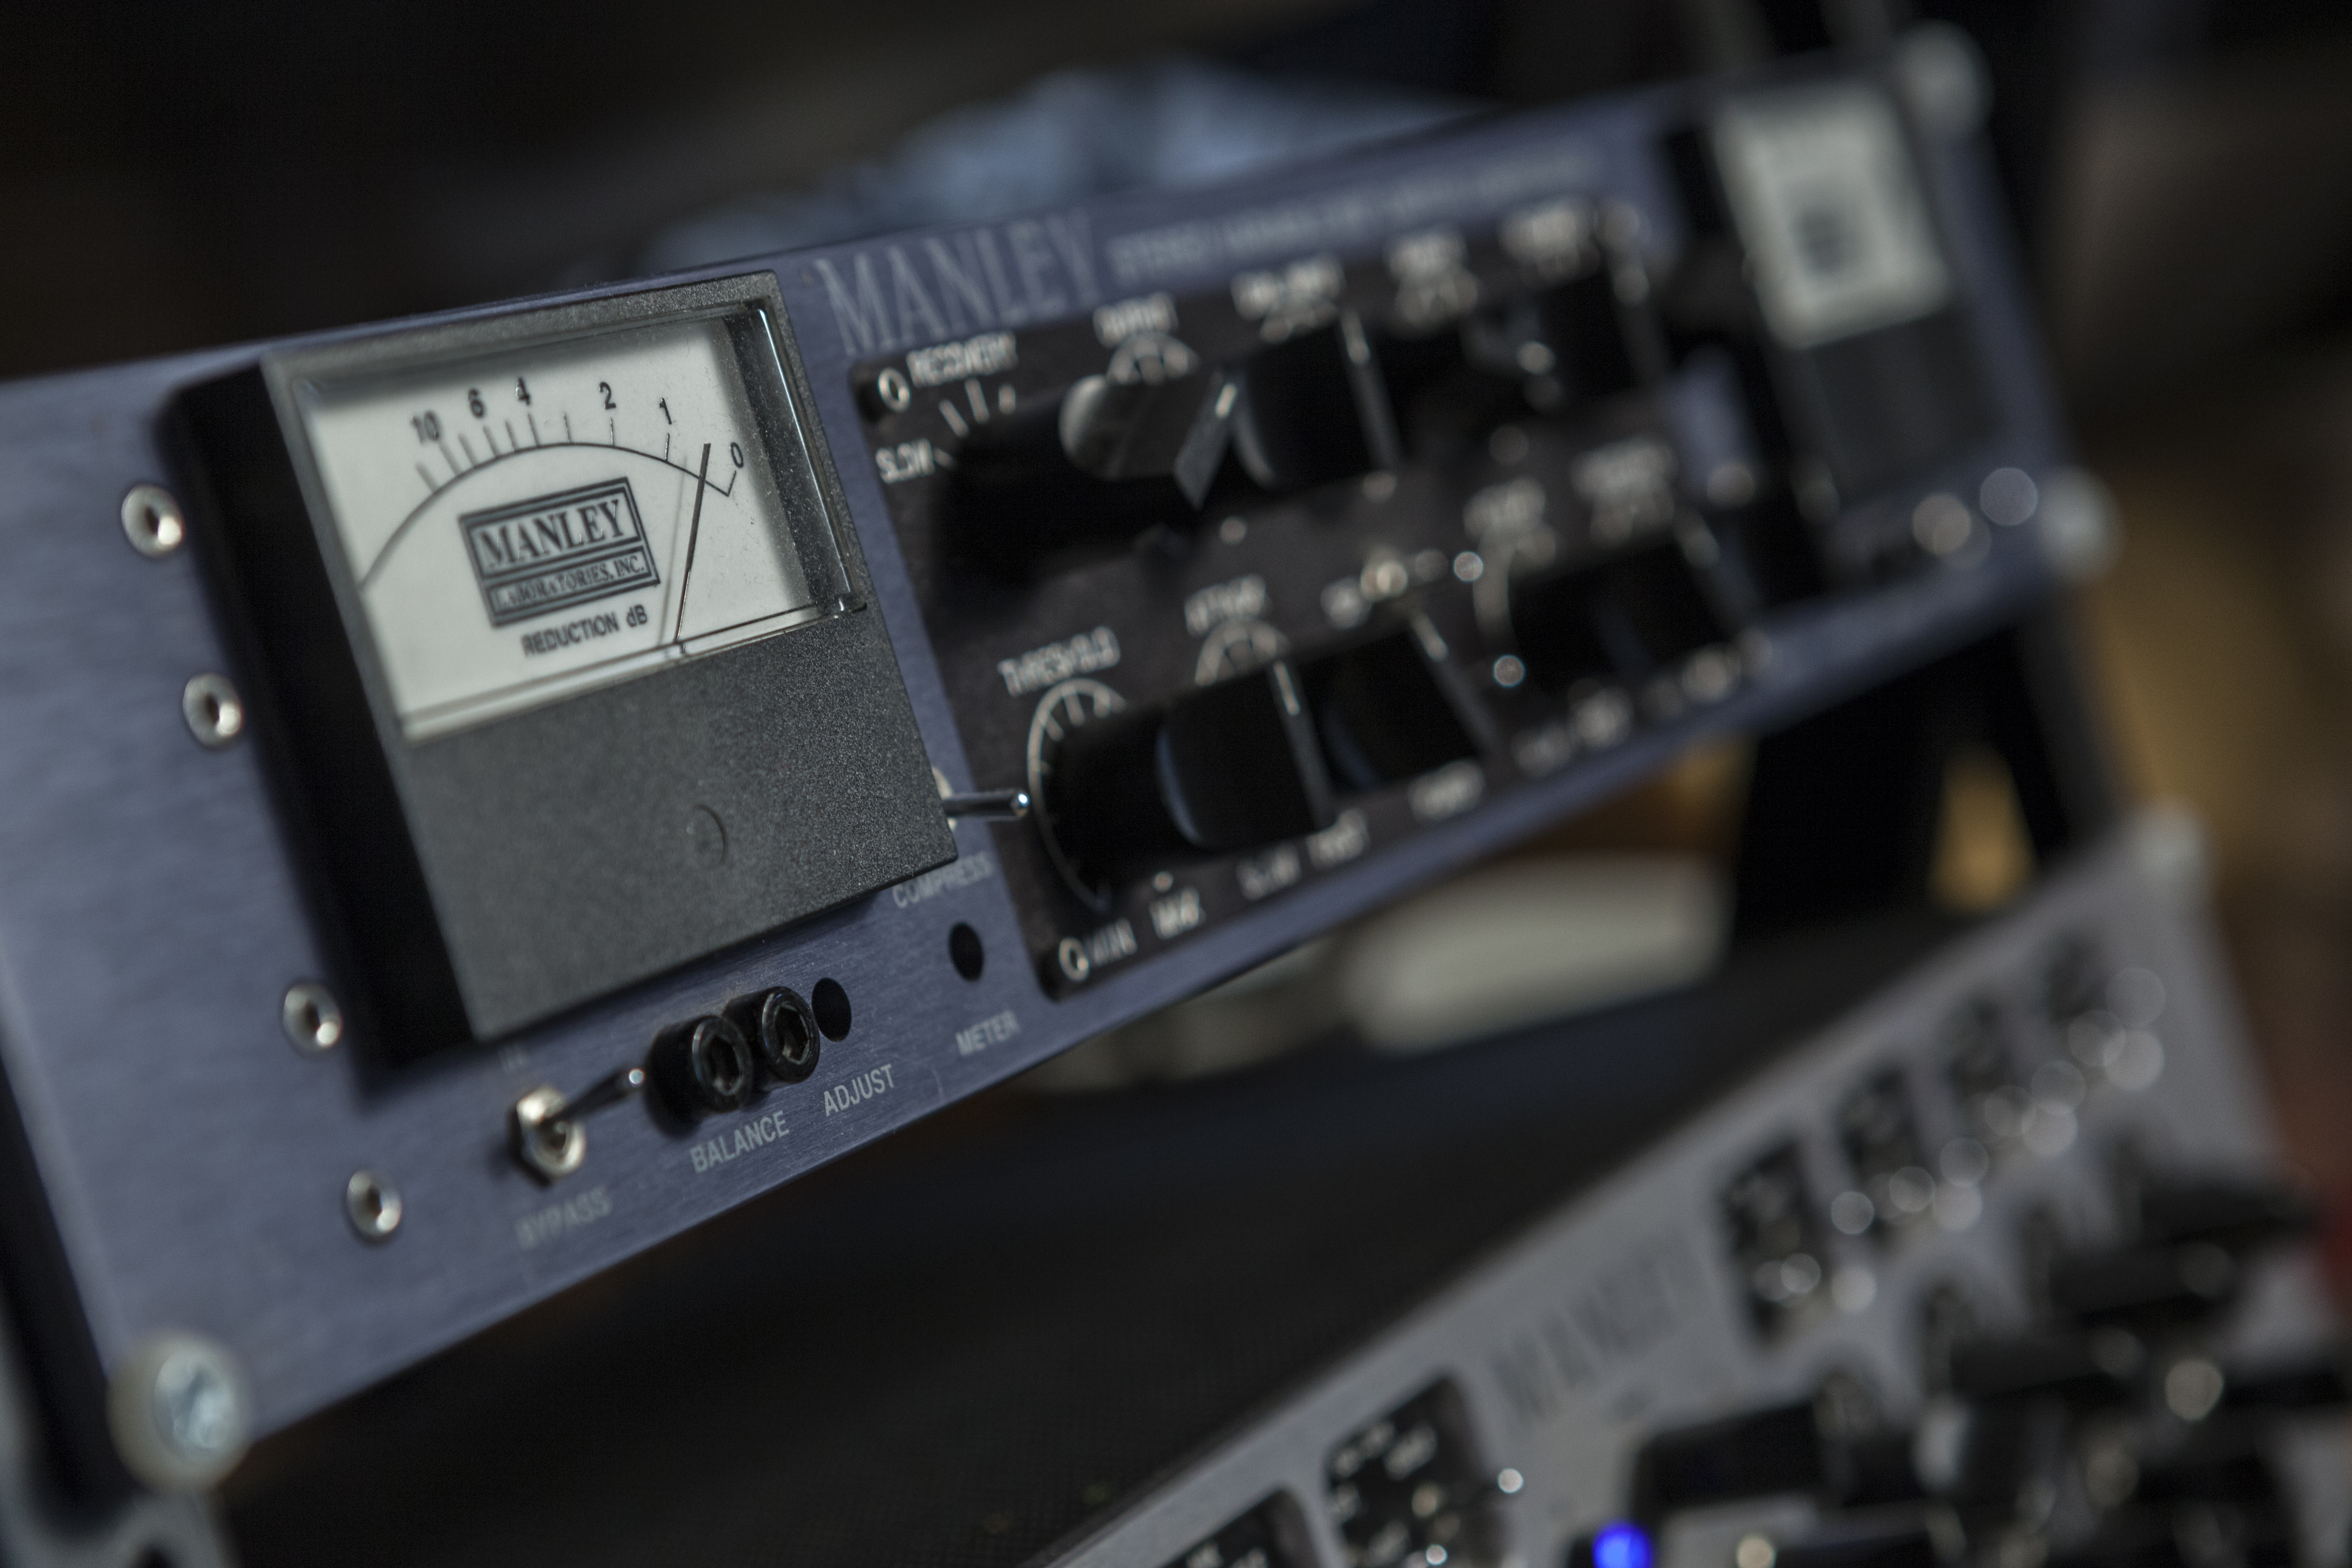
Use dynamics processing sparingly, but if you are looking for a heavily compressed sound, applying compression using a variety of techniques as opposed to one fat smash of gain reduction will usually give better results. Use compressors in series – instead of using one compressor to give 5dB of gain reduction, try spreading the workload over two or more units; this gives a cleaner overall sound as the individual compressors aren’t working so hard with greater scope for experimentation with attack/release times.
An even cleaner way to even out the dynamic range of recorded material such as vocals or drums is to adjust the dynamics using your DAW’s audio editing tools. Using volume automation as opposed to a compressor not only allows you to precisely control the dynamic range of the recording, but also has the benefit of not adding any compression/limiting artefacts to the signal. It is also a winner for applying sidechain compression such as the kick/bass ducking in house tracks in a clinical manner without using any extra processors.
6. Applying EQ correctly
There’s a minefield of potential EQ mistakes that can really affect the sound of your overall mix. One common one is overzealous use of high/low-pass filtering on individual channels within a mix – typically, it’s desirable to use high/low-pass filters for removing unwanted frequencies, freeing up headroom within the mix and increasing clarity of individual elements.
This can be a great technique if applied carefully using gentle filters, however many digital EQ plugins offer much steeper filter types which can make the individual elements of the mix sound too separate. A good rule of thumb is to use 12dB/oct or 18dB/oct filters for high/low-pass work as they offer the best compromise between removing unwanted frequencies and retaining a cohesive, musical sound.
Filtering out too many low frequencies from individual elements can lead to a thin-sounding mix
Paying careful attention to what frequency the filters are applied at is also crucial – filtering out too many low frequencies from individual elements can lead to a thin-sounding mix, for example, while overdoing the low-pass filtering can remove too much air resulting in an overly dull sound. A great tip is to solo the channel you’re filtering and listen carefully to how the filters affect the sound before seeing how the filtered channel sounds in the context of the whole mix – if the overall sound is affected more than you’d like, try backing off the filters a touch.
Also, if you’re not blessed with monitoring that accurately reproduces low sub bass or shimmering high frequencies, a frequency analyser such as Voxengo’s excellent (and free!) SPAN will allow you to cross-reference the sound coming from the speakers with a visual indication of what your low/high-pass filters are doing.
7. Clean boosting
Another common EQ mistake is applying multiple/large EQ boosts. Most typical minimum phase EQ circuits will add phase distortion when a boost is applied due to the frequencies being boosted incurring a time delay compared to the rest of the frequency spectrum. It could be said that this phase distortion effect is what gives certain EQ circuits their ‘musical’ sound, however overusing EQ boosts to shape the frequency content of a signal will typically result in a tired, over-processed sound.
A cleaner alternative is to cut frequencies before using makeup gain to bring the overall level back up. An example of this would be a +6dB high-shelf at 1kHz – instead of doing this, try applying a -6dB low-shelf at 1kHz before using the EQ’s makeup gain to match the processed and unprocessed levels. As EQ cuts do not introduce any phase distortion, this will give a cleaner sound than applying a big boost.
Using a multi-purpose EQ such as DMG Audio’s EQuilibrium is a great way to have your EQ cake and eat it!
Of course, there are plenty of linear phase EQs available that can offer boosting without the phase distortion introduced by minimum phase designs; however, these can be detrimental to sound quality in a different way due to linear phase processing’s tendency to give transients a ‘smeared’ sound. Using a multi-purpose EQ such as DMG Audio’s EQuilibrium, which allows each band to be adjusted between linear/minimum phase, is a great way to have your EQ cake and eat it!
Finally, another great tip for clean boosting using bell curves is a technique called feathering – instead of applying a 3dB boost at 100Hz for example we can apply a 1.5dB 100Hz boost with two 0.75dB boosts at 75Hz and 125Hz respectively. This achieves a similar effect to a single, bigger boost but adds less phase distortion overall as the work is spread over three gentle boosts instead of one larger one.
8. De-essing
De-essing is traditionally associated with vocal processing, but has a whole world of other uses for any high-frequency material. Although you’d traditionally use a de-esser to tame sibilance in a vocal recording, it’s an equally useful tool when taken out of context and used on other material such as overly bright drums, guitar and synths – or even a whole mix!
We could use standard EQ to remove unwanted frequencies from the high mid and treble areas a de-esser is normally tuned to but this will have the side effect of removing those frequencies permanently, giving a duller and less detailed overall sound. Instead, as de-essing is a dynamic process, it only works when we need it – leaving the high frequencies below the de-esser’s threshold untouched. Sound good? Let’s explore using a de-esser to control some overly bright percussion in a breakbeat…
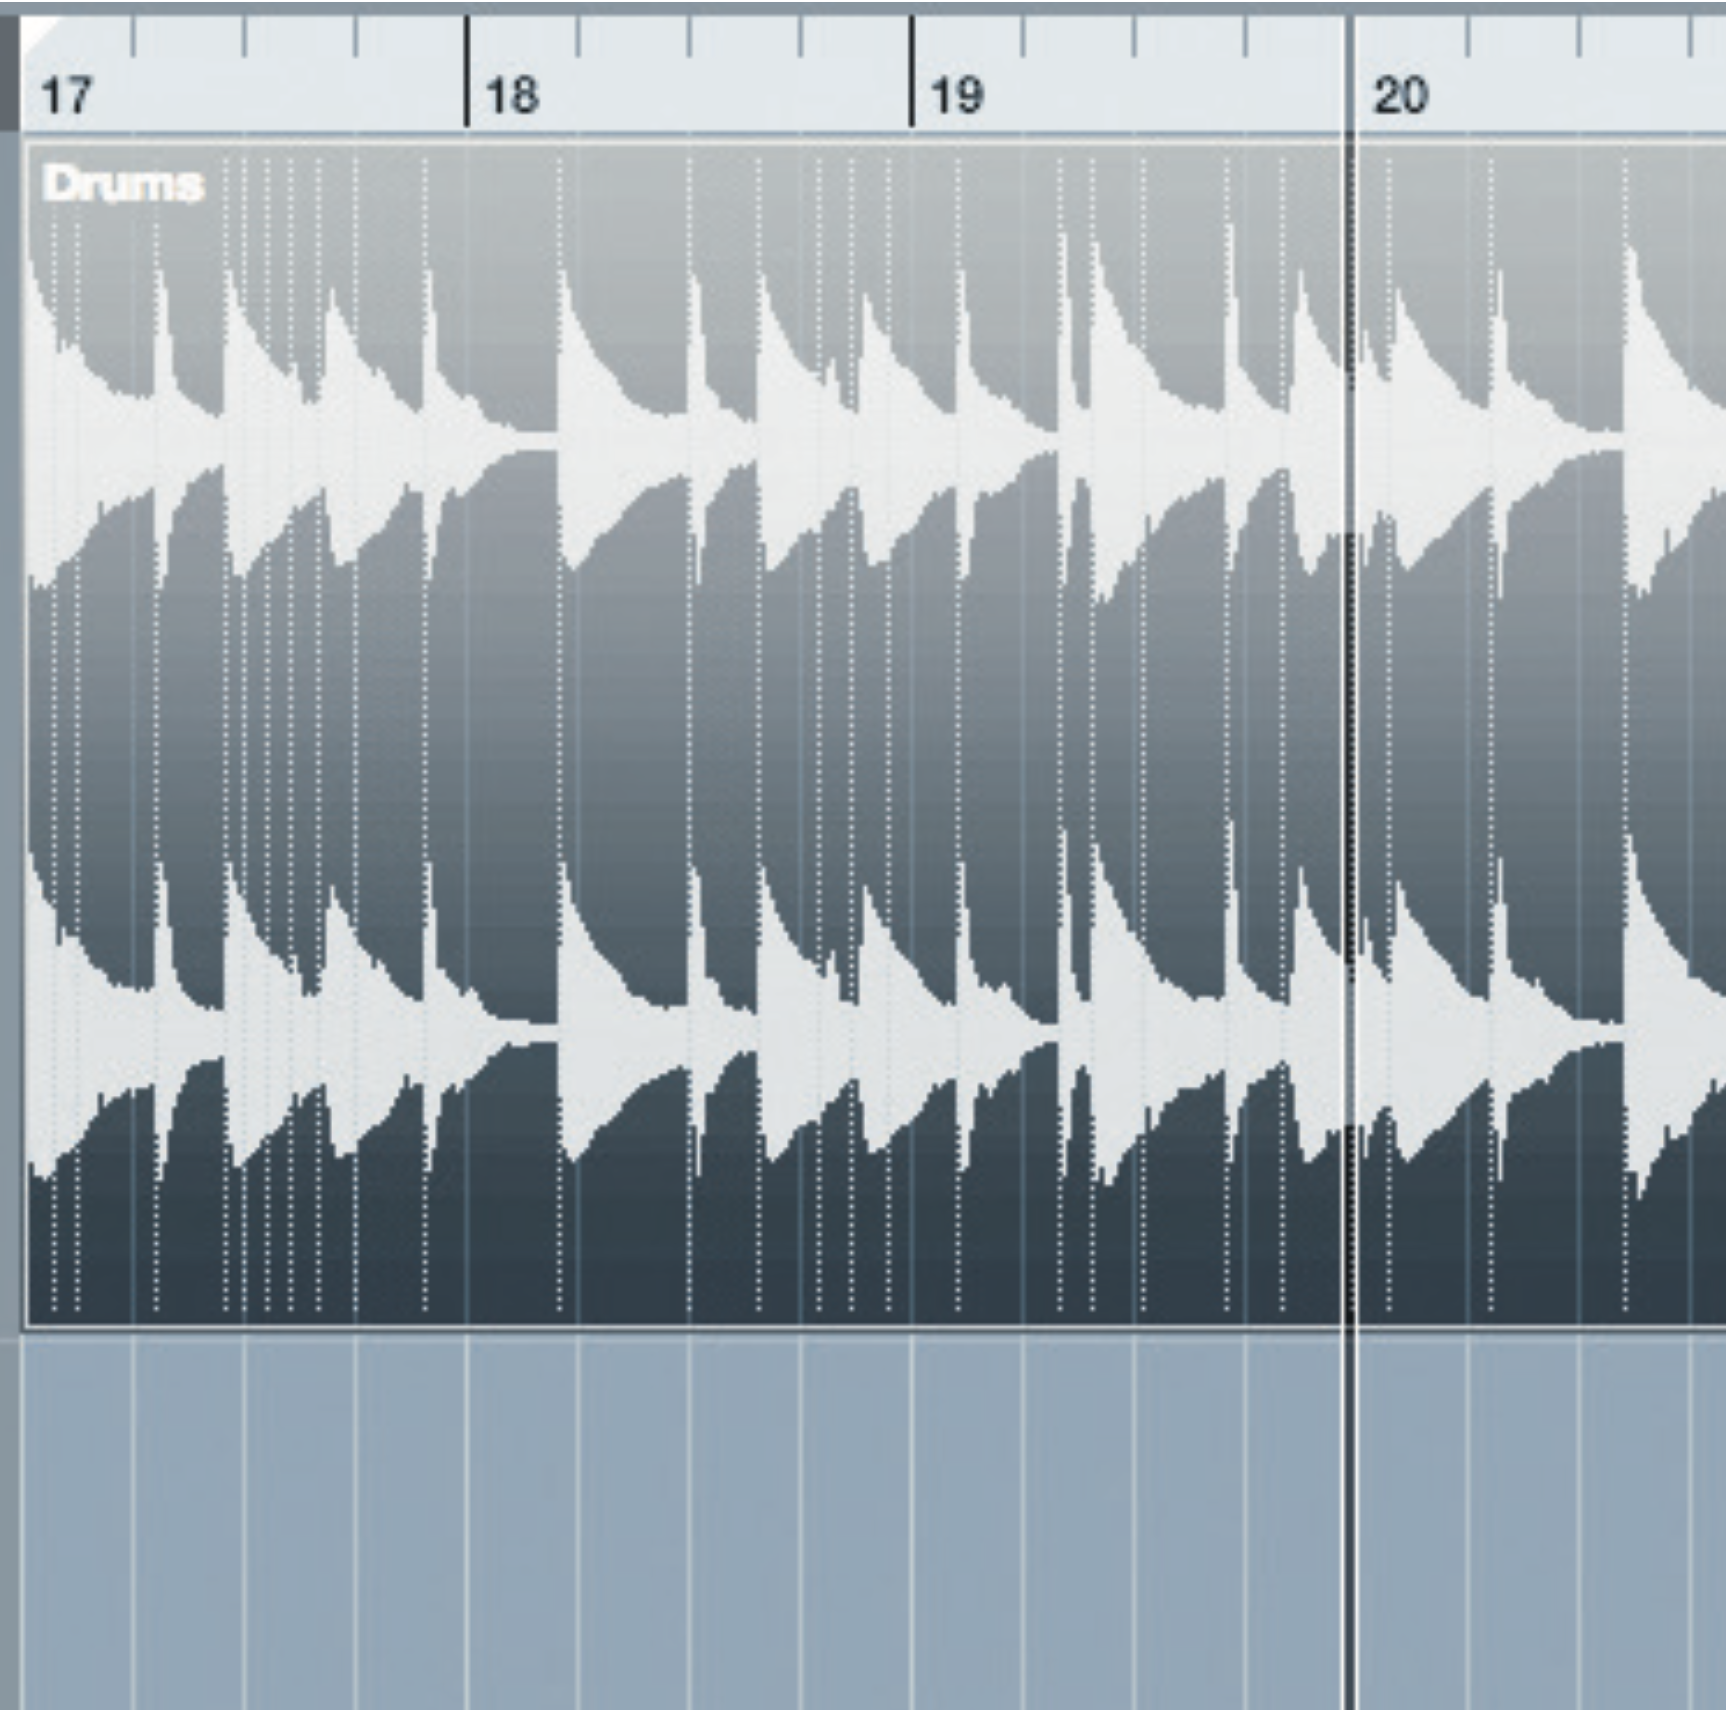
Our breakbeat sounds nicely balanced in the main except for a≈bright ride cymbal that comes in for only some of the time – a de-esser such as DMG Audio’s Essence is ideal for dealing with the problem without robbing the other drum elements of all their brightness.
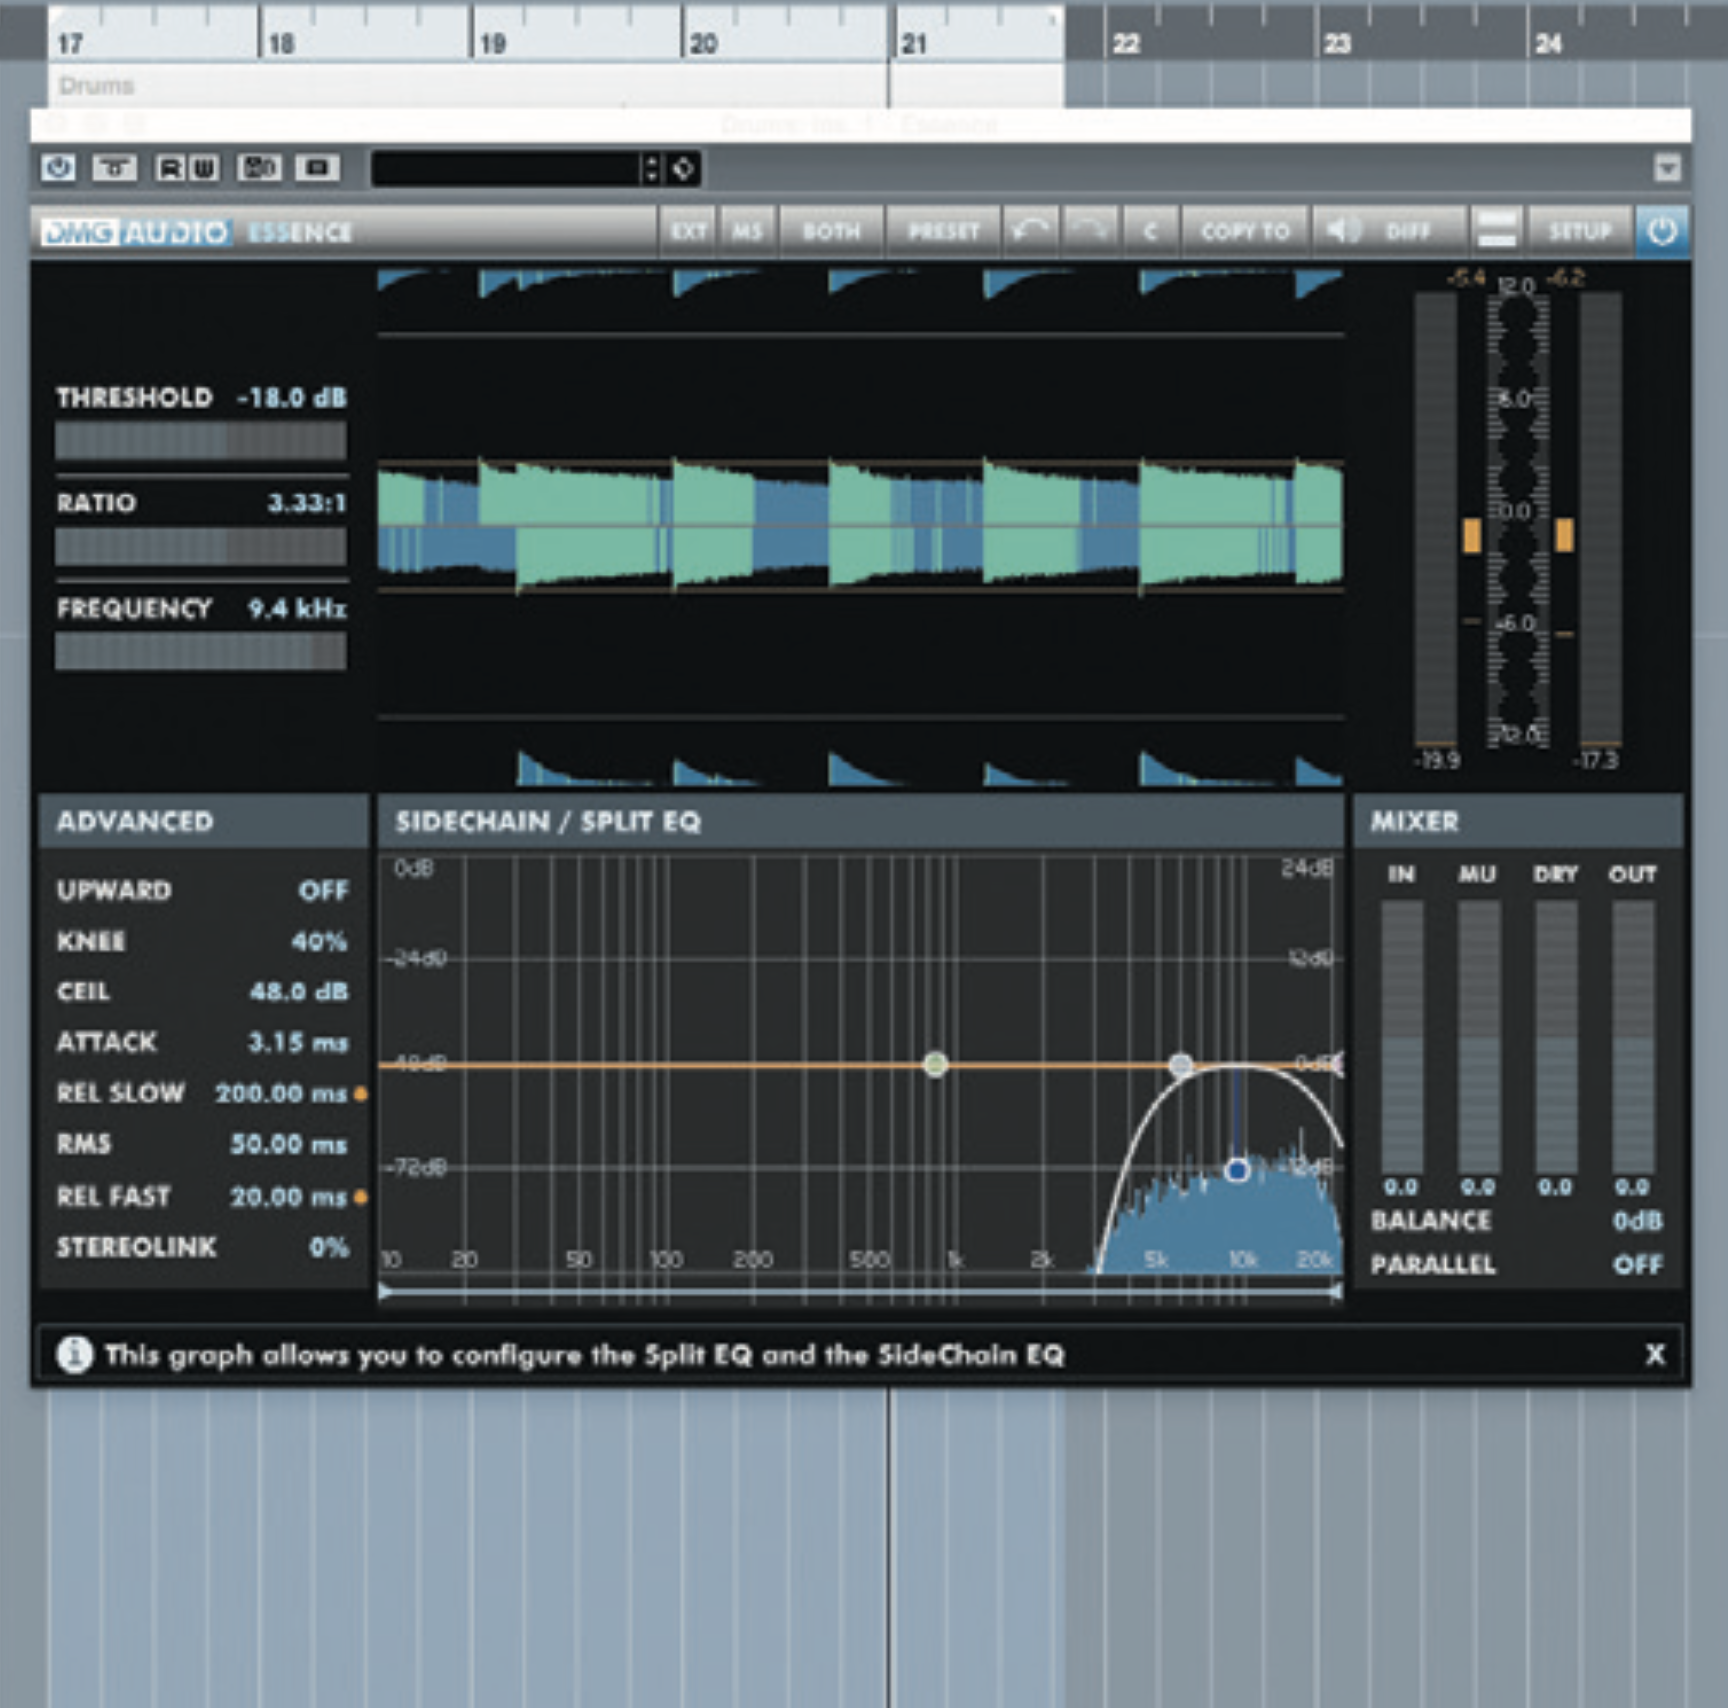
We set Essence’s output signal to Difference so we can hear which frequencies are being processed before adjusting the centre frequency of Essence’s band-pass filter to 9.4kHz. This deals with the ride’s brightness while not affecting the other drum elements too much.
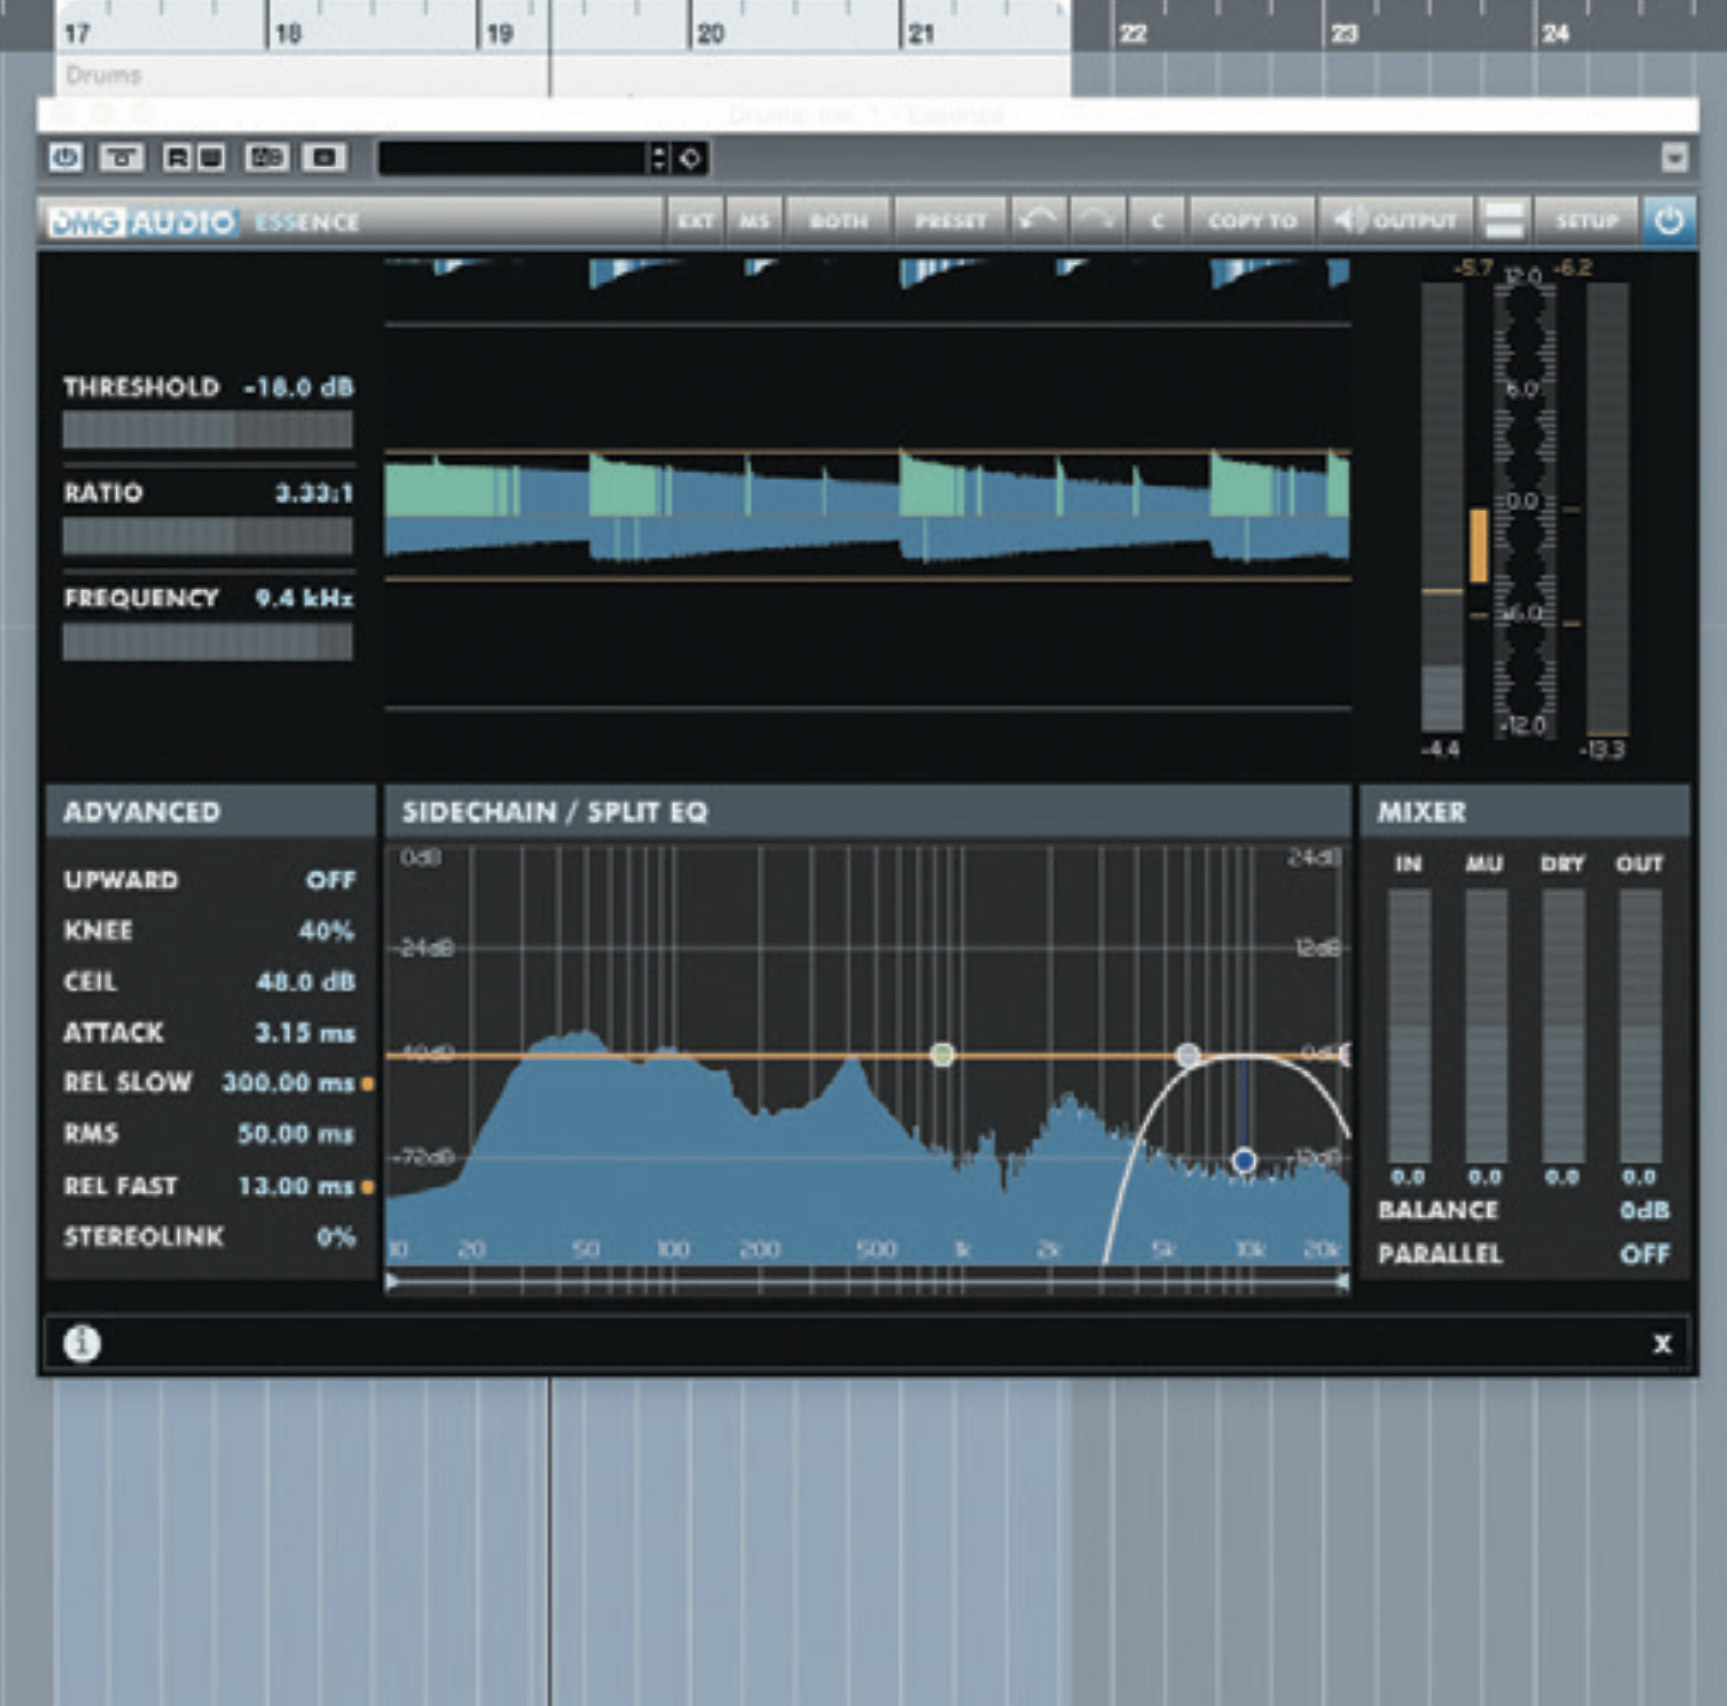
We set the Fast release to 13ms to catch less of the snare in our processing before pushing the Slow release up to 300ms so that more of the ride’s brightness is removed. Finally, we A/B the Output and Difference signals to check the difference our processing has made.


