The ‘sunburst’ is a brilliant photographic technique to master as it can transform your sunrise landscape shots. The great thing is it’s fairly simple as you just need a standard zoom lens and to use a narrow aperture around f/11 or f/16 and big bright lights like the sun (or street lights at night) become big stars in your shots!
The amount of aperture blades your lens has will affect how many points are on your sunburst – the number of points in the star is double the number of your lens's iris blades.
But there’s more to it than just using a narrow aperture to create the sunburst effect. It also takes prep and practice, and knowing where and what time of day is best.
Firstly, shoot early in the morning. You need the sun low in the sky to be able to capture the sunburst within your scene - as if you shoot in the middle of the day, the sun will be too high in the sky.
To avoid an over-exposed bright sunburst, the key is to shoot at sunrise so the bright light is diffused on the horizon. Or better still, shoot in misty conditions for lovely diffused natural sunlight!
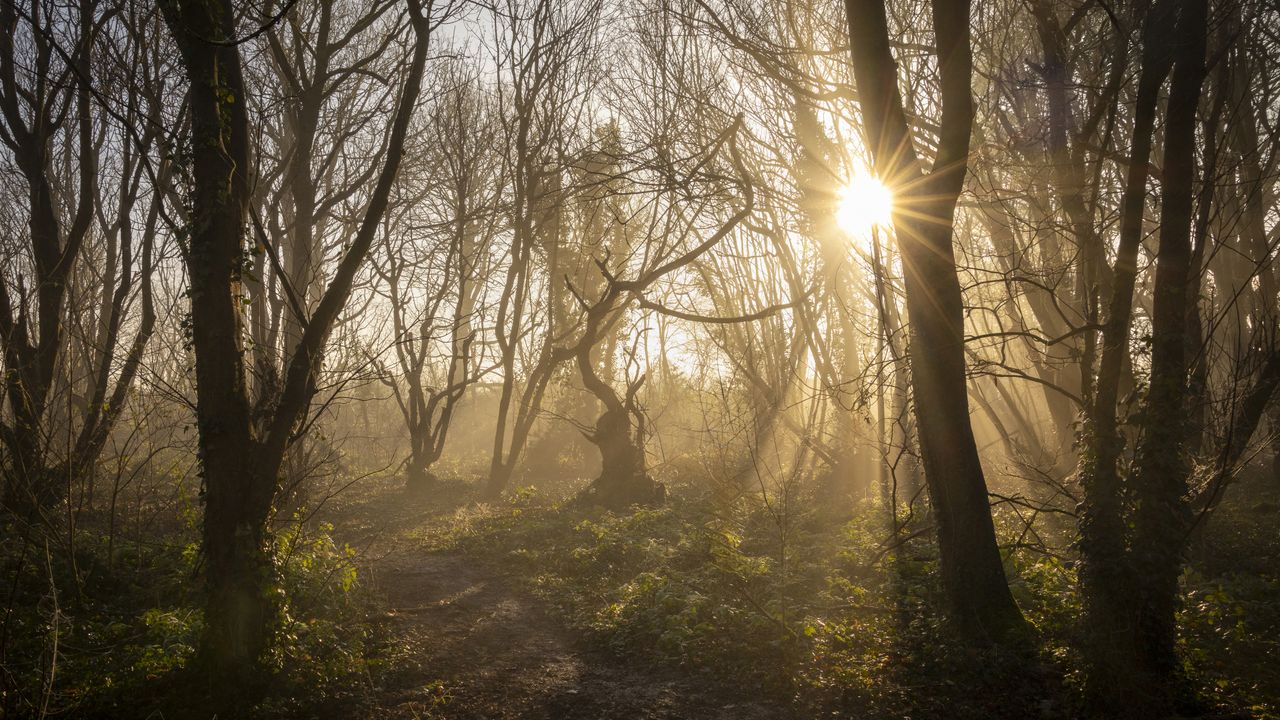
I’d done a recce at this forest location the day before when it was cloudy, using my PhotoPIlls app for the position of the rising sun, in relation to the trees, and worked out the best spot, the low angle, and wide 24mm focal length for the best composition.
The next morning the sun was shining, but as it had been a cold night, I was blessed with misty conditions. Ideal for sunbursts. So I quickly returned to the forest, trekked to my pre-planned photo spot, and I got down low with my Canon EOS R5 Mark II and an RF 24-105mm F4 L IS USM on my tripod low to the ground.
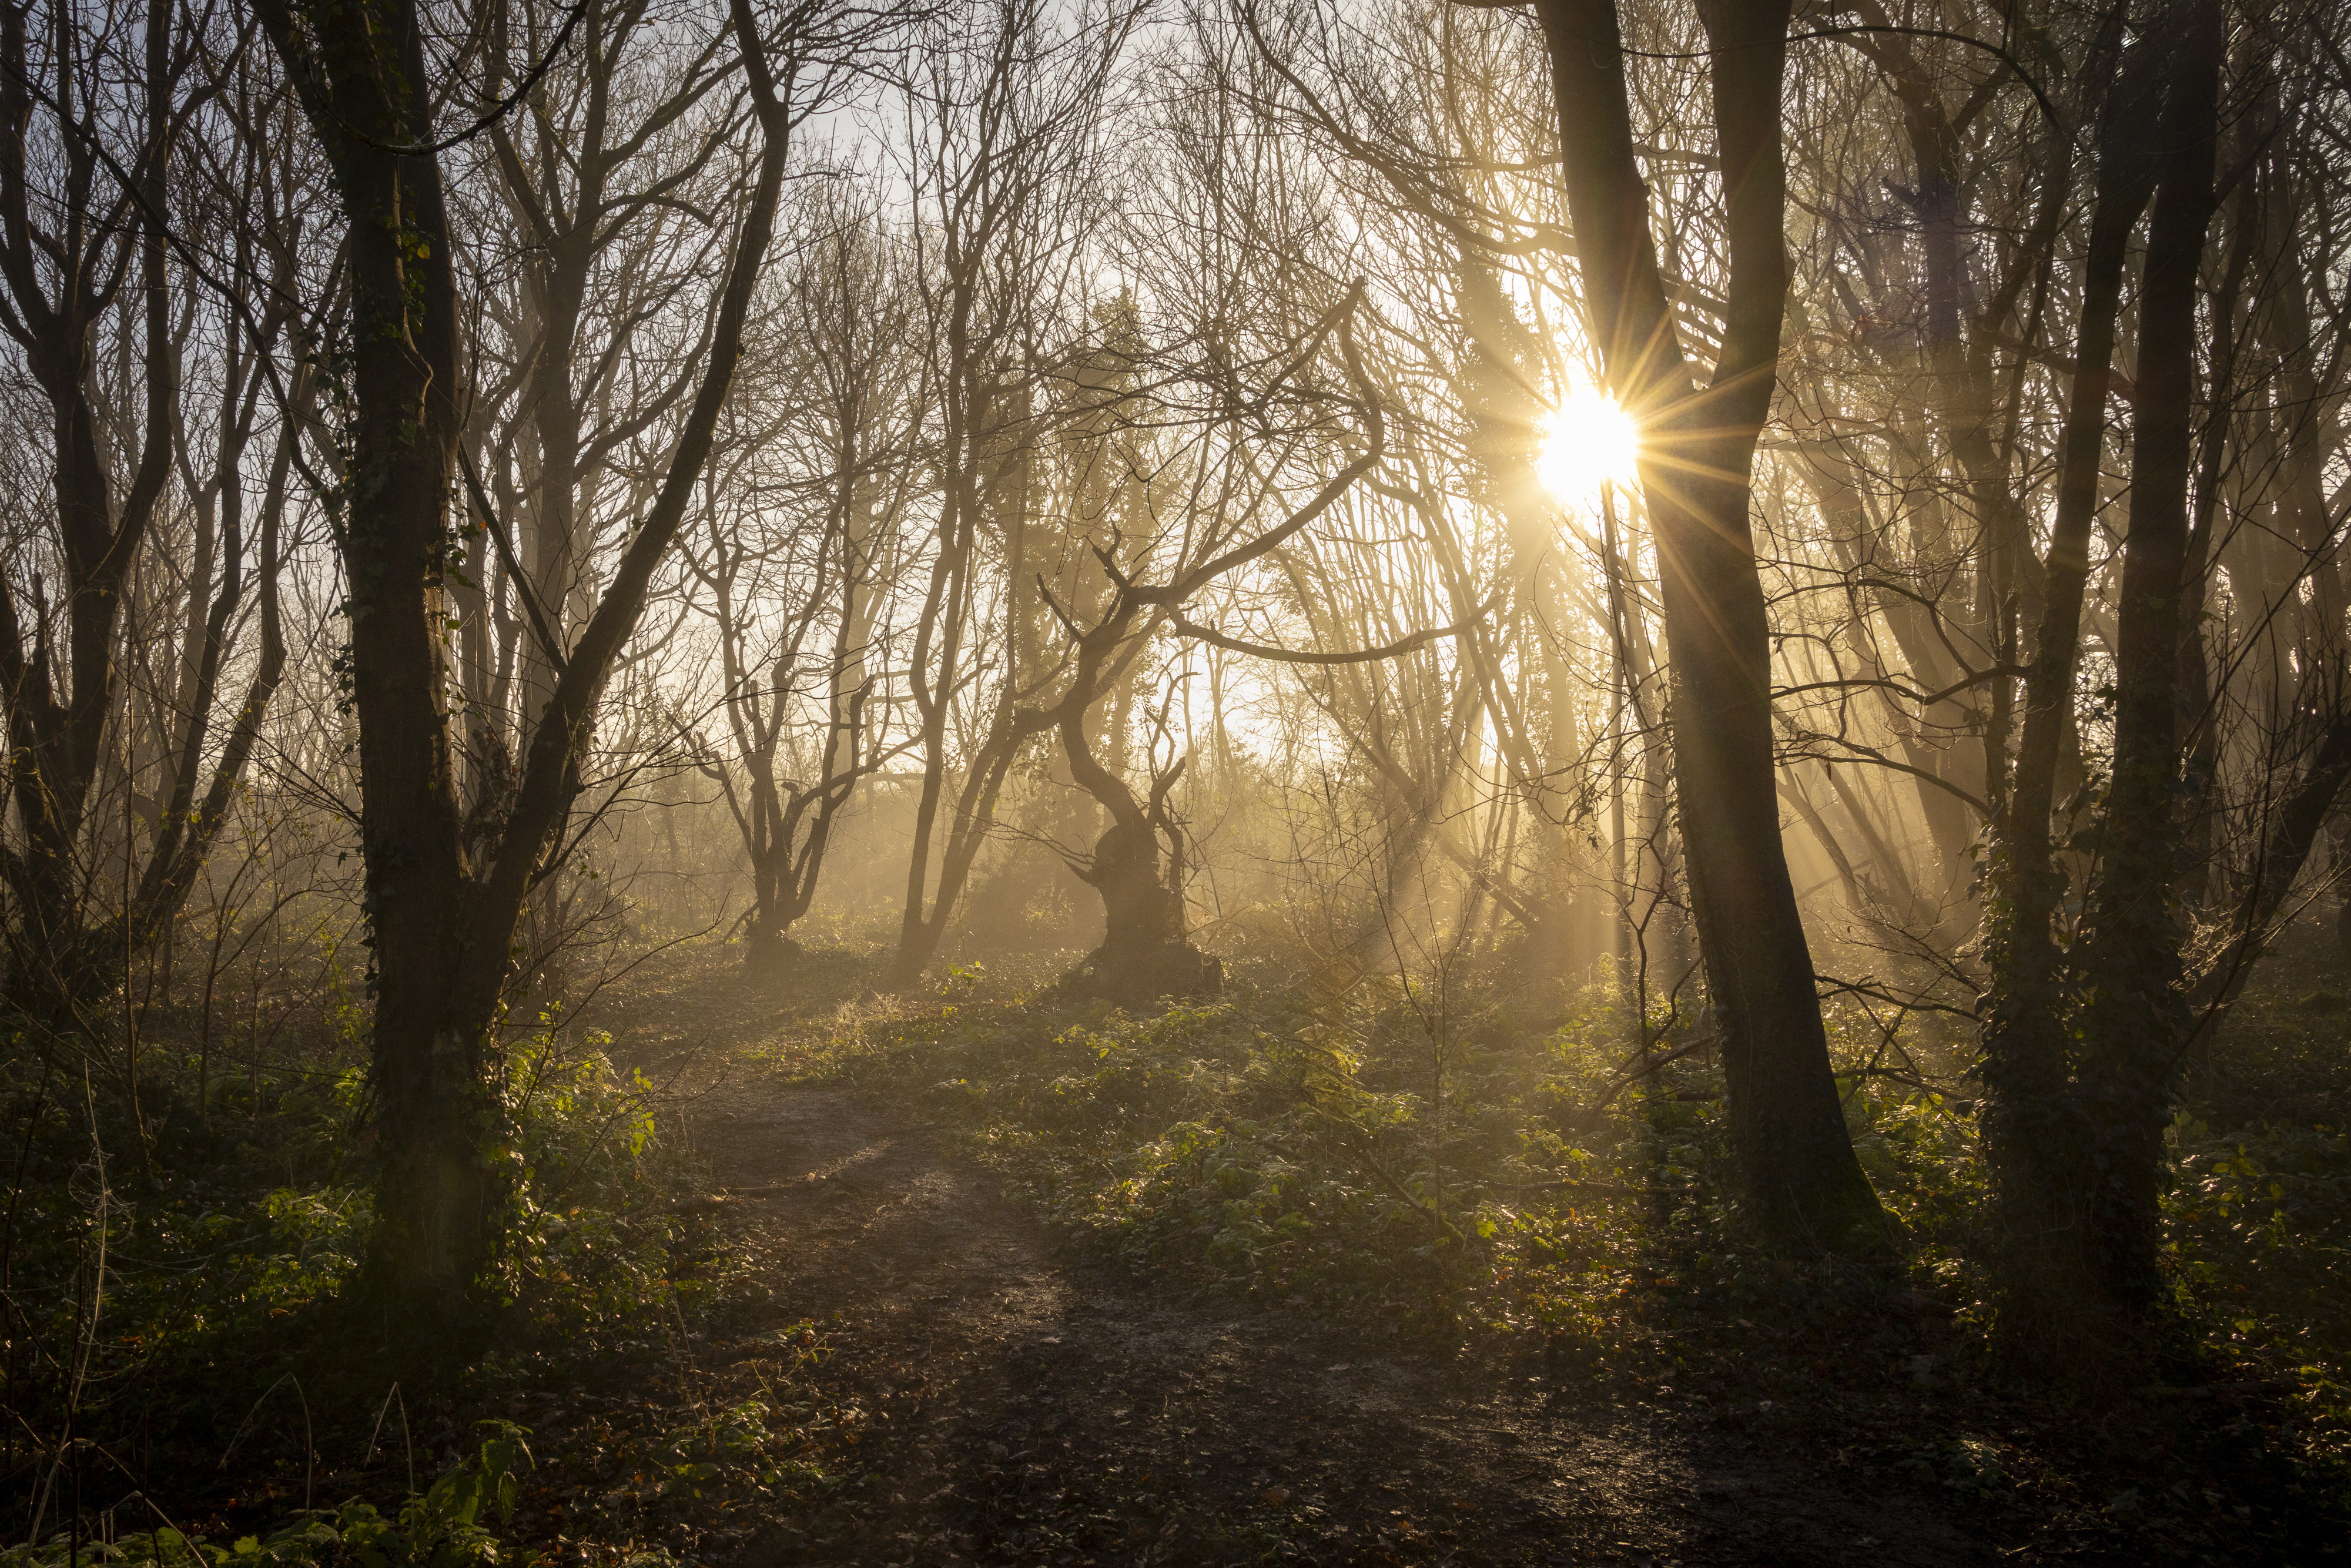
After a few test shots at f/16 even with the mist the sun was very bright. So I shuffled a foot to my right so the sun poked out behind the larger tree trunks.
For my sunburst photos, I shoot at a narrow aperture of f/16, and bracketed exposures to merge into a RAW HDR in Adobe Camera Raw software to hold the highlights and boost the shadows.
If you’re not up early at sunrise, and you’re shooting a bit later in the morning, you’ll need to get down low and shoot upwards, and to control the brightness of your sunburst, partially place the sun behind objects like a tree branch or church spire.
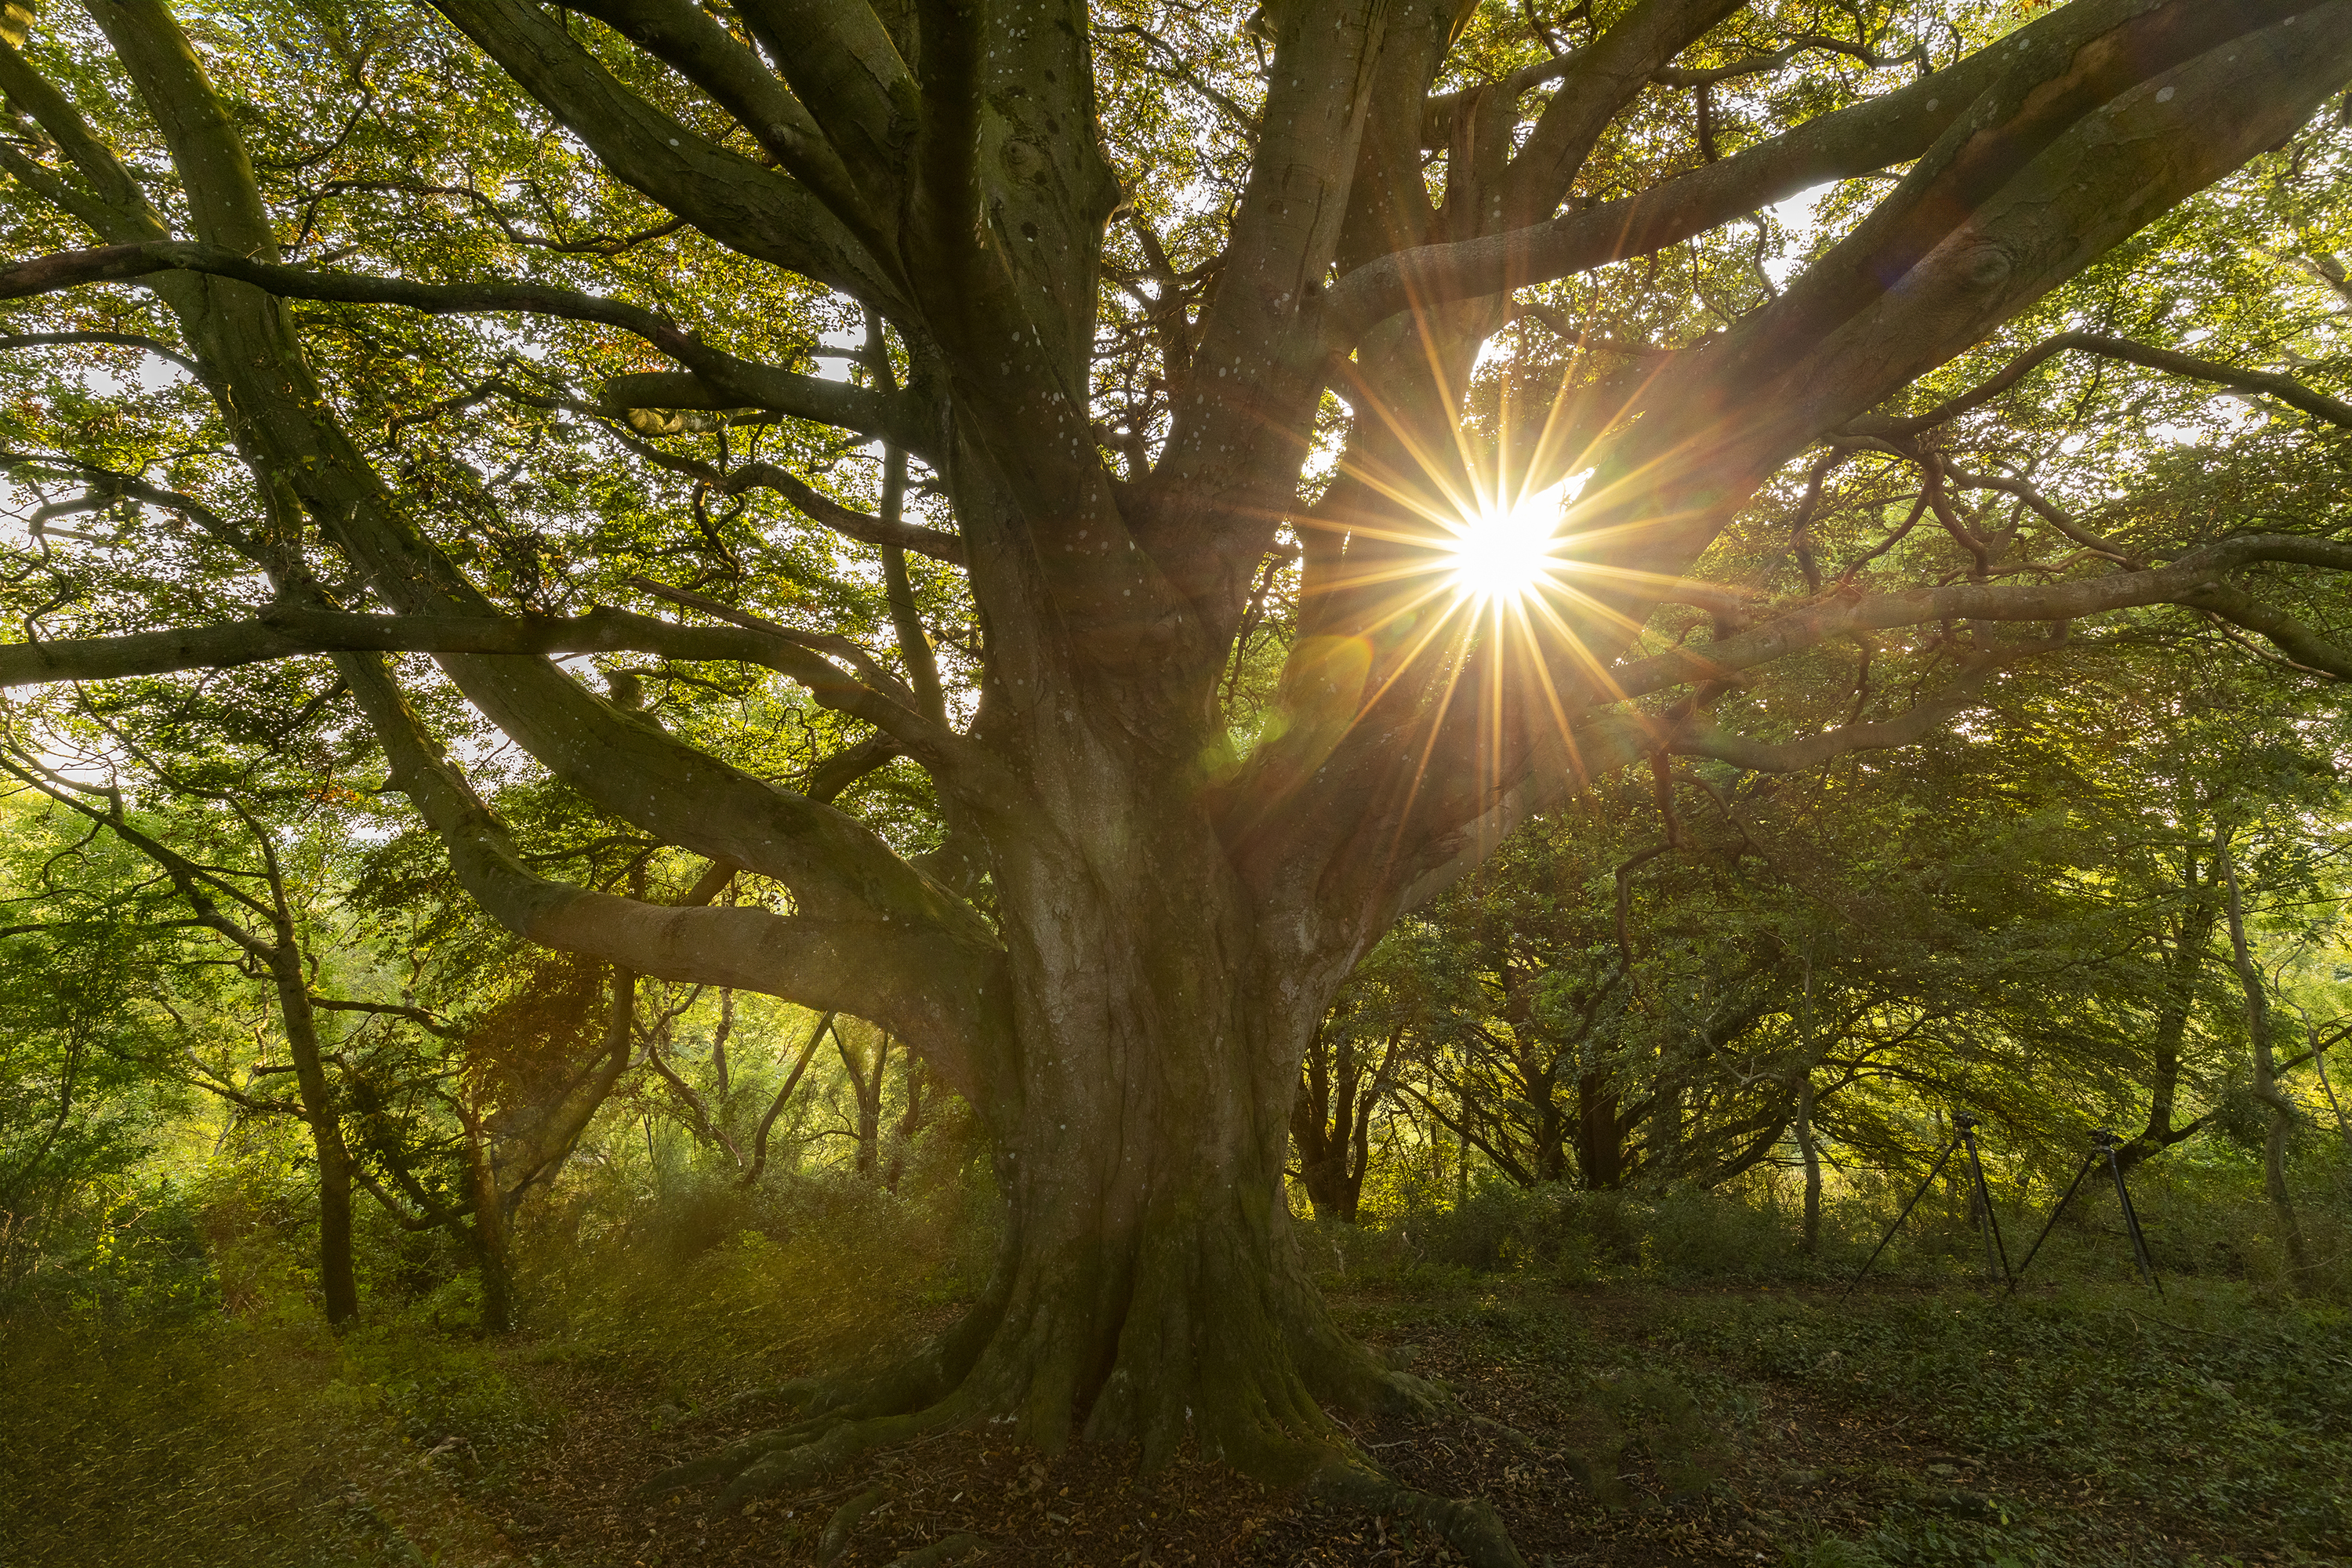
This massive tree give me lots of options for where to place the sun the frame. The often-overlooked Canon EF 16-35mm f/4L IS USM has produced a fantastic sunburst with lots of points!
You might also like…
Take a look at these landscape photography tips, to help you get the most of the best cameras for landscape photography and the best lenses for landscapes.