The reversed reverb technique is a great pre-effect for vocals and other lead instruments, and although we can get an approximation by using envelope-based reverse reverb algorithms, to truly tailor the sound it’s best to go back to basics and replicate the traditional tape-based method inside our DAW.
Here’s how it’s done...
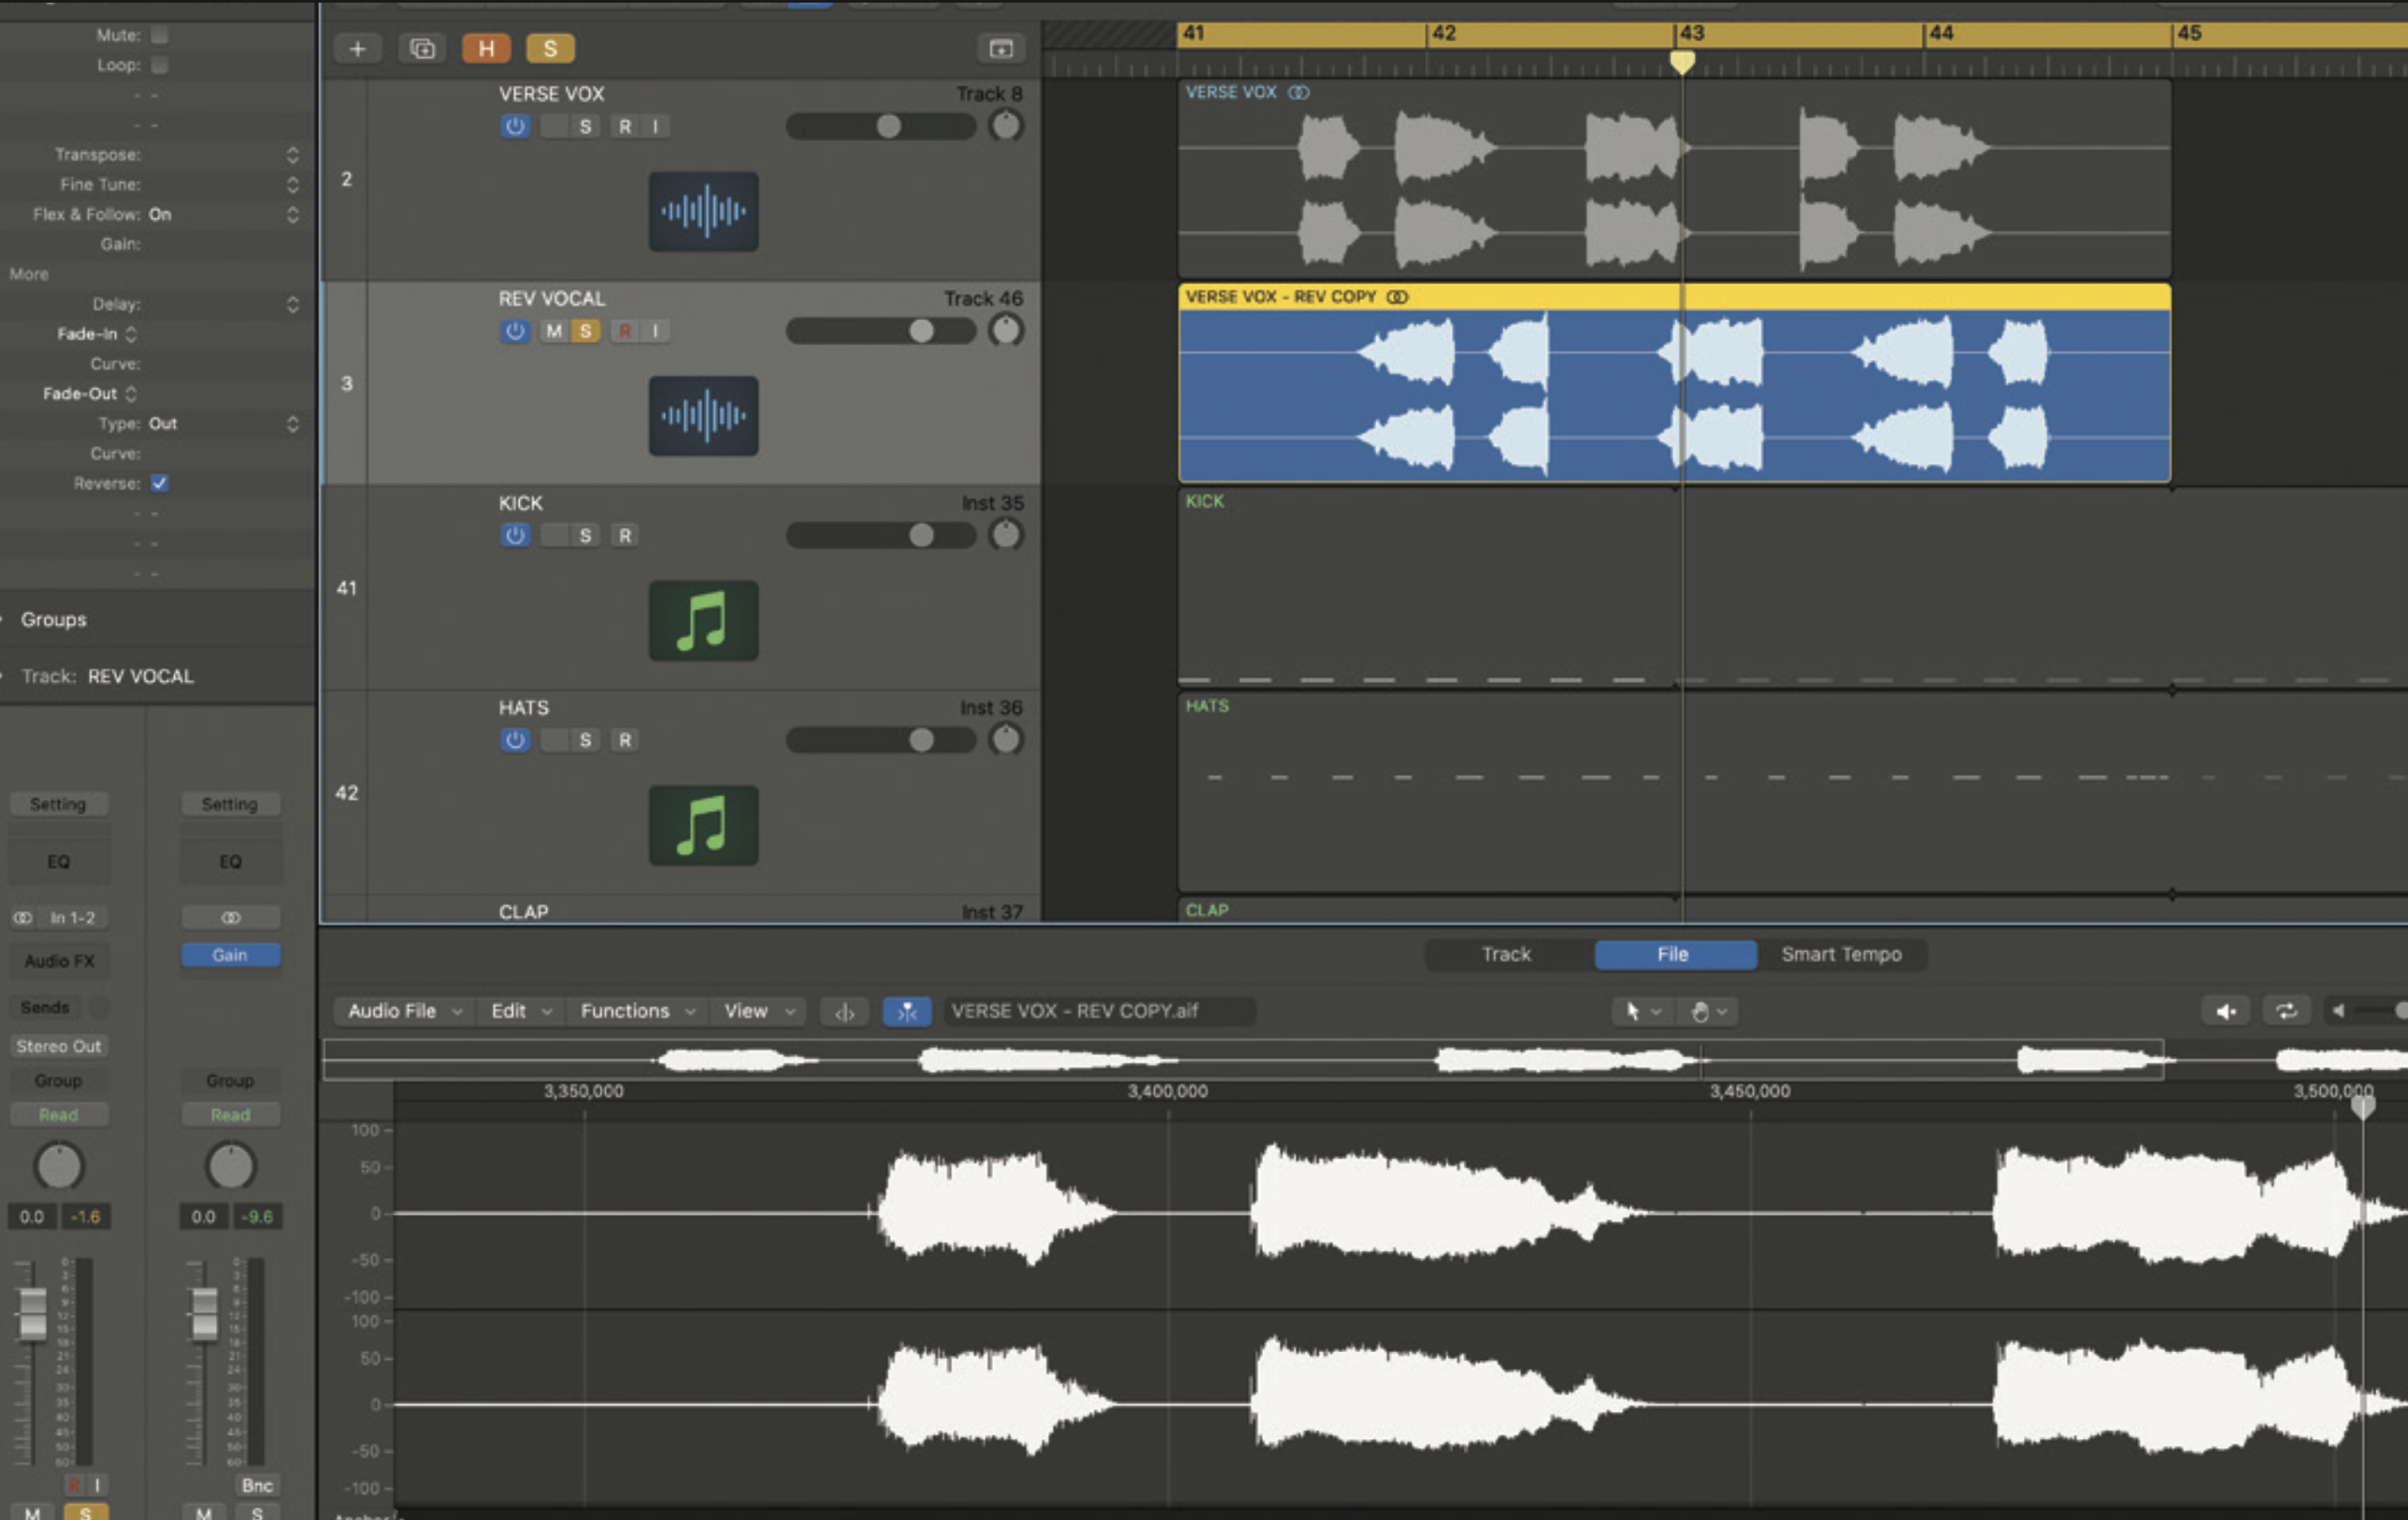
The idea is to create a backwards reverb tail that leads into the sound that created it. To do this, you have to reverse the original audio and then send it to a reverb. Here, we’ve copied and reversed a vocal part, put it on a fresh track and set up a reverb as an insert with the mix blend at 100% wet.
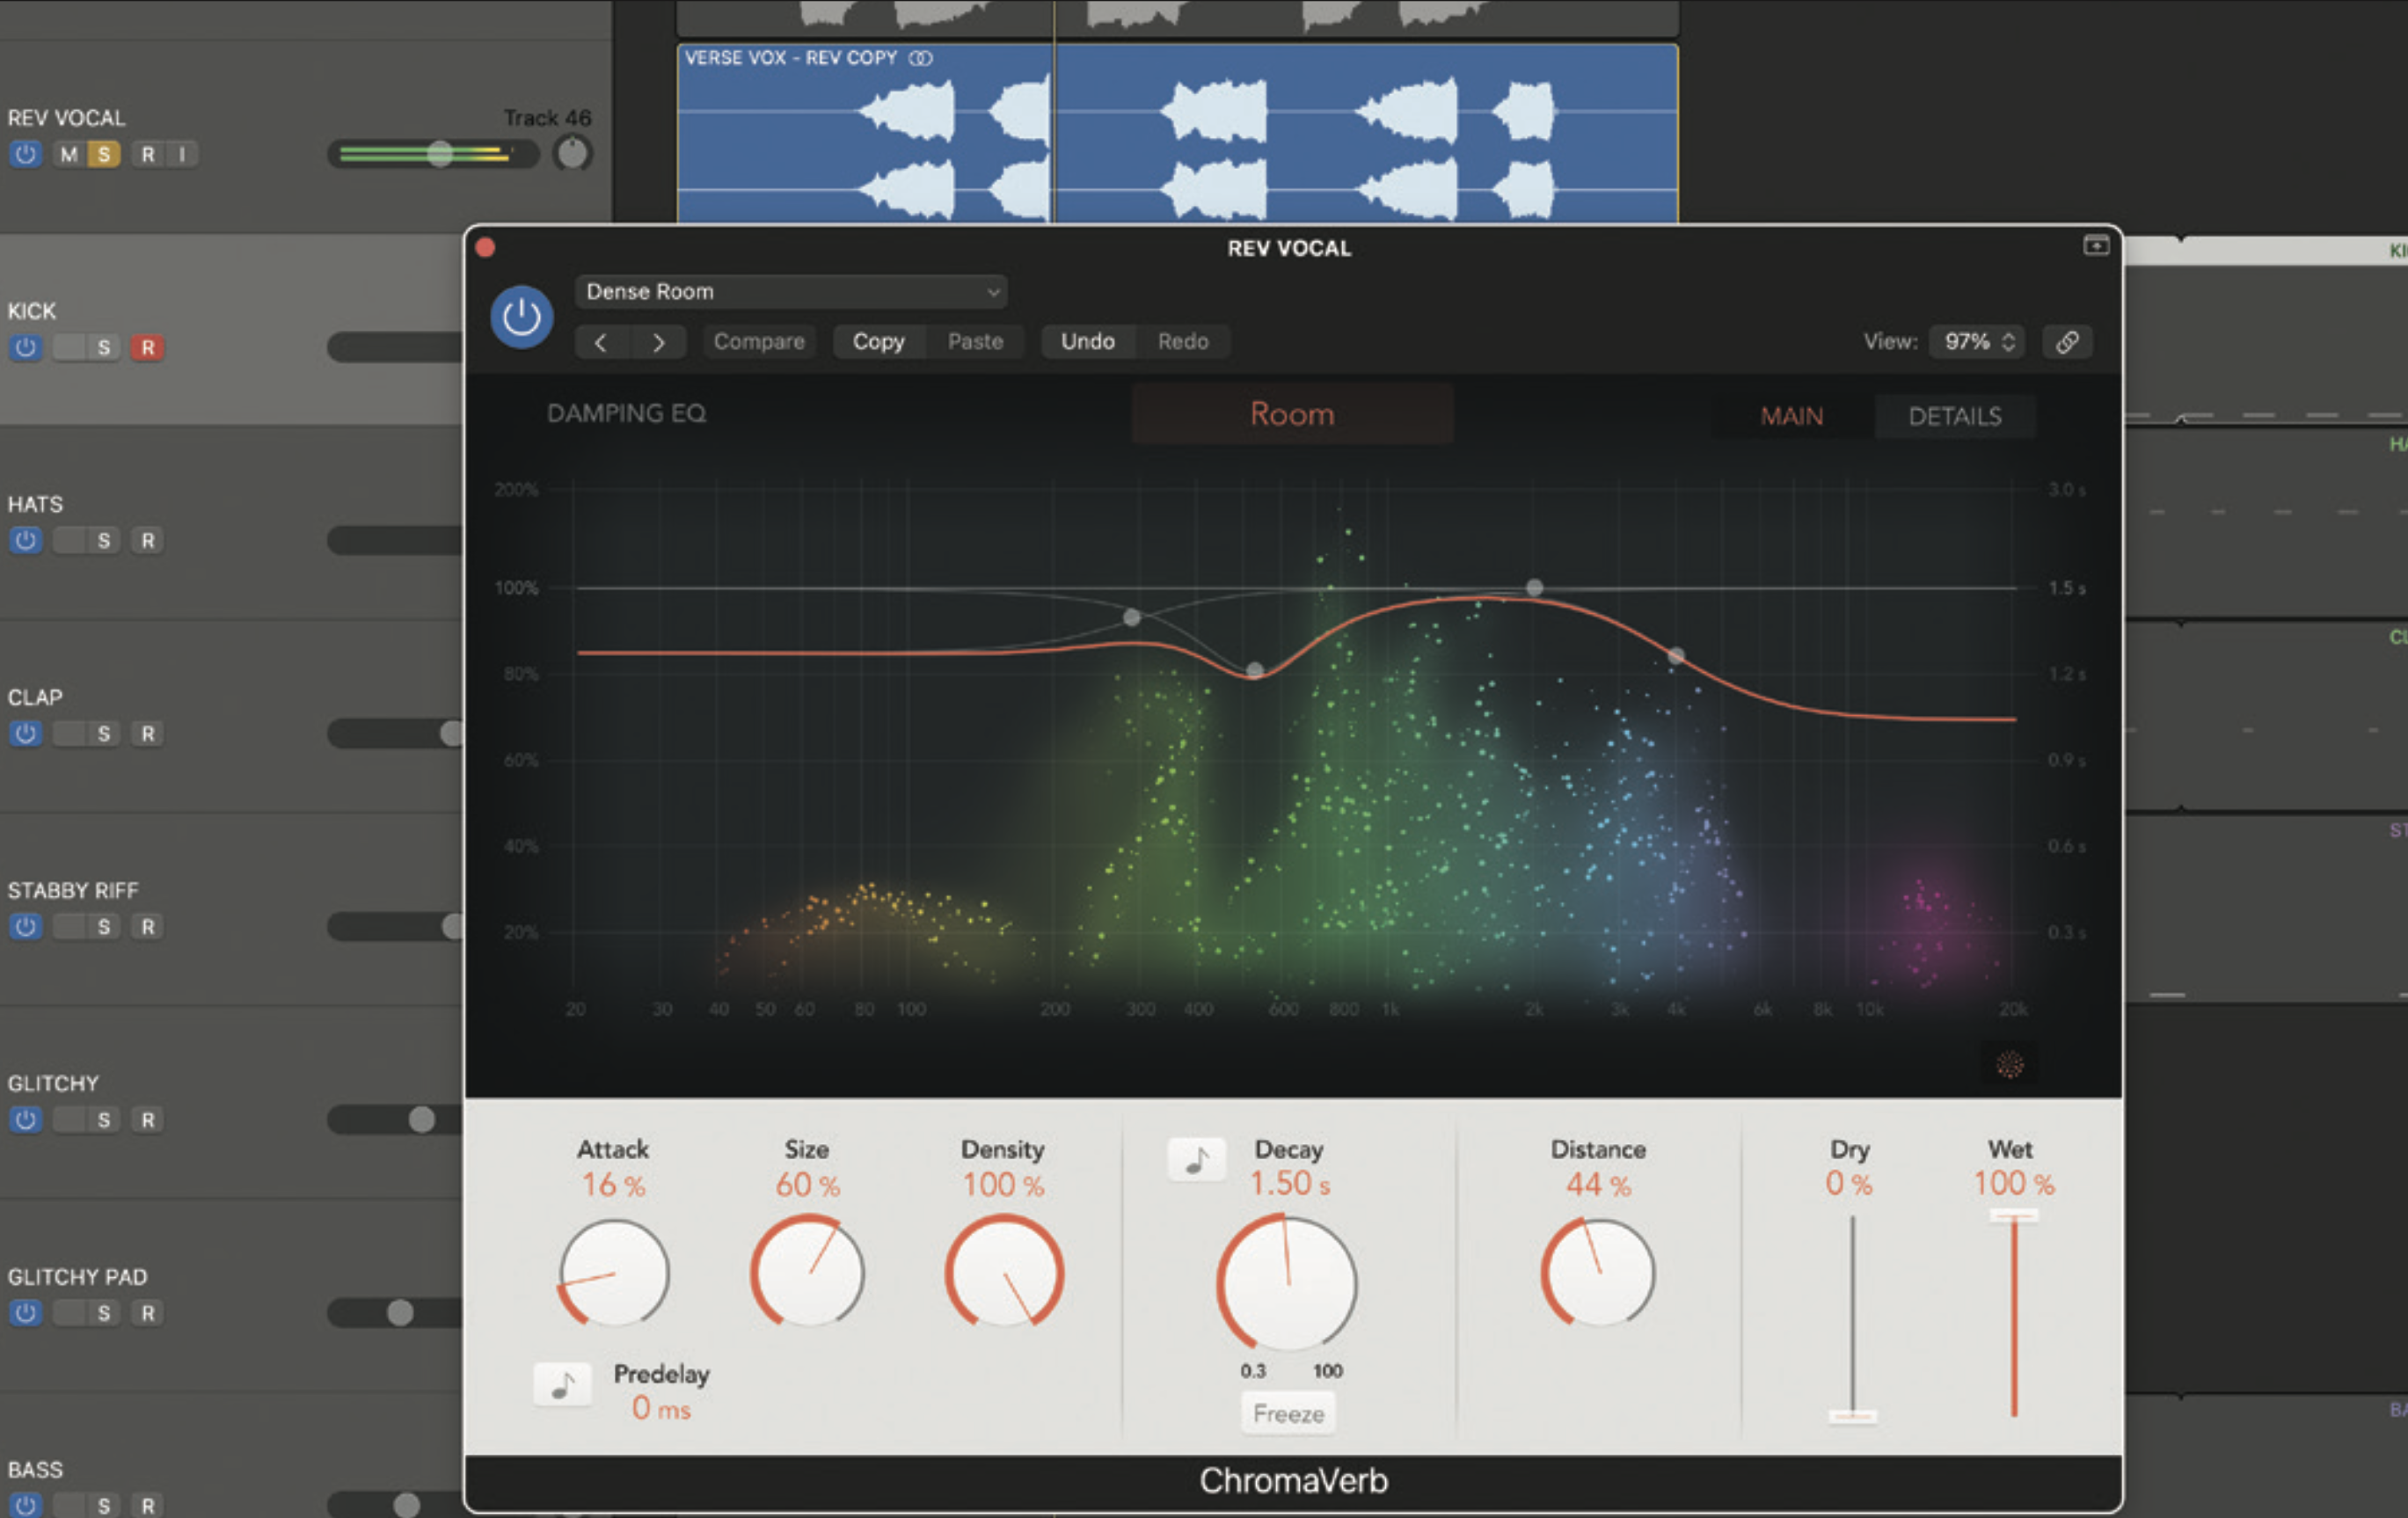
The type of reverb used will depend on what type of effect you want to create, but in general terms, long reverbs don’t work that well, as once they’re reversed, they simply take too long to build up. The most reliable option is a medium reverb with plenty of early reflections. Here we’ve chosen a medium room with 1.5-sec decay.
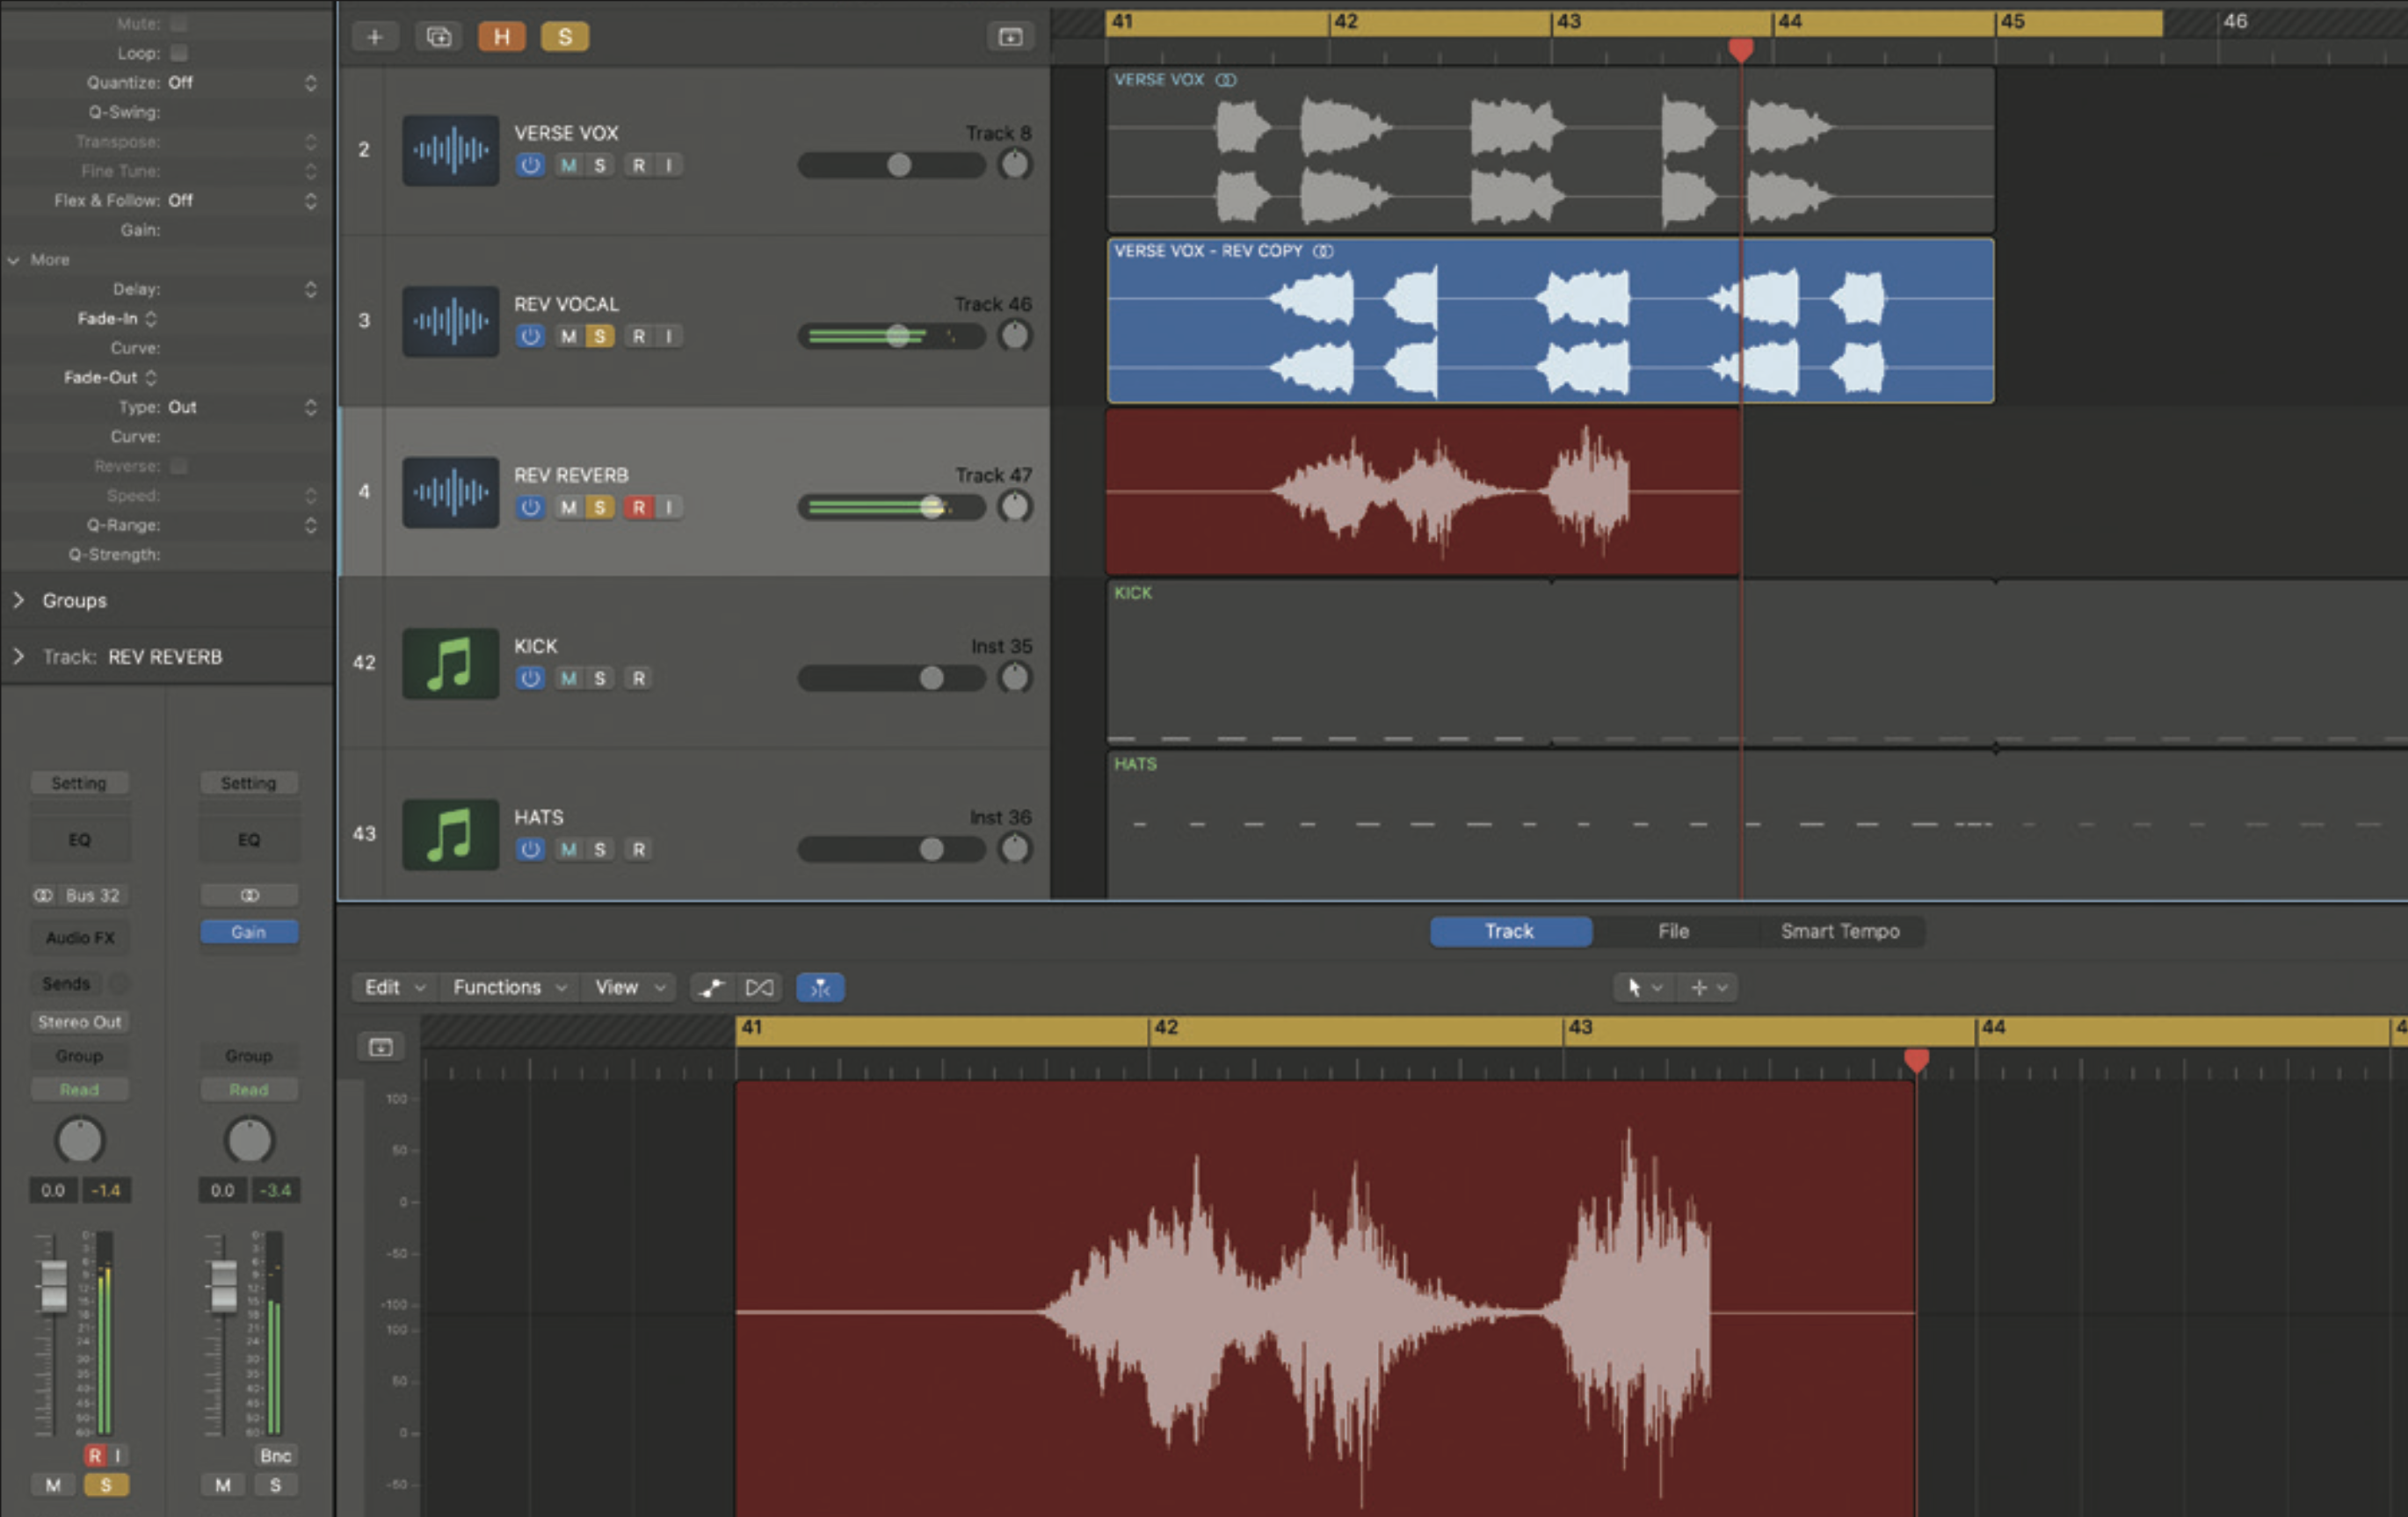
With everything set up, it’s simply a case of bouncing the reverb effect. As mentioned, make sure you’re only bouncing the effect and not the source, as you’ll balance the source and effect in the next stage. Import the effected audio and reverse it. You should have a backwards-sounding reverb.
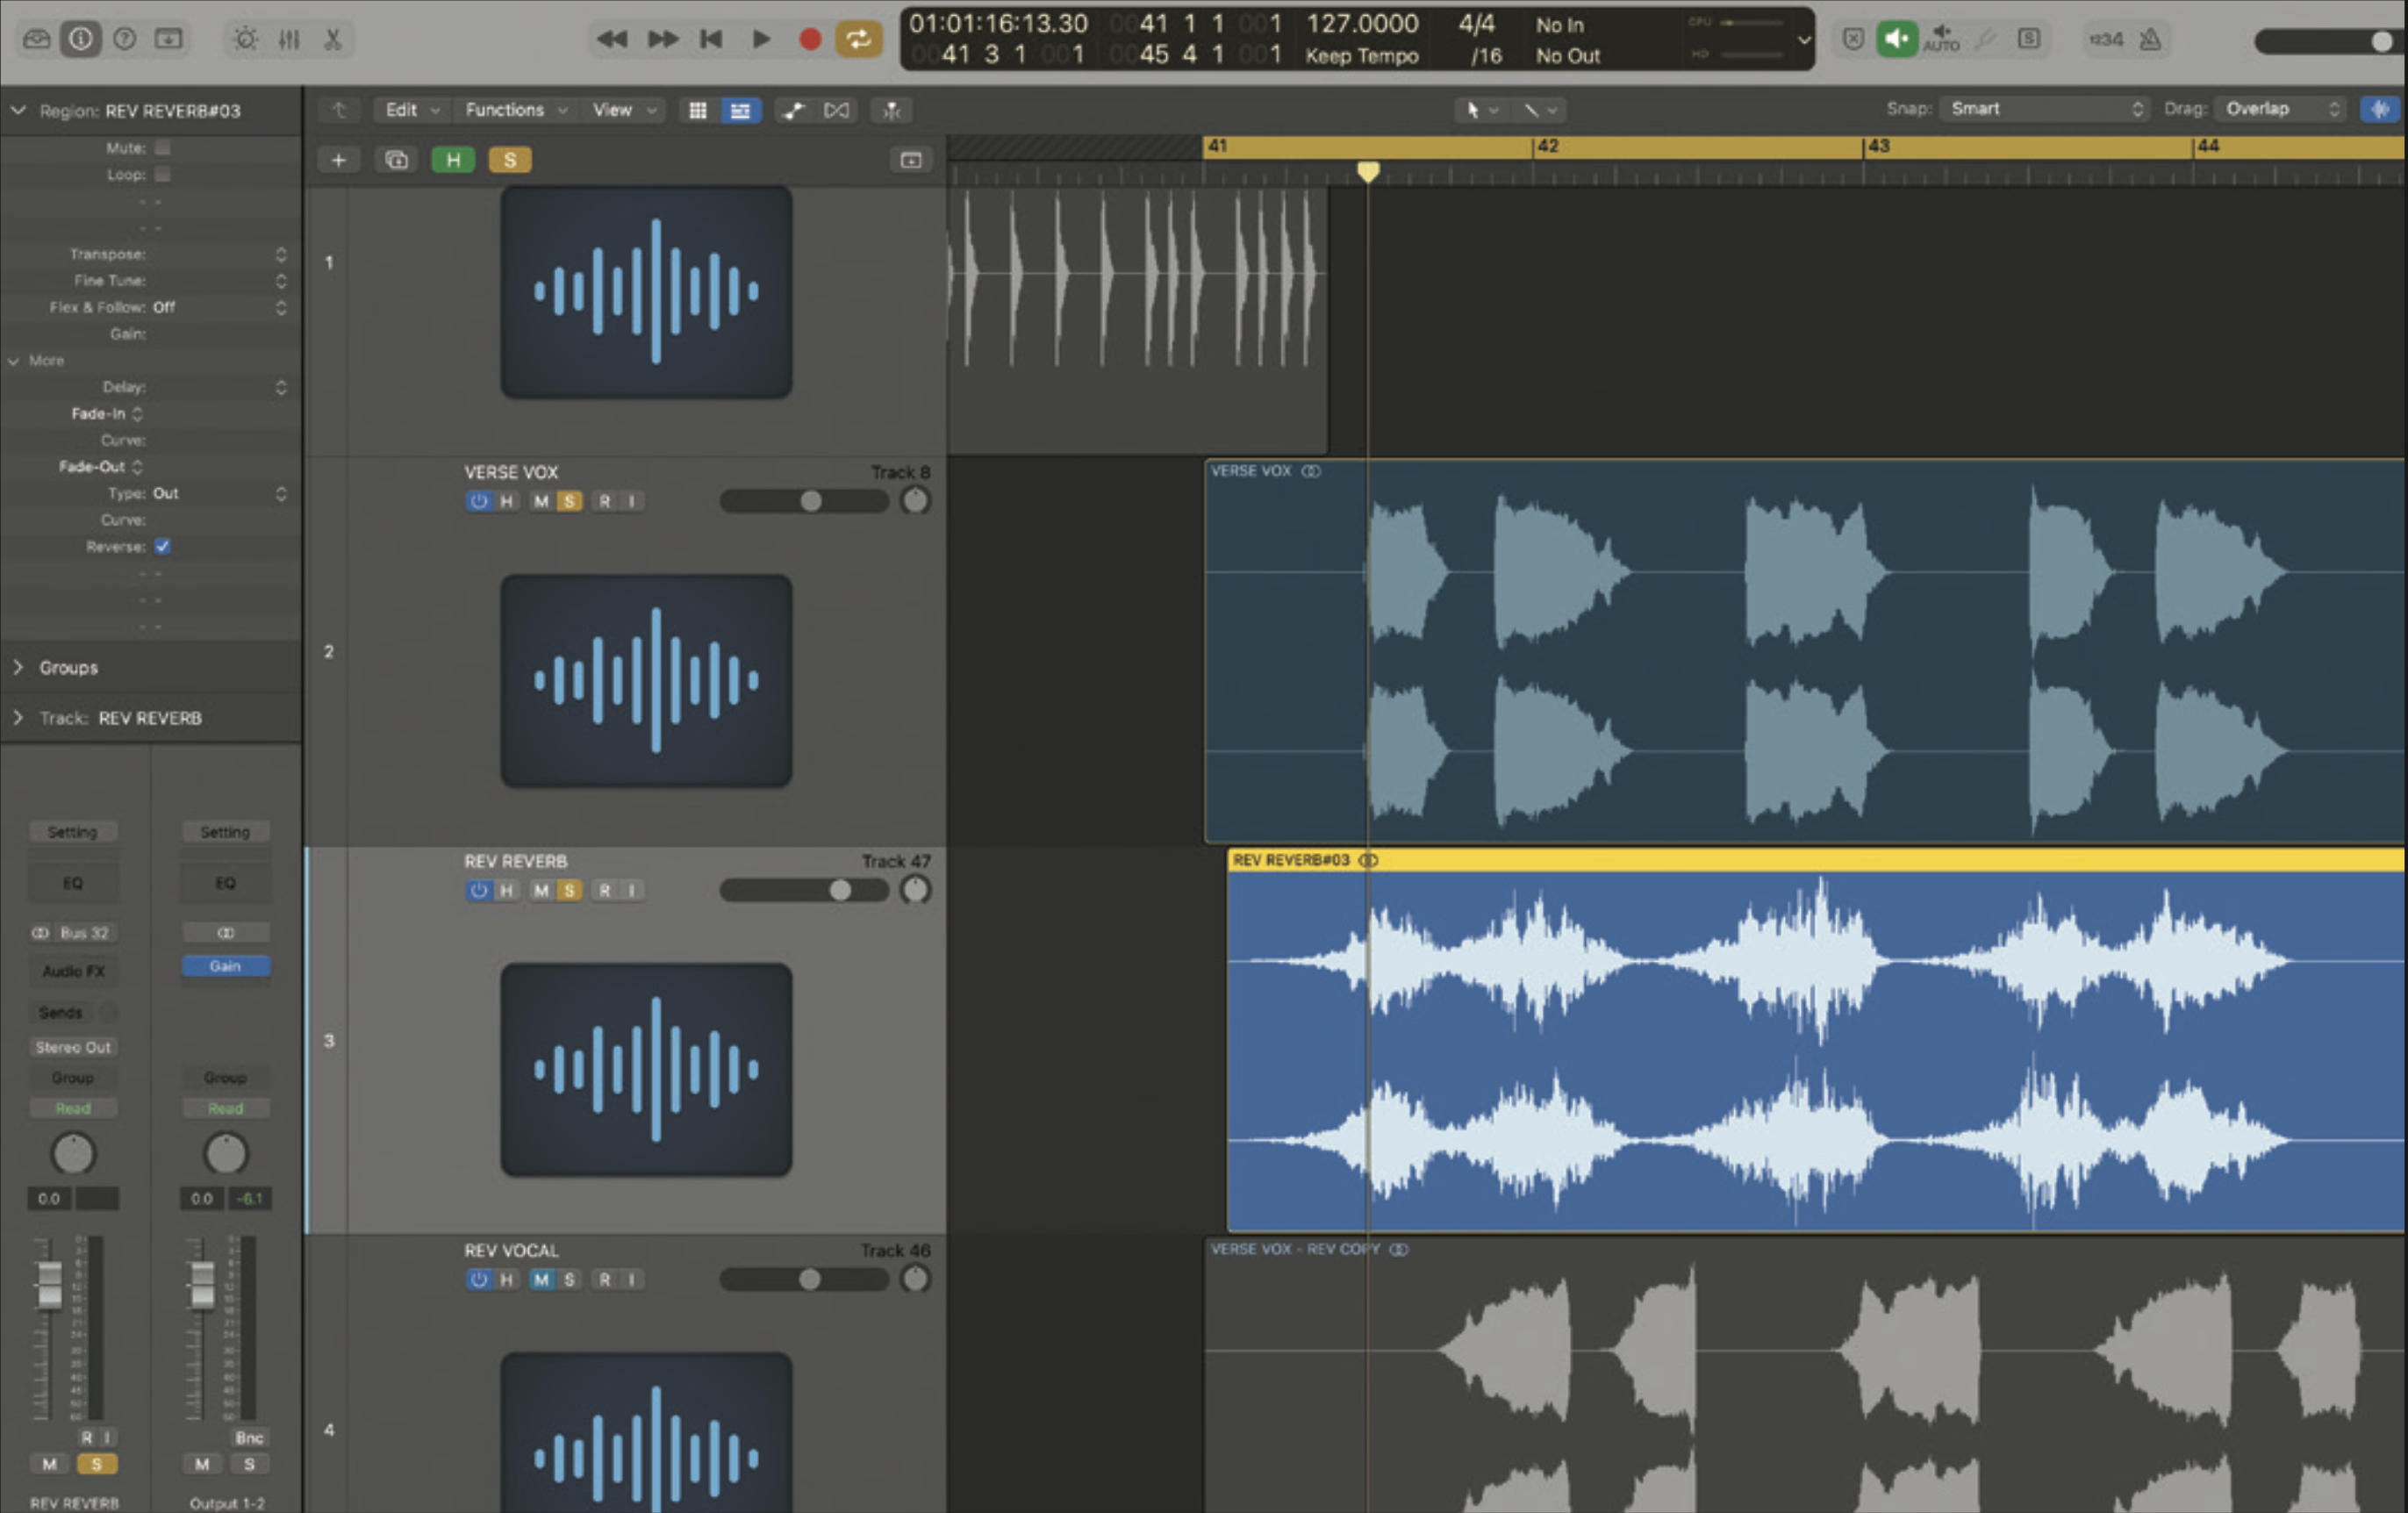
Now return to your original source audio and line up the reversed reverb audio. Find the final decay section, which will now be at the beginning of the waveform, and move the file so this peaks at the beginning of your source audio. We’ve done this above, and you can see that the main body of the reverb is louder.
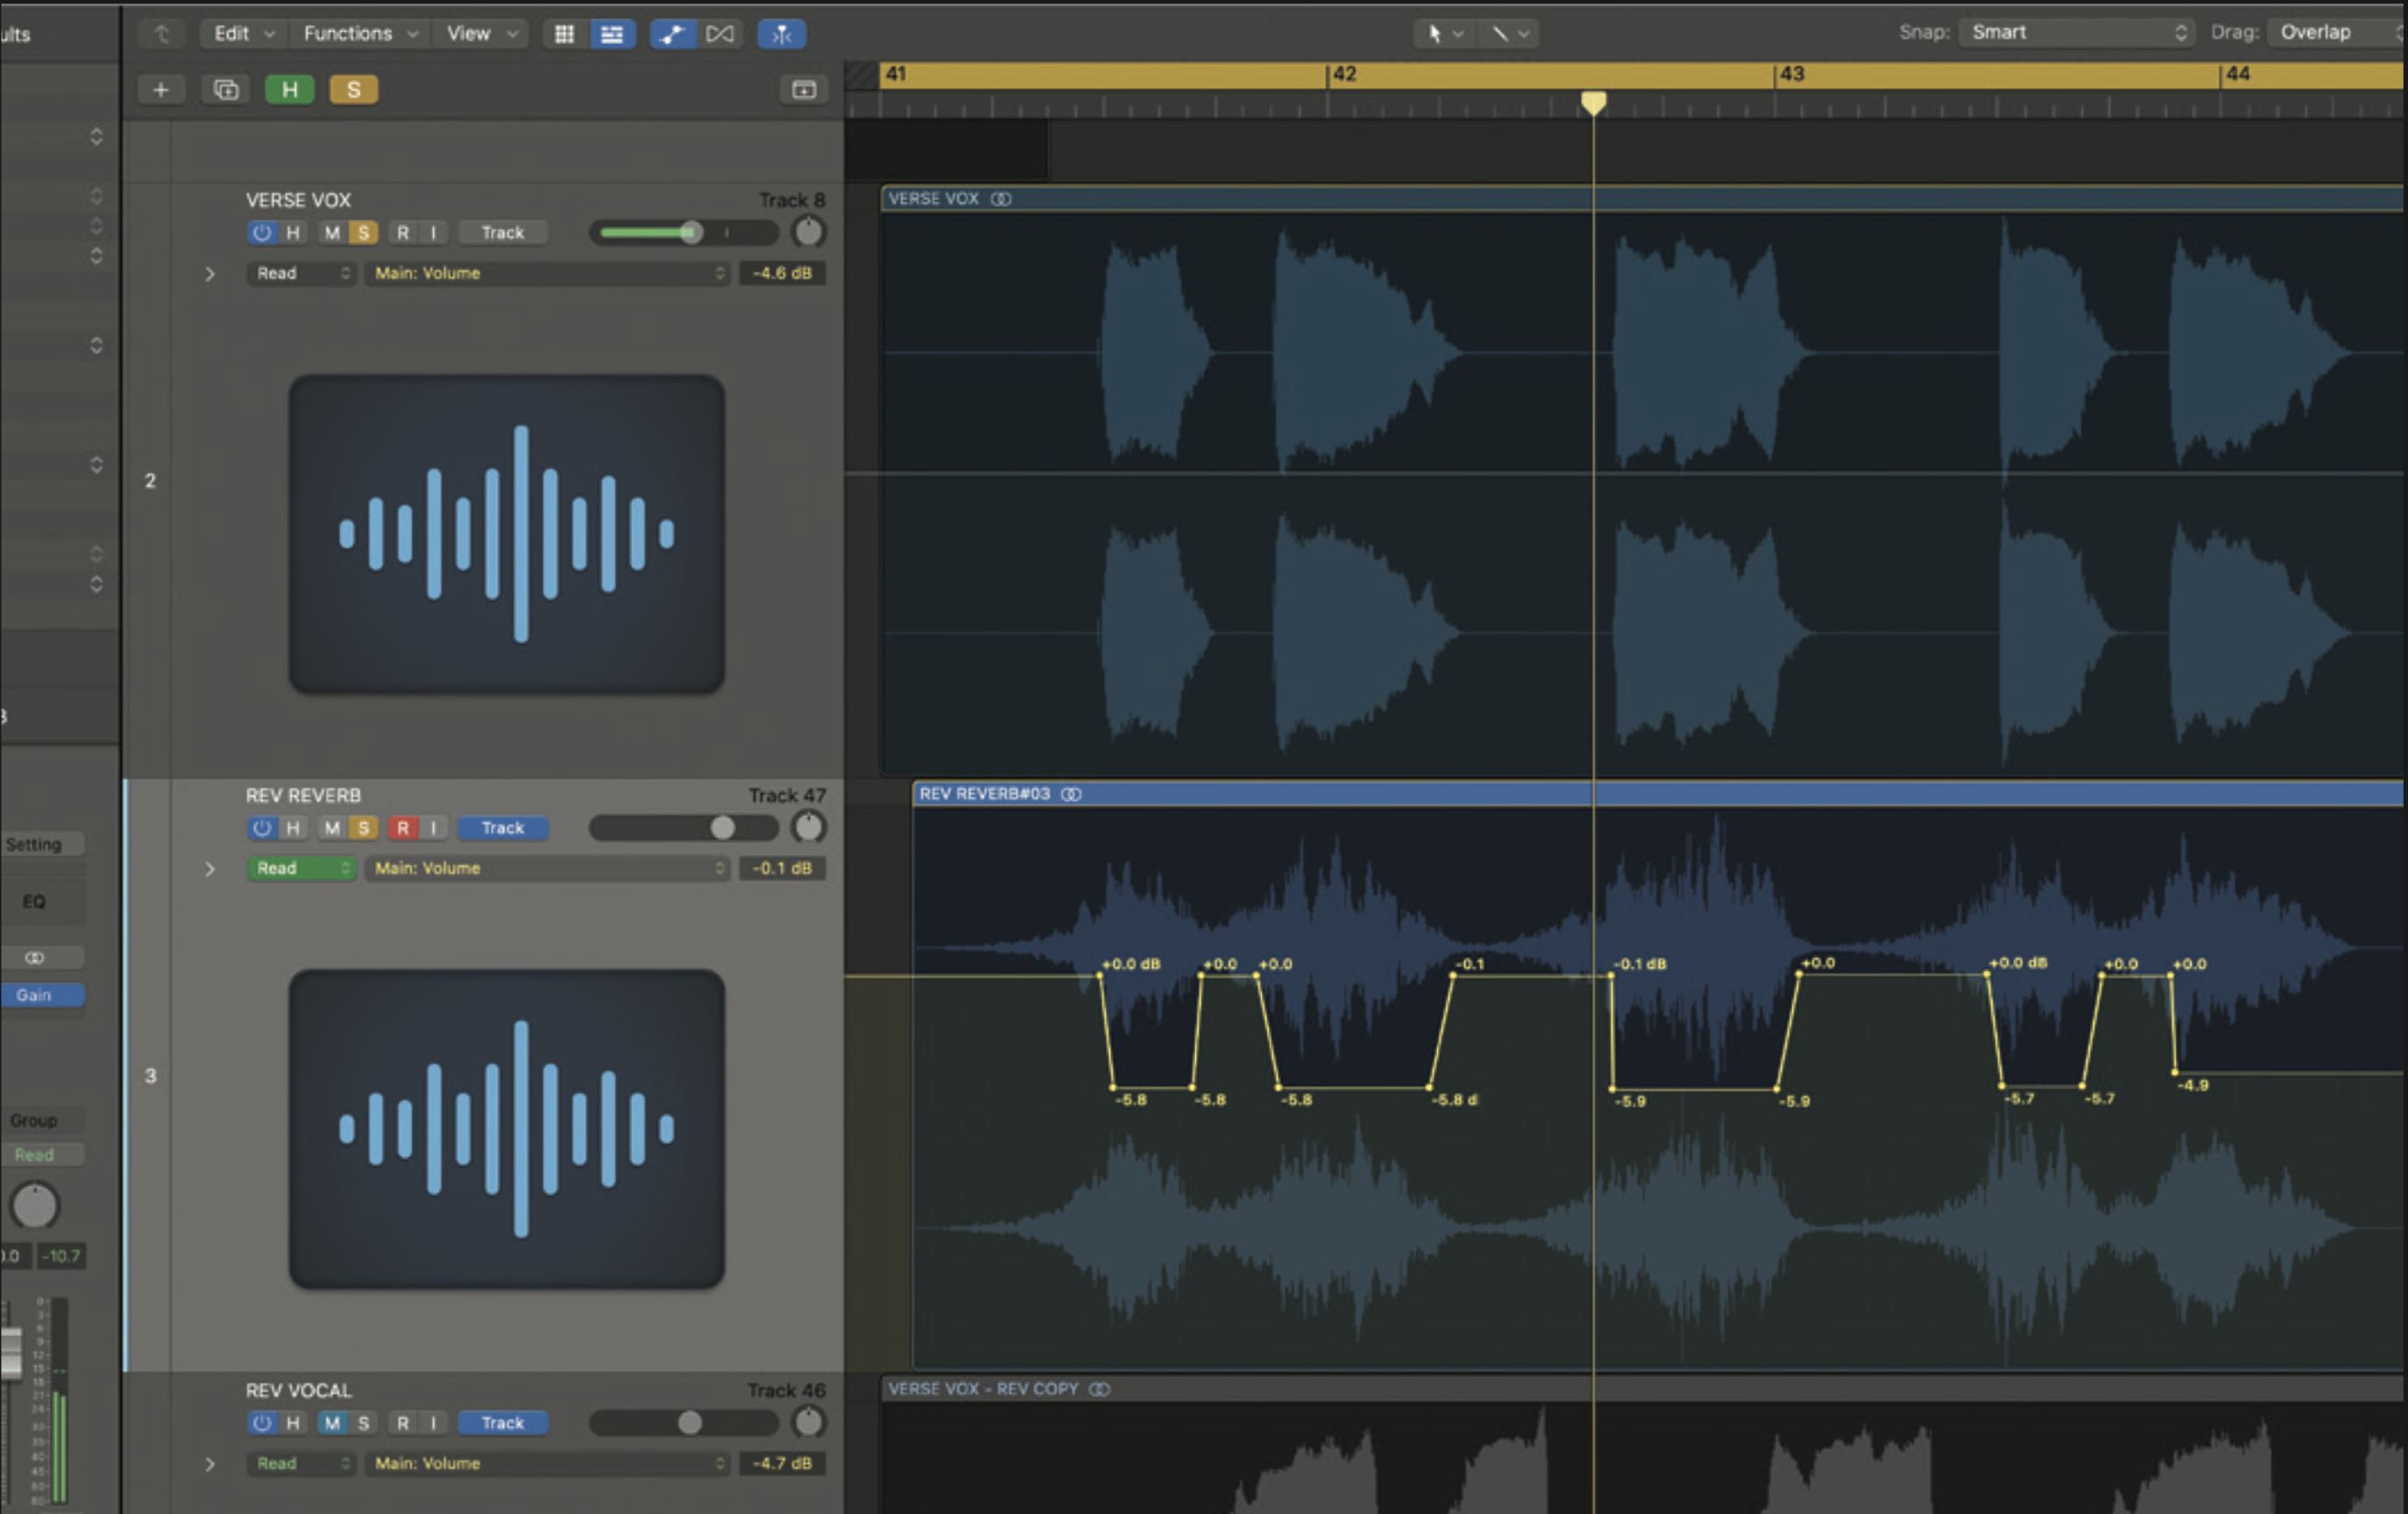
The effect works best where there are gaps between the source so you can actually hear the reverb lead in. Also, you probably don’t want to hear the reverse reverb elsewhere. To that end you can potentially remove those sections altogether, or as we’ve done here, use automation to ride the levels accordingly.

