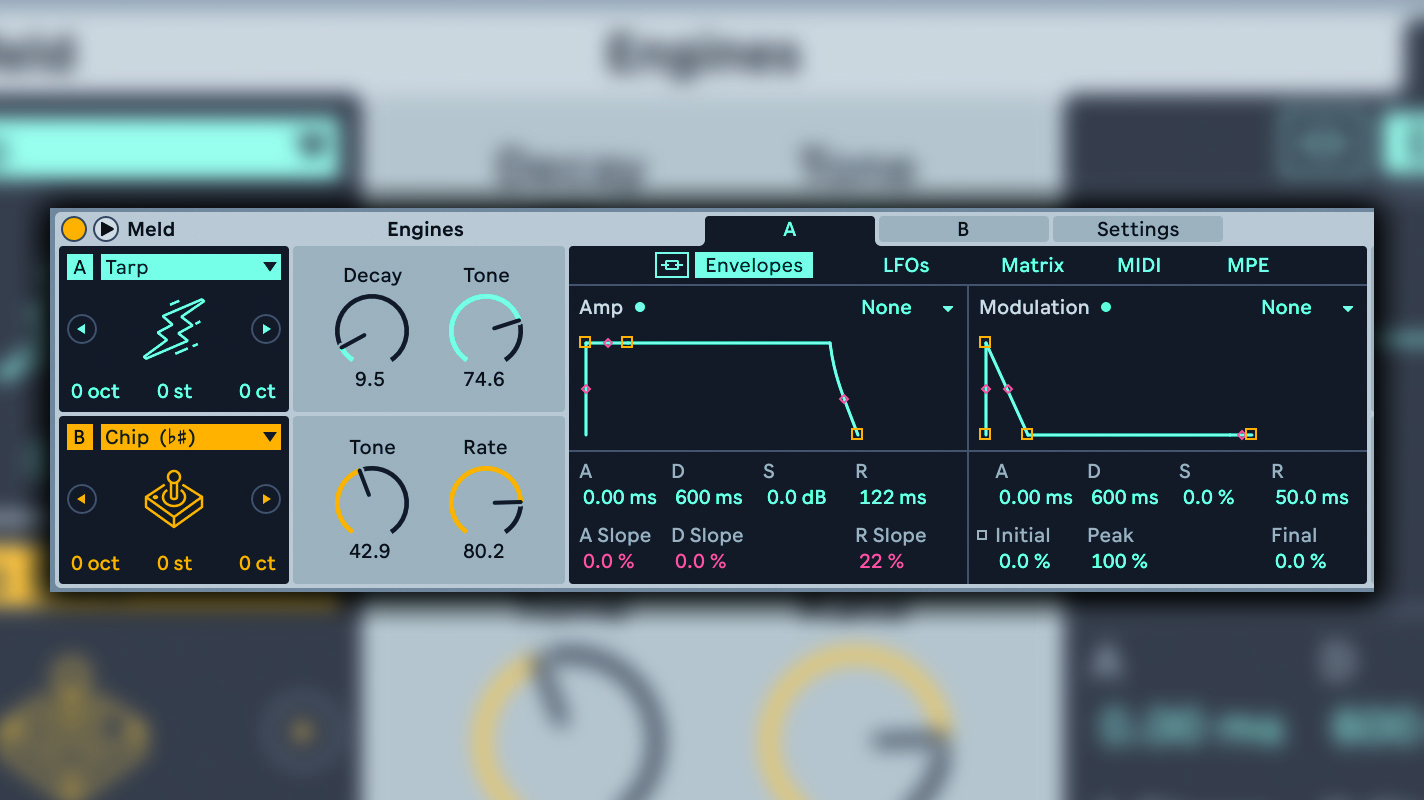
If you are as excited by the latest Ableton Live 12 update as we are, then you will have doubtless heard about its synth star, Meld. This fantastic, characterful instrument is capable of a wide range of tones and some amazing evolving textures, and is a huge highlight of Ableton's latest release.
Meld is a bi-timbral macro oscillator synth that has a character all of its own, not to mention the ability to sound like many other synths. In fact it is one of the most flexible and wide-ranging synths that we have come across. It can be explored and played on any level you wish, and could become yet another bona fide Ableton classic.
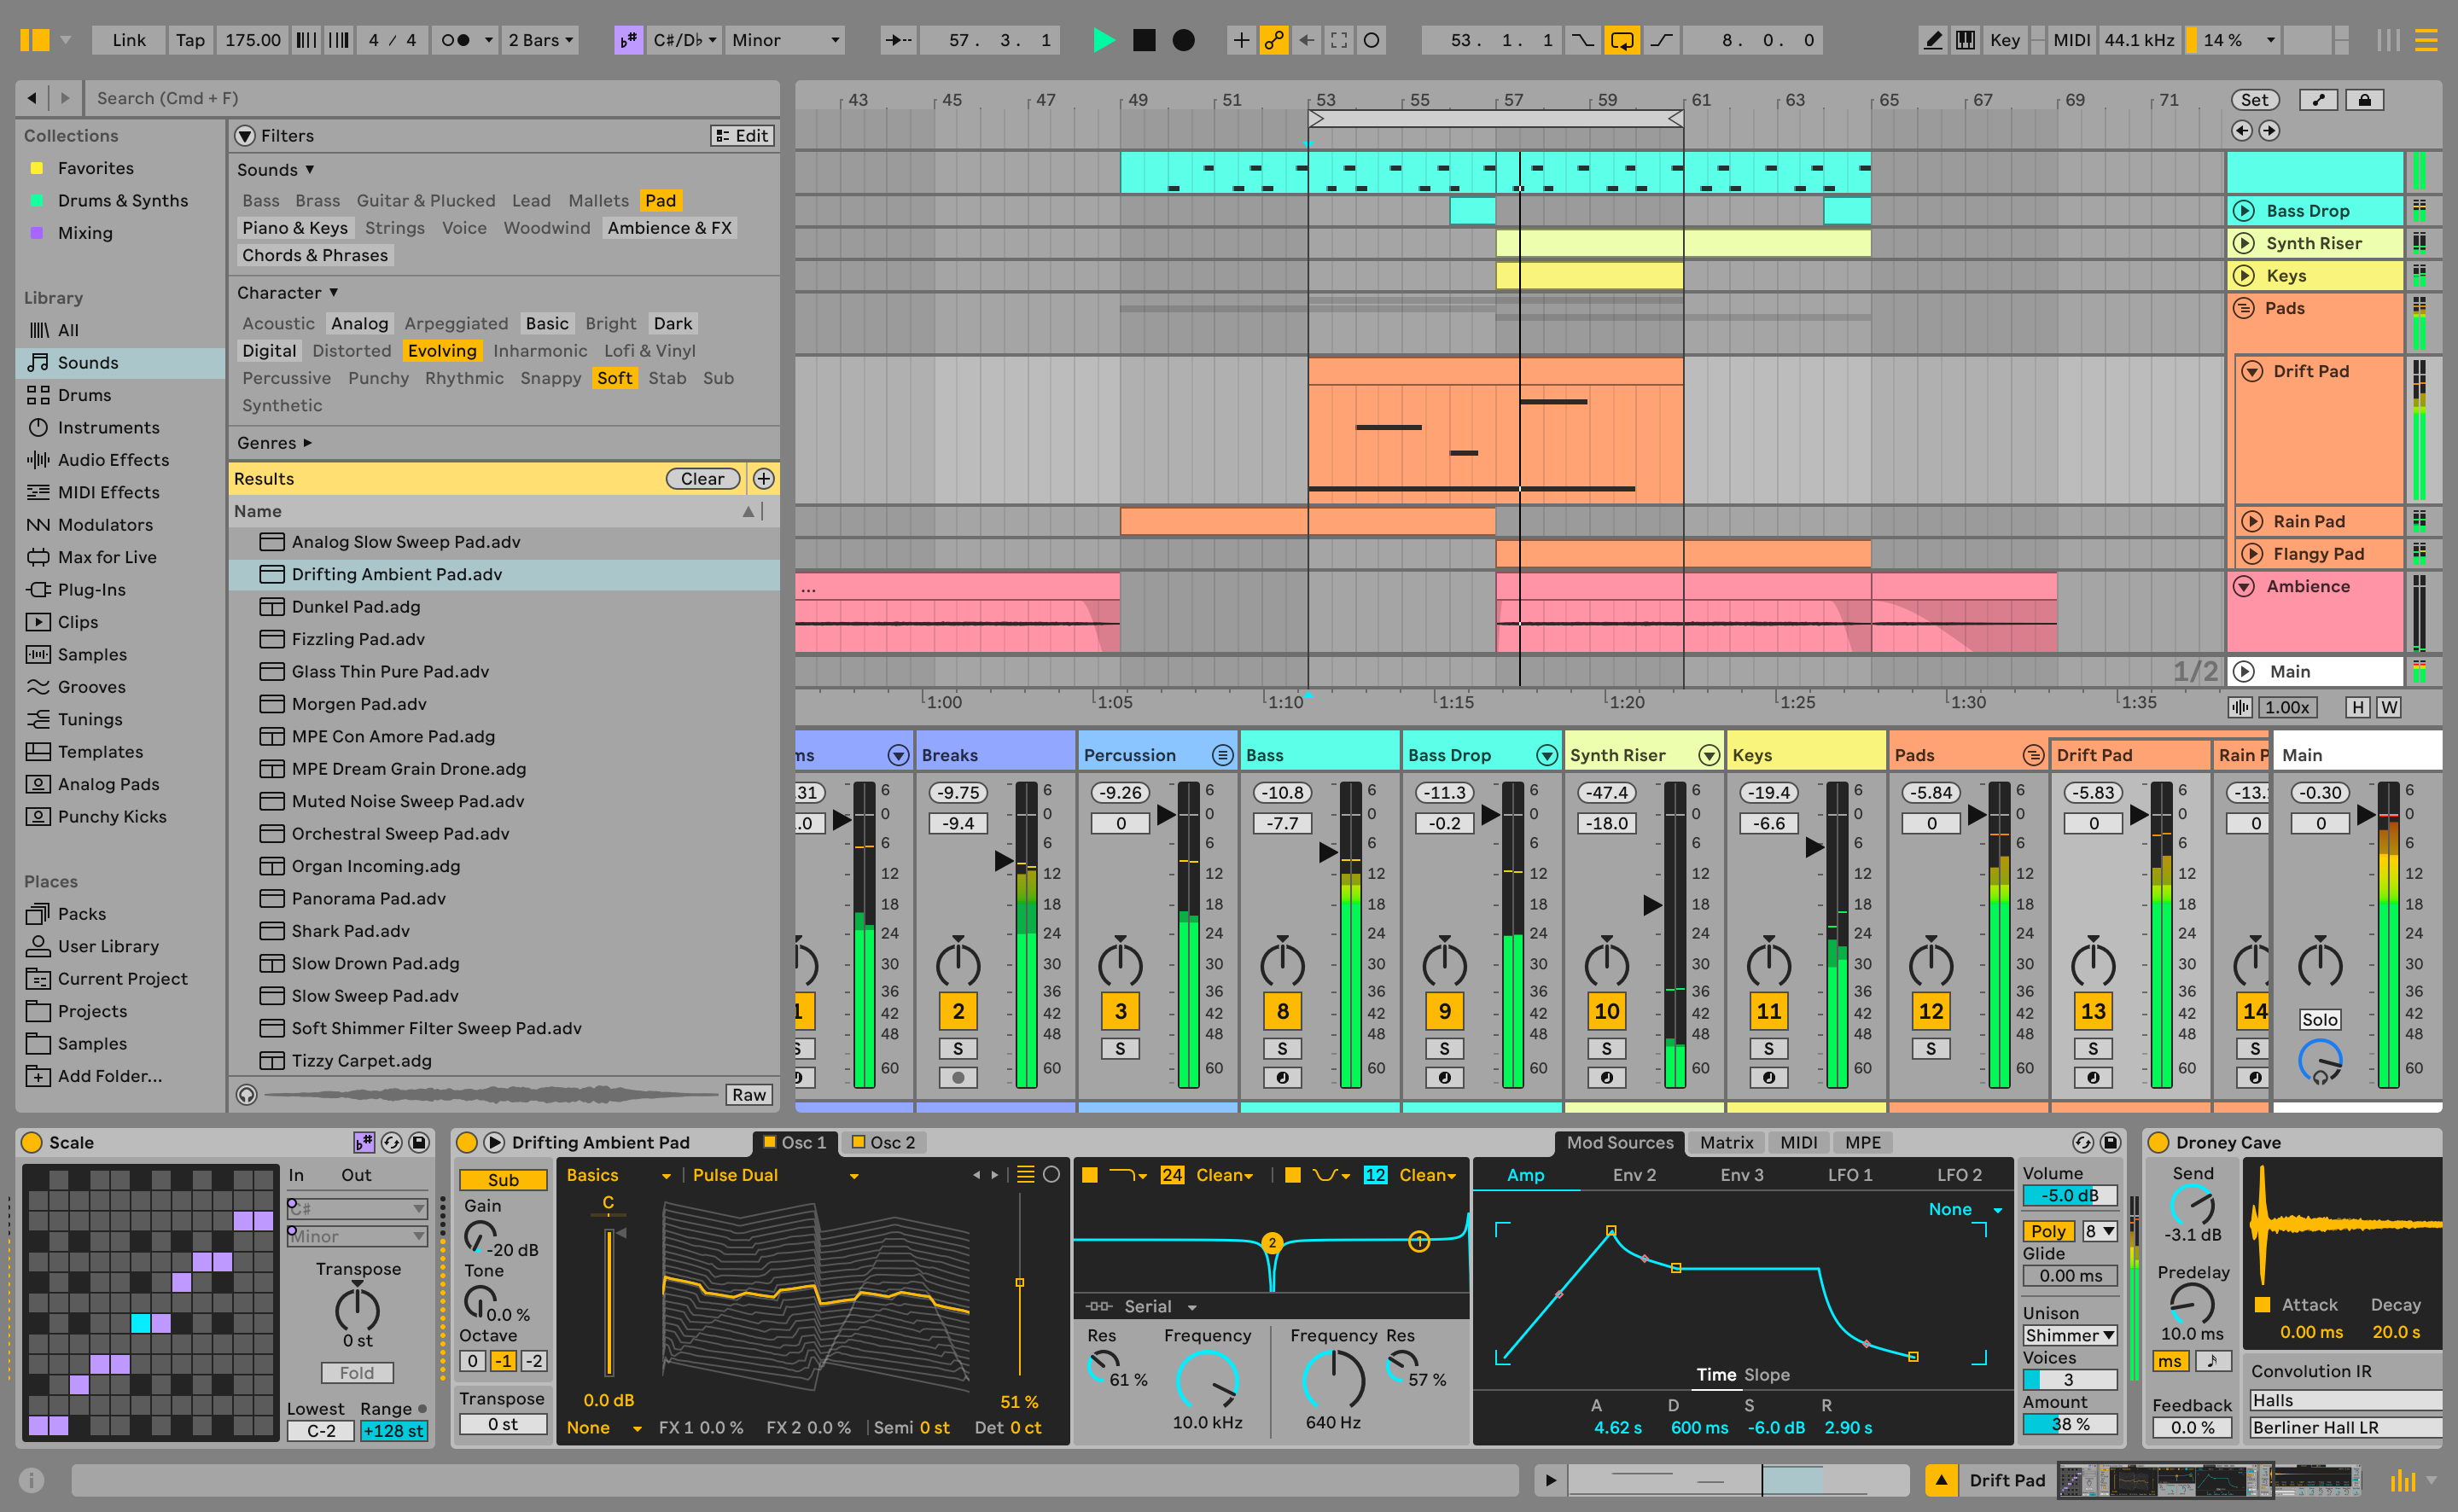
We've been testing out Ableton Live 12 for a month - here's what you really need to know
This in-depth guide looks at all aspects of the synth so you can get to know this new member of the Ableton family and discover why it's one of the best reasons to upgrade to version 12 or even, dare we say, buy into the whole Ableton Live lifestyle if you are not already a user.
The basics
At the core of Meld is a bi-timbral synth, where you can select different engines, Oscillator A and B, in two slots as your core ingredients. These macro oscillators can be very different beasts, so much so that loading one in can change the parameter types of the right-hand macro controls associated with each oscillator.
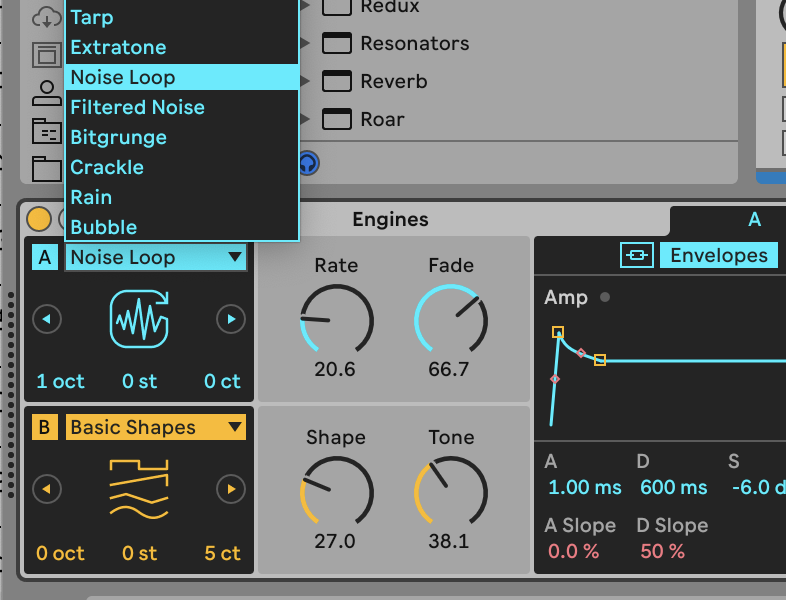
In some instances, just a single engine acts and feels like a full synth plugin – some of the engines are almost like full VA or FM synths, for example. And when you blend the two together to explore that full bi-timbral power, you begin to understand just how powerful this plugin is.
If that all sounds very straightforward, it's because it is! That's the beauty of Meld
Each of the oscillators, A and B, has its own amplitude envelope, modulation envelope, and a couple of LFOs, all located to the right of the macro controls. To the right of these you get a wide range of filters per oscillator, then a panel to mix the two. Finally on the right you get a few controls to set up global parameters, add some drive or alter volume.
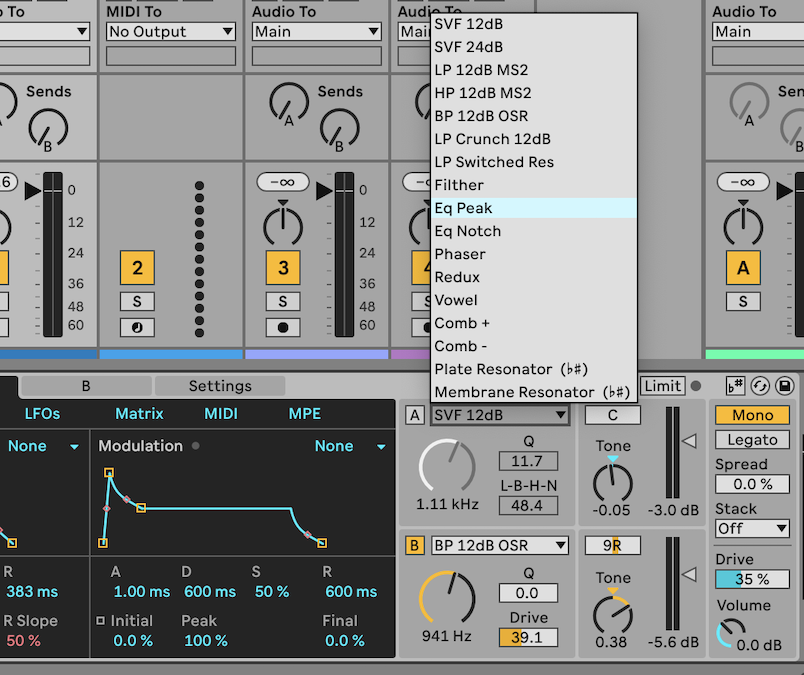
If that all sounds very straightforward, that's because it is! That's the beauty of Meld. You can simply use the synth on this level, in a very basic way, just mixing and matching those oscillators to get a wide range of sounds. Then using the extensive filters, you can quickly introduce some movement into the sound by selecting a filter option like Plate Resonator or Phaser from the 17 types available, which introduces some neat distortion and flanging effects when you shift the main frequency dial.
Where Meld excels, though, is with its modulation capabilities. You can start off simply by using the two envelopes and LFOs as modulation sources and then clicking the third option, the Matrix, which shows them as the sources along the top (left to right) with destinations running down the left, from top to bottom.
You simply map the source to destination by clicking and dragging a cell where they join. Here we've connected the modulation envelope and LFO1 to the filter frequency and they are modulating that by 33 and 3.1 respectively.
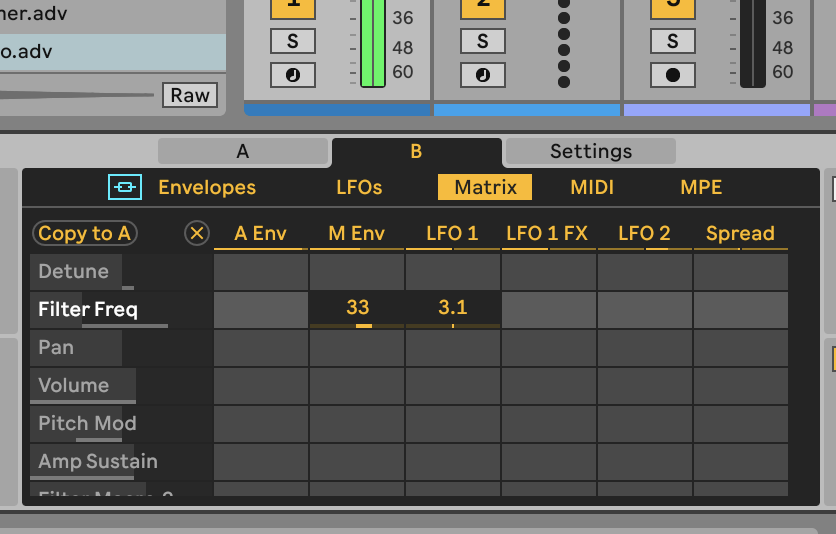
In this way you can set up fast modulation connections, but it gets much more interesting when you start going deeper, which we will in our tutorials below.
Meld also has one or two tricks up its sleeve, including a secondary set of effects on LFO 1, that can also be seen as a source, and an option to expand the plugin (by hitting the triangle indicated with the red square in the screenshot below) so you can see the modulation Matrix in its full glory with both expanded sources and destinations.
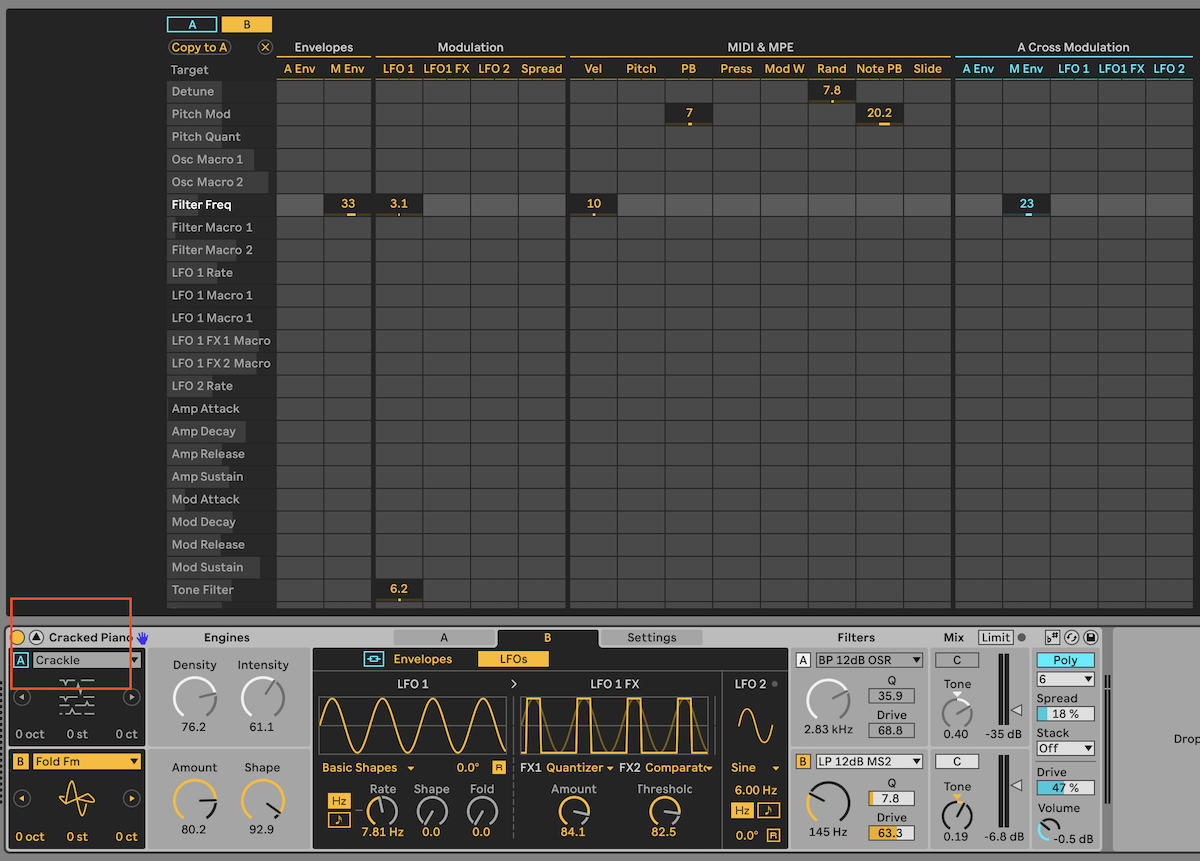
In the tutorials below we'll cover more on Meld's modulation and how you can transform some of its already dramatic presets into even more complex and evolving textures.
Three quick tips to get started
1. Start basic or bi-sic
If you are using Meld for the first time, simply explore it's bi-timbral engine using the drop-down (actually pop-up) menus to change oscillator shapes and waveforms. Experiment with these combinations to get a feel of what they offer and also their macro controls which will change depending on which one you load up. You can do a lot of sonic tweaking even on this level.
2. One at a time
We'd also recommend just using one oscillator, A or B, at a time with Meld to start with. You'll hear exactly what is going on without the second oscillator distracting you, so can be more focussed and start to learn what each element does when you start to explore the Matrix area and modulation possibilities.
3. LFO1 FX are great - use them!
We thought this might be a gimmick at first but, as we see below, the effect slots for LFO1 really do provide another layer of character – several actually – that take the modulation up a few notches. This is really worth experimenting with once you get into Meld modulation, which we're just about to do.
Mad Meld modulation
As we said, the modulation is Meld's biggest strength and as we explore that here, it's worth keeping the plugin in its expanded form. You now get some 23 targets including oscillator and filter macros that might change in their purpose according to the preset selected.
The expanded modulators include both envelopes, the two LFOs (including the rather great LFO1 FX) and Spread which is a +/- value related to the Spread parameter on Meld and often can be used to increase or attenuating the modulation level.
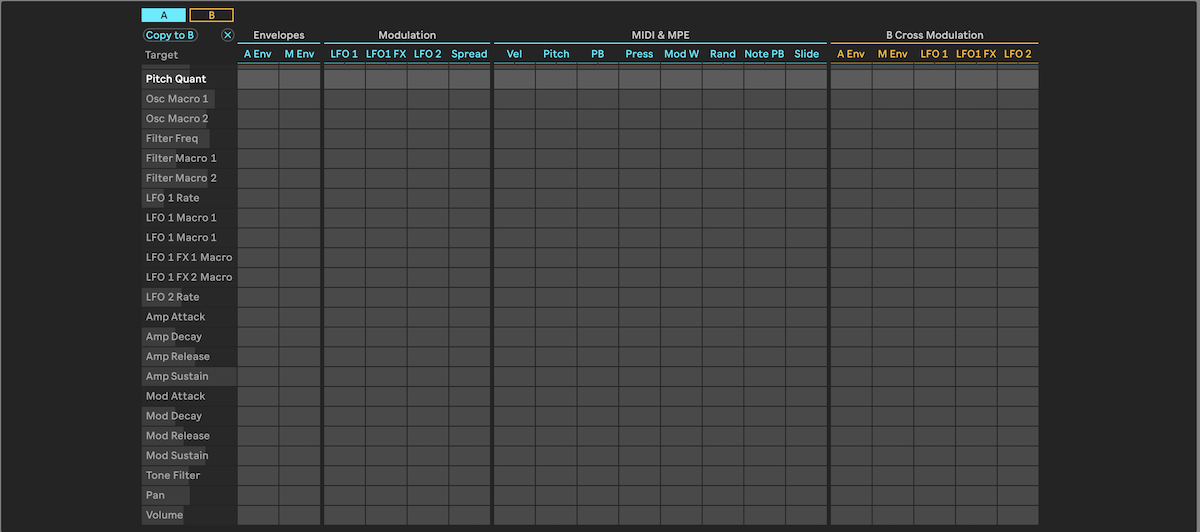
Also check out the expanded MIDI set of modulation parameters including the MPE Slide and Press options which will give you control by way of aftertouch and up and down sliding on an MPE compatible controller.
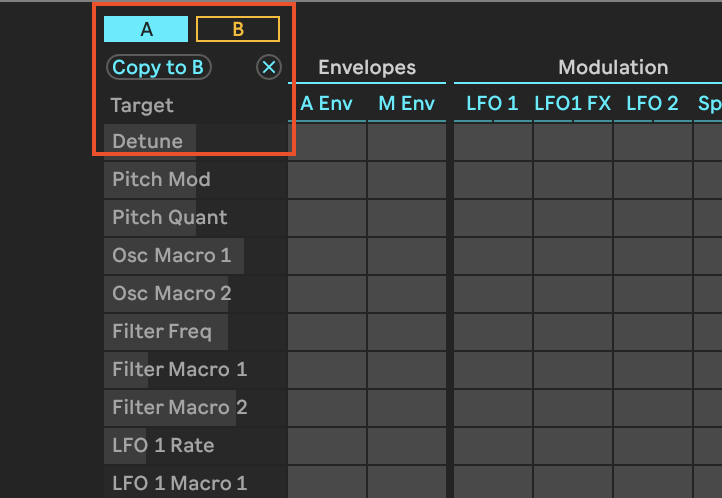
The three modulator sections we have discussed so far – envelopes, LFOs and MIDI/MPE – can be selected for each oscillator, with blue indicating Oscillator A and orange for Oscillator B. You can switch between these using the very top left icons as shown.
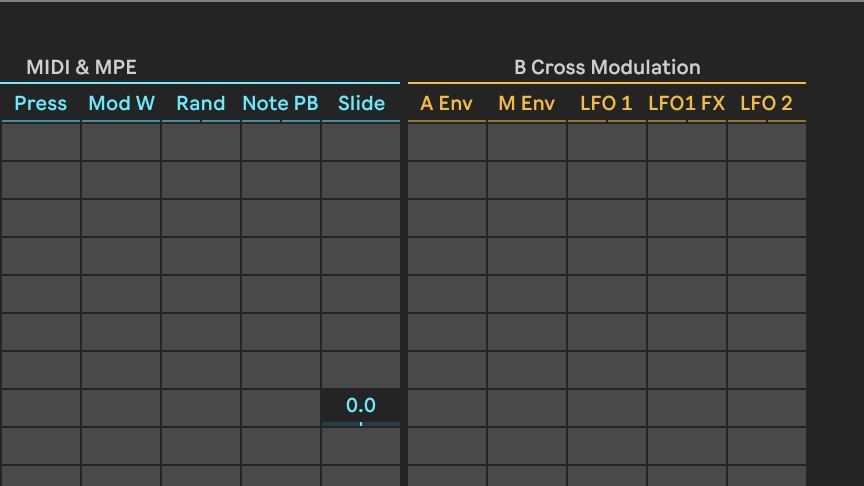
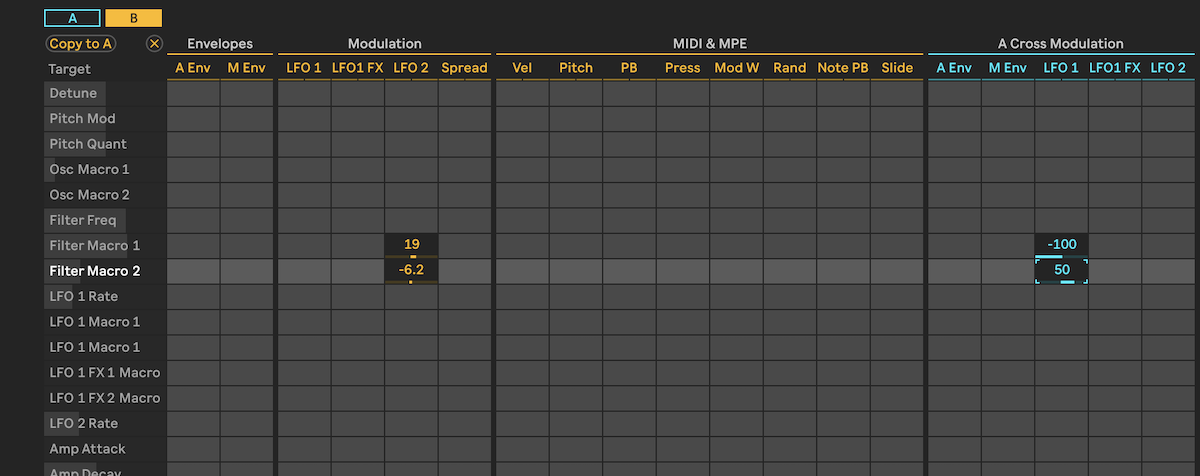
Finally as sources go, you can also cross modulate in Meld with the envelopes and LFOs of each oscillator available as sources within the other's. The far right column shows Oscillator B's cross modulation (orange) available in Oscillator A's blue mod matrix.
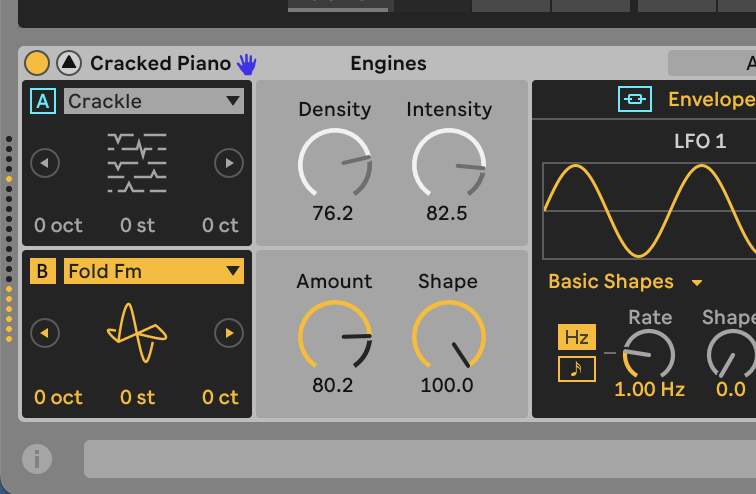
Now we'll go into some deep modulation. Select a preset like Cracked Piano where you can hear defined notes – nothing too outrageous. In order to hear the changes you make even clearer, switch off Oscillator A so we are only hearing Oscillator B. Click on the A icon to switch off Osc A and its box becomes transparent as shown.
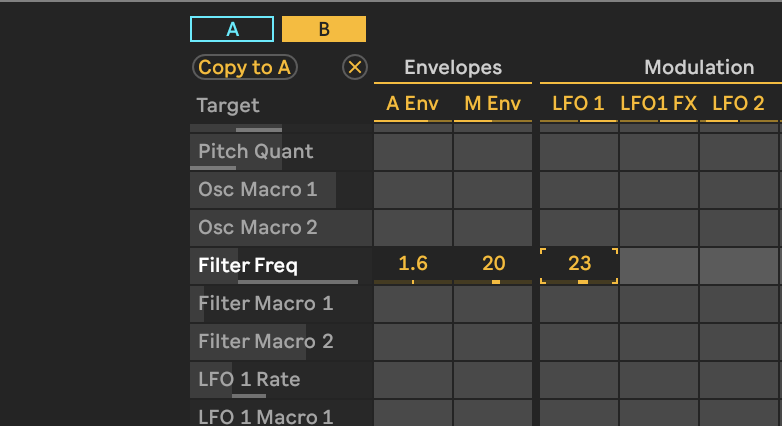
Now for something to modulate and, yes, we'll go for the obvious Filter Frequency as it is the easiest to hear in action when modulated. When you manually turn that knob (in our red square), note how it is highlighted in the Matrix in white as your target.
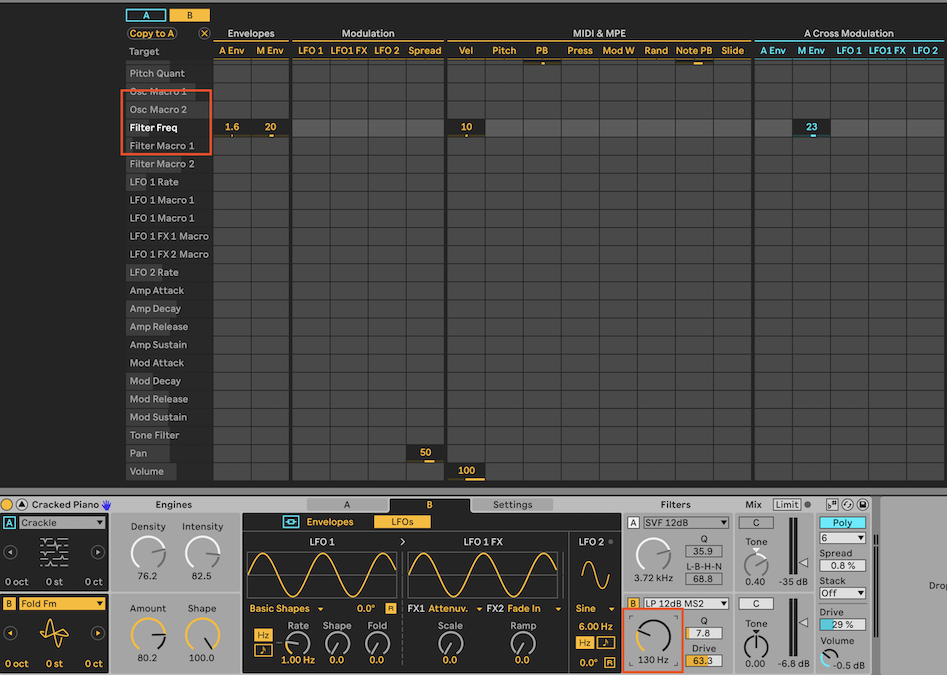
Click and drag up in the slot that links LFO1 to the Filter frequency and you'll hear the frequency rise and fall with the LFO as you play Meld.
LFO effects
Now let's turn our attention to that well-endowed LFO section. Adjusting the rate of LFO1 up and down obviously changes the rate of our filter frequency rising and falling. Keep this at 1Hz as it's very clear to hear. Then experiment with the Shape and Fold controls which give the pulsing more dramatic character.
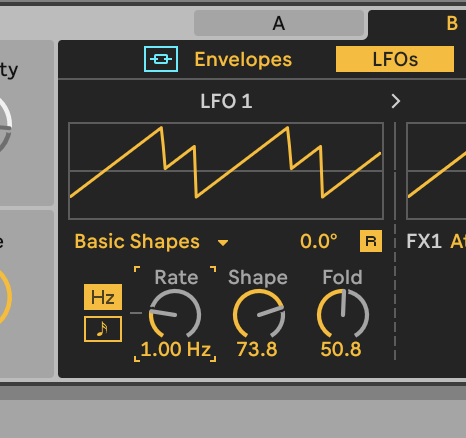
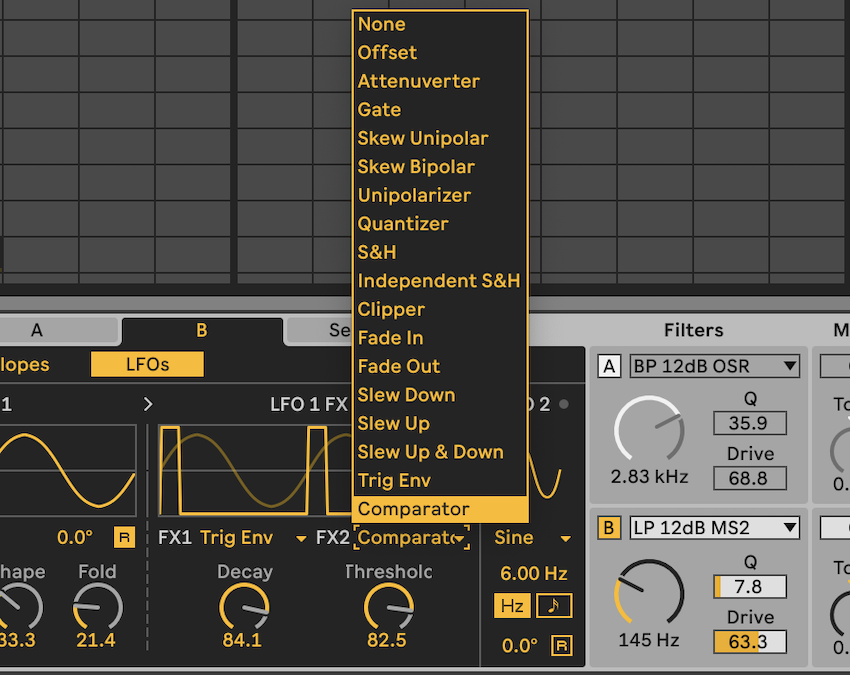
Reset (or undo) back to the simple sine wave pulsing so we can now hear how the LFO1 FX work. These apply up to two effects onto the shape of LFO1. The easiest way to hear it in action it to select a dramatic effect like Ind.S&H and maybe a slope effect in the second slot. Slow your original LFO down to make any changes completely audible.
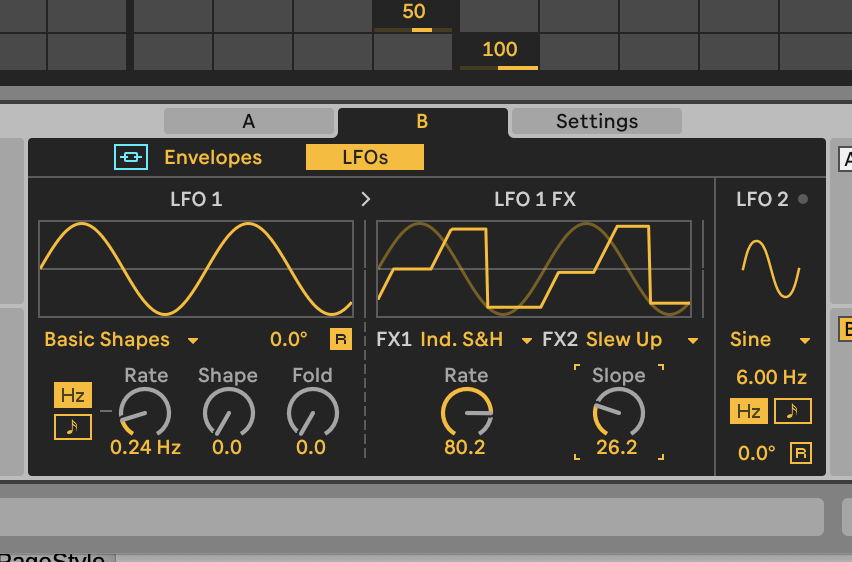
In this case you'll hear a juddering sound, and the impact increases as it cycles. Some of the effects are not as predictable as this, and you sometimes have to make sure to have one effect slot set to 'None' as one can cancel out the drama of the other.
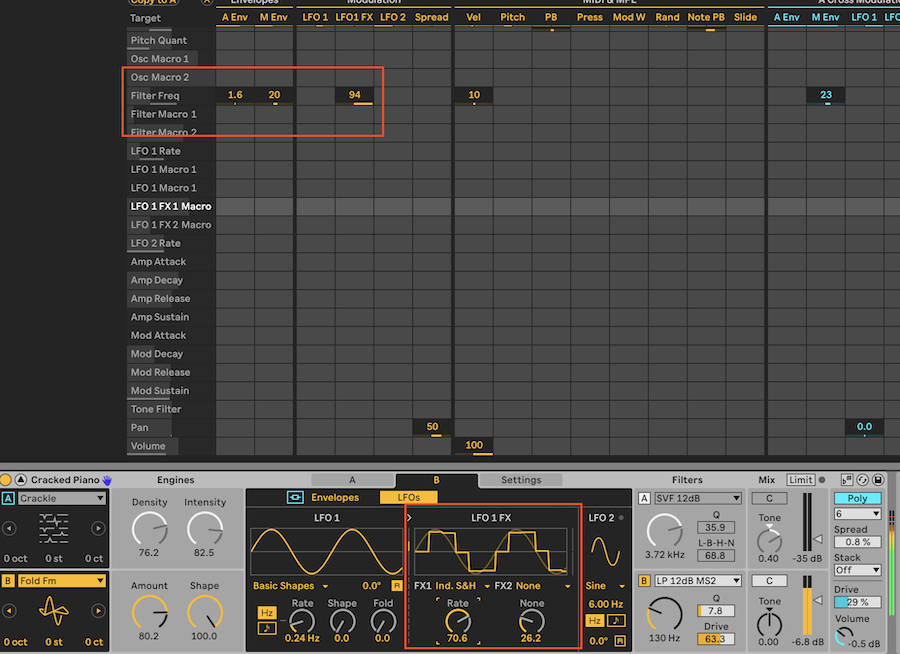
However, these effects are a great addition to Meld and remember that LFO1 FX gets its own source modulation slot so you can use any combination of these effects to modulate anything else.
Here we're using just LFO1 FX to modulate the filter and it results in a wild, shimmering buzz.
Advanced modulation
You can use these modulation principles to link any of the main sources with all of the destinations at whatever level you wish, so there's already a lot of modulation flexibility here.
The MIDI and MPE section is particularly useful to assign modulations for live performances, or to record automated tracks – say pitch or velocity changes over time.
The other interesting section in Meld is the Cross Modulation area which lets you apply modulation sources from one oscillator to another – effectively, you are modulating your modulators!
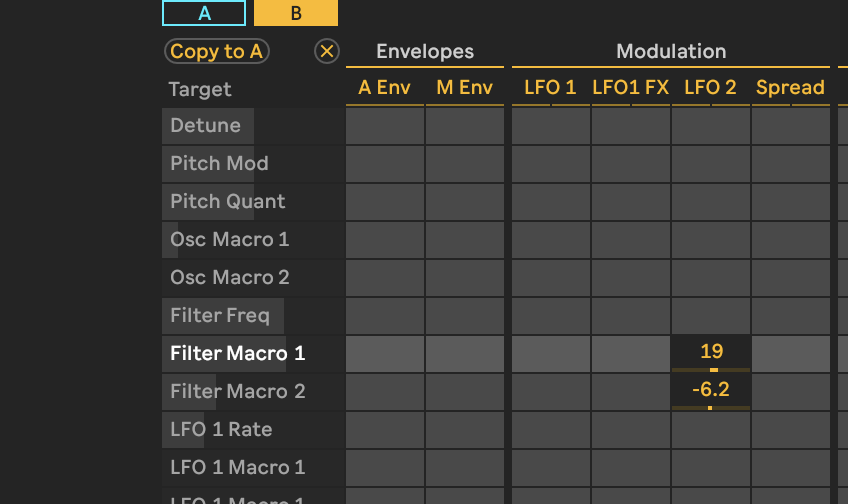
Here we have set up Oscillator B's LFO 2 – a more standard modulator compared to the FX-laden LFO1 – to modulate both of its Filter macros, which in this case are its Q and Lo-fi crunchy effect. Again we've kept the rate at 1Hz to clearly hear the effect.
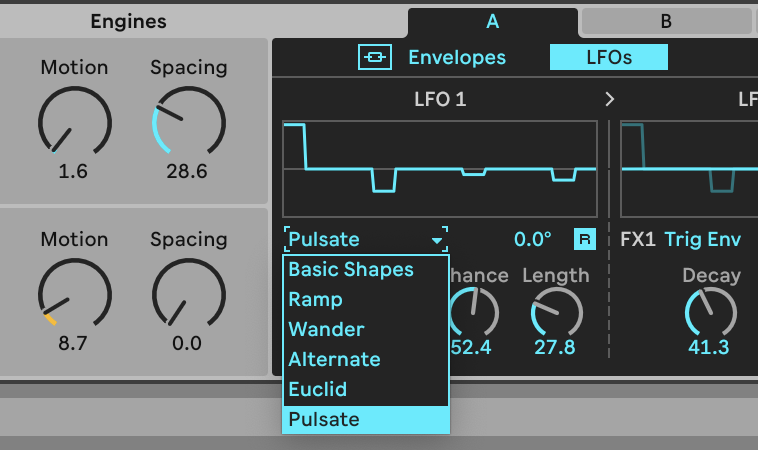
Now turn to Oscillator A's LFO and select the Pulsate waveshape.
Next, return to Oscillator B and select Oscillator A's LFO1 in the Cross Modulation section and you will hear it (best at an extreme setting) modulating the already modulated filter macros. OK it doesn't sound great – like a broken record – but it does demonstrate the kind of power cross modulation offers (and to be careful how you use it!).
And finally… more effects
Some of Meld's less headline-grabbing features are its effects. It's not exactly laden with them, but they do each get their own controls and are great for ladling on even more sonic interest.
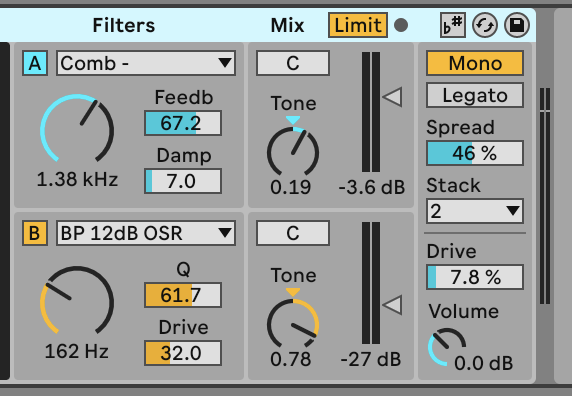
The Filter effects are variable and found as either Macro 1 or 2 in the mod matrix. They vary depending on which of the 17 filter options you have selected, so the Vowel filter, for example, has a Morph effect to take you between vowel 'a-e-i-o-u' type shapes. Others have crunchy, lo-fi effects, drive or dedicated bitcrusher effects.
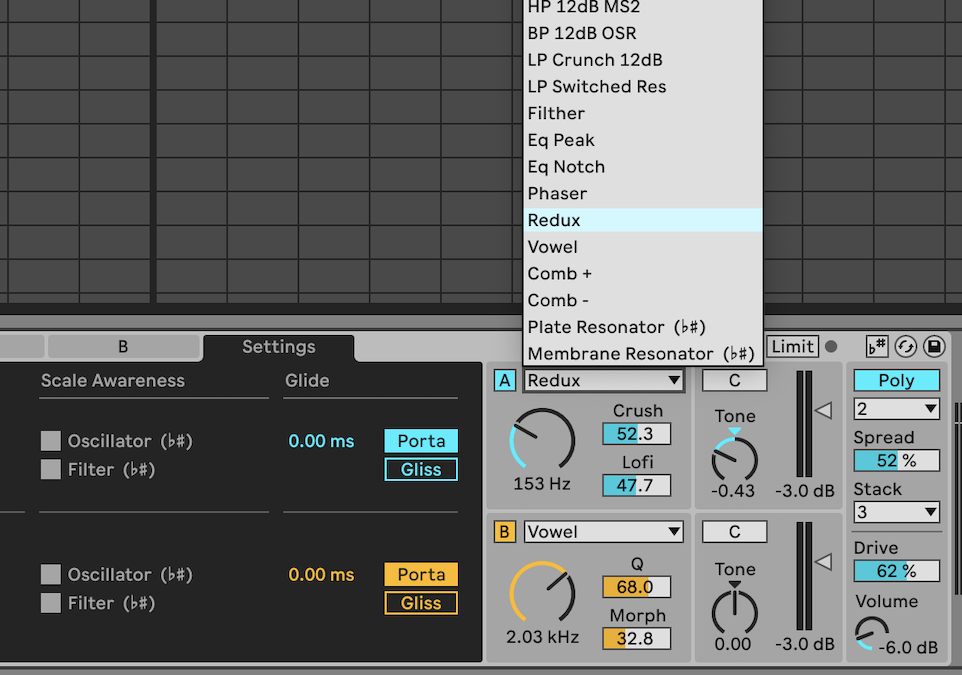
The Mix area is for standard mixing and panning between the two oscillators but also features a Tone control that is an EQ on steroids, more of a filter to filter your filter! The Drive slider on the output adds more distortion and grunt and works particularly well if you have some low-end body in your sound.
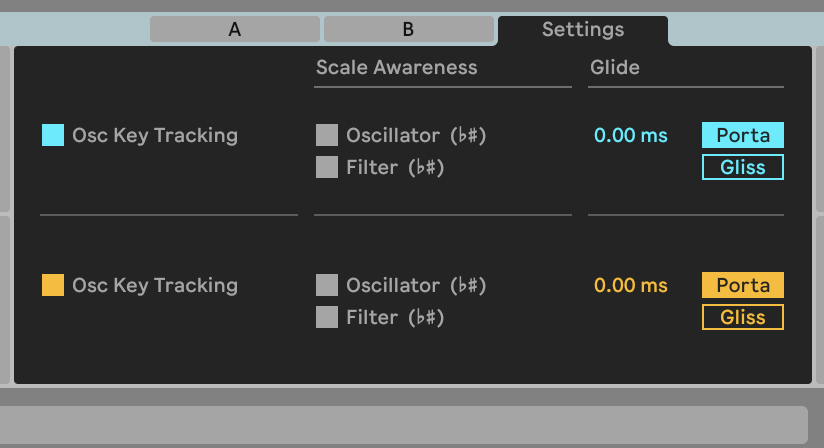
Finally, just a quick note on the Settings tab near the LFOs. This allows you to set standard note glissando and legato glides and oscillator key tracking, but also includes the new Scale Awareness options for both filter and oscillator. This is part of the key and scale upgrades for Live 12 that allows you to lock associated effects and instruments in the same scale to keep pitches in check.
We're sure you'll agree that Meld is a fascinating addition to the Live family of instruments. It's brash, confident and loud when you want it to be, but can be more nuanced and subtle too. It demands experimentation and hopefully this guide gives you an idea of how to do just that. We look forward to getting our hands on the full version of Live 12 on its release next year.
Please note that we used the beta of Live 12 for this feature and the finished version of Live 12 may look slightly different.


