Watch video: Dodge and burn in Affinity Photo
Our eyes are naturally drawn to the lighter parts of a photo and away from darker areas, so we can manipulate the viewer’s perception of an image with subtle lightening and darkening in different parts of the frame. This ability to guide the viewer’s journey can be hugely effective when it comes to editing landscapes. Even a simple vignette can work wonders, as it darkens the corners of a frame and draws the eye into the middle towards more important details.
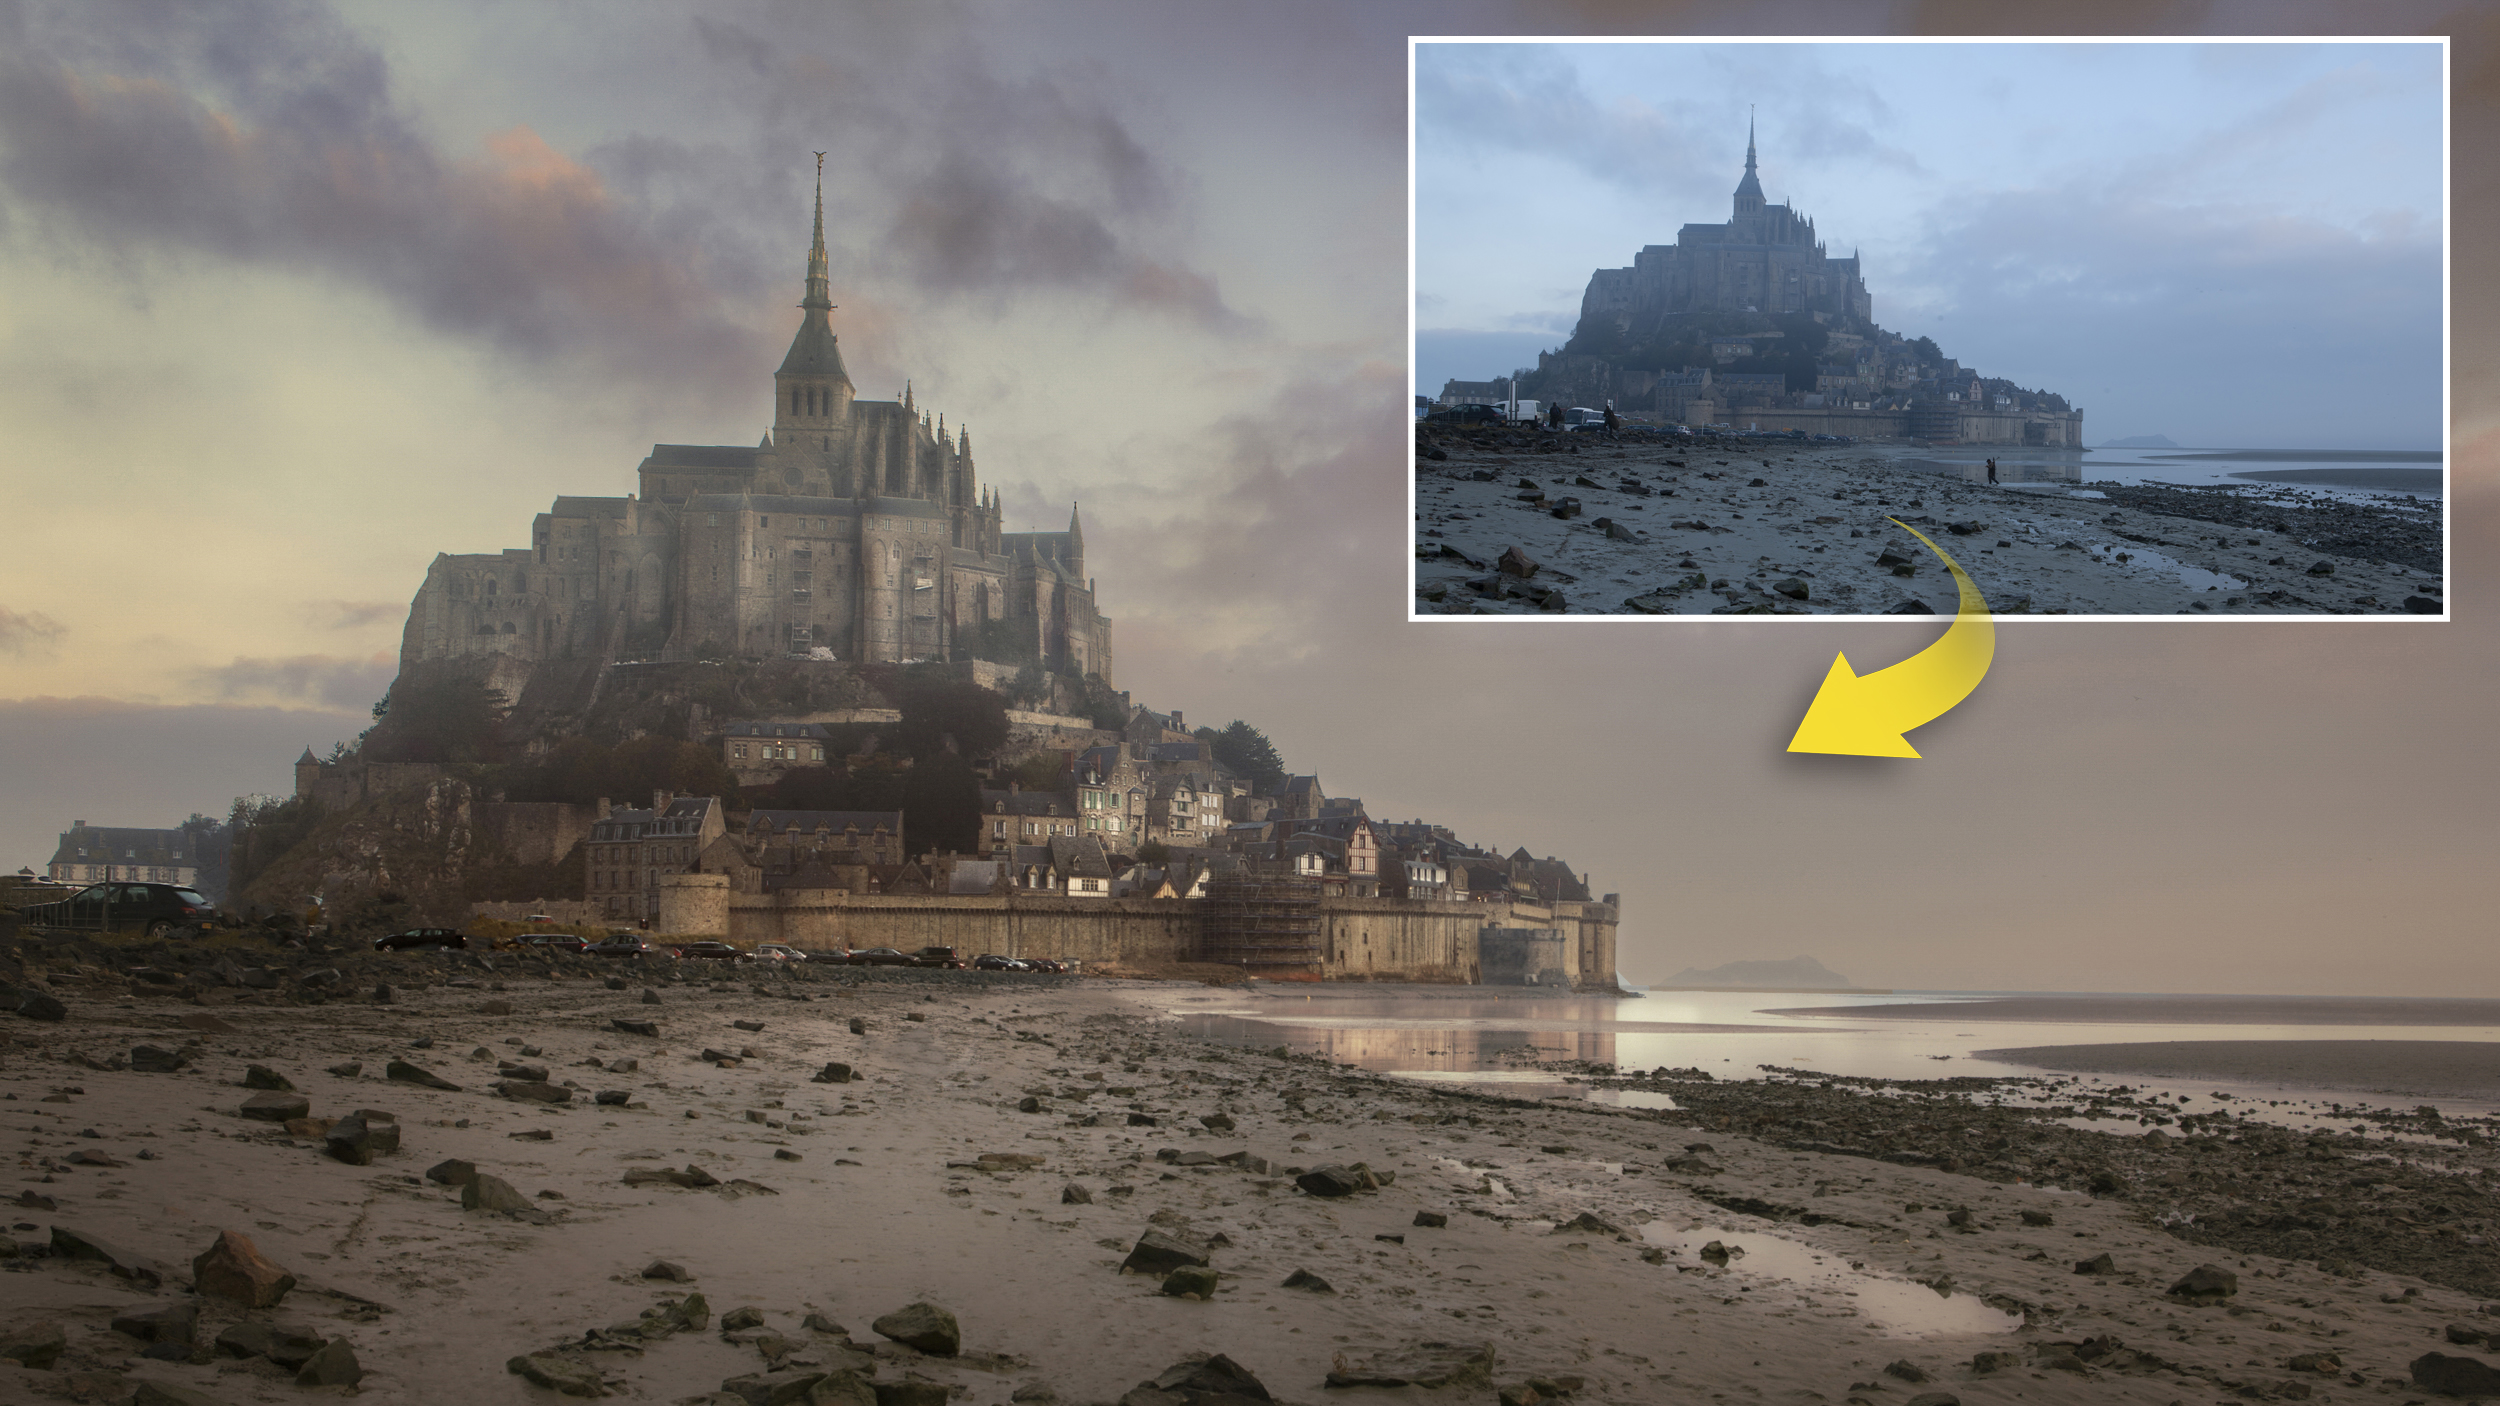
However, with a soft serene image like this, we don’t want to push things too far. While there are several excellent tonal tools for boosting contrast in Affinity Photo, this sort of work is often best done by hand rather than with a change in contrast. This is where the Dodge and Burn tools come in. By selectively lightening and darkening the buildings, reflections and fine details, we can draw attention to the most interesting parts and add to the sense of depth, while retaining the overall misty morning feel.
There are other ways to draw the eye, too. Here the sand looks rather untidy. But by smoothing out parts of the beach, we can create subtle leading lines that lead the eye through towards Mont Saint-Michel. We’ll finish off with a series of color changes – both universal and selective – to make the beach, sky and buildings work in harmony with one another.
To follow along, download the start image here or use one of your own landscapes.
1. Dodge the buildings
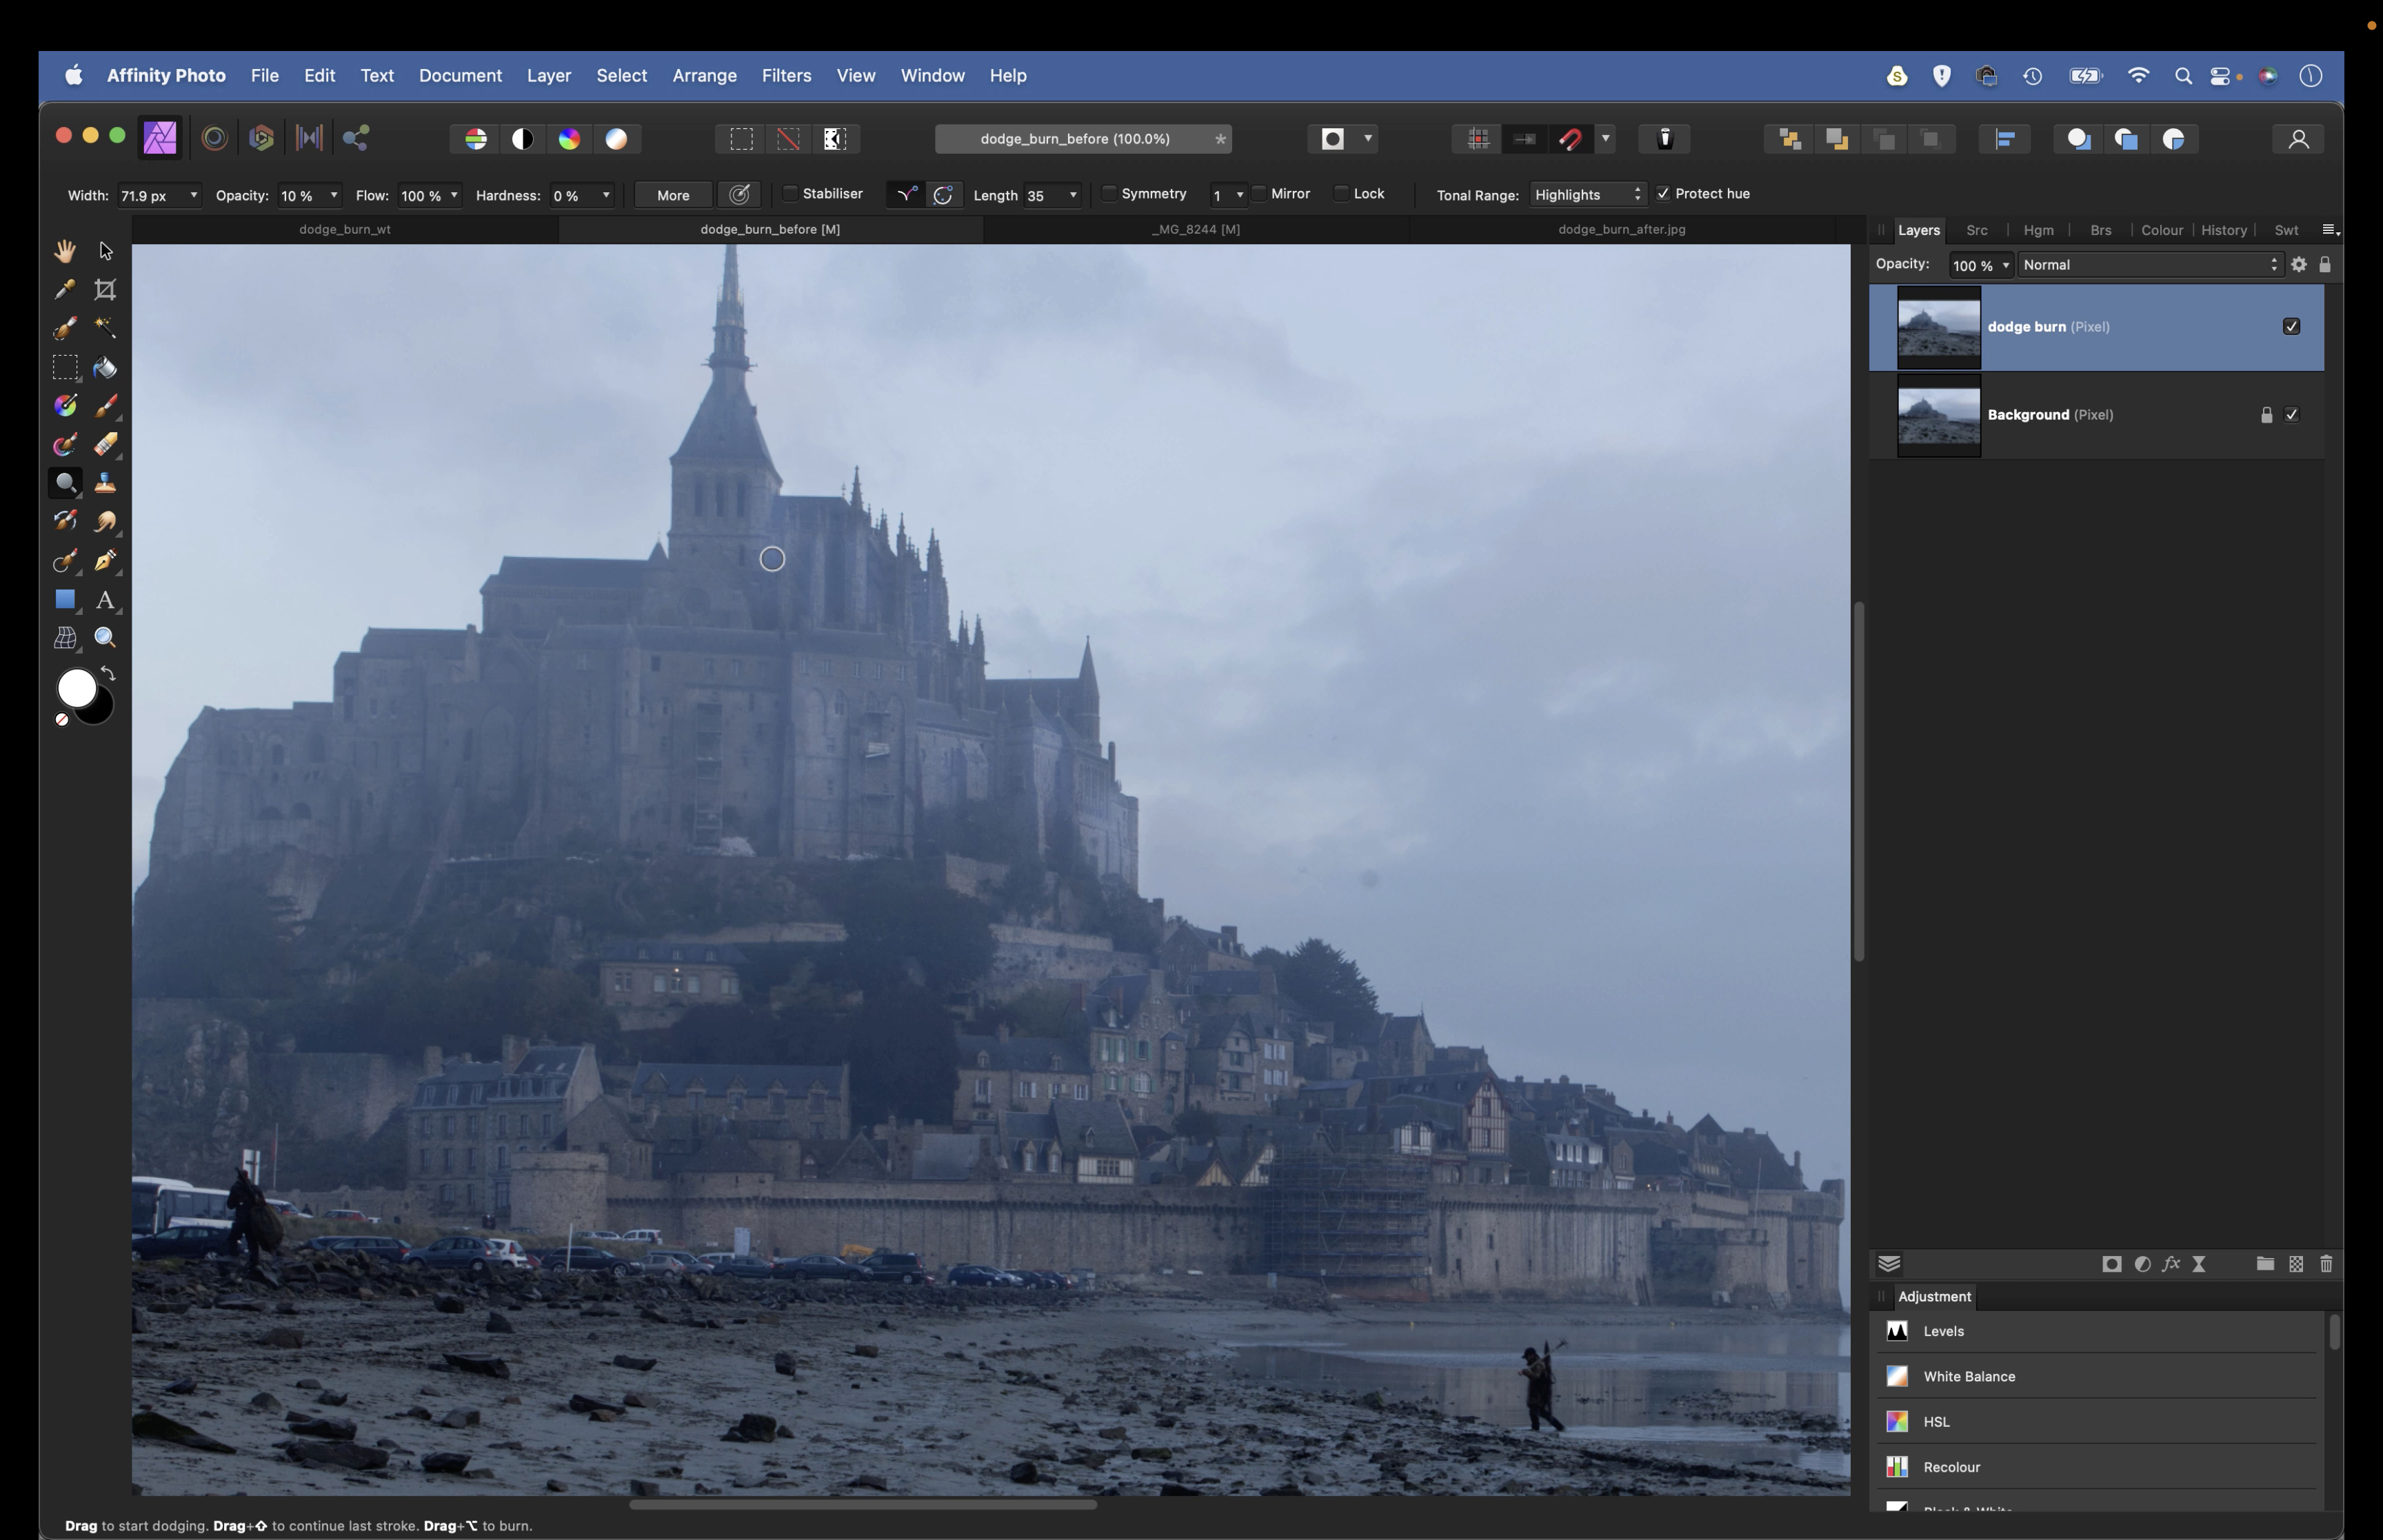
Open the start image, then press Cmd/Ctrl + J to copy the layer. Grab the Dodge tool, set the range to Highlights in the options and hit 1 for 10% strength, then zoom in and paint over the ridges in the building to subtly lift them. Use the ] and [ keys to resize the brush tip.
2. Burn the shadows
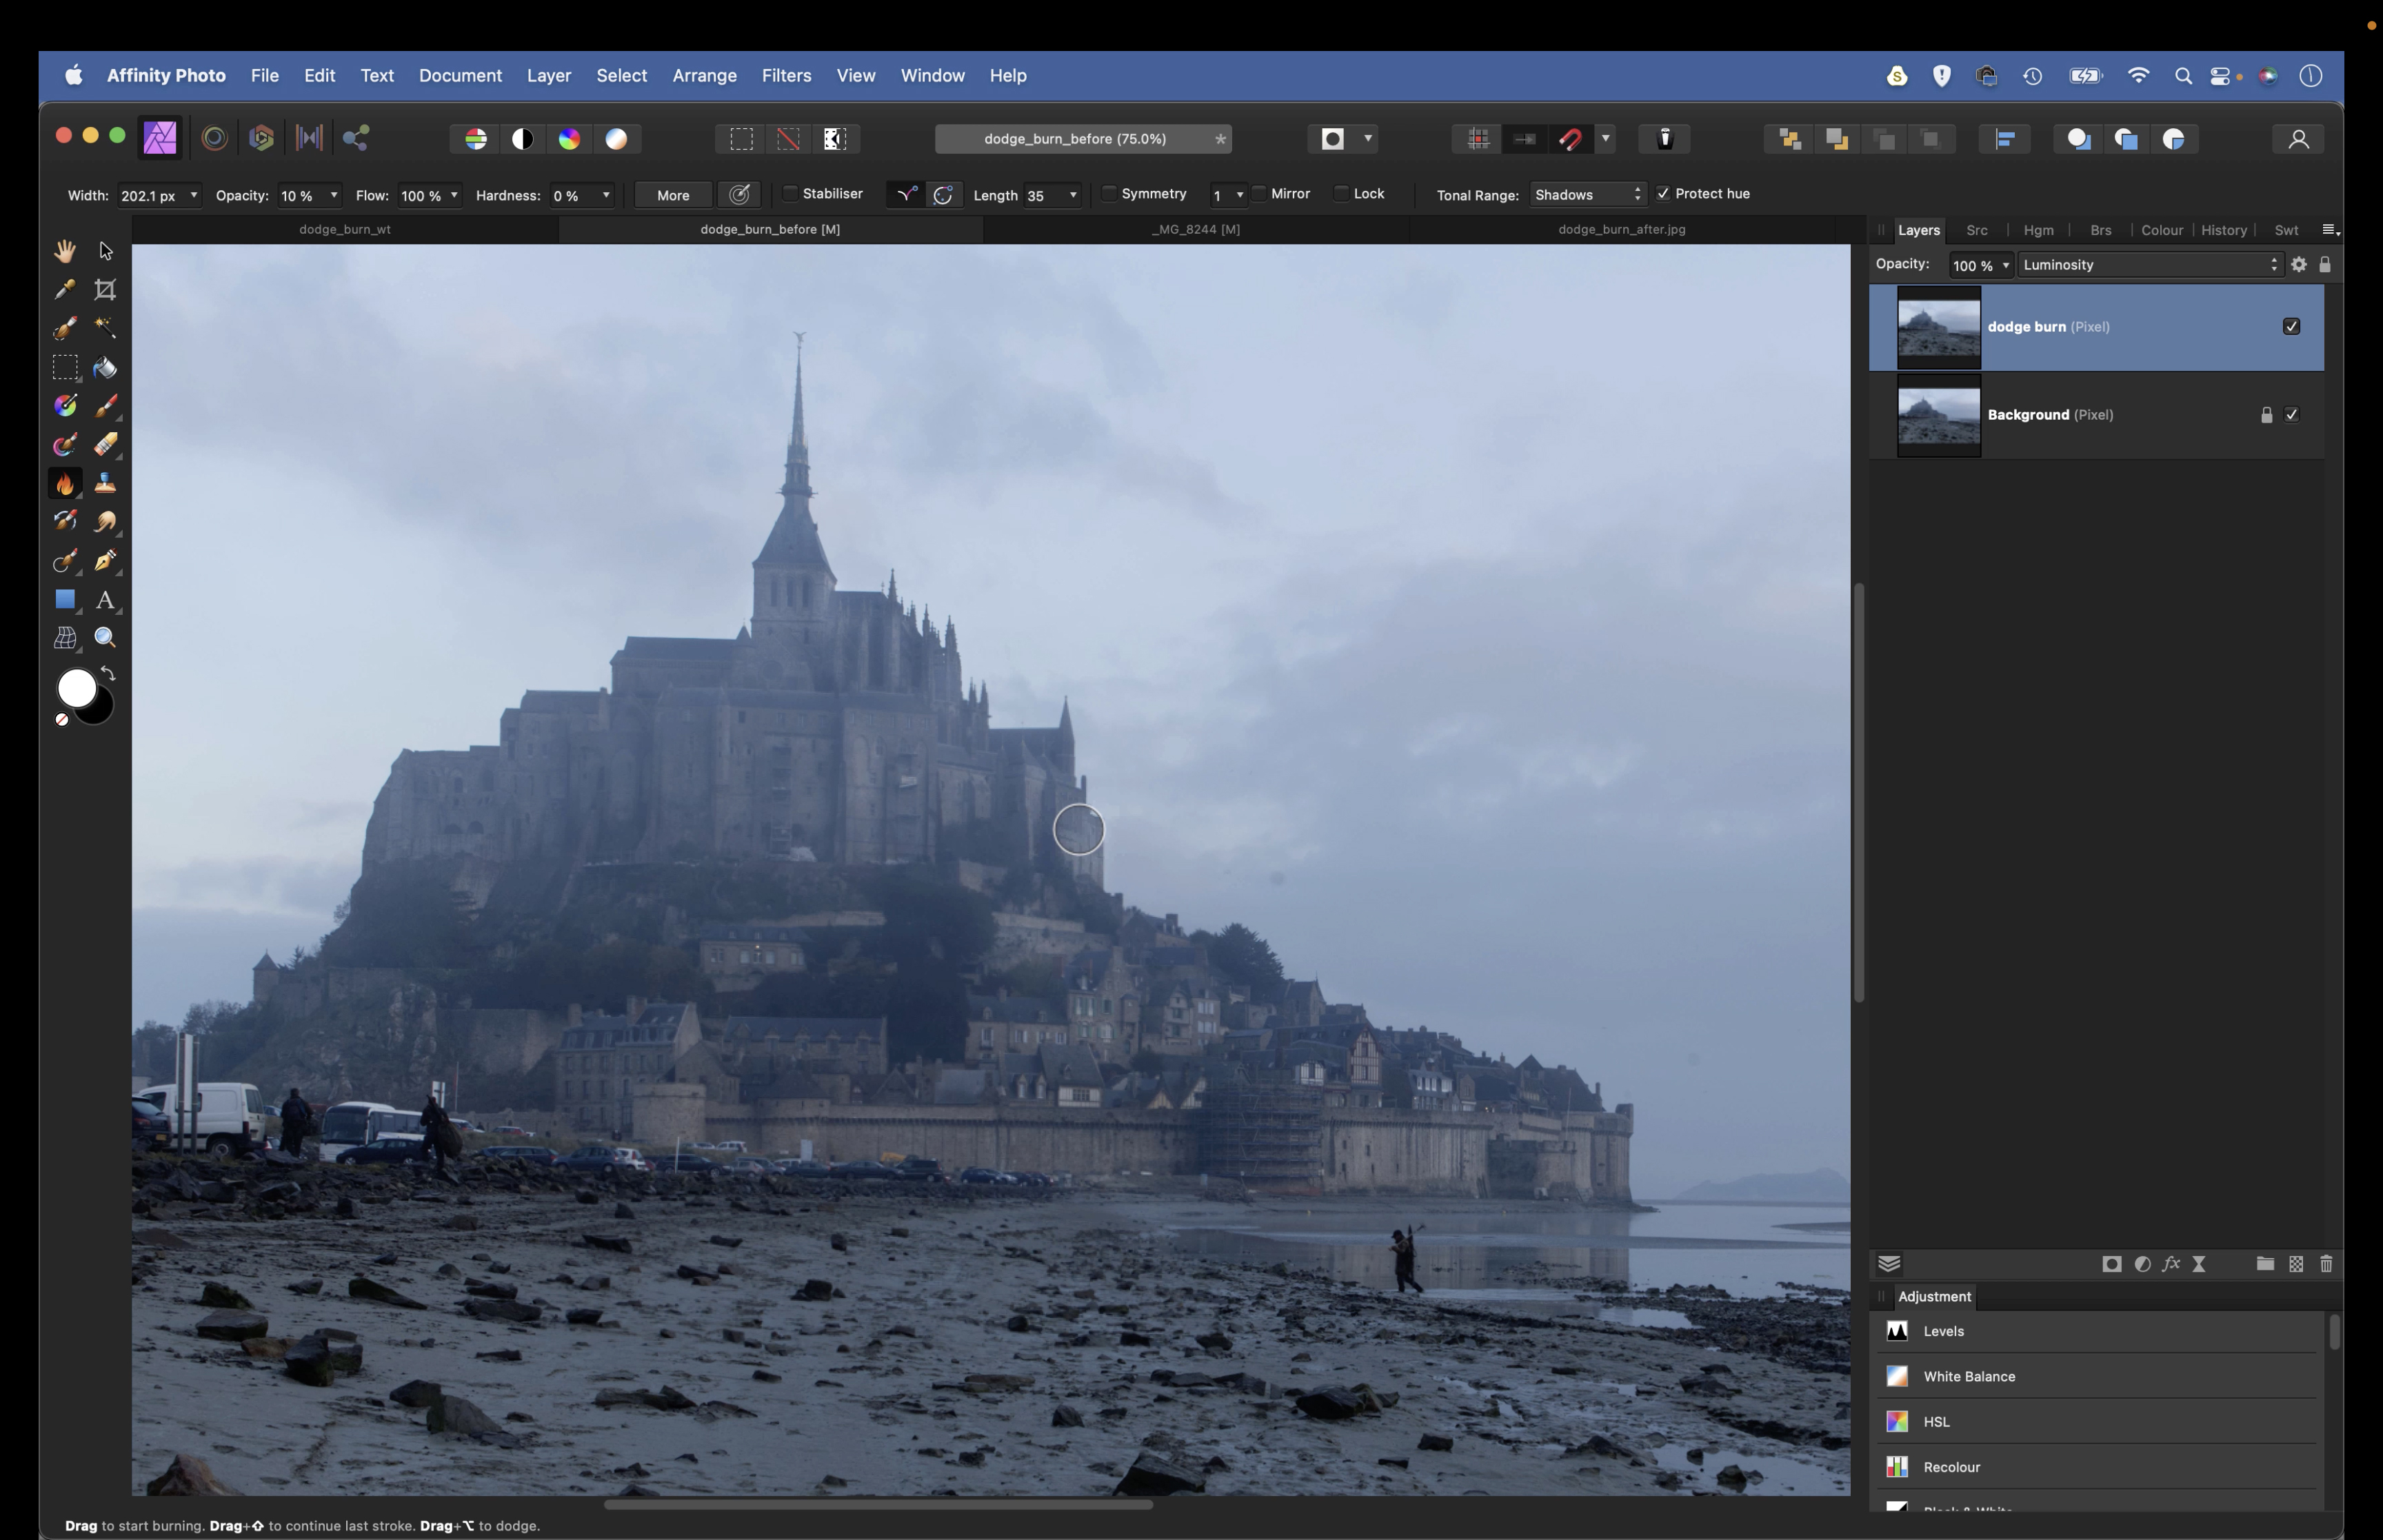
Switch to the Burn tool and set the range to Shadows, again with strength 10%, then paint to darken the shadow sides of the buildings and add definition to clouds. The dodging and burning may shift colors, so set Layer Blend Mode to Luminosity to prevent this.
3. Tidy up the sand
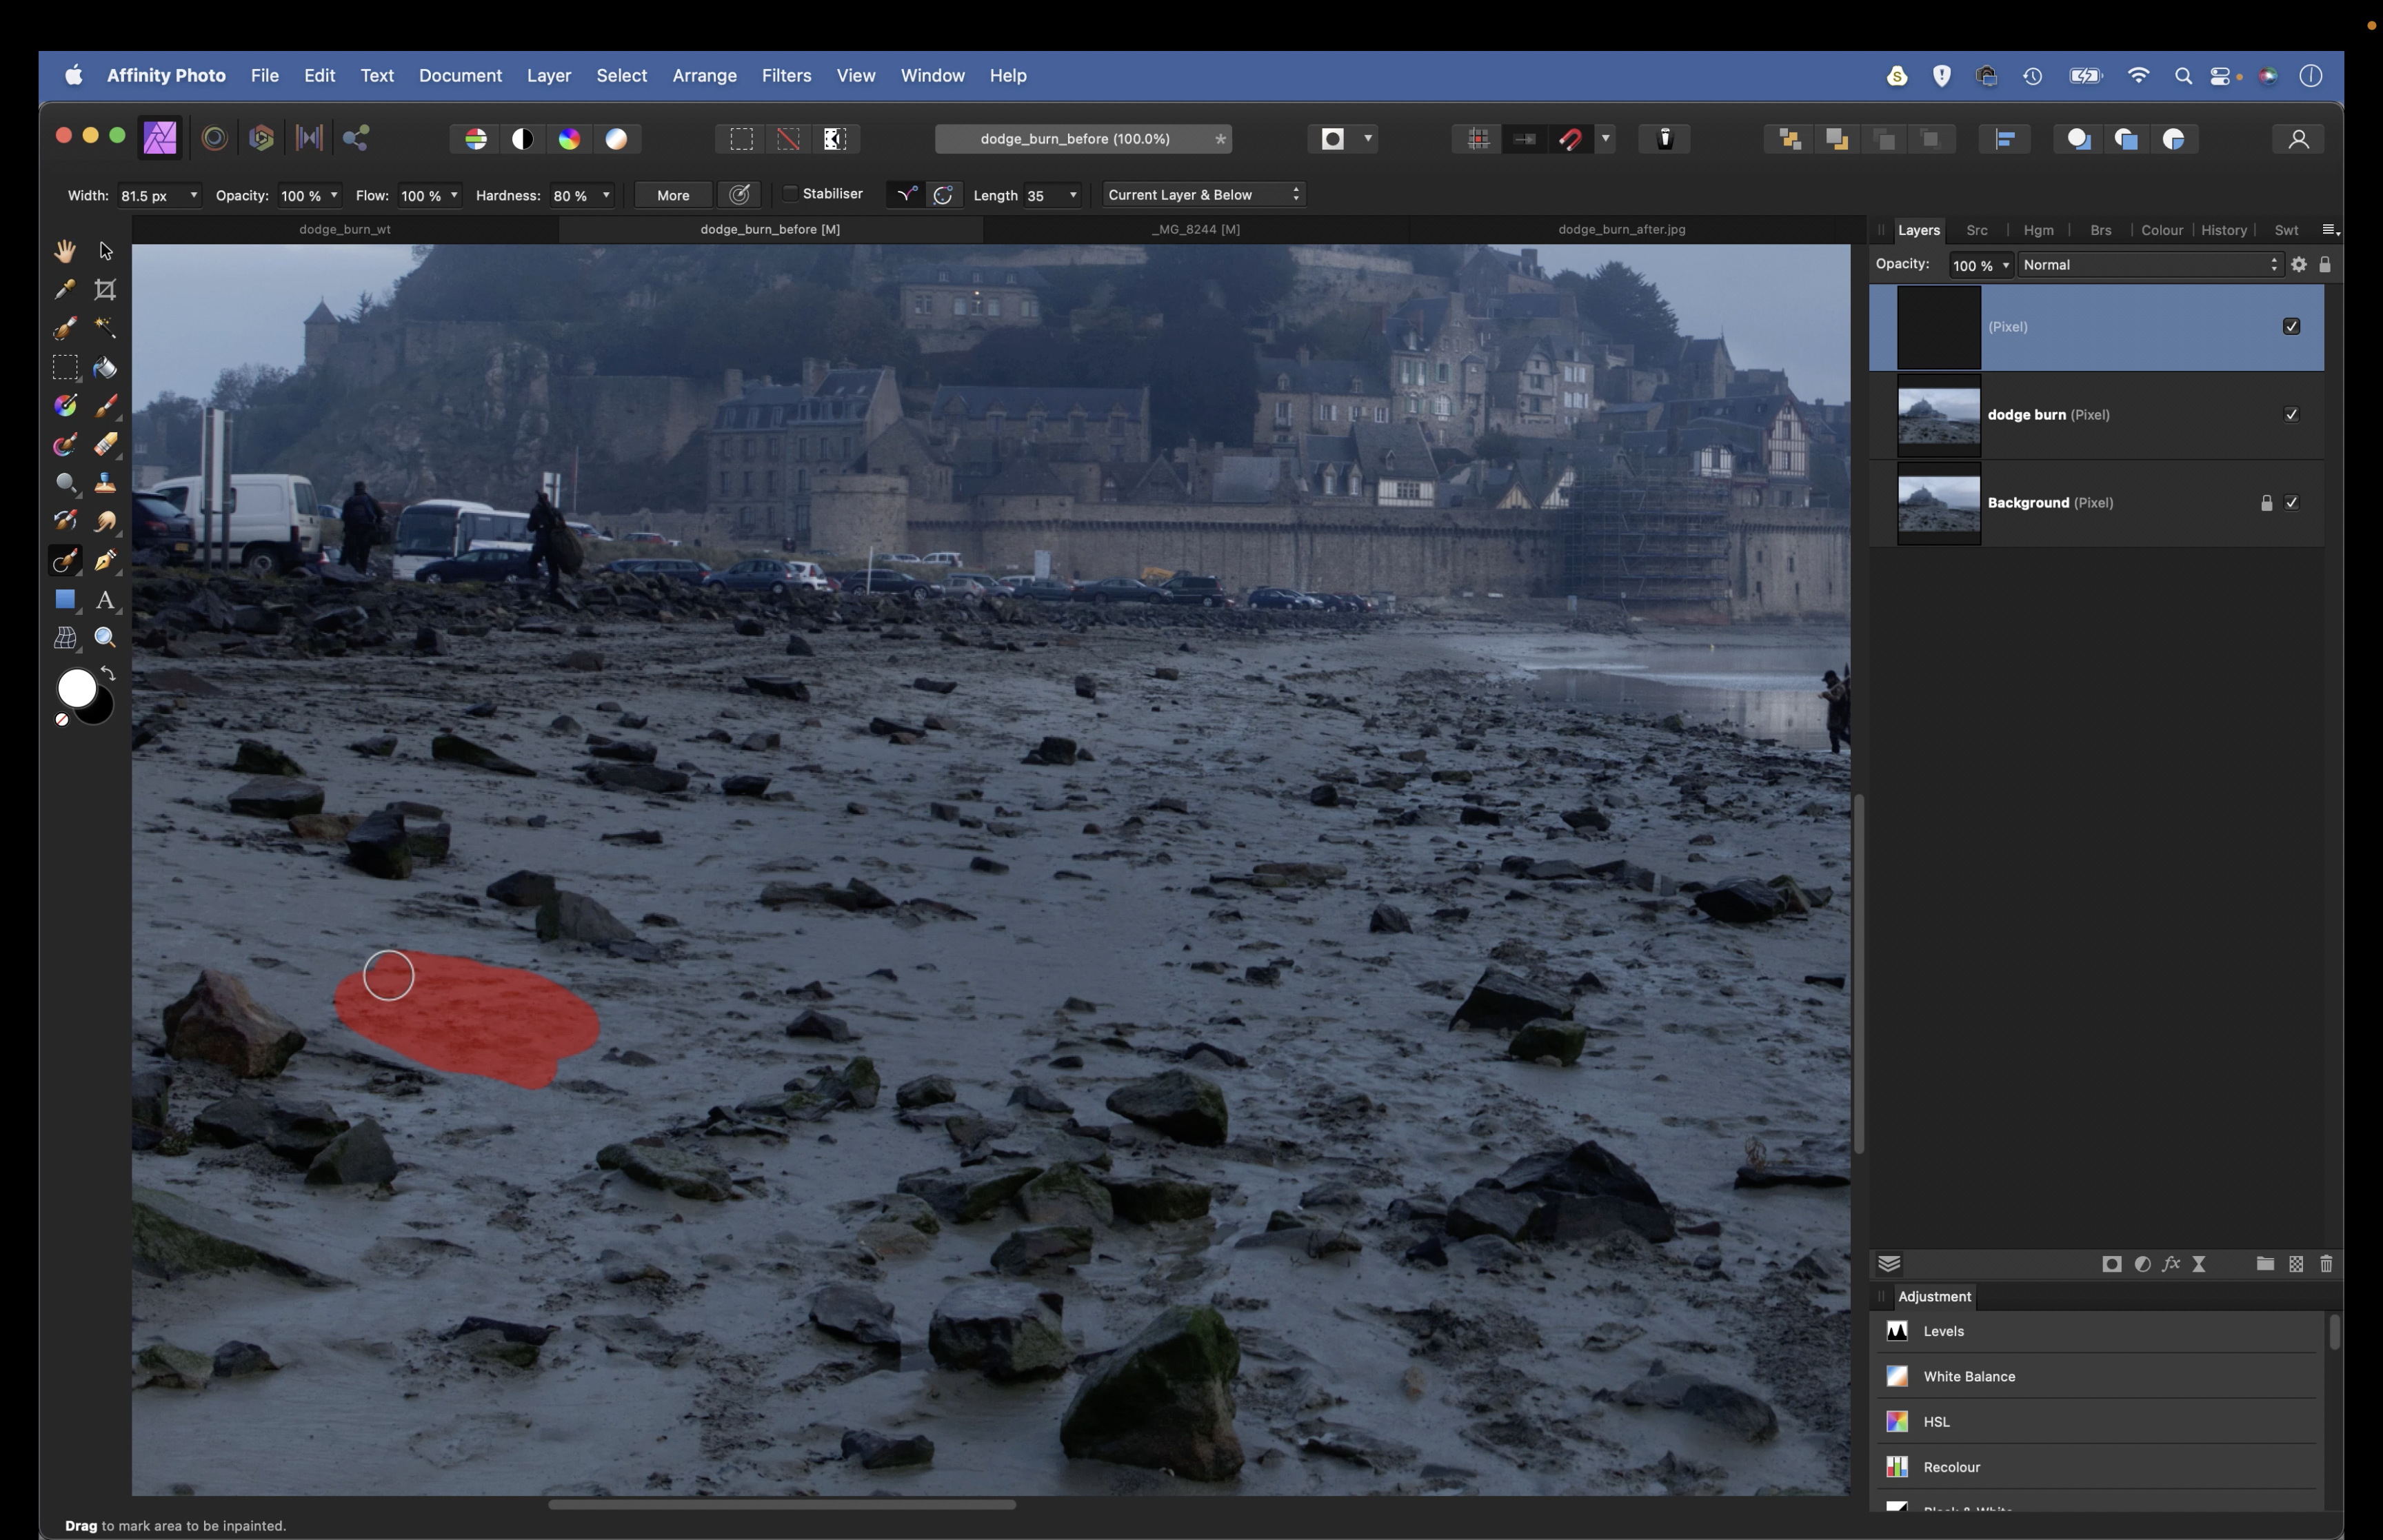
Click the new pixel layer icon in the Layers panel to make a new empty layer, then grab the Inpainting tool and set Current And Below in the options. Paint to tidy up the messy bits of sand. Use the Clone tool if you need more control, again set to Current And Below.
4. Make it warmer
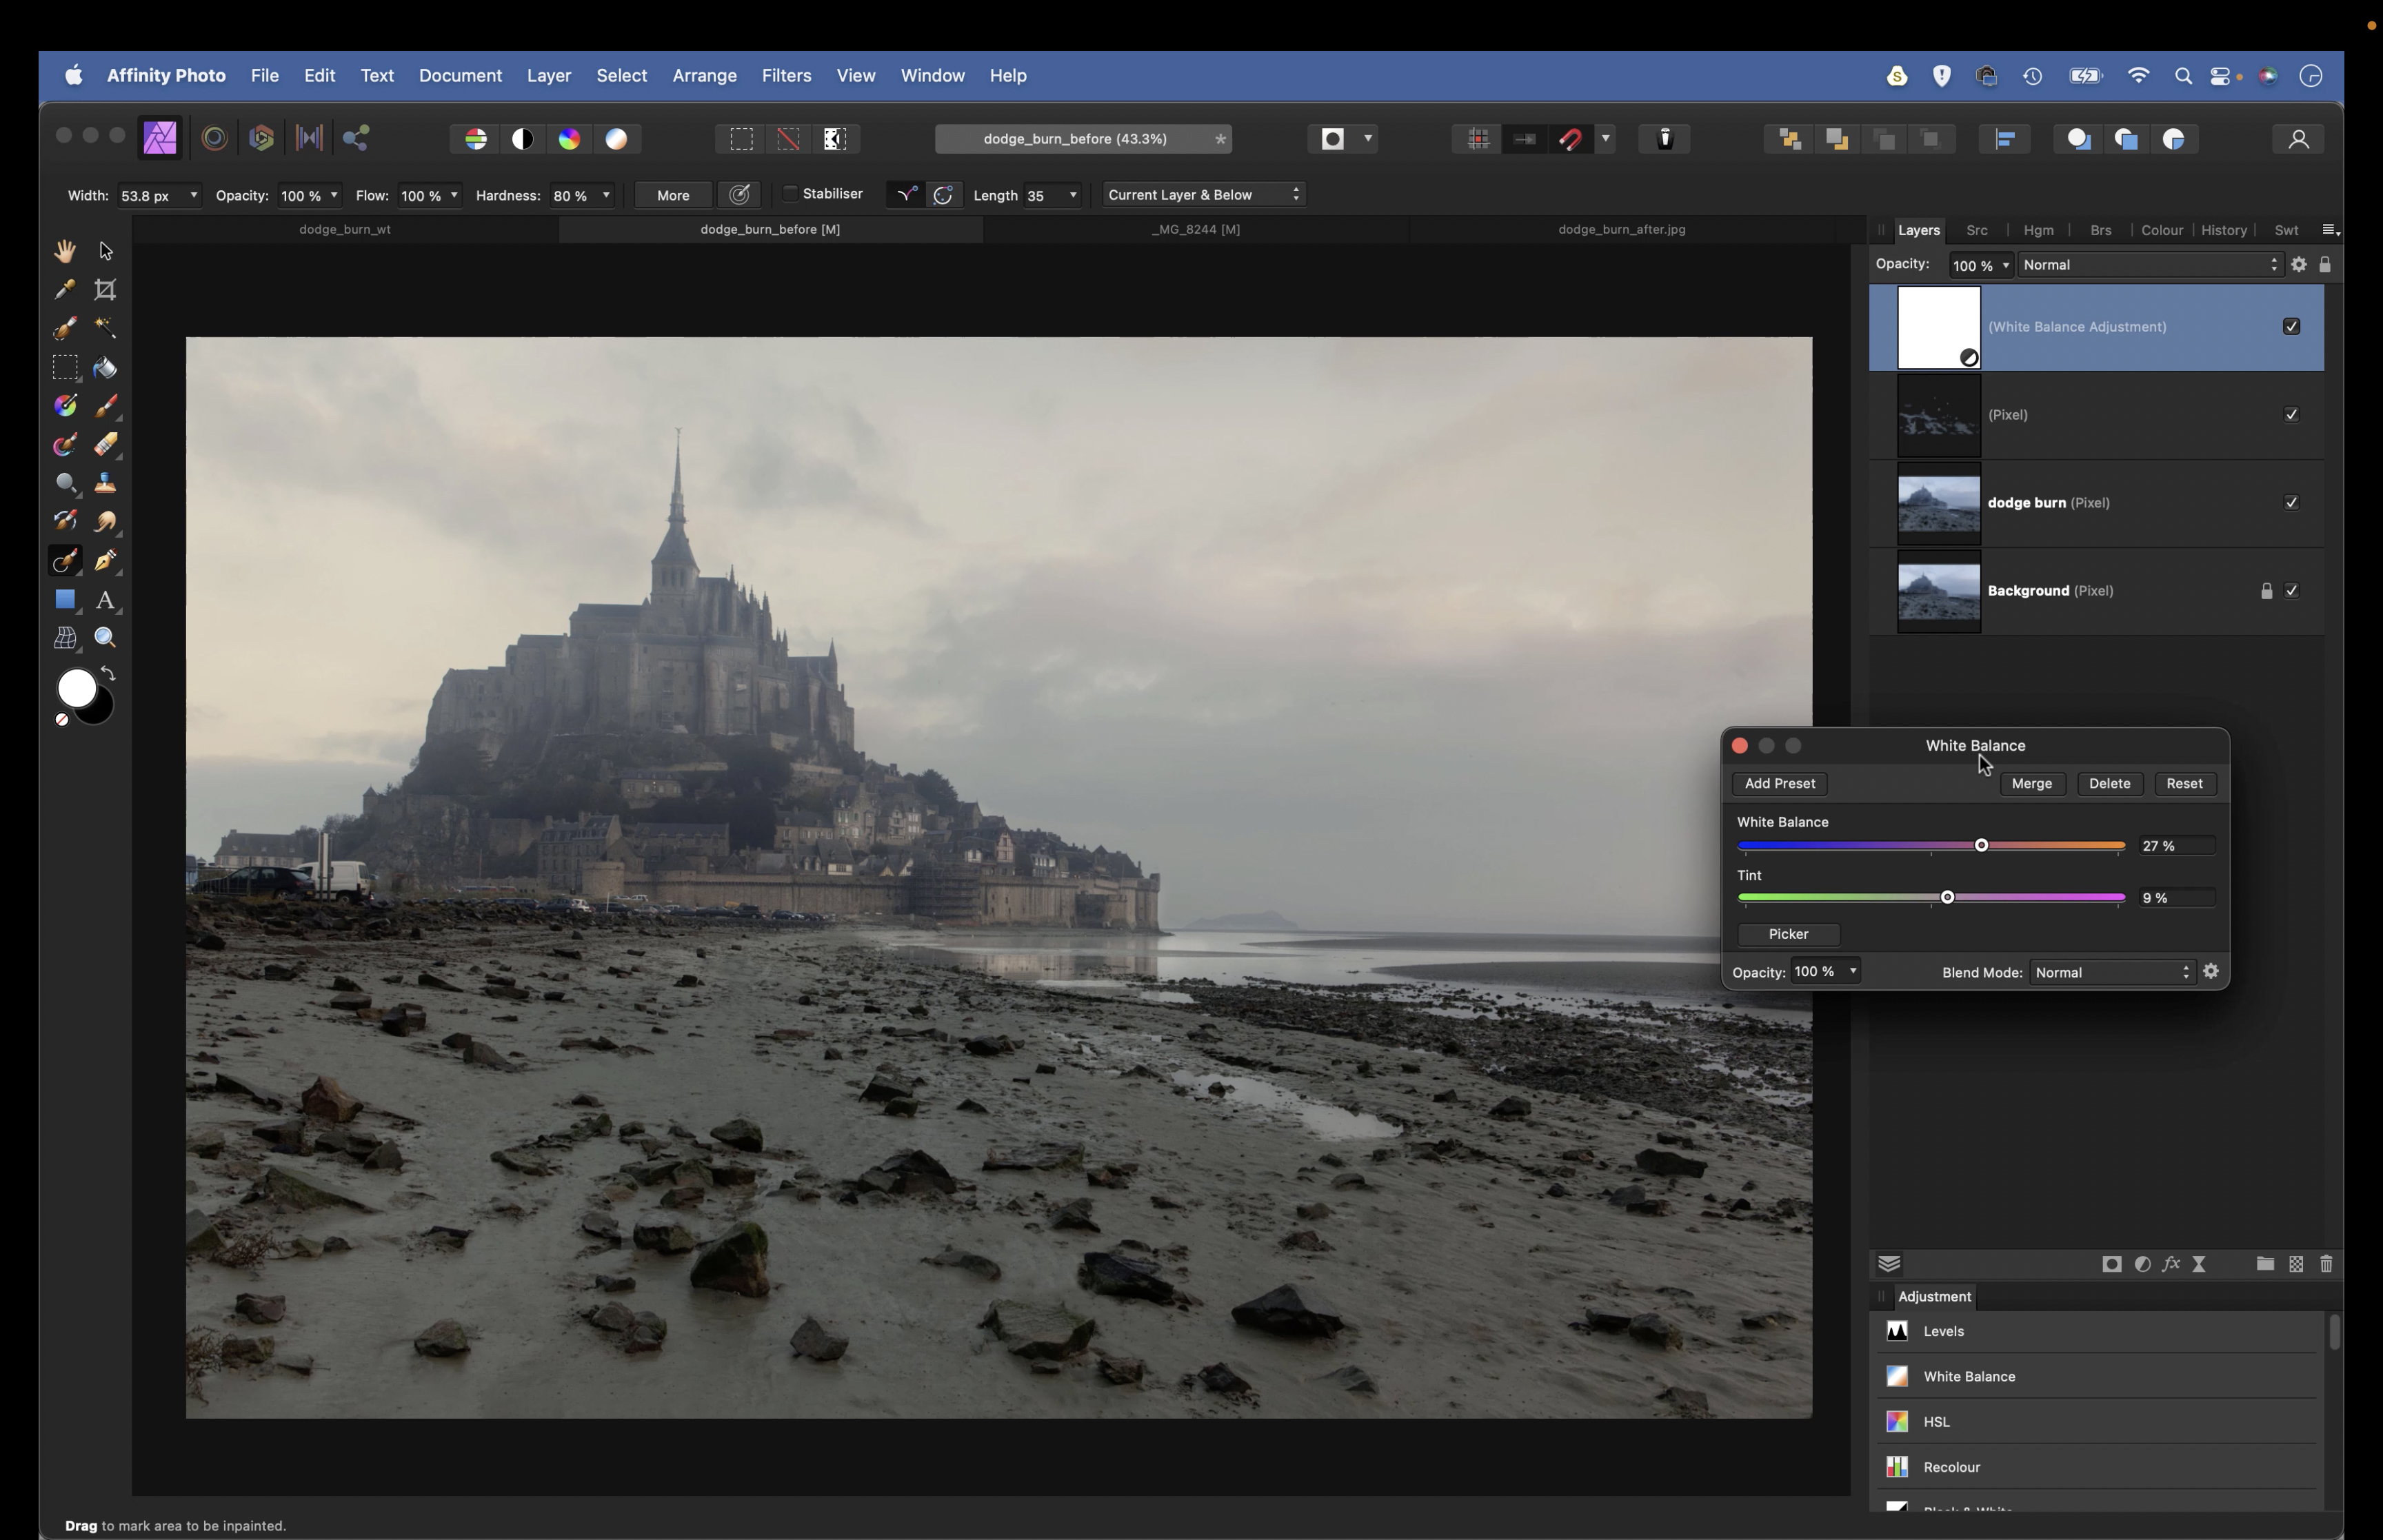
Click the Adjustment icon in the Layers panel and choose White Balance. Drag the Temperature and Tint sliders to the right a bit to warm the image. Now highlight the dodge burn layer and grab the Selection brush. Tick Snap To Edges, then paint over the sky.
5. Boost the sky
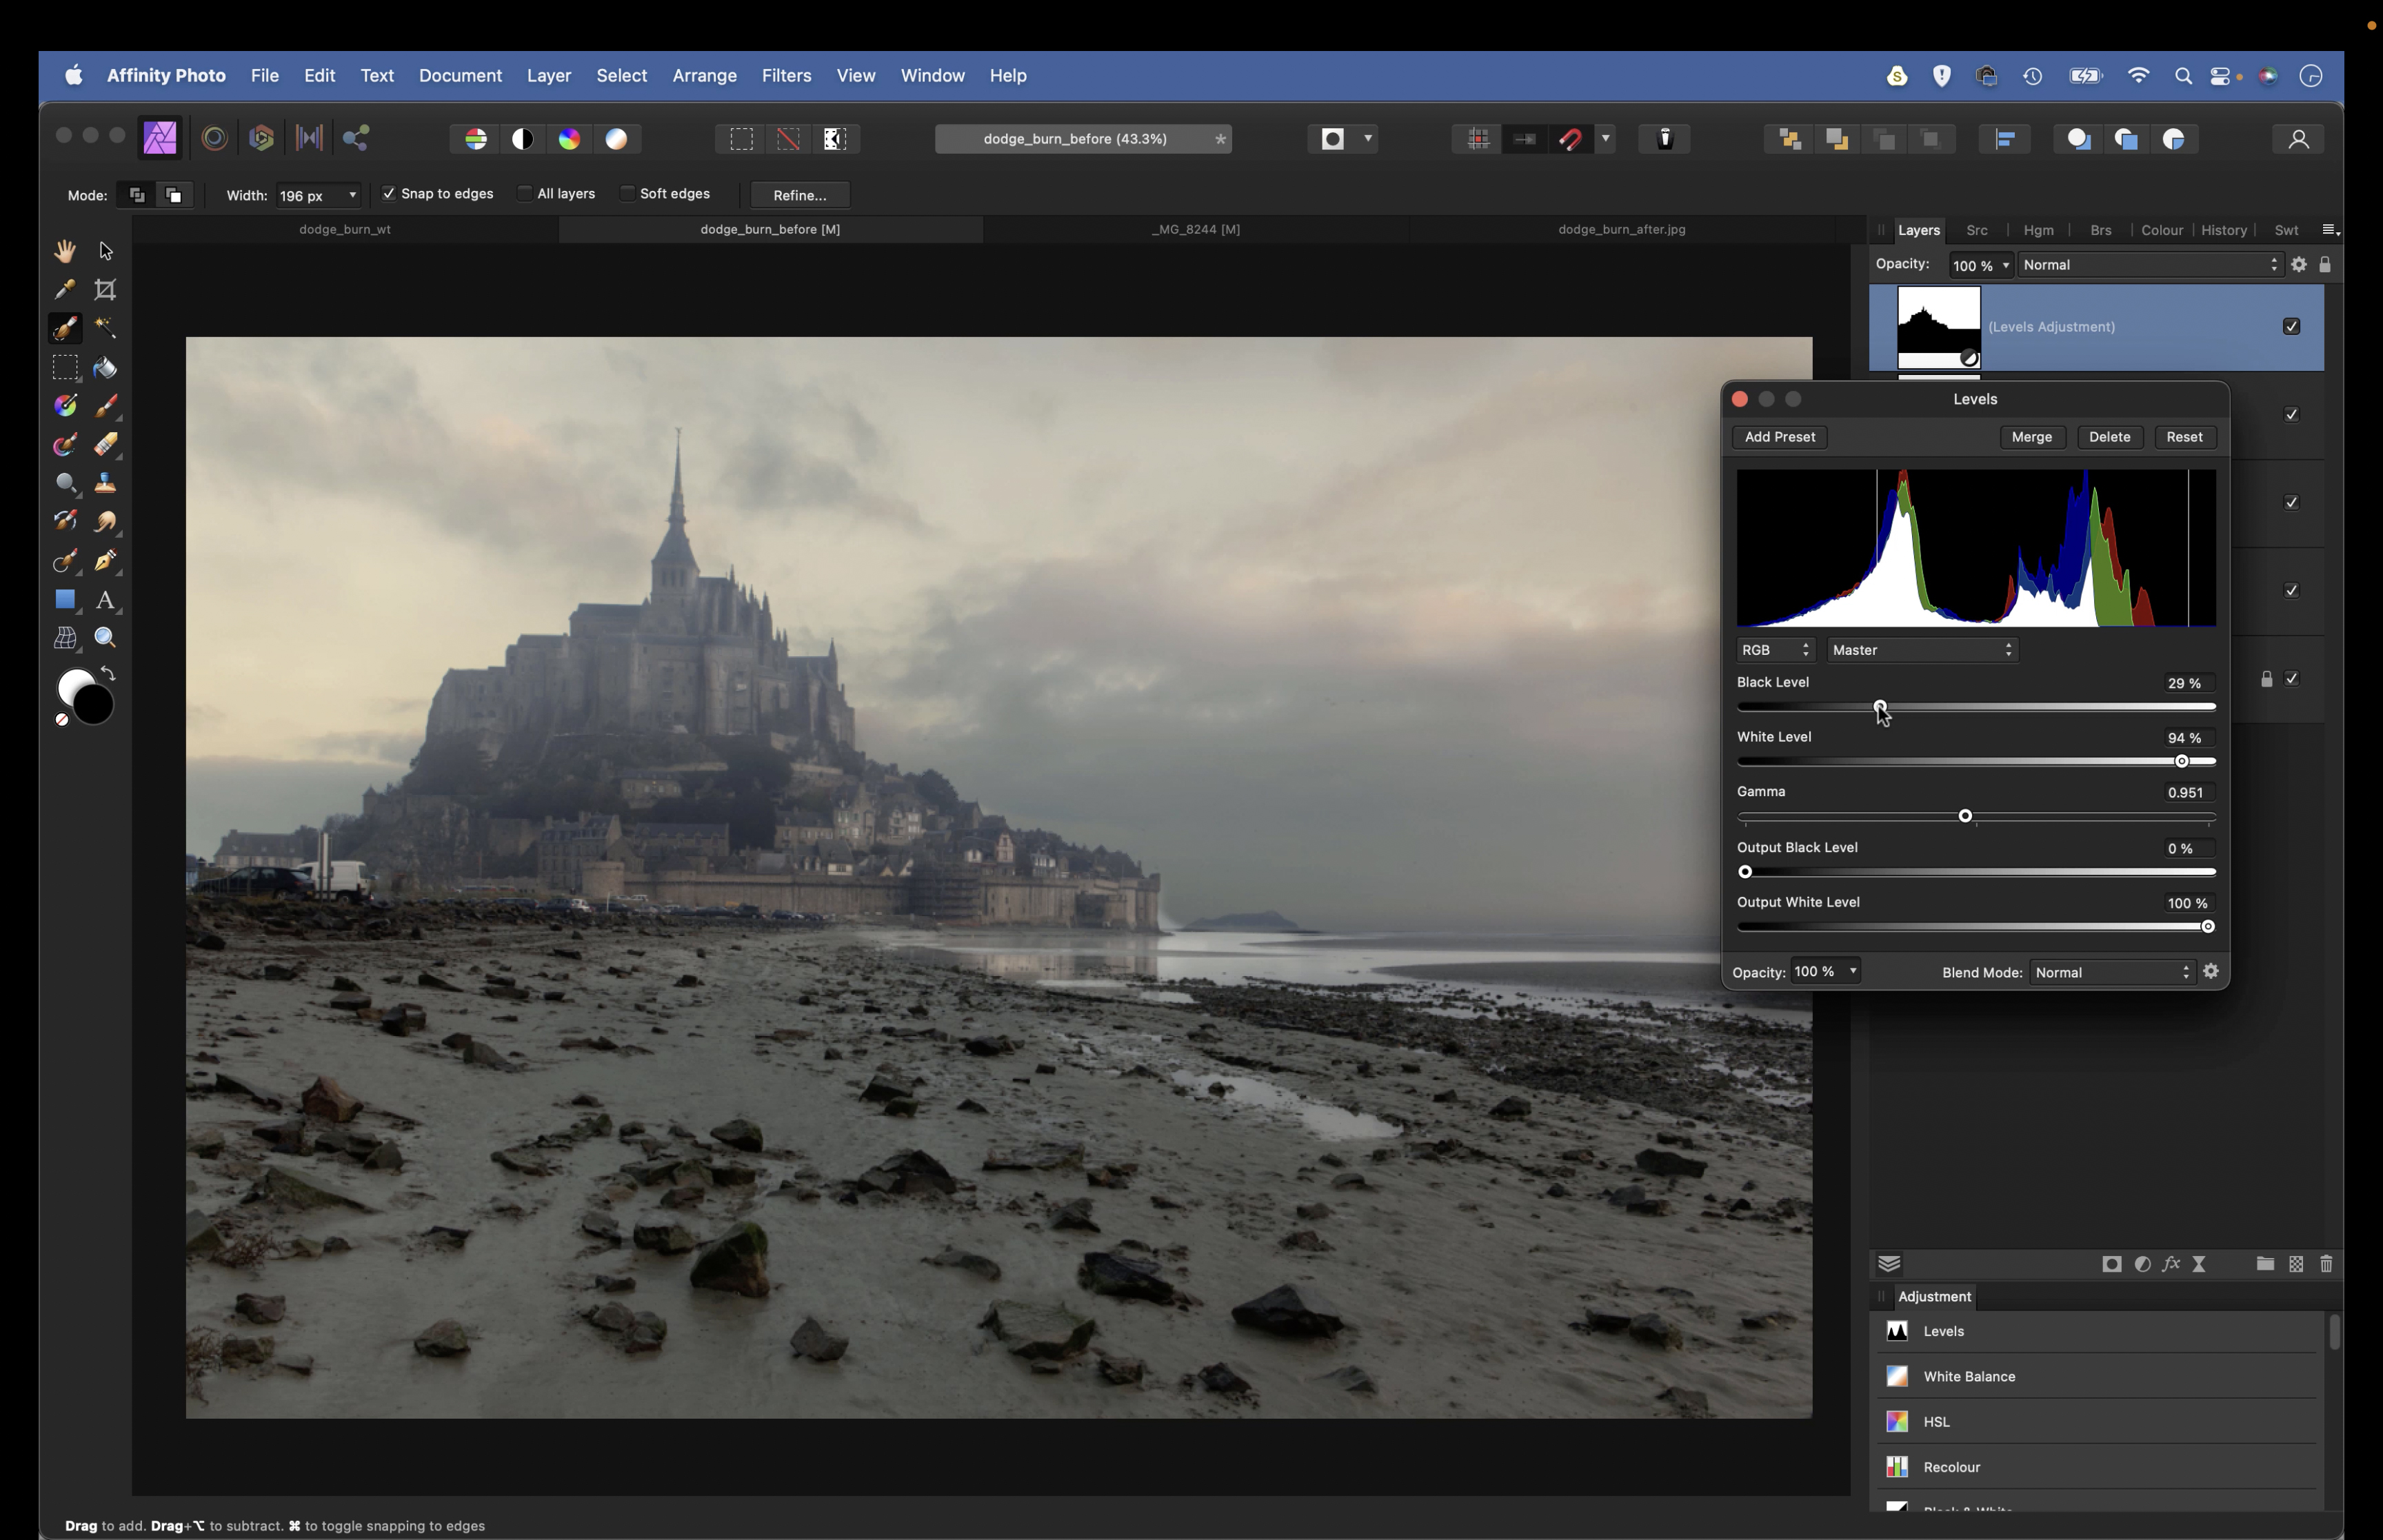
The Selection brush locks onto edges, but if it goes wrong, hold Alt and paint to subtract. Click Refine, increase Border Width, then paint with the Matte brush over missing details. Hit OK, then add a Levels Adjustment. Drag the Black point in to darken the sky.
6. Make a dodge burn layer
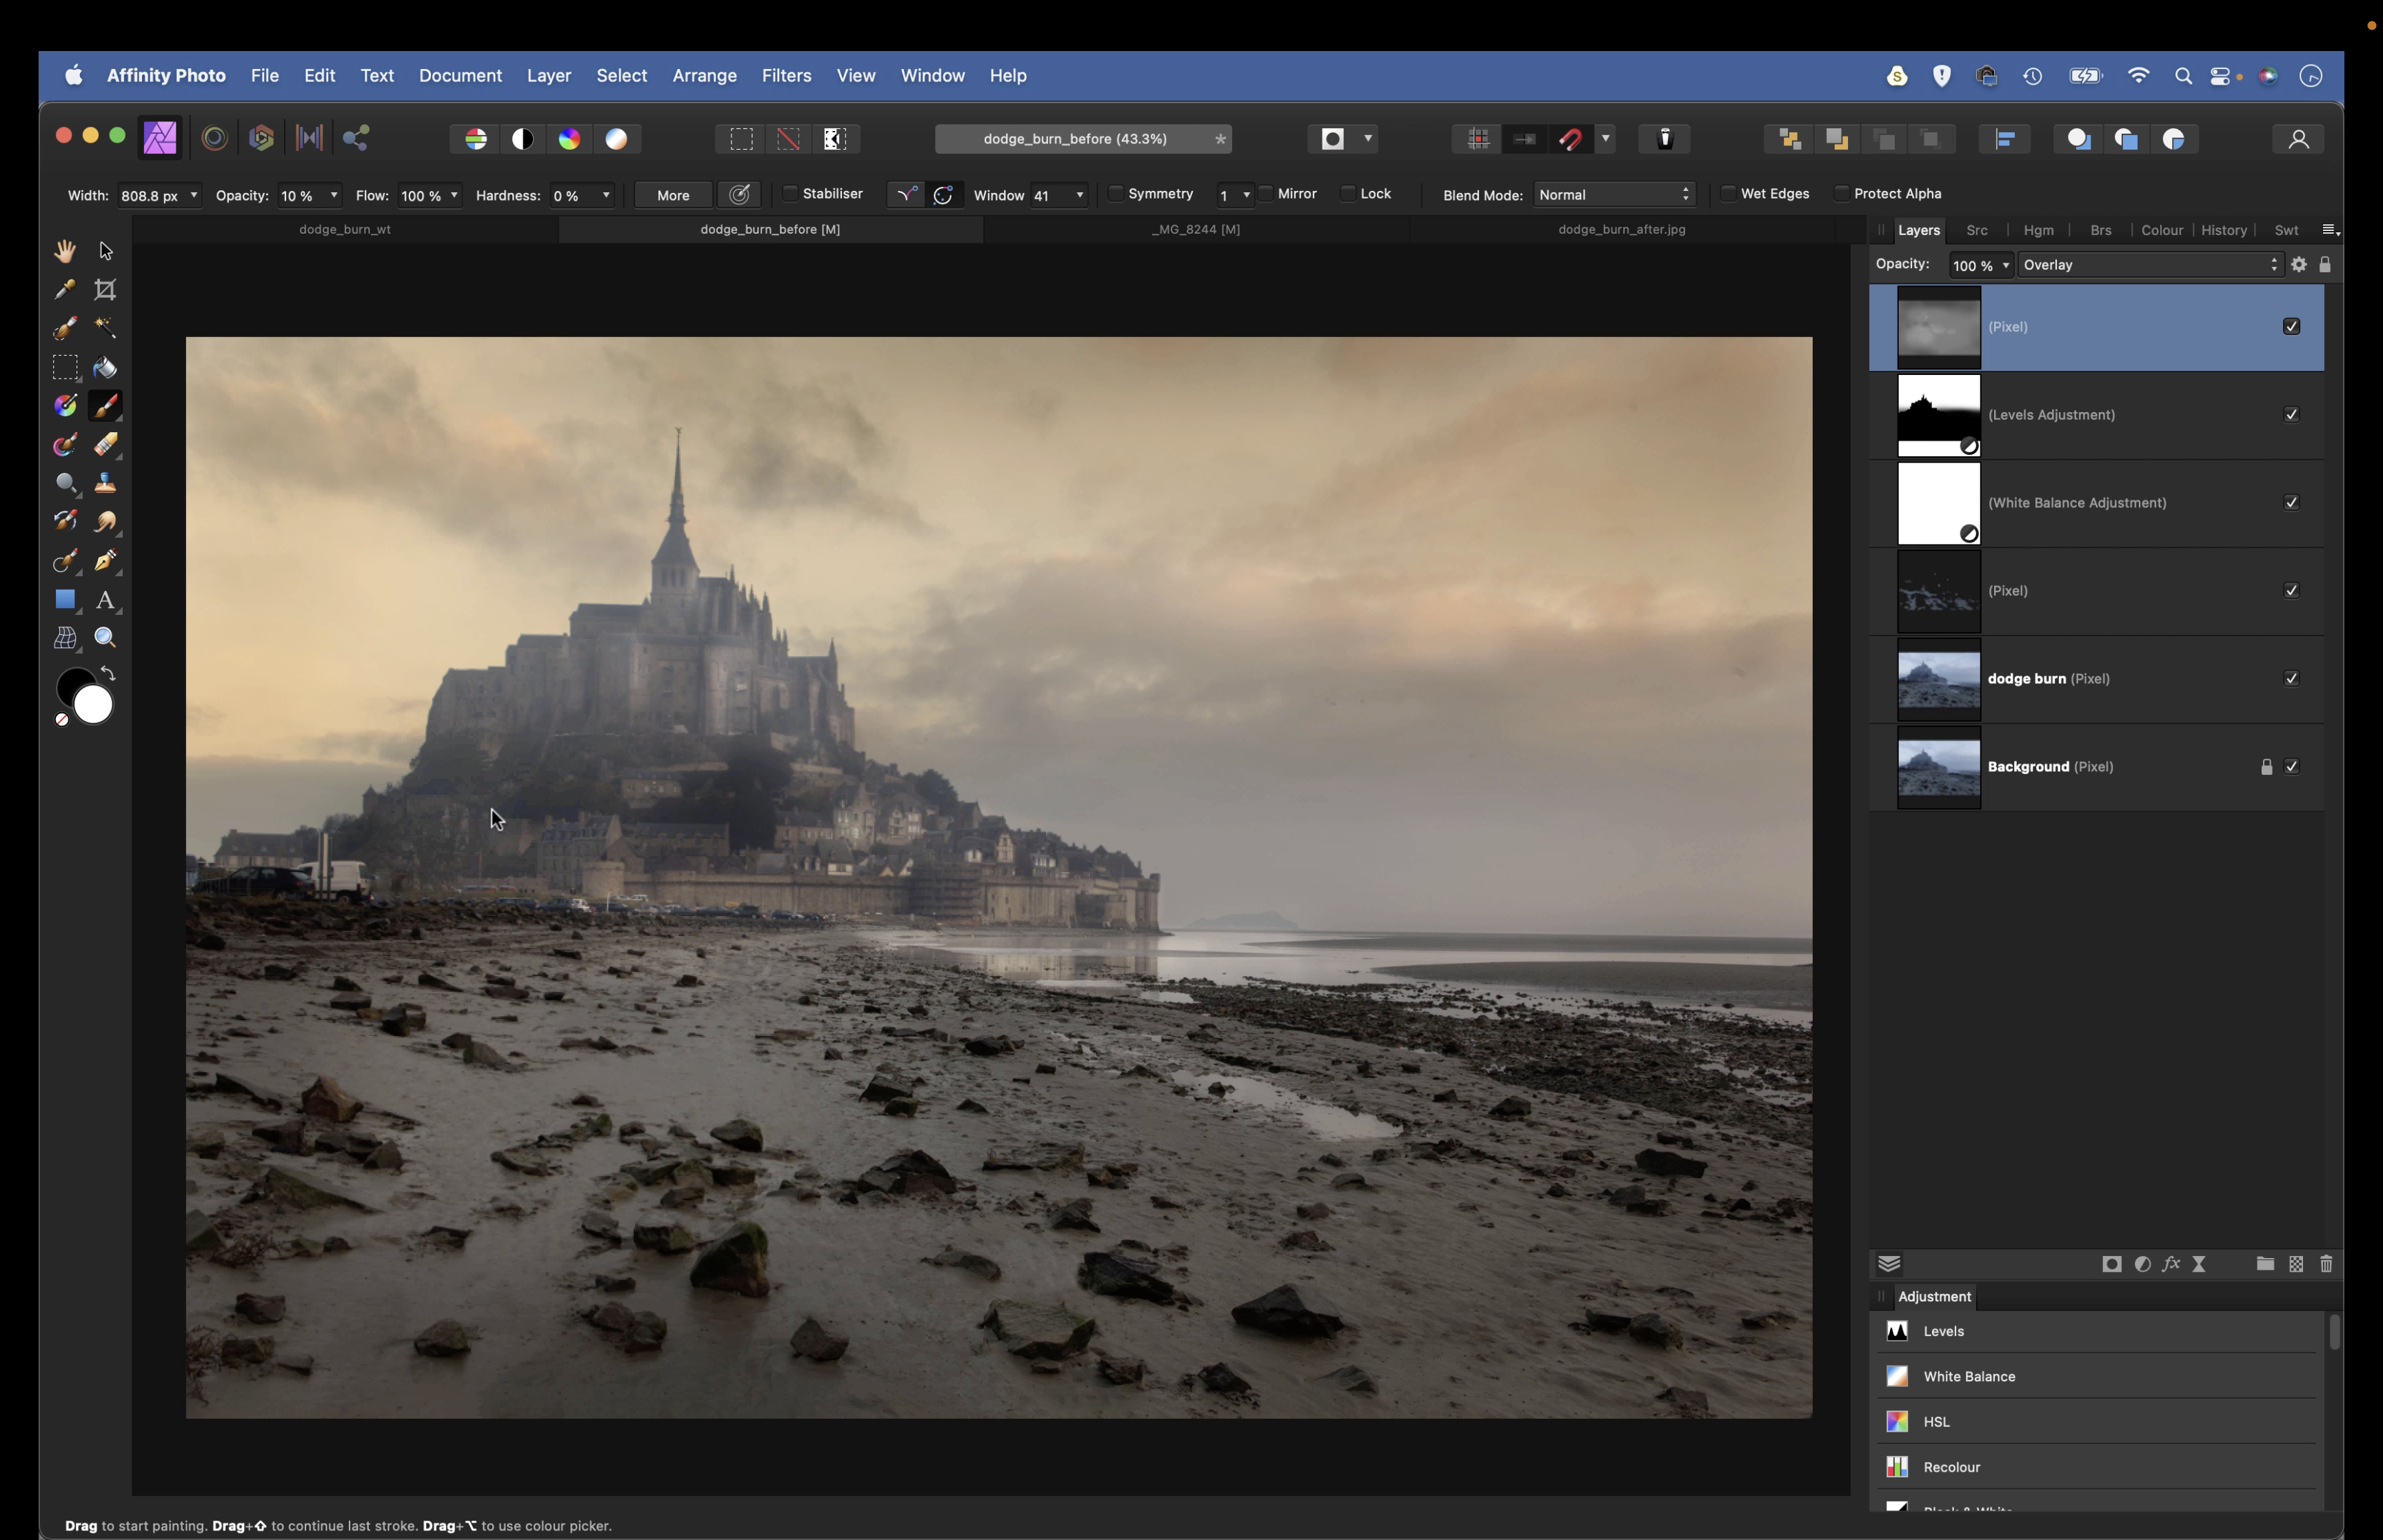
Make a new layer, then go to Edit > Fill. In the color box, choose HSL then set H 0, S 0, L 50. Hit Apply and set the blend mode to Overlay. We can paint on this layer with white or black to lighten or darken. We’ve added a vignette to darken the edges of the frame.
If you enjoyed this tutorial but want a bit more power from your laptop, why not look at the best photo-editing laptops? If you're really keen to improve your skills further then online photography courses could be the way to go.

