One of the things that puts people off recording their own podcast is the amount of professional kit you need, not to mention a decent room to record in that offers the optimum acoustics, and without lots of background noise.
But what if you didn’t need to invest in a recording studio, or even a decent microphone to get great results? Well, thanks to AI and Adobe Enhance Speech, you can turn even poor quality recordings into something that sounds like it was recorded using a proper setup.
Not only will Enhance Speech make voices sound as if they’ve been recorded professionally, it will also remove all the annoying background noises, hisses and crackles entirely.
I’ve been using Adobe’s Enhance Speech for my own podcast recordings for a while now, but it’s just been upgraded to version two, which feels even easier to use. The processing time certainly feels a lot quicker. Here’s how it works:
How to enhance any recording
We're going to show you how to get started with Adobe Enhance Speech, which is one of the Adobe Podcast tools.
1. Record your audio

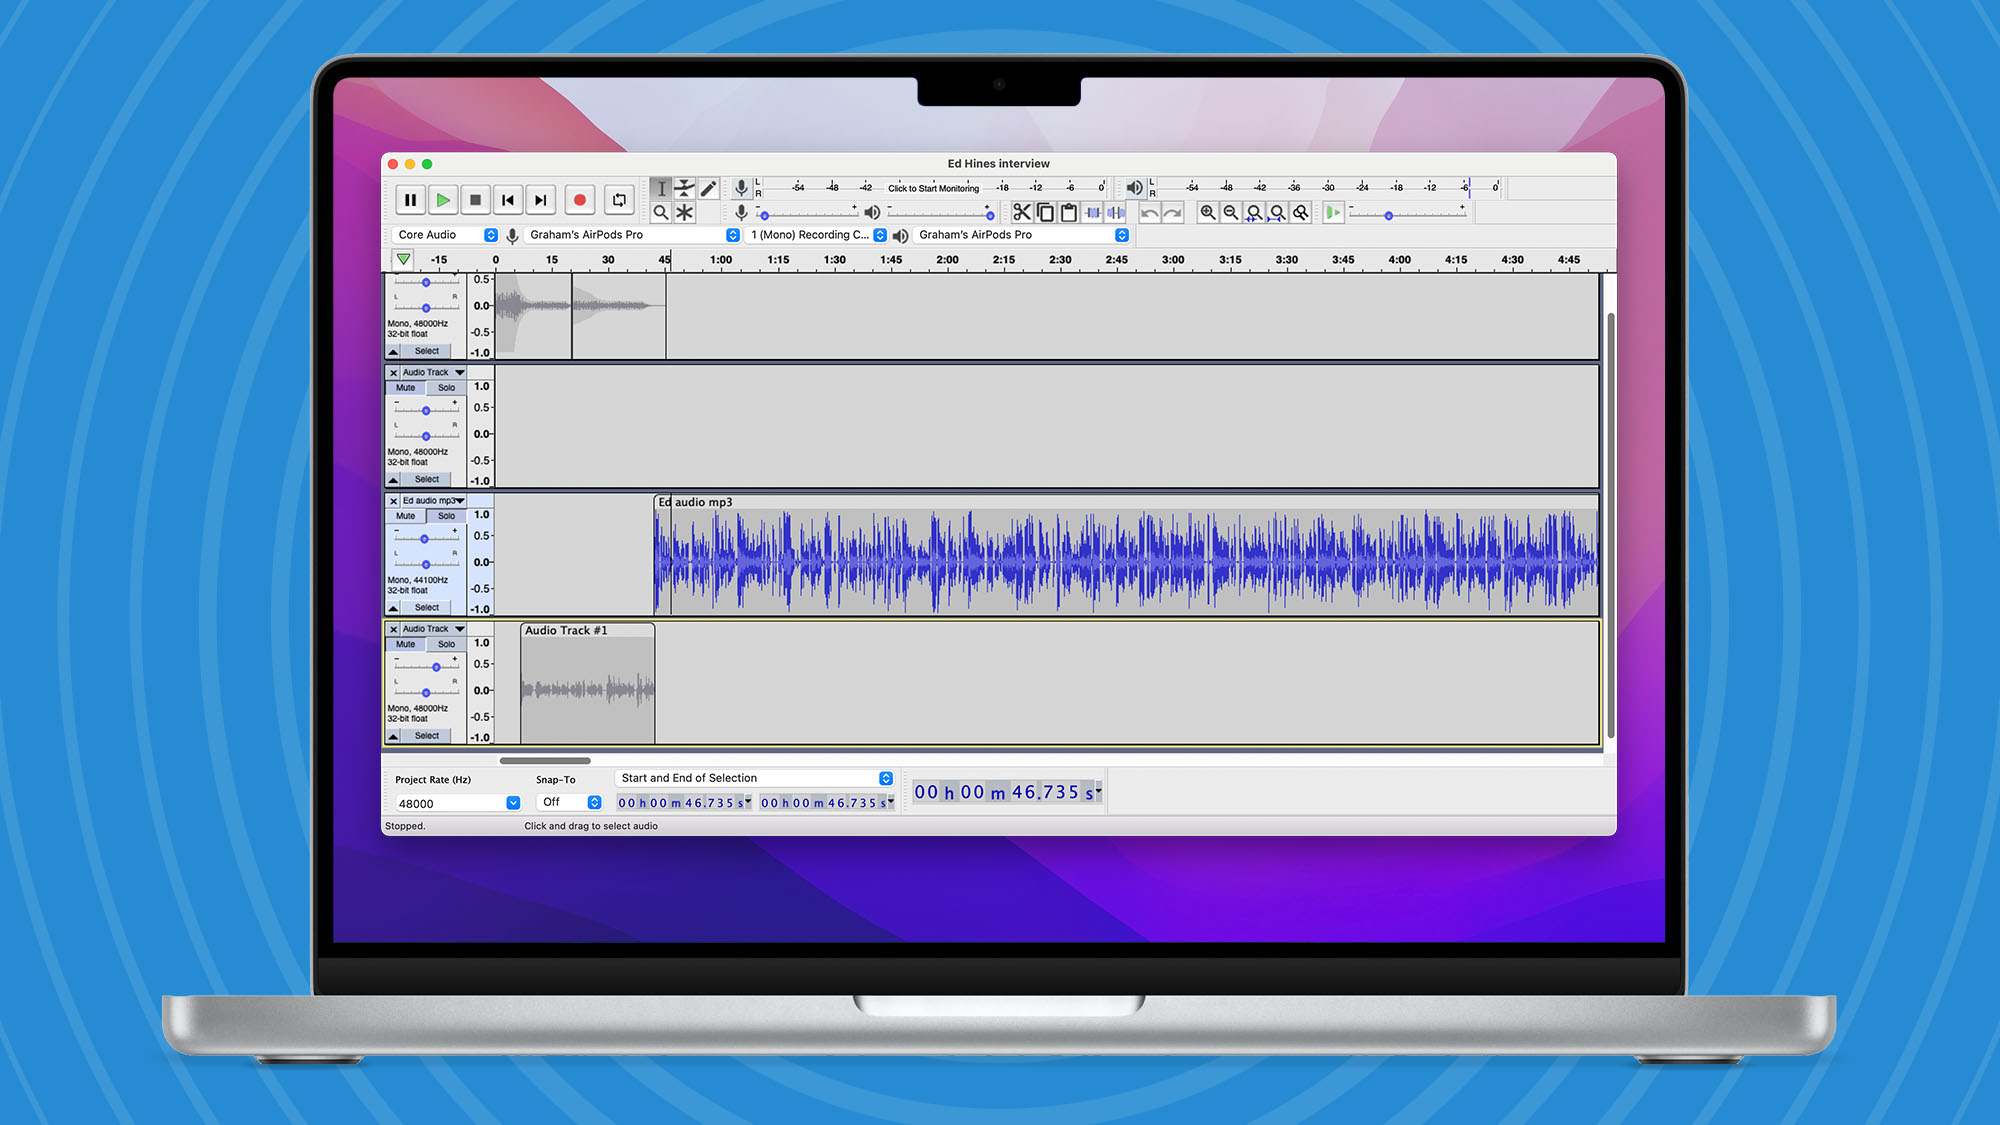
First of all, record your podcast audio. Sit down with a friend around a microphone and have a chat, or do a VC and export the audio. Remember, just record the speaking sections, and don’t add any music at this stage. It doesn’t really matter what format you save your recording in - either a WAV or MP3 - because Enhance Speech can handle most file types. Here I'm using Audacity to record my audio.
2. Upload your audio

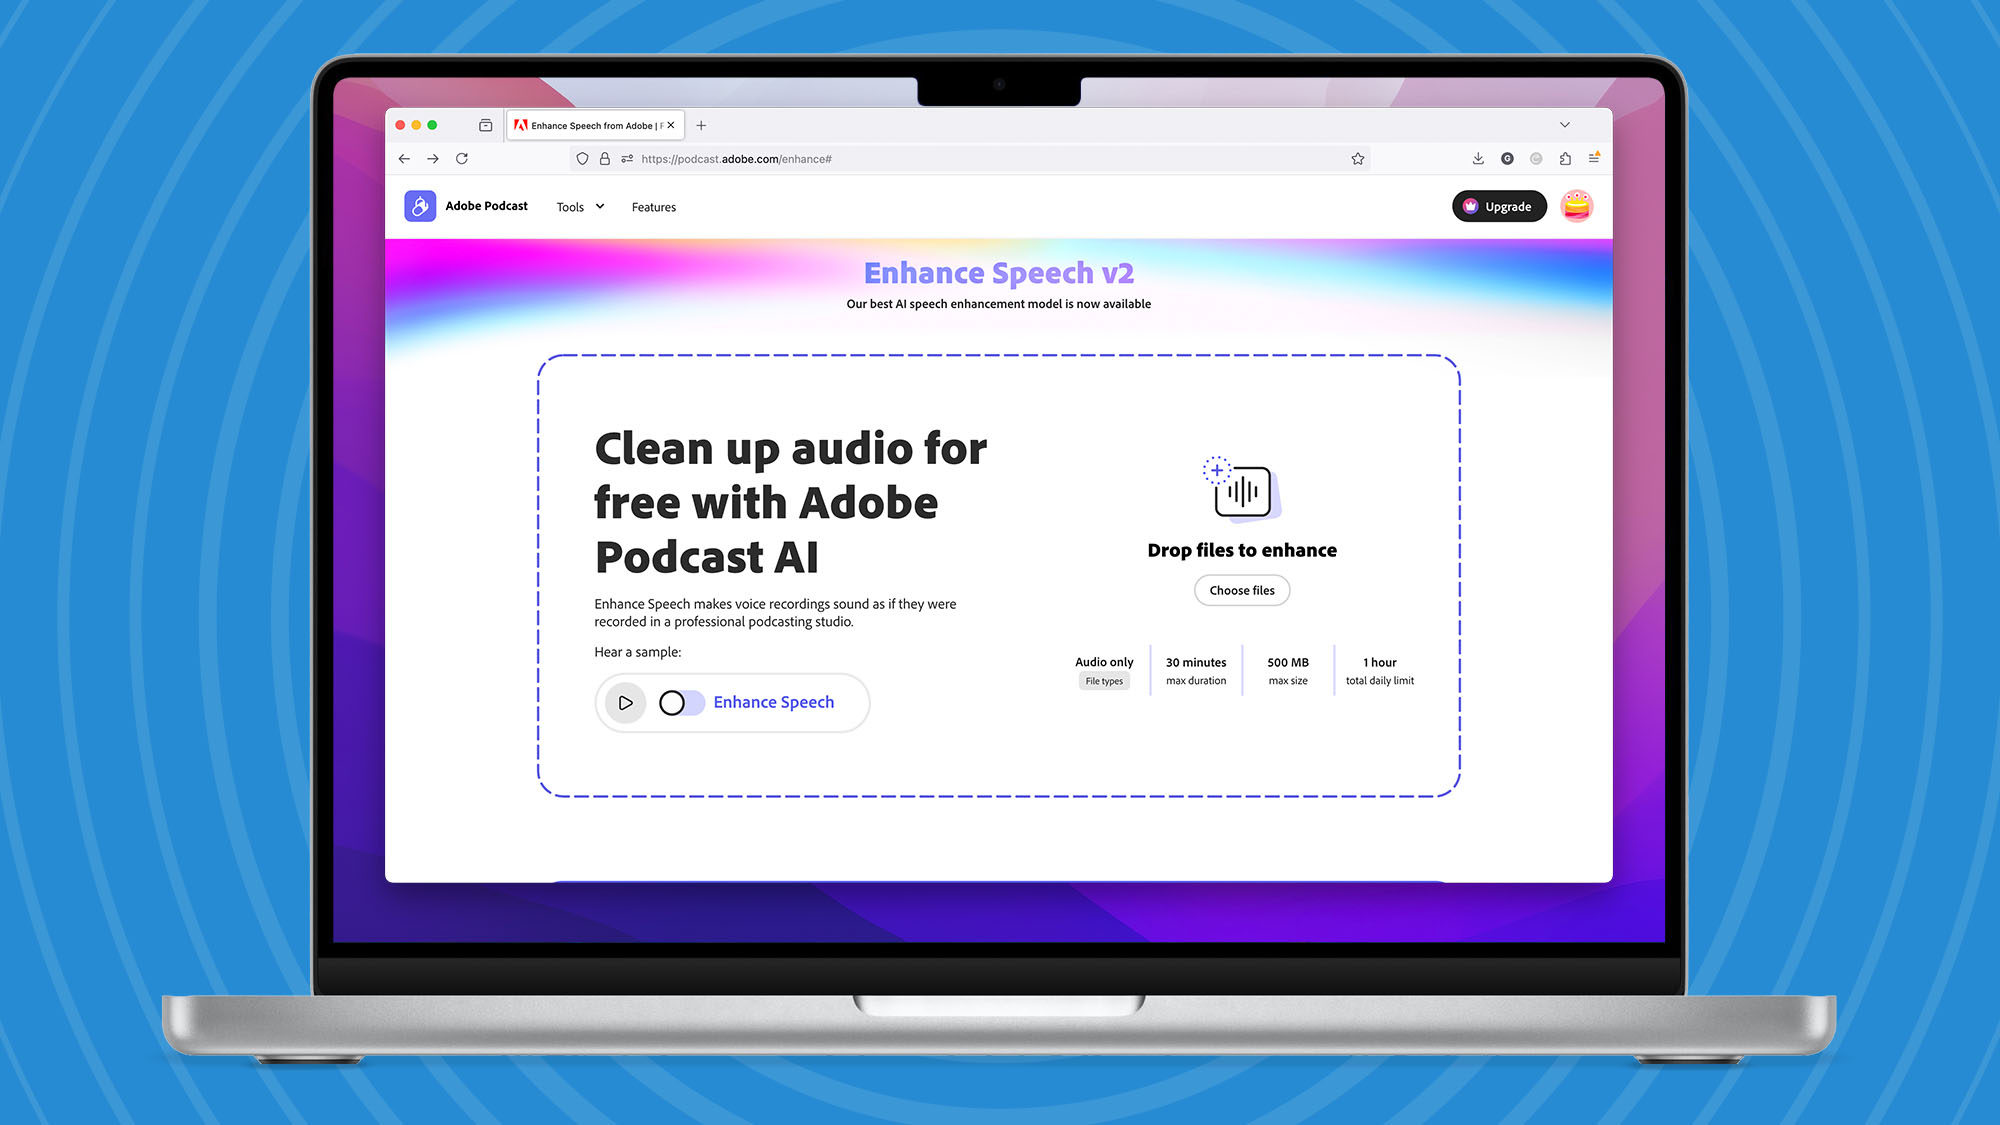
Go to Adobe Enhance Speech v2 in your web browser and click on the 'Choose files' button, then locate your audio and upload it. This might take a couple of minutes, depending on how long it is, but once it’s uploaded, it will be ready to go immediately.
3. Enhance your audio

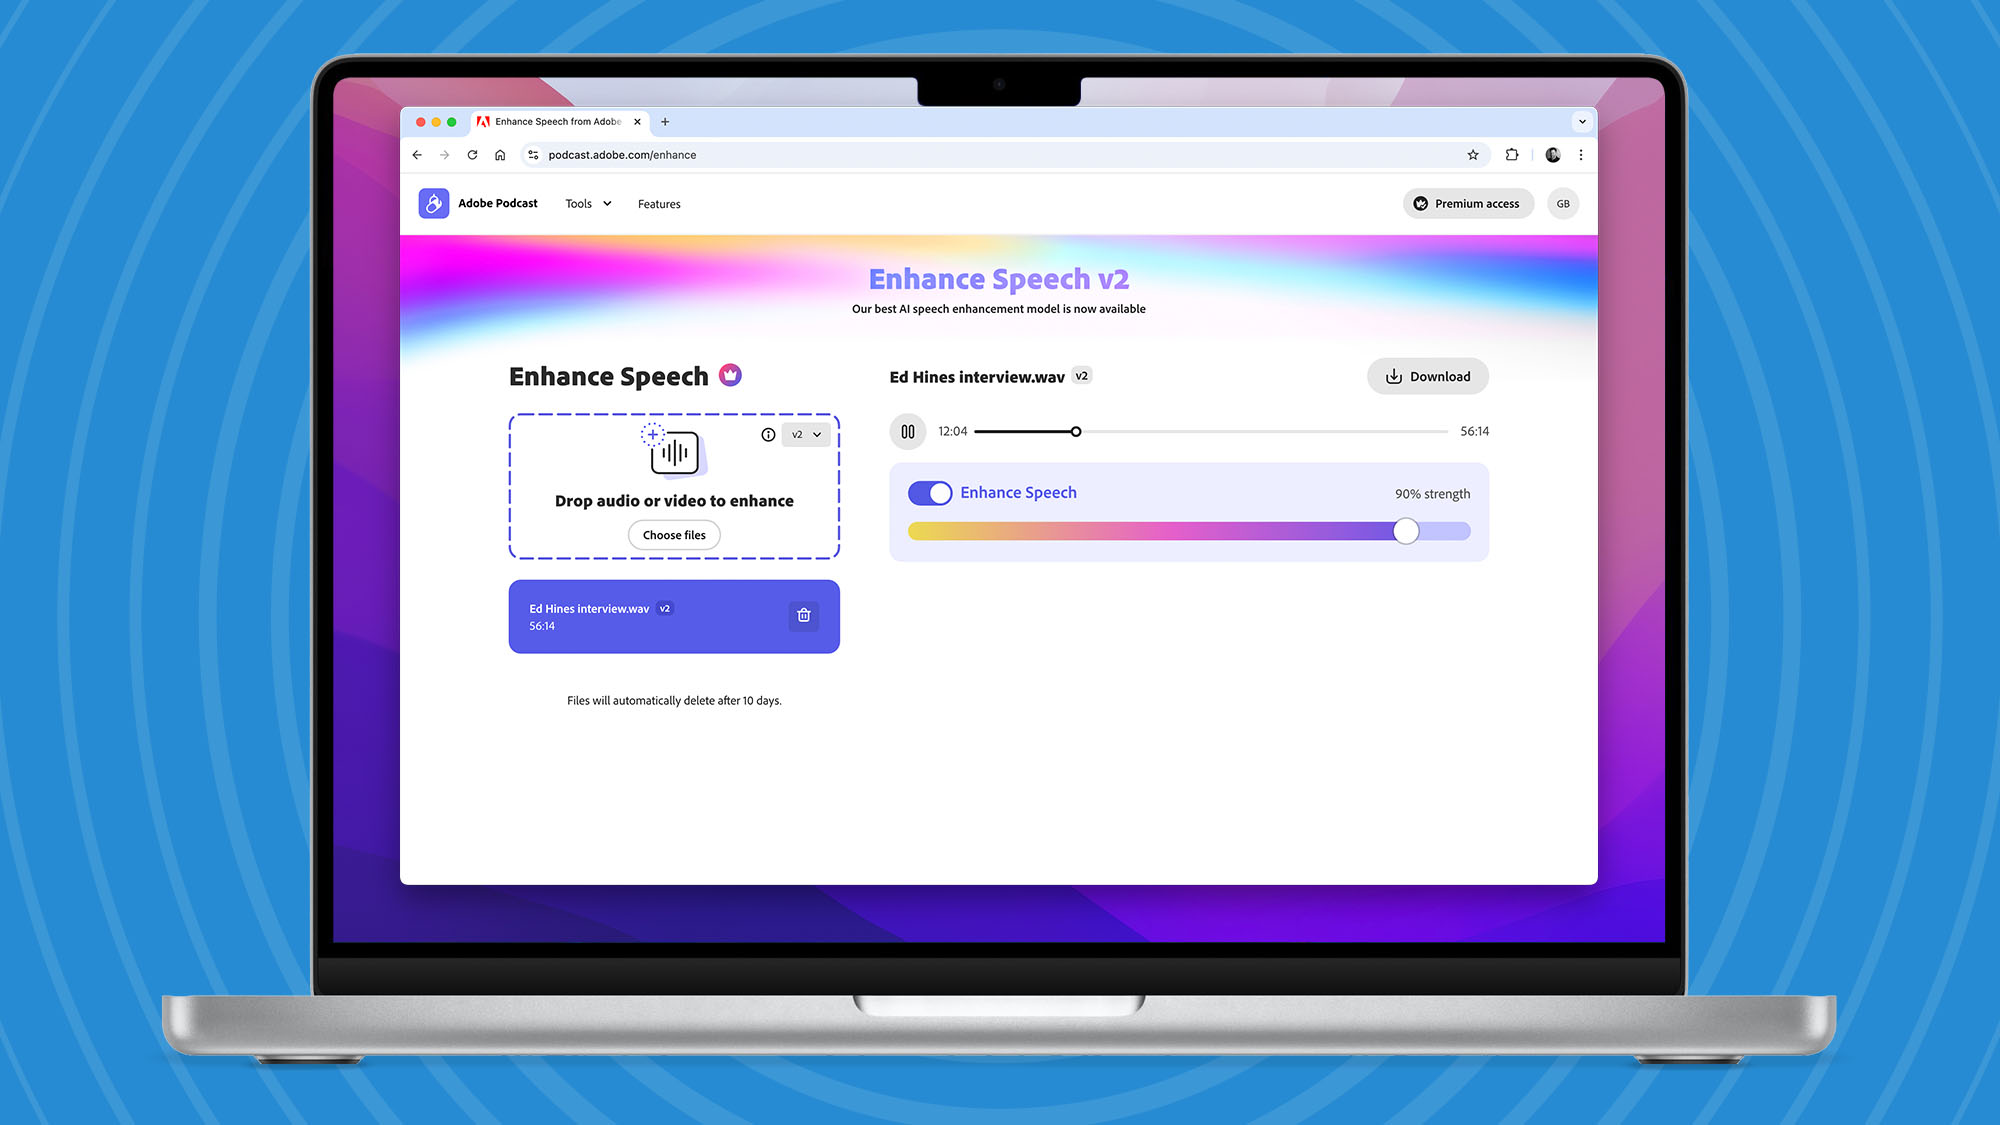
Once the file is uploaded, you can preview your enhanced audio. Click the play button to hear it. If you’d like to compare it to the original, just toggle the ‘Enhanced audio’ switch on and off. There’s also a slider you can use to decide on how much enhancement you’d like (a premium feature). One thing to notice is how much more bass is added to the enhanced audio.
4. Download your audio and make a podcast

Once you’ve added the correct amount of enhancement you can download the audio, then put it in your audio editor. I'm using Audacity because it’s fully featured and free, but you might want to check out our best audio editors of 2024. Add some music at the start, or edit out parts you don’t want.
What's next
The end result of using Adobe Enhanced Speech 2 is that your podcast sounds as if it was recorded in a proper studio. My favourite feature is its ability to remove background noise almost entirely. Gone are sounds of traffic passing by outside, which can often ruin a podcast recording.
On the free Adobe account you get audio only, 30 minutes of recording, 500MB max files size, and a one hour daily limit of enhancement. If you upgrade to Podcast Premium for $9.99/month (£9.99/AU$20) you can get video as well as audio support (MP4, MOV and more), four hours of daily enhancement, control over strength, and access to both V1 and V2 models. A seven-day trial is also available.
The final step is to upload your audio file to a podcast platform. Spotify for Podcasters is a good choice because it's free and it makes it easy to share your file, but be sure to check out our best podcast hosting platforms of 2024.


