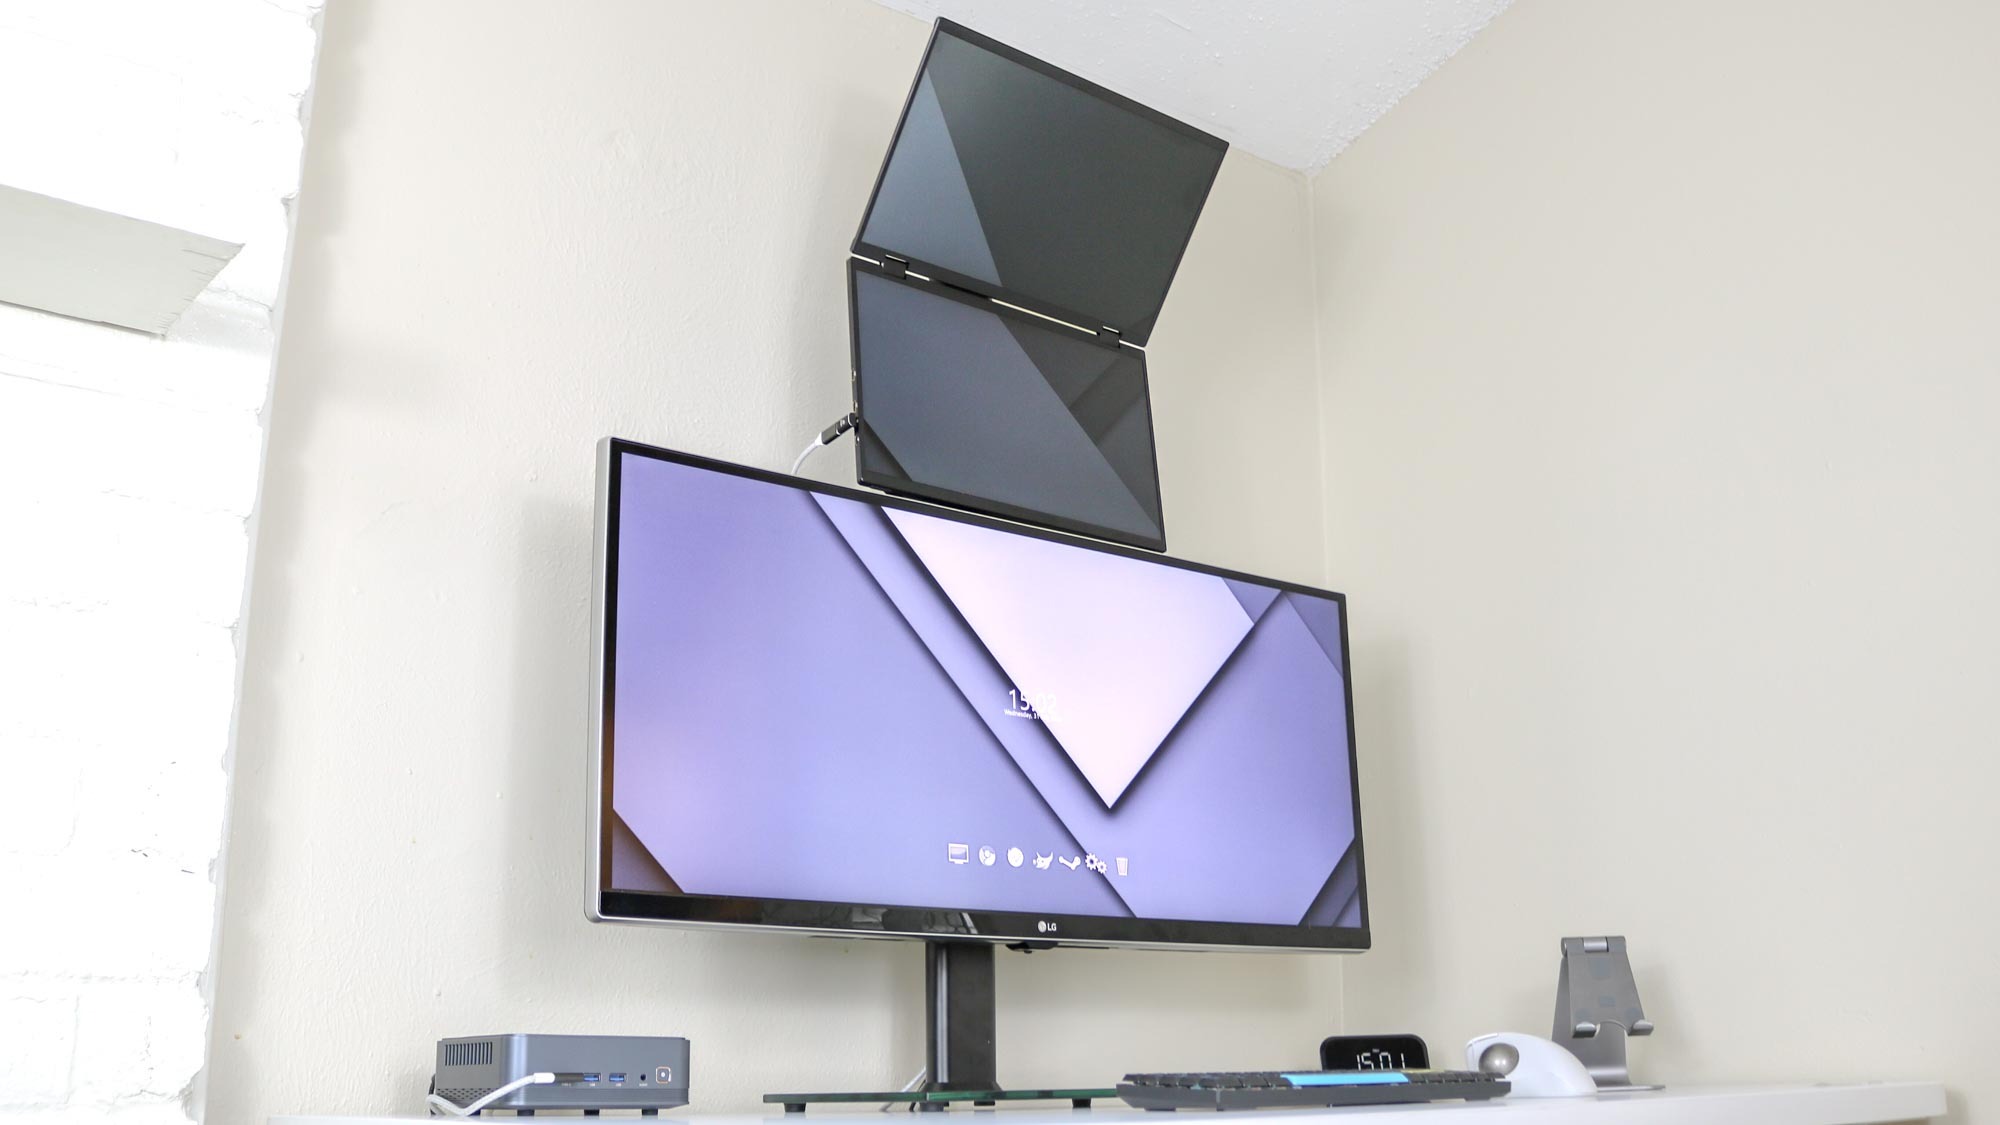
At this point in my life, a single monitor just doesn’t cut it anymore, which is why I spent the past week trying out three different stacked monitor setups to see which one I liked the most.
Before switching to a multi-monitor setup, I had one of the best tablets next to my monitor and I used it to quickly glance at useful information while doing the majority of my work on a single screen. This setup wasn’t without its issues though, as I had to remember to charge the tablet every night. Plus, it wasn’t actually connected to my computer, which meant I couldn’t easily drag programs or windows to it.
When I started working from home full-time six years ago, I decided to invest in an ultrawide monitor instead. That way, I could have two windows side by side without having to constantly switch back and forth between them. This worked for a while but when I joined Tom’s Guide, I needed to stay in touch with my coworkers throughout the day via Slack. This meant giving up one of my precious Chrome windows or having to constantly switch tabs to see what everyone else was up to.
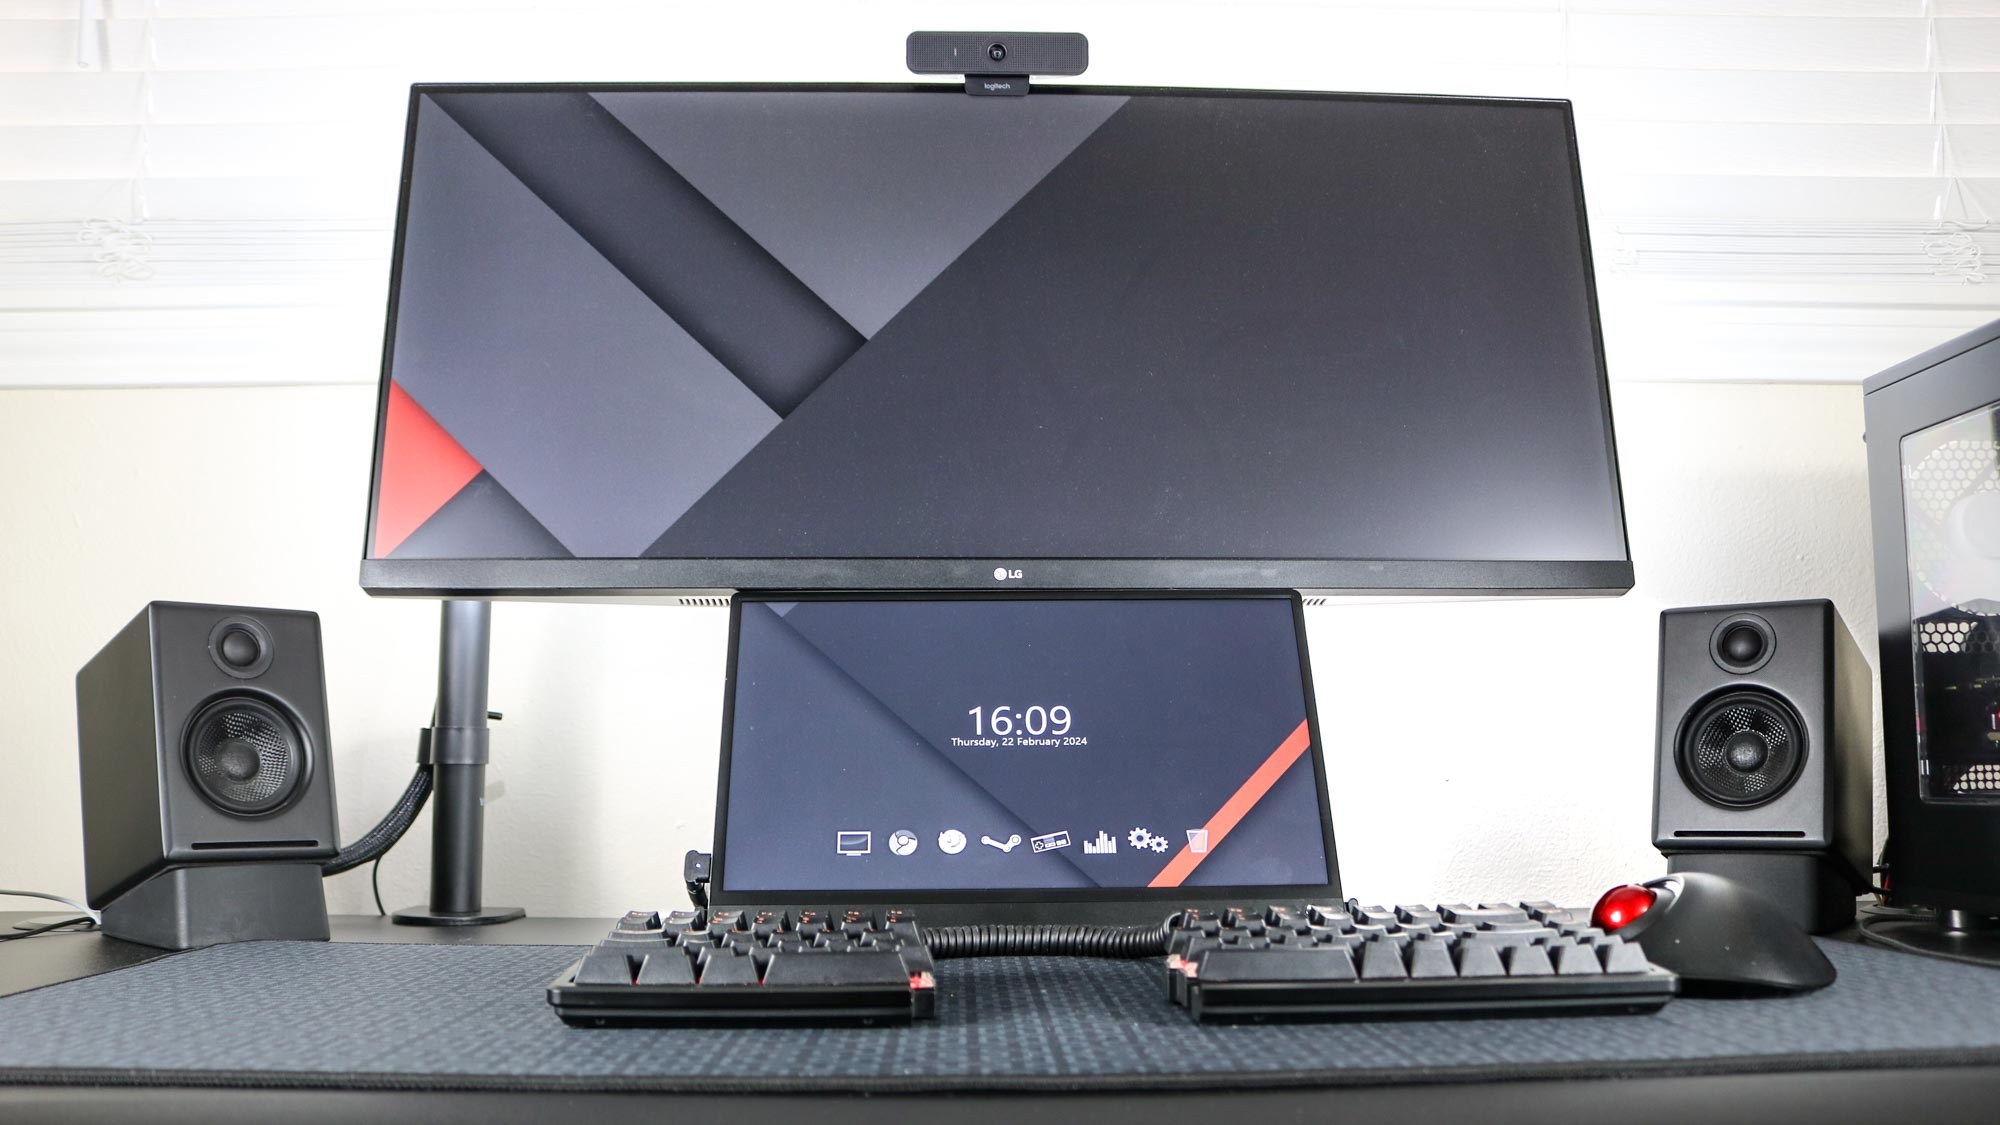
Though I once thought a single ultrawide monitor was enough, I eventually ended up adding a touchscreen portable monitor underneath it. I’ve been rocking that setup at my main desk for almost a year now and I absolutely love it. However, as someone who reviews the best standing desks and the best office chairs for a living, I’m always putting together new desk setups to show them off.
For instance, last year I put together a new desk setup using a mini PC mounted to the back of a monitor. For that setup, I used a monitor stand to give it a cleaner look and ended up liking that stand so much that I bought another one in white for a different desk setup. It was then that I found out I could get the same monitor stand in a dual monitor version. When it went on sale during Prime Day, I couldn’t help myself.
Here’s what my experience has been like using three different stacked monitor setups for a week and which one I ultimately decided to keep using.
Doubling up
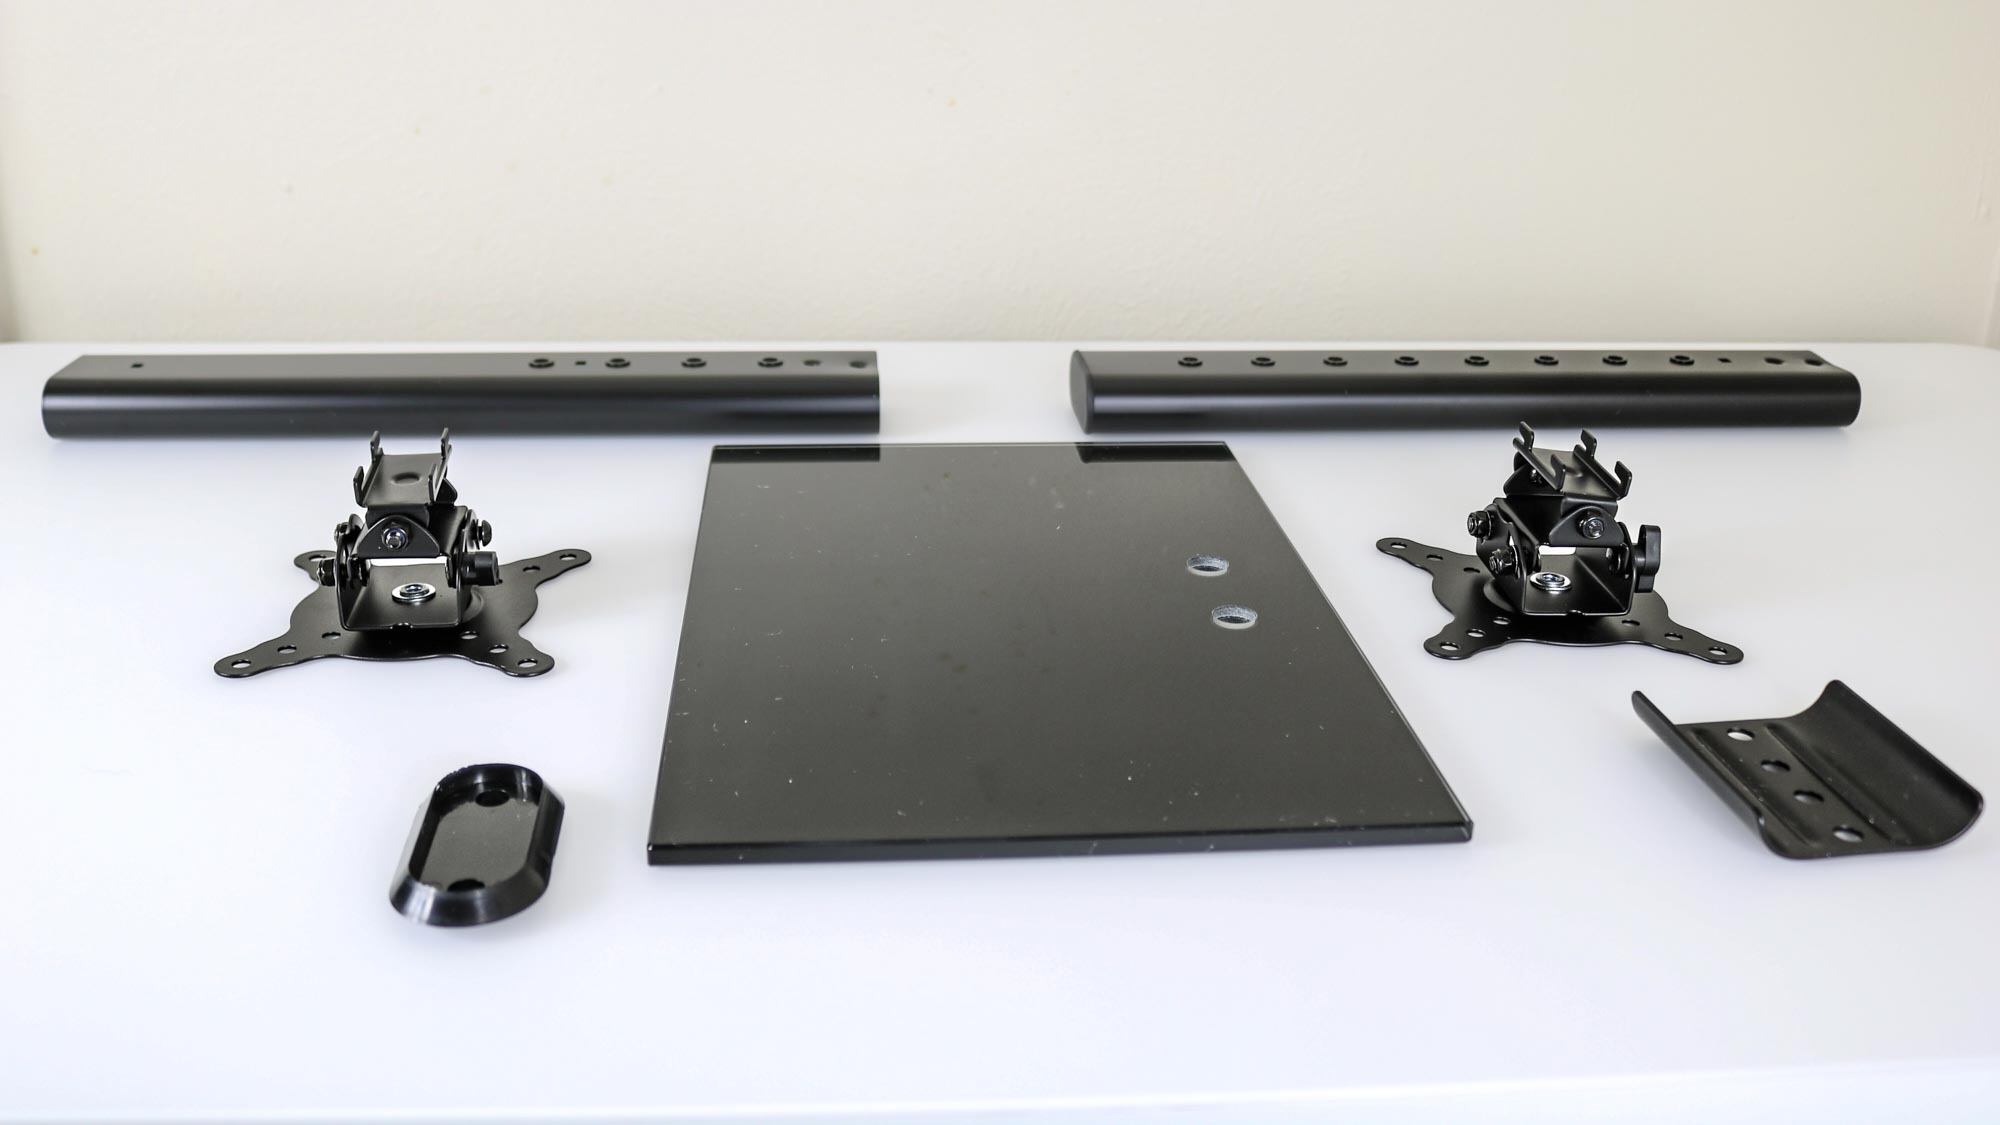
The dual monitor version of this stand is almost identical to my existing ones with a glass bottom plate, a metal stand and a monitor bracket that slots into it. However, you get an extra stand with this version, a small metal plate to connect them and a second monitor bracket. Just like the single monitor version, it comes in either black or white.
Putting everything together is extremely simple too. You just need to secure the two metal stands together and then attach them to the underside of the glass bottom plate. Then it’s just a matter of attaching the monitor brackets to the back of your monitor — or monitors in this case — and then slotting them into the stand.
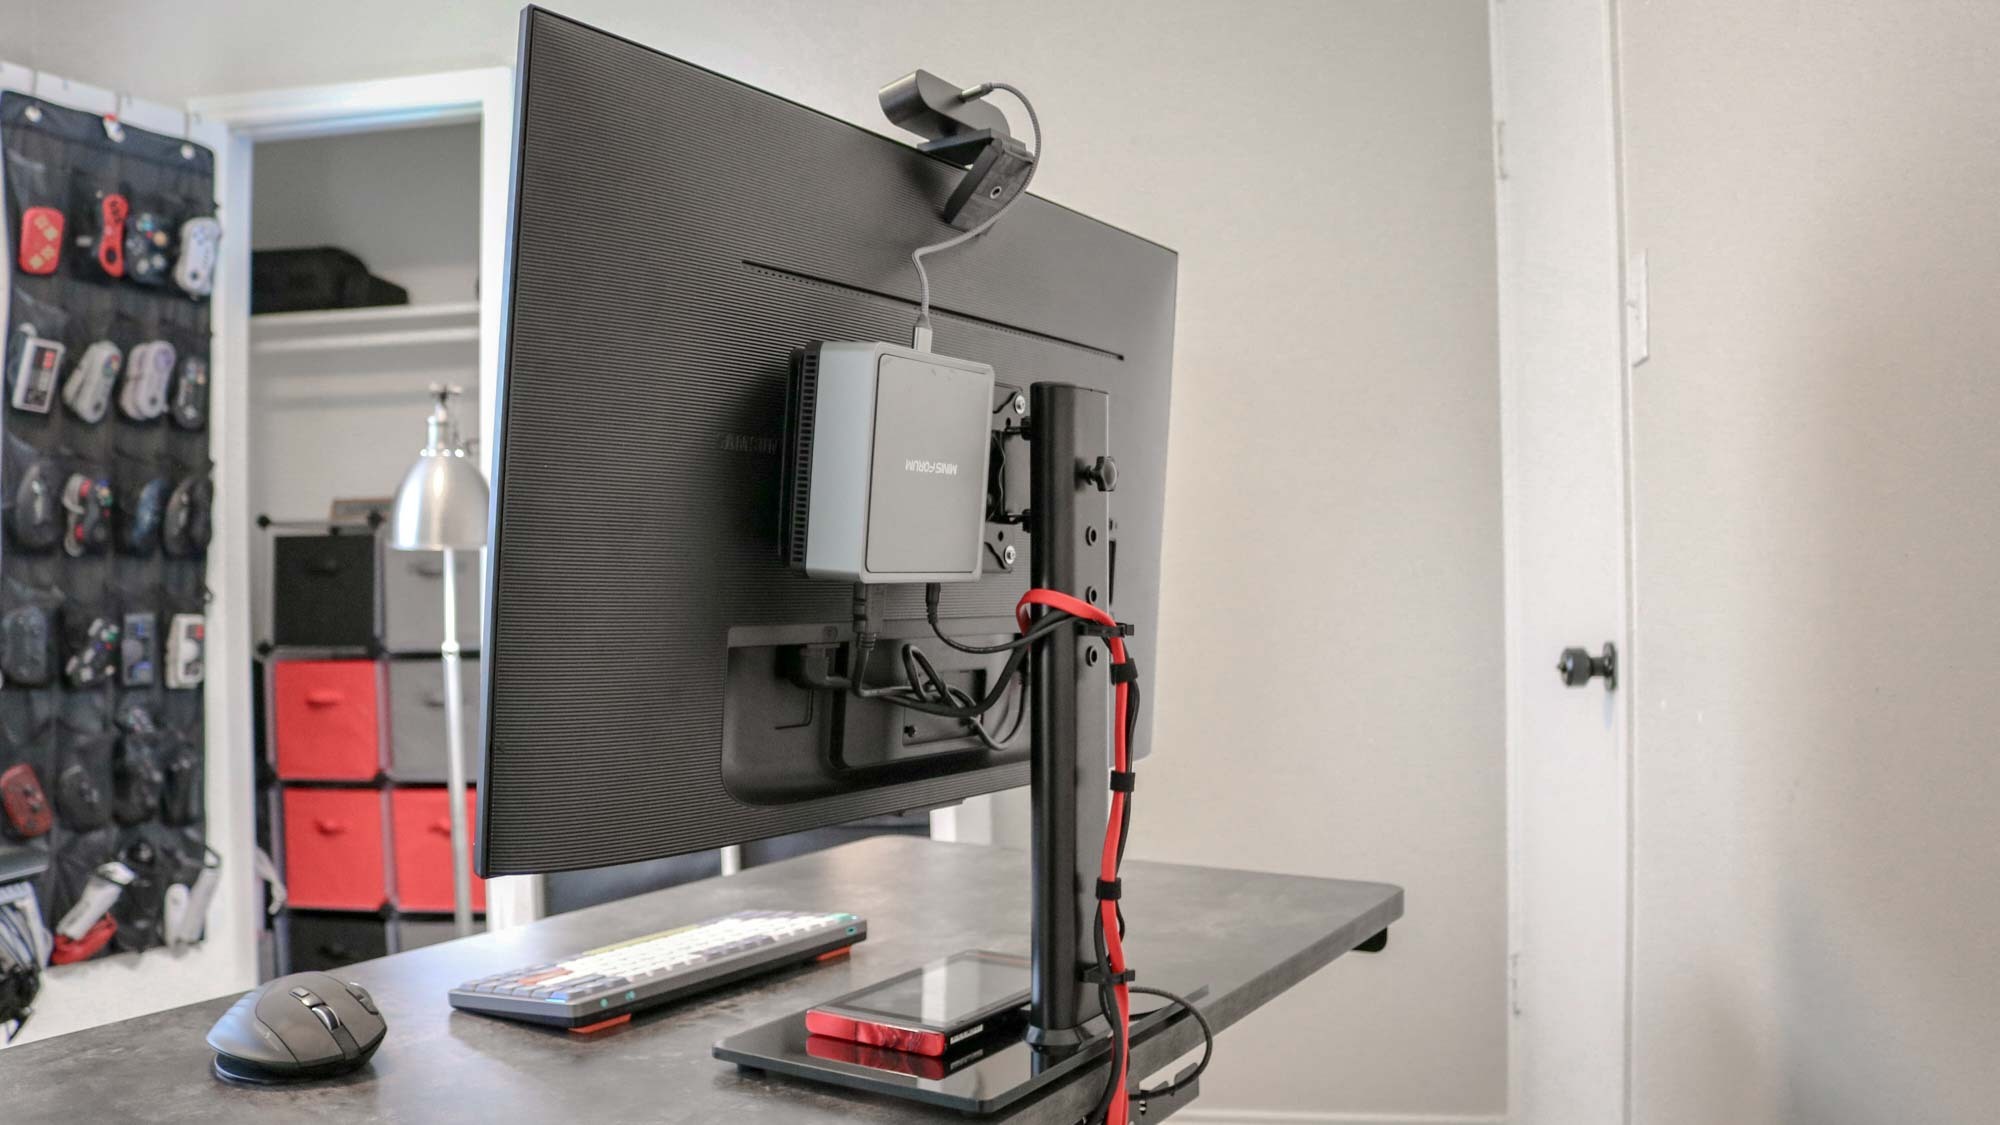
Another thing I really like about this monitor stand is that it comes with two wire guards that slot into the back of the stand. They make cable management a breeze since you can easily run cables up from your desk to your monitor and the stand ensures they’re out of sight. While you can see all the cables in the photo above, when you’re facing the monitor, you can’t see anything.
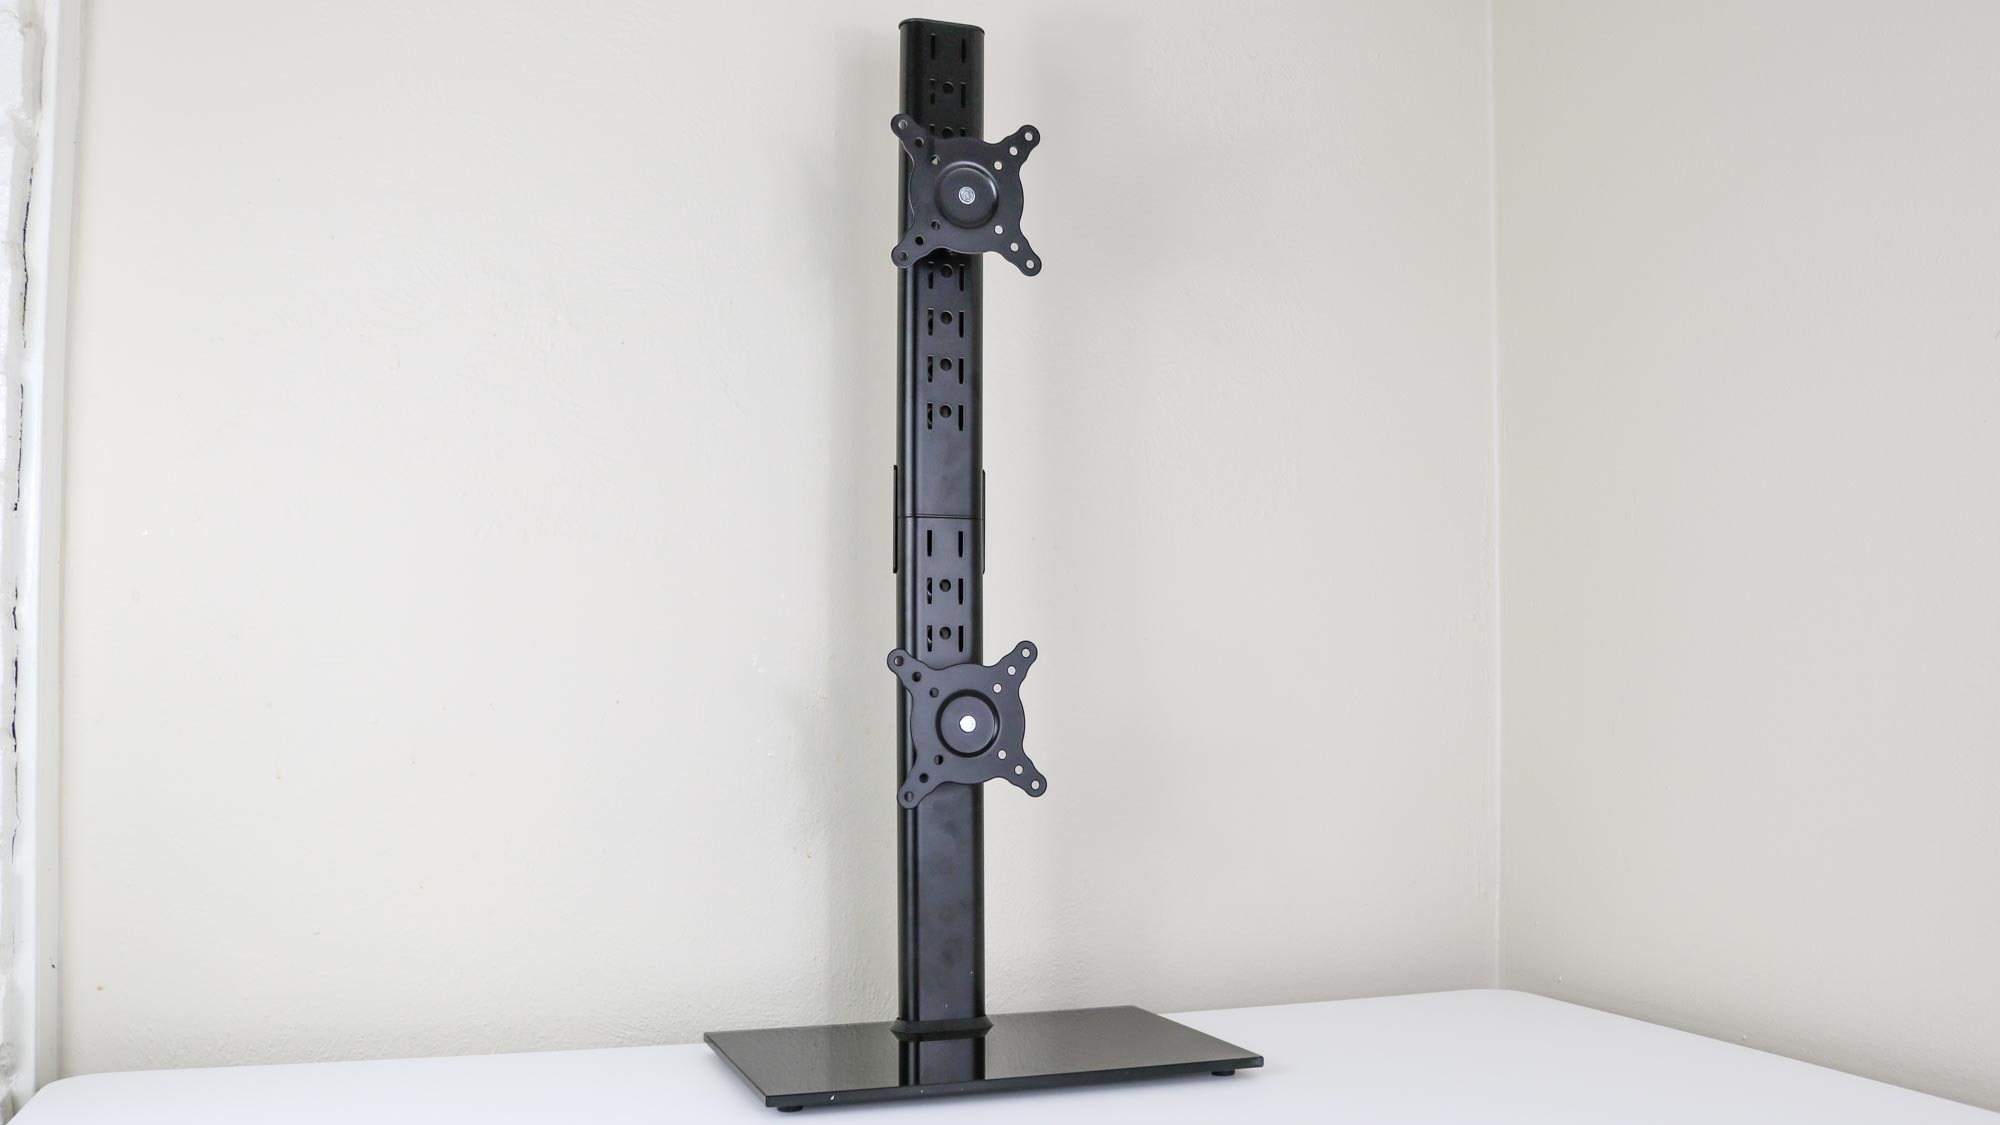
In less than 10 minutes, I put my new dual monitor stand together and had it ready to go on my desk. It is quite a bit taller than the single monitor version at 29.2 inches compared to just 16.6 inches, so do keep this in mind if you plan on following in my footsteps.
Ultrawide with room to spare
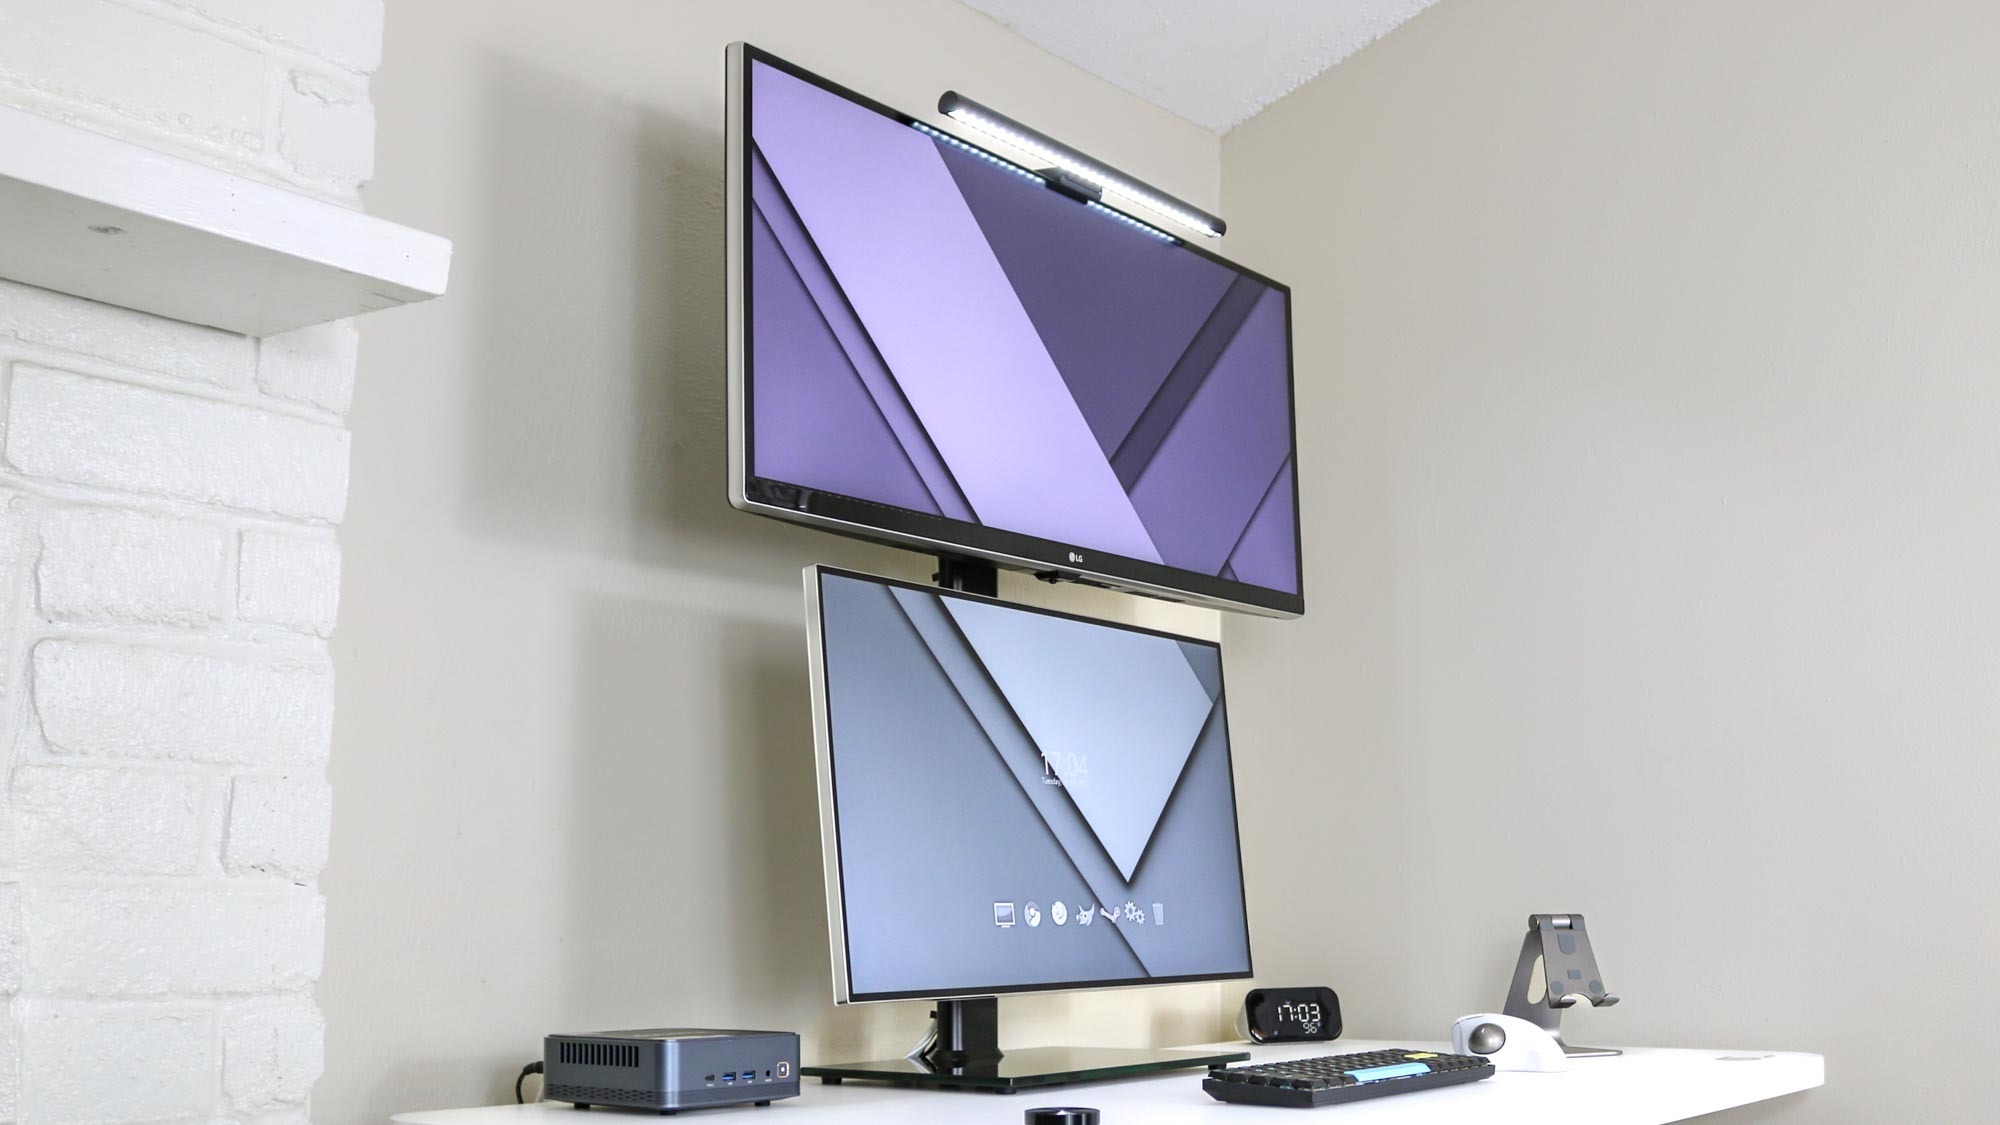
With my new dual monitor stand all setup, it was time to try the first of three stacked monitor setups. Fortunately, I have several of the best monitors around my house that I’ve picked up over the years for various projects and the Acemagic F2A mini PC to power the whole thing.
As I really like using an ultrawide with a smaller monitor underneath my main desk, I decided to try recreating that setup but with a monitor stand instead of a monitor arm. Unlike the portable monitor I’m using there though, the 16:9 monitor I used here is quite a lot larger at 27-inches as opposed to 15.6-inches. As such, I had to have the ultrawide monitor up a bit higher than I would have liked.
Even if it wasn’t ideal, I enjoyed the time I spent working on this stacked monitor configuration. Not only could I have two windows side by side on the top, but I could also have another full-sized window underneath them that was a bit larger than the one on my portable monitor. I added a monitor light bar on top of the ultrawide but I wanted to put one of the best webcams in between the two monitors. Unfortunately, there just wasn’t enough room as the ultrawide monitor on top has a joystick button to control them right underneath the LG logo.
Stacked ultrawide with a twist

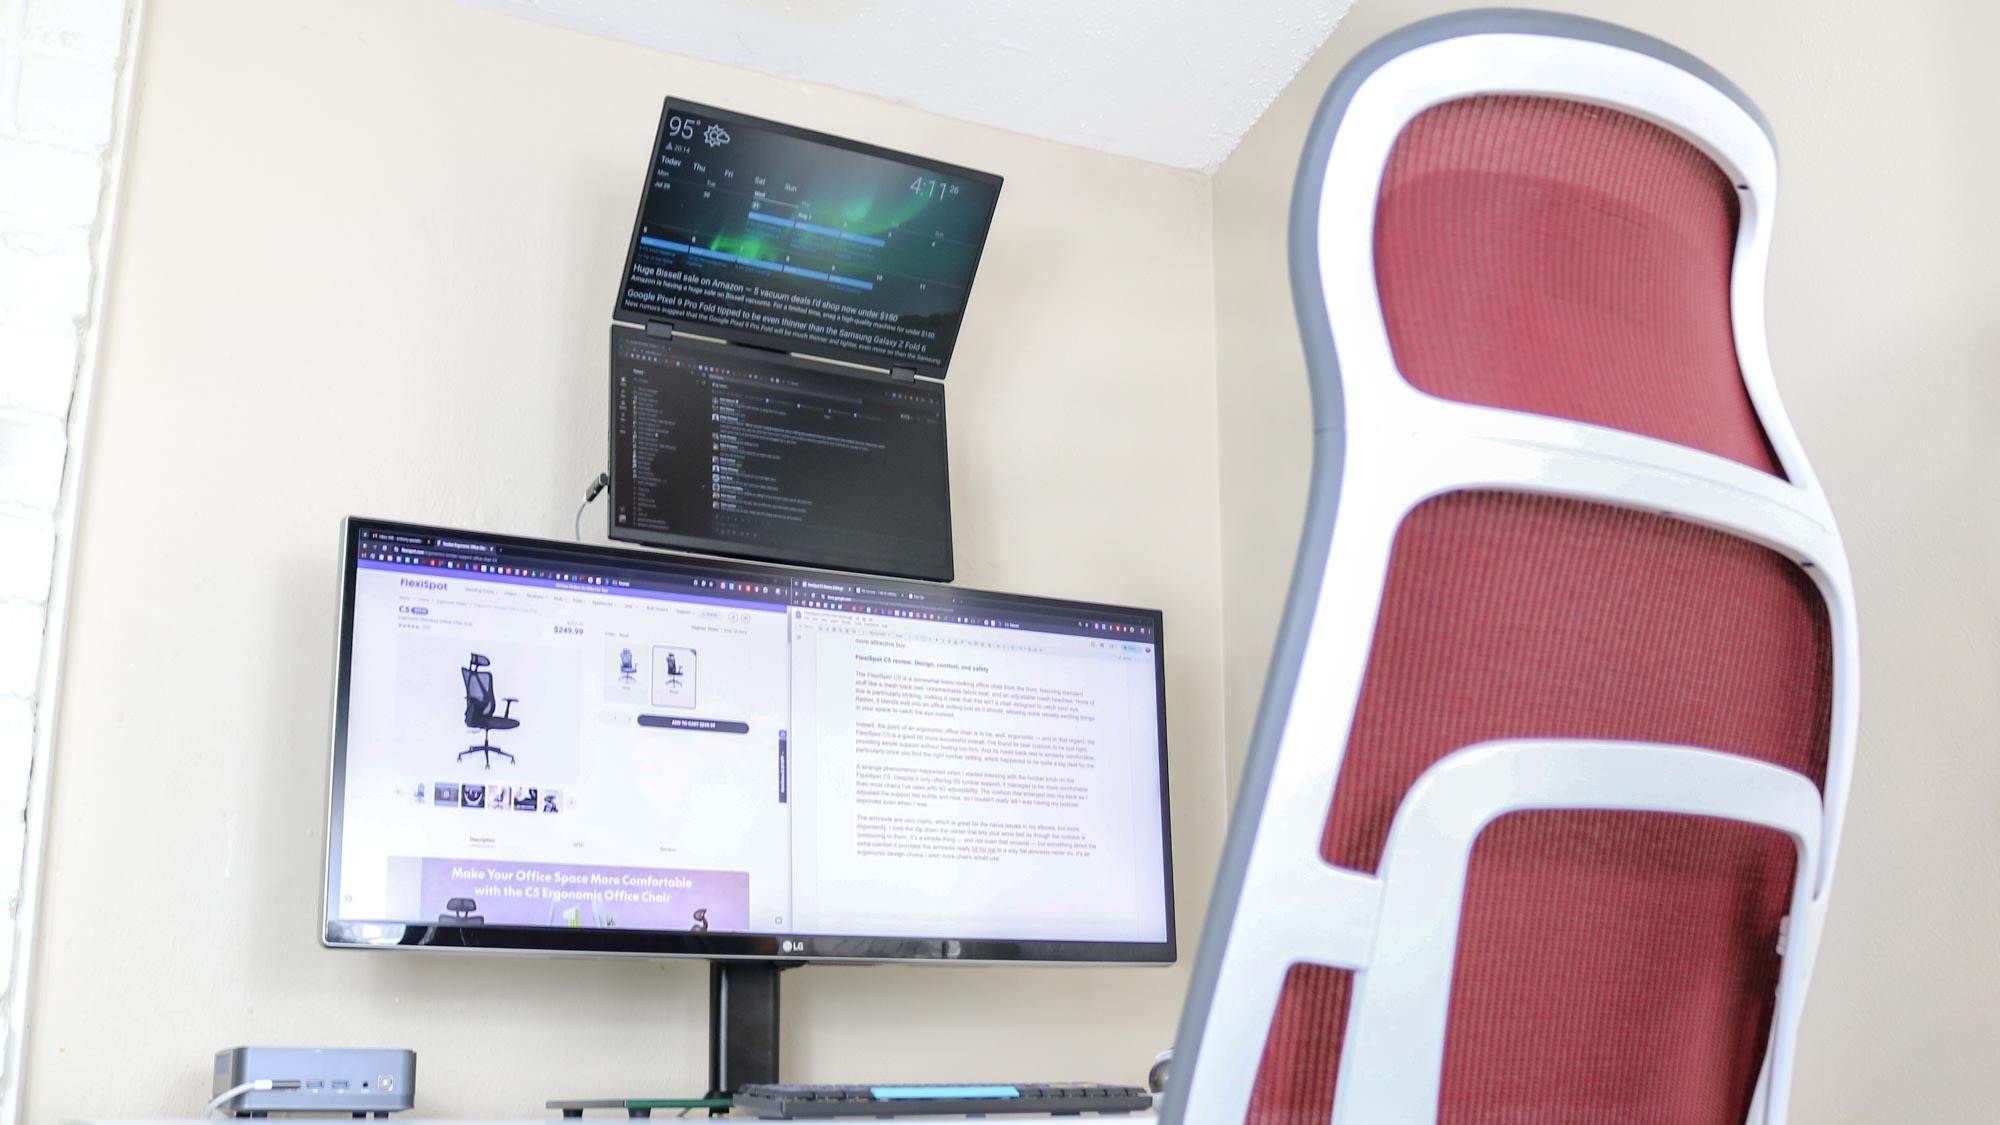
I wasn’t done with my ultrawide monitor though and I decided to use it again in my second stacked monitor configuration. This time around, I had it on the bottom and a portable monitor on the top. However, the Uperfect Delta ($499, Amazon) isn’t your typical portable monitor as it has two folding displays connected by a hinge.
Although I would have loved to use my touchscreen portable monitor in this setup, it doesn’t have VESA mounting holes at the back which is why I’m using one of the best laptop stands to prop it up on my main desk. The Uperfect Delta does have VESA holes on the back of the lower monitor, which is why I decided to mount it above my ultrawide.
Just like I did when I brought a mini PC with me on my last trip, I’m powering both of this portable monitor’s displays using a single USB-C cable. This made cable management a bit easier but I also used a USB-C elbow connector so that the cable could run directly behind the monitor instead of off to the side.
Now this stacked monitor setup may look a little silly in pictures but I absolutely loved using it. The hinge on the Uperfect Delta is strong enough that I was able to angle the top display over the ultrawide monitor underneath it. I did most of my work on the ultrawide but used the portable monitor’s dual displays to show useful info. I had my DAKboard-powered digital dashboard with the weather, my calendar, and all of the latest stories from Tom’s Guide on the very top display and underneath it, I had Slack open to keep up with my coworkers.
Tried and true
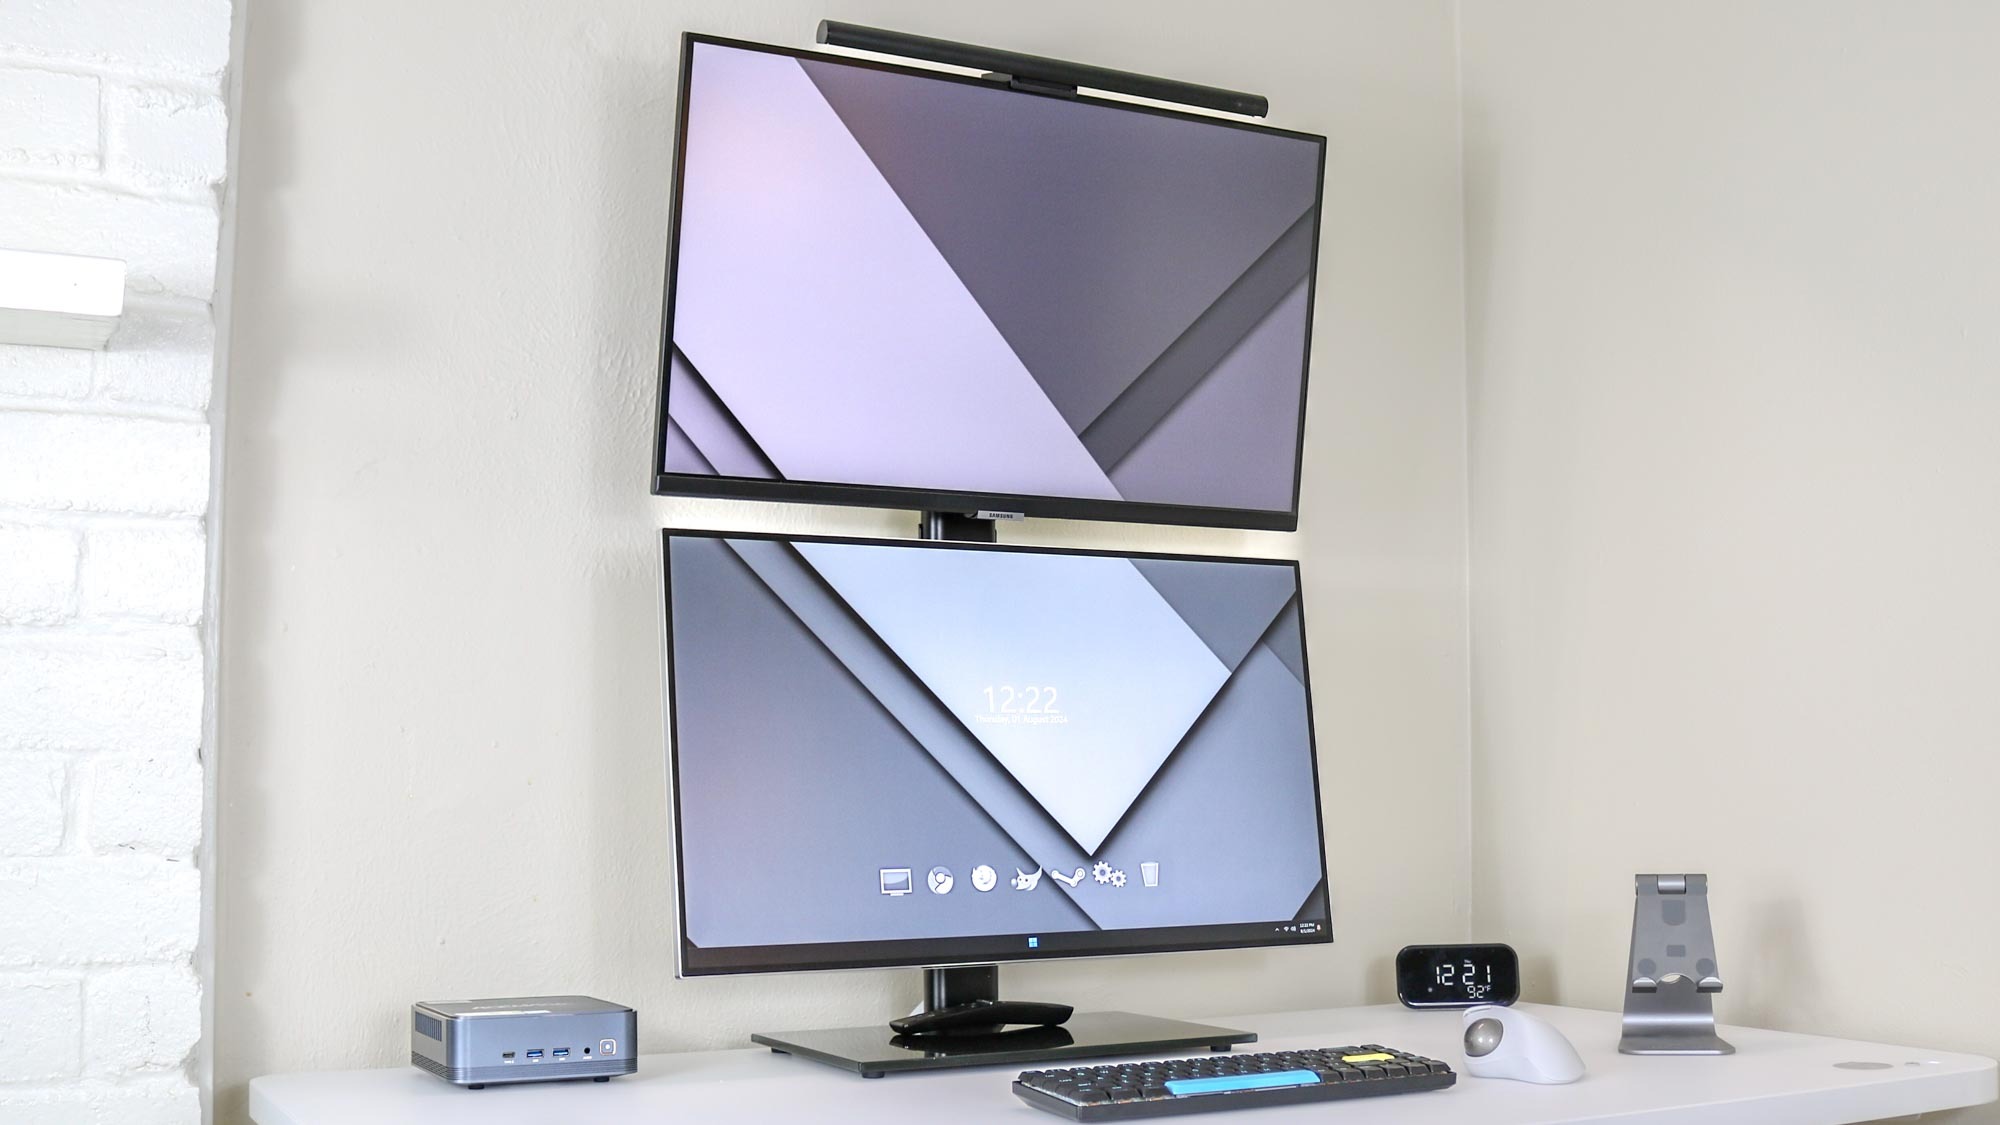
For the third stacked monitor setup, I debated using a 32-inch monitor on the top with a (non-touch) portable monitor underneath it. While I might give this setup a try eventually, I decided to go with something more traditional to finish things off.
I used that same 27-inch monitor from the first setup on the bottom but I added another 27-inch monitor on top. Though the bottom monitor is from LG and the top one is from Samsung, they’re both the same size and actually work quite well together. I also put my monitor light bar on the very top and with the help of a USB-C extension cable, I was able to use the Opal Tadpole webcam with this setup too (not pictured here). This particular webcam was designed to be used with the best laptops but in this case, there was just enough room between the two monitors to wedge it in there.
I have to admit this was the stacked monitor setup I was least excited about. However, once I put everything together, I realized why it’s the most popular. With the top monitor tilted inward and the bottom monitor tilted back, it really feels like you have one giant monitor, kind of like with the LG DualUp. I found this setup to be the most comfortable to use and after a week of putting monitors up and then taking them down, I’ve decided this one will be staying in place for a while.
Not your average desk setup
What works for one person isn’t necessarily going to work for another but that’s one of the best things about taking the time and effort to build out your own desk setup. Unlike in the living room where you wouldn’t just add another TV, you can easily and relatively affordably add another monitor to your desk setup. In fact, doing so could even help boost your productivity as you have more screen real estate to work with and you can keep all of your different tasks organized by which monitor they’re on.
With previous multi-monitor desk setups I’ve put together and written about in the past, a lot of people in the comments have said that using two monitors like this would put a lot of strain on one’s neck. Well, here’s how I avoid neck strain when using a setup like this. Since I always use an electric standing desk, it’s really easy to make sure that my monitors are in an ergonomic position and right at eye level. As for the one on top in the picture above, I lean back in my chair when I need to look at something on those screens
Even if a stacked monitor setup isn’t for you, I still recommend investing in a monitor stand or a monitor arm due to how much flexibility they give you. Not only can you raise your monitor to ensure it’s at eye level, but you can also tilt it forward or backward or even turn it from landscape to portrait orientation depending on the task at hand.
Finding out what works for you when you work from home or game at your desk is something you’re going to have to figure out on your own. I’m here to give you some examples of the setups I’ve used, along with tips and tricks on how to get the most out of your current setup, and to recommend some of the products I use to put together an awesome desk setup even easier.


