As a runner, I know that strong glutes are the secret to running faster. The glutes make up the largest muscle group in the body, but if, like me, you spend a lot of time sitting down, the glutes can become a little lazy. One exercise known to fire up your glutes is the single-leg glute bridge, which also isolates and strengthens the hamstrings simultaneously. To find out more, I added 50 single-leg glute bridges a day to my workout routine, read on to find out what happened.
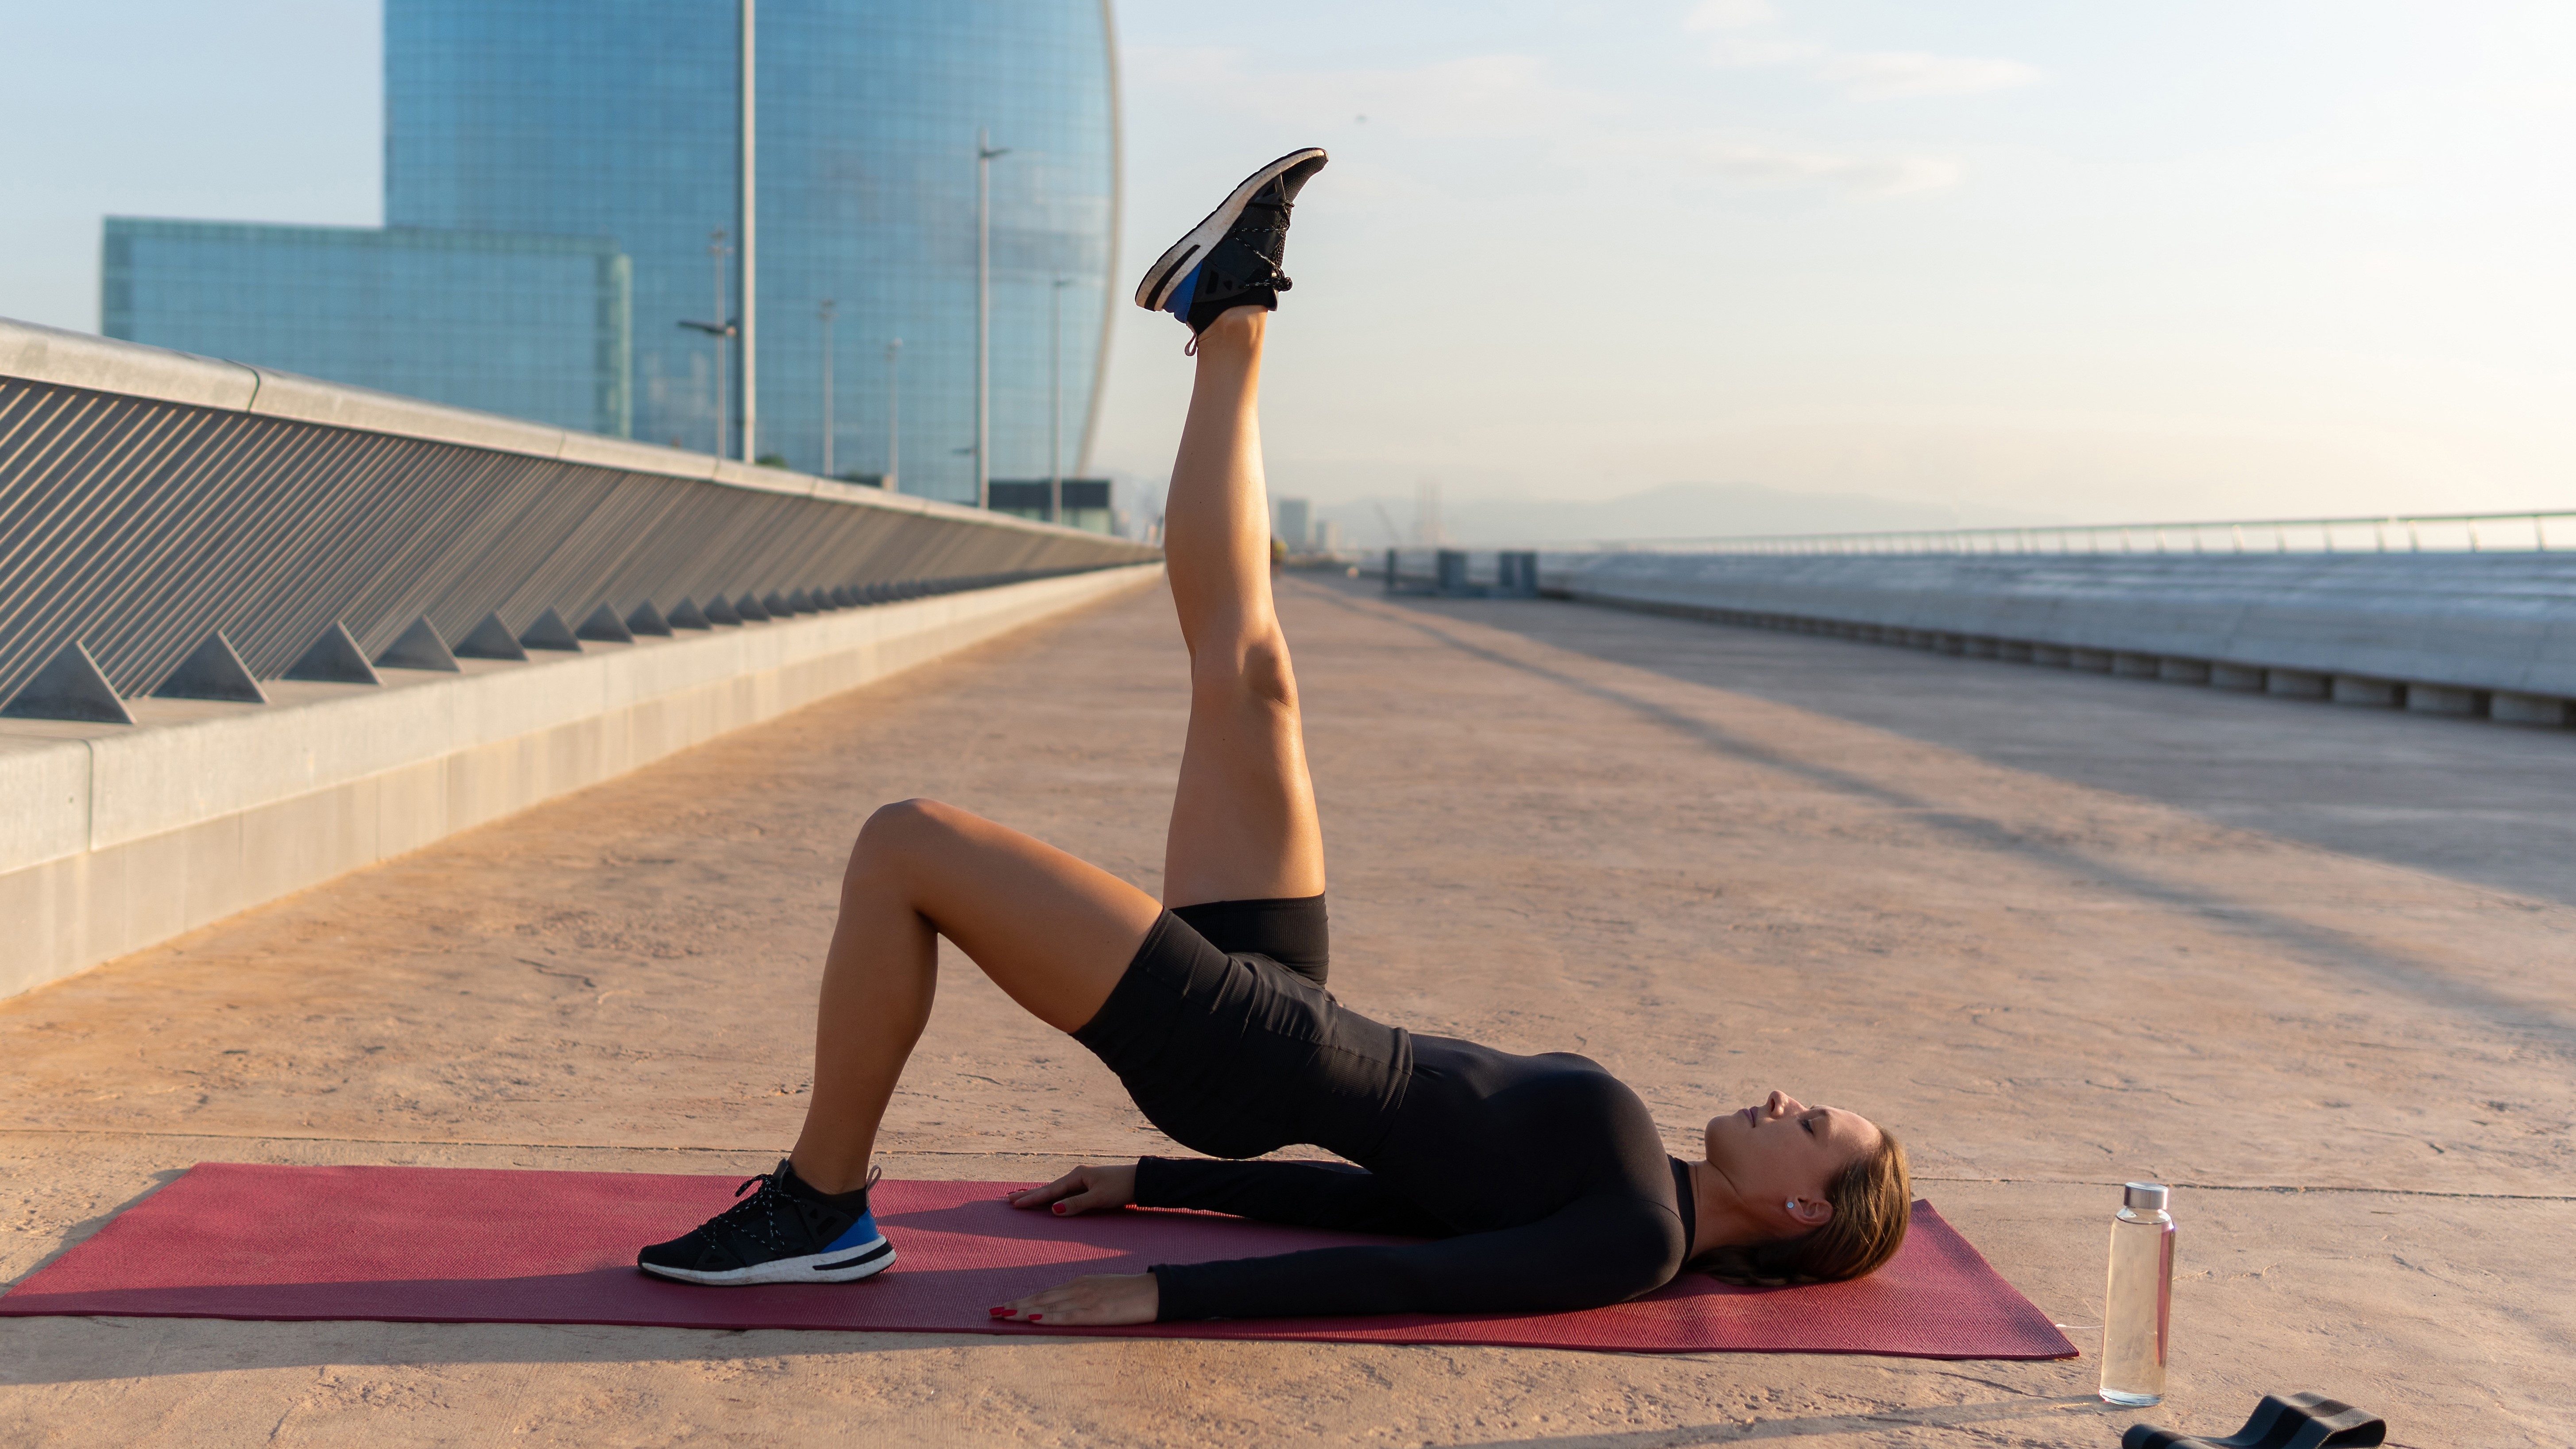
A single-leg glute bridge is an excellent way to work on the posterior chain — the group of muscles that run along the back of the body, including the hamstrings, glutes, and lower back. It’s also a unilateral exercise, which means you work on one leg at a time — this can help you notice any muscle imbalances in the body, and work on strengthening them.
As a reminder, what works for me might not be right for you and your body. If you’re new to exercise, or you’re returning to exercise following an injury, it’s a good idea to check your form with a personal trainer before adding weights, or reps to the move. It’s also not recommended to train legs every day of the week — for this challenge, I did one strength session and around 30 miles of marathon training, however, in a normal week, I would only train legs once a week to avoid overtraining.
How to do a single-leg glute bridge
Let’s start by taking a look at how to do a single-leg glute bridge:
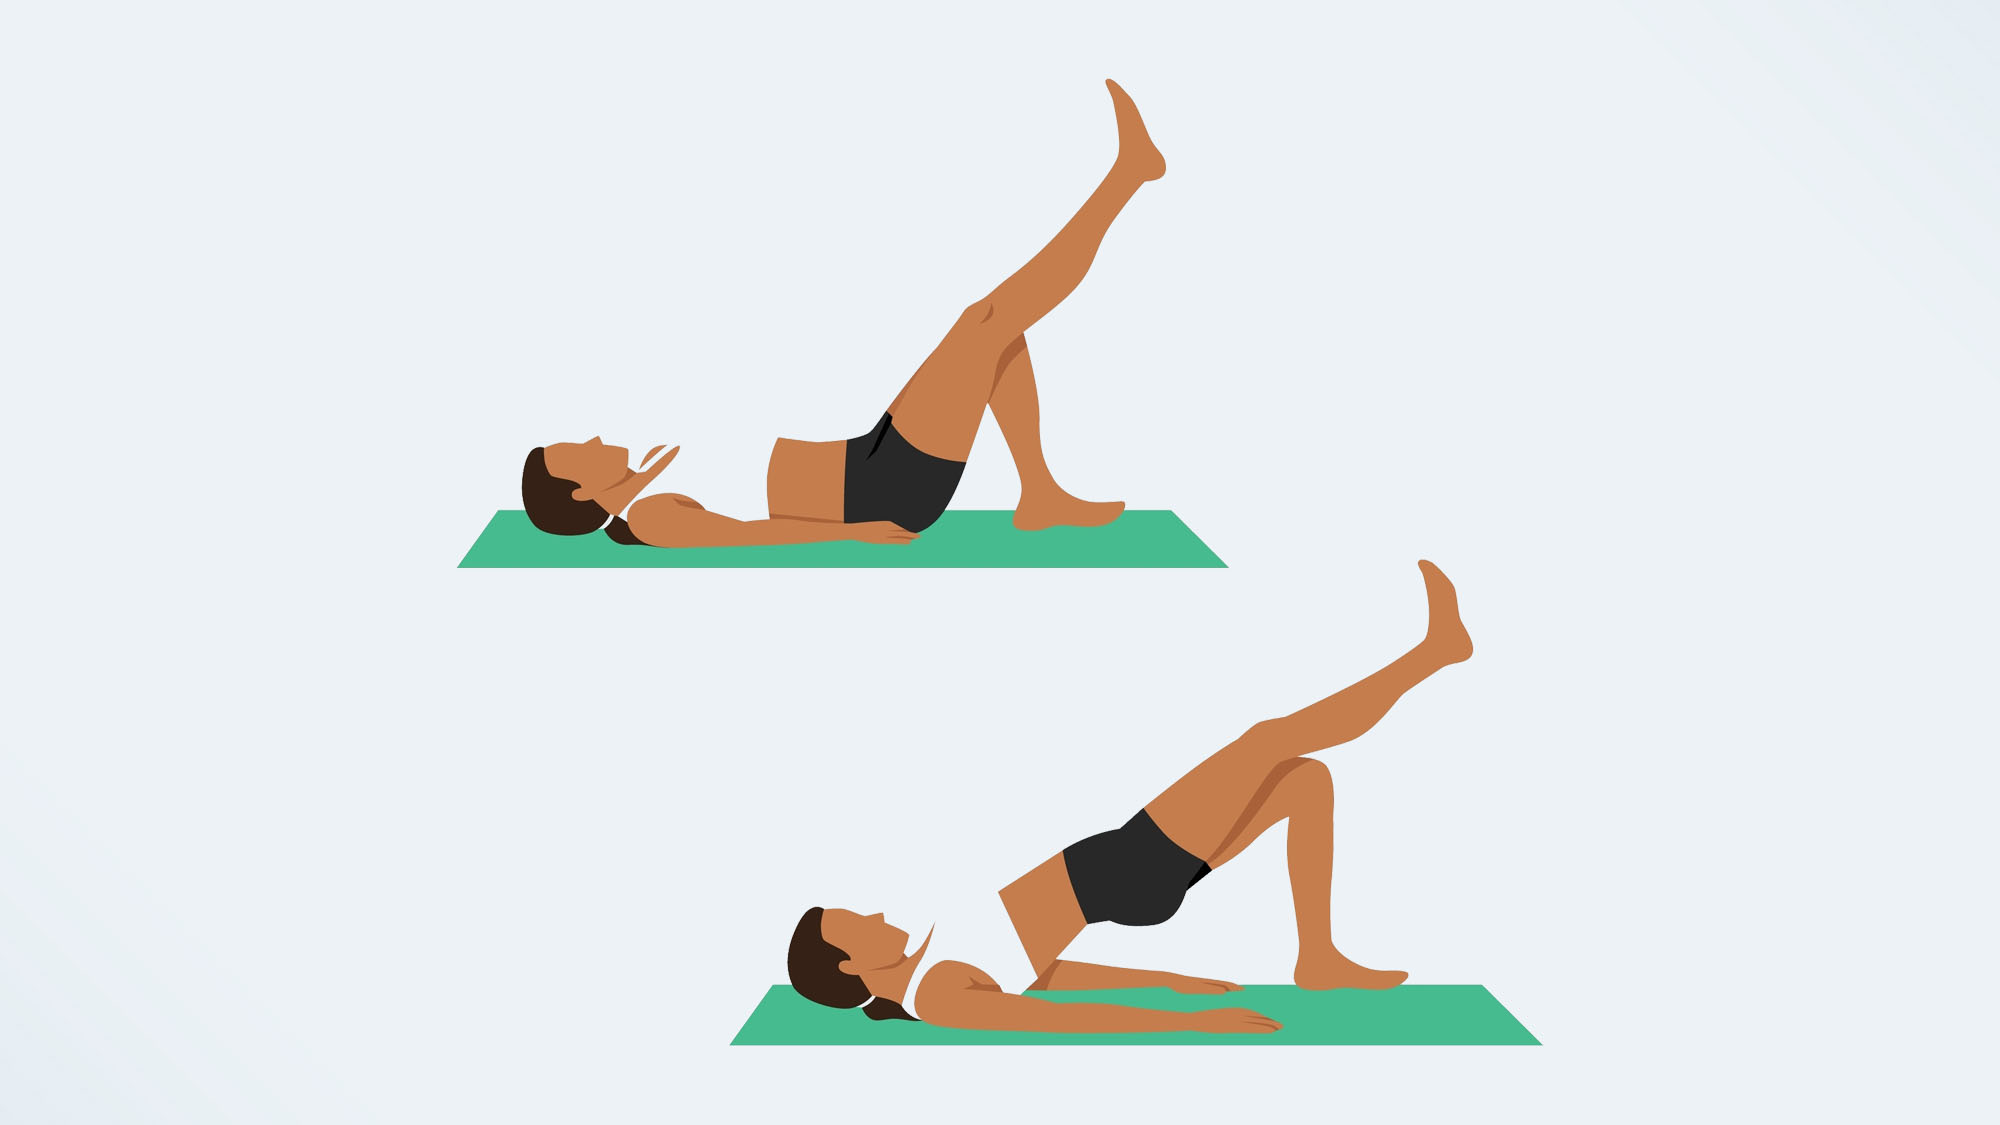
- Start by lying on your back with your knees bent, your feet flat on the floor and your arms by your side.
- Lift one foot off the floor and extend your leg so it is at a 45-degree angle from the floor. You can also bend the knee if this feels better.
- Squeeze your core, as if you’re trying to suck your belly button into your spine, and push into the foot still onto the floor to raise your hips up off the floor. Use your posterior chain to drive your hips into the air — think about making a straight line, so your shoulders, hips, and knees form a straight line.
- Hold this position for a few seconds.
- Lower your hips back down to your starting position slowly and with control, keeping one leg lifted.
- Repeat all your reps on the same leg before switching sides.
- Make sure you complete the same number of reps on both sides.
If this is too challenging, start by working on your glute strength by practicing the glute bridge with two feet on the ground. Here’s how to do a glute bridge, and what happened when this fitness writer did 50 glute bridges every day for a week.

I did 50 single-leg glute bridges for a week — here’s what happened
To find out more, I took a deep dive into this move and did 25 single-leg glute bridges on each side for a week. Here’s what happened:
Day one
I went into this challenge thinking 50 reps would be a walk in the park — glute bridges are a regular part of my strength training routine, and how different could the single-leg version be? I was wrong — lifting one leg made the move a lot harder, and after about 15 reps my hamstrings were burning.
I found I had to slow down and really think about squeezing my glutes at the top of the movement to achieve full muscle fiber engagement. As a reminder, during this exercise, the movement should be coming from the heels and your hips, not your legs. Be sure to fully extend your hips at the top of the movement.
Days two and three
On days two and three of this challenge, I continued to lift and lower in the single-leg glute bridges. I found they didn’t get easier, and that I was definitely weaker on my left side — I am right handed, and therefore right footed, so this wasn’t much of surprise, but it highlighted that I needed to work on this.
I also found that this one worked my core. I had to really think about engaging my core to keep my hips in line as I performed the lifts. As well as working all three glute muscles, the single-leg glute bridge challenges the rectus abdominis and the obliques.
Day four
To up the ante on day four, I added a heavy dumbbell to the mix. To do this, I held one of the best adjustable dumbbells across my hips as completed the single-leg glute bridges. I asked a personal trainer to take a look at my form as I added weight to the move, and she reminded me to keep my core engaged to avoid any aching in the lower back as I got tired. I broke the sets up into three sets of 10 reps on each leg with a minute rest between.
Day five
As normal, by day five of this challenge, I was getting a little bored of the move. To mix things up, I tried the bridge march variation. To do a bridge march, start the move as a glute bridge with both legs pressed into the mat, at the top of the movement, squeeze your glutes and your abs, and raise one leg up off the mat, bending at the knee. Hold for a count, then lower the leg back to the floor and repeat on the opposite side. Keep swapping sides until you’ve completed all your reps.
I found the marches made it more challenging to keep my core engaged and my hips from sagging — I really had to think about squeezing my glutes and moving with control. If you're worried about your hips sagging or moving during this exercise, place your hands on them to check.
Days six and seven
By the end of this week, I found that by really drilling down into single-leg glute bridges had helped me get better at them. Sure, my right side was still a lot stronger than my left, but I wasn’t wobbling as much. On day seven, I did my glute bridges before heading out for a long run, and found it easier to activate my glutes as I ran — something I always struggle with.
My verdict after a week? I’ll be incorporating single-leg glute bridges into my routine going forward. I found the single-leg variety definitely worked my glutes harder than the standard glute bridges I often opt for. Who knows, perhaps single-leg glute bridges are the secret to PR’ing my next marathon!


