In this Blender tutorial, I'm going to look at how to make a tranquil ocean scene. Creating ocean and beach scenes can be one of the toughest jobs around. There are just so many different components at work including displaced surfaces, numerous textures, foam requirements and vegetation, then there’s the not so small task of trying to get everything lit correctly.
Over the years I’ve worked on a number of different types of oceans with various software and renderers. I’ve found Chaos Phoenix one of the best options for generating realistic water surfaces, but we don’t have that plugin for Blender. For this kind of project it could be worth investing in one of best laptops for 3D modelling or the best drawing tablets.
In essence, all oceans boil down to a displaced surface. The way that surface is displaced can take on various forms including geometry displacement or material displacement. The waves and how they move and respond to their surroundings is another factor that the natural eye already understands. It’s therefore not easy to trick the viewer and needs an accurate simulation in order to be genuinely believable.
In this tutorial I'm going to use the built-in Blender Ocean modifier, which is set up with a range of parameters perfectly suited for creating oceans. It’s by no means as comprehensive as Phoenix or other water simulators, but has enough in it to create pretty impressive results. For more on Blender and how it works, take a look first at Blender: everything you need to know, and our Blender 4.0 review.
Blender tutorial: create a tranquil ocean scene
I’ll be generating a simple ocean with light waves that lap up towards the beach. To create the water and foam textures I’ll bake all this into a single texture and then map it onto the surface. This isn’t a workable option for animated water because the foam won’t animate accordingly, but it can create some realistic results for still images, especially with the more cartoon-style image we’re aiming for. Although the modifier does come with an associated texture, we won’t be utilising that on this occasion.
A number of the modifier properties can also be animated, which is great when generating oceans for videos. With careful attention it’s possible to create highly believable results without too much work. (For more, read our guide to how to simulate fluids in Blender or find inspiration in our list of Blender tutorials.)
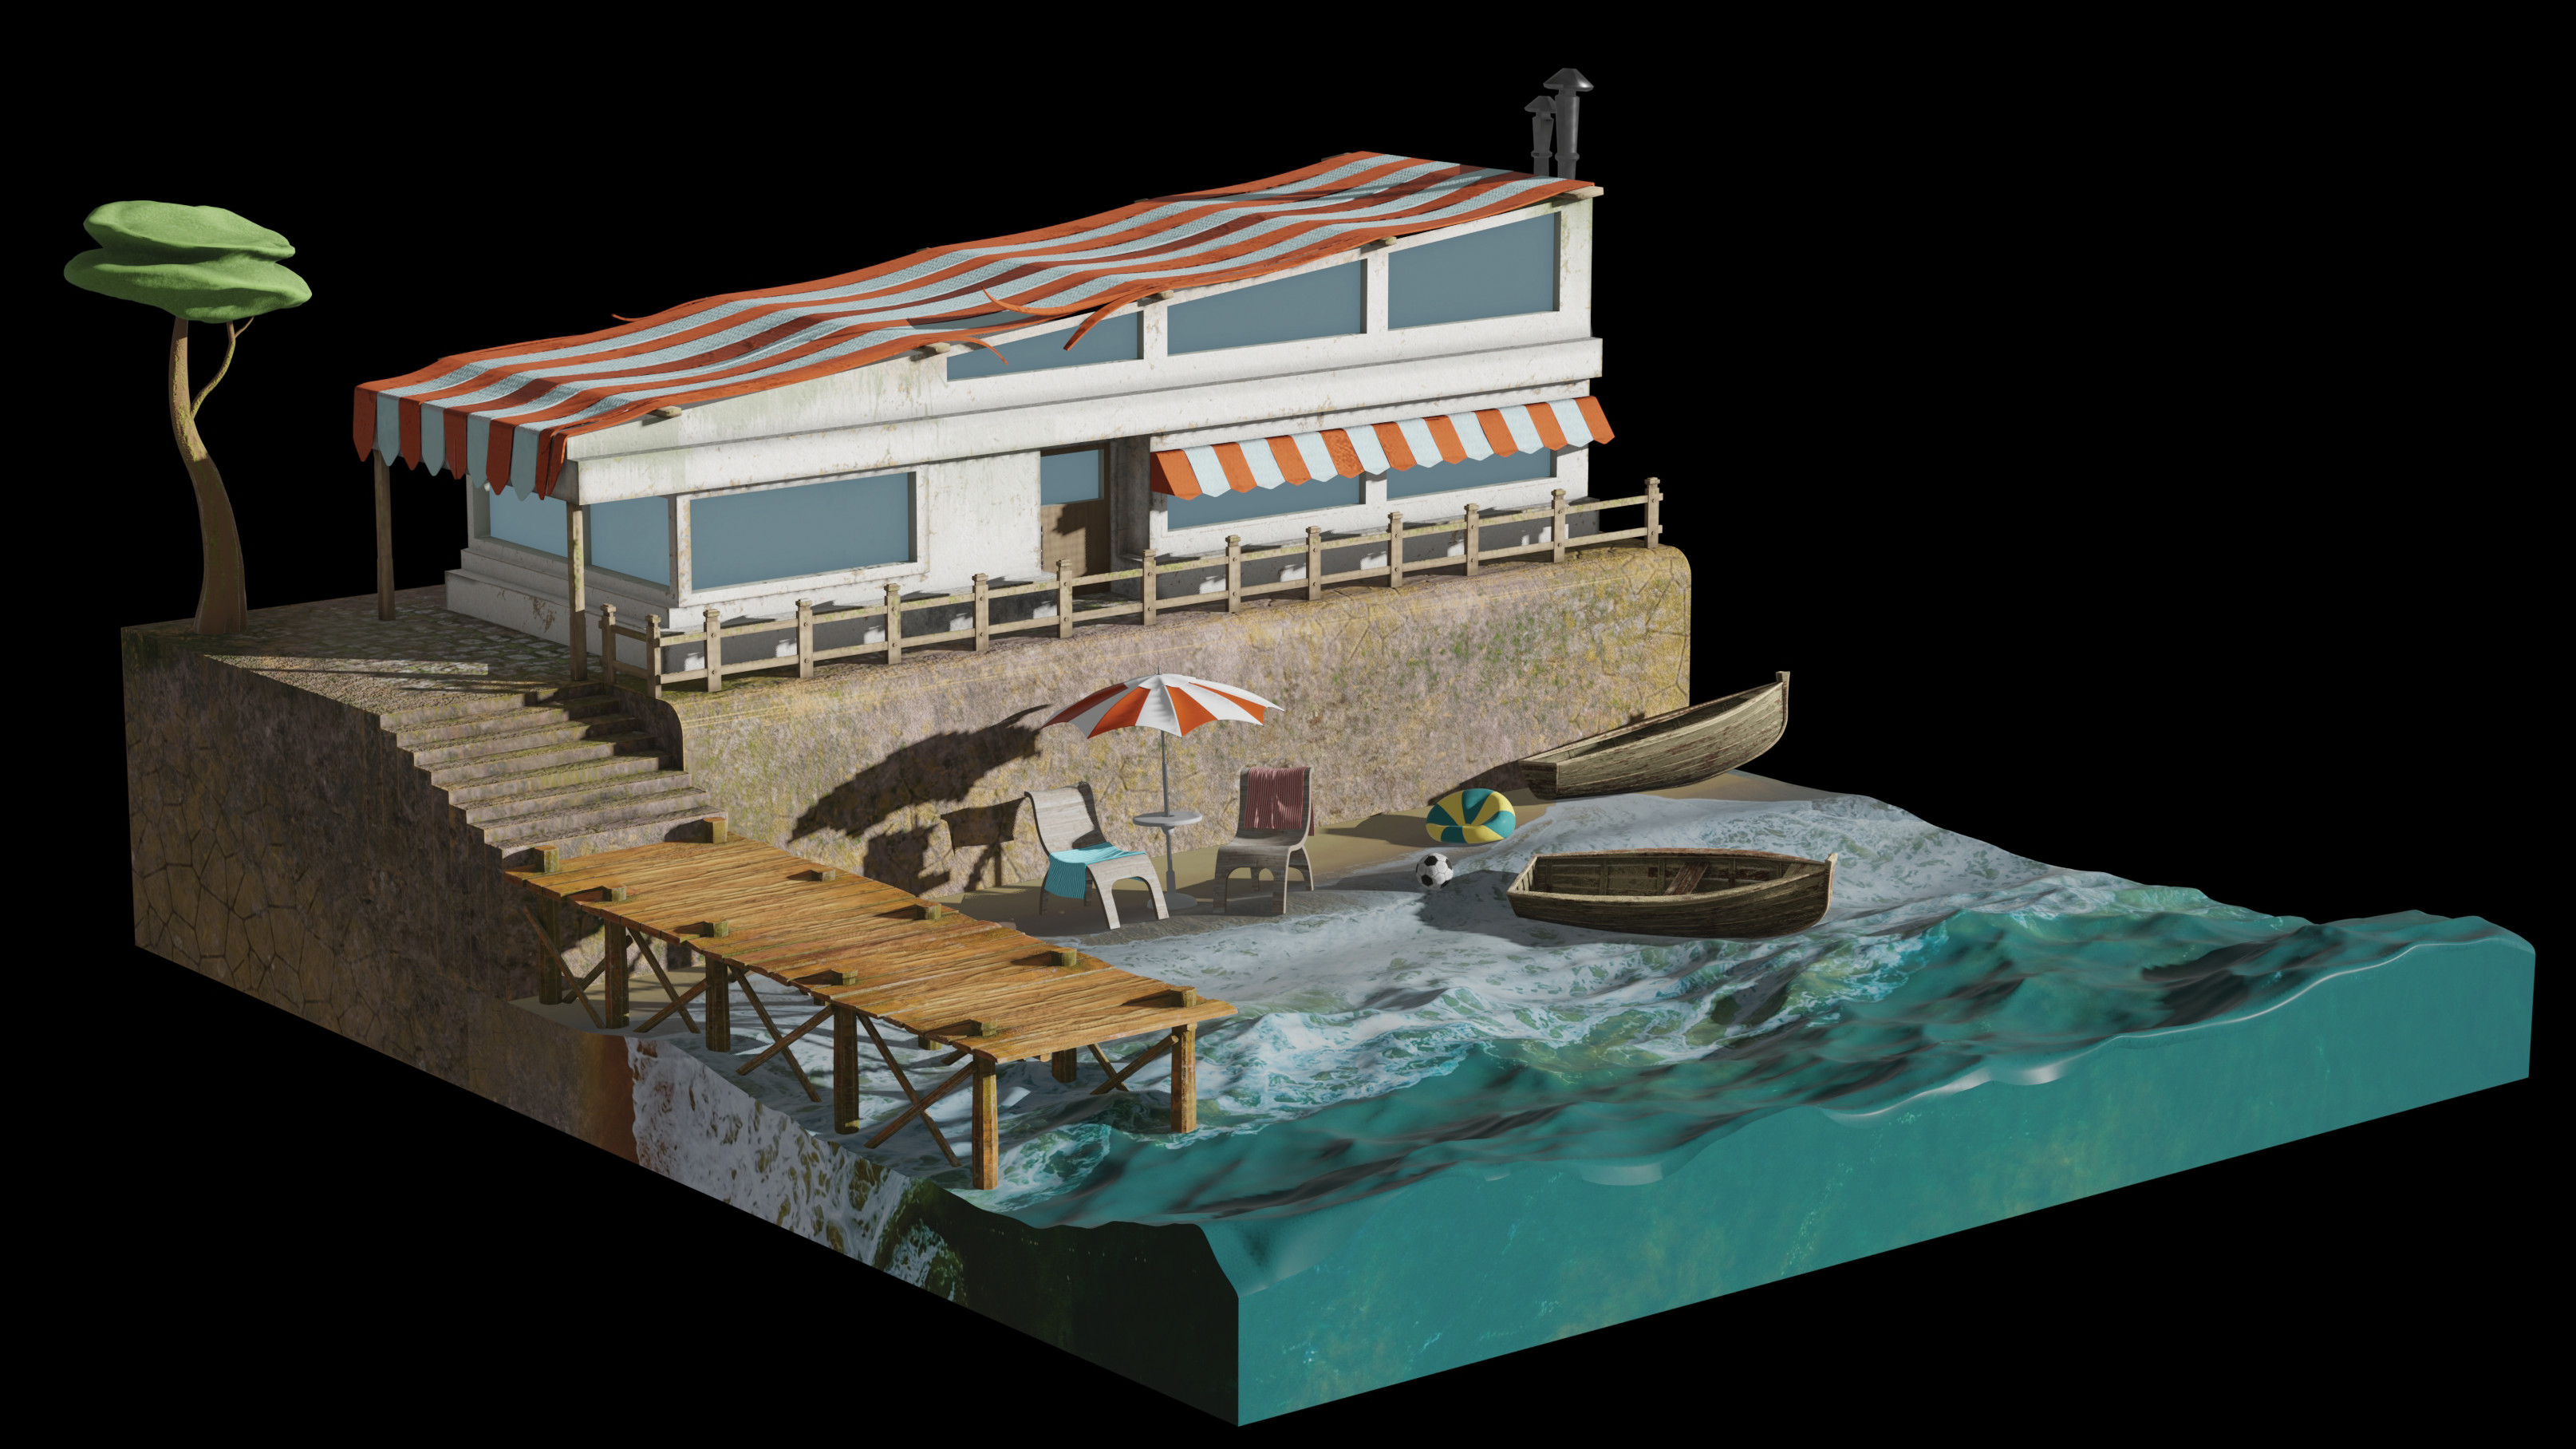
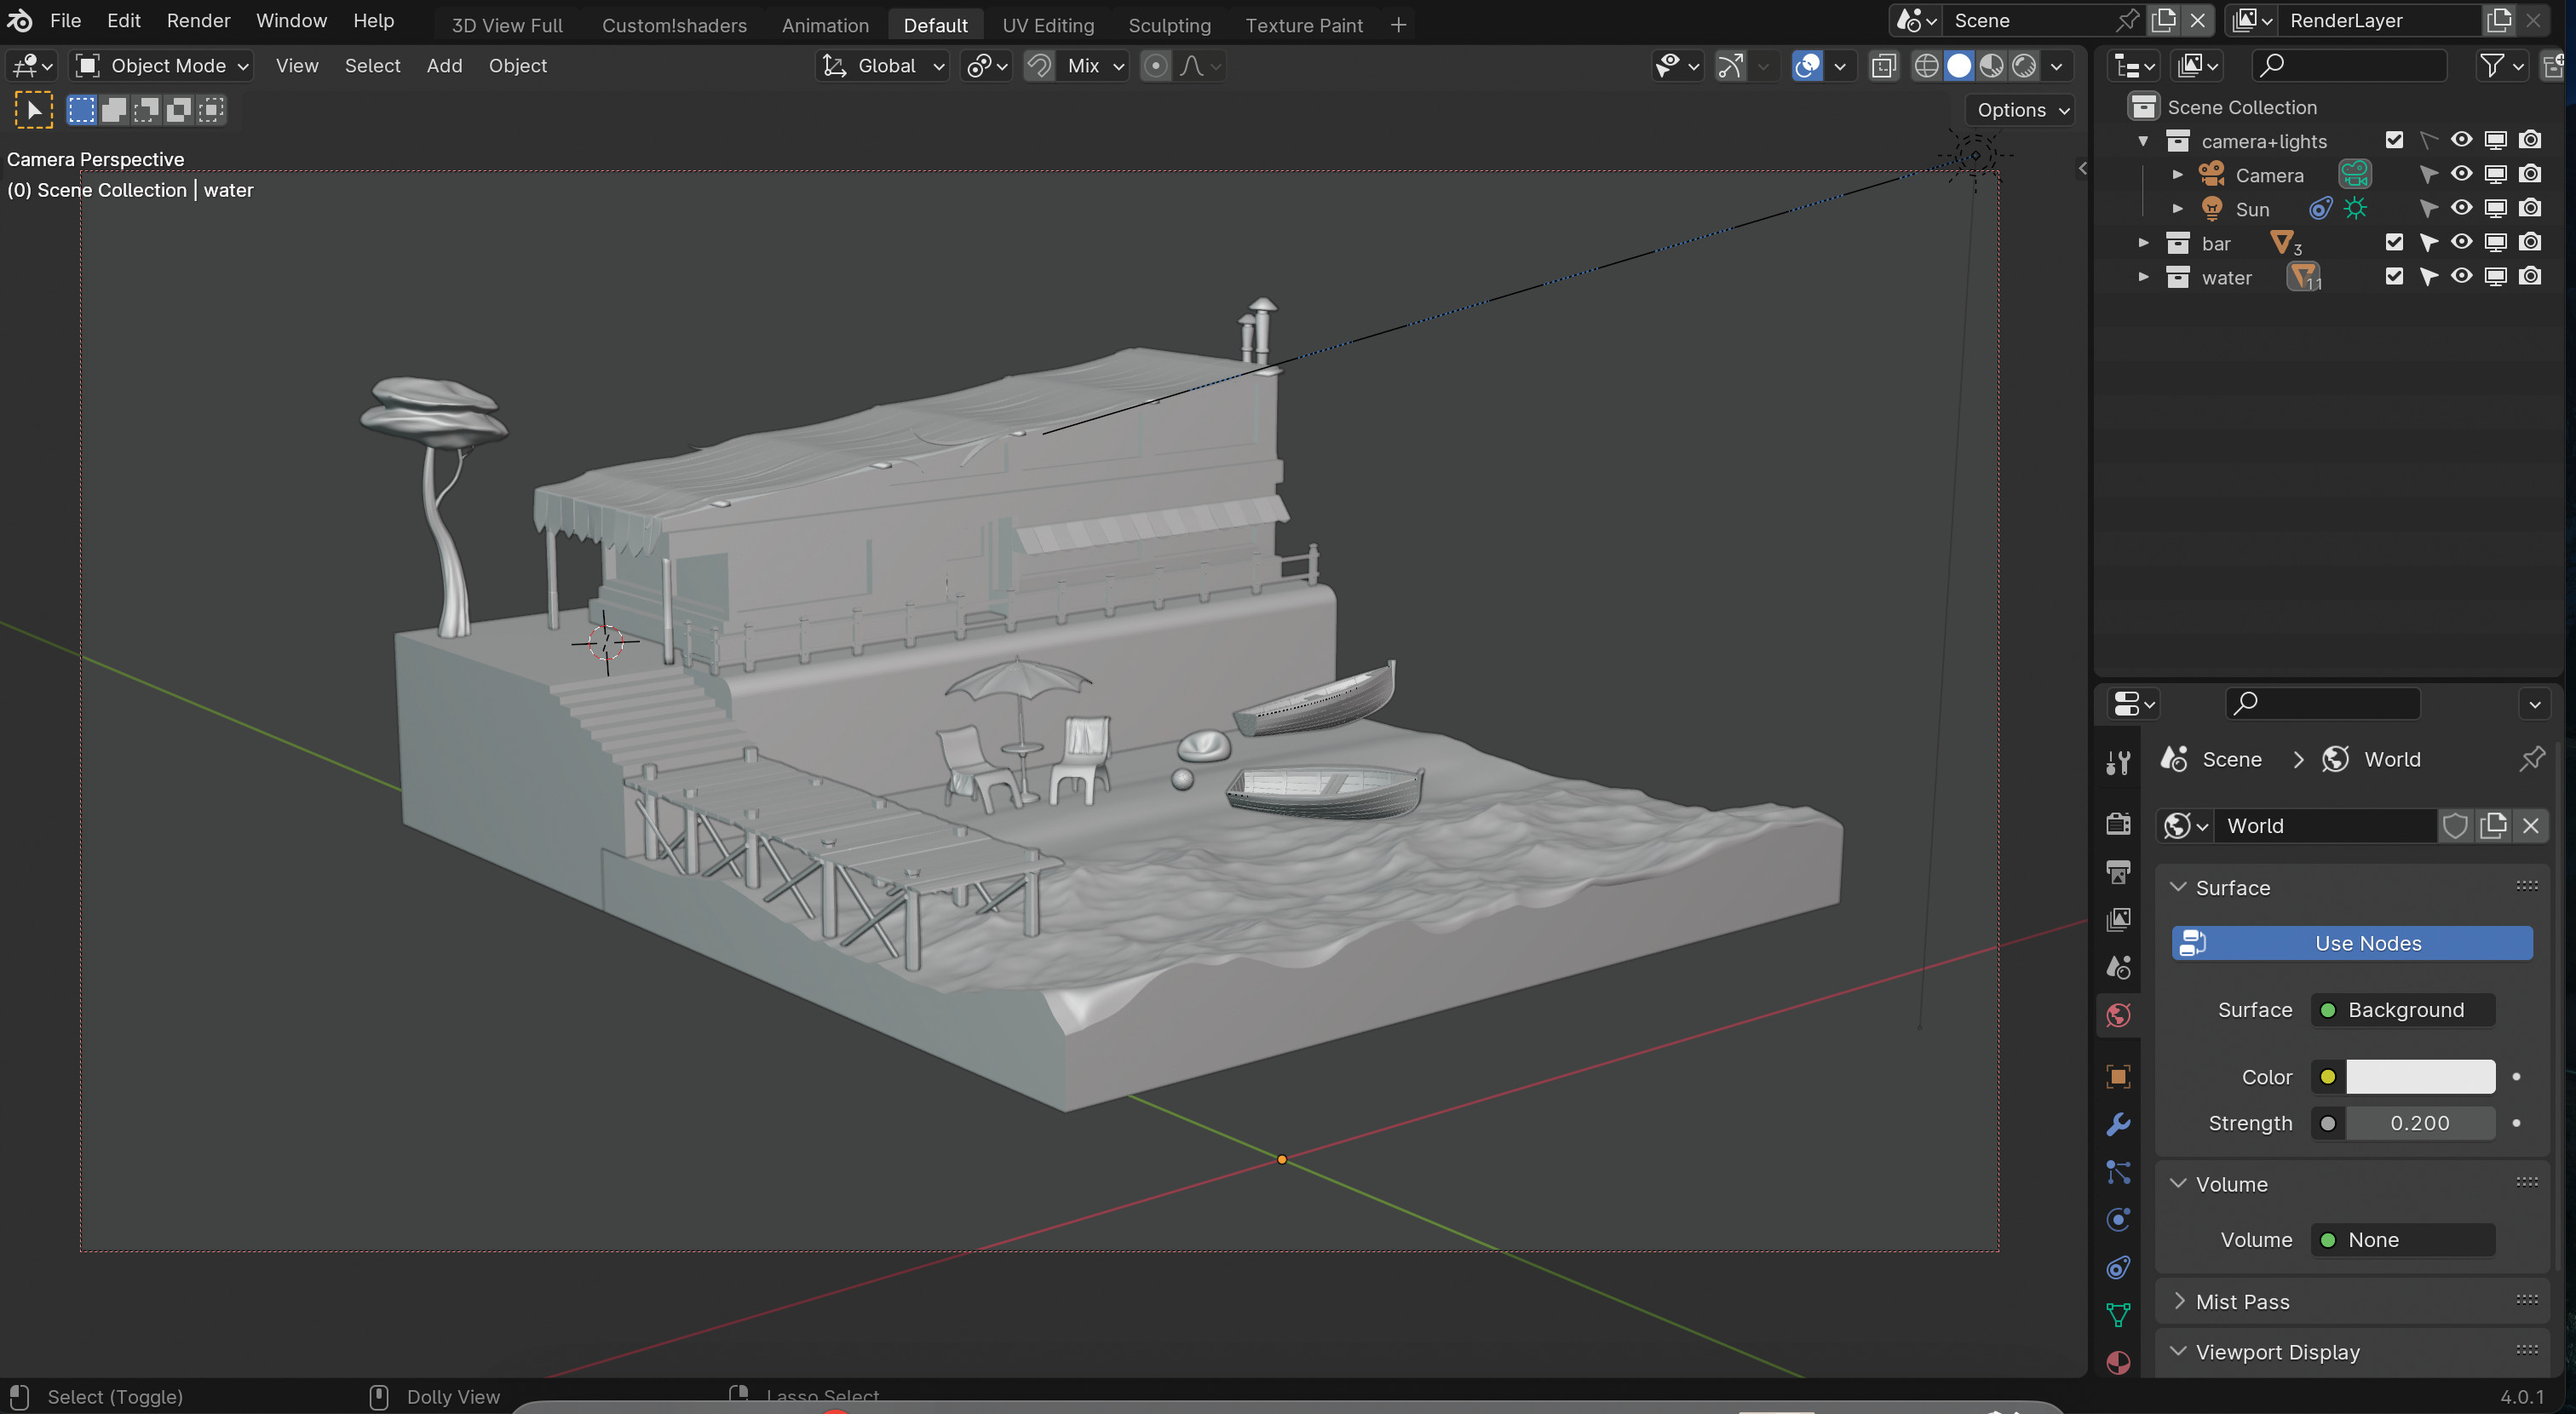
I’m going to guide you through the Ocean modifier one step at a time to make sure you have all the knowledge required to fine-tune the results, plus all the necessary settings to create an ocean just like the one in the main image. Let’s make a splash!
01. Setting up in Blender
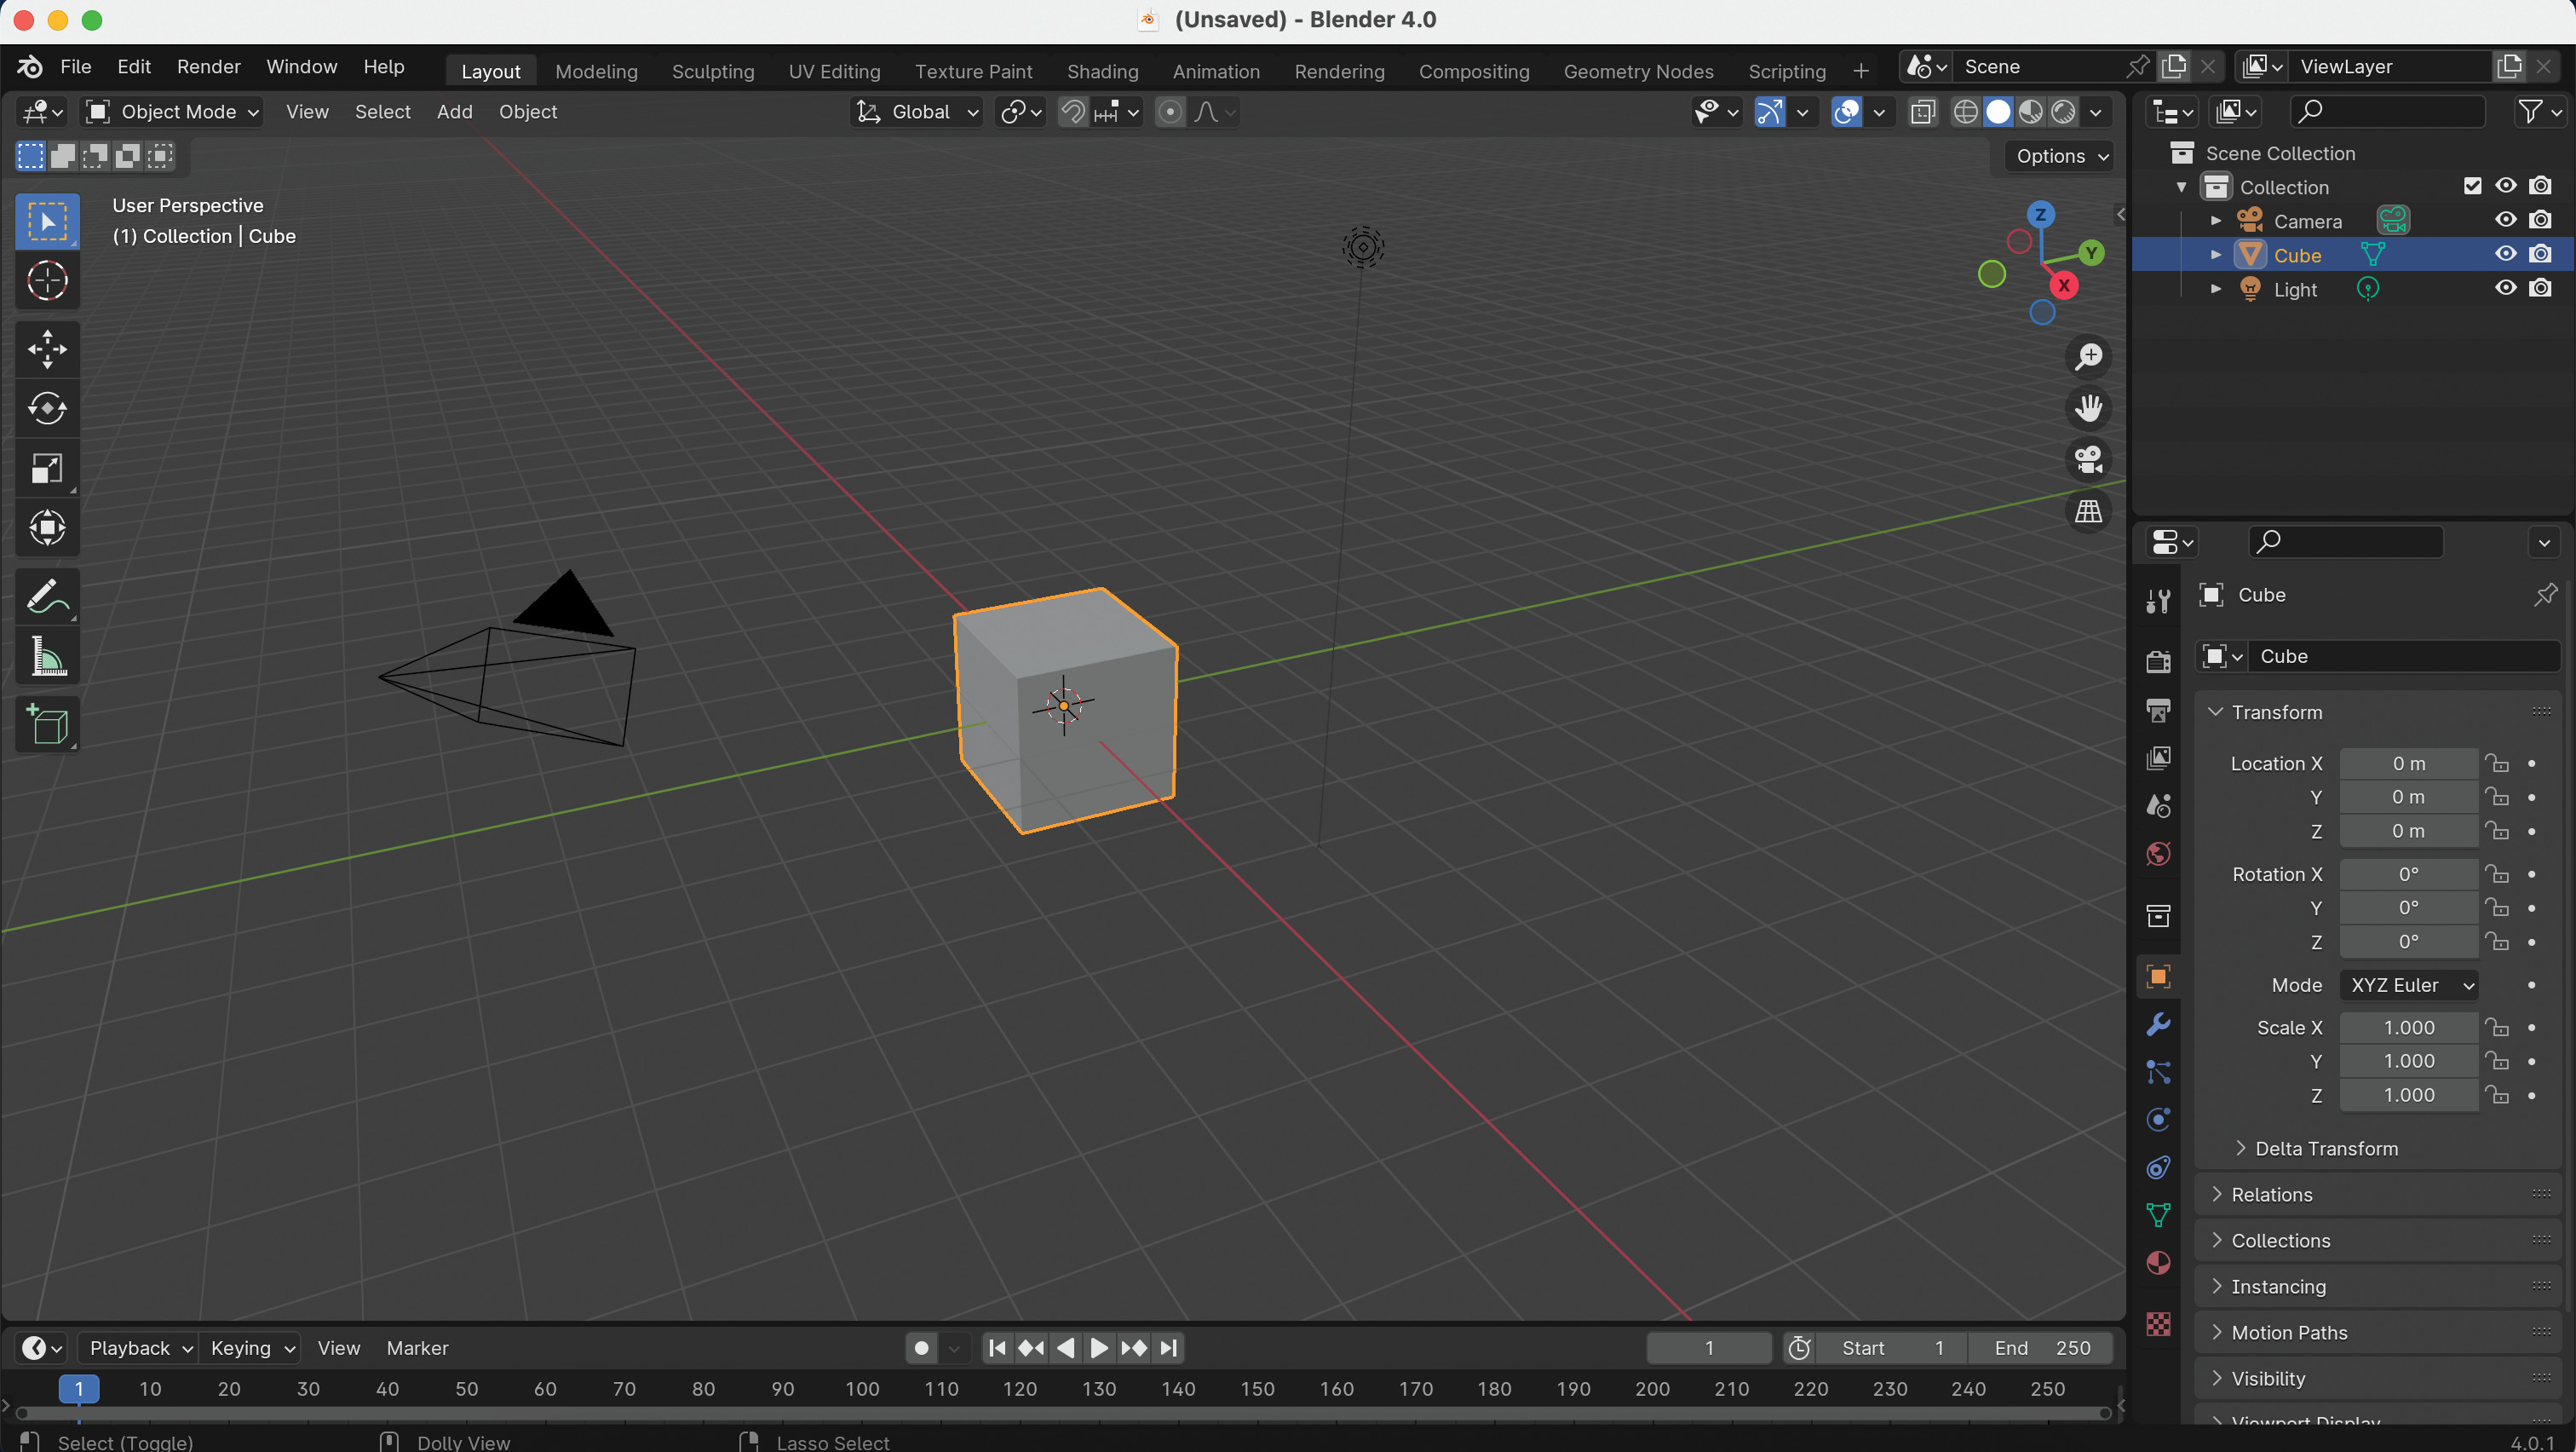
Open Blender and make sure the workspace is set to Default using the bar at the top of the window, where there’s a horizontal list of layout options. This will provide you with easy access to the 3D Viewport, the Outliner and the Properties panels.
These will be the main panels that you’ll need to generate the geometry of the ocean. Later on in the tutorial we’ll use other panels, but these will do just fi ne for the time being. Finally, delete the default objects such as the cube, camera and light.
02. Create a plane
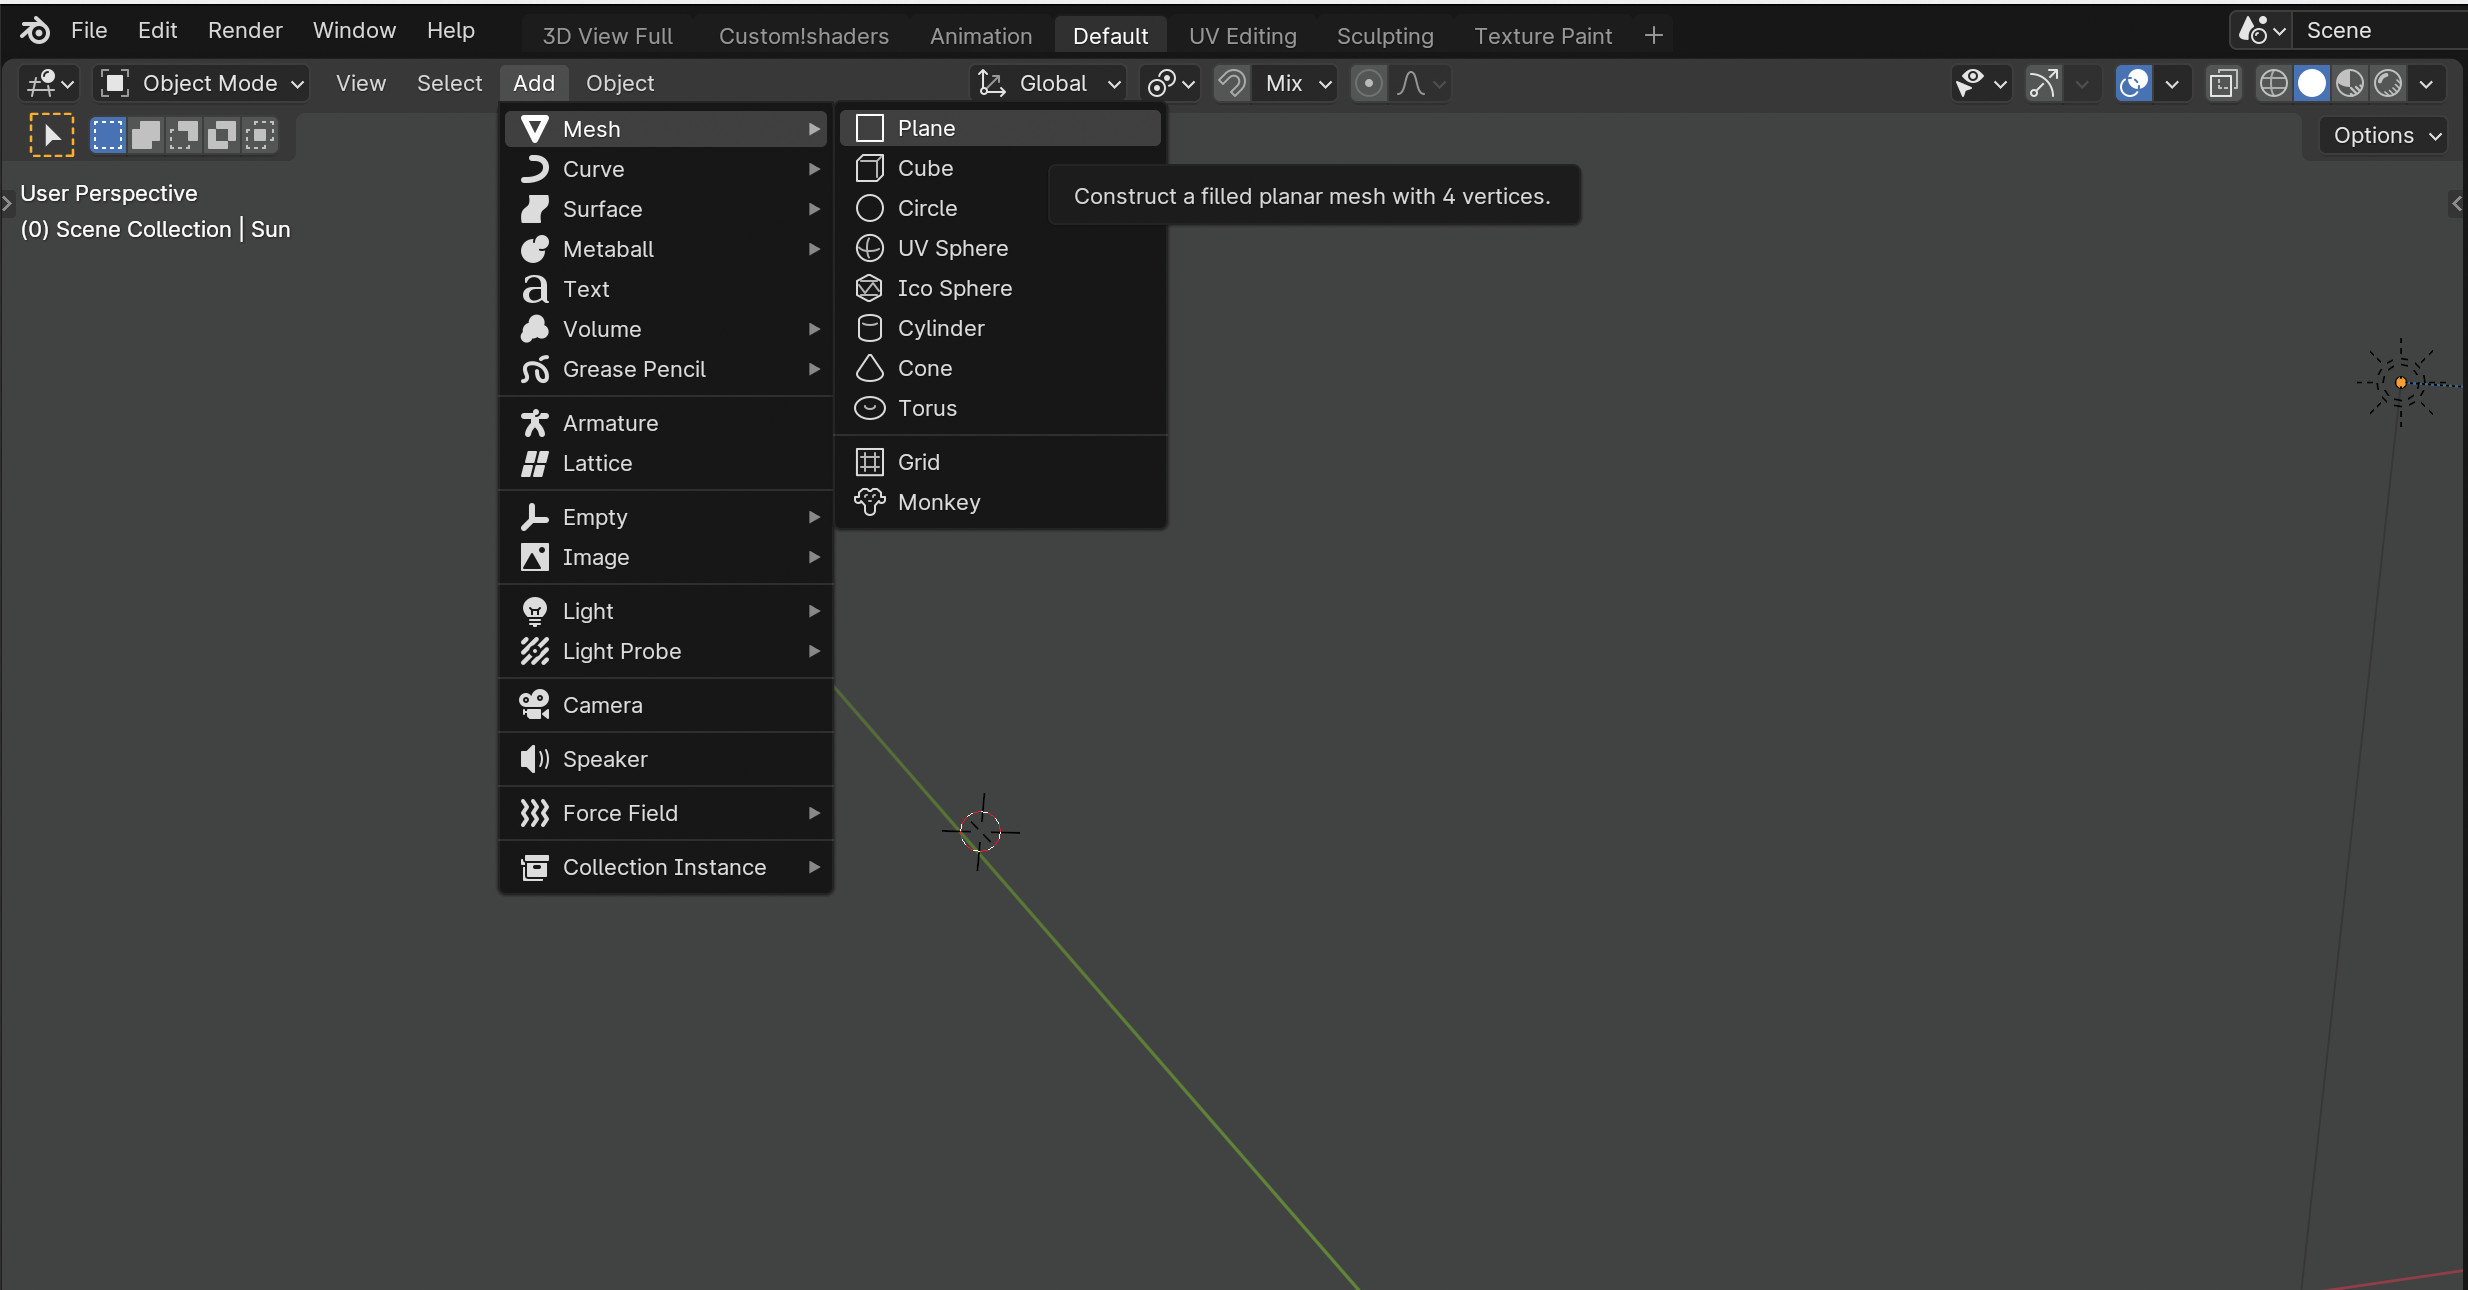
The basis of our ocean will be a simple plane, created with Add > Mesh > Plane. Move it to your desired location if you don’t want it at the origin, then head over to the Object Properties rollout of the Properties panel and locate the Scale section. Change the X and Y scale to 0.1 for a much smaller plane. If you want a larger or smaller ocean, simply change the scale accordingly.
03. Applying the ocean modifier
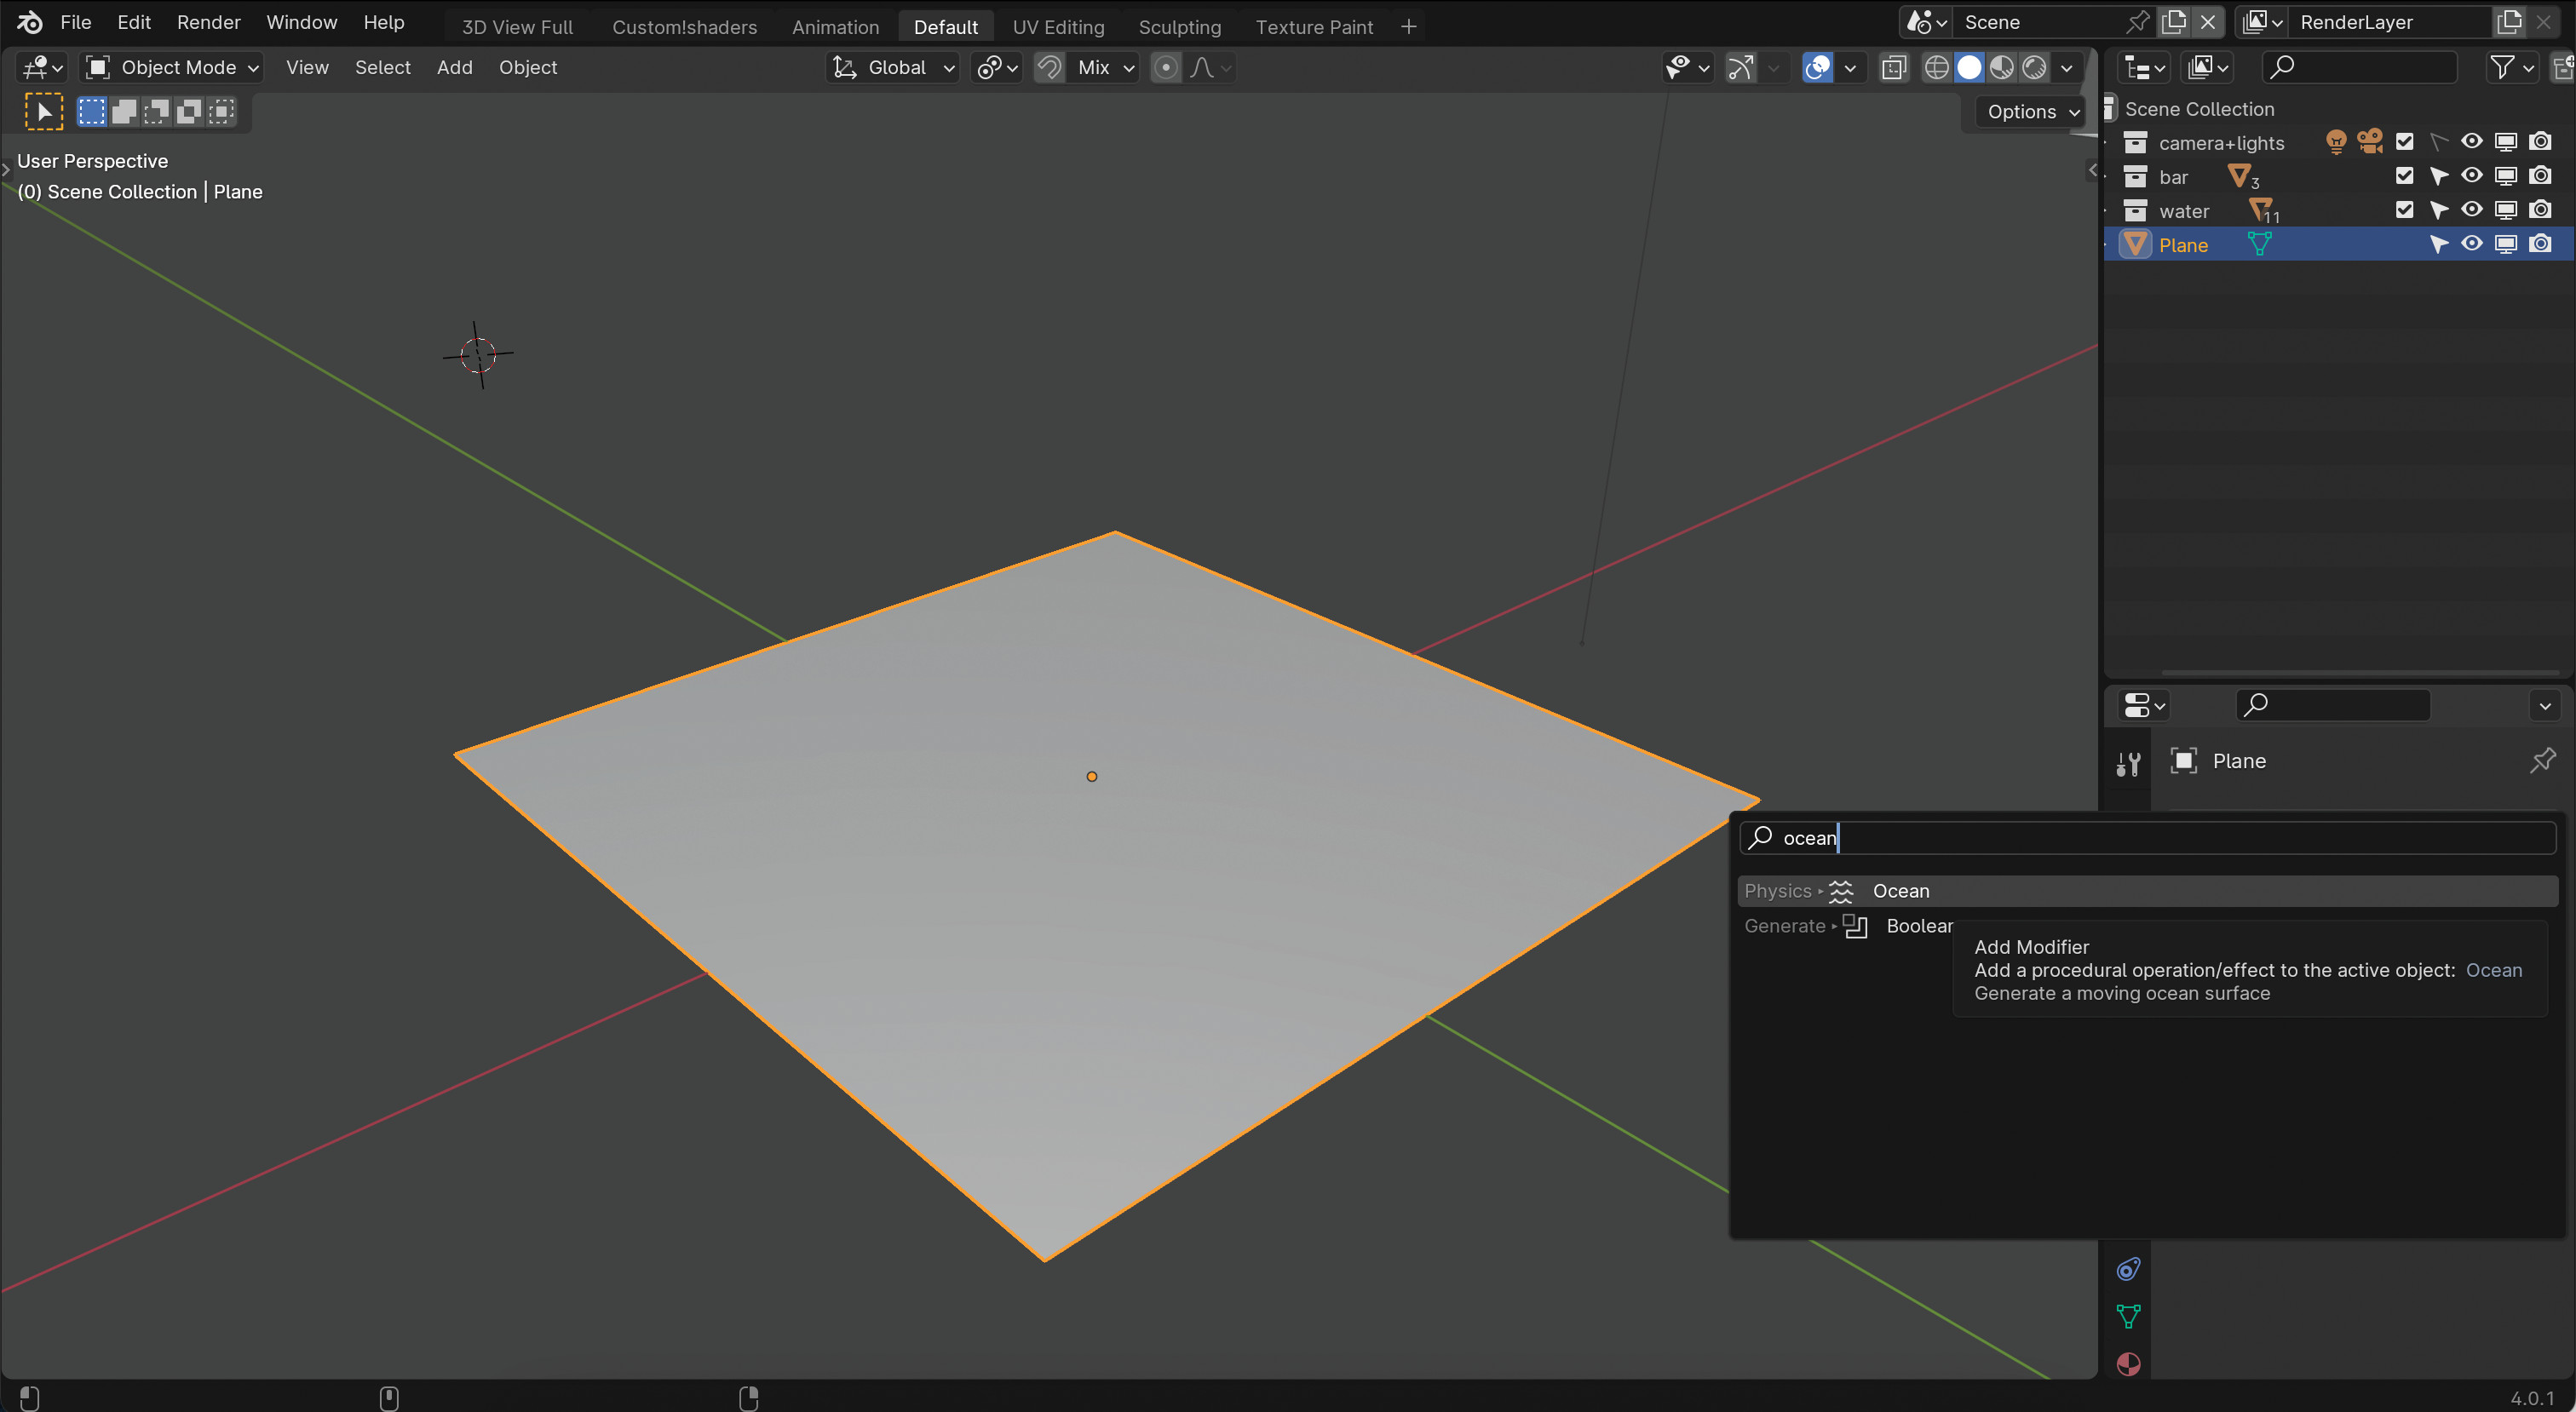
We’ll now use Blender’s built-in Ocean modifier to displace and distort our plane. Inside the Properties panel, make your way to the Modifiers rollout, click Add Modifier and search for Ocean. The benefit of using this modifier is that it gives you a wide range of parameters that are ideally suited to creating an ocean surface. It’s also possible to animate these properties for a video.
04. Setting the type
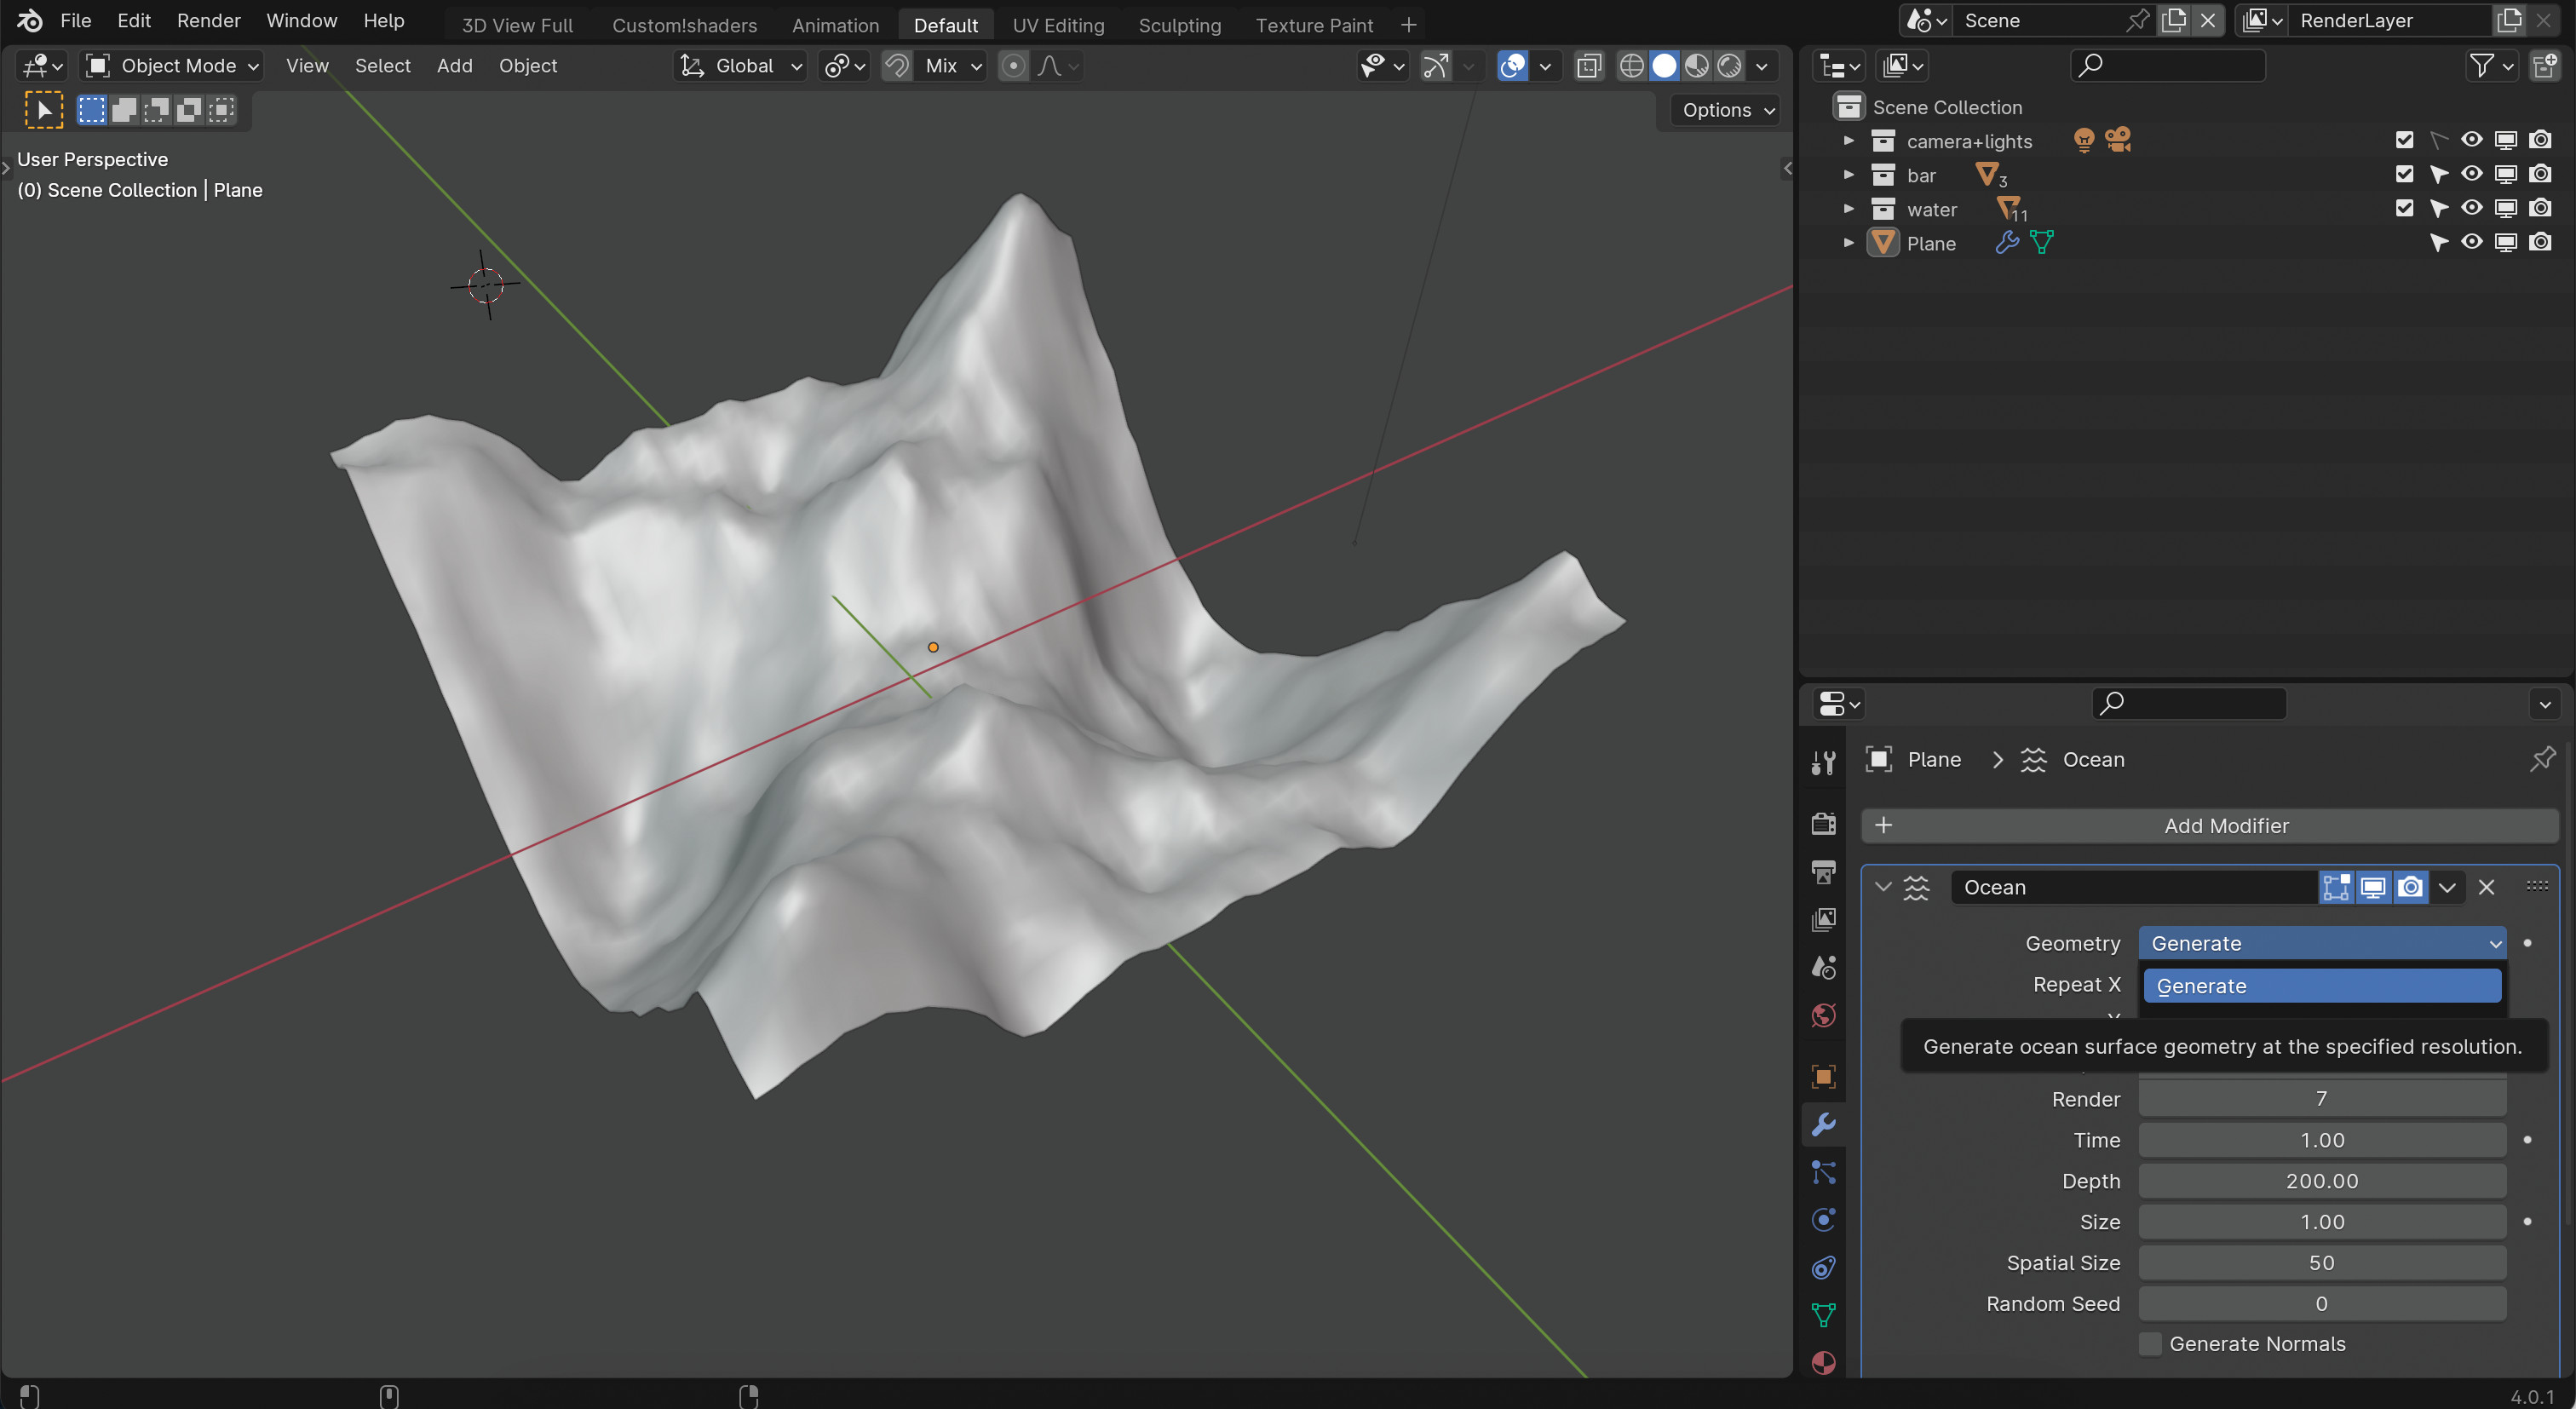
By default the type is set to Generate, and using this option rather than Displace is important. This ensures the tiled mesh grid corresponds with the resolution of the simulation data and the ocean grid overrides any data defined by the mesh object. Displace utilises the mesh object data instead of overriding it. Generate also adds a UV channel mapping the UV space to the simulation grid.
05. Thinking about resolution
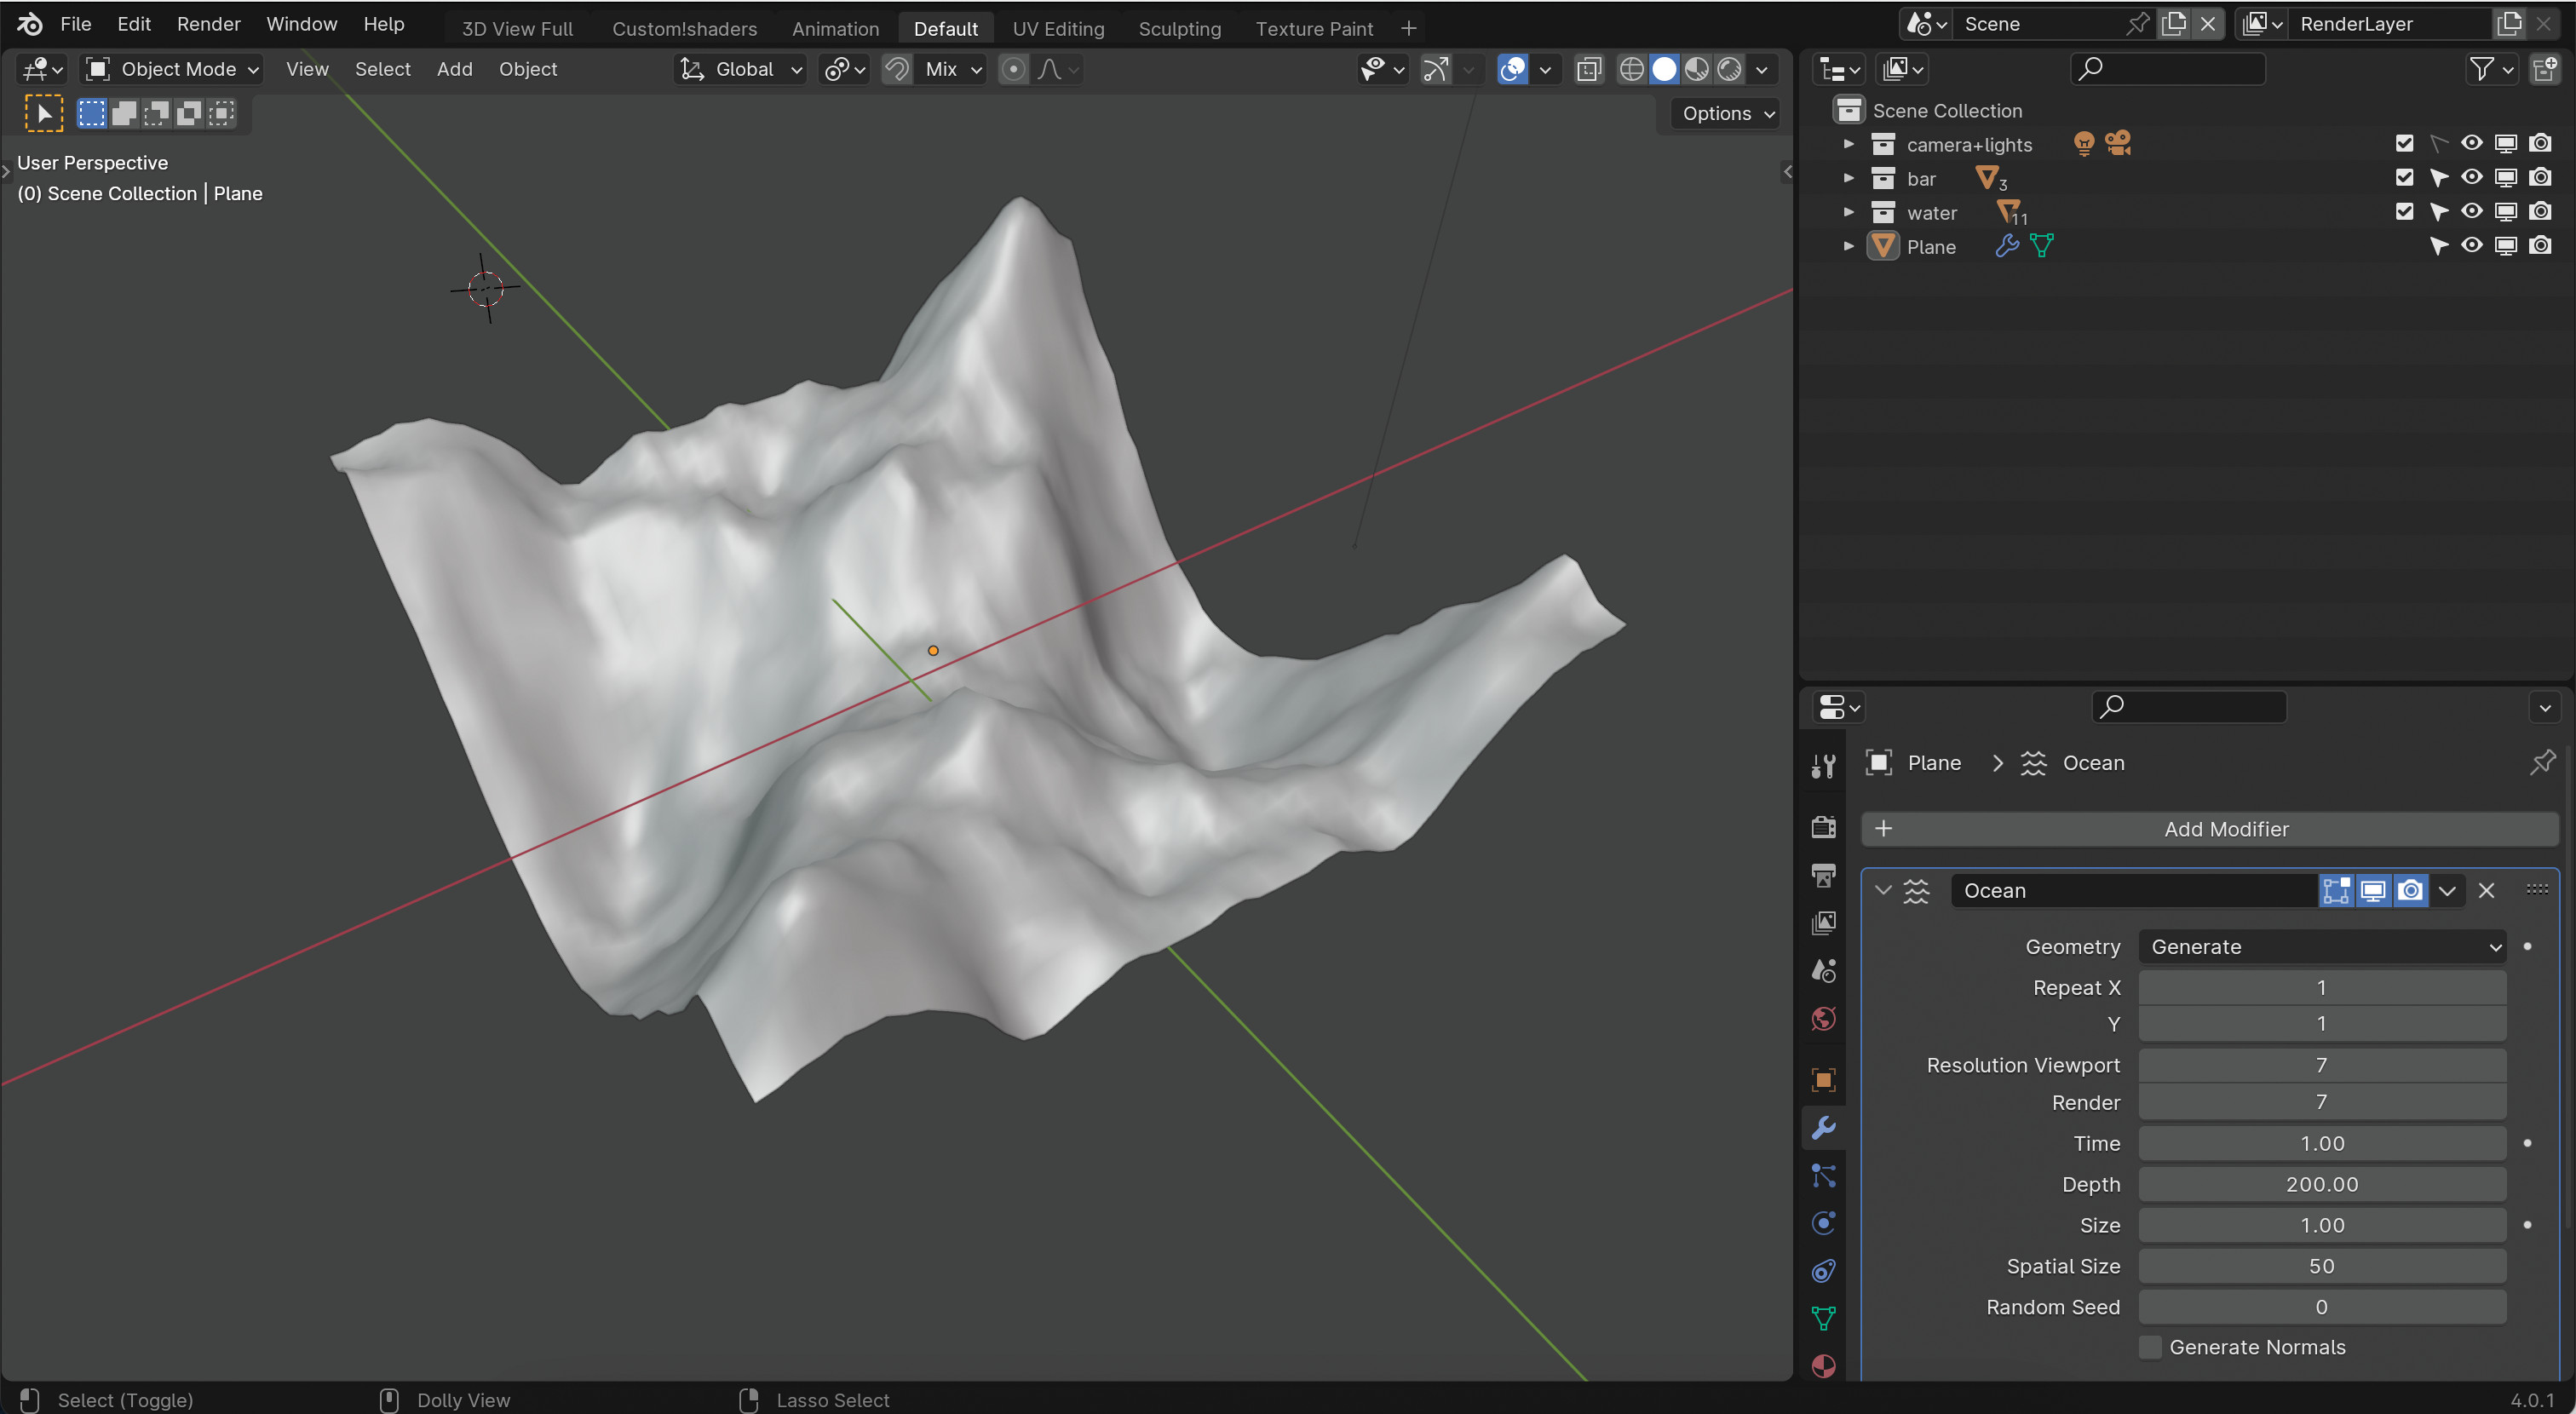
The Resolution Viewport and Render define the quality of the ocean generation both within the Viewport and when rendered. Having these two options enable users to manage their hardware resources during the creation process versus the render process.
When creating the ocean it makes sense to have a lower quality so changes are generated quickly. On the flip side, when rendering it makes sense to have the higher settings instead. Managing these is crucial for creating a detailed enough simulation.
06. Adjusting the resolution
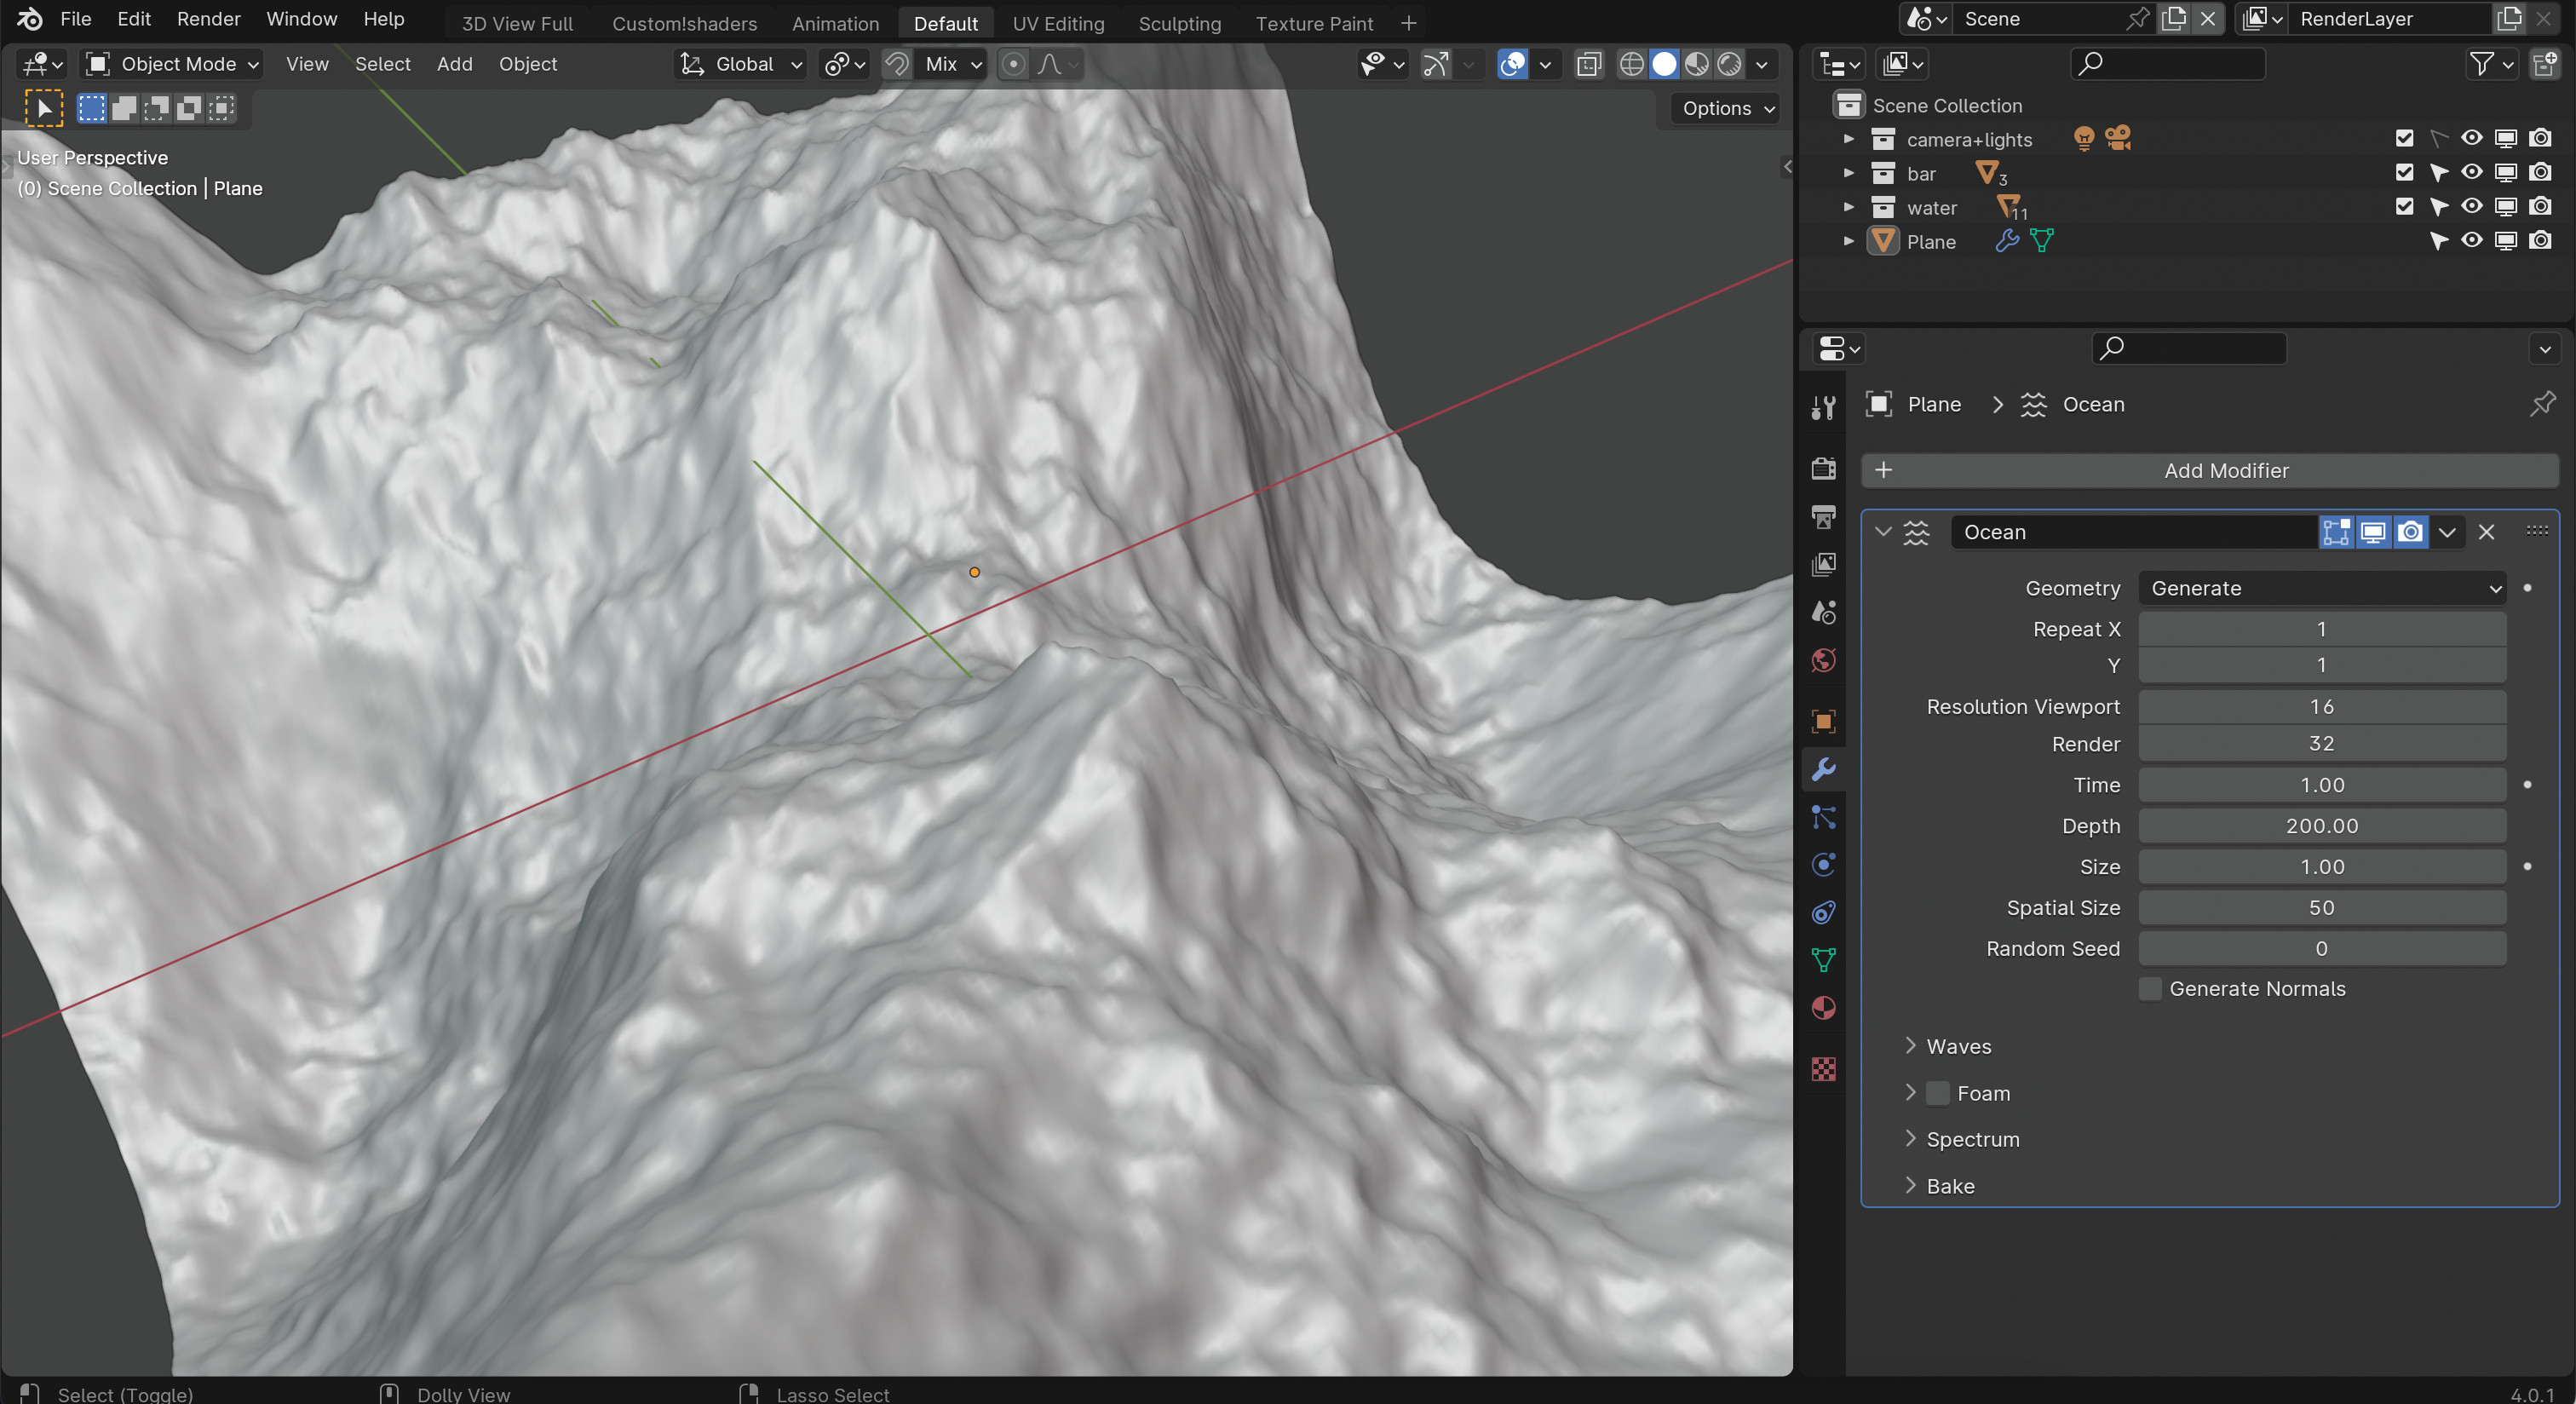
It’s important to know that the actual simulation grids created are powers of two of the set resolution values. This means that a resolution value of 16 will create simulation data at a size of 256 × 256. Let’s set the Resolution Viewport to 16 and the Render (resolution) field to 32.
I don’t know why the Render option itself doesn’t refer to resolution, but that’s precisely what it does. If you find your hardware resources struggling at these values then simply lower them.
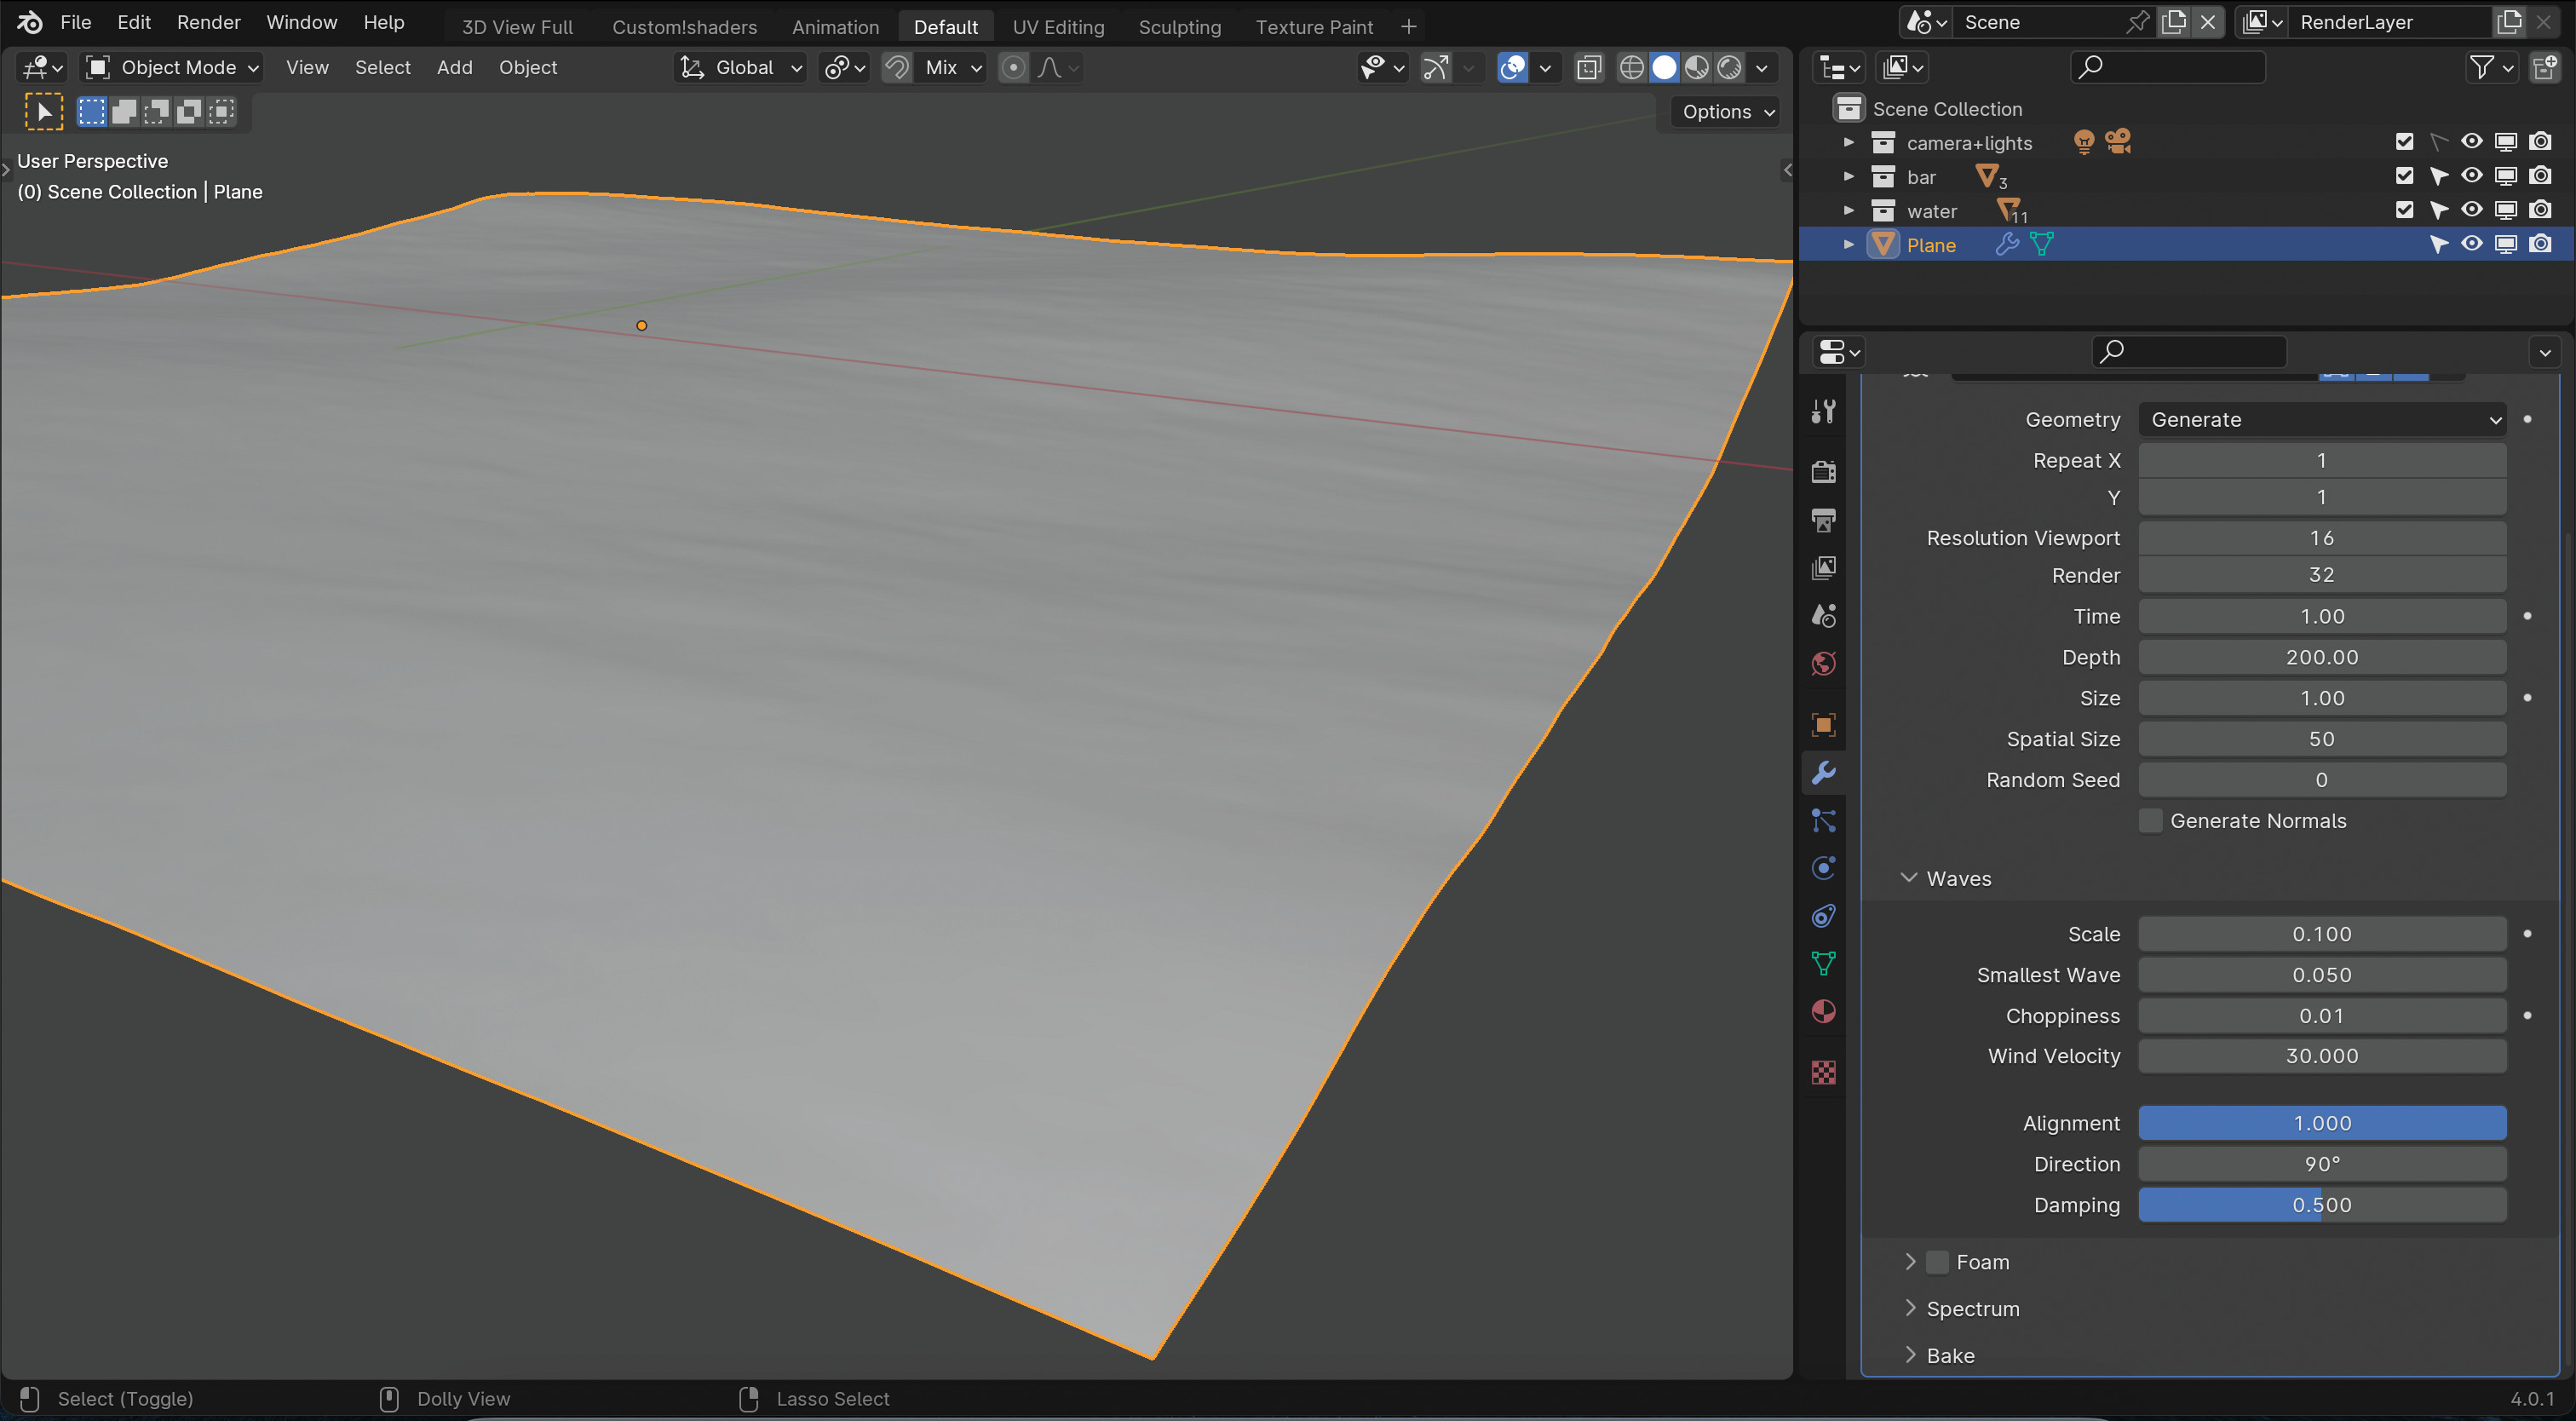
07. Reducing the waves' scale
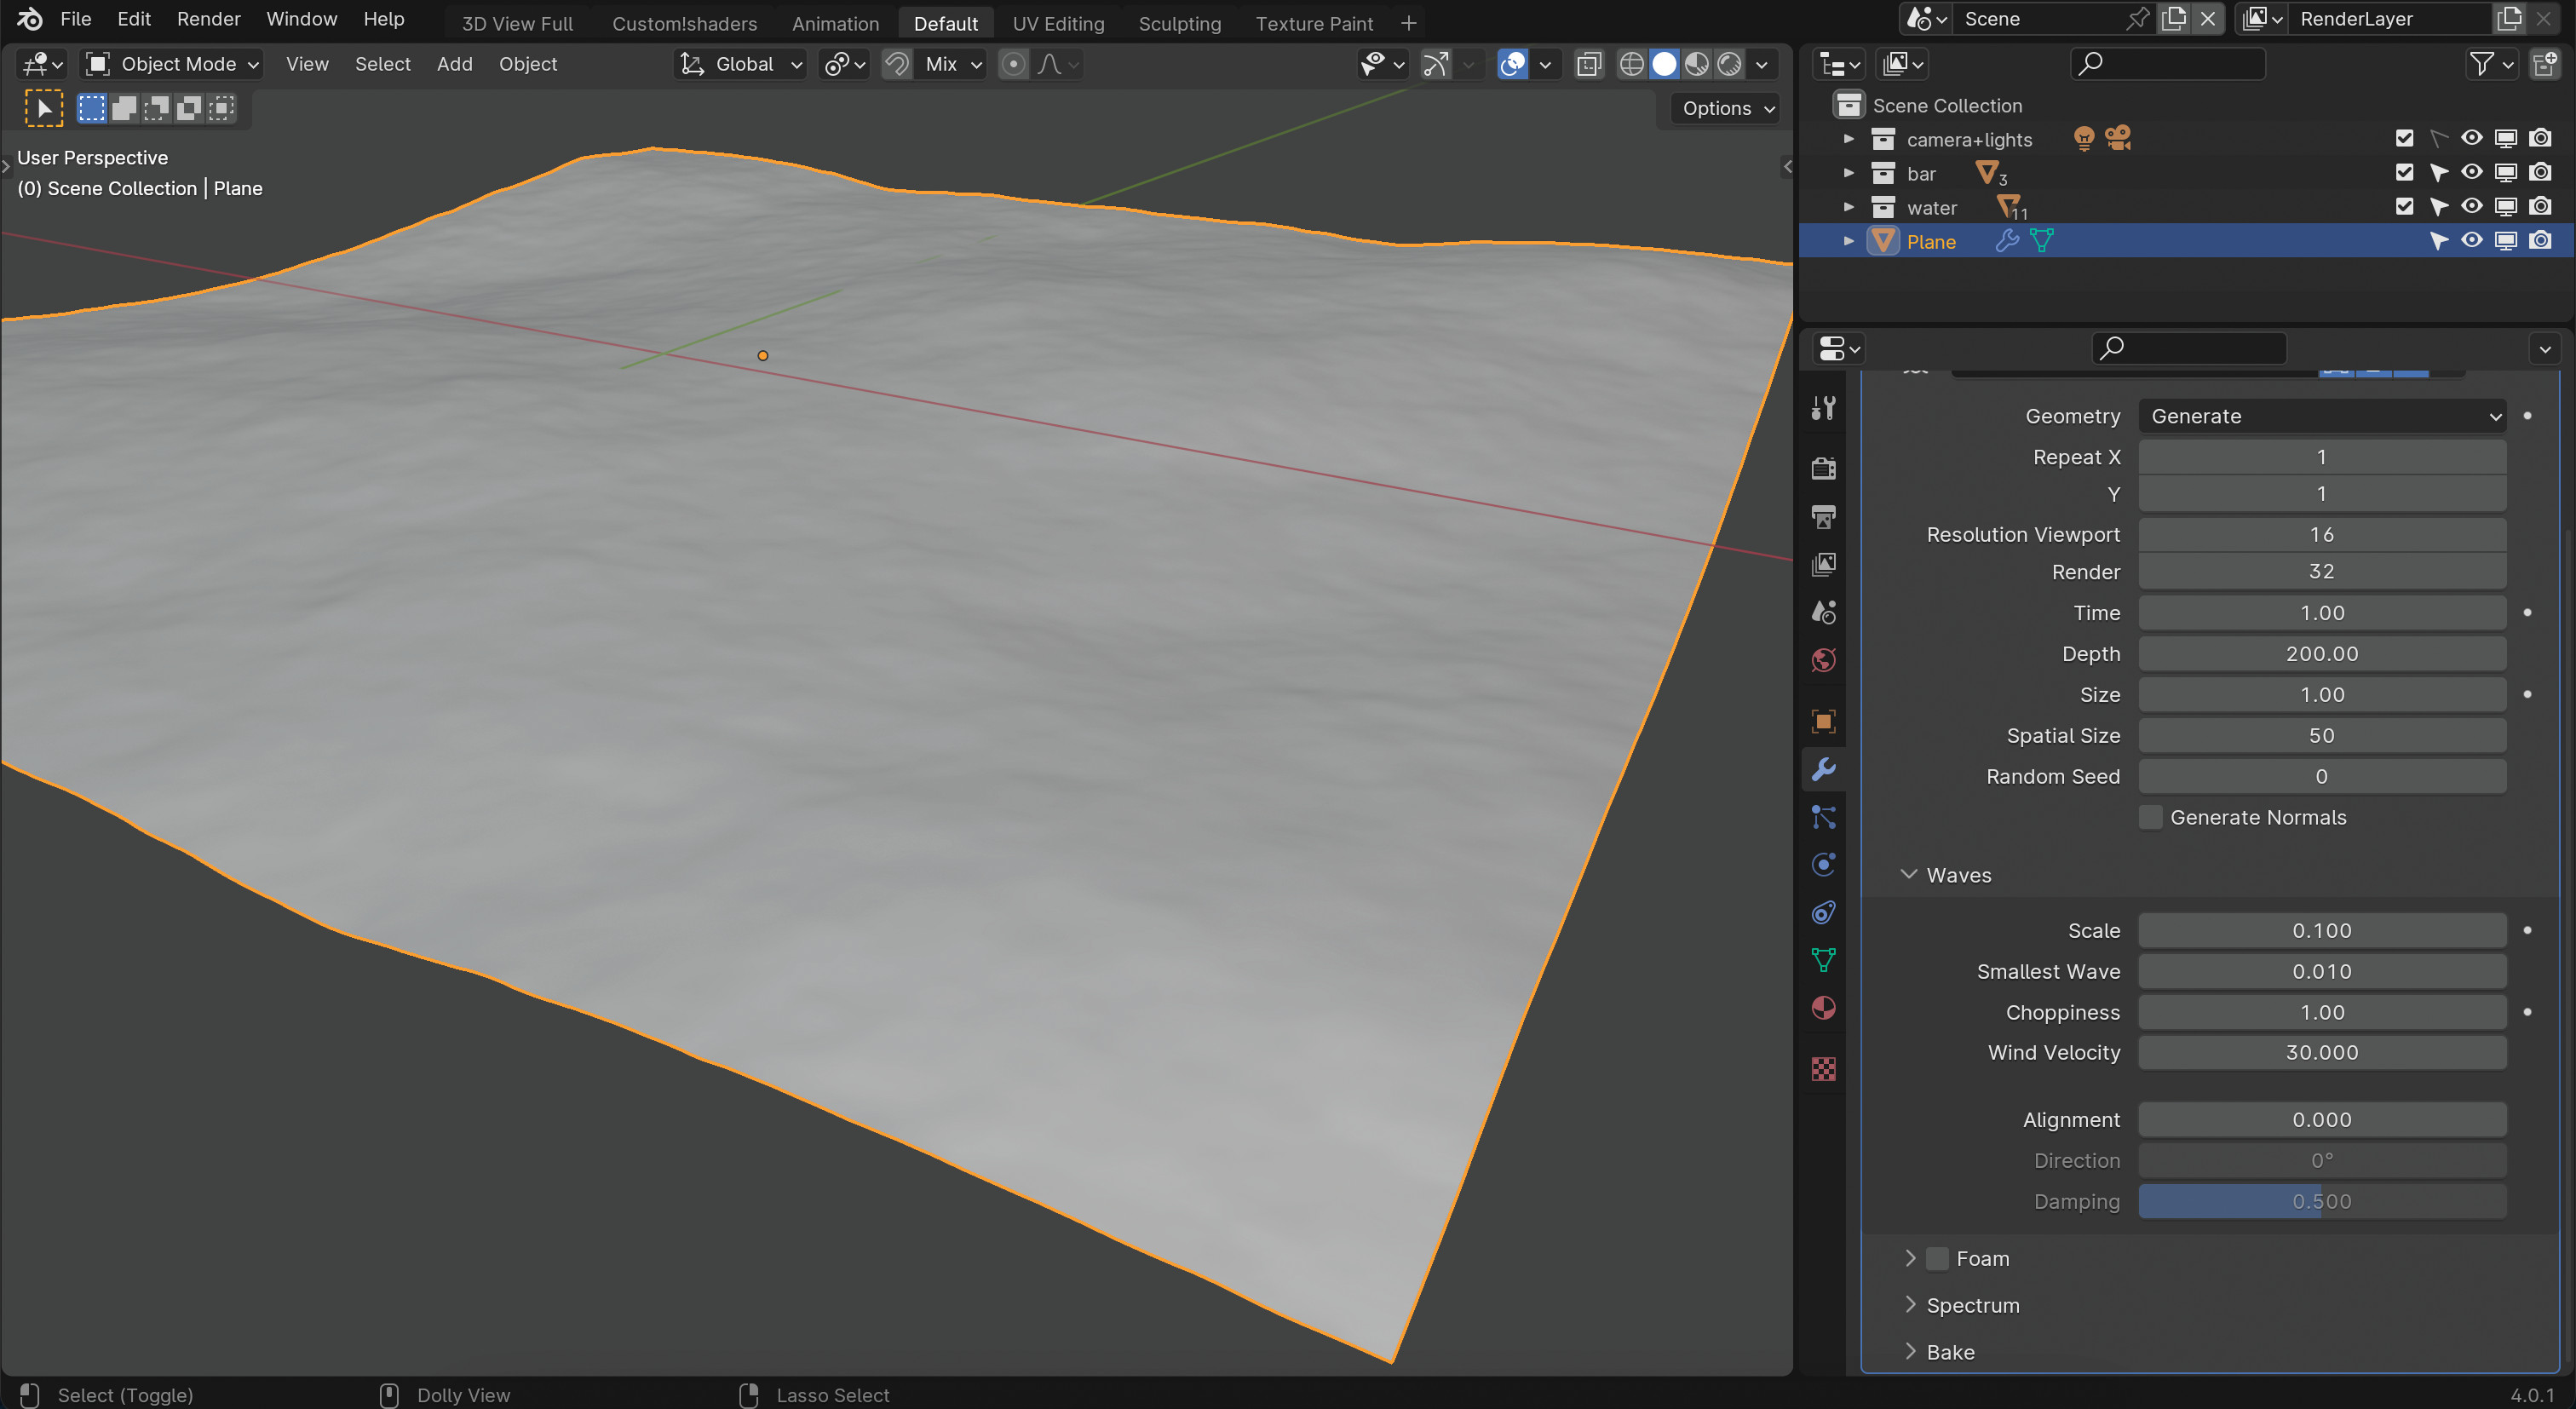
The first thing to sort is how ridiculously wild our ocean is! This might be the look you’re going for, but as we’re creating a coastline we want something gentle and fitting for a relaxing beach scene. To do this, go to the Ocean modifier and open the Waves rollout. Reduce their height by changing the Scale to 0.2 and you’ll immediately notice everything is a lot calmer.
08. Defining the smallest wave size
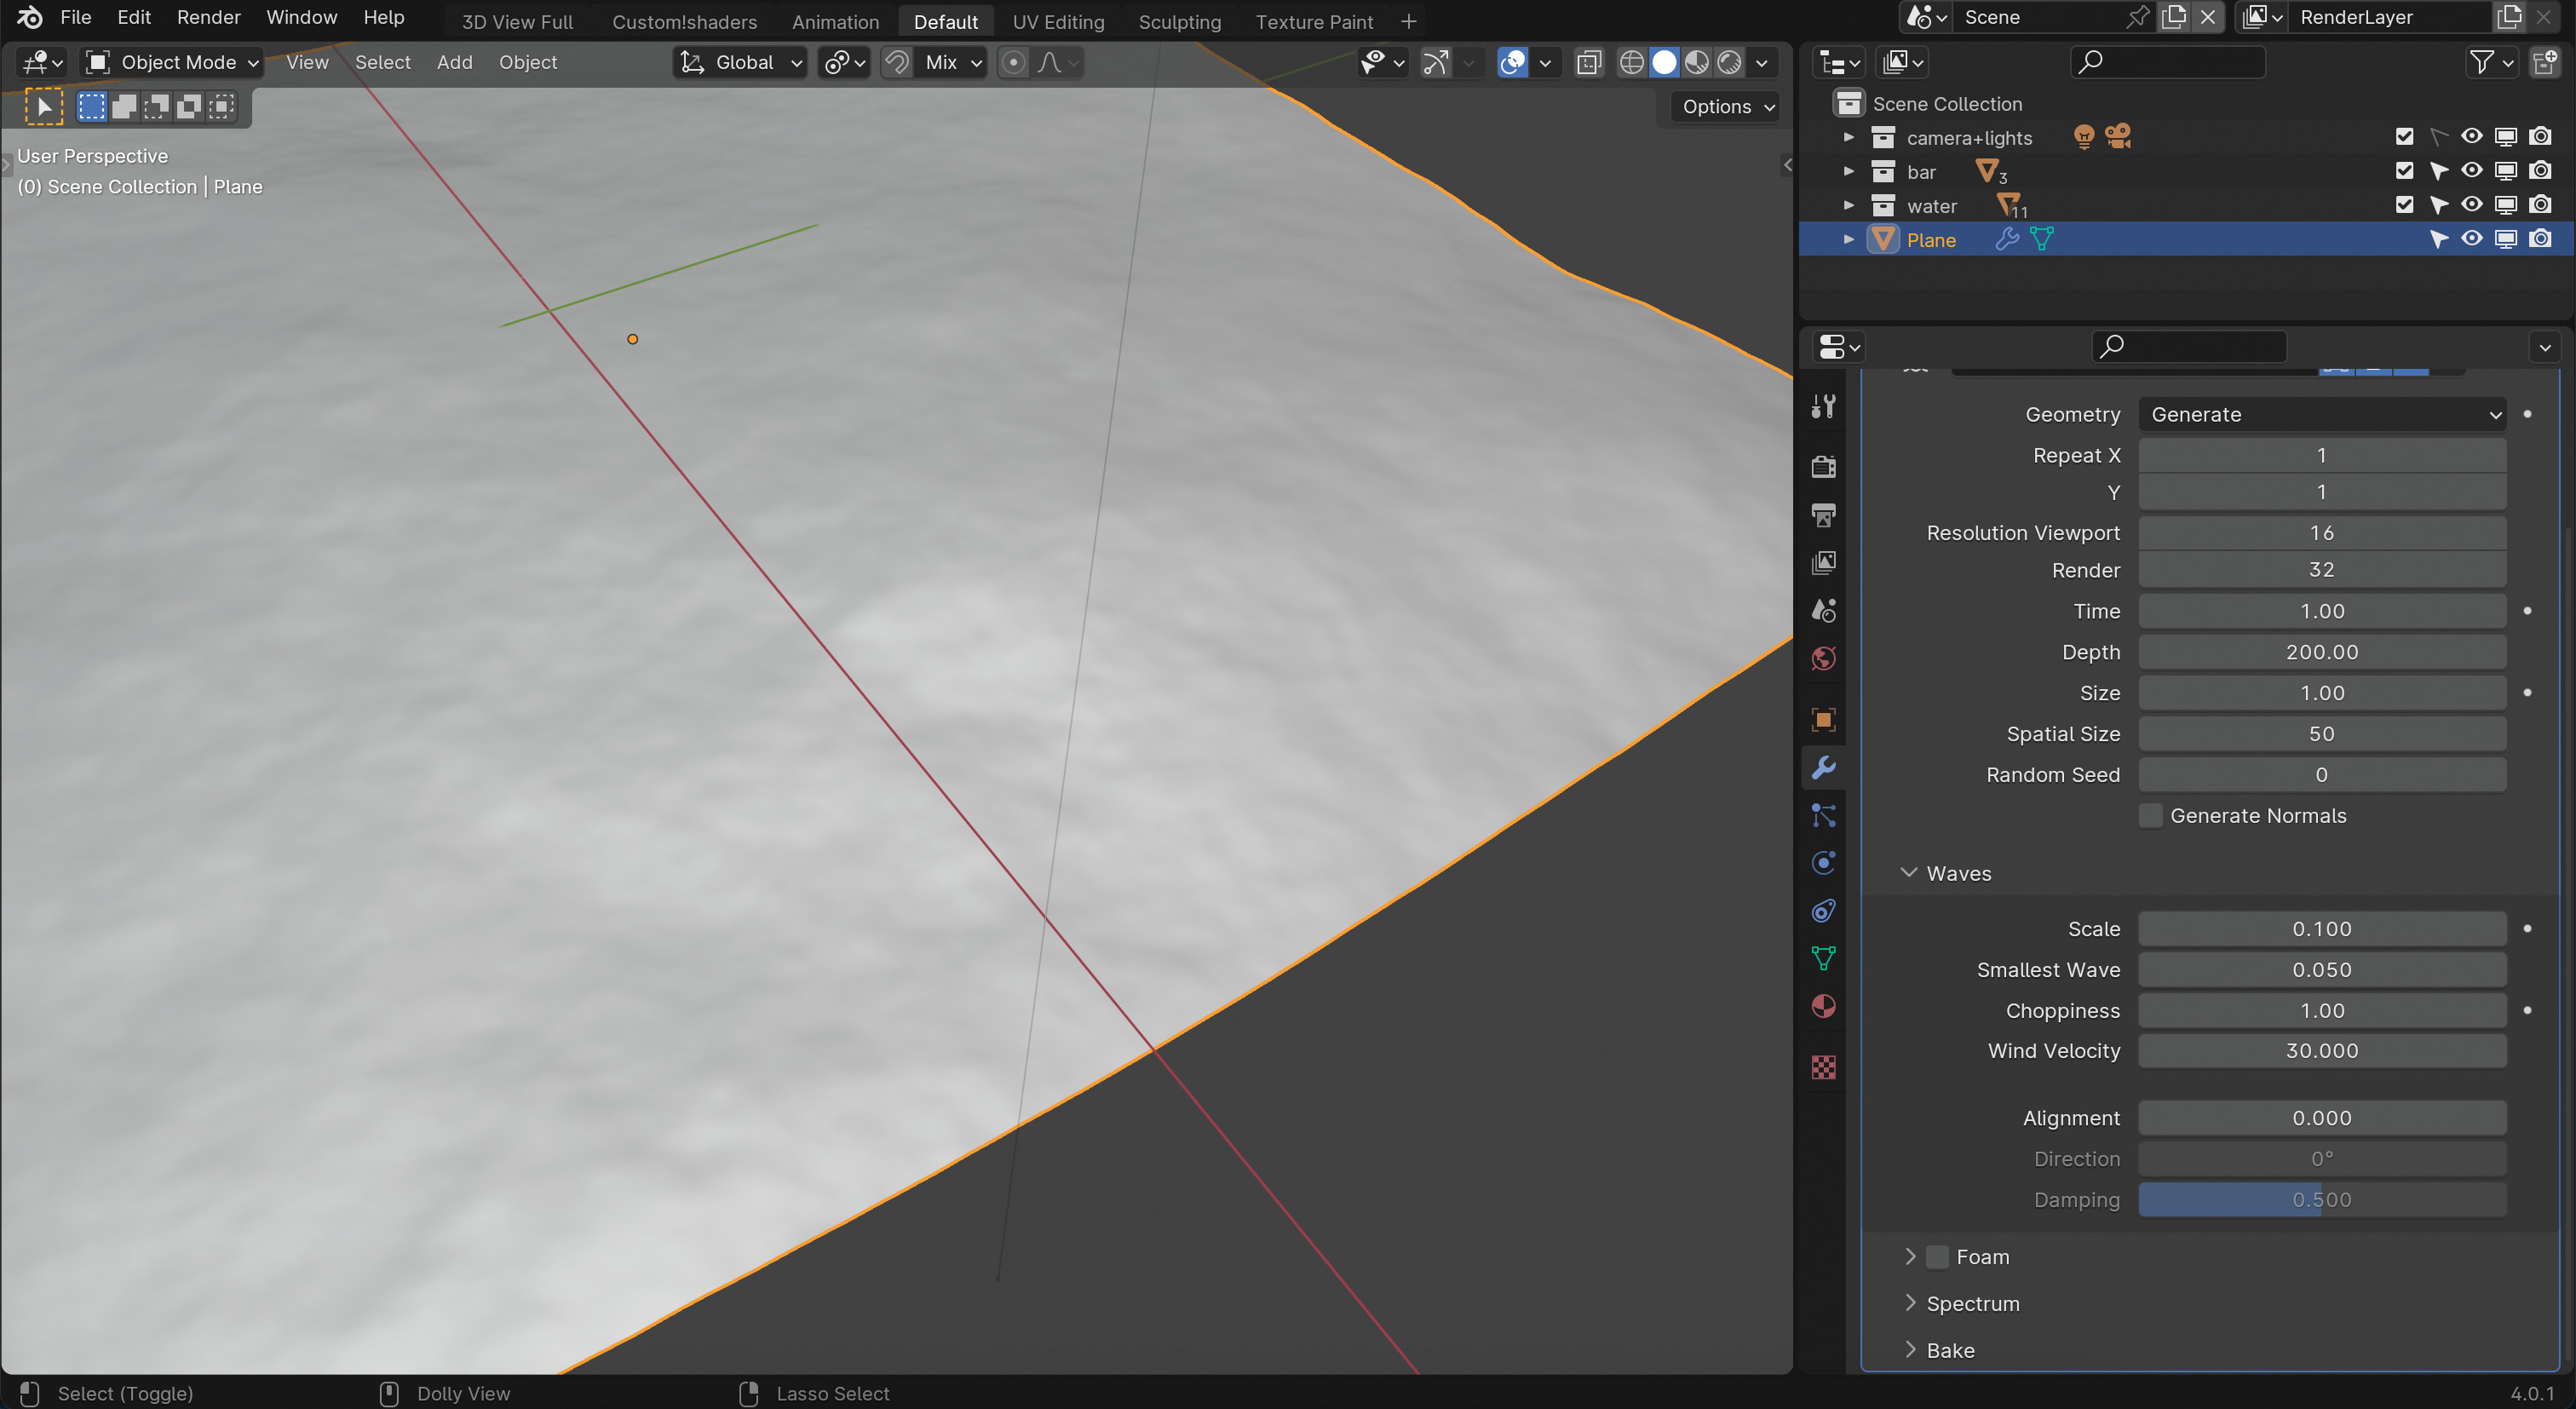
To help reduce the choppiness even further you can use the Smallest Wave parameter. This acts as a minimum limit for the size of any generated waves and is, in effect, a low-pass filter for them. It’s already set to a pretty small value by default so it won’t need too much of a change here. Set it to 0.05 and you should see a small change in the simulated ocean.
09. Changing the choppiness
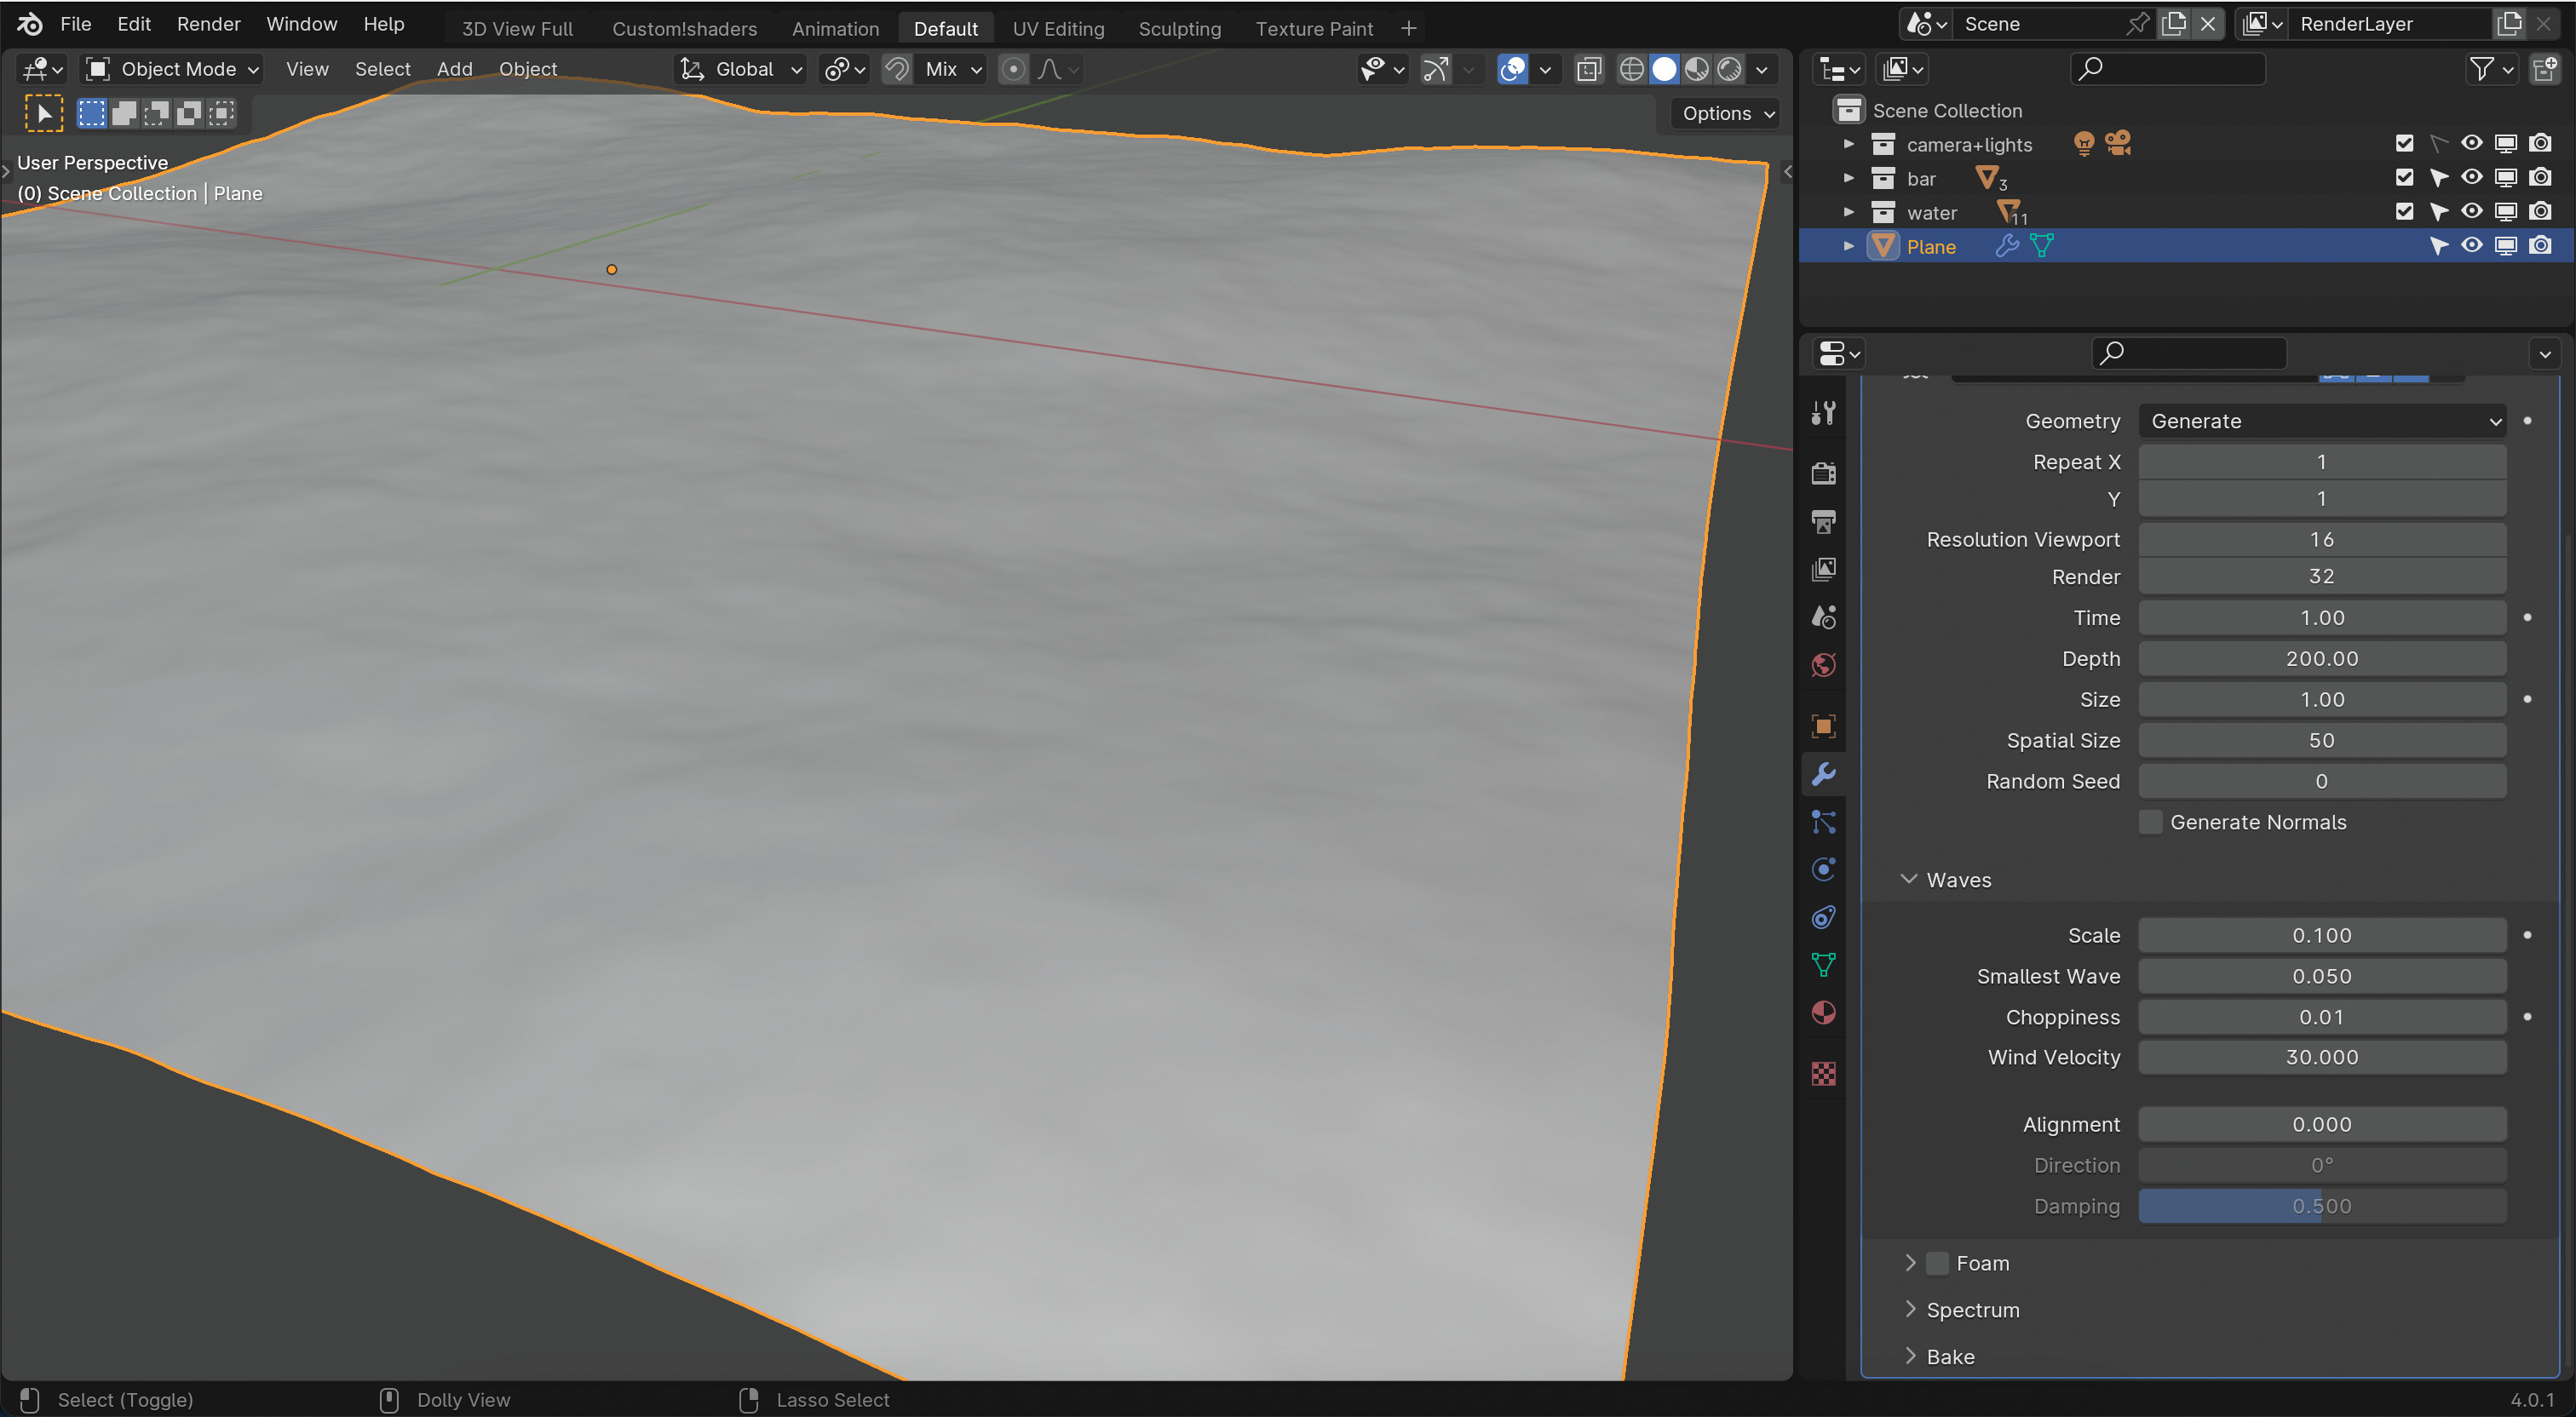
Another option for reducing the choppiness is the actual Choppiness parameter. The waves will always be displaced in the Z direction, but if you also want to displace them in the X and Y directions you can use any number above 1.0. A setting of 0.0 results in no lateral displacement and higher values increase the effect. Set this to 0.01 so there’s hardly any choppiness of this type.
10. Controlling the seas
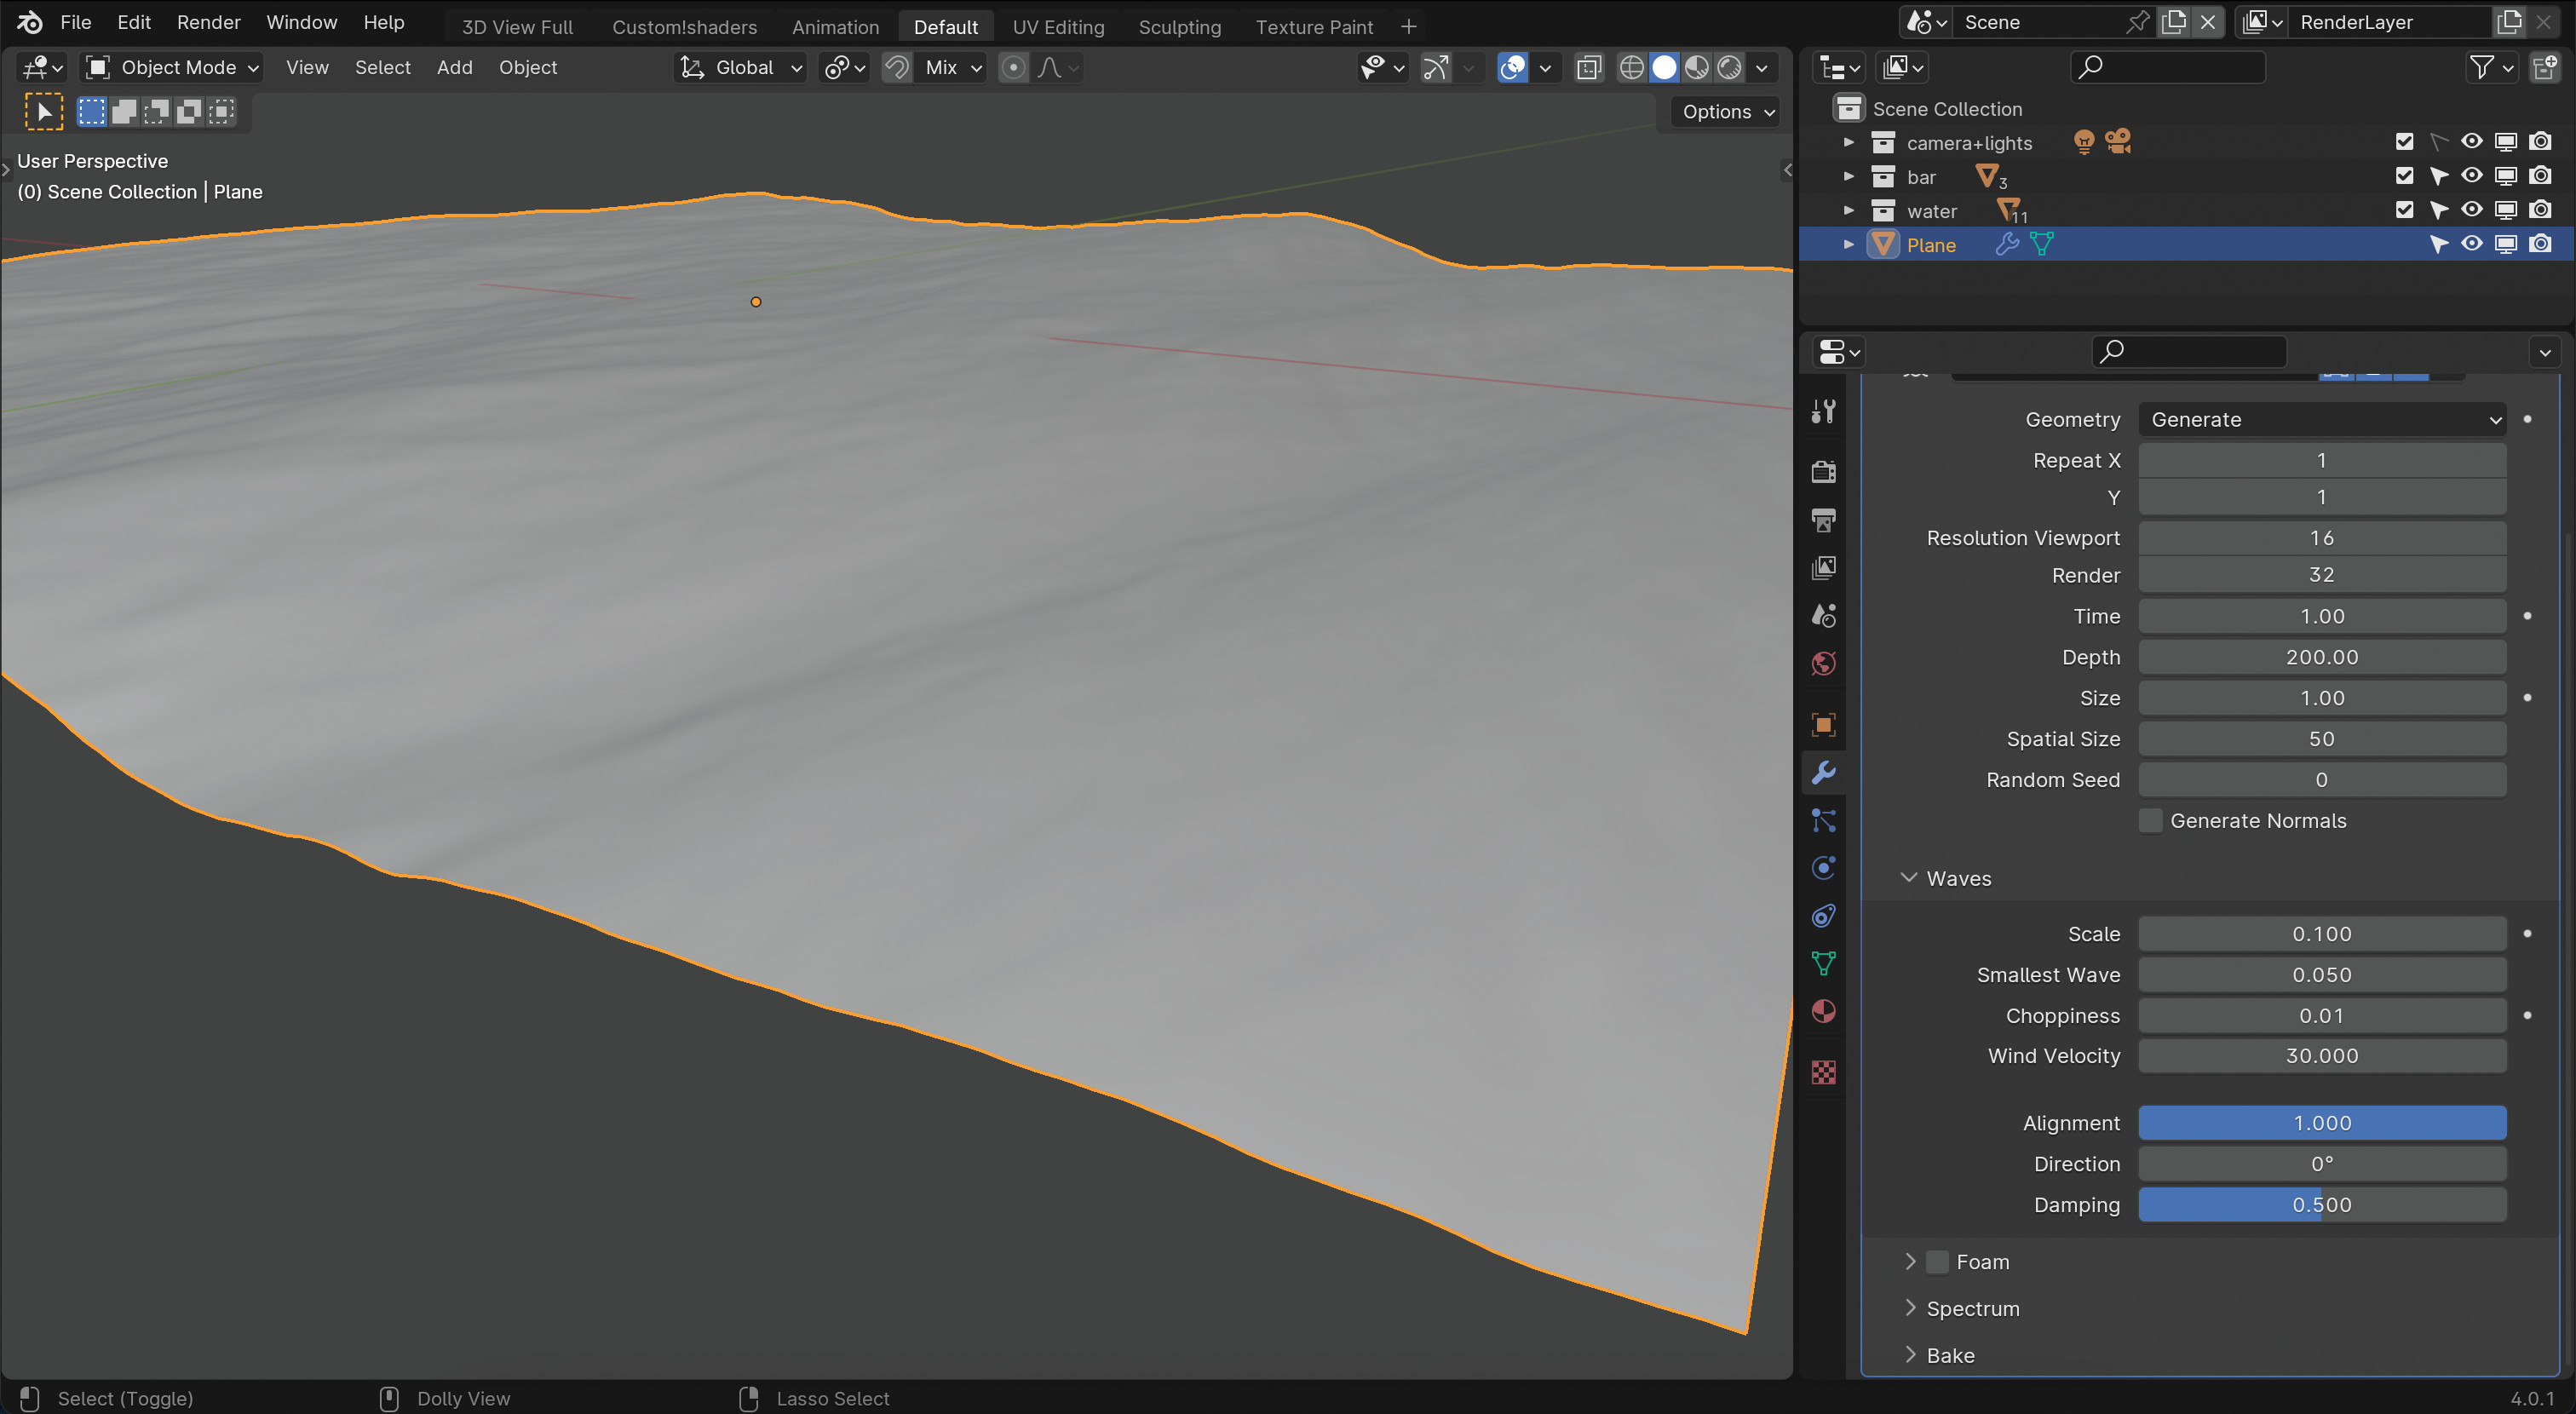
Now it’s time to really transform our ocean into a gentle set of waves that are lapping up to the beach. This is achieved simply by changing the Alignment value, which controls the direction of the wind. At a value of 0.0, the wind and waves are completely random while setting a value of 1.0 results in a more constant and uniform direction being achieved. The latter is definitely the effect that we want, so set yours to 1.0 and watch your simulation take another step towards a relaxing scene.
11. Changing the direction
It’s possible your waves are travelling and oriented in the wrong direction. This can be rectified by rotating the whole ocean object, but that isn’t always desirable, especially if the mesh isn’t uniform across the X and Y directions. An easier solution is to change the Direction property; 90 degrees will rotate it. This property is only available if you’ve changed the Alignment from 1.0.
12. Adding extra scene elements
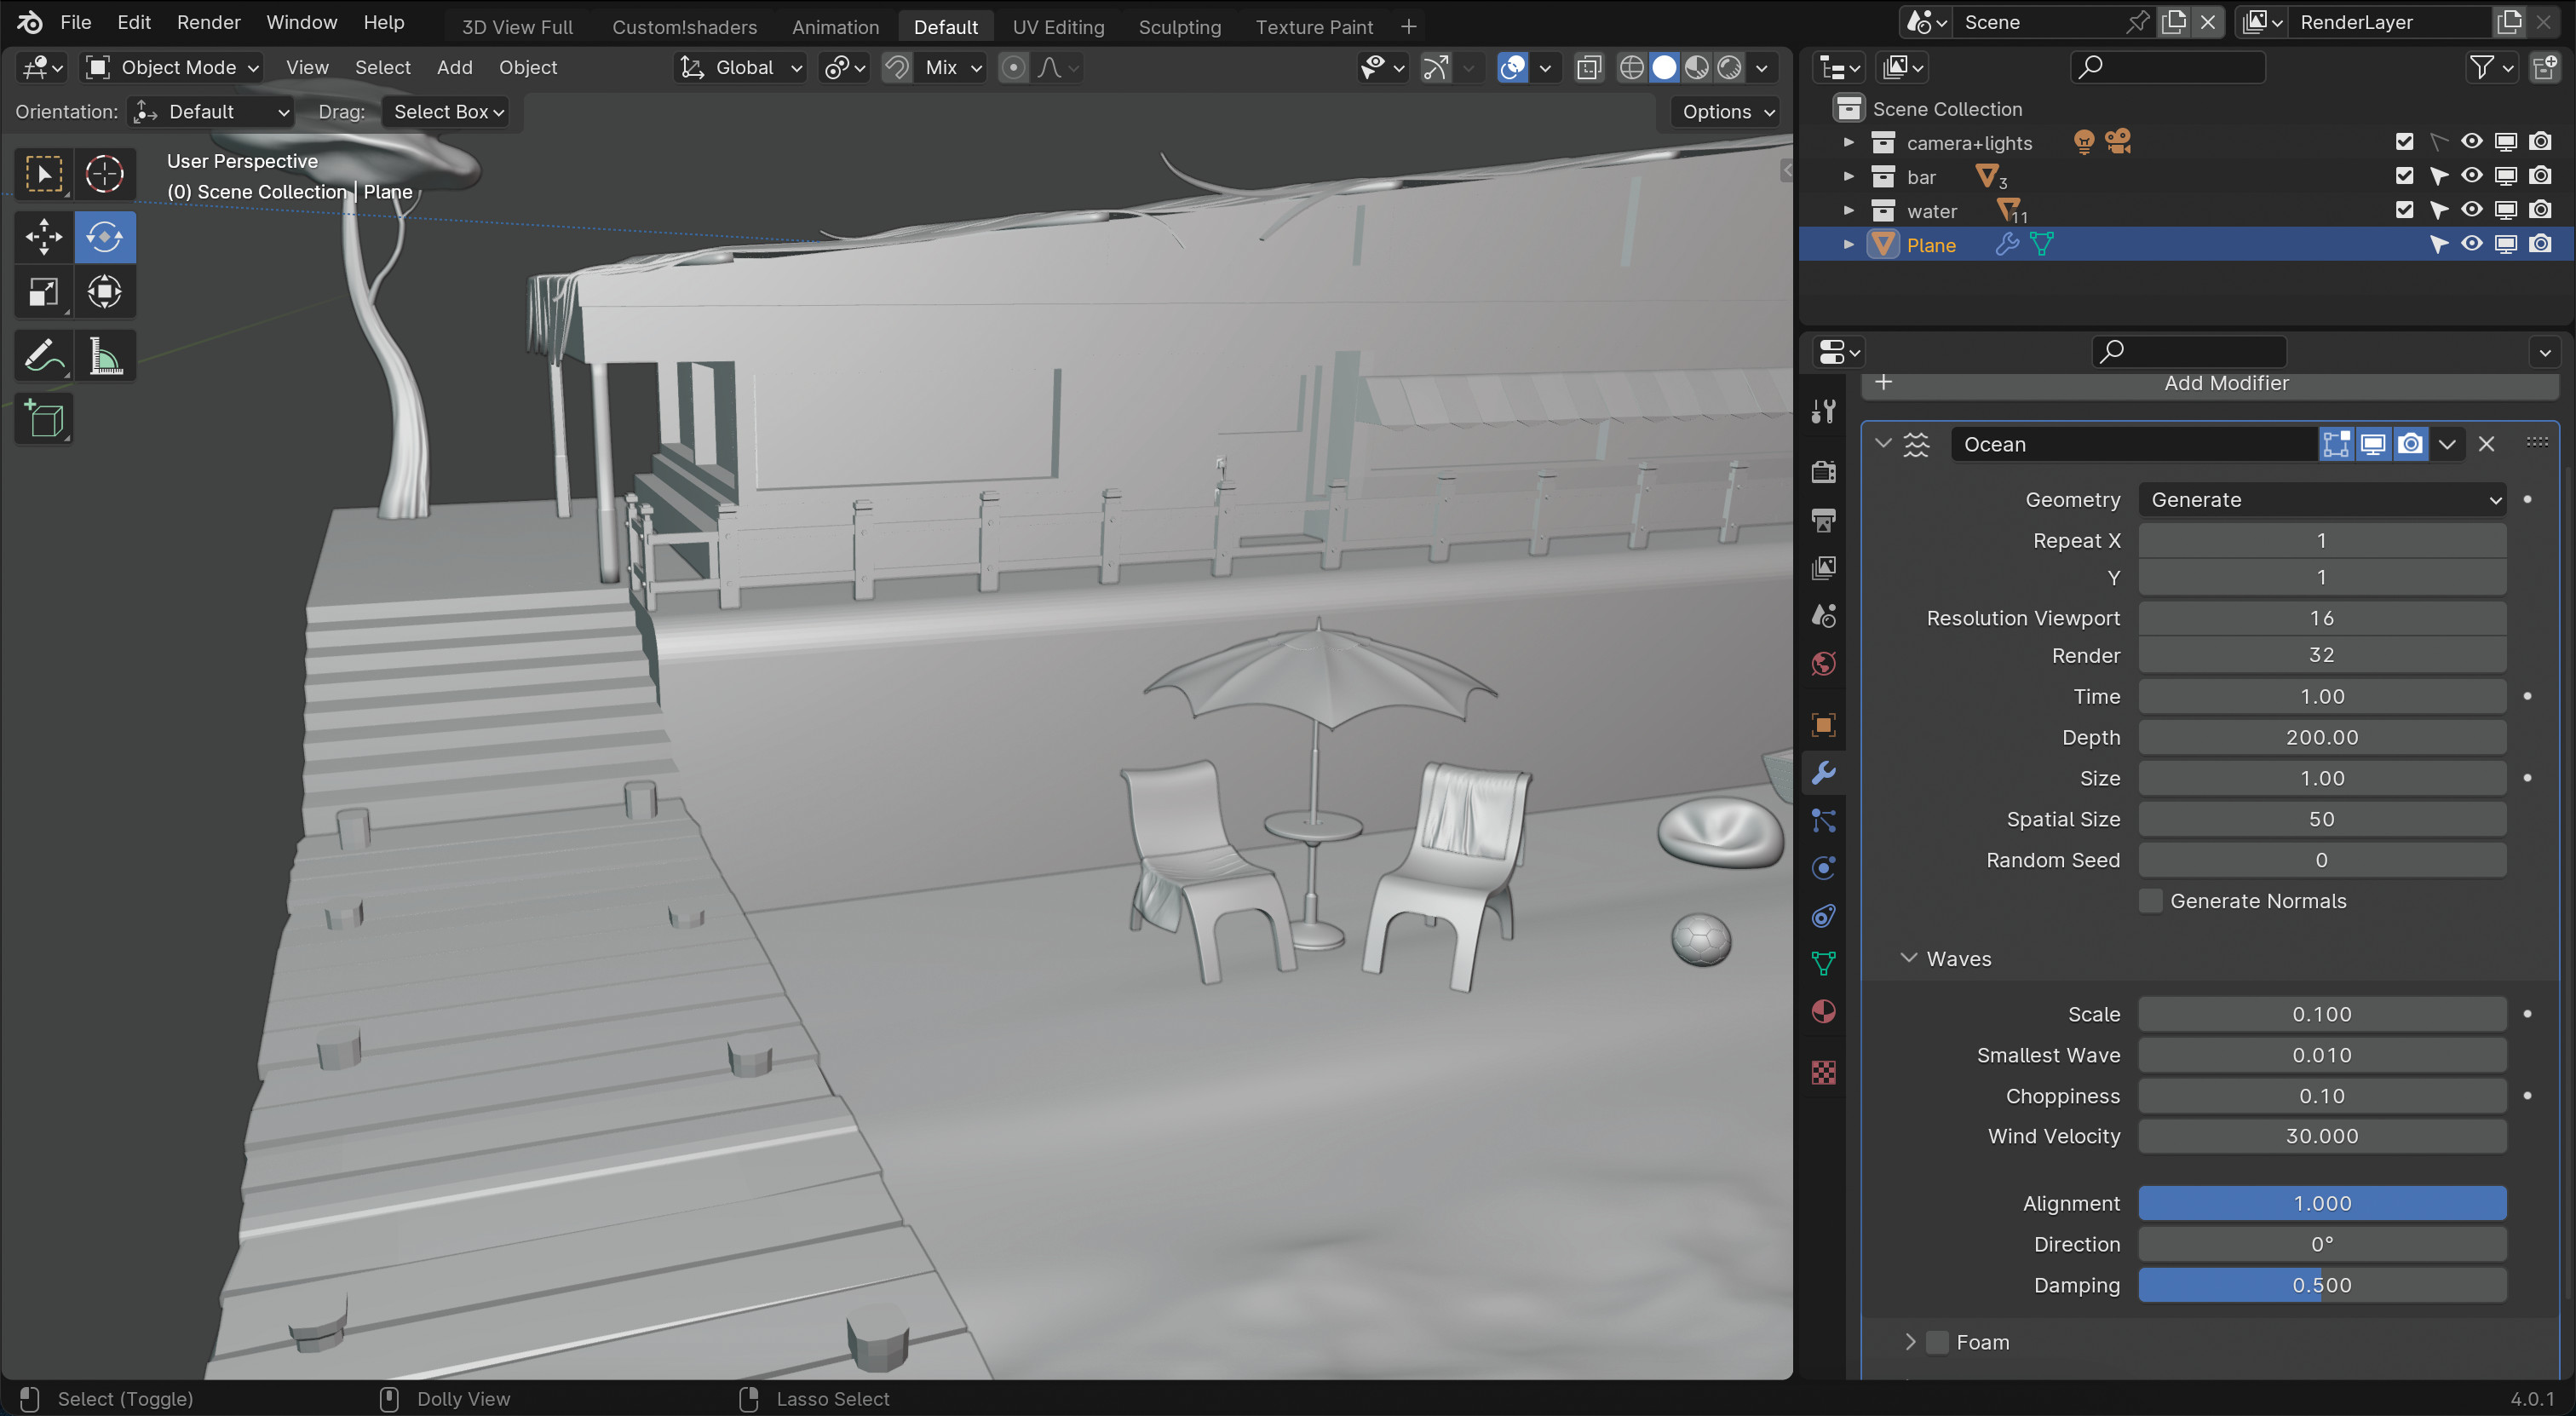
With our ocean suitably generated we can focus on the broader scene. As we’ve created a gentle lapping ocean, we should complement it with a relaxing beach. You can either download or create objects like a pier, or deckchairs with a parasol. The example here shows a beach house and cafe, which is a nice touch. Make sure you texture all these objects accordingly.
13. Creating texture with Photoshop
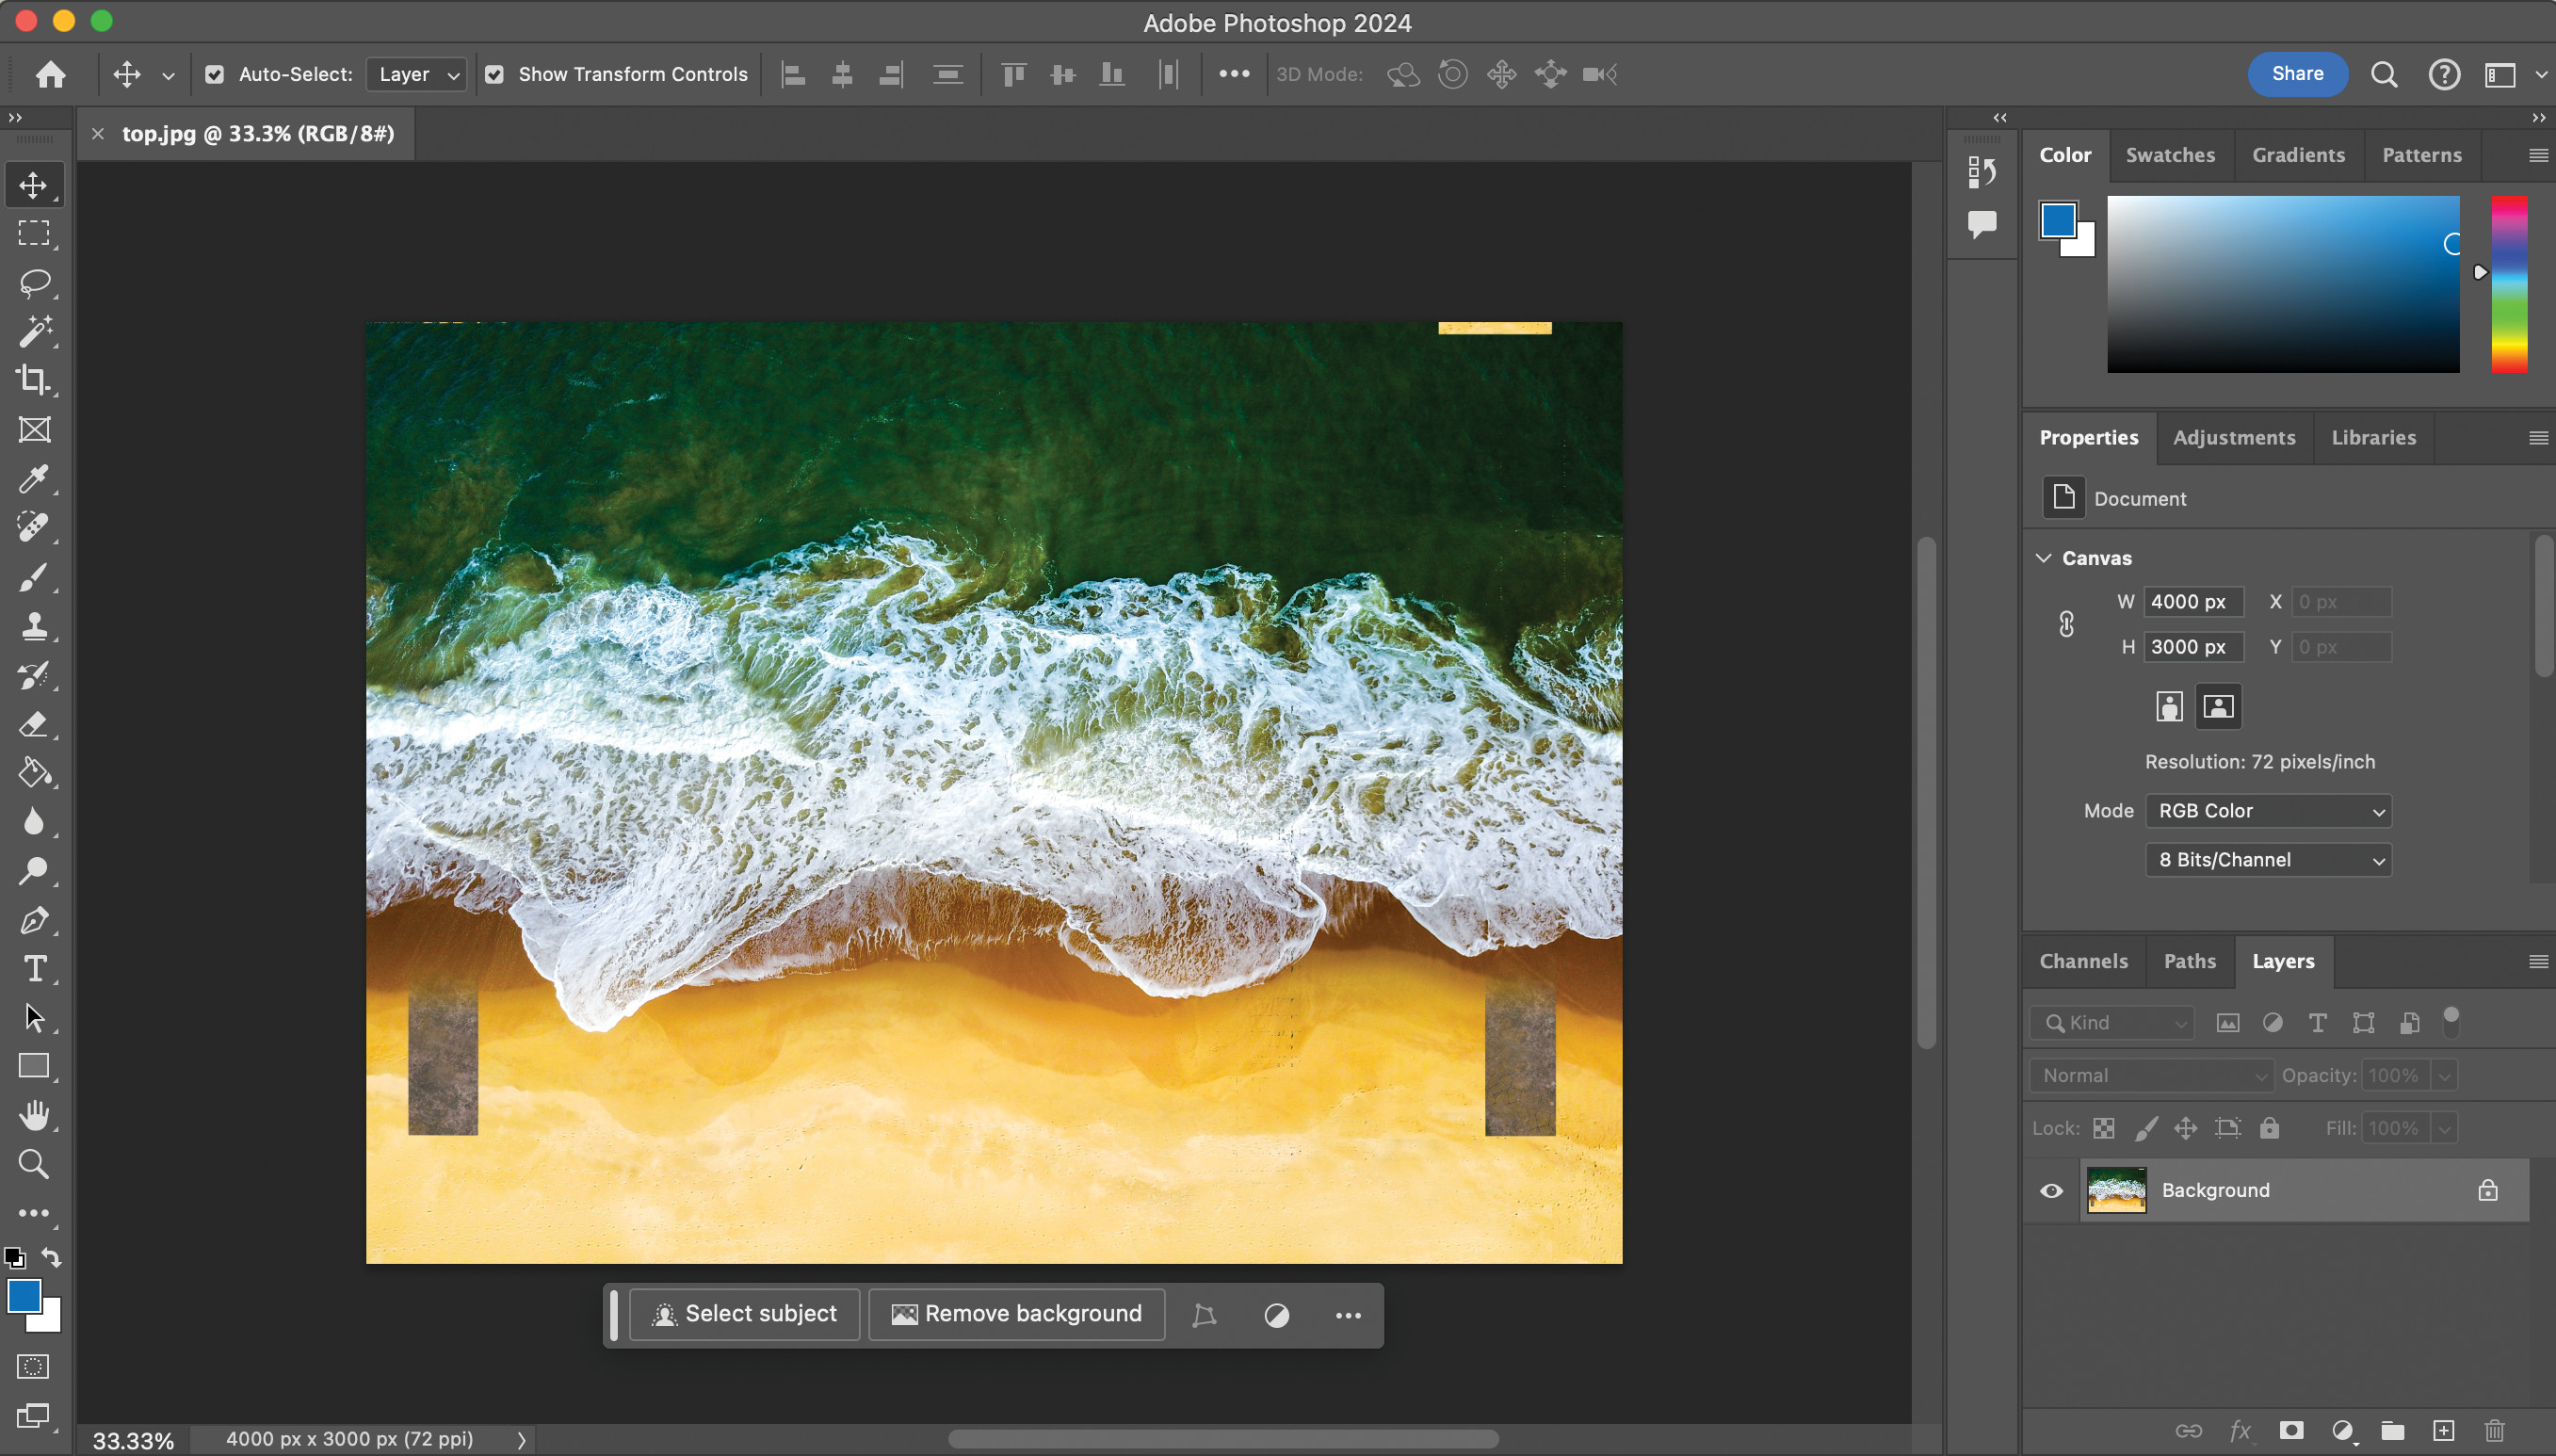
For our example we have a texture that incorporates the ocean, its foam and the sand. This was the easiest option for realistically representing the interaction between these different parts.
In Photoshop it’s a case of creating a top-down view of the ocean and sand. This can be achieved using multiple layers, while painting on the foam is also a good option.
Making this image as high resolution as you can is also vital, especially for close-ups. Finally, save the image as a JPEG. The texture in this example was created by Nic Moldoveanu.
14. Applying texture in Blender
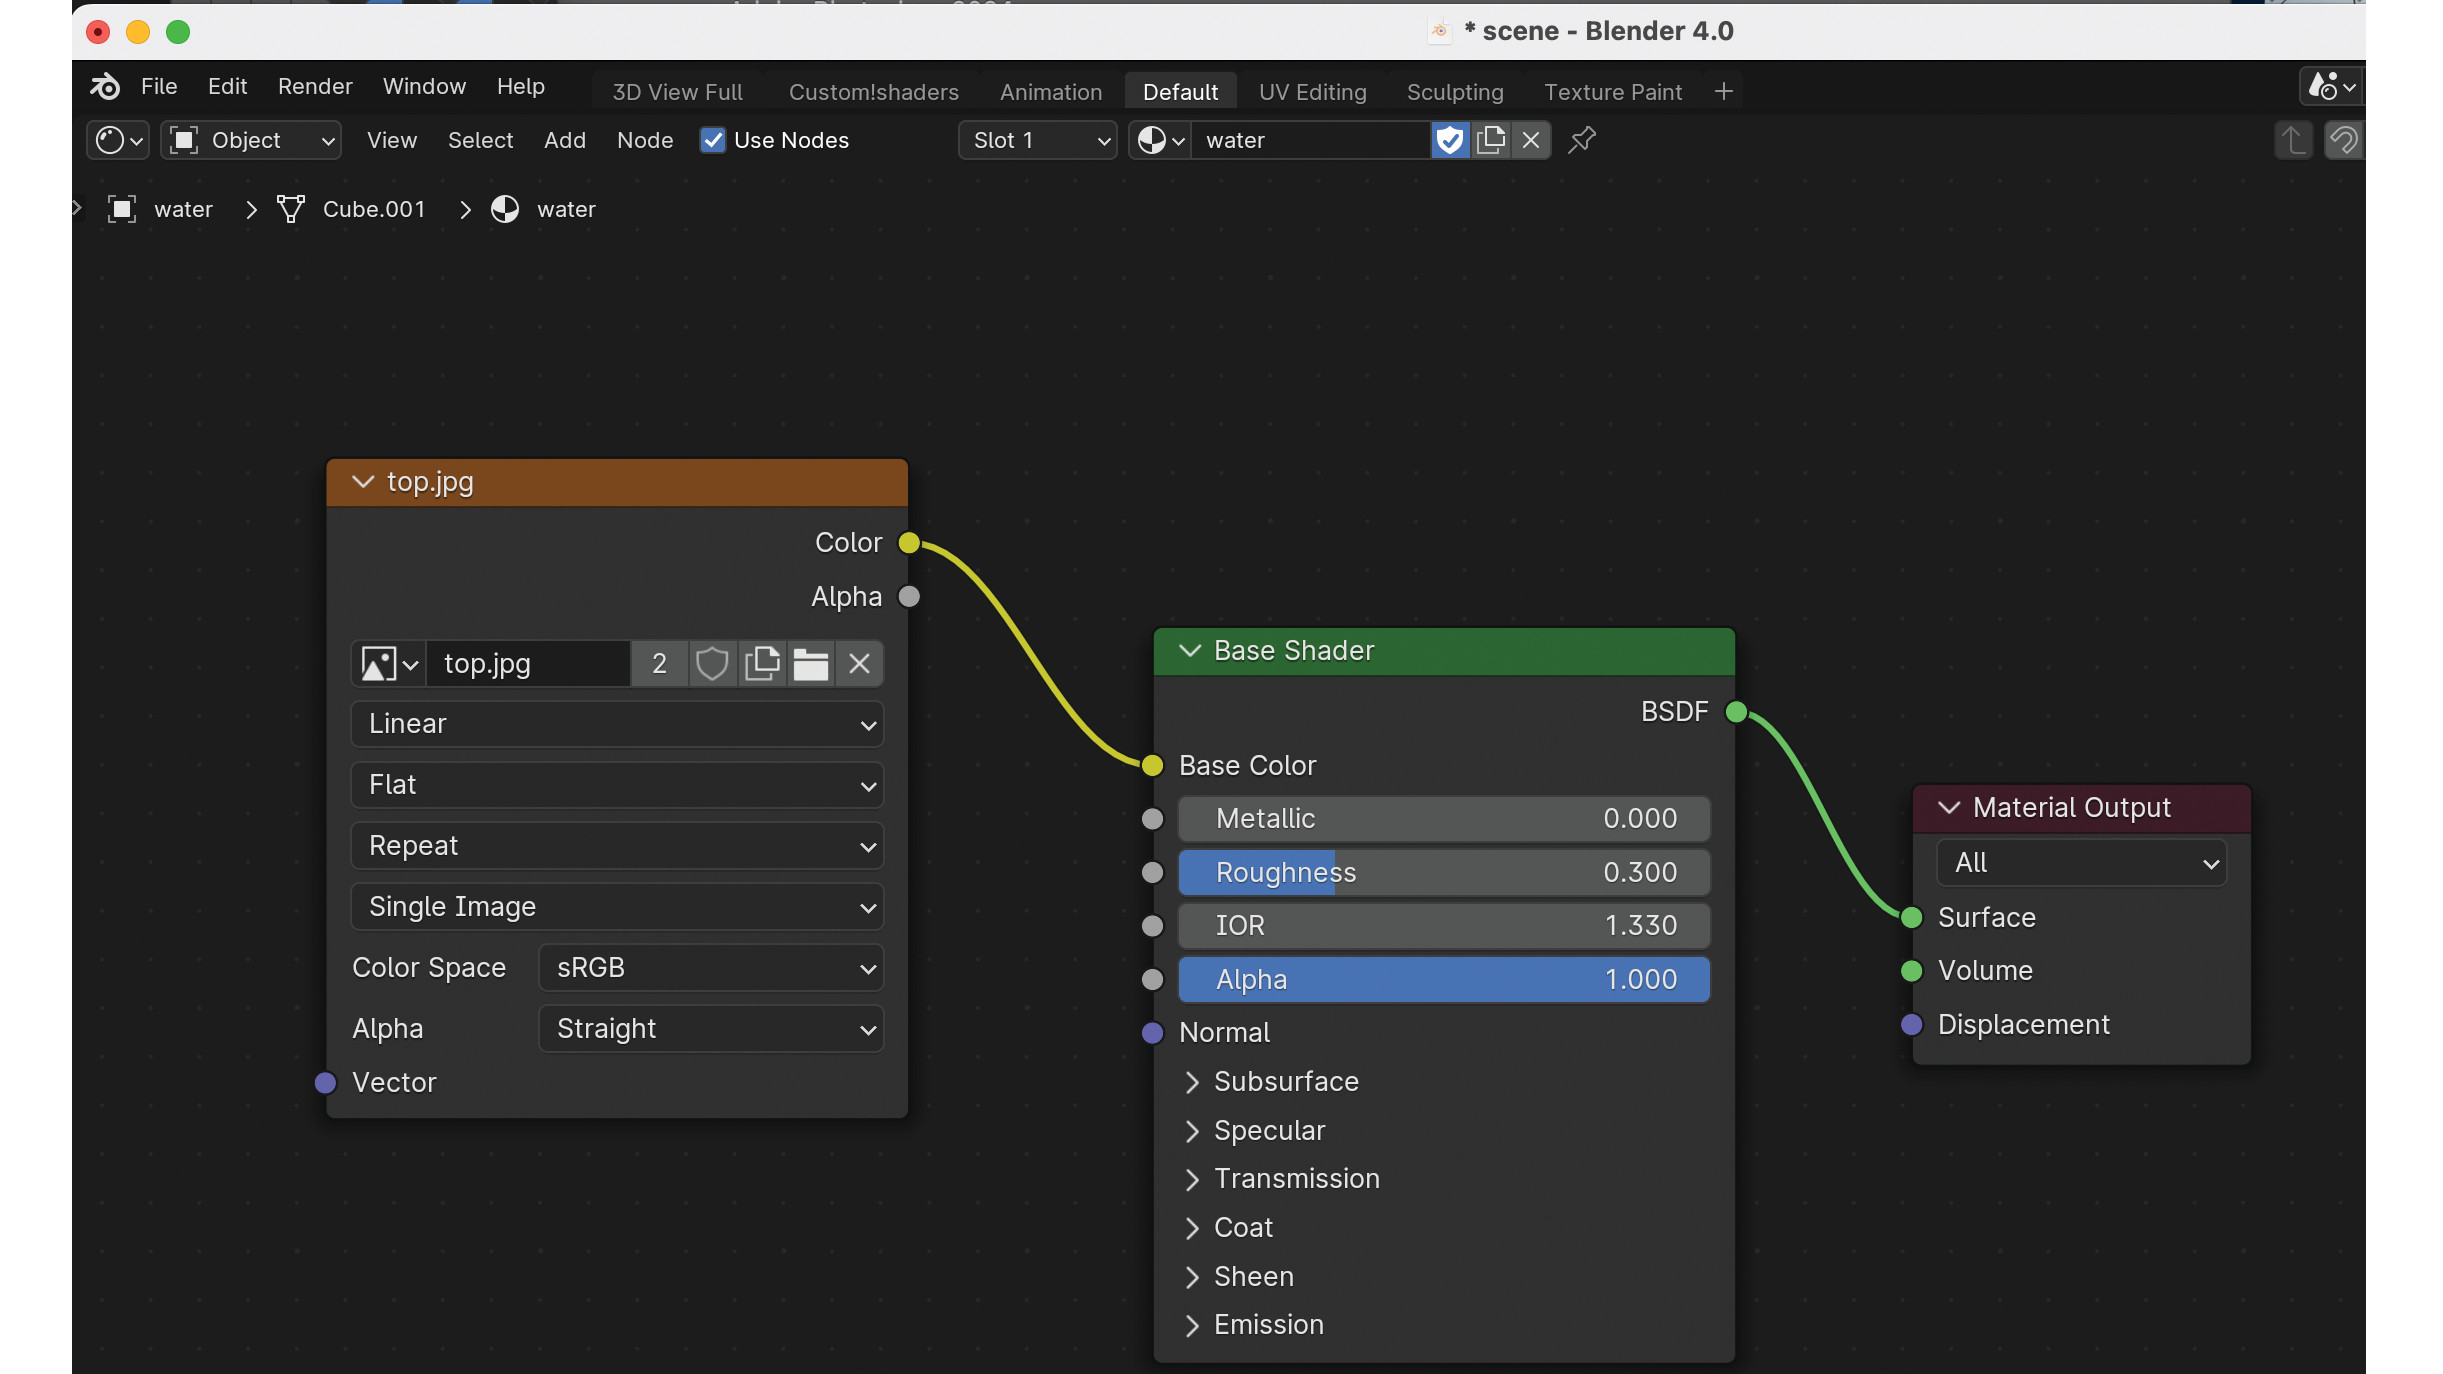
Let’s go back to our ocean object in Blender and open a Shader Editor view. We need one each of Material Output, Base Shader and Image Texture nodes. Link the BSDF output of the Base Shader to the Surface of the Material Output node, then connect the Color output of the Image Texture node to the Base Color of the Base Shader. Lastly, add the JPEG to the Image Texture node.
15. Setting up a camera and light
Use the Add menu to create a camera and a light. The camera can just be a default type and will require positioning to create the view you want, while the light should be a Sun light and can be located so the shadows are in a pleasing direction. Tweaking the Strength of the sun can also create a nice level of lighting. At this stage, we’re now ready to render our scene.
16. Rendering the scene

Start by going to the Output rollout in the Properties panel, where you can set the X and Y resolutions for your output image. Start off low for test renders and increase it for the final image.
In the Render rollout, make sure that the renderer is set to EEVEE, as this will produce the quickest results for a simple scene like this. After test rendering, make adjustments to your scene including the camera location and the position of the sun.
When you’re happy, you can increase the output resolution and render your final image.
Creating an ocean in Blender: tips and tricks
Here are a few extra tips to keep in mind when using Blender to create an ocean scene:
01. Animate the water
Animating the waves over time is as simple as keyframing the Time parameter within the Ocean modifier. Setting it to two different values across the time range will result in the waves being animated.
02. Creating the wave foam
It’s possible to generate foam data in the Ocean modifier. By enabling Foam within it, we can create a foam mask that can then be retrieved by the Ocean texture.
03. Fine-tuning the wave frequencies
The Ocean modifier’s Spectrum rollout gives four different options for types of water that are being created. Each option uses a separate wave spectrum model and ensures the simulation is ideally suited to each.
Get more Blender tutorials in 3D World
This article originally appeared in 3D World. Subscribe to 3D World at Magazines Direct. If you've missed this issue or other editions of 3D World start a subscription. Each issue contains 3D art and inspiration as well as training from leading artists in video games, film VFX, animation and illustration.