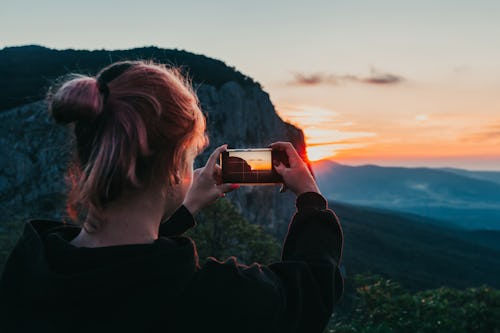
Live Photos shot on an iPhone can be pretty magical. A Live Photo can capture the silly moments before a posed group selfie bound for Instagram, some additional minute details of a gorgeous macro photo, or the final moments of a fading sunset shot.
The only problem with Live Photos is that you can’t share them everywhere. Other Apple users will be able to view them (if you tell them to check it out) and you can post them on some platforms properly, but usually, they go unappreciated unless you’re actively thumbing through your camera roll.
But those Live Photos don’t have to live hidden in iPhone albums forever. With a few taps, you can convert these one-of-a-kind photos into quick videos or GIFs for sharing anywhere.
What exactly is a Live Photo and how do I take one?
When taking Live Photos, your iPhone records 1.5 seconds before and after you take a picture. That video is saved along with the image. Live Photos are the poster child for Apple’s go-to HEIC image format, a “container” file that can store multiple compressed images and videos in one file without significant quality loss.
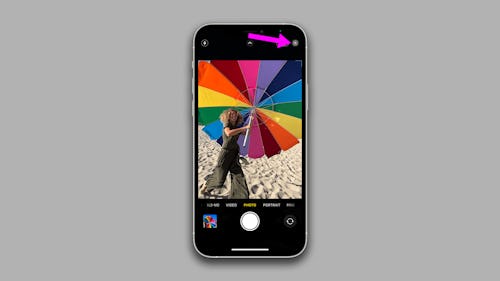
Live Photos are enabled by default on all iPhones, but it’s an easy feature to turn off on accident. If Live Photo mode is enabled, you’ll see a circular “Live” icon in the upper right corner of your screen when taking a photo. If that symbol is crossed out, Live Photos are disabled. All you need to do is tap on the “Live” icon.
How to save a Live Photo as a video
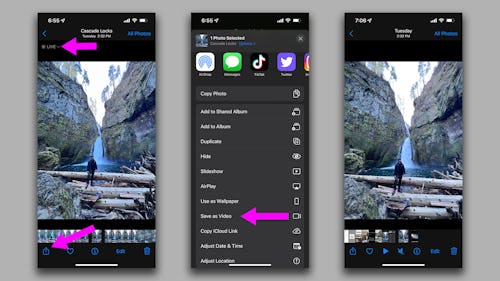
- In your camera roll, find a Live Photo that you’d like to save as a video. Live Photos will be indicated by a circular symbol and the word “Live” in the upper left-hand corner of the screen when you have a single photo selected.
- Once you’ve picked your photo, tap on the “Share” icon in the lower left-hand corner of your screen.
- On the shared menu, scroll past the suggested contacts and apps section to find and tap the menu item titled “Save as Video.” Your iPhone will process your request in a moment.
Saving a Live Photo as a video does not replace the original Live Photo. The Live Photo will remain wherever it was stored in your camera roll. The new video will appear just after the Live Photo in your camera roll and also appear in your recent photos list.
How to save a Live Photo as a GIF
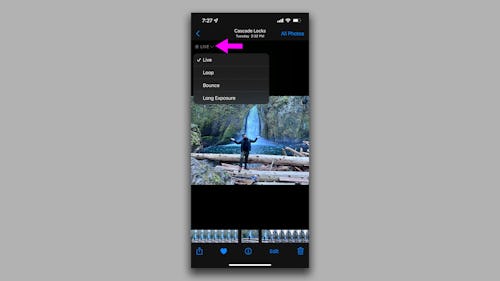
- In your camera roll, find a Live Photo that you’d like to save as a GIF. Live Photos will be indicated by a circular symbol and the word “Live” in the upper left-hand corner of the screen when you have a single photo selected.
- Tap that “Live” label to open up a dropdown menu. There are two options for GIFs: “Loop” and “Bounce.” Choosing “Loop” will simply loop the short video portion of the Live Photo. Instead of jumping back to the start of the video though, there’s a light fade that makes it a bit of an awkward choice for shorter loops. “Bounce” plays the video clip, then reverses it, (and repeats forever), delivering that “boomerang” effect that homemade GIFs usually have. Check out the differences between the two below in this “Look, I’m somewhere outside” pose Live Photo.


- Once you convert your Live Photo to either the “Loop” or “Bounce” effect you can share the GIF as you would any other photo or video. It’ll send as a .GIF file.
Unlike the video conversions, converting a Live Photo as a GIF does not create a new version of the image. There’s just one copy of the file. You can return to the “Live” dropdown menu at any time to change the GIF mode or turn the file back into a Live Photo.


