
Ah, fresh strings! Maybe the last time you fit a set is now a distant memory? Maybe the strings on your classical guitar have been there forever, perhaps even since the guitar was made? If you feel your classical guitar strings need a freshen up and you're not sure how to approach it, never fear, we’ll show you how with this step-by-step guide.
The method behind tying on classical nylon guitar strings can be misunderstood. Here, we’ll lay out each phase of the process, so you can get the technique down for yourself. If tied incorrectly your strings may slip and cause the guitar to drop tuning, and in the worst case slip off and whip your guitar’s top by the bridge, so it's important to take your time and get each step right.
The classical guitar uses three plain nylon strings and three wound strings. The plain strings last much longer than the wound silver strings and because of this you can also buy ‘treble’ and ‘bass’ sets of three strings independently. The winding of the bass strings degrades them fast through rusting or the winds breaking altogether – both of these common symptoms will make the string sound terrible, and it’s time to add a fresh set and bring your sound back to life!
What tools will you need?
- A fresh set of strings
- Wire cutters
- String winder
- Guitar tuner
- A hook pick for string removal
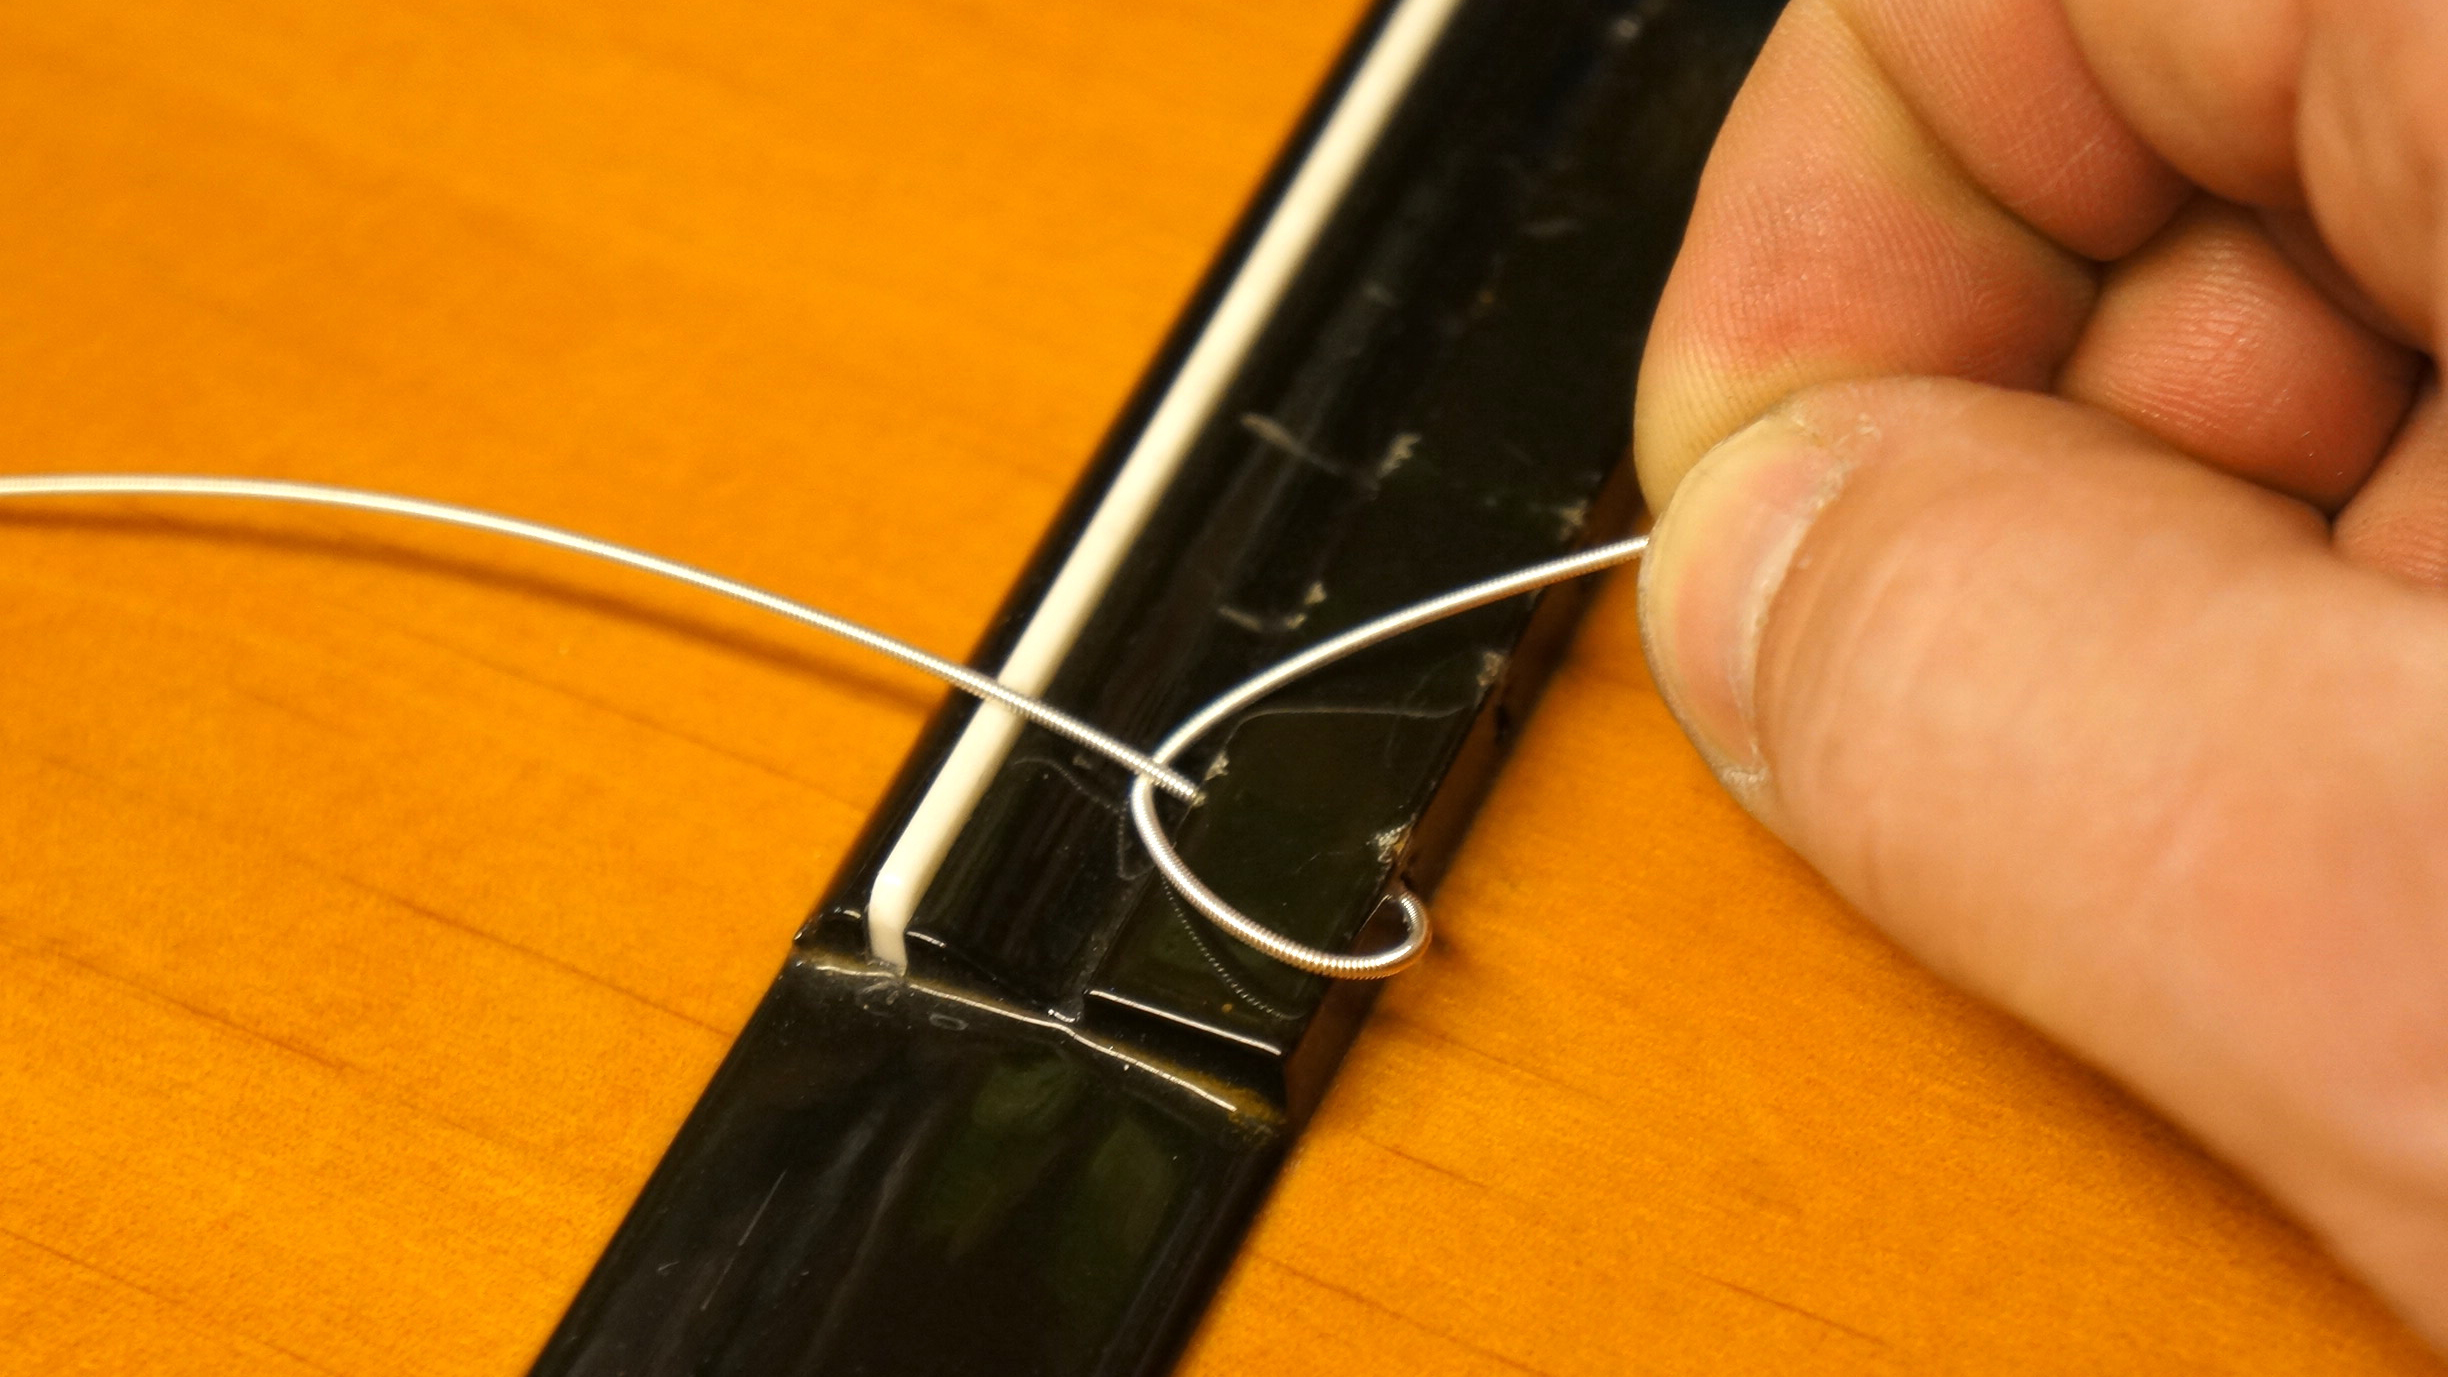
1. Remove the old strings
De-tension and take off your old strings. With the strings out of the way, now’s a great time to give your fretboard and frets a clean. Next up, feed your new bass E string through the hole in the bridge (as shown) and bend the tail back round.
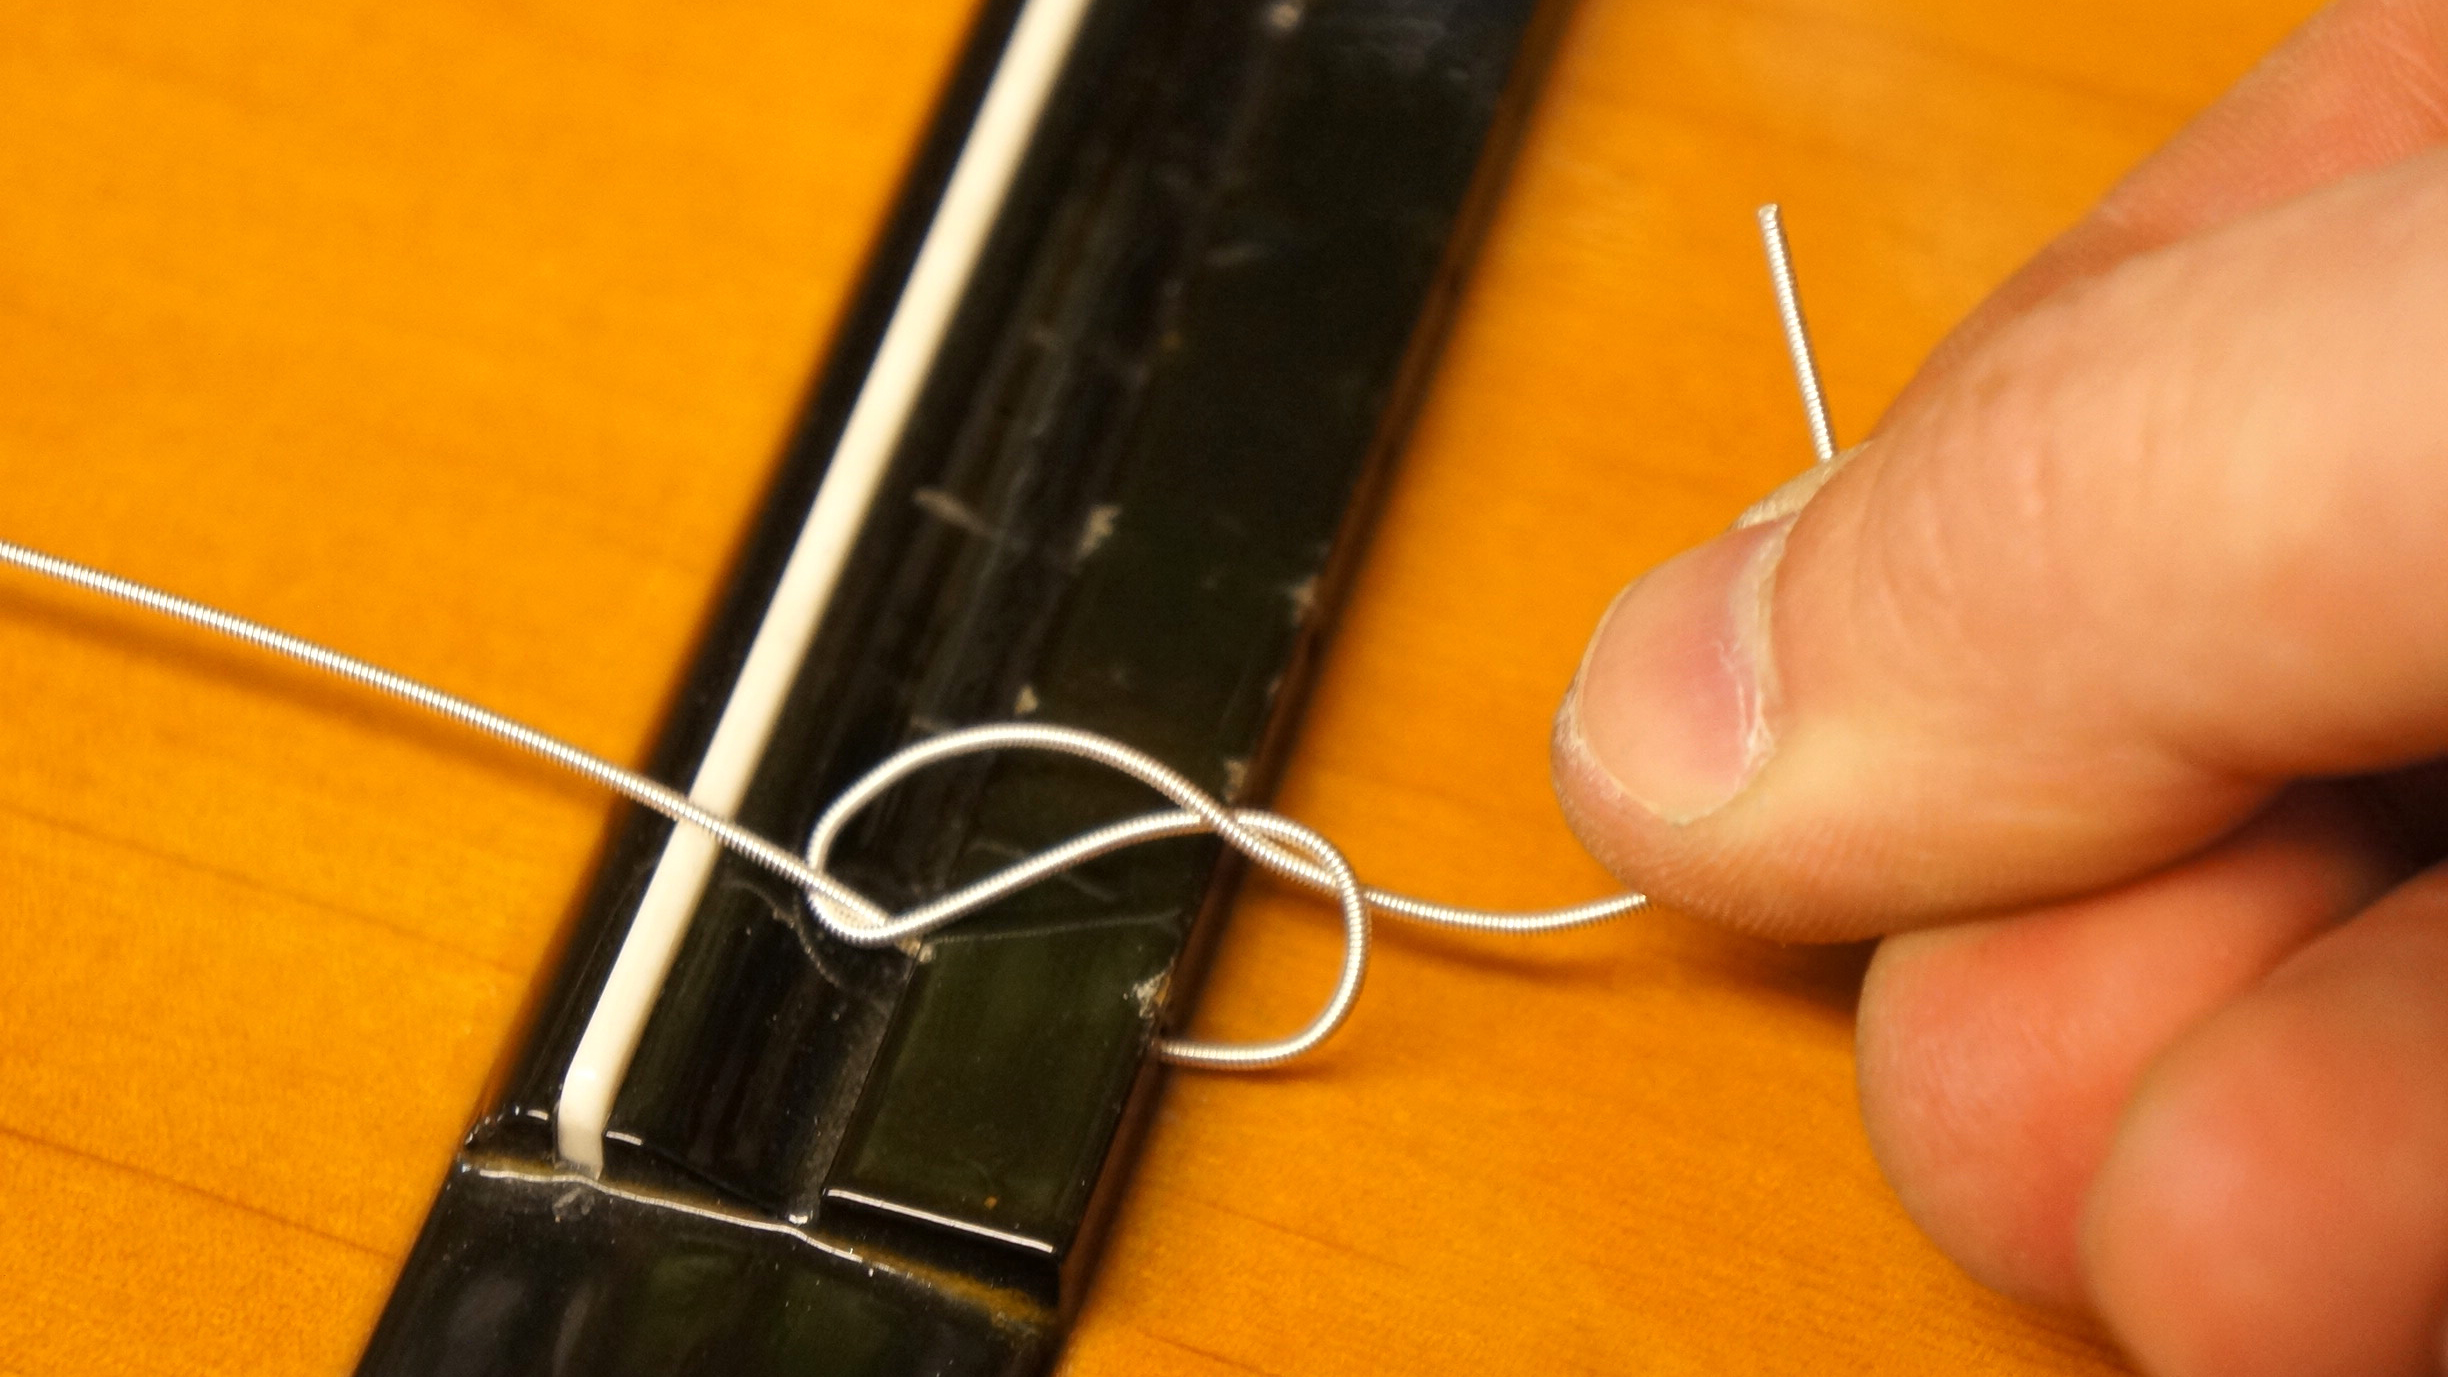
2. Secure the string tail
We need to get this tail of the string to hold fast under the tension we’ll tune it to, so we need to loop the string tail back under itself.
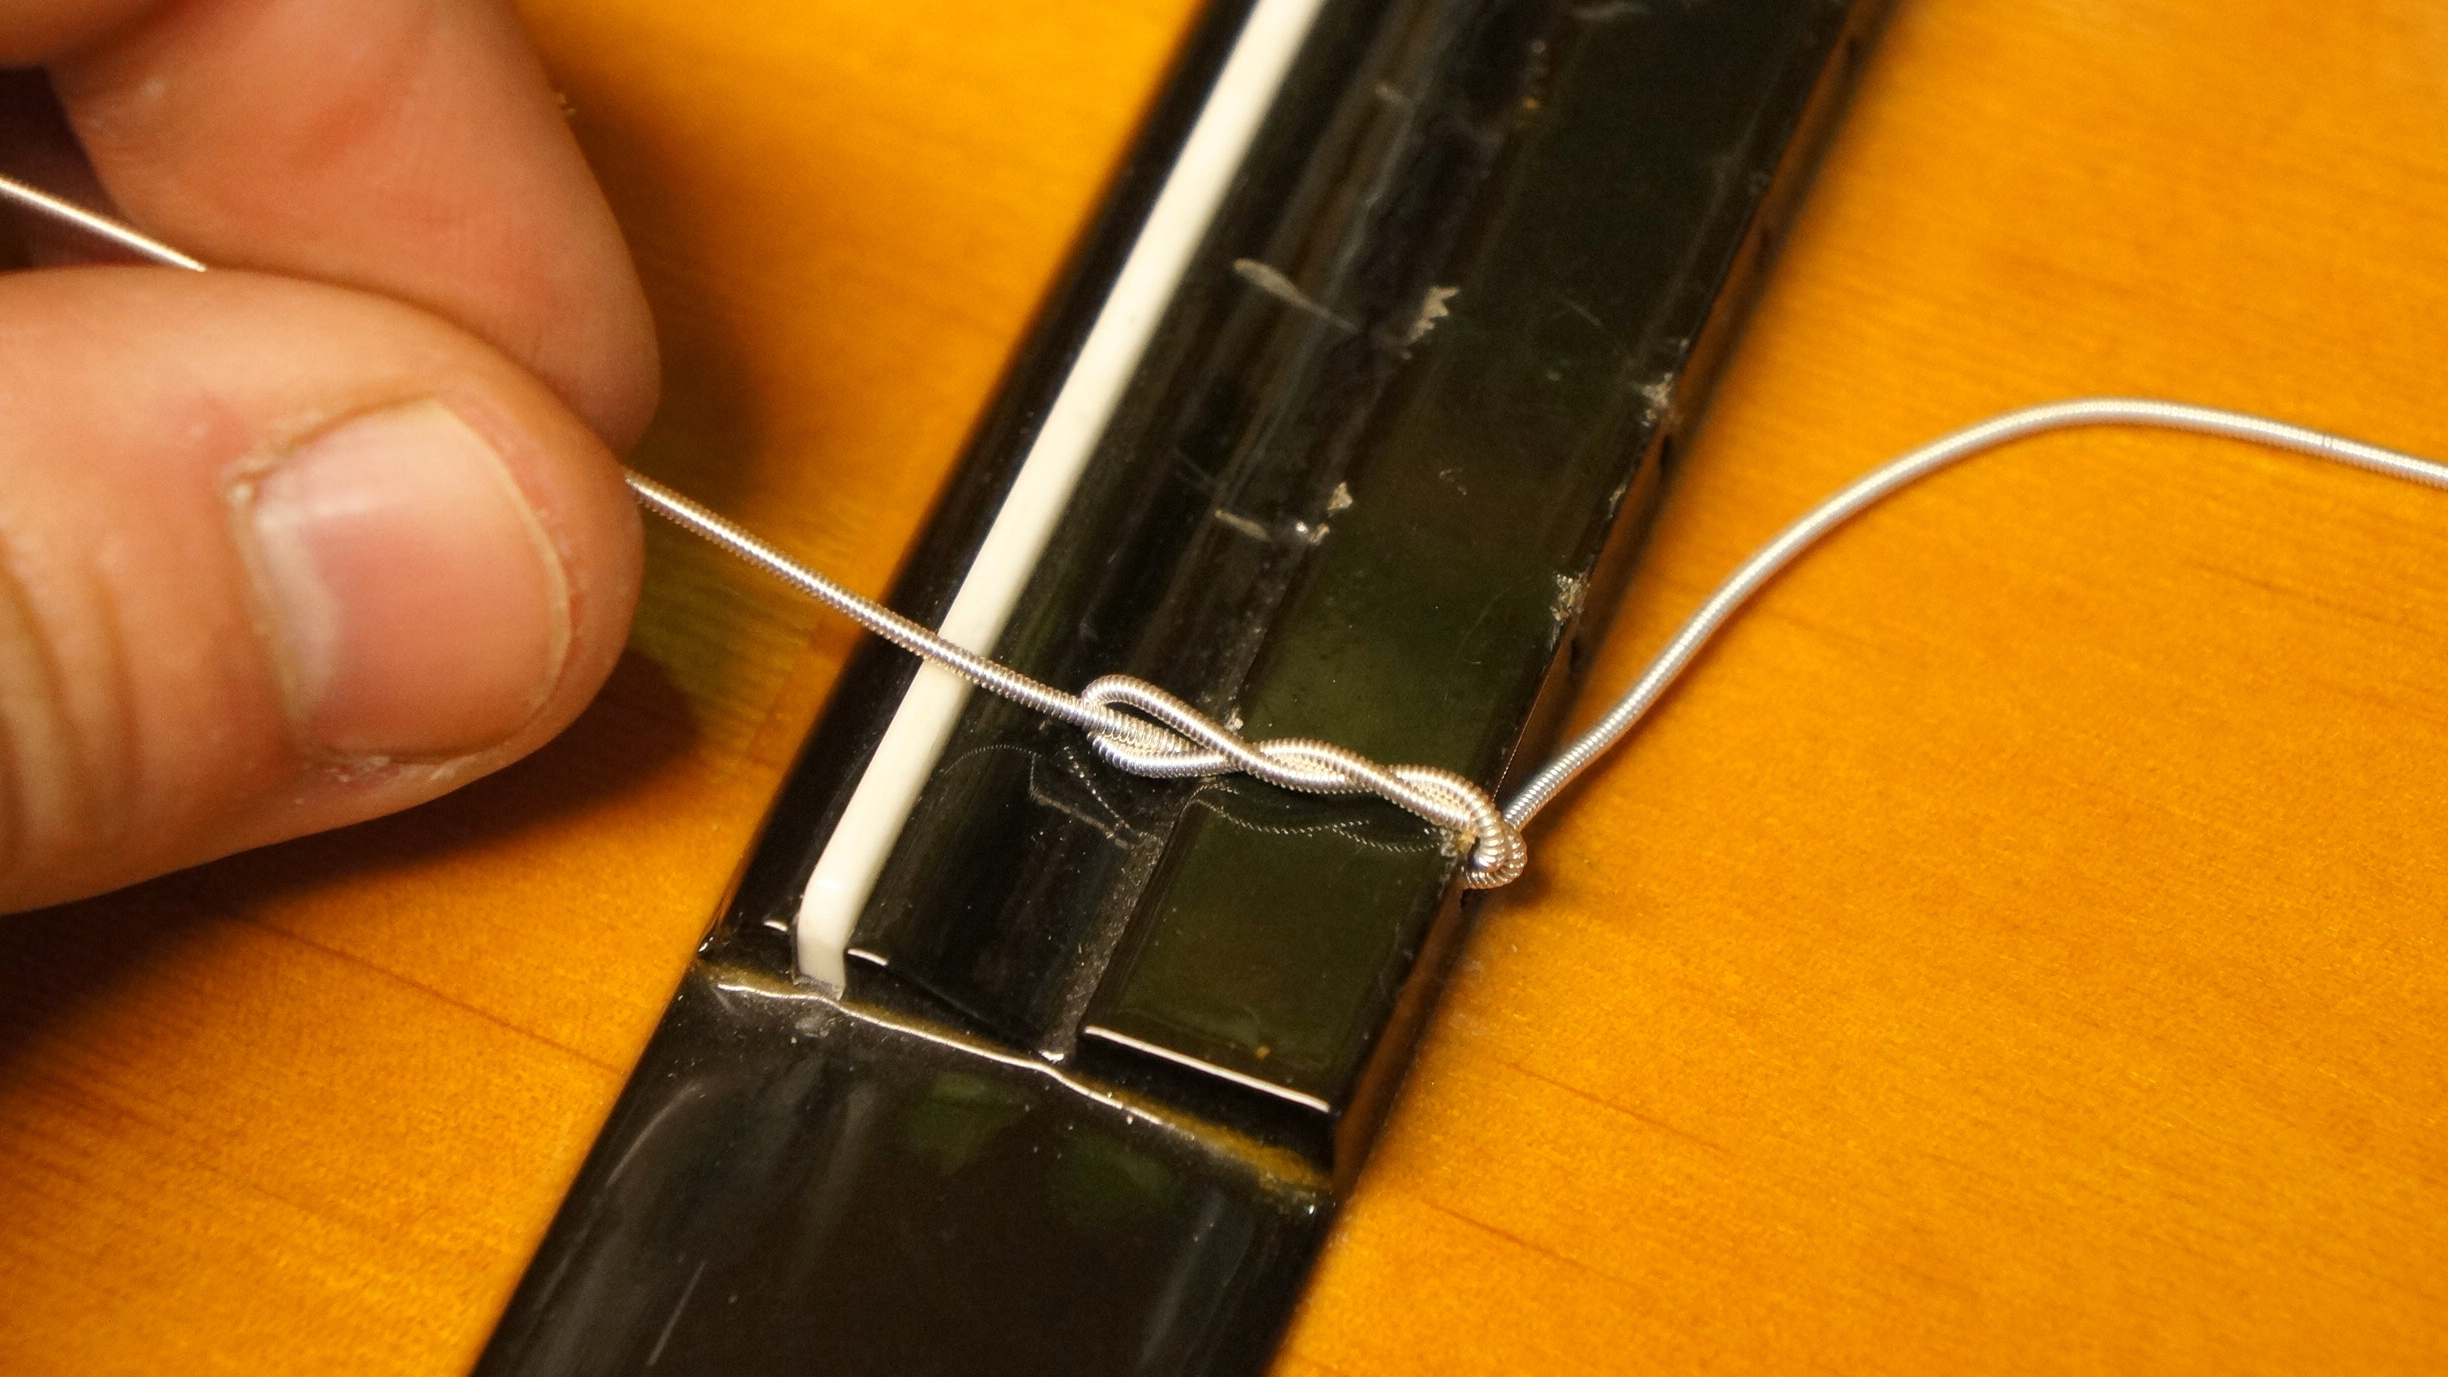
3. Loop it round again
Once more, fold the string’s tail back through again, creating a double hitch. Can you see how the last bend of the tail is placed around the corner of the bridge? You must arrange it this way to make sure it will not slip. Pull the string tight to lock the winds of the hitch together.
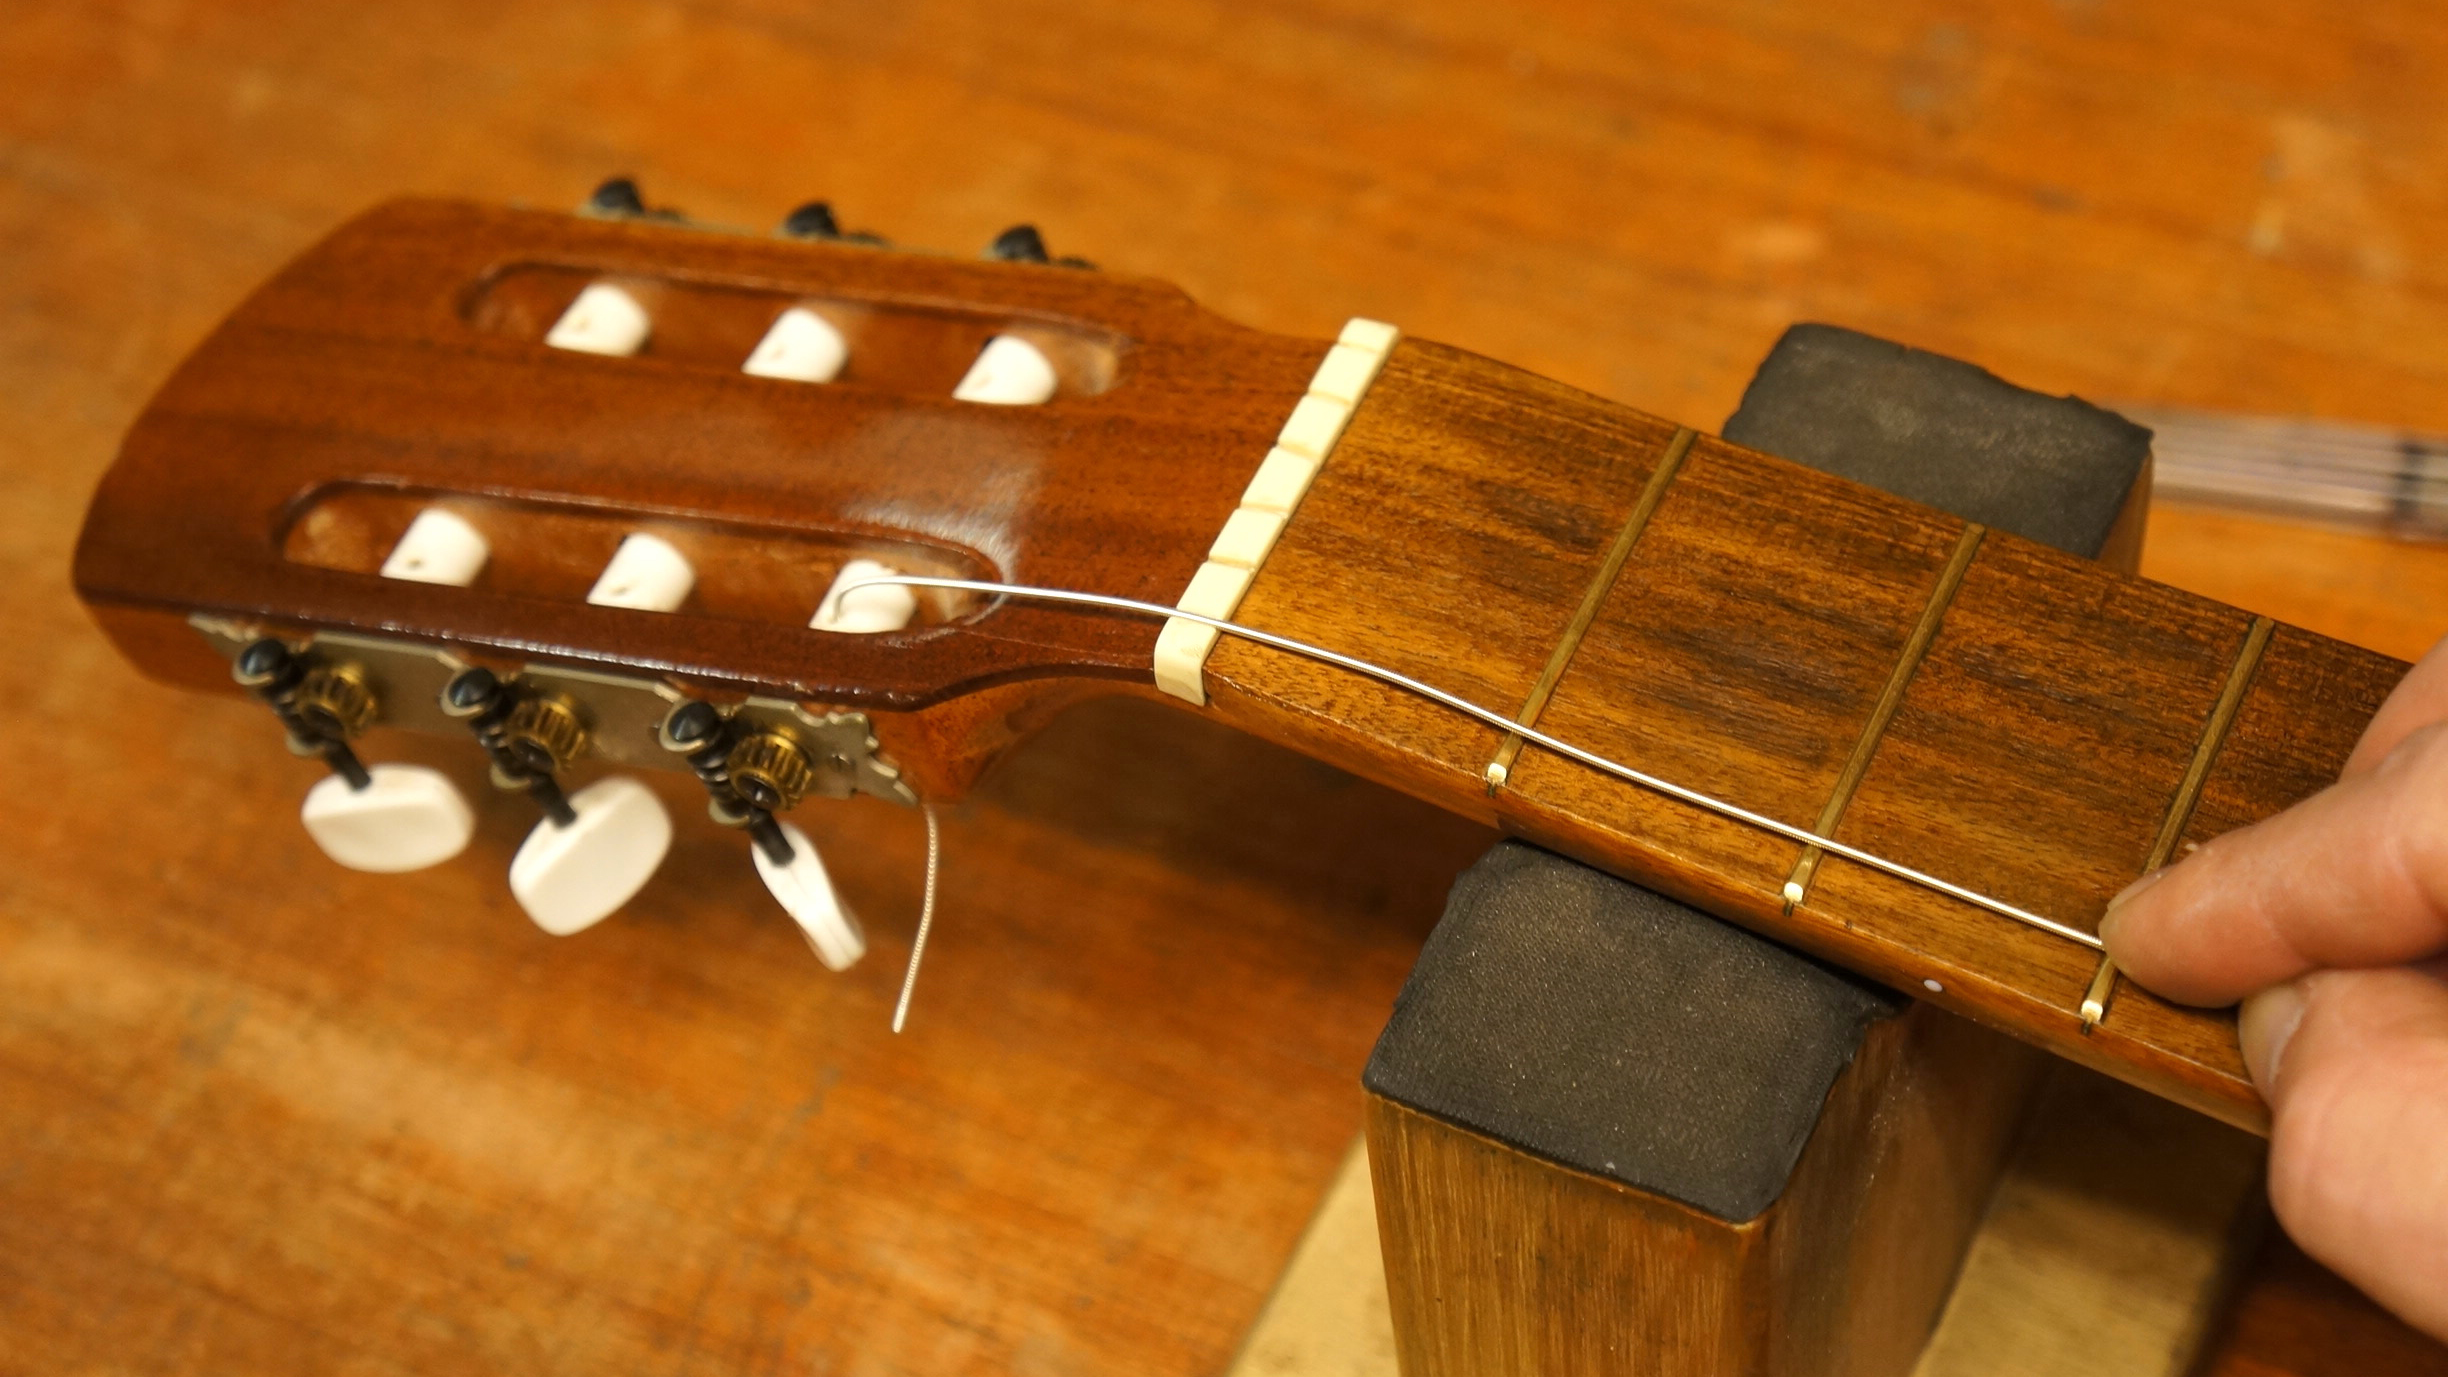
4. Feed the string through the string post
Turn each of your tuners so they’re facing the same way. Feed the other end of the string through the hole in the capstan (or string post) and pull tight. Grab the string at the nut, then pull the string back through the tuner until your thumb is level with the third fret. This allows plenty of winds around the tuner, and should be the same for each string.
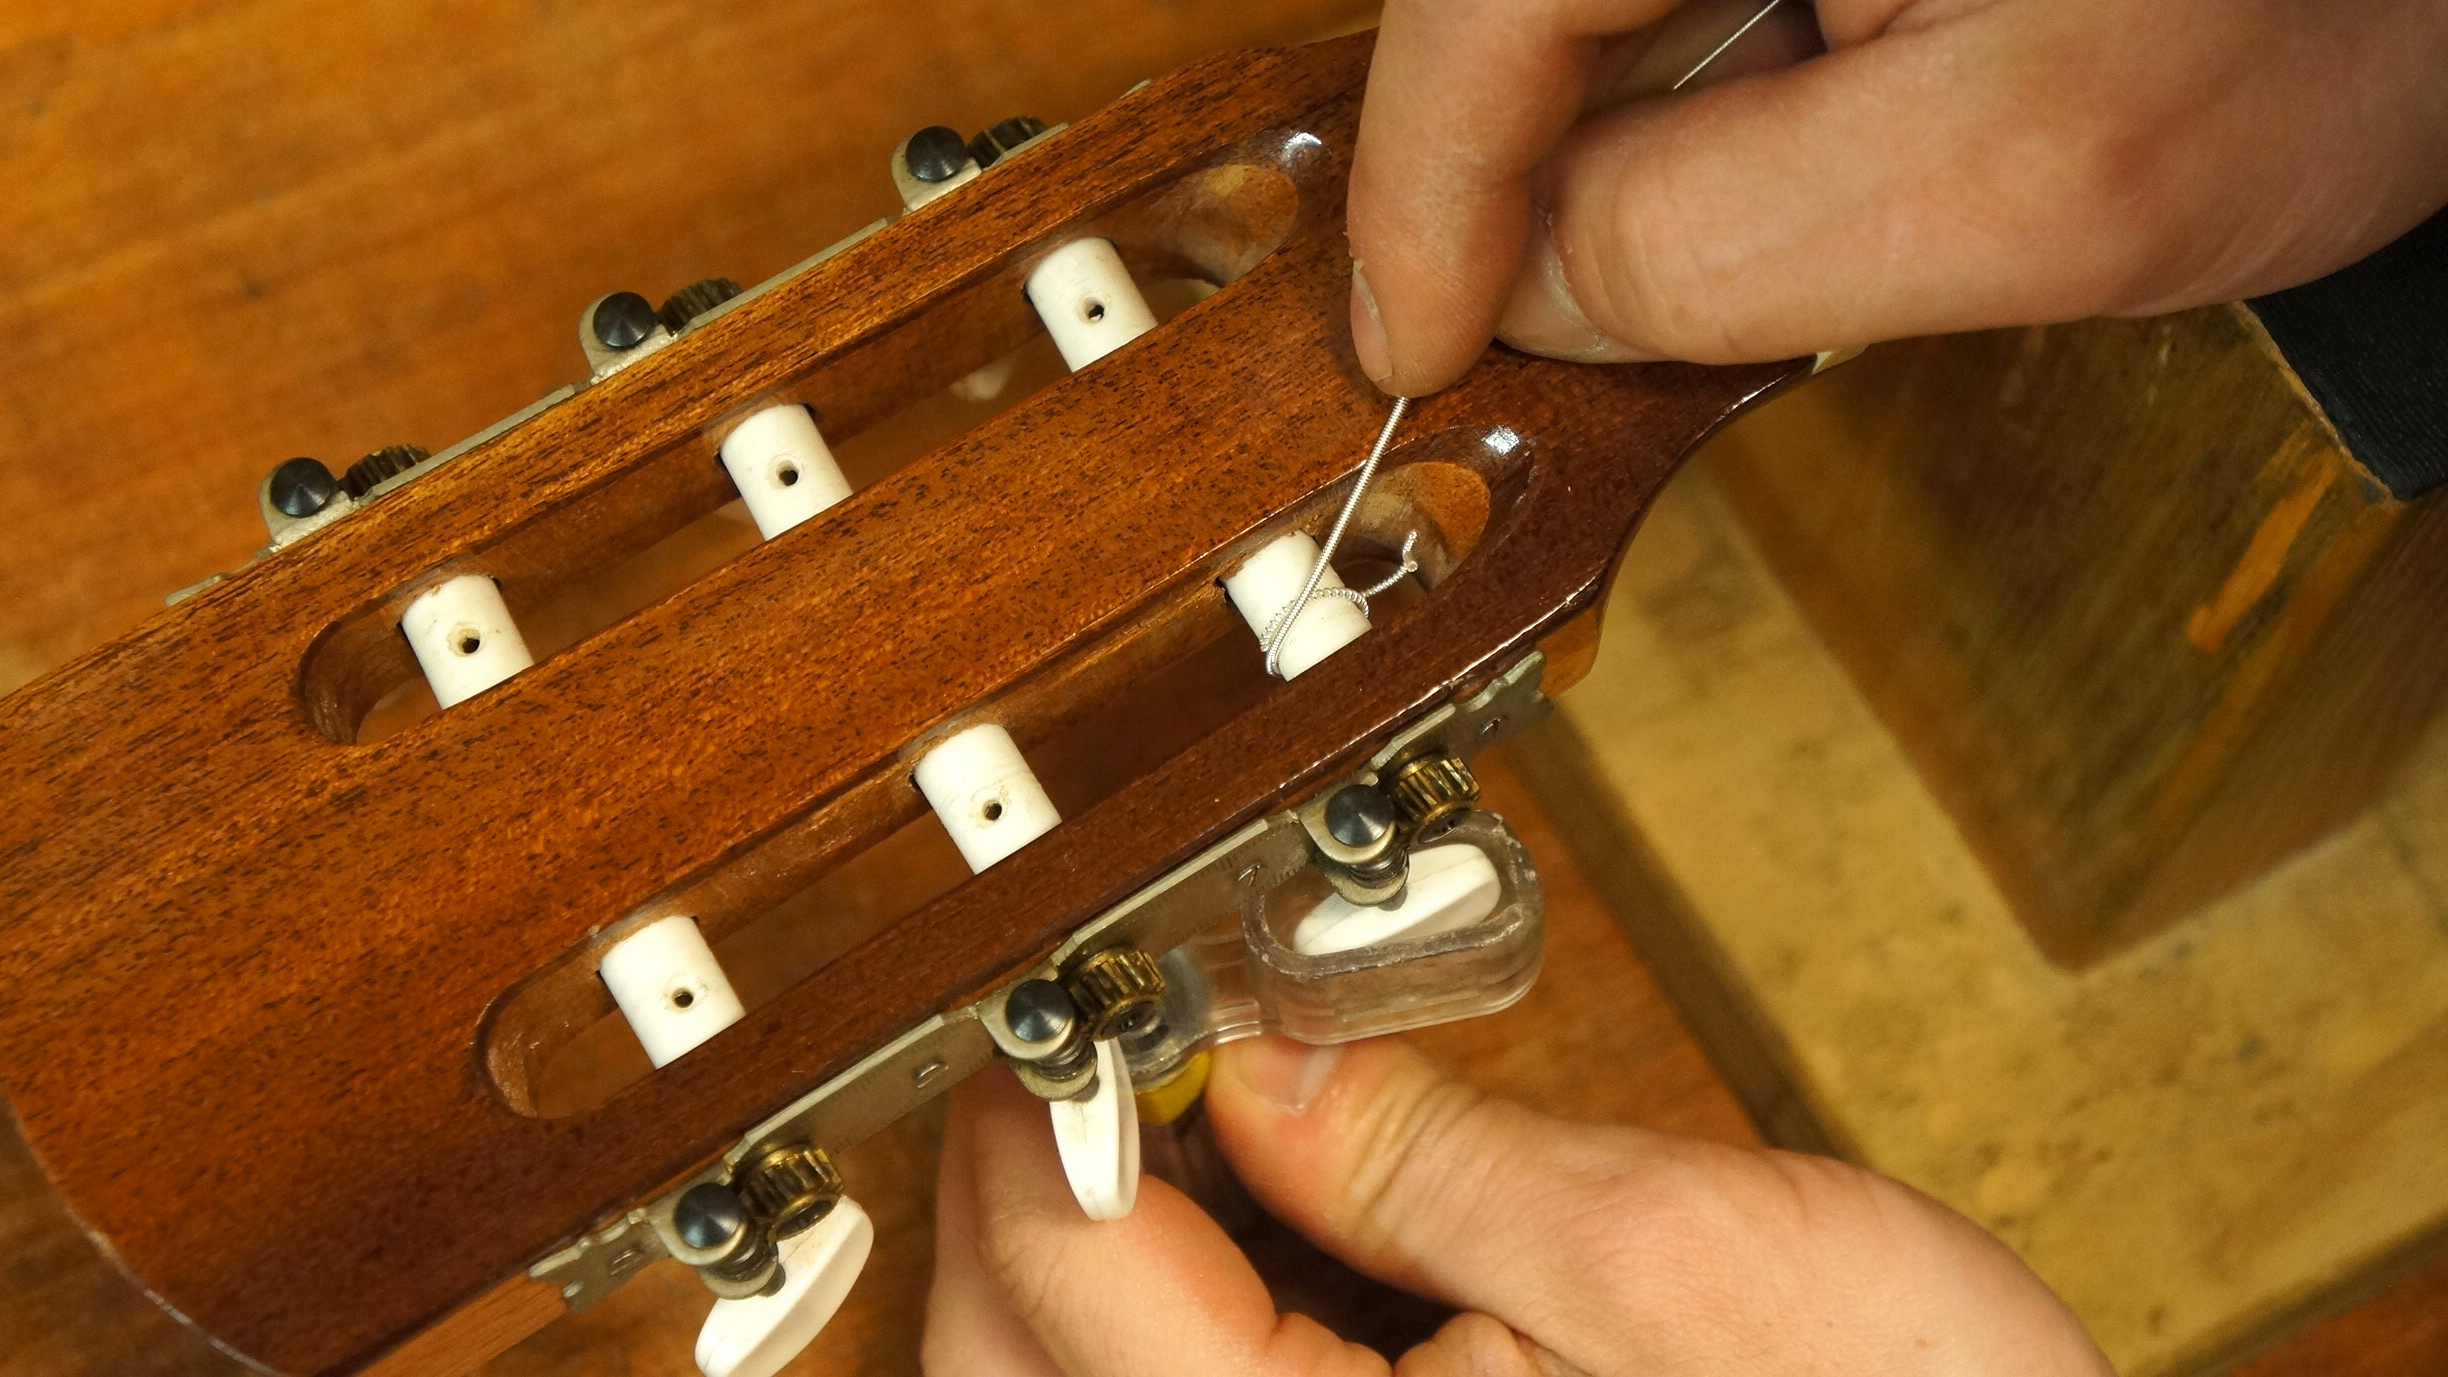
5. Feed the string tail through again
With the spare end of the tail, feed it into the tuner hole a second time (if you can), this allows for an extra bit of grip for the string. Whilst holding mild tension on the main part of the string, begin winding the string up.
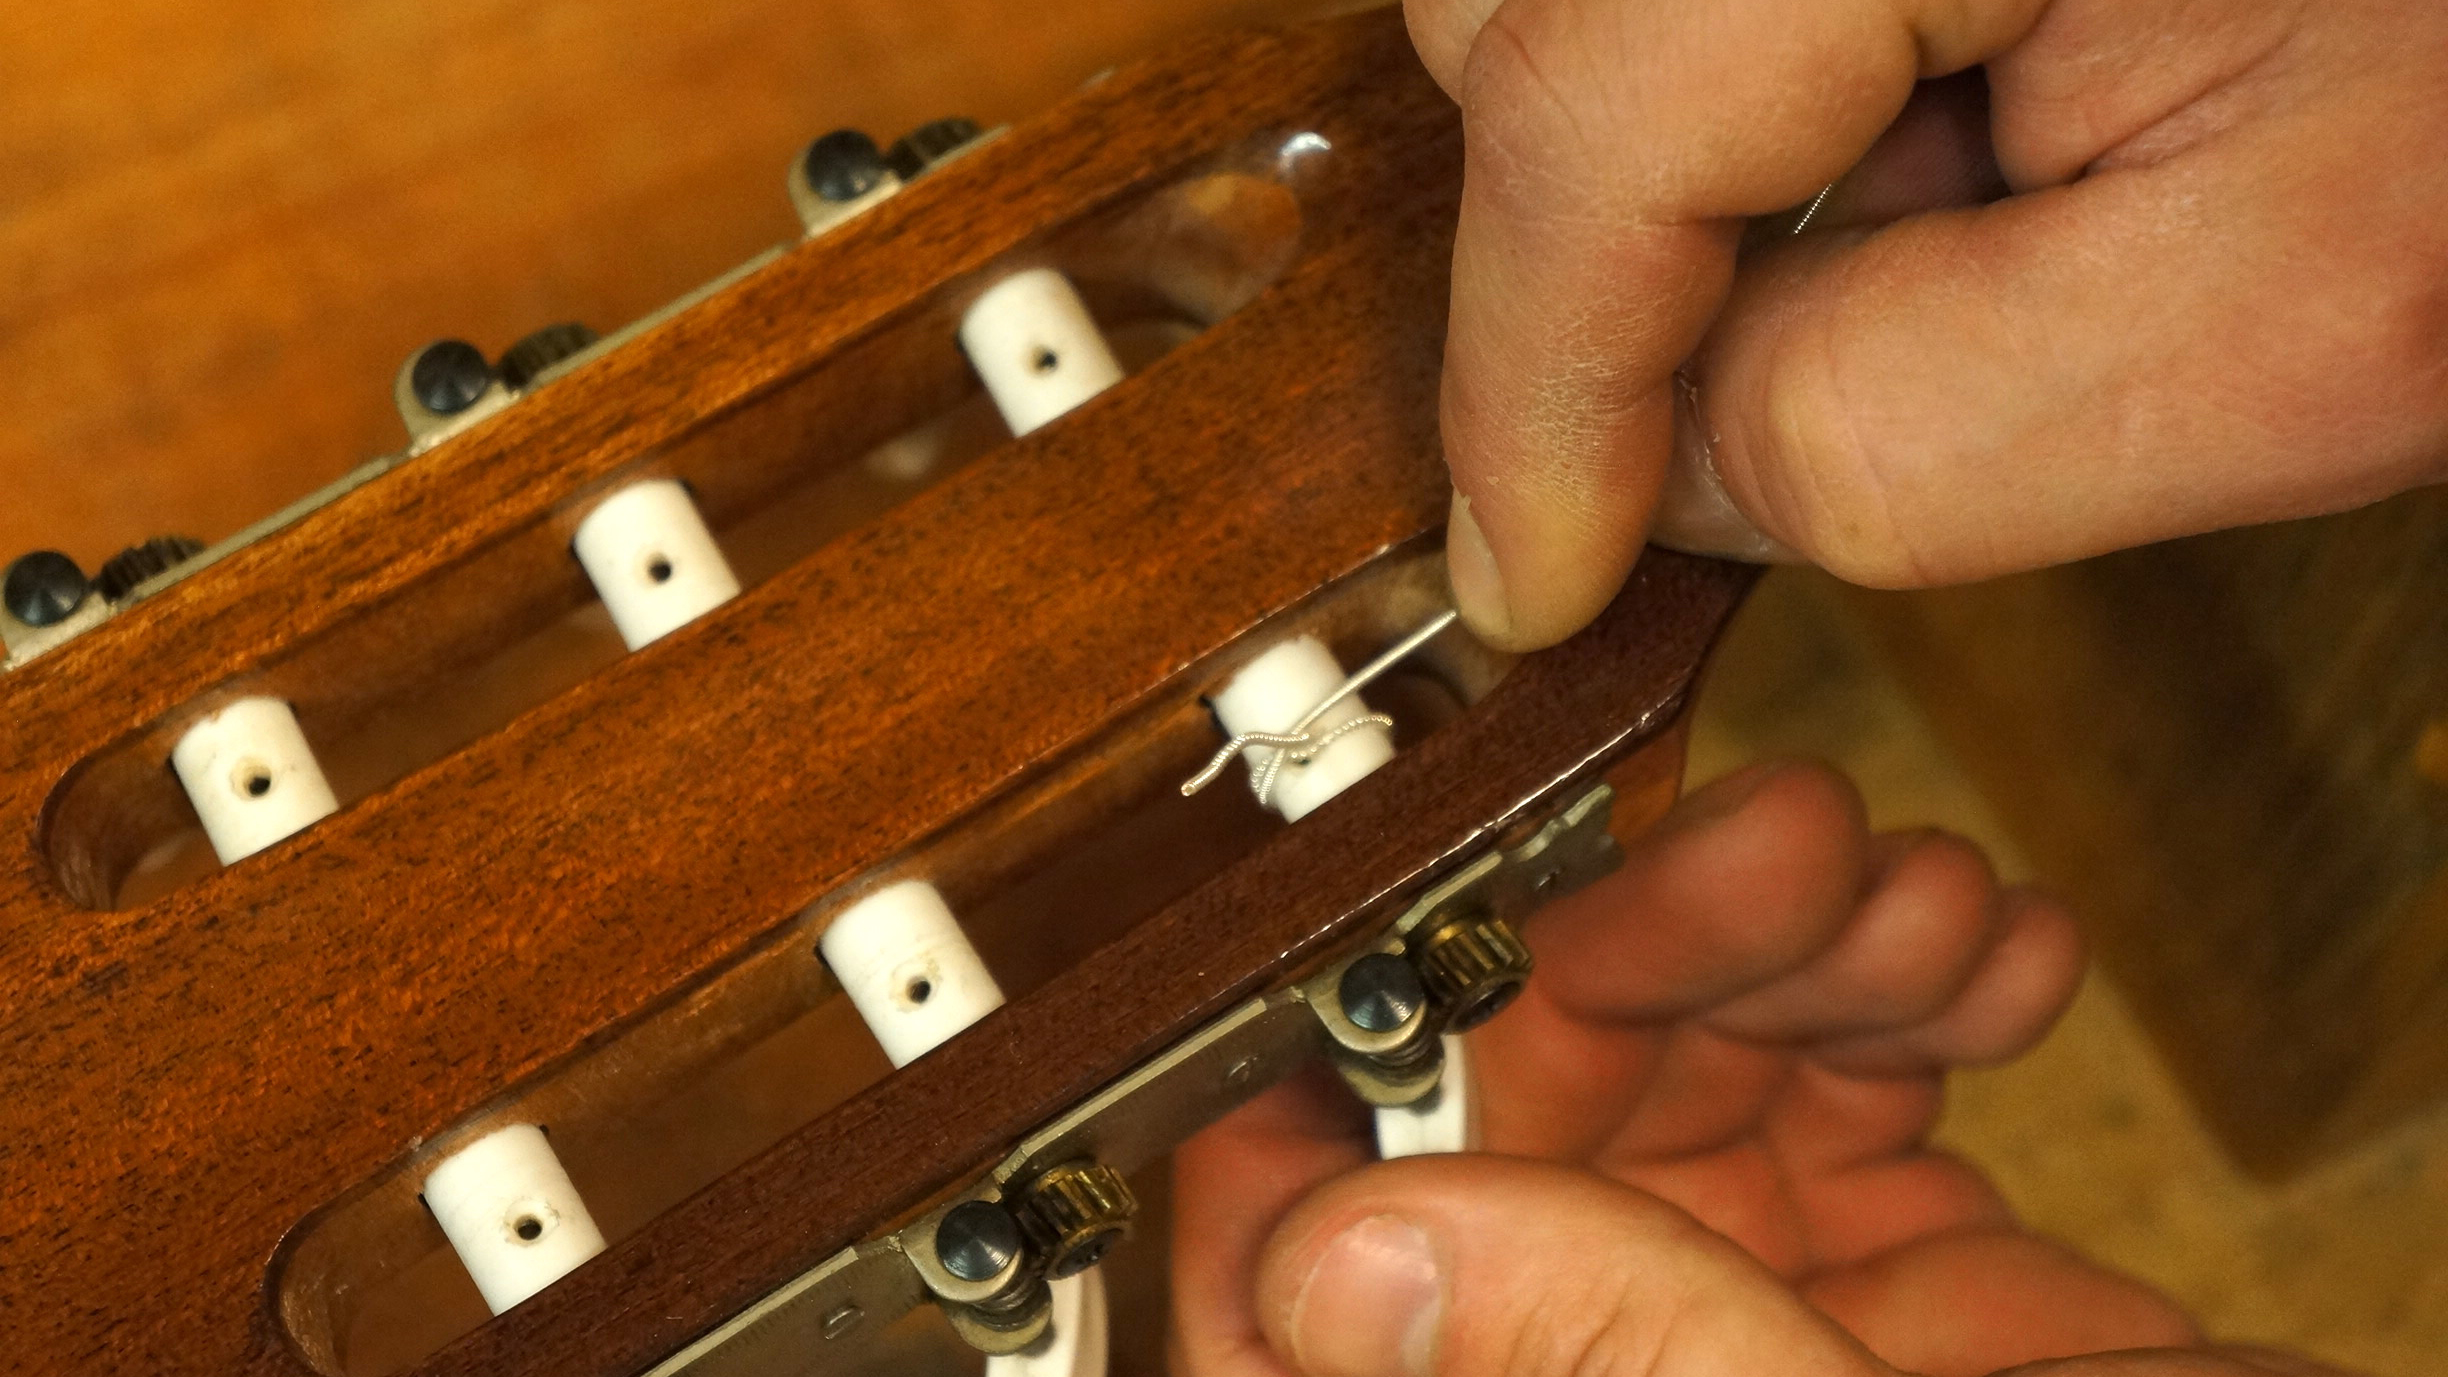
6. Secure the string
In order to help the string grab to the tuner we’re going to cross over the wound string. This will trap part of the string and keep it in place.
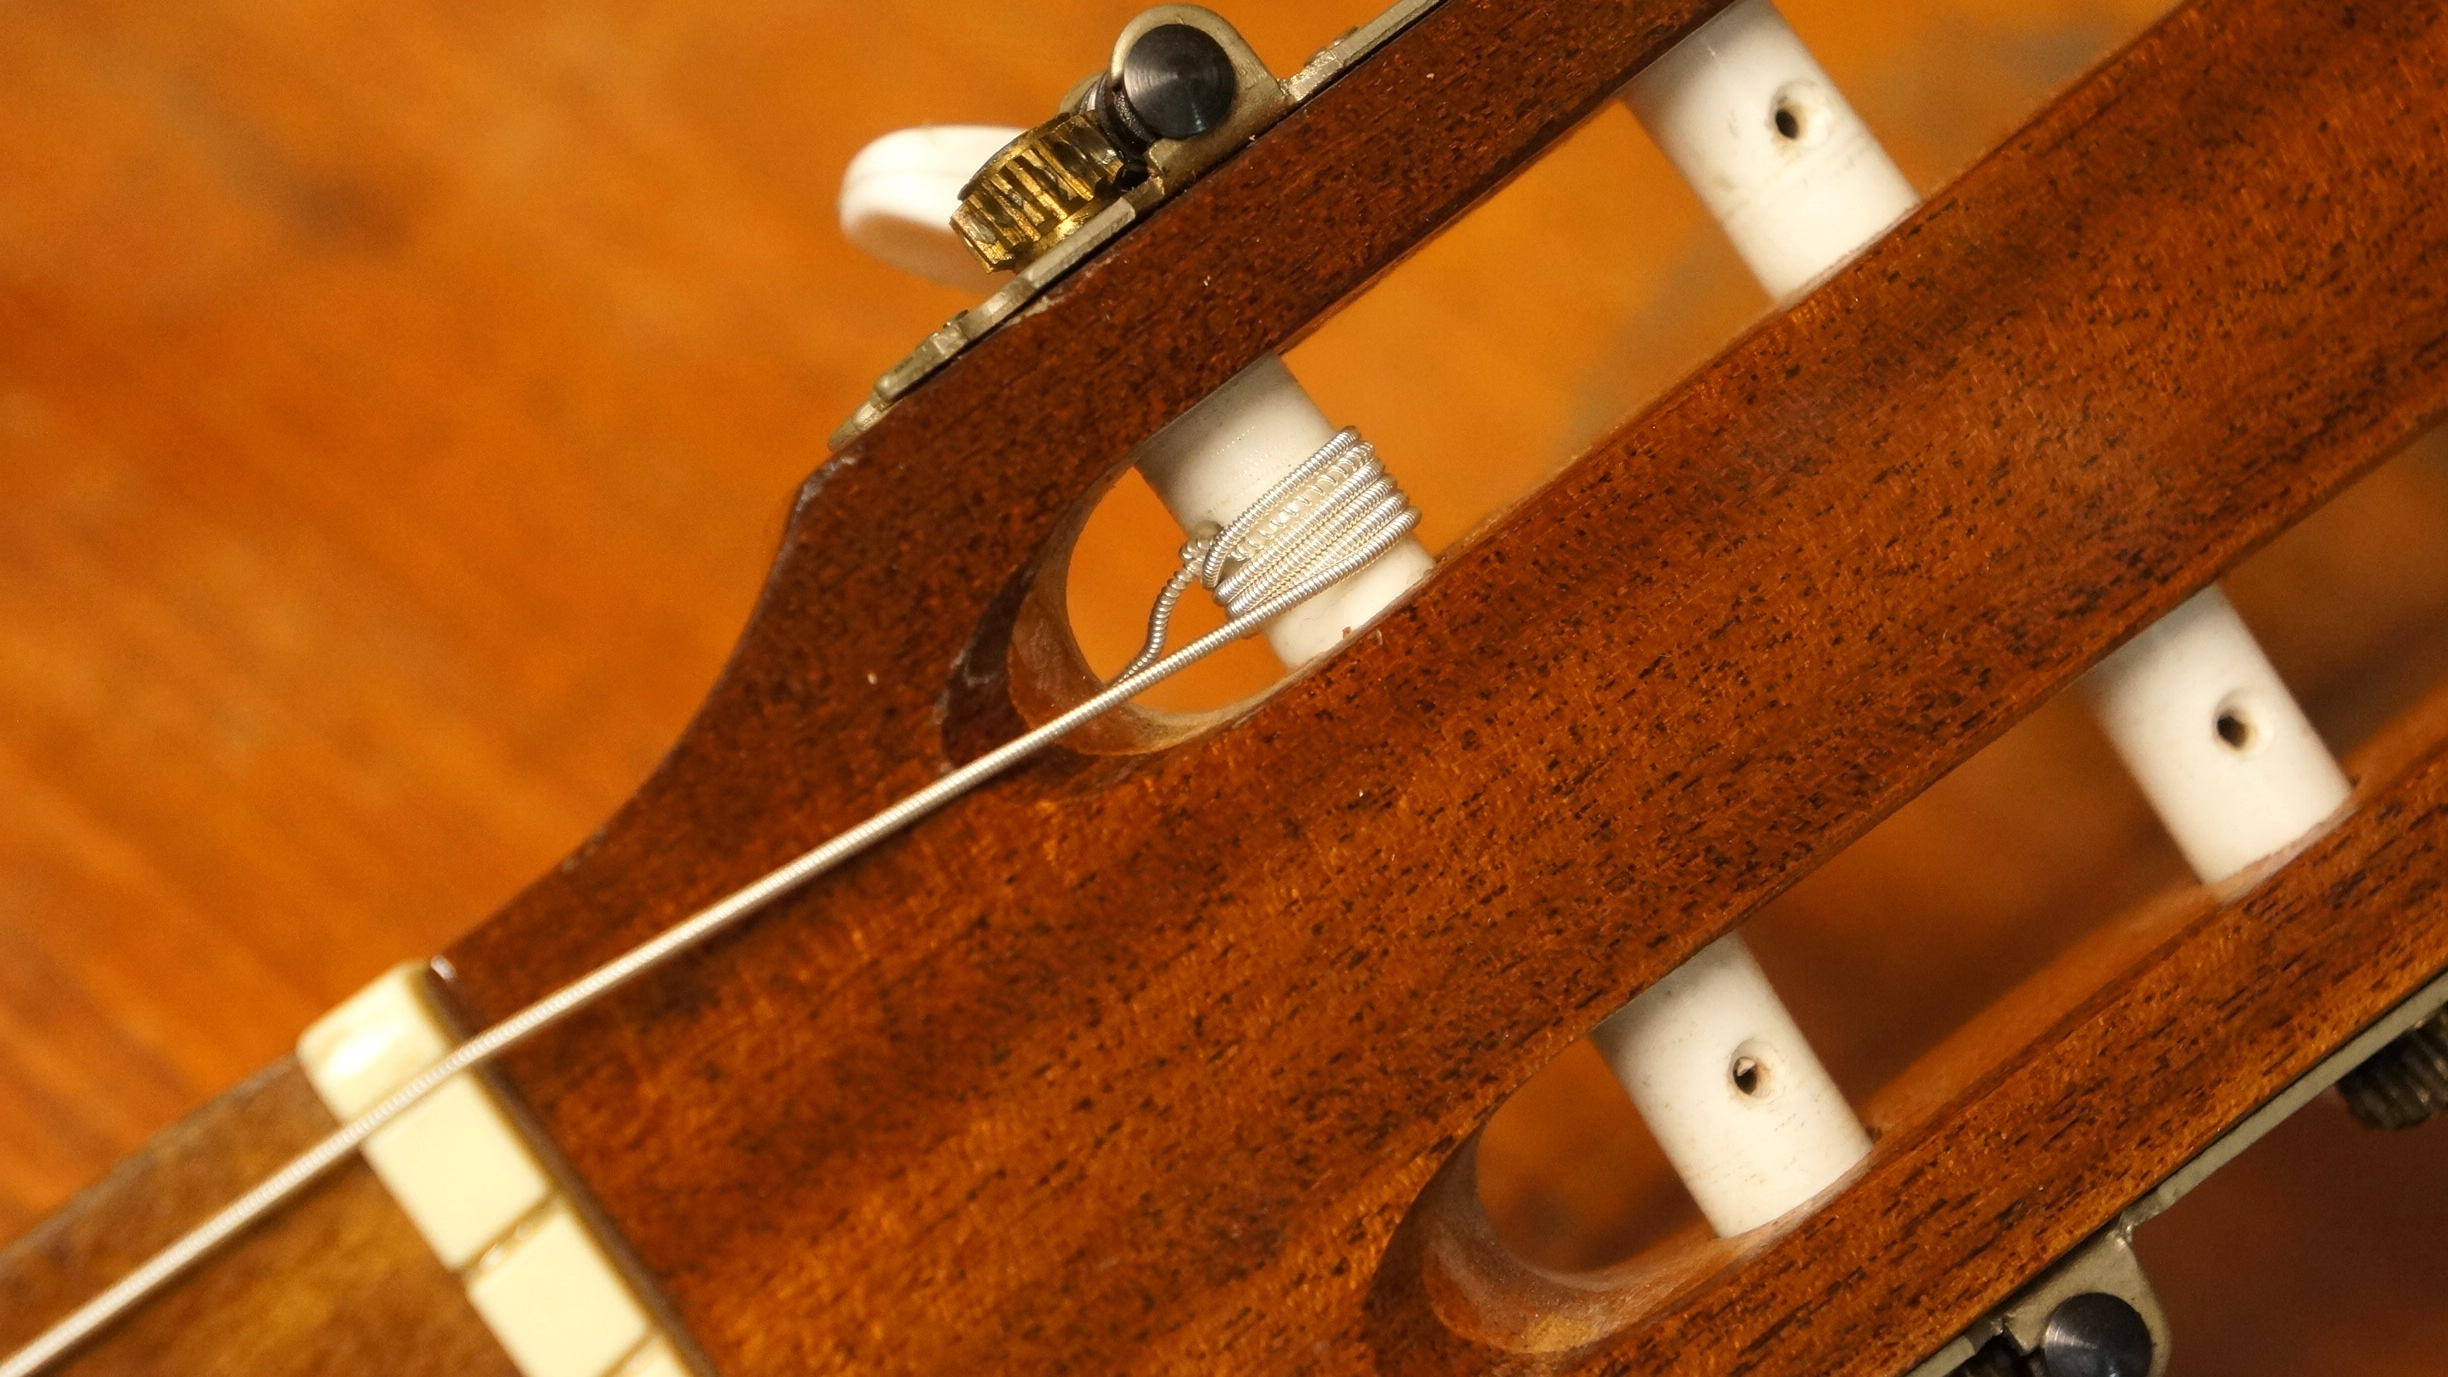
7. Wind the rest of the string
Wind up the rest of the string so it’s roughly in tune – keep the string feeding nicely as it runs. If the winds become a bit messy you can always slacken off the tuner and make them neater or have another go.
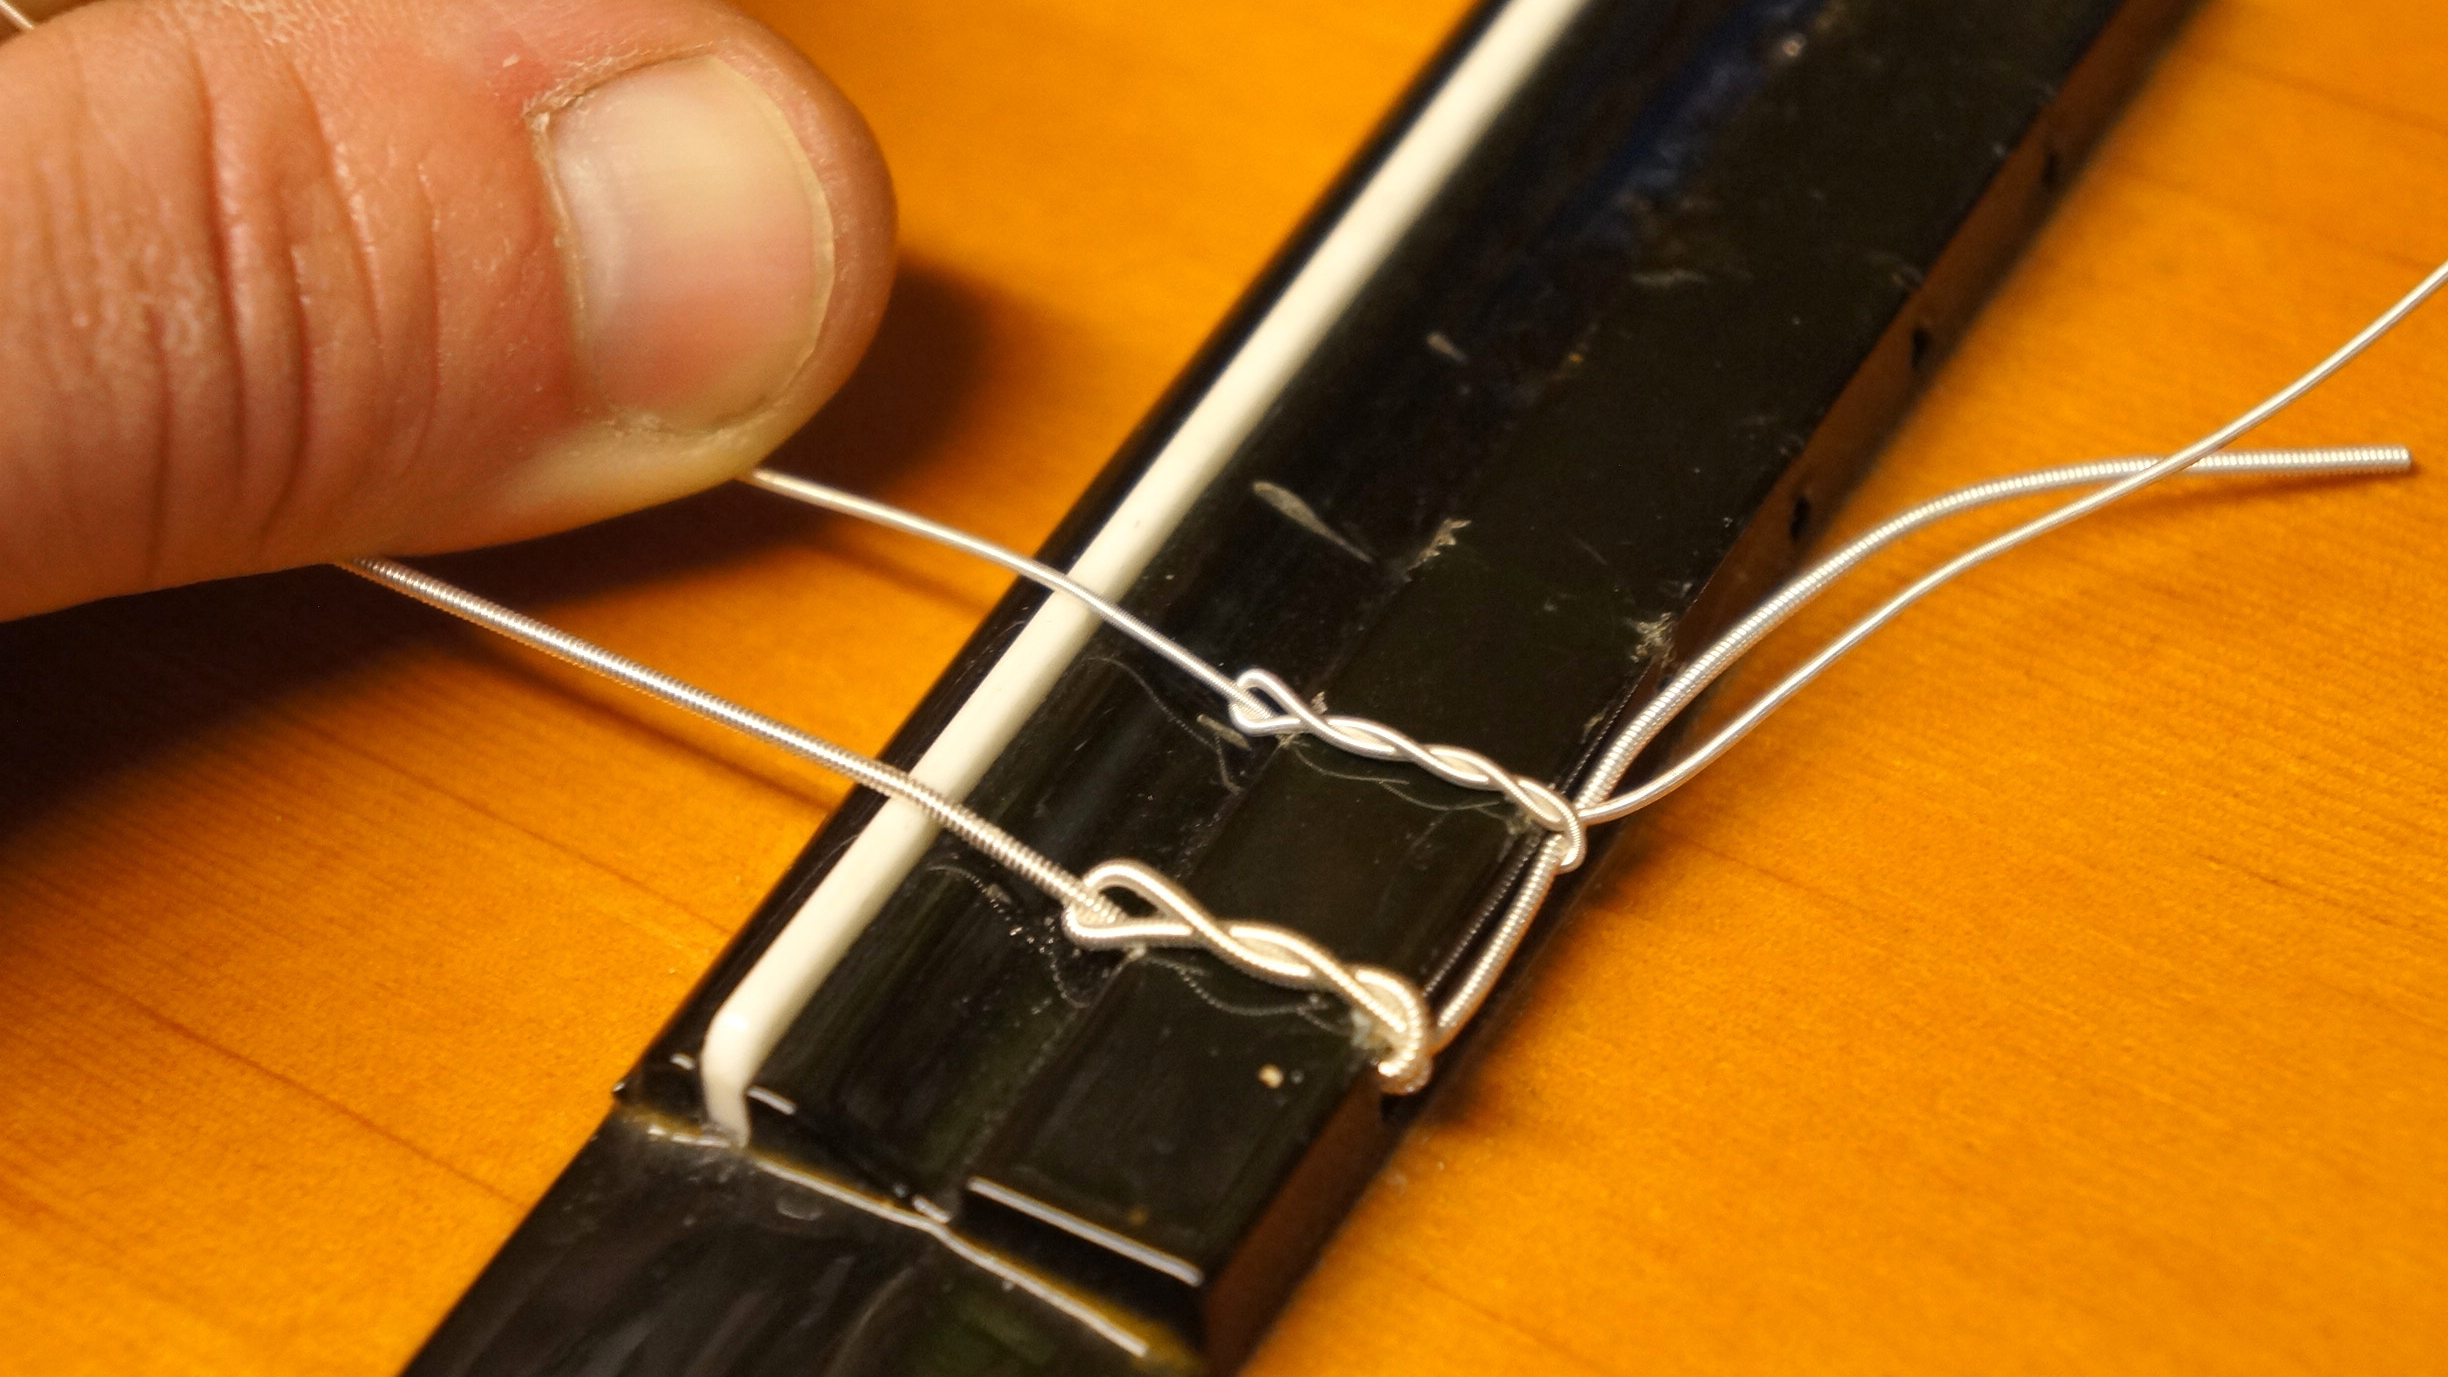
8. Repeat for the next strings
Repeat the process for the remaining two bass strings, however when you feed the string through the bridge, make sure you capture the previous string’s tail with the hitch. The common way to do it is join all the bass wound strings together as a trio, then the nylon strings as a trio.
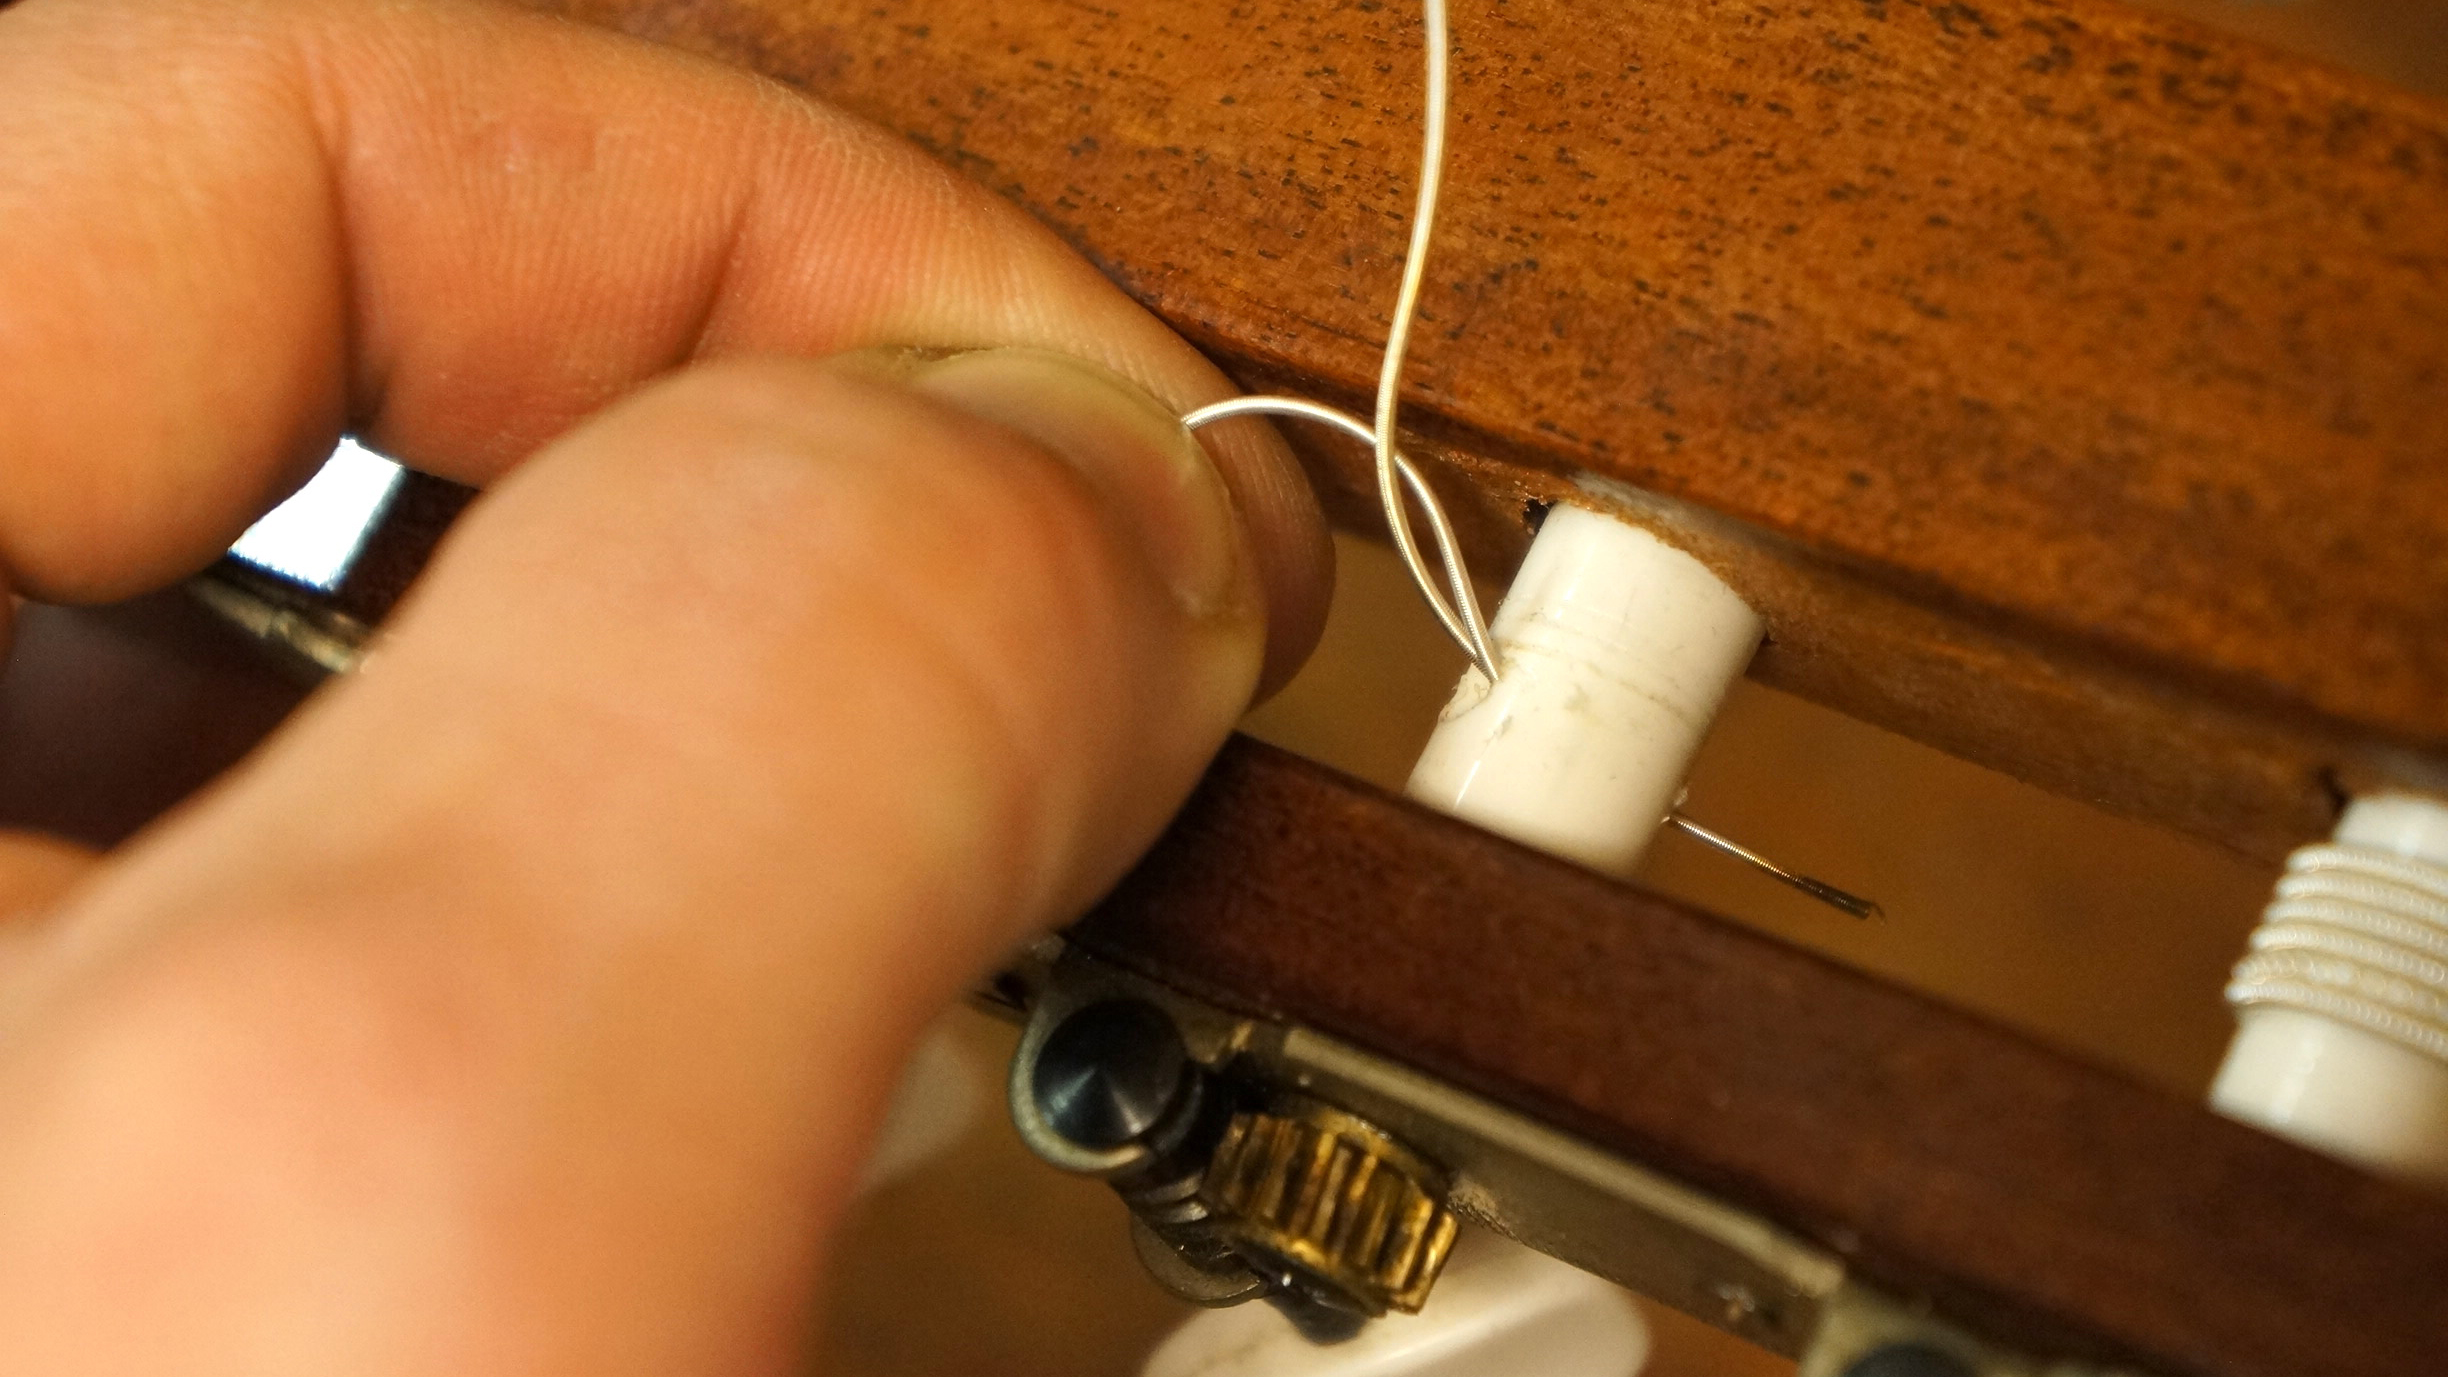
9. Revisit the double string method
Once again, employ the double string method at the tuner end. Plain nylon treble strings should fit much easier than the bass strings and this method will really help with a secure installation of these strings.
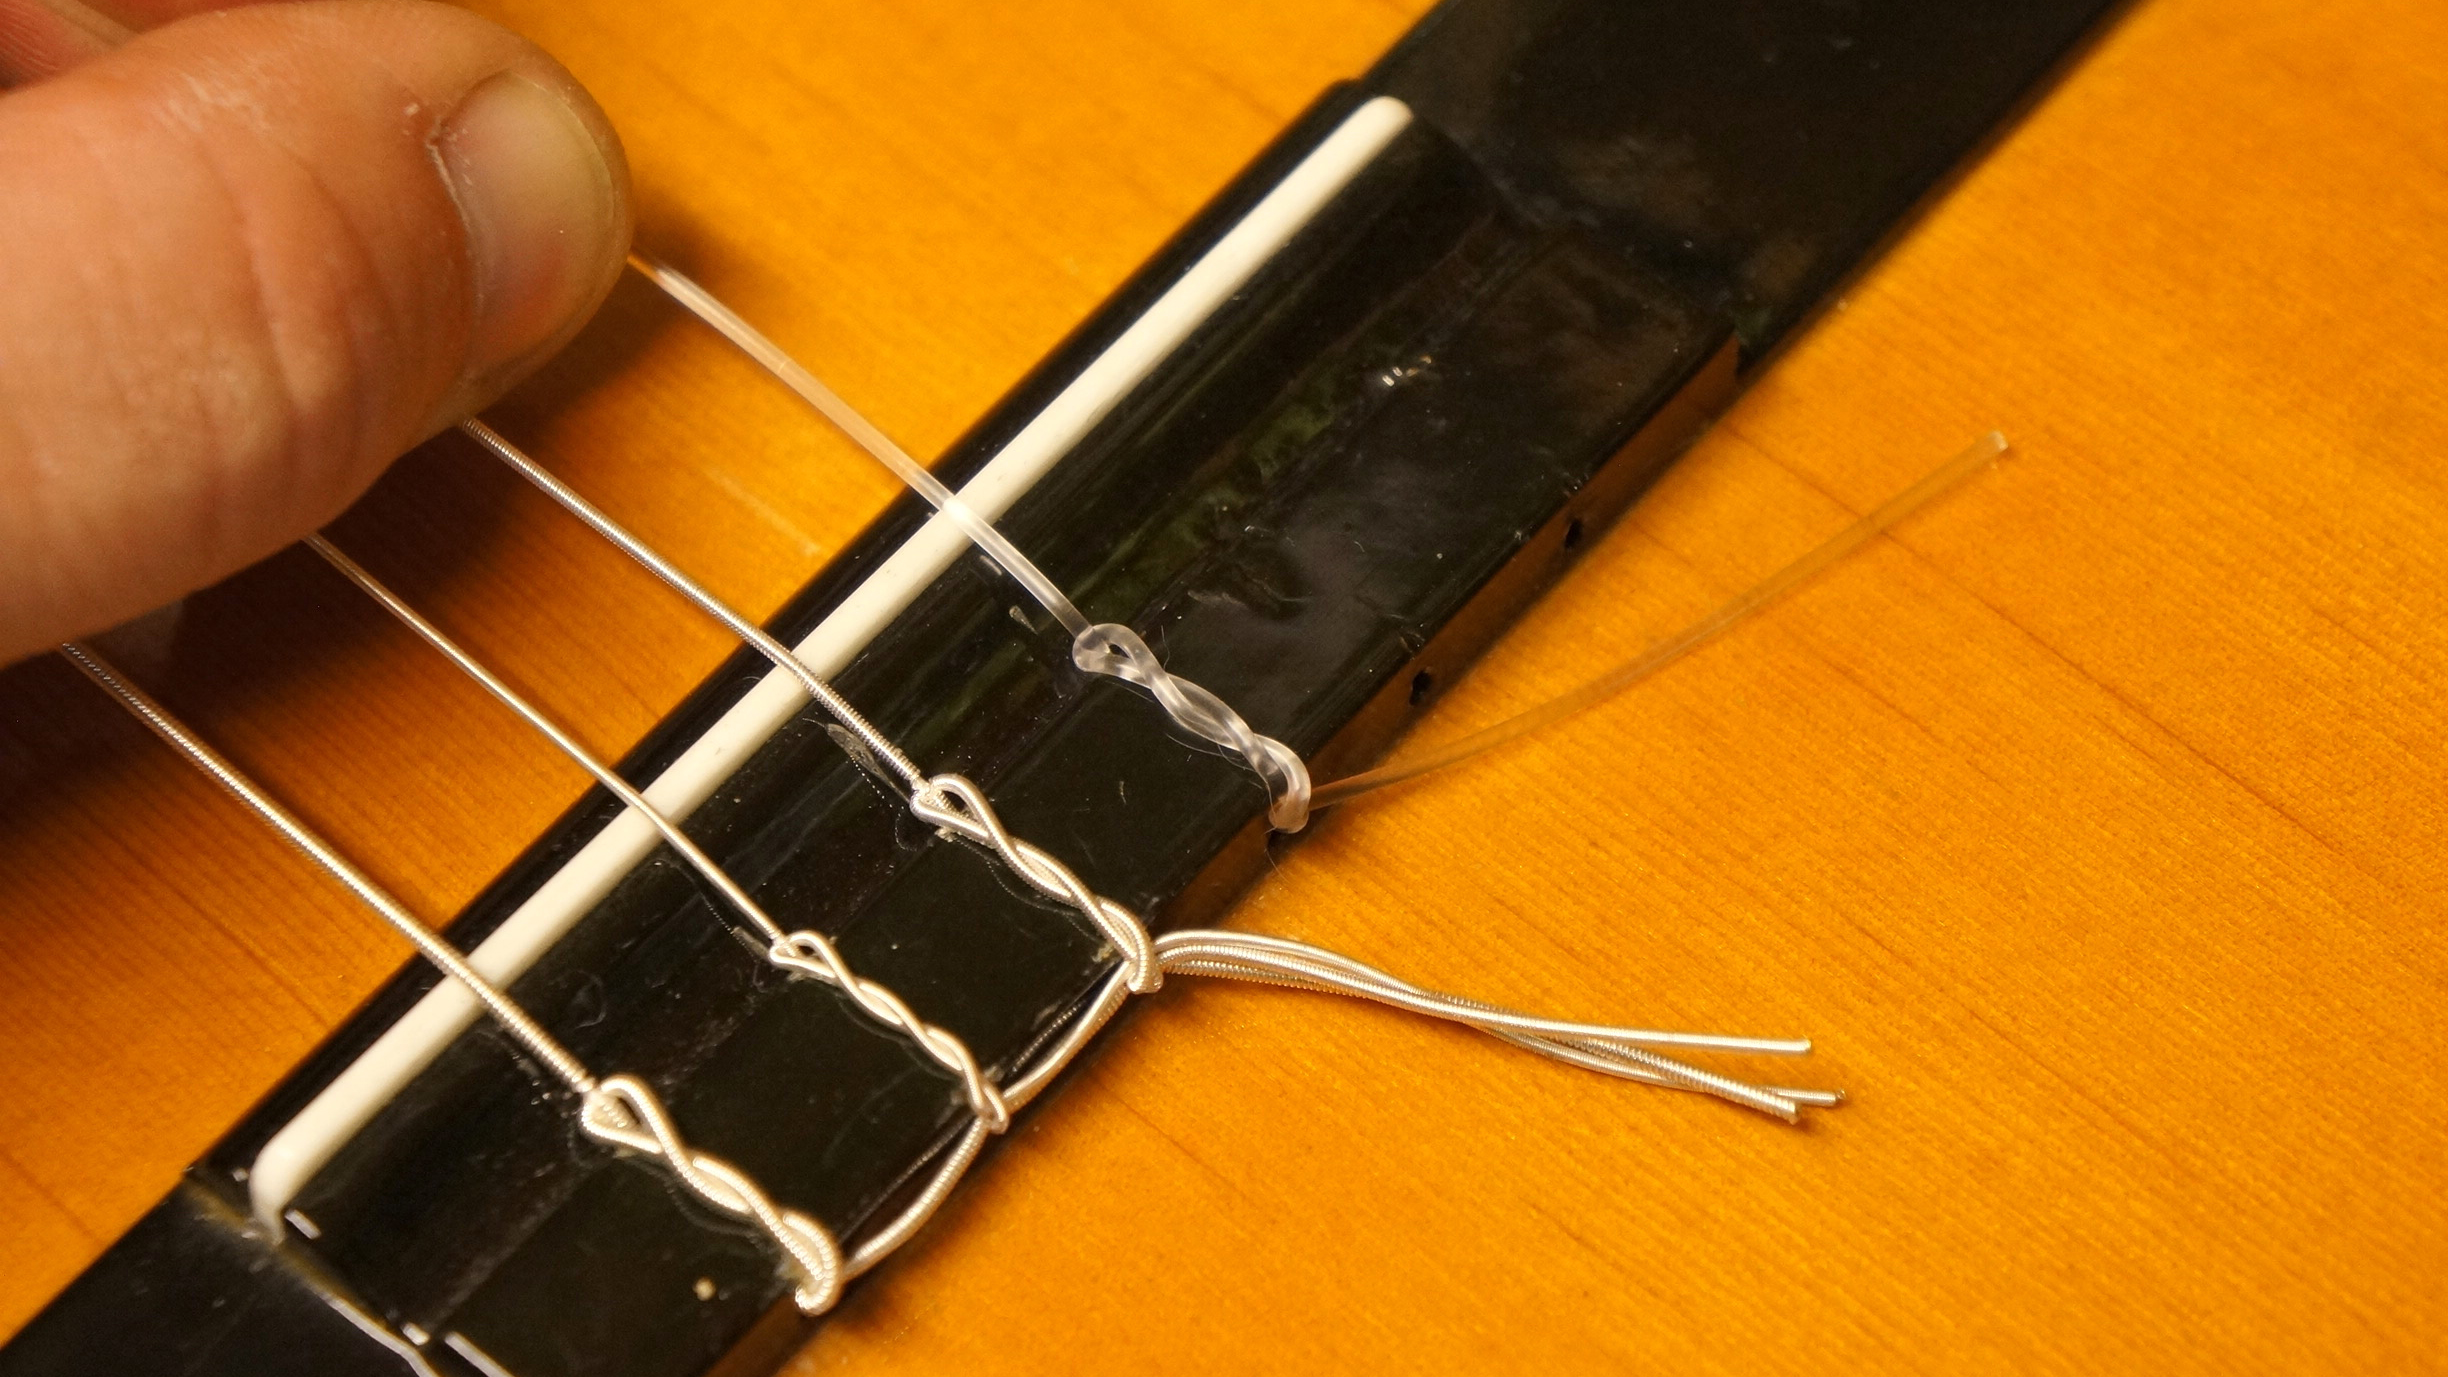
10. Start attaching the treble strings
Right, it’s time for the slippery nylon strings! Follow the same procedure using the hitch at the bridge. Leave the wound silver string tails out of the hitch this time. Leave plenty of spare tail on the plain nylon strings. Repeat the string process as above for your remaining three plain strings.
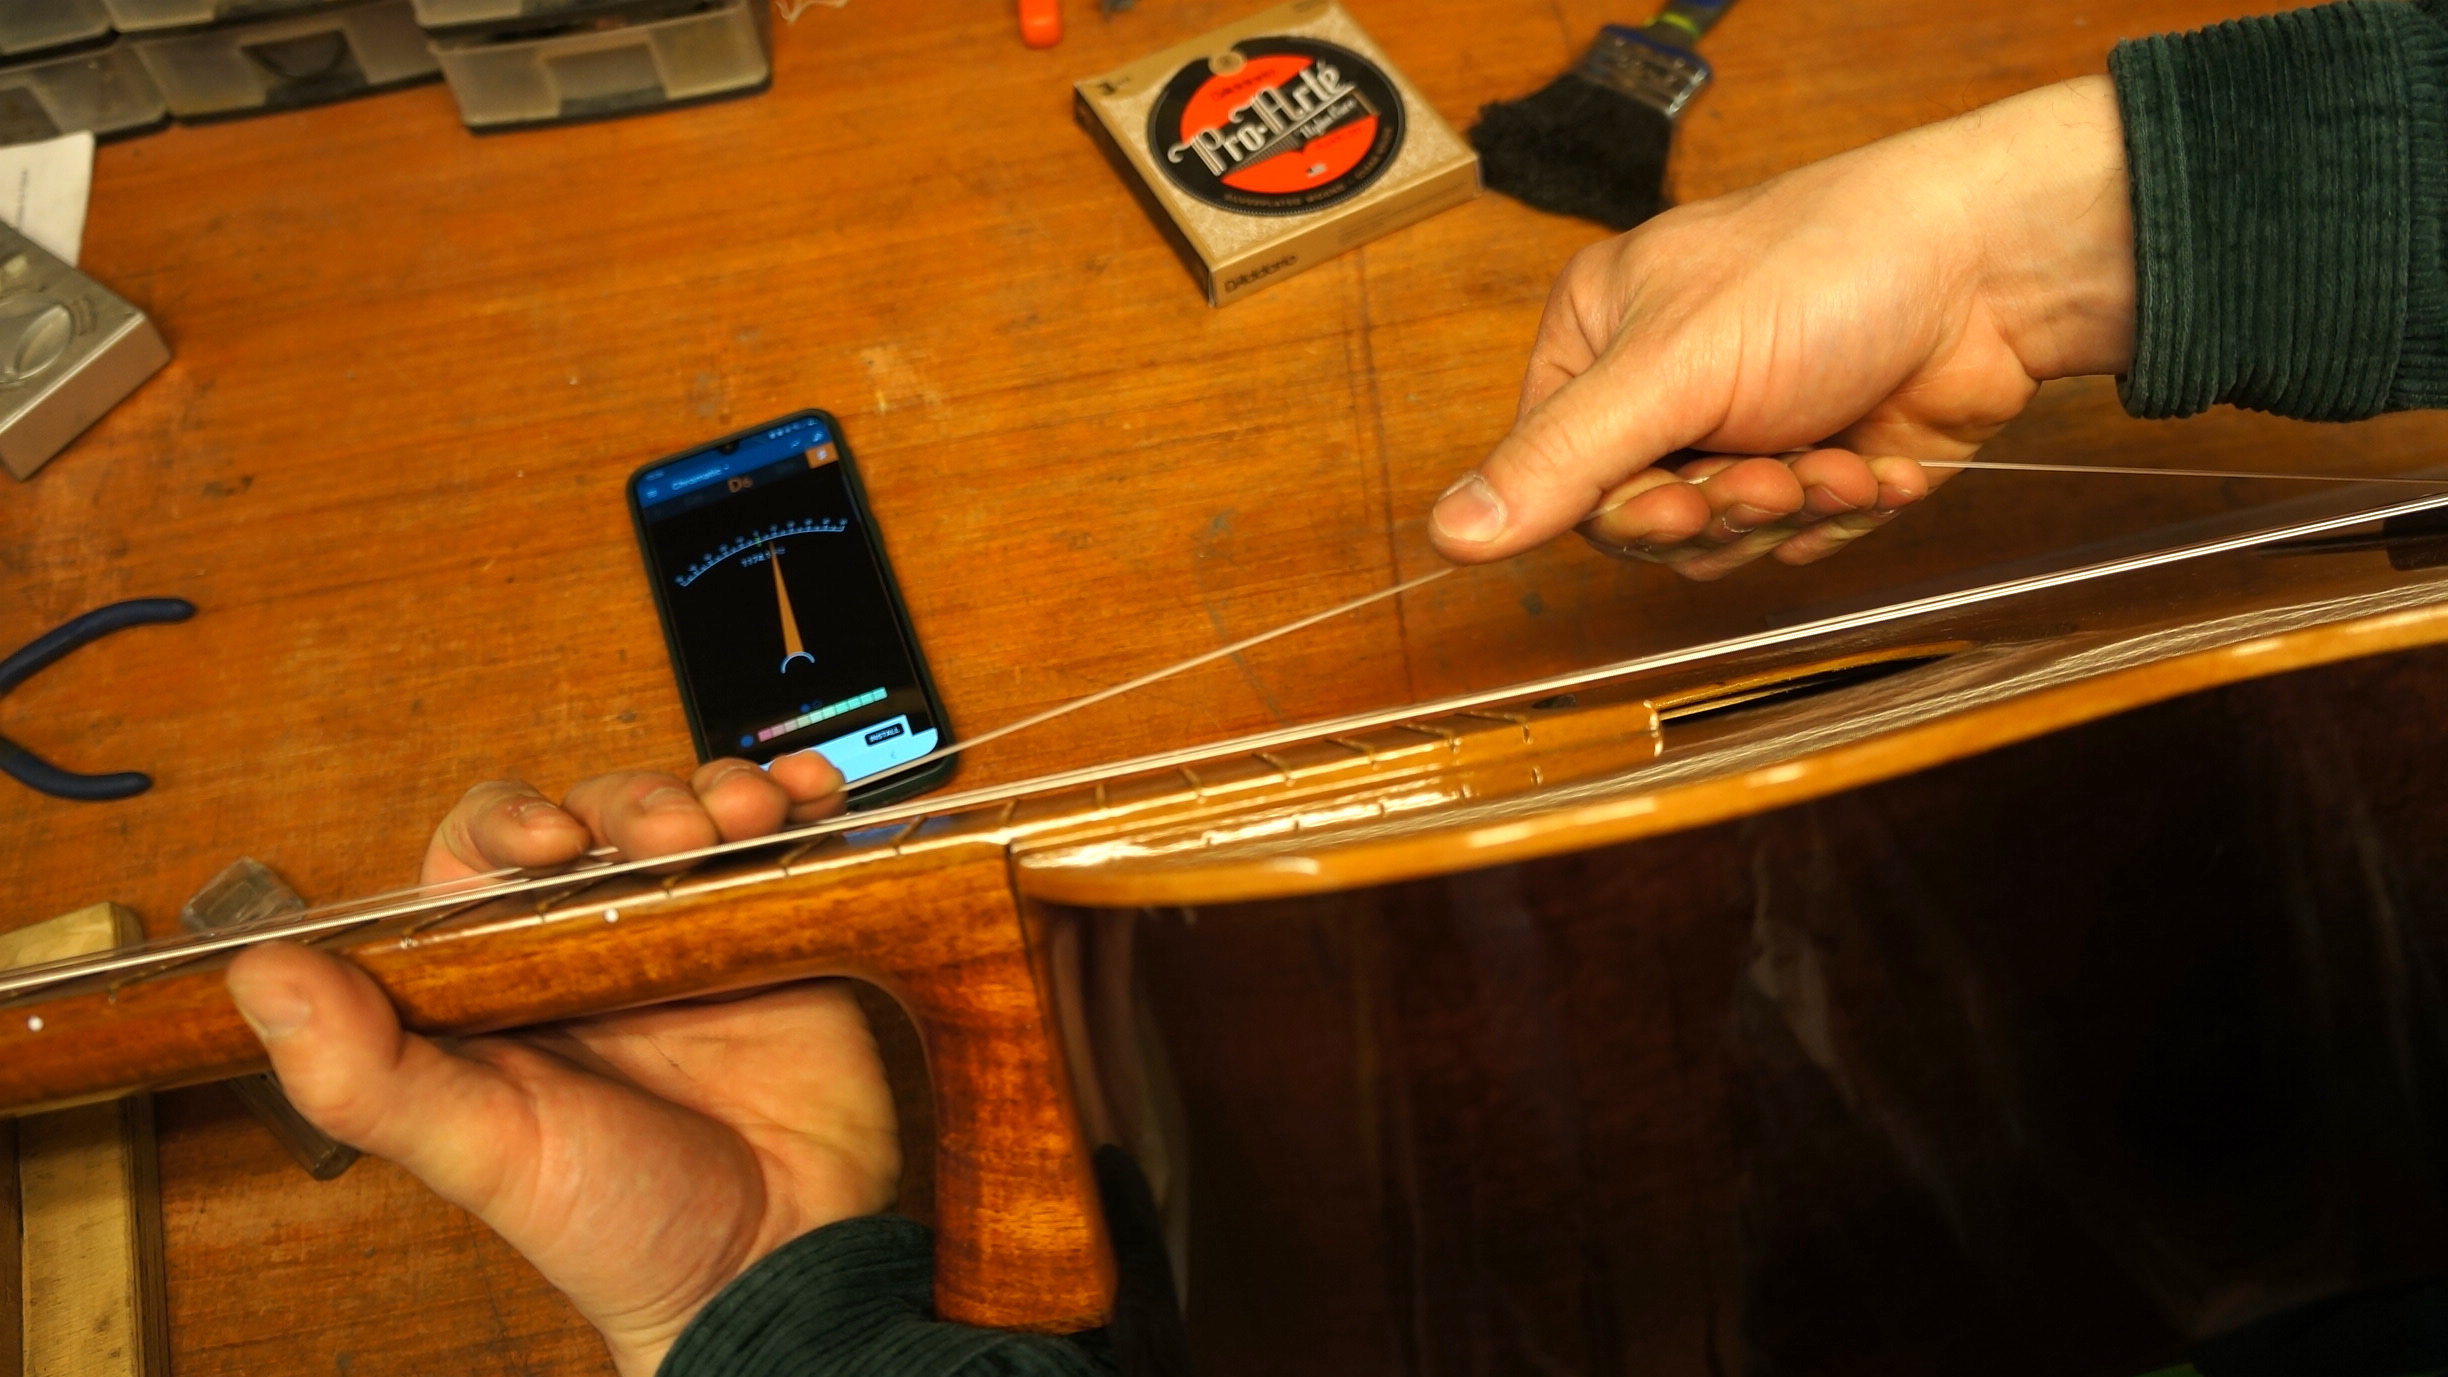
11. Stretch the strings
With the guitar roughly in tune, don’t sweat it, stretch in the new strings a little. The nylon strings will stretch greatly and the bass wound strings will stretch less. Pulling the strings like in the picture settles and tightens the winds and knots up. If you have any slippage we recommend having another go at tying the hitch.
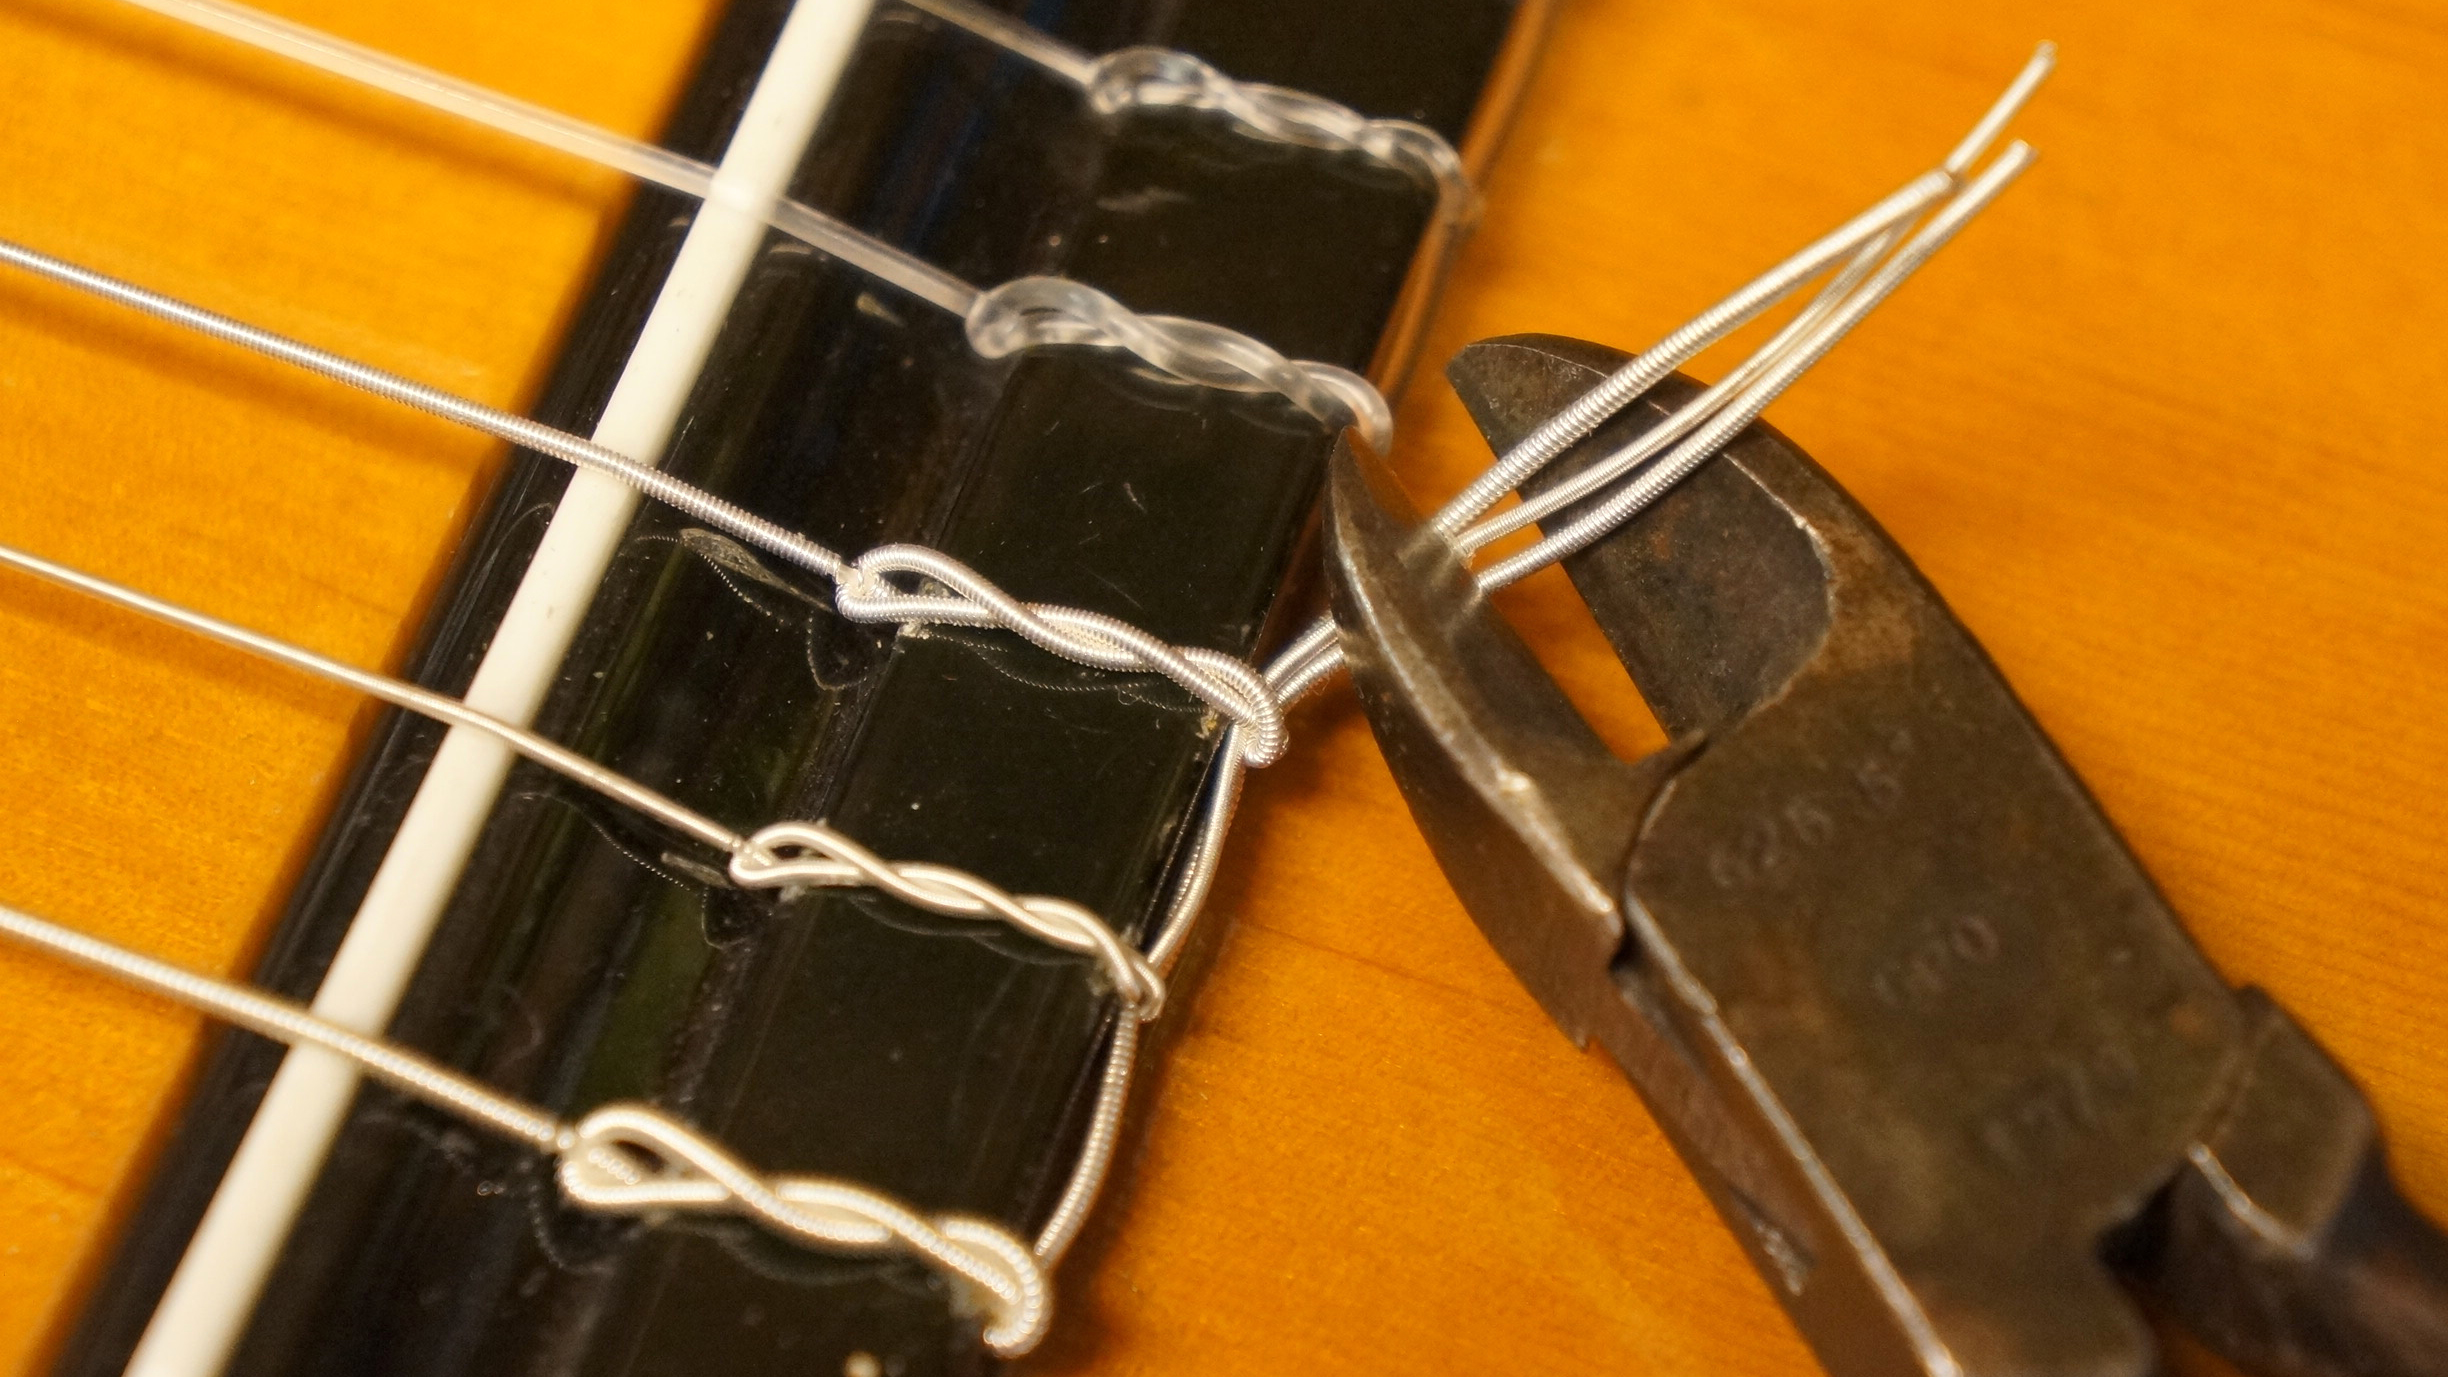
12. Trim the string ends
When the strings have been stretched in and you’ve checked that they’re not slipping, you can now trim off the tails at each end – be careful not to scratch the lacquer with those wire cutters!
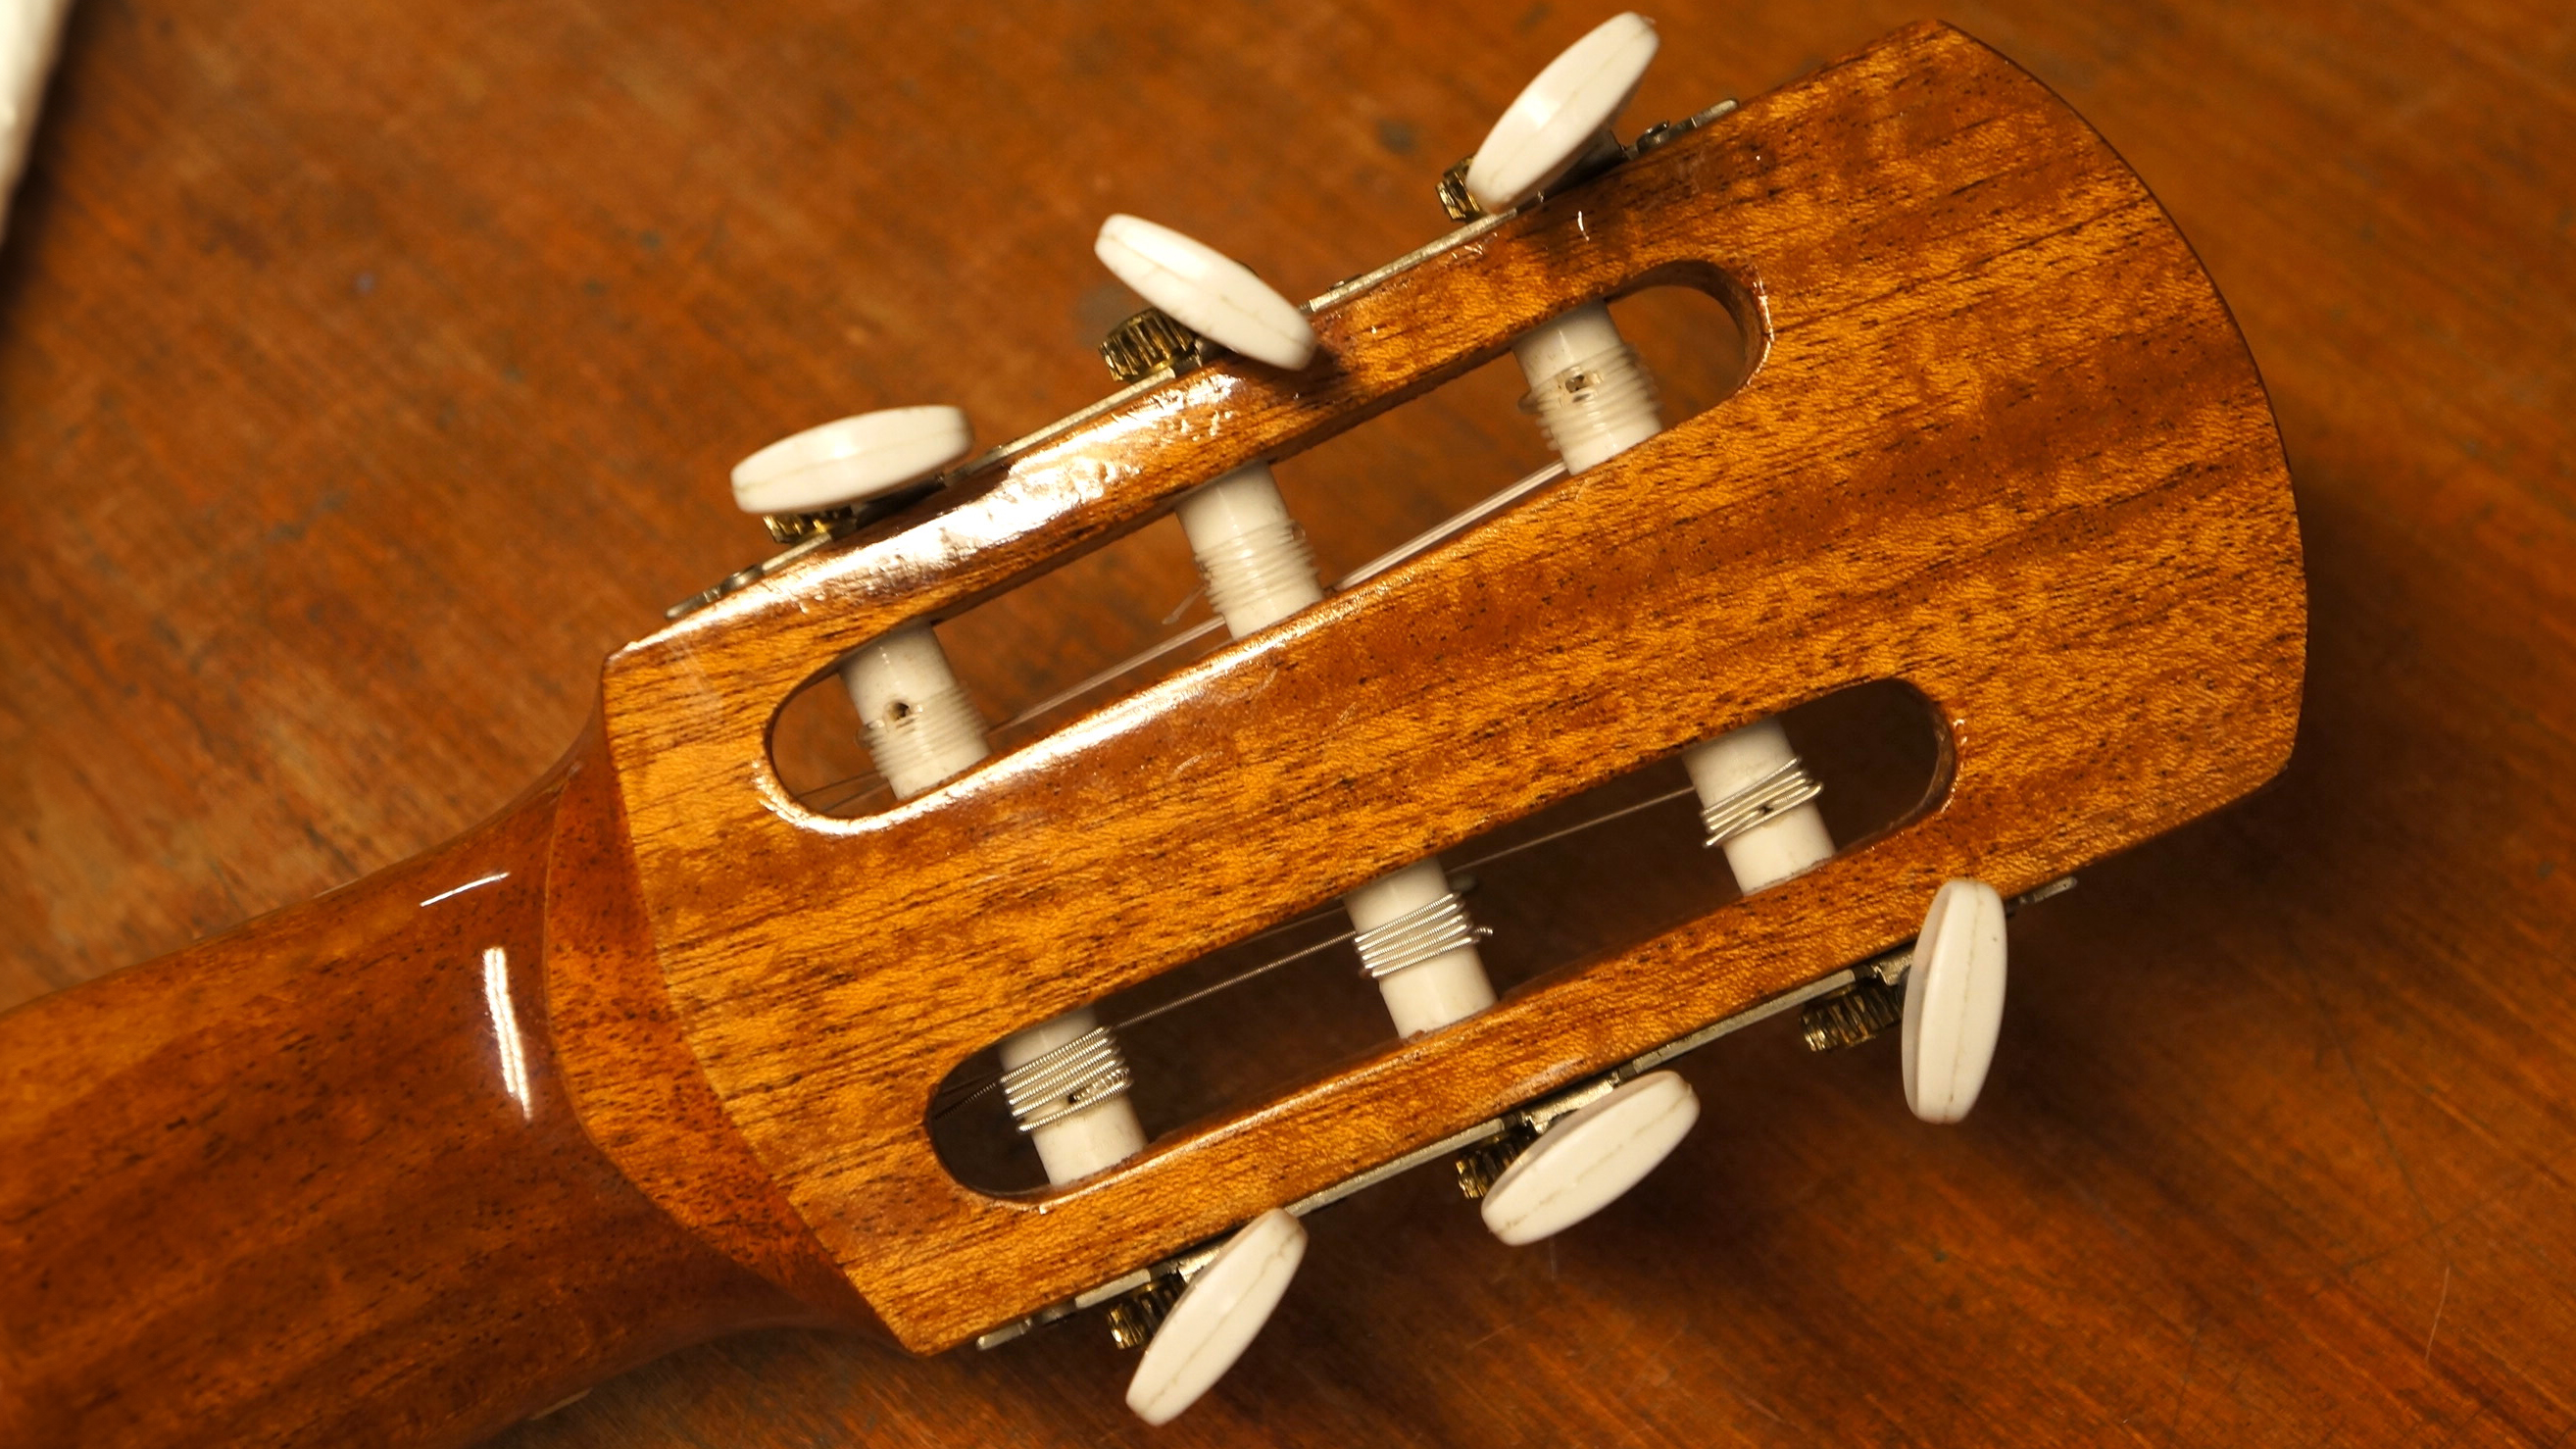
13. Tune up!
With any luck you will have a neat set of winds at the headstock like those in the picture above; you can always loosen and have a tidy up by poking the winds around a bit. It’s entirely normal for the strings to keep dropping pitch for a little while – particularly when they’re fresh – this is the nature of nylon strings. If you tune up quick, maybe you can get half a song out of your guitar before it’s slipped down in pitch, however once your new strings are settled they’ll actually be very reliable at staying in tune.


