
The Snap feature of Windows 10 and Windows 11 makes it easy to organize apps and windows by quickly resizing them to occupy half of the screen. This is handy, but also somewhat limited. The FancyZones module of PowerToys is a much more advanced window manager that provides many more options.
Spend a little time configuring window zones on your desktop and you can then drop any open app or windows into one of them for instant resizing. There are numerous pre-defined window layouts for you to choose from but, importantly, you can also create your own. This is one of the most versatile components of the PowerToys utility collection, and here we'll show you how to get started.
Steps
- Install PowerToys and activate FancyZones
- Create zone layouts
- Configure options
- Organise your windows
Tools and Requirements
- Windows 10 or Windows 11
- Microsoft PowerToys
Step by step guide
1. Enable FancyZones
FancyZones should be enabled by default when you install PowerToys, but it is worth checking that you have not accidentally disabled it previously. It is also possible that you disabled it on purpose, not thinking that you were going to be using it - now you are! You can enable the module by opening PowerToys, move to the Dashboard section and enable the FancyZones toggle. You can also jump straight to the FancyZones section and enable the toggle from here.
2. Choose a desktop layout
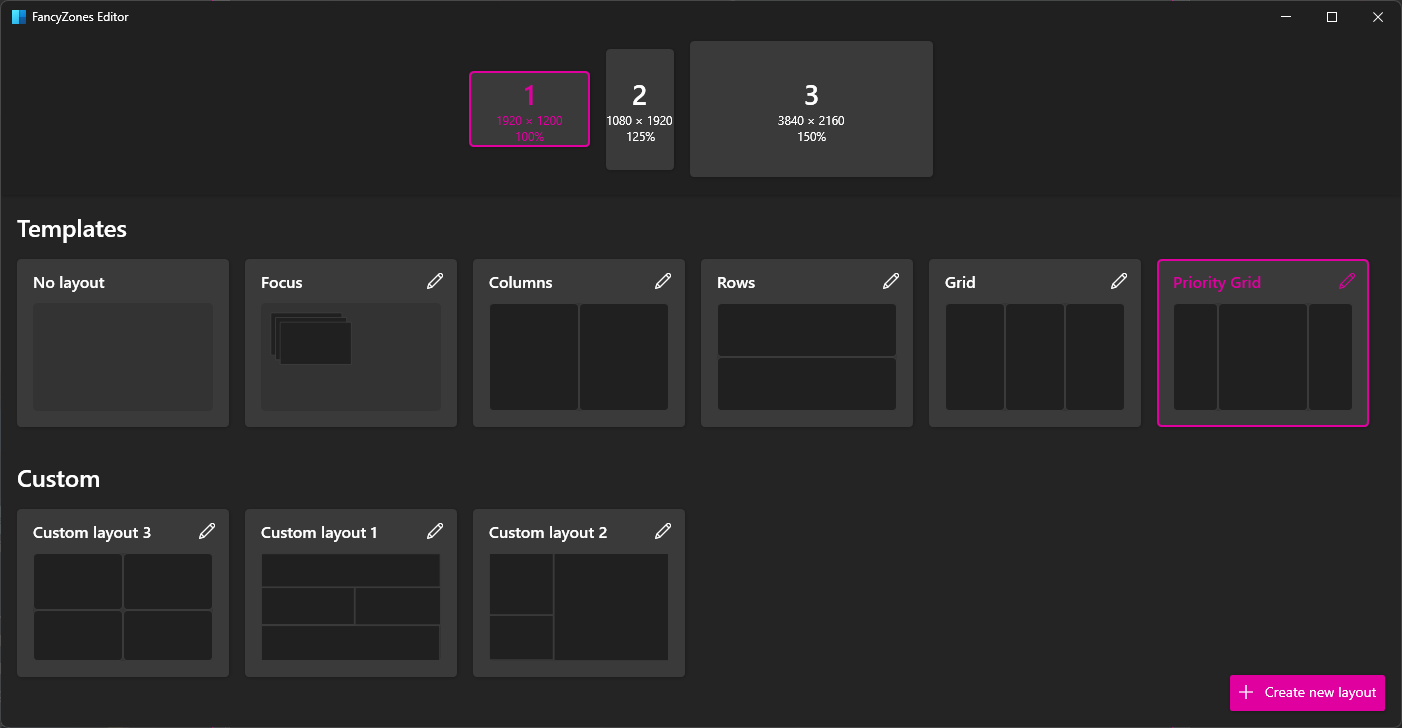
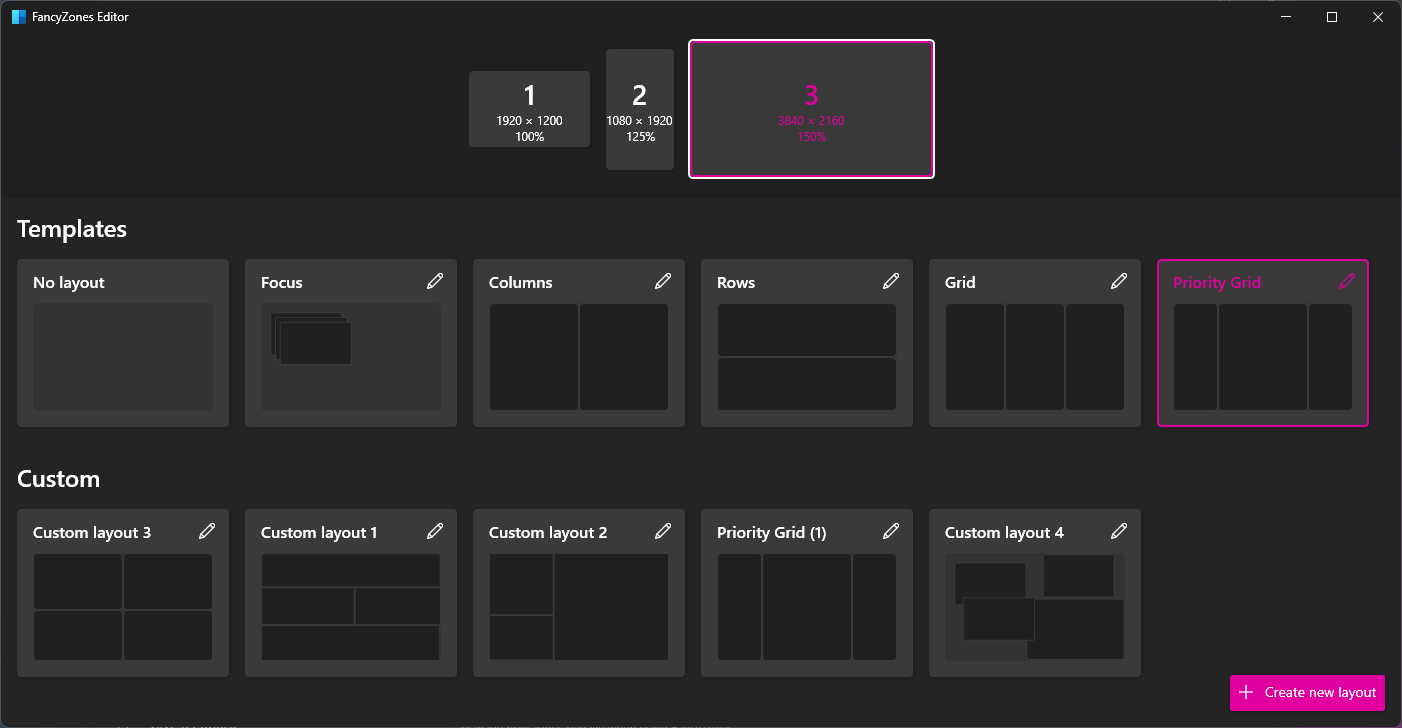
FancyZones works by having windows automatically resize to predefined grid layouts, and you will need to decide on the layout you would like to use. To do this, move to the FancyZones section of PowerToys and click Launch layout editor; alternatively, you can use the Windows + ' keyboard shortcut. Look to the Templates section, and you will find a number of readymade grid layouts and you can just select the one that is going to work for you.
3. Editing desktop layouts
While it is handy that there are a number of predefined layouts for you to choose from, it is possible that none of them are quite right for you. You can create your own layout from scratch, or you can tweak an existing one if you prefer. To edit a predefined layout, click the pencil icon next to its listing in the layout editor and you can then use the simple controls to change the number of zones, adjust padding and so on.
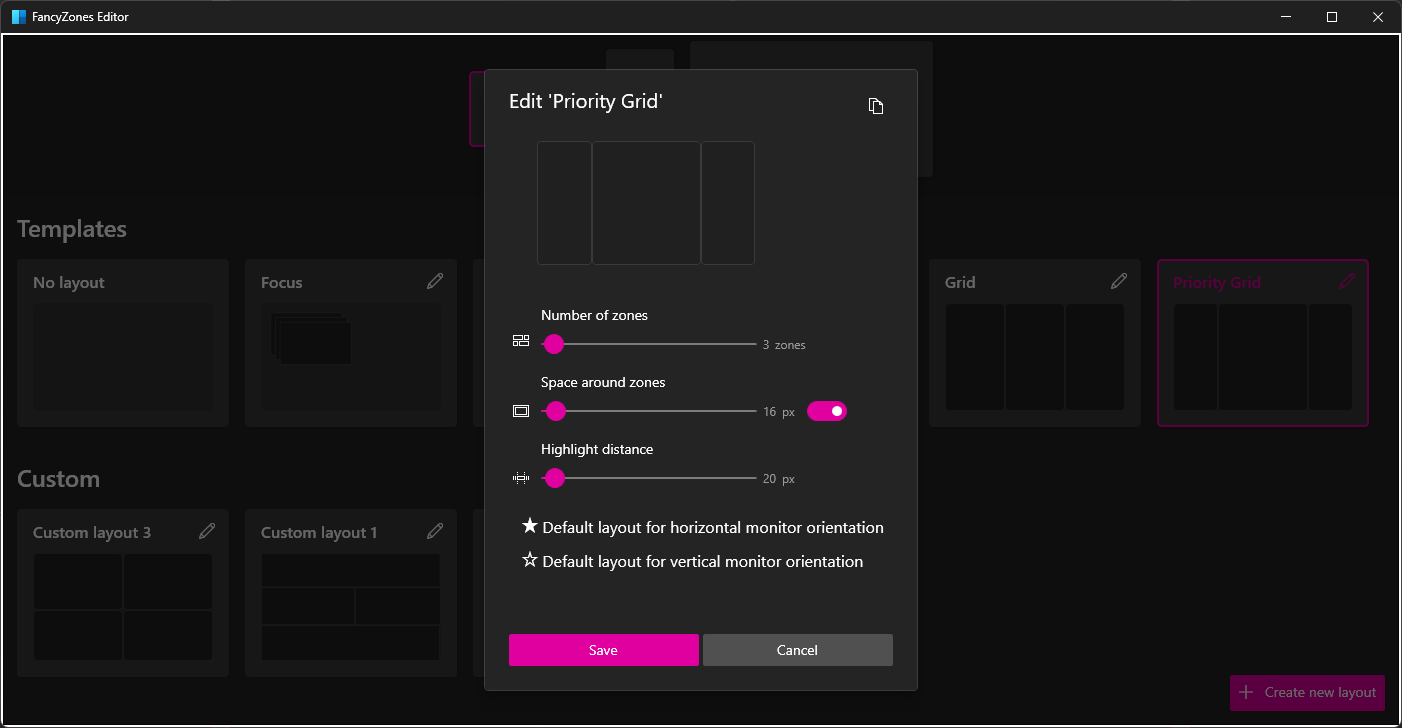
4. Create your own desktop layout

For greater control, you can create your own layout, and this can be achieved in a couple of ways. The first is to edit an existing layout and click the copy button to the upper right to add it to the Custom section ready for editing. The second is to click the Create new layout button and then choose between building a Grid layout which is quite simple, or a Canvas layout which can be much more complicated and can include zones that overlap.
5. Grid creation options
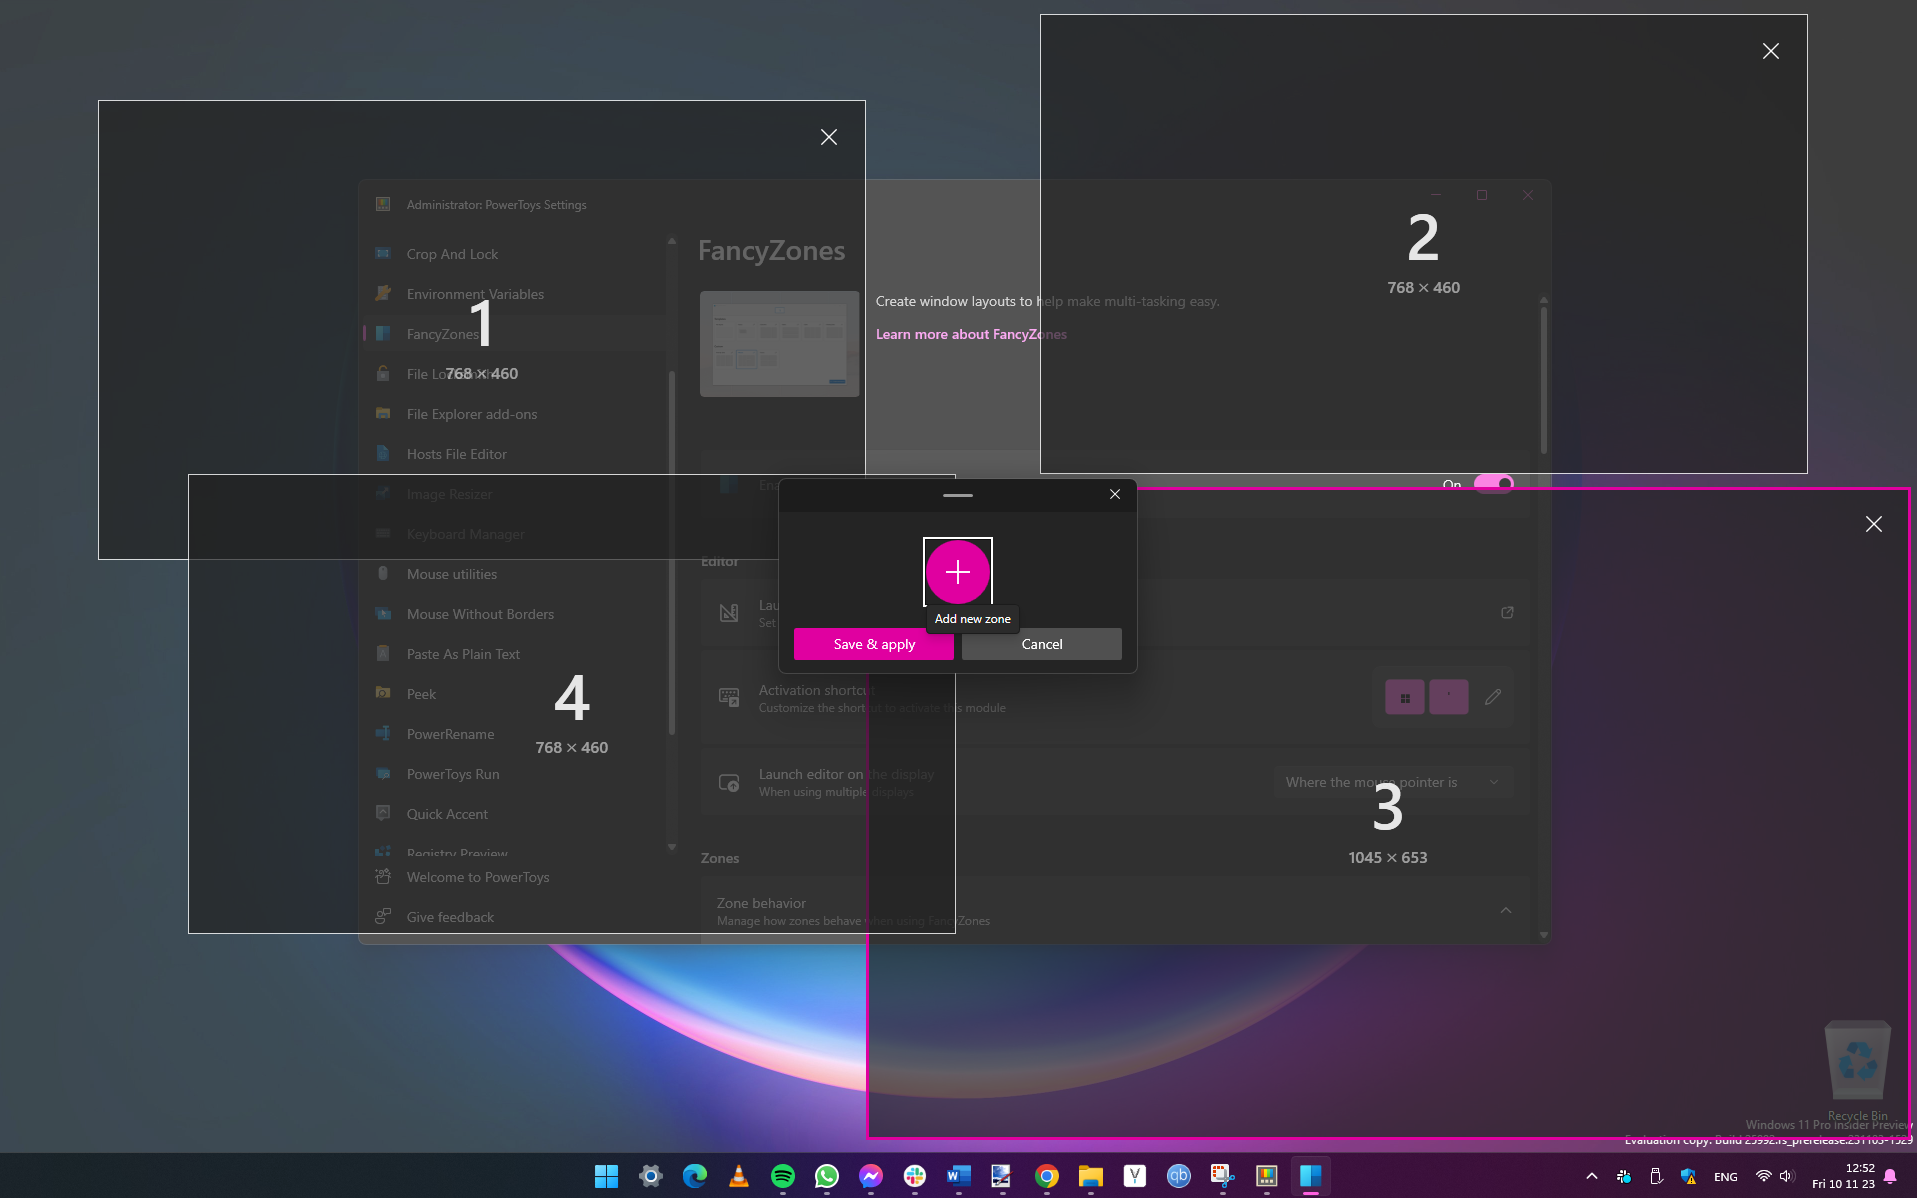
If you opt for a grid layout, you will need to use the on-screen editor to resize the main zones as required, and create new ones by splitting existing zones in two. Should you go for a Canvas layout instead, you can set about the task of using the + button to add as many zones as you need, and resize them using the mouse. When you're done, click the Save & apply button.
6. Working with multiple monitors
While most people have a single monitor connected to their computer, multiple display are increasingly common. Having the extra desktop space multiple monitors provides is useful, but it in no way eliminates the need for organisation; thankfully, FancyZones works well with multiple displays. You can opt to use a different layout on each screen if you want, and you just need to use the previews at the top of the layout editor to choose which screen you are defining when selecting a layout.
7. Making use of FancyZones
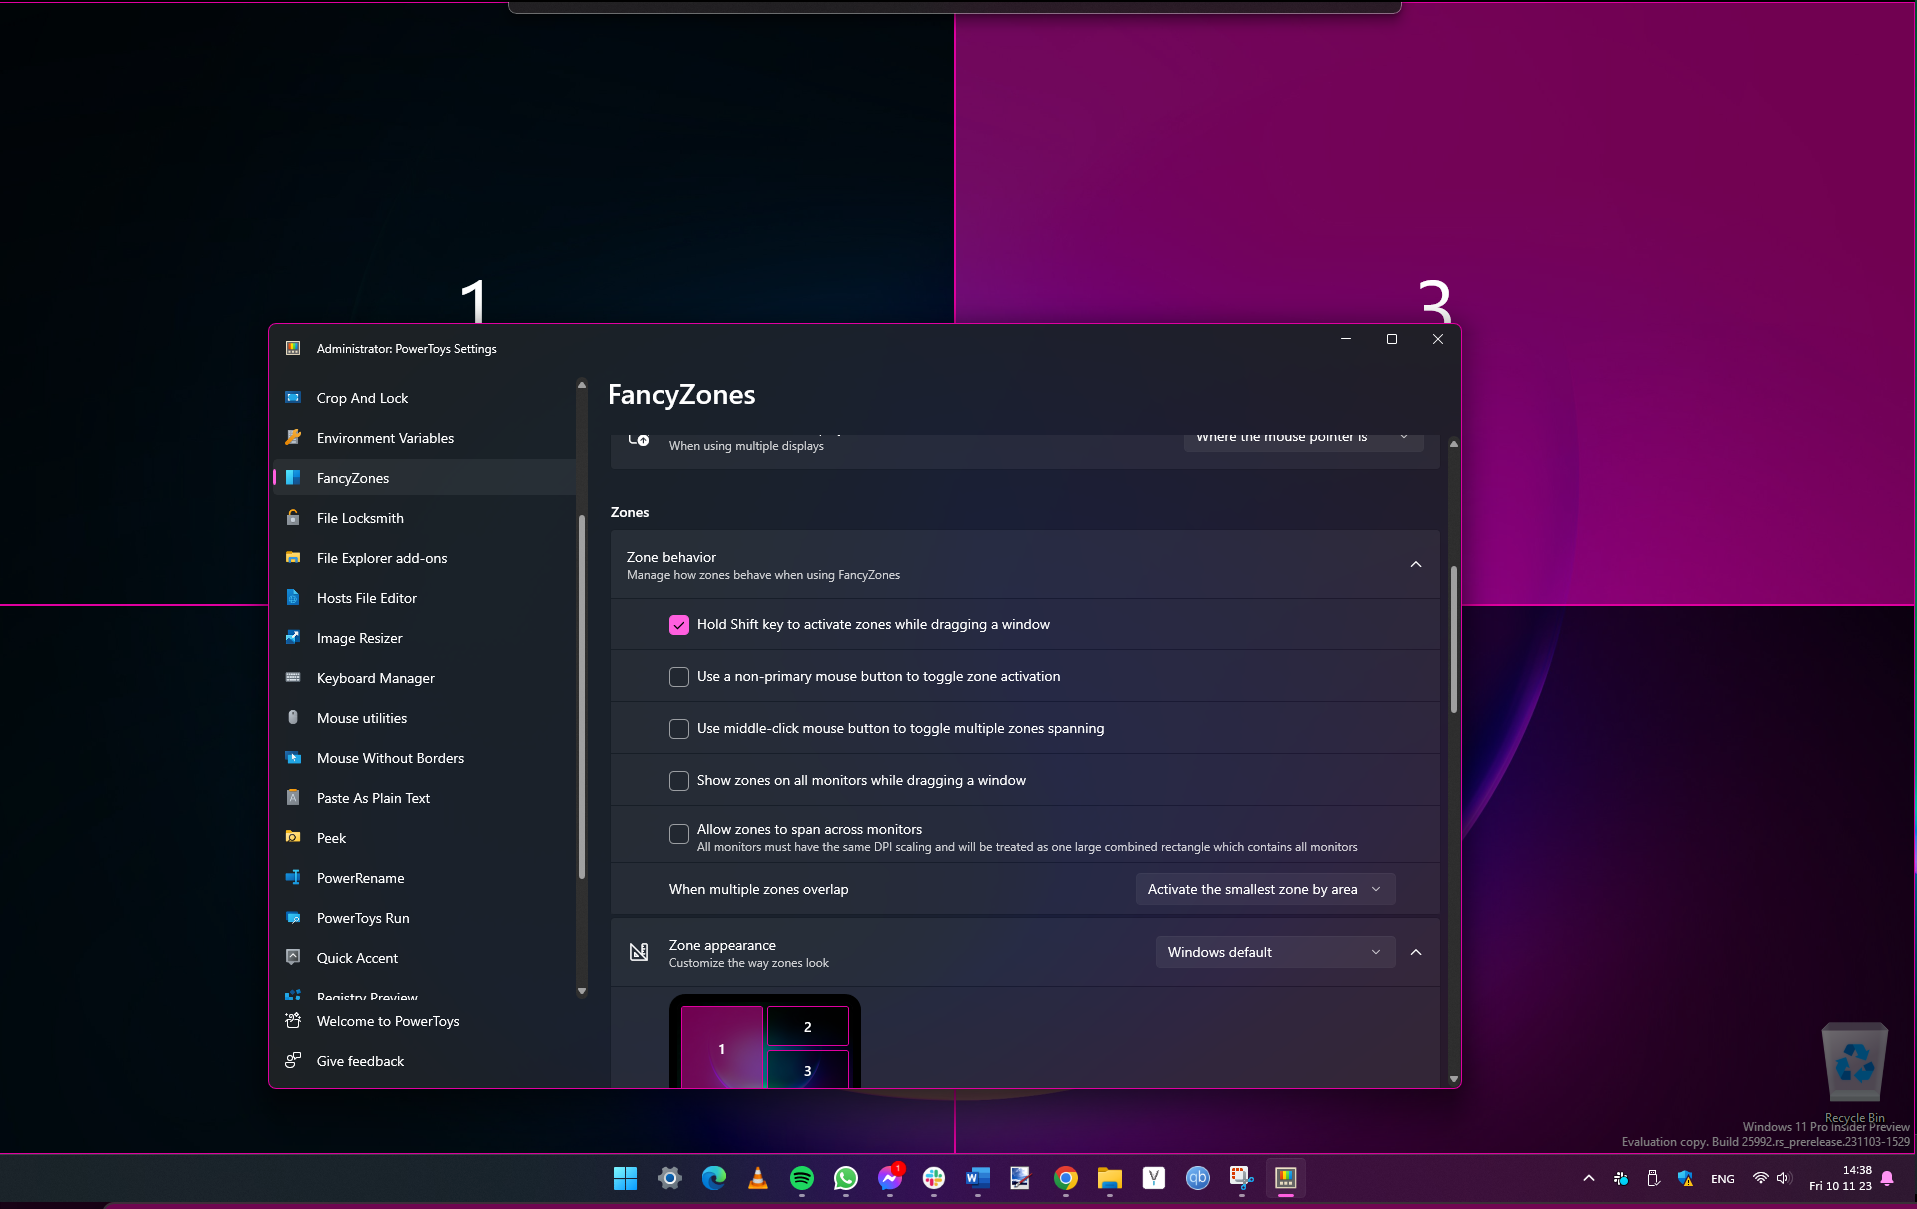
When it comes to using FancyZones, things are very simple. Using the left mouse button, click and drag the title bar of an app or window; as you drag, press Shift and you will see the outline of the zones you have created pop into view. When you are near a zone, it will be highlighted to show that it is active, and you can resize the window you are moving into that zone by simply releasing the mouse button.
8. Configure activation options
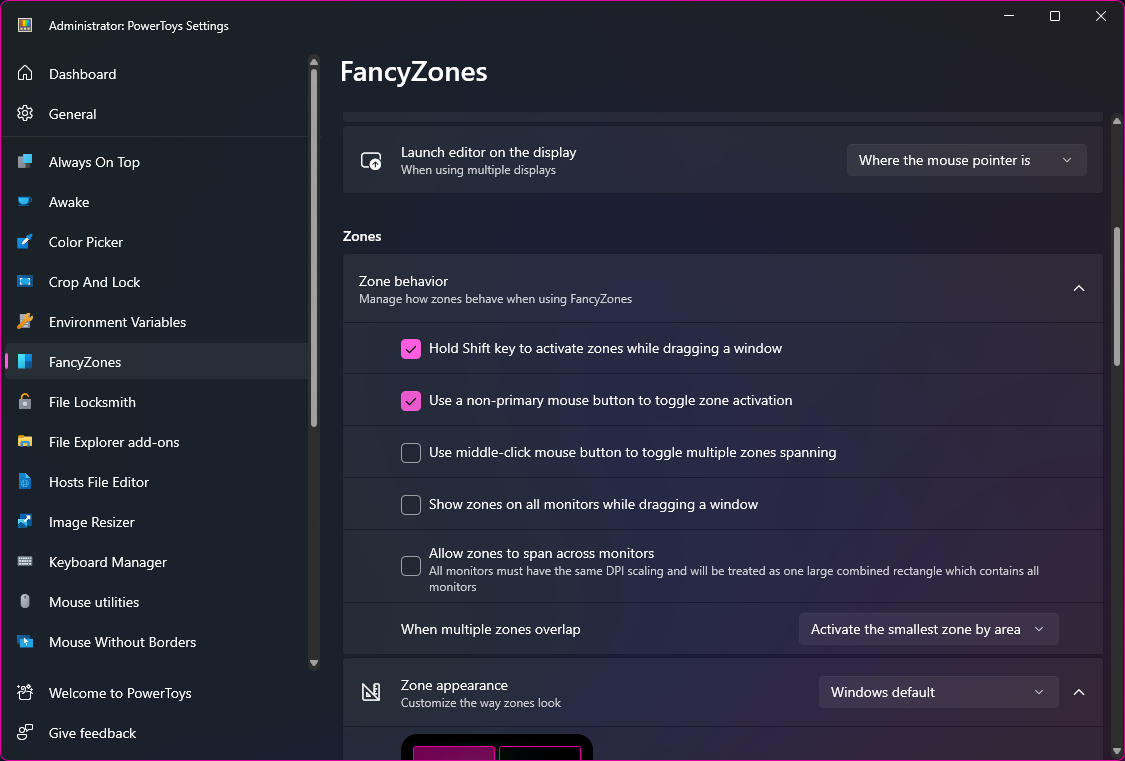
What we have described so far is more than enough to get you started in FancyZones, but there is plenty more to explore - particularly when it comes to customization options. Head to the FancyZones section of PowerToys, look under the Zones heading and you can configure the app so that, in addition to Shift, you can use the non-primary mouse button to activate zone - this is the right mouse button for most people. This is a useful setting to enable as it makes window resizing a single-handed operation.
Final Thoughts
The ability to Snap windows was a handy addition that Microsoft made to Windows 10 and 11, but it is a feature that has long been criticised for being too limited. This is something that FancyZones seeks to address, giving you complete control over quick, automated window resizing. It makes it easy to ensure that you can see everything you need to see at any given moment, and that you are making the best possible use of available screen space.
In a slightly similar vein to FancyZones, Stardock offers an app called Fences. This is another desktop organization tool that many people find to be helpful. It does work in something of a different way to both the Snap feature of Windows and the FancyZone utility, and it does have a price tag attached to it. There is a free trial available, however, that you can use to check it out to see if it is right for you.