There are numerous reasons someone might need to create a virtual machine, and fortunately in 2024, it's possible to do it well and for free. Major players, including Microsoft, Broadcom/VMWare, and Oracle, all have free software available to create instances of different operating systems on your Windows 11 PC.
It's the latter of those three we're focusing on here. Virtualbox by Oracle is a completely free, open-source, and cross-platform virtual machine tool. It's been around for what feels like eternity, but it's still in active development today and is absolutely one of the best free virtual machine applications around.
If you're new to Virtualbox, though, the first thing to do is get yourself set up. Here's how you go about that.
Before you begin
Before you get started using Virtualbox there is a little bit of housekeeping needed to make sure your system is ready for it.
First up, if you're on Windows 11, then your system should be using a CPU modern enough to have no troubles running virtual machines. However, there may well be settings in your BIOS that you need to ensure are enabled first. Each BIOS is different, so you'll need to refer to documentation for your hardware if you need to know how to get into it and how to navigate it.
Settings could well be labelled clearly as relating to hardware virtualization. Or, you could be looking for Intel VT-x or AMD-V. In any case, it's worth checking first before you get further along.
You also need to ensure you don't have Microsoft's Hyper-V set up on your PC already. If you do, you'll need to get rid of it before dabbling with Virtualbox.
How to install Virtualbox on Windows 11

Virtualbox isn't available in the Microsoft Store, but there are two alternative locations to get it.
The first is simply going to the Virtualbox website and downloading the installer. Then opening it up and running through it as you would any other Windows application.
But if you use the Windows Package Manager (winget) you can also get it here. Enter the following command into your PowerShell window:
winget install oracle.virtualboxWinget will go and fetch the installer and immediately run it for you.
In terms of installation, that's literally all you have to do. Virtualbox is now on your Windows 11 PC, but before you get building any machines, you should take care of updates.
How to update Virtualbox

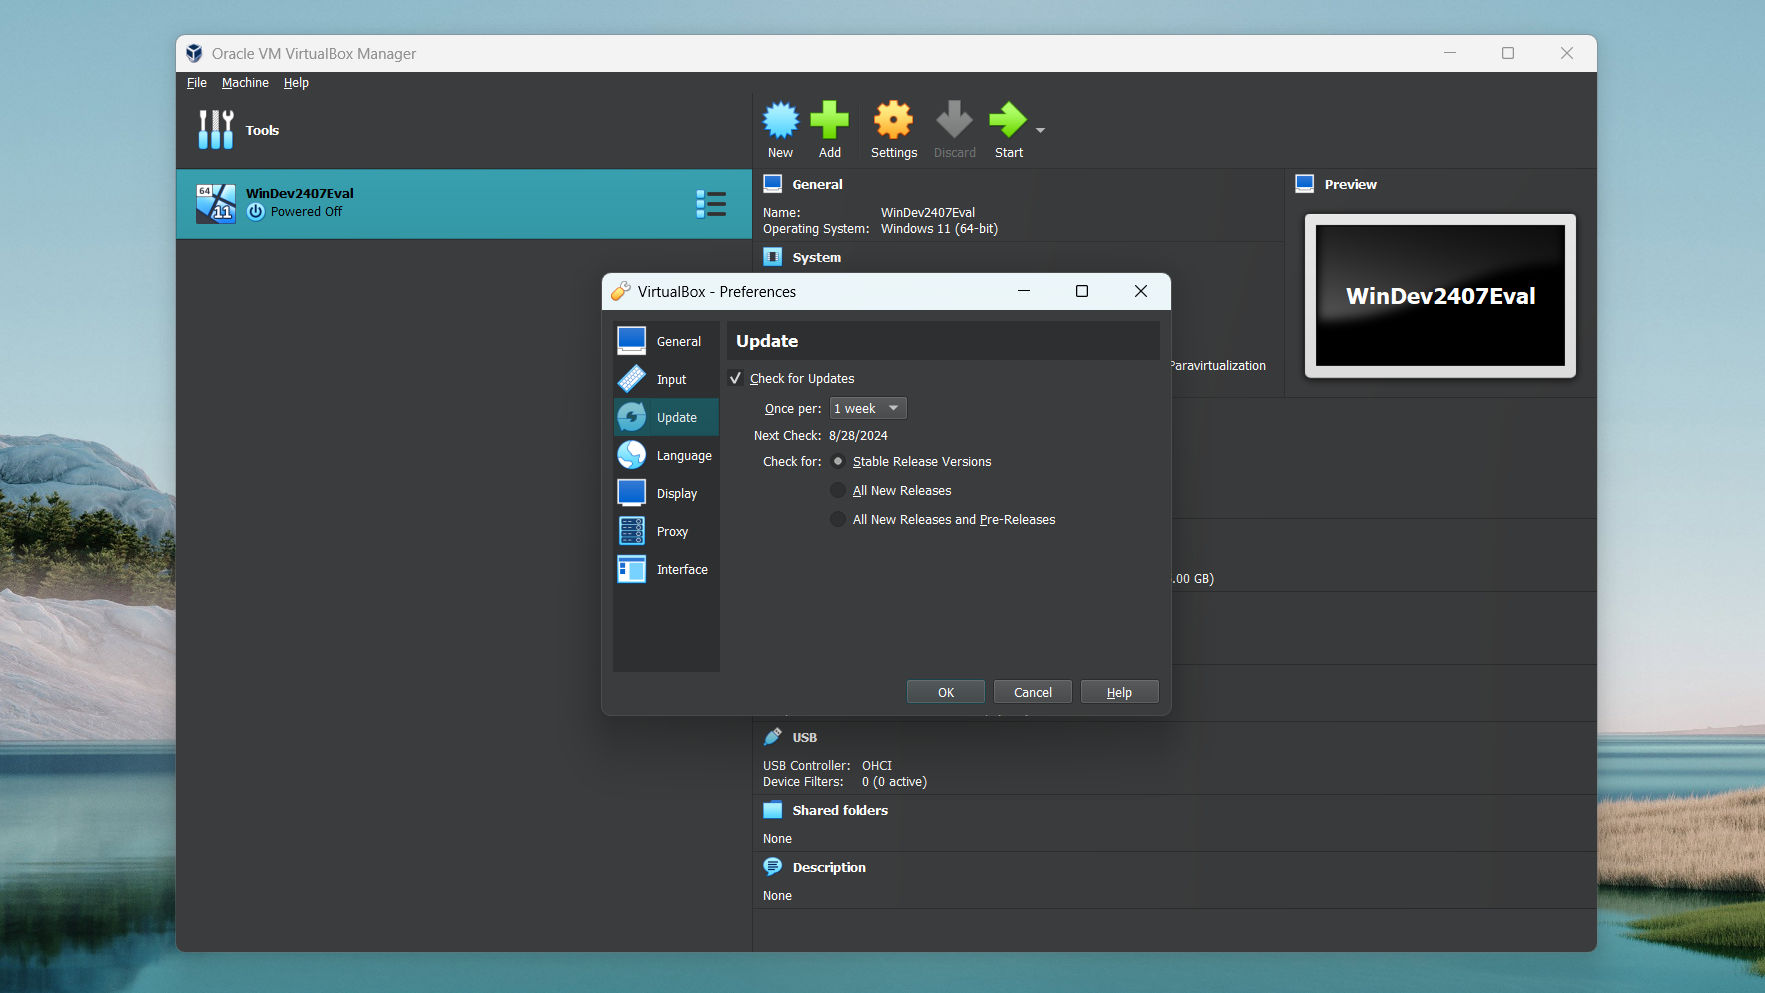
Once you have it installed, you don't have to worry about manually checking the website for updates. The app is capable of updating itself, and you can even set it up to happen automatically to make life easier. You can always check for manual updates from the File menu, but here's what you should do to make sure it regularly checks without your intervention.
- Click File.
- Select Preferences.
- Select Update from the sidebar.
- Check the box next to Check for Updates.
- Choose your timeframe from the dropdown box. You have options between one day and one month.
- Select whether you want to check for Stable, all new, or all new and pre-releases of Virtualbox.
- Click OK.
You're now set up so that Virtualbox will check for updates on whatever schedule you picked. Personally, I have it set to check once a week, as I'm sticking to stable releases, so there's little benefit to checking more frequently than that.
But now you've taken your first steps! Virtualbox is set up, updates are taken care of, and you're ready to build some virtual machines!


