Knowing how to find your PC's model number on Windows 11 can come in handy for troubleshooting hardware issues or ensuring compatibility with accessories and peripherals.
The model number is a unique name or code assigned by the manufacturer to identify the technical specifications of a product. The model name, on the other hand, is a consumer-friendly label utilized during branding and marketing.
For example, the model name Dell XPS doesn’t give specific information about the product, other than it being a laptop under the XPS line. But the model number, Dell XPS 13 9310, reveals more of the device’s tech specs and differentiates it from other products in the XPS line.
In this guide, we'll show you how to swiftly find the model number of your PC on Windows 11. And if you’re planning to upgrade your computer, check out these best Windows laptops.
How to find PC model number Windows 11
Note: The model number can also be found on the computer’s packaging or in the user manual, but below we cover steps to find it using the computer.
Also, the model number is different from the serial number, which is used to identify individual units of a product, and is usually a longer alphanumeric code.
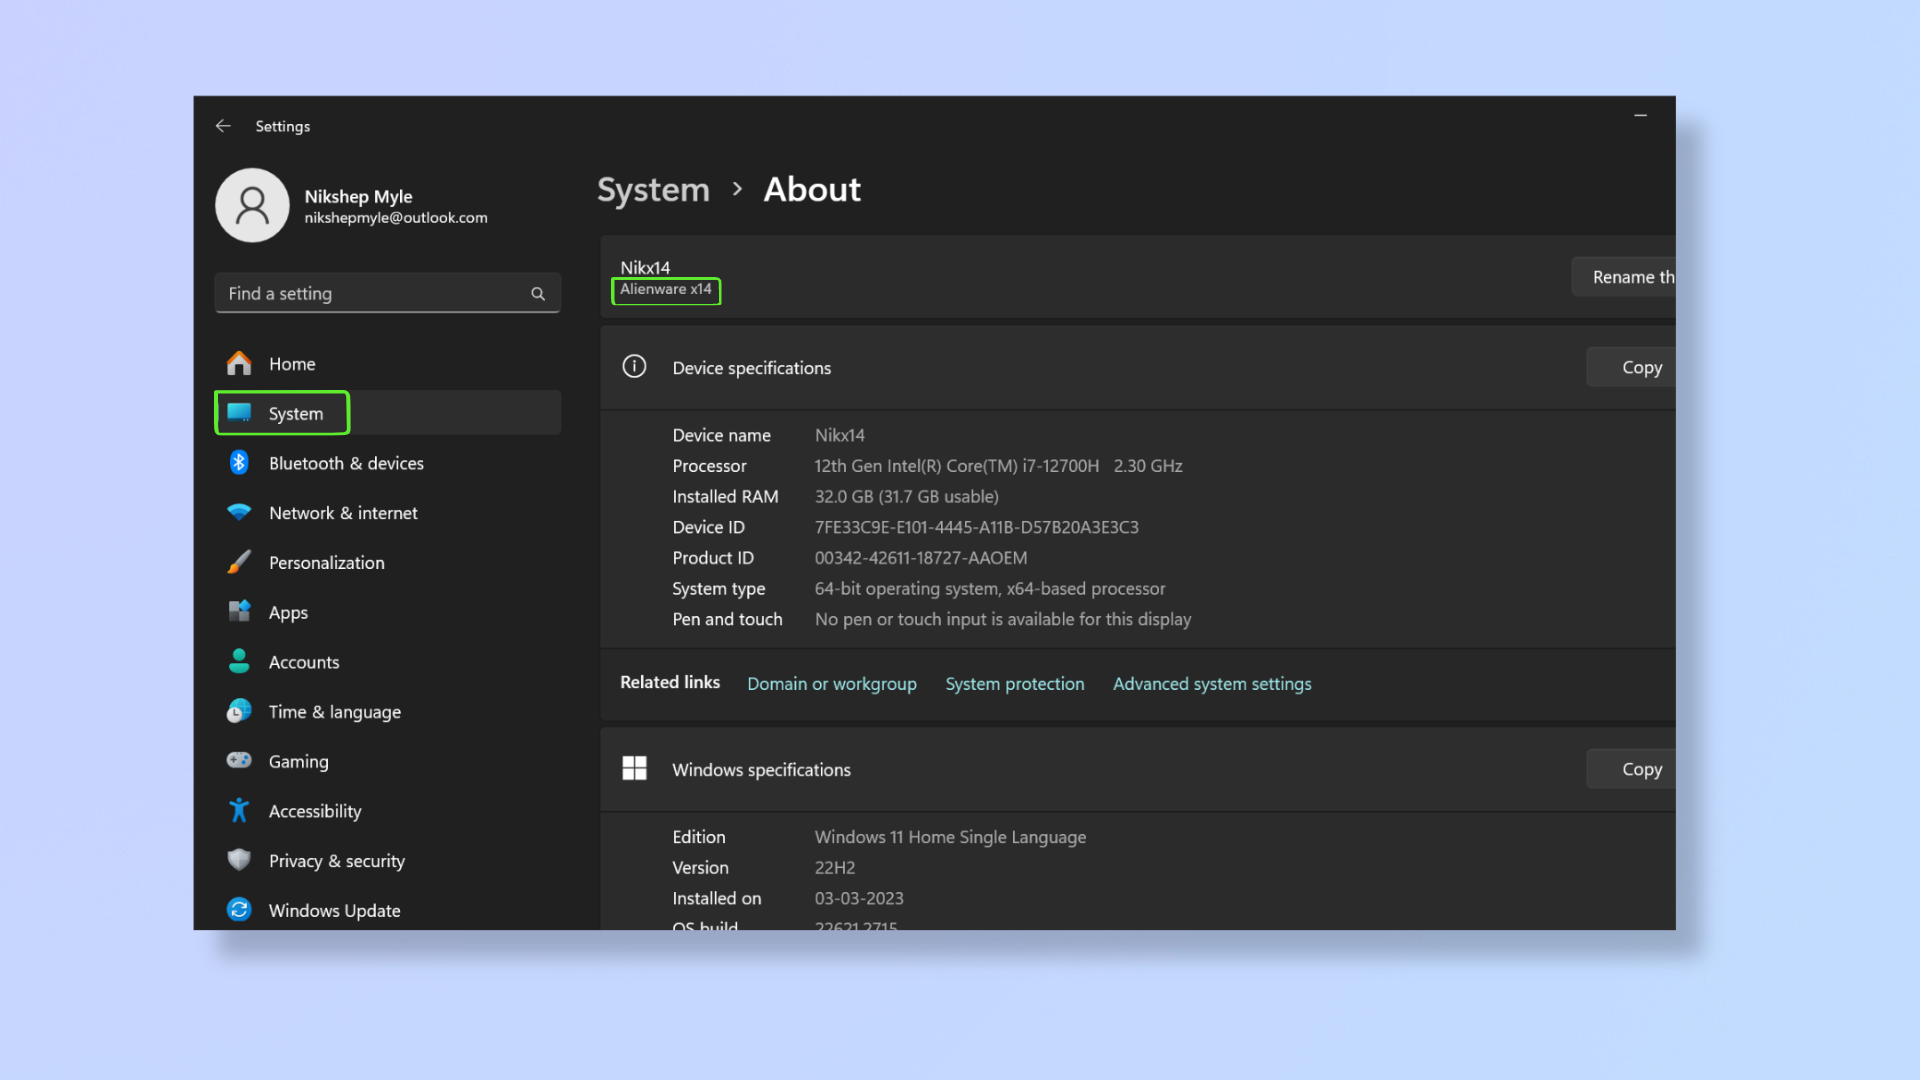
Method 1. Go to Settings > System > About

Press Windows + I to launch Settings. Click System in the left pane, scroll down, and click About.
At the top, above Device specifications, you’ll find your device name and the model number under it in smaller font.
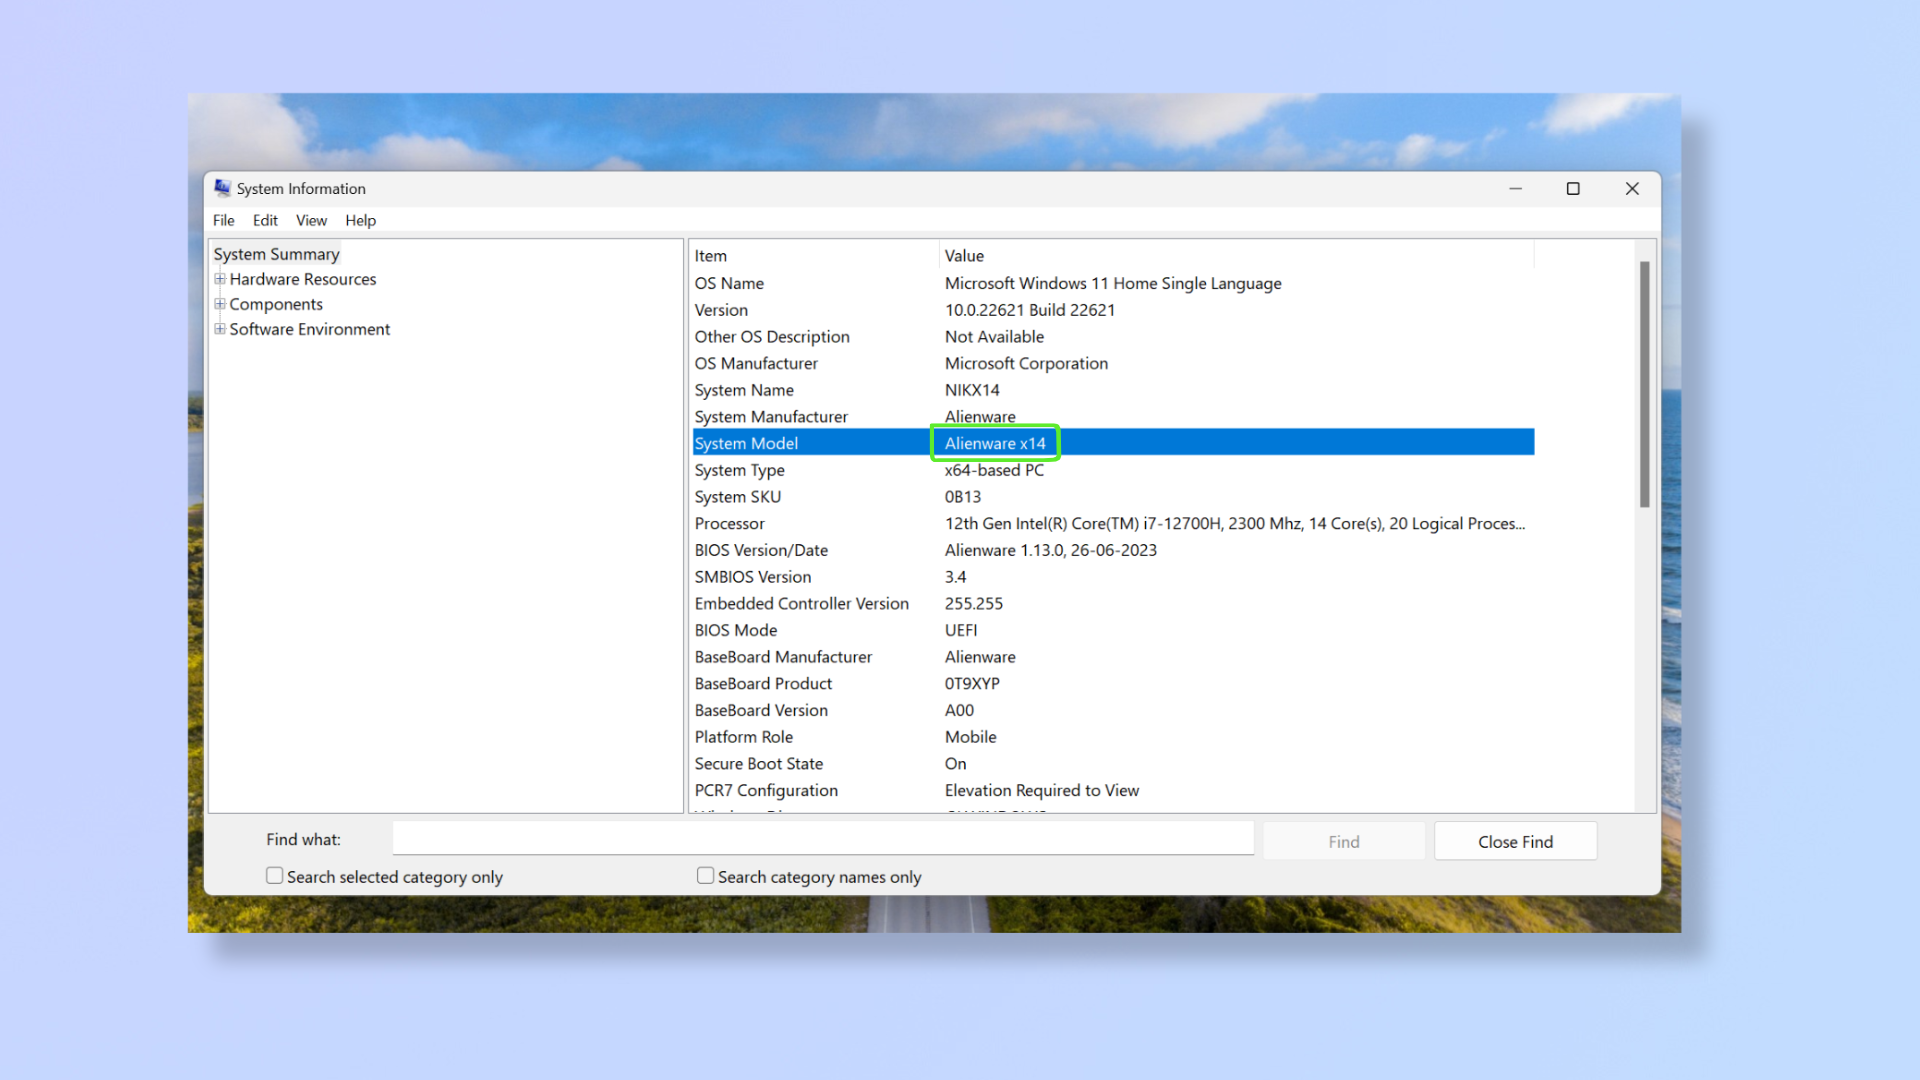
Method 2. Press Win+S and search "System Information"

Hit Windows + S to open Search, type System Information, and press enter to open the app. You’ll find the model number beside System Model and also the System Manufacturer above it.
Now that you know your computer’s model number, you can find out what peripherals it’s compatible with, what software and apps it can run, and what kind of upgrades it can handle. For more on Windows, read these guides on how to get PowerToys in Windows 11, how to use Windows 11 PowerToys Shortcut Guide, and how to remap keys on Windows 11.


