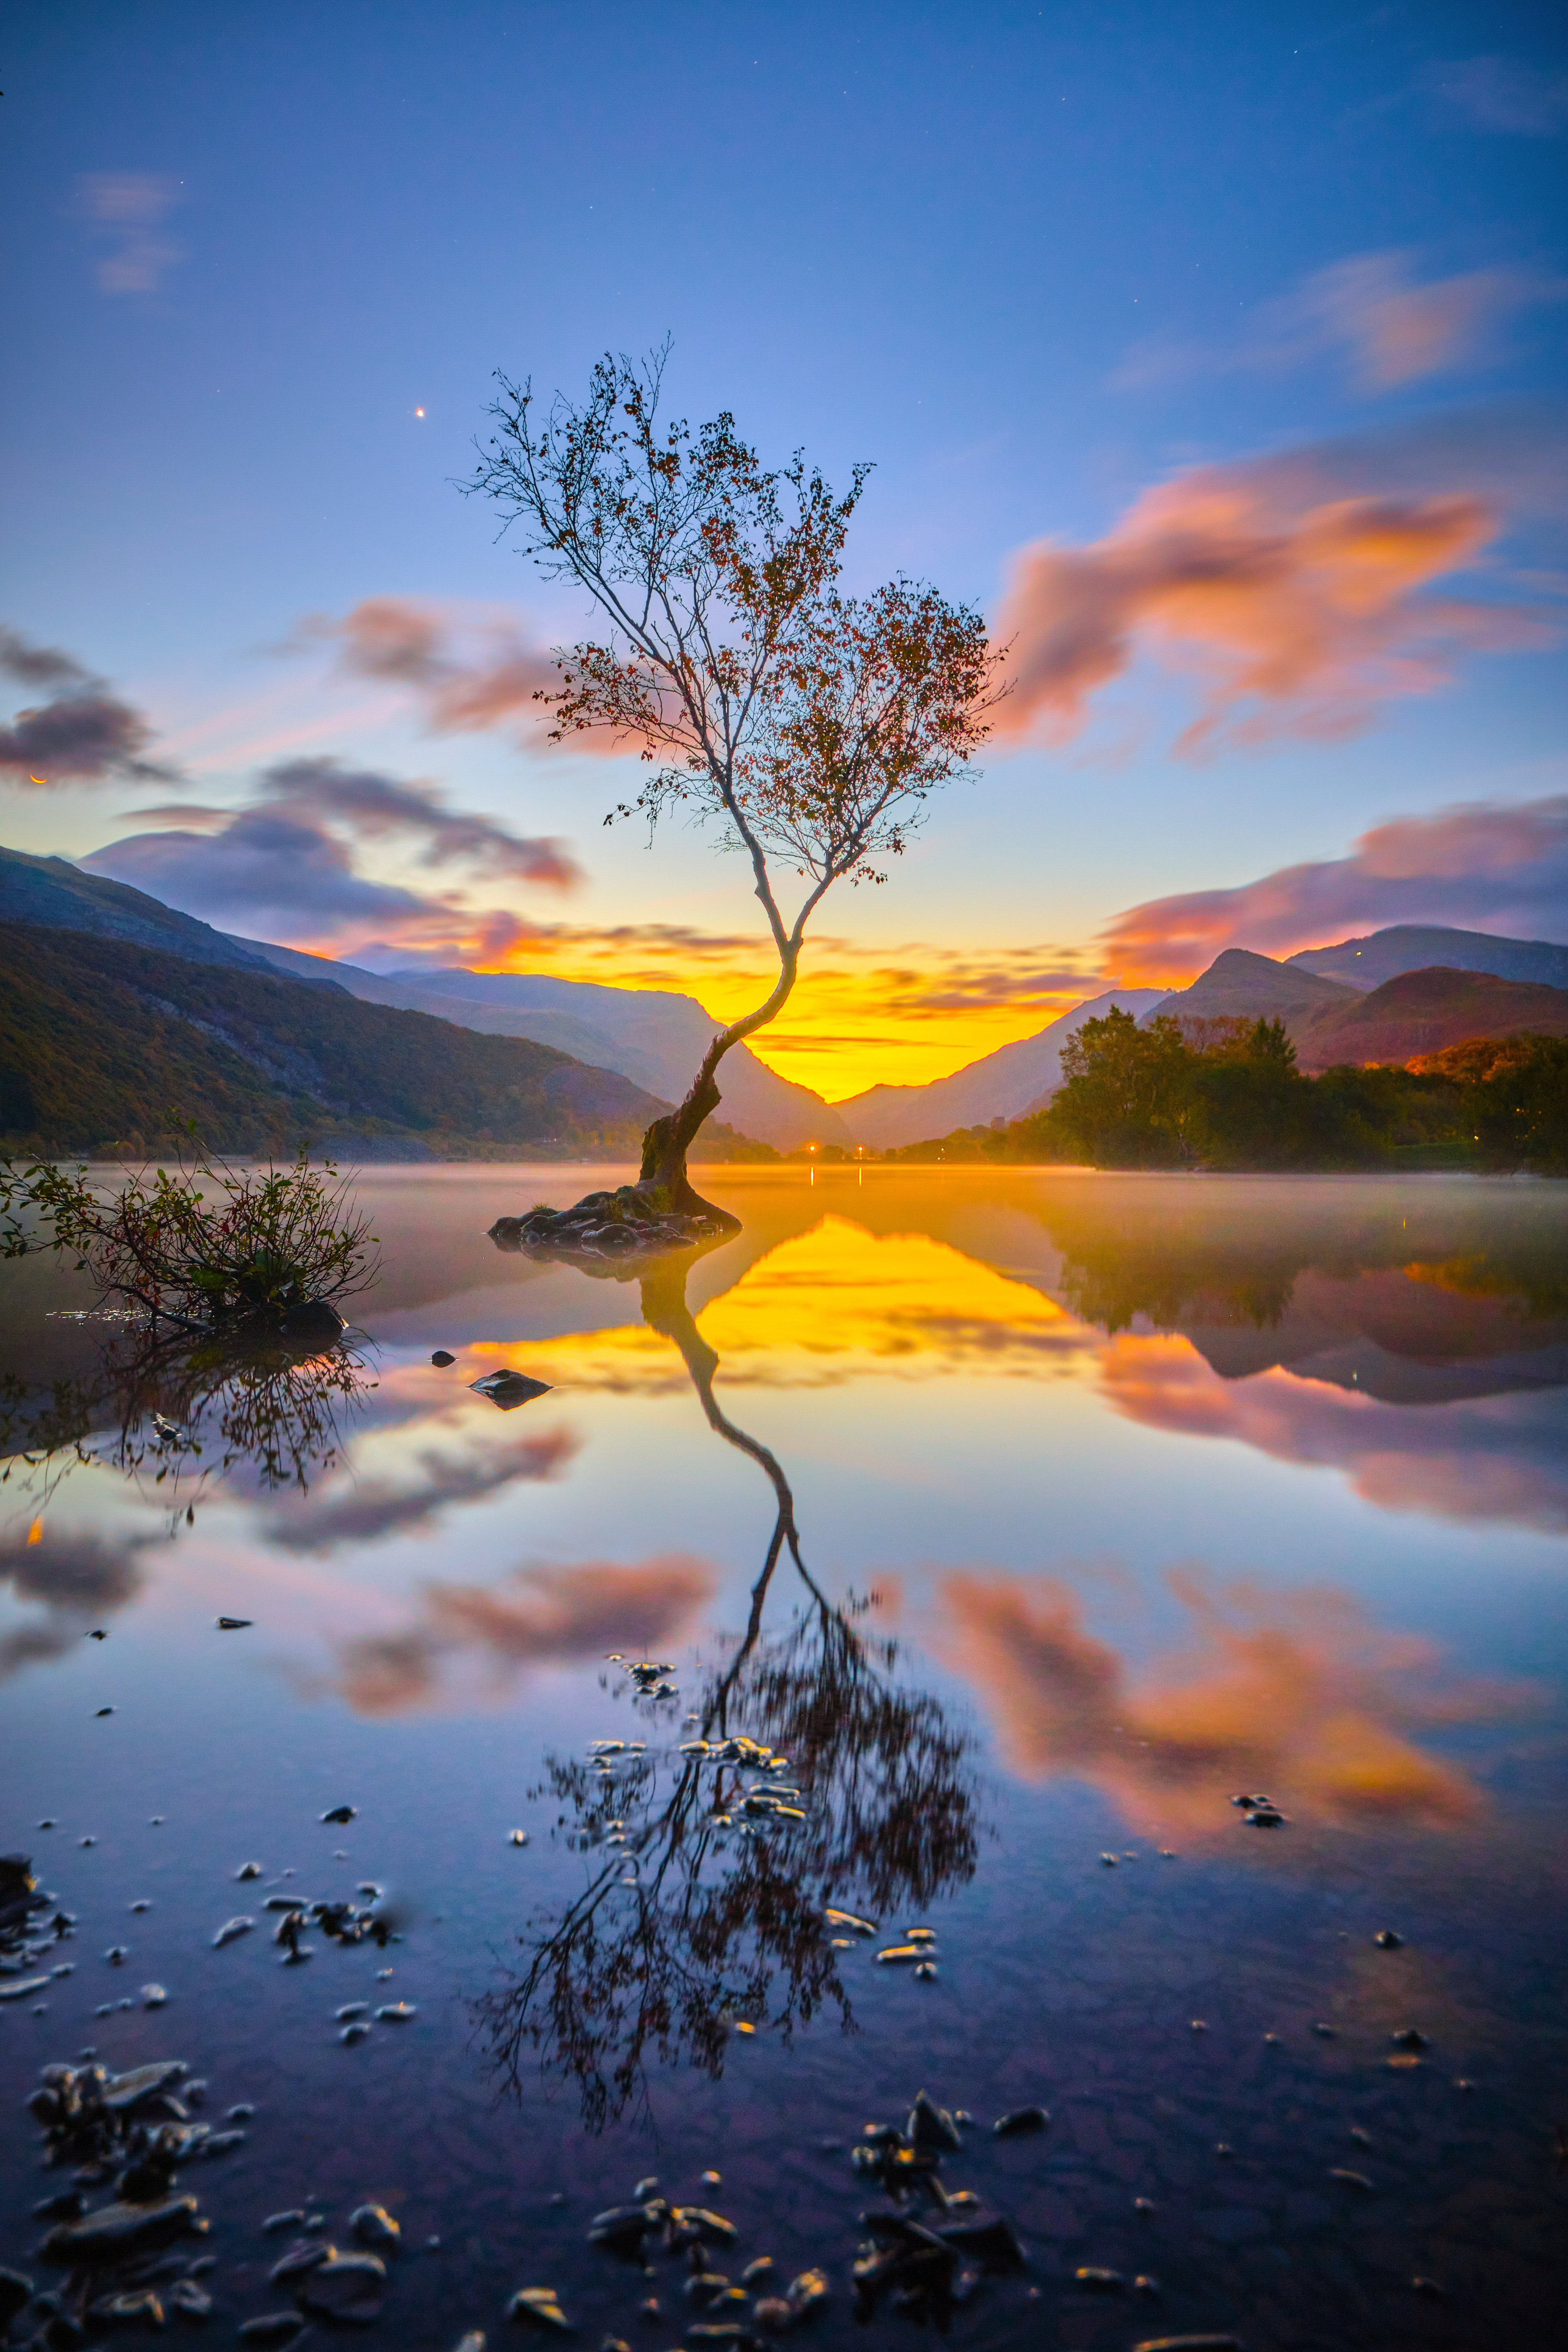
Have you ever taken a scenic photo in portrait orientation and thought to yourself, it might have been better in landscape format? Or, sometimes, it’s just interesting to see what new versions of old images you can create.
That’s where Photoshop 2024’s new Generative Fill tool can come in handy, adding realistic content to enhance an image or give it a different perspective.
Previously, Content Aware Fill could be used to expand the canvas of a photo but it was limited because it was generating the image extension directly from elements in the image itself. It couldn’t create new content and, the larger the canvas extension, the higher the possibility of generating repeating patterns.
Generative Fill differs in two ways; firstly that it can fill much larger areas, and secondly that it can create new content not derived from the original image. So, here’s an image of a tree in a lake, in portrait orientation – but what would it look like as a landscape orientation image?
1) Expand the canvas
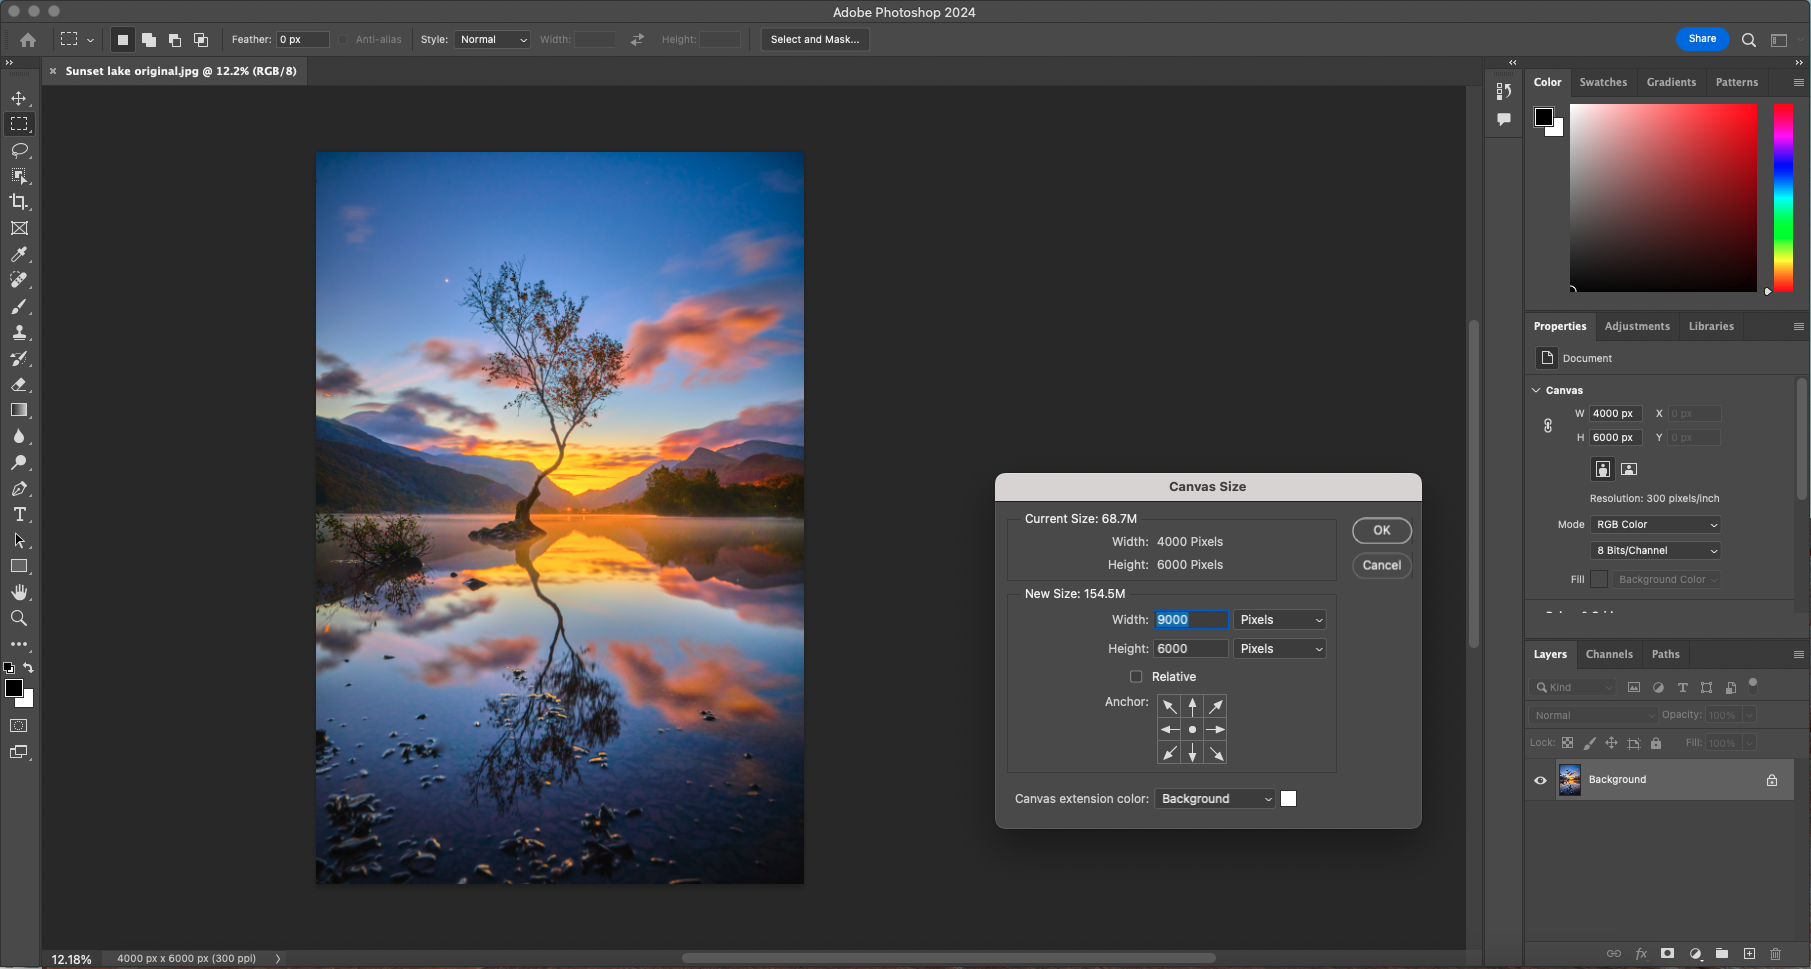
Firstly, increase the canvas size to the new format by going to Image > Canvas Size. The original was 4000 x 6000 px, so enter the new values of 9000 x 6000 px to create the blank panels at the sides. Select the Magic Wand tool and click in the left-side white area to select it all.
2) Feather the selection
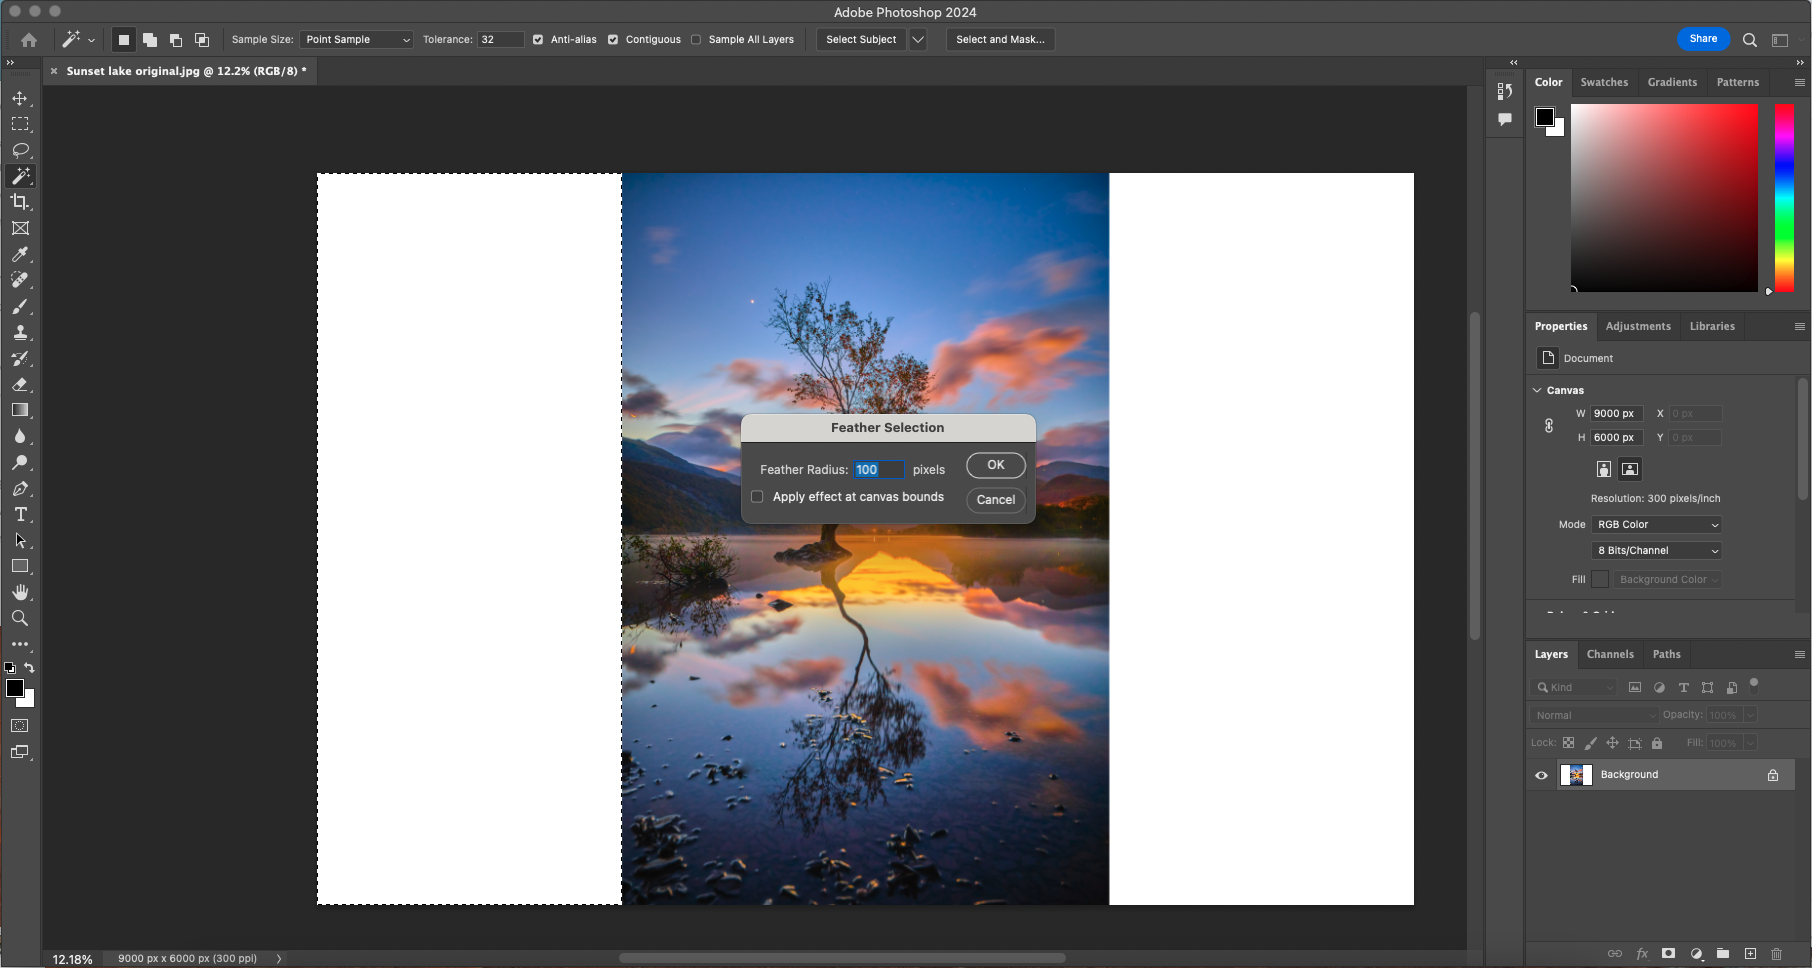
Go to Select > Modify > Feather and enter a value of 100 pixels. A feathered edge helps blend the new content with the old. Ensure that the box to apply the feathering along the boundary is not selected, so only the right side of the selection is feathered.
3) Create new content
At this point the Contextual Task Bar should appear. You can also go to Edit > Generative Fill. Now, like Content Aware Fill, you can just hit Generate and it will create the new content based on what’s in the image. However, you usually get better results by spelling out what you want.
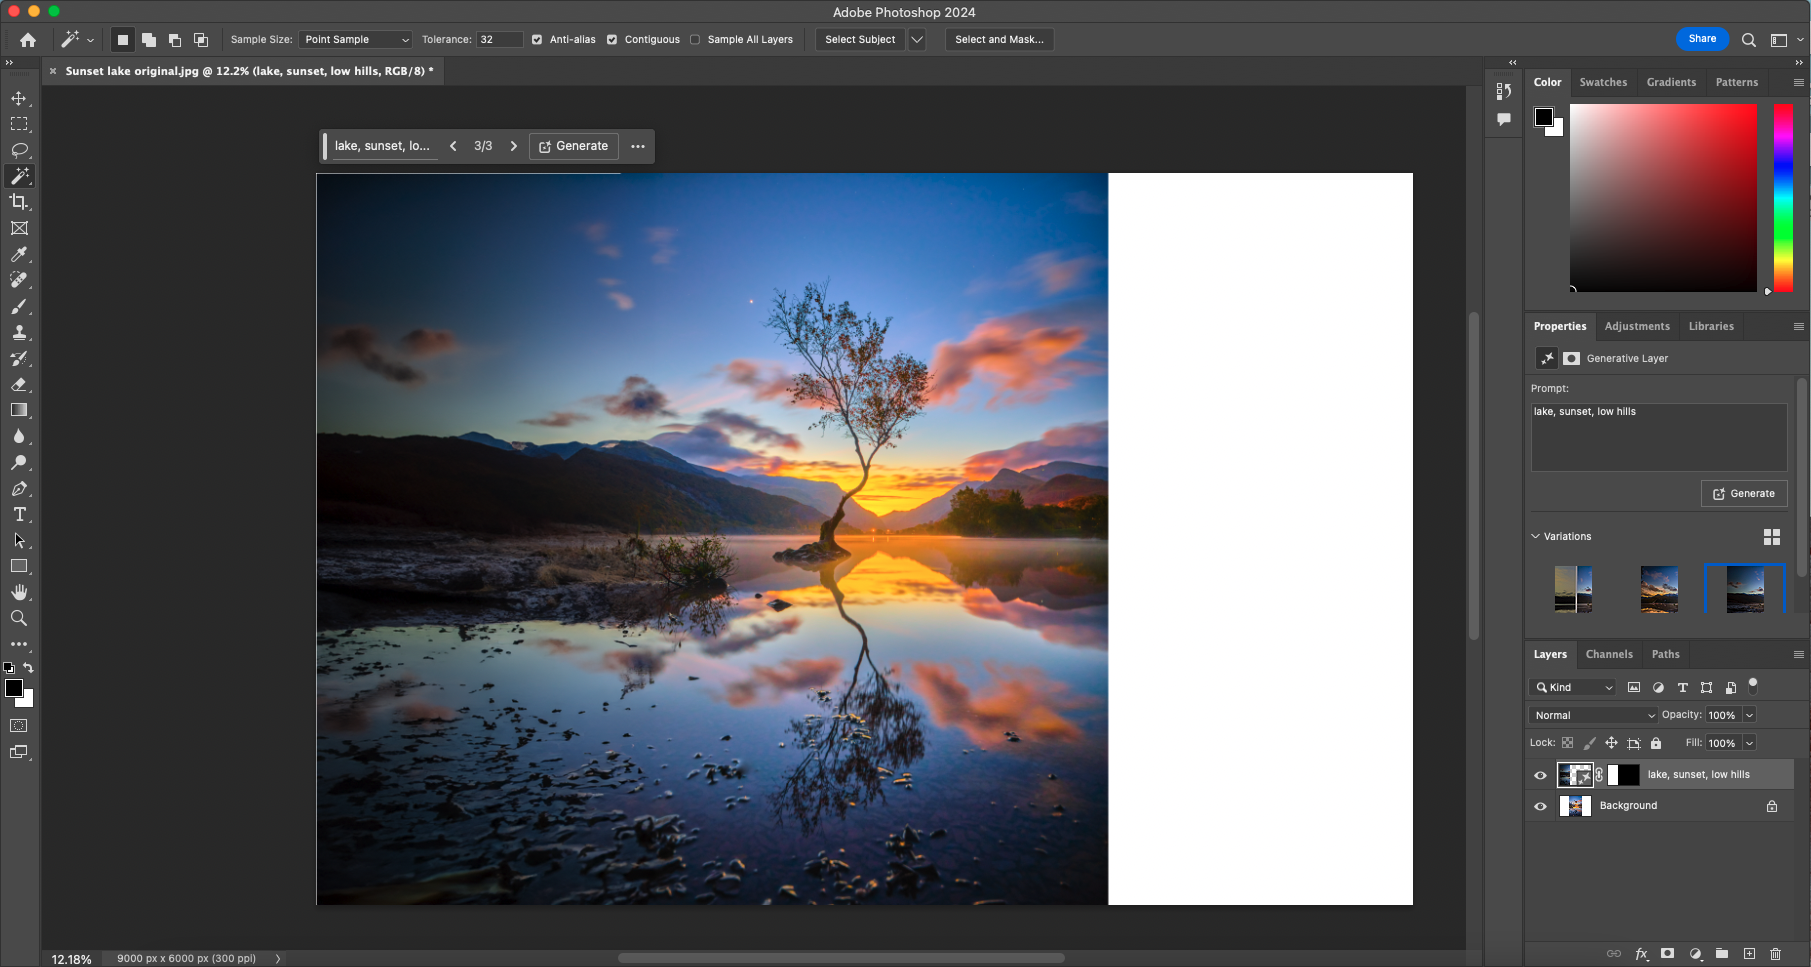
4) Look at the variations
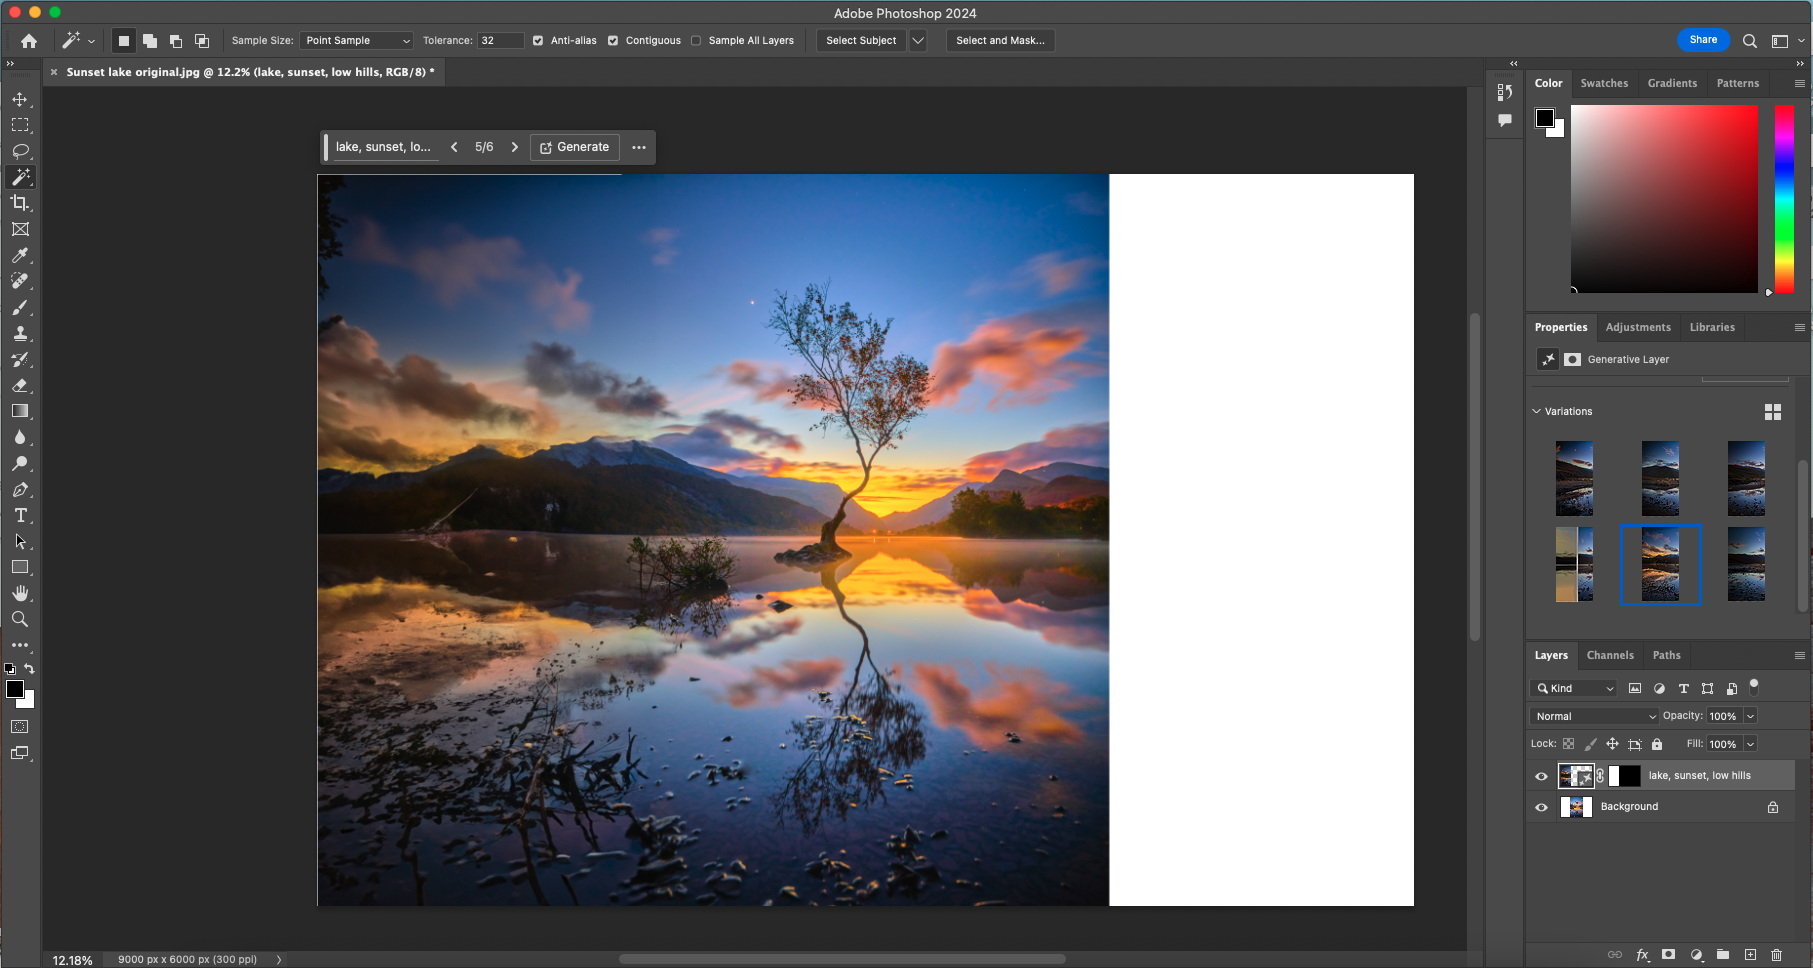
In the Contextual Task Bar you can click on the arrows to scroll through three versions of the new content, to see which is best. Hit Generate to create another three versions if you didn’t like the first three. Also look to the panel on the right, where there are thumbnails of all the versions.
5) Select and blend
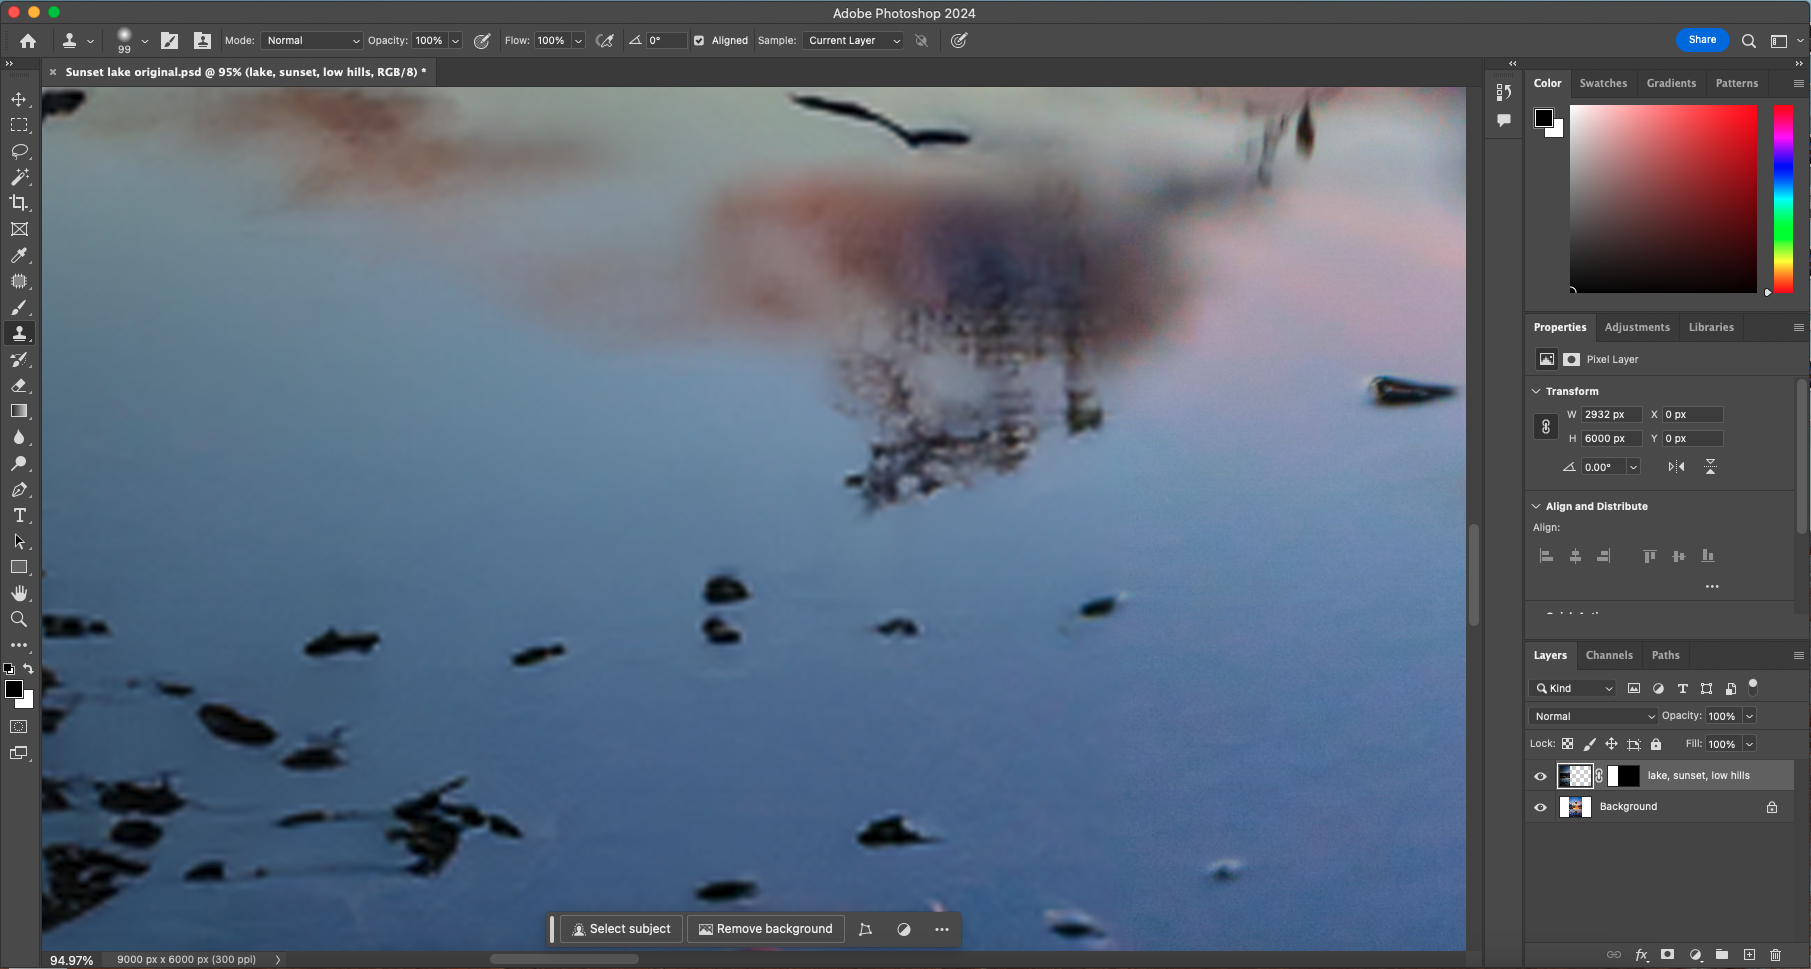
Find one you particularly like and check for errors and also matching brightness. Select the new layer and use Image > Adjustments > Curves to match the exposure more closely. Use the Clone Stamp / Spot Healing Brush / Patch tool to remove errors (you’ll be prompted to rasterize the layer first).
6) Finishing up
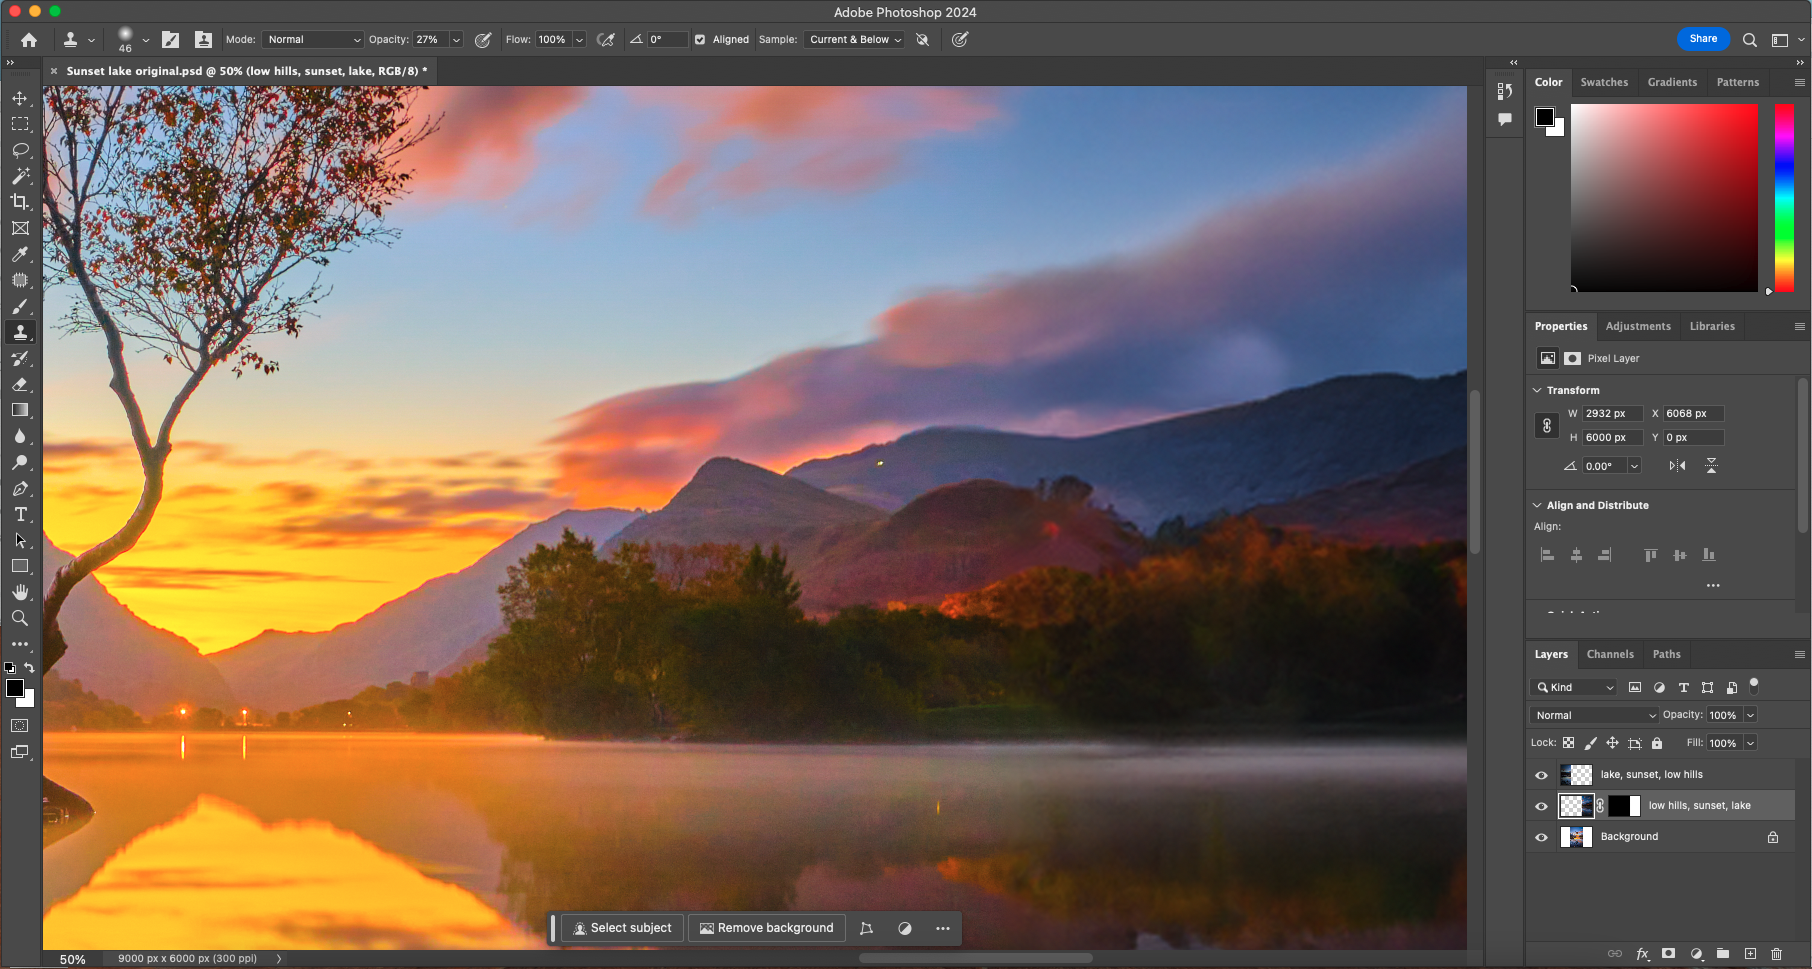
Select the original layer and repeat the process for the right-hand side of the image. If you need to clone over the boundary edge between the new content and original image, select the new content layer, the Clone Stamp tool and tick the box for Sample: Current and Below. Merge the layers and save your new landscape.
If AI is your thing, take a look at the best AI mage generators. If you prefer doing the edits yourself, check out the best photo editing software and the best free photo editing software – and you might want one of the best photo-editing laptops to handle all the processing!


