Knowing how to enable God Mode in Windows 11 or Windows 10 is one of the simplest ways to put Windows' most powerful tools at your fingertips. This little known feature gathers more than 200 tools and settings in one place, as a kind of virtual cheat sheet.
This God Mode feature was first seen in Windows Vista, with most of the options it contains usually located across various parts of the Control Panel. Though Microsoft has now shifted many of the Windows Control Panel's options to the Settings menu, enabling God Mode can still come in very handy.
The tools found in God Mode cover a number of everyday tasks, like adding and removing apps or user accounts, tinkering with disk partitions, creating System Restore points, or adjusting your power settings. God Mode on Windows 11 or 10 really lives up to its name.
In our guide below, we'll explain how to activate God Mode in Windows 11 and 10, and how to use it once it's enabled. There's no risk involved with turning on this hidden feature, other than also making it easier for other people to tweak your settings. So, if you've ever wanted to play God on your Windows PC, here's how to go about it.
Note: We've used screenshots from Windows 11, but these steps will work the same on Windows 10 too.
How to enable God Mode in Windows: Activate God Mode
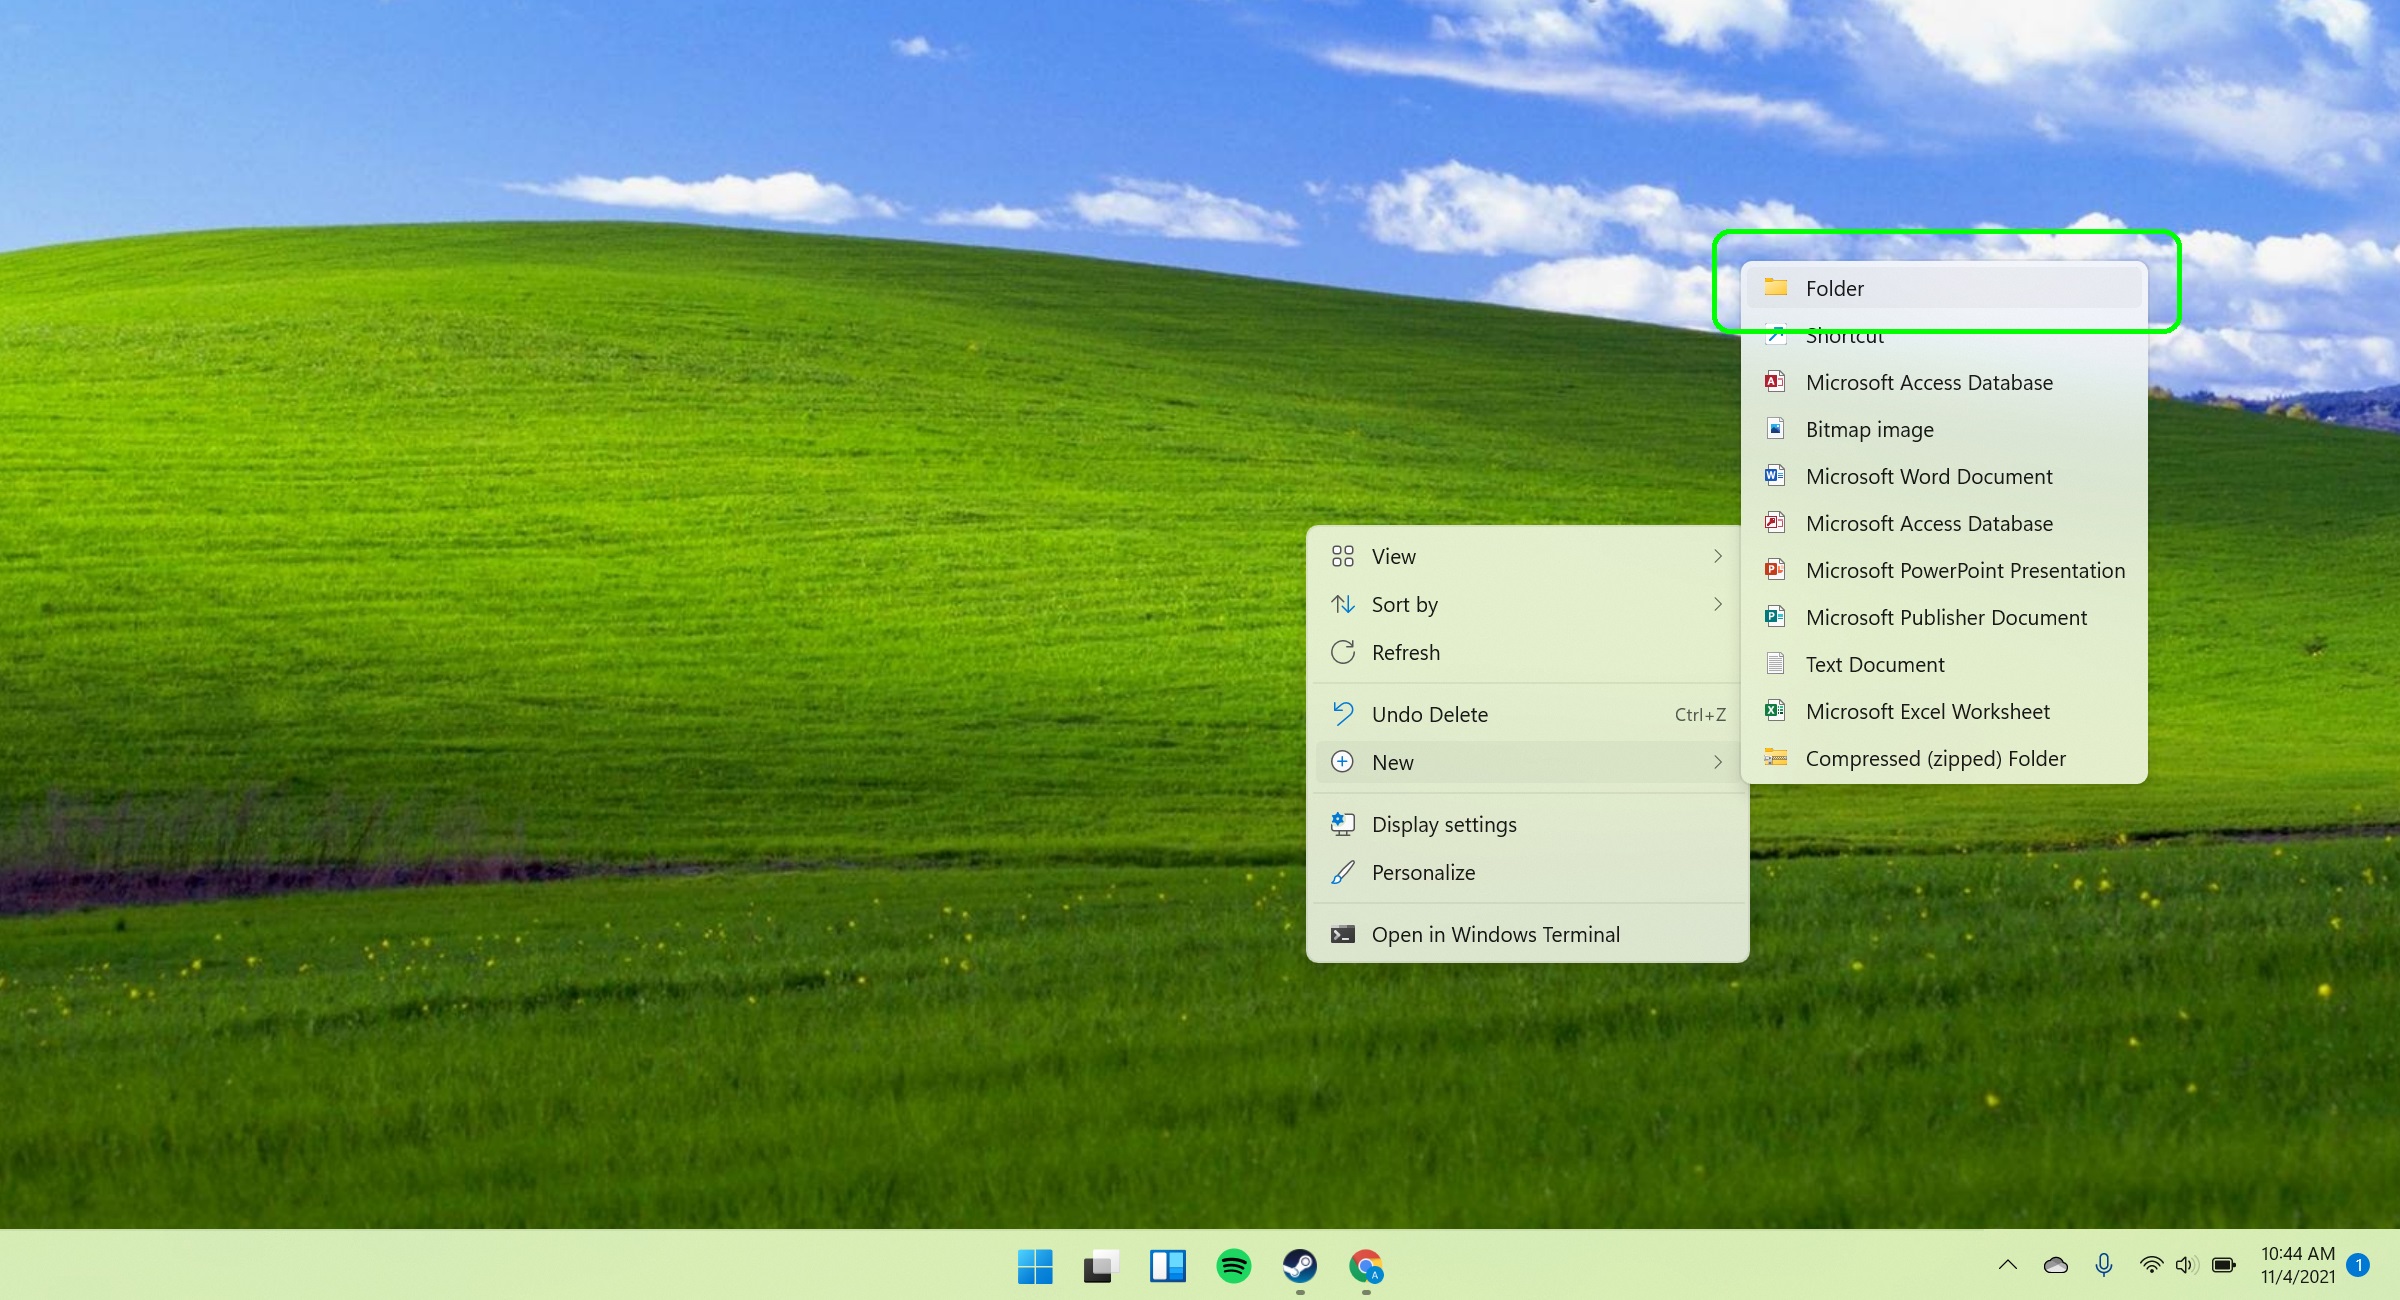
1. Right-click a blank area of your Windows desktop and move your mouse pointer down to New in the context menu. Choose Folder in the side menu that opens.
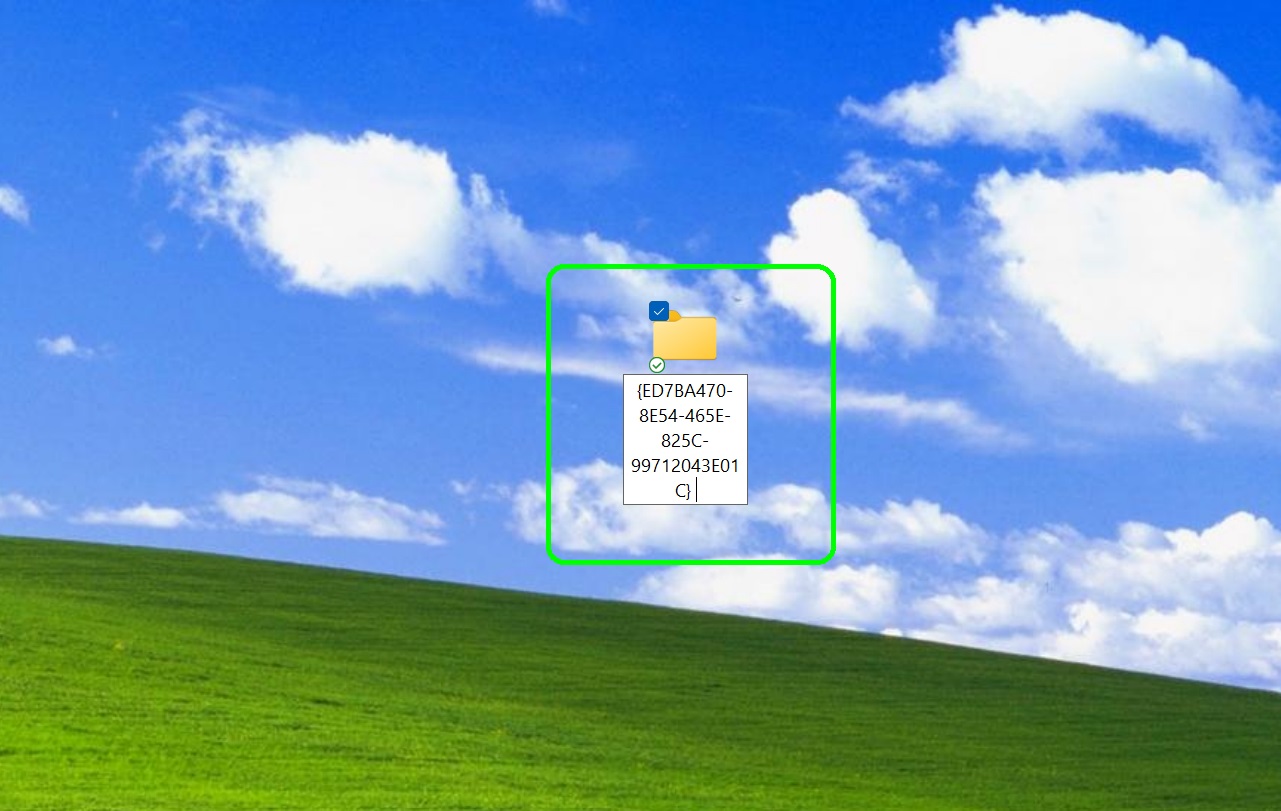
2. Select the new folder on your desktop and either press the F2 key on your keyboard or right-click the folder and choose Rename. Give the folder the following name by copying and pasting the text below:
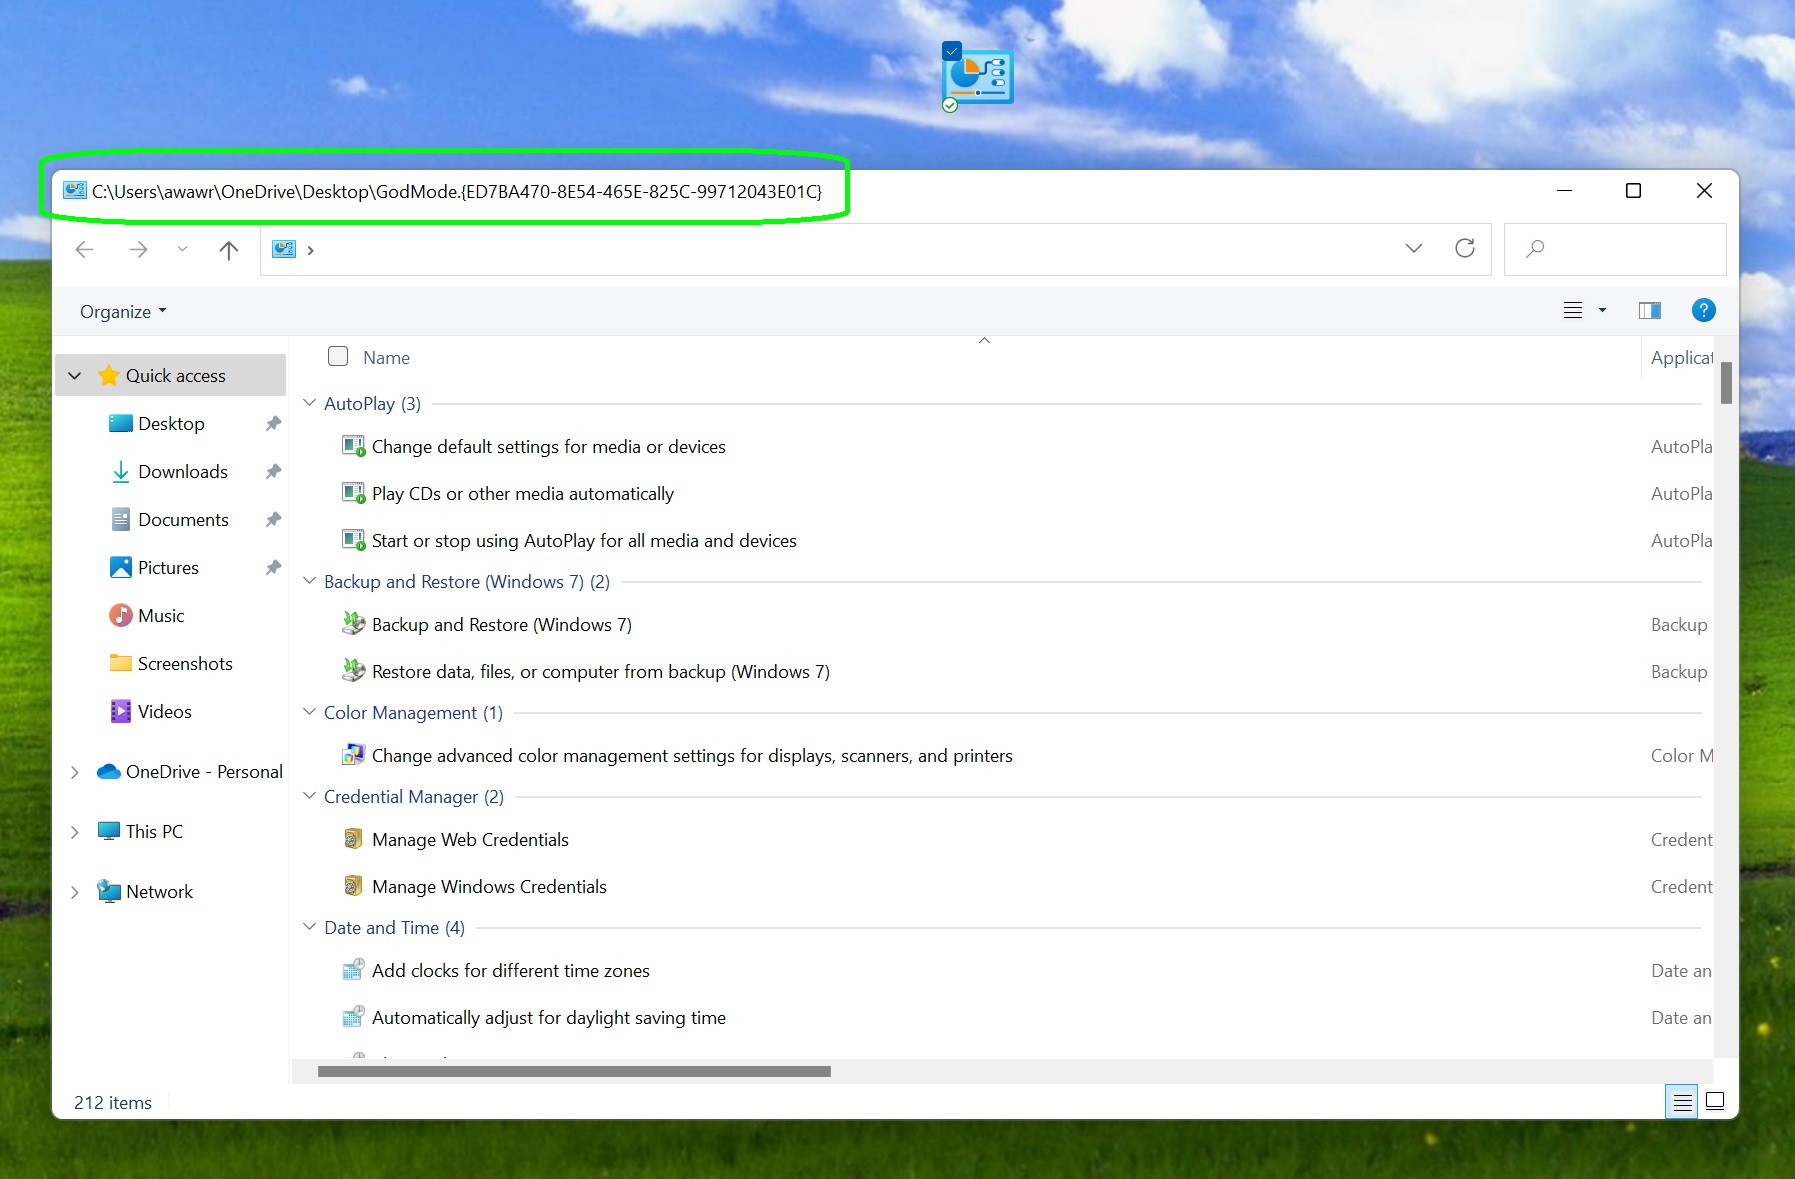
GodMode.{ED7BA470-8E54-465E-825C-99712043E01C}
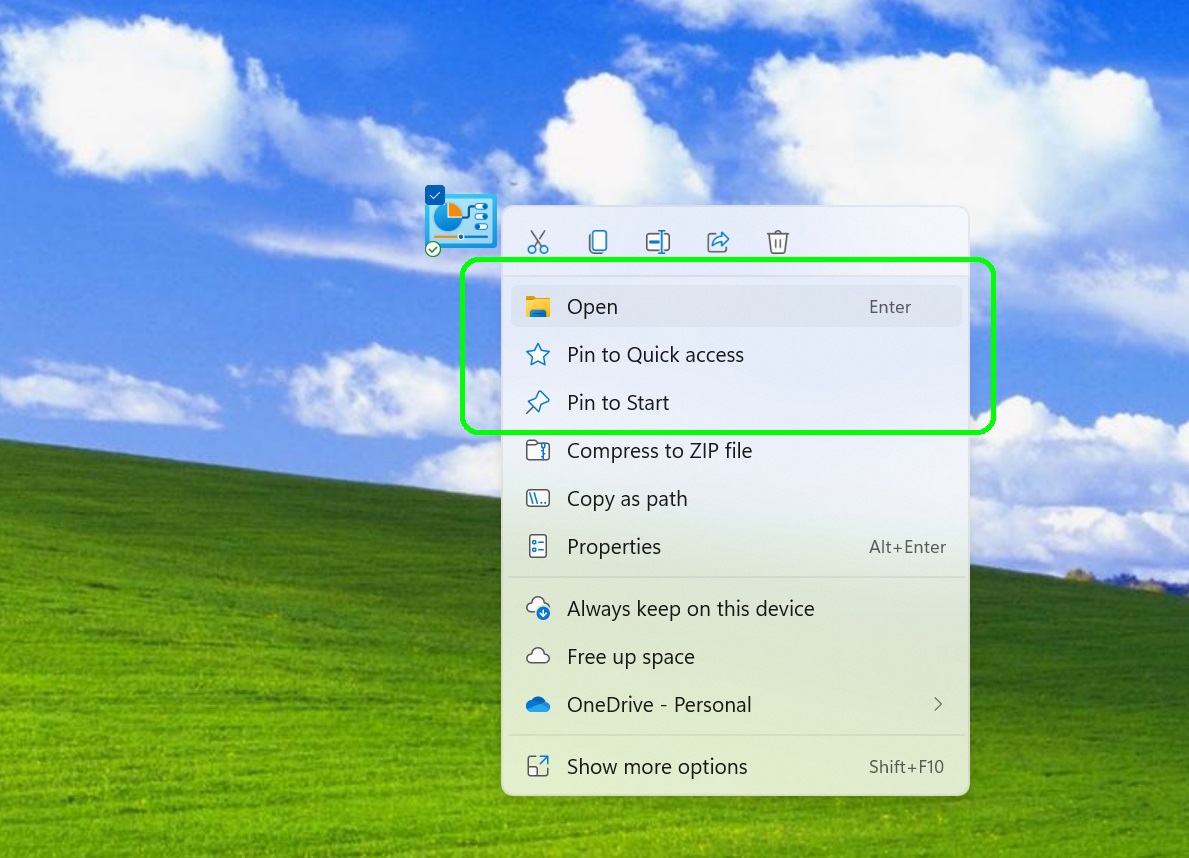
3. Press Enter on your keyboard or click away from the folder to confirm its new name. The folder’s icon may change to a Control Panel icon, as shown below, though sometimes it reverts to the default folder icon. Double-click this to enter God Mode.
Alternatively, right-click the icon and choose Open. This will also let you pin God Mode to the “Quick access” menu in File Explorer.
How to enable God Mode in Windows: Using God Mode
1. When the God Mode folder opens, you’ll be presented with a list of more than 200 Windows tools and settings, organized into categories and sorted alphabetically within them.
Double-click an entry to access that tool or setting, or right-click it and choose Open.
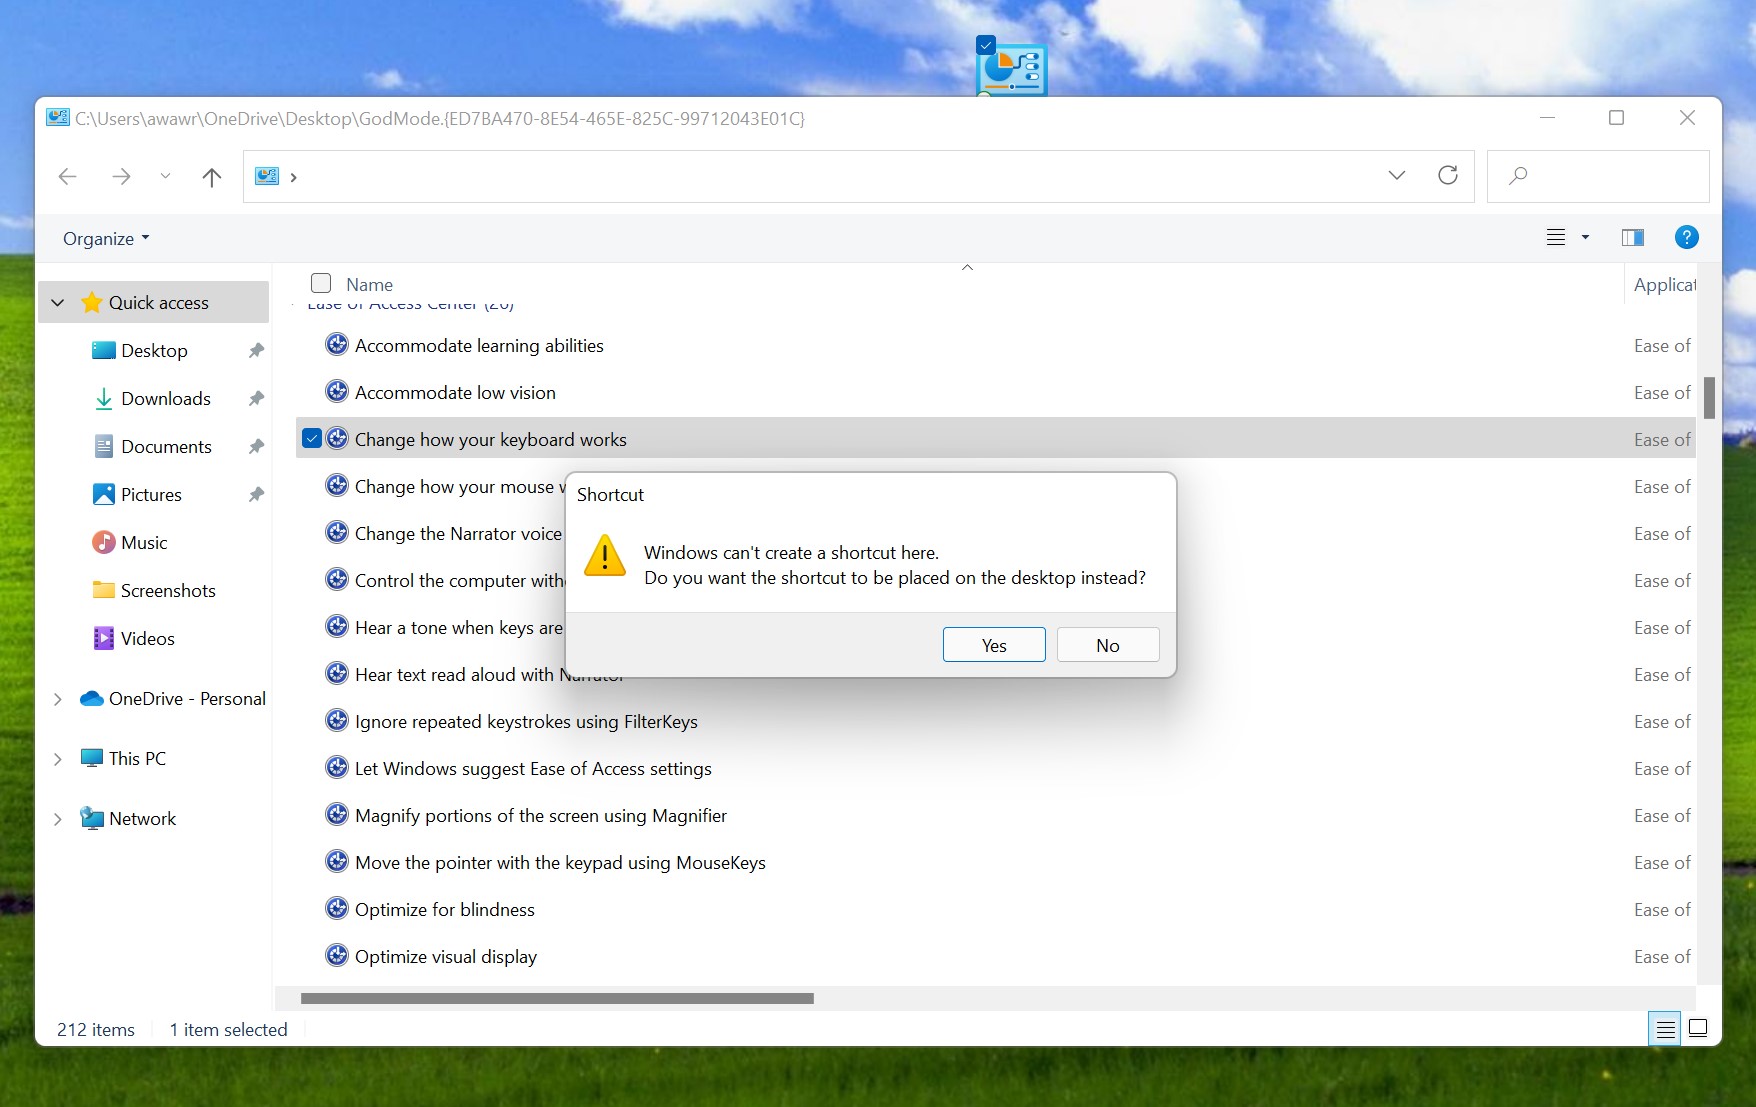
2. For even easier access to a specific Windows tool or setting, right-click its entry and choose “Create shortcut.”
Windows will warn you that you can’t create a shortcut in the God Mode folder, so choose Yes to place the shortcut on your desktop instead.
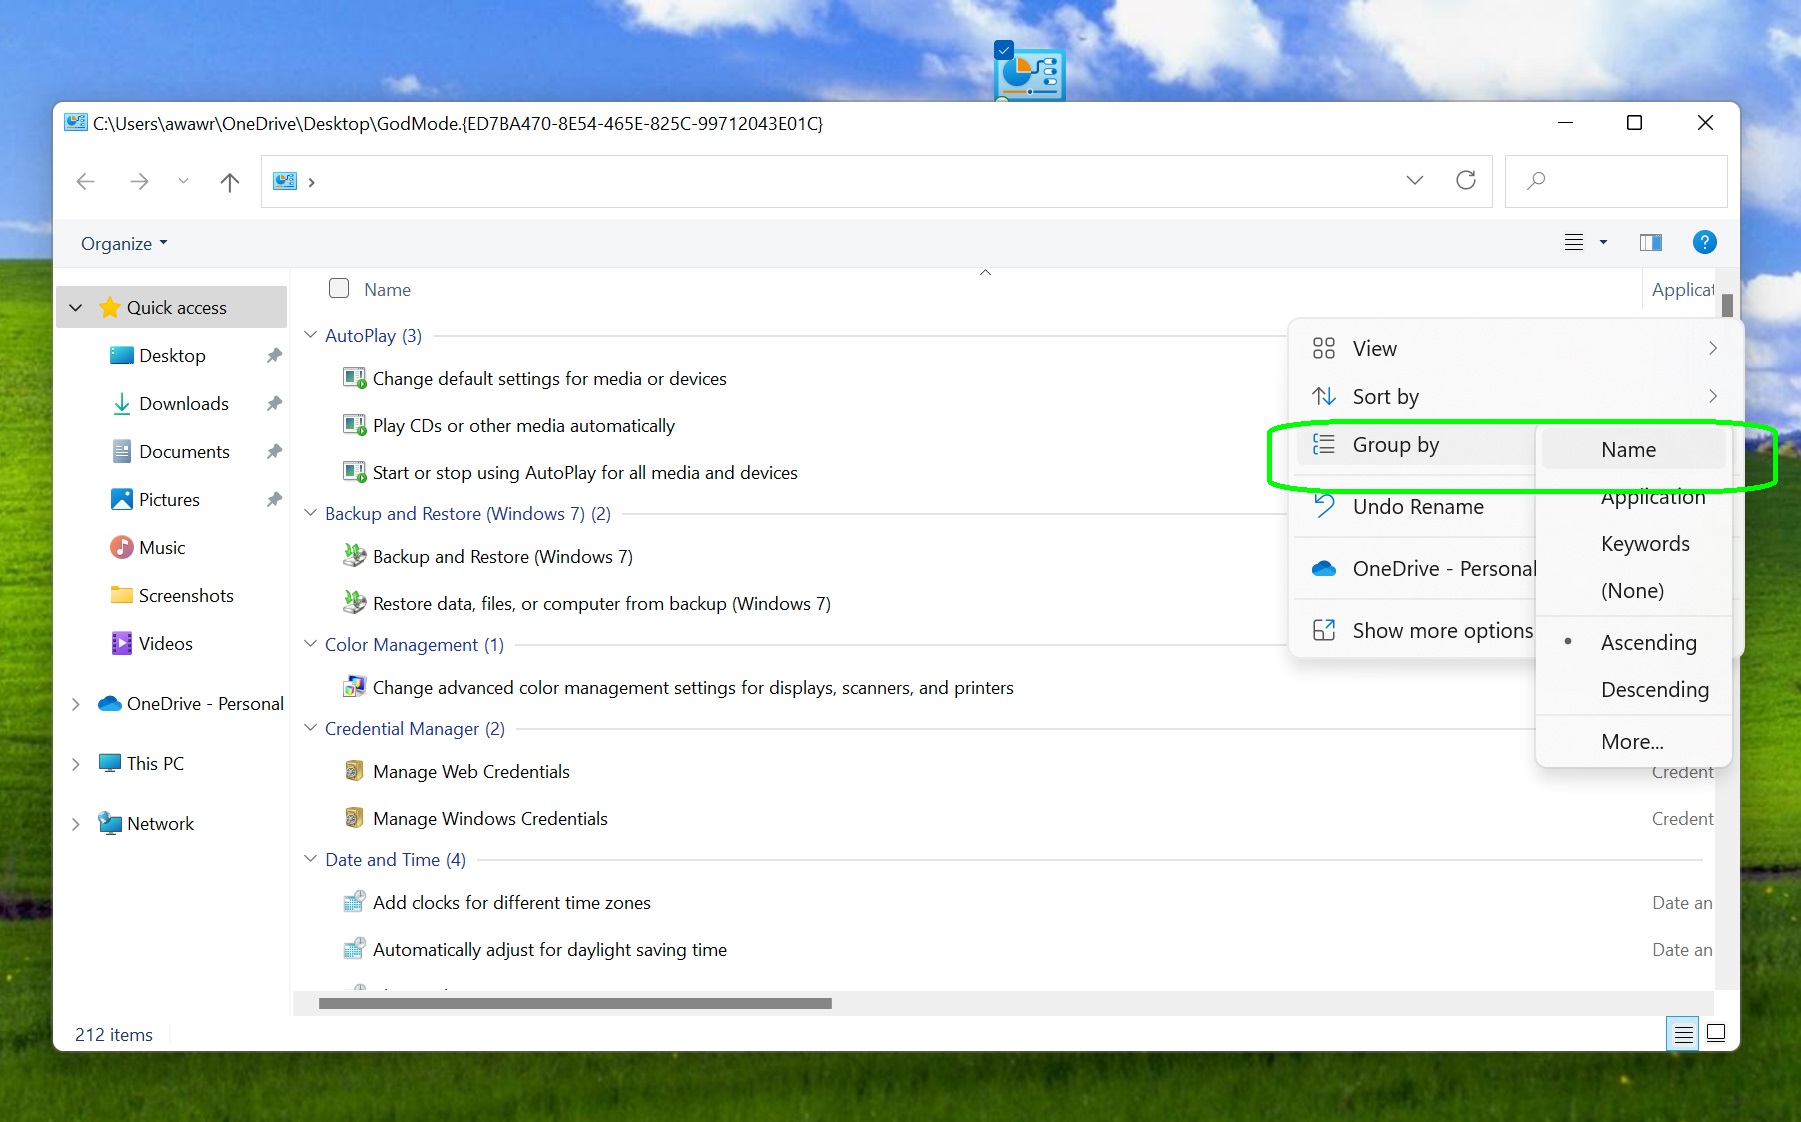
3. If you find God Mode’s category structure difficult to navigate, you can display all its options in one alphabetical list instead. Right-click a blank area of the folder and choose “Group by,” then Name.
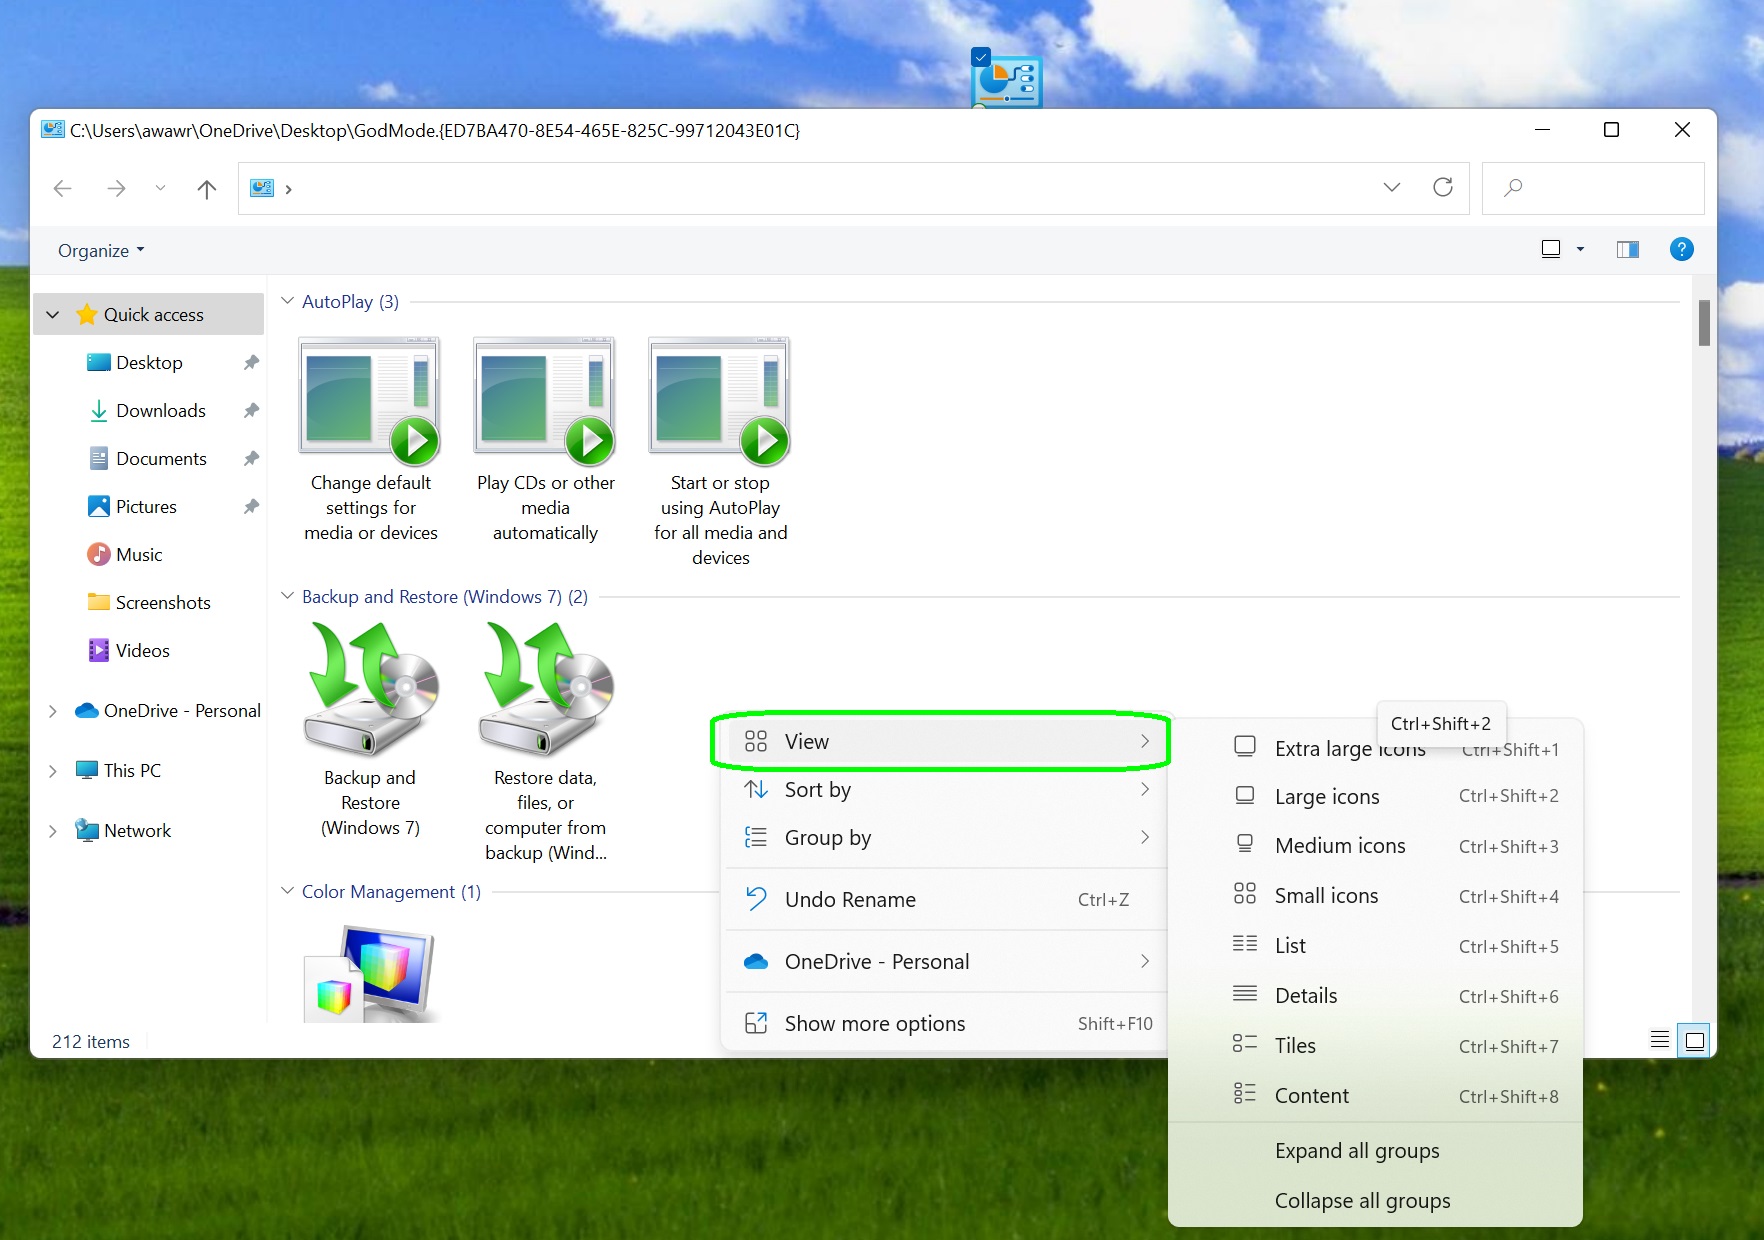
4. Similarly, you can display God Mode’s settings as easily clickable icons rather than text entries in a long list. Right-click a blank area and choose View, then select either “Medium icons” or “Large icons.”
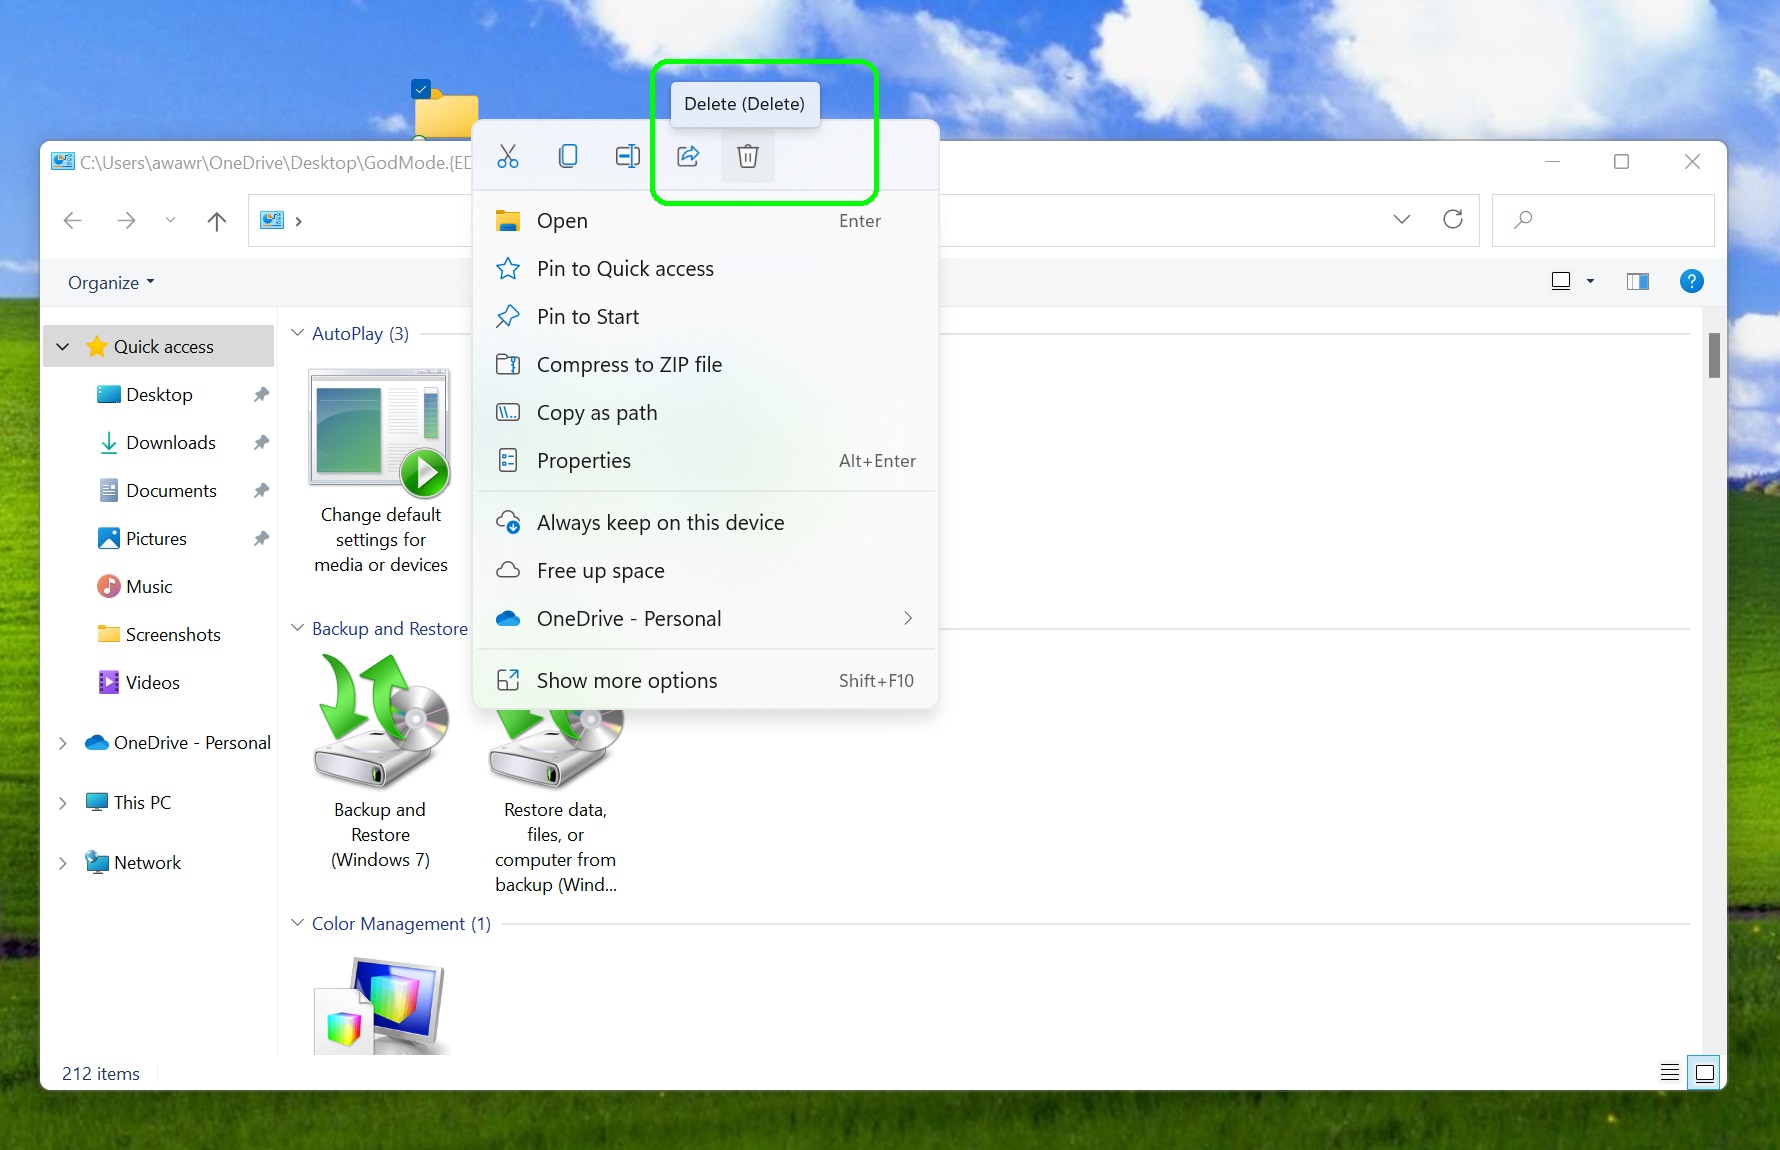
5. If you decide that you don’t want God Mode anymore, in case other people use it to tweak Windows settings without your permission, simply right-click the folder on your desktop and choose Delete.
You’ll still be able to access God Mode's various options individually through the Control Panel in Windows.
More Windows tips
For other Windows trips and ticks check out our guides on how to play Android games on your PC with Google Play Games, how to open Task Manager on Windows and how to create a Kill Switch in Windows.
Fancy dabbling with a bit of AI chat? Learn how to use ChatGPT.


