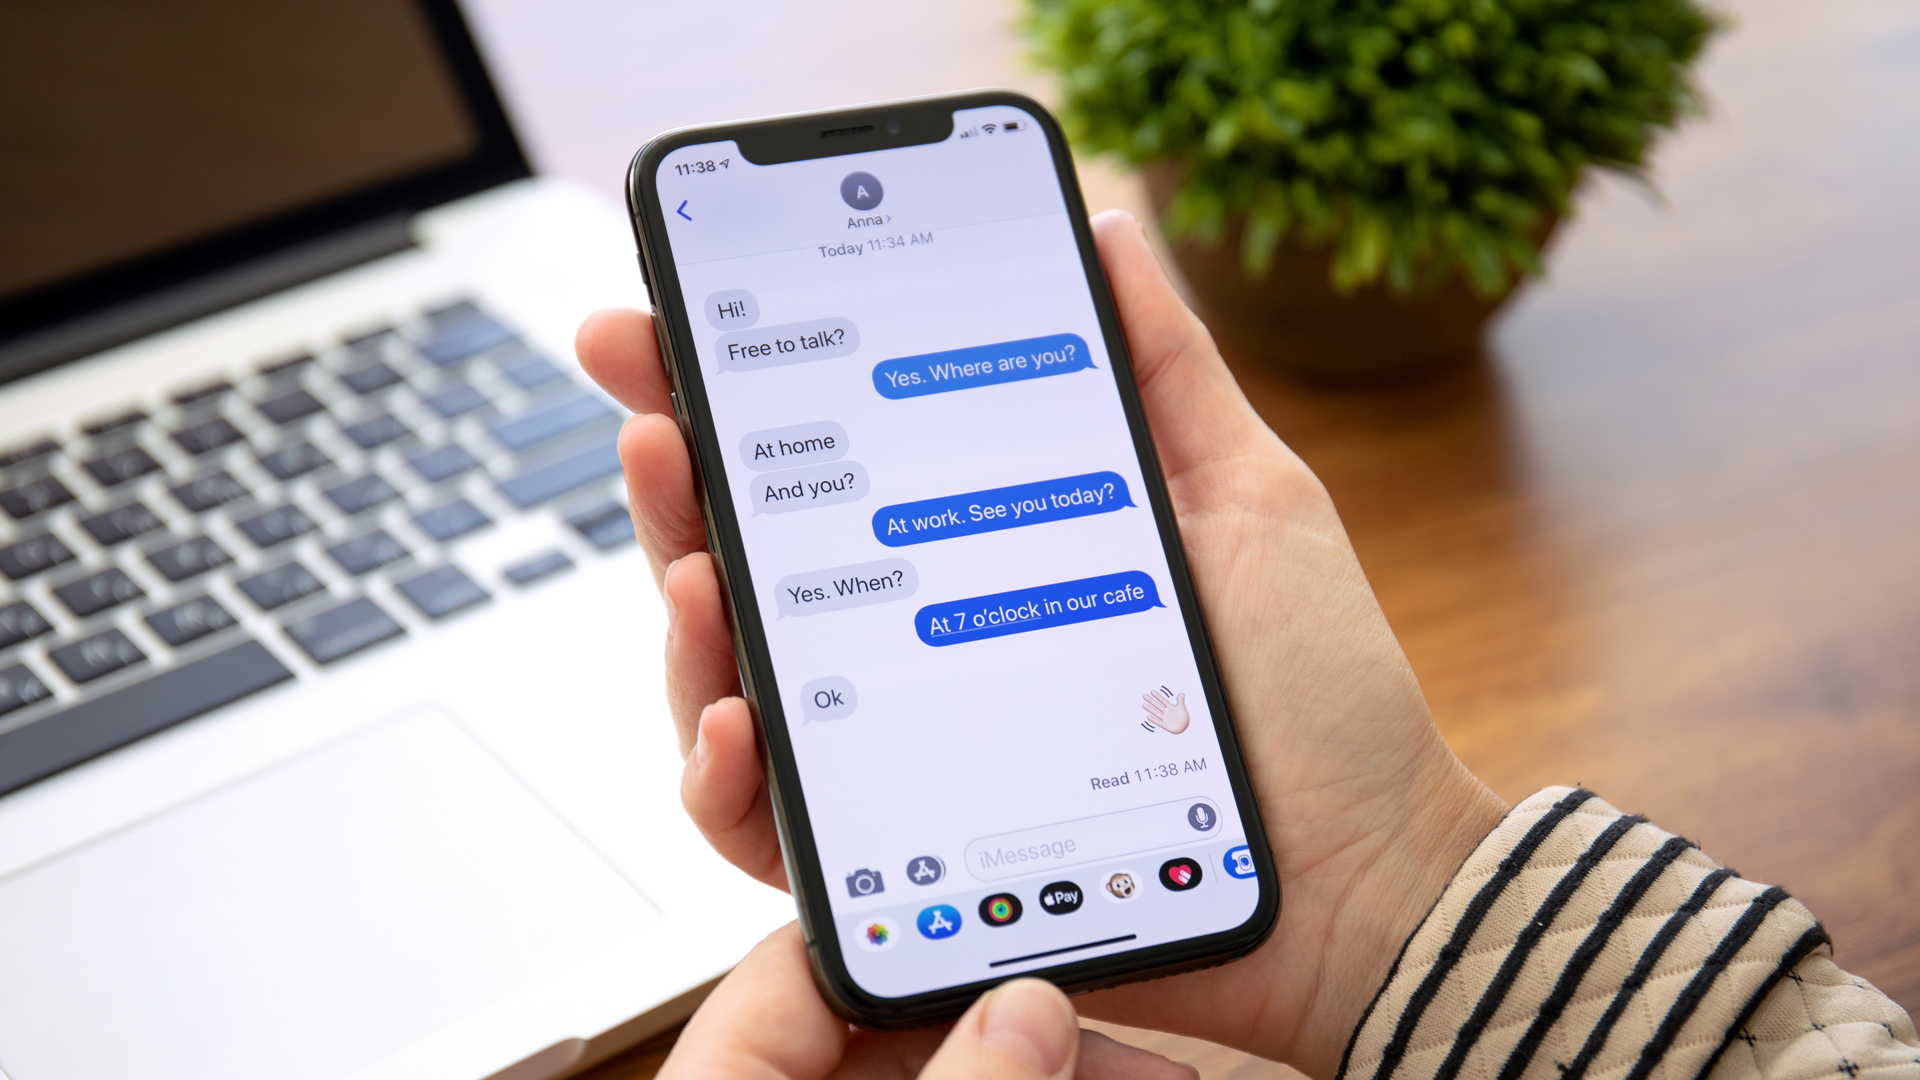
Apple has put a lot of emphasis on security over the past few years, and the release of iOS 17.2 comes with a brand new feature. Contact Key Verification (CKV) is a new setting for iMessage, which ensures you can be certain that the person you’re messaging is who you think they are.
Simply put, the feature is designed to keep unwanted parties out of your private conversations. Whether they’re simplifying snooping on what’s going on, or actively attempting to trick you into thinking they’re someone else. It’s not something you really need to be worried about, but it is available for your own peace of mind.
Here’s how to enable iMessage’s Contact Key Verification in iOS 17.2.
What is Contact Key Verification?
Contact Key Verification is an opt-in setting for iMessage, designed to offer automatic alerts if unverified devices are detected. The idea here is that once you have Contact Key Verification set up on your iMessage account, each device has its own public verification key.
The warning comes when a device suddenly appears in an iMessage account that isn’t recognized. It suggests that someone has snuck their way into a conversation in a way that would otherwise be undetected.
Apple has made it clear that it’s never seen this kind of attack happen before. So CKV is a case of Apple being proactive with its security measures, rather than trying to catch up with bad actors that are actively exploiting security holes.
CKV is a feature that won’t be particularly useful for ordinary people. You’re just not interesting enough to warrant the amount of effort it would take to try and bypass Apple’s existing security measure. Instead this is for people who would be common targets, like politicians, journalists, human rights activists and so on.
Not that there’s any disadvantage to having Contact Key Verification enabled, There’s no such thing as too much security when it comes to private messages.
How to enable Contact Key Verification in iOS 17.2
Note: this feature only works on iPhones running iOS 17.2 or later.
1. Update your software to iOS 17.2
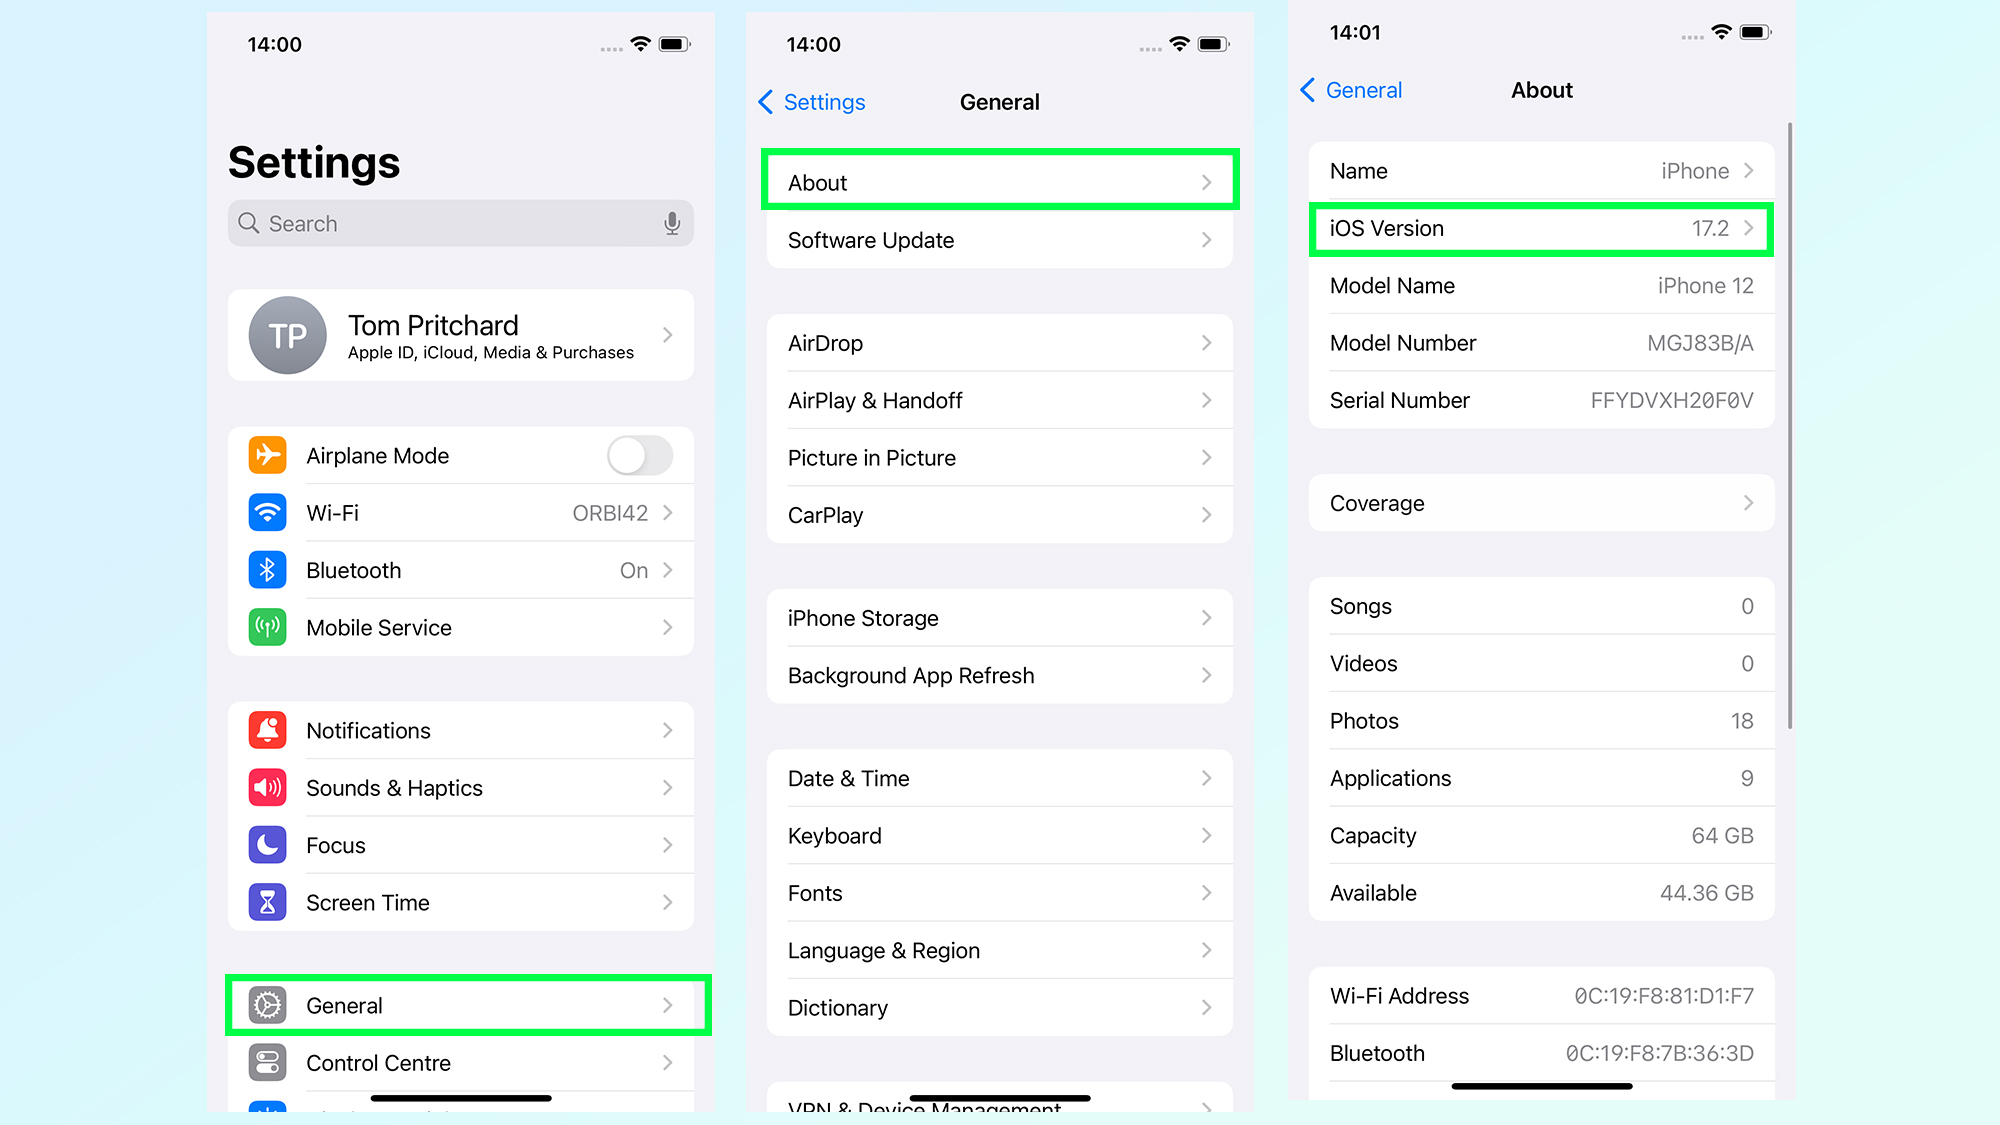
Contact Key Verification is only available if you’re upgraded to iOS 17.2 or higher. You can check this by heading to Settings > General > About or alternatively going from General to Software Update to check for any pending upgrades to your OS.
For the time being iOS 17.2 is only available in beta. Be sure to check out our guide on how to install the iOS 17 public beta to access the update ahead of the public release.
2. Open Settings and tap your name
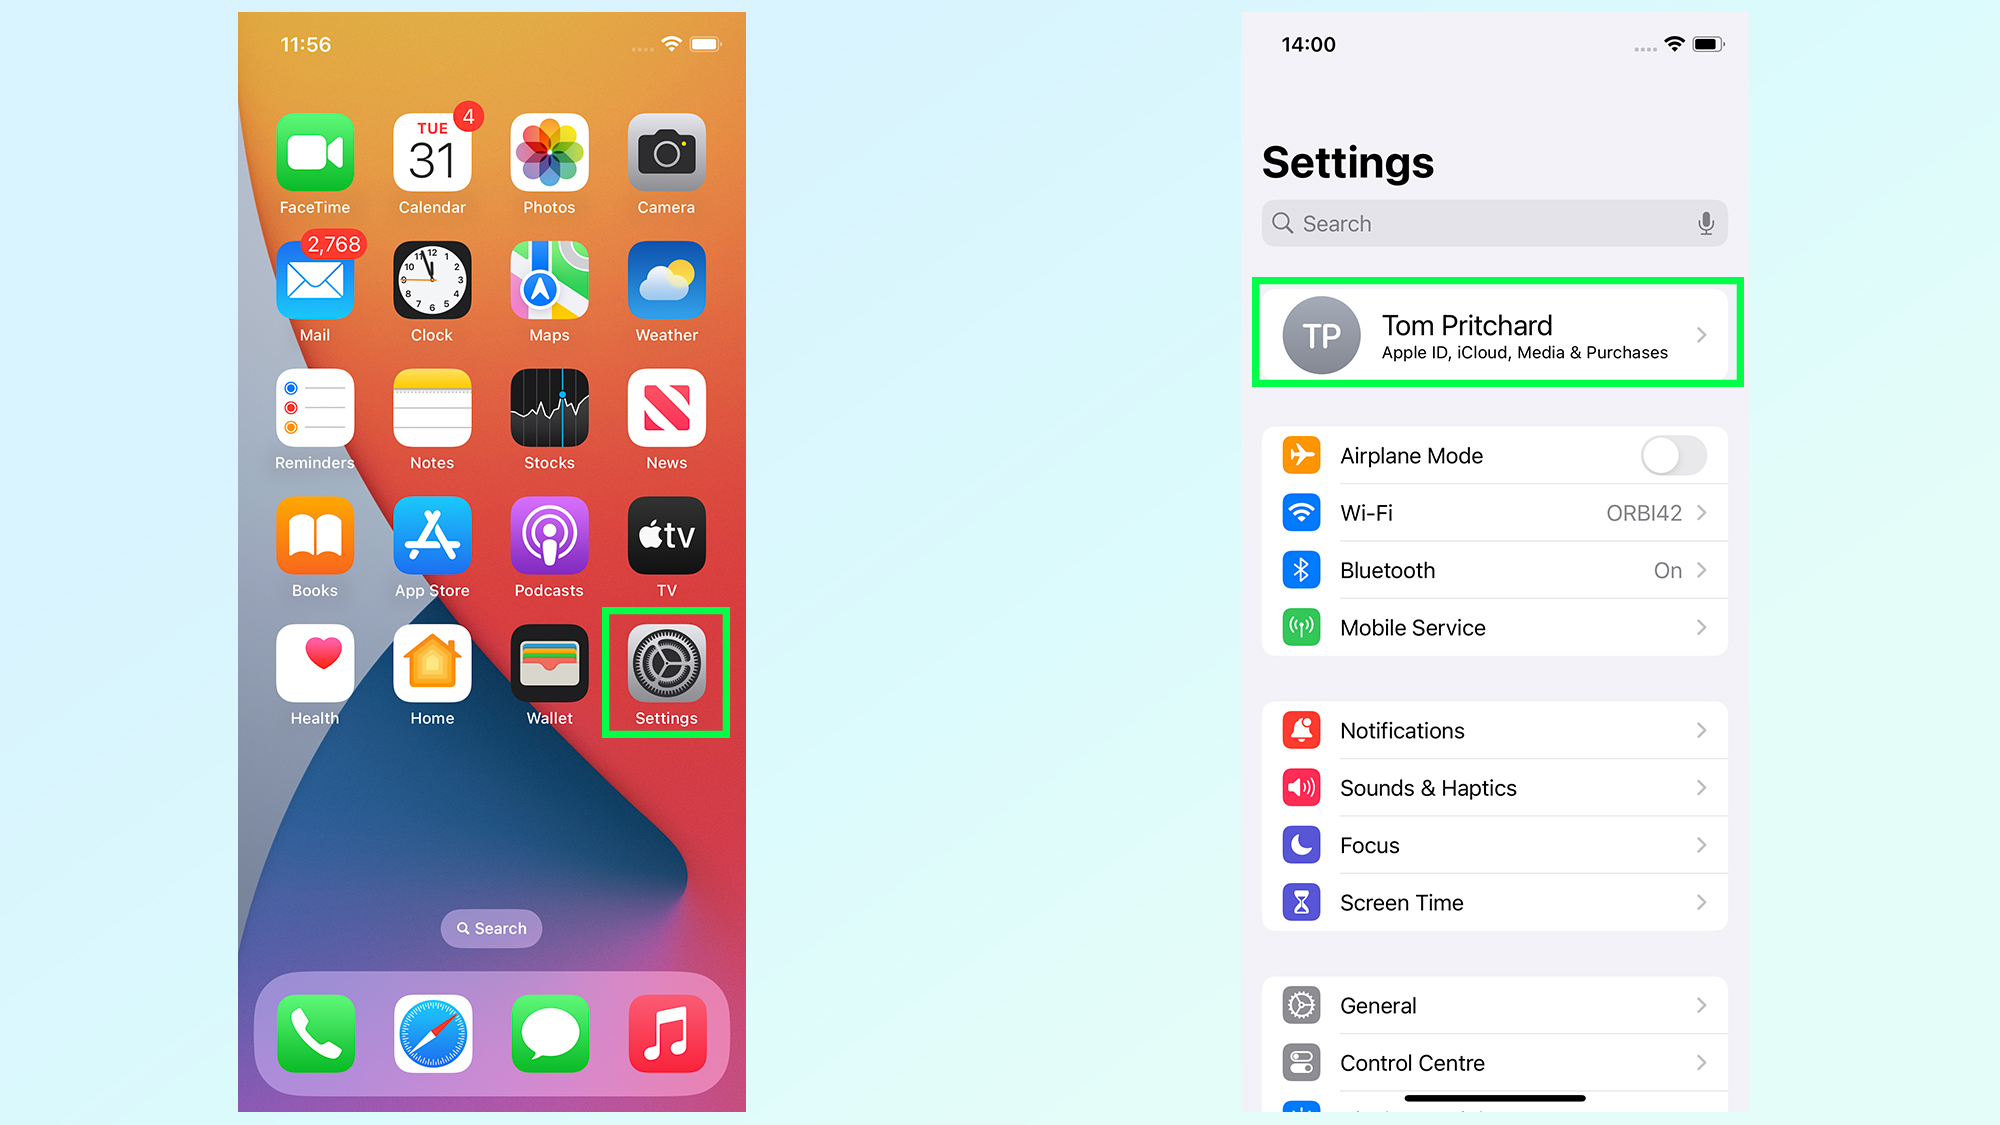
Open the Settings app, then tap your name at the very top of the screen to open Apple ID settings.
3. Scroll down to find Contact Key Verification
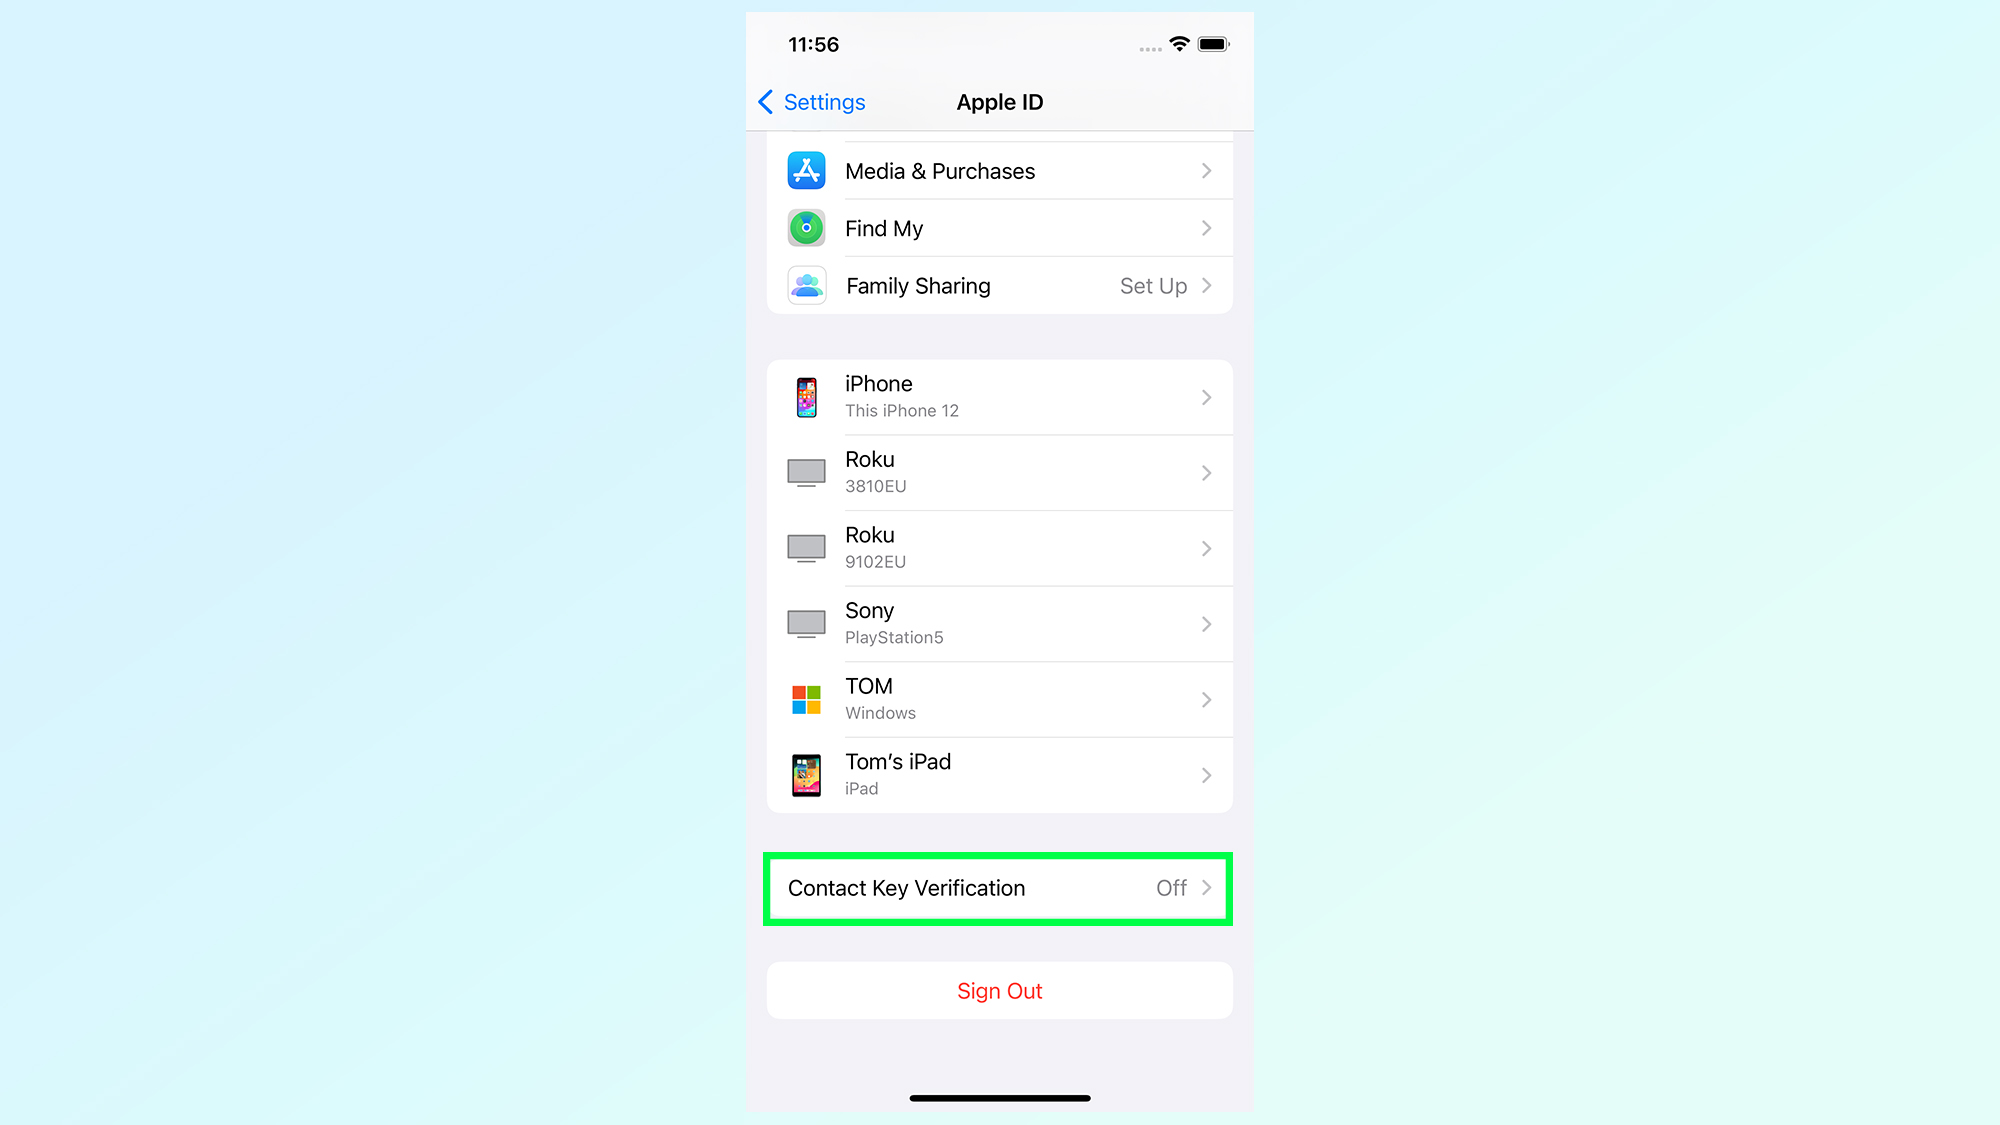
You'll need to scroll down to the very bottom of the page and tap Contact Key Verification.
4. Toggle on 'Verification in iMessage' and tap Continue
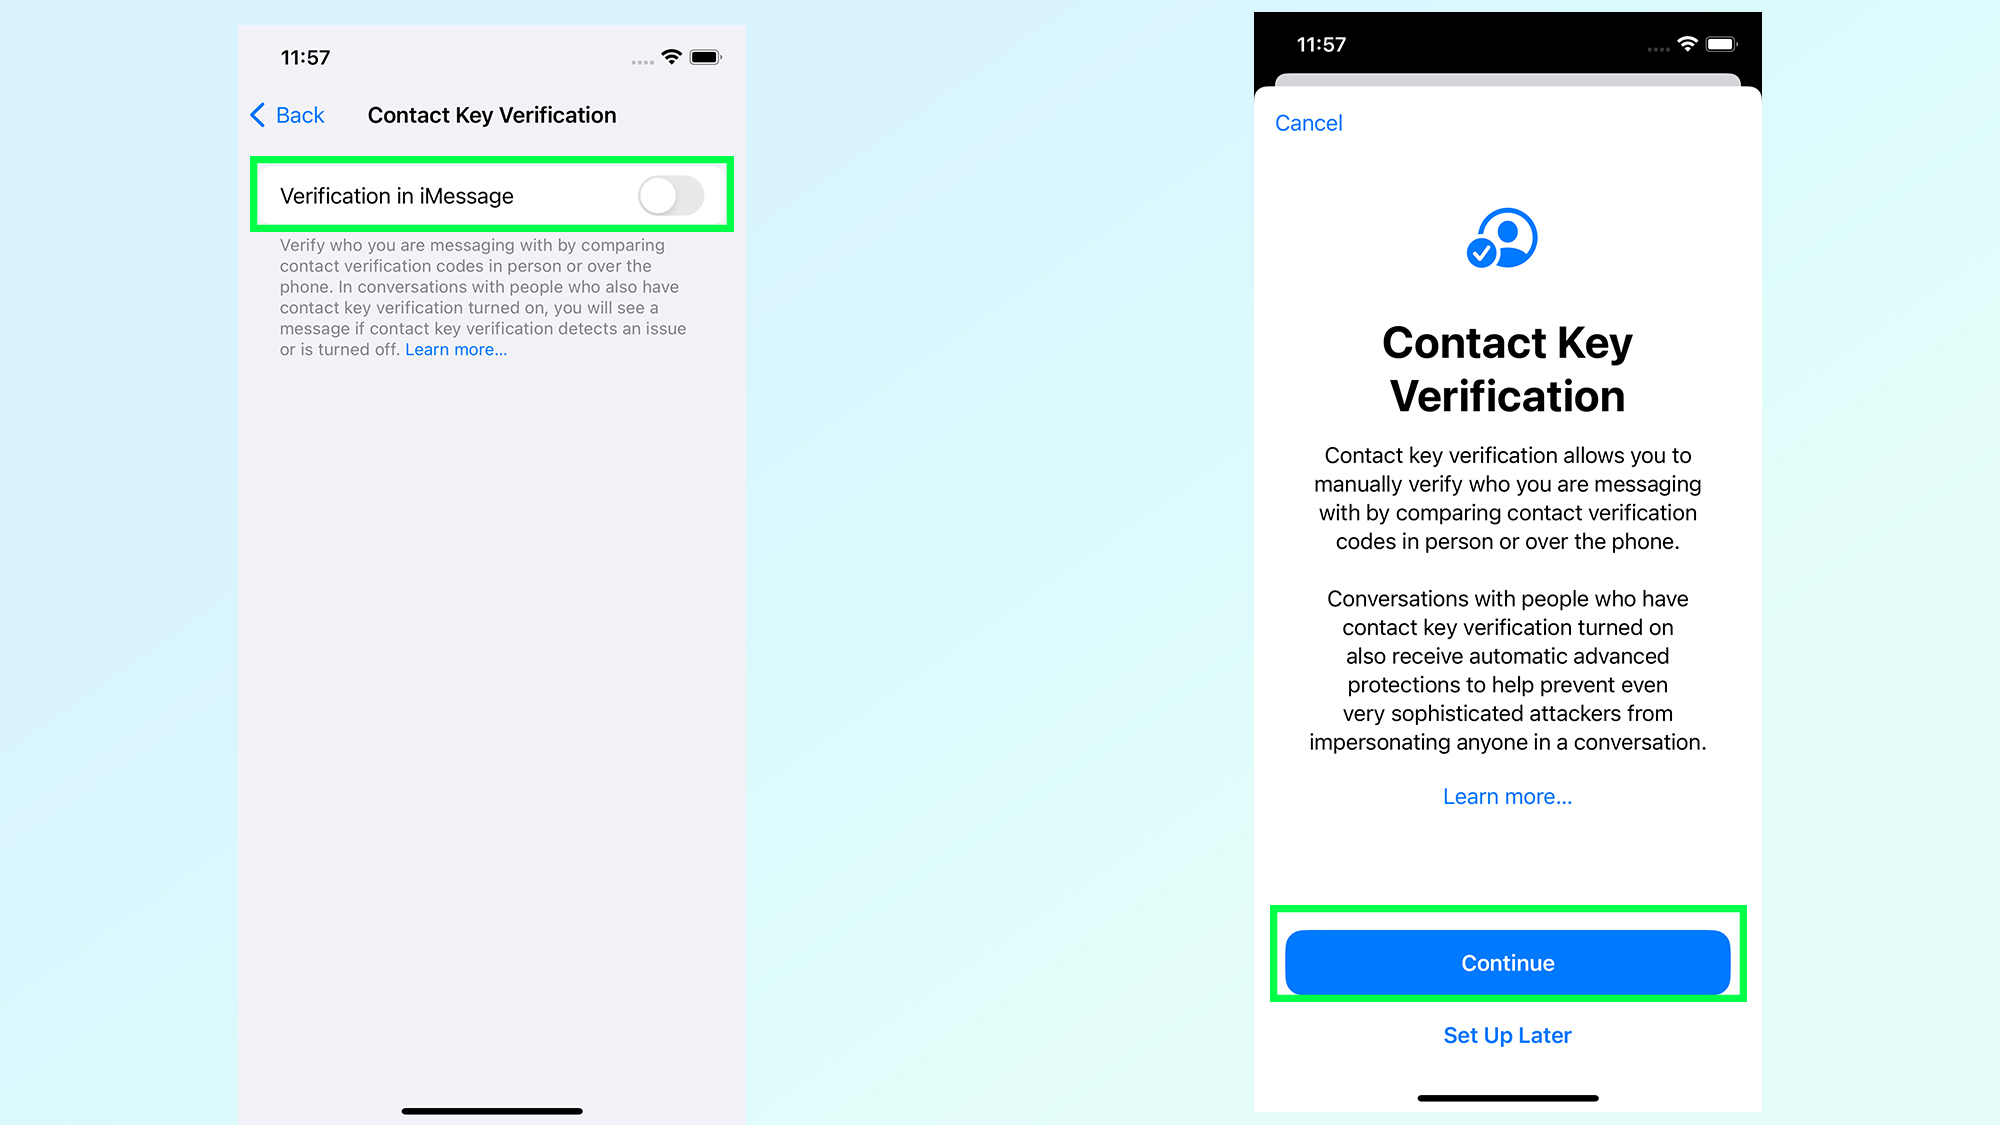
At the very top of the screen, toggle on Verification in iMessage. A pop-up message will appear about setting up Contact Verification, and you'll want to tap Continue.
4a. Update other Apple devices, or disable iMessage
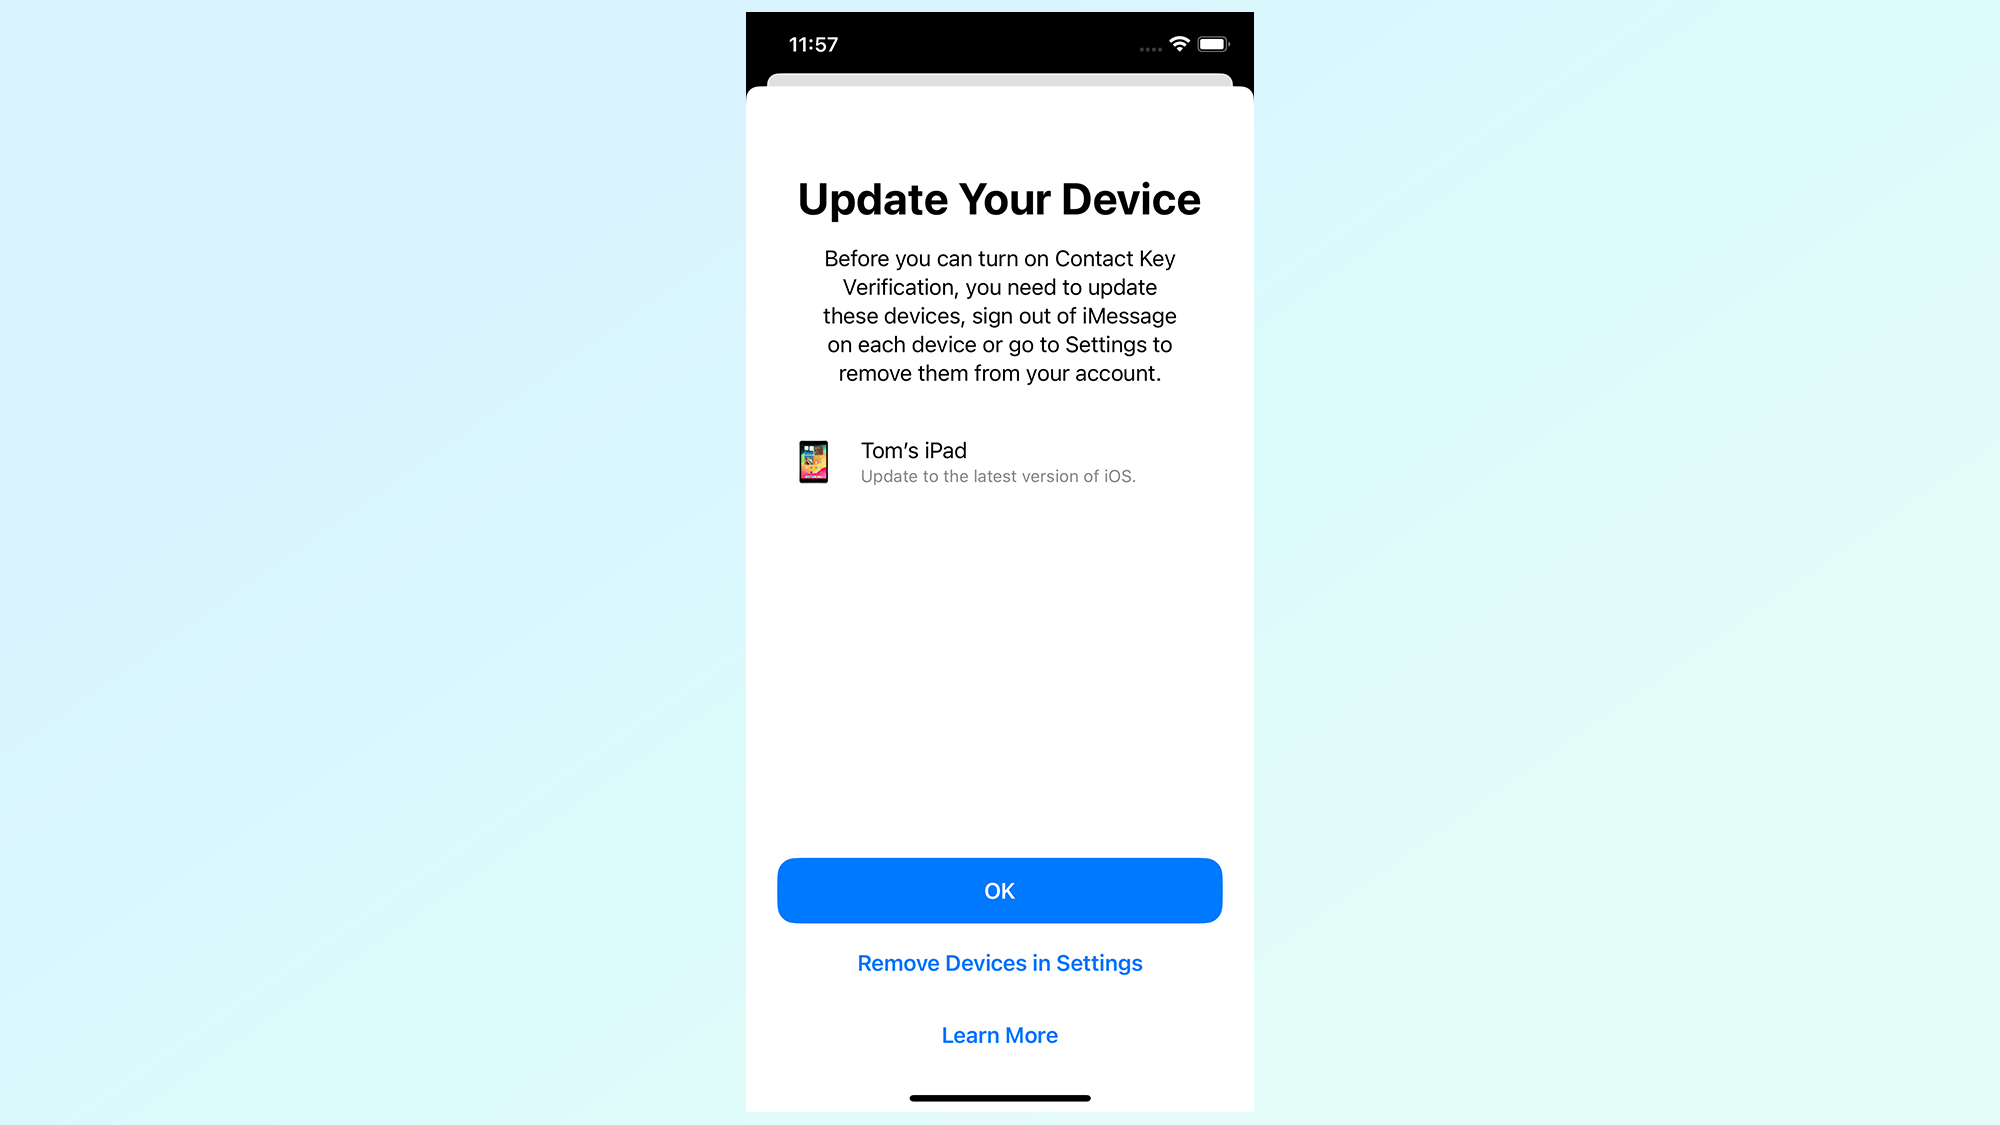
If you have any other Apple devices connected to your Apple ID that don't yet support Contact Key Verification, you'll be met with an error message.
Your options are to either update those devices to the appropriate software, or disable iMessage on that device — in my case an iPad. Either option is fine, but you'll need to pick one to continue.
5. Reveal and copy your public verification code
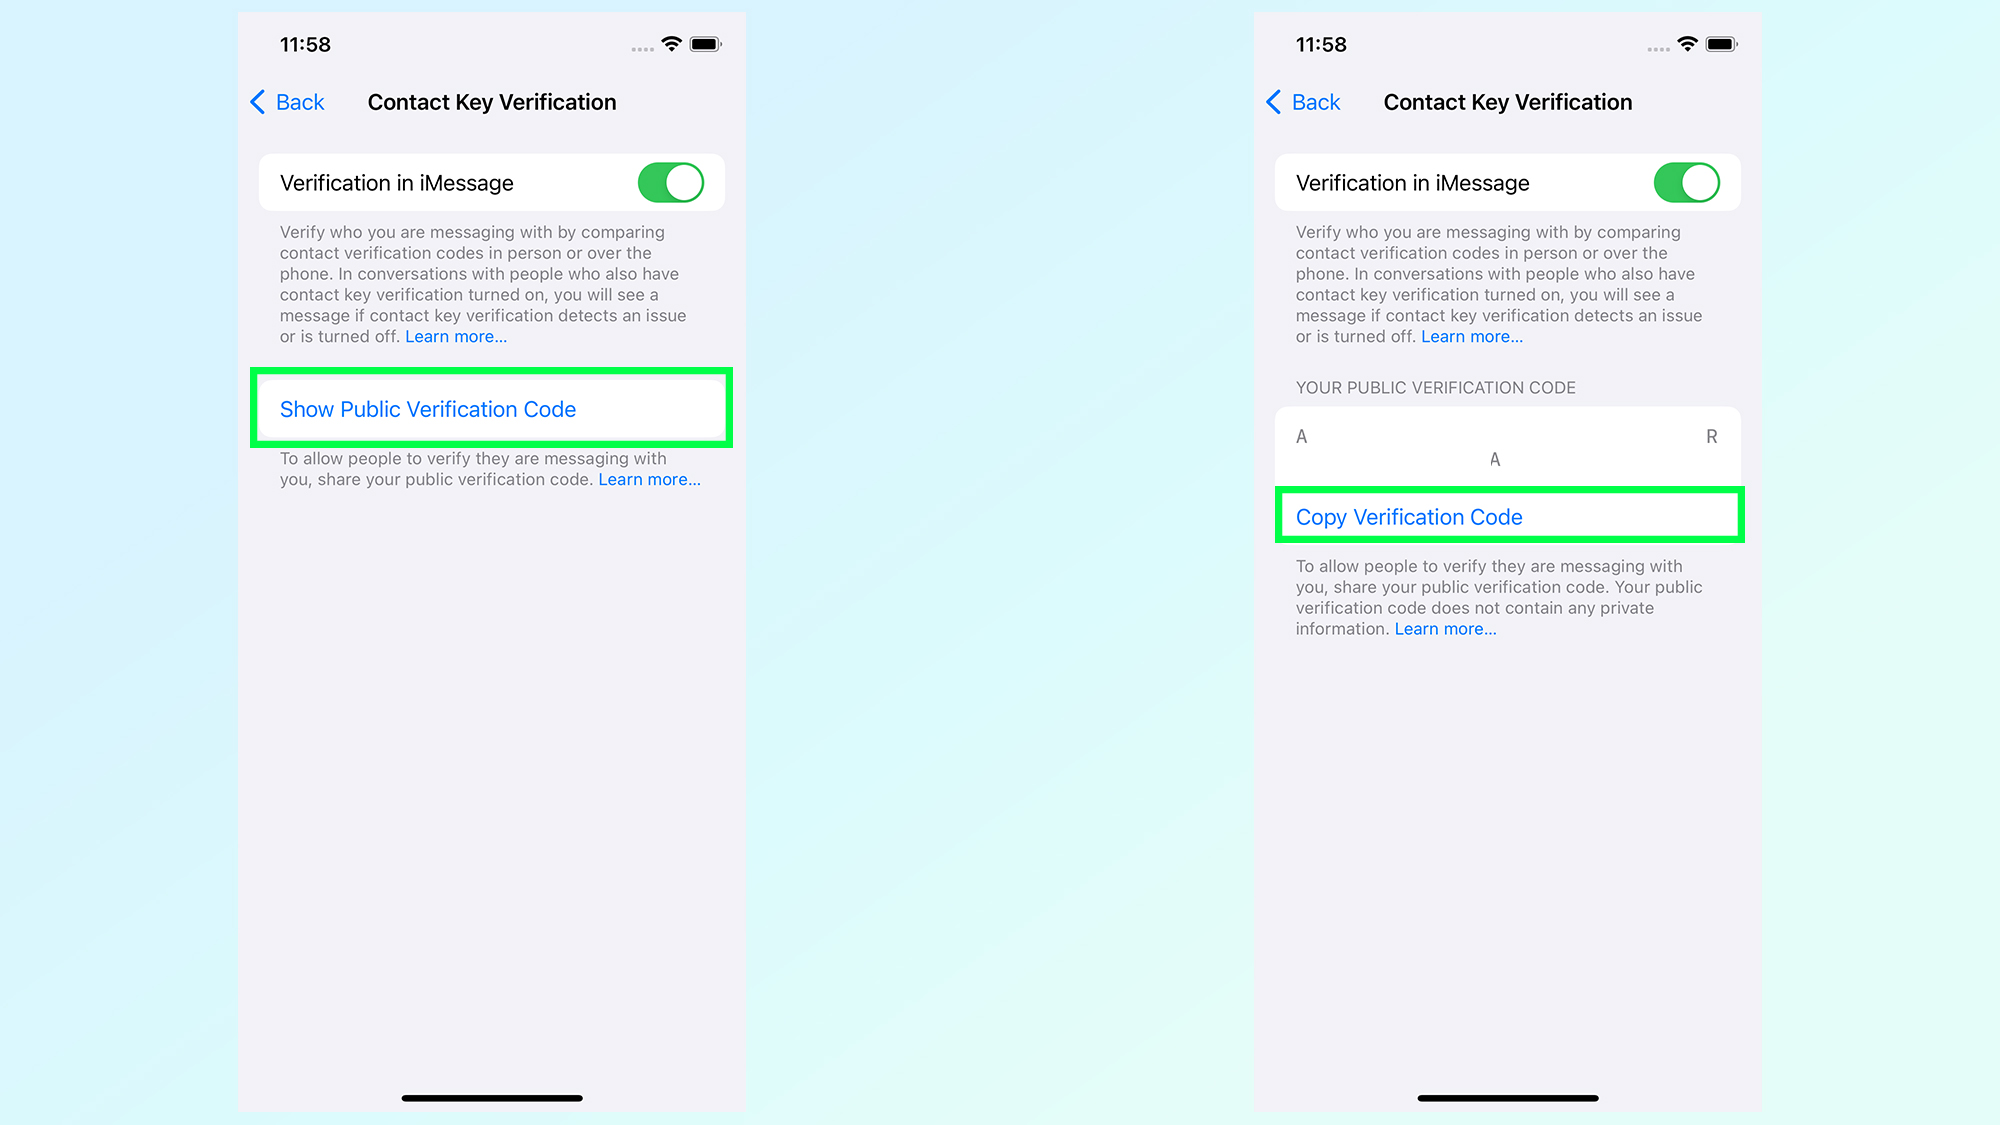
Once Verification is set up, you will be able to see your own personal verification code. Tap Show Public Verification Code to see your code and tap Copy Verification Code so you can share it with your contacts.
And there you have it, Contact Key Verification is set up. Now you've done that, be sure to check out some of out other iPhone and iOS 17 tutorials. That includes triggering live translation with the Action button, how to use reverse charging to charge AirPods, sending callers to voicemail with a single tap, and how to swap between the iPhone 15 Pro's camera lenses.


