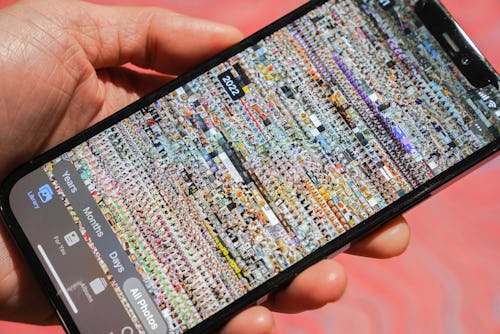
We don’t have to tell you that the iPhone’s camera system improves year after year. Apple has always made mobile photography a priority and the iPhone 13 line certainly delivers with features like ProRAW shooting, an impressive macro mode, and Photographic Styles.
But improved photo quality comes with a price: your iPhone’s storage fills up quickly with large media files you might not even want (or know exist!).
We’ve all got photo libraries filled with eyes-closed portraits, screenshots we’ll never look at again, and accidental inside-the-pocket videos. And even if you’re meticulous about combing your photo roll for duds, there are a few places unwanted images can hide in your library.
There’s nothing worse than going on vacation and getting hit with a notification that your iPhone storage is full. It may seem like a daunting task to clear out your Photos app, but we’ve got a few tips and tricks for making it a painless experience.
How to see how much storage your Photos app is using
The first thing to clearing up your Photos app is knowing how much of your iPhone’s storage it’s eating up. In the Settings app, go to “General,” then “iPhone Storage.” If you shoot or save a lot of images like us, your Photos app will use up a ton. Ours uses up 405.82GB out of 512GB!
Tap “Photos” and you’ll get a breakdown of how much storage your “Recently Deleted” album uses (more on that below), how much you can save by moving files to iCloud Photos, and an option to “Review Personal Videos” hogging up precious space.
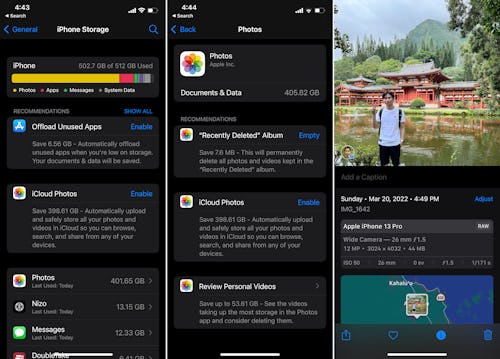
To see how much storage each individual file (photo, video, screenshot, etc.) is using on your iPhone, swipe up on an image (see third screenshot above). It’ll show all of the metadata for the file including the size.
Use Cleanup to delete duplicates, screenshots, and videos
While long videos and ProRAW photos certainly take up a lot of digital space, most folks’ storage woes come from not being aware of how many duplicate photos, old screenshots, and accidental videos they have in their library.
We’ve all had mobile photoshoots where 100 photos are captured and only three make it to Instagram. If most of the photos aren’t good today, they’re not worth looking at again tomorrow — so get them off your phone. The same goes for quick screenshots of text messages (or accidental lock-screen captures) and random videos of the inside of your pocket. All of these files might not hold any meaning, but they take up plenty of space on your device.
Going through your photo library image-by-image is going to take forever so we recommend speeding up the process with a handy app like Cleanup, at least to get started.

Cleanup is one of our favorite “cleaning” apps for iOS. Technically there’s a monthly fee for this app, but you can get everything you need to do done within the three-day free trial if you play your cards right. Cleanup has several categories of media that it will assist you in sorting through and each has its own folder on the home screen. Here are some tips for culling each category:
- Similar: This mode pulls out photos that look similar so you can pick your favorite and delete the rest. Cleanup will pick a handful of photos that look similar, pick a favorite, and ask if you want to delete the rest. Just scroll down through this list and throw out those portrait session shots that didn’t make the final cut.
- Duplicates: This mode brings your attention to identical copies of photos you have on your phone. Maybe you had the same photos sent to you by multiple friends or accidentally saved multiple copies while using an editing app. You don’t need two of anything, so you can quickly scroll through this list and toss the dupes.
- Videos: In this menu, you can swipe through all of the videos on your phone Tinder-style for easy deleting. Just tap on a video preview to get started — the video will play and you can swipe left to delete it or swipe right to keep it. Then it’ll move on to the next one.
- Screenshots: This mode doesn't have the quick-swipe system enabled, but it’s still faster to bulk delete screenshots here versus the iPhone’s Photos app. Unless you think you have a lot of important screenshots, we recommend selecting all your screenshots to start and then picking out the ones you’d like to keep instead.
- Other: With quick-swipe delete or save choices, this is the fastest way to dig through the rest of the photos on your phone. It’ll still take some time, but it’ll be a lot less work than all the tapping you’d have to do in the Photos app.
We definitely recommend going through your photo library manually at some point, but the Cleanup app speeds up the process and gets the obvious trash files out of the way.
Manage files that take up a lot of space
Aside from files you just don’t want, you should also consider deleting or moving files that take up a lot of space. The easiest way to look at your library by type is to tap on the “Albums” tab in the Photos app and scroll to the “Media Types” header toward the bottom of the menu.

Here you’ll find a handful of folders holding a certain type of media file. Here are the folders you should review:
- Time-lapse: Even the shortest, most uneventful time-lapse videos take up quite a bit of space. Since these videos are usually taken just to test the feature and play around, you should check out your library and delete whatever you don’t need to keep.
- Slo-mo: This is another video file that takes up a lot more space than you might expect. If you’ve been playing around and capturing everything under the sun in slow motion, you might want to clean out this folder.
- Cinematic mode: Again, this sort of video file can take up a lot of space. Unless you’re a filmmaker or content creator, there’s not really a good reason to be saving every video you shoot using this mode.
- Burst: Have you ever taken a Burst photo on purpose? We’re certain you’ve done it by accident without realizing it. These files look like one photo but could be secretly made up of hundred-plus individual photos that eat up your storage discretely.
- Live Photos: Live Photos are great, but those precious lil videos they capture with a still photo? Yeah, they eat up storage because they’re separate .mov video files. Turn off Live Photos to save up on storage and delete all the ones you don’t need.
- Panoramas: Gosh, panos are friggin’ cool. Not cool? How massive the files are. Because panoramas are multiple photos stitched together, the resolution can exceed 60 megapixels and the files balloon accordingly.
- RAW: Maybe you like shooting RAW and getting more range in the edit process. Or you accidentally turned RAW shooting on and n ever turned it off. Either way, RAW files are significantly larger than JPEGs. We’ve seen RAWs that are 44MB compared to 2.5-4.5MB for their JPEG equivalents.

Deleting photos manually
Instead of going through your photos one by one (this can take a while even if you’re using Cleanup’s Other designation), you can bulk delete photos right in your Photos library.
- While looking at your entire library in the Photos app, tap the “Select” button in the upper right-hand corner of the screen.
- Now you can scroll through your entire library and tap photos and videos to select them. If you’re trying to select multiple photos in a row, you can drag your finger across them instead of tapping each one individually.
- When you’ve selected all the photos you no longer need, tap the trash can icon in the lower right-hand corner, then tap the delete option on the pop-up to confirm that you want them sent into the trash.
Empty your “Recently Deleted” folder
Because sometimes users regret deleting media files, Apple doesn’t ditch deleted files straight away. Whenever you delete a photo, it actually goes to a separate “Recently Deleted” folder where you can still view it and recover it. Anything you delete stays here for up to 30 days. We’re trying to clear up our storage space ASAP, so let’s skip the waiting period and erase those files.
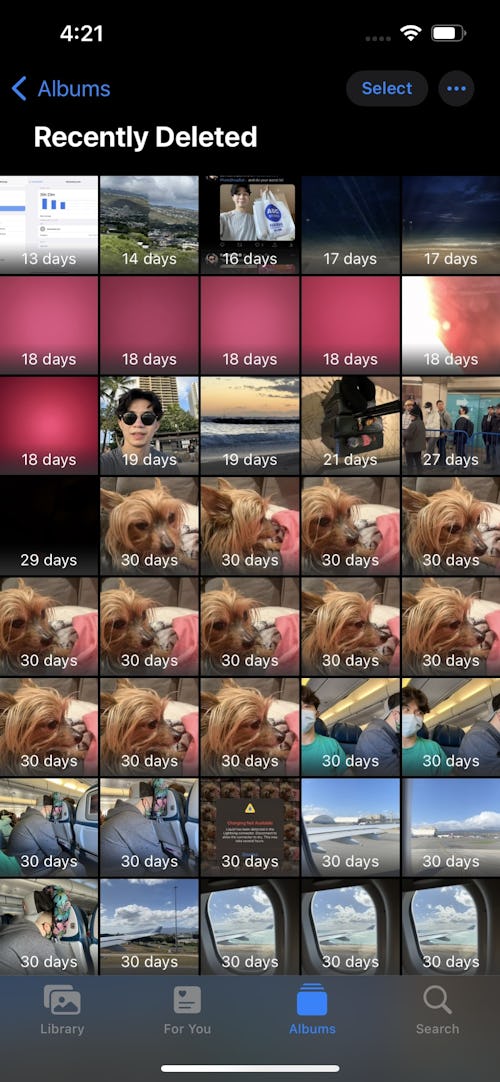
- In the “Photos” app, tap on the “Albums” tab at the bottom of the screen.
- Scroll all the way to the bottom of this menu and tap on “Recently Deleted” under the “Utilities” header.
- Tap the “Select button in the upper right-hand corner of the screen.
- Tap on “Delete All” in the bottom left-hand corner of the screen.
- Confirm that you want to delete all these files permanently in the pop-up.

