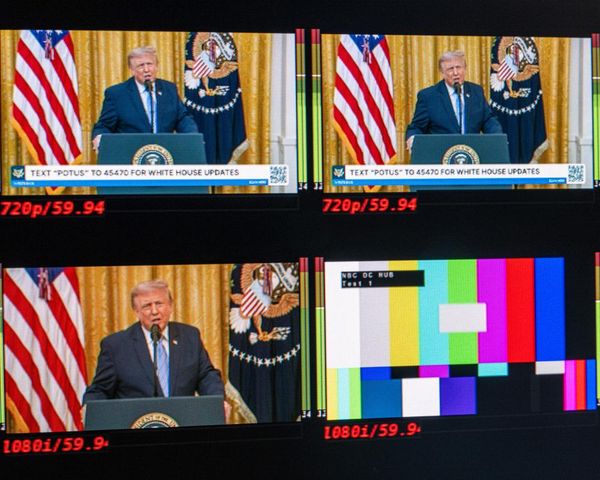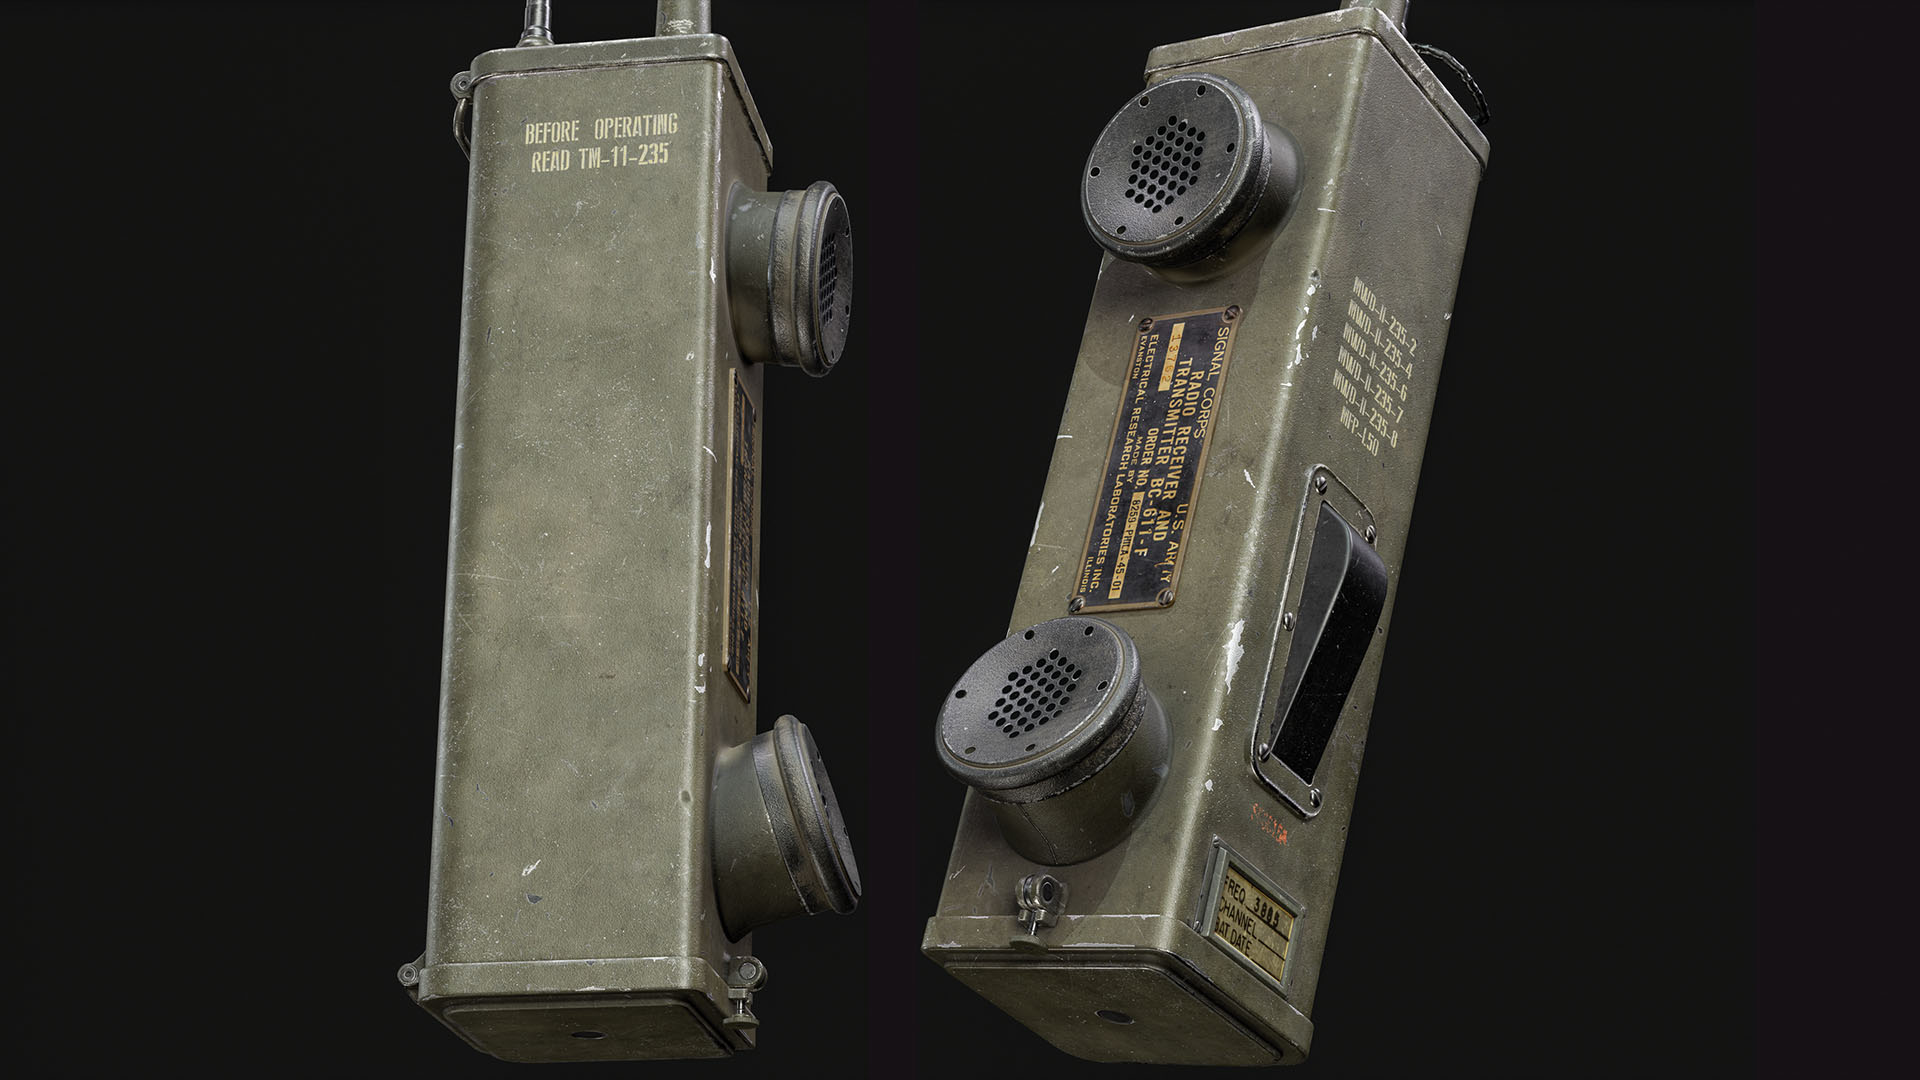
For this workshop, I’m going to guide you through creating a high-quality asset for a video game or movie – in this case a military-style walkie-talkie. We’ll cover the process of creating the high-poly mesh, using ZBrush to add fold details, the best practices for creating a low-poly mesh, getting the most out of your UVs, tips and tricks for getting high-quality bakes, and achieving photorealism in your textures. At the end of this tutorial, you should have a few extra workflow hacks on your belt, allowing you to create high-fidelity assets for your portfolio.
If you're new to Unreal, check out our Unreal Engine 5 guide for all you need to know and to see the creation platform in action, take a look at how Still Wakes The Deep was made more terrifyingly beautiful with Unreal Engine 5. Want to upgrade your creative kit? Check out our best laptops for 3d modelling guide.
01. Check your metrics
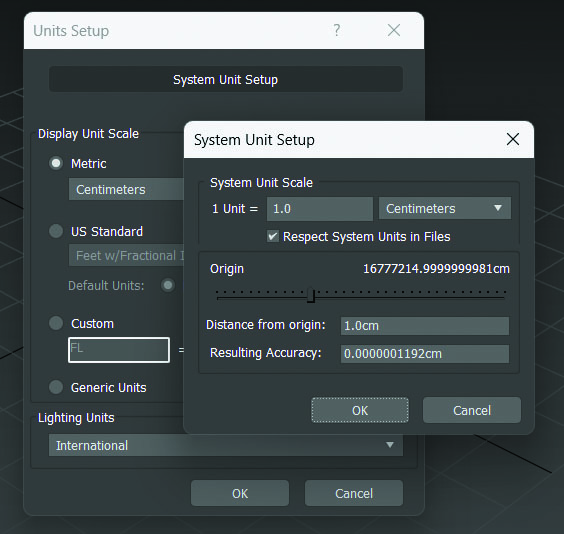
The first part of creating any asset is blocking out your model, ensuring the metrics and overall silhouette are correct. This can be the foundation to both your low and high-poly meshes. To start, it’s important that the units in your DCC package align with the game engine you’re targeting and the asset you’re creating.
As we’re creating assets for Unreal Engine here, it’s important to ensure your metrics are set to centimetres. In 3ds Max, you can make this adjustment by going to Customise>Units Setup. Don’t forget to check that this is also reflected in the System Unit Setup window.
02. Blockout your asset
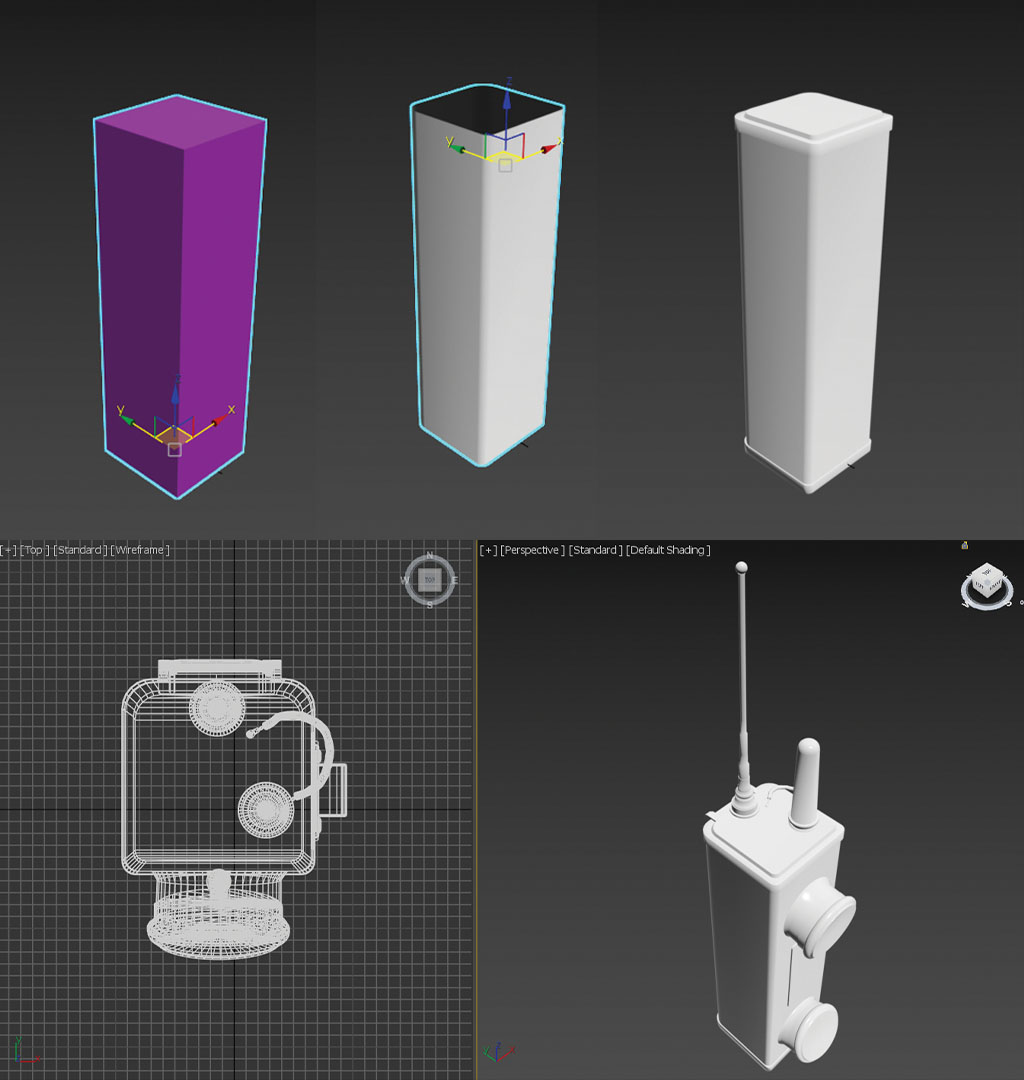
To begin the blockout process, start with a box primitive and match the scale of reference you’re using for this asset. It’s important to know that the chamfers on the front are a lot different to the chamfers at the back. This typically throws off the process if attention isn’t focused on the reference, so doing the blockout process avoids any snags later on. Once you’ve done that, chamfer the edges slightly.
The next step is to add the upper and lower sections of the asset in the blockout. This is key to maintain the overall shape and chamfers visible on the object’s main body when adding these sections. Now we’ll add the front cylindrical parts that will contain both the microphone and speaker of the walkie-talkie. Keep working through this process until the blockout is complete.
03. Create the high-poly mesh
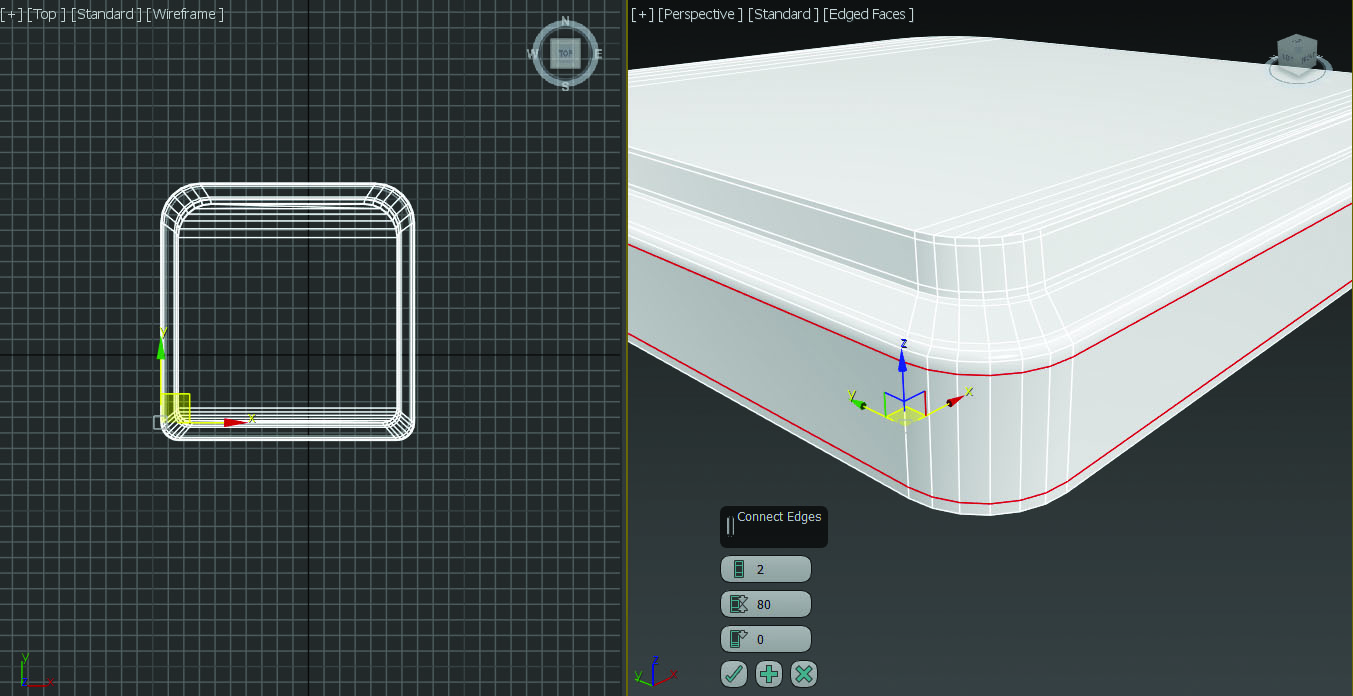
Once you’re happy with the blockout, the next step is starting on the high-poly process. During this stage, I’d duplicate the blockout asset and begin adding more edge loops, with the result being a TurboSmooth modifier. Take your blockout mesh and split it up into parts, then add supporting edge loops.
This will allow the mesh to maintain its shape while smoothening the edges of each part. Throughout this process, you should always try to maintain consistency across the mesh in terms of the distance of the edge loops placed down, as this will avoid any smoothing inconsistencies when you apply a TurboSmooth modifier.
04. Finalise the mesh
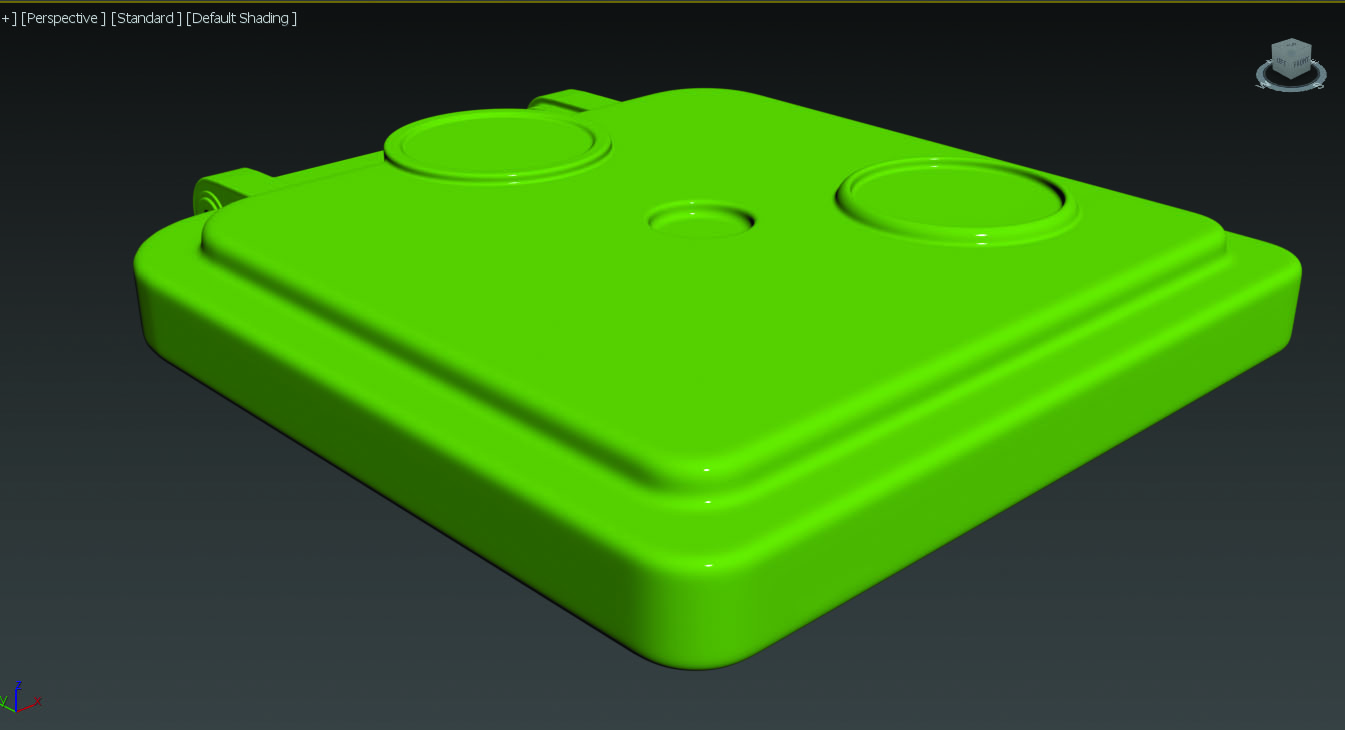
Once you’ve added the extra edge loops around your mesh, let’s use a TurboSmooth modifier and, if required, round out the edges a little more. In the process, keep in mind that we’re also going to export these meshes into ZBrush for further adjustment later on. To avoid cranking up the Subdivision levels in ZBrush, it’s best to add enough edge loops and TurboSmooth beforehand while we’re still in 3ds Max. Continue this process until all the meshes are ready for ZBrush implementation.
05. Set up meshes for Booleans
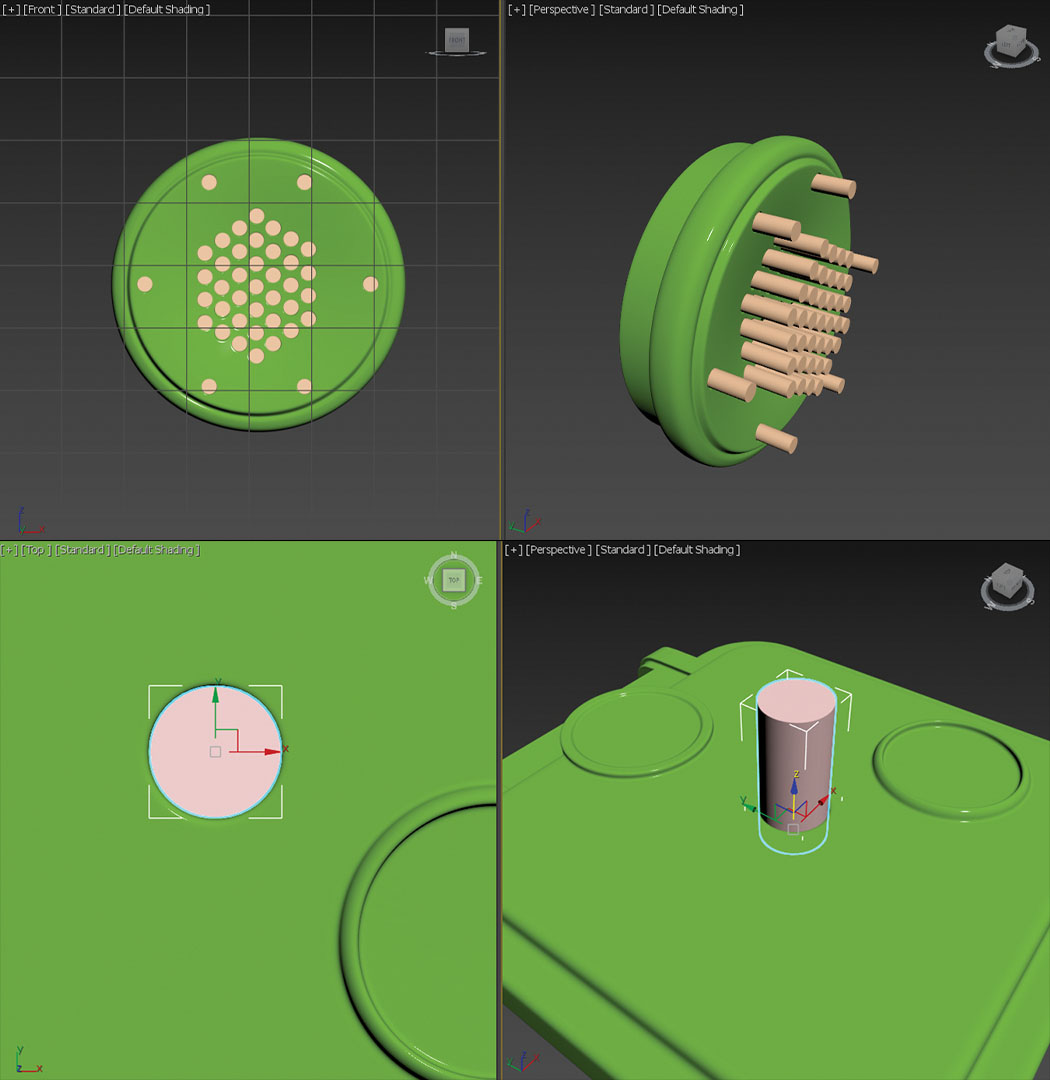
If you follow the reference for this walkie-talkie asset, you can see visible holes on the parts that act as the microphone and earpiece. We’re going to achieve this with the Boolean pipeline.
First, create cylinders that match the reference and place them in a way that makes sense aligning with the reference. Make sure the sections protruding from the mesh are consistent to avoid any discrepancies with the length of the holes created by the Boolean process. Continue this job in other areas that require a Boolean pass, for example the top section housing the antenna where there’s a small hole that contains a screw. Once this is complete, prep everything for export to ZBrush.
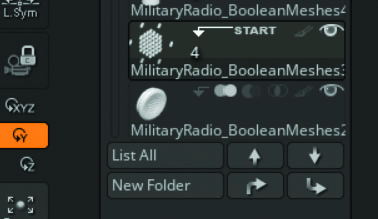
06. Import meshes to ZBrush
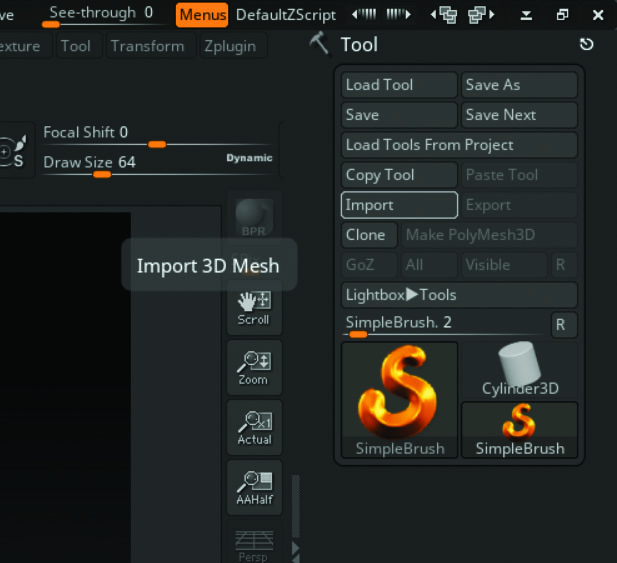
Once you have everything exported as an OBJ, bring it into ZBrush. With the mesh loaded up, go to Split>’Split to Similar Parts’; ZBrush will detect the Boolean meshes and split them from the parts you want to Boolean them against. This will avoid any visible errors and artifacts appearing during the process. Once that’s done, ensure the Boolean parts are above the meshes you want to Boolean in the Toolbar, as you’ll merge them during the DynaMesh/Boolean process.
07. Boolean your meshes
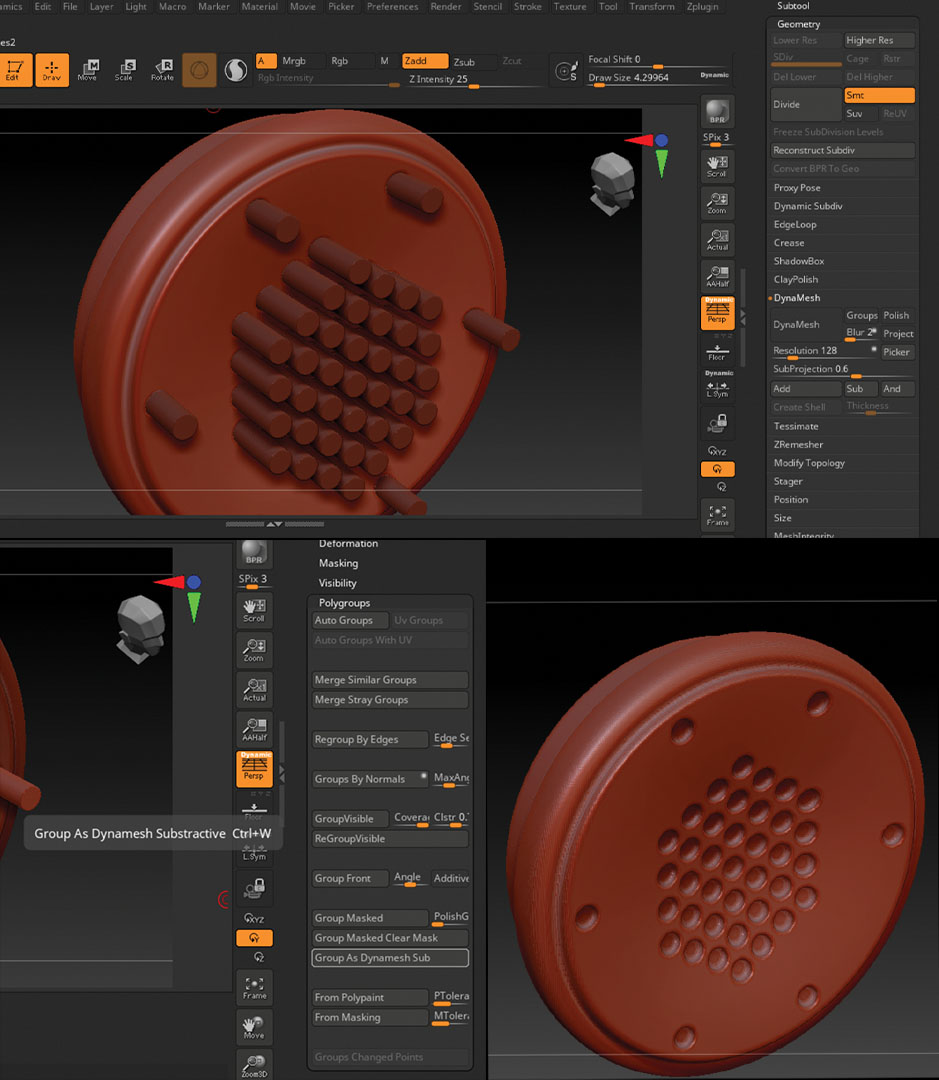
Select the first mesh you want to Boolean – let’s start with the microphone or earpiece. In the DynaMesh tab, I’ll typically set the DynaMesh slider to 1400, which ensures we maintain the existing shape and density when we convert the mesh, done by clicking DynaMesh. Next, select the tool you want to Boolean against this mesh. Ensure that underneath the mesh name, you have the Minus option selected so the geometry is removed.
Ensure that DynaMesh is still selected by clicking ‘Group As DynaMesh Subtractive’ under Polygroups, which will group the mesh as the subtraction mesh during the process. Once you’ve done that, merge both meshes under the tool section by holding Ctrl, and clicking and dragging. You should see the holes visible now. Repeat this process for the other parts of the high-poly mesh.
08. Start work on the low-poly
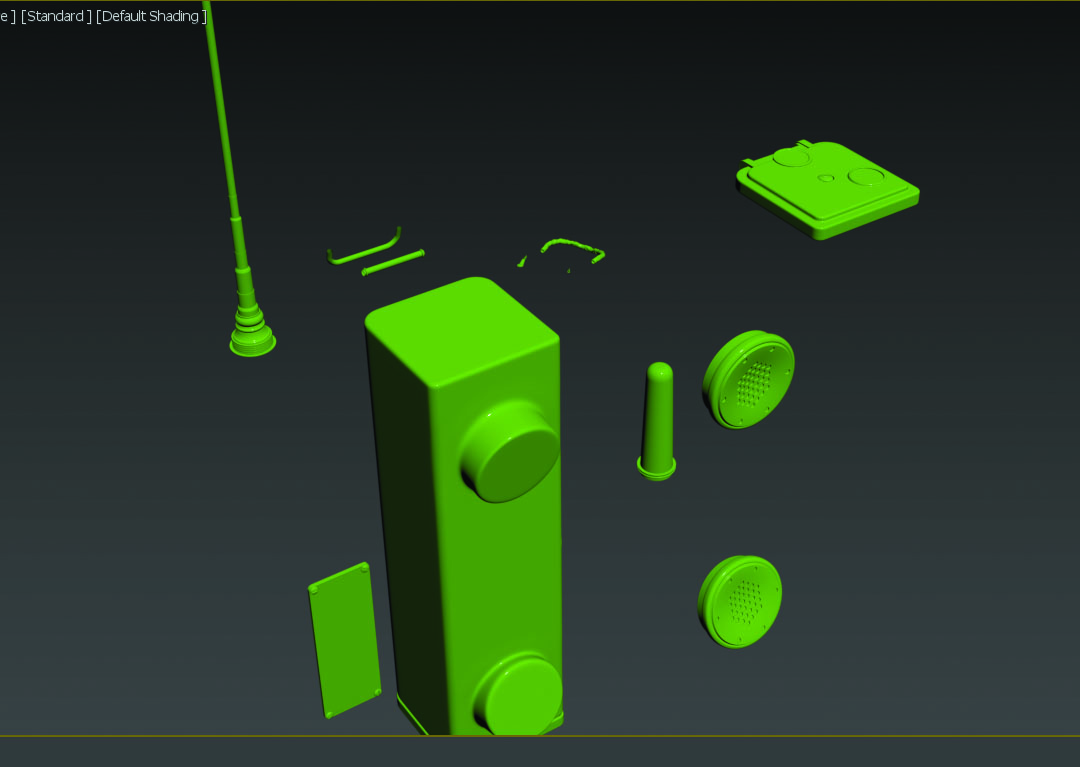
When this process is complete for all the high-poly elements, reimport those objects back into your DCC software to create the low-poly. The quickest method for this is using the existing blockout mesh that we created at the start of the tutorial.
Take each part and align it with the high-poly. There will be elements that you need to add, so you can simply model those. It’s important that each high and low-poly mesh is matched 1:1 to avoid any issues during the baking process. These can range from visible artifacts or errors that occur during baking, to elements that don’t have any additional geometry to be baked onto the surface. You can always optimise or reduce afterwards.
09. Continue the low-poly process
Keep adjusting the initial blockout mesh to align with the updated high-poly meshes. If you have multiple parts of an asset that are the same, to speed things up it’s always best to add a single low-poly mesh that can be duplicated after the UV stage.
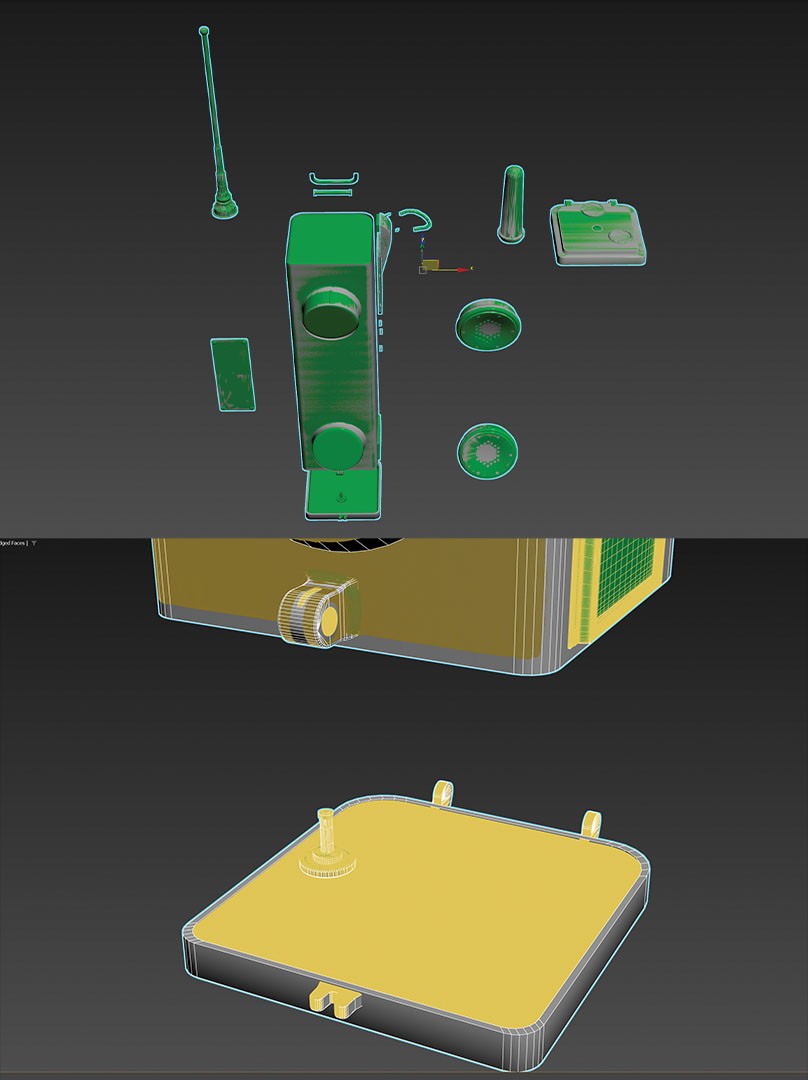
10. Unwrap your low-poly mesh
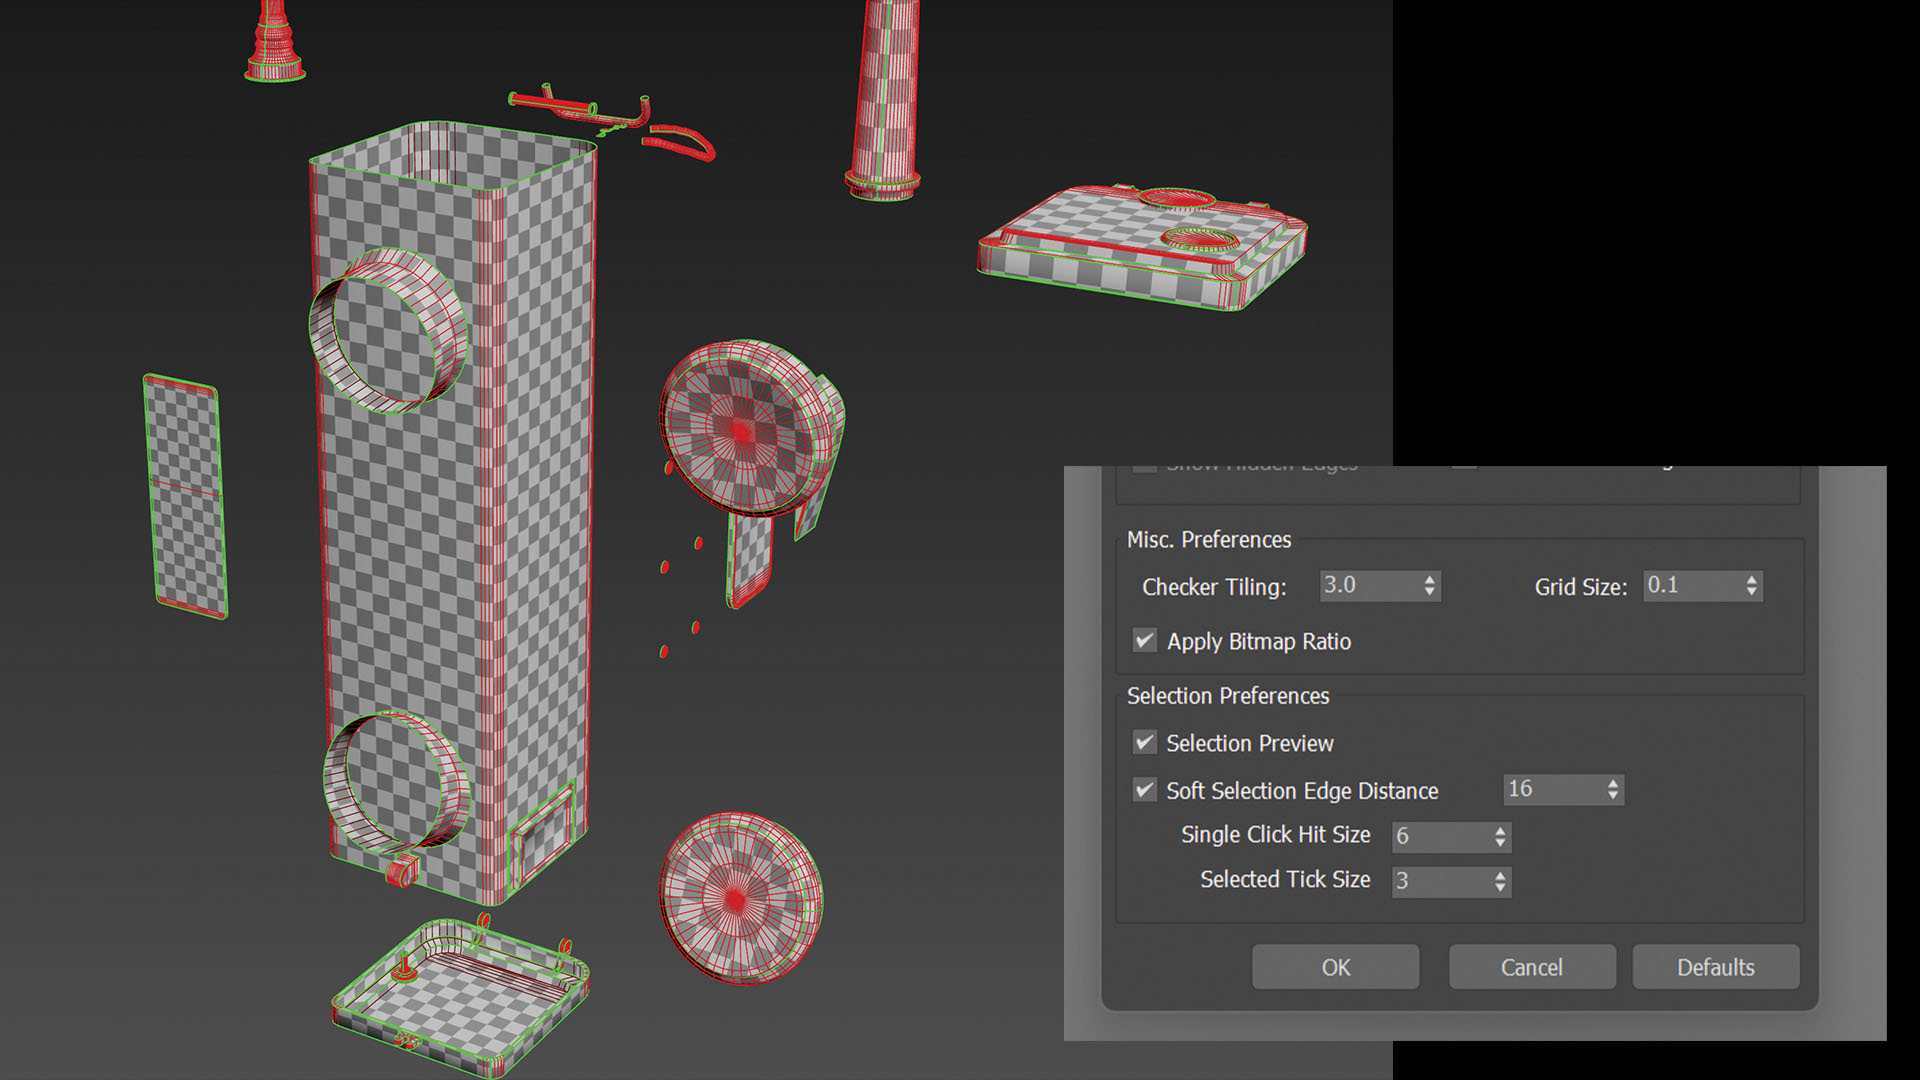
Once you’re happy with the low-poly mesh and everything is positioned correctly, matching up with the existing high-poly, you can now proceed to UVing the low-poly mesh. Pay extra attention to ensure there’s no stretching or skewing of the UVs. You can check this by applying a texel checker map on your mesh for better visibility. To do this in 3ds Max, open the UV Unwrap modifier tool, then select Options>Preferences. This will bring up the Unwrap Options window, which allows you to adjust the density of the texel checker map with the Checker Tiling field.
11. Pack your UV shells
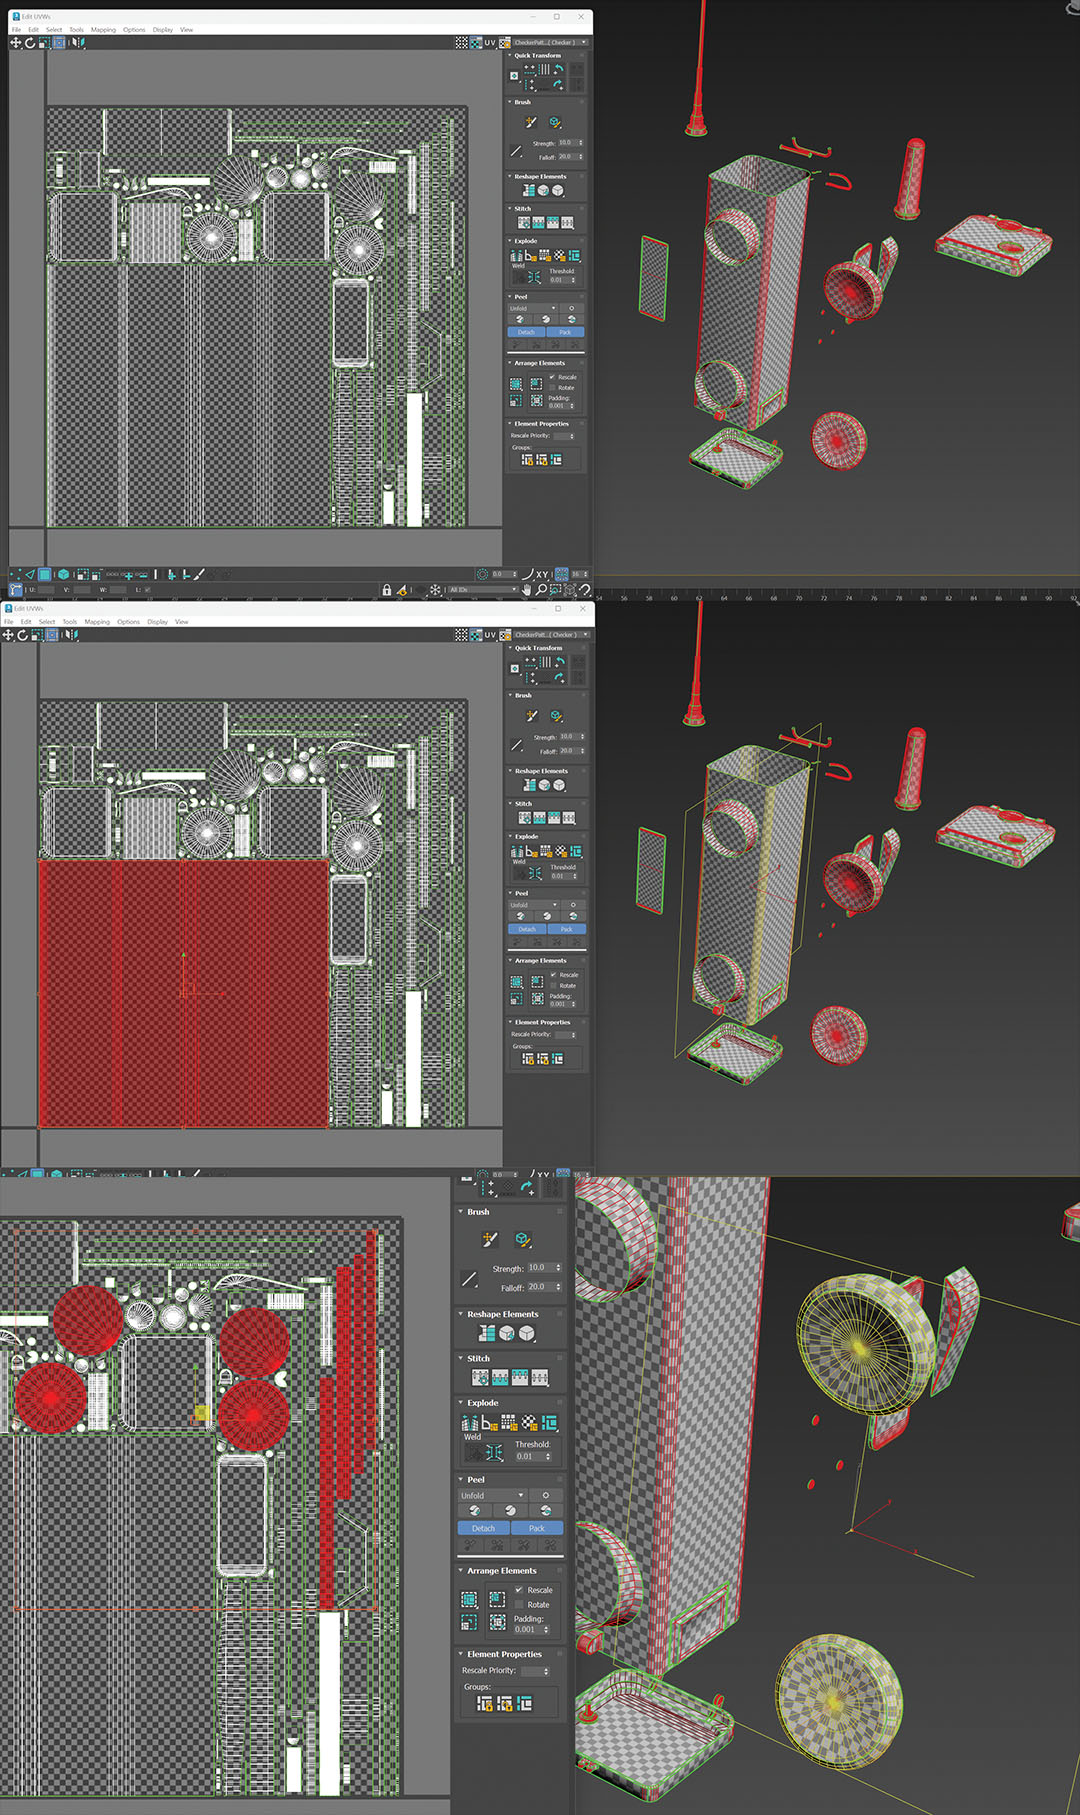
Once you’ve unwrapped your low-poly mesh, it’s time to pack them. As you can see in my 0-1 UV space, I’ve packed things in a way that makes sense. The body of the radio is one unique island flattened out to allow me to add details such as text, scratching and so on with ease. I always recommend packing related UV islands close together. Not only does this make it easier to catch errors like colour bleeding during texturing, but it also allows you to optimise your UV shells like shrinking shells that aren’t visible to the player, relative to the location of the shell on the asset
12. Import to Marmoset
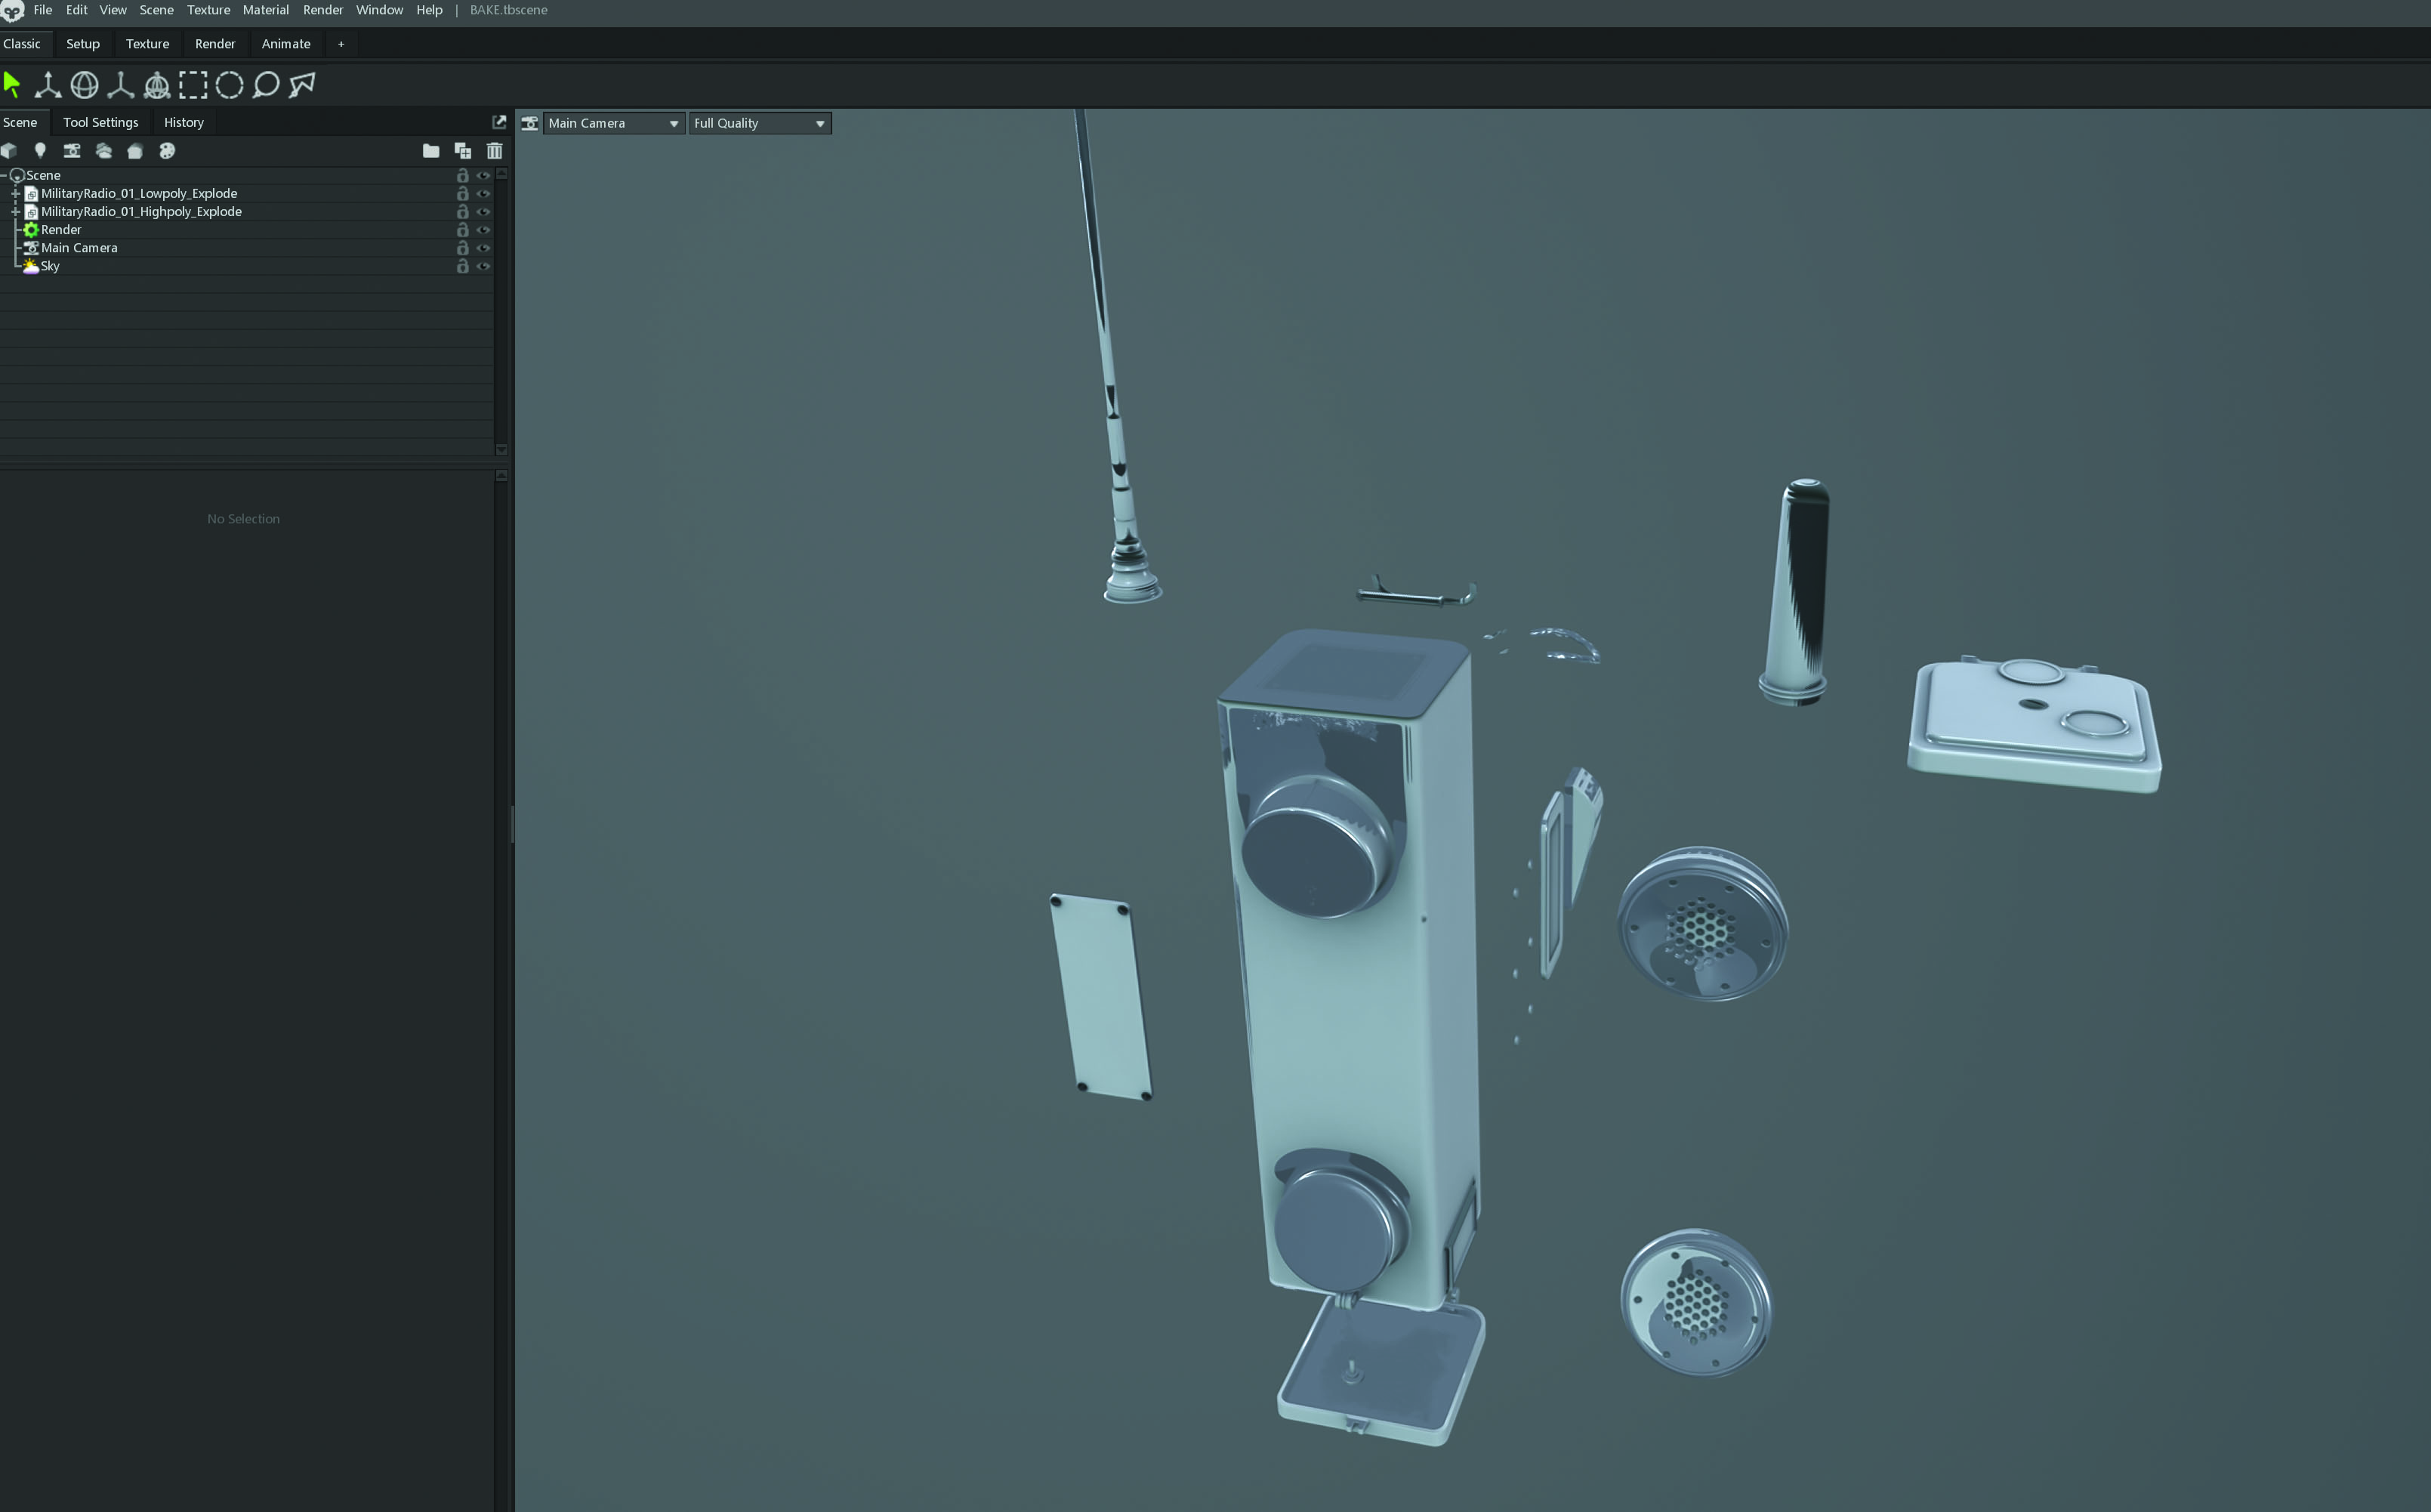
With your UV shells packed in the 0-1 space, we’ll bake the maps required for the texturing. To start, open Marmoset Toolbag and import the low and high-poly meshes you’ve created. Be sure you import both as FBX files to avoid any scaling or offset issues. Once both meshes have been successfully imported, it’s better to give both separate materials so you can identify and ensure the variants are overlapping correctly.
13. Bake the meshes
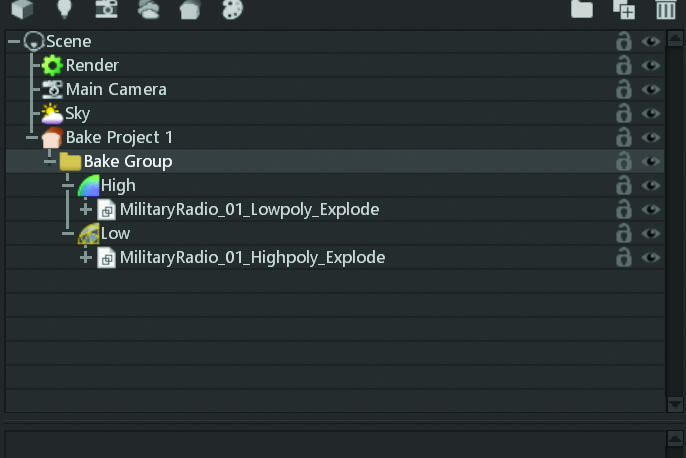
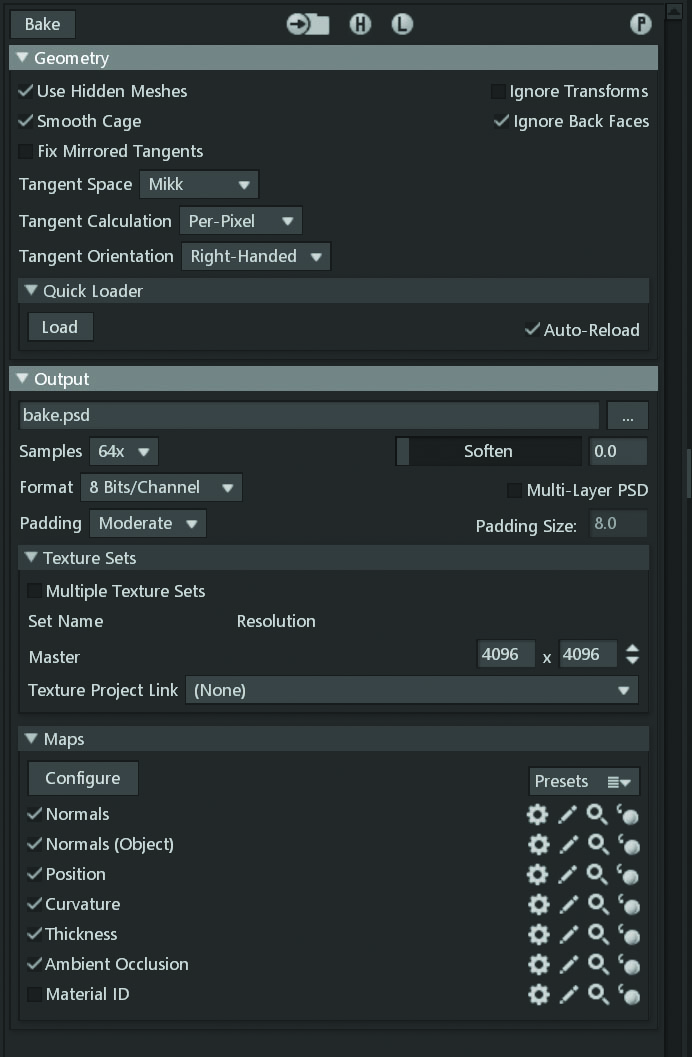
Head to ‘New Bake Project’ on the left-hand side of the user interface. This will be visible above the scene. Once you’ve selected this, drag your two meshes into the groups that appear, then select ‘Bake Project 1’ and ensure all the maps are ticked, minus the Material ID.
Set the Samples to 64x and the resolution to 4096 x 4096 so your bakes come out clean and at a good resolution without any visible aliasing. Before we bake, check the cage and ensure that it’s covering all the meshes correctly. Once you’re happy with the positioning of the cage, simply click Bake.
14. Switch over to Substance 3D Painter
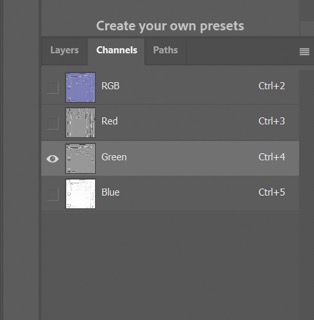
Open Substance 3D Painter and select New Project. As we’re targeting Unreal Engine 4, make sure you set ‘Unreal Engine 4 (starter_assets)’ for the Template, followed by setting the Document Resolution to 4096. Select the low-poly mesh, followed by importing the PSD files exported from Marmoset and flipping the Green channel in the Normal map so it’s aligned with how Unreal reads normal textures; this can be done quickly in Photoshop.
15. Texture with Painter
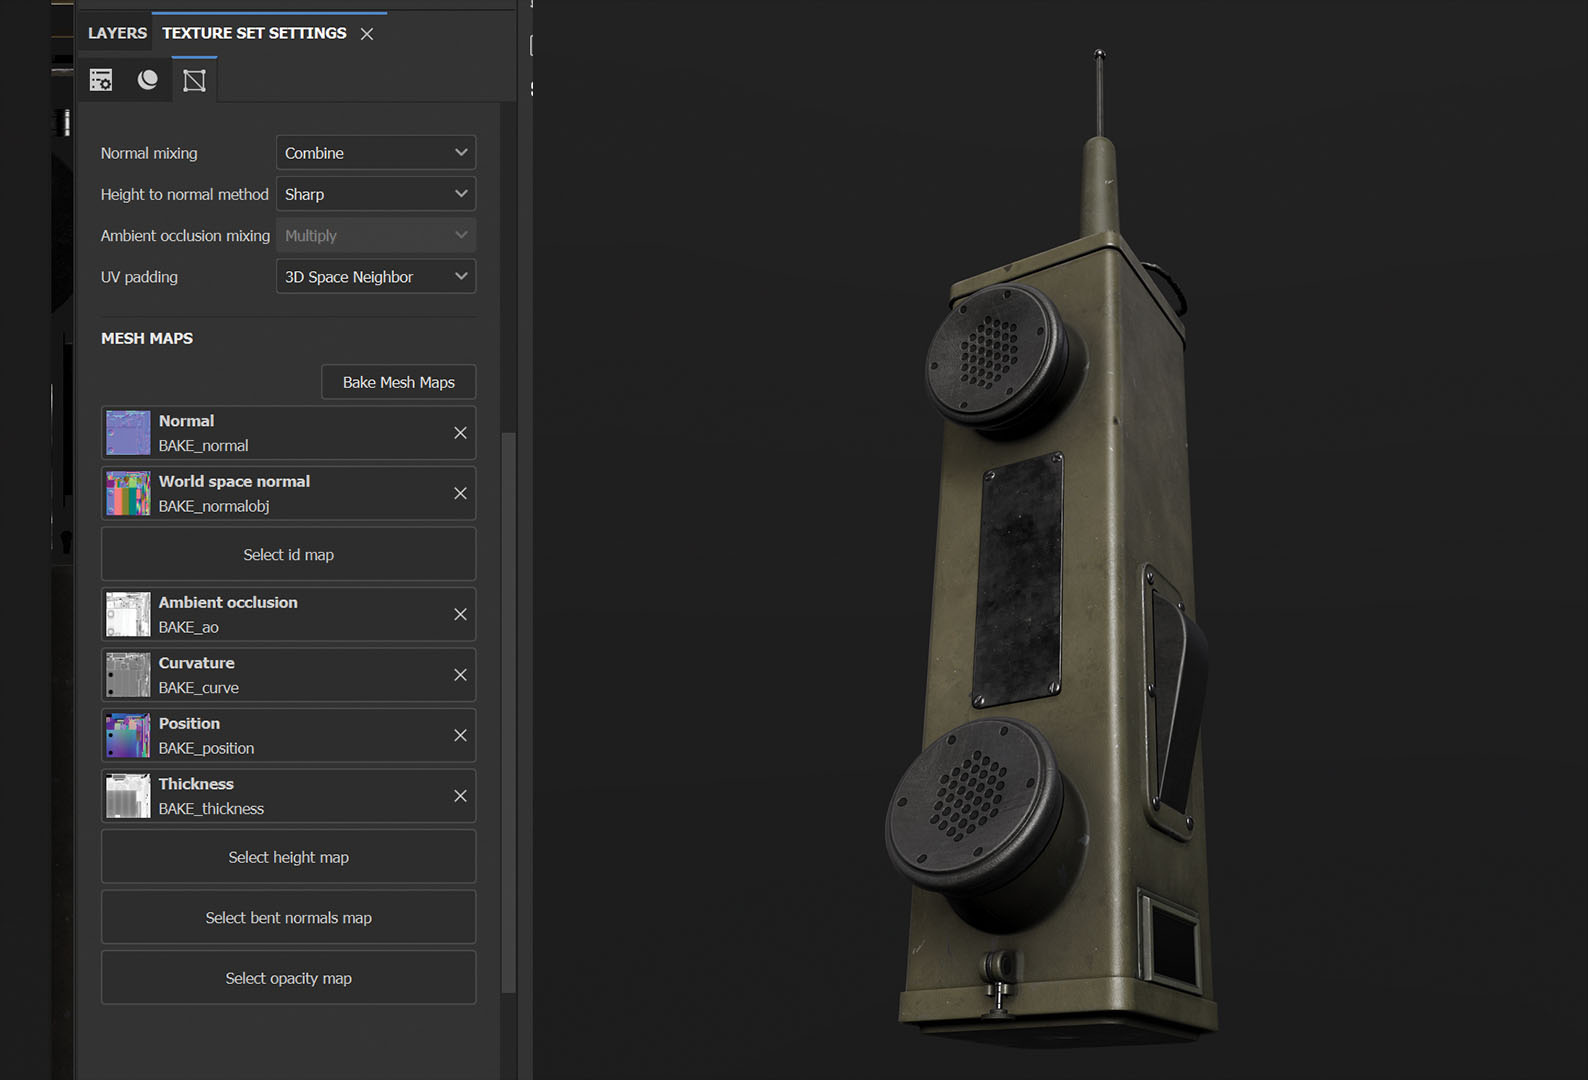
Apply the baked texture maps to the asset under Texture Set Settings. Once applied, you should see them appear on the mesh in your viewport. Let’s begin texturing! Apply the base materials to your asset, aligning them as close as possible to the reference before adding any extra details. For the body of the radio I used the Steel Painted Metal preset from the Smart Materials, and then Steel Stained for the metal sections.
16. Additional details

The next step is to give the asset more character and add storytelling elements. For this pass, I typically lean heavily on the generators provided with Painter to do the first pass of detail, followed by an additional paint layer and then bringing in my own artistic input around the asset. It’s important that while texturing the asset, you also check the Roughness and Metallic texture maps. The Roughness map is your best friend for getting nice visual interest that hits the light correctly, such as dust build-up. In the Metallic map, keep things either 100 per cent black or 100 per cent white.
17. Export your textures
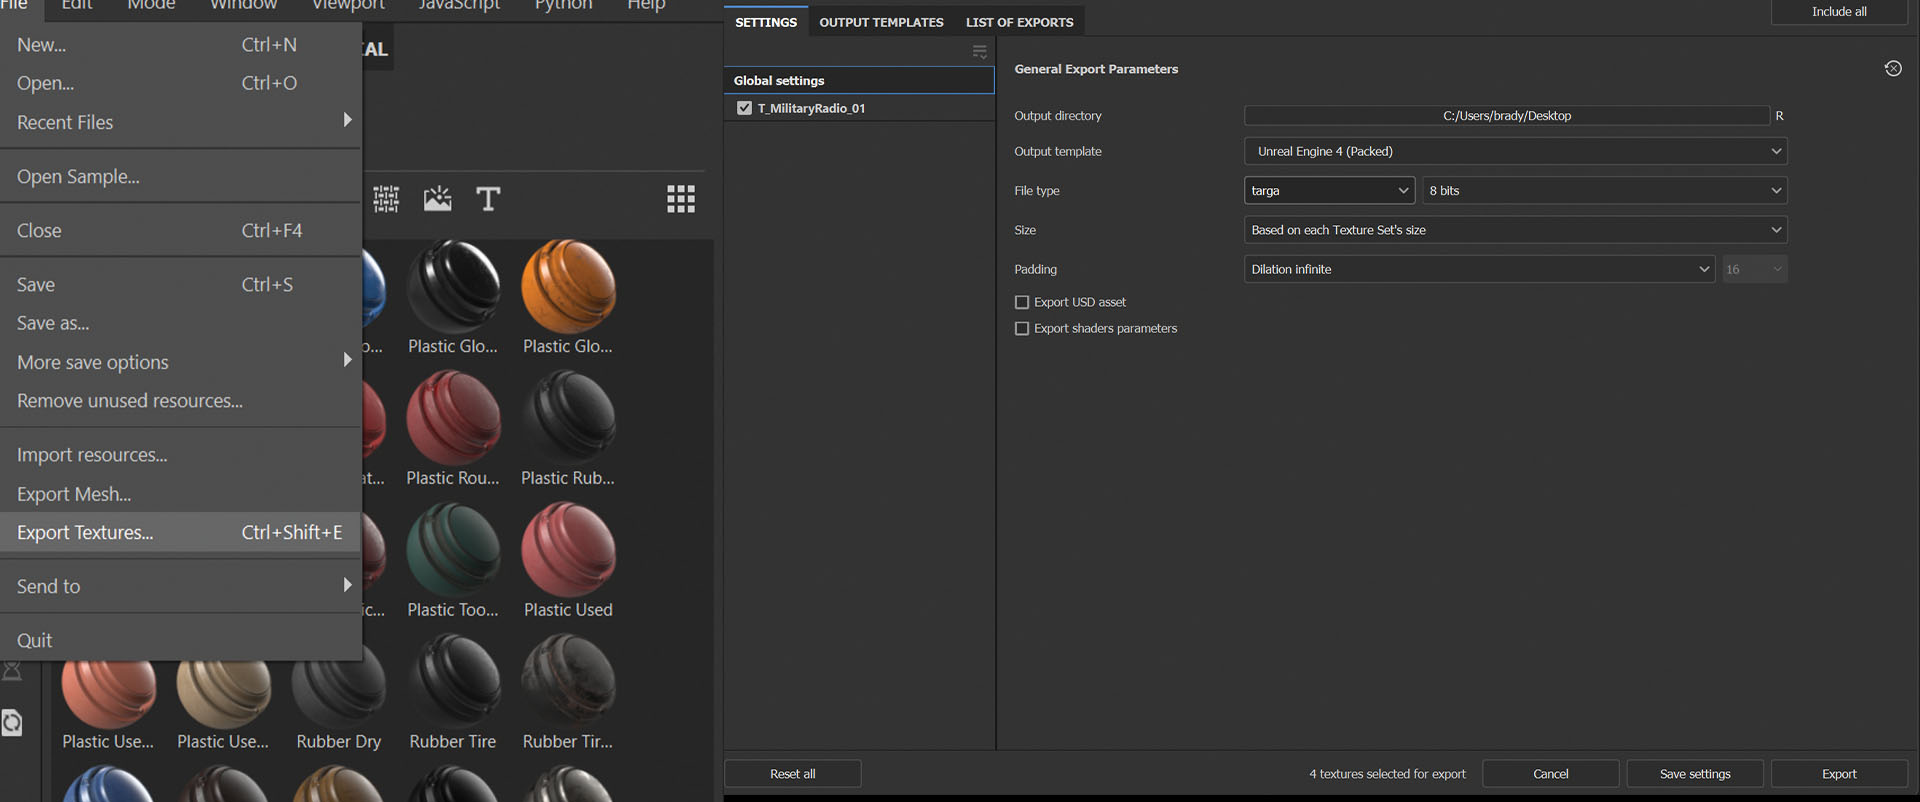
The final step is to export our textures for integration in Unreal Engine. Go to File>Export Textures, then set the Directory to your liking and ensure the Output Template is set to ‘Unreal Engine 4 (Packed)’. Ensure that the File Type is set to Targa (TGA), as this is the most common file type used in Unreal Engine, and check your Set List has a relevant name such as ‘T_MilitaryRadio_01’. Clean and consistent naming conventions are vital when authoring assets for games.
This content originally appeared in 3D World magazine, the world's leading CG art magazine. 3D World is on sale in the UK, Europe, United States, Canada, Australia and more. Limited numbers of 3D World print editions are available for delivery from our online store (the shipping costs are included in all prices). Subscribe to 3D World at Magazines Direct.