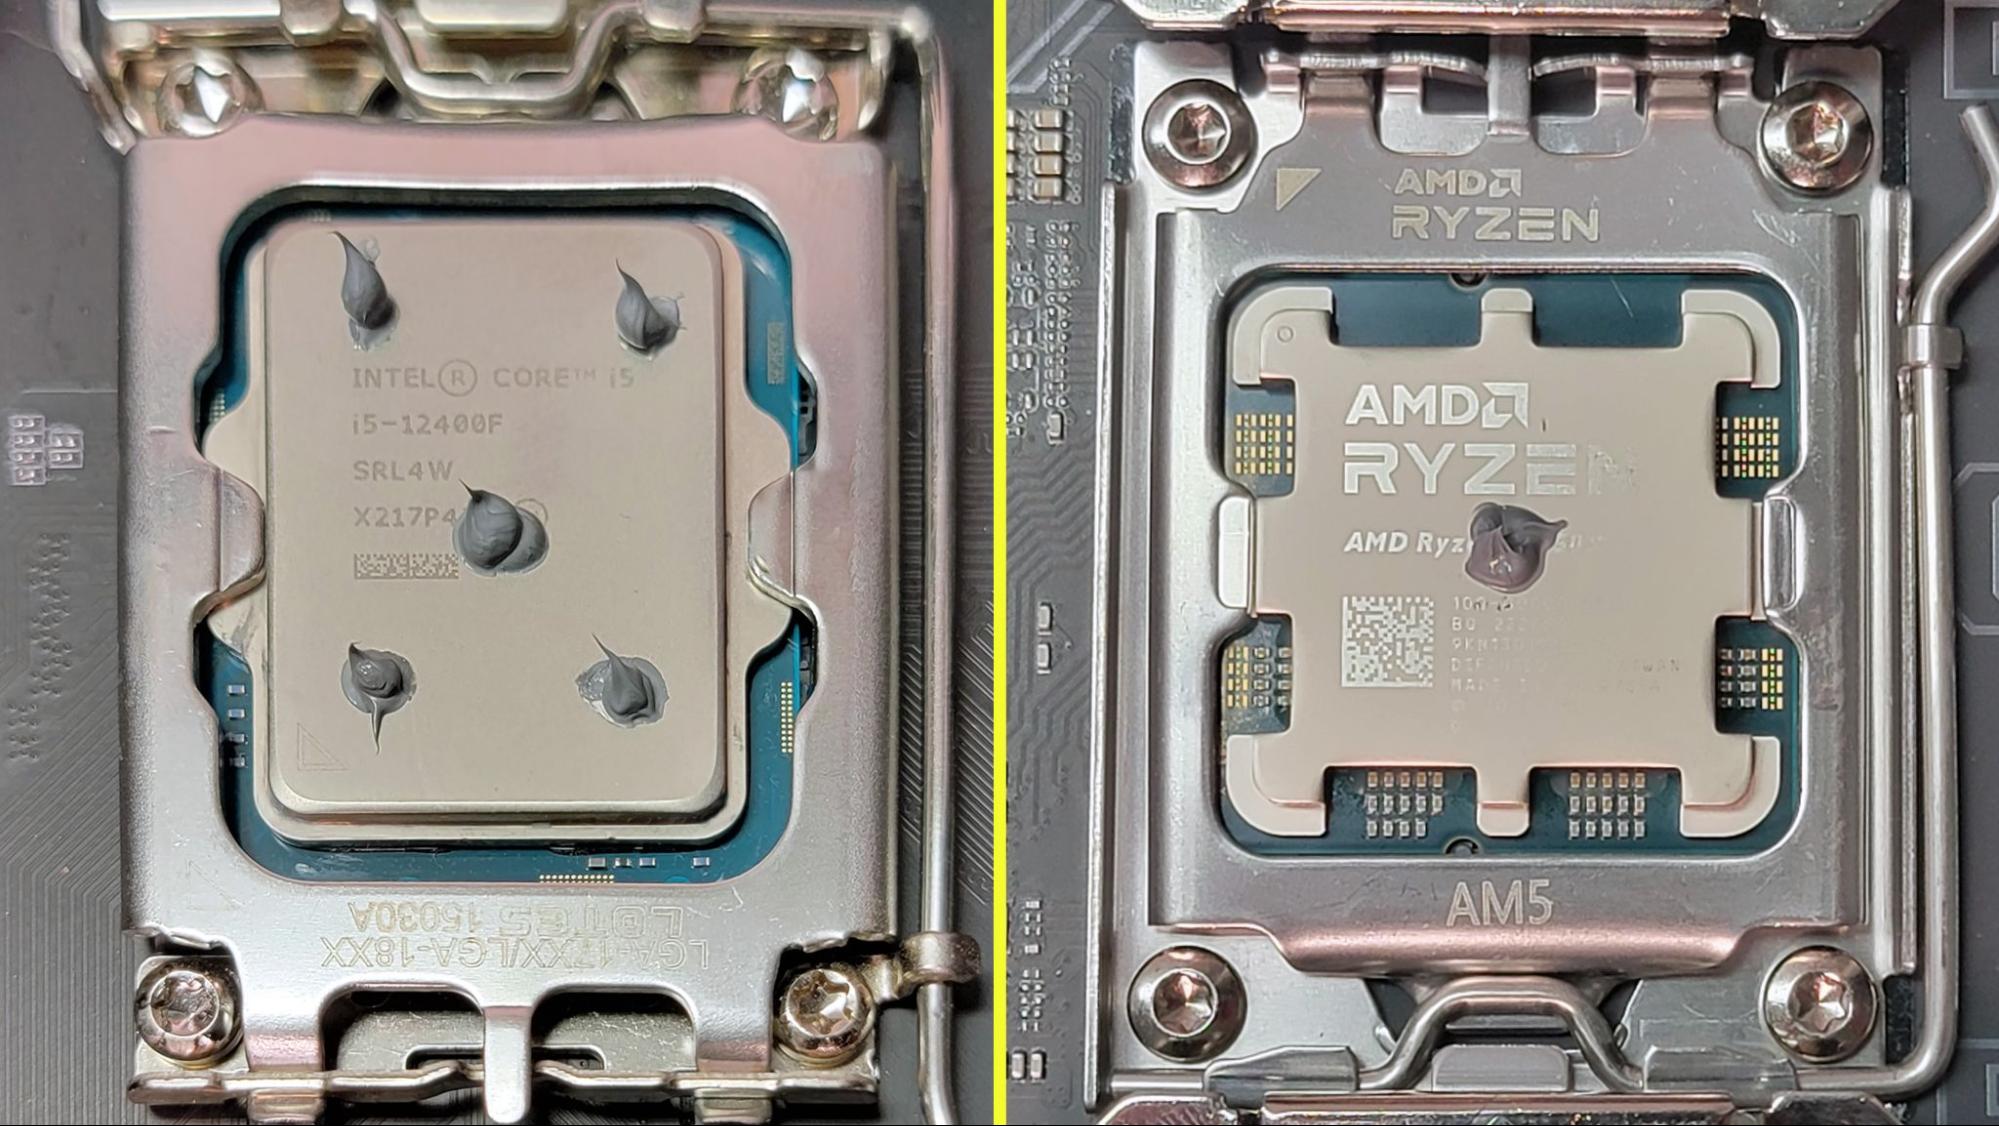
Changes to the shape, size, and internal component layout of modern CPUs have made applying thermal paste, also known as thermal interface material (TIM), more complicated than it used to be.
CPUs have incorporated ever more cores and core types. Chiplets and hybrid architectures have proliferated, moving the most thermally demanding bits away from the exact center of the integrated heat spreader / lid of the CPU. And despite shrinking manufacturing nodes, many processors have just gotten physically bigger. So while you used to be able to apply thermal paste basically the same way across all consumer manufacturers and platforms and expect great results, that's no longer the case.
And let's face it: There was never any true consensus across the PC-building world about exactly what is the "right" or "best" way of applying TIM is. We all just know the wrong way when we see it. So at the risk of verging into an area of hotly contested debate, we're here to offer some simple instructions on how to properly apply your thermal interface material of choice (check our tested list of the best thermal paste) between your CPU and cooler, to achieve good thermal transfer and get that pesky heat away from your components and outside your case.
We're not saying the advice below is the absolute best method or the only correct method. We're just saying it works, and it's more or less what's recommended by PC thermal experts like Noctua and others.
Oh, and this guide is strictly for traditional thermal pastes – the non-conductive, viscous materials that make up the bulk of our best thermal paste list. Liquid Metal compounds can result in lower temperatures than most thermal pastes, but they are also usually conductive, meaning getting a drop or two in the wrong place can fry your components. And if you do get it in the wrong place, liquid metal is often much harder to remove than thermal paste – and you will need to remove it if it gets on your motherboard or other electrical components. As such, we only recommend liquid metal to seasoned PC build experts and serious overclockers.
First, install your CPU
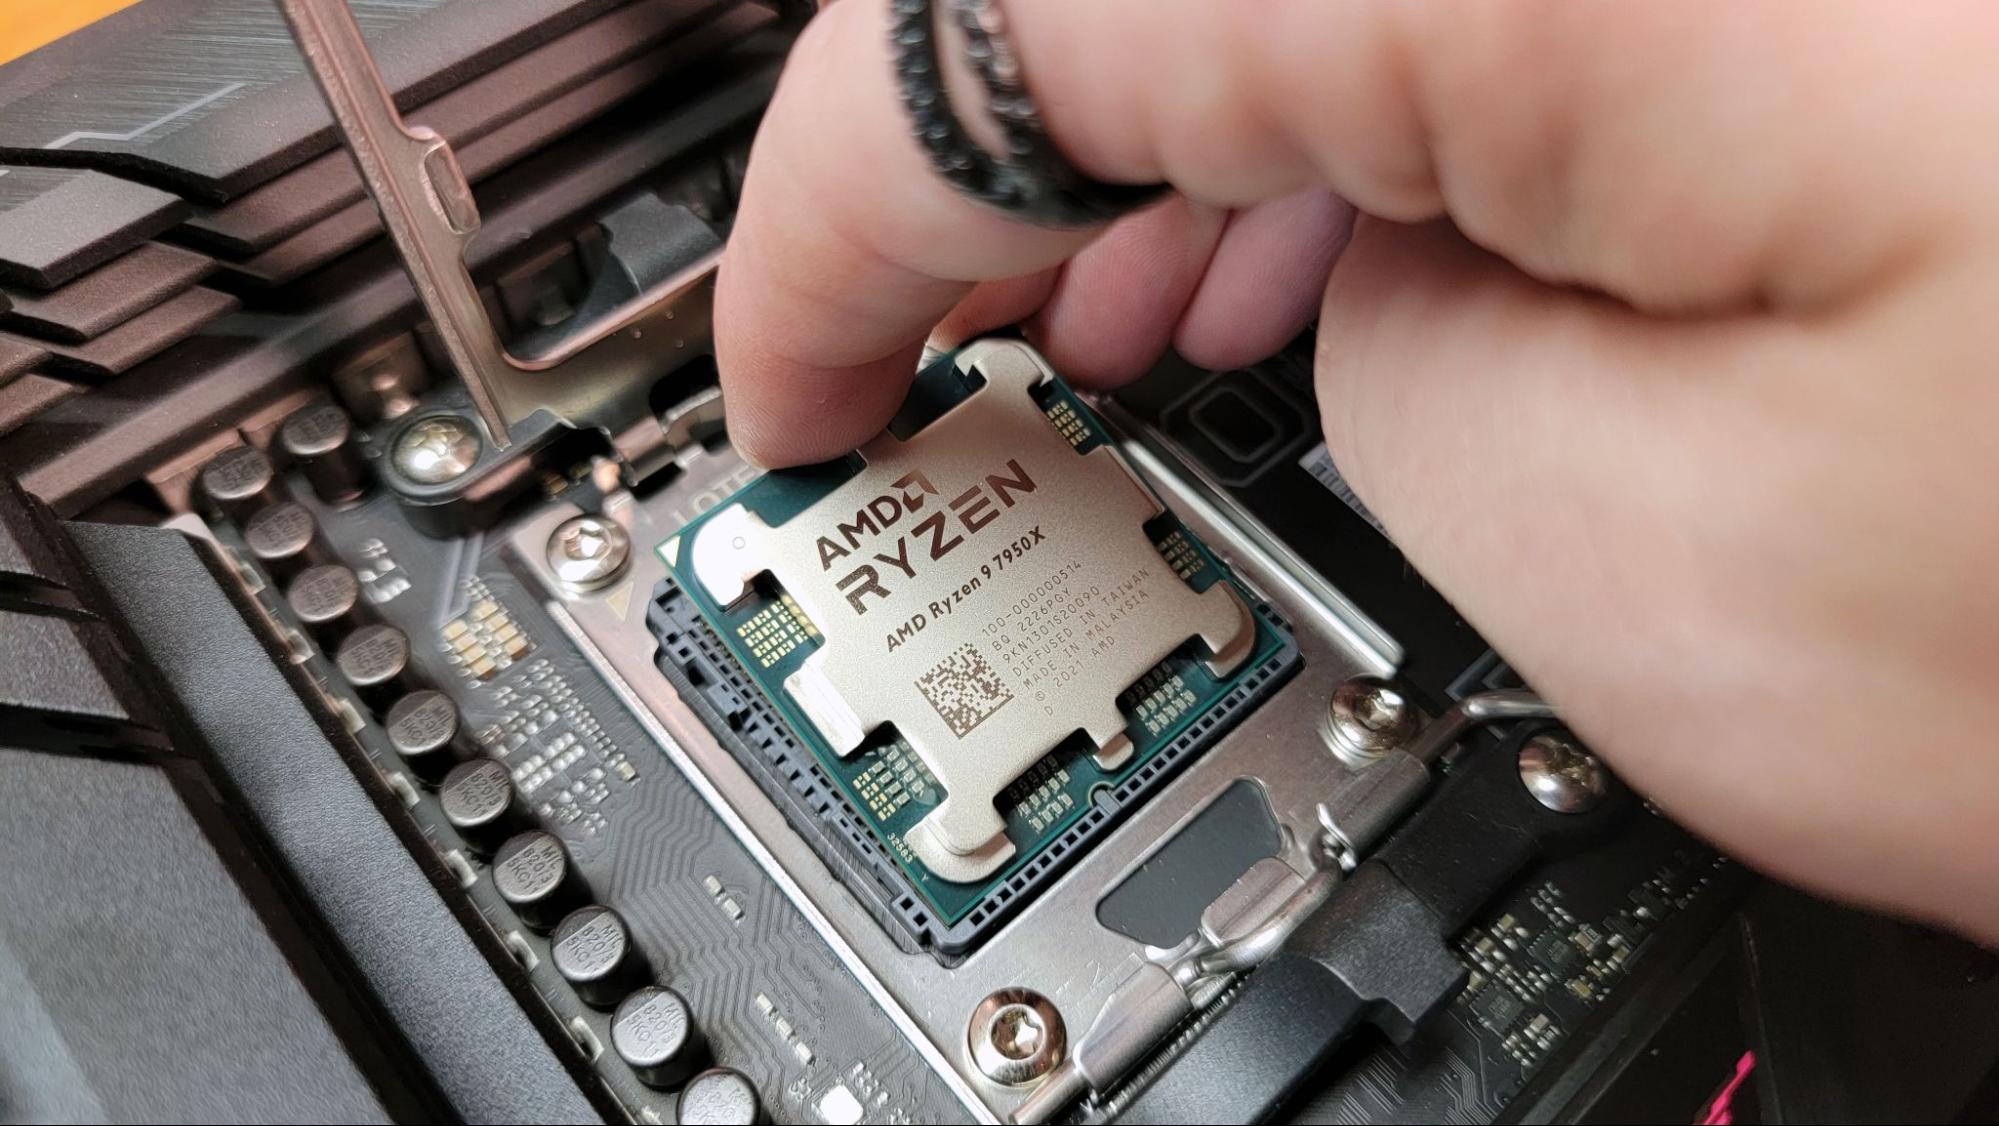
For most of us, it goes without saying that the CPU needs to be installed in your motherboard socket before you apply your paste. But hey, everyone was new at PC building at some point. If we want to keep our hobby (and in our case, our careers) thriving, we need to be welcoming to those who are just attempting to grasp the basics.
So yes, check out our how-to on how to install a CPU if you need it. Get your CPU properly latched into its socket. And, if you're installing an AIO liquid cooler, you probably also want to install your motherboard in the case first (along with any required backplate or mounting hardware).
Because while it's often a smart move to install your CPU and an air cooler with the motherboard outside the case, you'll almost always want to install an AIO onto your CPU after the motherboard is in the case. Having to move your motherboard around while it has a big, floppy, potentially component-damaging radiator attached to it is just asking for a hardware catastrophe.
OK. So your CPU is installed and you've sorted out and installed all the necessary cooler mounting hardware for your CPU / motherboard socket? Good. It's finally time to break out the thermal paste. Unless it's already pre-installed for you.
Want the simplest solution? Get a cooler with thermal paste pre-applied.
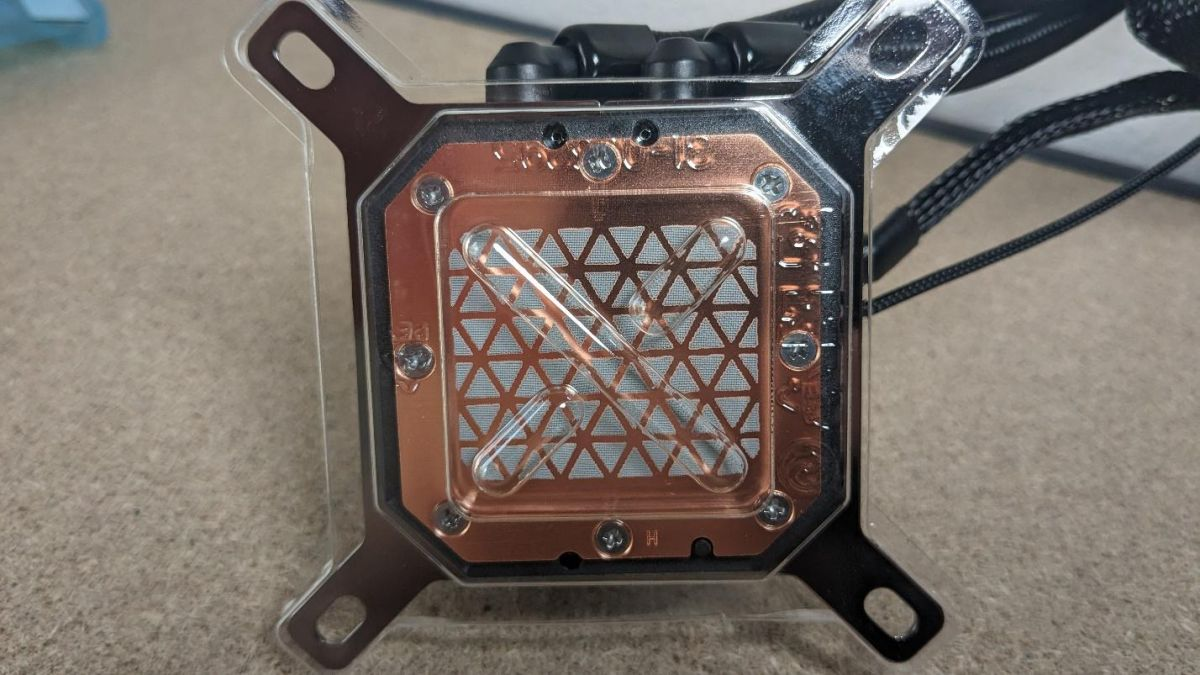
Lots of coolers these days, particularly all-in-one (AIO) liquid coolers, come with thermal paste pre-applied to the cooling plate. The image above comes from Corsair's iCUE H100i Elite Capellix XT. This is applied with a machine in a way that assures even application and should work fine for any CPU platform that the cooler supports. After all, no company selling CPU coolers is likely to set its product up for failure by shipping poorly applied (or poorly performing) thermal paste.
So, if you just want to make things easy and aren't going to obsess about getting and maintaining the lowest possible temperatures or the highest possible overclocks, using thermal paste that's pre-applied from the manufacturer is perfectly fine. Just be sure to remember to remove the plastic film or cover that's there to protect the paste during shipment!
And, if at any point you remove the cooler after installing it on your CPU, you'll need to carefully wipe off the pre-applied paste from the cooler and your CPU and apply fresh paste. So if you're upgrading your CPU, or your cooler didn't come with pre-applied thermal paste, we'll see you in the next section, where we finally get to the "how to" bit.
How to apply thermal paste on an Intel CPU (LGA1700, LGA1851)
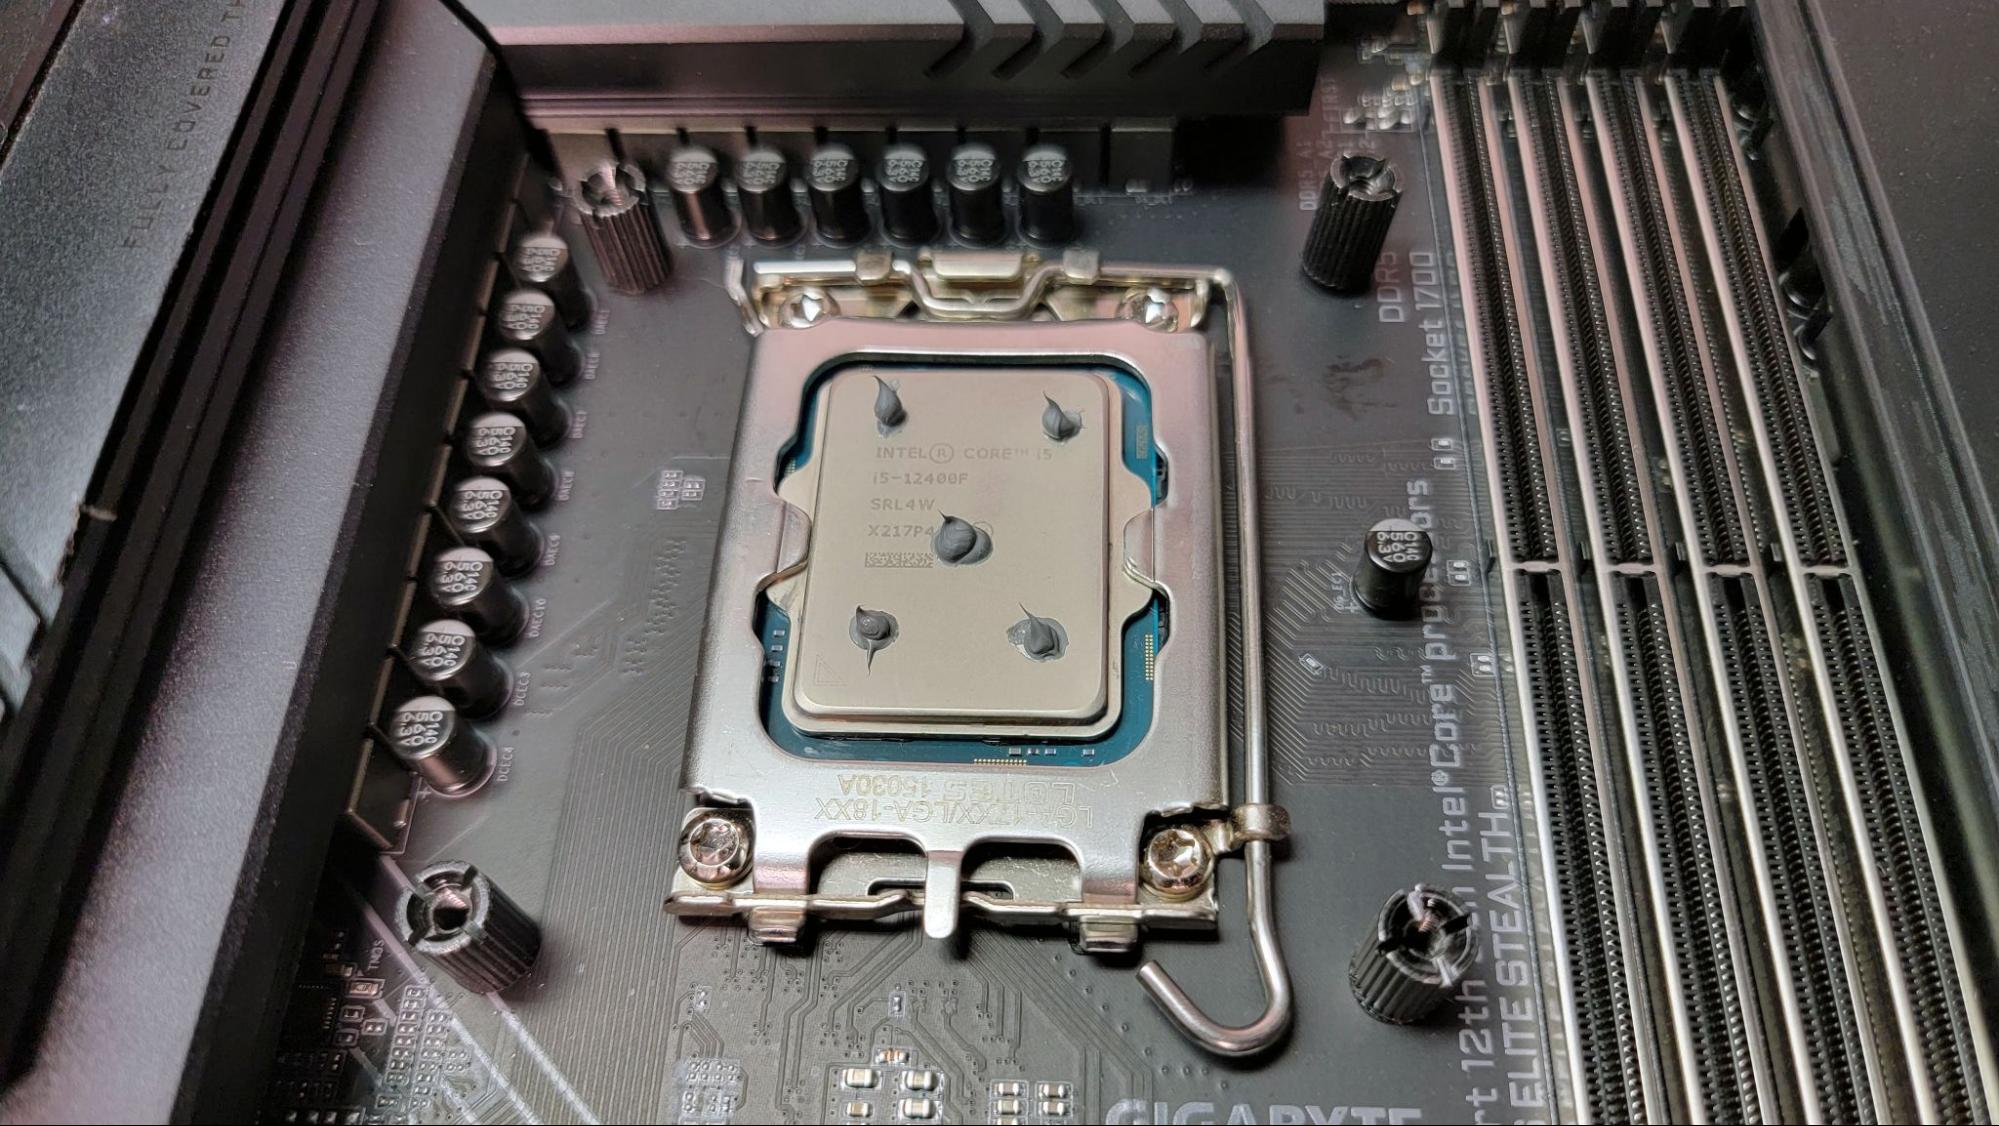
Intel's previous-generation mainstream CPUs had a square, more compact shape. But with the rise of the hybrid CPU architectures used in 12th Gen Intel CPUs and later, that use the LGA1700 or LGA1851 socket, they have a rectangular shape with more surface area. This, combined with larger, more complex layout of the components under the heat spreader, means that you'll want to apply more than a single dot in the center of the CPU.
For 12th - 14th Gen Intel processors as well as Core Ultra (Arrow Lake), apply one small (3-4mm) dot of paste in the center of the CPU and four smaller dots (2mm) a couple of millimeters in from each corner. Note that the typical syringe applicator and viscosity of thermal paste makes it pretty hard to be exact here. So long as you're not applying substantially larger dots here, you should be fine. It's also pretty difficult with most pastes to apply a dollop that's less than 2mm. Take your time, attempt to replicate something like the image above, and things should turn out fine. Again, just don't go overboard on the amount of paste.
How to apply thermal paste on an AMD CPU (AM5)
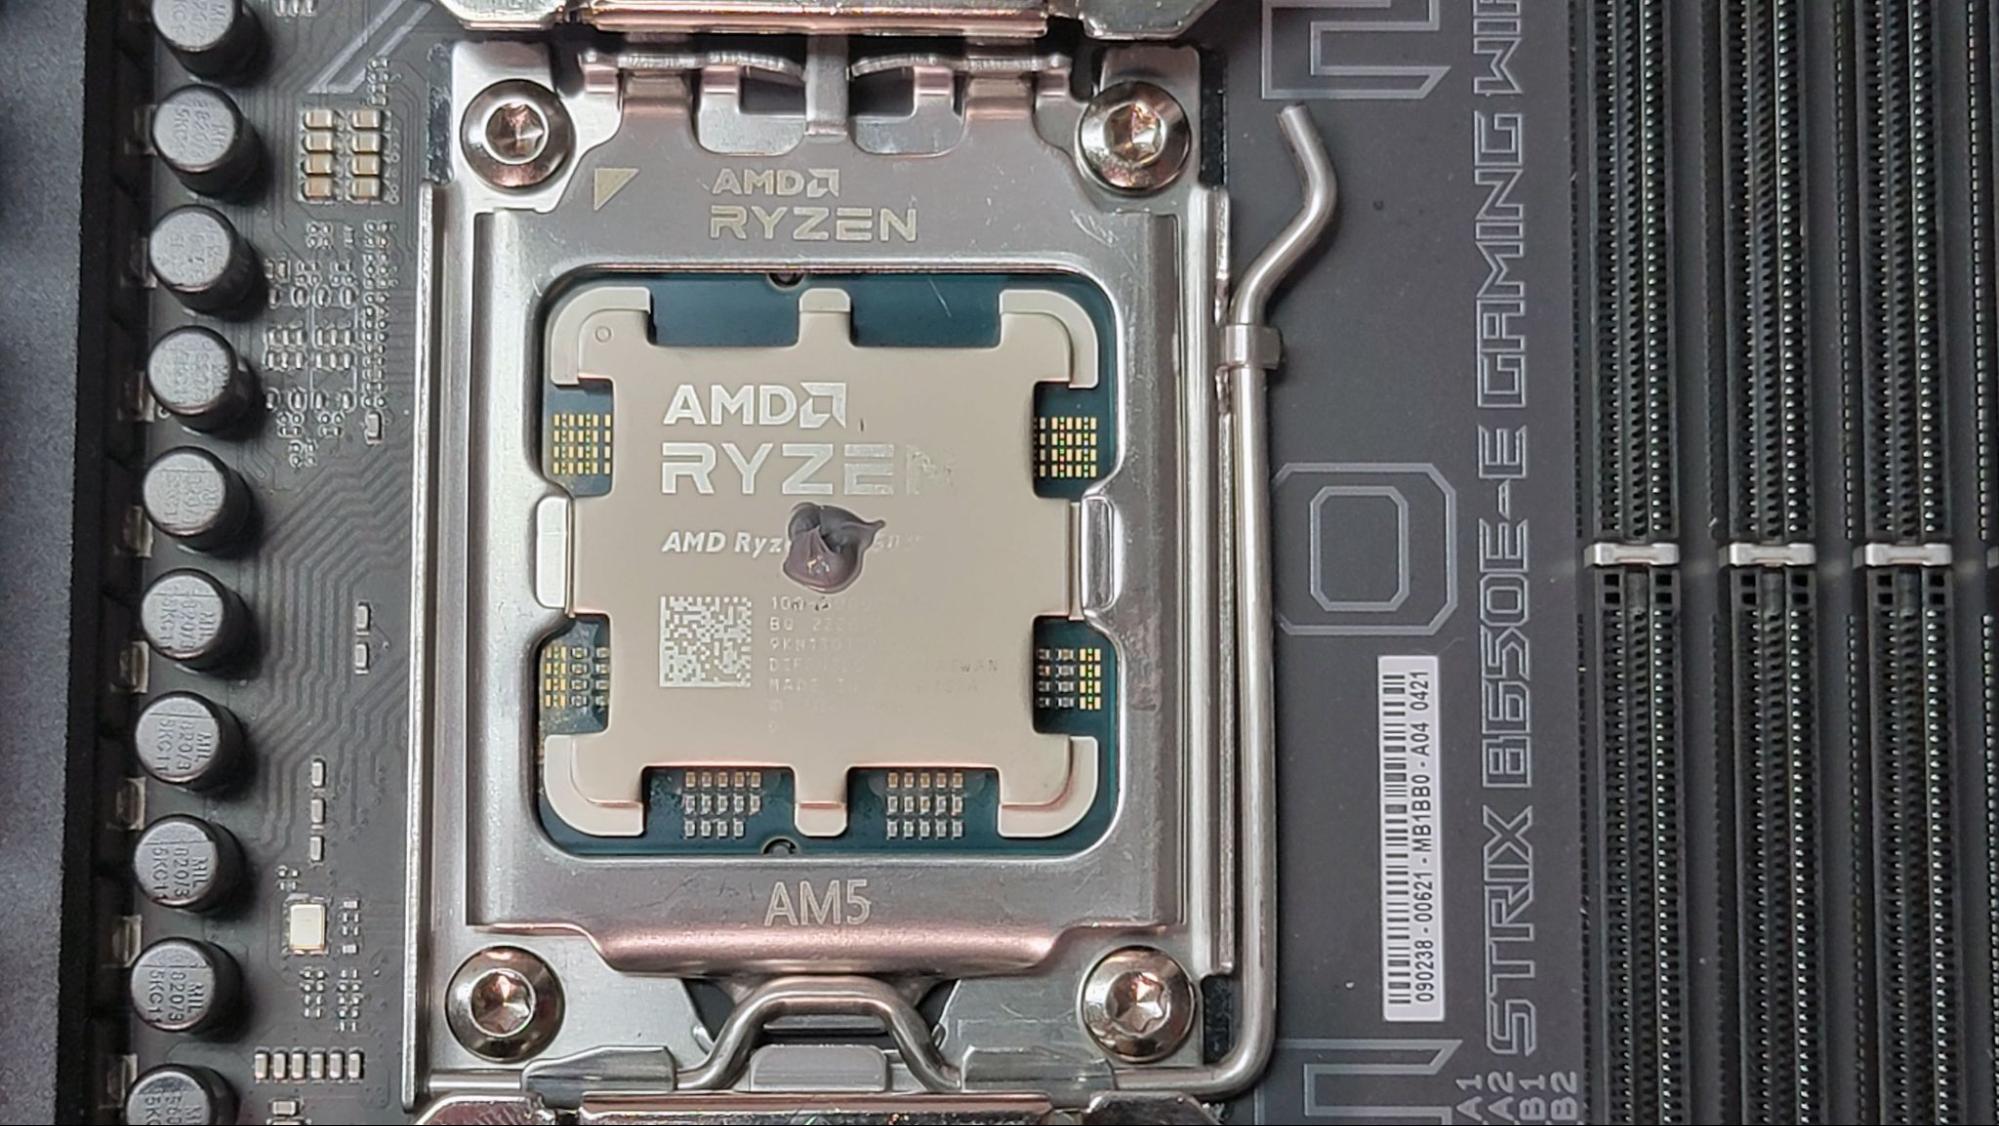
AMD's current AM5 socket and its Ryzen 7000-9000 processors are thicker and heavier than their AM4 predecessors. But because the heat spreader has two cutouts around each edge, its surface area for heat transfer is fairly small. So for AMD's Ryzen 7000, 8000, and 9000 CPUs, apply one 3-4mm dot in the center of the CPU.
How to apply thermal paste on an Intel LGA1200 or LGA115x CPU
Older Intel processors have a compact surface area with their primary components in in the center of the chip, under the heat spreader. As such, you should apply one 3-4mm dot on the center of the CPU, just like in the image above of the AMD AM5 CPU.
How to apply thermal paste on an AMD AM4 CPU
AMD's older Ryzen processors on the AM4 socket (Ryzen 1000-5000) straddles the size line between Intel's older LGA1200 socket and previous CPUs and the larger LGA1700 and LGA2066 chips. So either of the above methods (one 3mm dot in the center alone, or one center dot with four smaller dots around the outside) will work just fine. Just be extra careful about not applying too much paste, especially if going for the five-dot method, as socket AM4 CPUs are still quite small.
How to apply thermal paste on AMD TR4 and STRX4 (Threadripper) CPUs
These workstation processors are much larger than their mainstream CPU counterparts (with, generally, many more CPU cores). As such, there is much more surface area to cover for with these chips, which means you'll need more thermal paste in more spots to maintain good thermal transfer.
For AMD Threadripper, apply four 3-4mm dots in a rectangular pattern roughly halfway in from the four corners of the processor. Then apply nine smaller 2mm dots interspersed evenly around and between the four larger dots. In other words, apply three 2mm dots along each of the shorter edges of your Threadripper chip and three more in a line across the center. Once again, it's less important that these 13 dots be exactly this size than it is to make sure you aren't using substantially more thermal paste than this in total.
Next steps
With your thermal paste applied, you're ready to install your cooler. There's no need to spread the paste around, as the metal base of the cooler will do this for you as you mount it. In fact, if you try and spread it manually, there's a good chance you'll spoil the distribution you were aiming for with the dots. Make sure you have all your mounting hardware handy before placing the cooler evenly on the center of your CPU. Then use the latches, pins, or screws of your cooler's mounting hardware to secure the CPU in place.
Once everything else in your system is reconnected and you've booted up for the first time, it's a good idea to run some kind of CPU benchmark while keeping an eye on your temperatures. But if you've followed our thermal paste guidelines above, you should achieve the temperatures and clock speeds that your CPU and cooler pairing are capable of delivering.


