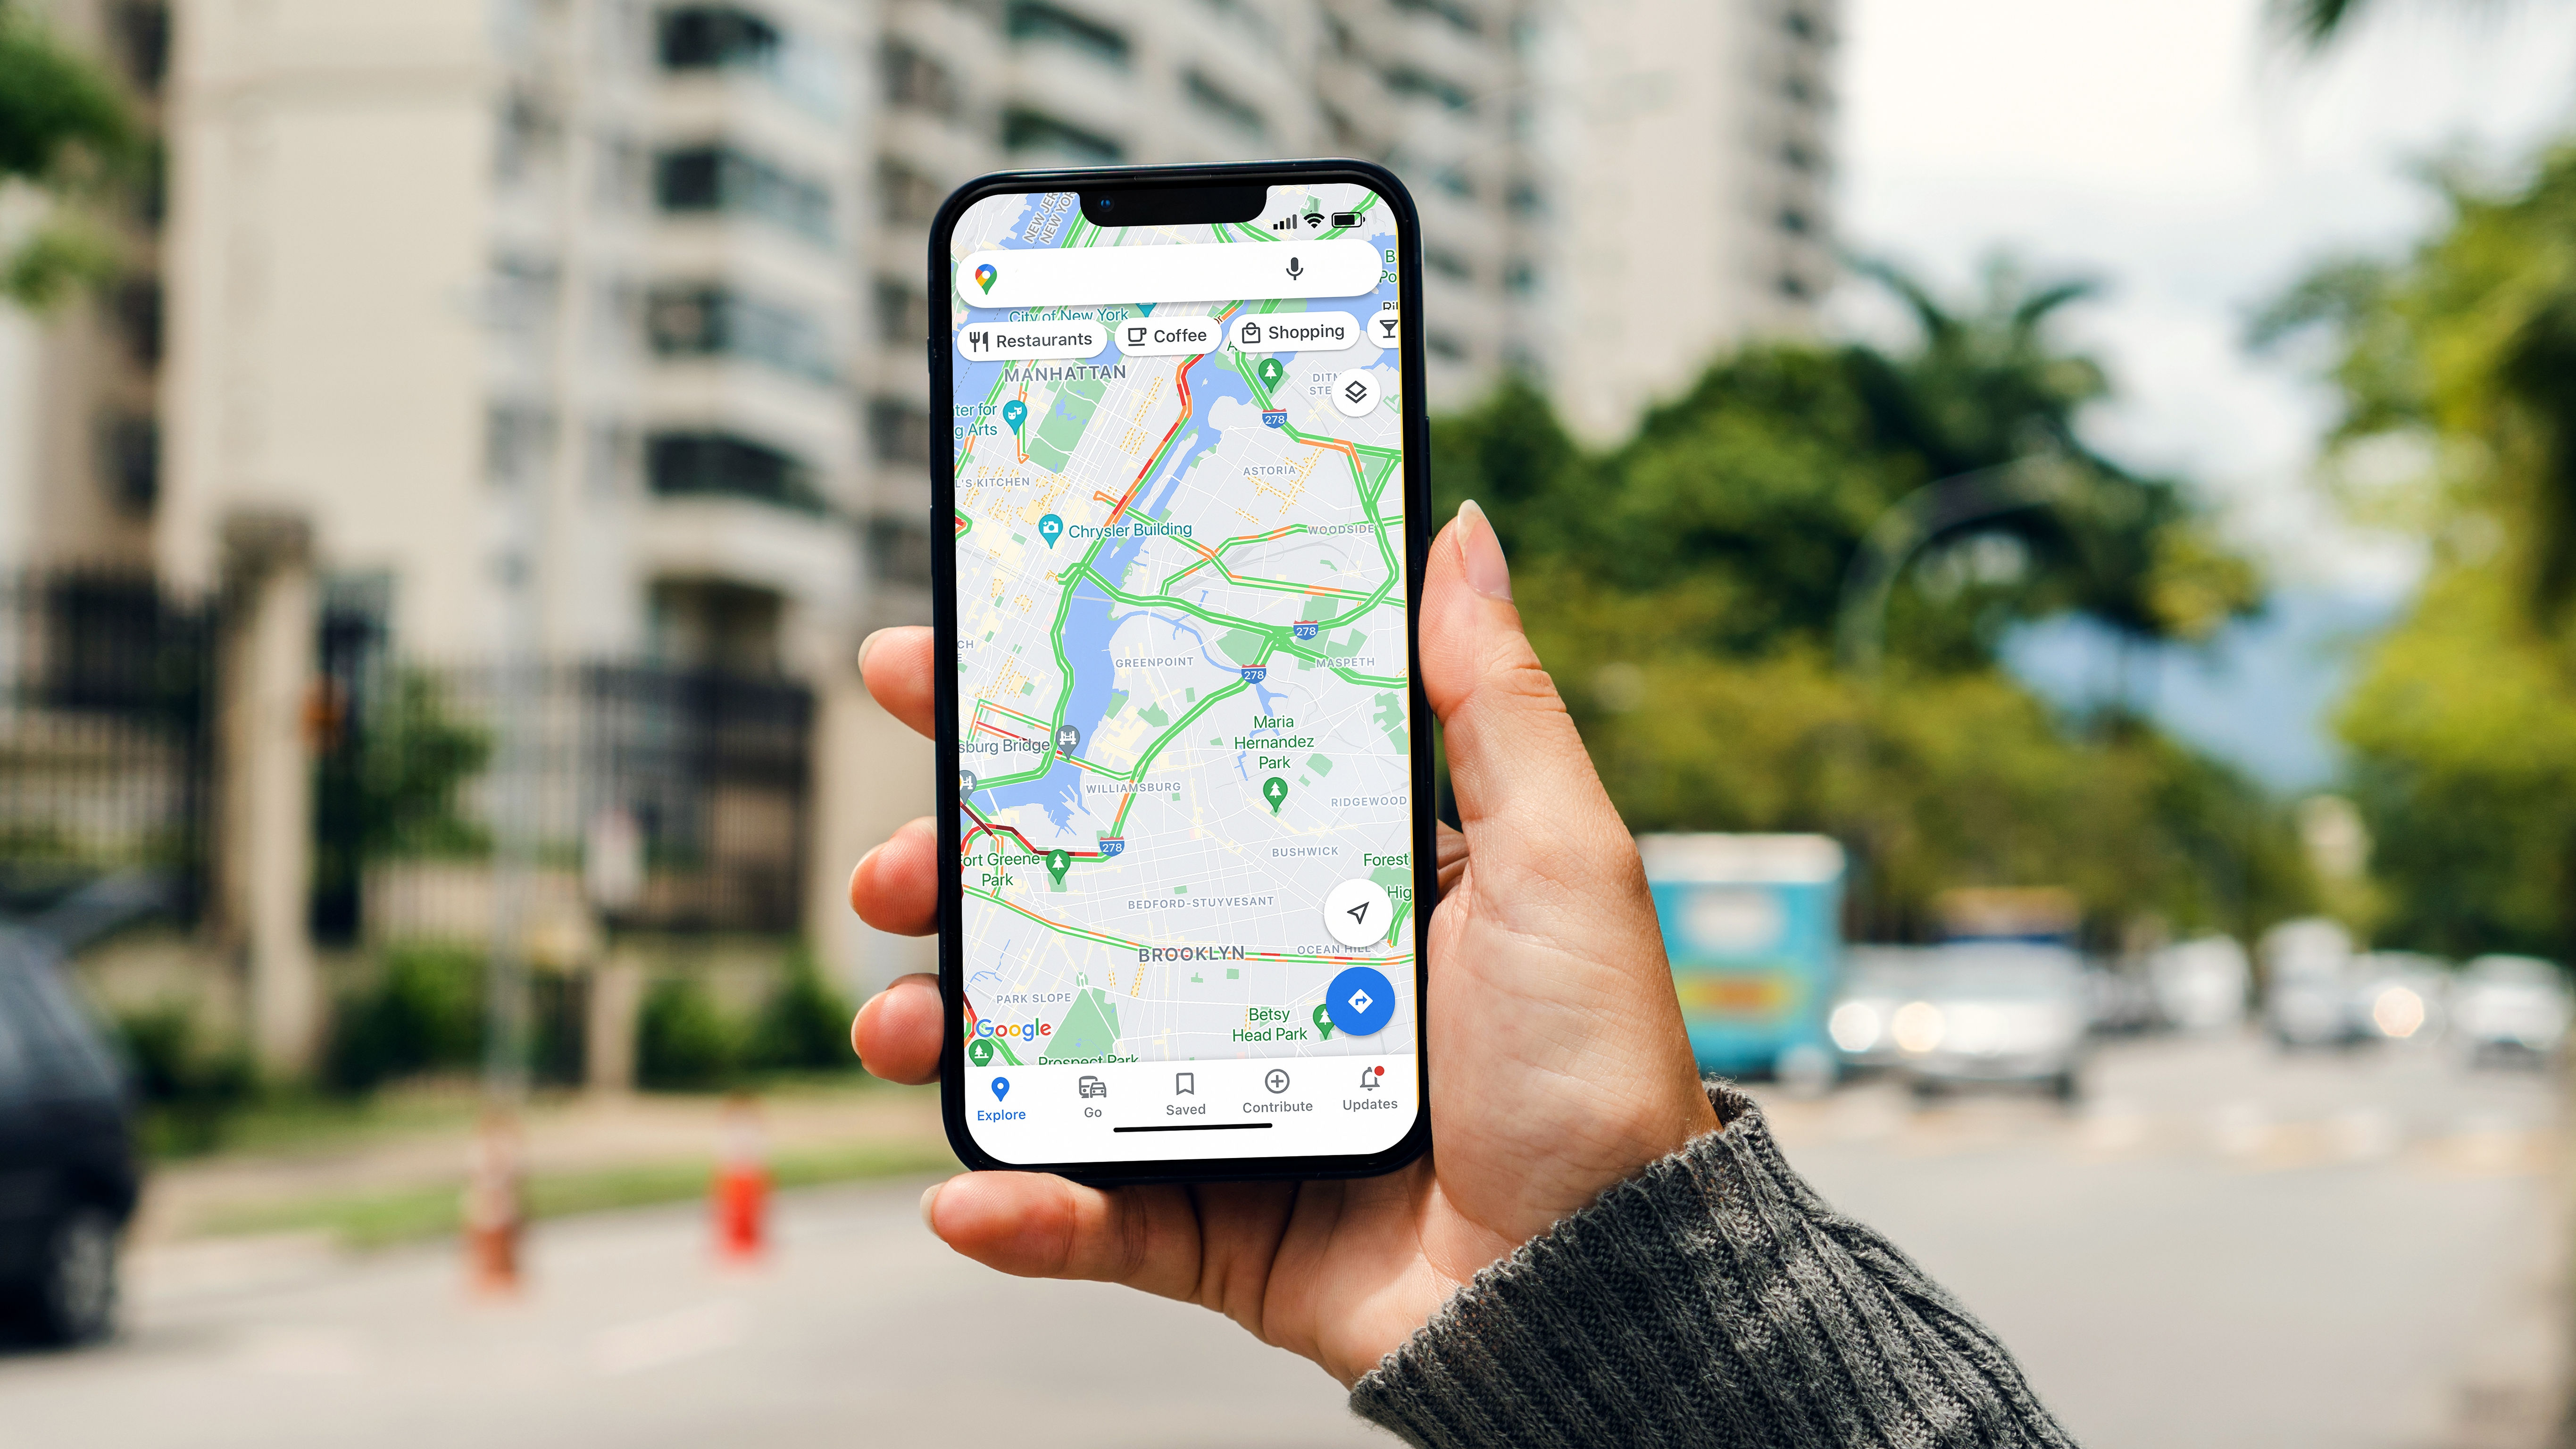
Google Maps can be an invaluable tool in any number of places, but it only works properly if the app can get an accurate read on your location. There are times when GPS accuracy can be rather poor, whether that’s because of tall buildings, overhanging foliage, or simply because you’re inside — and that means your navigation will be affected.
Fortunately it is possible to calibrate Google Maps on Android and iOS. That way the location accuracy is improved, and you have more confidence that the app is sending you in the right direction. Here’s what you need to know.
How to calibrate Google Maps on Android and iOS
- Open Google Maps and find your current location
- Tap the blue dot and press Calibrate
- Hold your camera up and scan your surroundings with Live View
- (Android only) Choose the Use Compass option
- (Android only) Spin your phone in a figure of eight motion
Read on to see full illustrated instructions.
1. Open Google Maps and find your current location
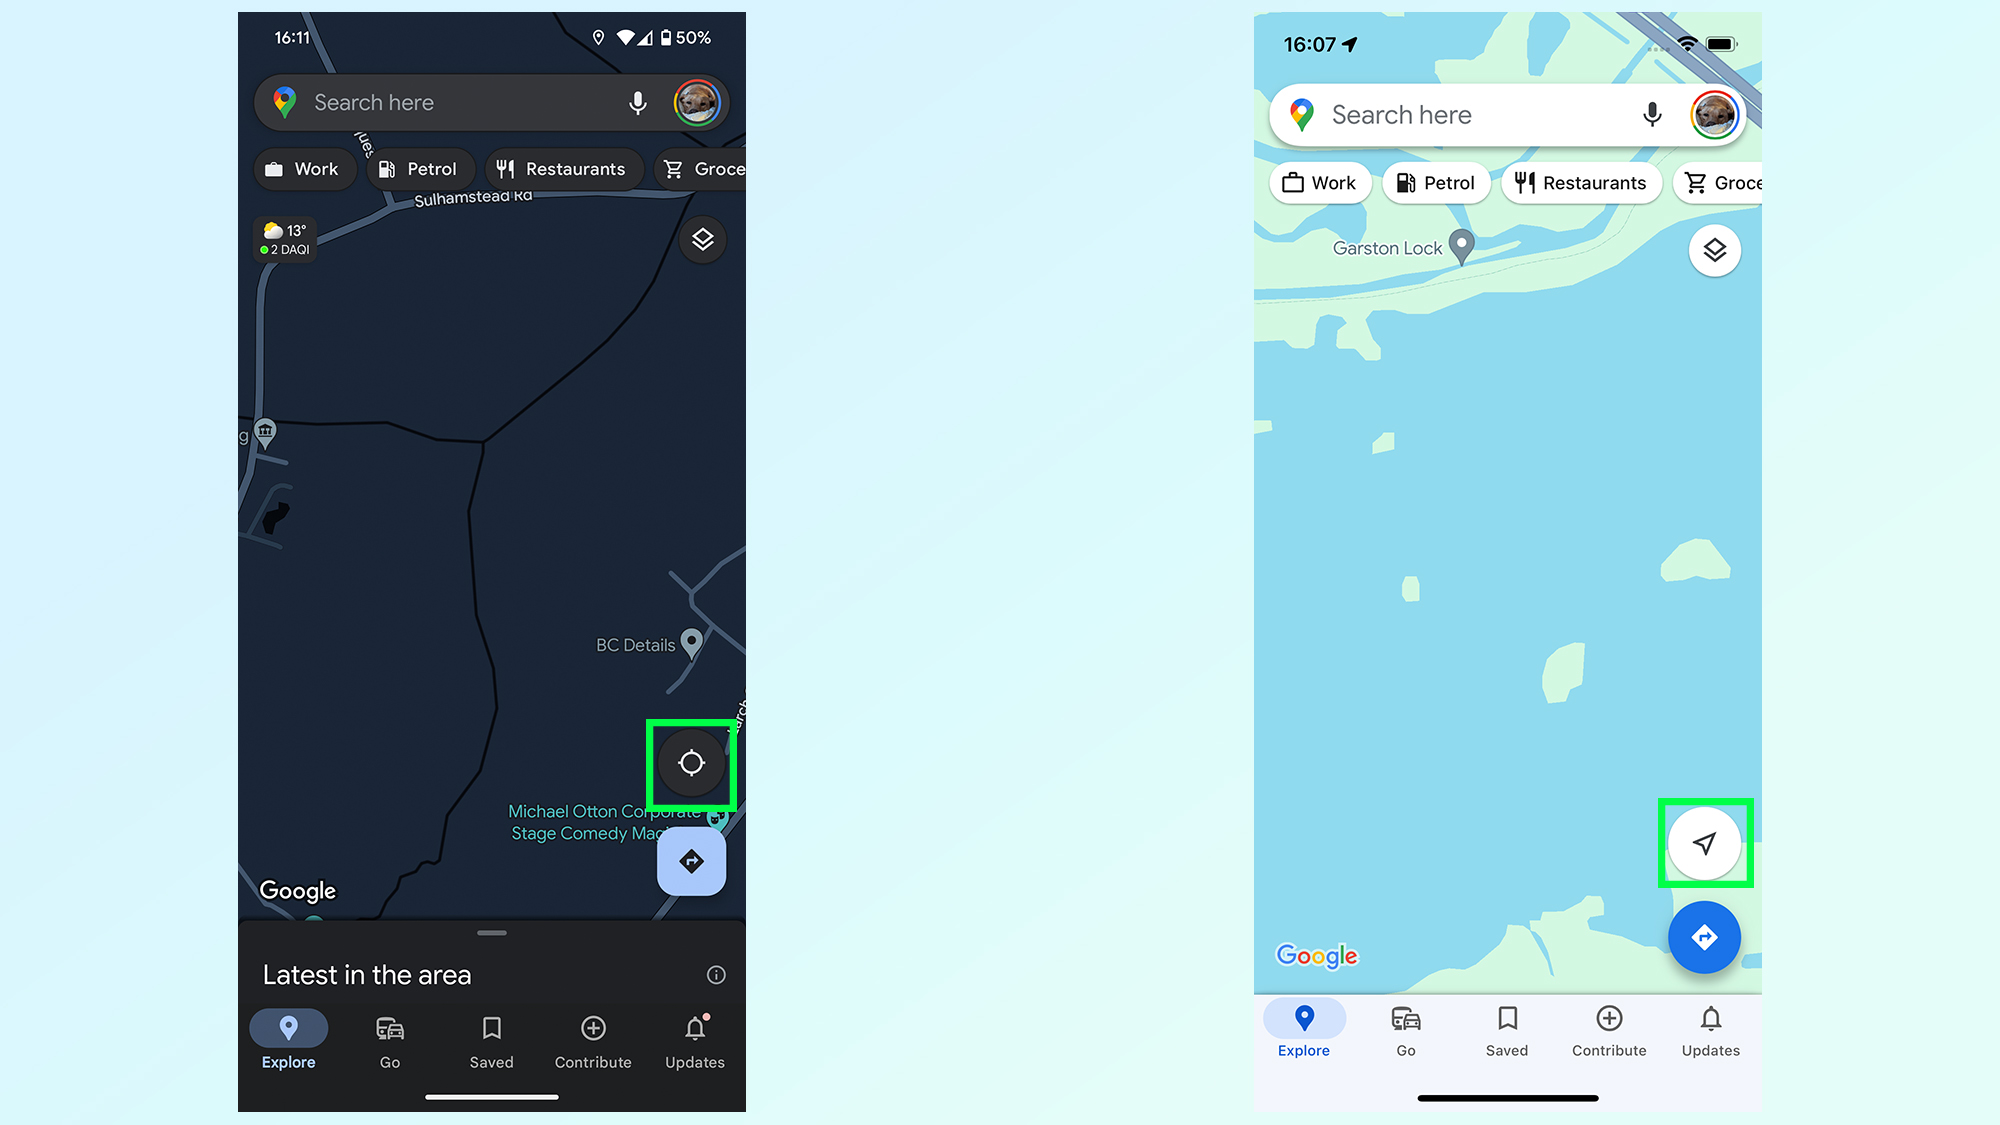
Your first step is to open Google Maps and locate your current position on the map. You can do this by tapping the location button on the bottom right side of the screen. For Android users this is a spiked circle that looks a little like a minimalist compass, and for iPhone users it’s an arrow pointing towards the upper right.
2. Tap the blue dot and press Calibrate
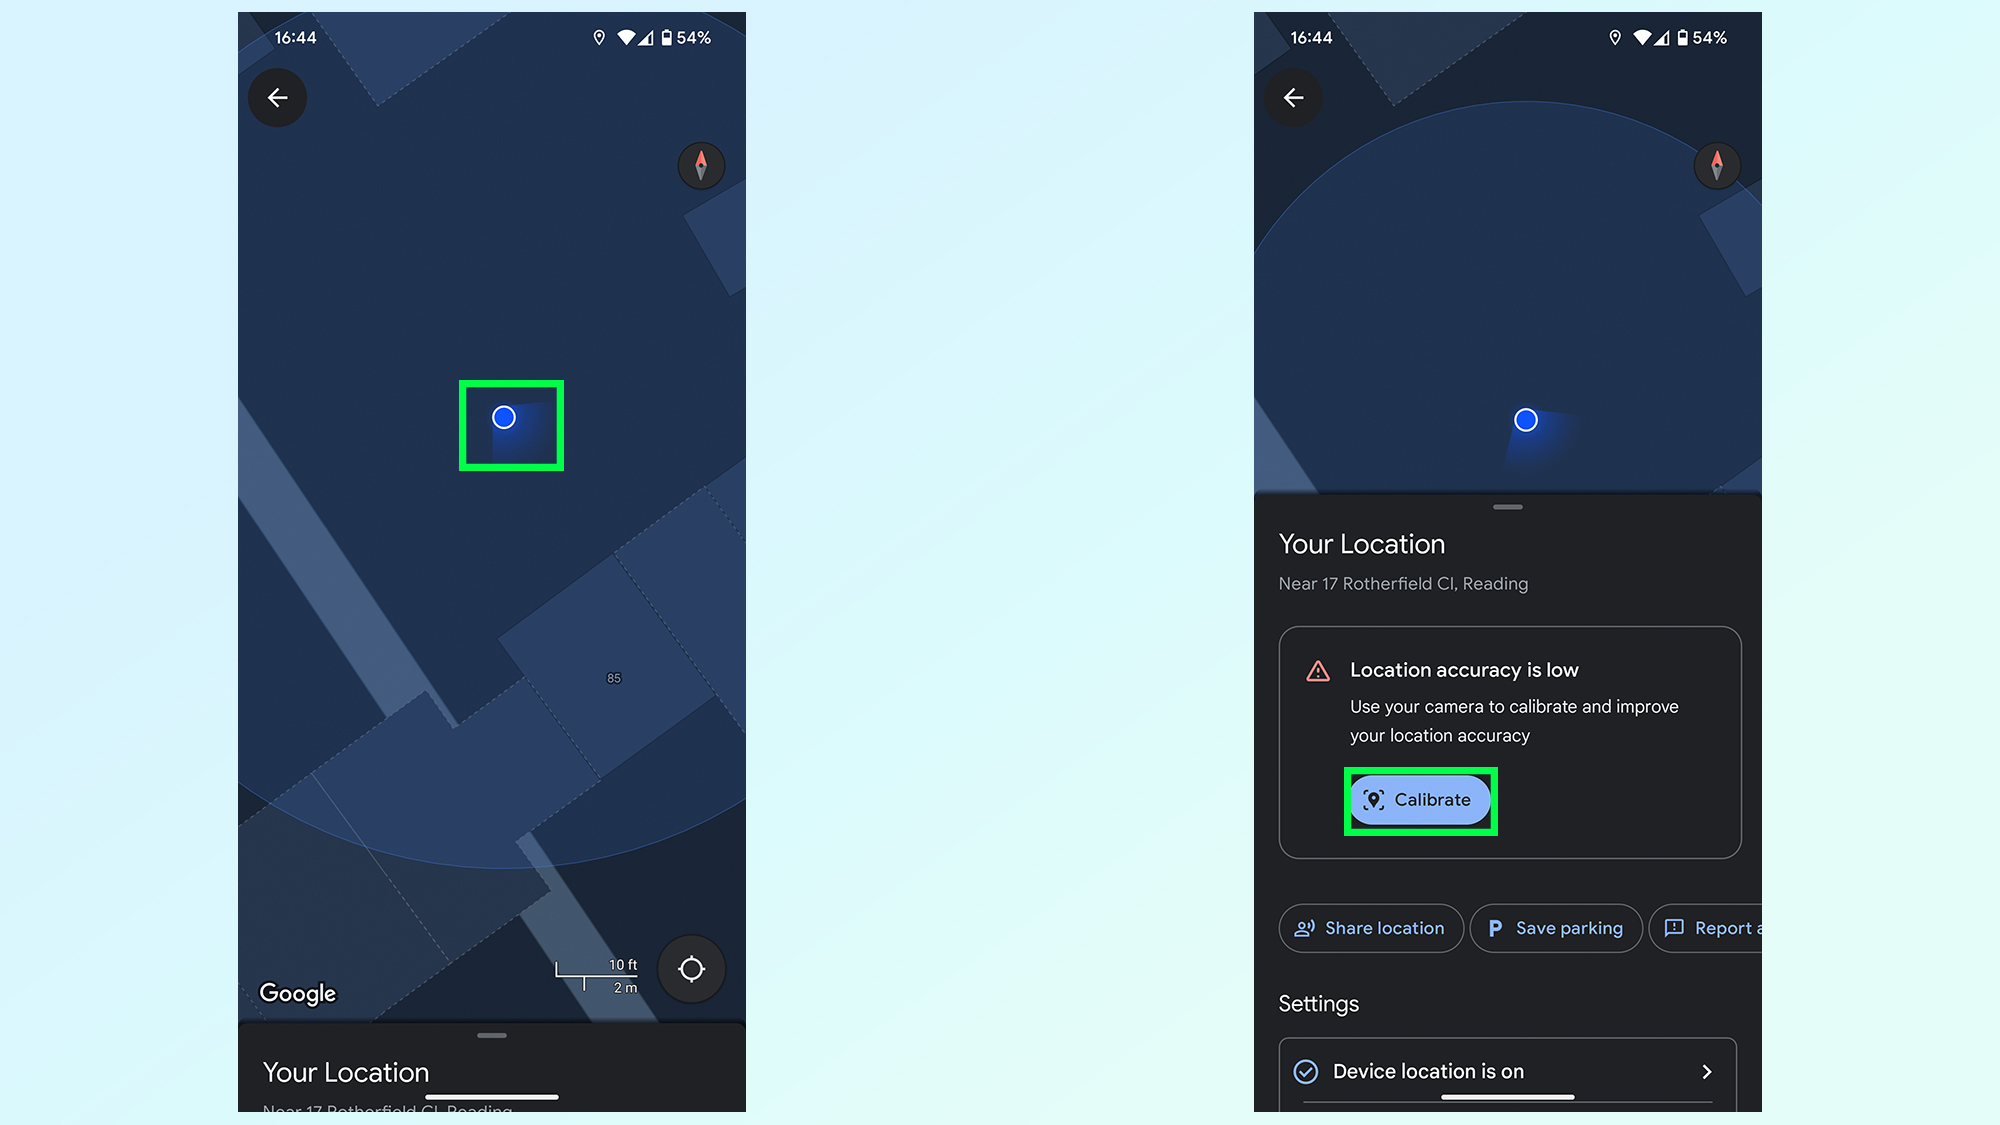
From here you’ll need to tap the blue dot that represents you on the map. This can be a bit tricky if you’re not zoomed right in, so if you end up dropping a pin cancel that and try again.
Once you’ve successfully tapped the dot, you’ll need to tap the Calibrate option. If your location accuracy is low, Google Maps will prompt you to calibrate right away. If not, then you can tap the calibrate option between Share location and Save parking
3. Hold your camera up and scan your surroundings with Live View
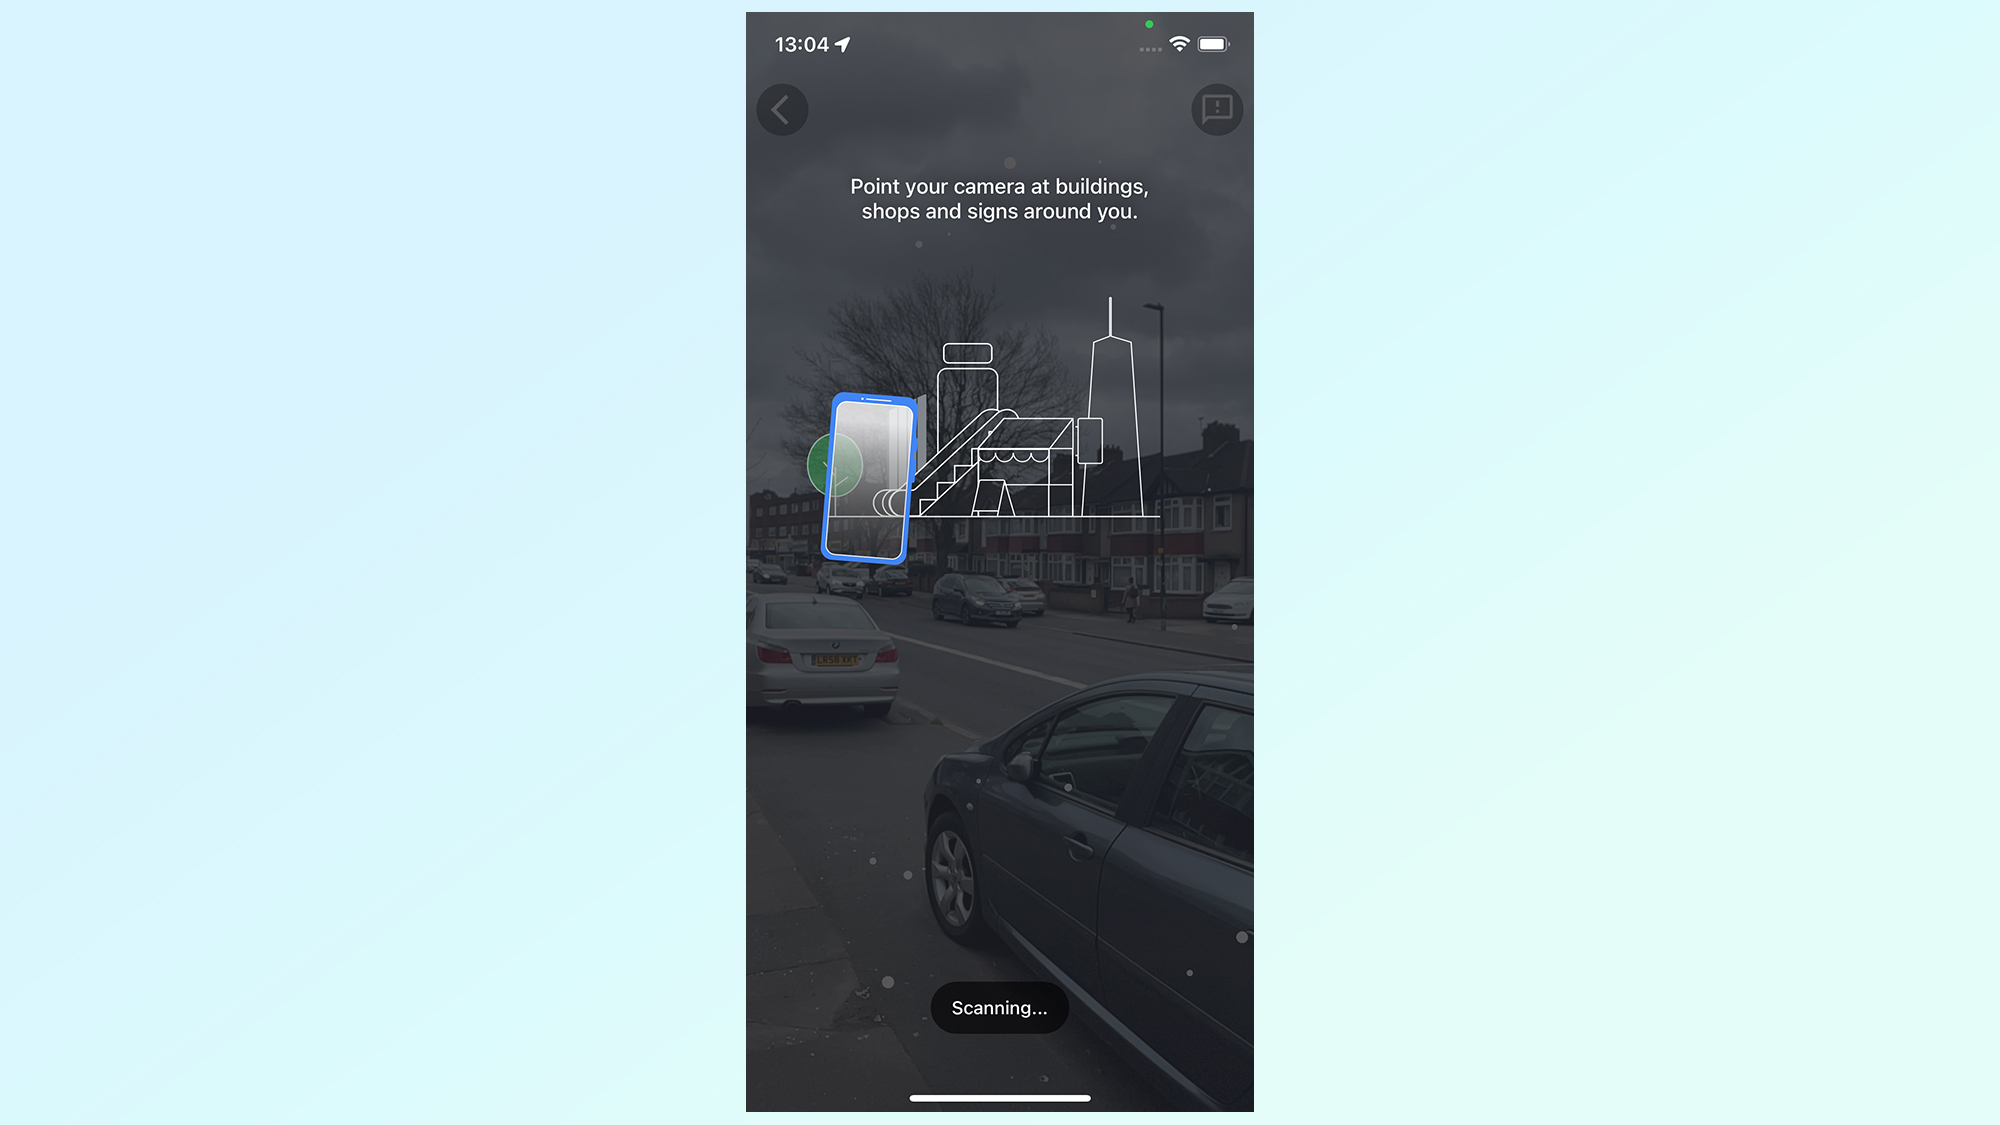
Your first option will be to use Live View to scan your surroundings and help Google Maps figure out where you are. All you need to do is hold your phone in front of you, camera facing out, and move it around you in a straight horizontal line. Make sure the camera can capture all the buildings around you, including store signs if there are are any.
You’ll have to be outside on the street to do this, otherwise the app won’t be able to figure out where you are.
For iPhone users this is the only way to get Google Maps to calibrate and lock in on your position. If you can’t get Google Maps to calibrate with Live View from where you are, then you’ll have to go somewhere else and try again.
4. (Android only) Choose the Use Compass option
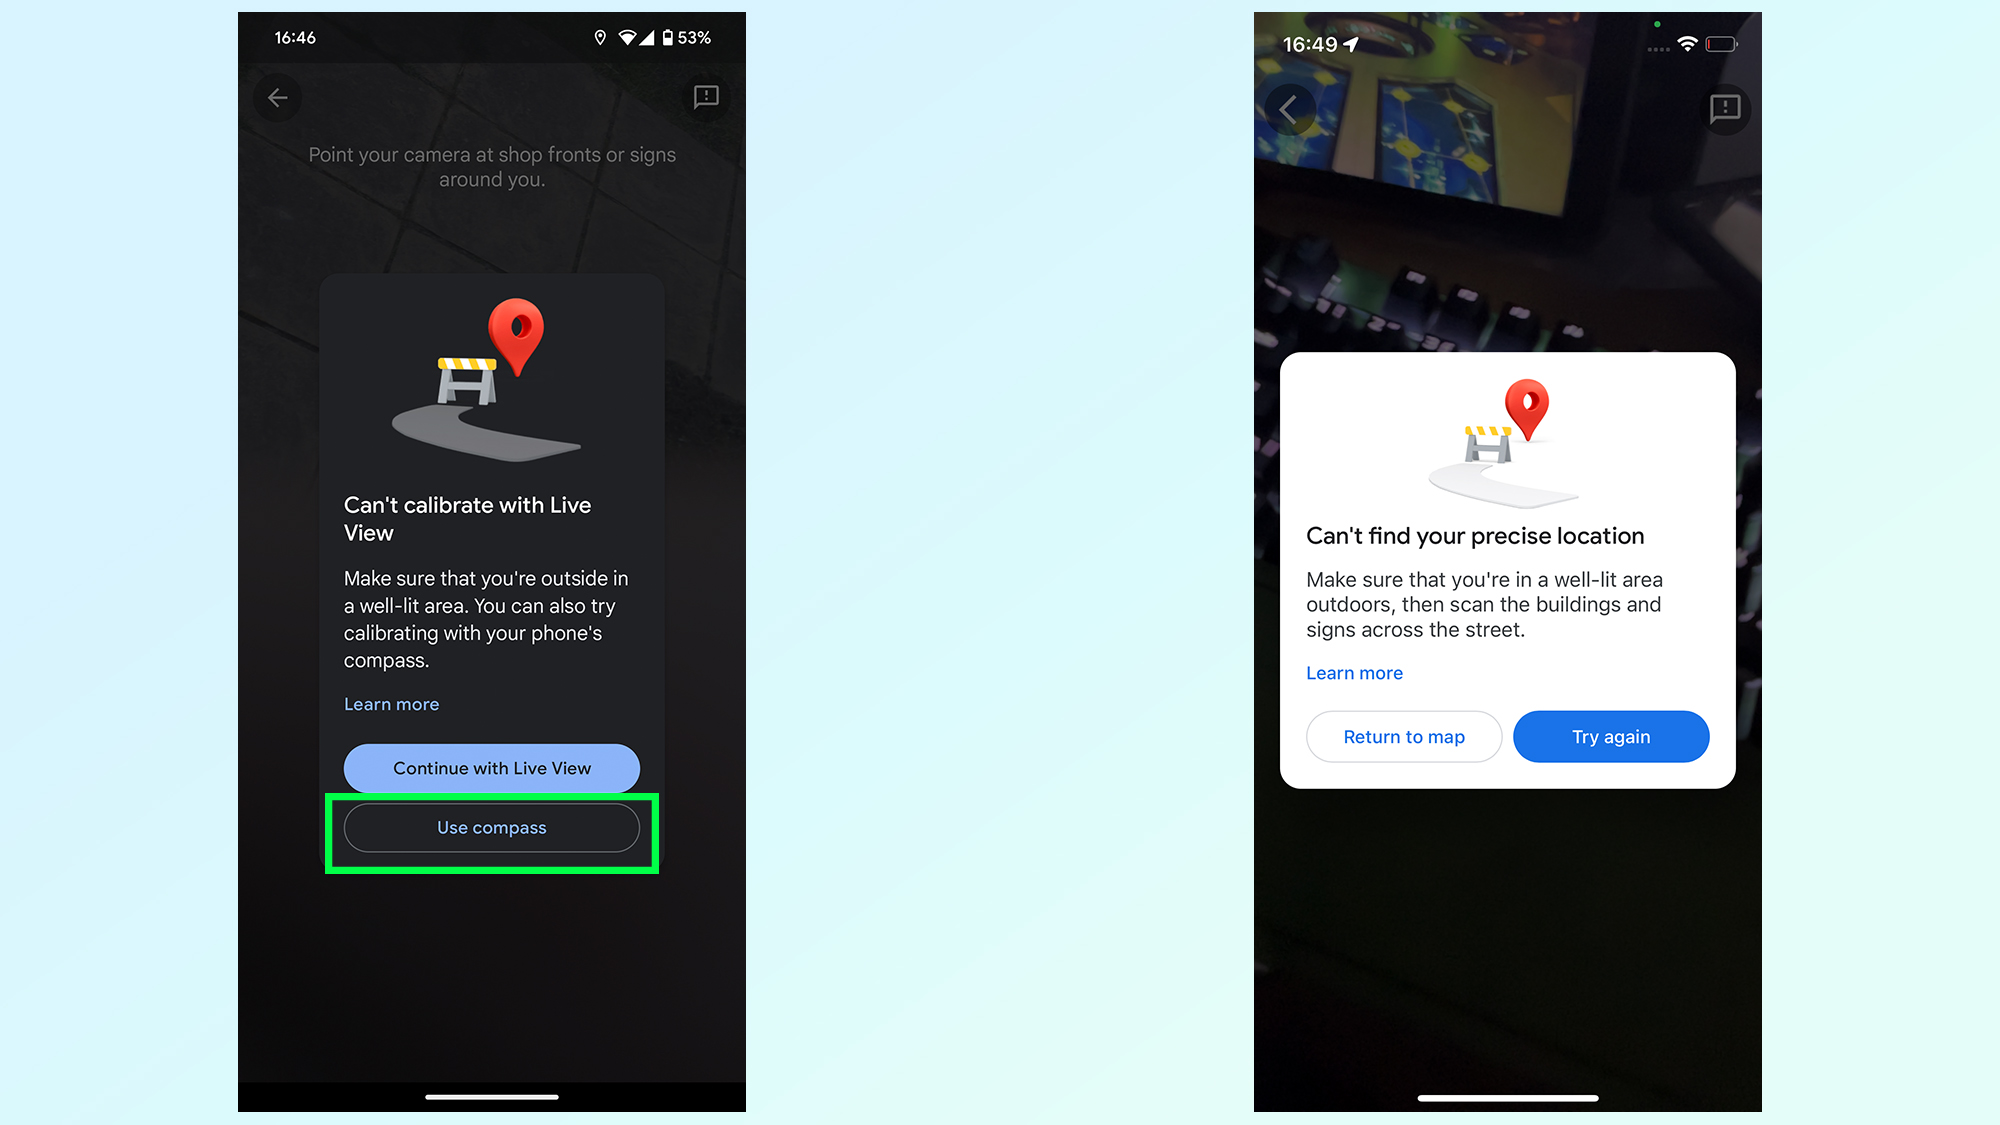
Android users (left) who find themselves unsuccessful in calibrating with Live View will be given the option to use your phone’s compass instead. If this option comes up tap the Use Compass button on the screen.
iPhone users (right) will be prompted to either try Live View again, or return to the map and make do.
5. (Android only) Spin your phone in a figure of eight motion
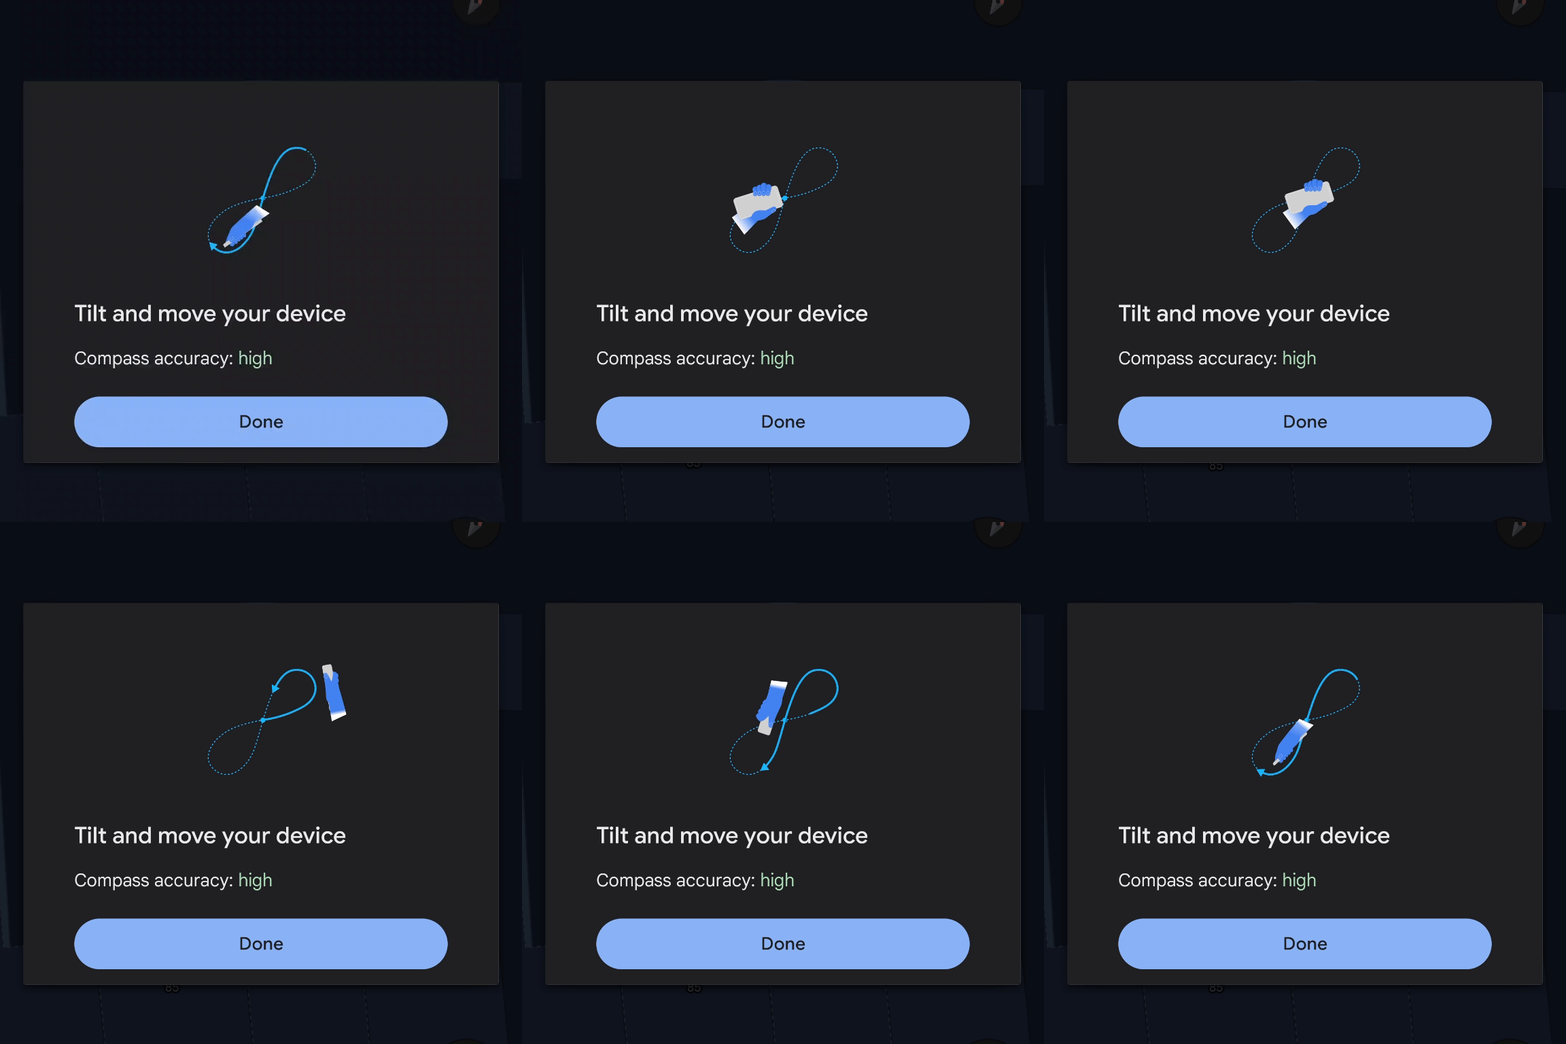
You’ll then want to spin your phone in a figure of eight motion, as shown on the screen. Be sure to watch the animation properly and see how the phone is turning. Because you’ll get better results if your phone is flipping over during the motion than you would if it stays screen up all the time.
There you have it, and with any luck you've improved Google Maps' location accuracy, allowing it to pinpoint you more accurately and offer better directions.
If you're looking for other tutorials that can help make your phone even better, be sure to check out some of our other guides. They include how to film super-smooth videos on Google Pixel phones, how the Galaxy S24's new Circle to Search feature works, how to set up parental controls with Google Family Link, and how you can ditch the desktop scanner by scanning documents with the Google Drive app.


