
Watch video (above): The beauty of Solarization
Of all the darkroom techniques to have made an impact on digital photography, Solarization is perhaps the most instantly recognisable. First championed by Man Ray in the 1920s, Solarization involved momentarily flicking on the lights in the darkroom while exposing a print. This partially inverts the tonal range of the image.
Normally, the tonal range would run from dark areas to bright areas. In digital imaging this is represented by the histogram, which groups dark pixels on the left of the graph and light pixels on the right. If we think of the range of brightness in this linear way from left to right, then imagine chopping the range in half and flipping one half around. This is what Solarization does. It inverts half of the tonal range, while leaving the other half to follow the usual linear path from dark to light. Normally, it’s the darker half of the range that is inverted, while the lighter half remains closer to normal (although it can be the other way around too, just make an upside down V in Steps 2 and 3 below).
You can see the effect clearly here in the pattern on the model’s dress. The tones that were originally close to black have been flipped to bright white. But the brighter tones in the back of the dress remain closer to normal. The effect is simple to achieve in Affinity Photo 2 with a combination of adjustment layers. We can fine-tune things to get the look we like by adding in further layers, controlling the strength and spread of the effect. Download the start images (click here) and follow along...
1. Convert to black and white
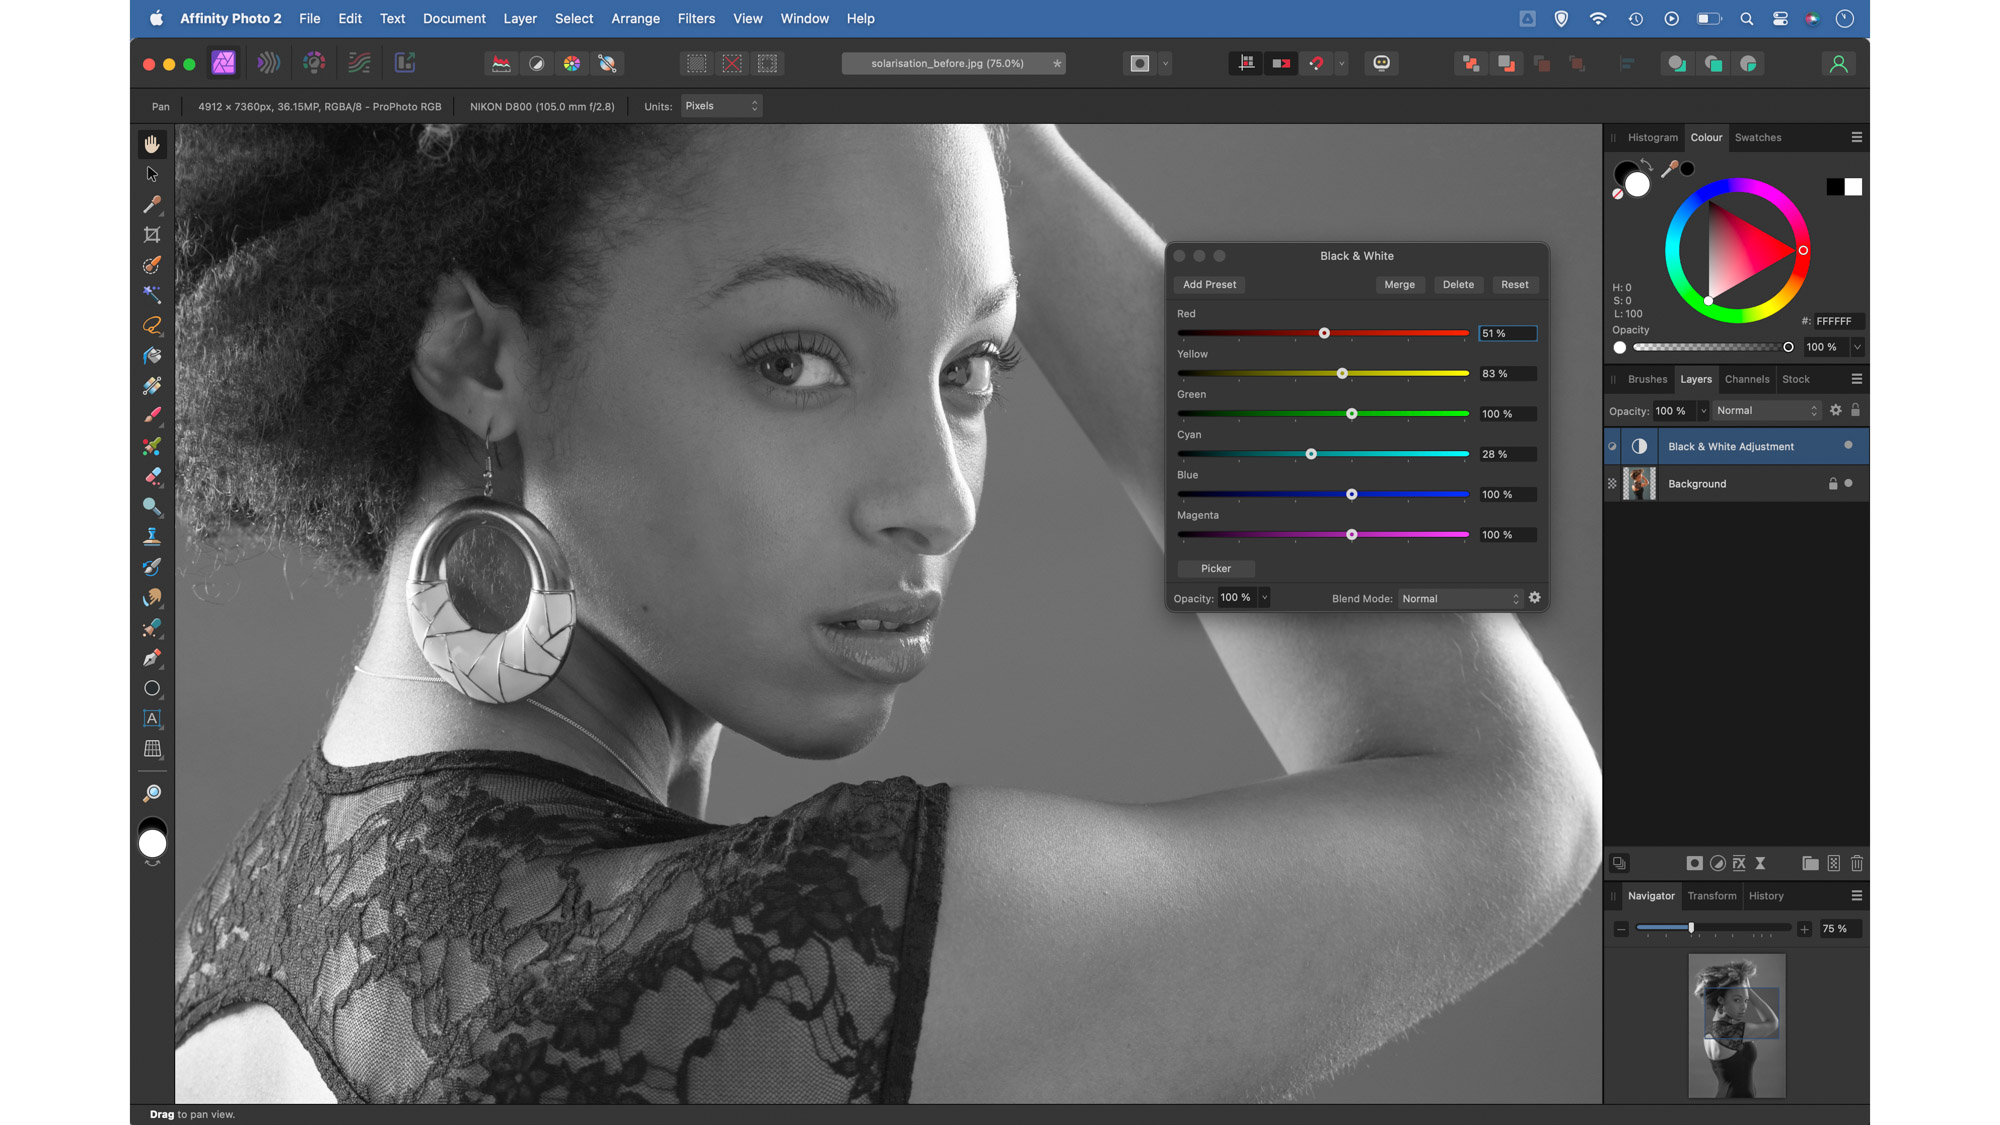
Open our start_solarization.jpg or your own image into Affinity Photo then go to the Layers Panel, click the Adjustment icon at the bottom and choose Black and White. Use the colour sliders to control the brightness of the different colour ranges until you hit upon a combination that works for the photograph.
2. Invert the shadows
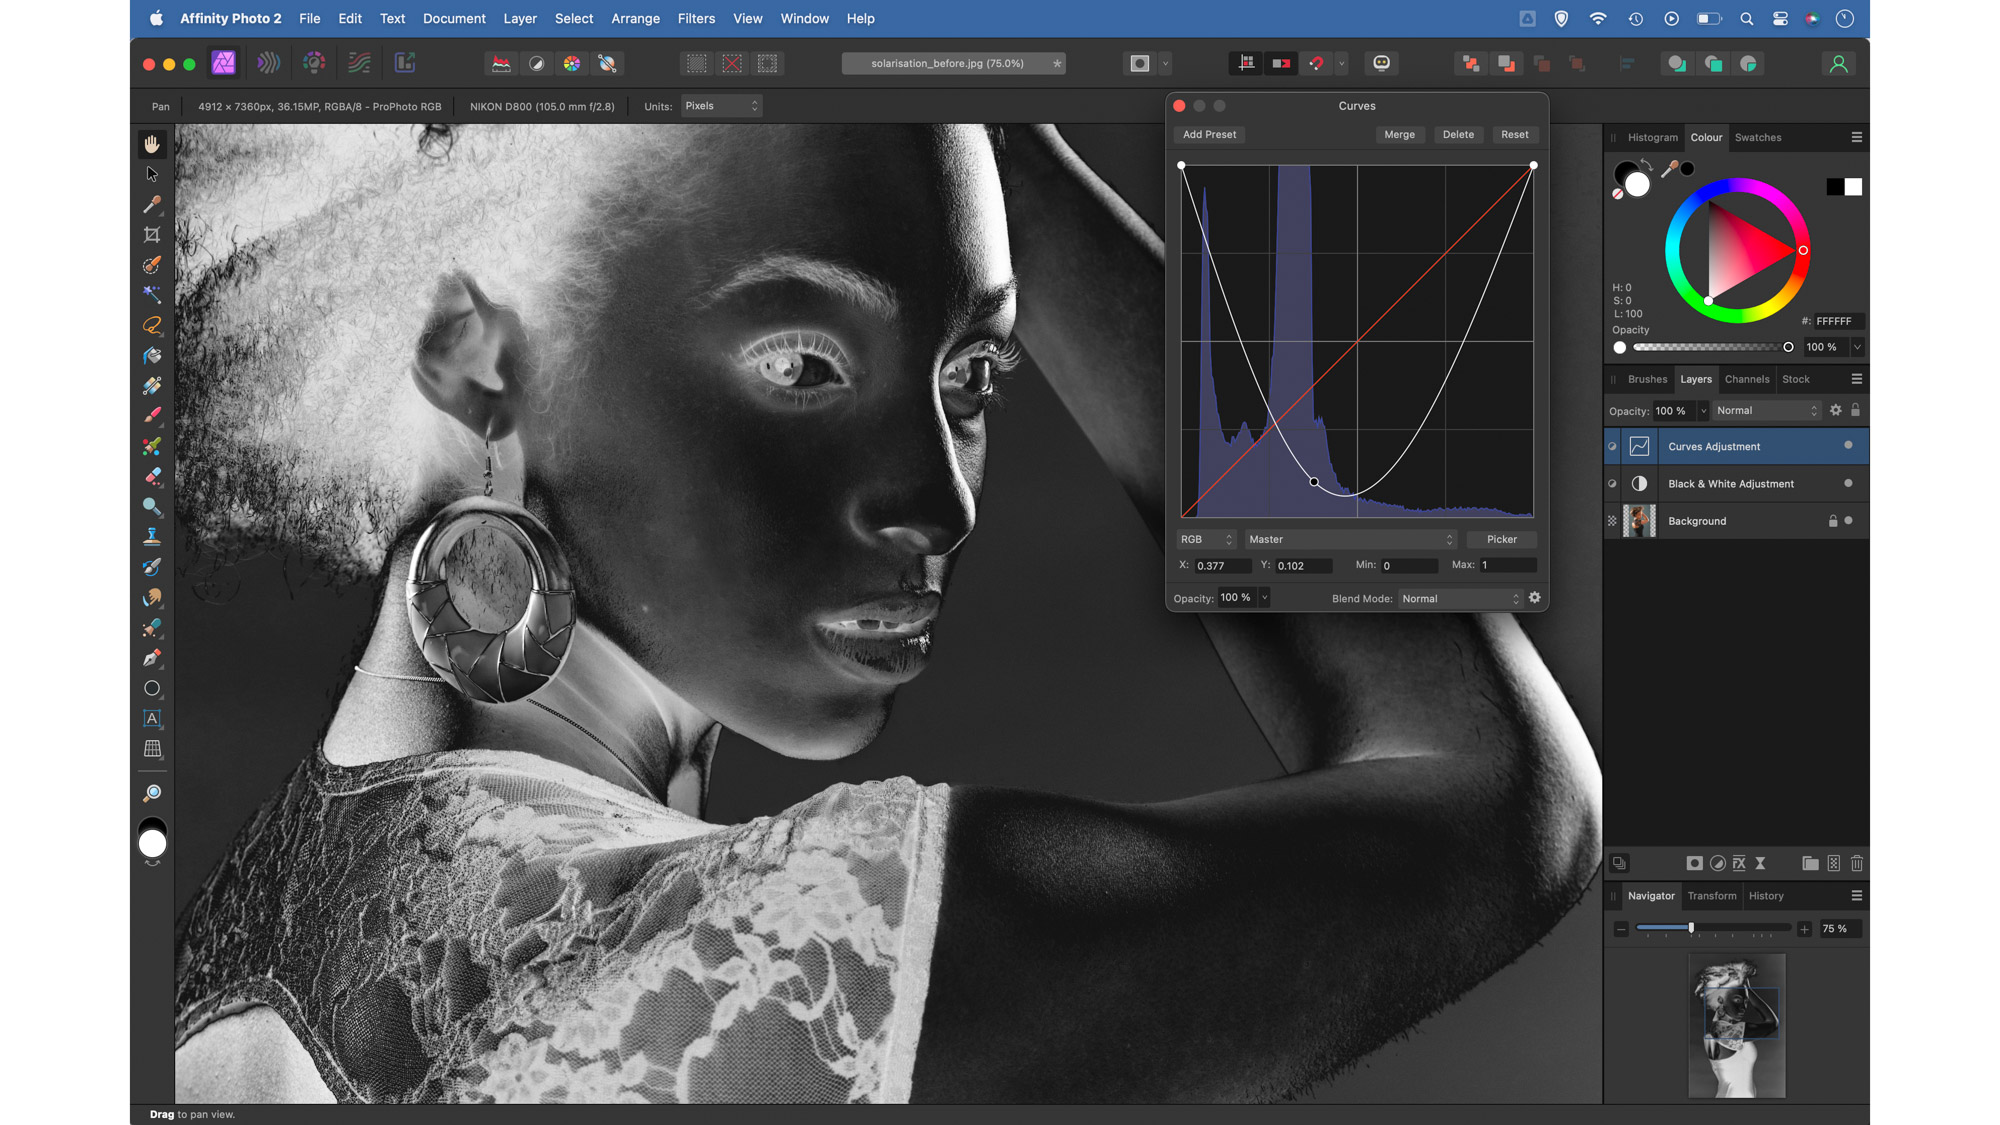
Click the Adjustment icon again and choose Curves. The diagonal curve line represents the tones from black on the left to white on the right. We can achieve the solarization look by inverting the left half of the line. First drag the bottom left point to the top, then drag the middle down to make a U shape.
3. Straighten the V
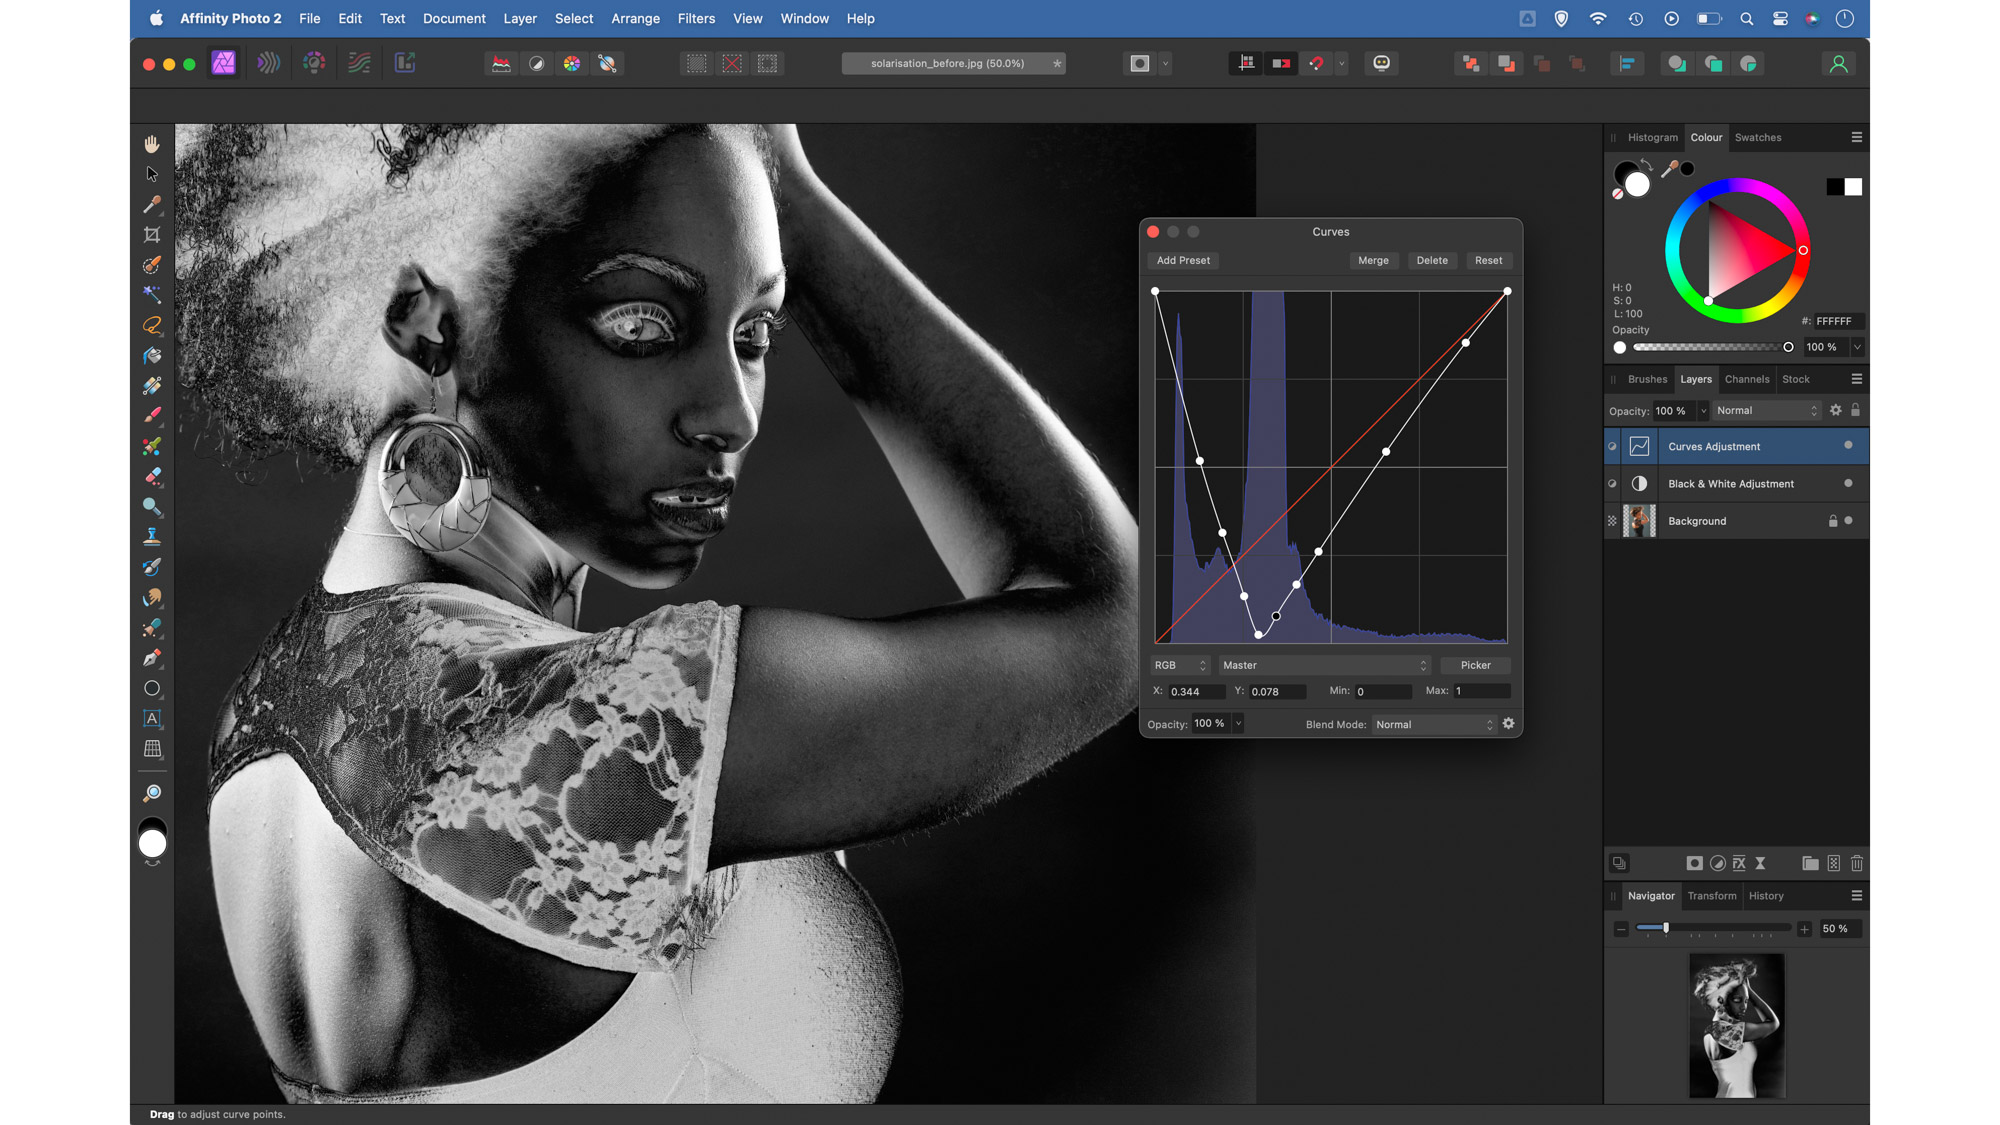
Add more points along the curve line to make the shape of the V more pronounced, less curvy and straighter. Here we pushed the bottom point of the V closer to the shadows to allow the skin tones to remain closer to normal. You can delete points if necessary by highlighting them and pressing Delete.
4. Fine-tune the brightness
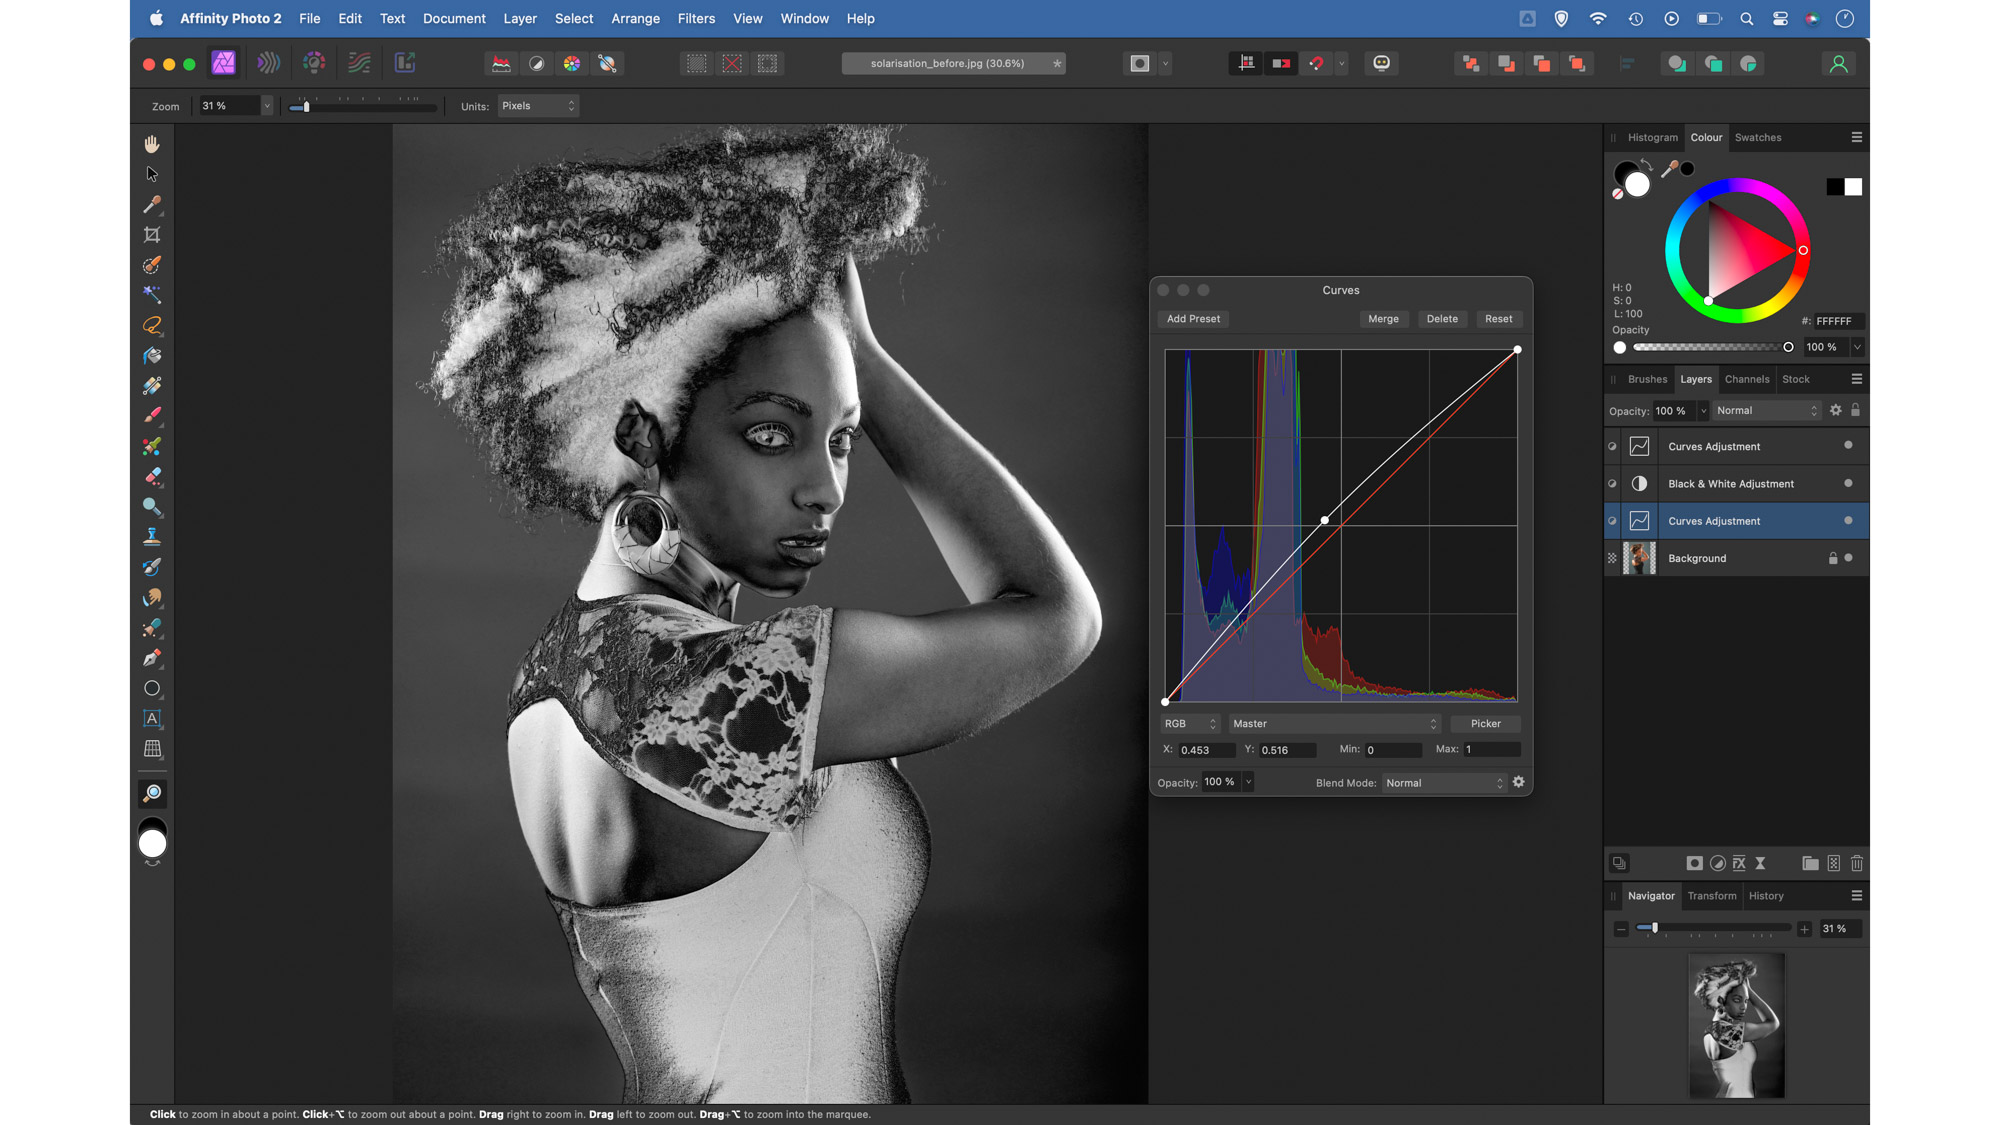
Highlight the bottom layer then click the Adjustment icon again and choose Curves. Drag up or down on the curve line and notice how this affects the image. We can use it to further fine-tune things by determining which shadow areas are inverted. You might also want to tweak the black and white layer.
5. Paint black to tidy
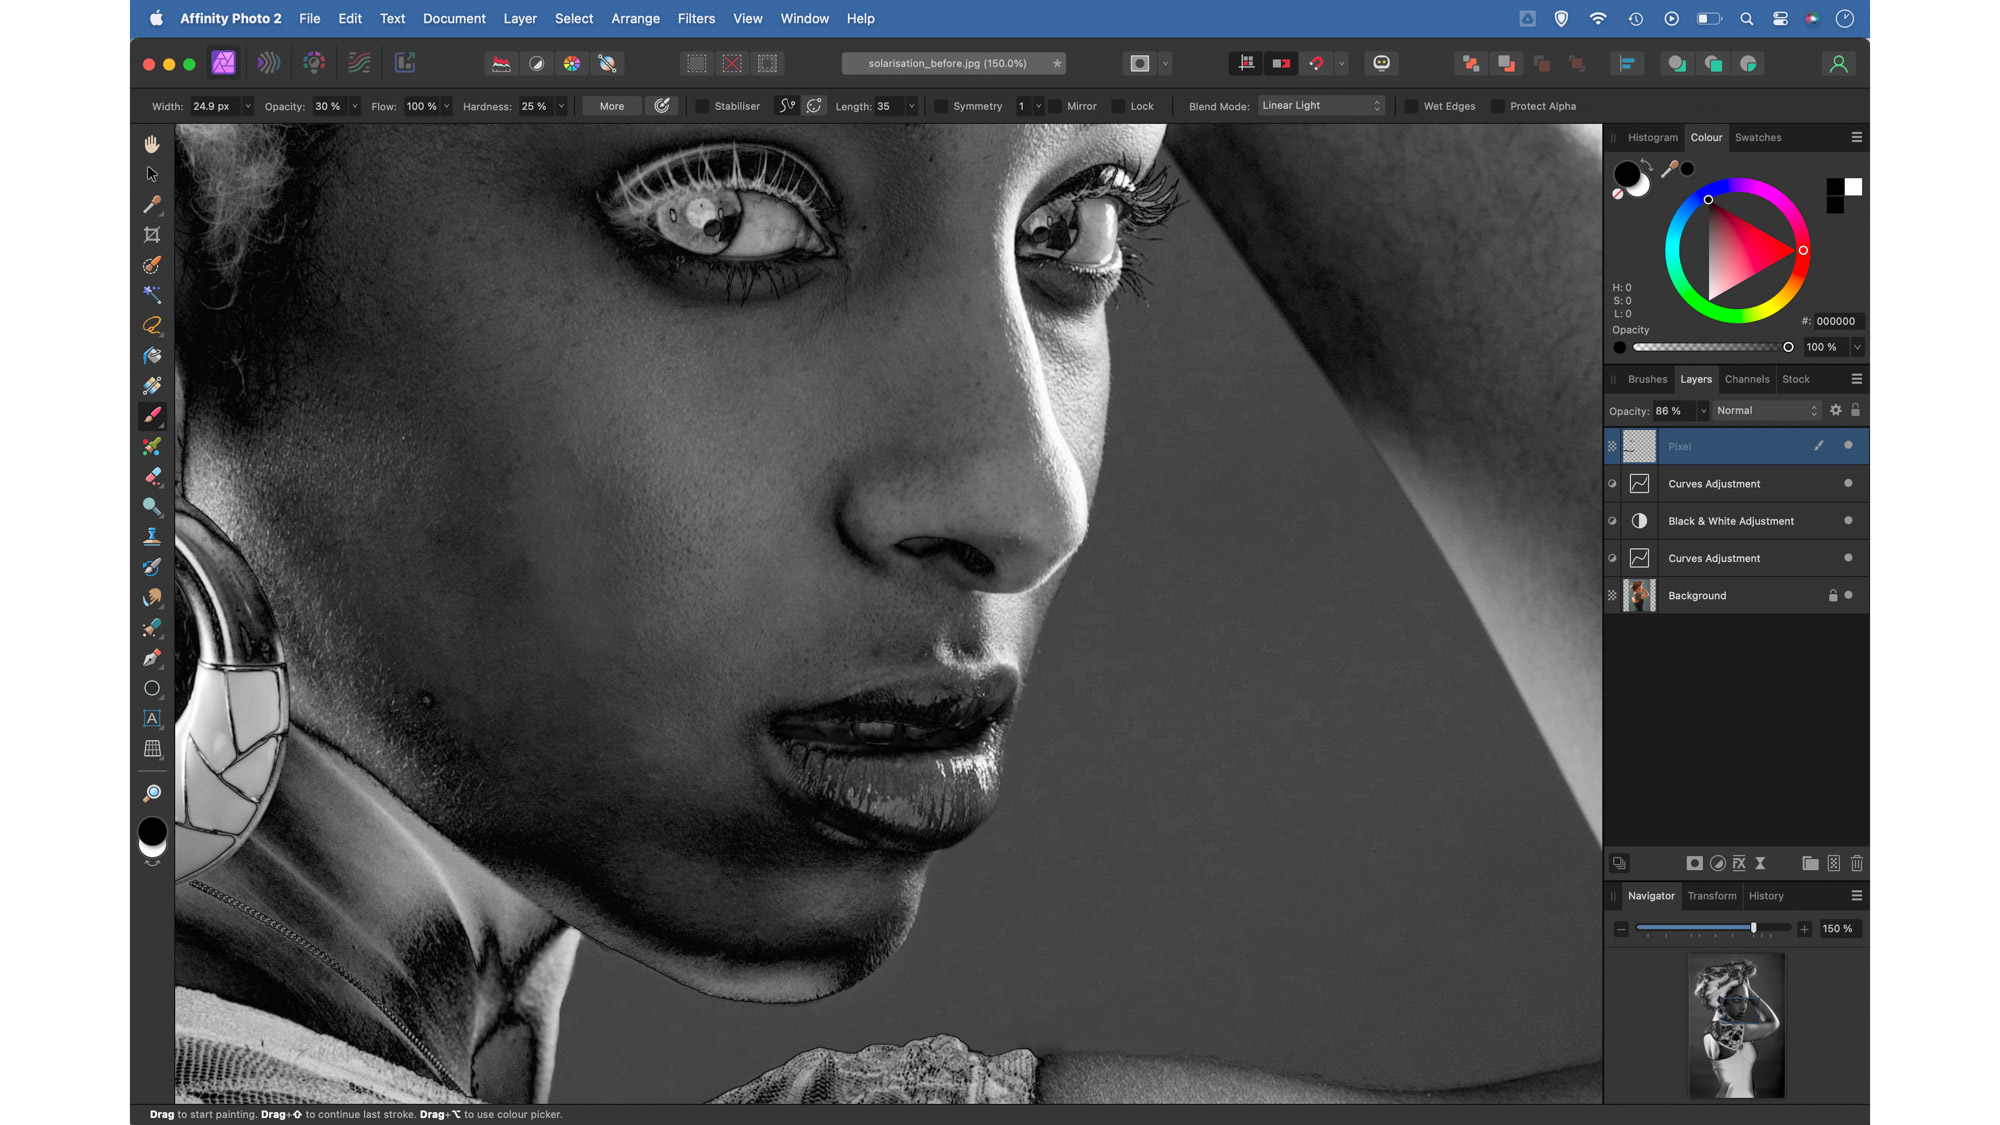
The Solarization effect creates weird and wonderful results, but in places the effect can be too strange. Here it creates a bright spot in the subject’s nostrils and mouth that are a little too distracting. We can make a new layer at the top of the stack then grab the brush tool and paint with black to darken the areas.
6. Finish off with a color tint
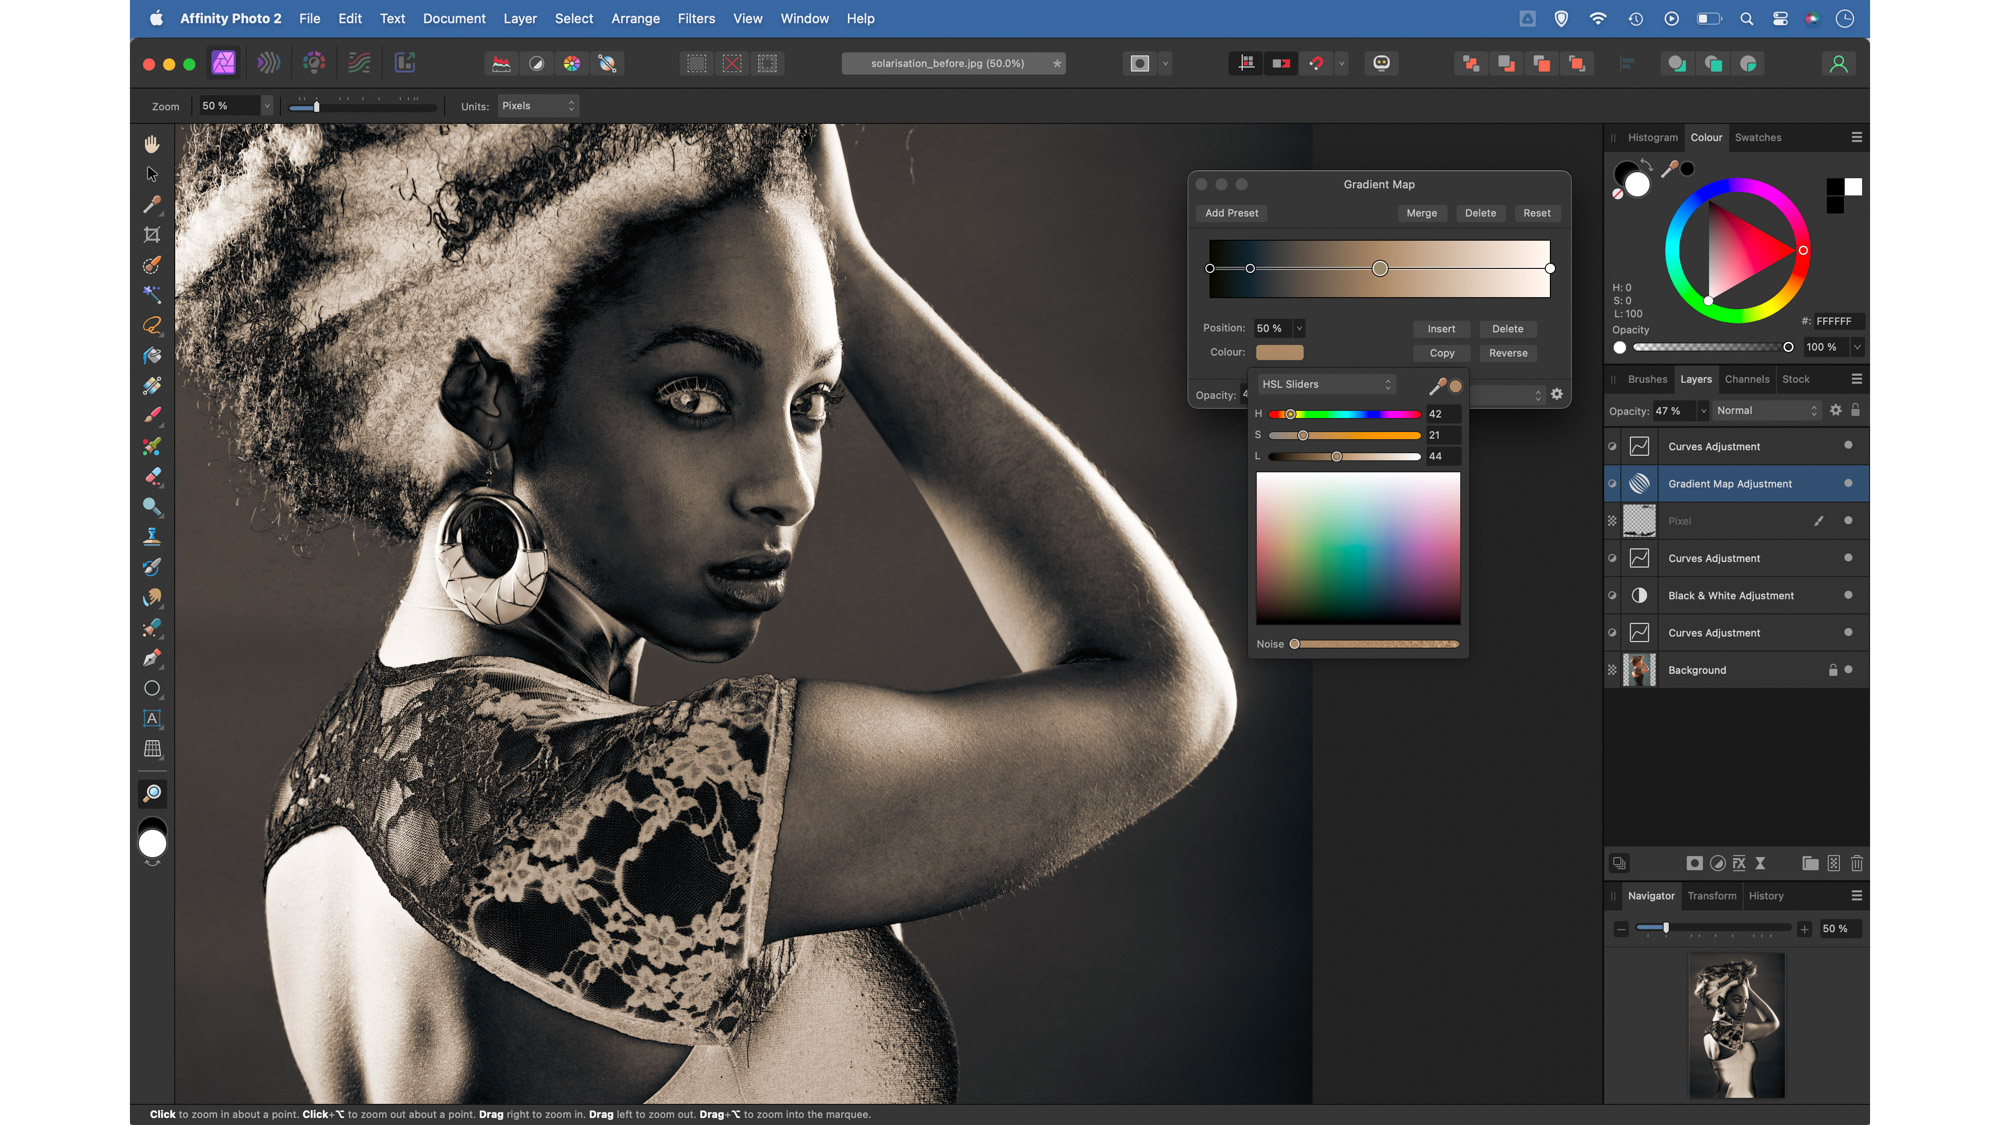
Click the Adjustment icon and choose Gradient Map. Click on the left colour spot and choose a dark tone. Click the middle spot and choose a warm colour for the midtones, then a light colour for the highlights. Add further spots to tint the tonal range however you like, and adjust layer opacity to control the tint.

• See more of our Affinity Photo tutorials
If you enjoyed this tutorial but want a bit more power from your laptop, why not look at the best photo-editing laptops? If you're really keen to improve your skills further then online photography courses could be the way to go.


