Filmmaking is expensive. Not only do you need to buy decent recording equipment, both for the visual and the audio, but when all the shooting’s done, you have to get hold of the best video editing software, with enough features to not constrain your creativity.
Sure there are many apps out there that allow you to edit for free. Some even come bundled with your computer. But, if you’re looking for a professional grade option, you might reasonably expect such functionality comes at a price. But if all your money’s gone into the shoot, not to mention one of the best laptops for video editing, your finances might restrict you to a video editor way cheaper than Adobe Premiere Pro or even Final Cut Pro…
Well DaVinci Resolve offers everything you need, and asks for nothing in return – it's the best free video editing software out there, and has been for a while. That’s right: it’s absolutely free. So let’s check it out.
How I tested
DaVinci Resolve is multi-platform, capable of running on Windows, Macs and Linux computers. I chose to test it on my trusty five-year old 2.3 GHz 8-Core Intel Core i9 PowerBook. Using an older machine hopefully leads to a more accurate impression of the software’s performance, as we can’t expect everyone to be able to afford the latest and greatest. I uploaded some HD and 4K footage and took it through its paces.
Getting started
• Very easy to find and download on Blackmagic Design’s website.
• Make sure you don’t install the beta version.
Grabbing the software is incredibly easy: head on over to Blackmagic Design’s Davinci Resolve landing page , scroll down a little, and click on ‘Free Download Now’. As of this writing, the developers are heavily promoting version 20, but be aware that it’s actually still in beta, and isn’t expected to be finalised until around September 2025. So grab yourself a copy of 19 for your chosen operating system instead - it’s the version I’m reviewing here.
Setup score: 4.5/5
General Overview
• DaVinci Resolve is an all-in-one solution when it comes to importing, editing, manipulating, and sharing your footage.
• The ‘Cut’ and ‘Edit’ Pages offer different ways of editing, depending on your expertise.
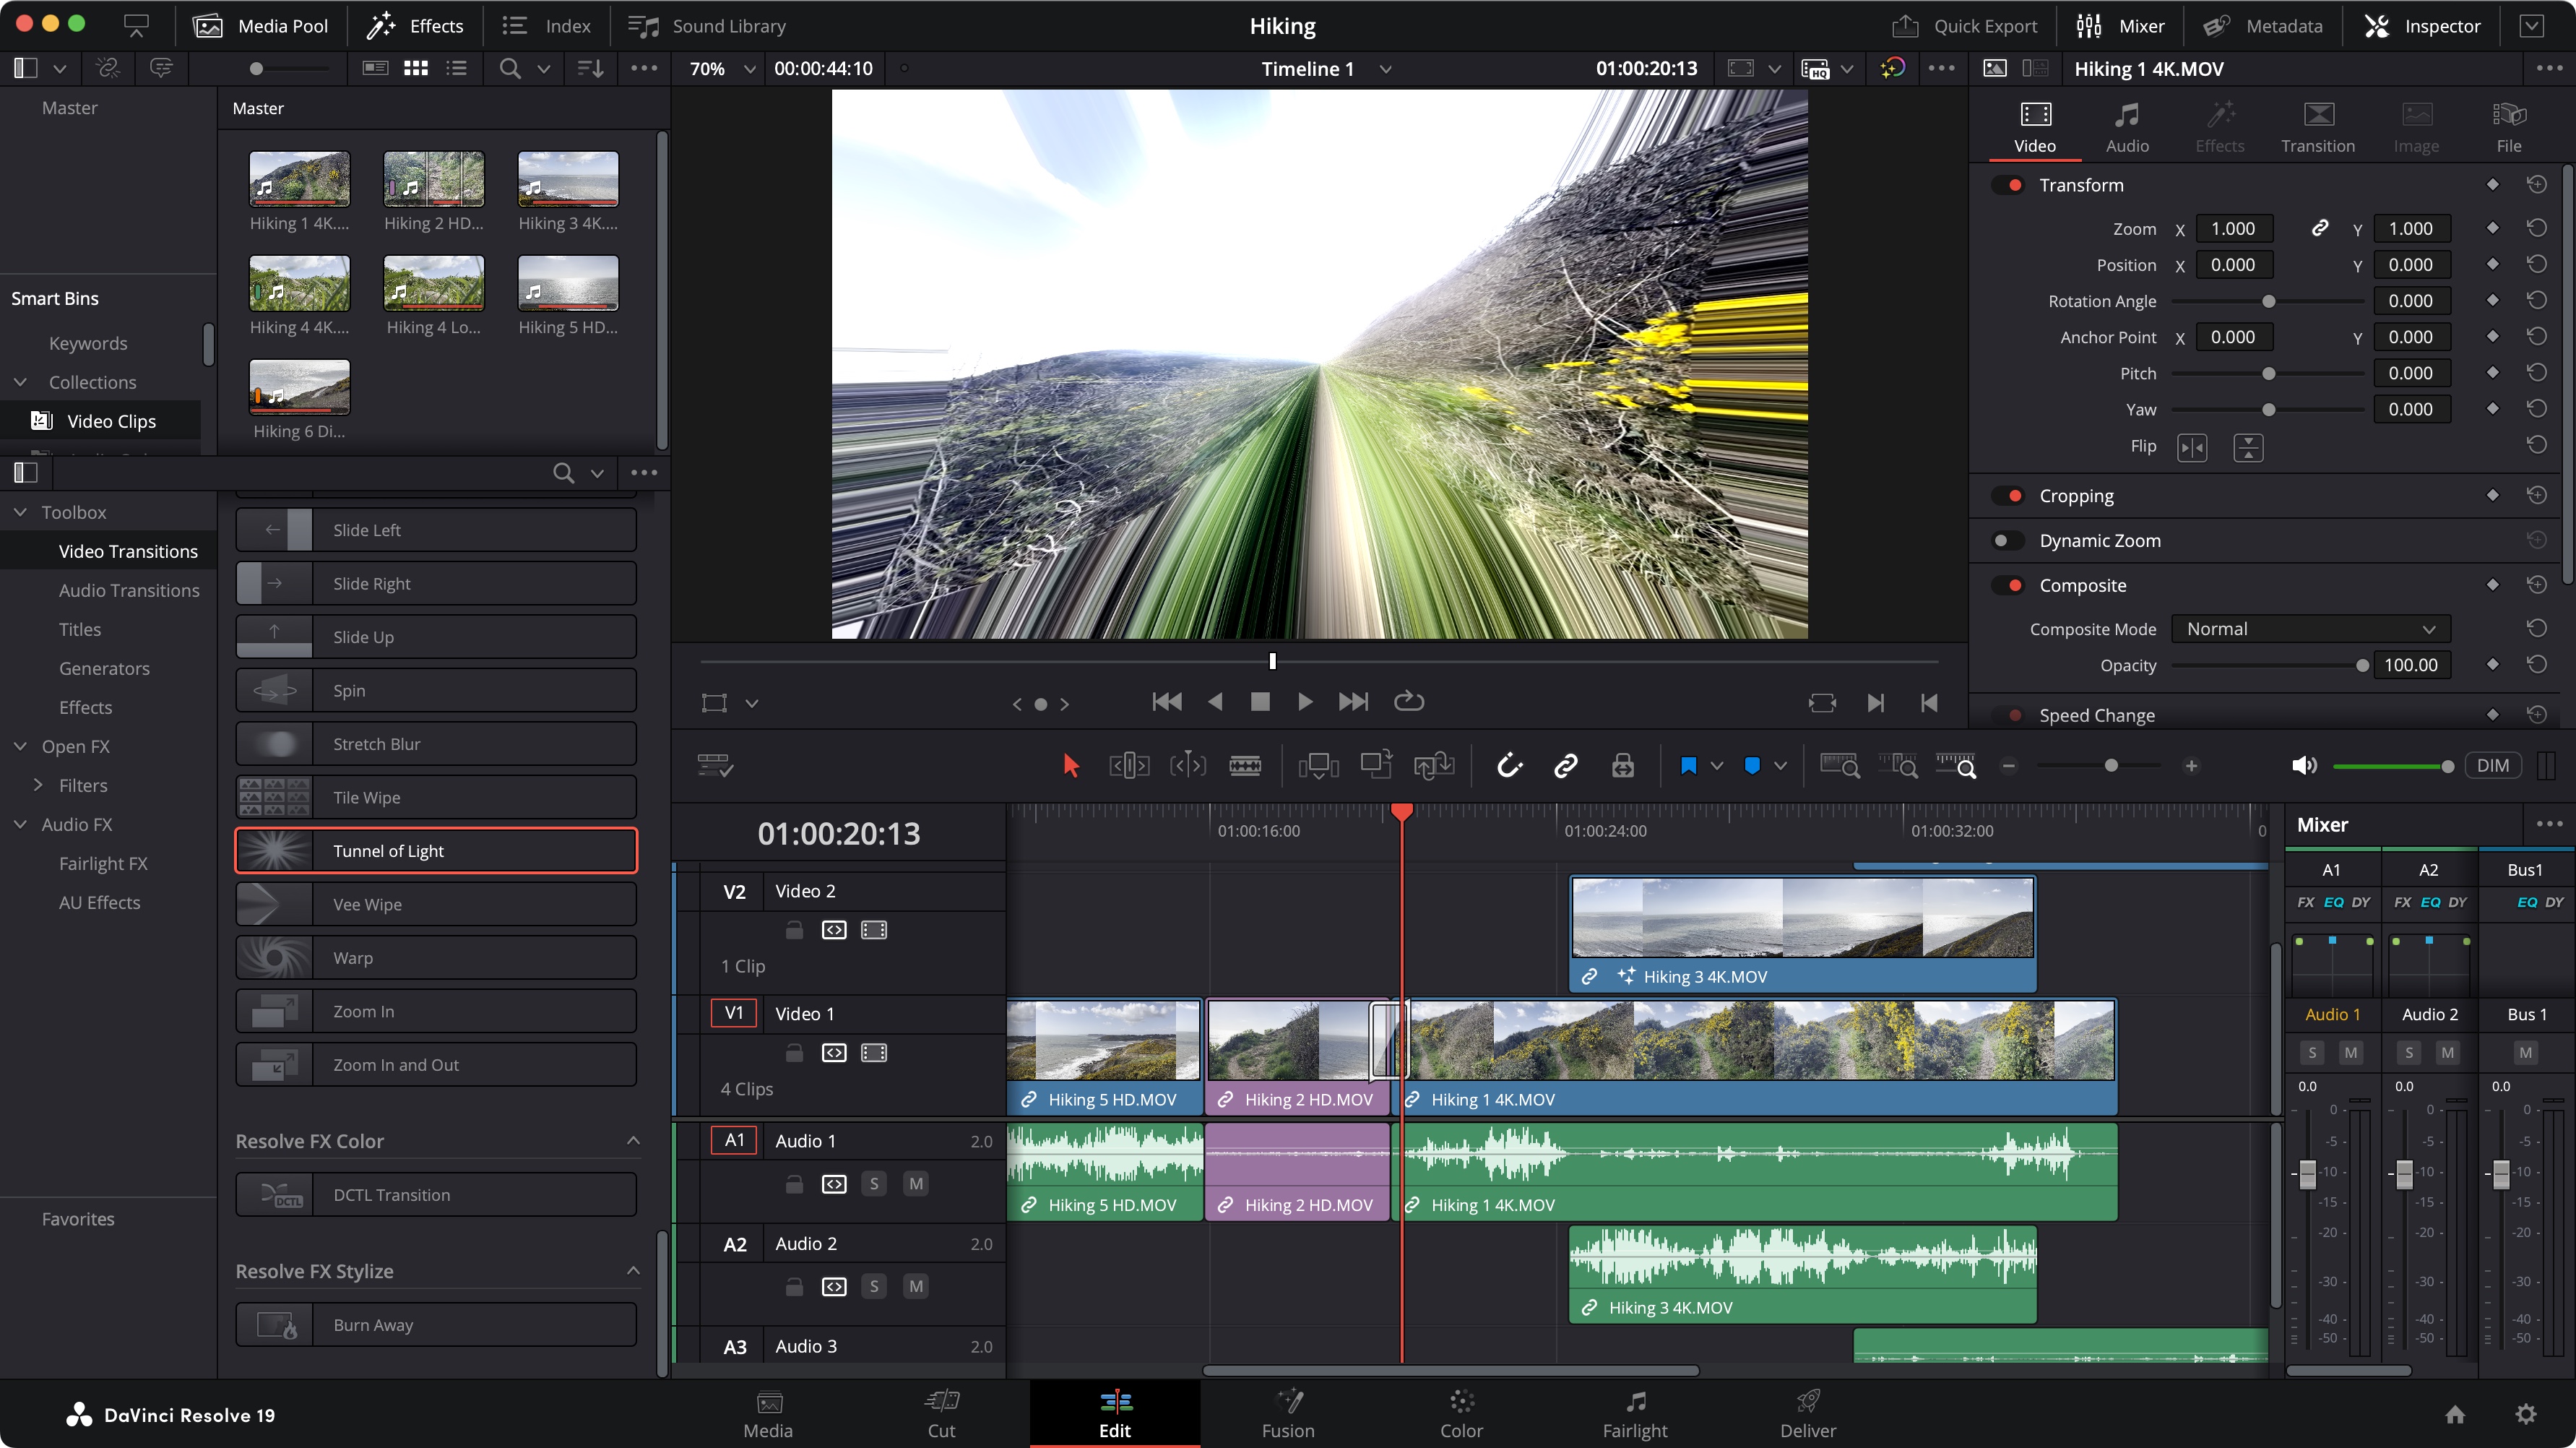
Put simply, when it comes to non-linear video editing, DaVinci Resolve can do it all: import footage, trim it, set in and out points, work with multiple layers, add transitions, apply colour correction, use keyframes to animate effects. Pretty much everything you’d expect.
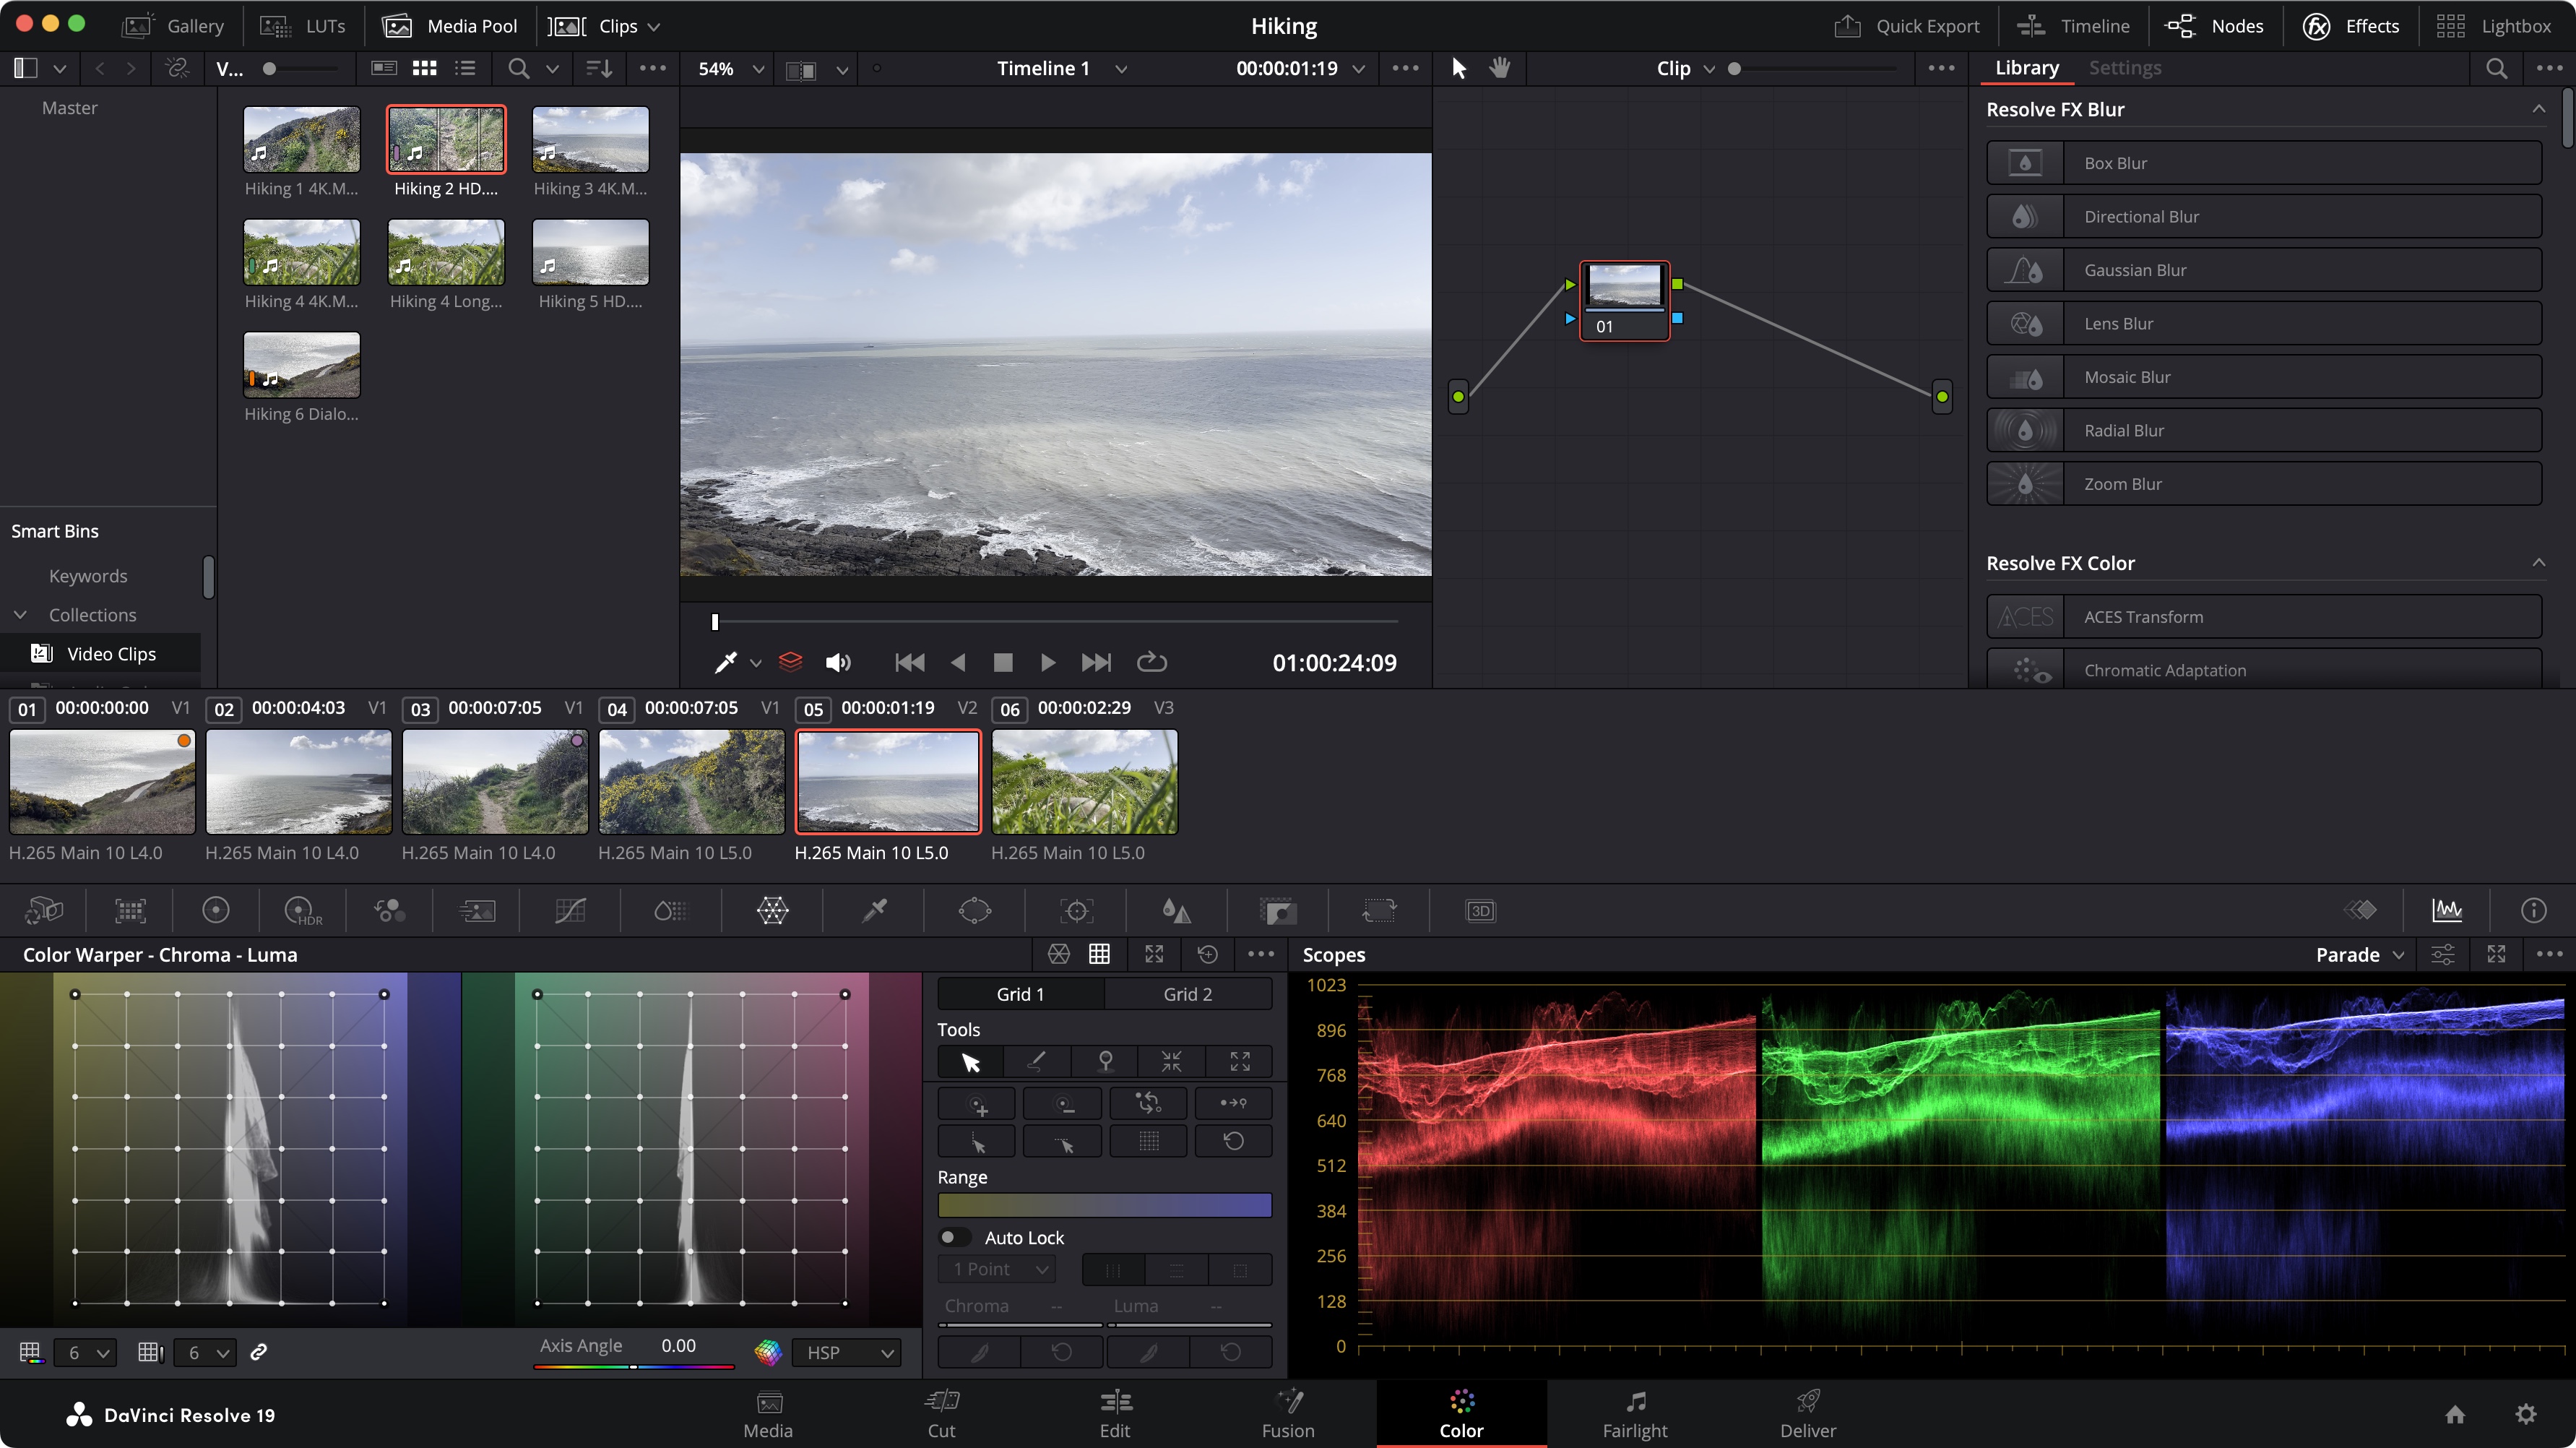
What I like about Resolve is how its interface changes depending on what you intend to work on, while still remaining familiar. At the bottom of the interface are as series of seven icons, each of which is designed for a specific purpose. These are known as ‘Pages’.
You have the ‘Media’ Page to import, catalog and organise your media. The ‘Cut’ and ‘Edit’ Pages offer different ways of editing, ‘Fusion’ is where you apply special effects, ‘Colour’ is as you’d expect: where you work on colour correction, ‘Fairlight’ offers advanced sound manipulation, and finally, ‘Deliver’ is your final destination, when you’re ready to export your work and share it with others.
DaVinci Resolve is pretty much a one-stop shop offering you all the tools you need from ingest to final edit. Let’s take a closer look at some of these Pages.
Feature score: 4.5/5
A Closer Look
1. Import
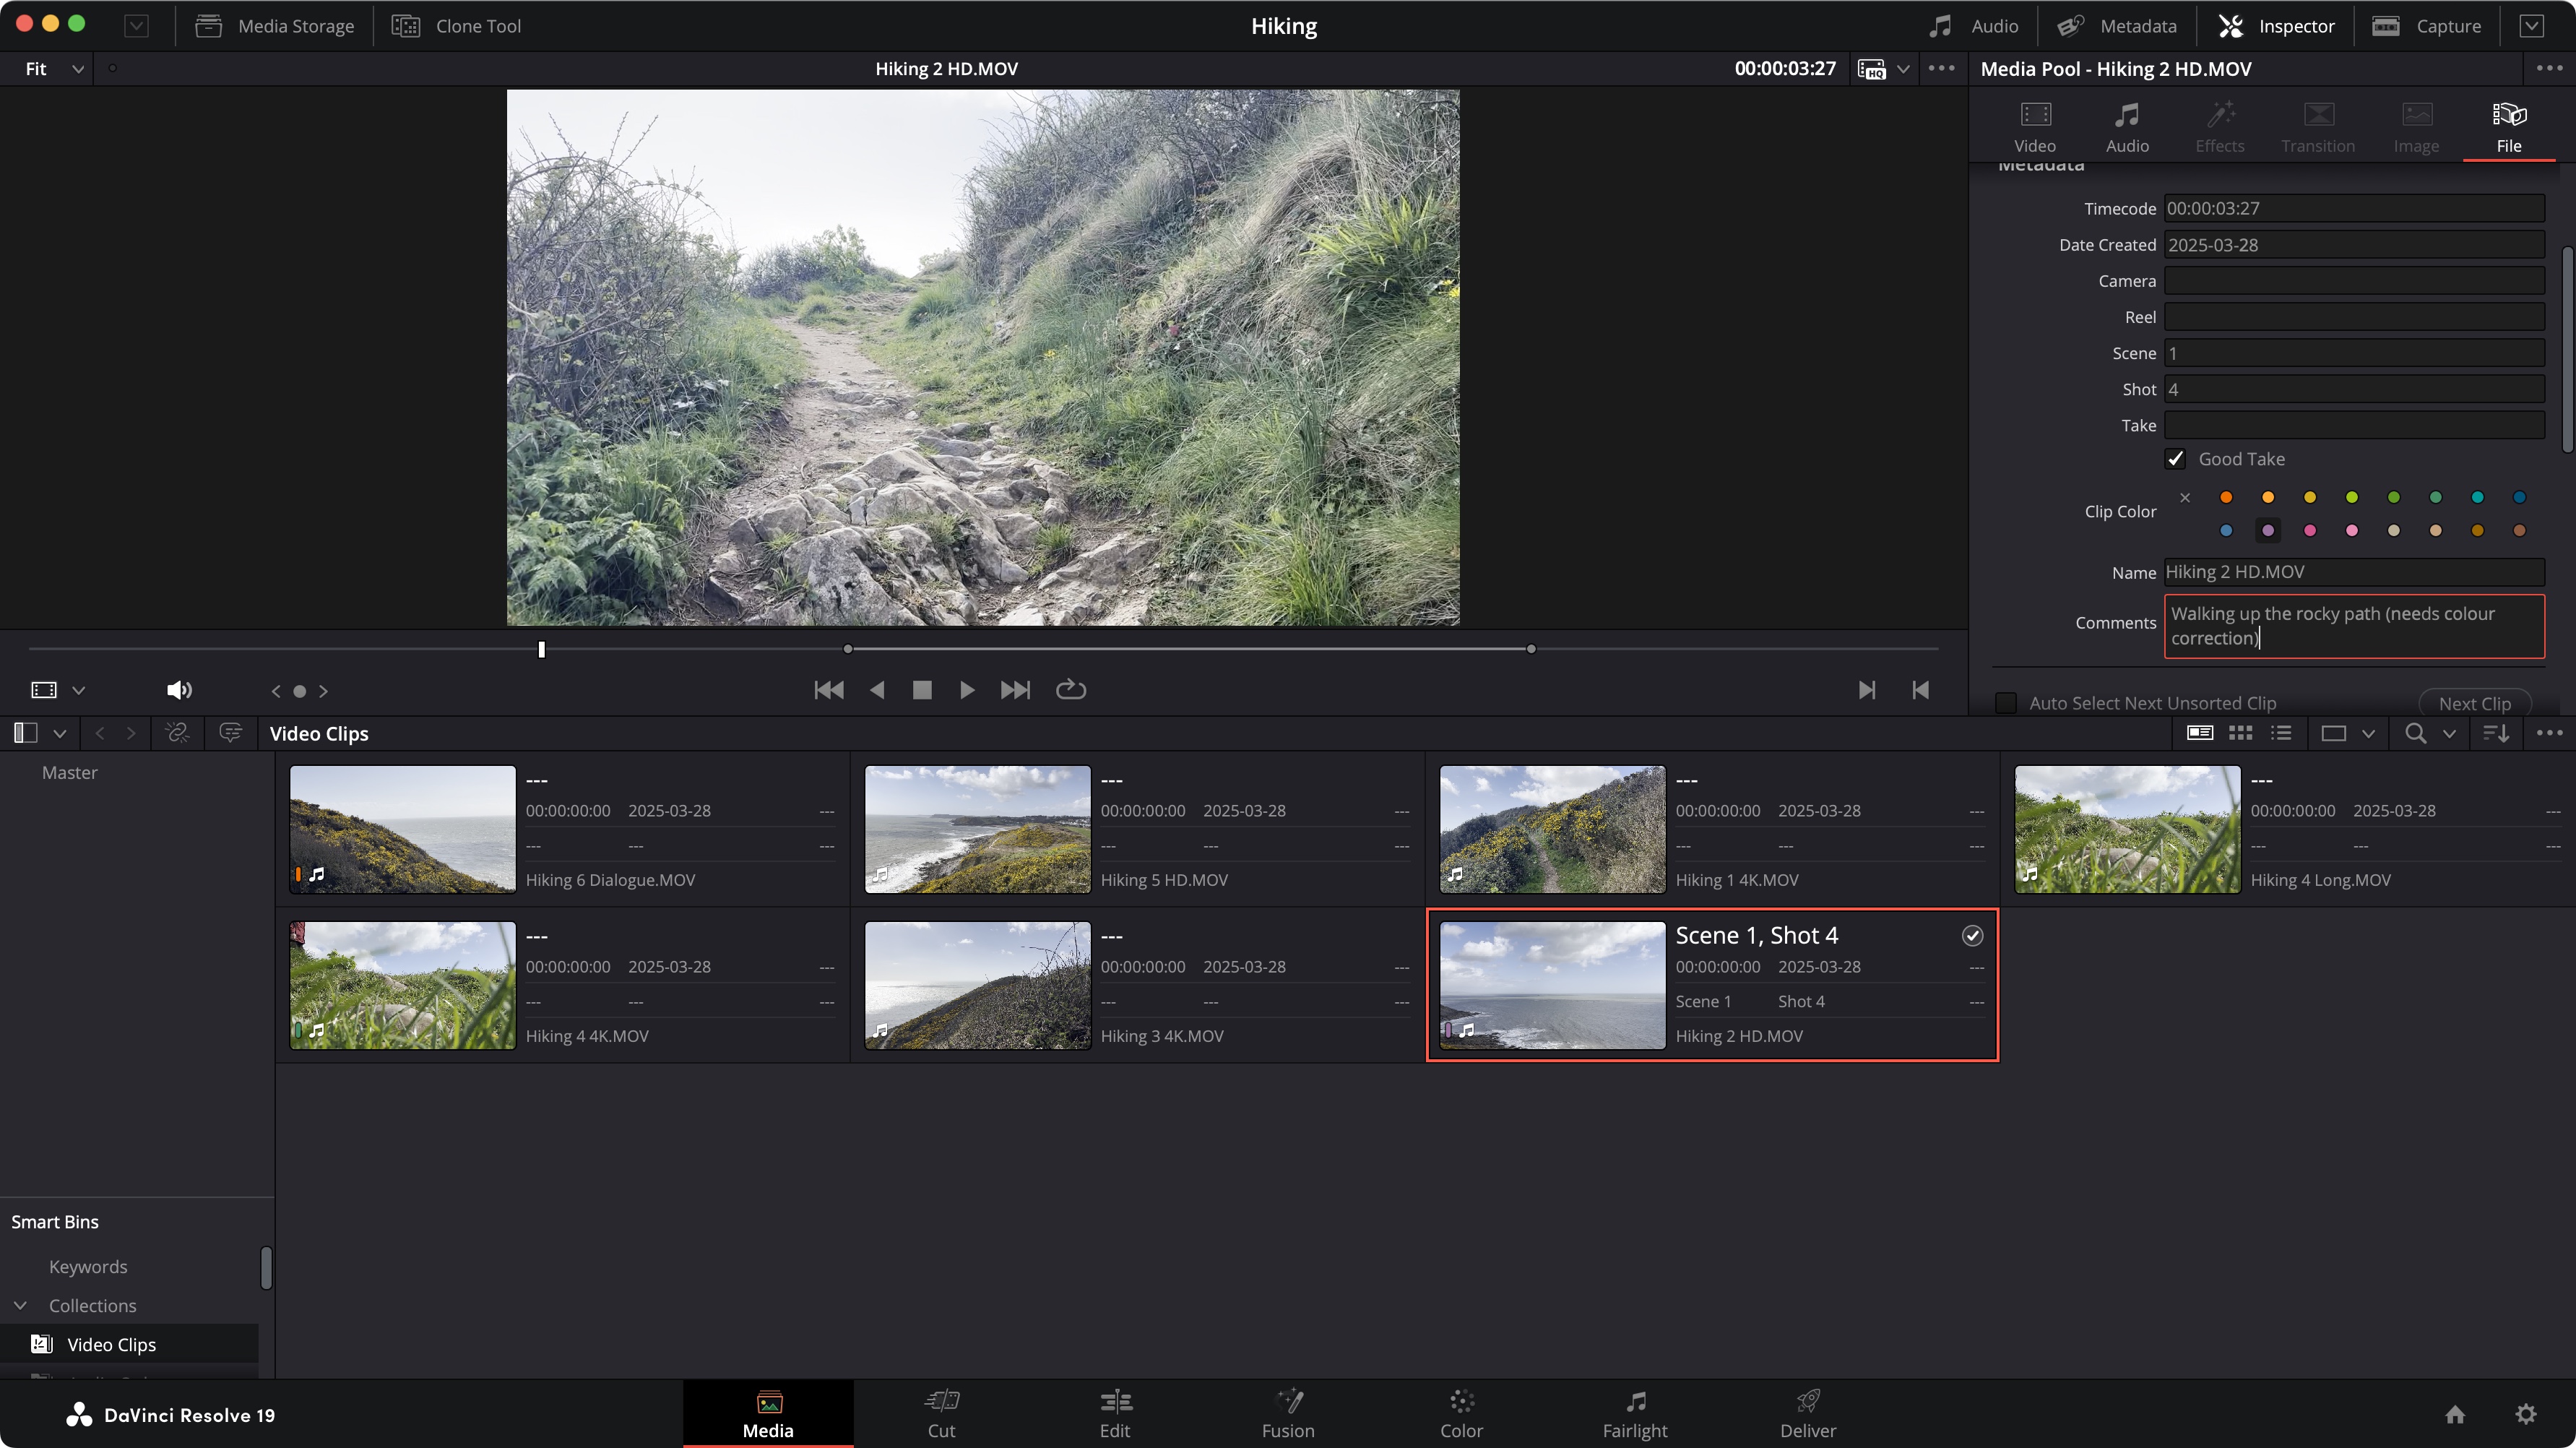
The first section you’ll work in is the Media Page. This is where you import, manage and organise any clips you’ll be using in your project. In that respect the interface is very simple, as all you need is being able to label your file properly, add comments if you need to, set in and out points, if required, etc. None of this is compulsory: you could just drag clips in, and switch to another Page to get on with the editing, but any organising you do here can certainly ease the editing process later on, especially if you’re working with a lot of media.
Feature Score: 4/5
2. Edit
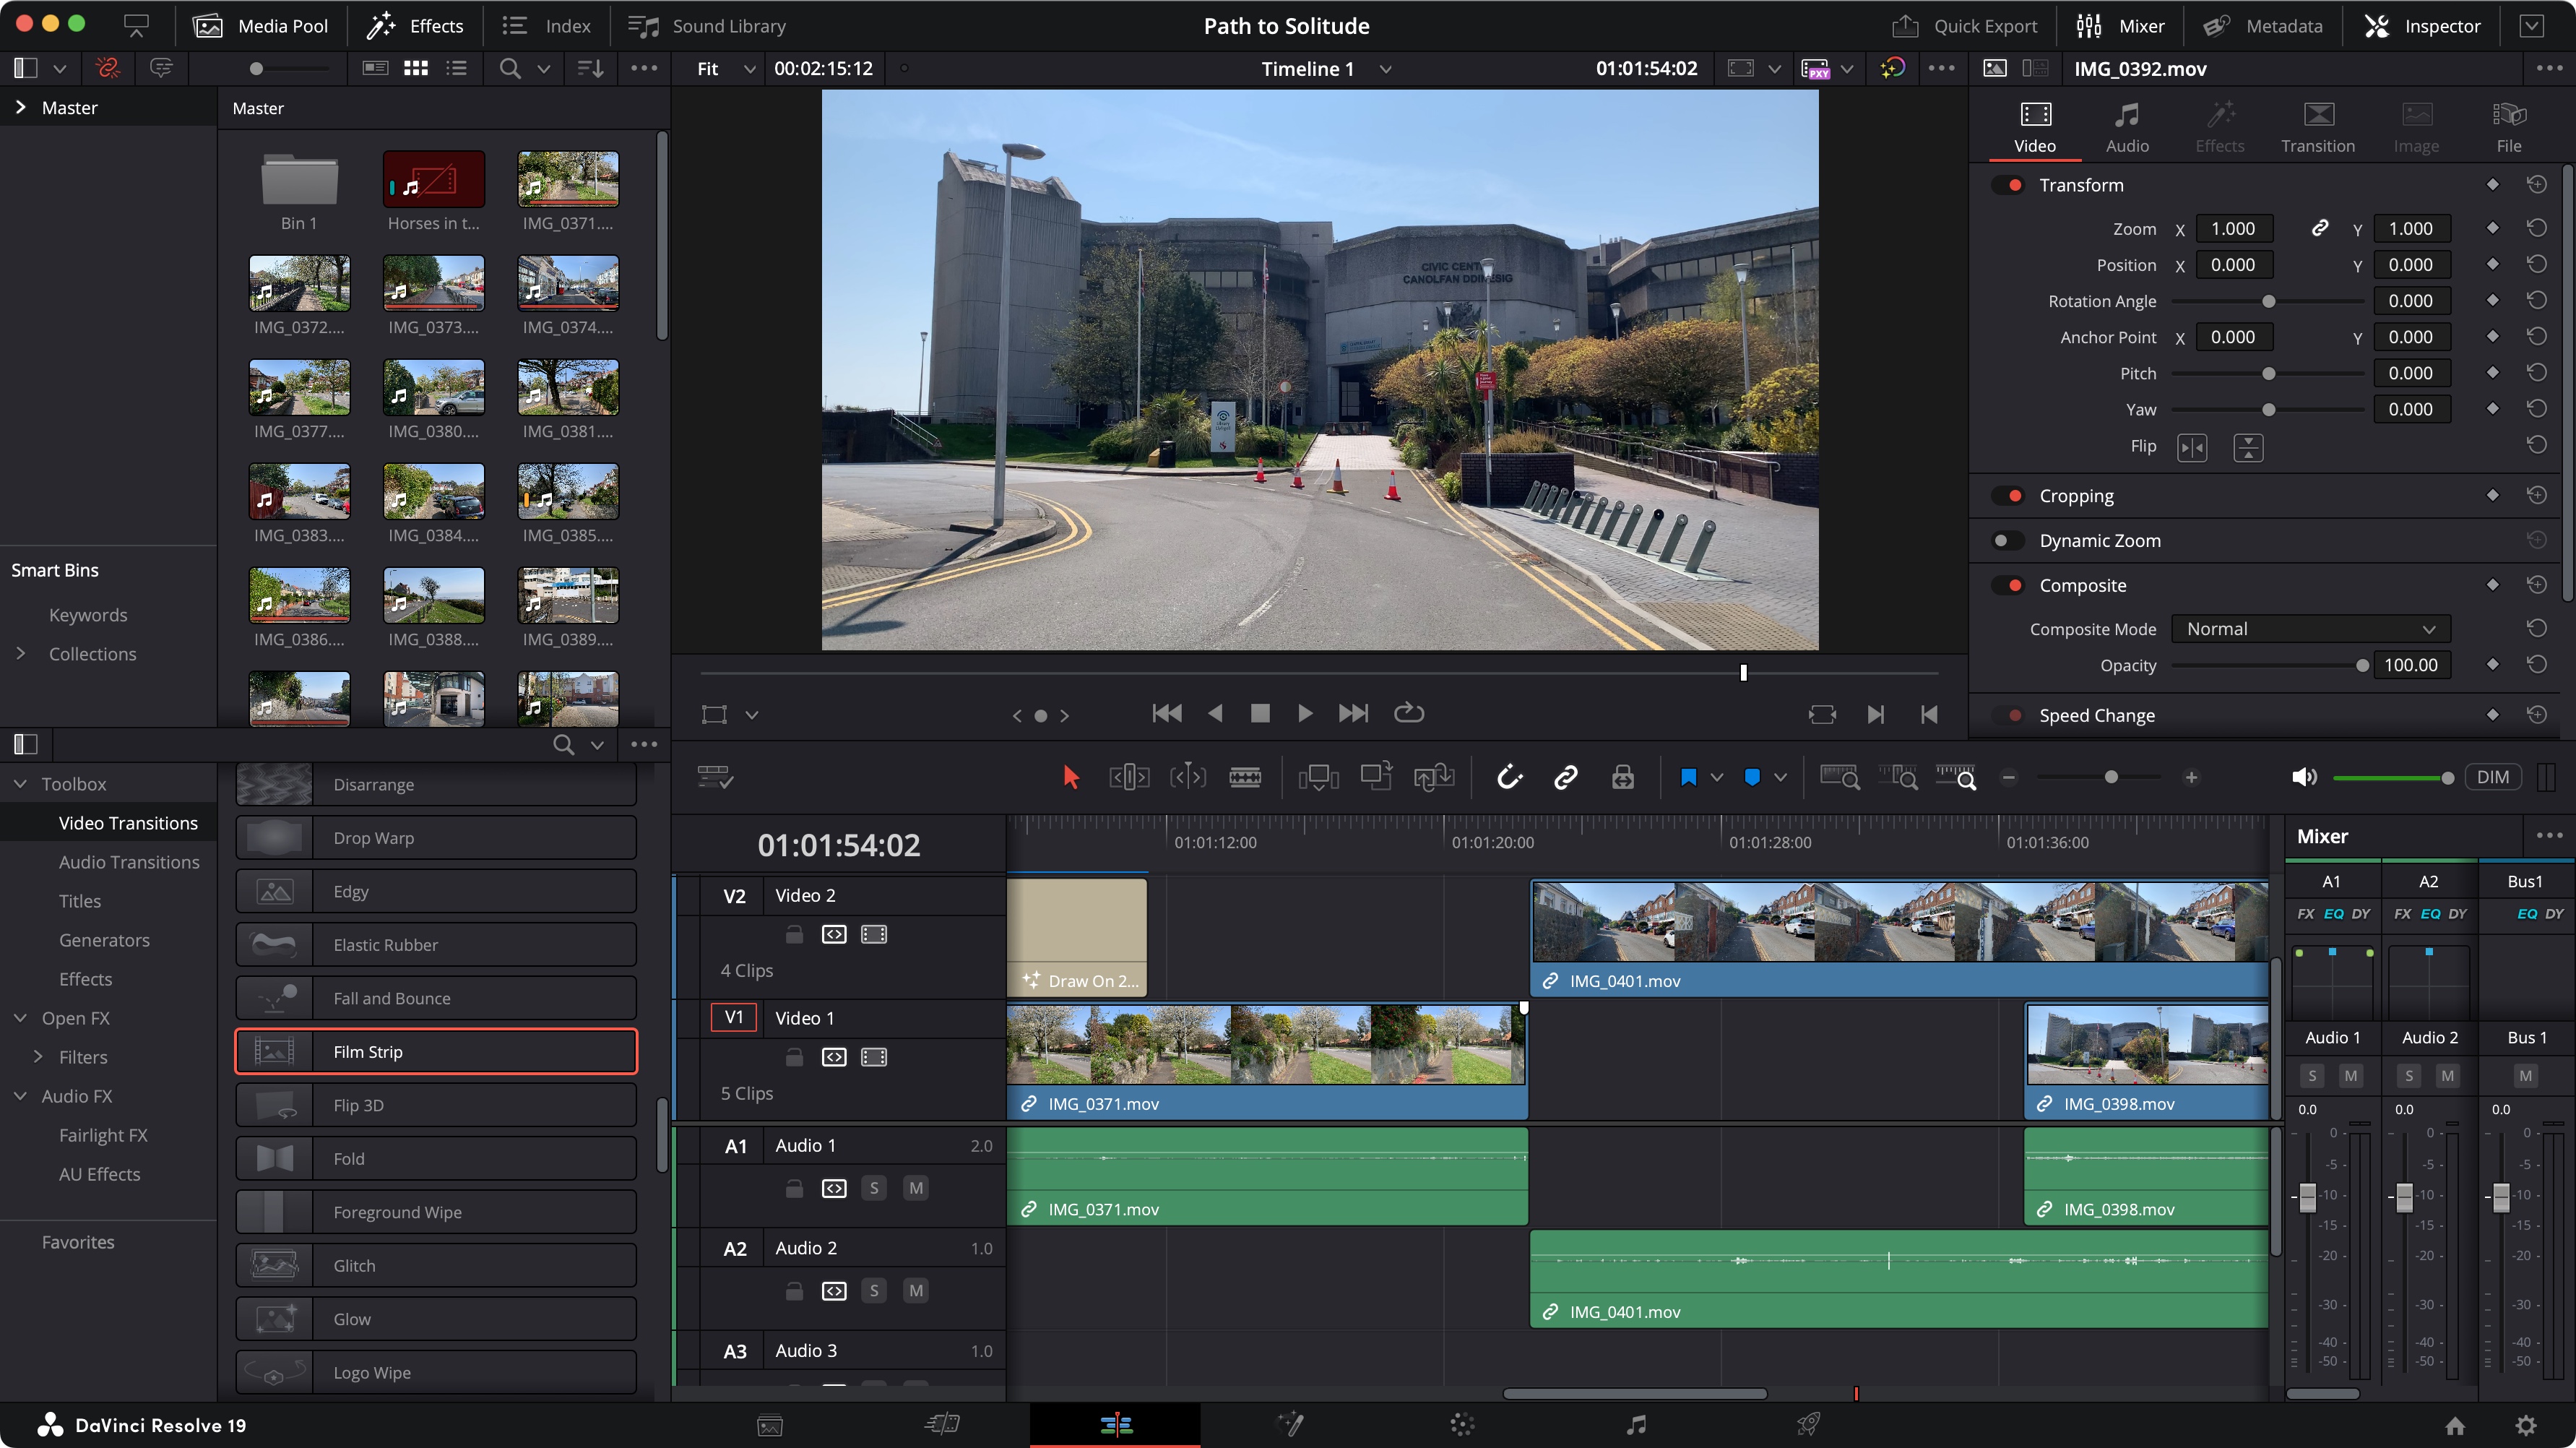
You might get a little confused when it comes to editing, as DaVinCi Resolve has two Pages devoted to it: Cut and Edit.
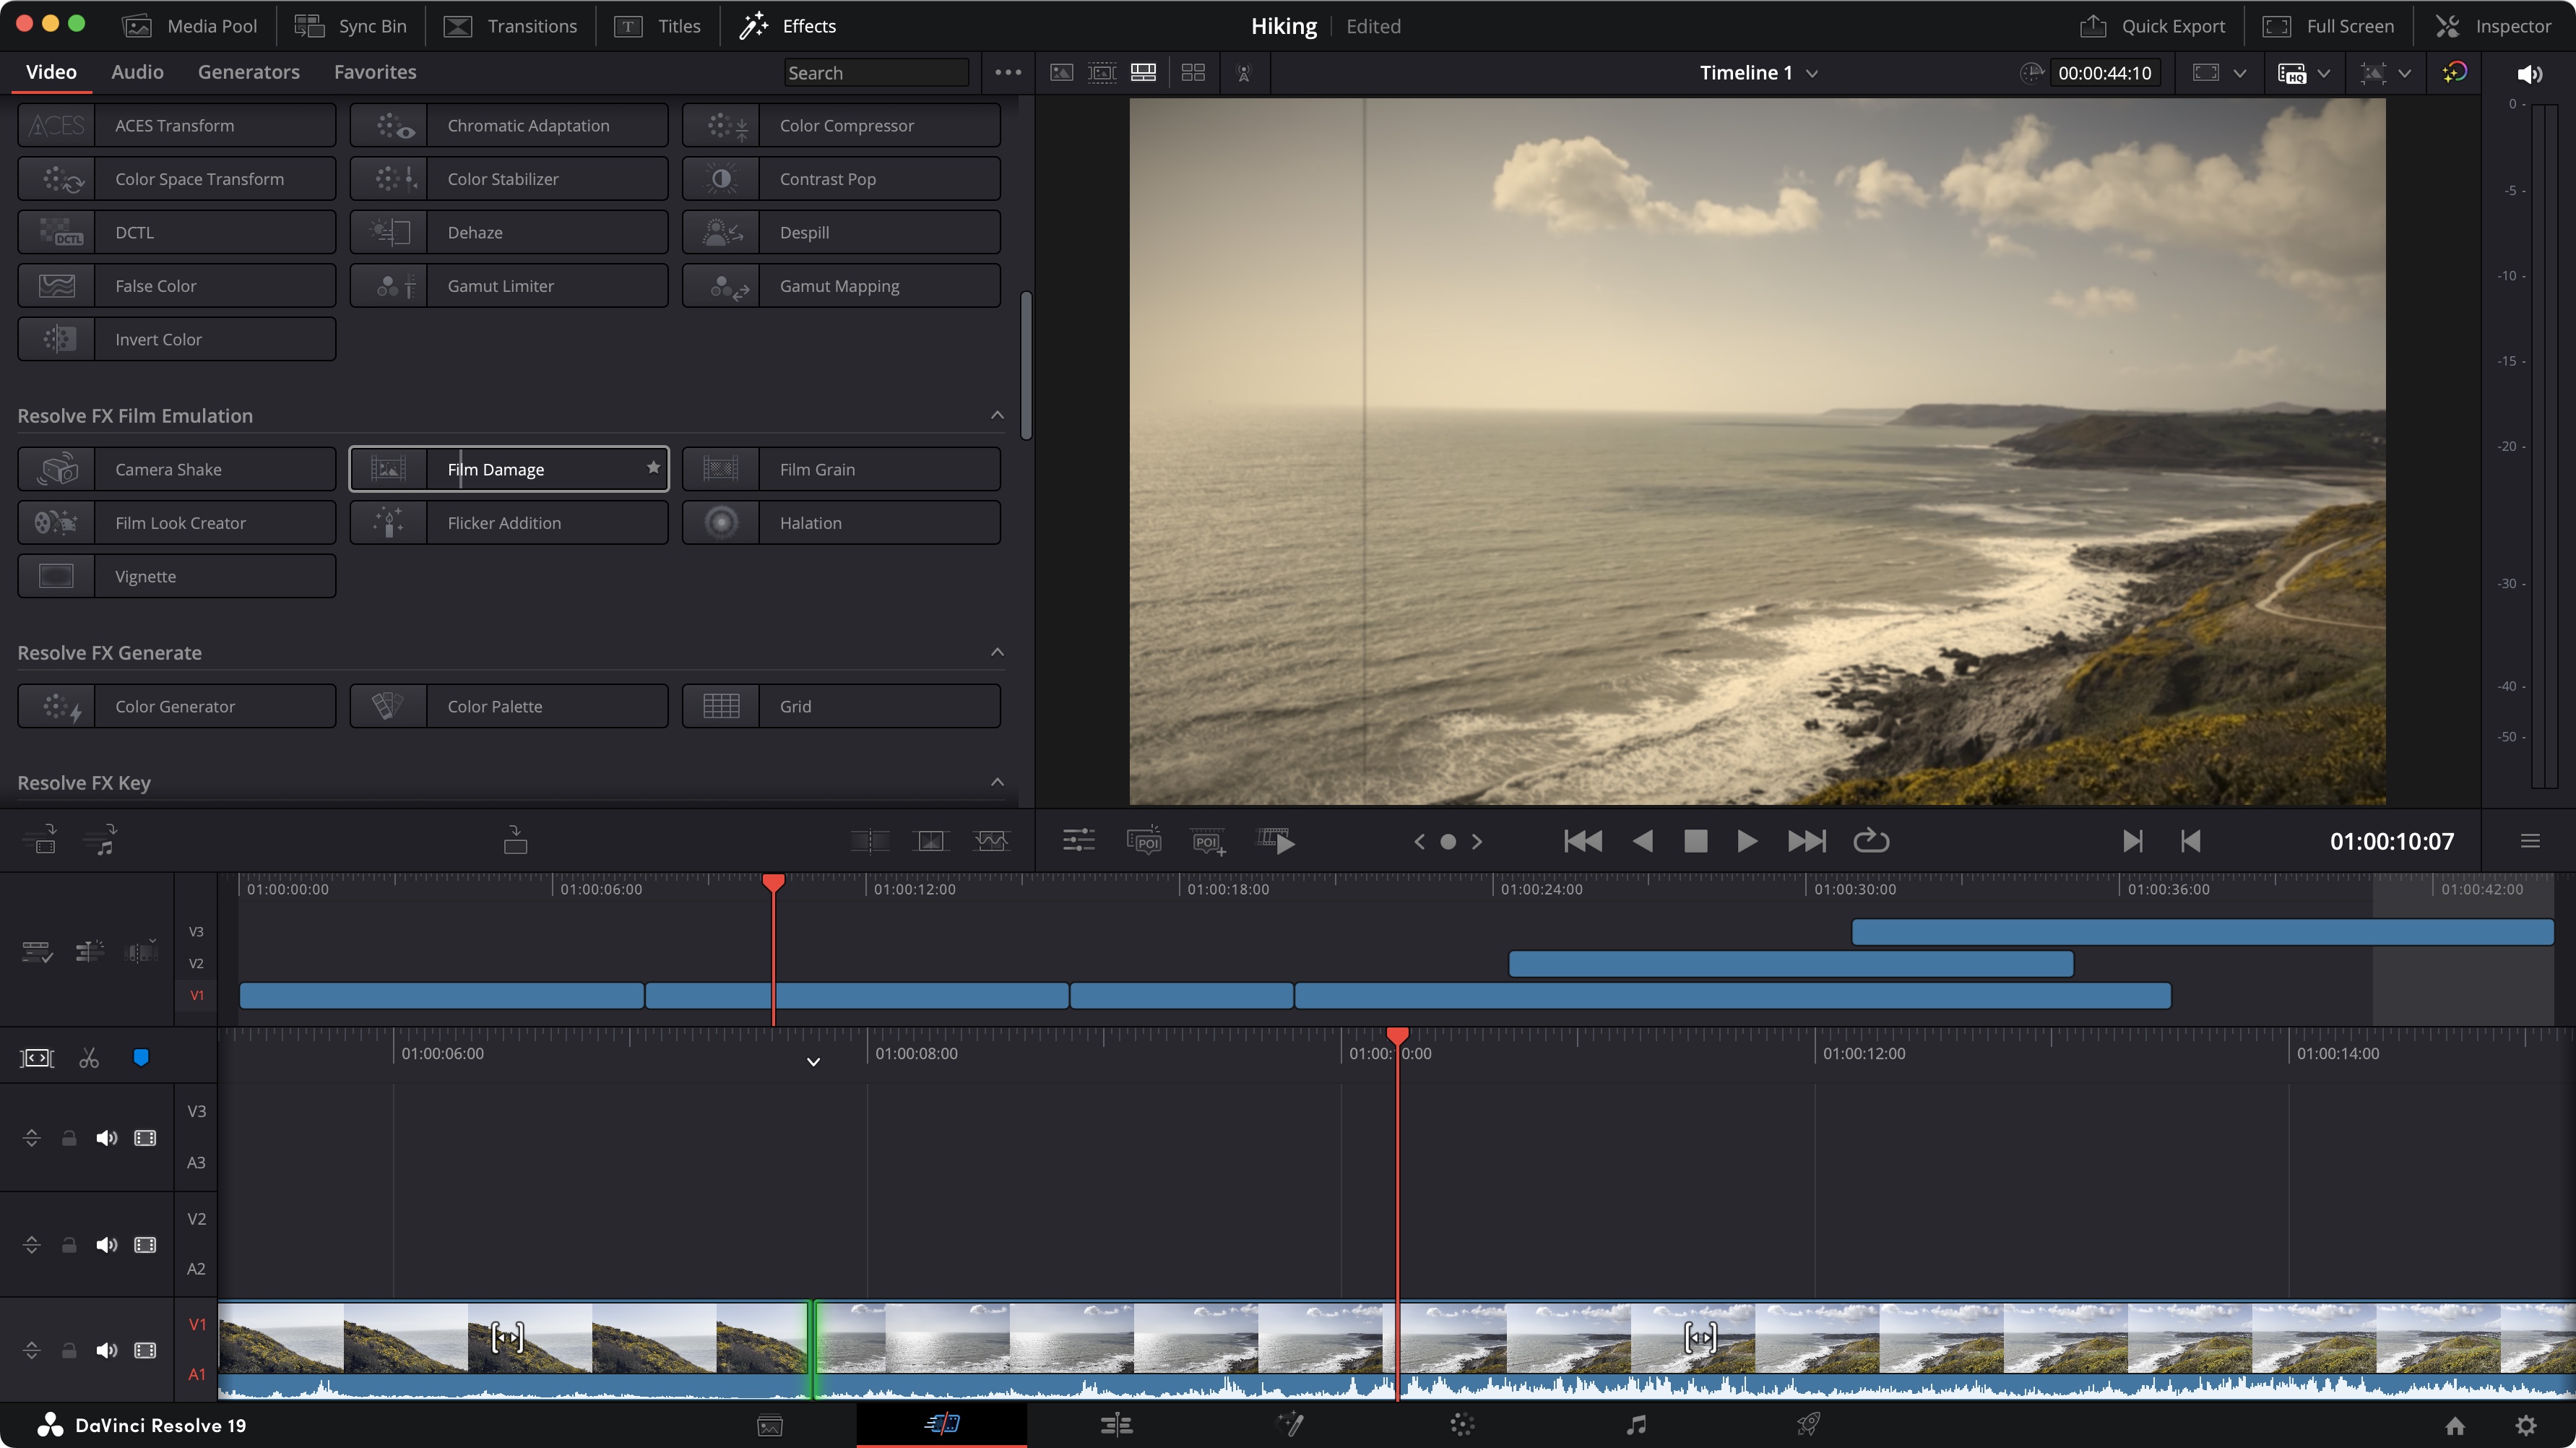
Cut is designed for simple quick projects where speed is of the essence. I also see it as a great interface for newcomers, either to the platform or to video editing in general. The simplified look acts as a good introduction to the concept of editing, but if you’re well versed in the matter, you could use it to whiz through a rough cut in little time.
By contrast, the Edit page offers more advanced tools and an interface that would be more recognisable to experienced editors. Think of the two as iMovie and Final Cut Pro, or Premiere Elements and Premiere Pro, all wrapped in the same program, making it easy to switch to the more complex way of doing things when you’re ready for it. You can also just to dip in to perform a specific action, and return to the simpler interface for the rest of your work.
Feature score: 5/5
3. Effects and Correction
Although you can do an entire project within the Cut and Edit pages, even applying effects, performing animations, and working on sound, DaVinci has three advanced Pages designed to focus on those three aspects in much greater detail: Color offers advanced colour correction tools, while Fairlight is there to present you with precise audio manipulation, and Fusion is the place where you do all your visual effects and motion graphics.
Again, you don’t need to use them when you get started, as they may well overwhelm newcomers, but all three offer very powerful tools you help you manipulate your project with great precision.
Perhaps the most confusing Page may well be Fusion, as Resolve’s effects work is based on nodes, in a very similar way to how Shake used to (that is until Apple bought it, gutted it, and integrated its remnants into Motion). It is a different way of dealing with effects, which can feel very alien at first, if you’ve never encountered it, but give it a little time, and you’ll realise just how powerful that technique actually is.
Feature score: 4.5/5
4. Export
Having worked your way through all of Resole’s Pages, you’ll eventually reach the last one: Deliver. This is where you go when it’s time to share your project with the world. Resolve comes with a host of presets, top left of the interface, which you can scroll through left and right to see more of them. You’ll find settings for master copies, or formats optimised for specific social media platforms, such as YouTube, TikTok and others. If you’re comfortable with tinkering with such parameters, you’re completely free to do so. When you’re happy with your settings, send your project to the Render Queue. You can send as many projects as you like to that queue, but bear in mind that once the render starts, you won’t be able to carry on working in Resolve until the job is done, which is the most frustrating aspect of the entire suite, as far as I’m concerned.
Feature score: 3/5
User interface and experience
• Interface is recognisable no matter which Page you’re in.
• Some sections remain the same in almost every Page to make it easier to familiarise yourself with this complex interface.
You’ll find the interface is very flexible, and grows with you as you get more comfortable working in the DaVinci Resolve environment and your editing prowess increases.
Although each Page is laid out differently, to make the most of its available tools, the interface is still instantly recognisable, with some sections remaining available through most Pages, like the Media Pool tab, for instance
DaVinci Resolve offers a lot of flexibility and although it might take a little time to get used to, once you’re familiar with where everything is, you’ll be flying.
Performance score: 5/5
Mobile tools
• Blackmagic Camera gives you advanced controls for your phone and tablet’s camera.
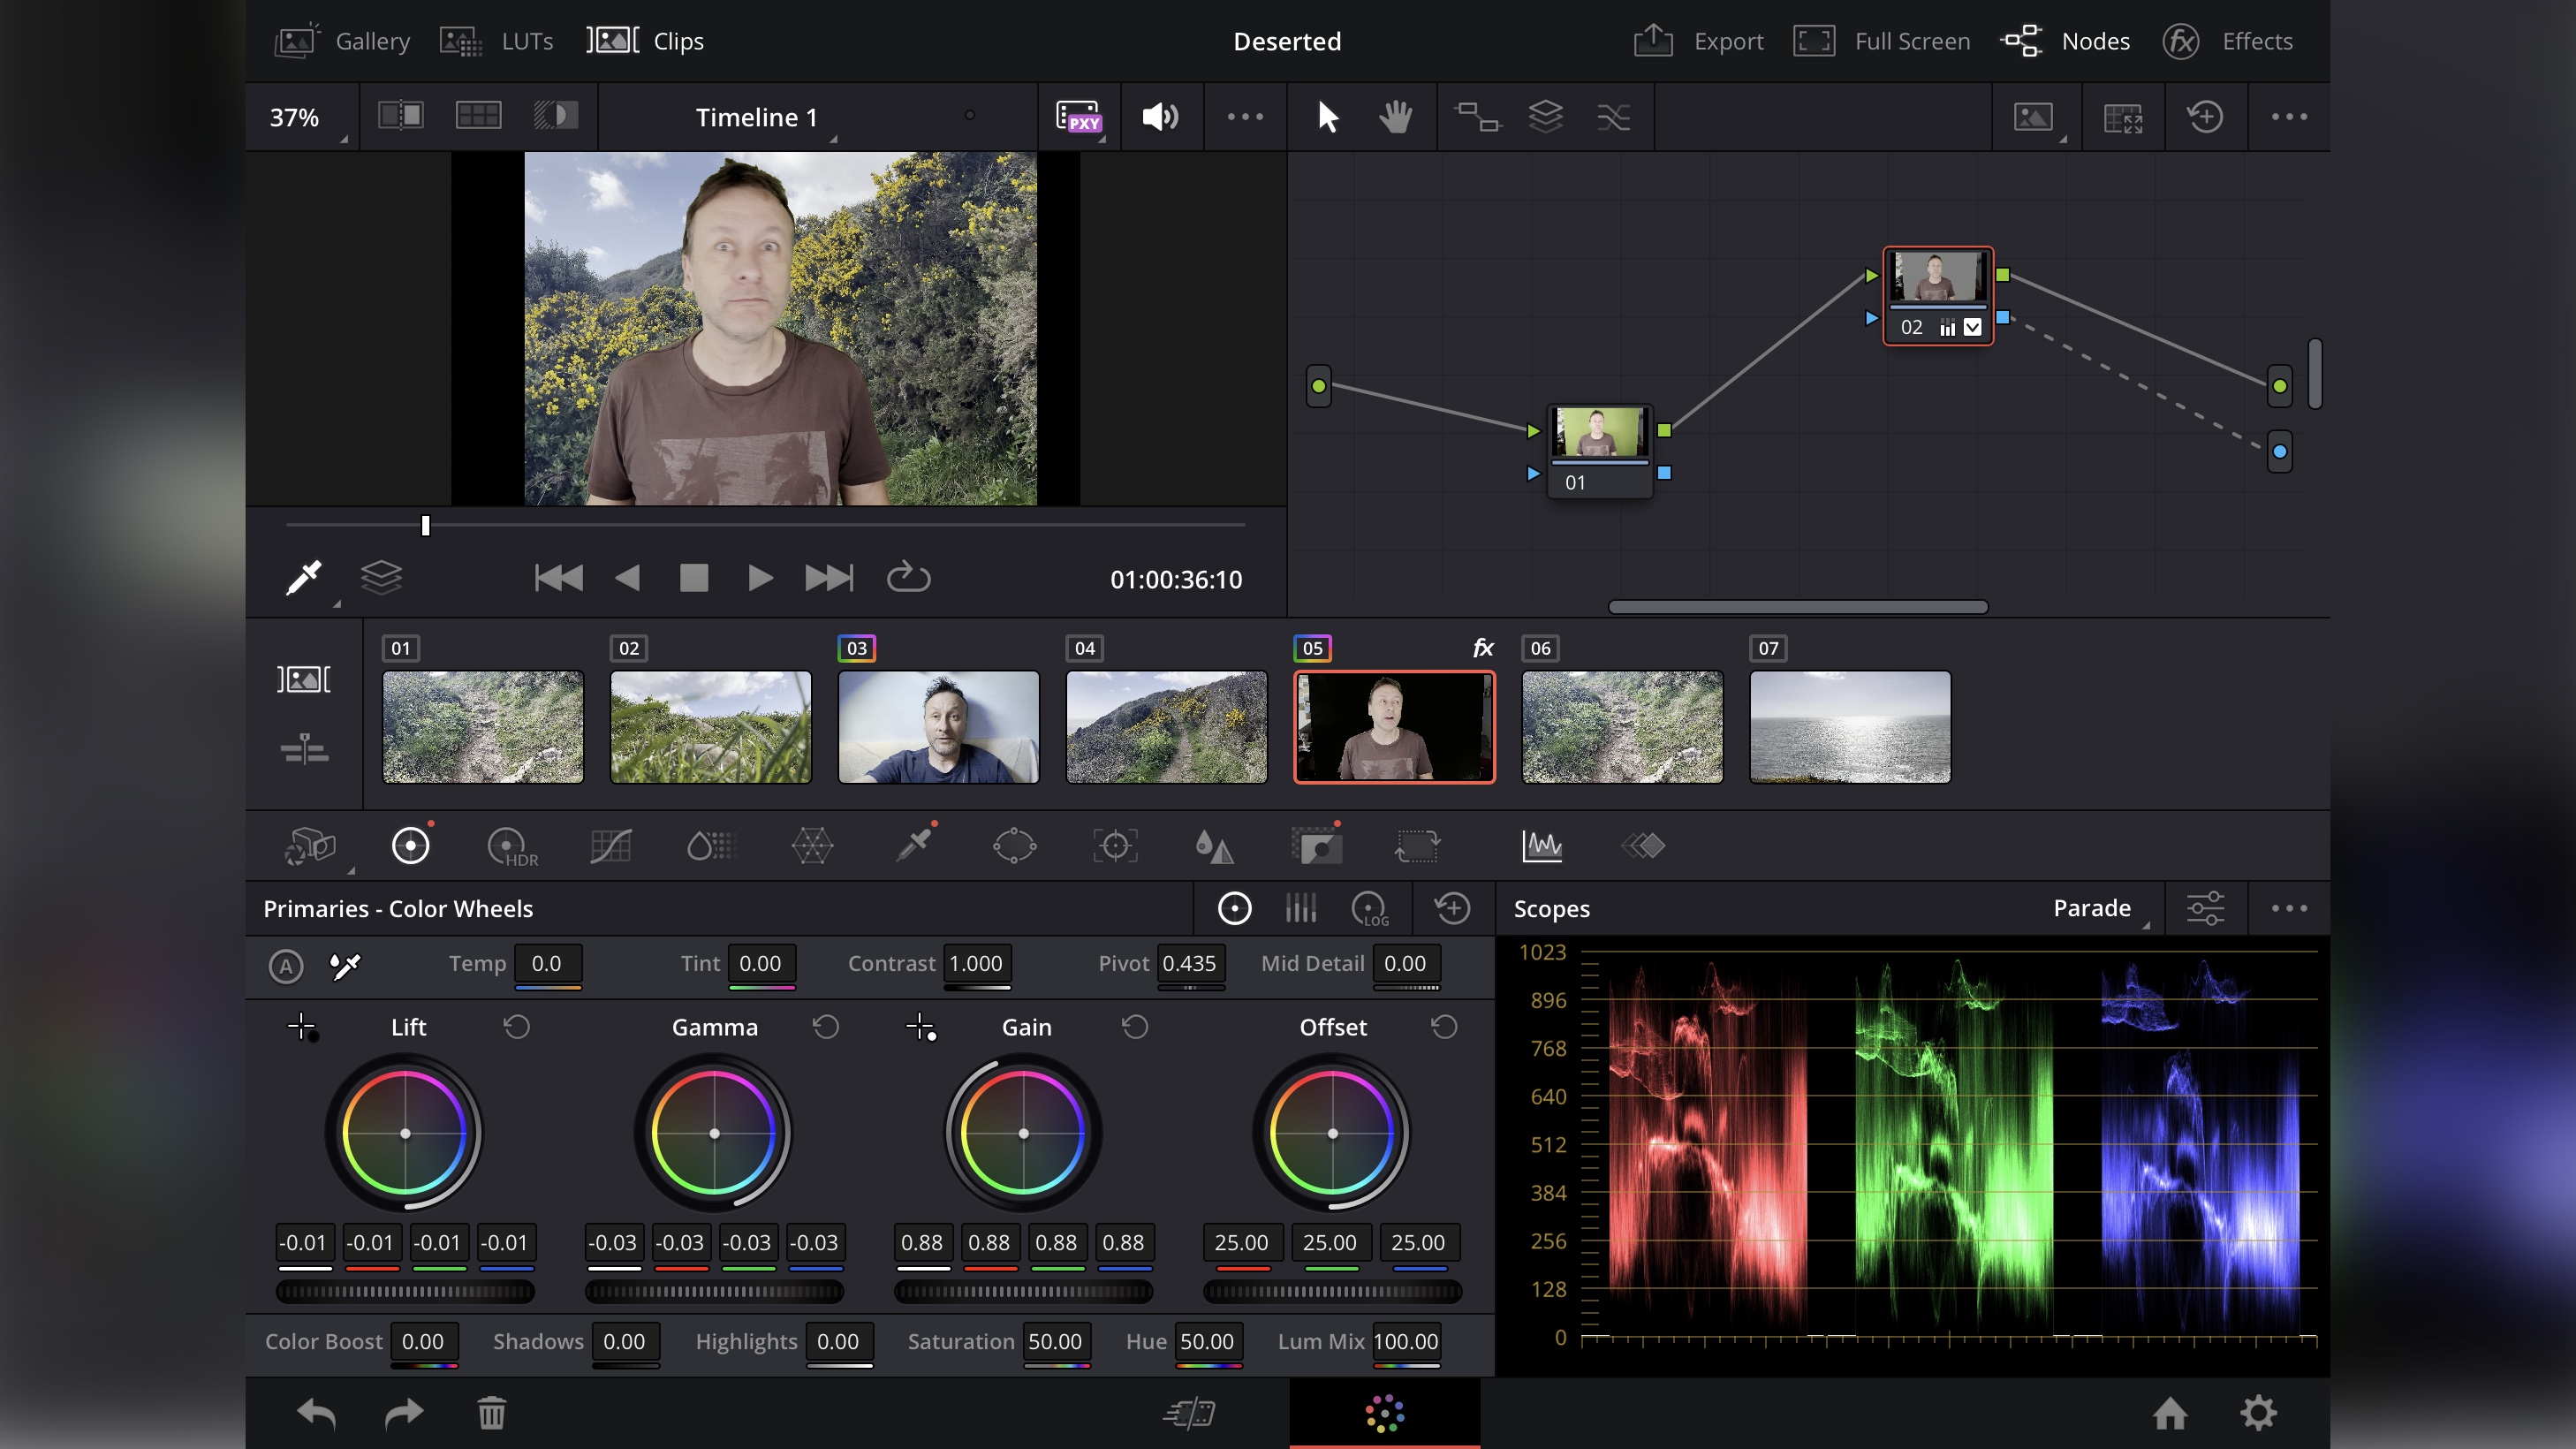
• DaVinci Resolve for iPad restricts you to the Cut and Colour Pages, but is incredibly well implemented for touch controls.
DaVinci Resolve is a big piece of software, and as such, you shouldn’t expect to be able to see it running on a tablet, let alone a phone… however, Blackmagic Design haven’t left you high and dry if you’re a fan of these devices.
First there’s Blackmagic Camera which adds “Blackmagic’s digital film camera controls and image processing” to your phone and tablet.
And then there’s DaVinci Resolve for iPad which features support for its ‘Cut’ and ‘Color’ Pages. Yes it’s limited in terms of functionality, but its touch and pencil commands work amazingly well within an interface that feels like you’re using the Resolve desktop software you know and love.
Mobile score: 4/5
Help & support
• The Blackmagic Design forums are your only source of help.
• They do also offer a wealth of video tutorials.
It can be so frustrating when things go wrong and you’re at your wits end, so some kind of support from the developer would be most useful. Unfortunately, you can’t just call someone for help: as DaVinci Resolve is free, your only option is the forums. This may not sound too good, but many professional users do lurk there, and have helped countless people struggling with a particular issue, and do be fair, Adobe and Apple also rely extensively on forums to resolve problems with their own software.
Backmagic Design also offer an extensive collection of video tutorials to teach you everything you need to know about Resolve, and is a great resource, even for experienced editors.
Support Score: 3.5/5
Key plans and pricing
DaVinci Resolve is free. Totally free, and will remain free. You download it for free, use it for free, and any future updates, large or small, is yours, for free. No catch. Seriously.
However, Resolve has some limitations: you can only edit in up to 60fps and Ultra HD (3840 x 2160), for instance. If you need to expand these limits, that’s where DaVinci Resolve Studio steps in. With it, you can work at up to 120fps and a staggering 32K resolution, have additional audio tools, a neural engine AI voice isolation, music remixer and dialogue separator, and so much more. The cost? $295. Any future upgrade, large or small, will be free. Worth thinking about when you’re ready to move your editing to the next level.
Value score: 5/5
Who is it for?
✅ You need professional video editing tools
✅ You are on a very tight budget
✅ You feel let down by other free alternatives
❌ You need something simple
❌ You don’t like being overwhelmed with so many powerful options
DaVinci Resolve is an incredibly powerful video editor, and you may find it hard to believe that Blackmagic Design offer it for free, but that’s because it’s subsidised through the company’s hardware sales.
As a free video editor, it’s impossible to beat. It offers options other free alternatives can only dream of, and my favourite aspect of the software is that it can grow with you: you don’t need to know how Fairlight works for instance, and just focus on the Cut page until you’re ready to delve deeper.
If you’re at all serious about video editing, even if your budget isn’t seriously constrained, this is a software suite you should definitely explore.


