After years of neglect, Apple has finally begun to take the Contacts app seriously on iPhone.
It’s strange to think that an app built around phone numbers would be so neglected by Apple's first phone. But with iOS 16 and 17, the company has fixed some holes to make it the app it should have been from the early days of the iPhone.
Here are the iPhone tricks hidden within your Contacts app.
A note on compatibility
The tips below require at least iOS 16 or 17, depending on the feature.
That rules out older handsets. For iOS 17, you’ll need an iPhone XR (2018) or later, while iOS 16 will take you back to 2017’s iPhone 8.
With that out the way, on with the guide.
1. Create contact lists to group friends and family
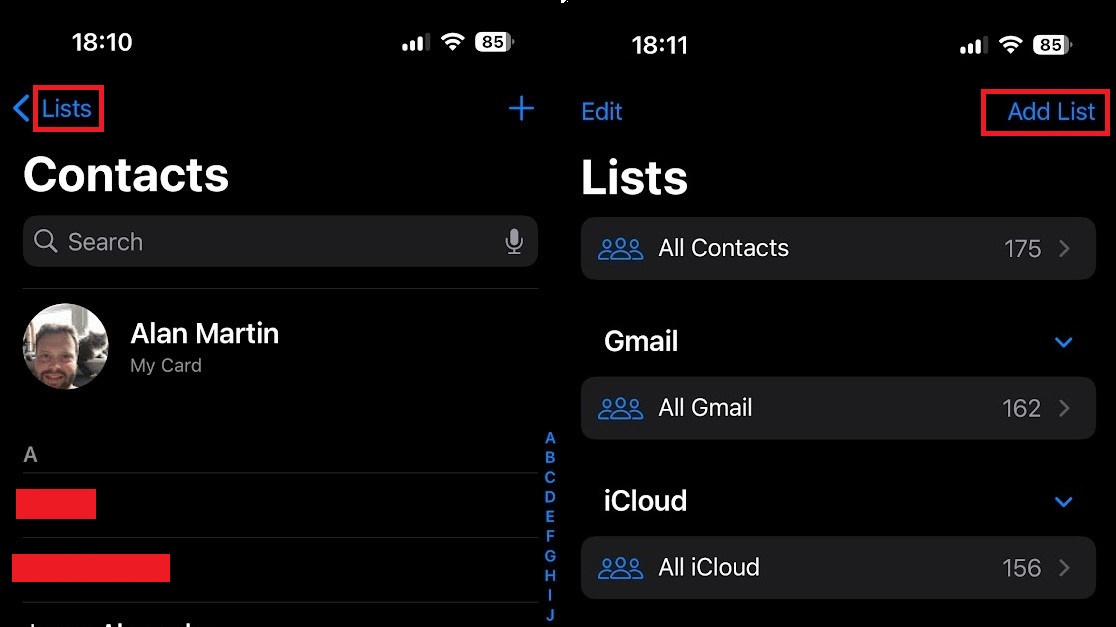
With iOS 16, Apple added the ability to create custom lists of contacts. For example, a group full of your family members, one with fellow parents or another exclusively for your colleagues. That’s handy if you want to send a message to all of them at once, saving you a copy and paste.
To get started, open the Contacts app and tap ‘Lists’ in the top left-hand corner of the screen. Select ‘Add List’, give it a name (e.g: ‘work friends’) and tap done.
You can now add people to the list by selecting ‘Add Contacts’ or, if you’re nimble with your touch controls, you can drag and drop them. To do this, press down on the name of a contact and move it a little. Then with another finger, tap ‘Lists’, and continue to drag the name onto your chosen destination.
2. Easily share a contact’s info
Need to pass on someone’s contact details? You don’t have to mess around with the fiddly copy-and-paste functions of iOS.
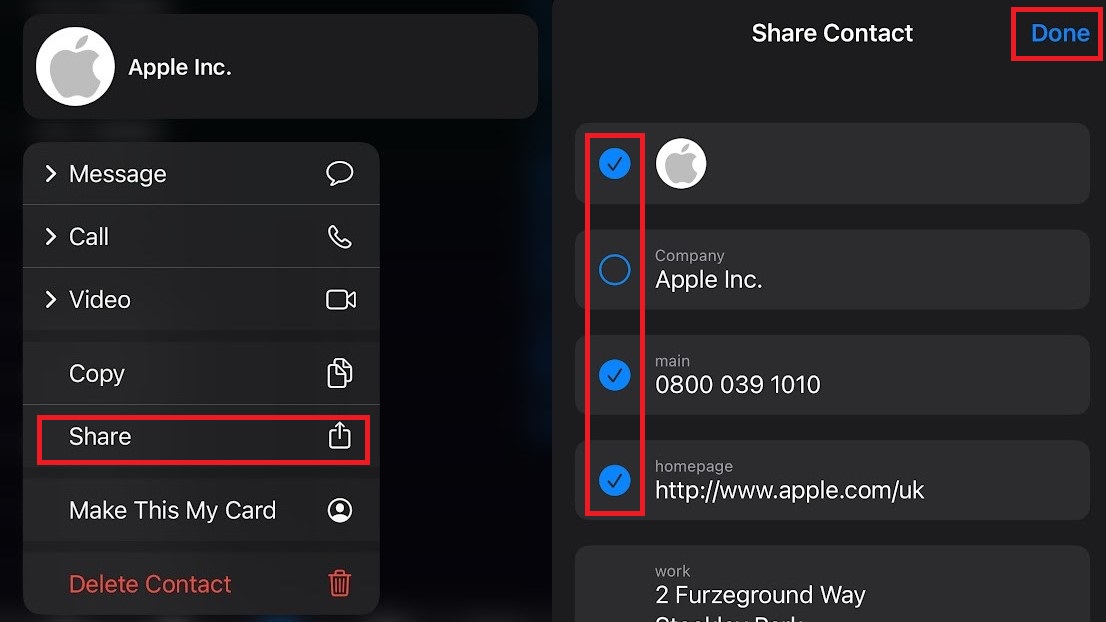
Instead, press down on the name of the contact and press ‘Share’ from the menu that appears.
Deselect the parts you don’t want to share (e.g: if you just want to give a phone number, then you can untick the email and postal address), and then press ‘Done’. Then select the app or person you want to share the details with and the selected info will be ready to easily pass on.
3. Provide your contact info to a new friend
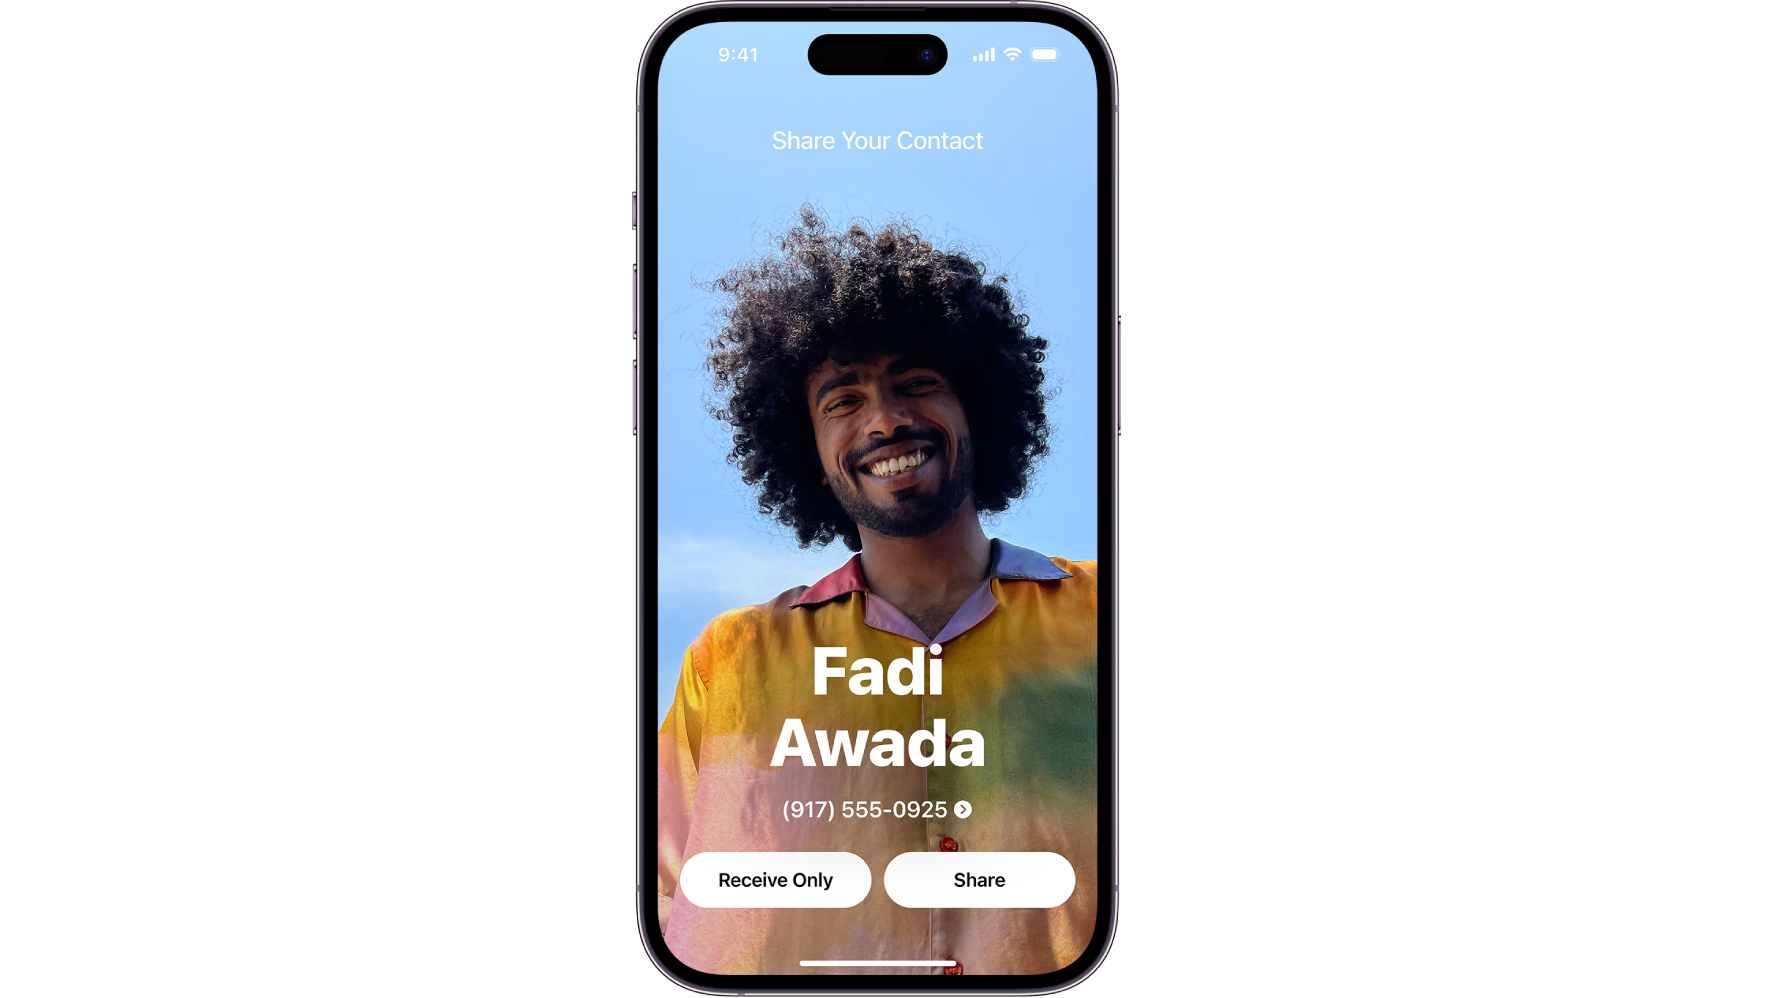
If it’s your information you want to share with a fellow iPhone user, there’s an even easier way. Assuming you’re both running iOS 17.1, you can simply hold your iPhones near one another to bring up Namedrop.
As Apple explains, you need to hold the display of your iPhone a few centimeters from the top of the other person’s handset. After a few seconds, NameDrop will appear on both screens.
Select whether you’re just taking their information or sharing your own, and away you go. Once again, you can edit the information you want to send. Just tap the ‘>’ icon to select the fields you want to be shared.
4. Create stylish posters for your top contacts
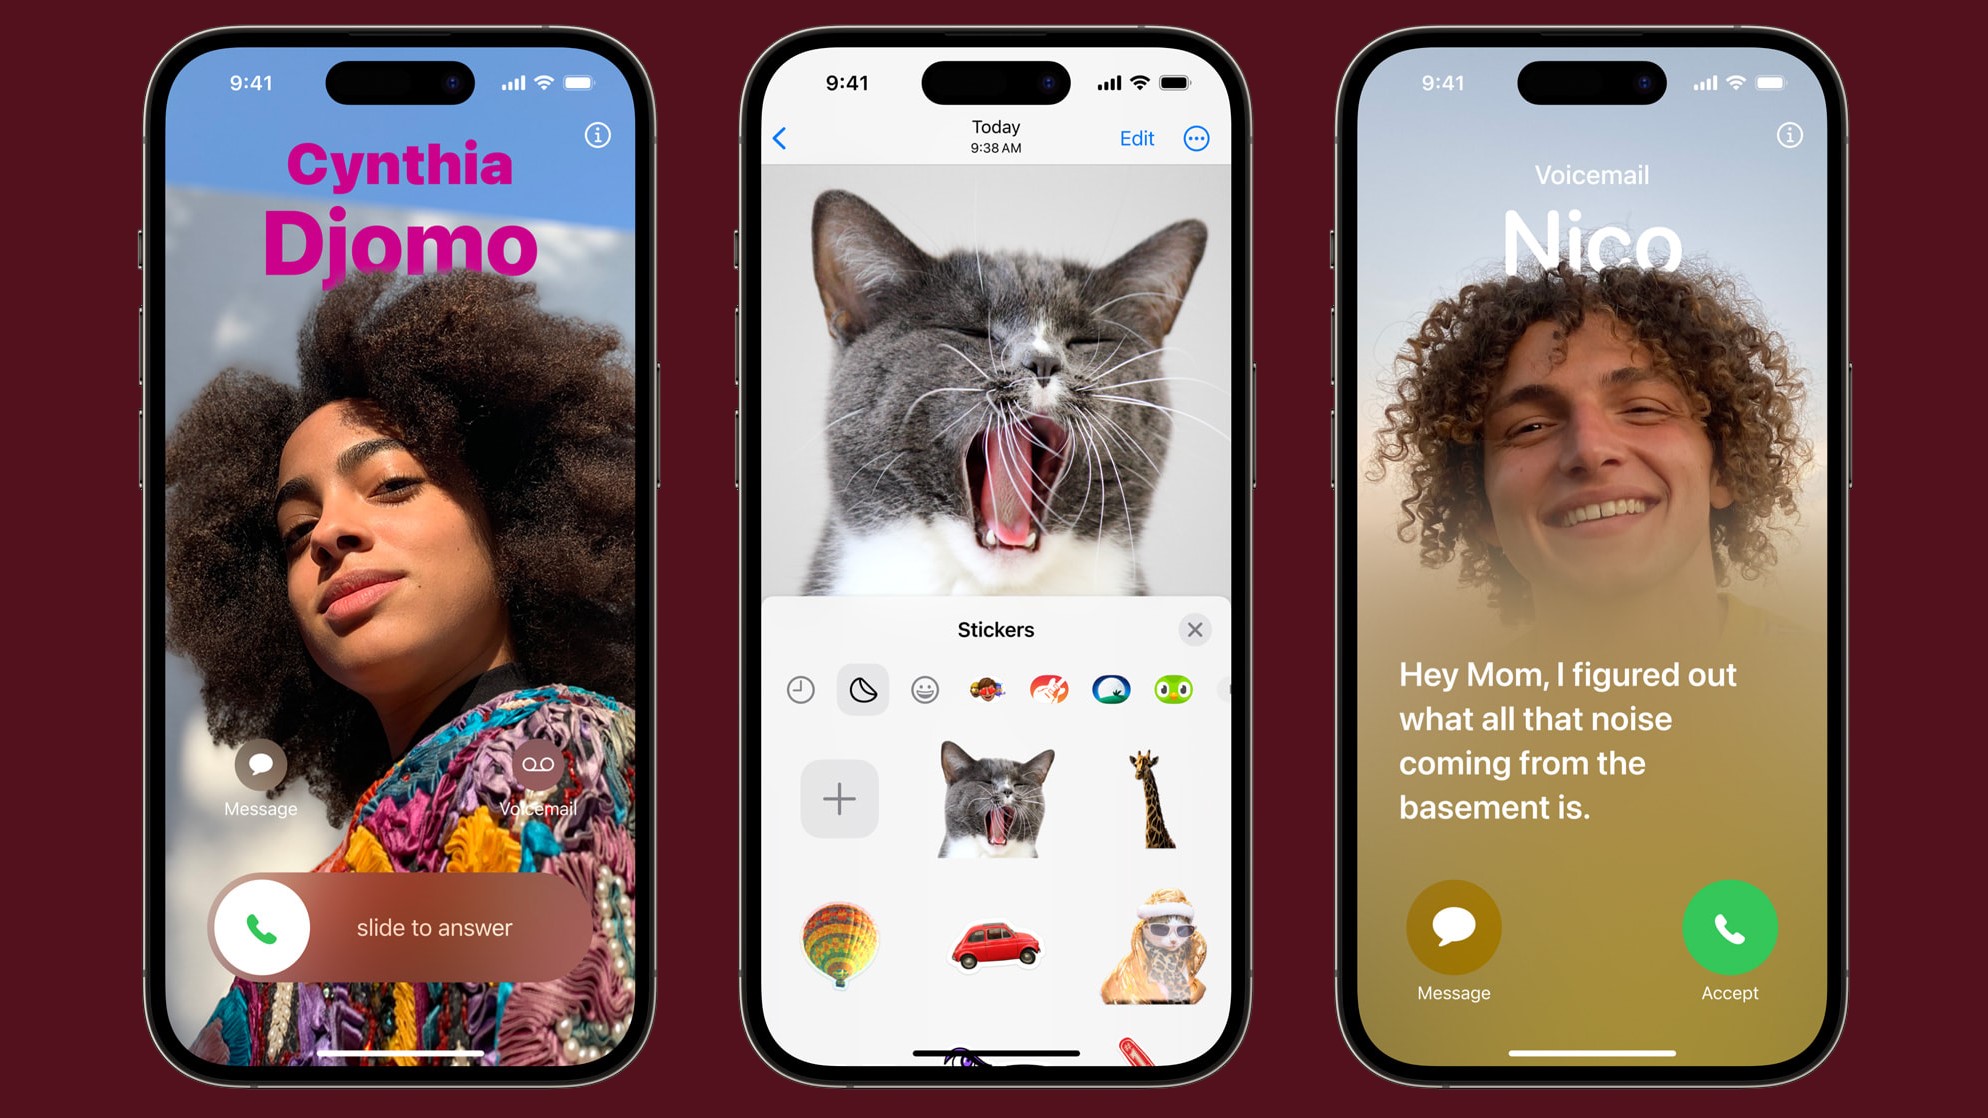
One of the best features of iOS 17 was the introduction of Contact Posters. This lets you create an arty, full-screen picture of your contact which will pop up every time they call, rather than the boring humdrum name and call time.
We wouldn’t recommend doing it for every contact, as it takes a few minutes each time, but for those who you’re regularly calling, it makes quite a difference. Here’s how to set up Contact Posters in iOS 17.
5. Make contacts a home screen widget
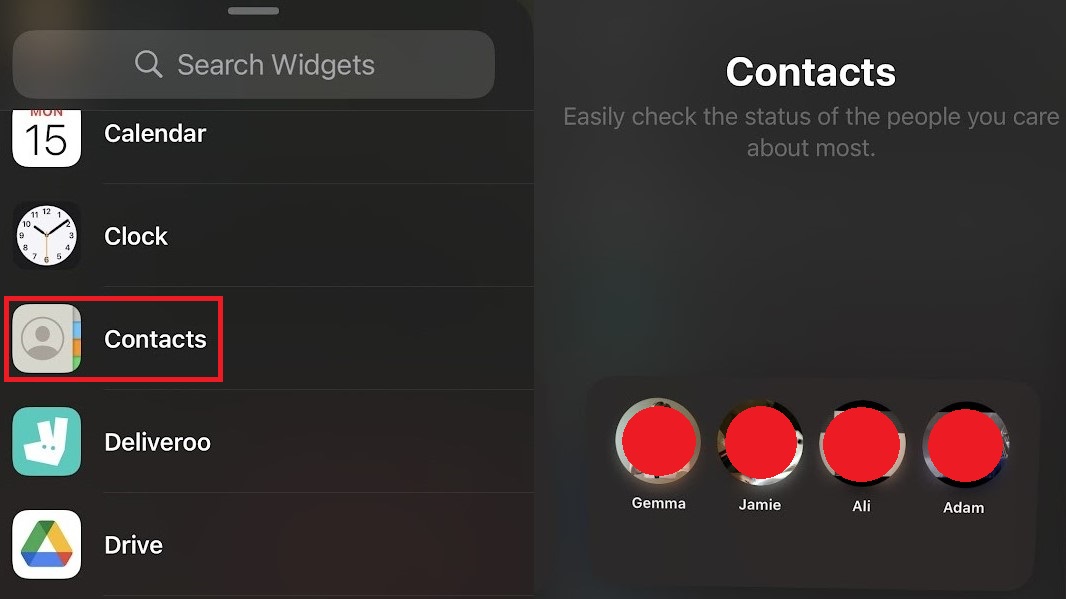
As much as the Contacts app has been improved by Apple over the last few years, it would still be more convenient to avoid it entirely. And thankfully, with iOS 17, Apple has made that happen.
You can now set up a home screen widget containing your most contacted friends and family. This can contain six, four or just the one contact — it’s completely up to you.
To set it up, swipe right on the home screen until you arrive at the widgets screen. Tap ‘Edit’, then the plus icon at the top of the screen. Scroll down the list until you hit ‘Contacts’.
Initially, this will just feature whichever one, four or six contacts are first alphabetically, but it’s easy to change. Just press down on the block and select ‘Edit Widget’ to sub out names as you see fit.