RECORDING WEEK 2024: When we record, our primary tasks are to capture both the performance and sounds that we want. To that end, it’s not unusual to spend some time adjusting mic positions and also EQing and maybe compressing the sounds we’re recording on the way into our recording system.
Nevertheless, unless we’re feeling super-confident about the sounds we want to hear, and how they’ll work together as the track production progresses, then hitting the EQ or compression hard at the recording stage can be a big gamble.
Throw a compromised monitoring environment into the equation, or a situation where we can only record directly into our interface as we have no inline EQ chain, and the options become even more limited.
The upshot of this is that it’s quite easy to end up with a build-up of frequencies we don’t really need and as we layer up more overdubs and tracks the problem only gets worse, resulting in our mix sounding muddy, undefined and lacking punch.
But what do we actually mean by muddy? Most typically we’re talking about the low mid frequencies (about 200Hz to 500Hz) and you’ll also hear this frequency area referred to as boxy or thick. But muddiness can also come from too much build up in the low frequencies, particularly if you have kick and bass sounds fighting for dominance.
The important thing to remember is these frequencies and the low mids in particular exist in many sounds, providing fullness and weight, and at the right levels are vital for a well balanced mix.
In this tutorial we’ll work through ways to resolve this issue, starting with establishing which tracks and frequencies are causing the problem. We’ll then hone in on the typical frequency areas of concern, looking at various different solutions.
Step 1: Finding the cause
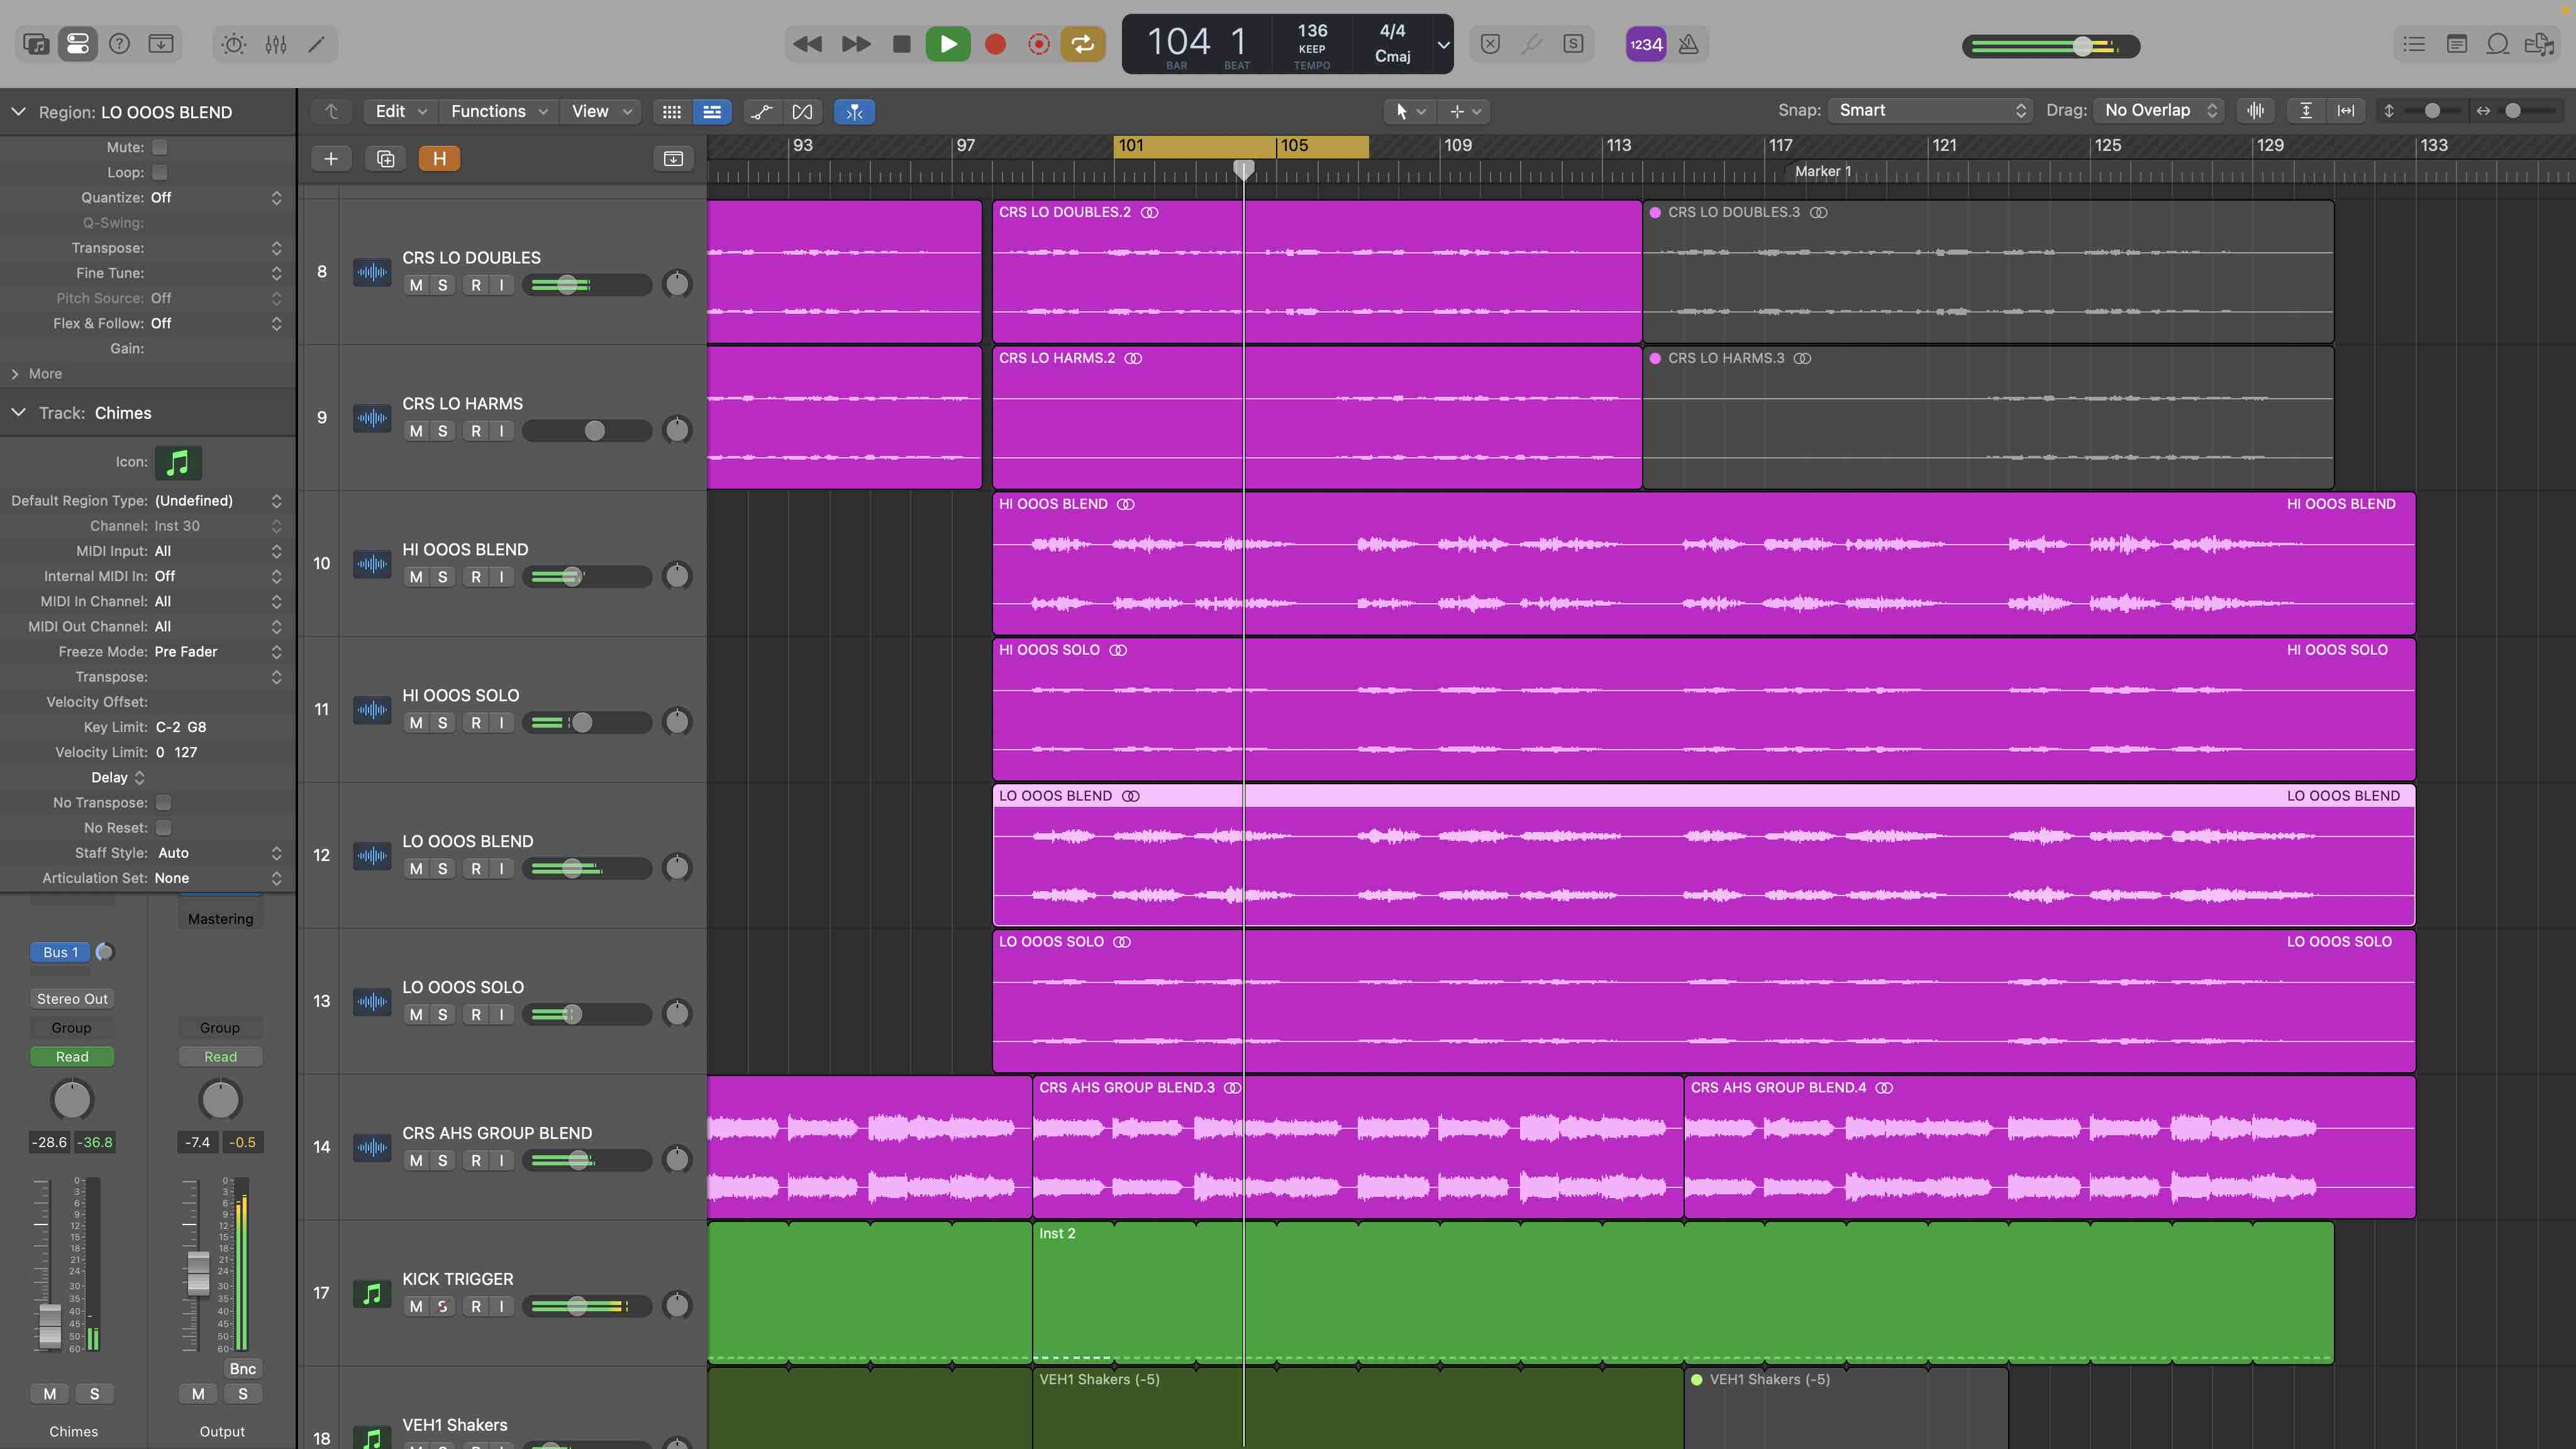
Our ears will have told us we have a problem with muddiness, and our next job is to pinpoint what is causing it. Multiple tracks of vocals or layers of synth pads can easily be the culprit. But also look at doubled sounds. A DI and mic pairing on bass or electric guitar for example.
Step 2: Sound sleuthing
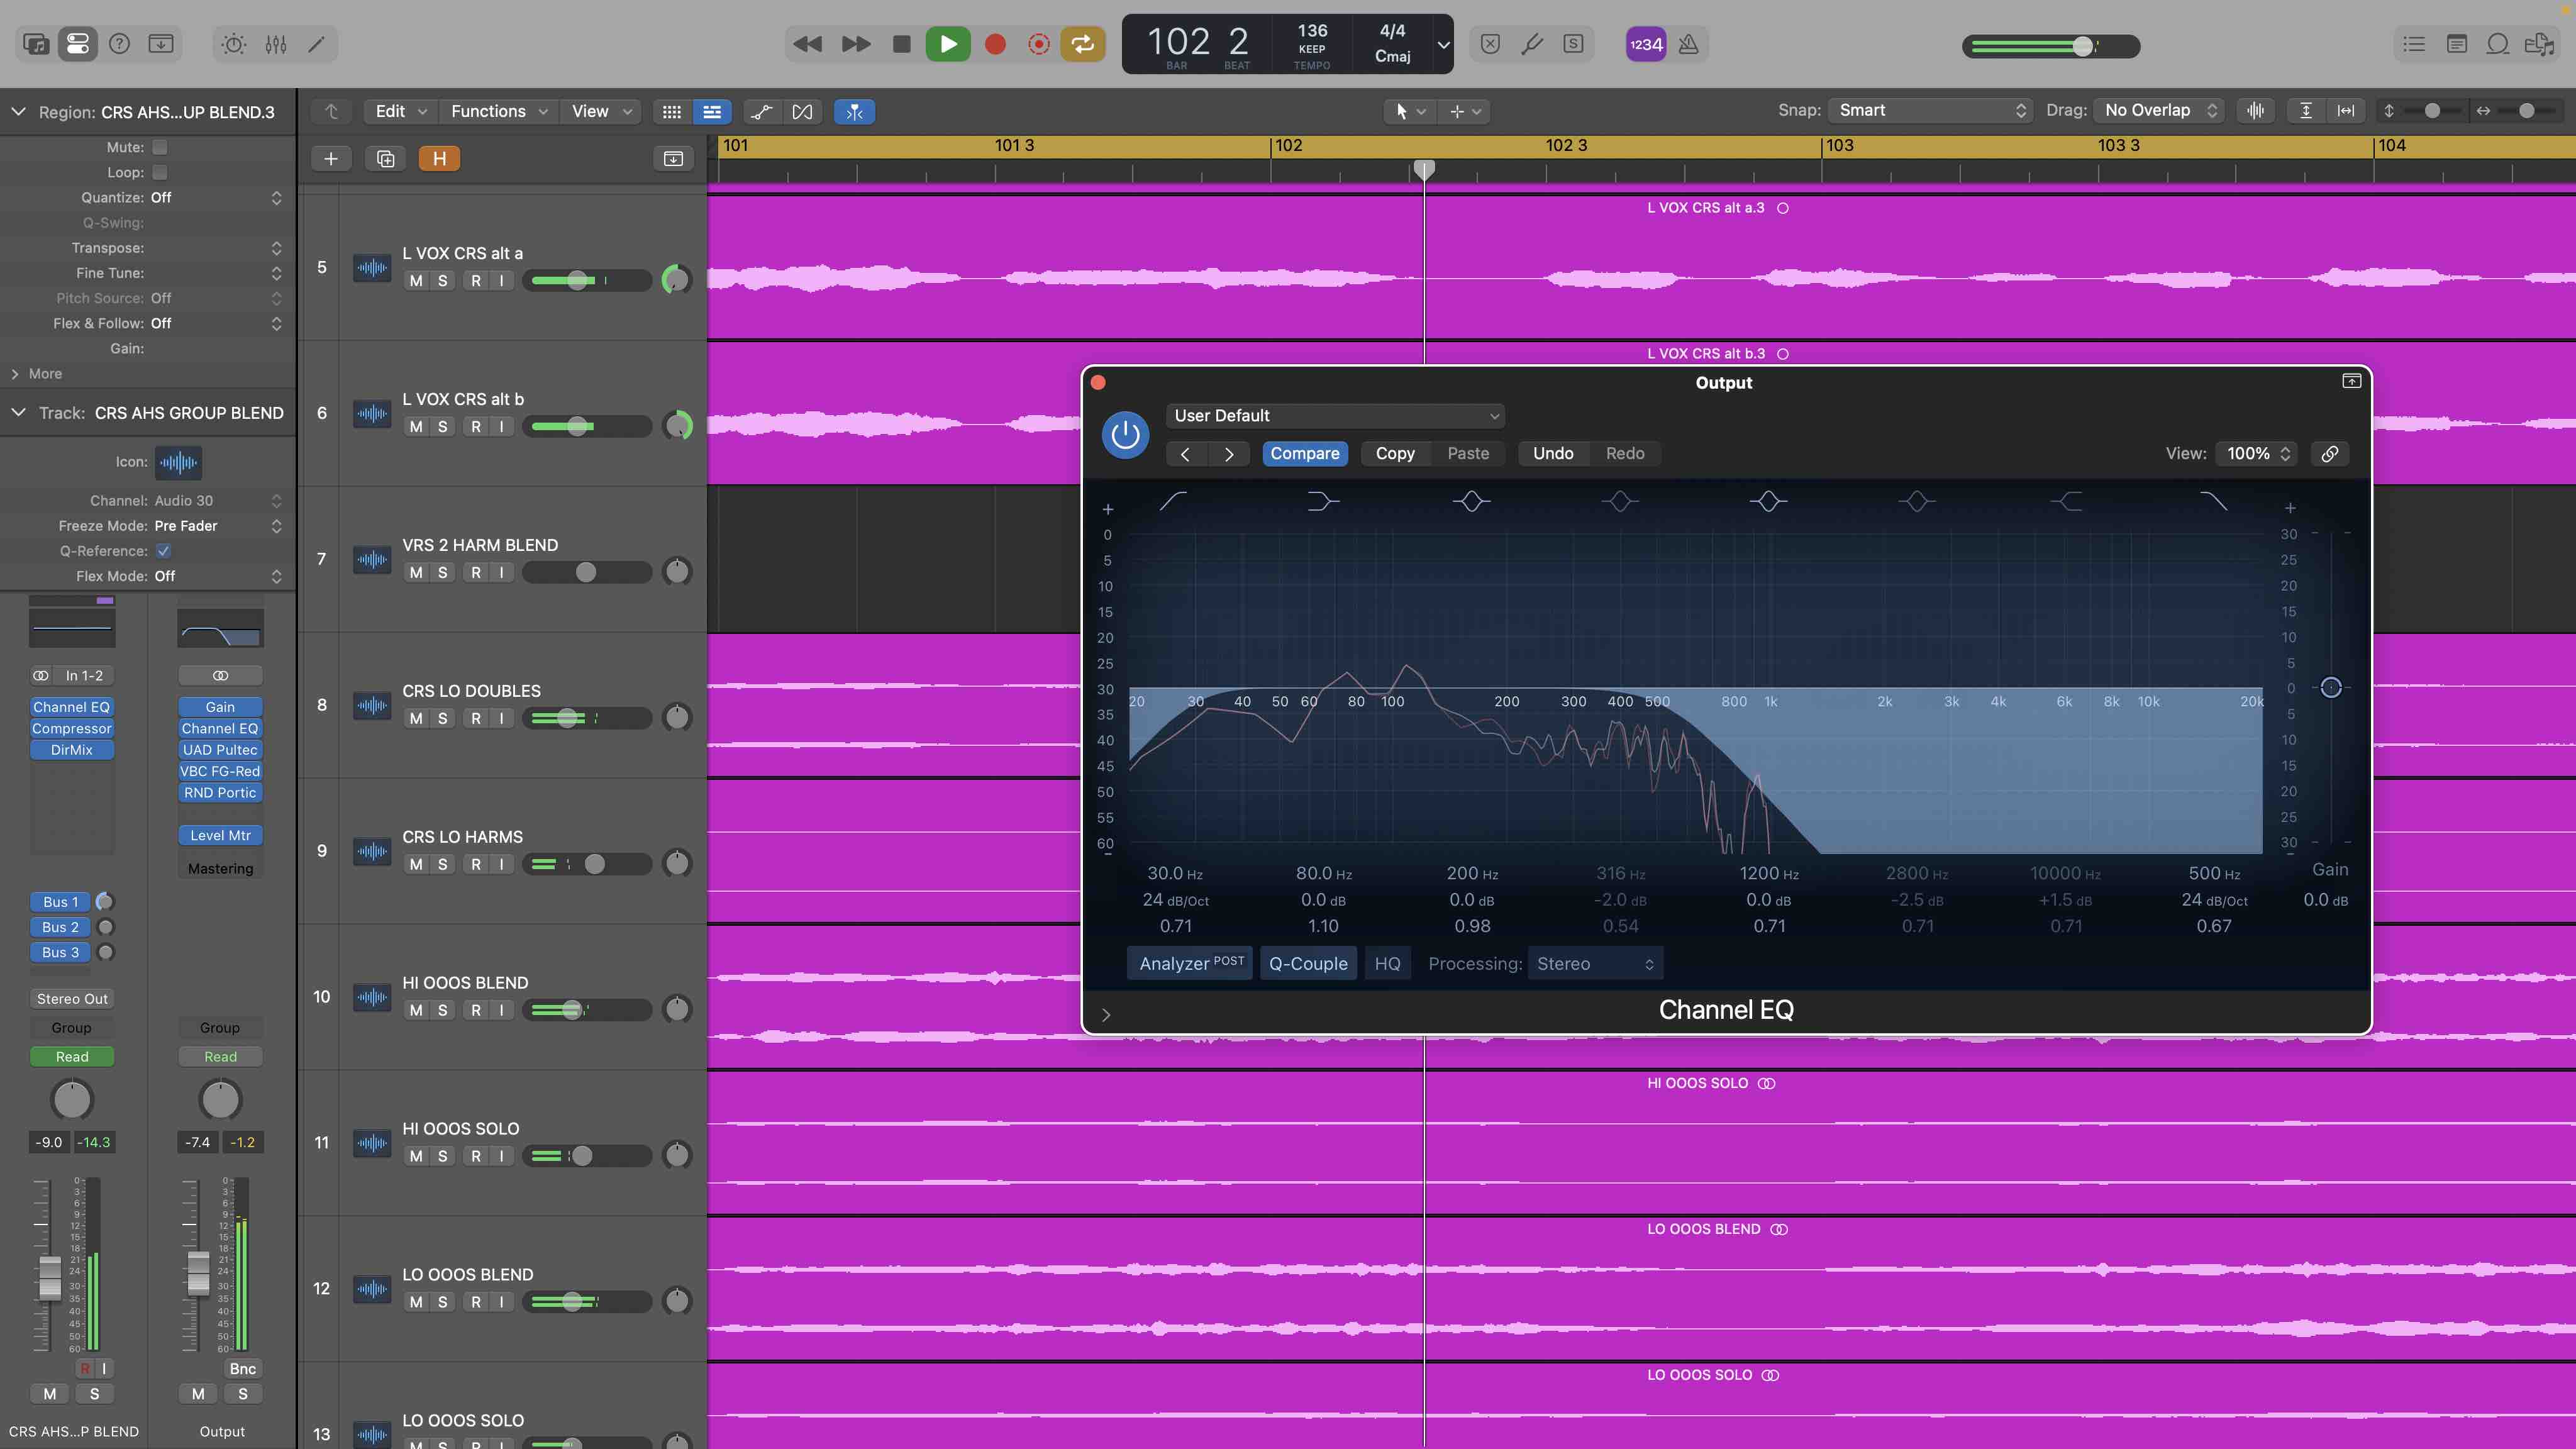
If you’re struggling to find the problem instruments, try muting tracks or groups of tracks. Take a methodical approach to reveal the problem, which you can then focus on. If you’re still struggling to hear the frequency region or differentiate the elements then try temporarily adding a low pass filter at about 500Hz to your mix output or individual tracks.
Step 3: Deeper analysis
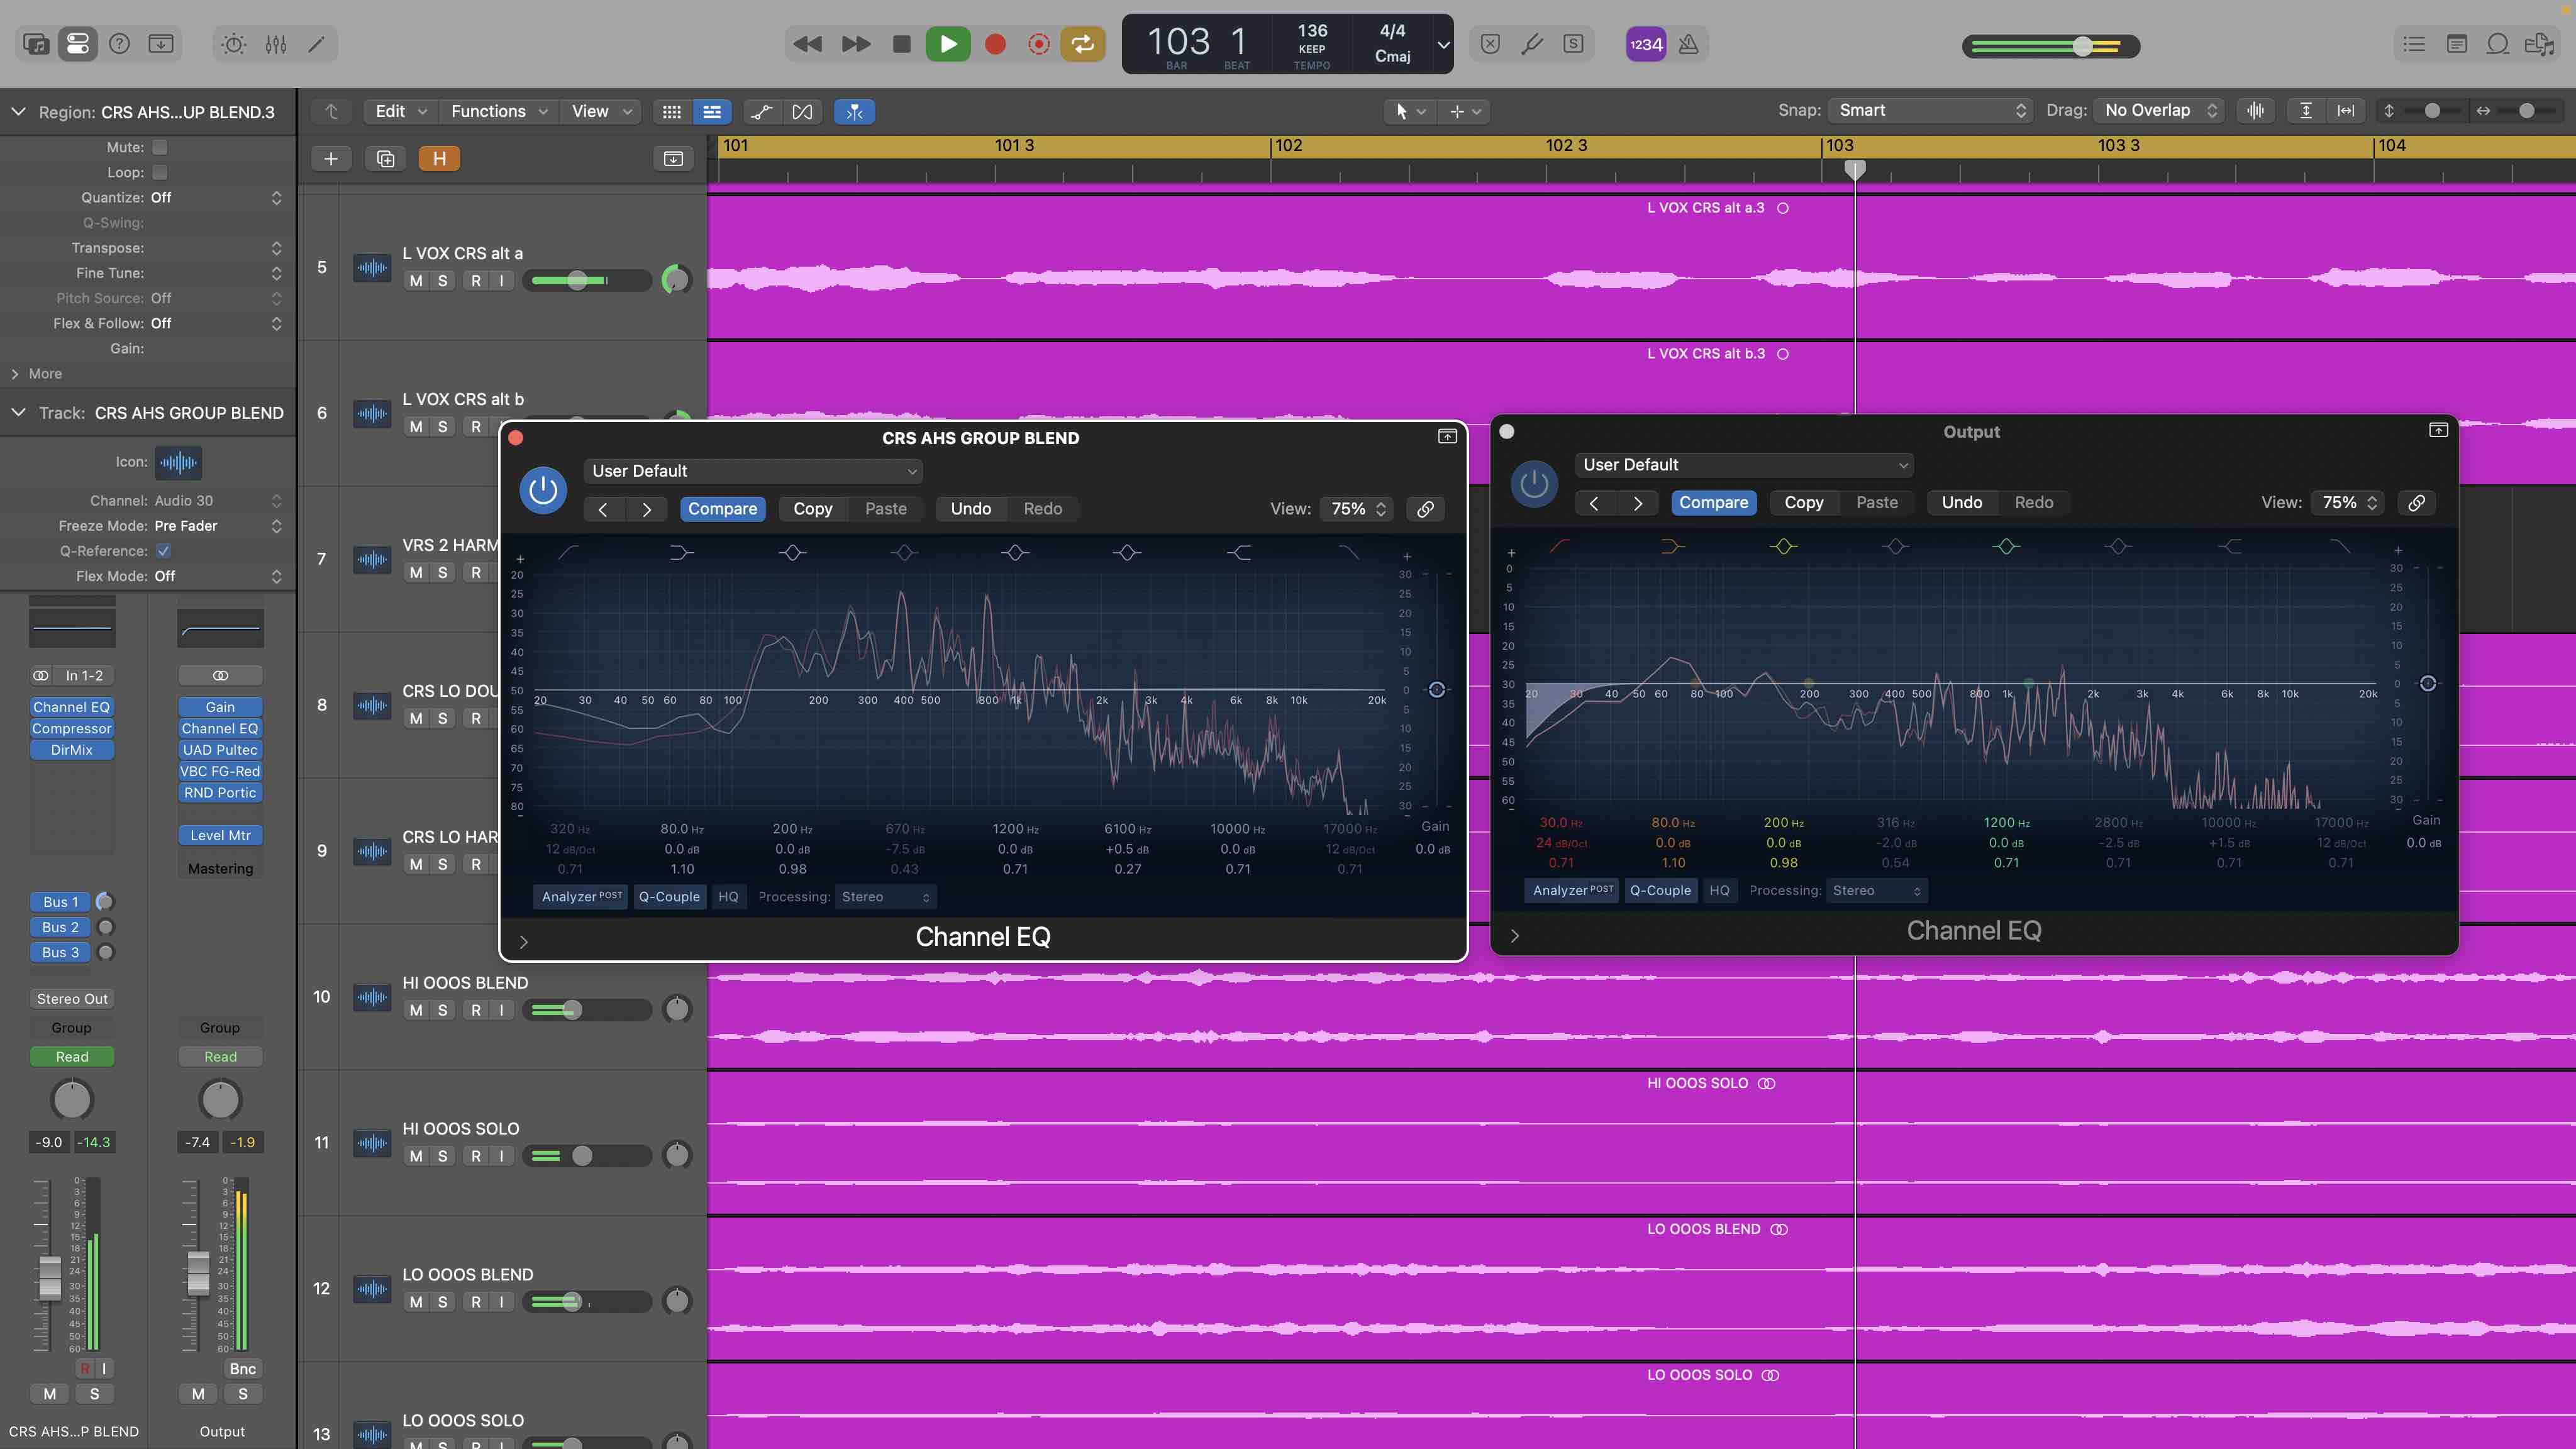
One further tool that can be really handy and confirm your initial findings are frequency analysers. We recommend you use them on both your mix bus and individual tracks to get the most accurate overall picture. Conveniently, they’re often integrated into your EQ with pre and post EQ analysis, which is handy once you start EQing.
Step 4: Bear your genre in mind
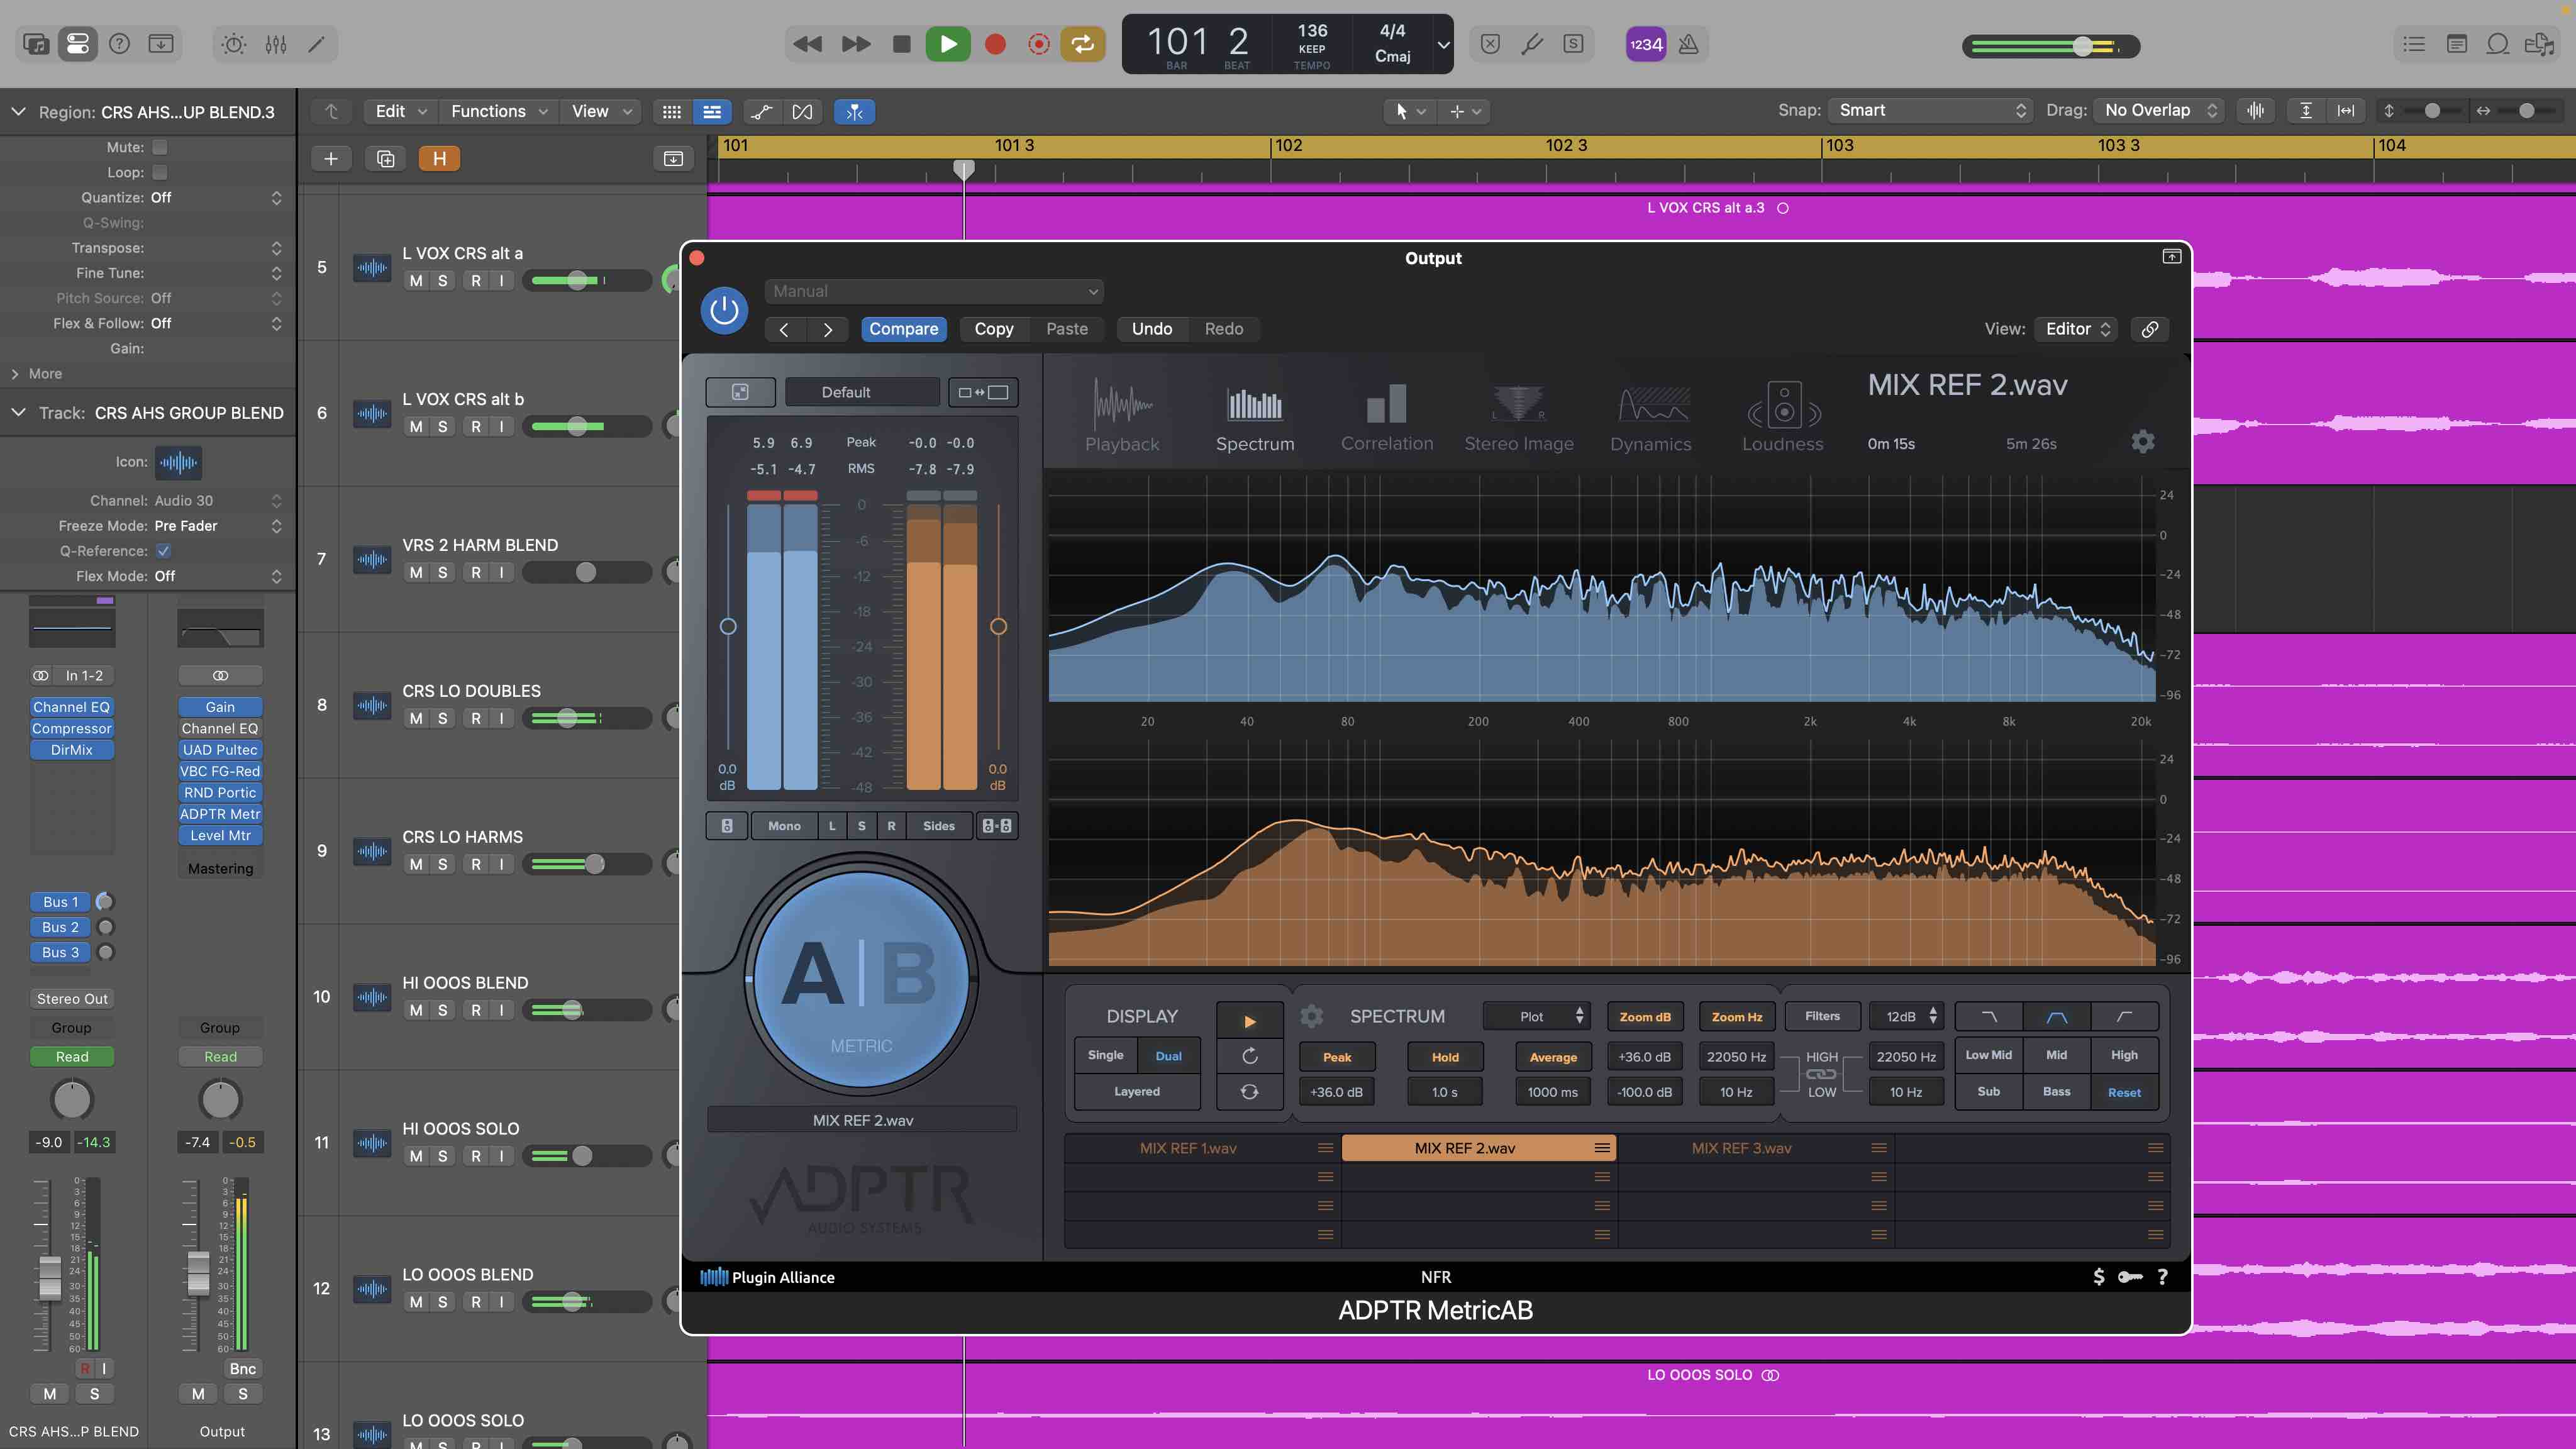
Finally, different styles of music have quite specific norms when it comes to the frequency balance of different instruments. In riff-heavy rock music for example the low mids may be dominated by guitar and bass, whereas in R&B this region may be all about vocals and beats. Understand your genre and use some suitable references.
Step 5: The solutions
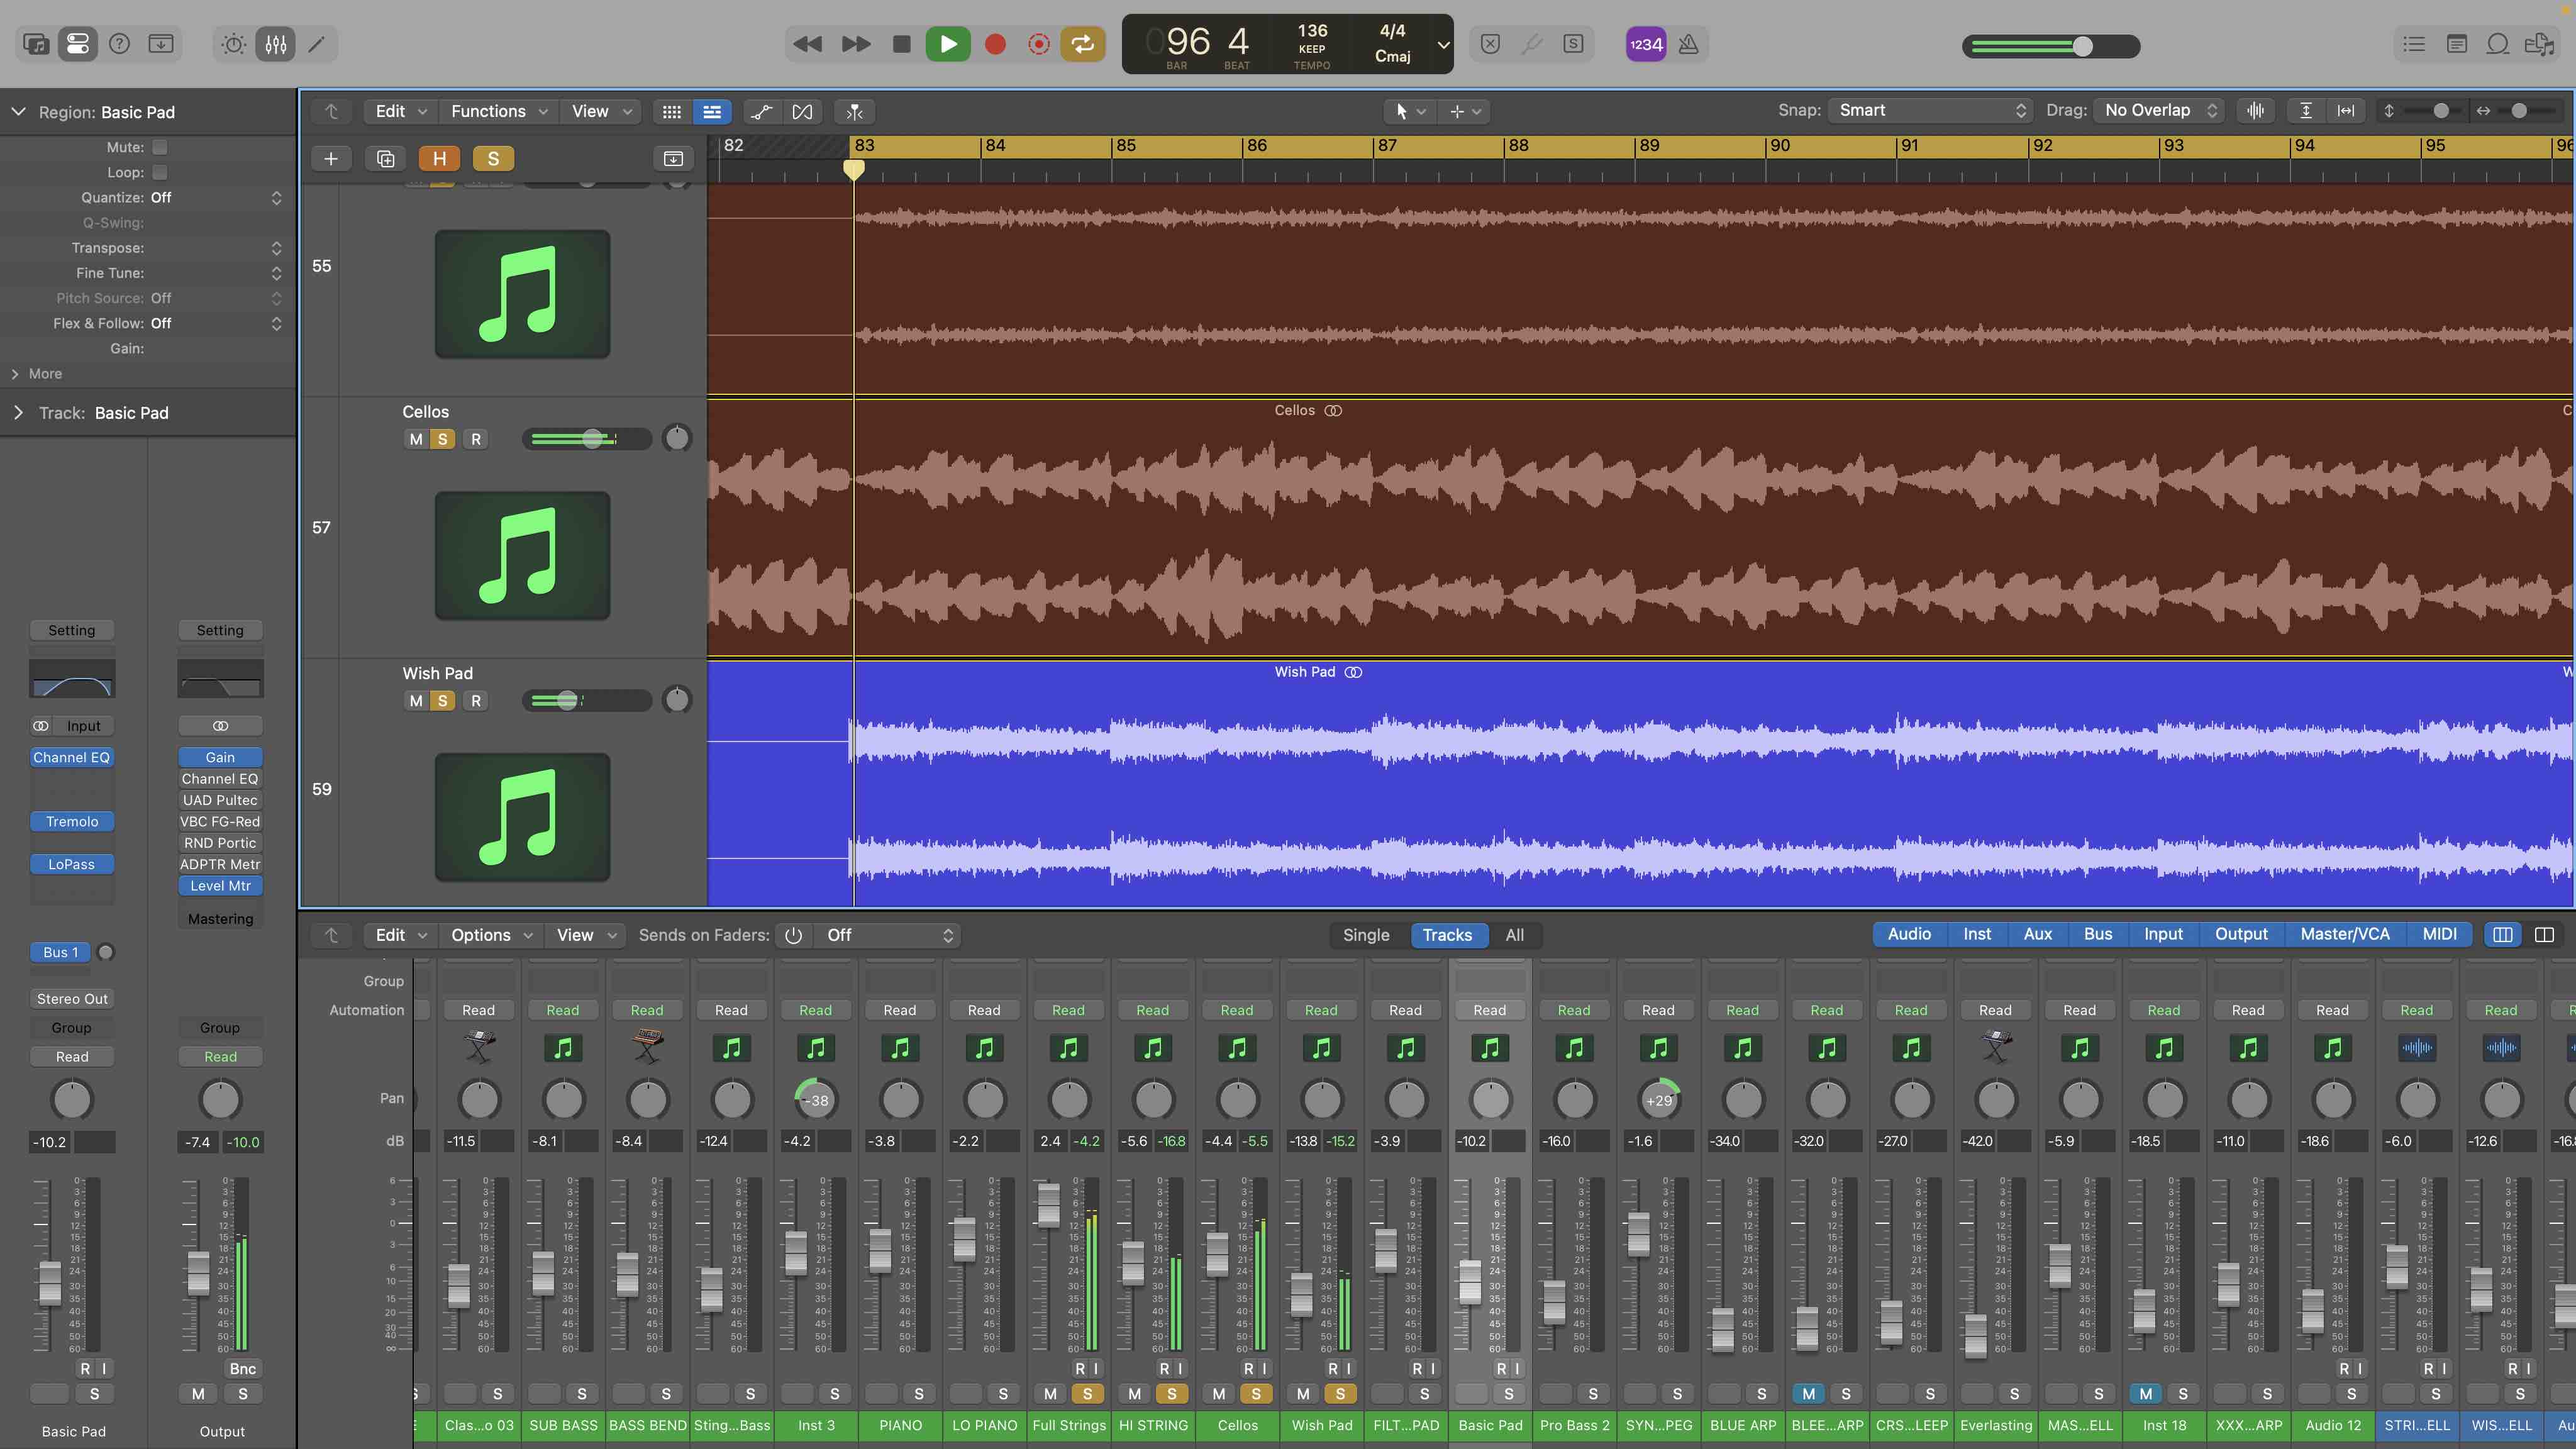
Before we get into EQ and dynamic solutions, it’s important to check the balance between elements. This is a process that will continue as the track is mixed to achieve the best frequency balance. Nevertheless, at the outset it’s worth checking that you can’t resolve any muddiness simply by balancing your tracks slightly differently.
Step 6: Eliminate unwanted lows
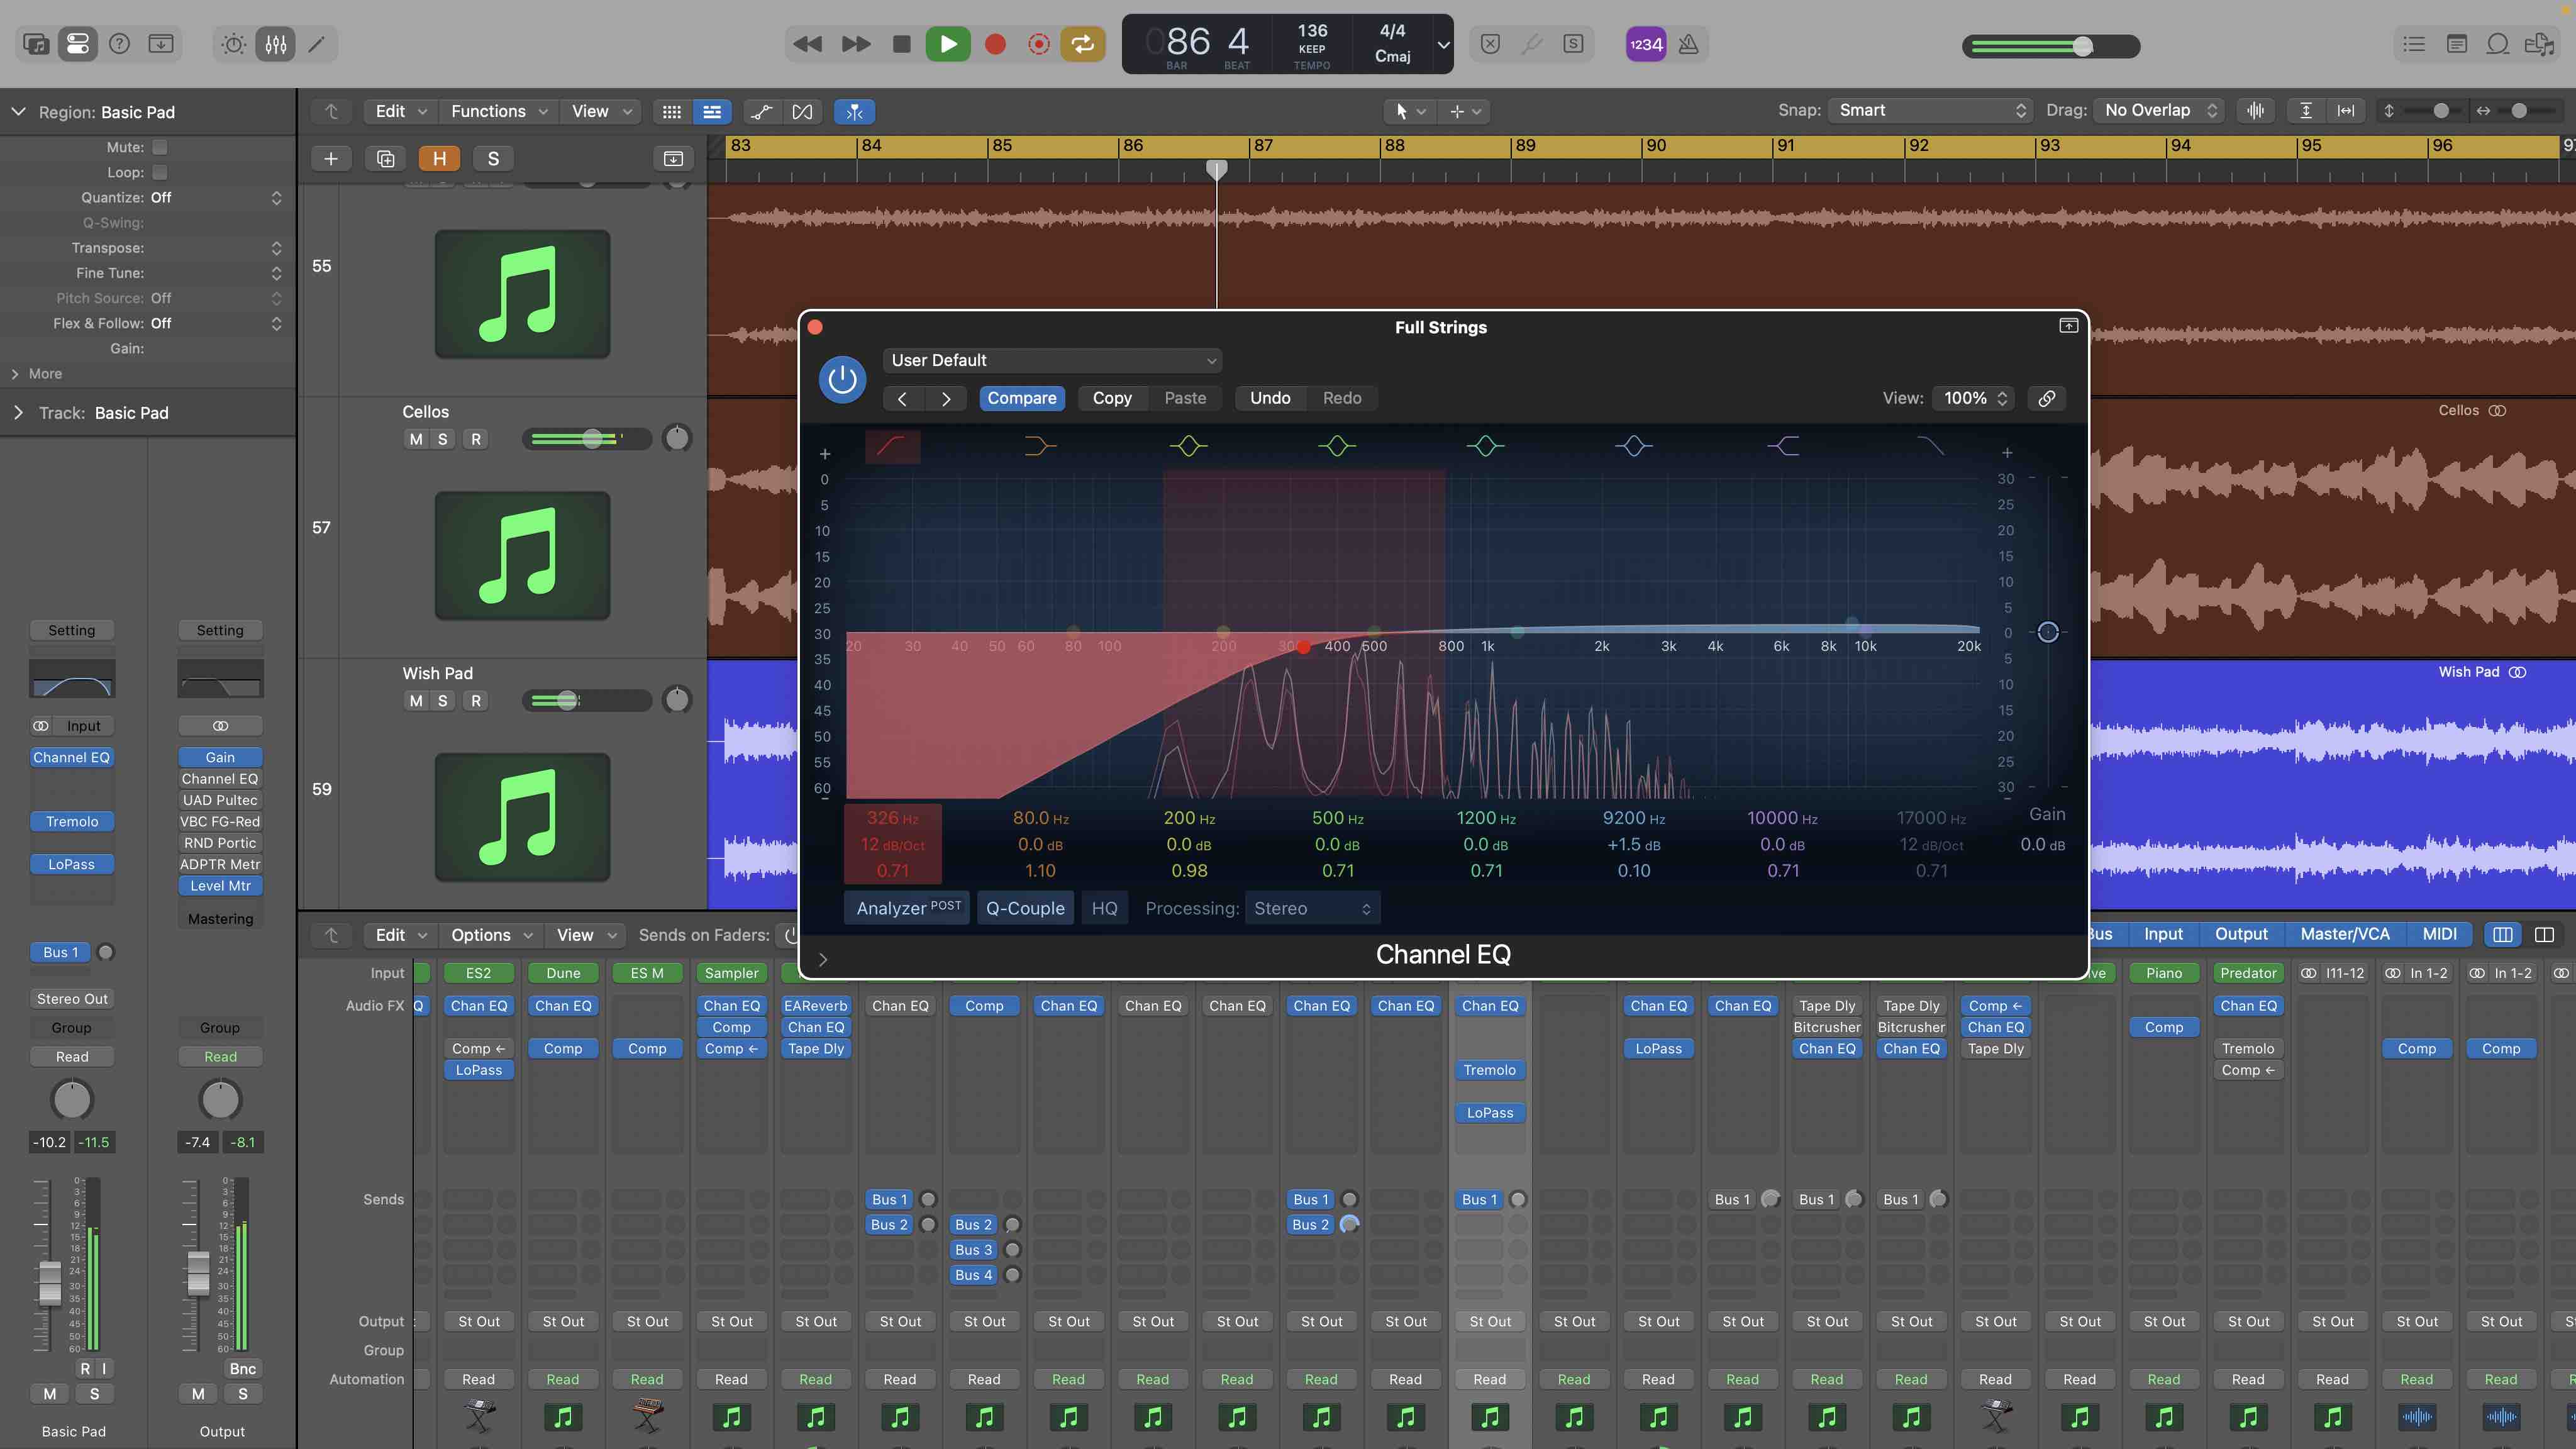
Many sounds don’t have significant low frequencies or we don’t need them in the balance. Here the simplest solution is to just use a high pass filter. Start with a 12dB/octave slope and the frequency at about 350Hz. Adjust the cut off frequency to taste and select a steeper slope if required. Copy the same plugin to multiple tracks.
Step 7: Fine tuning your EQ
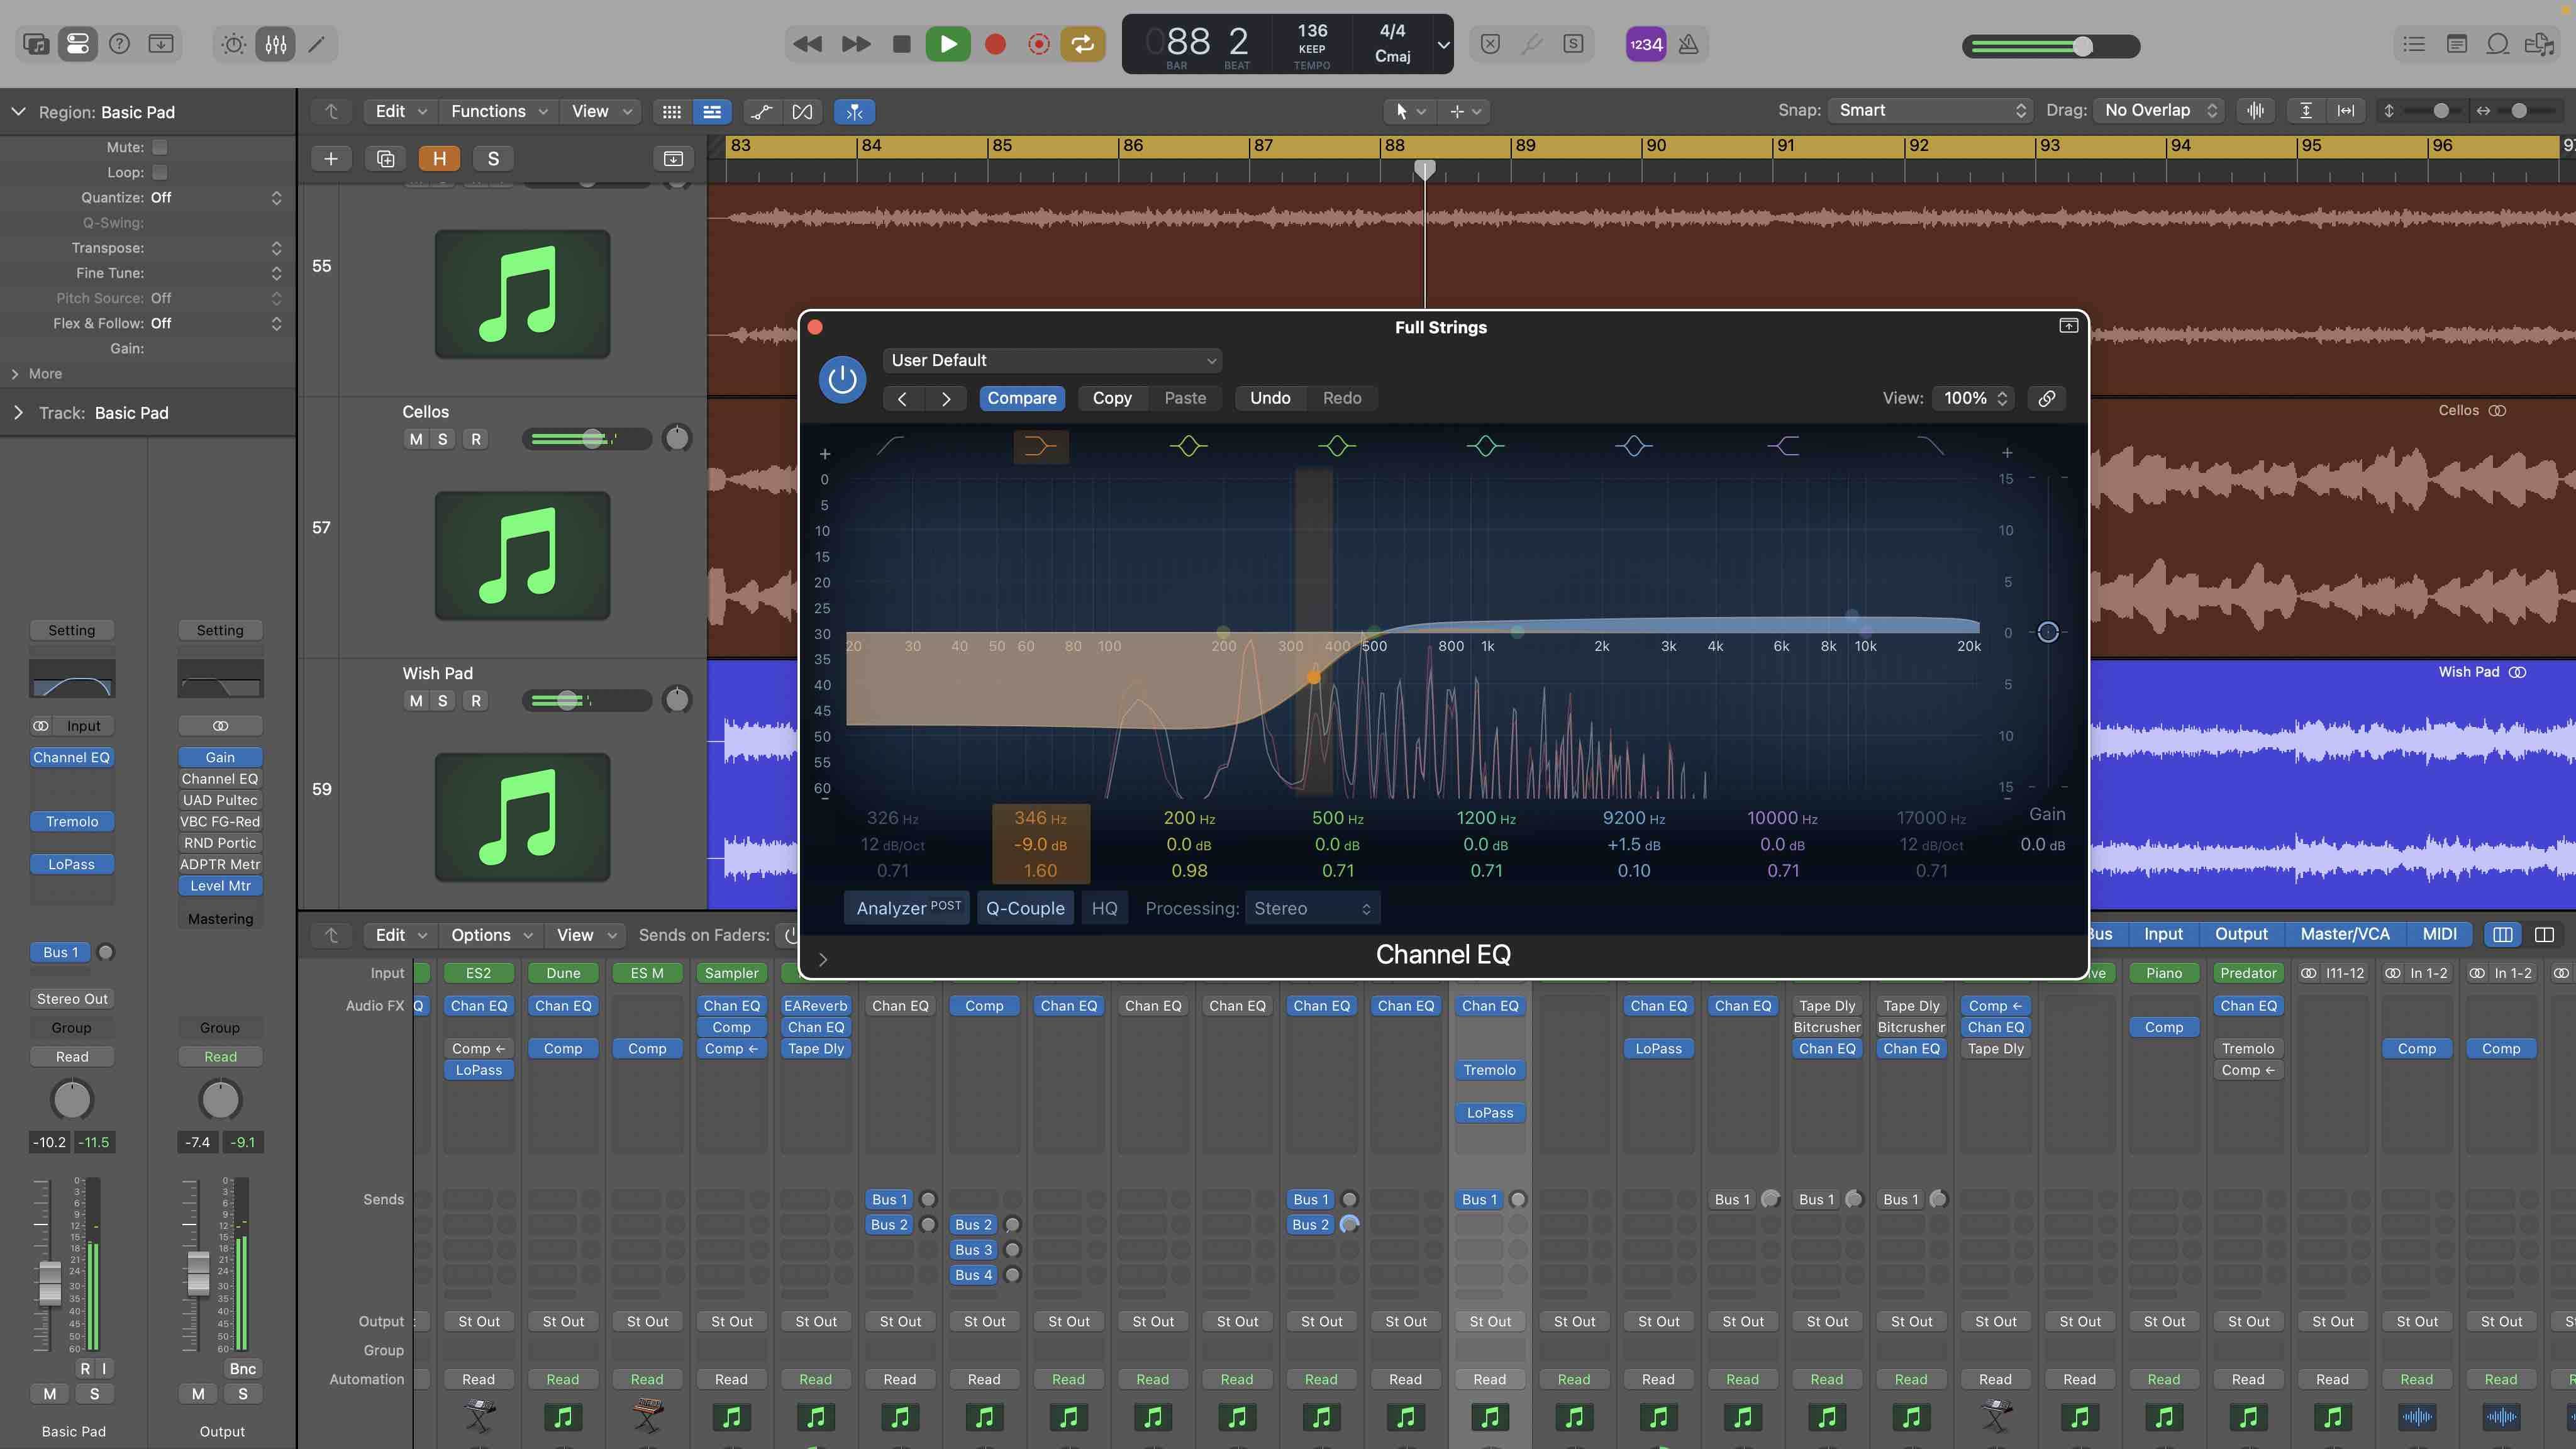
Sometimes the high-pass filter approach can be too aggressive. For a more finessed option that reduces the low mid frequencies from a frequency point downwards use a low shelf cut. Once again start with the frequency at about 350Hz and adjust the Q setting to select how steep the EQ curve is.
Step 8: Try a tilt EQ
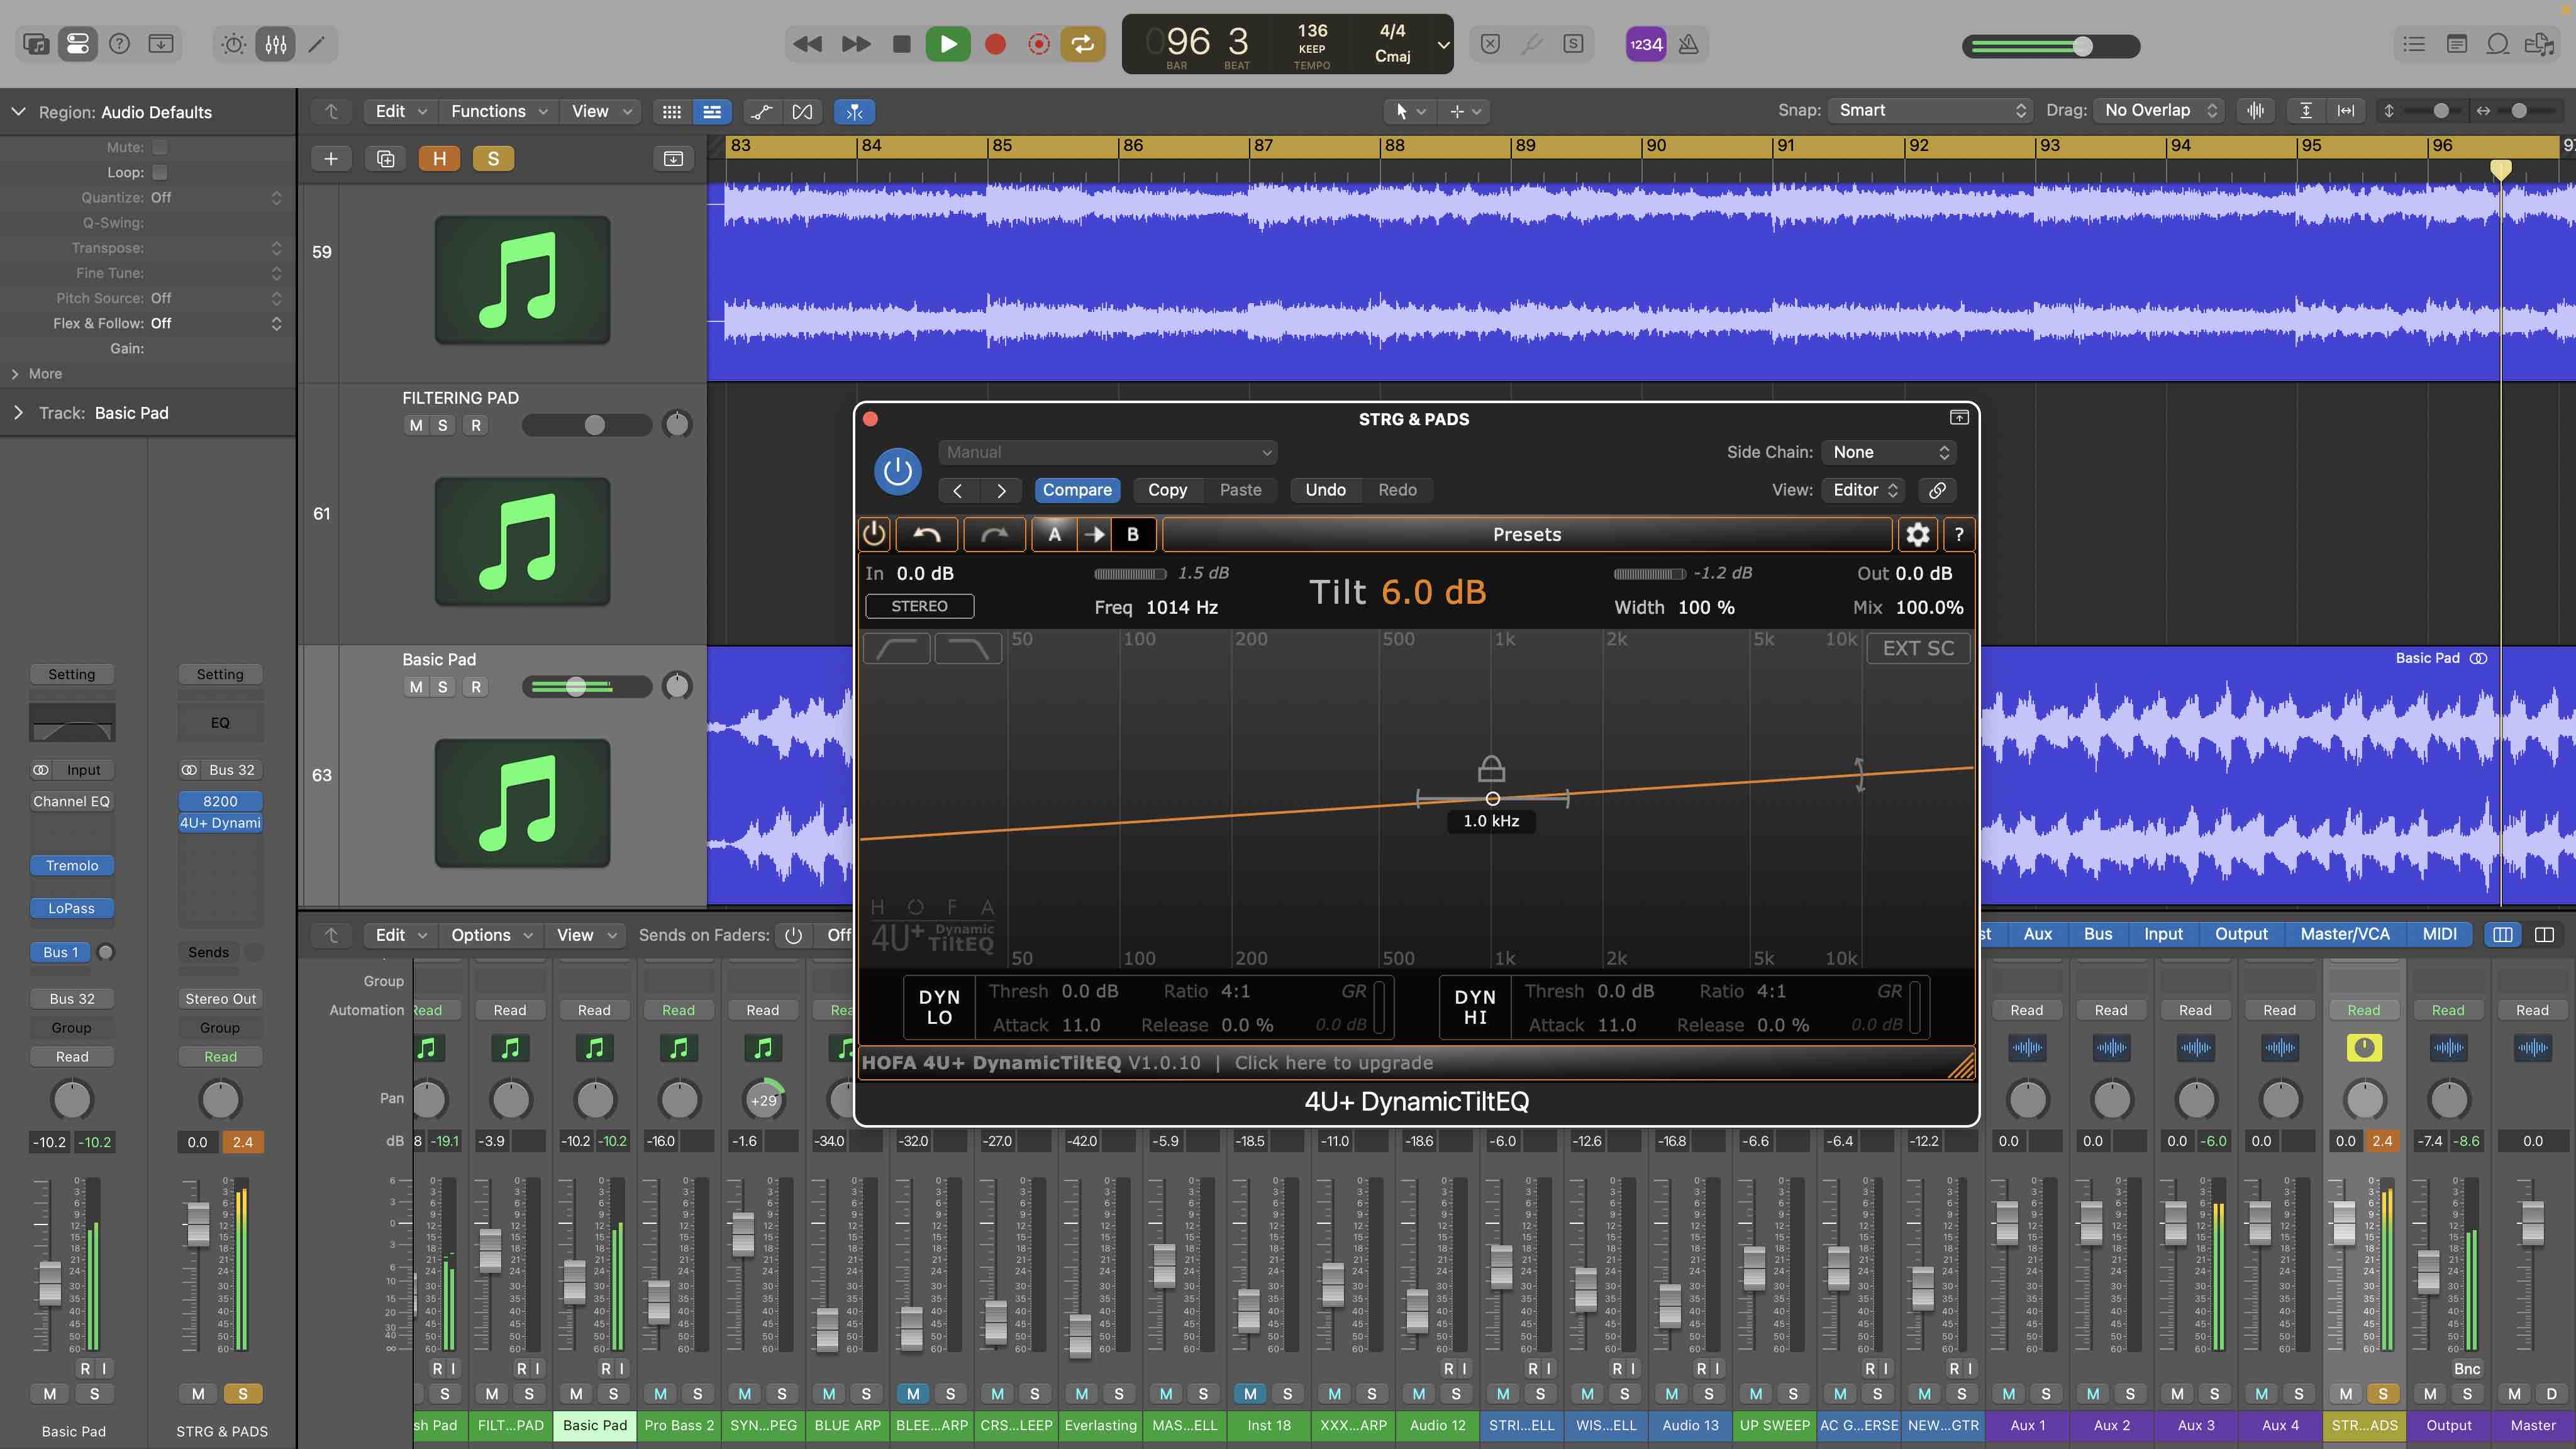
Our final EQ suggestion for muddiness is to use a tilt EQ. This can be a great solution for overall mixes or sub mixes where you feel the sound just needs a nudge in the right direction. The tilt EQ boosts the highs and cuts the lows around a frequency pivot and used carefully is great for reducing muddiness.
Step 8: Create space for your kick
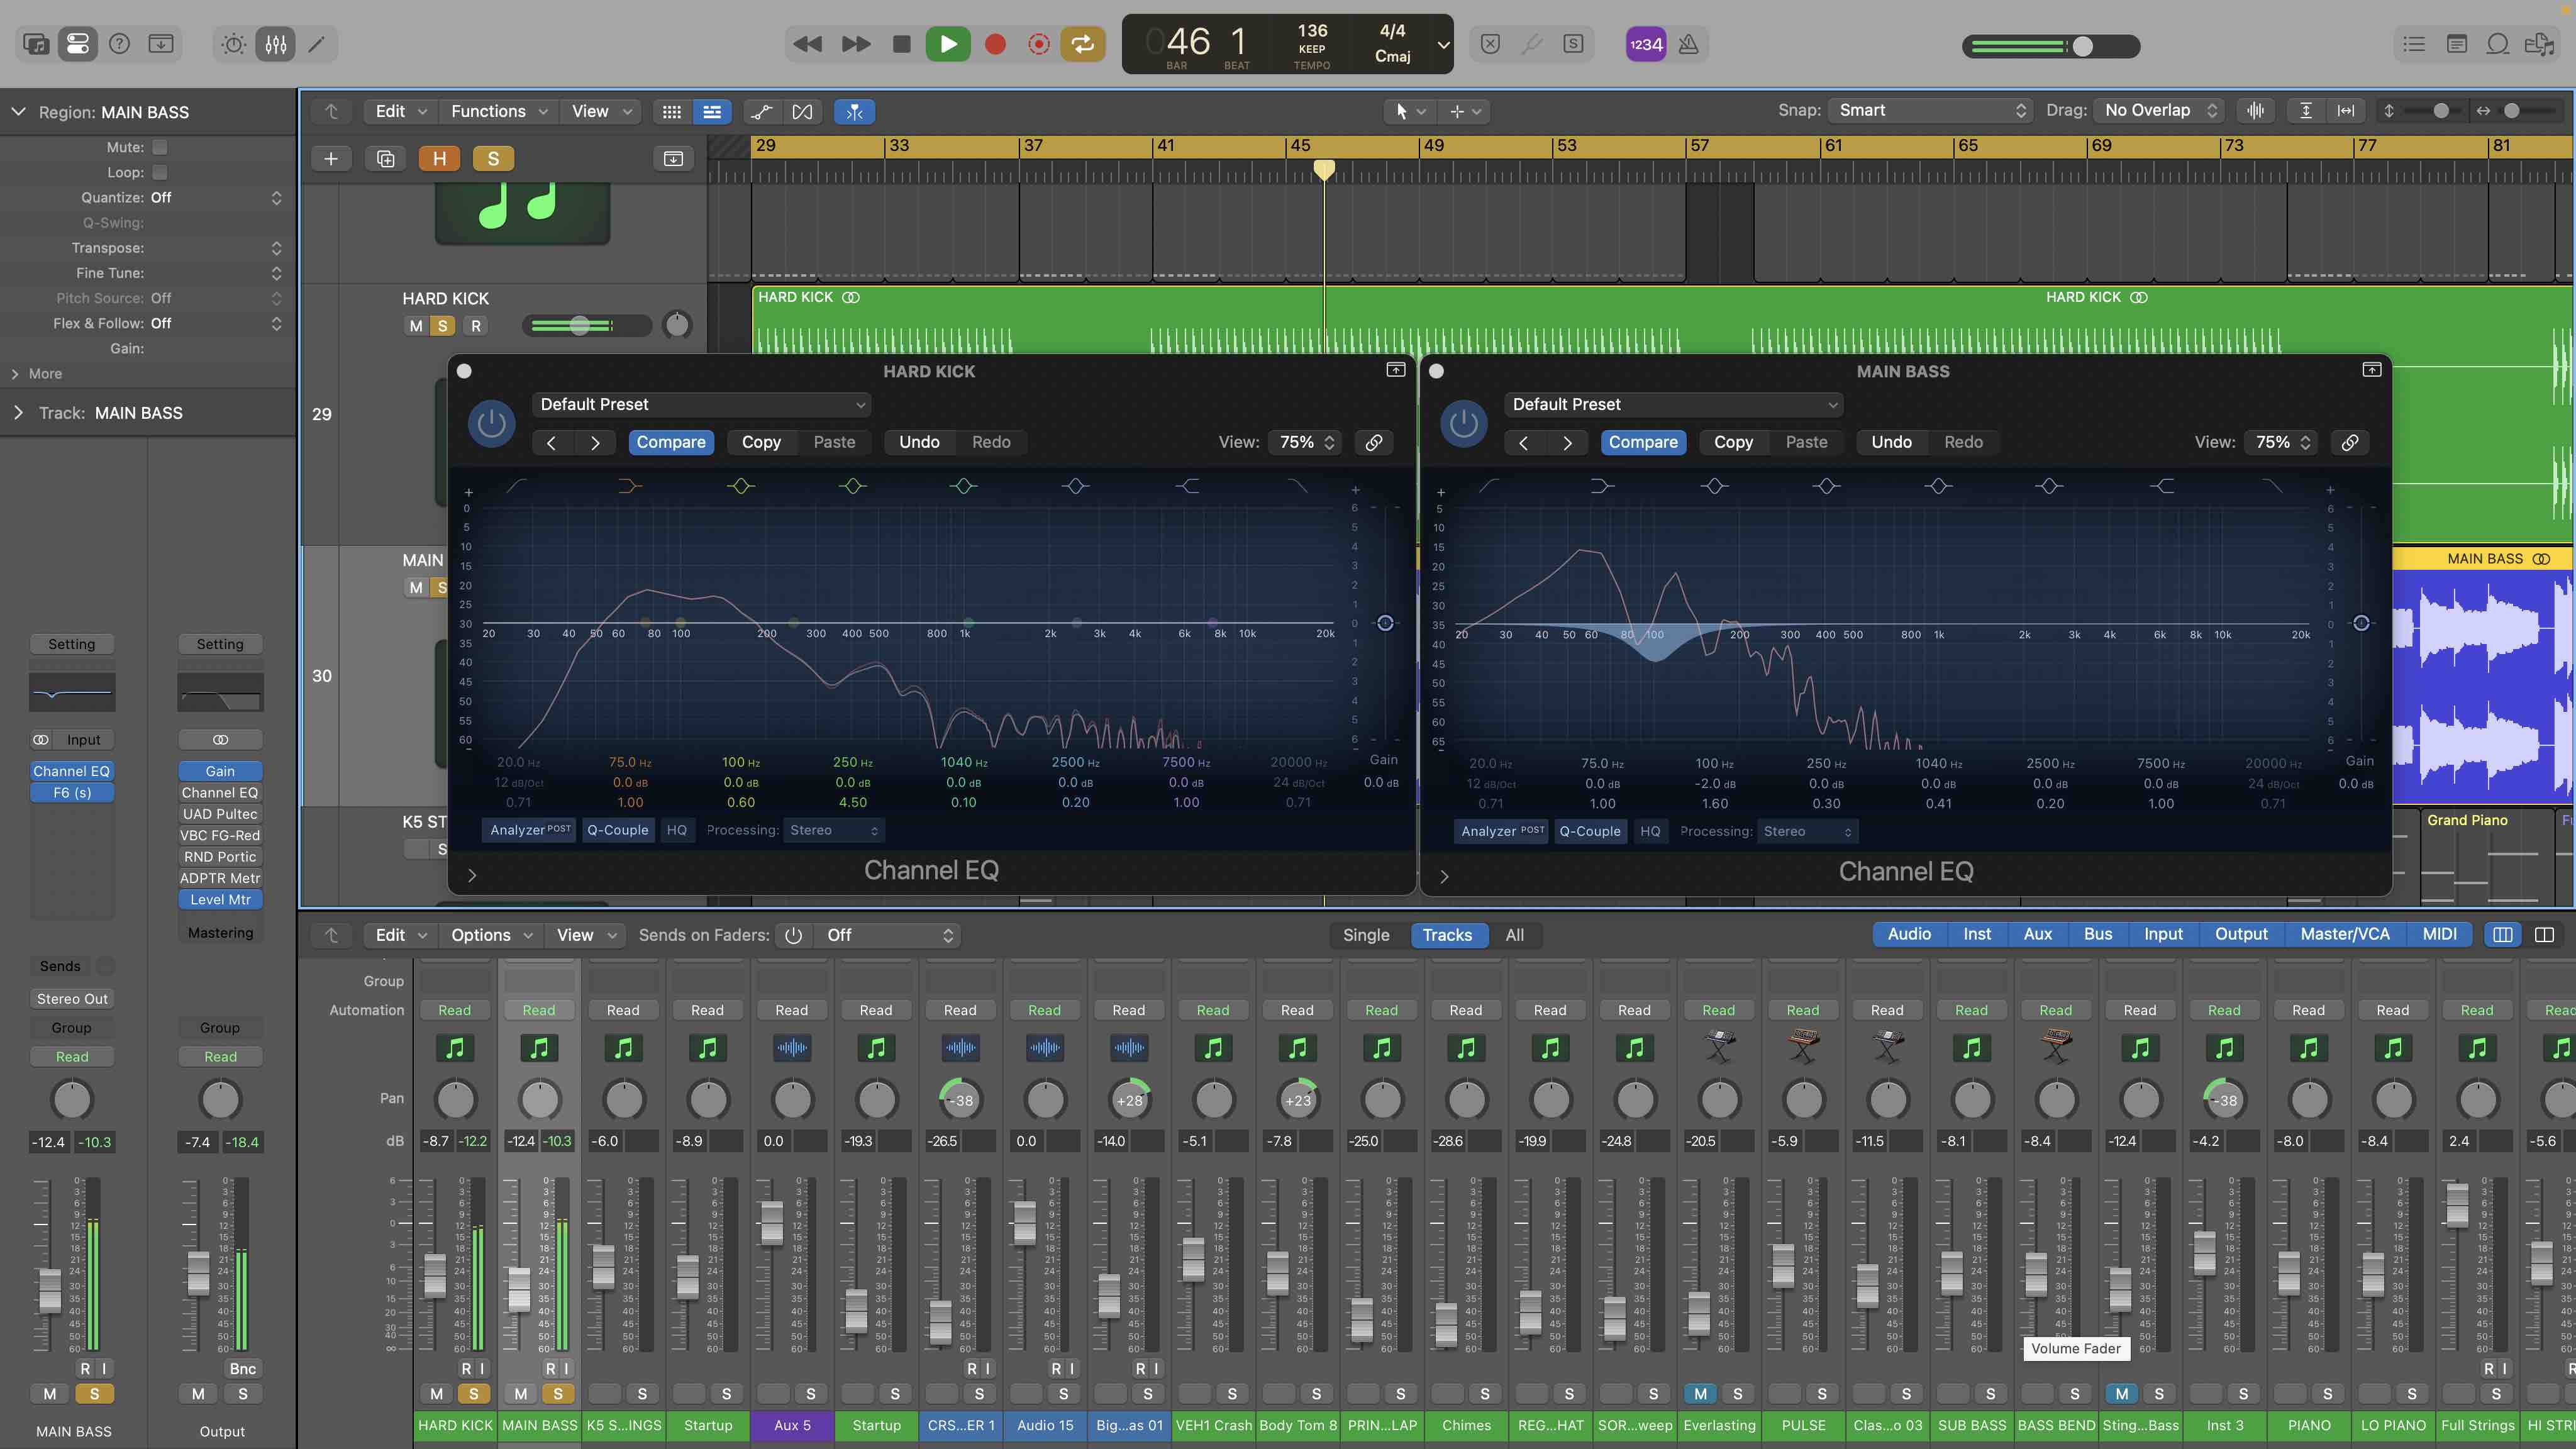
As mentioned, sometimes muddiness comes from the low frequencies and specifically competition between kick and bass sounds. Here we can try simple EQ as discussed above, and one solution is to notch out a frequency for the kick drum from the bass sound. Here ours it at about 100Hz
Step 10: Try a tilt EQ
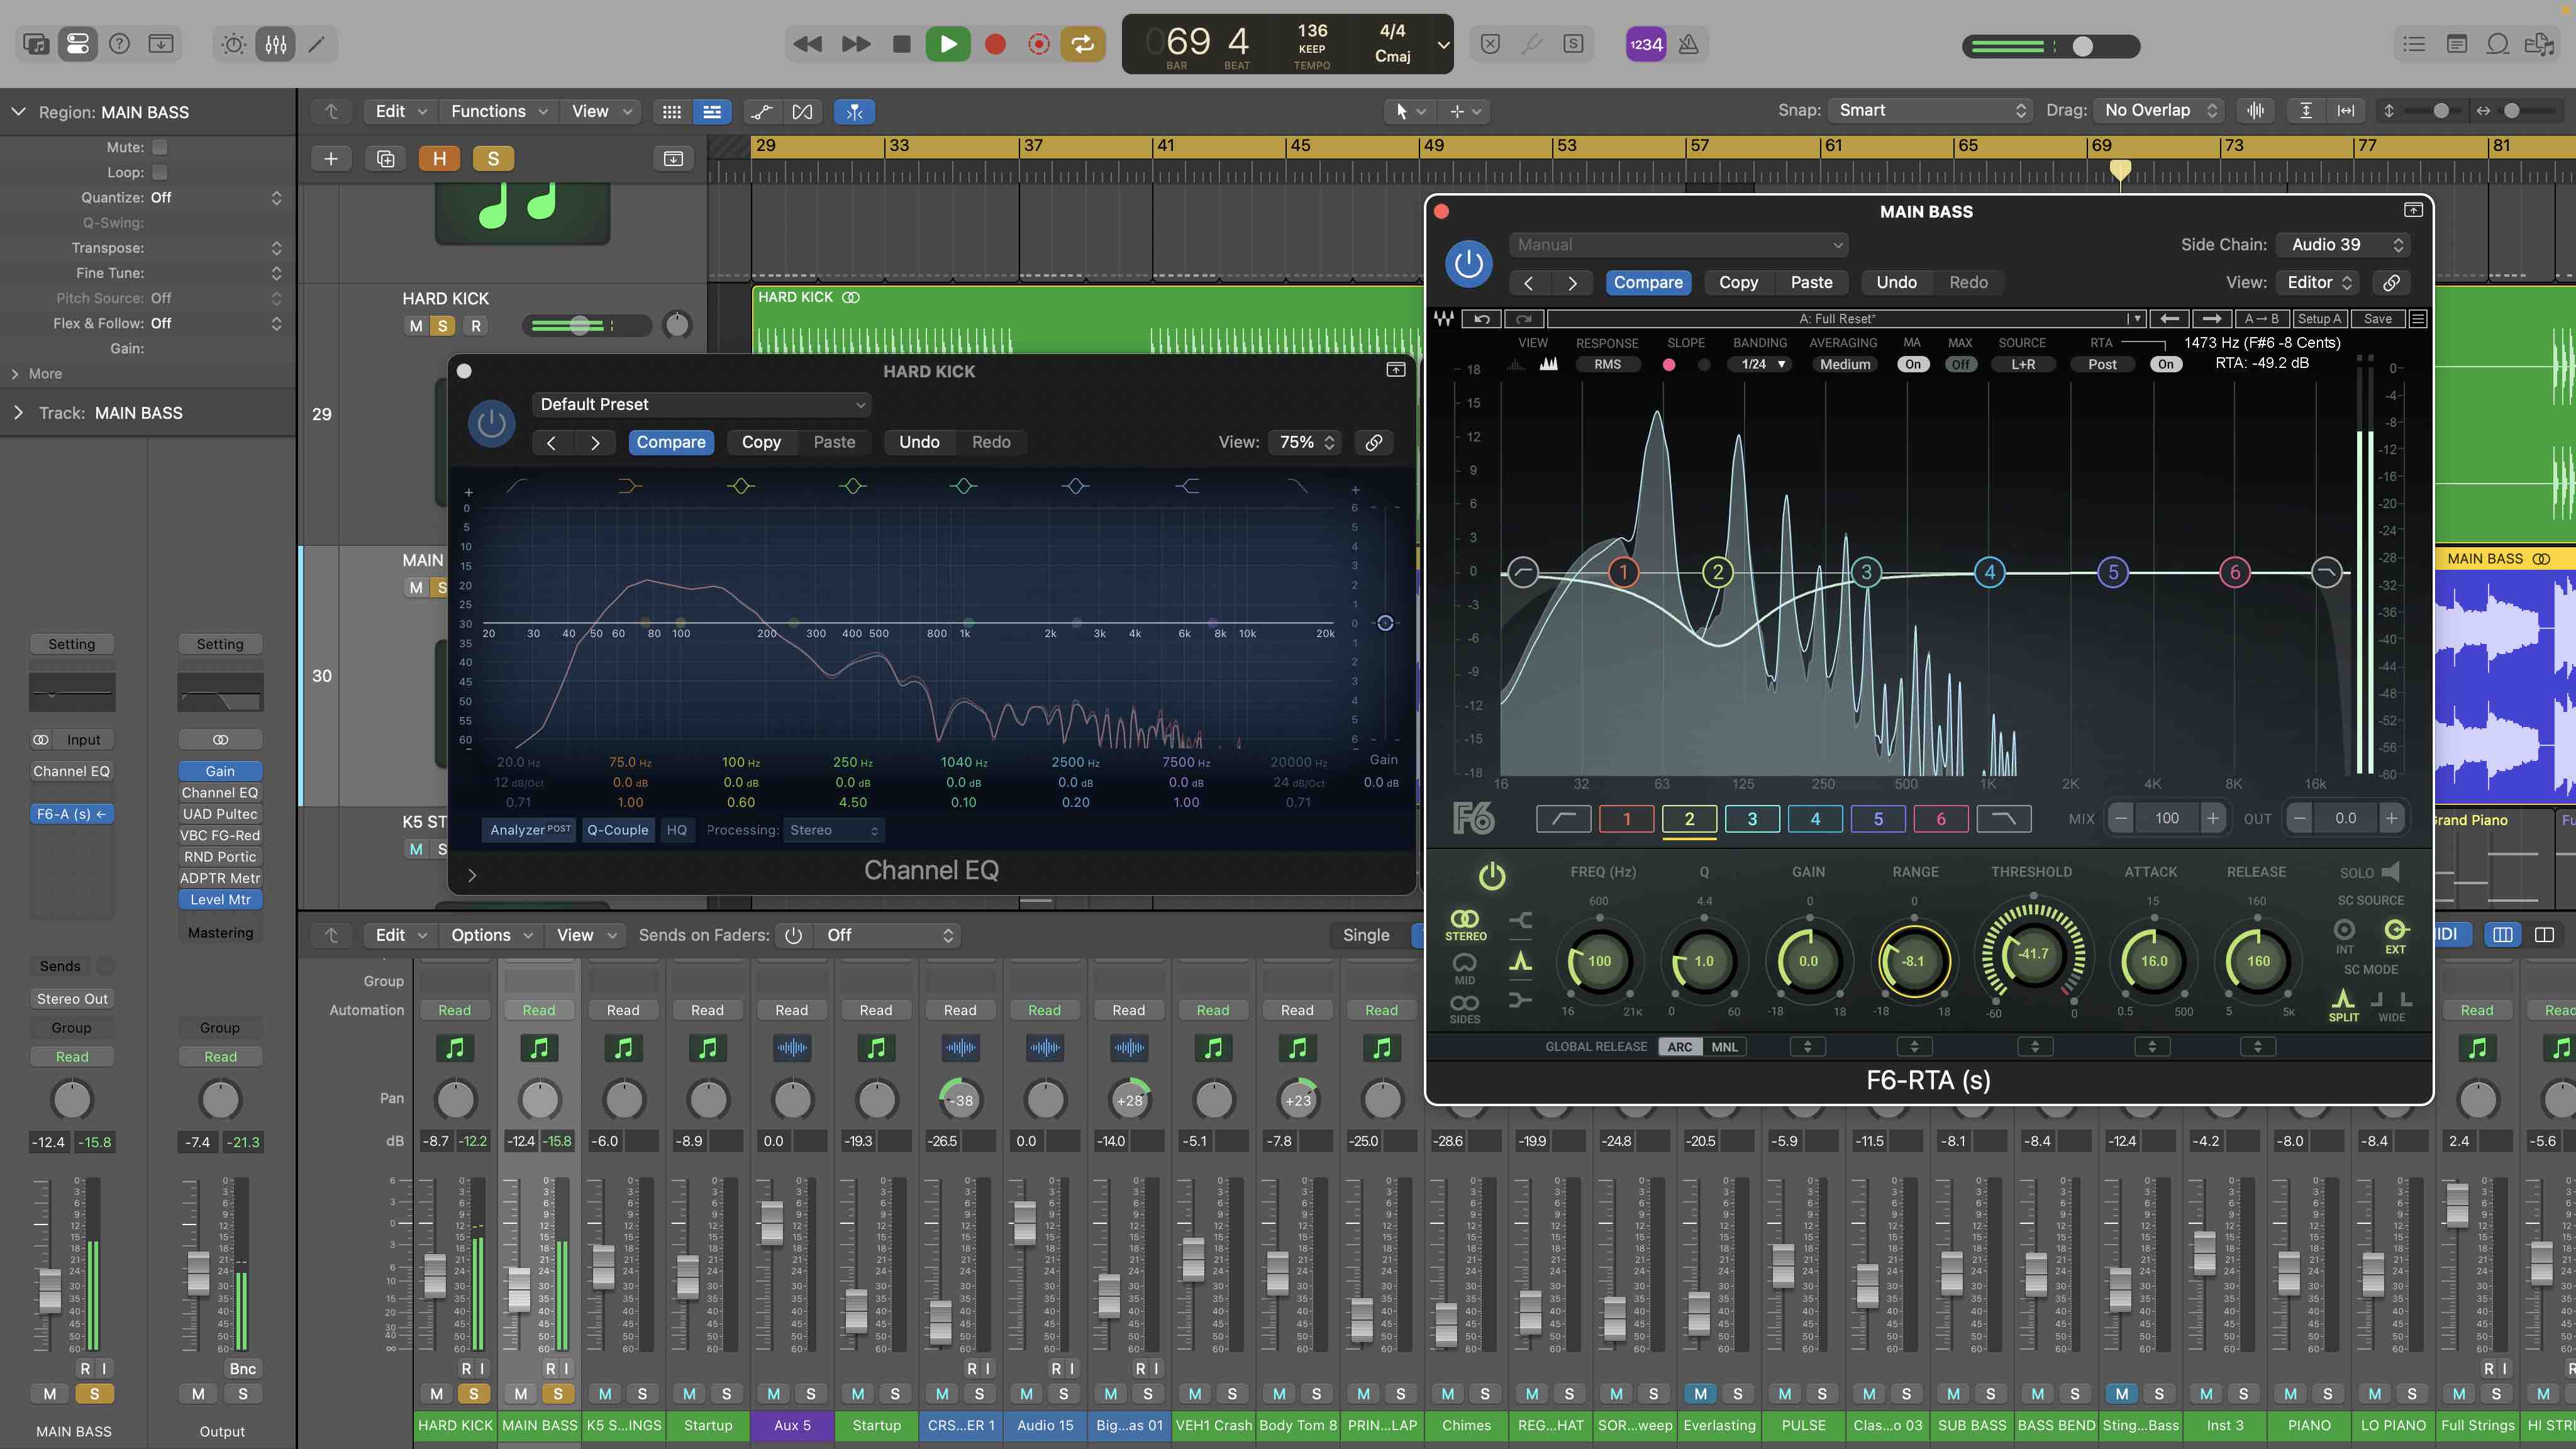
A more finessed approach and one that allows you to balance competing sounds as required is a side chained dynamic EQ. Taking the same frequency we used in the previous step but actually sidechaining it from the kick means that we’re better accommodating the dynamic nature of the problem.
Problems solved!
Get more recording stories and features at Recording Week 2024 here!


