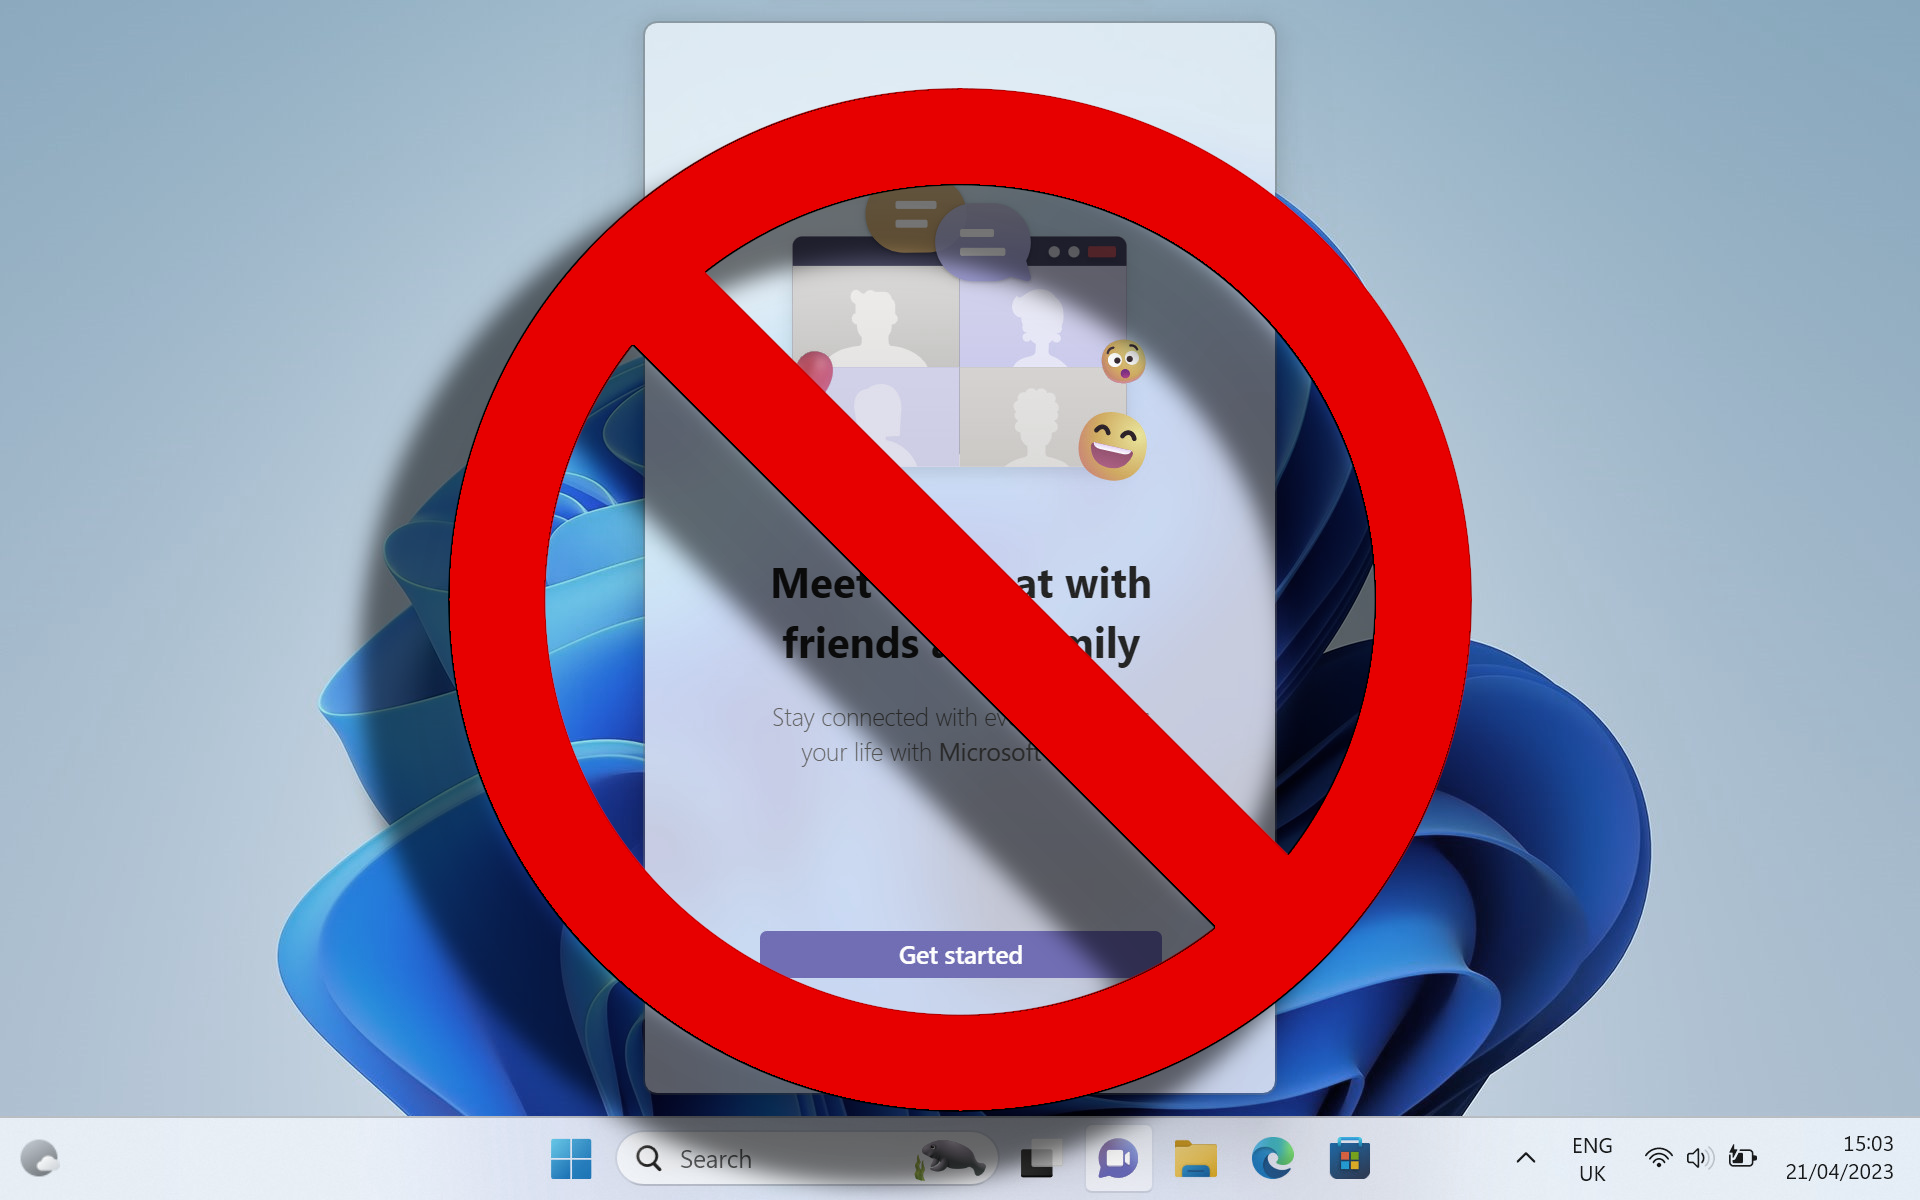
Nothing good ever came from an advert. Except maybe the ones surrounding this article. They’re great. I can vouch for those, I’ve heard they showcase the finest products in the land. Not like the ones you’d get from Windows, as it relentlessly pesters and pecks at you to sign up for a Microsoft account so you can put all your personal data onto its servers.
It’s essential, don’t you know? Without a Microsoft account, you can’t use Windows Hello. Did you know that? Anyone with $5 and a PayPal account could buy your password online tomorrow and you’d be helpless. Did you know that you can’t back up your data on the cloud in case of a ransomware attack because you don’t have a Microsoft Account?
Honestly, with the fear-mongering Windows Security is capable of, I wouldn’t be surprised if tonight I sit down at my laptop and Windows tells me if I don’t sign up for a Microsoft account soon, hackers will eat my hamster.
If Windows’ relentless efforts to try to get you hooked on the Microsoft ecosystem have you peeved too, let’s hatch a plan. You hate ads, I hate ads... Let’s kill the ads. Right now, together.
OK, let’s not be so dramatic. However, we should at the very least, explore how best to limit Microsoft’s influence over your data and how to prevent as much of its pushy sales tactics from reaching your desktop as possible. If that sounds good to you, then read on for our guide on how to block every last ad in Windows 11.
How to remove ads from the Windows 11 start menu
Let’s start off small and simple. If you own a Windows 11 computer, chances are at some point you’ve opened up the Start Menu and thought to yourself: “Hold on, I’ve never installed TikTok.” (or, if you’re a Zoomer: “Yo, I’m dead bro, what’s a Microsoft Solitaire Collection bro, that’s crazy. No cap.”)
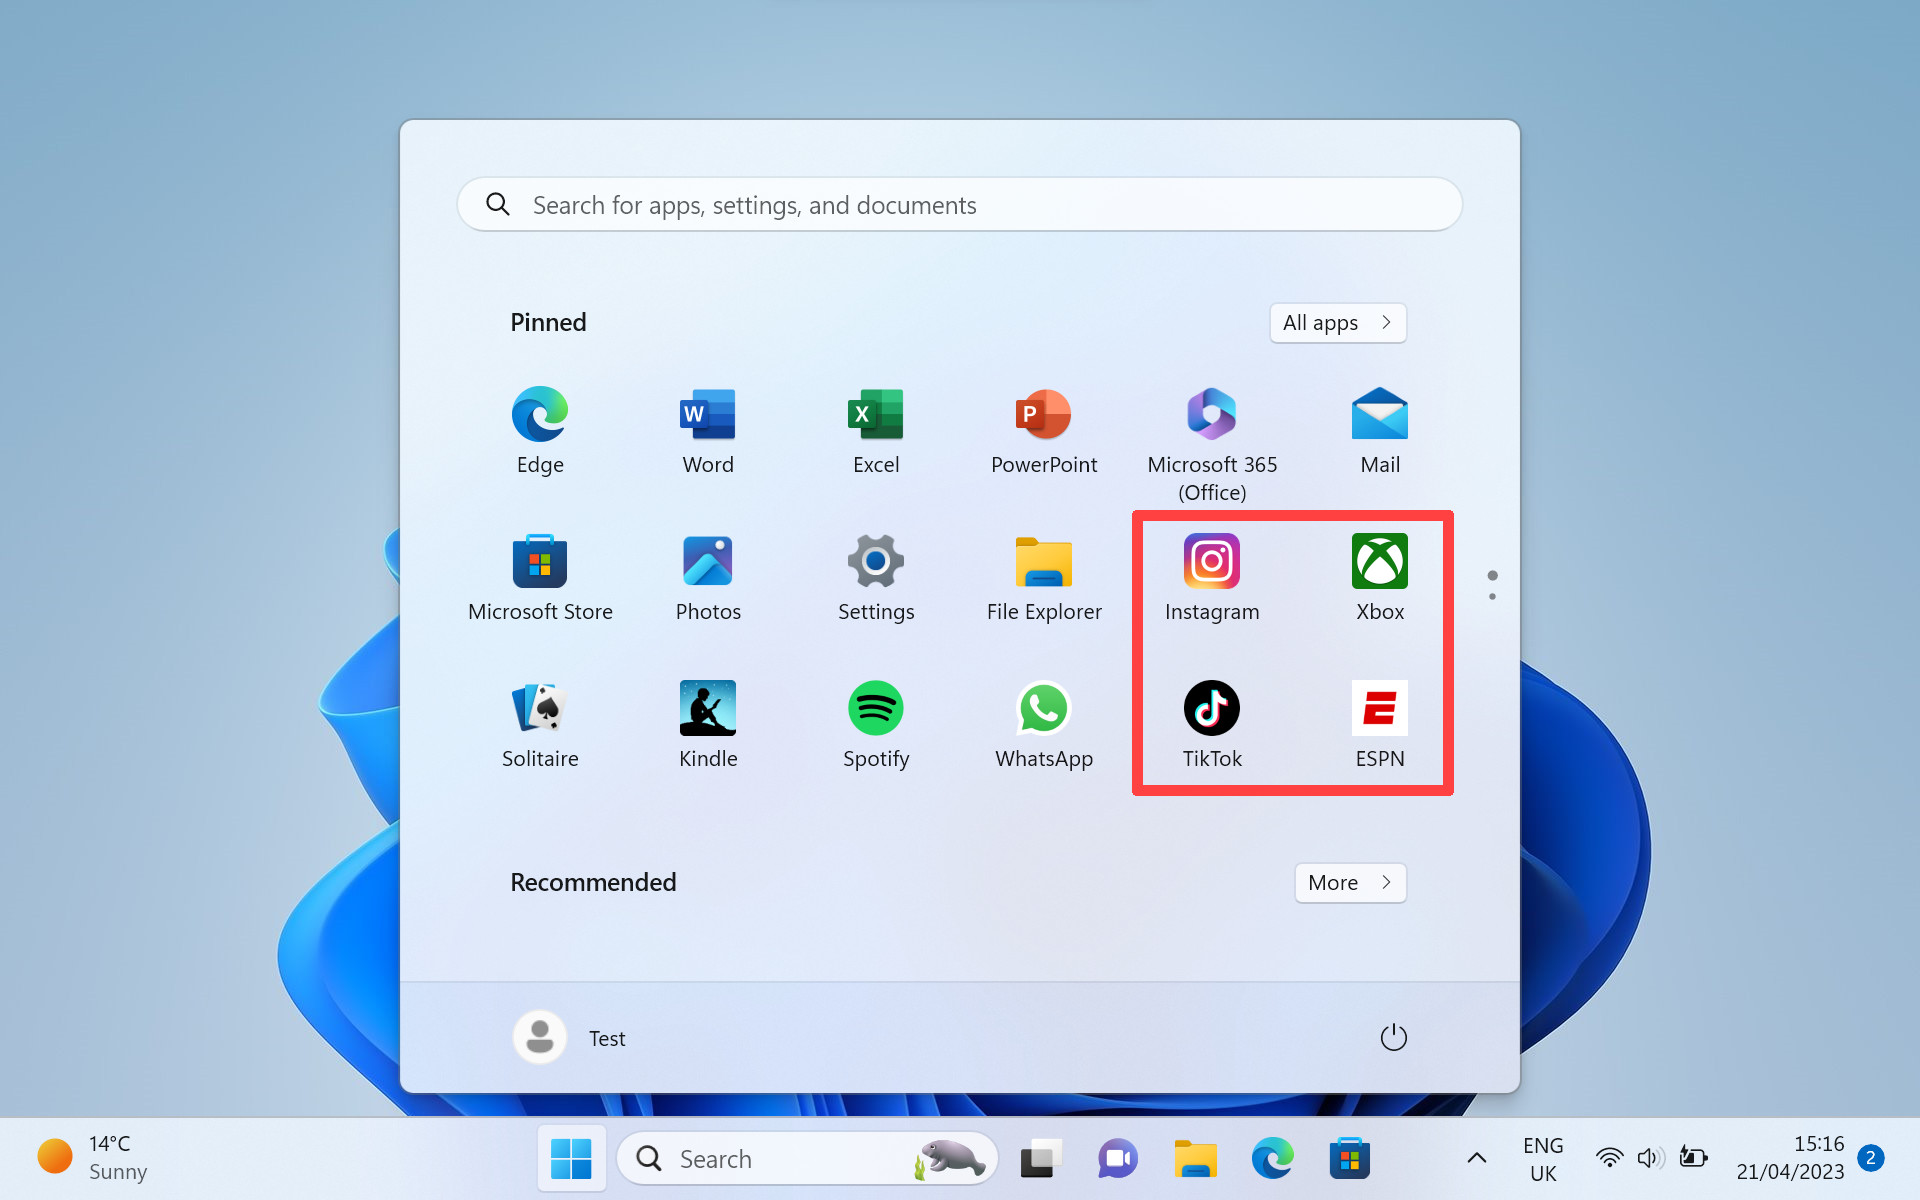
Don’t worry, you’re not going crazy. Those are ads — suggested apps from the Microsoft Store. Let’s go right ahead and get rid of those.
Step 1: Open the Start Menu by clicking on the “Windows” icon and look through your pinned apps list. If there’s anything there that looks out of place or unwanted, right-click it and choose “Uninstall.”
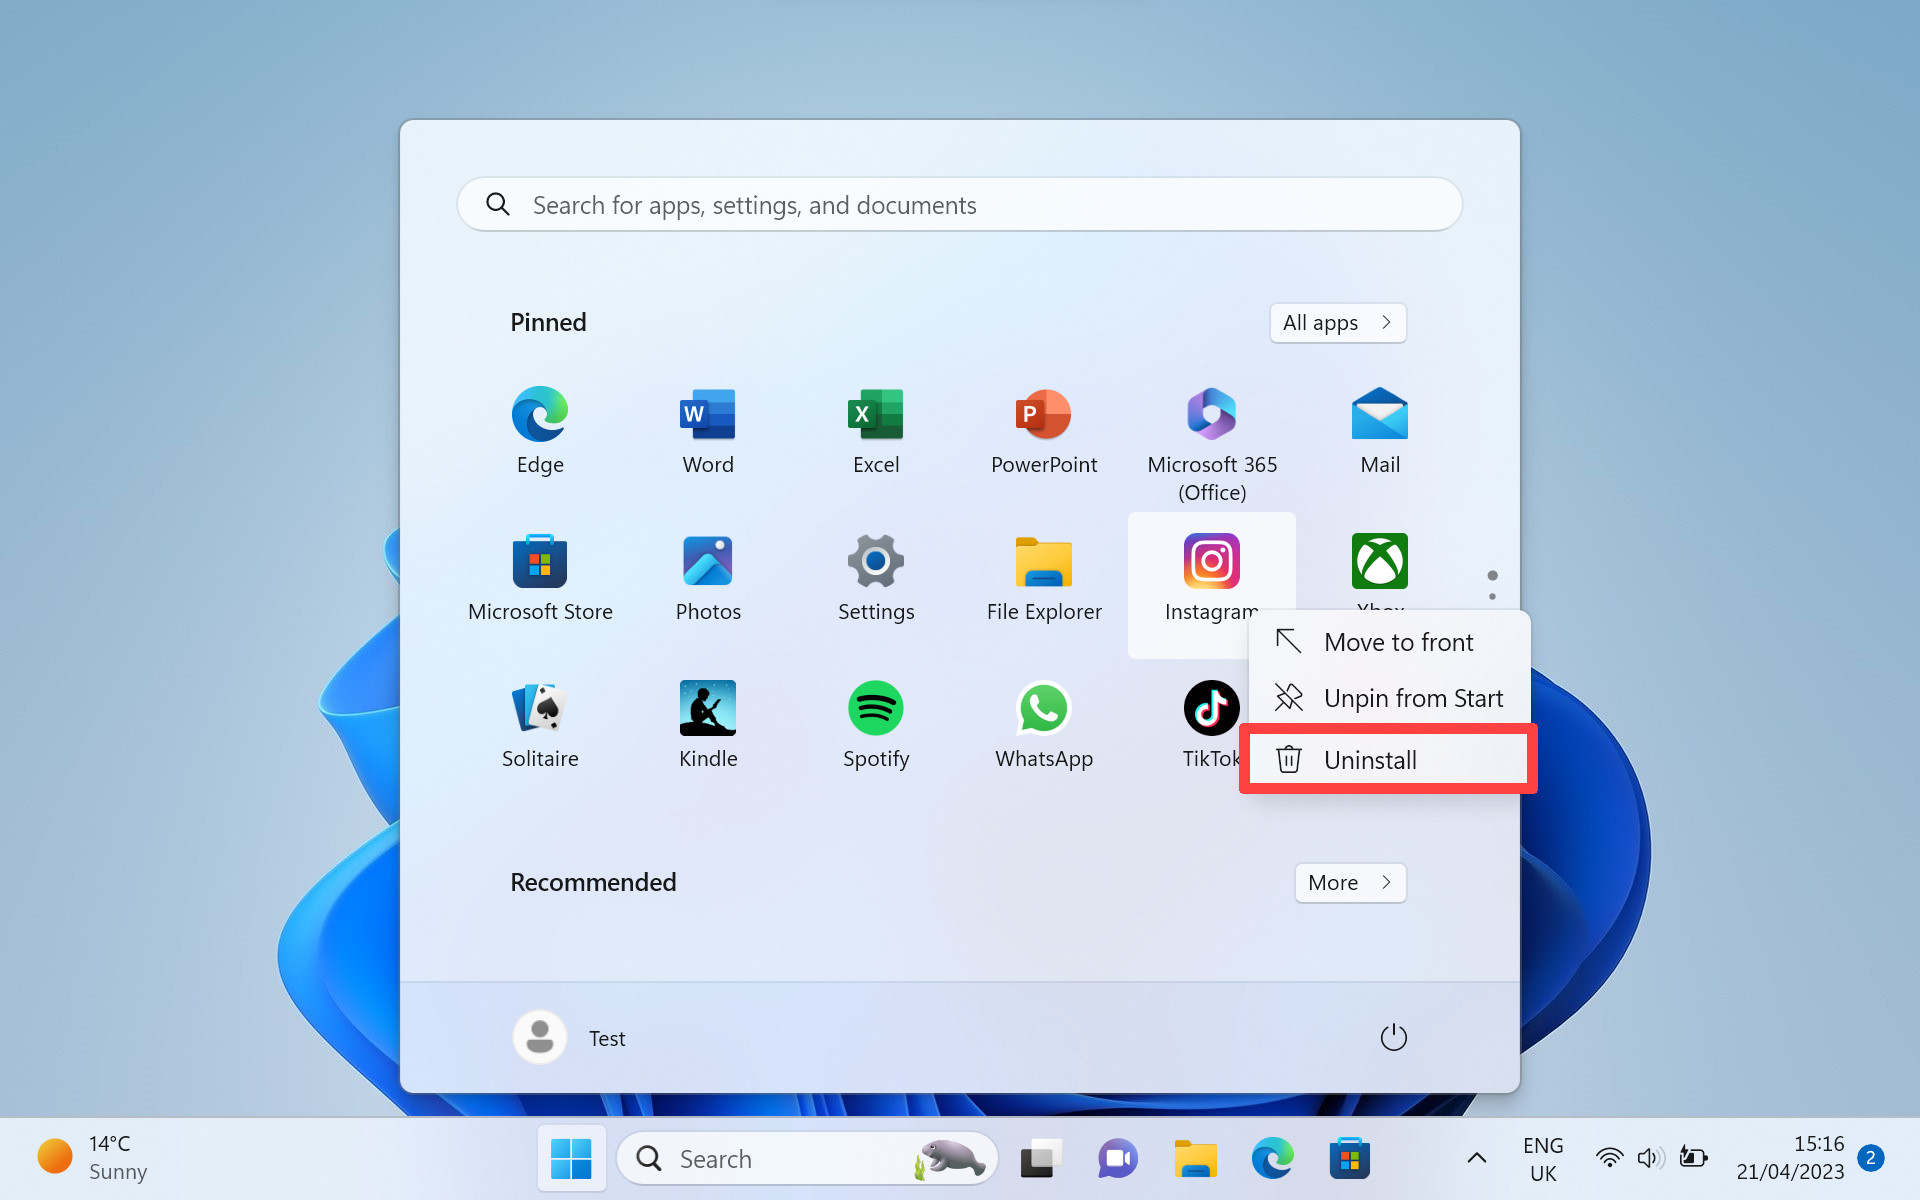
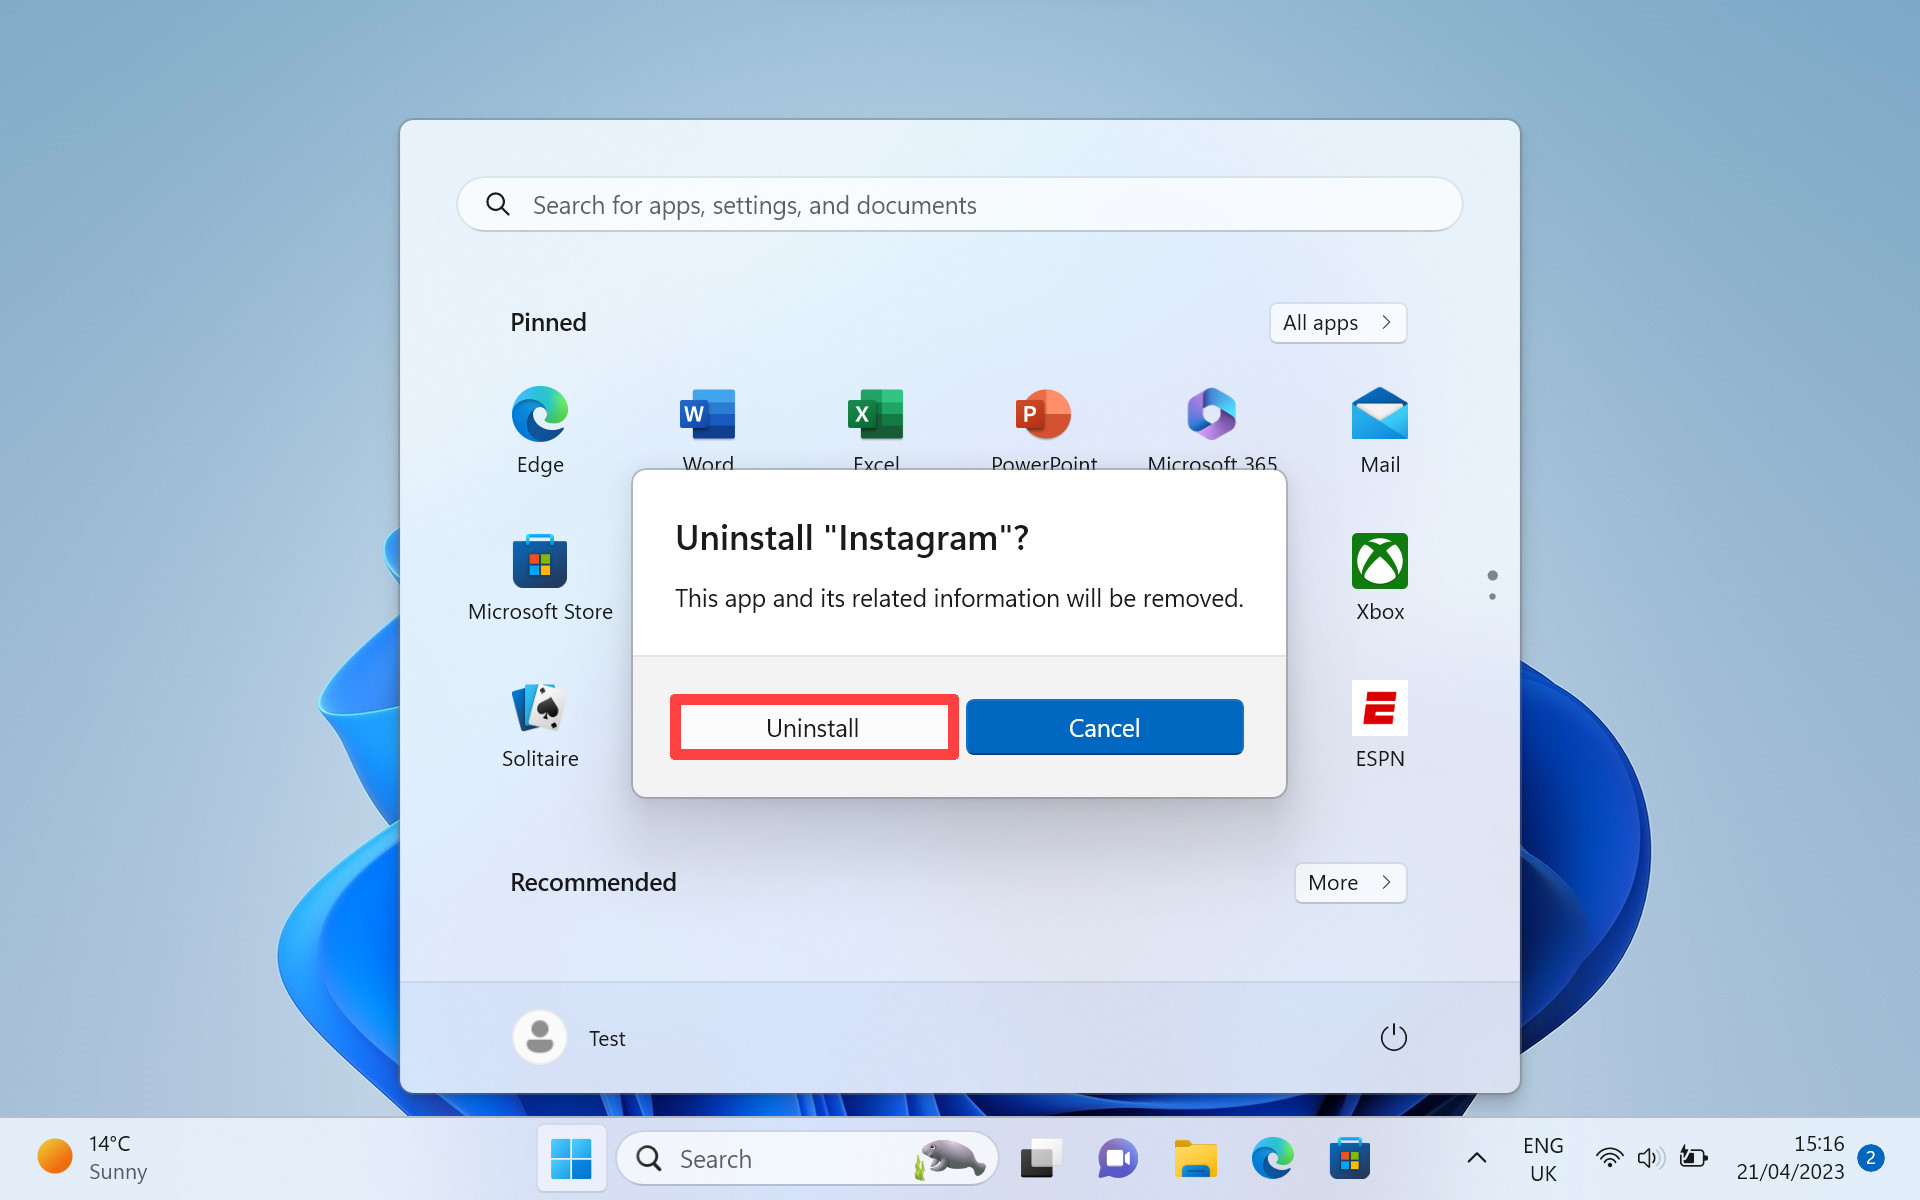
Step 2: After this, you'll receive a confirmation window about whether or not you want to uninstall the app. Click “Uninstall” and the app recommendation is gone for good.
How to remove ads from the File Explorer
Yeah, you read that right. Even the humble File Explorer has turned to the dark side. OneDrive suggestions for backing up your data will be the main culprit here.
Microsoft’s hard sell on its cloud storage platform is actually the main culprit for a lot of the ad issues on Windows 11. However, it’s easy enough to fix and can be done in a few simple steps.
Step 1: Click on the “Windows” icon in the taskbar, then choose “File Explorer” from the pinned apps section (you may need to scroll down to find it if it’s not readily visible.)
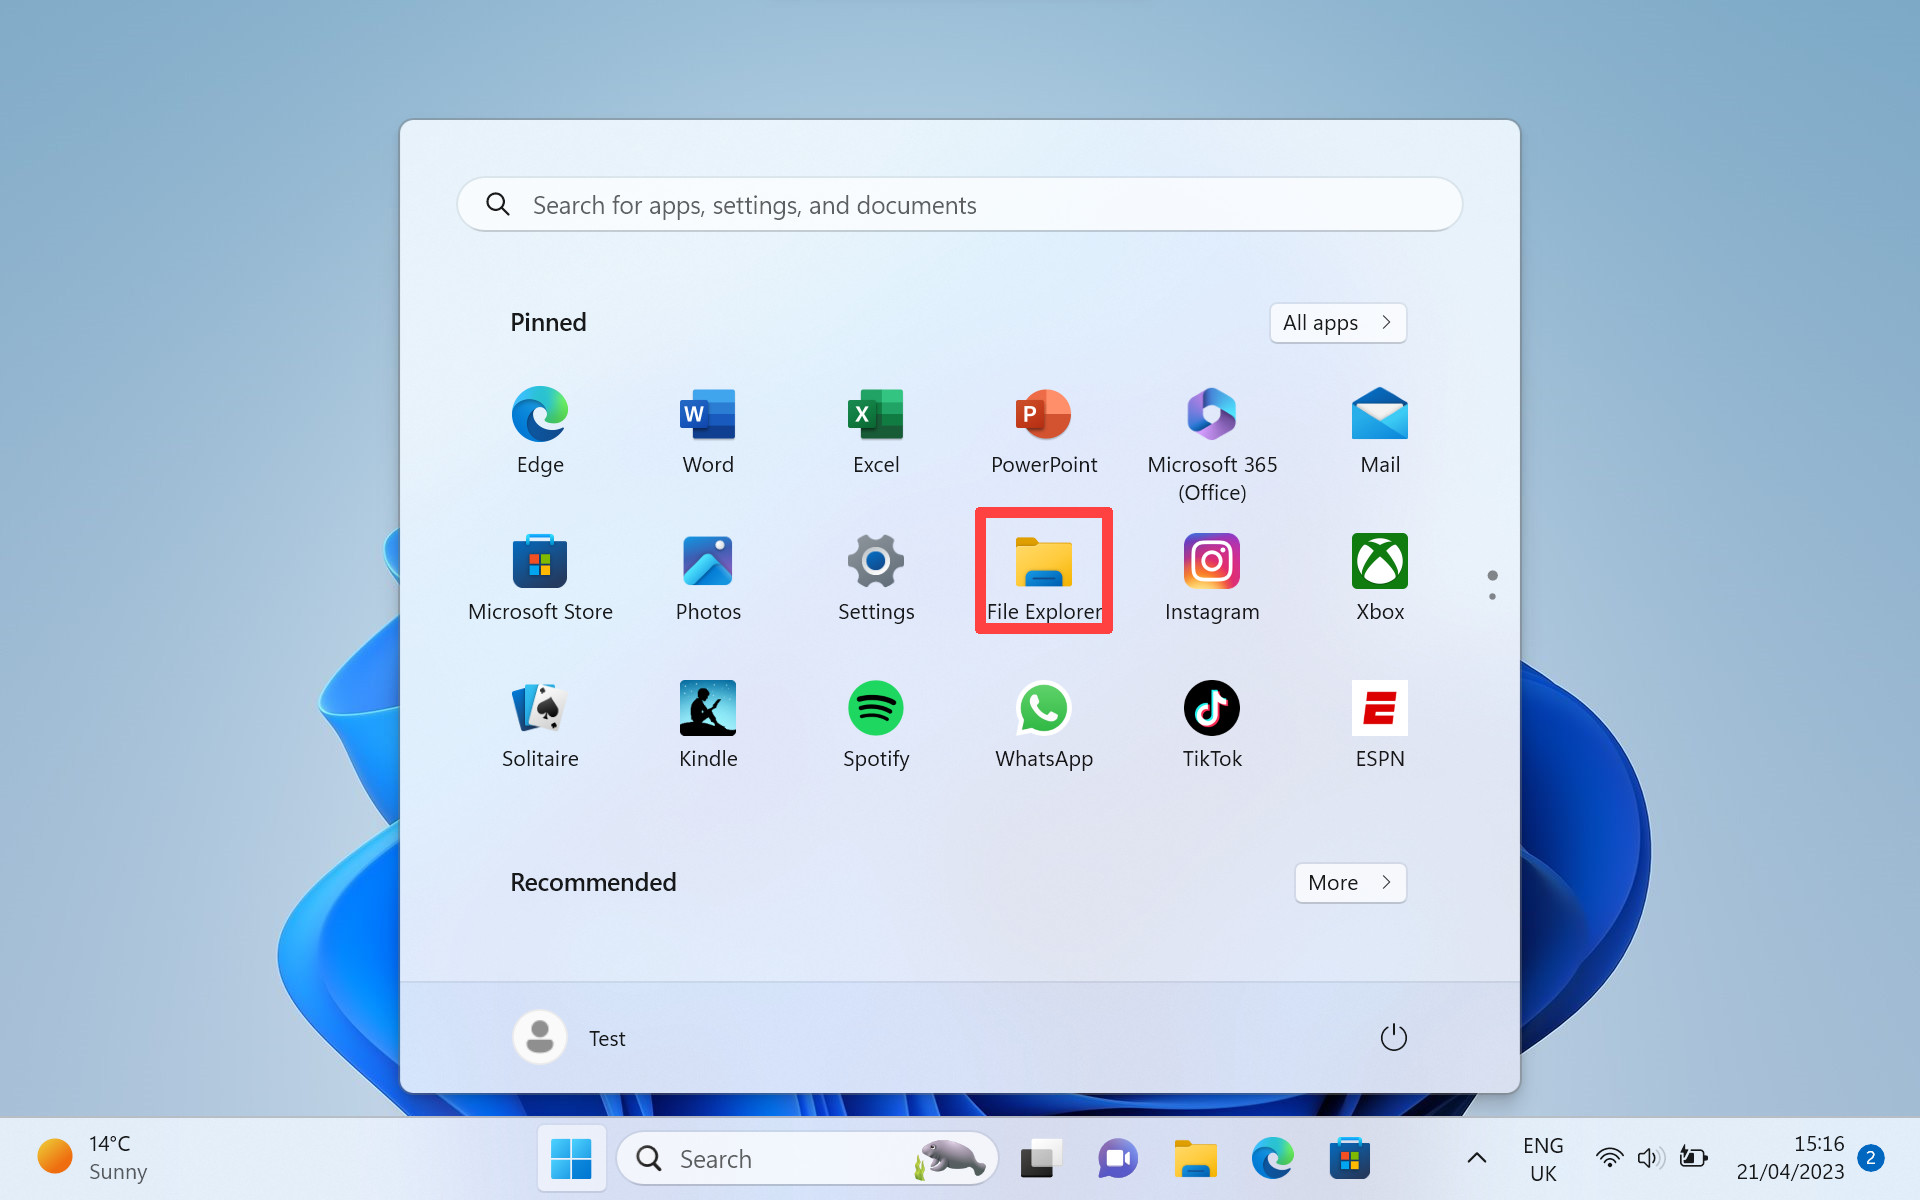
Step 2: With the “File Explorer” now open in front of you, click on the “···” button near the top-right of the screen. Once the drop-down context menu appears, click on “Options.”
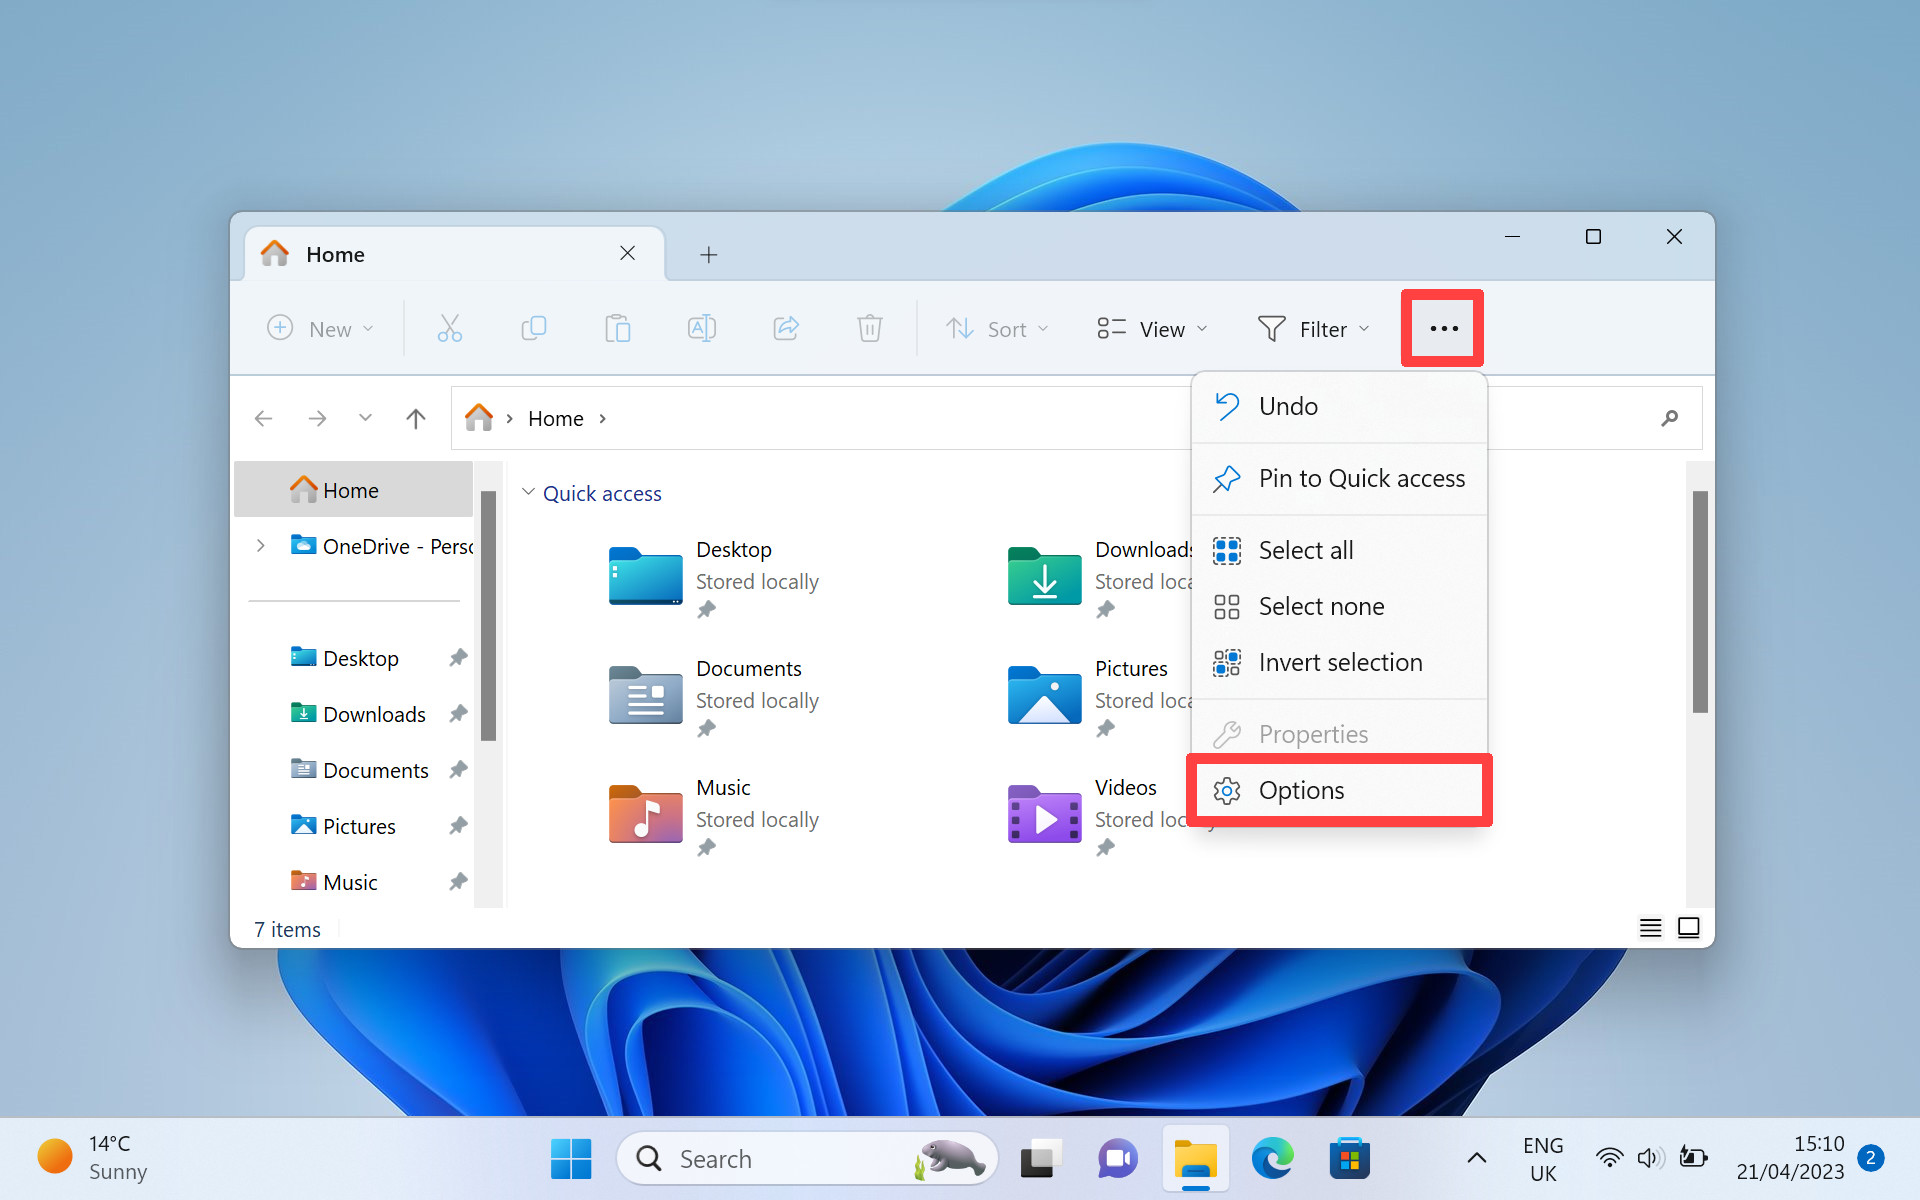
Step 3: Click on the tab near the top of the “Folder Options” panel that says “View.” Then in the box below where it says “Advanced Settings,” scroll down until you see a checkmark box next to “Show sync provider notifications.”
Ensure this box is unticked and click “OK” at the bottom of this panel. That’s all there is to it! No more ads.
How to remove ads by disabling device usage settings in Windows 11
If you’ve owned your computer for a while you may not remember enabling this setting, but Windows 11 may be delivering you ads based on how you want to use your device. The “Device usage” setting is how Windows determines which category of ads to target you with.
Let’s make that task harder for them and quickly disable this setting to prevent Windows’ annoying pop-up suggestions in the future.
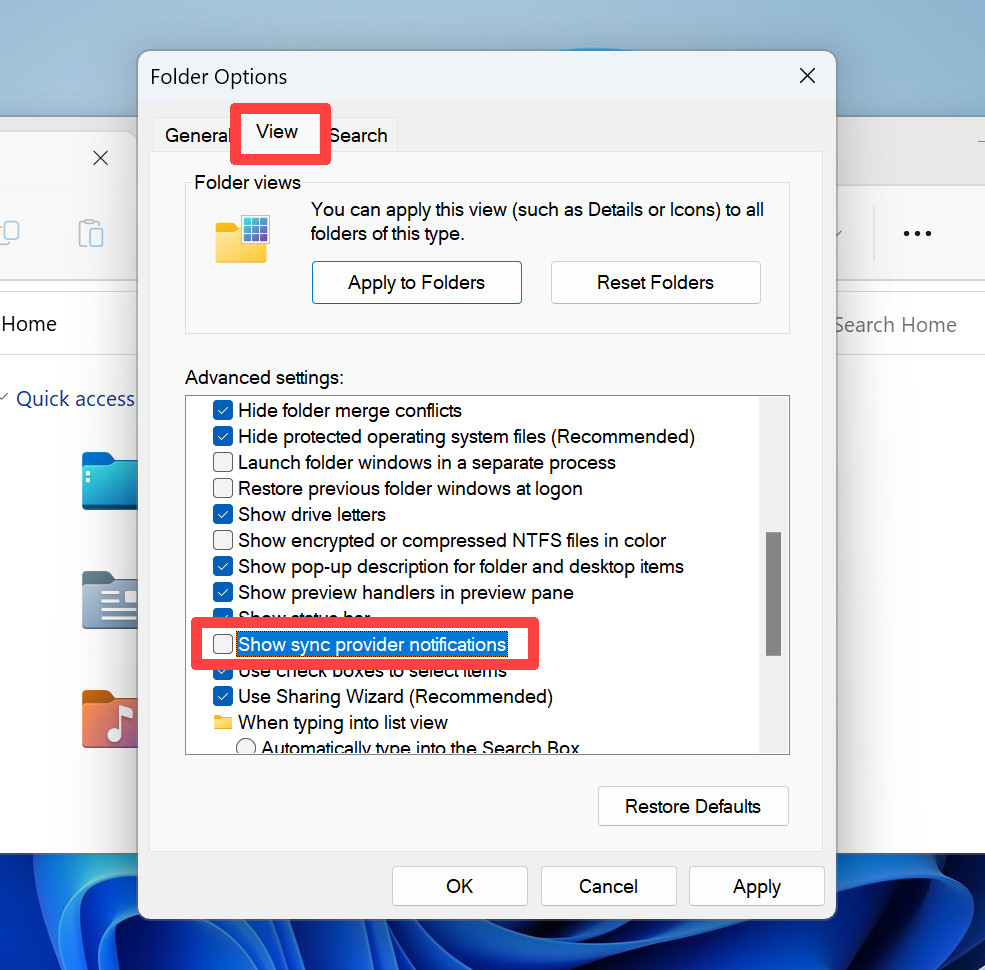
Step 1: Click on the “Windows” icon in the taskbar and select “Settings” from the pinned apps selection.
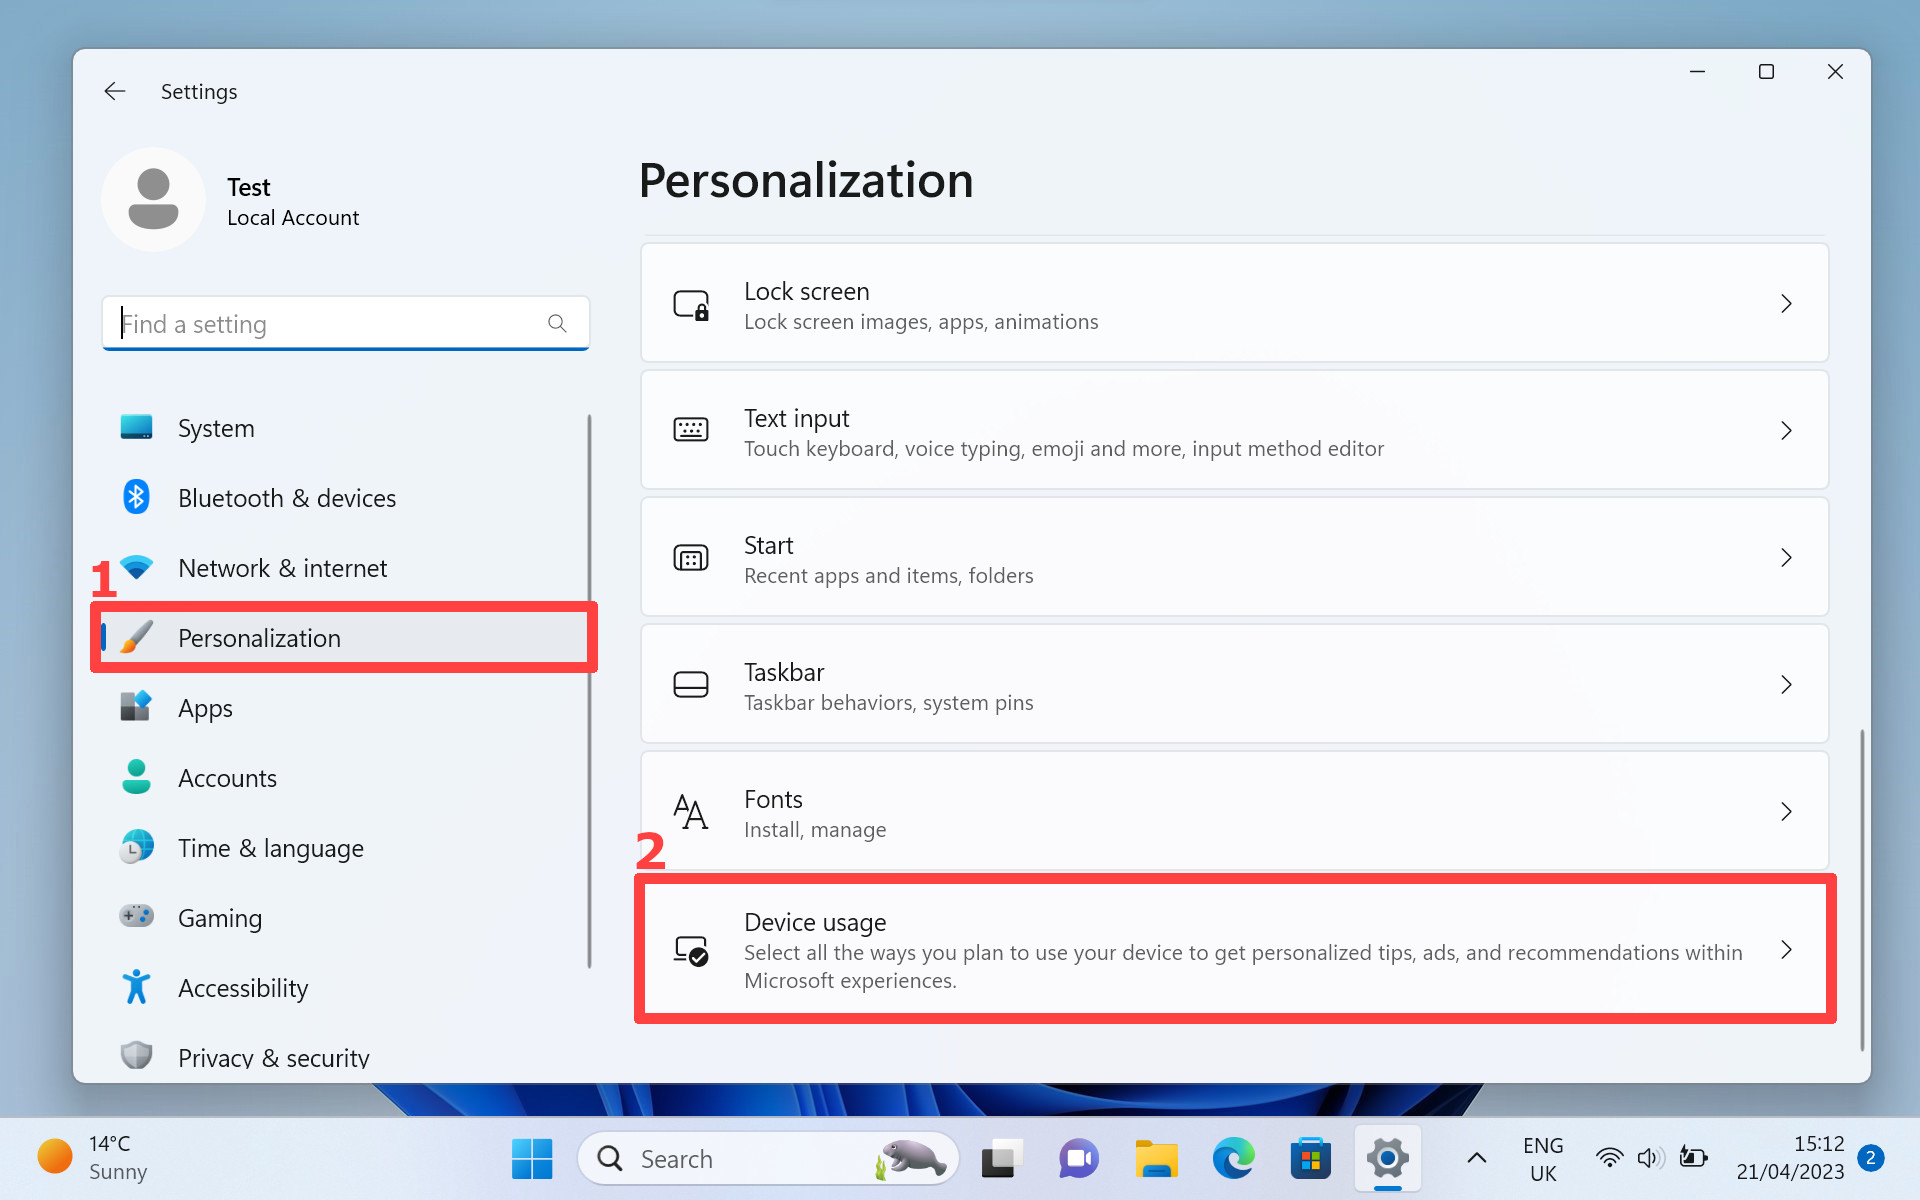
Step 2: Once the “Settings” panel opens up, find and select “Personalization” on the left-hand side. Then, on the right-hand side, click on “Device usage.”
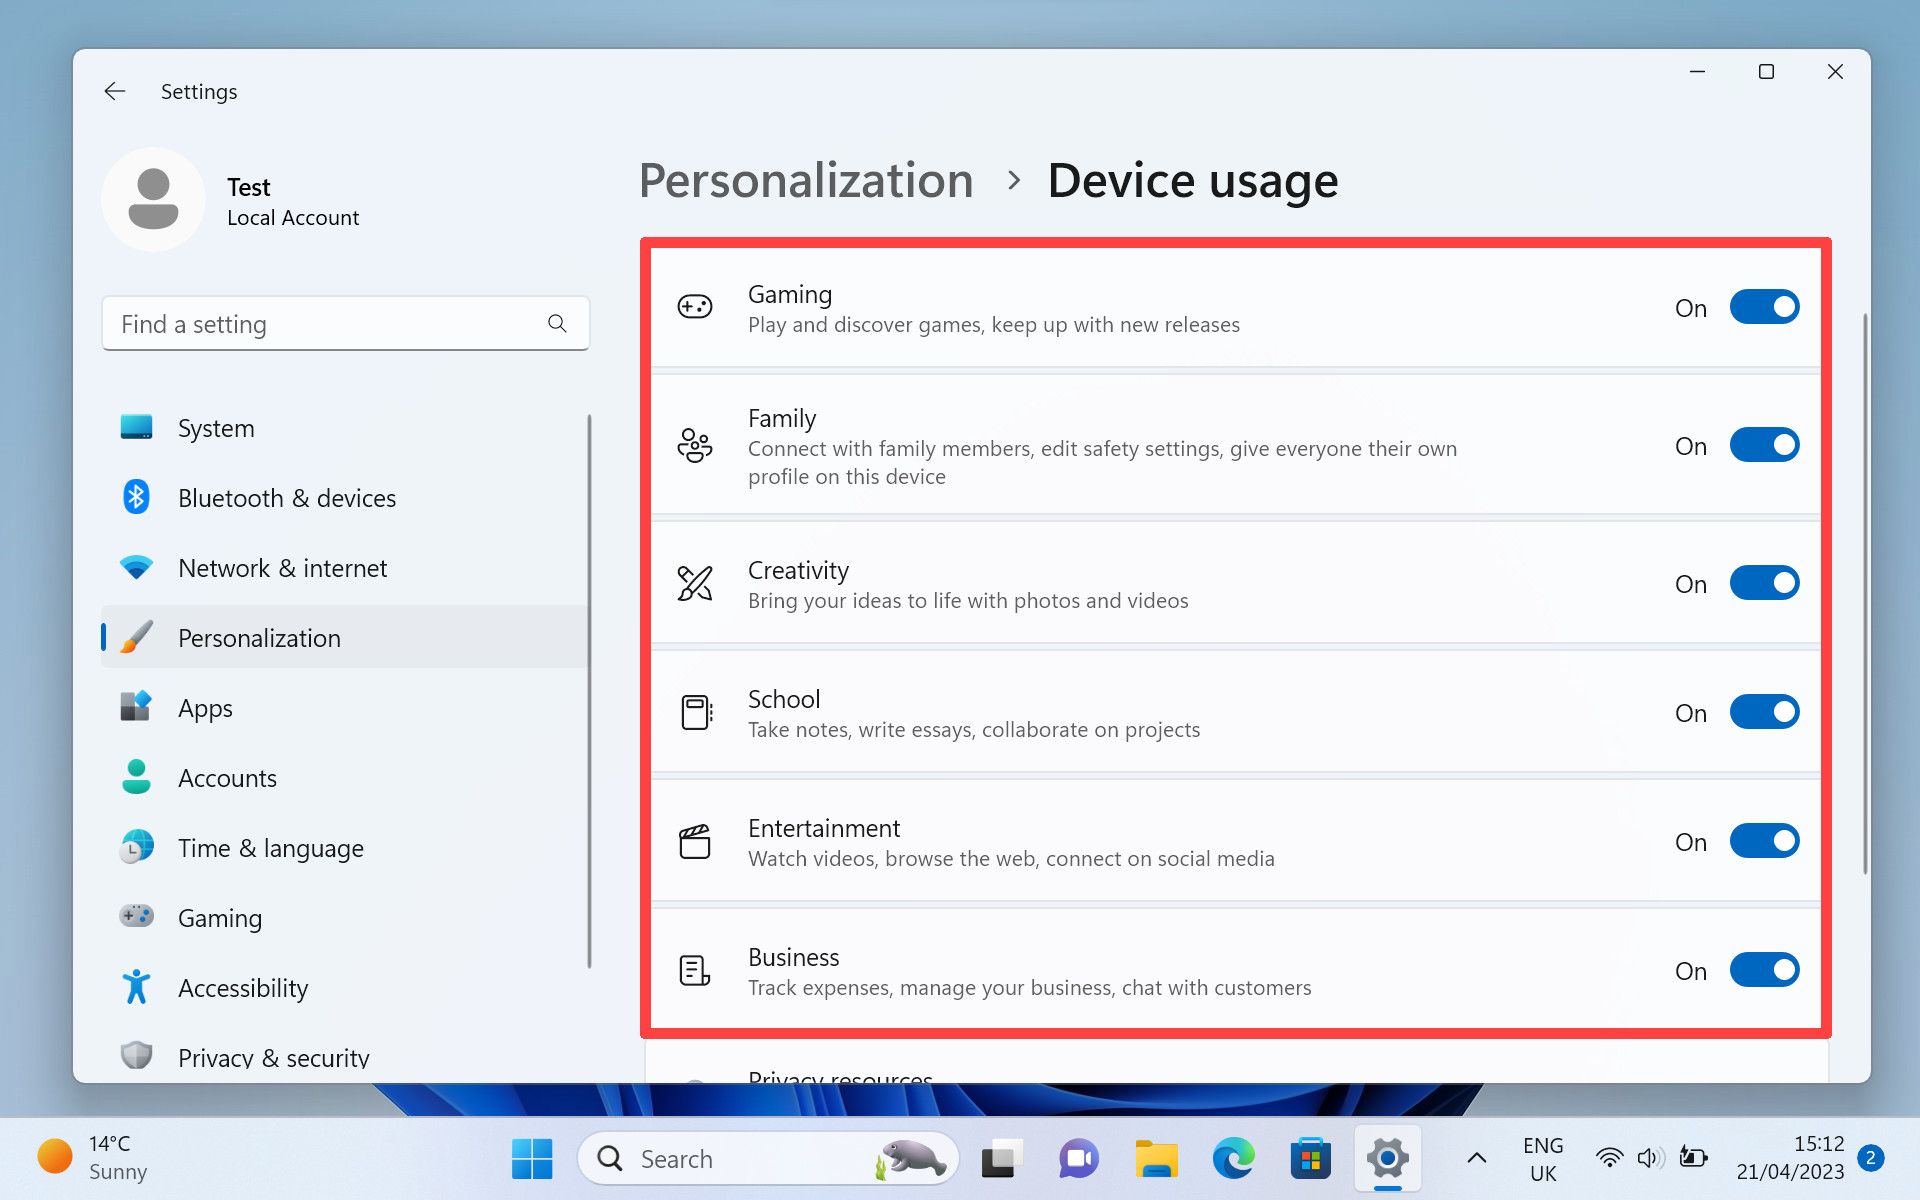
Step 3: You’ll now see a number of categories, make sure to flip each switch to the “Off” position. After which, Windows will no longer be able to track your interests and target you with personalized ads. Well done.
How to disable ads from suggested content in Windows 11
You may have noticed an annoying banner whenever you enter the “Settings” or “Account” panel that advertises Microsoft services like Game Pass and Microsoft 365. While both are fantastic, having a needless advert cluttering up important panels isn’t. It’s the very definition of ‘not fantastic.’ Maybe. Let’s shut down those ads.
Step 1: Click on the “Windows” icon in the taskbar and choose “Settings” from the pinned apps selection.

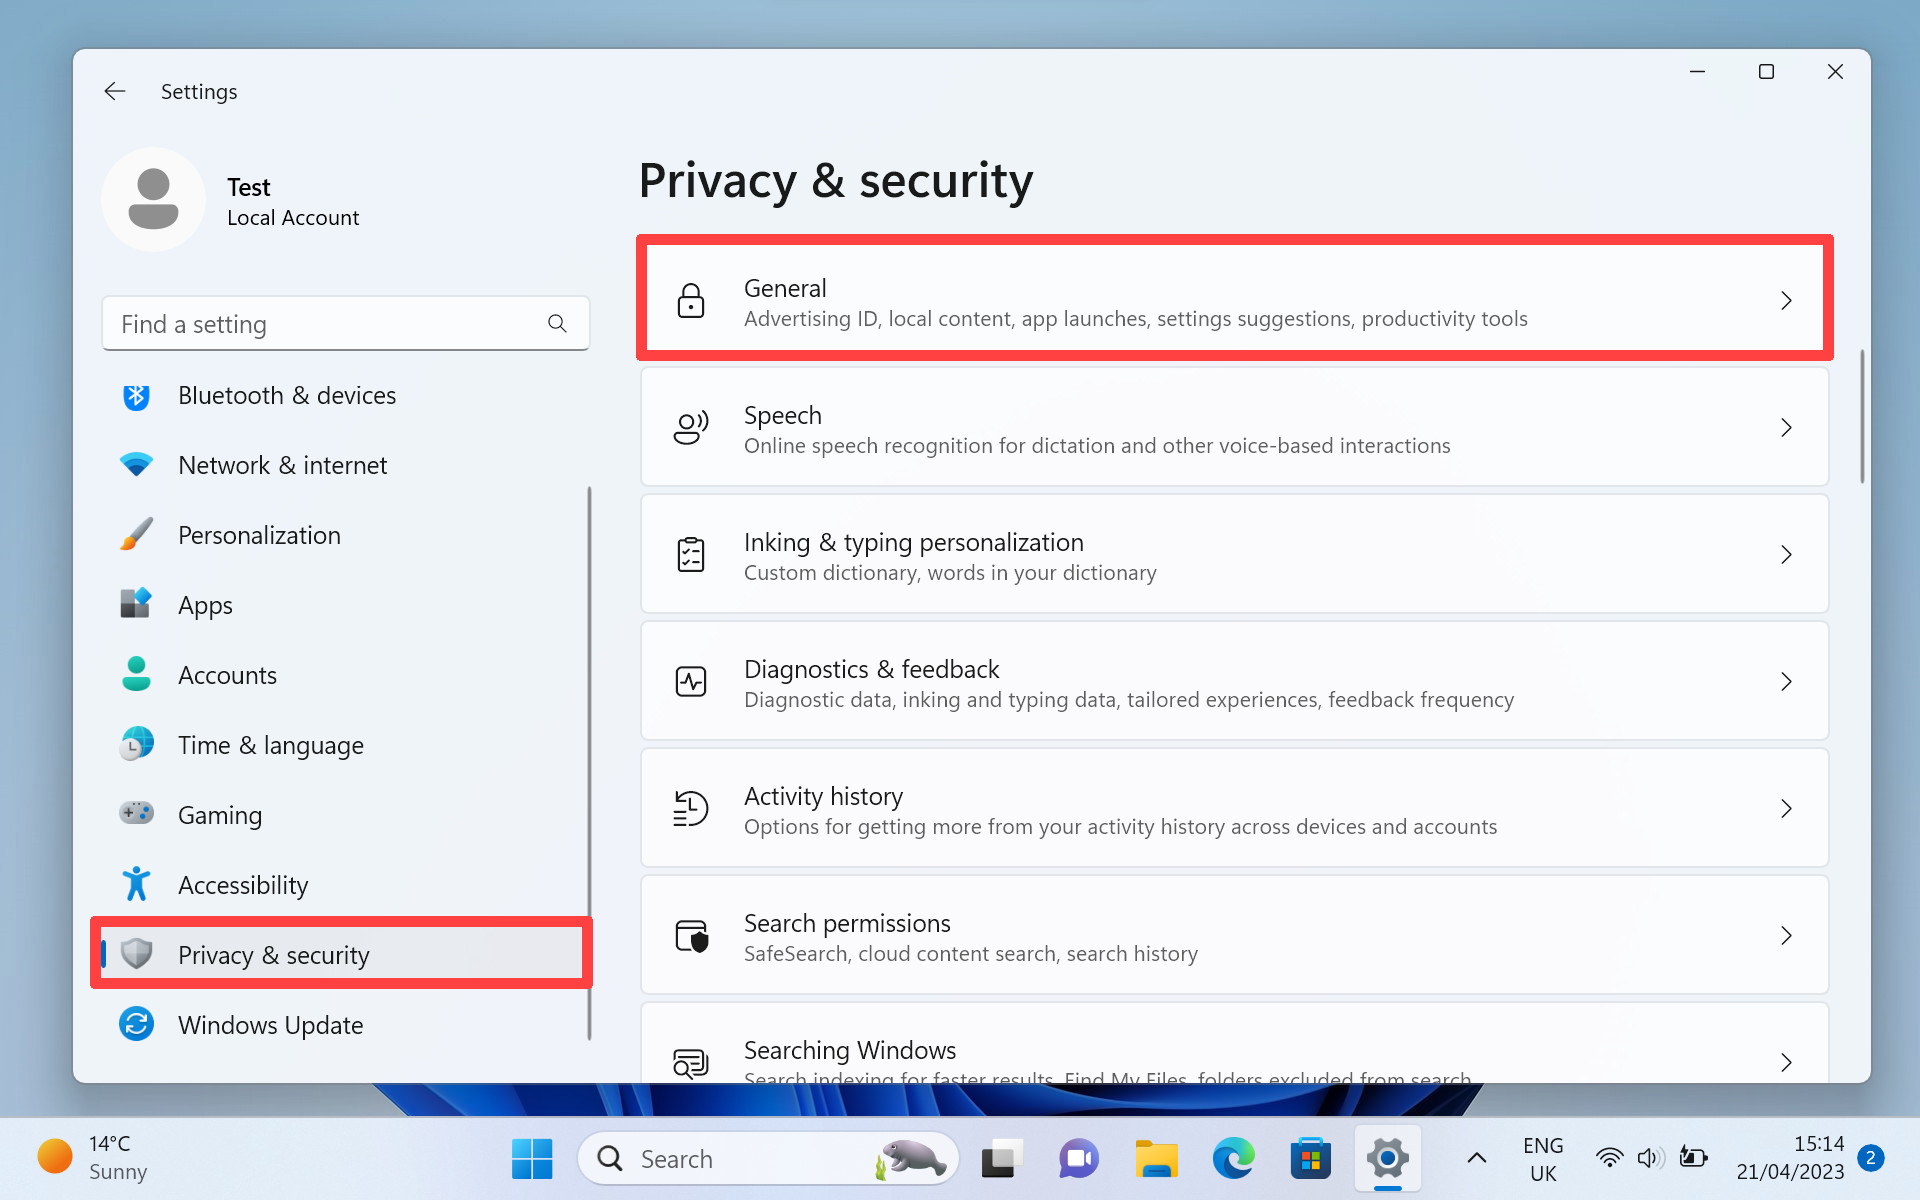
Step 2: Once you have the “Settings” window open in front of you, look to the left-hand side and click on “Privacy & security.” Then, move over to the panel on the right and choose “General.”
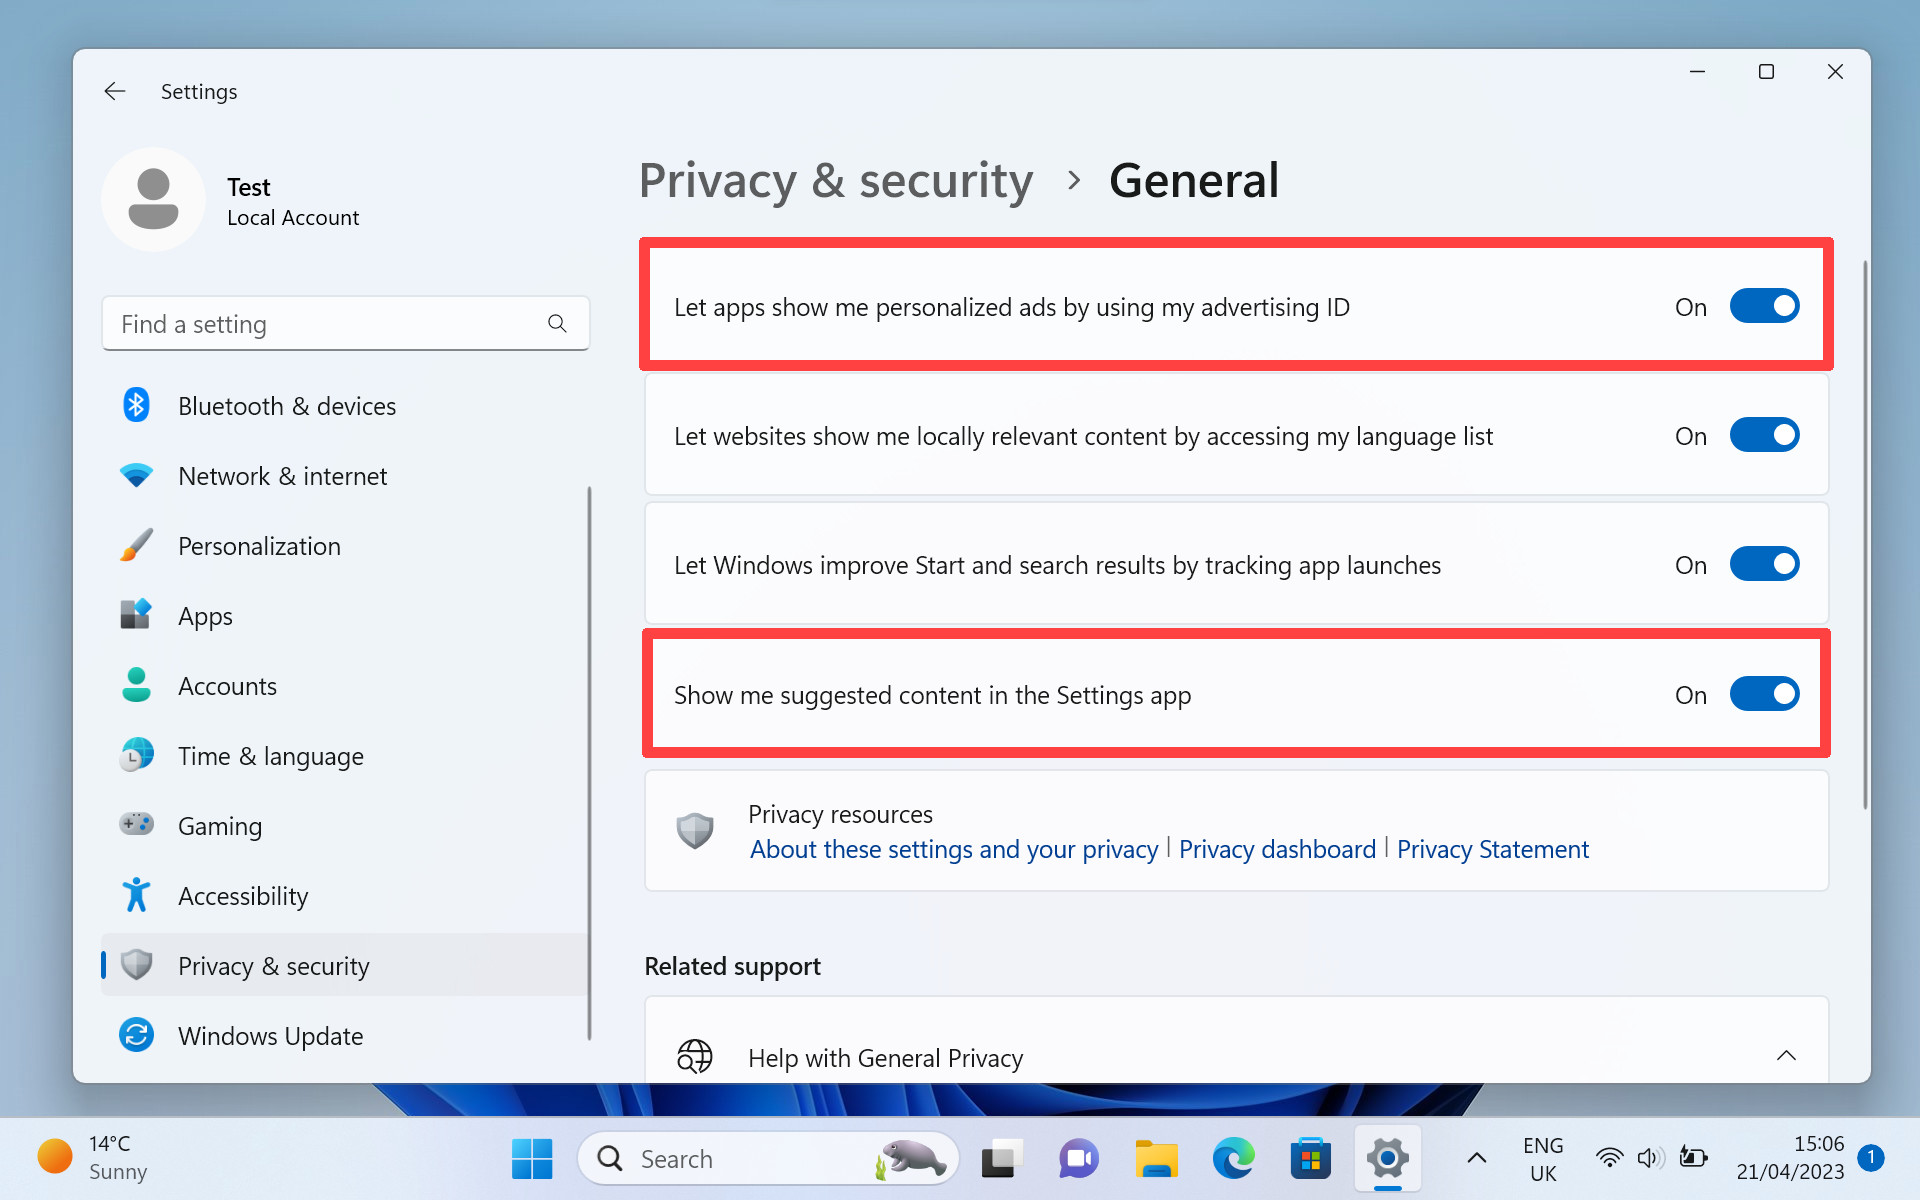
Step 3: You should now see a group of switches on the right-hand panel. Look for the switch next to “Show me suggested content in the Settings app,” and make sure it’s set to off.
As an added bonus, you can also prevent any apps from sending you personalized apps by switching off the switch next to “Let apps show me personalized ads by using my advertising ID.”
Two birds, one stone. There should no longer be ads found in these panels — top job.
How to disable ads from diagnostic data collection in Windows 11
If the size of this list wasn’t already a clue as to how committed Microsoft is when it comes to collecting your data so it can tempt you with apps, games, and services then how about the fact Microsoft also tries to do it through collecting diagnostic data. You know, the data it’s supposed to use to track bugs and issues within Windows.
If you aren’t aware of this hidden-away option, you’re gifting Microsoft more ways to target you with ads every time your system encounters an error — and this is Windows we’re talking about. Let’s get to it!
Step 1: Click on the “Windows” icon in the taskbar, and choose “Settings” from the pinned apps.

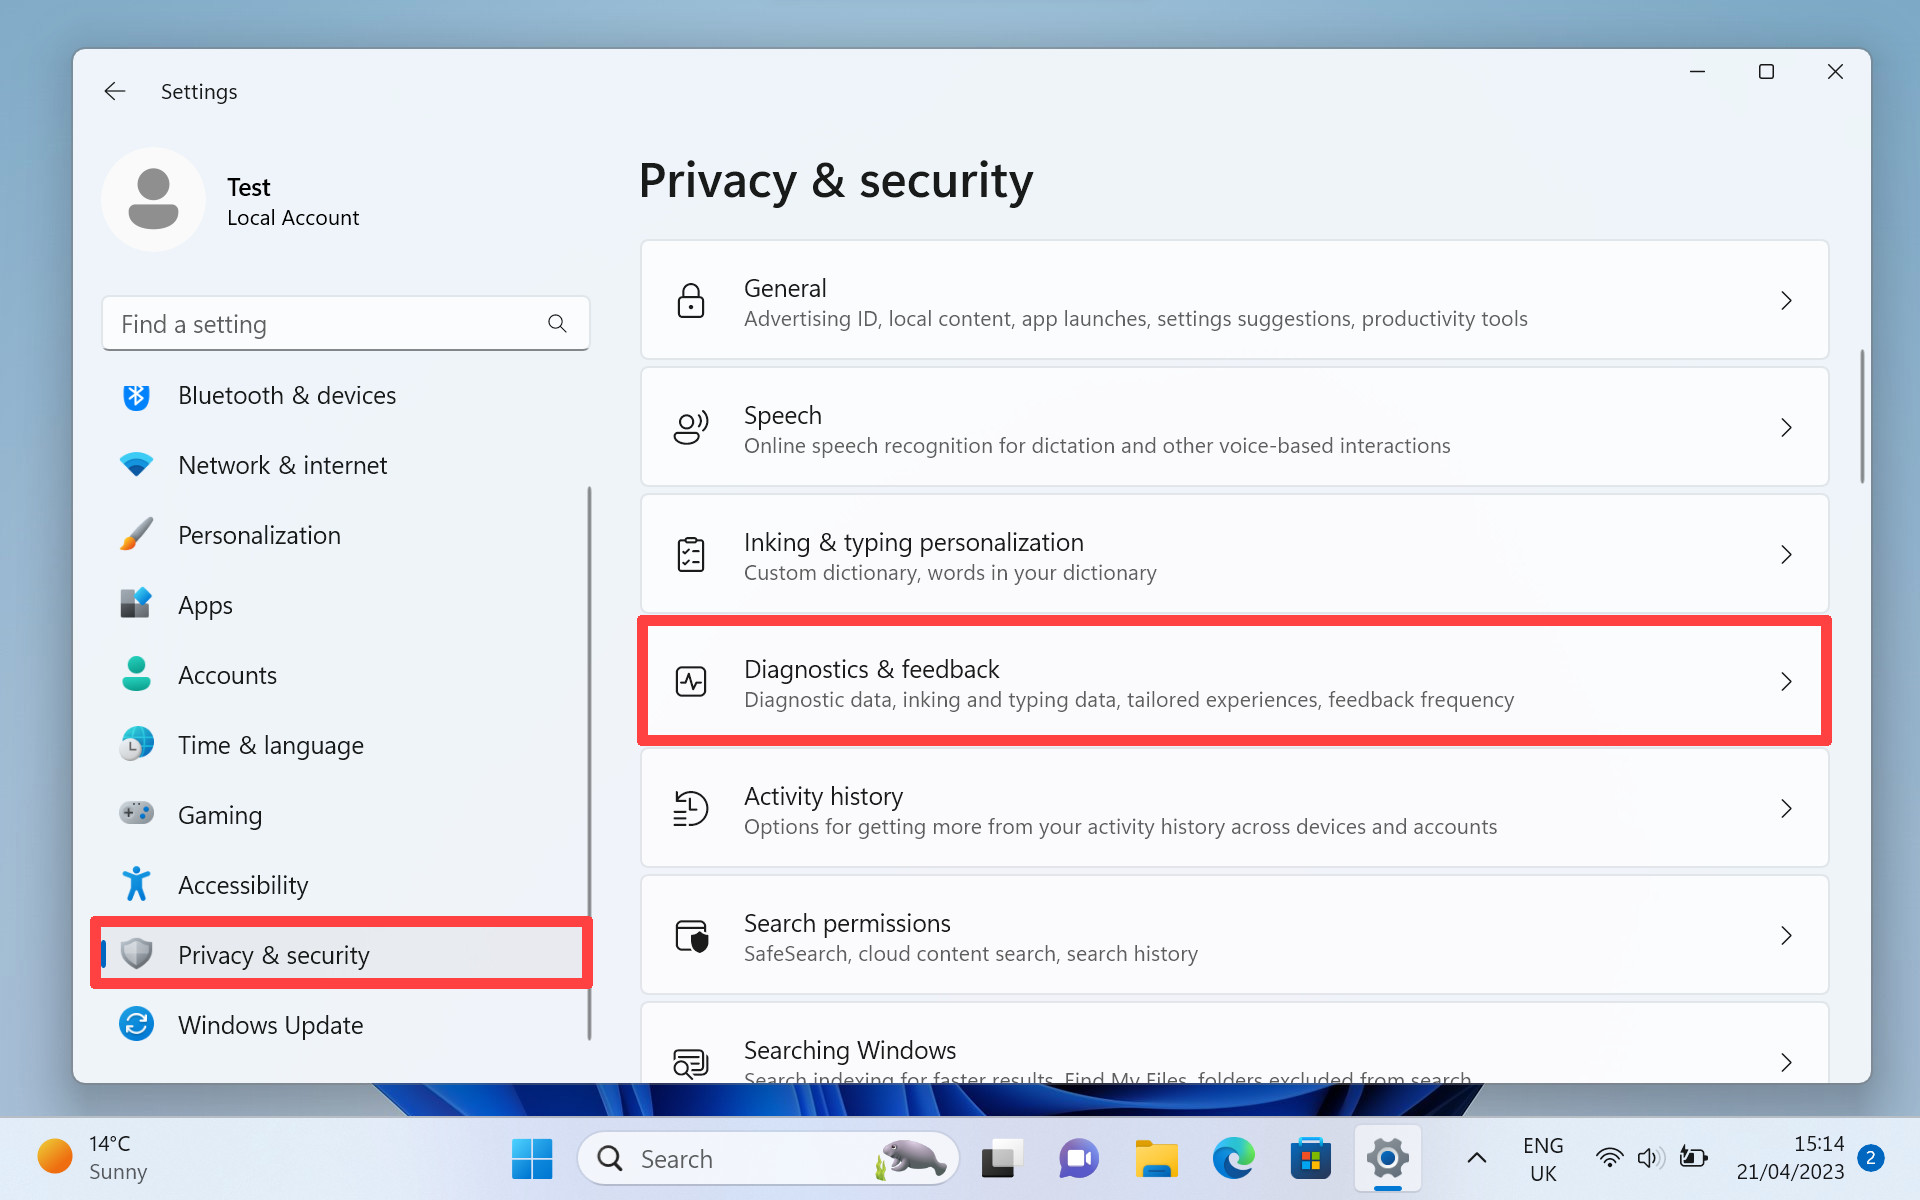
Step 2: With the “Settings” window open, look to the left-hand panel and click on “Privacy & security.” Then, on the right-hand panel, find and select “Diagnostics & feedback.”
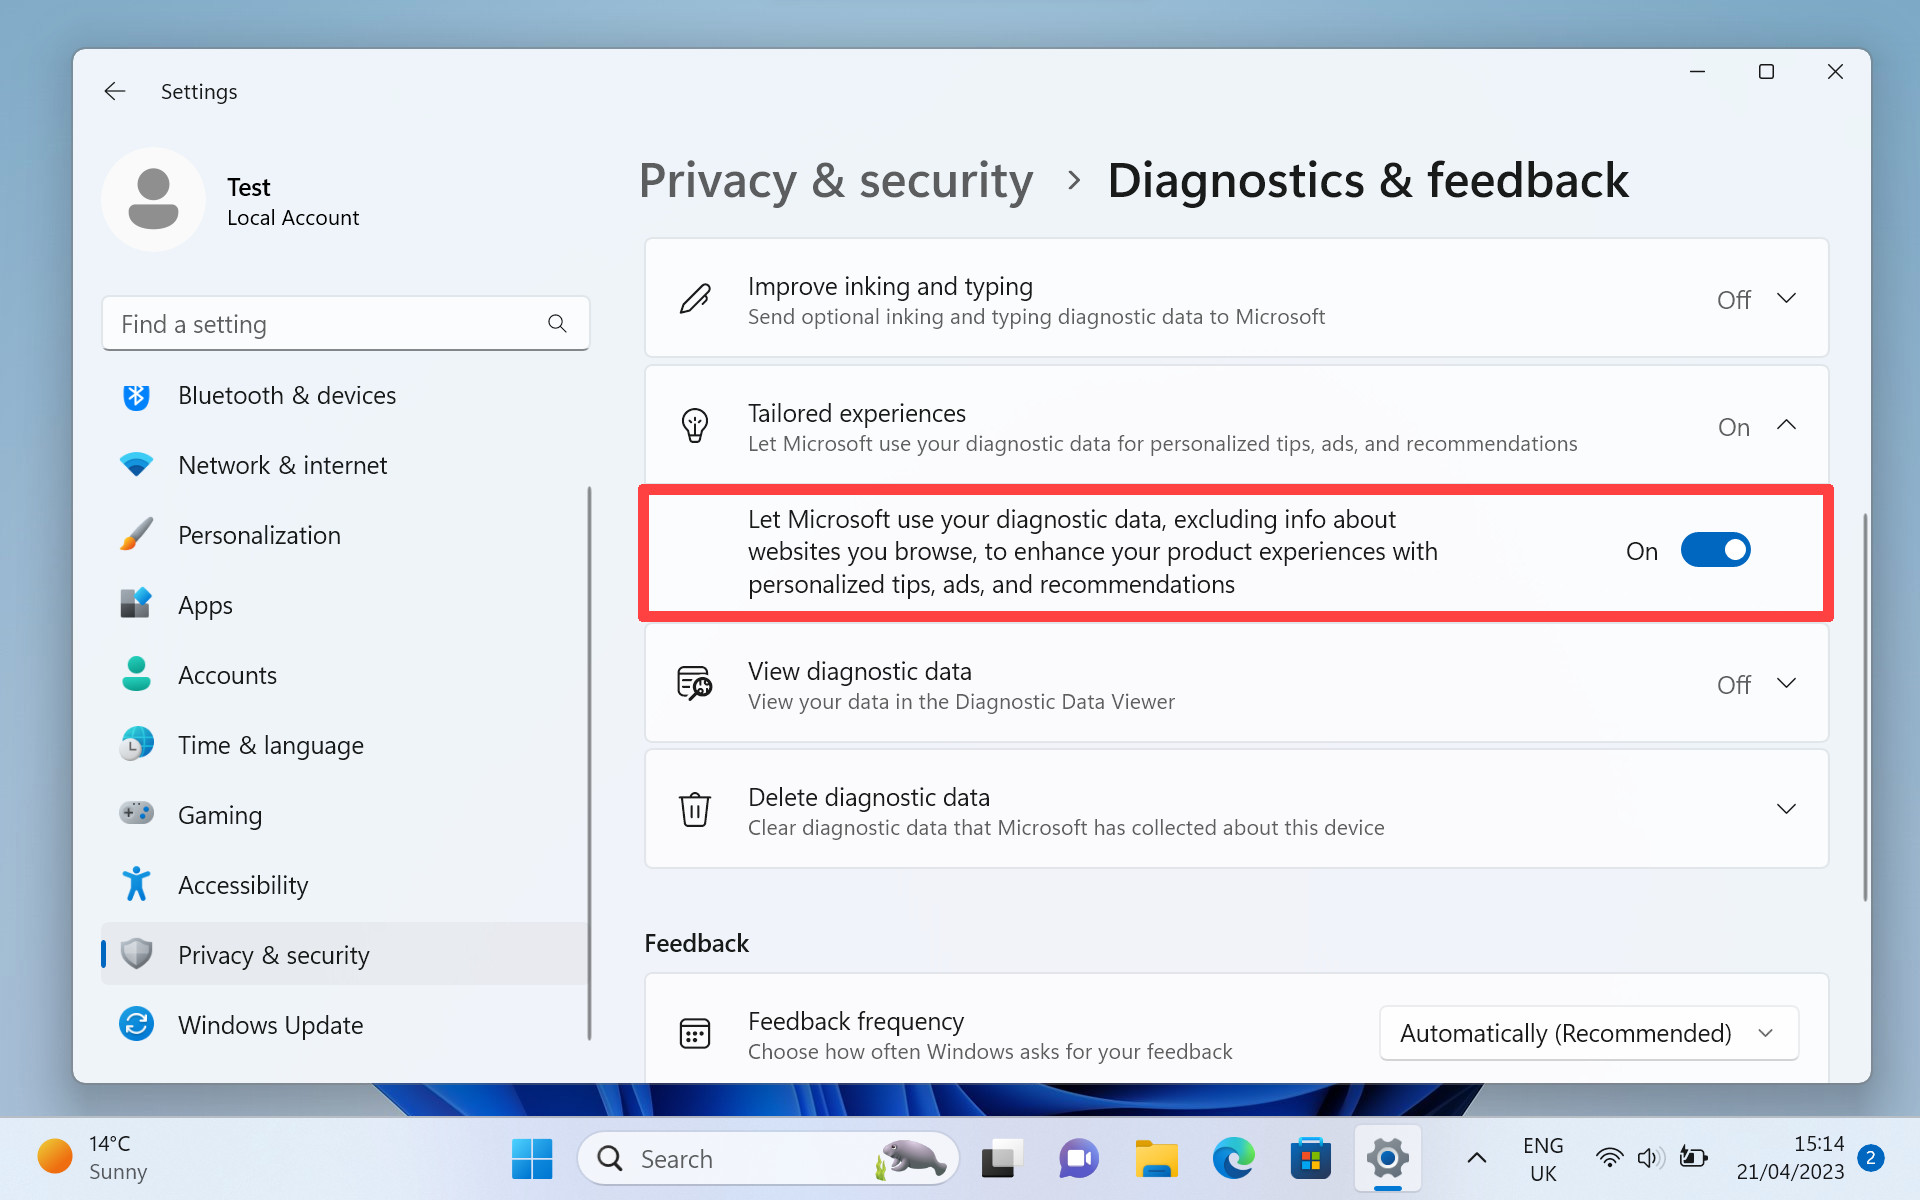
Step 3: On the right-hand panel again, scroll down slightly and make sure that the switch next to “Let Microsoft use your diagnostic data, excluding info about websites you browse, to enhance your product experience with personalized tips, ads, and recommendations” is set to “Off.”
Sneaky, huh? But not sneaky enough, as you’ve now prevented Microsoft from being able to harvest that information from you anymore. Rejoice and send crash reports with reckless abandon.
How to clean up the Windows 11 lock screen
They’re not exactly ads, but they’re annoying all the same. Sure, I occasionally do want to know where today’s image came from, but most of the time? No Microsoft, I couldn’t care less about your incessant need to teach me trivia about the Los Nevados National Park.
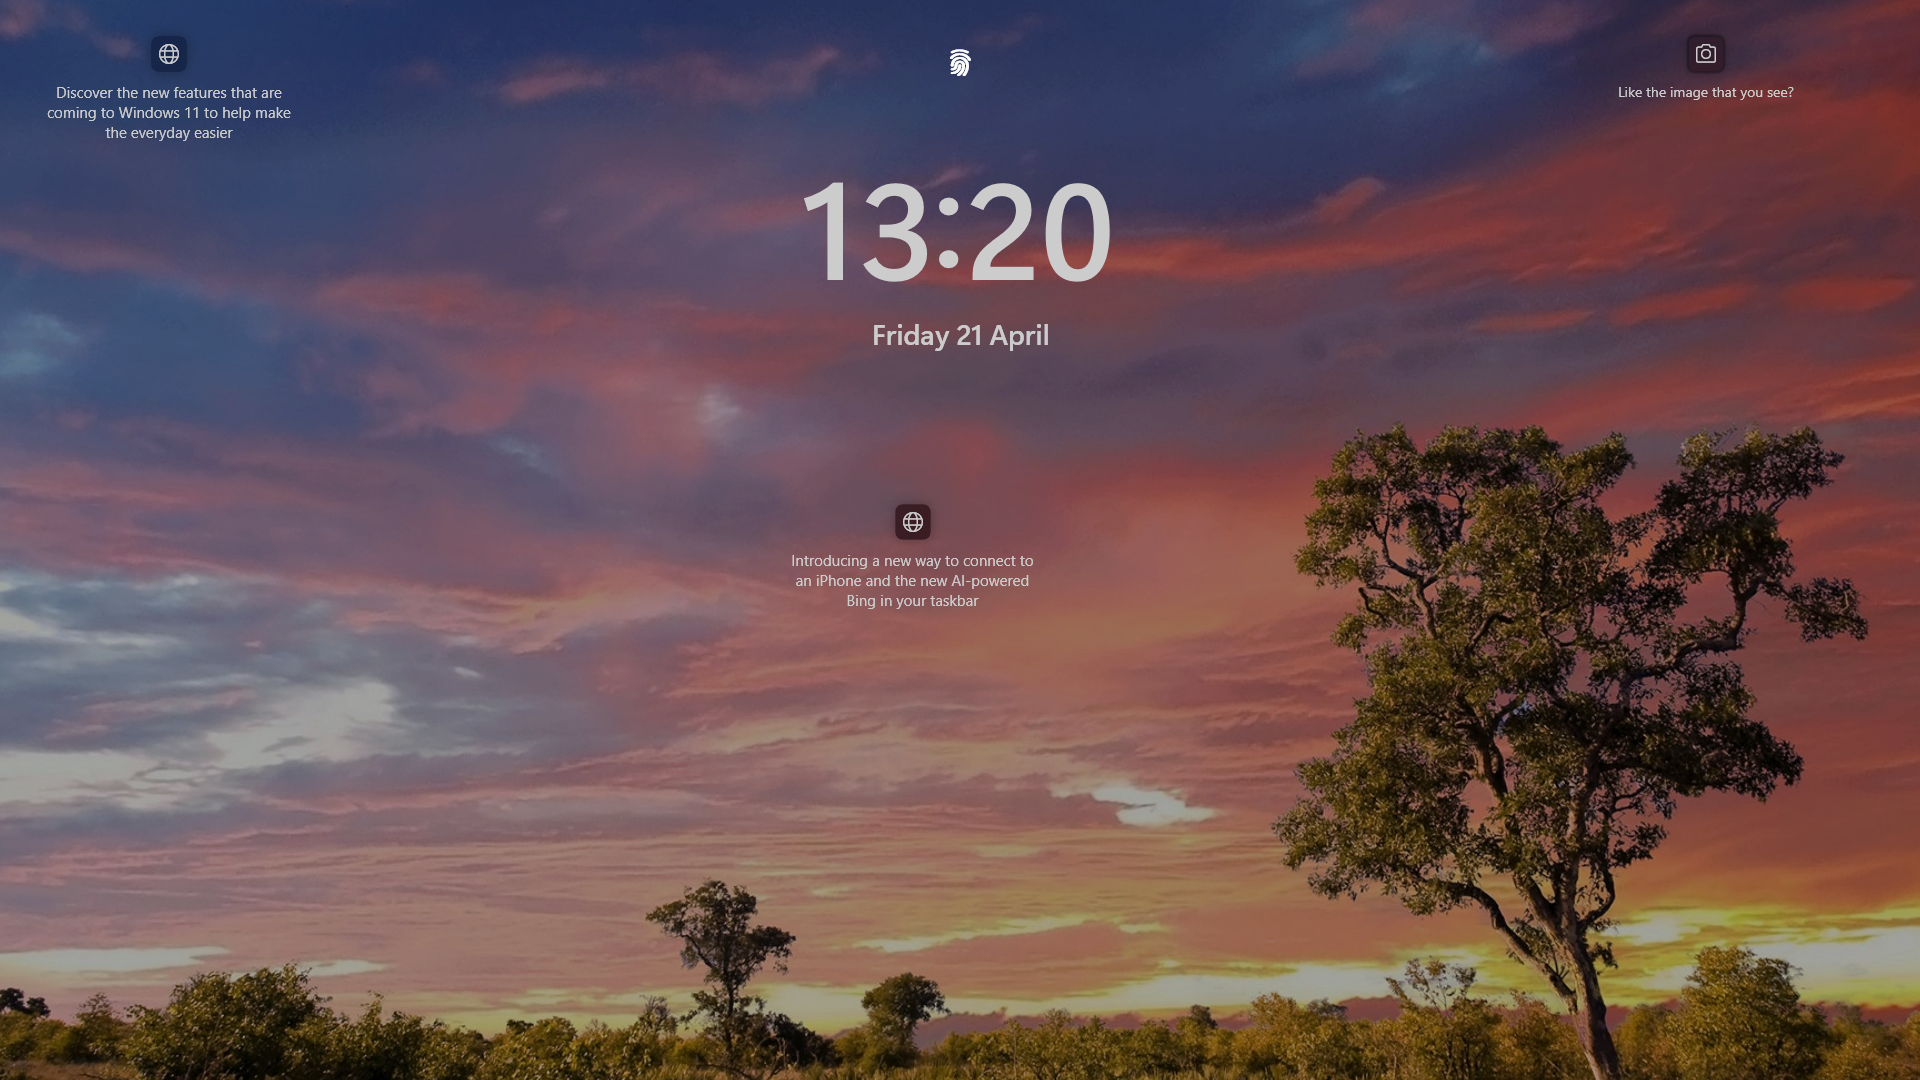
You might not even have noticed them before, after all, who’s really paying much attention to a Windows lock screen? Well, you — I suppose. Else you wouldn’t care about those irritating Microsoft tooltips getting in the way of all of that beautiful landscape photography. Anyway, let’s get to clearing them out of the way.
Step 1: Click on the “Windows” icon in the taskbar and choose “Settings” from the quick-pinned applications.

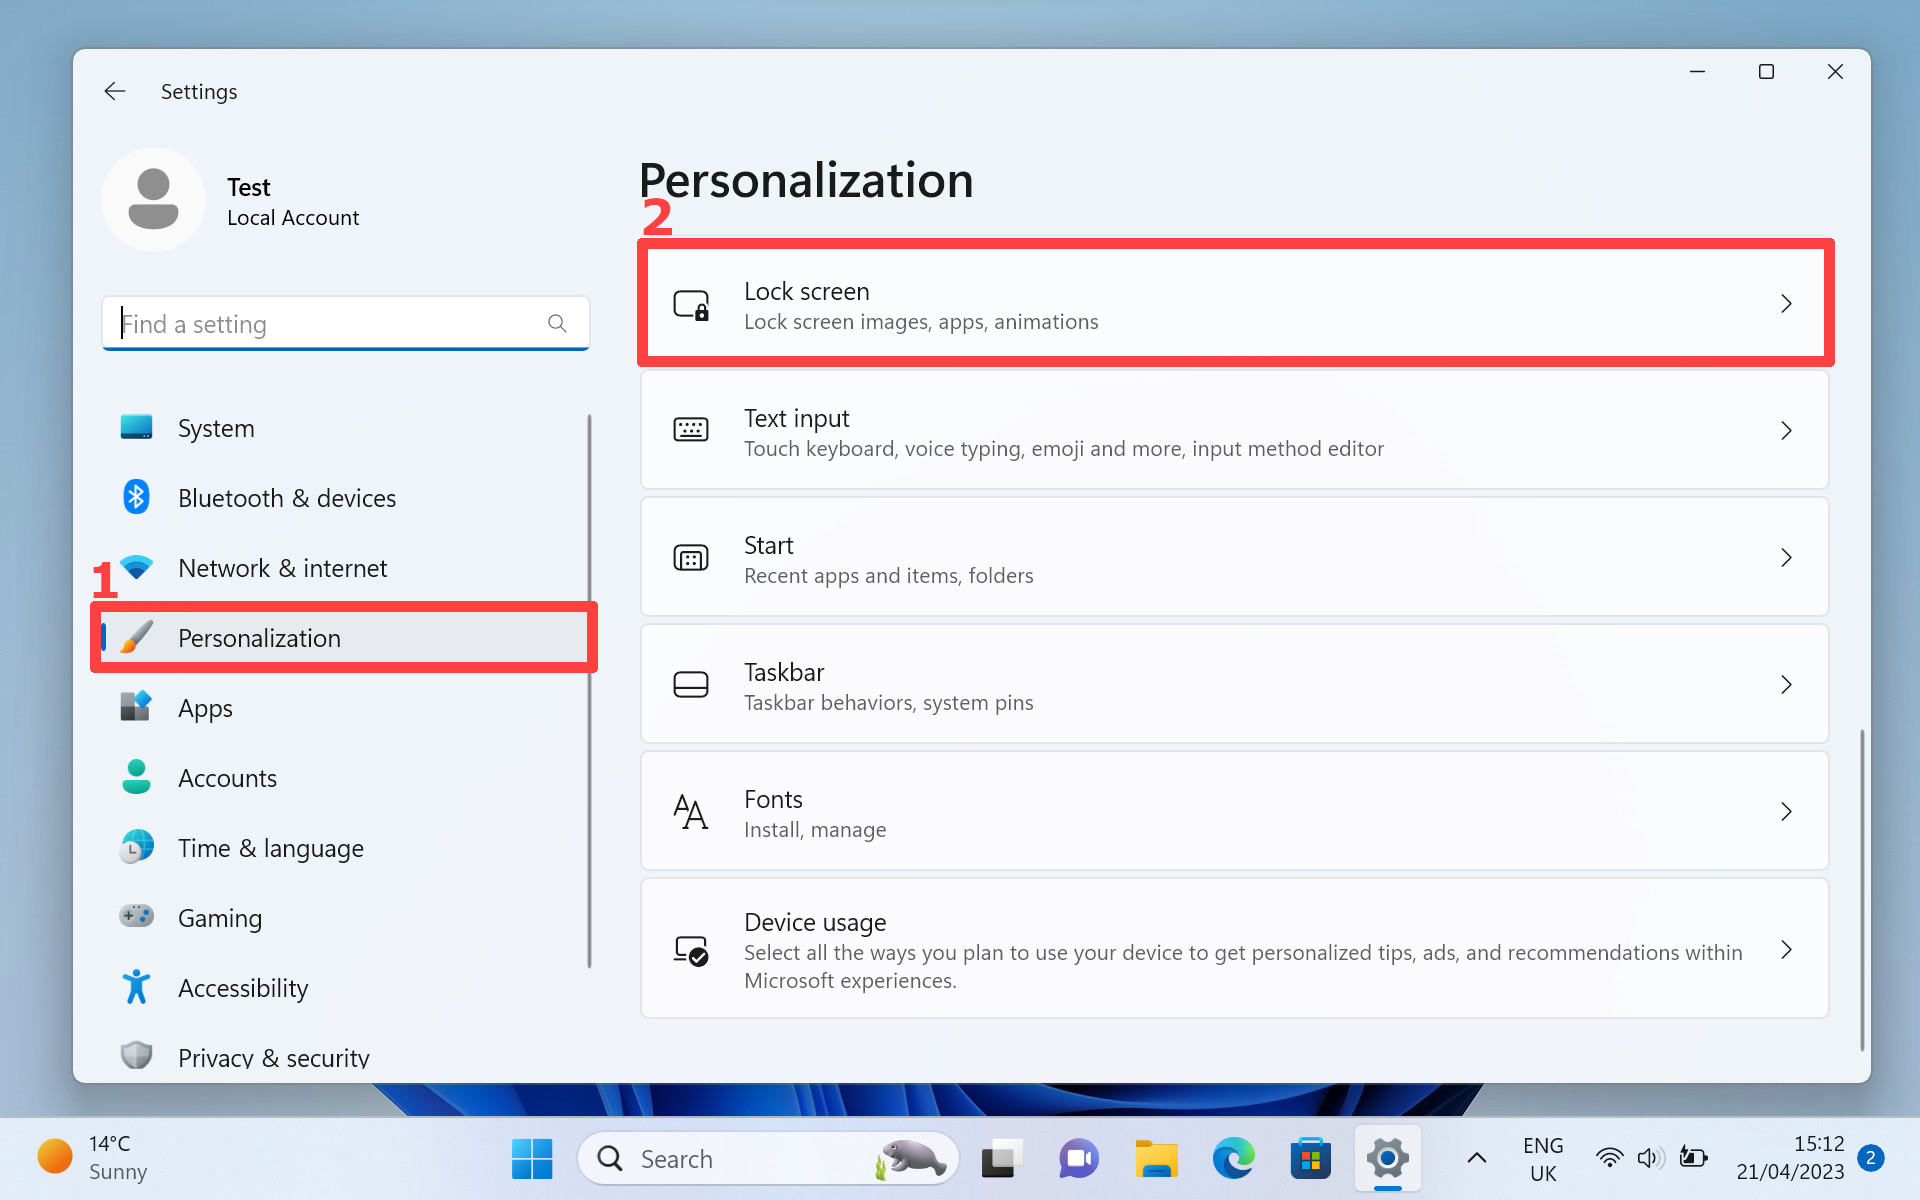
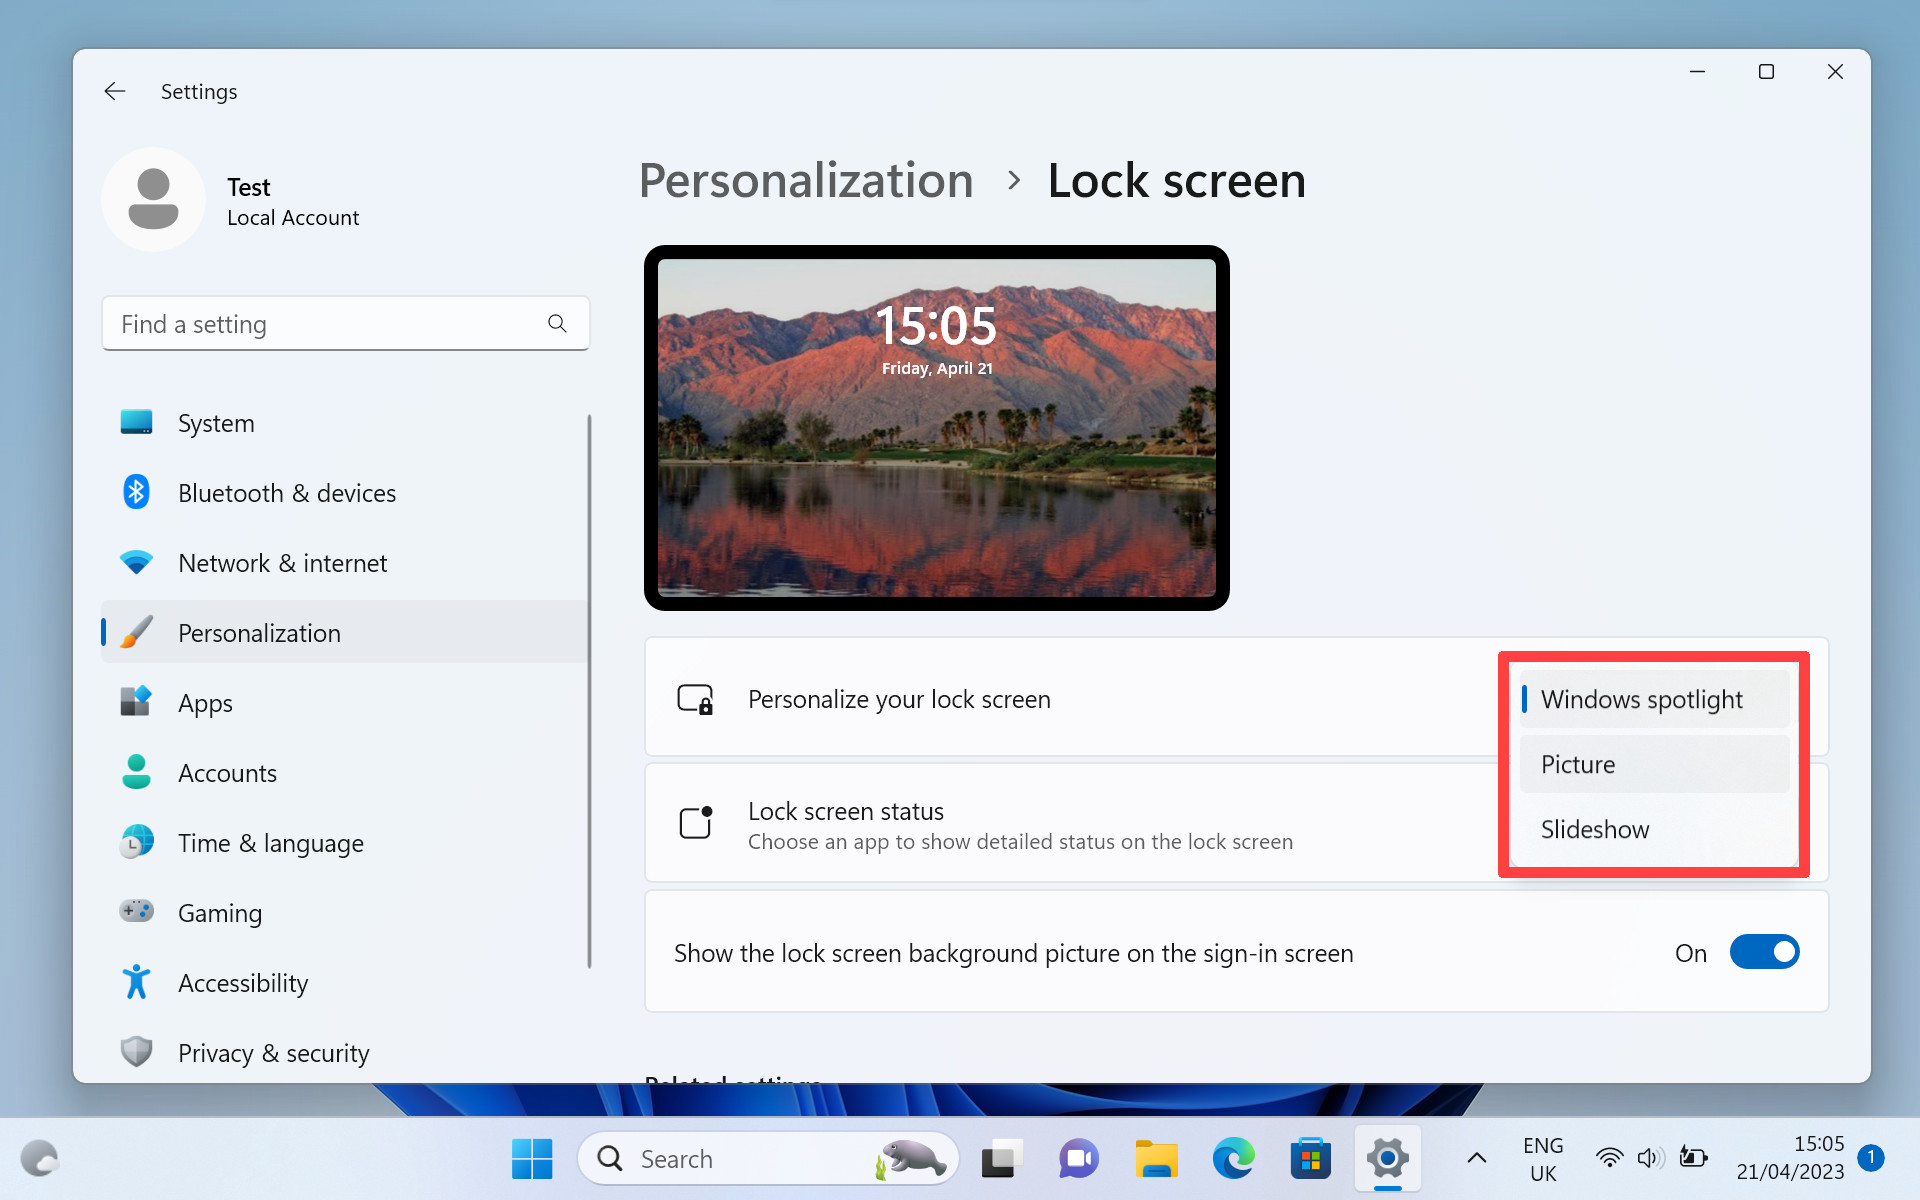
Step 2: Once the “Settings” window opens, choose “Personalization” on the left-hand side of the window. Then on the right-hand side of this window, choose “Lock screen.”
Step 3: Once you’re at the “Lock screen” menu, look for the drop-down menu next to “Personalize your lock screen.” Click it and choose either “Picture” or “Slideshow.”
Step 4: Once you’ve chosen, you should be able to see a new checkbox option has appeared. Untick the checkbox next to where it says “Get fun facts, tips, tricks, and more on your lock screen.”
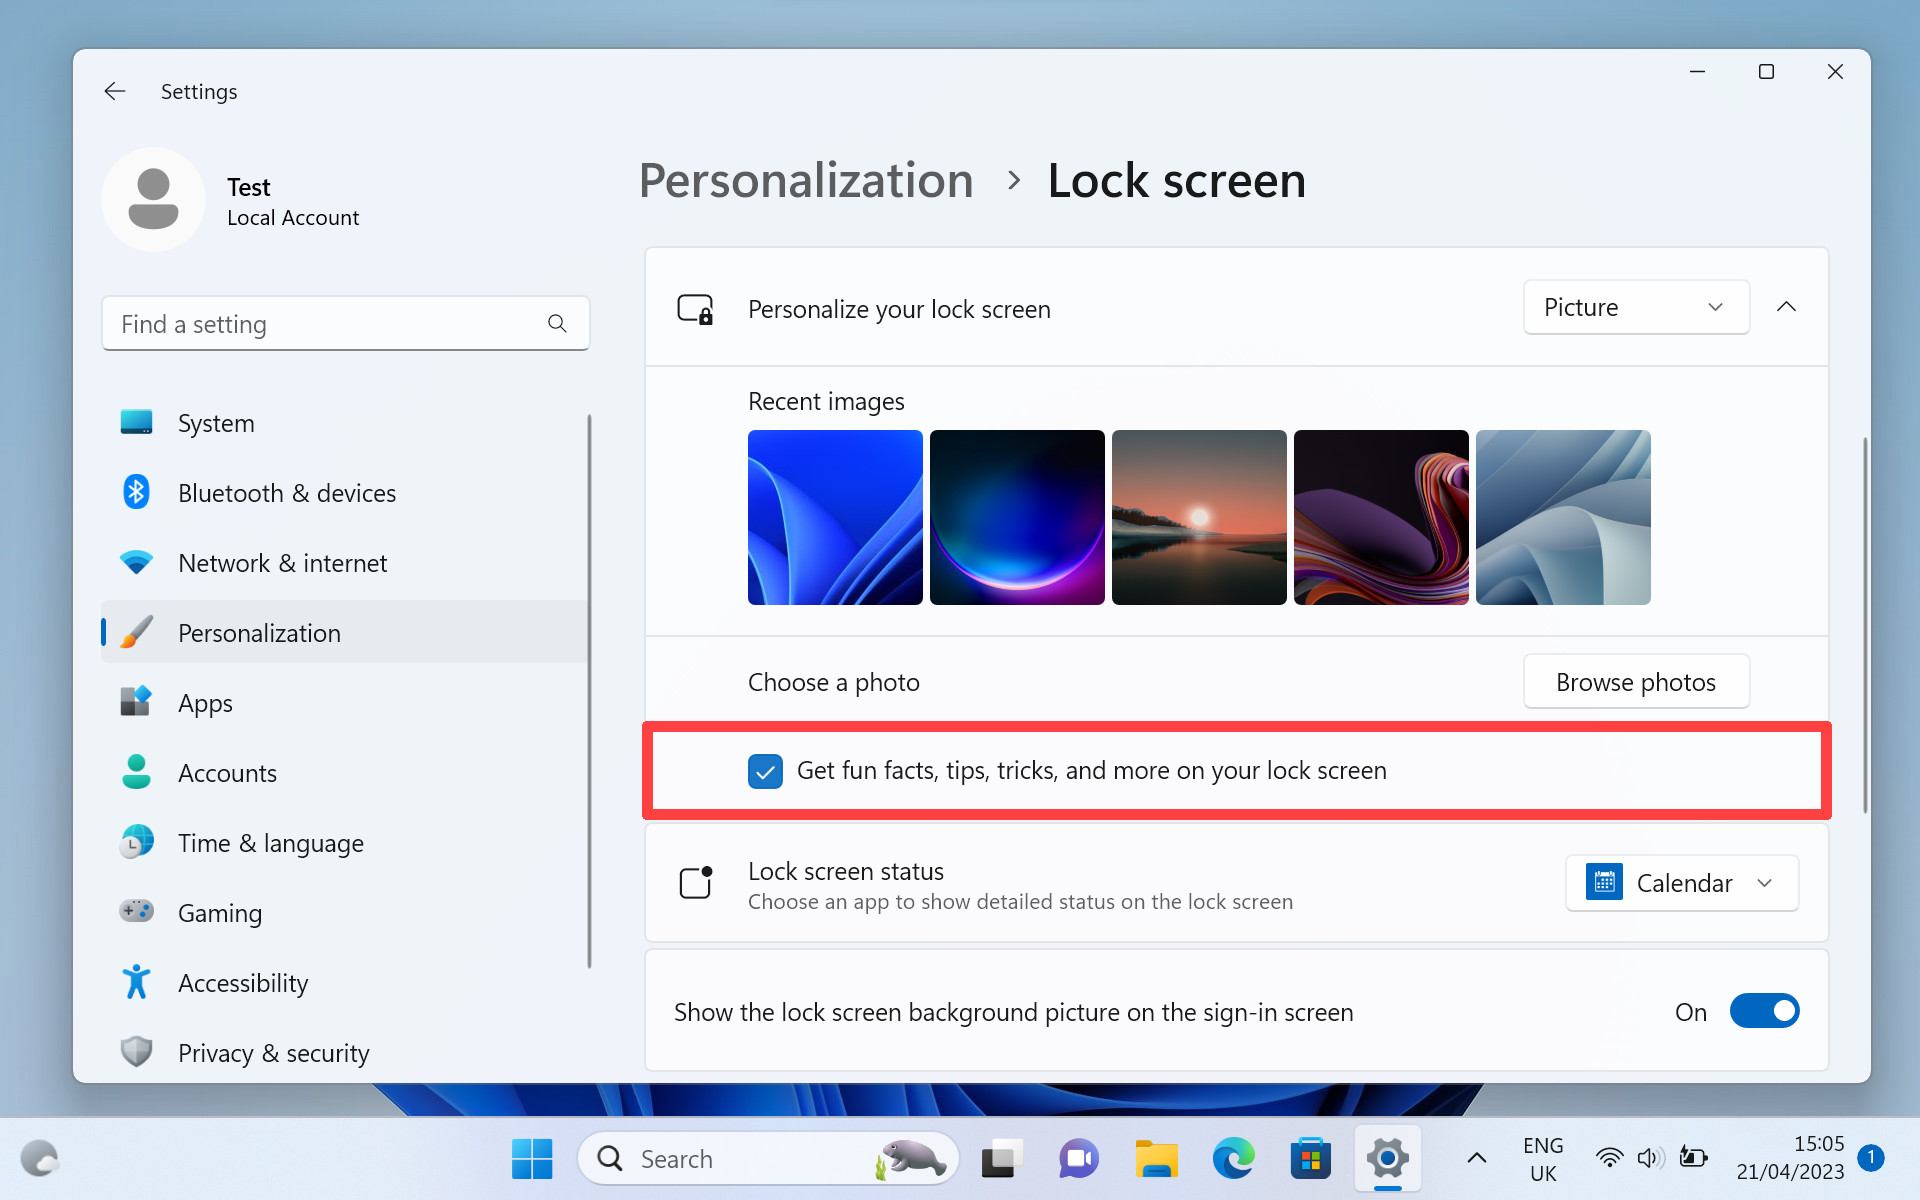
After these steps are complete, you’ll no longer have to worry about your favorite vistas getting all cluttered up by the makers of Vista.


