The laundry room, or more general utility room, is a space that's often neglected in terms of design. It's typically a small space devoid of any sense of order or style, but, despite practical purposes, we think these are areas that deserve to be seen just as much as the rest of your home.
Why then does the utility room fail to reach the standards of the rest of your spaces, then? Once you discover how much a well-designed space can revolutionize your laundry routine, you will regret not doing it sooner, and we've found a clever IKEA hack courtesy of home DIYer and lifestyle influencer Kerry Kellett that does just that. If you're looking to upgrade your utility room, look no further than this simple hack. Here Kelly teaches us how she transformed the IKEA Pax unit into a stylish utility system in just a few simple steps.
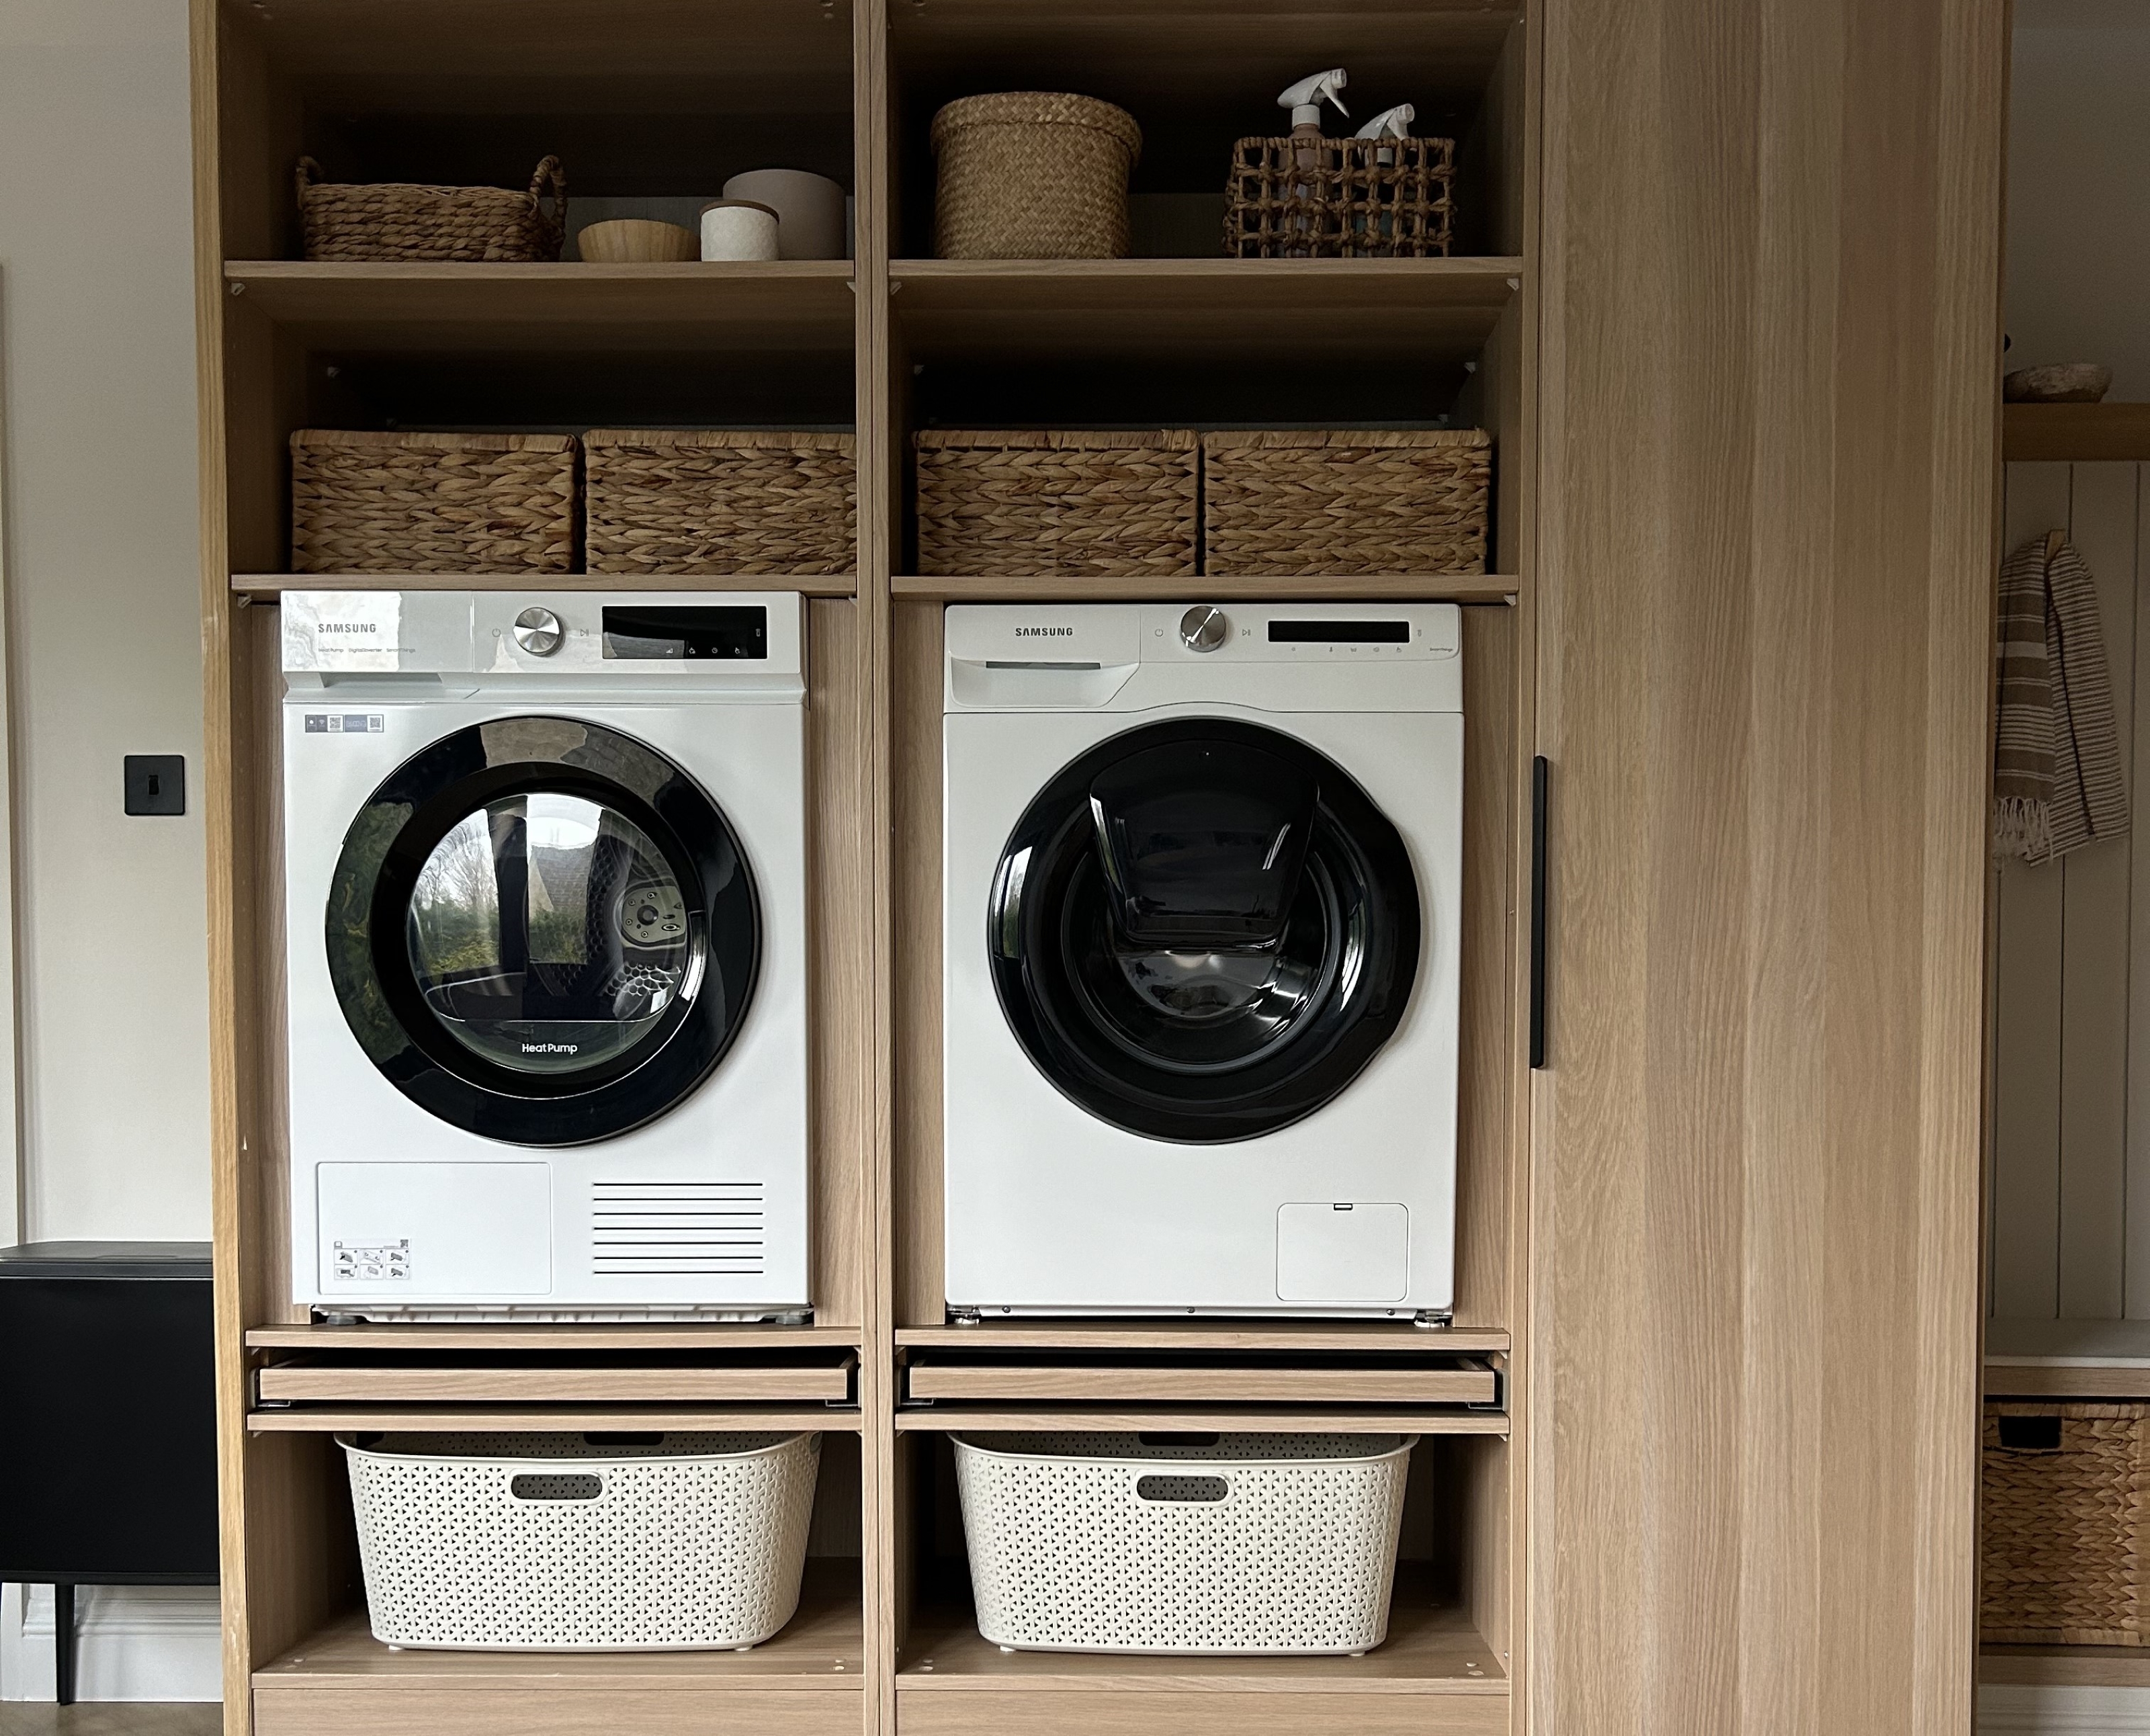
Kerry was eager to restore order to her utility room to make it as functional as possible. 'We created a large utility/built room in what was the old kitchen in our house,' she says. 'I wanted this space to be practical, and functional, but also easy on the eye.'
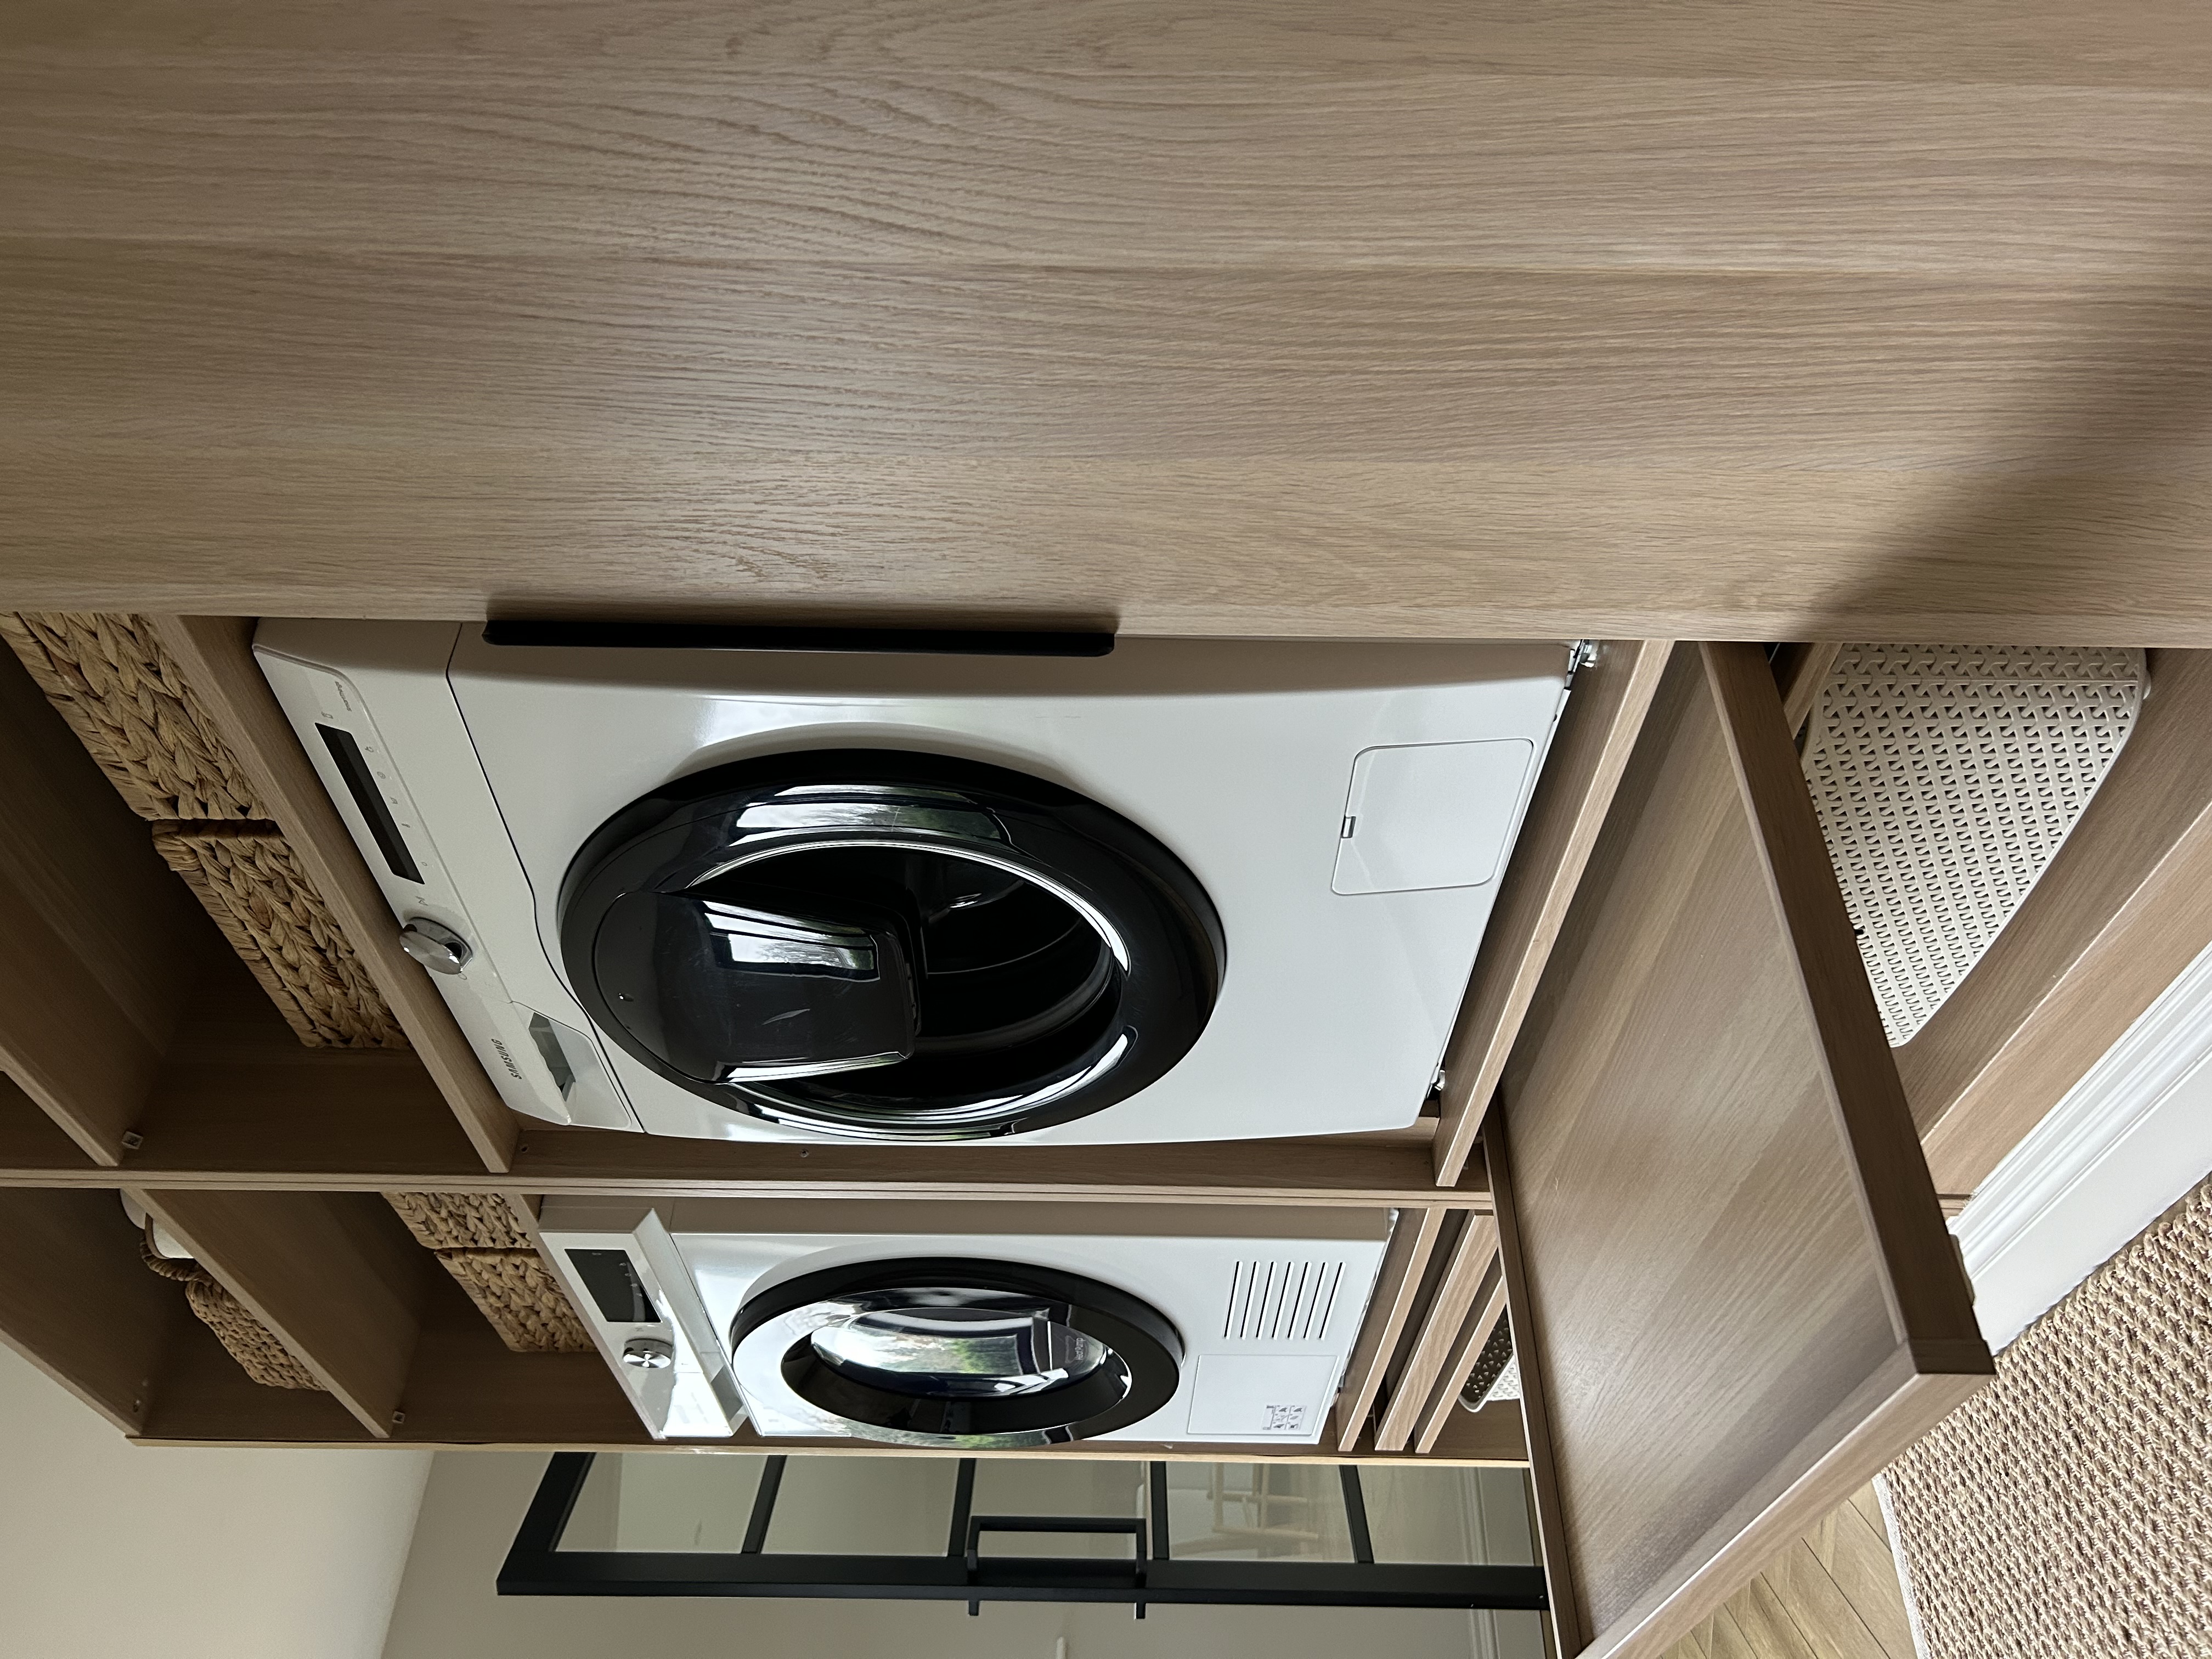
Laundry is no one's favorite task, so making it as easy and efficient as possible is a goal we can all get behind. 'I had the idea to raise the appliances off of the floor to save, bending down constantly,' Kerry explains. 'I loved the idea of having a pullout shelf for the basket to sit on and then the space underneath the storage.'
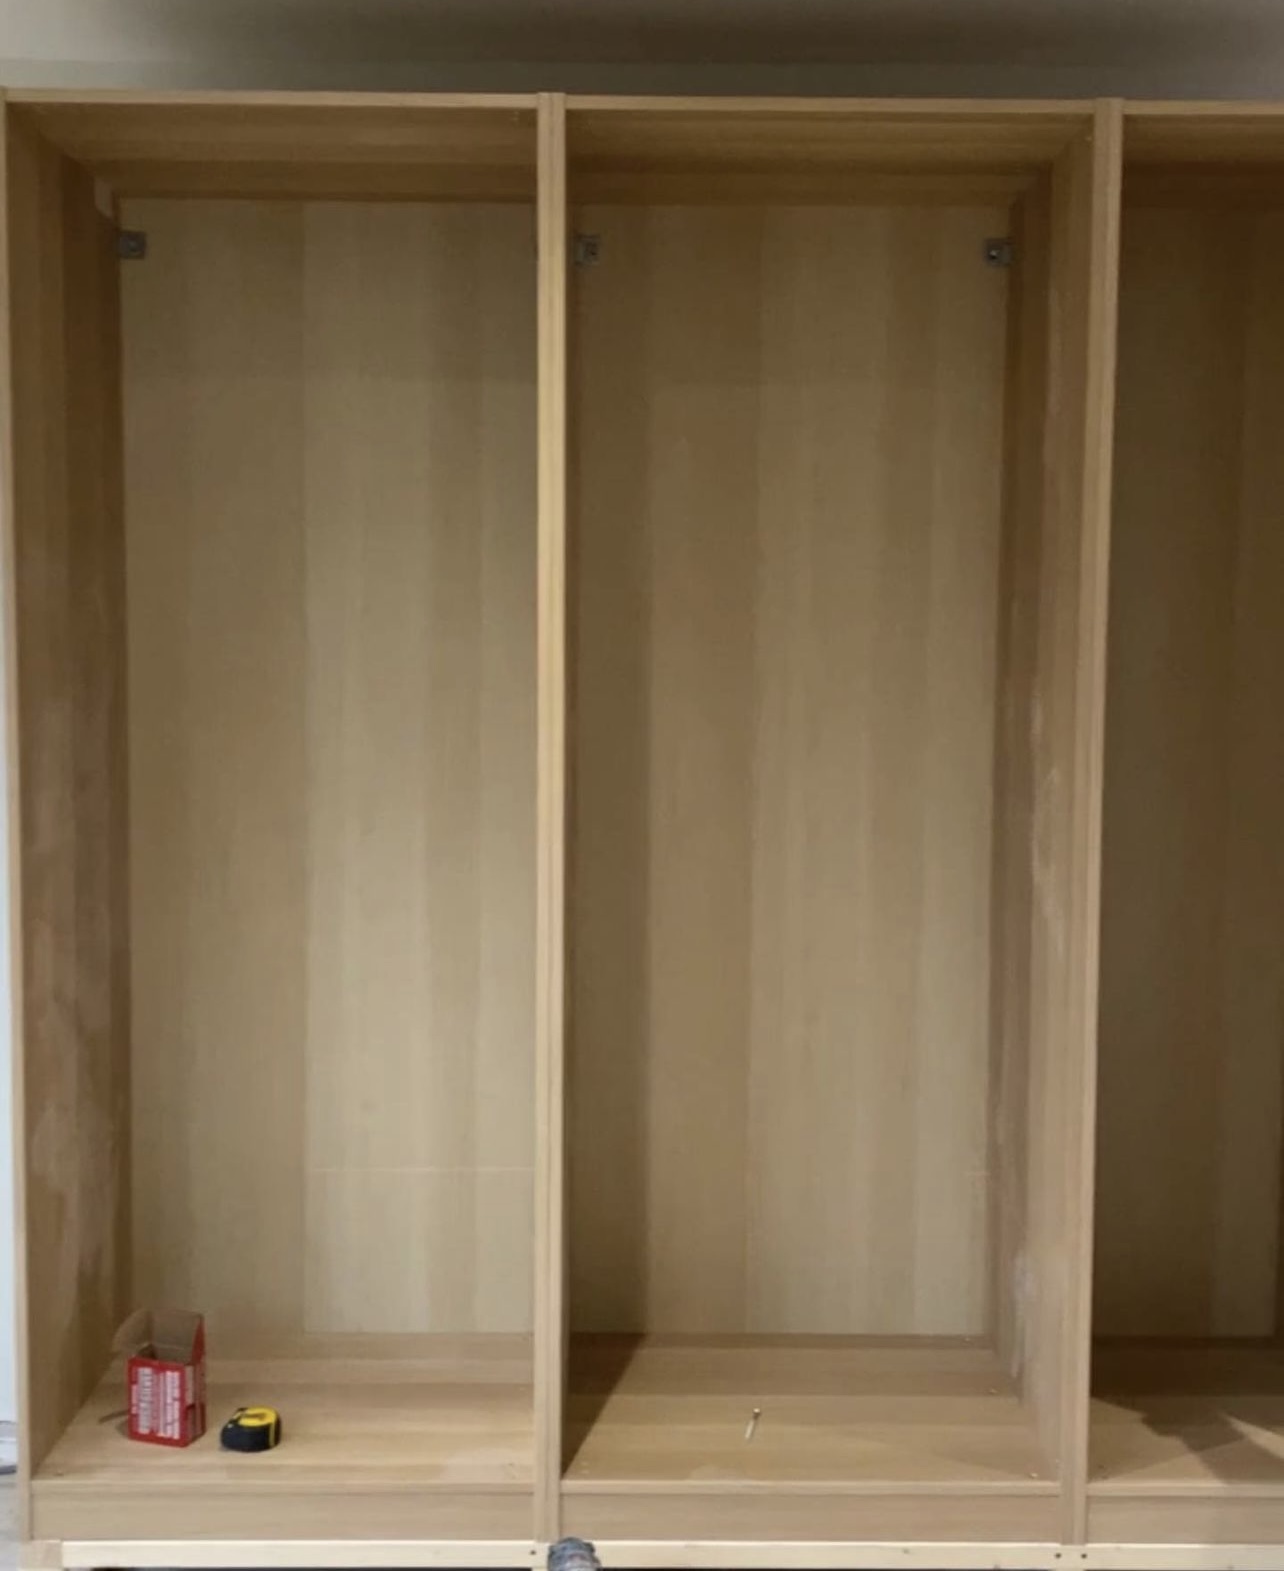
However, like most of us, Kerry was put off when it came to pricing a bespoke unit. 'We had looked at prices from kitchen companies and building bespoke for this kind of unit but unfortunately, this wasn’t in our price bracket, so we decided to go ahead with the IKEA PAX system and do it ourselves.'
Knowing, as we do, that an IKEA hack is the best way to get the most out of their practicality, she decided to get busy with a creative DIY project using the PAX system. 'I started by building a frame on the wall and floor using CLS timber 3x2,' she says. 'This creates a sturdy base for units to sit for the carcasses to sit on, but also raises them off of the floor, so the skirting board can sit across the front.'

The next part of her IKEA laundry room hack was securing the units to frames and fixing them together, then raising the waste plumbing for her washer. 'We already had electrics at this height behind, but obviously, if you didn’t you would need these for easy access,' she adds.
Kerry then used spruce pine timber all the way around on the metal shelf brackets for strength. 'We have then sat hot-rolled steel rods on top of these for the shelves to sit on and hold the weight of the appliances,' she notes. 'We then cut out the back of the unit for easy access to plumbing and electrics, and secured units into the shelves.'

In five relatively simple steps, with some affordable materials and limited DIY skills, you could have a brand new utility room that is practical and looks the part, too. ,' Kerry explains. 'Finally, the last step was then adding the skirting board to the front of the unit.' This gives the entire hack a built-in look that looks so professional.
In five relatively simple steps, with some affordable materials and limited DIY skills, you could have a brand new utility room that is practical and looks the part, too. It's the perfect weekend project to keep you busy this winter.


