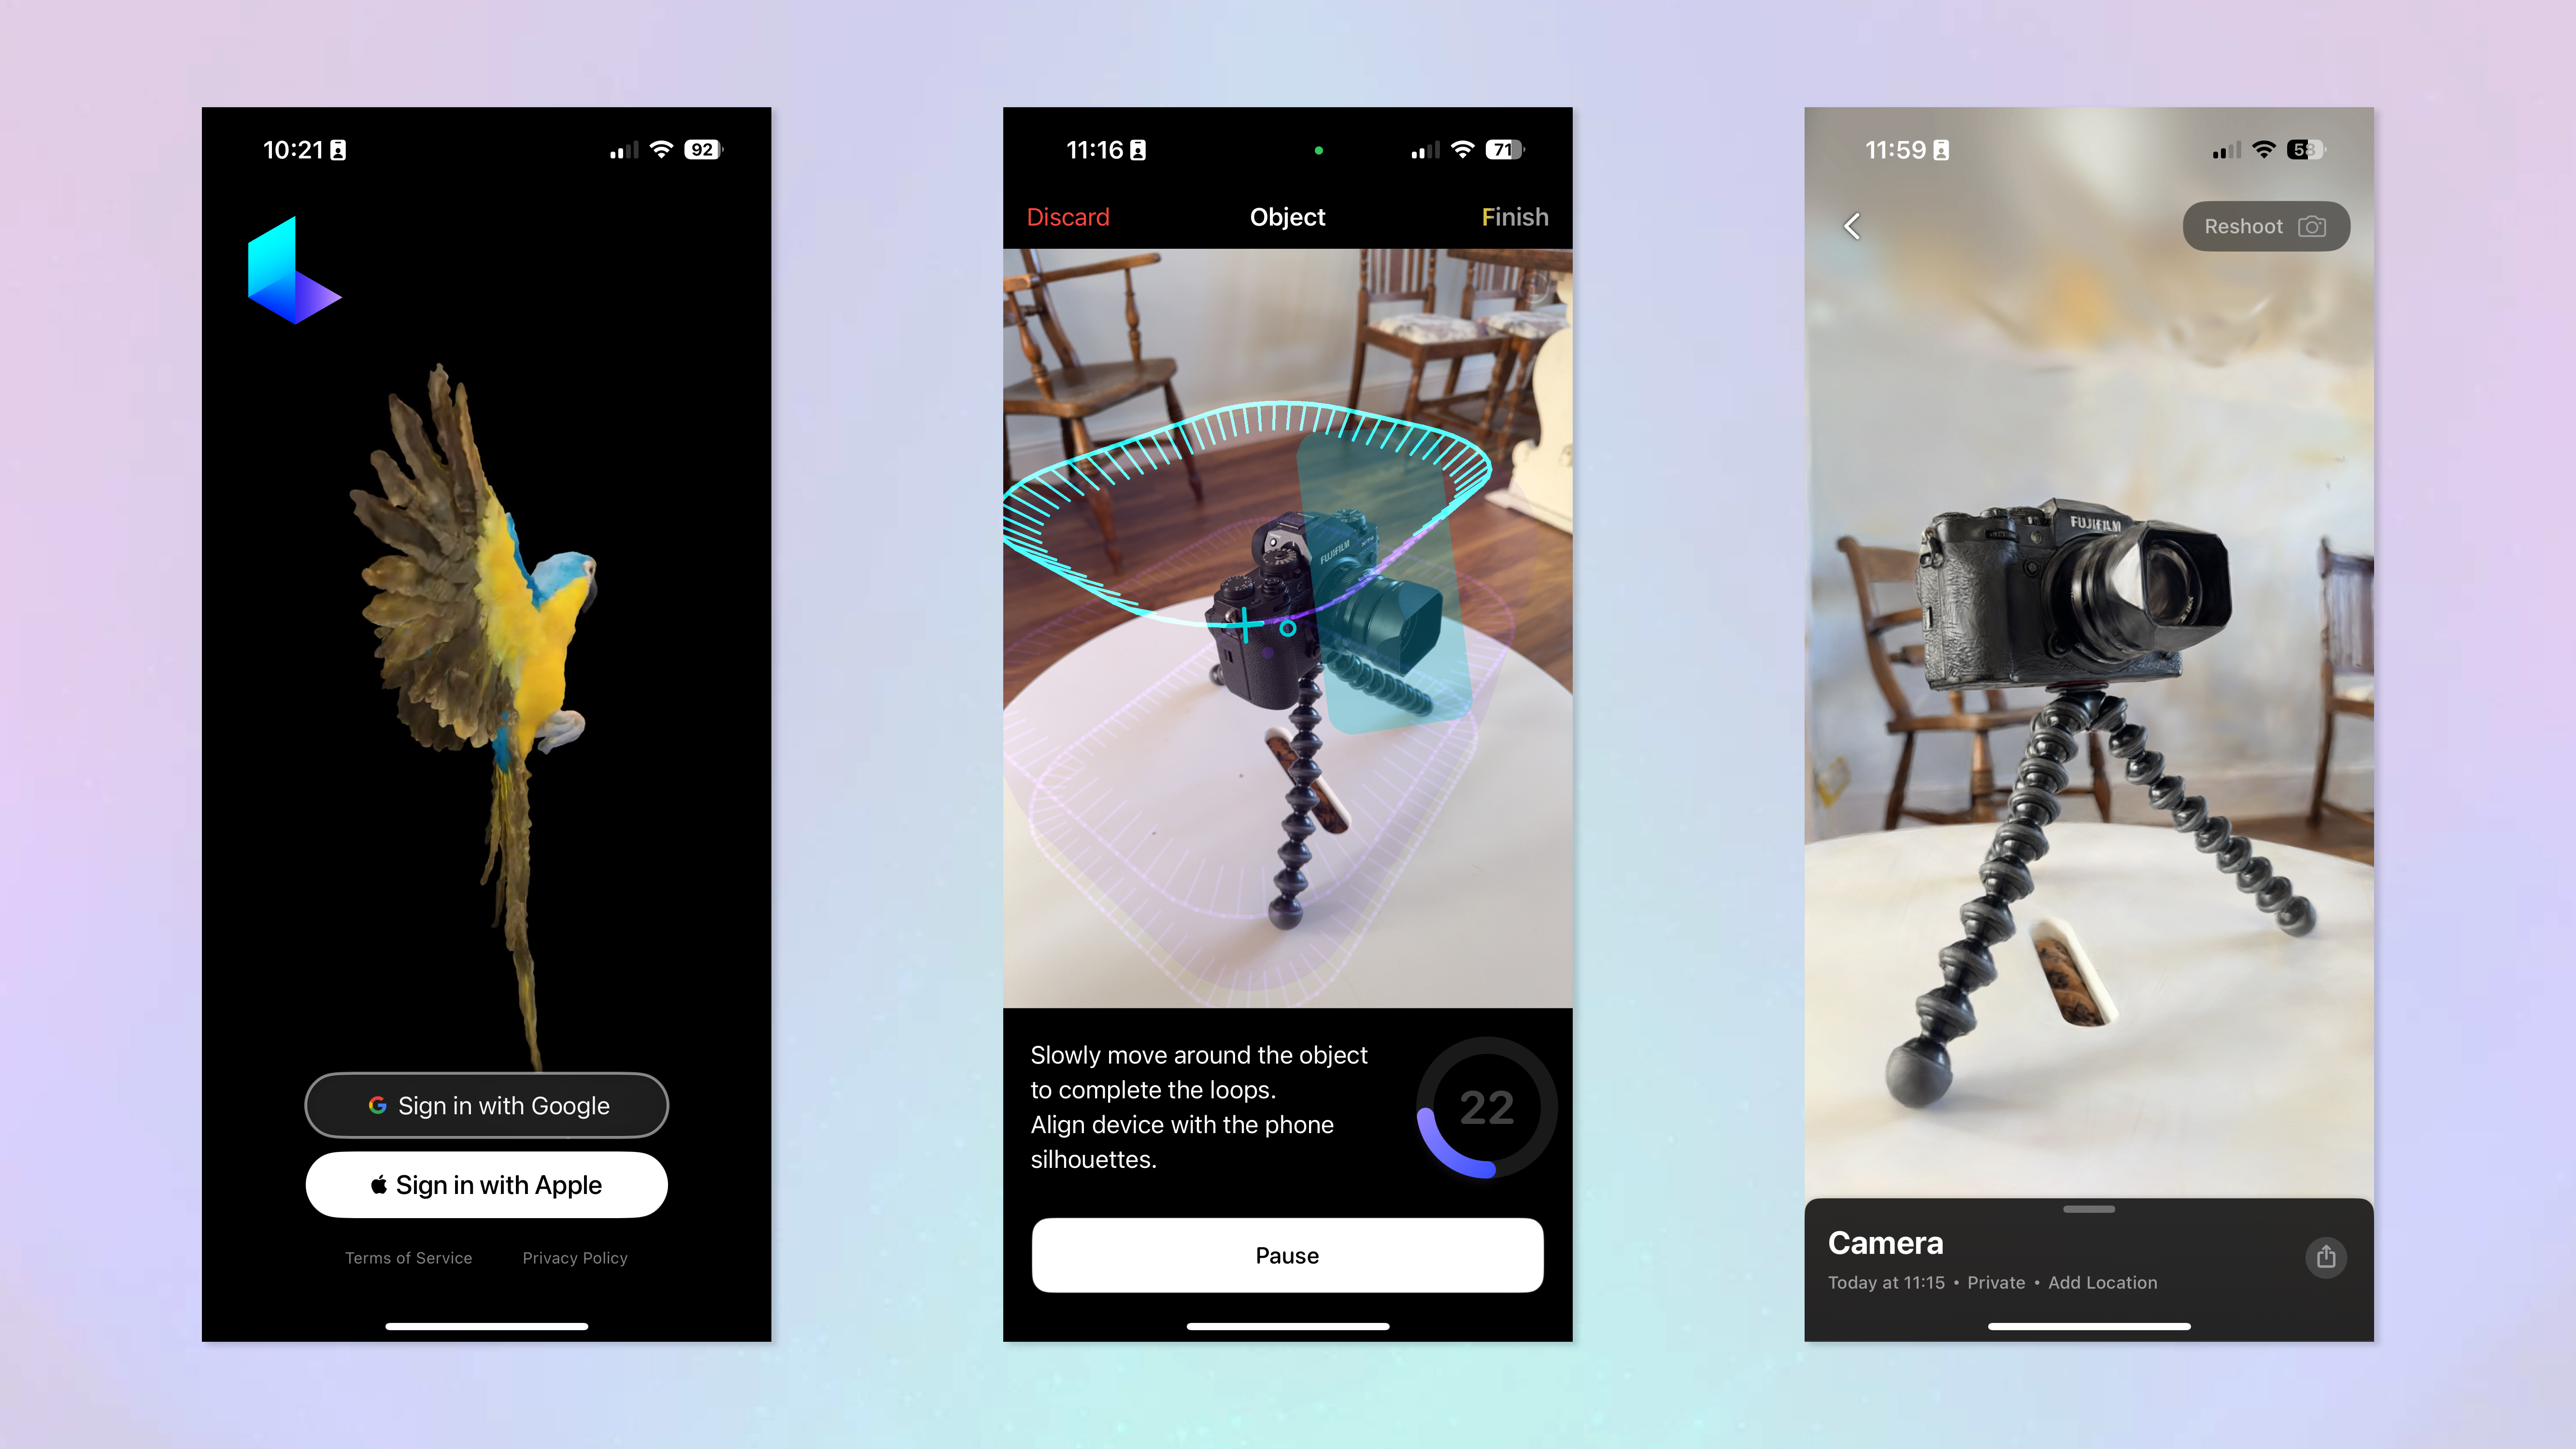
Thanks to the power of AI, you can now use your iPhone camera for 3D captures. Specifically, it's thanks to the power of Luma AI and their iPhone app.
Using Luma's AI 3D capture technology, you can capture any objects around you in full and highly detailed 3D. You can then export your capture as assets to graphical engines like Blender, Unity and Unreal, to render them in even higher detail and use how you please, including for game development.
Currently, the Luma app is available only on the Apple App Store for iOS devices, so if you're using an Android phone, you won't be able to try this out. In addition to the 3D capture technology, the app also has an AI image generation tool that will create 3D imagery based on prompts.
On iOS devices, Luma is restricted to the iPhone 12 and later. However, while you might expect a feature like this to utilize the LiDAR sensor found in Pro models, Luma doesn't use it — that means you don't need a Pro model.
Ready to get creating 3D assets of whatever you like? Here's how to use your iPhone as a 3D capture device with Luma AI.
How to use your iPhone as a 3D capture device with Luma AI
This process was demonstrated using an iPhone 15 Pro. Currently, the Luma app is only available on the Apple App Store, meaning you can't do this on an Android device.
1. Download the Luma app and sign in
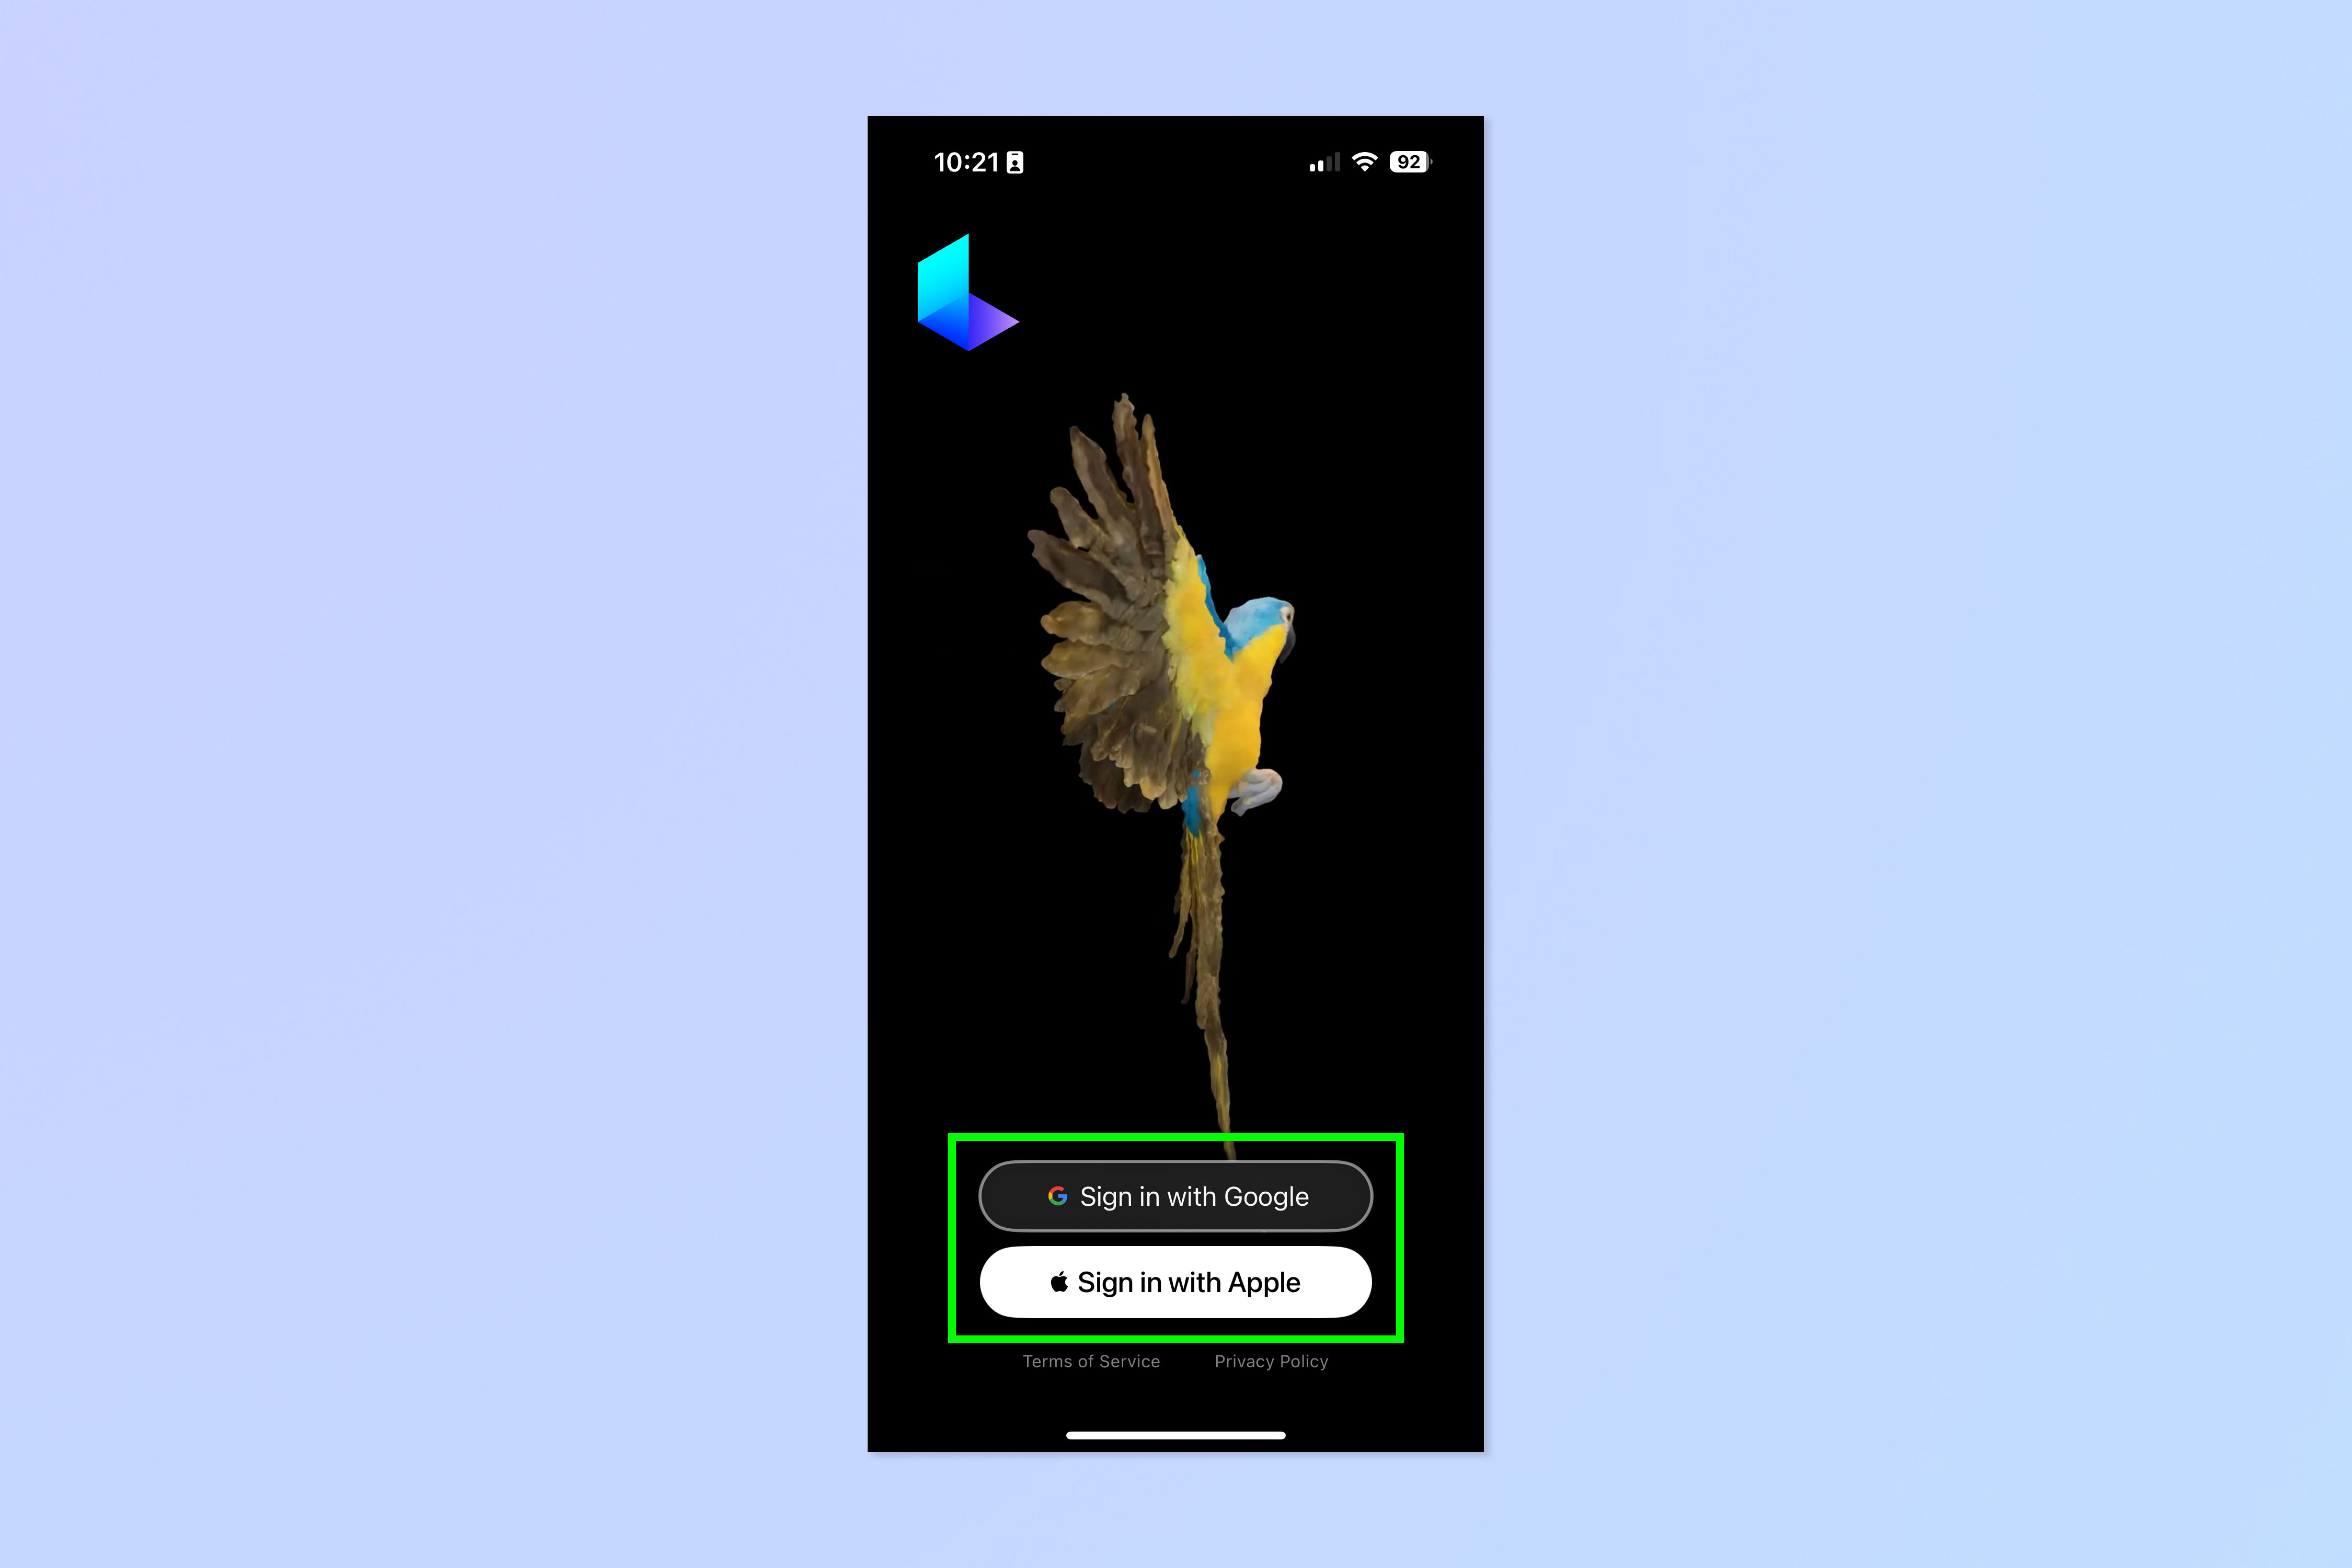
First up, download the Luma app from the App Store. Once it's installed, open the app and sign in with a Google or Apple account.
2. Tap the plus symbol
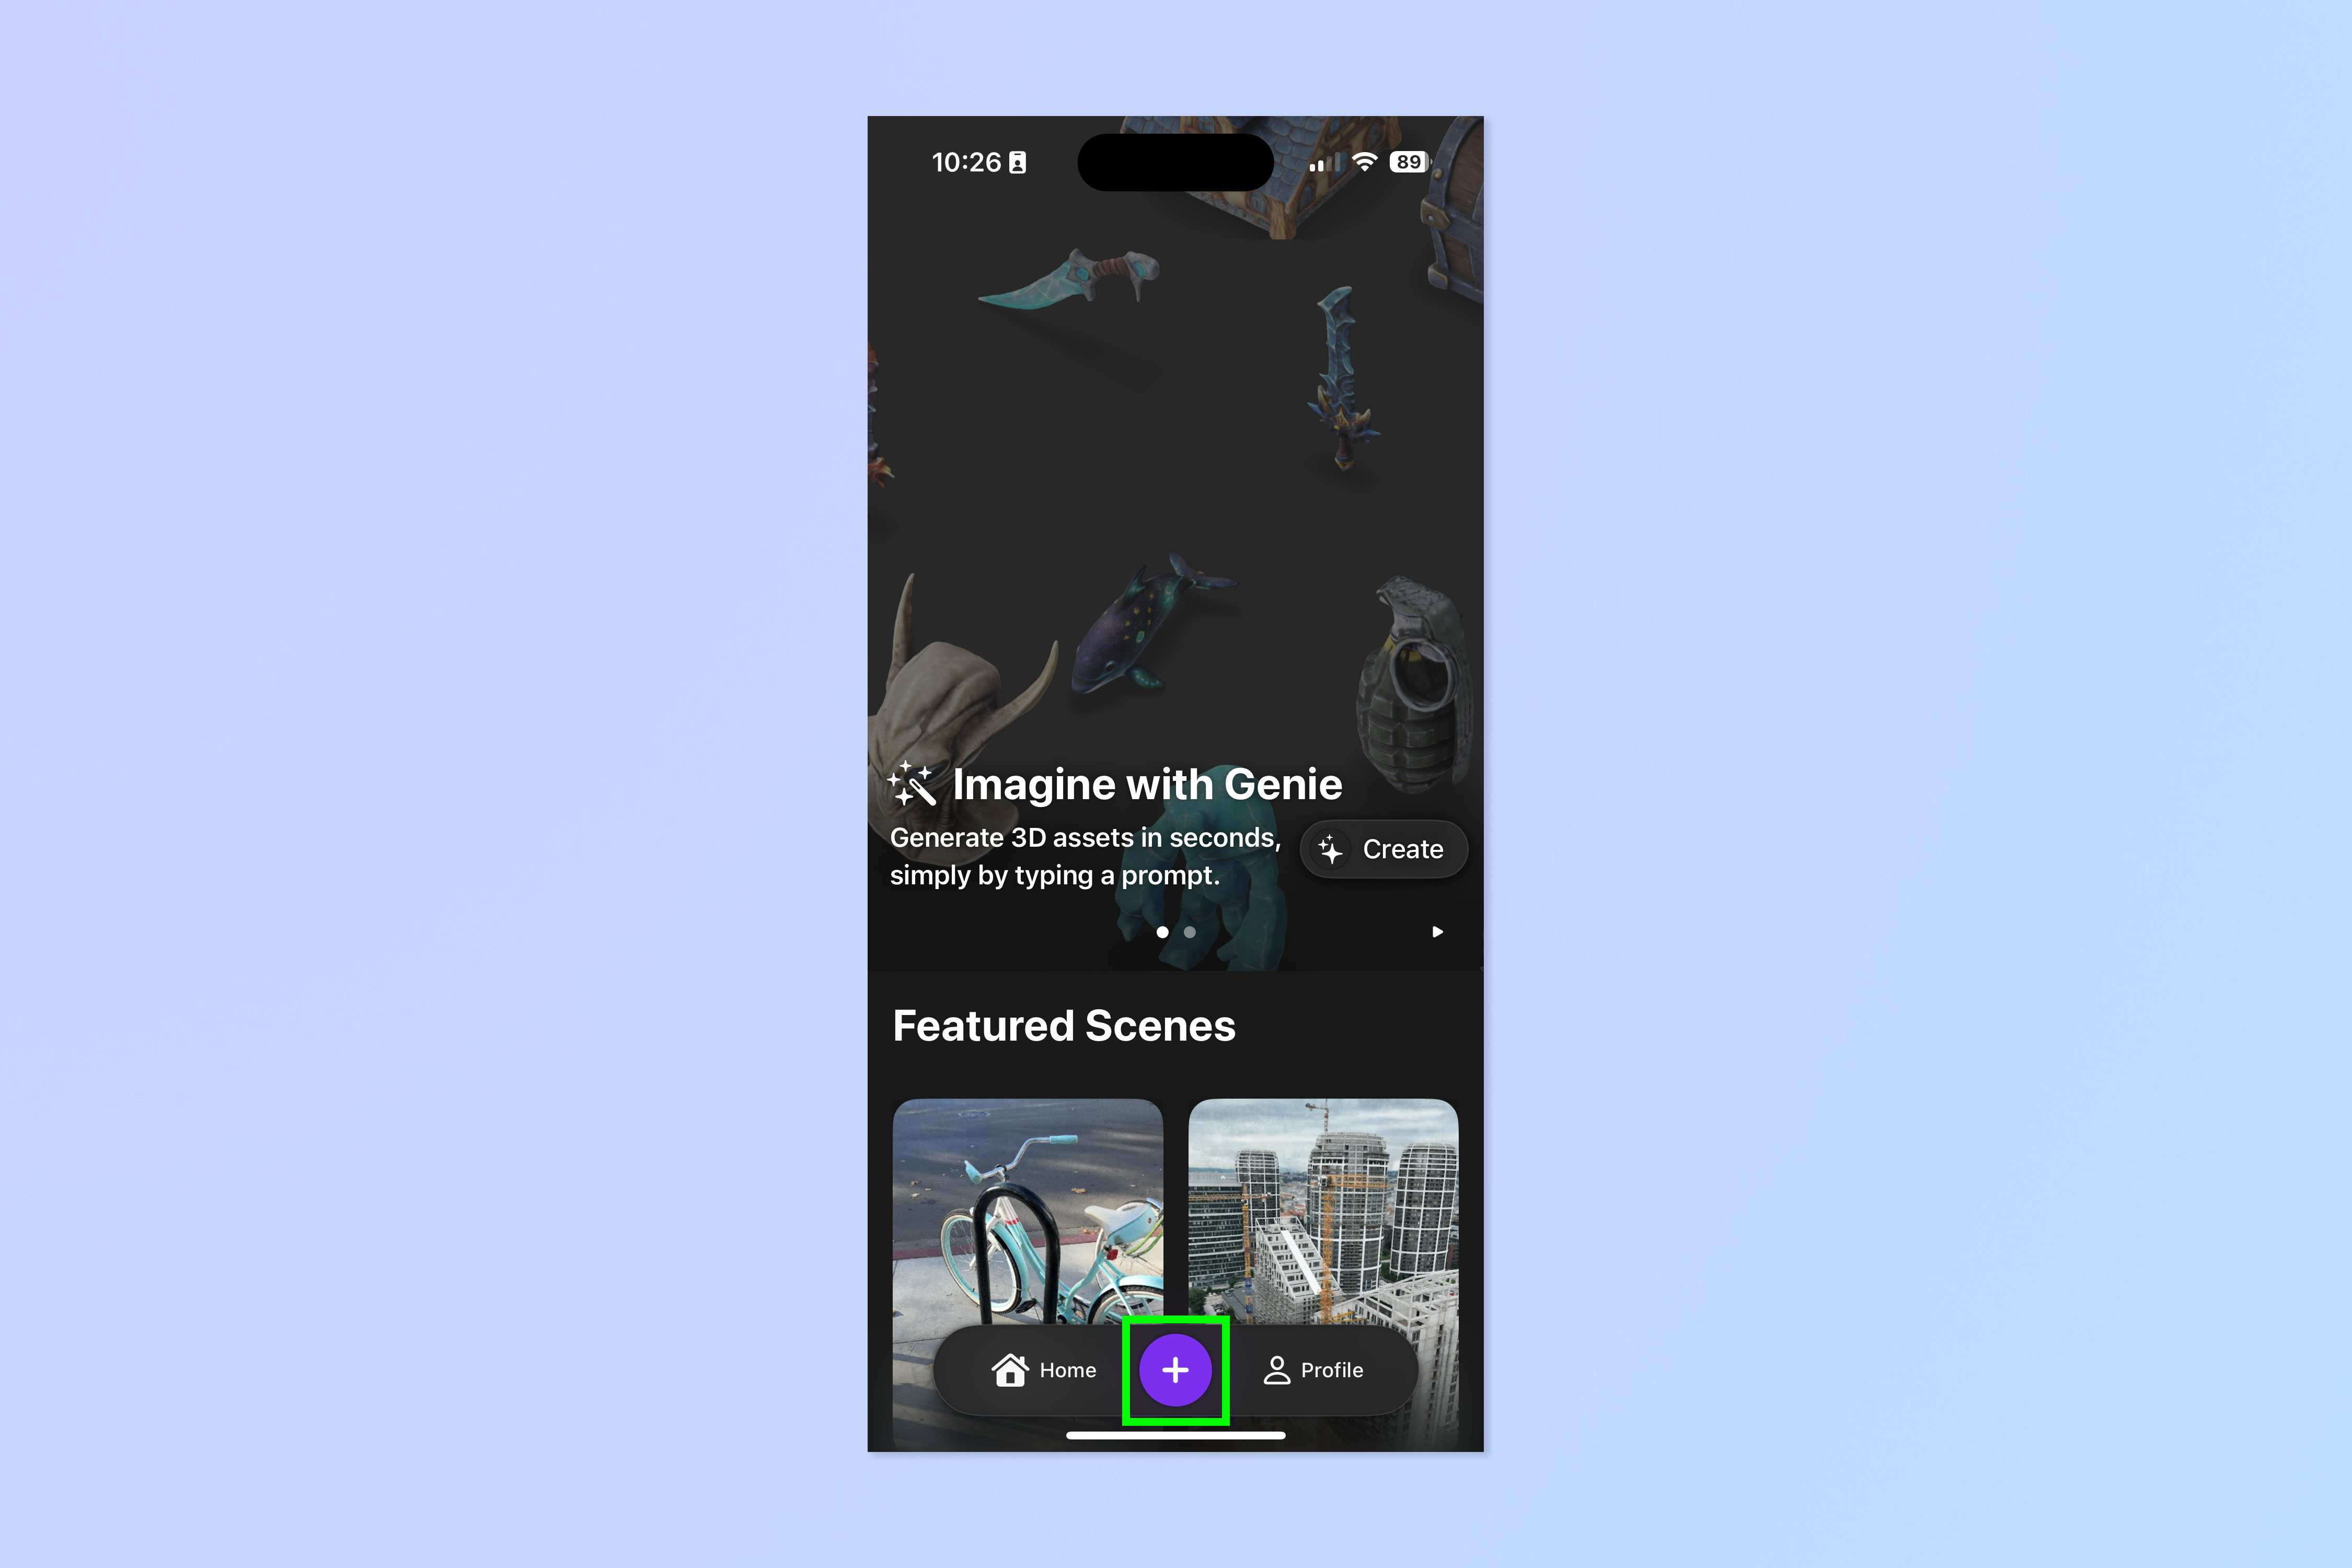
To get started with a new 3D capture, tap the plus symbol. You will need to grant the app access to your camera before you can actually start — if you haven't already.
3. Centre the camera on your object from two sides
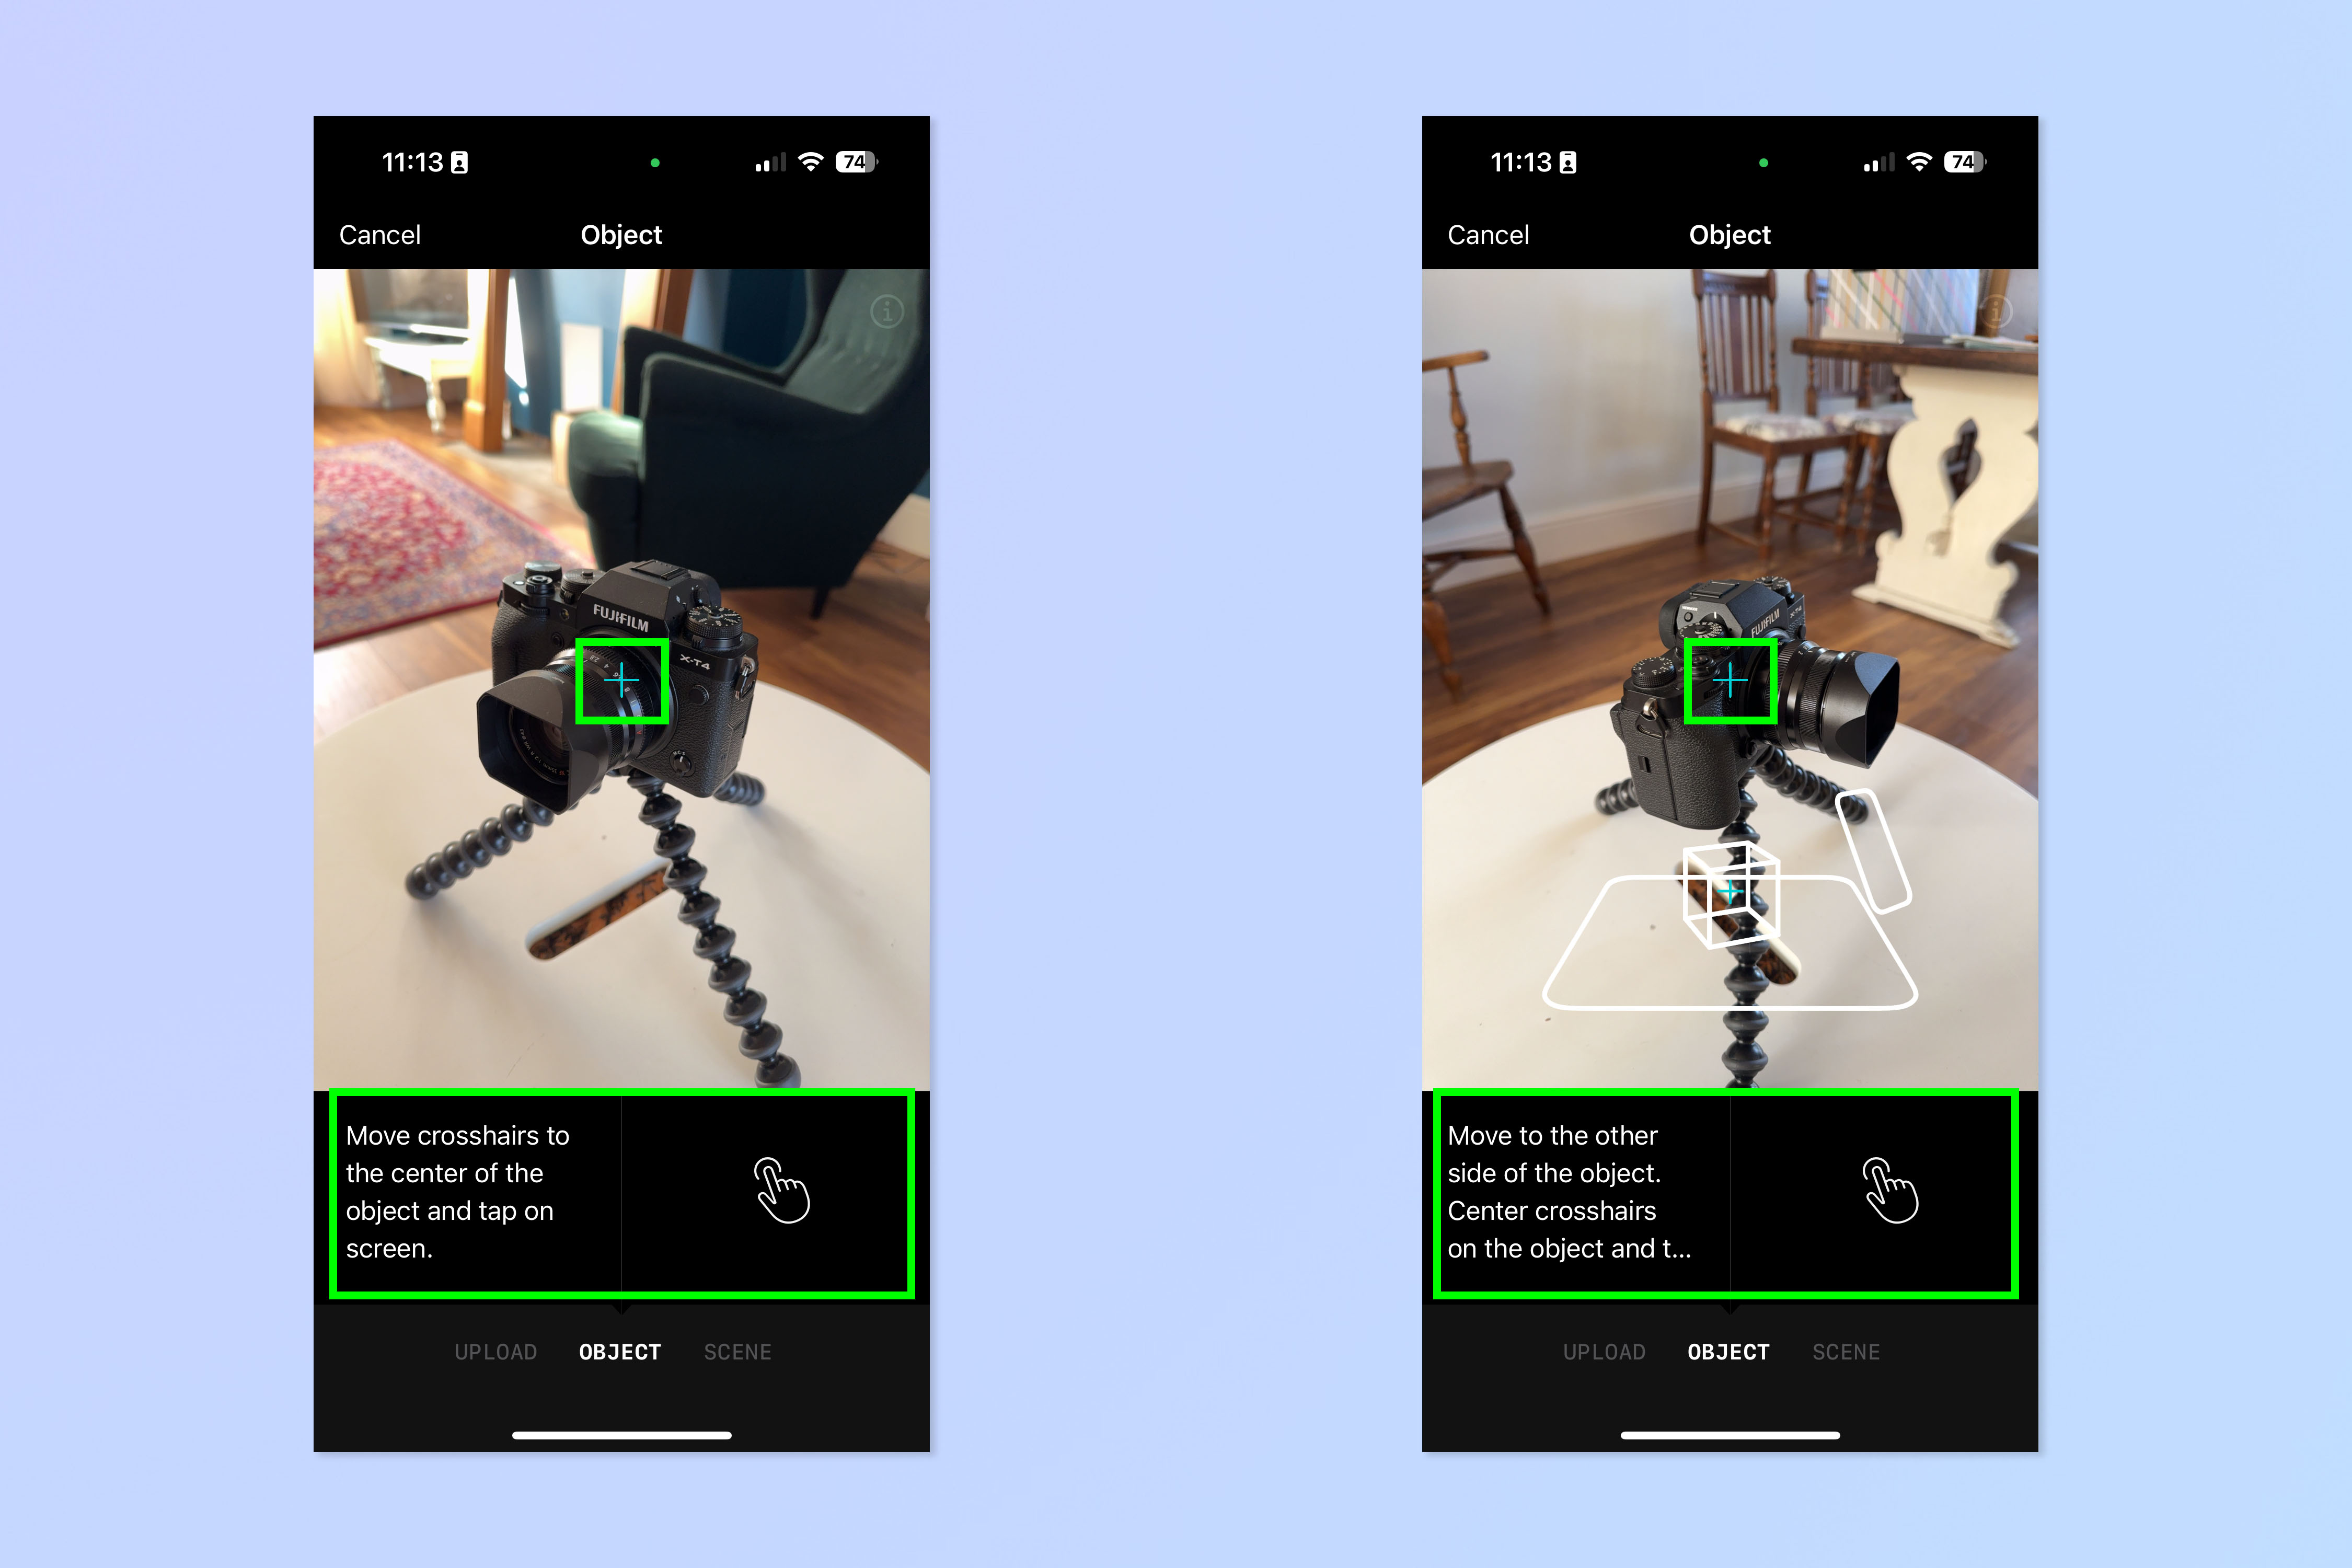
First, line up the crosshair with the centre of your object, then tap the screen. Now move to the other side of your object and repeat. You can look at the bottom of the screen for instructions. When you've tapped twice, you'll automatically be taken to the next step.
4. Place a capture box around your subject
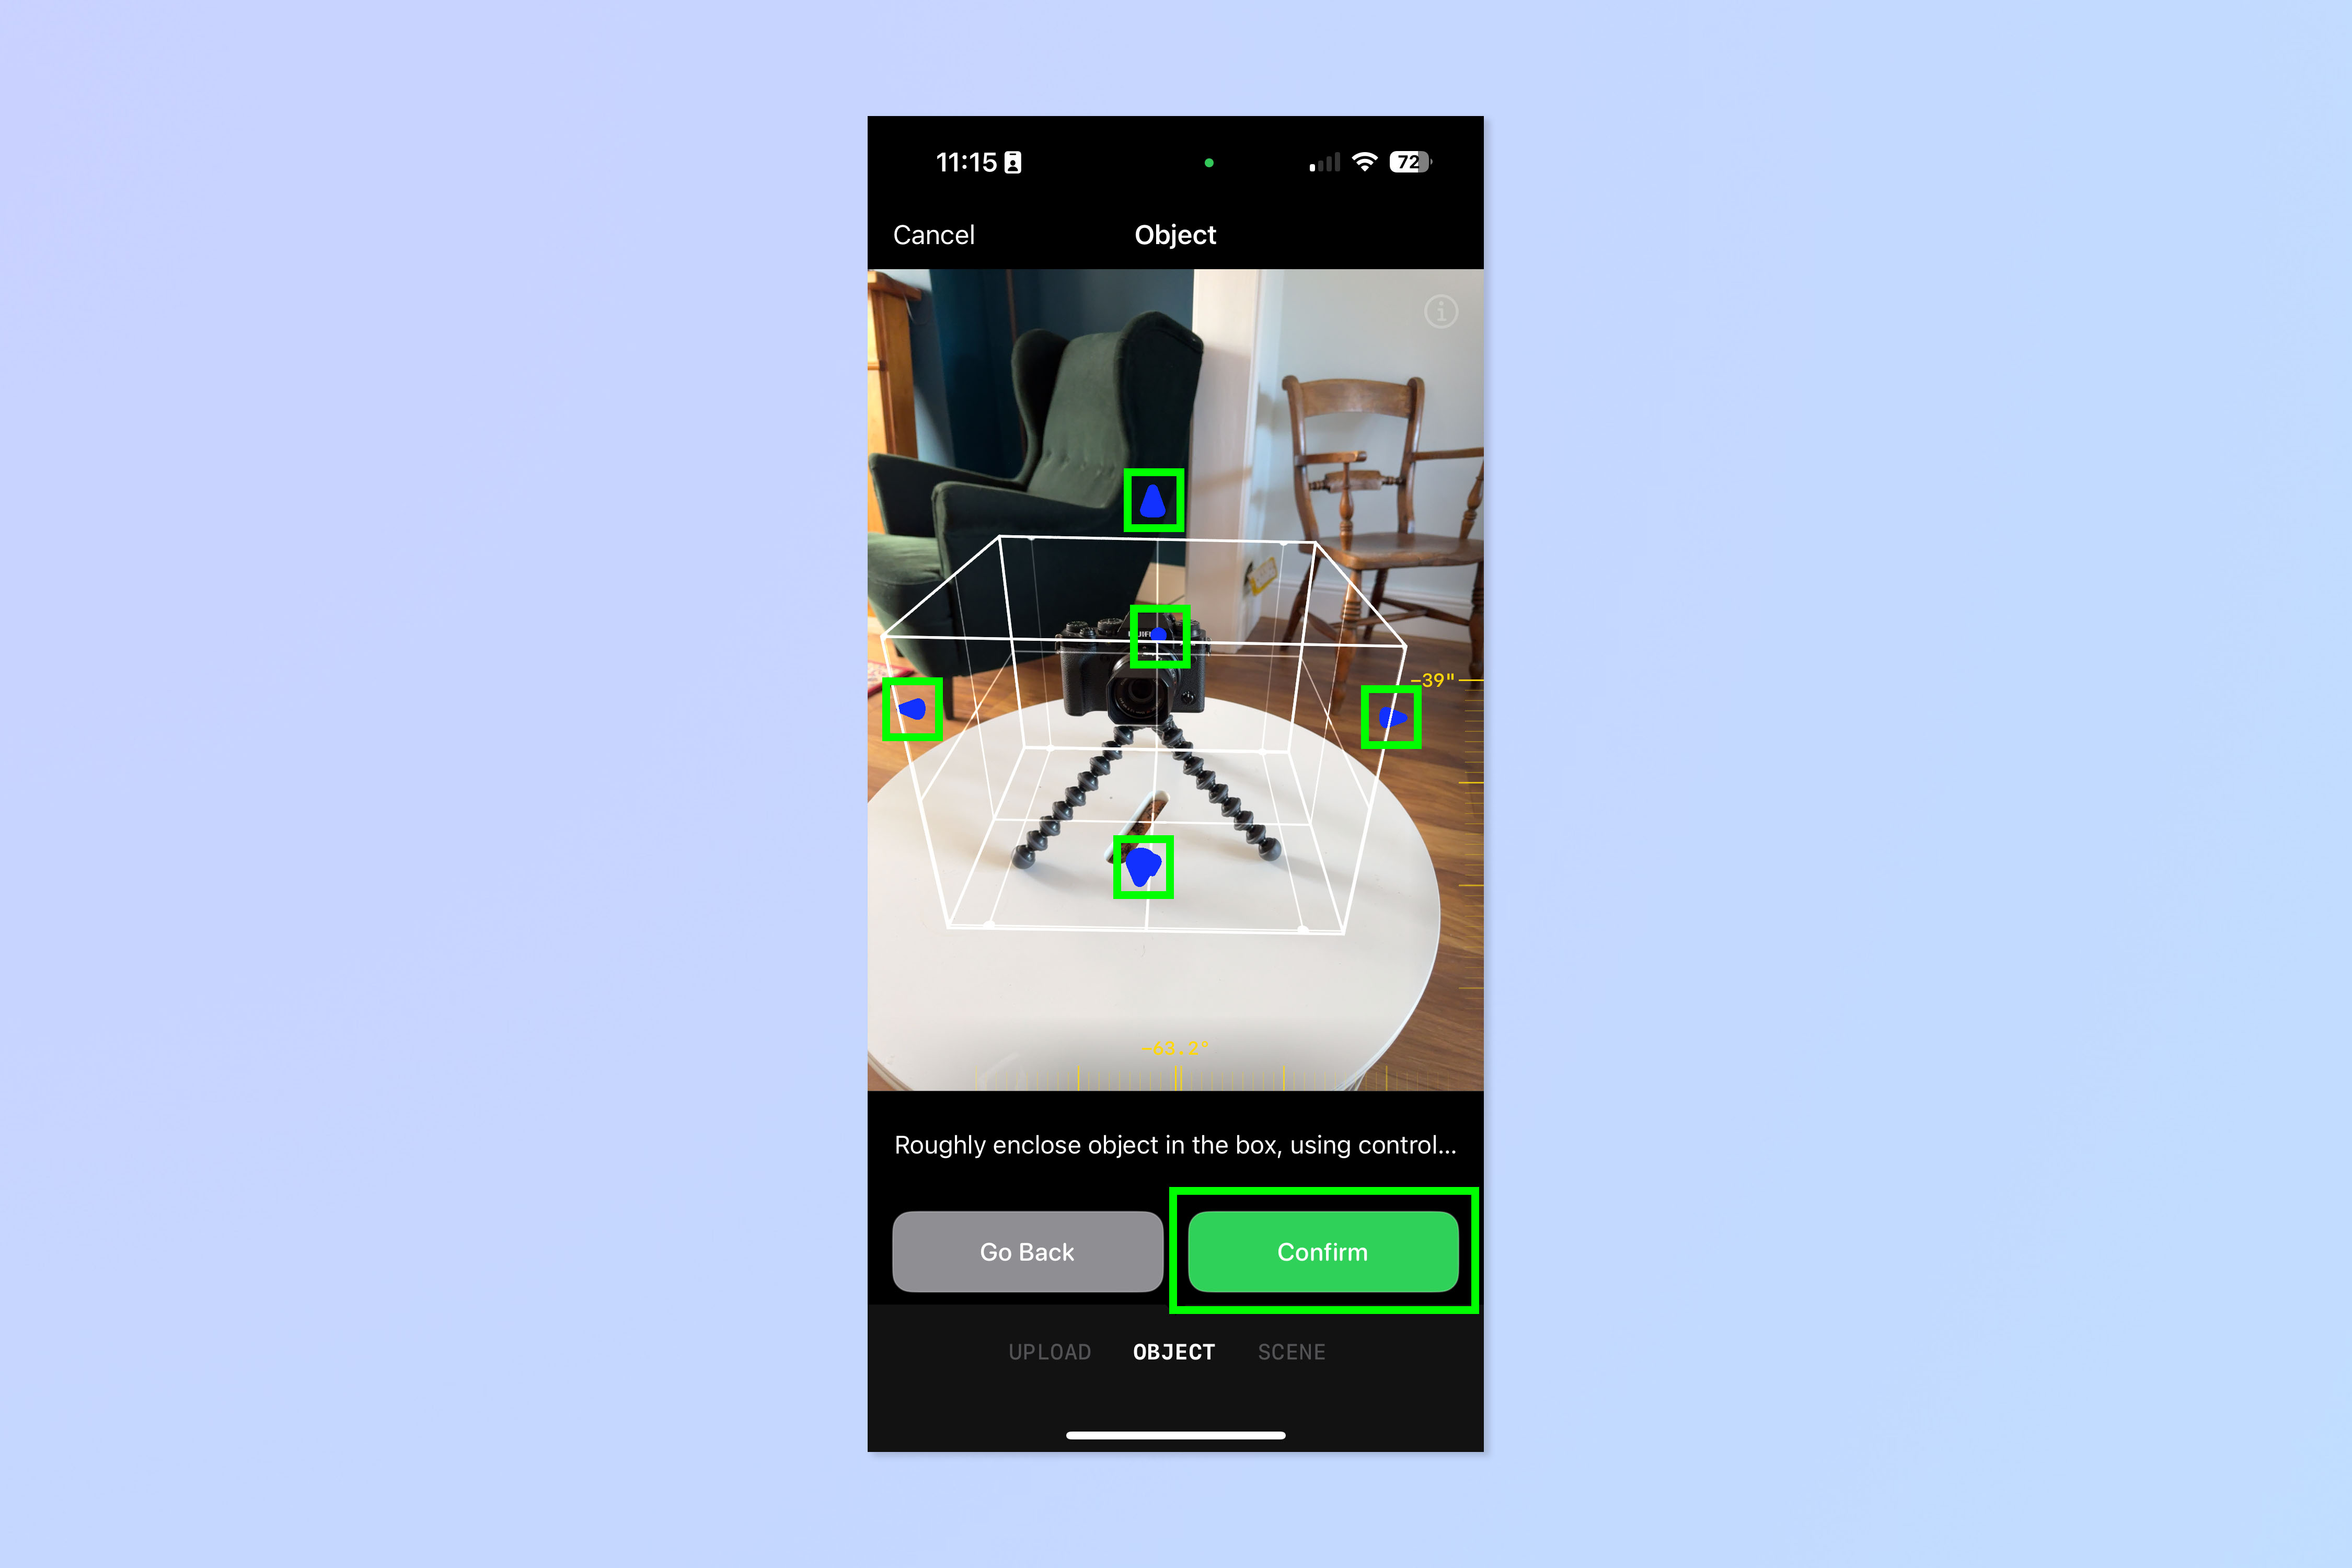
You now need to position a capture box around your subject, to tell the software which part of the scene is the primary object you want to capture. Drag the blue arrows to position the box roughly around your object — ensure everything you want to capture is inside. It helps to move around your object to ensure the box covers everything (this can be difficult to tell from a single angle). Tap Capture when you're happy with the box and ready to proceed.
5. Scan around your object from 3 levels
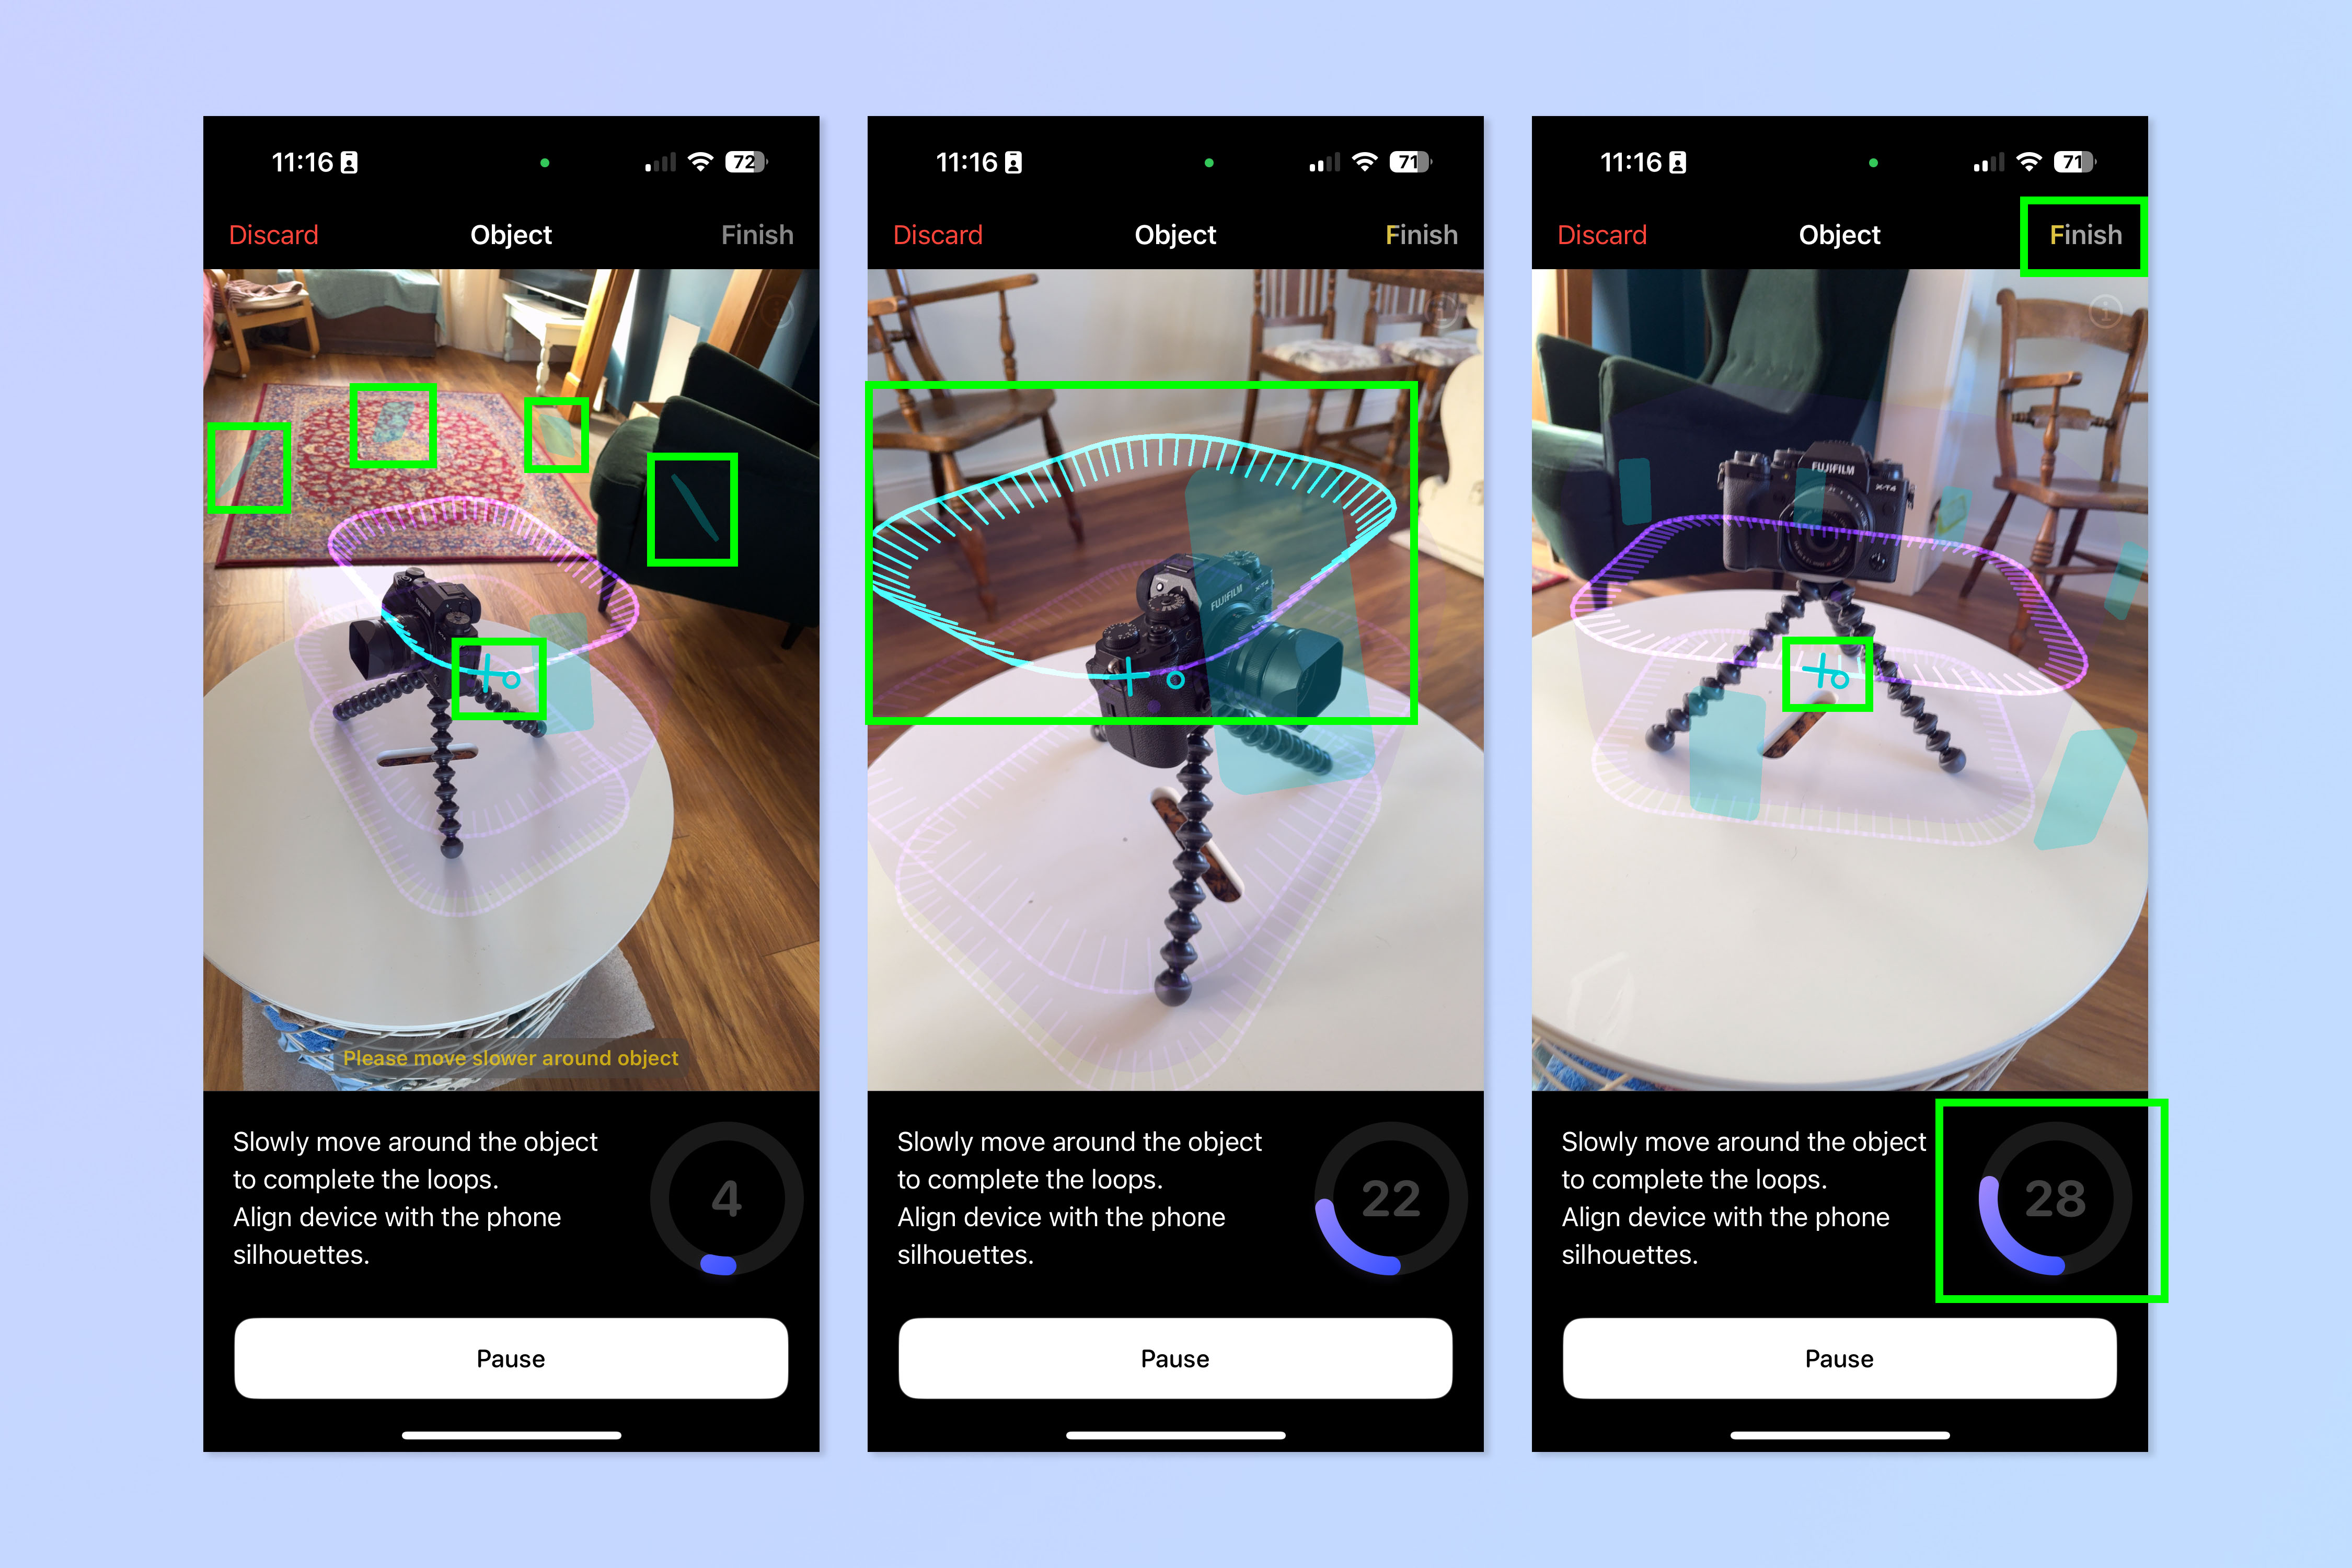
This part can take a little bit of practice. You now need to scan around your object at 3 levels. You will need a decent amount of space around your subject to do this, as the camera needs to be a certain distance away. Larger objects like chairs may need a couple of meters space.
Start at the top and aim to align the centre crosshair and circular reticle. Then follow the purple line with the crosshair and reticle aligned — you should see the line start to turn teal as the object has been scanned from that angle.
Notice the teal rectangles — these tell you the angle and distance to capture from, but they can be confusing, as they suggest you only need to capture from those points. Use them as a guide for height, distance and angle, but the main thing is following the purple line and crosshair with the centre reticle. If you're too close, the reticle will turn yellow and tell you to move away.
Once you have mostly or fully scanned one level, move to the next level using the line as a guide and the blue rectangles for distance/height, then repeat.
Aim to get the circular purple progress graphic at the bottom as close to 100 as possible. You can tap finish without getting to 100, but the less you scam, the less accurate your render will be. When you get near enough to 100, the scan will automatically close (I got to around 97).
6. Upload your Capture
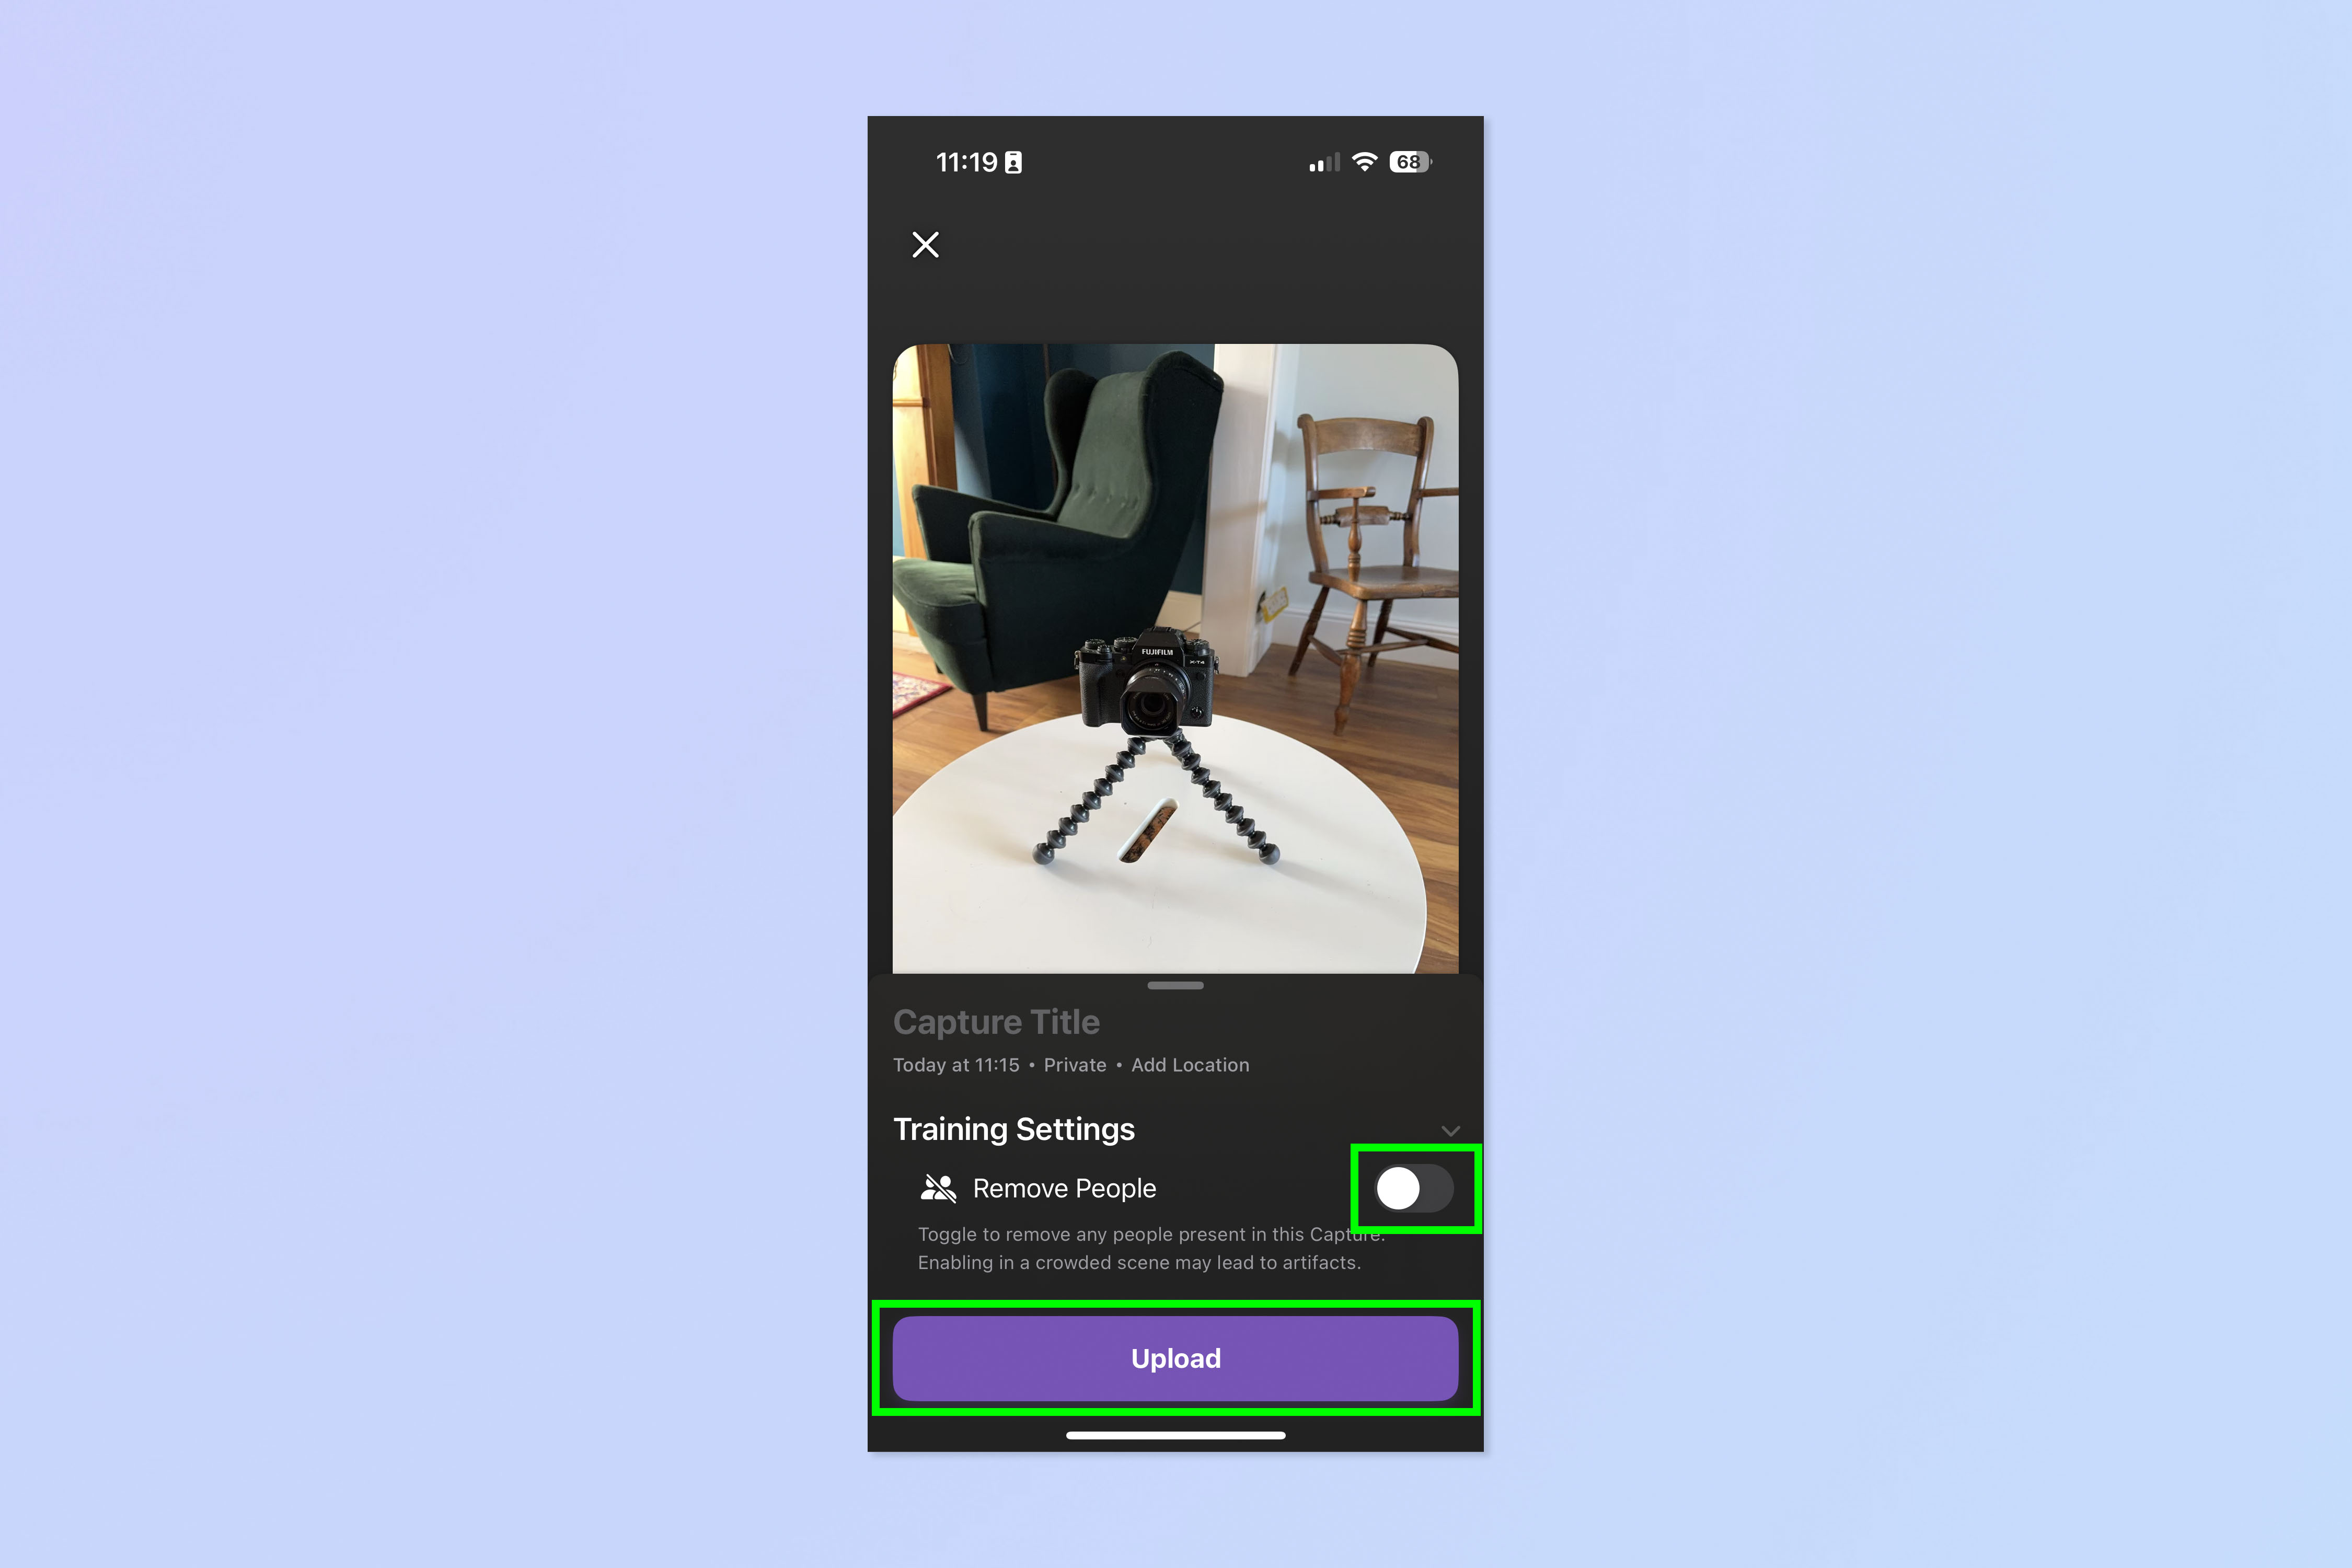
Now tap Upload. Here you can hit the toggle to remove people if there are any people in your scene that don't want to be identified.
7. Name your capture
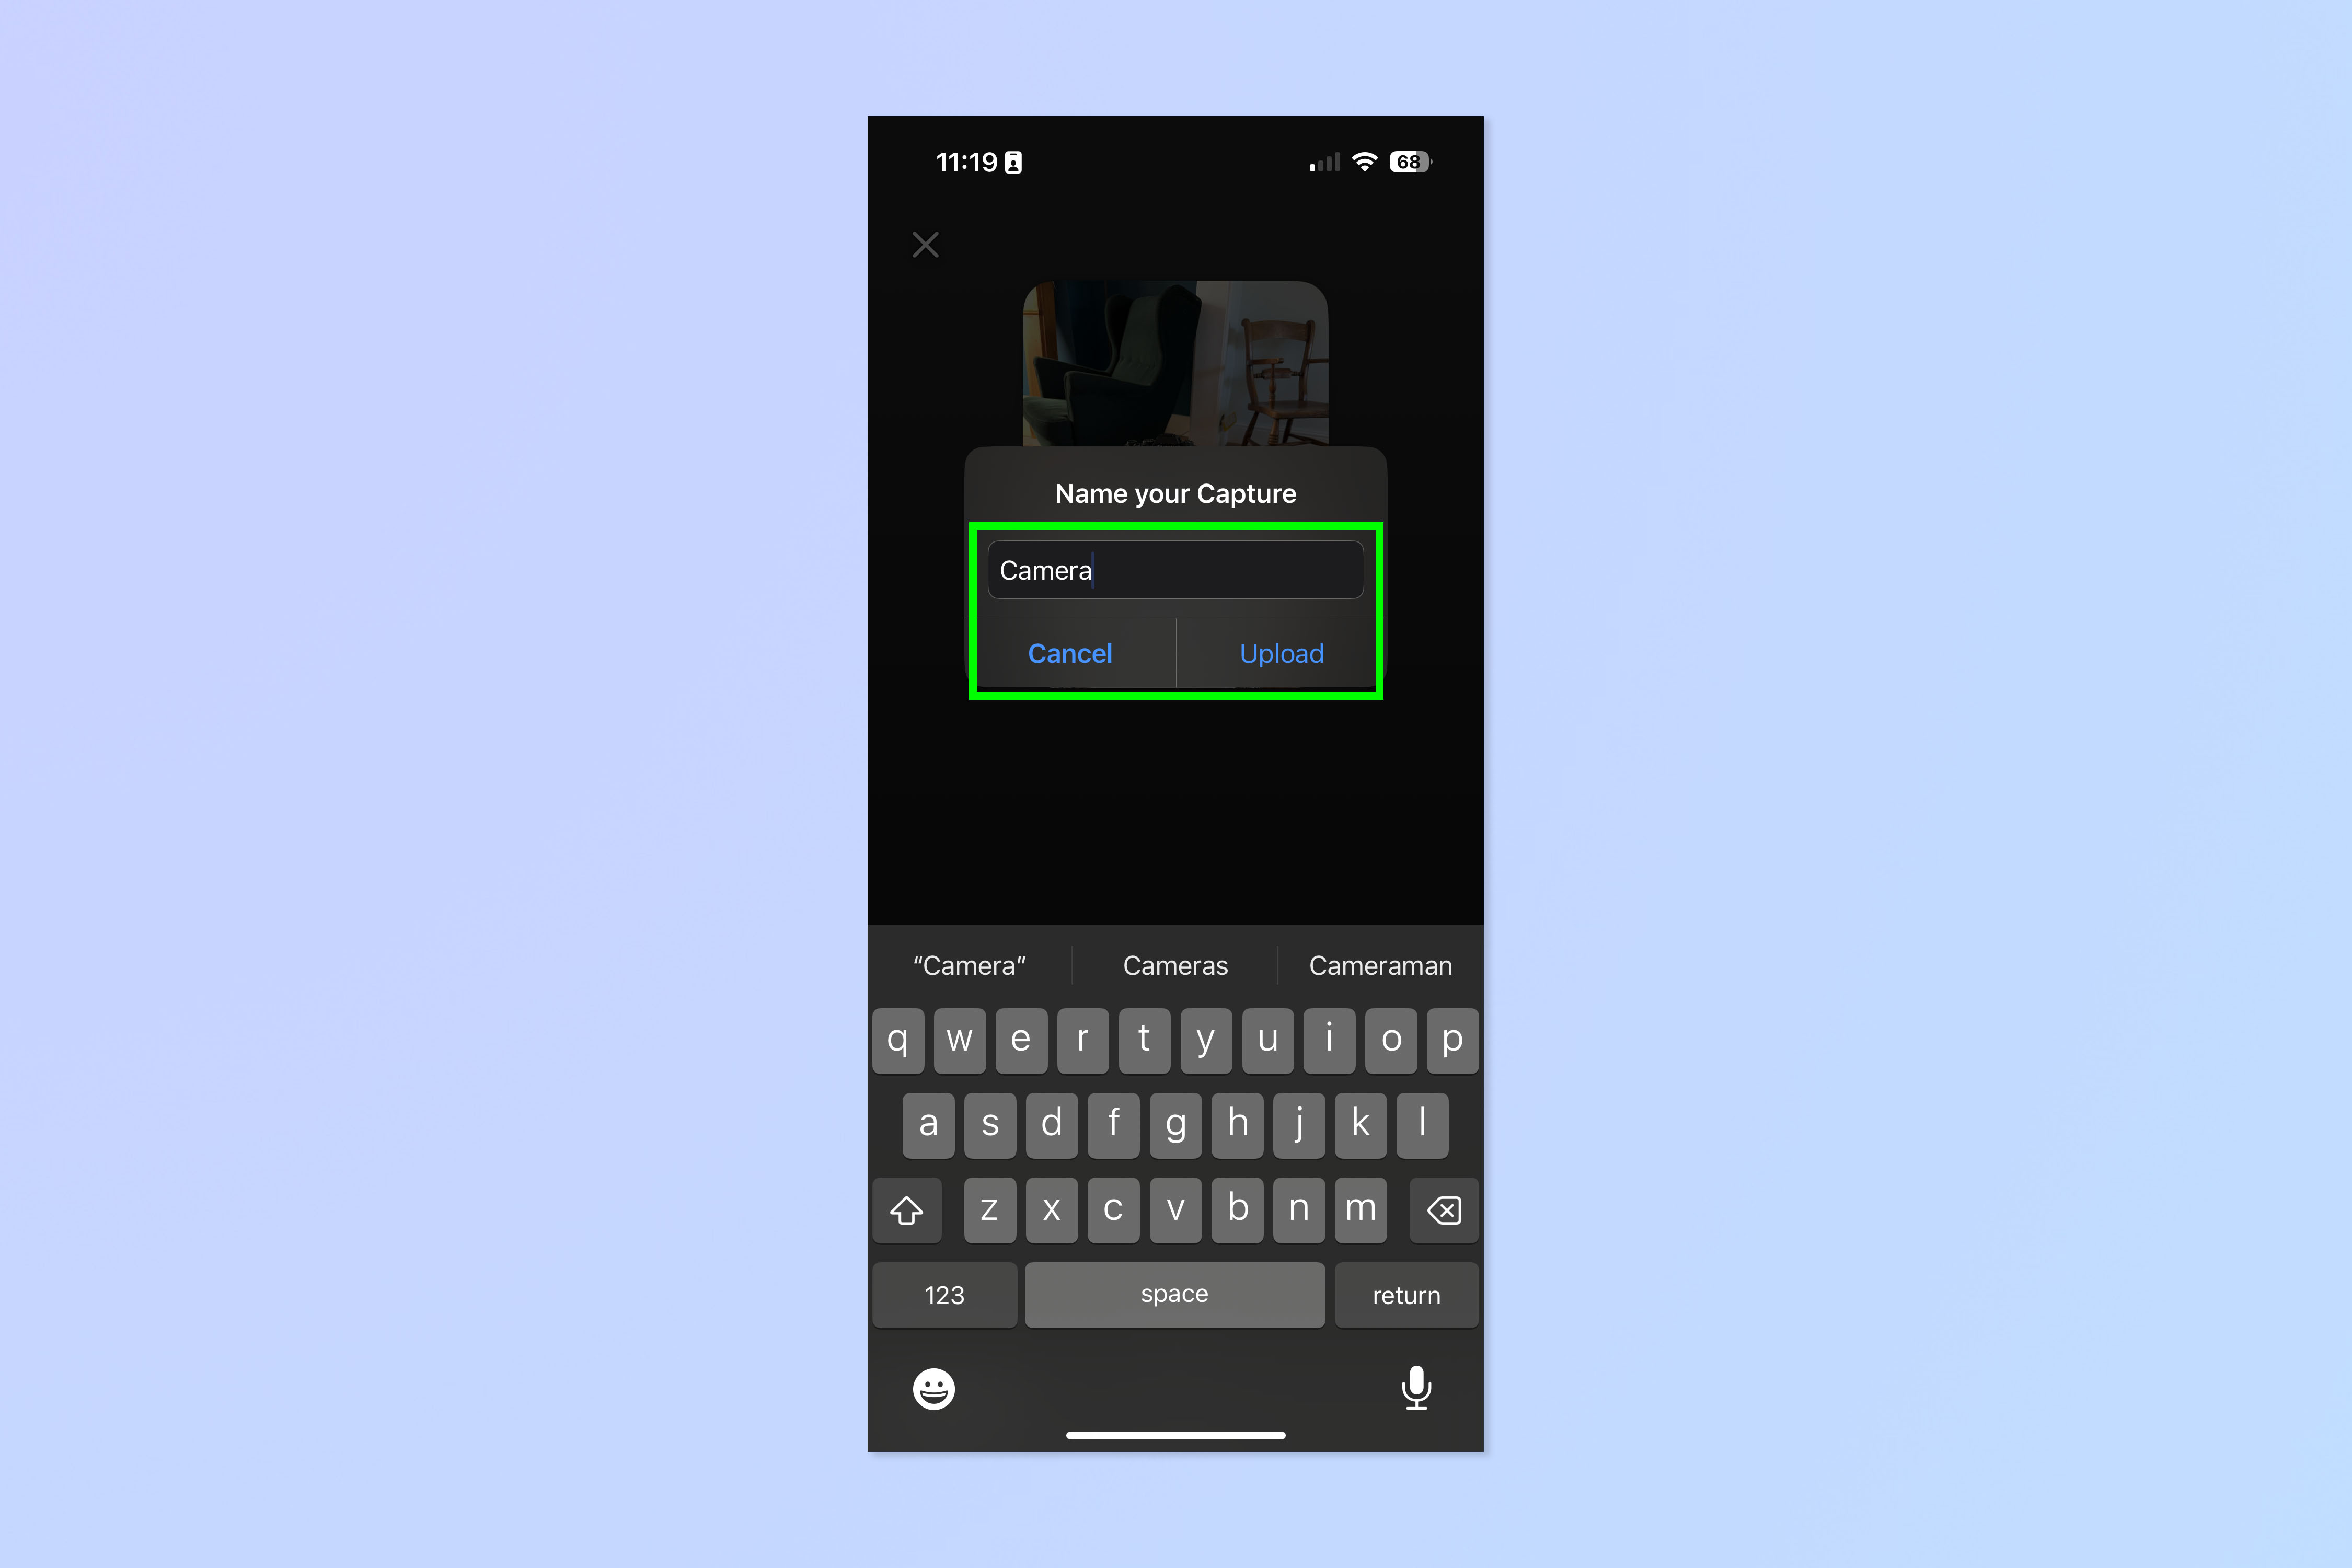
Name your capture when prompted and tap Upload when happy. If this is your first capture, the app will ask you to allow notifications so it can tell you when the capture is complete — choose whether you want notifications.
8. Adjust privacy settings while the capture processes
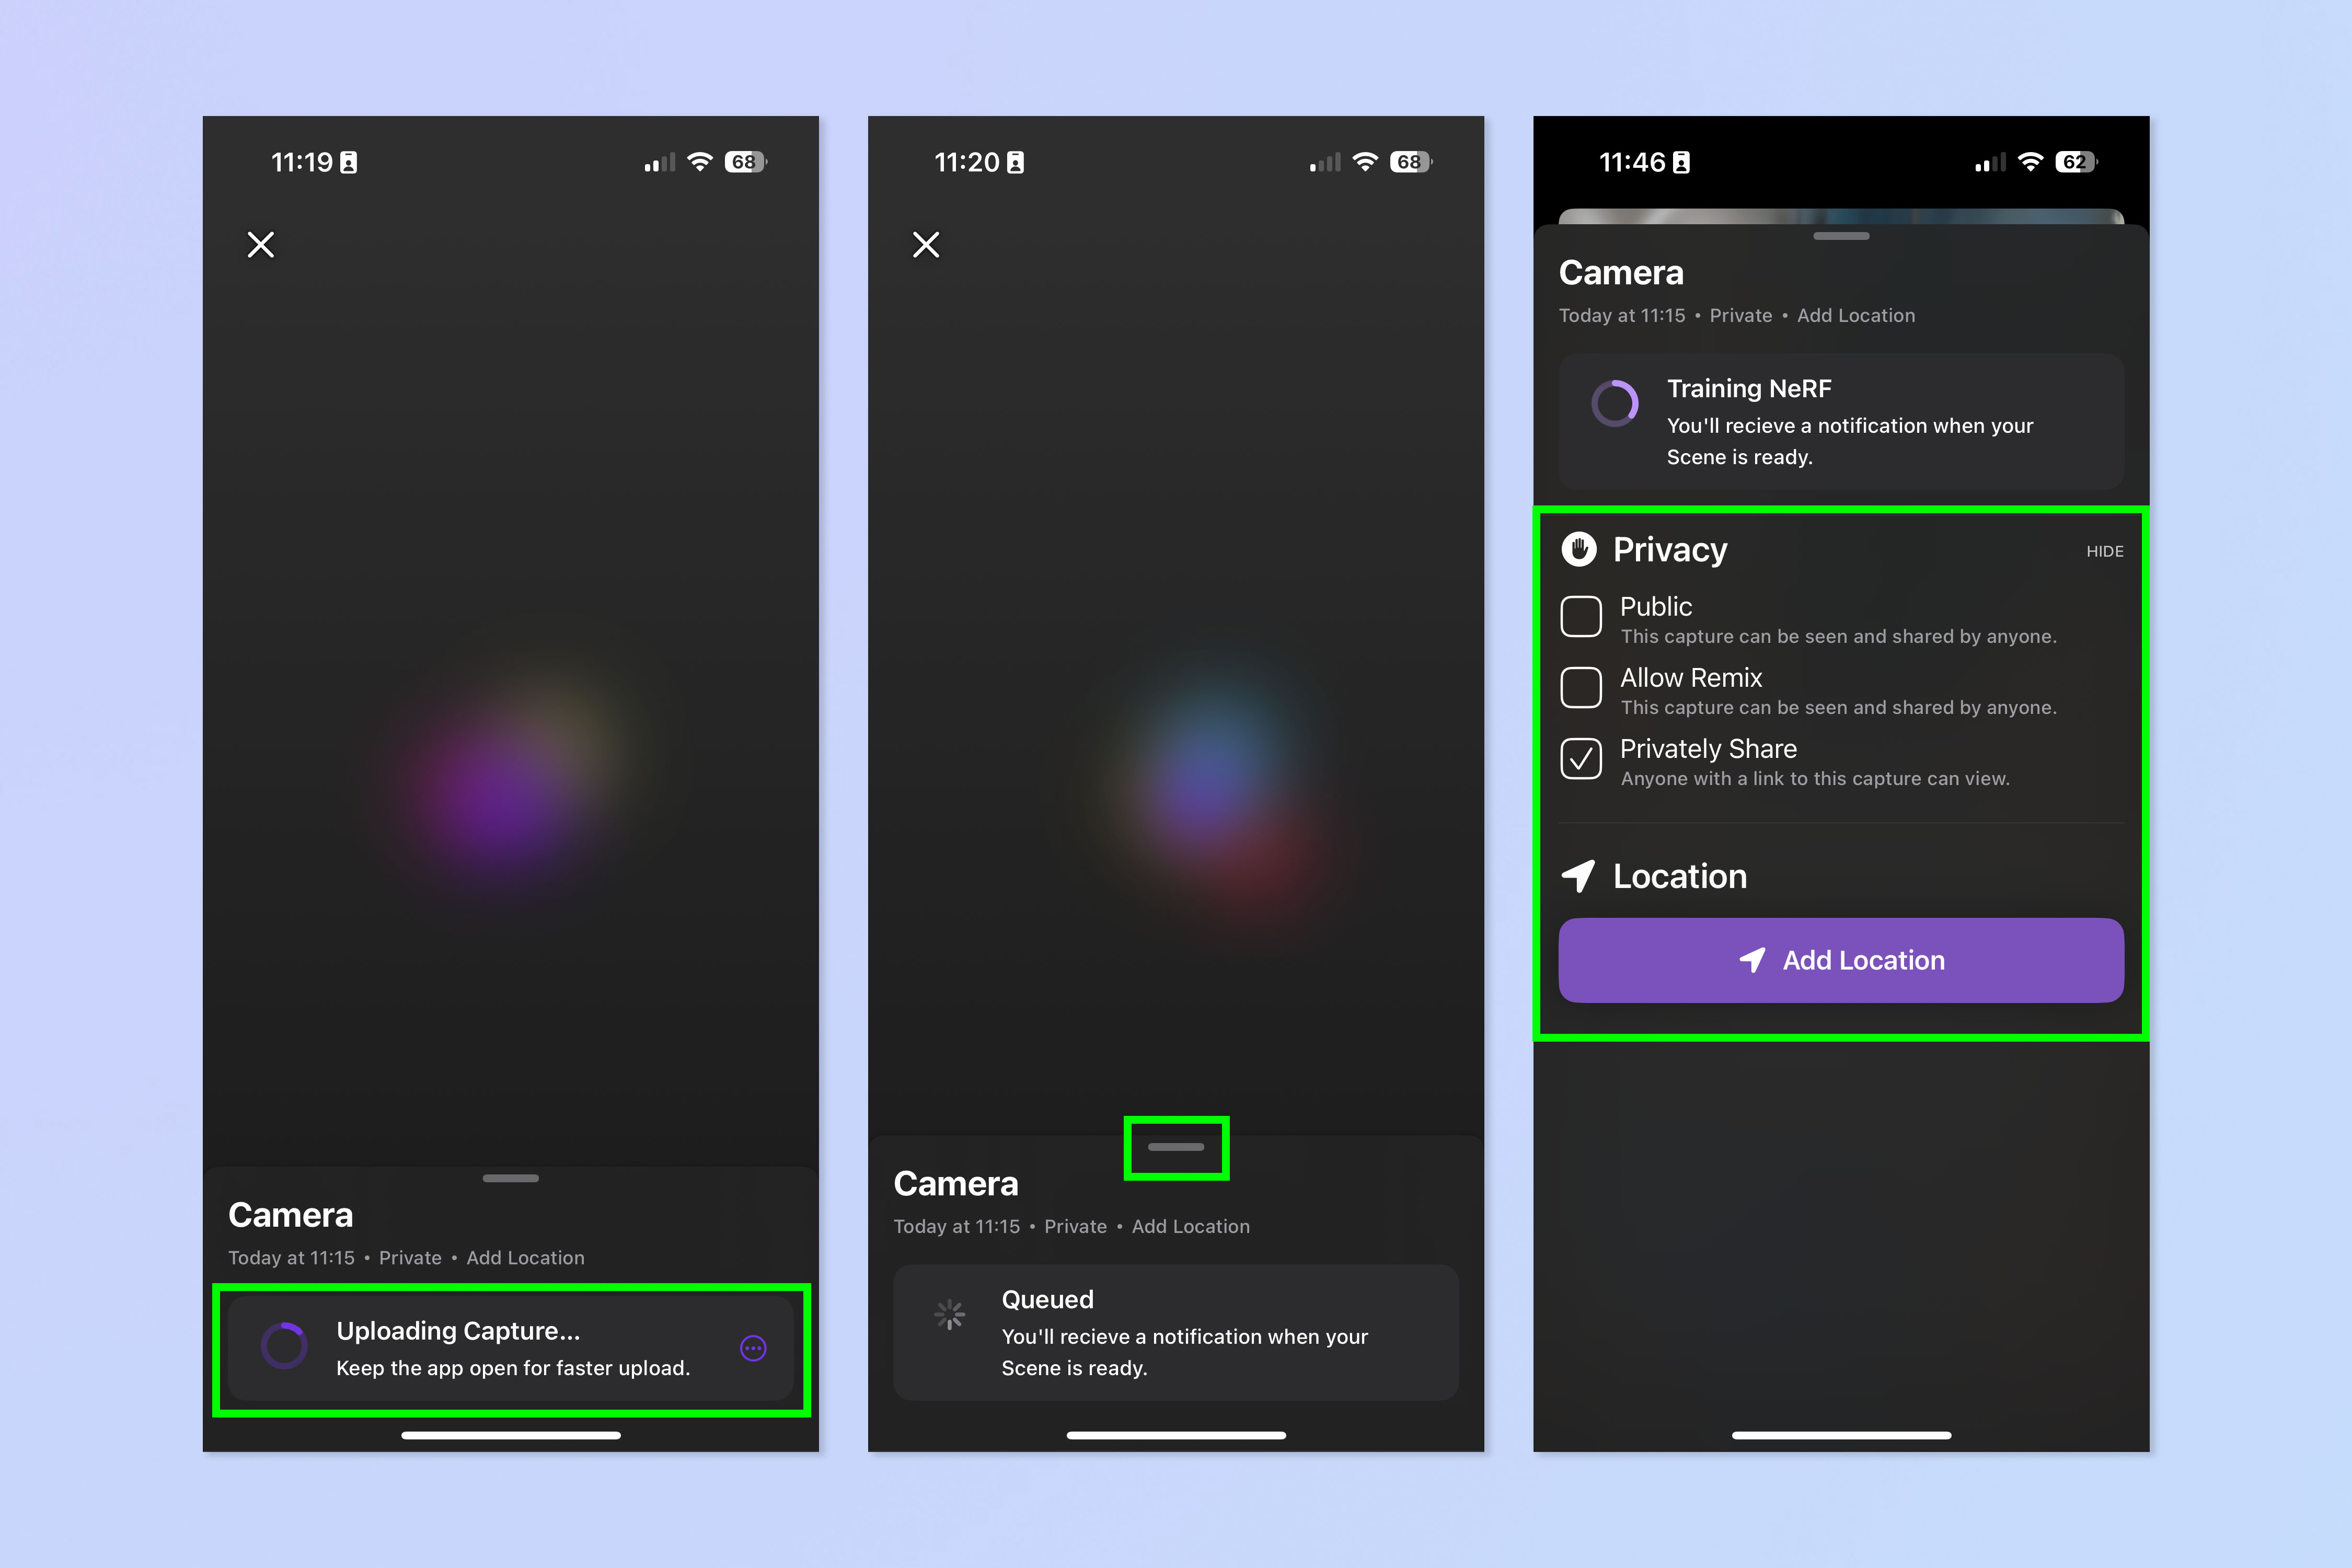
Now you need to wait while your capture processes. This took around 30 minutes for me. The app advises that this will happen quicker if you keep it open, but you can go about your day while waiting, and either check back once in a while or tap the notification you get when the capture is done (if you allowed notifications).
While you wait, swipe up on the bottom panel, then adjust your privacy settings according to preference.
9. View and export your capture
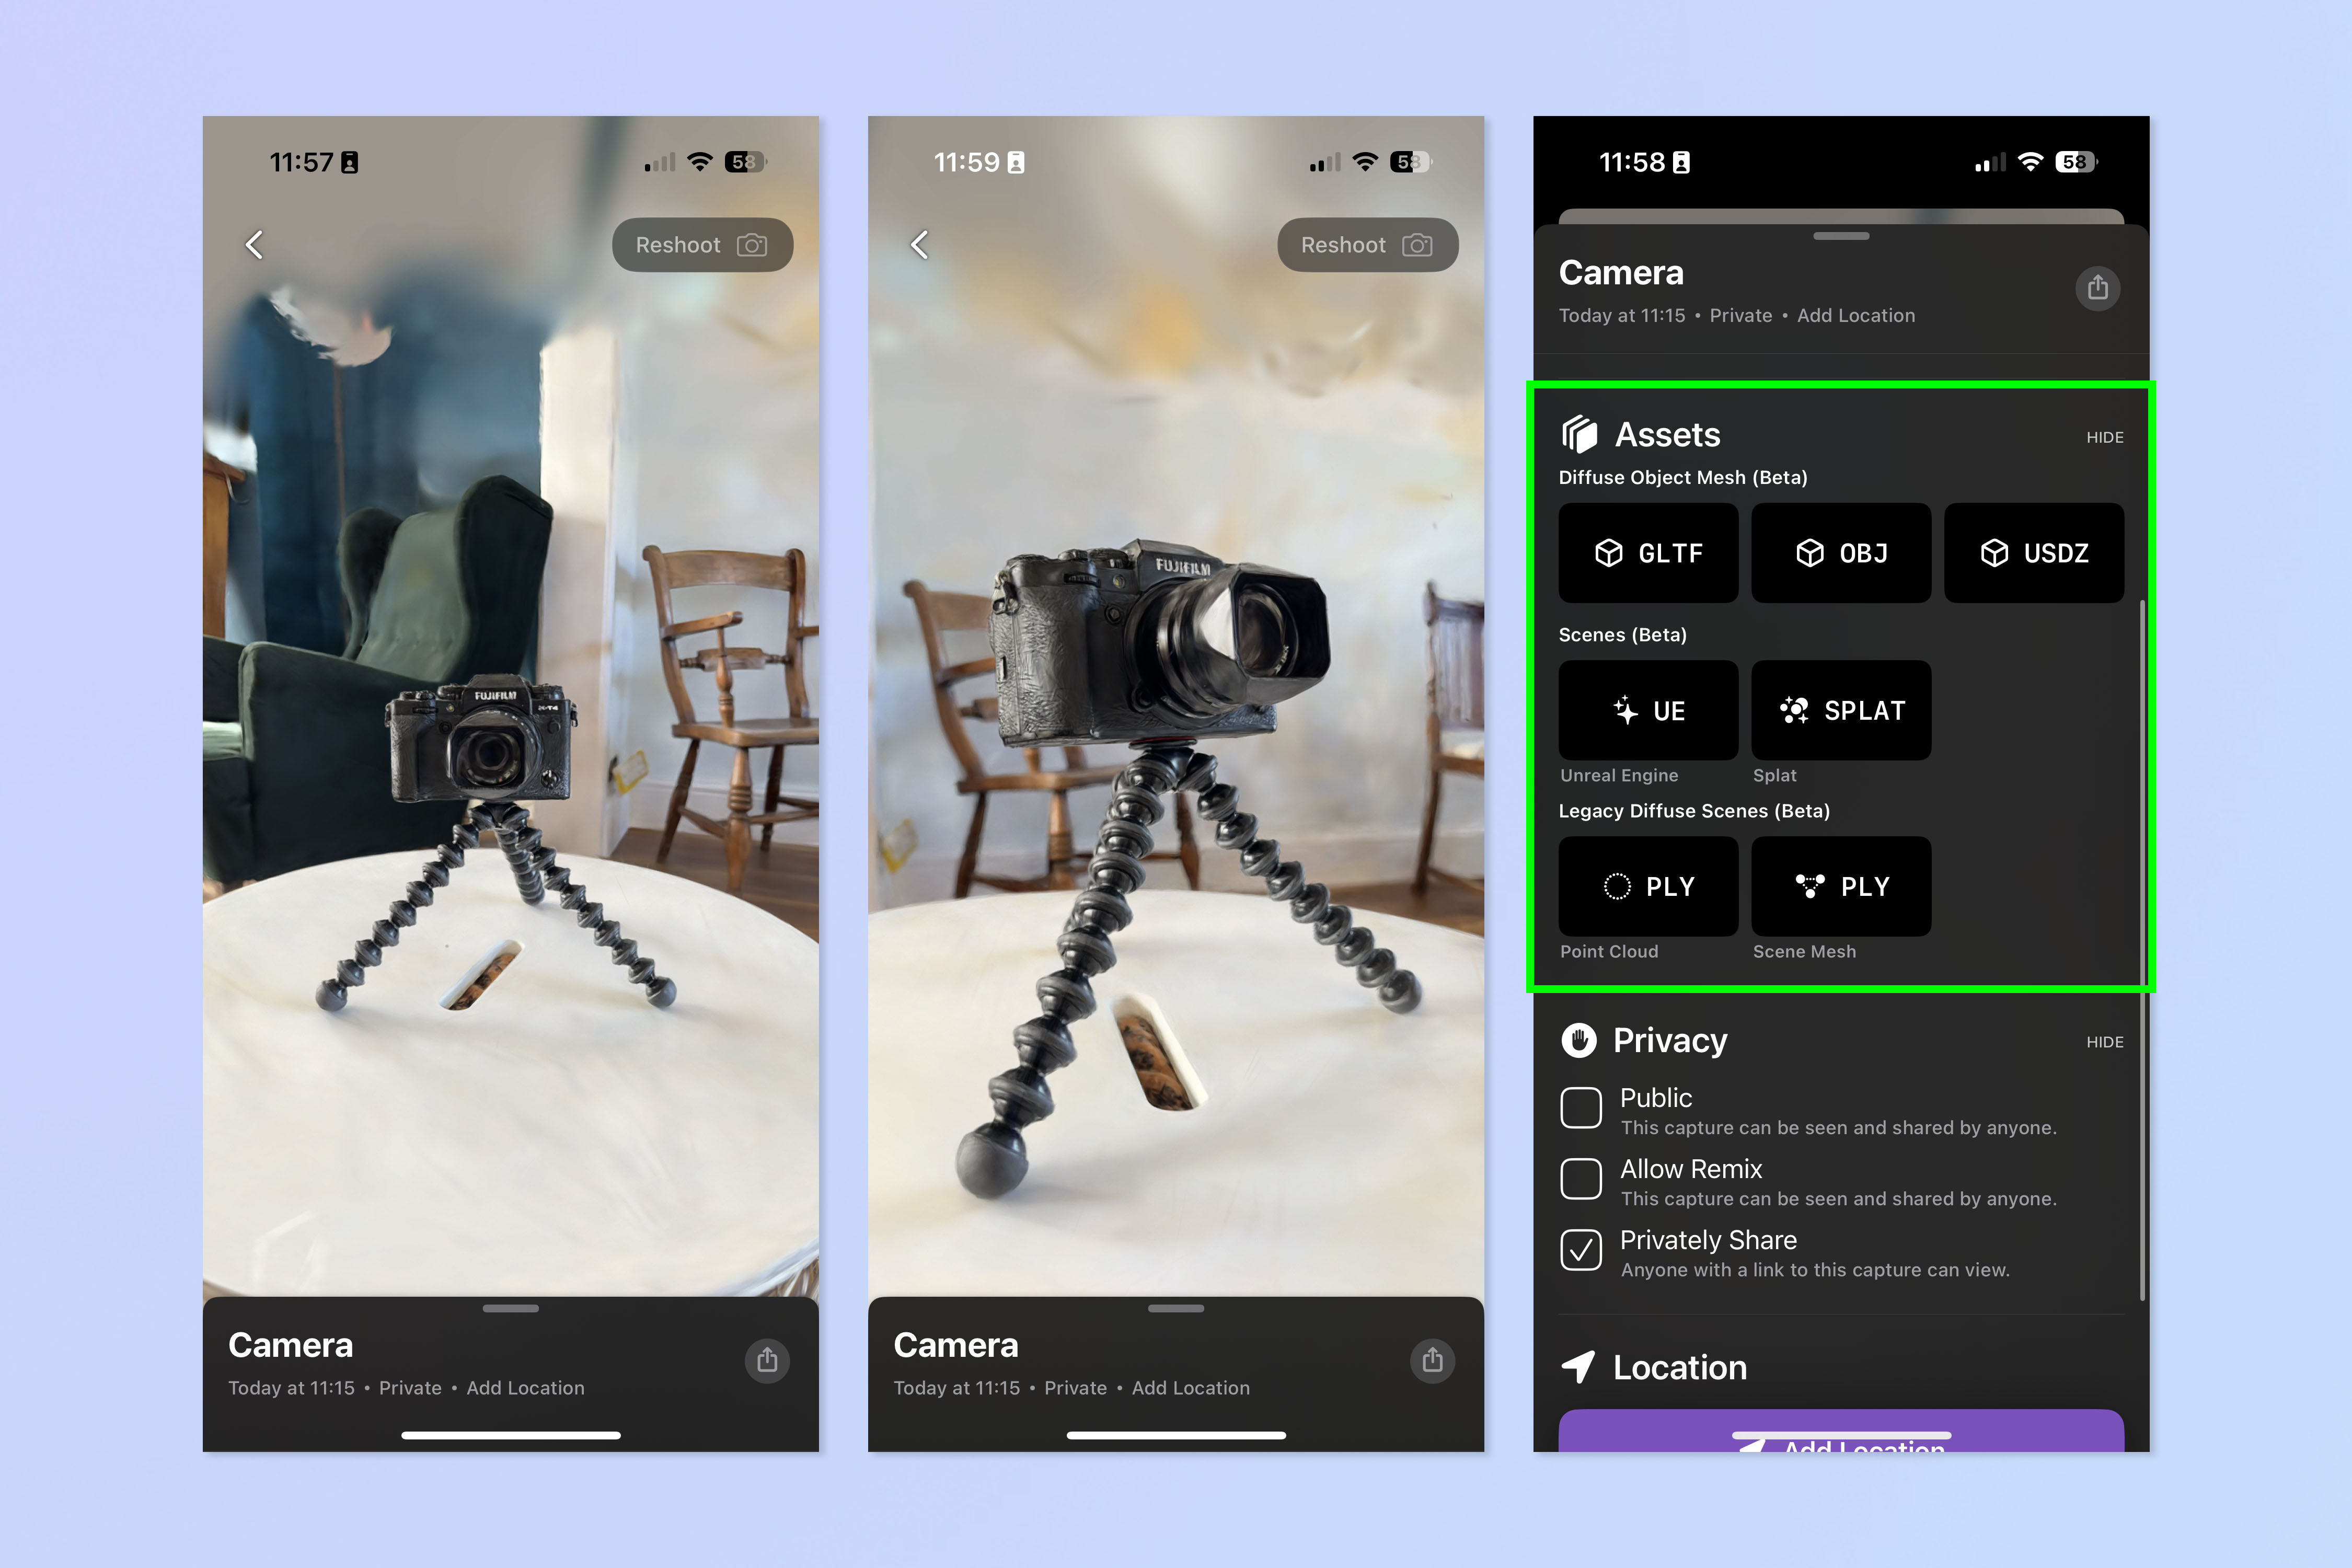
Once your capture is complete, you can pinch, swipe and zoom around your subject to view it in 3D. Swipe up to bring up the bottom panel, then tap an asset type to export your capture in various different formats to use in rendering applications.
You can also adjust your privacy settings again using this panel.
You now know how to use your iPhone for 3D capture. If you'd like to see more ways you can use AI, we have plenty of tutorials to help. Check out our guides on how to use ChatGPT, how to create your own chatbot with ChatGPT, how to use Microsoft Copilot on iPhone and iPad, and how to use Google Bard AI to plan a vacation.


