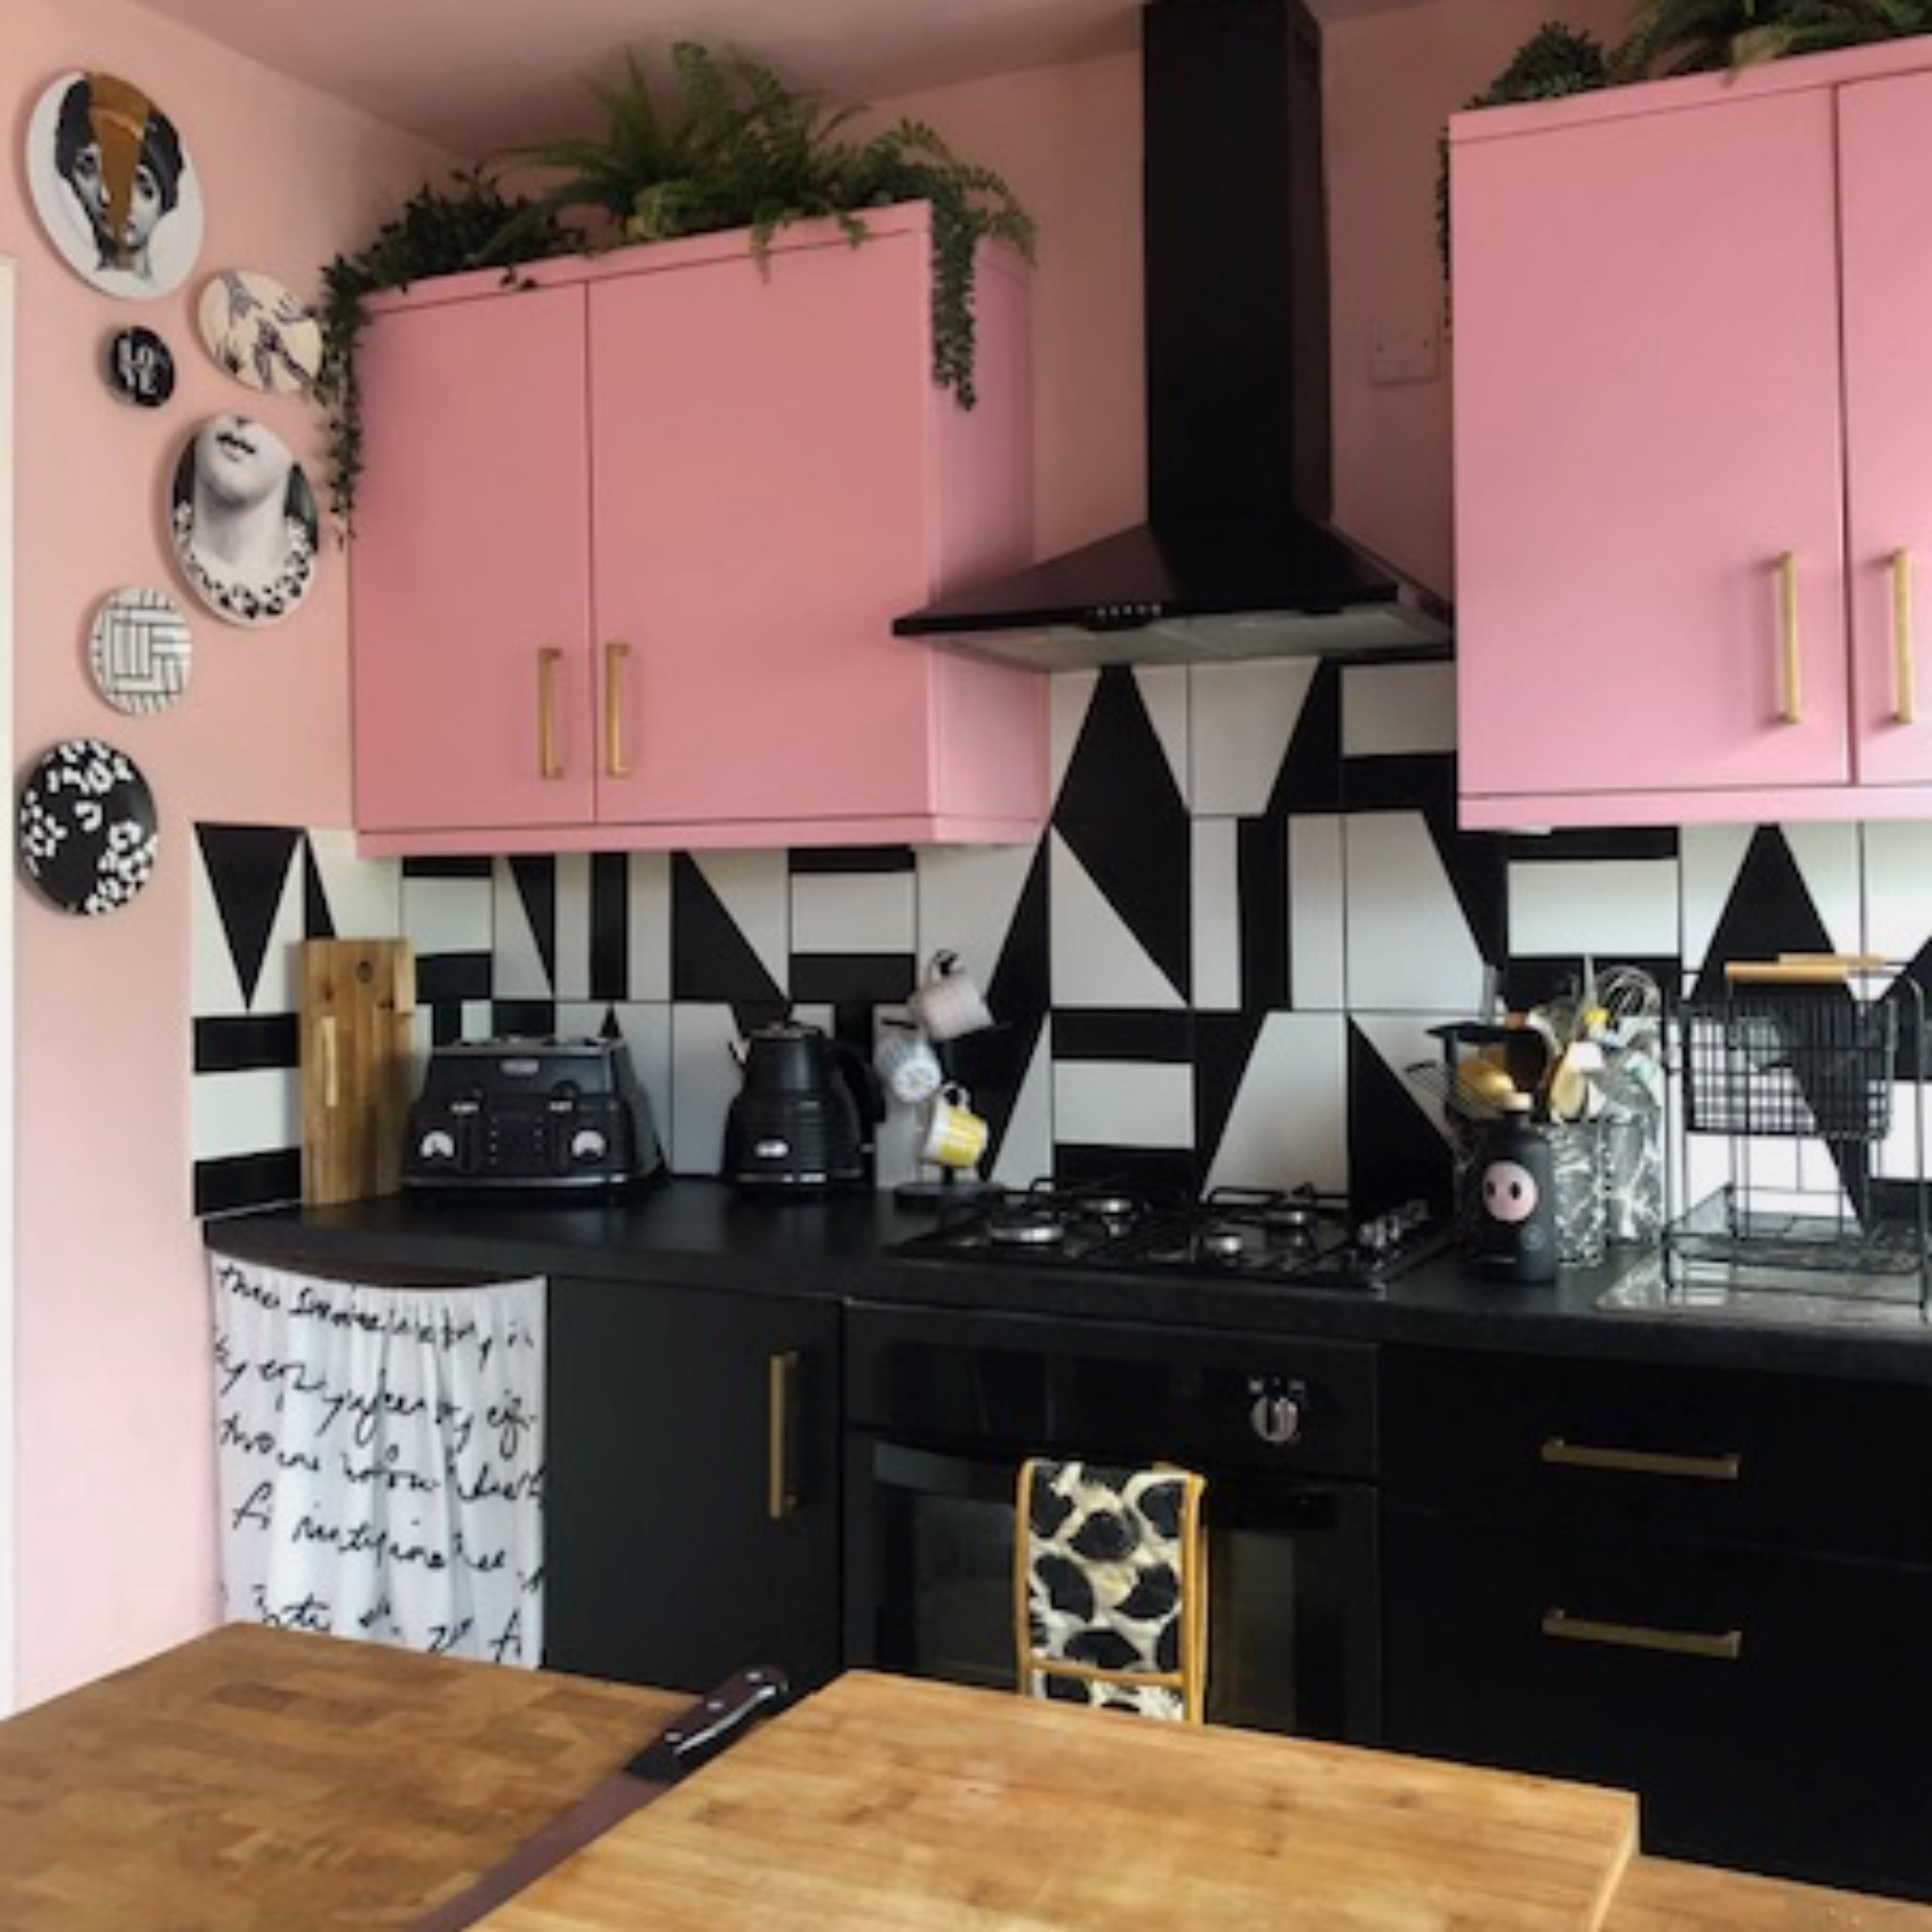
A kitchen transformation for under £150 was the aim for one renter, who set about making her kitchen look expensive on a budget. And with the cost of materials at an all time high, it was no easy feat, which meant special attention needed to be paid to what was used – as well as taking on the DIY herself.
New cabinetry, tiles and appliances were out of the question, so it was a case of transforming the existing kitchen into a bright, modern space.
DIY £150 kitchen makeover
Maisie Rees, a mum of one from Birmingham, wasn't going to be deterred by a low budget and put her mind to making the most of what she already had. 'I began by creating some mock-ups on my Mac,' she told Tap Warehouse, 'messing around with what to paint on the splashback and deciding on a colour for the cupboards.
What's even more astonishing is the fact she achieved the transformation in less than a week, and all while her two-year-old daughter had nap time!
'Because I was doing everything myself, I didn’t want to make any mistakes, so I didn’t start doing anything until I was confident with how I wanted it to look,' Maisie recalls.
Before
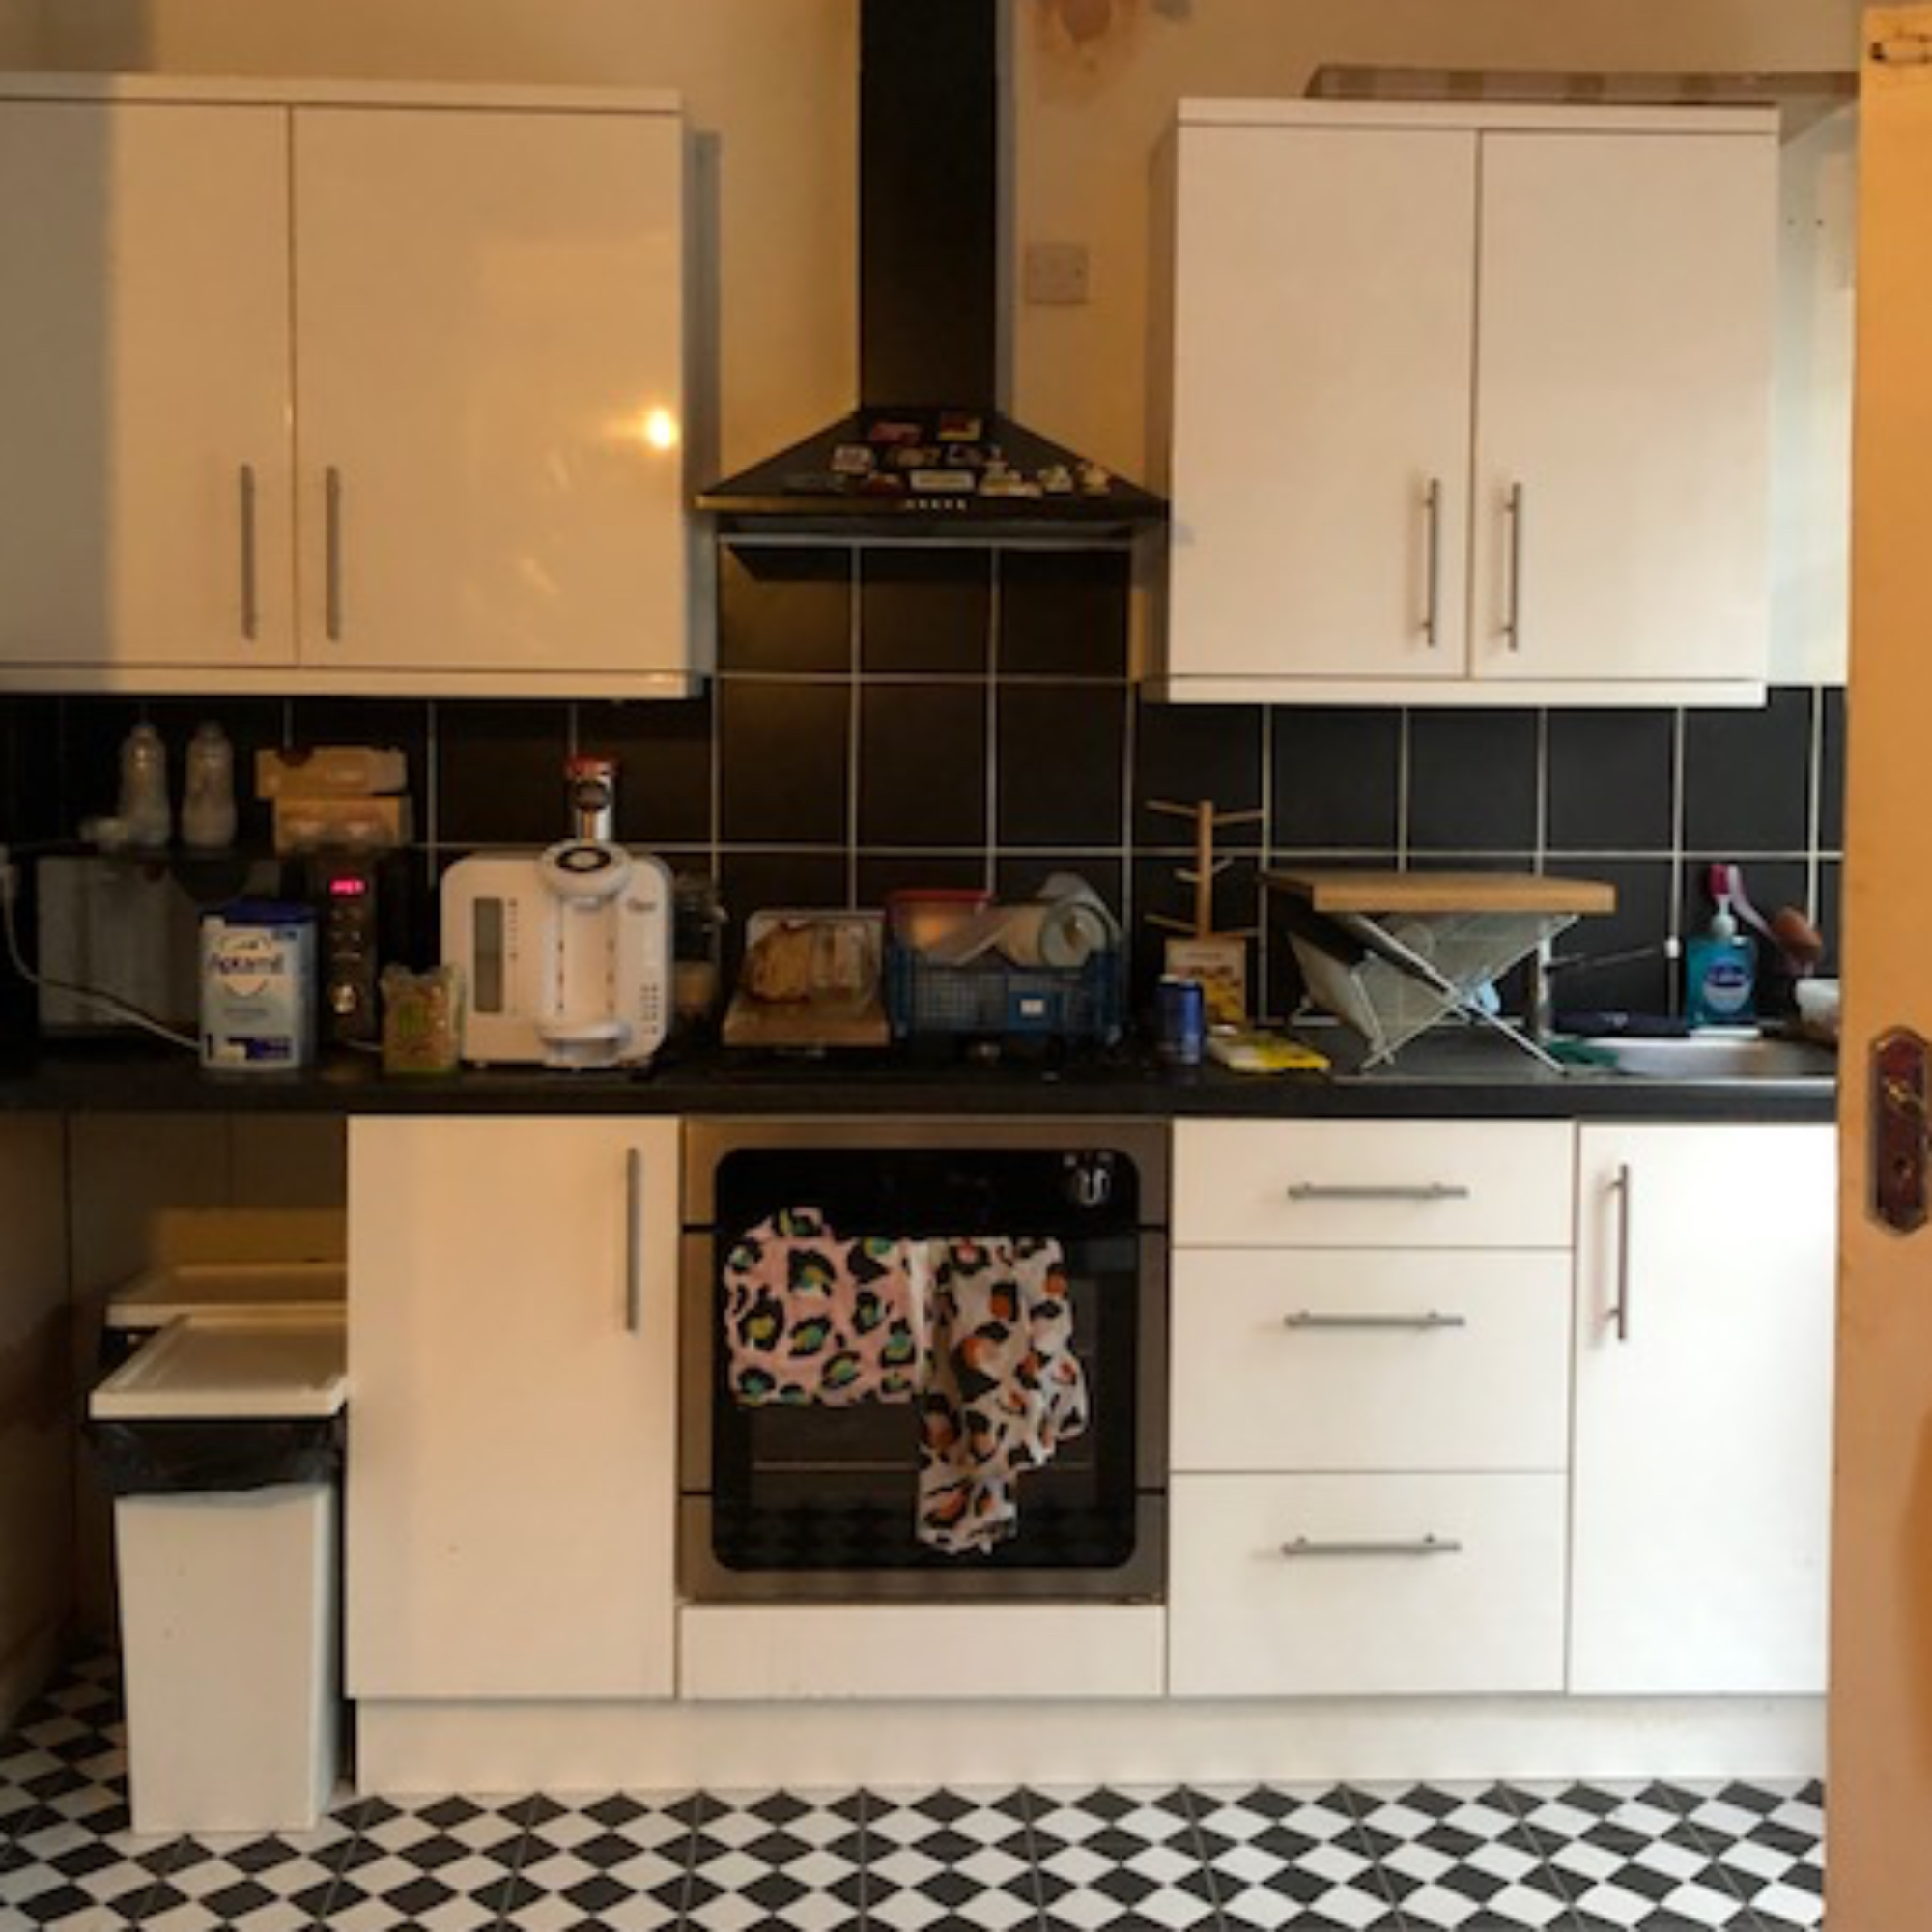
The white gloss cabinets and black tiles were perfectly functional but Maisie was keen to give the space a refresh. Having studied graphic design as a student and now being an interior stylist, she wanted her home to reflect her creativity and eye for design.
'Our budget didn’t allow for us ripping out the kitchen and starting again, so I thought I’d make do with what we have instead and give our home a bit of a makeover,' she says.
After

Punchy pink wall cabinets and black lower units create a bold contrast in the new-look kitchen, while the splashback tiles have been completely transformed by painting the kitchen tiles. So how did Maisie achieve the new design?
'I began by painting the walls and ceiling,' she says, 'and then I primed the existing splashback with white paint and then hand-painted the black graphic shapes, using cardboard templates. This was the bit that took the longest.'
It may have taken a while, but kitchen splashback ideas like this are a great way to update existing tiles.
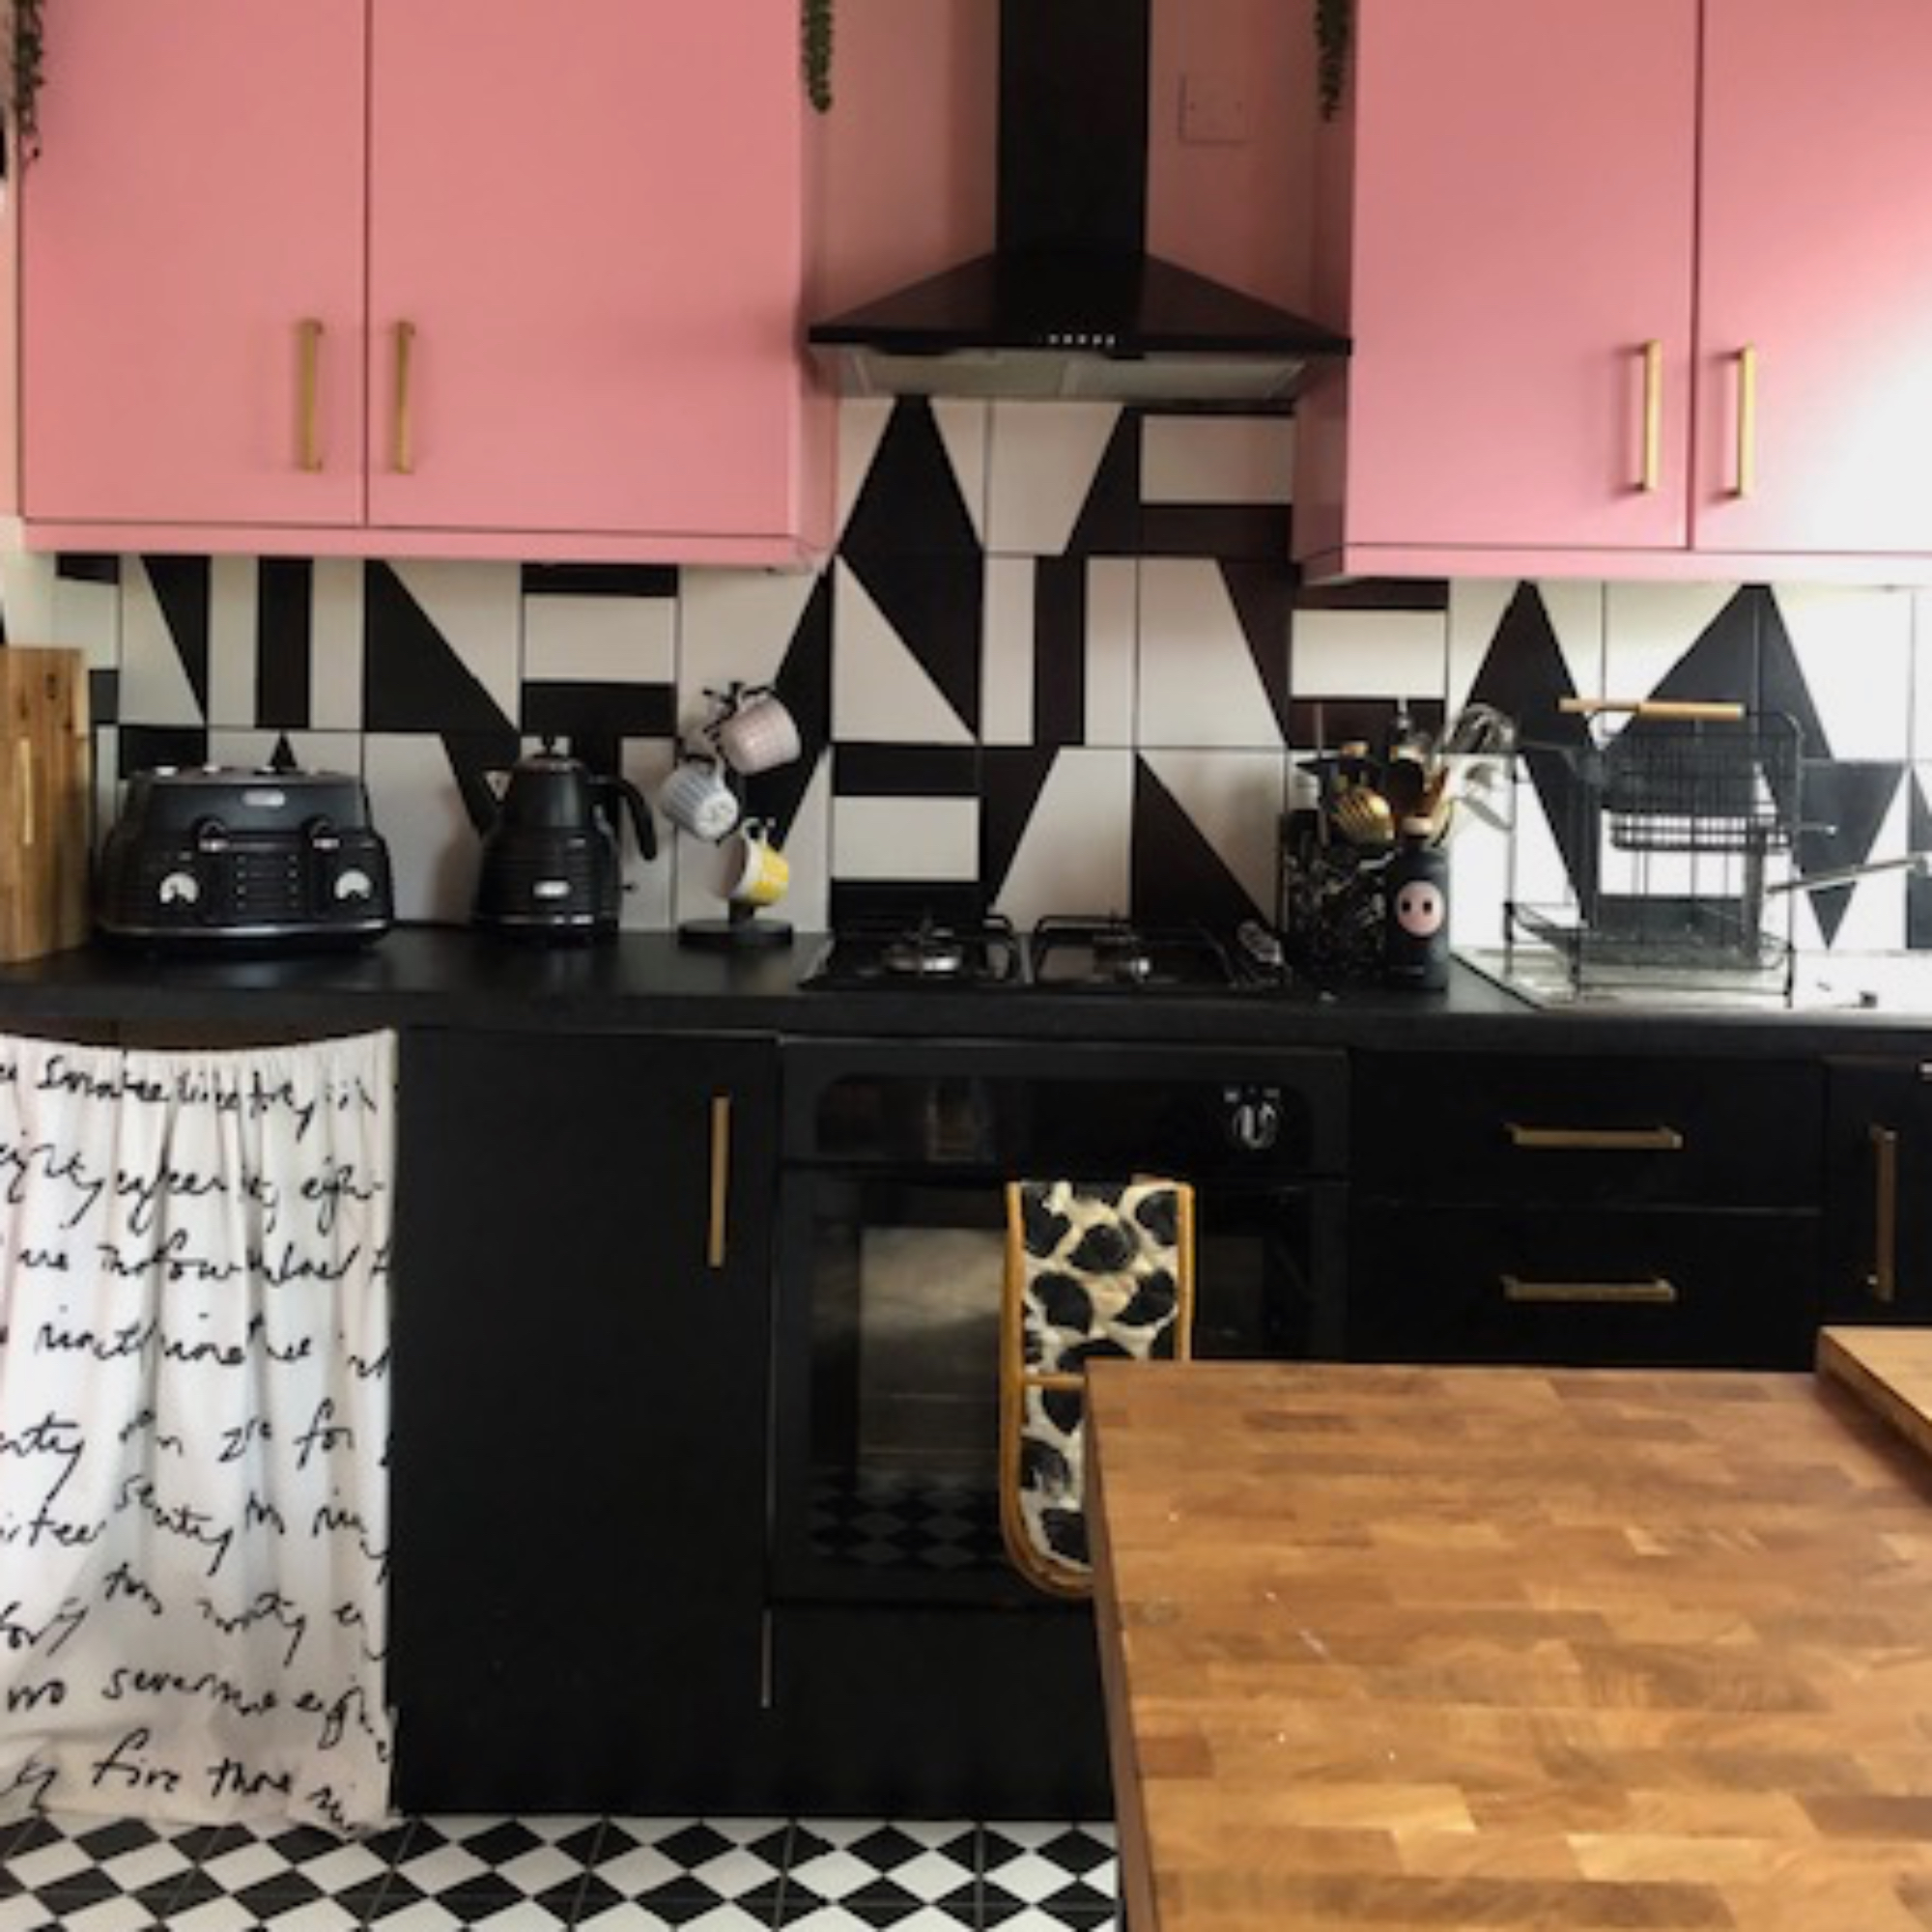
Deciding the cupboards also needed some attention, Maisie opted to wrap them in vinyl, before changing up the cupboard handles and spray-painting the oven.
'I usually work with a small budget and I regularly make over IKEA furniture to match my colour scheme or upcycle charity shop finds if I want something that looks unique,' she says.
We like the fact she also added a little curtain to hide the bin area, which was previously on display – and the fabric helps soften the hard lines of the kitchen and gives it a sweet, decorative touch.
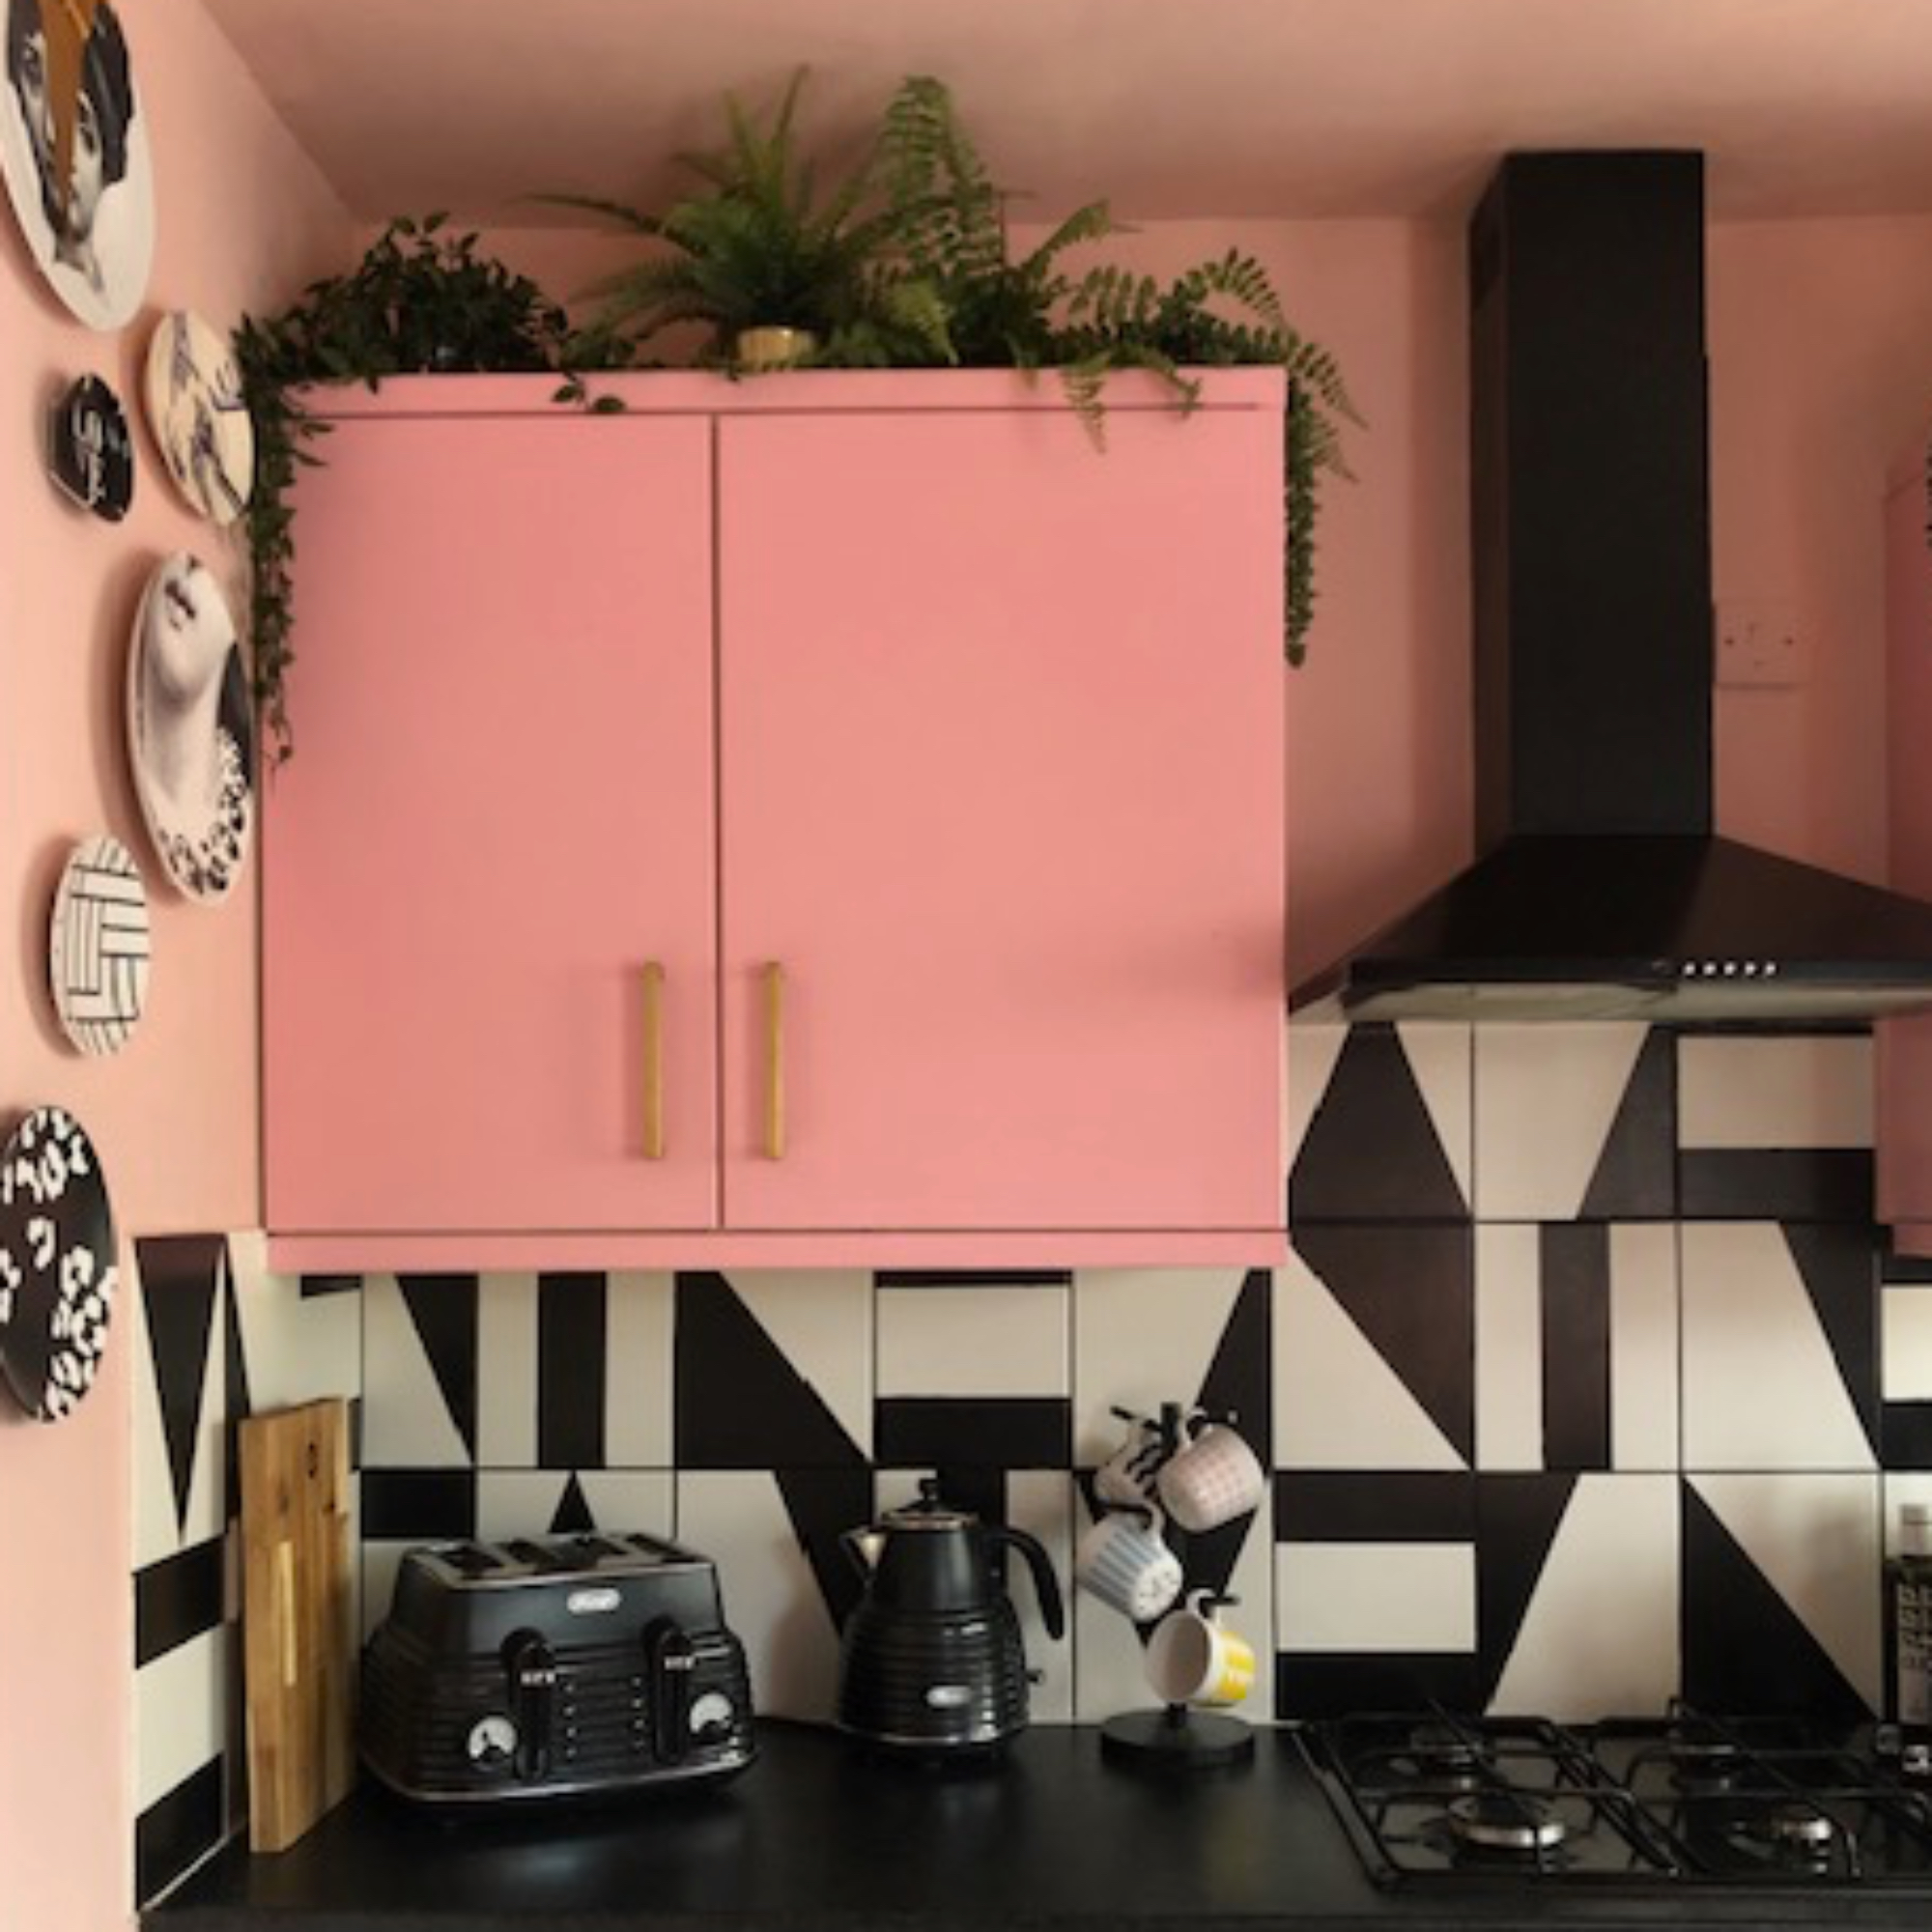
With the walls also having been painted pink, a group of decorative plates have been mounted to form a display, while plants on top of the wall cabinets bring life to the room.
So, does Maisie have any advice for any renters keen to take on a similar project 'Make sure you prep to save yourself from any potential mishaps and giving yourself double the work down the line,' she says. 'If it’s wooden furniture, lightly sand it… if it’s IKEA furniture, use the correct primer… if you're painting tiles, use the right type of paint. You’ll thank yourself later!'
You can see more of Maisie’s revamped kitchen on Instagram. Colour us very inspired to get our creative DIY hats on this weekend.


