AirDrop remains one of the handiest ways of transferring files — especially photos —between Apple devices. But what Apple hasn't made obvious is how you can control what data gets sent along with the image.
As well as the basic photo, AirDrop can send over location data or image metadata to let another person see exactly where you took the photo, or let them make major edits to your shot. Alternatively it can send none of that, letting you keep control for yourself when necessary.
This guide will show you how to adjust your AirDrop settings when sending images from an iPhone. But don't forget that this process also works on iPads in basically the same way. So let's get to it.
How to change photo location and data settings in AirDrop
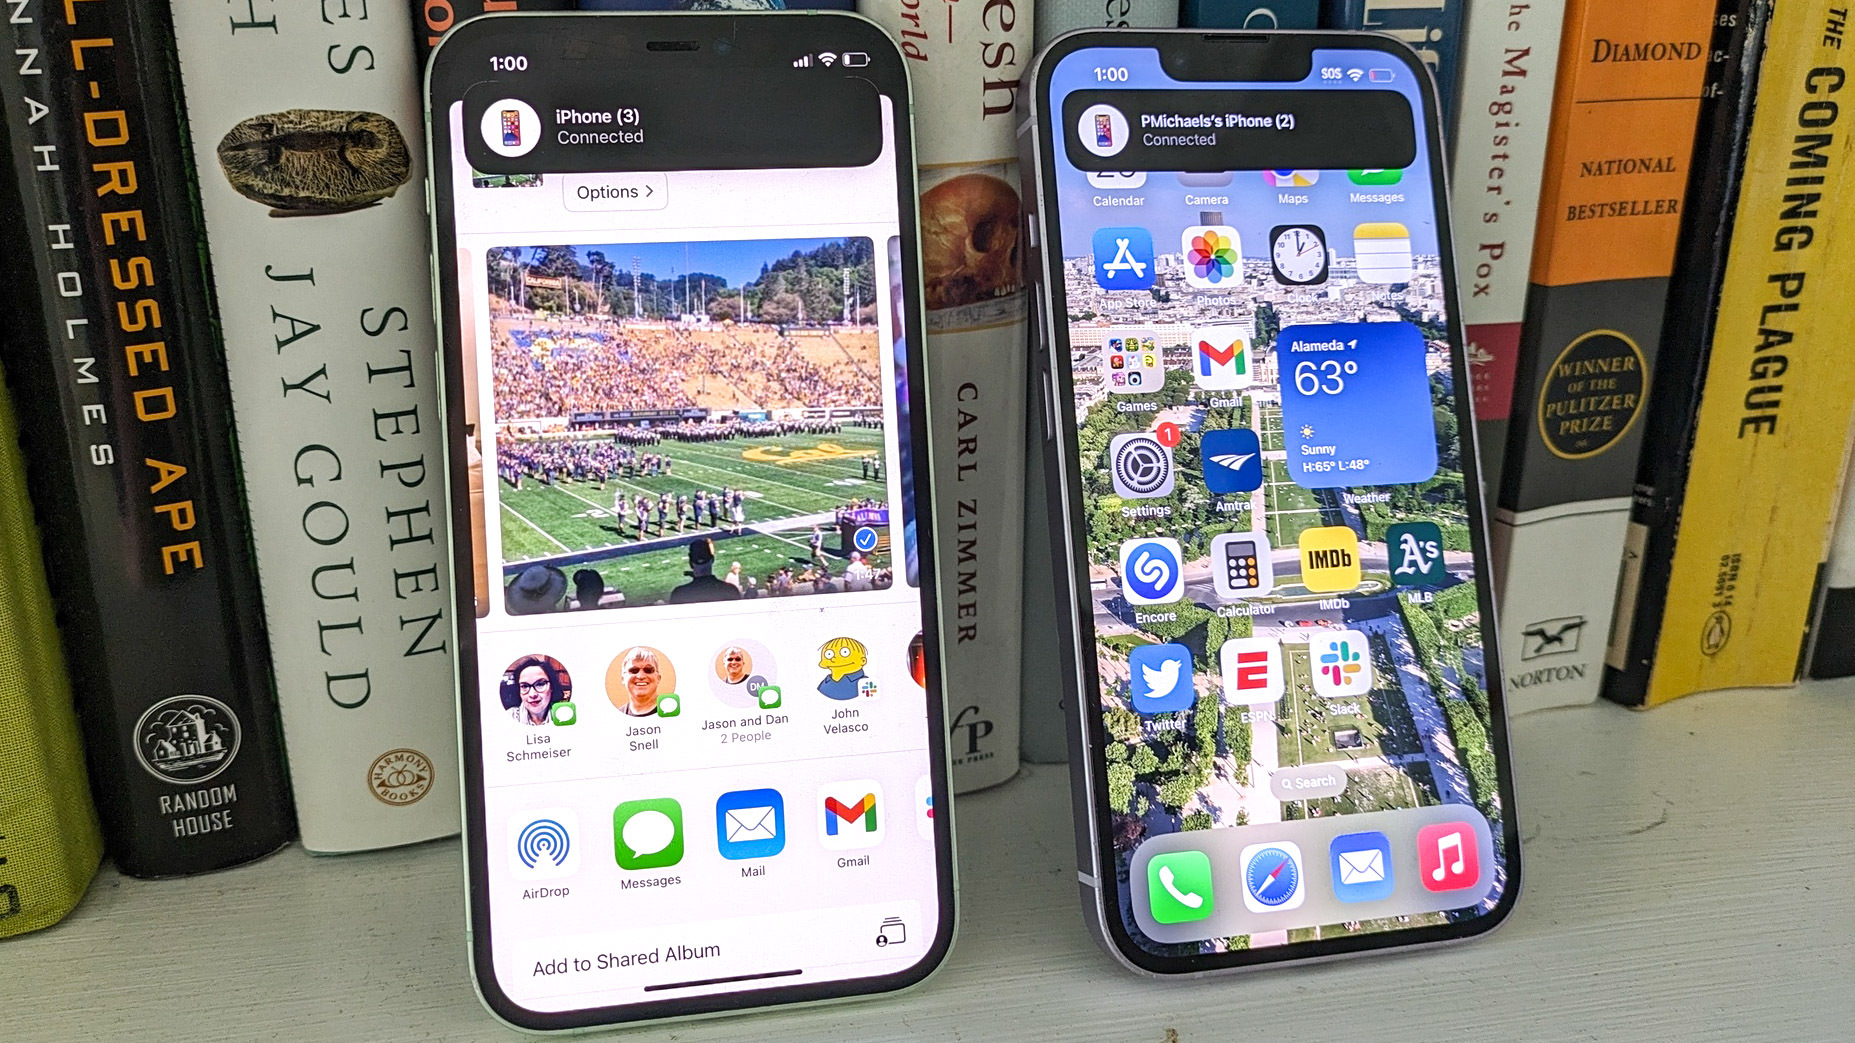
1. Select a photo or photos, and open the share menu
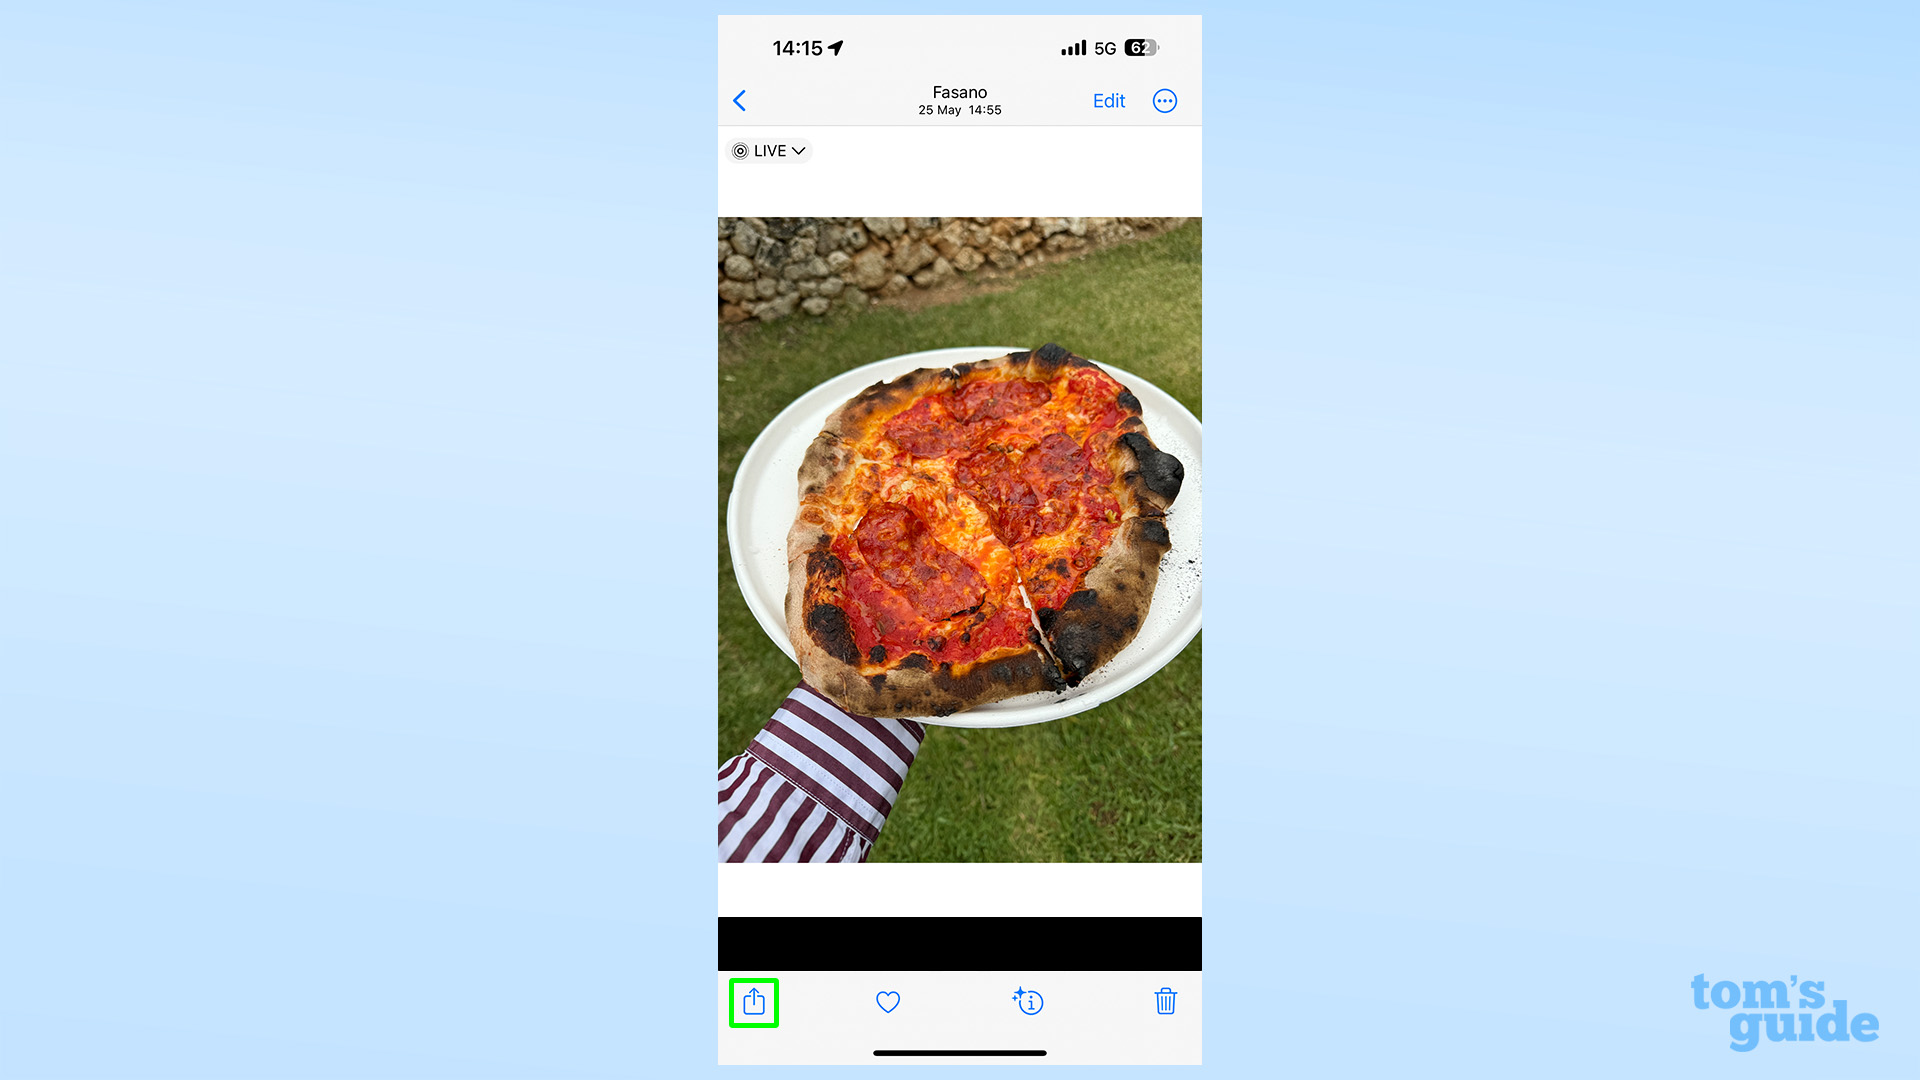
Pick your pictures — in my case a delicious pizza I had while on holiday in Italy — and then open the share menu by tapping the square and arrow icon in the bottom left corner.
2. Tap the Options menu above the image previews
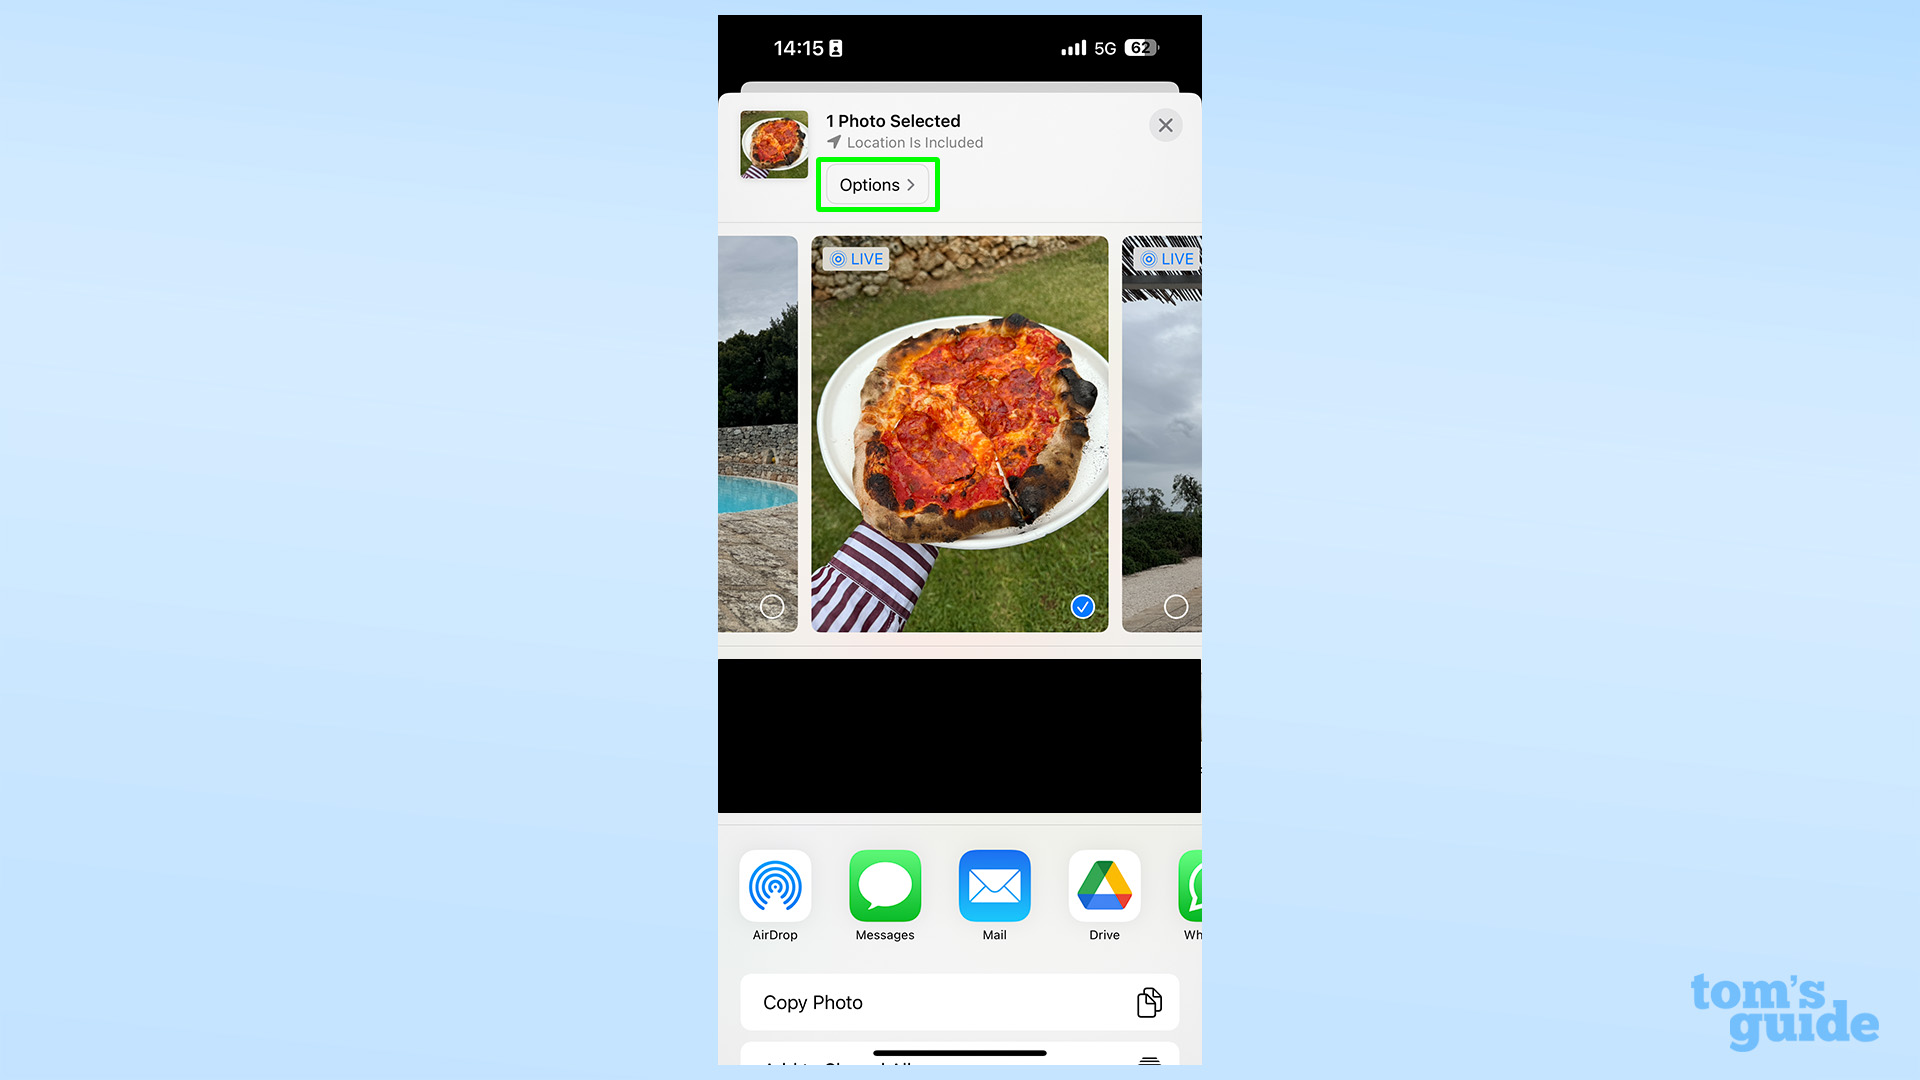
Don't go directly to AirDrop, or select one of your contacts (hidden by the black bar in this example. Instead, look for the unassuming options button near the top of the share sheet, and tap it.
3. Select the location, format and data settings you need
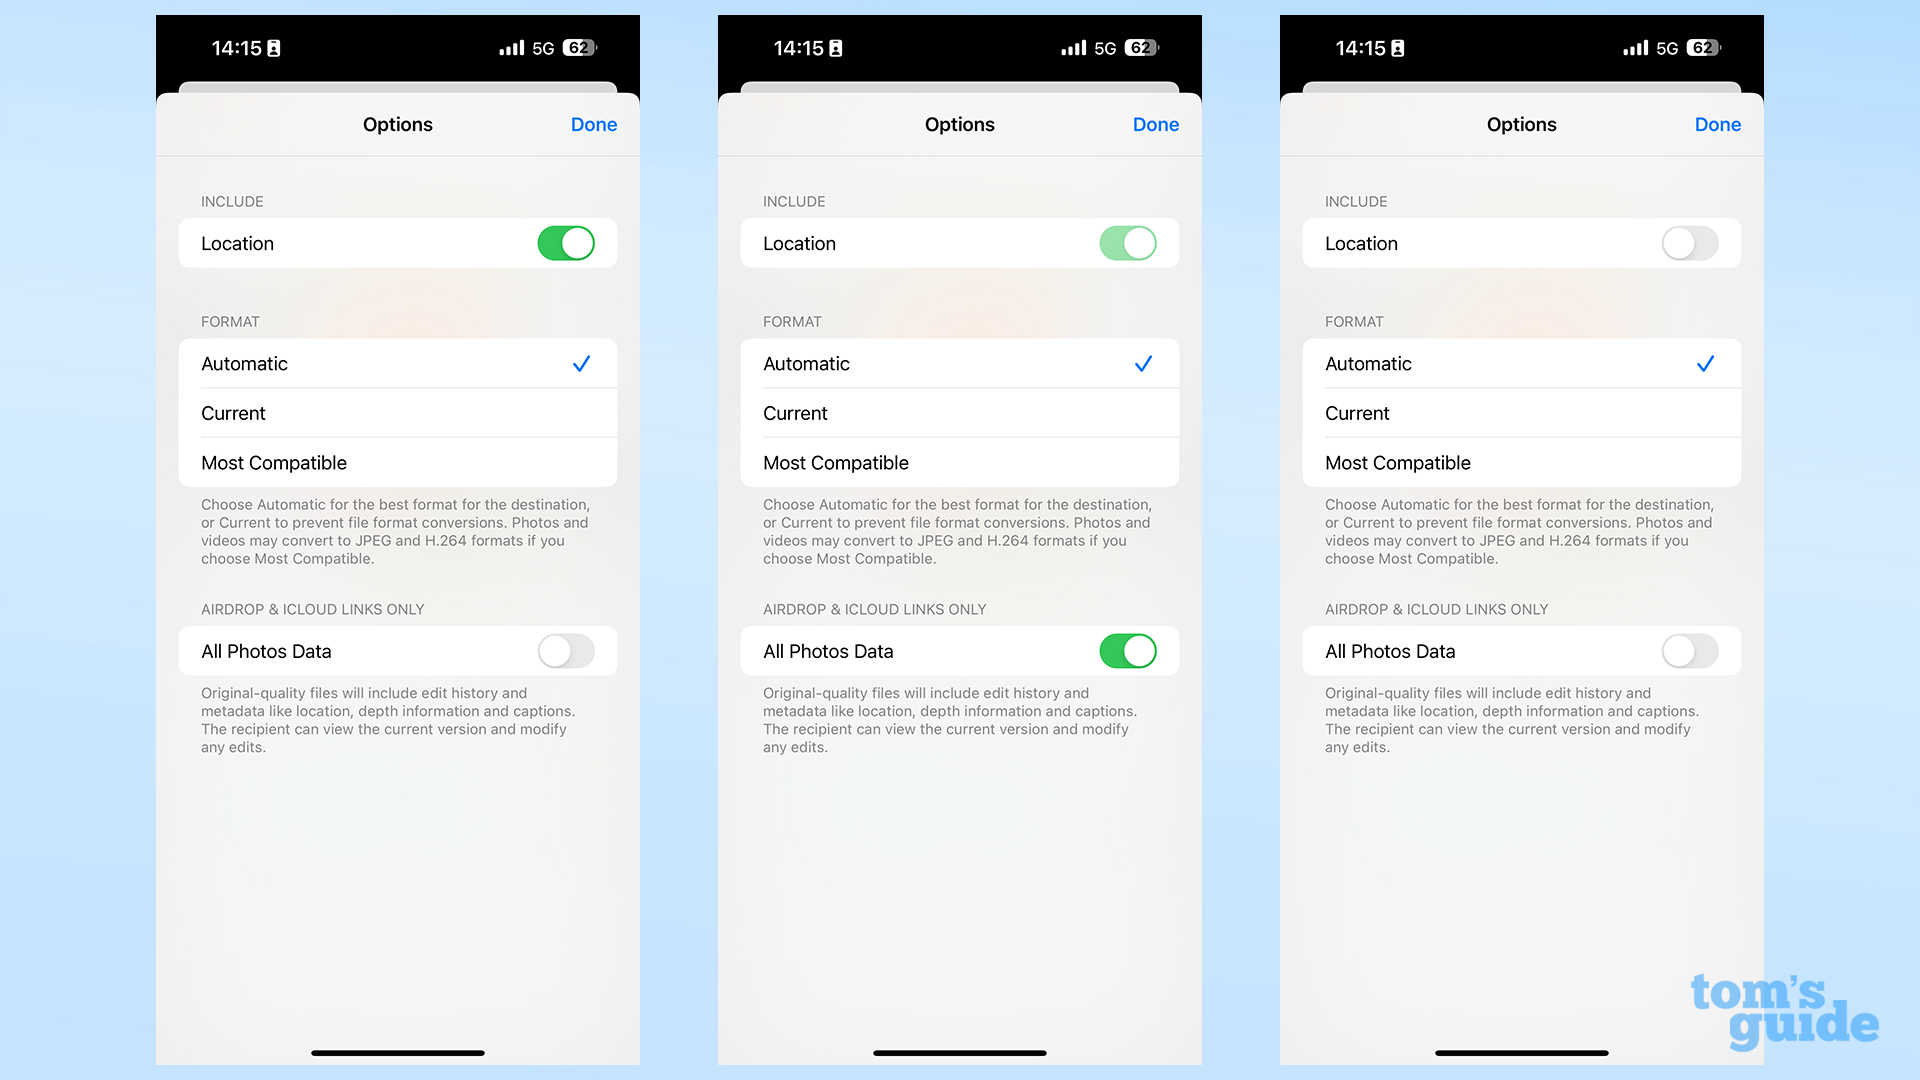
On this page, you can change three different sets of options. You can enable or disable sharing of photo location data, pick which format to send your image in (or let your phone decide) and whether you want all photo data, such as any edits you've made or portrait effect depth, to be sent over, too.
Once you're finished, hit Done and then share your images as normal.
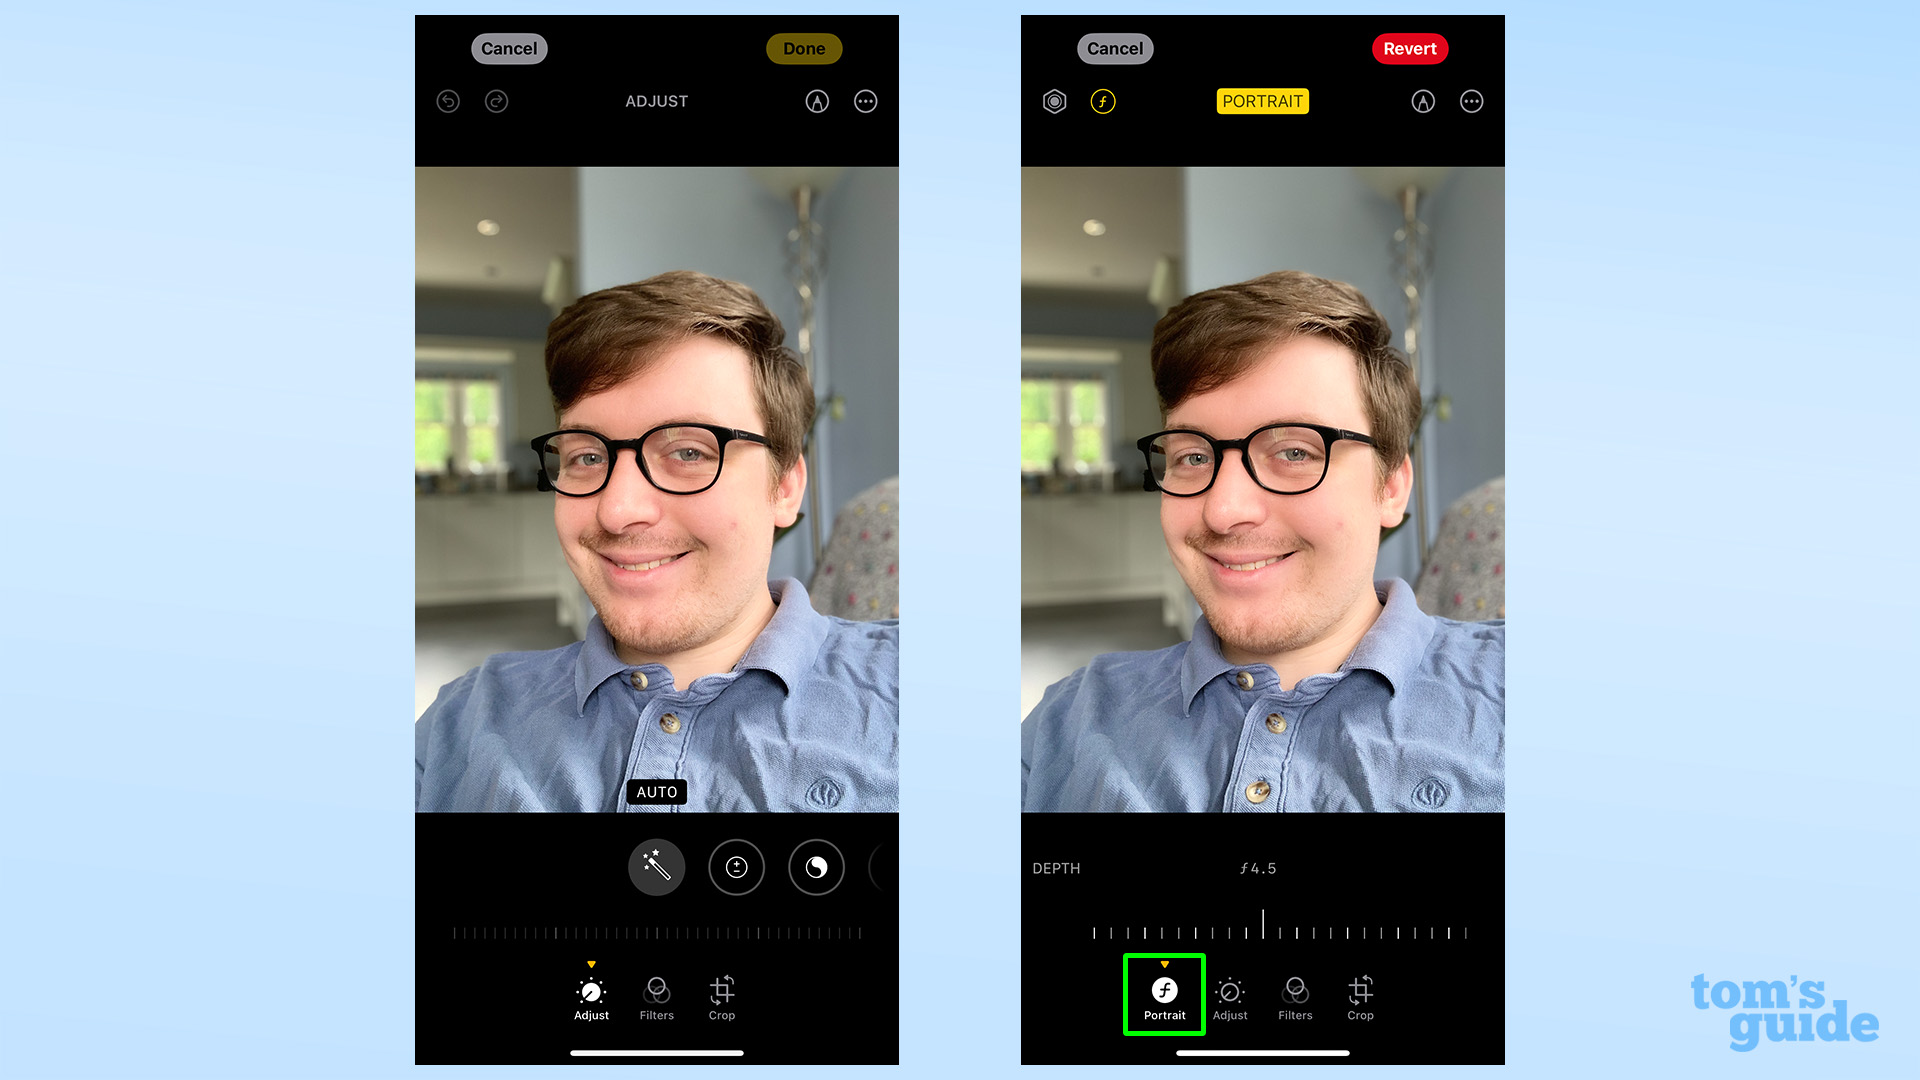
Let's see what difference these settings make, using an example of a portrait mode selfie I took on my iPad and then sent to my iPhone with different combinations of settings.
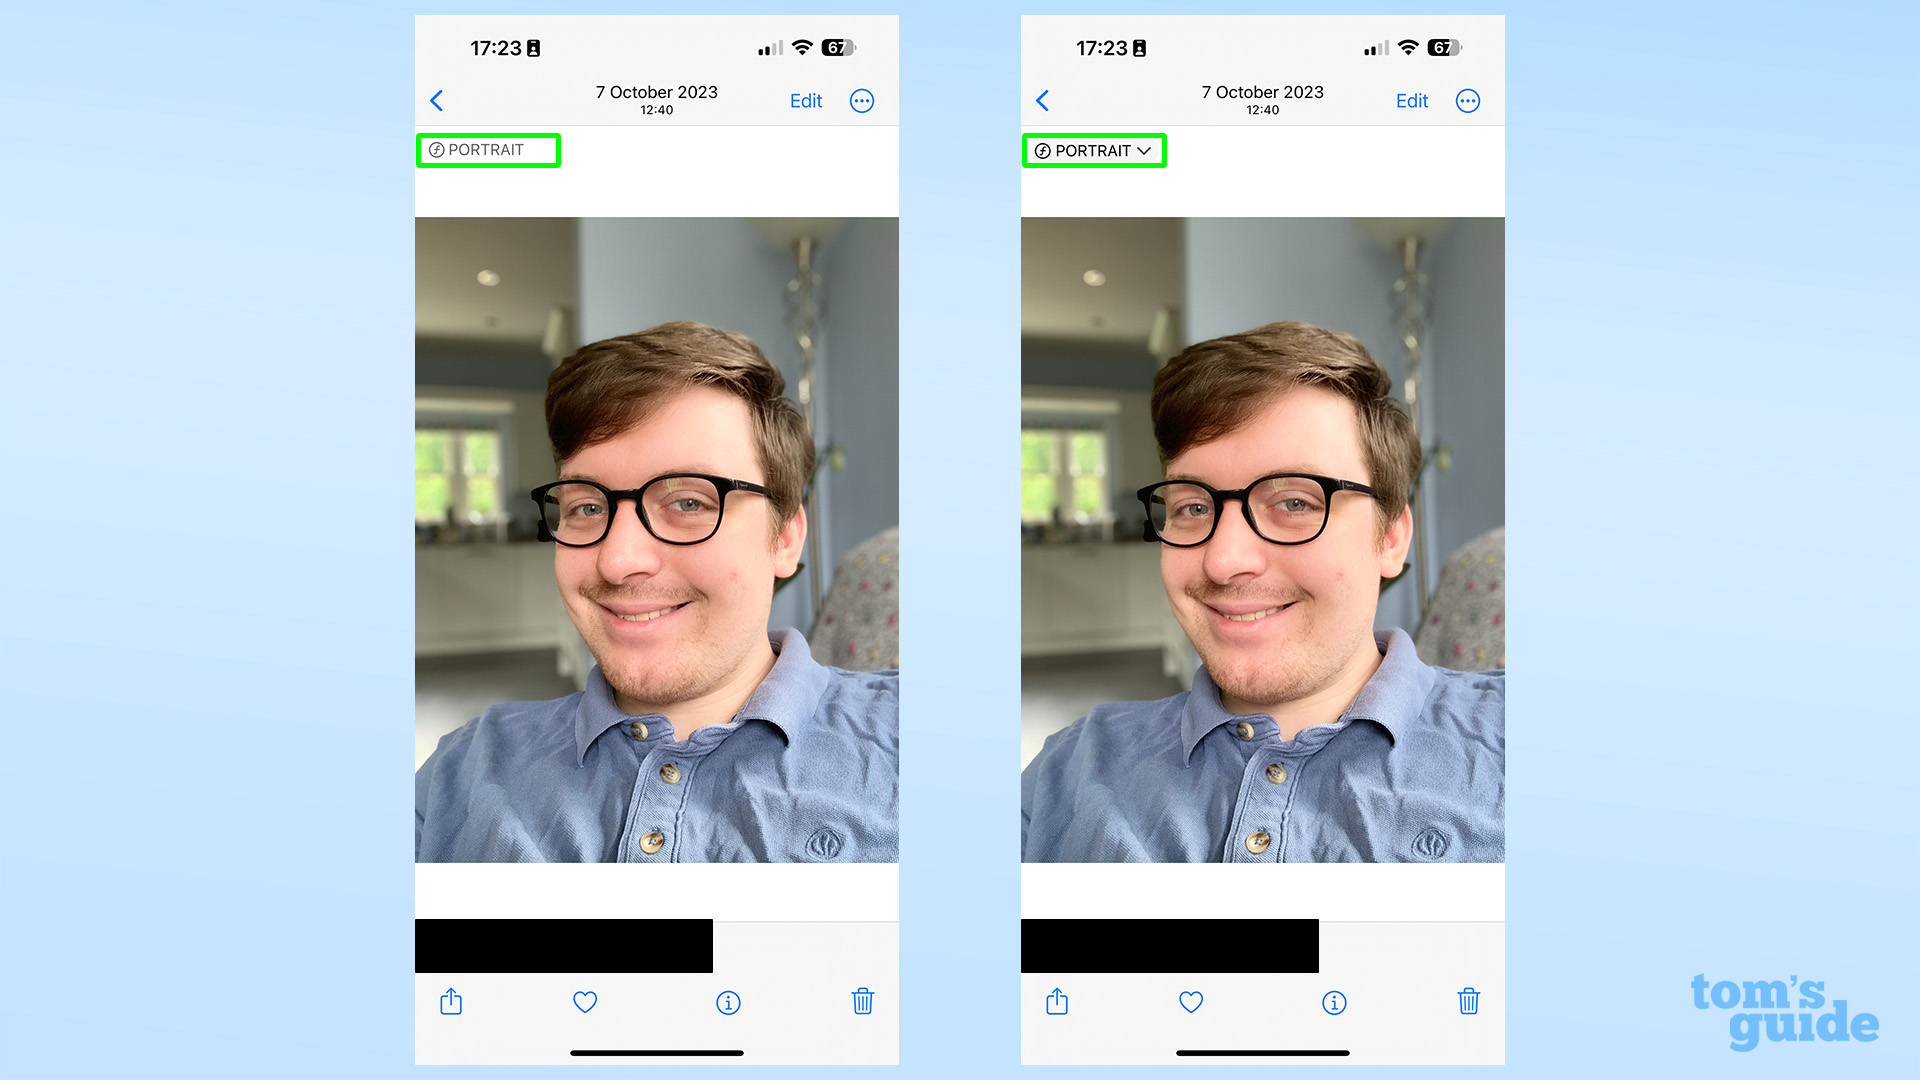
On the left is the photo I exported using standard settings, which is marked as portrait mode, but can't be edited. On the right is the image with All Photos Data transfer switched on, which gives you the option to adjust the portrait effect both in the standard photo app view, and in the Edit view (see below).
In this view, we can see two differences. First, that the regular settings have sent the photo as a pre-baked JPEG file, while the full settings have sent the photo as in the larger but also more editable HEIF format.
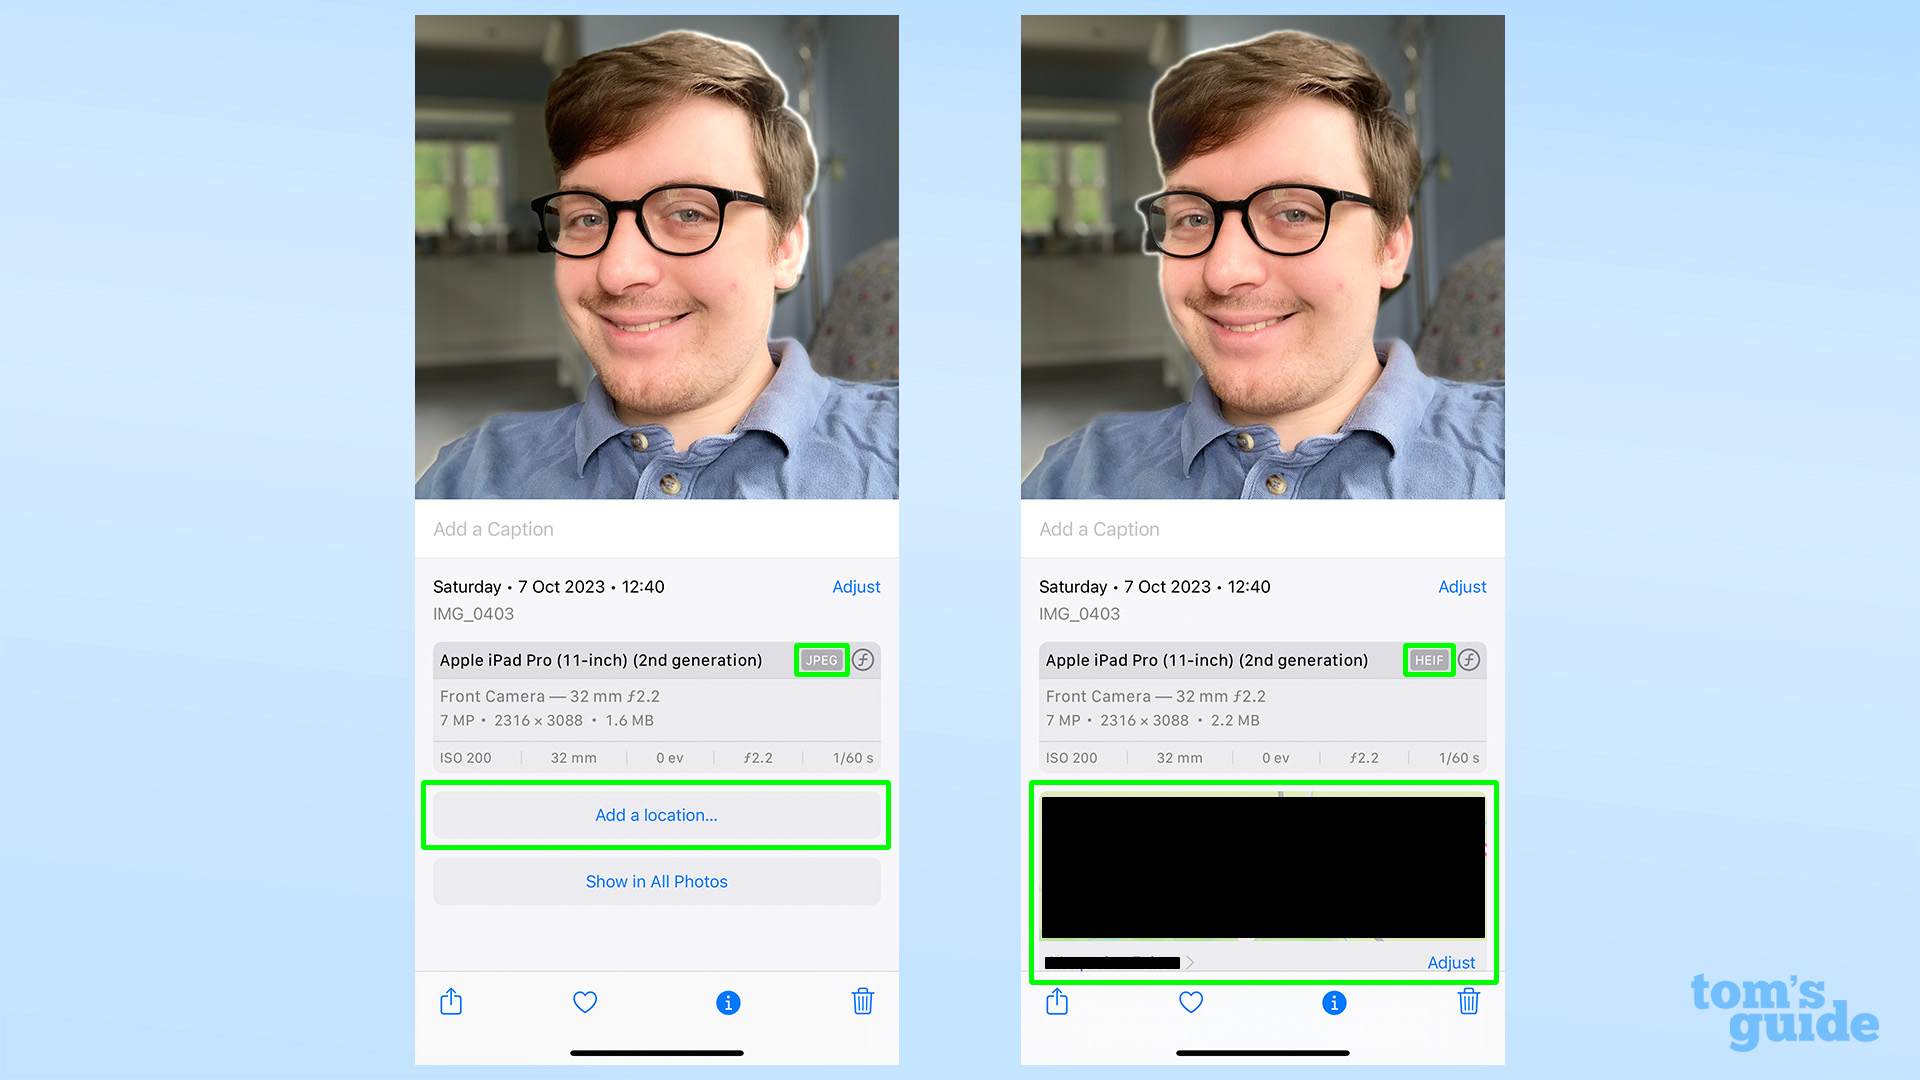
Second, the first image was sent without location data enabled, hence why it's prompting you to add one. The second had location data turned on, which is why you can see the map and location name as part of the photo info. Or you would if I hadn't blocked it out.
Our how-to pages are bristling with more tips on how to get the most out of your Apple devices. For example, you could have a look at how to make your iPad keyboard larger for easier typing, how to combine Live Photos into a single video to make more of your images, and how to enable Call Quietly on iPhone so you can call the emergency services discreetly.