
Hyperpop provides a great opportunity to go big on your sounds, pushing things to extremes and fully utilising your processing toolkit. This is very apparent with the vocals, where the main lead is often pushed and pulled in as many directions as possible to create the characteristic machine-like sound that defines the genre. But how do we create the main chipmunk-style vocal effect?
As ever there are different pathways, even including simply speeding up the whole track once it’s finished. Here we’re not going to do this, but instead focus on the various approaches available to achieve the core vocal sound, which you can then process further to taste.
How to make a hyperpop vocal
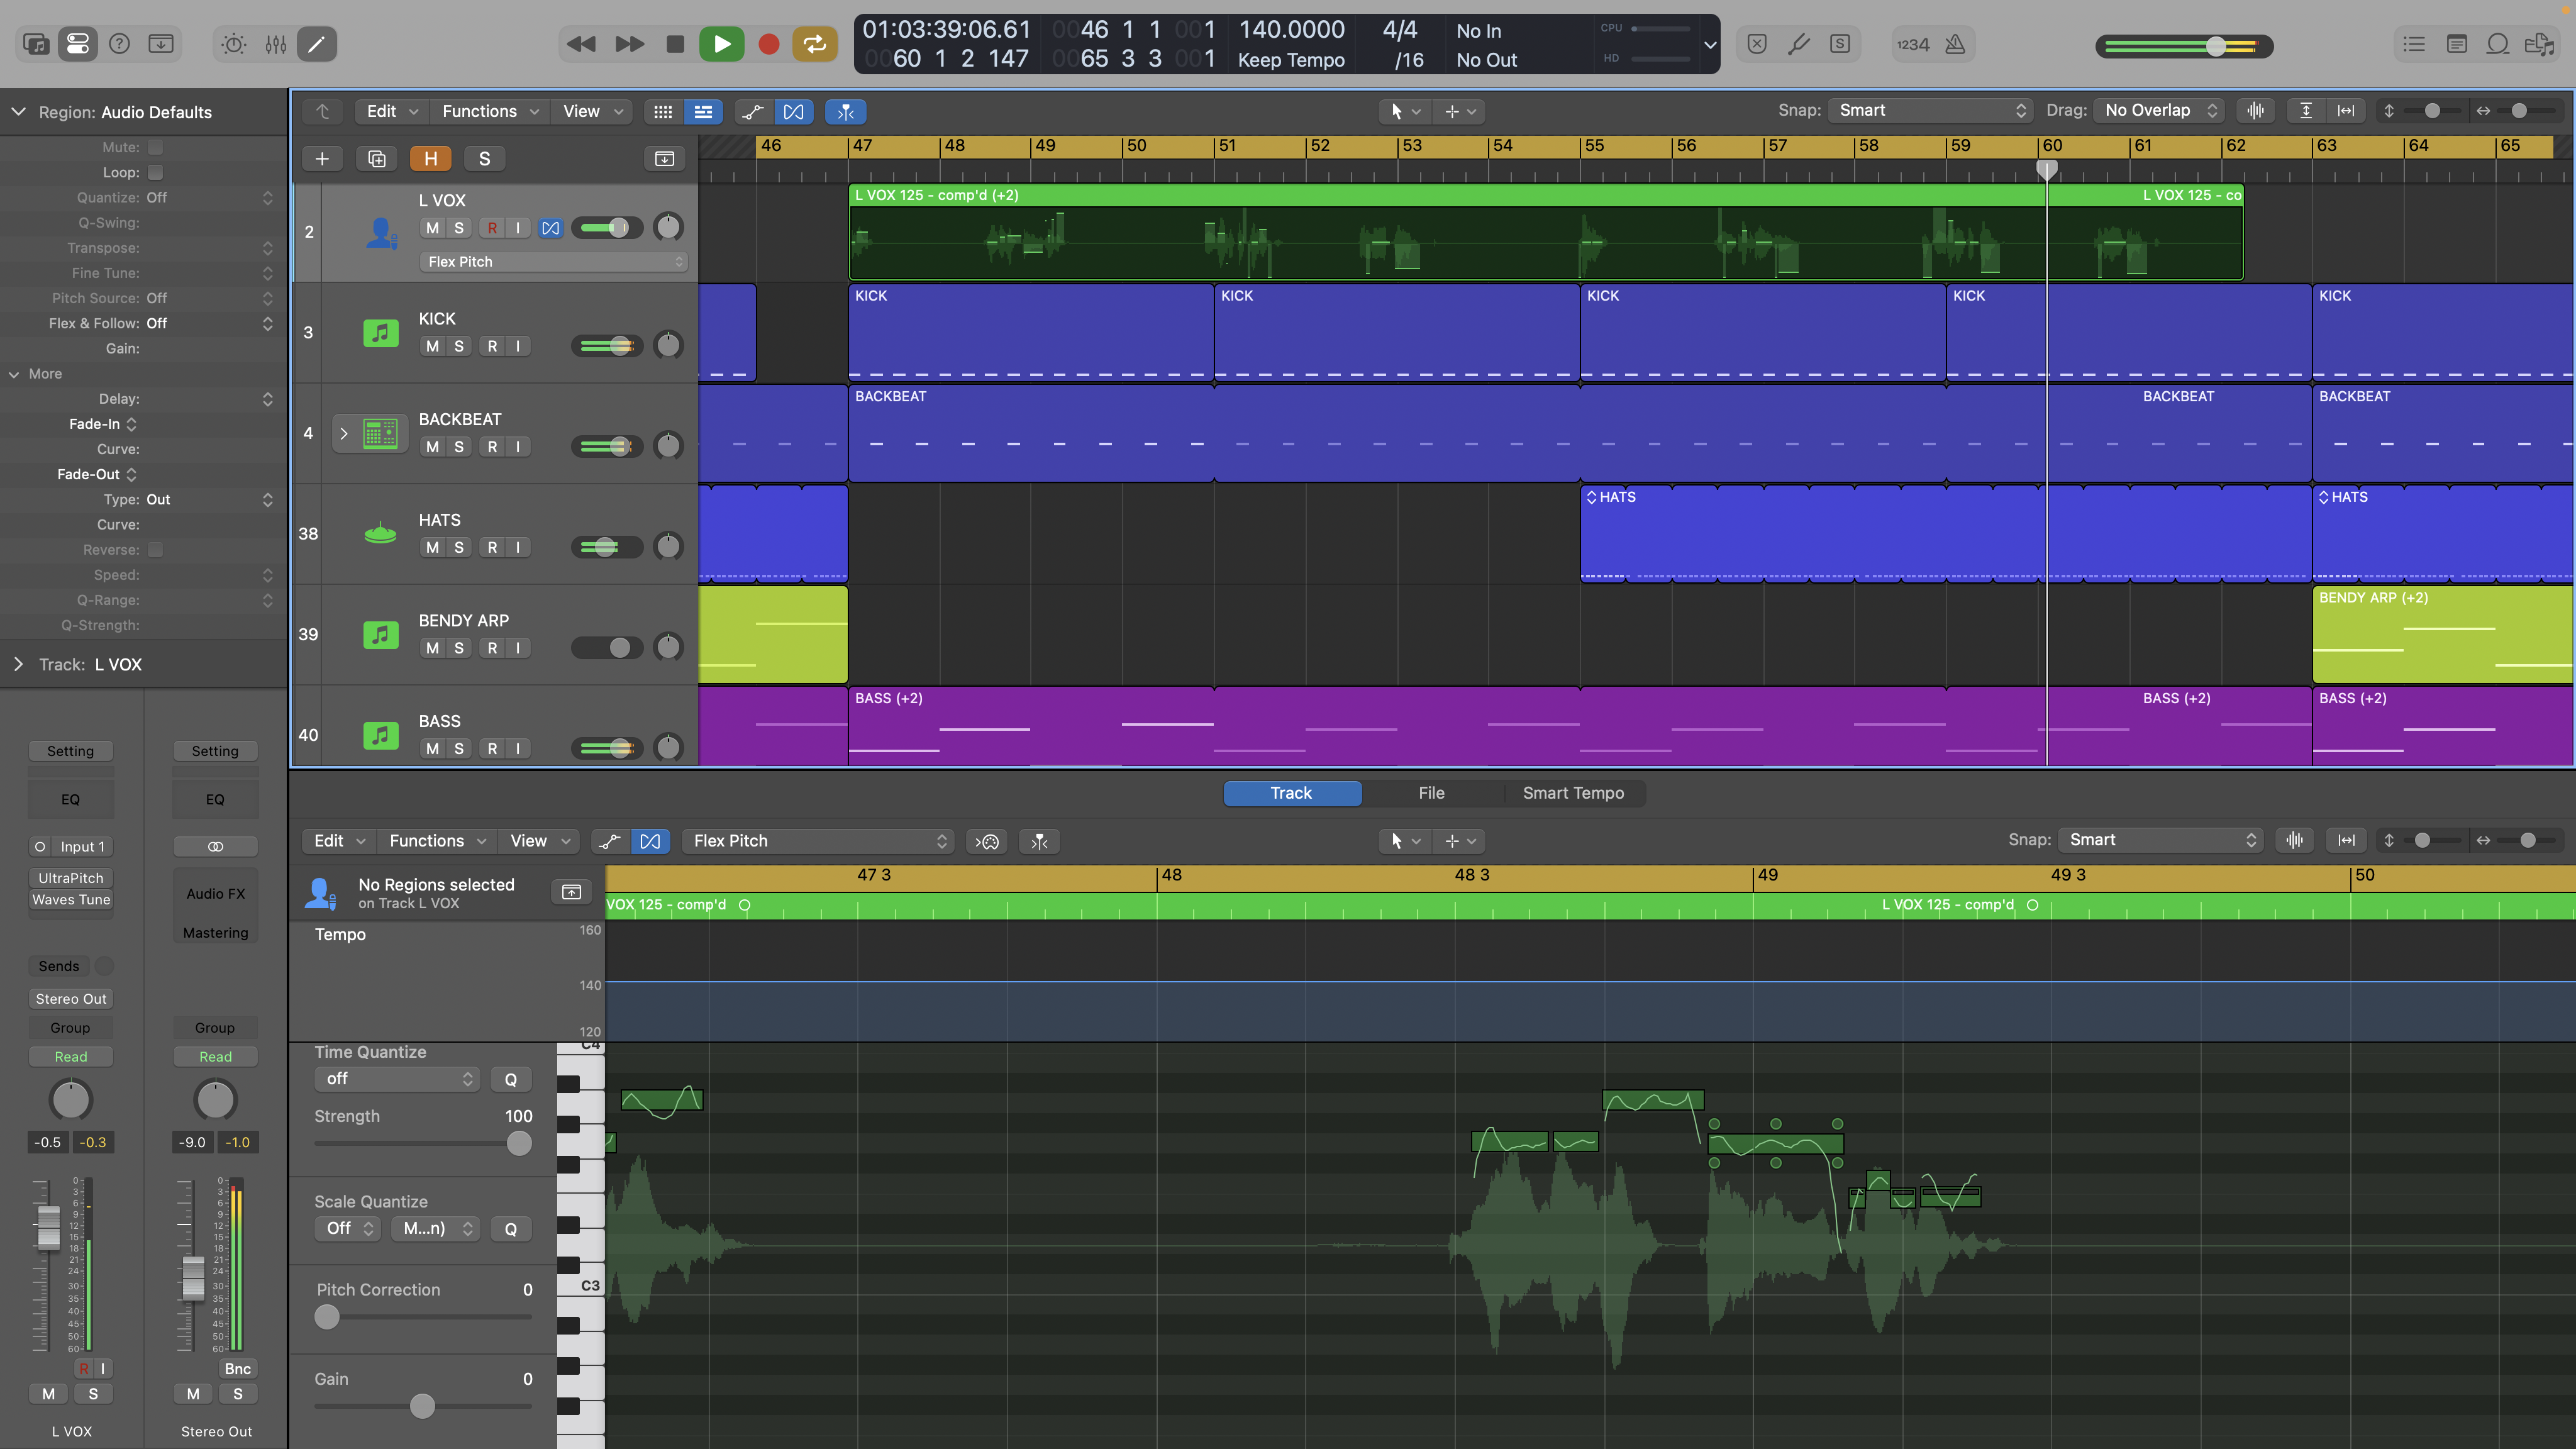
1. Before getting started it’s important to have some kind of plan, particularly if you’re recording vocals for your track. Quite often hyperpop vocals are sped up as well as pitched up so simply pitching up your regular vocal won’t necessarily create the desired effect. As we’ll find out, how we go about pitching the vocals can also influence how we record them in the first place.
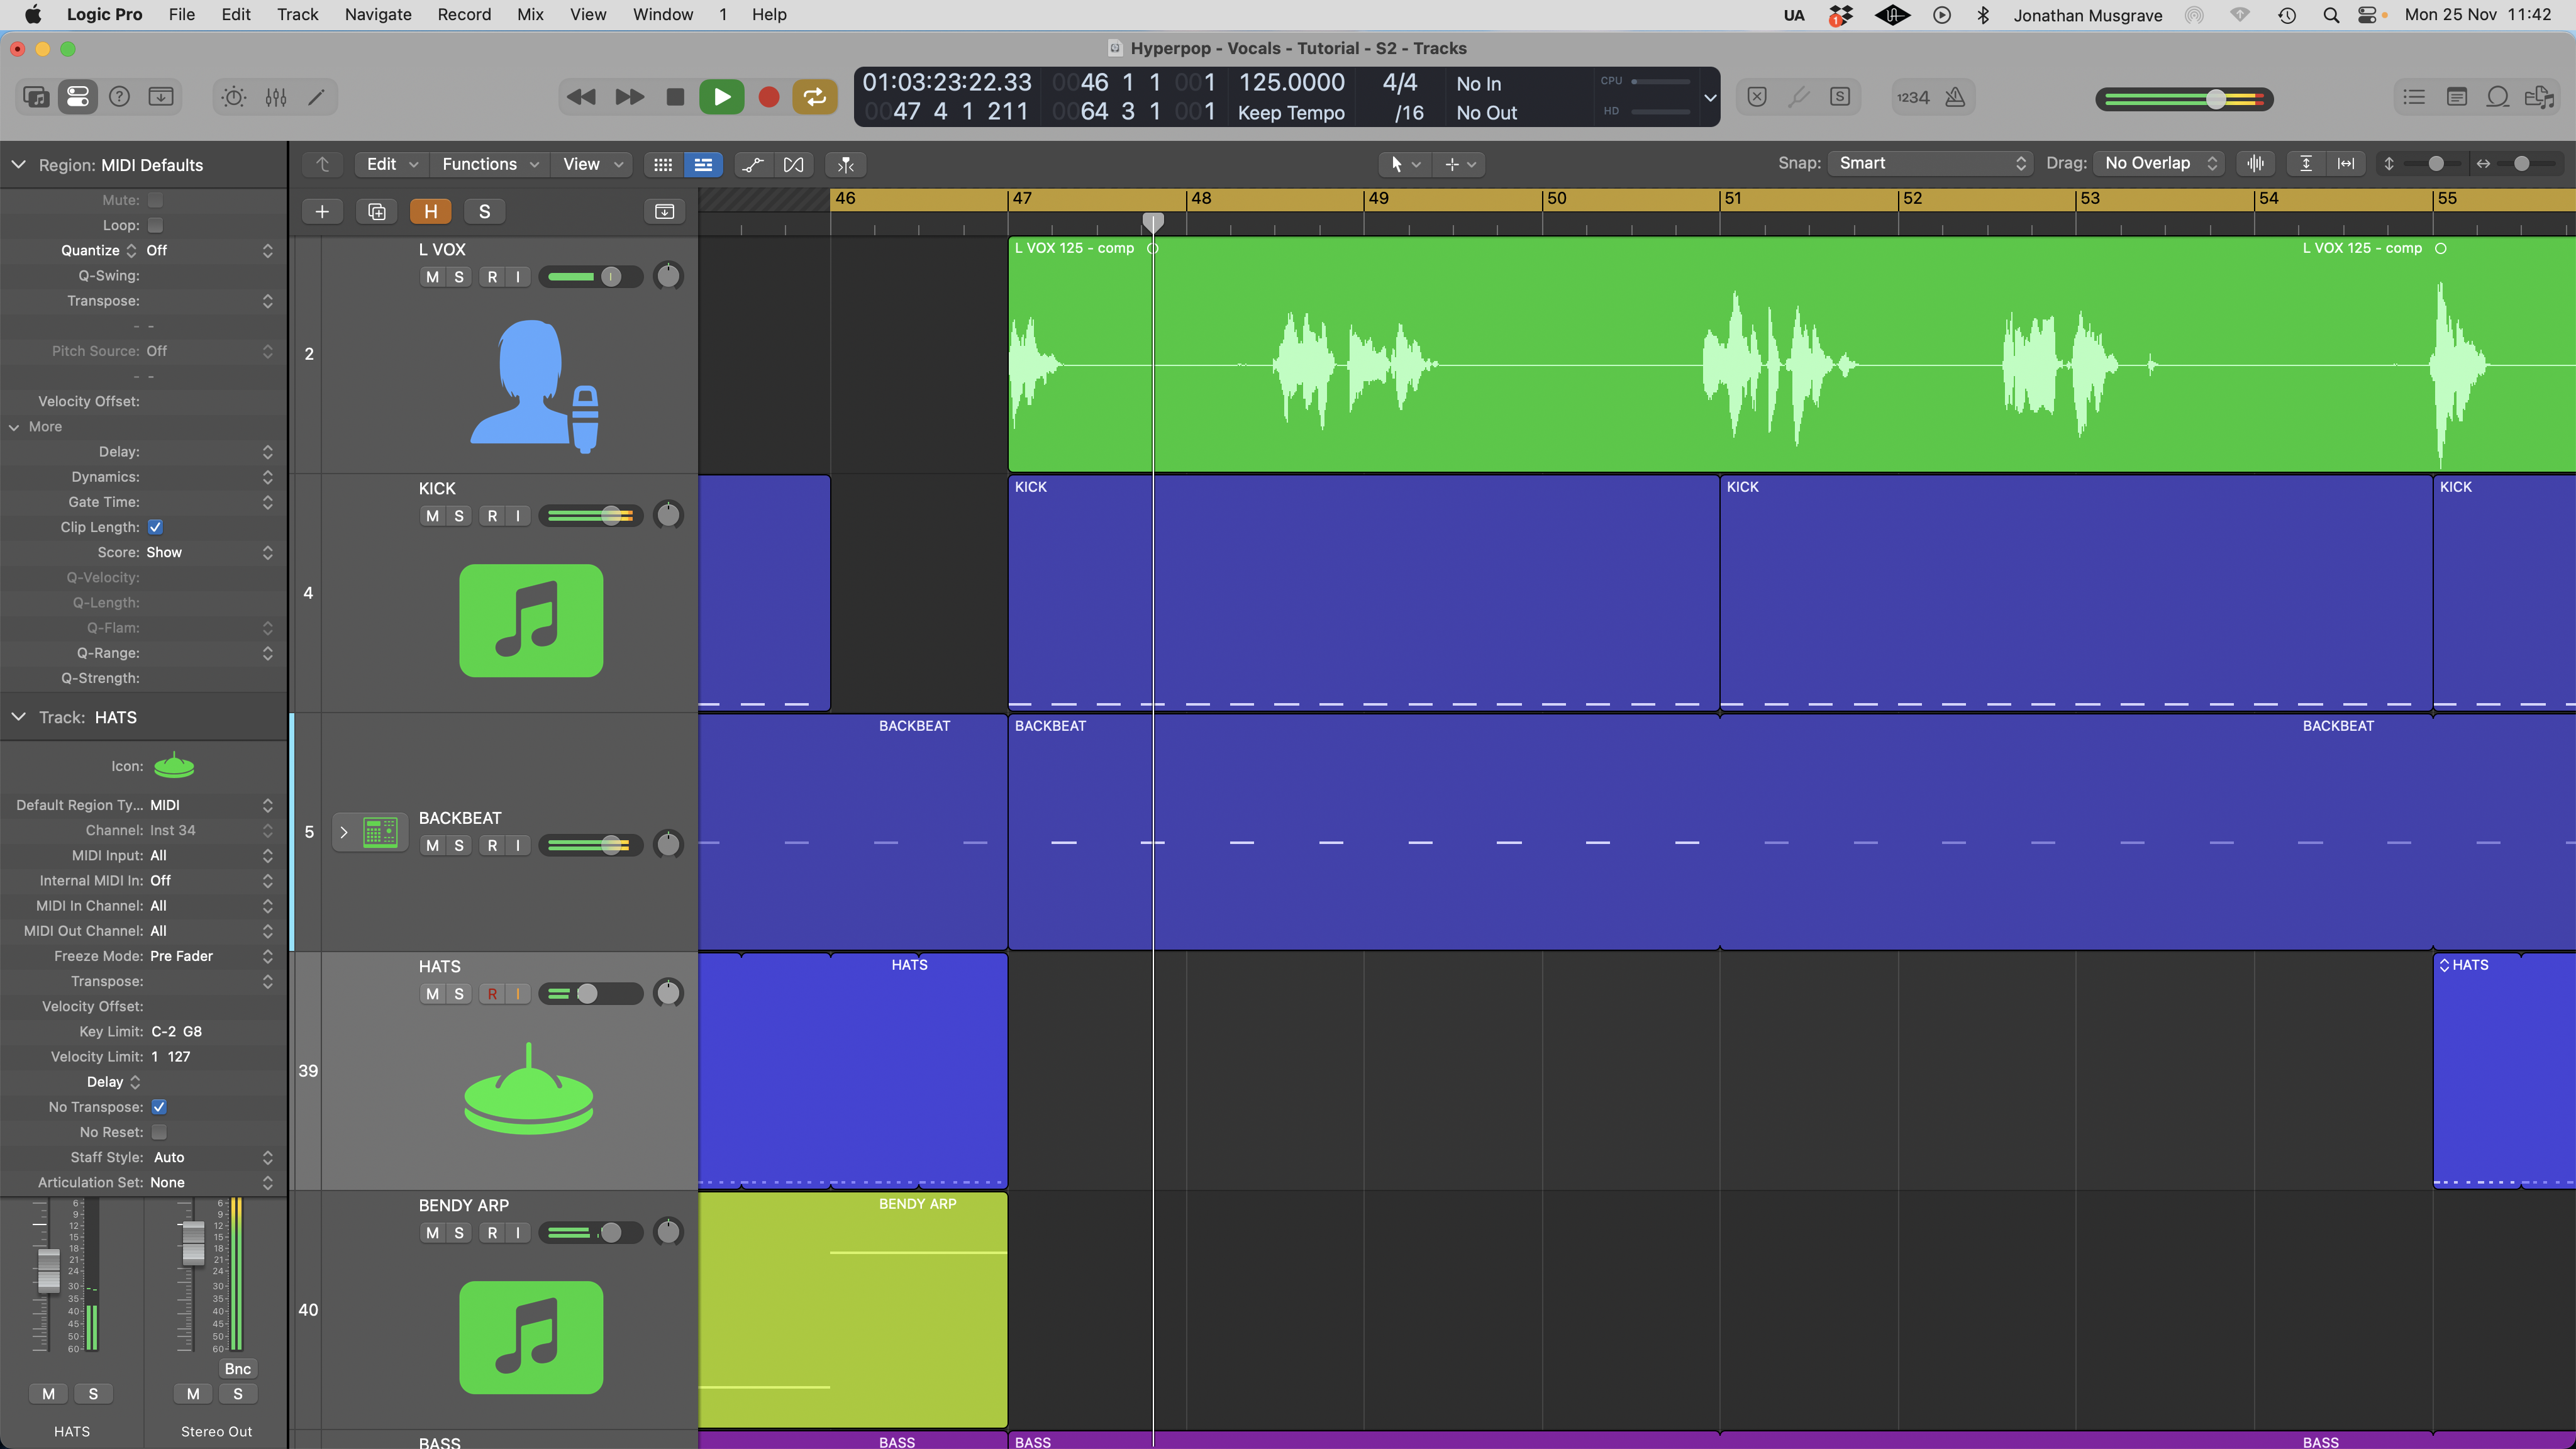
2. If you only want to pitch up your vocals, then jump to step 4. But let’s assume you want to speed them up as well. The first step is to record your vocals at a slower tempo than the final track. Here our track production is at 140 bpm and we’ve reduced the tempo by 15 bpm to record our vocals. We’ve then edited and compiled the vocals at the slower tempo (125 bpm).
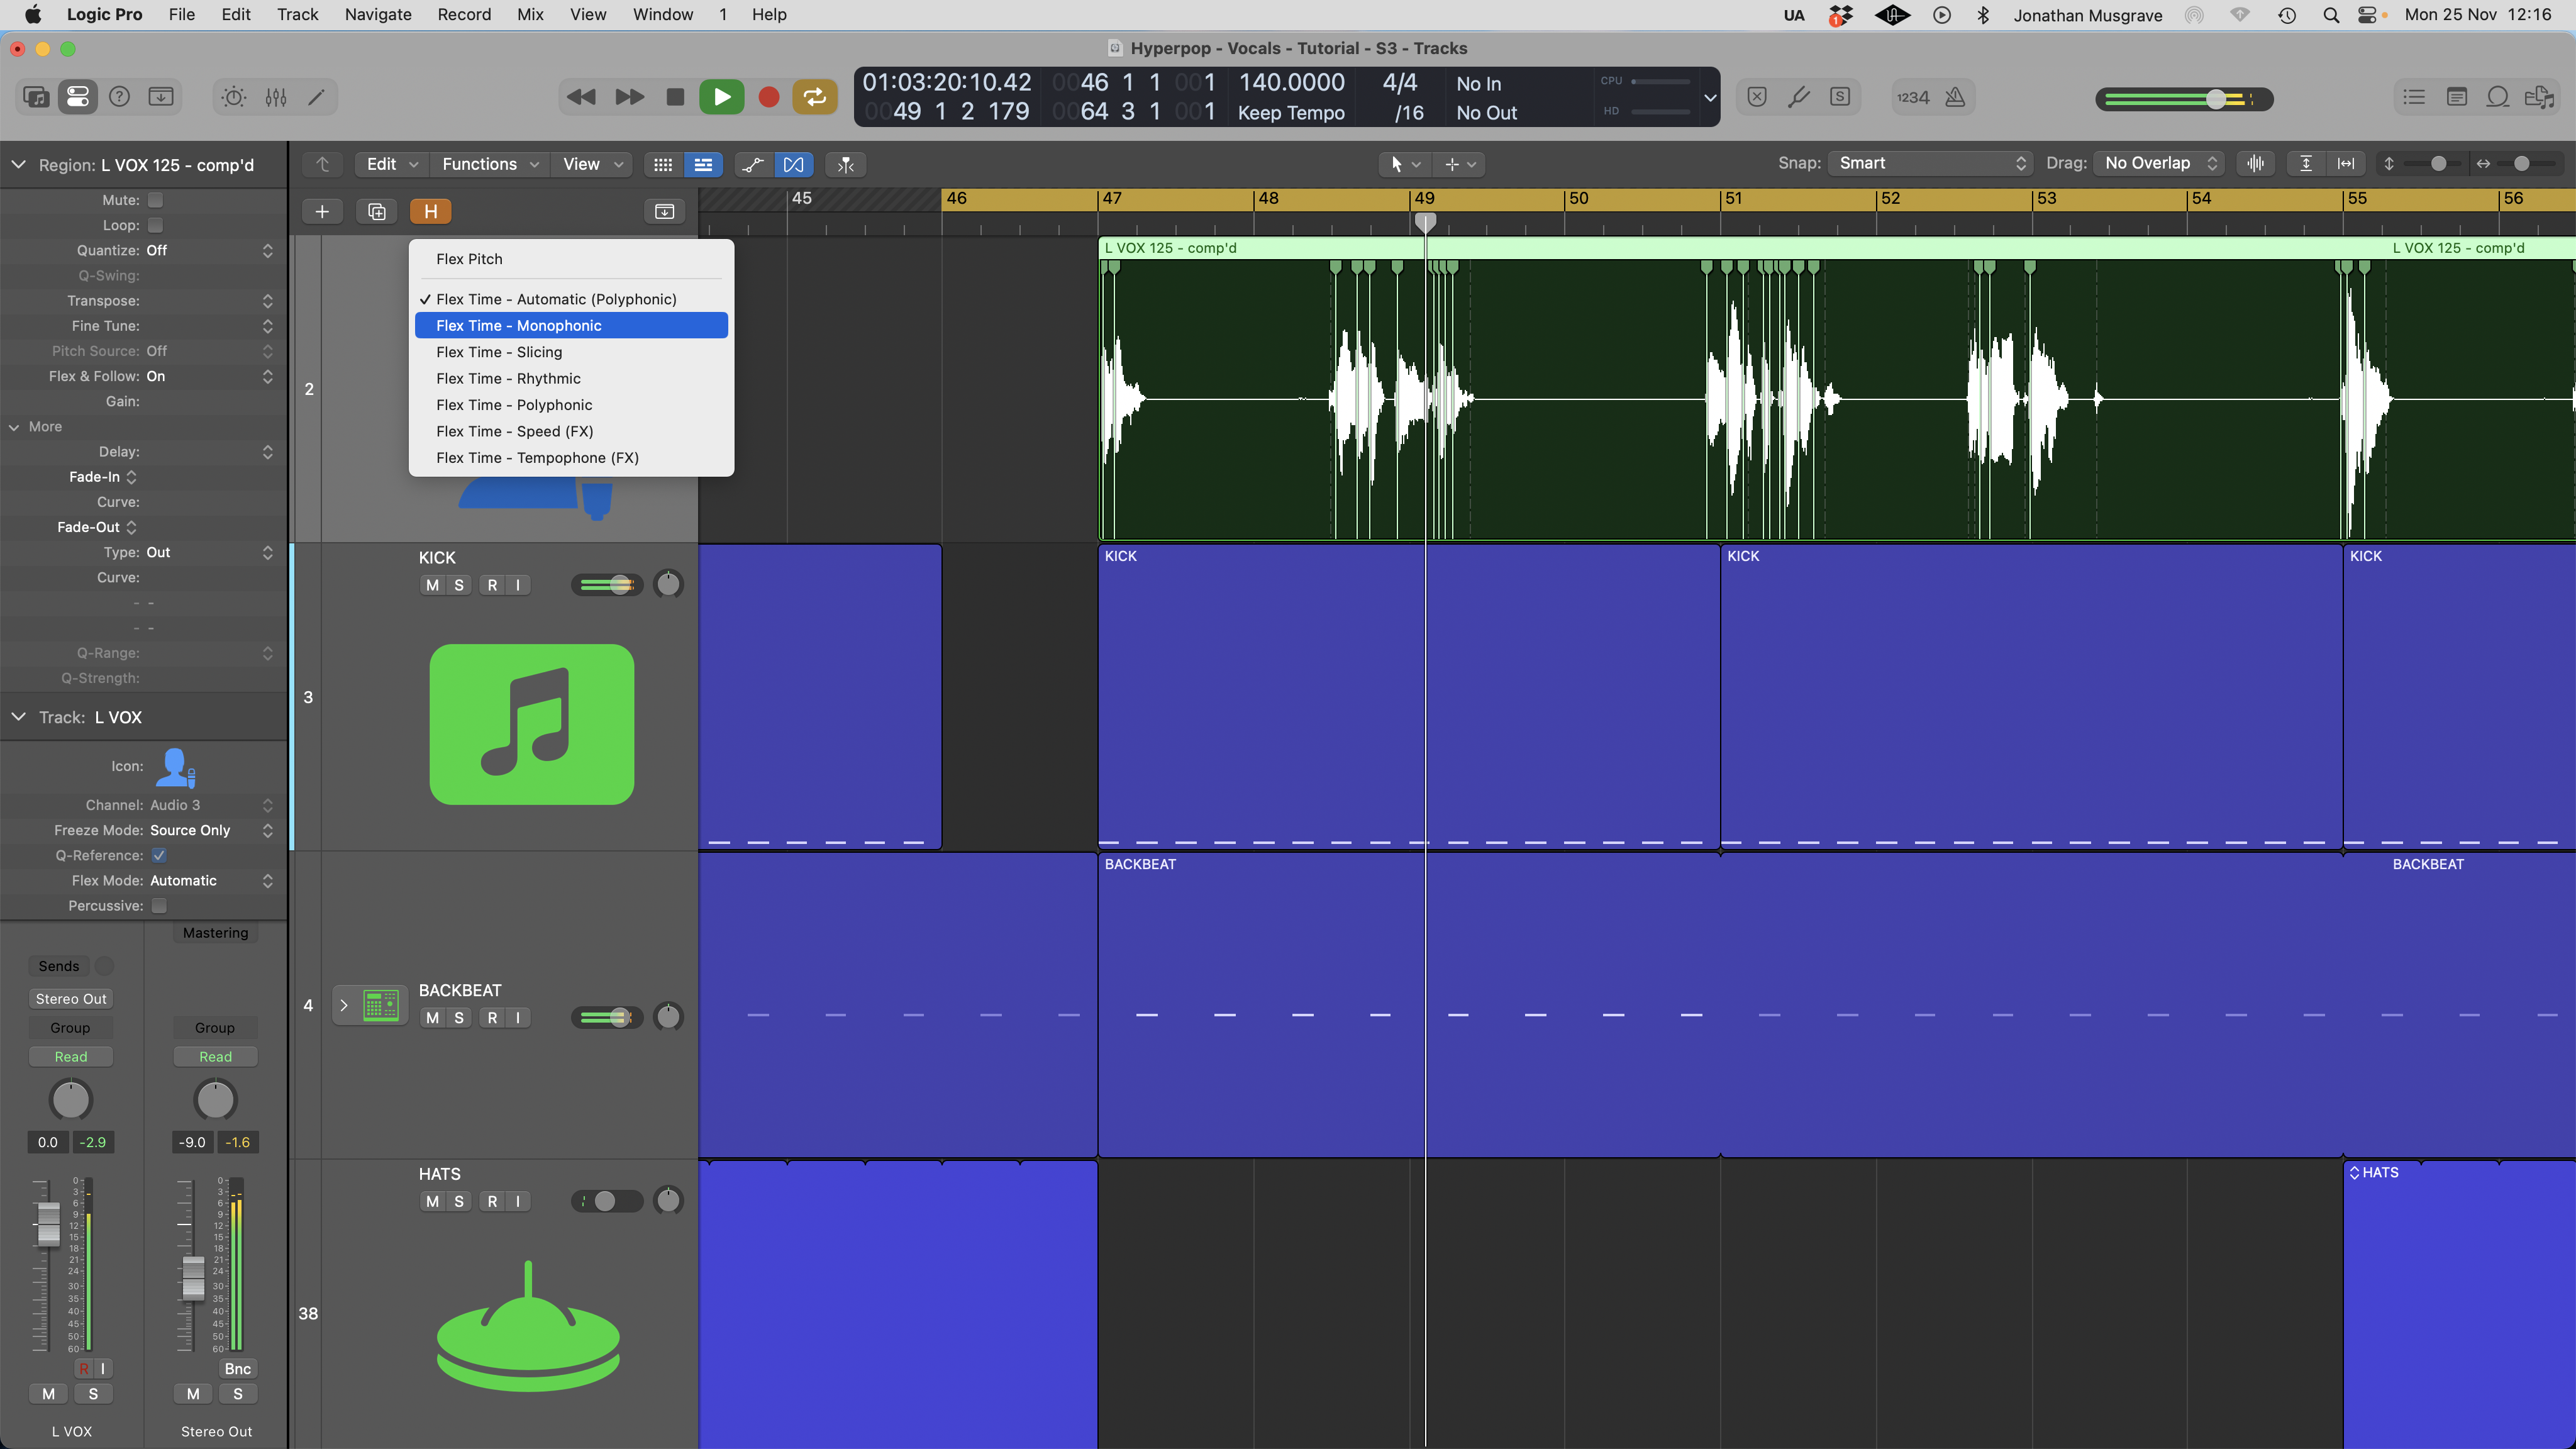
3. At this point there are various routes we can take. The simplest is to move back to the original tempo (140 bpm) and use either offline time stretch or your DAW’s audio manipulation tools (Logic’s Flex Audio for example) to get the vocal up to the required tempo.
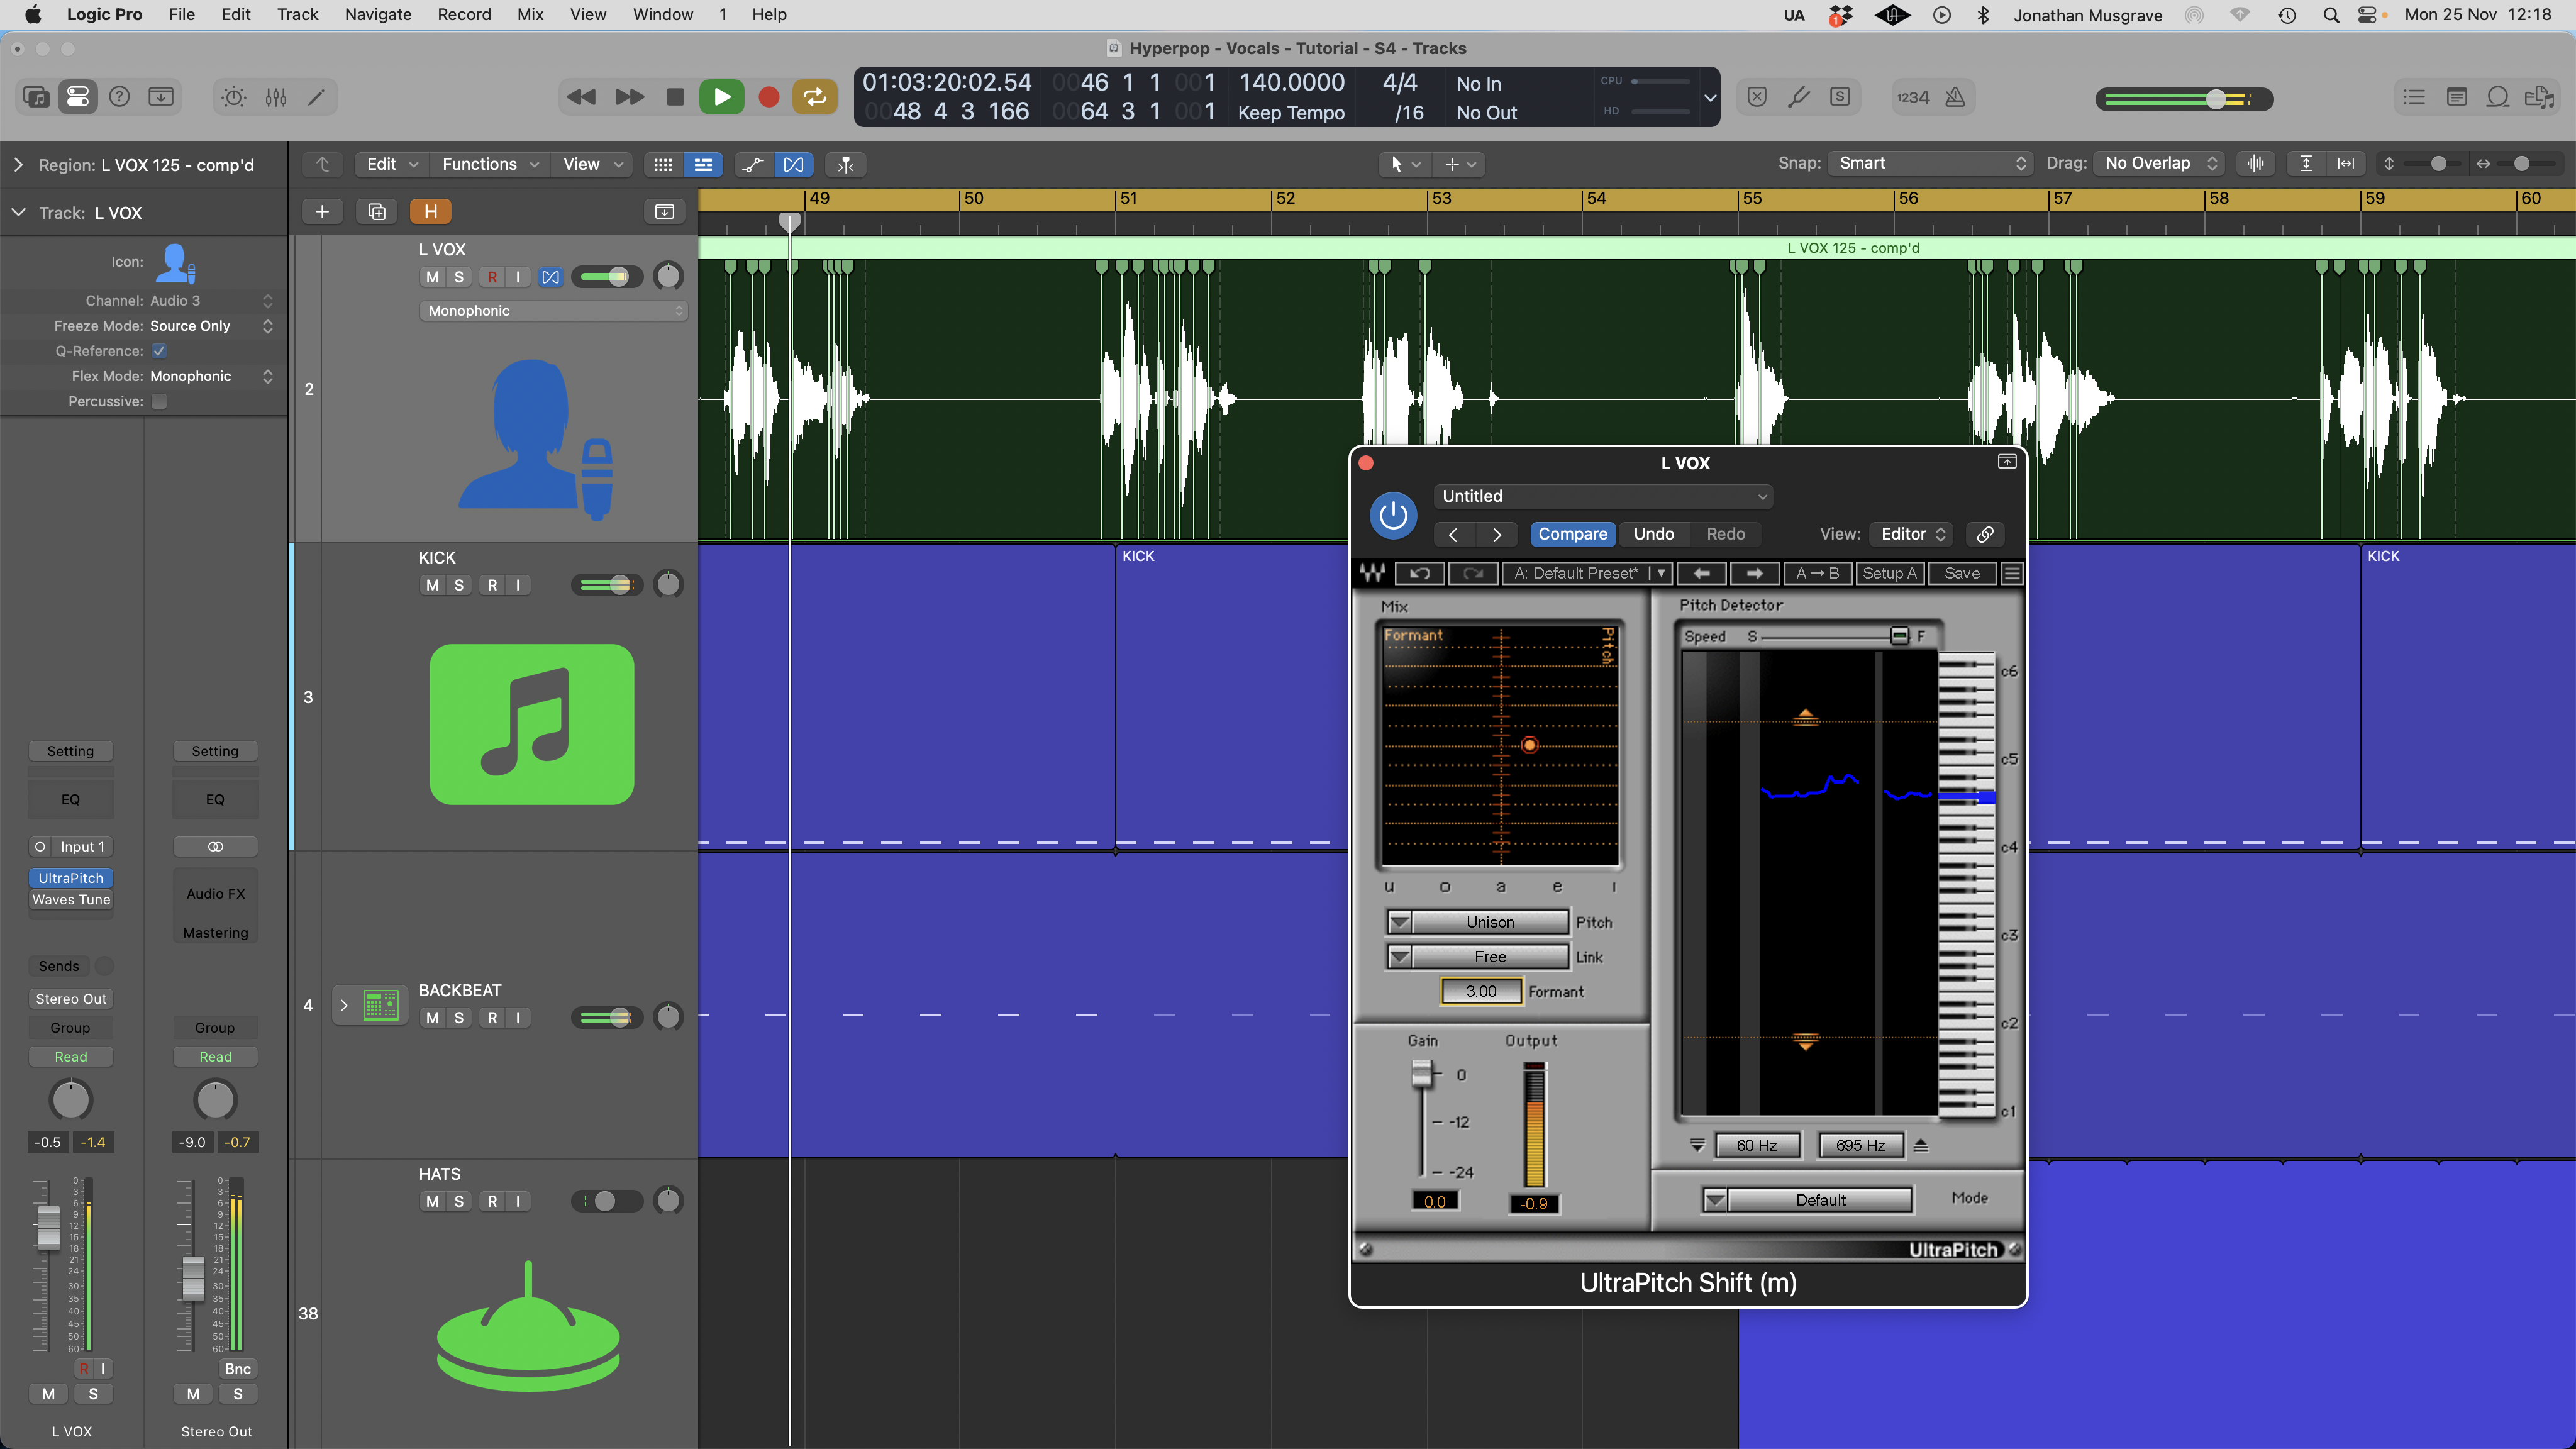
4. Armed with our sped up vocal a quick and dirty way to get the chipmunk effect is to use real time formant processing. This allows us to make the vocal sound younger without changing the pitch. Here we’ve used a regular plugin, setting a positive formant offset of +3. Even so, this type of processing can create undesirable audio artefacts.
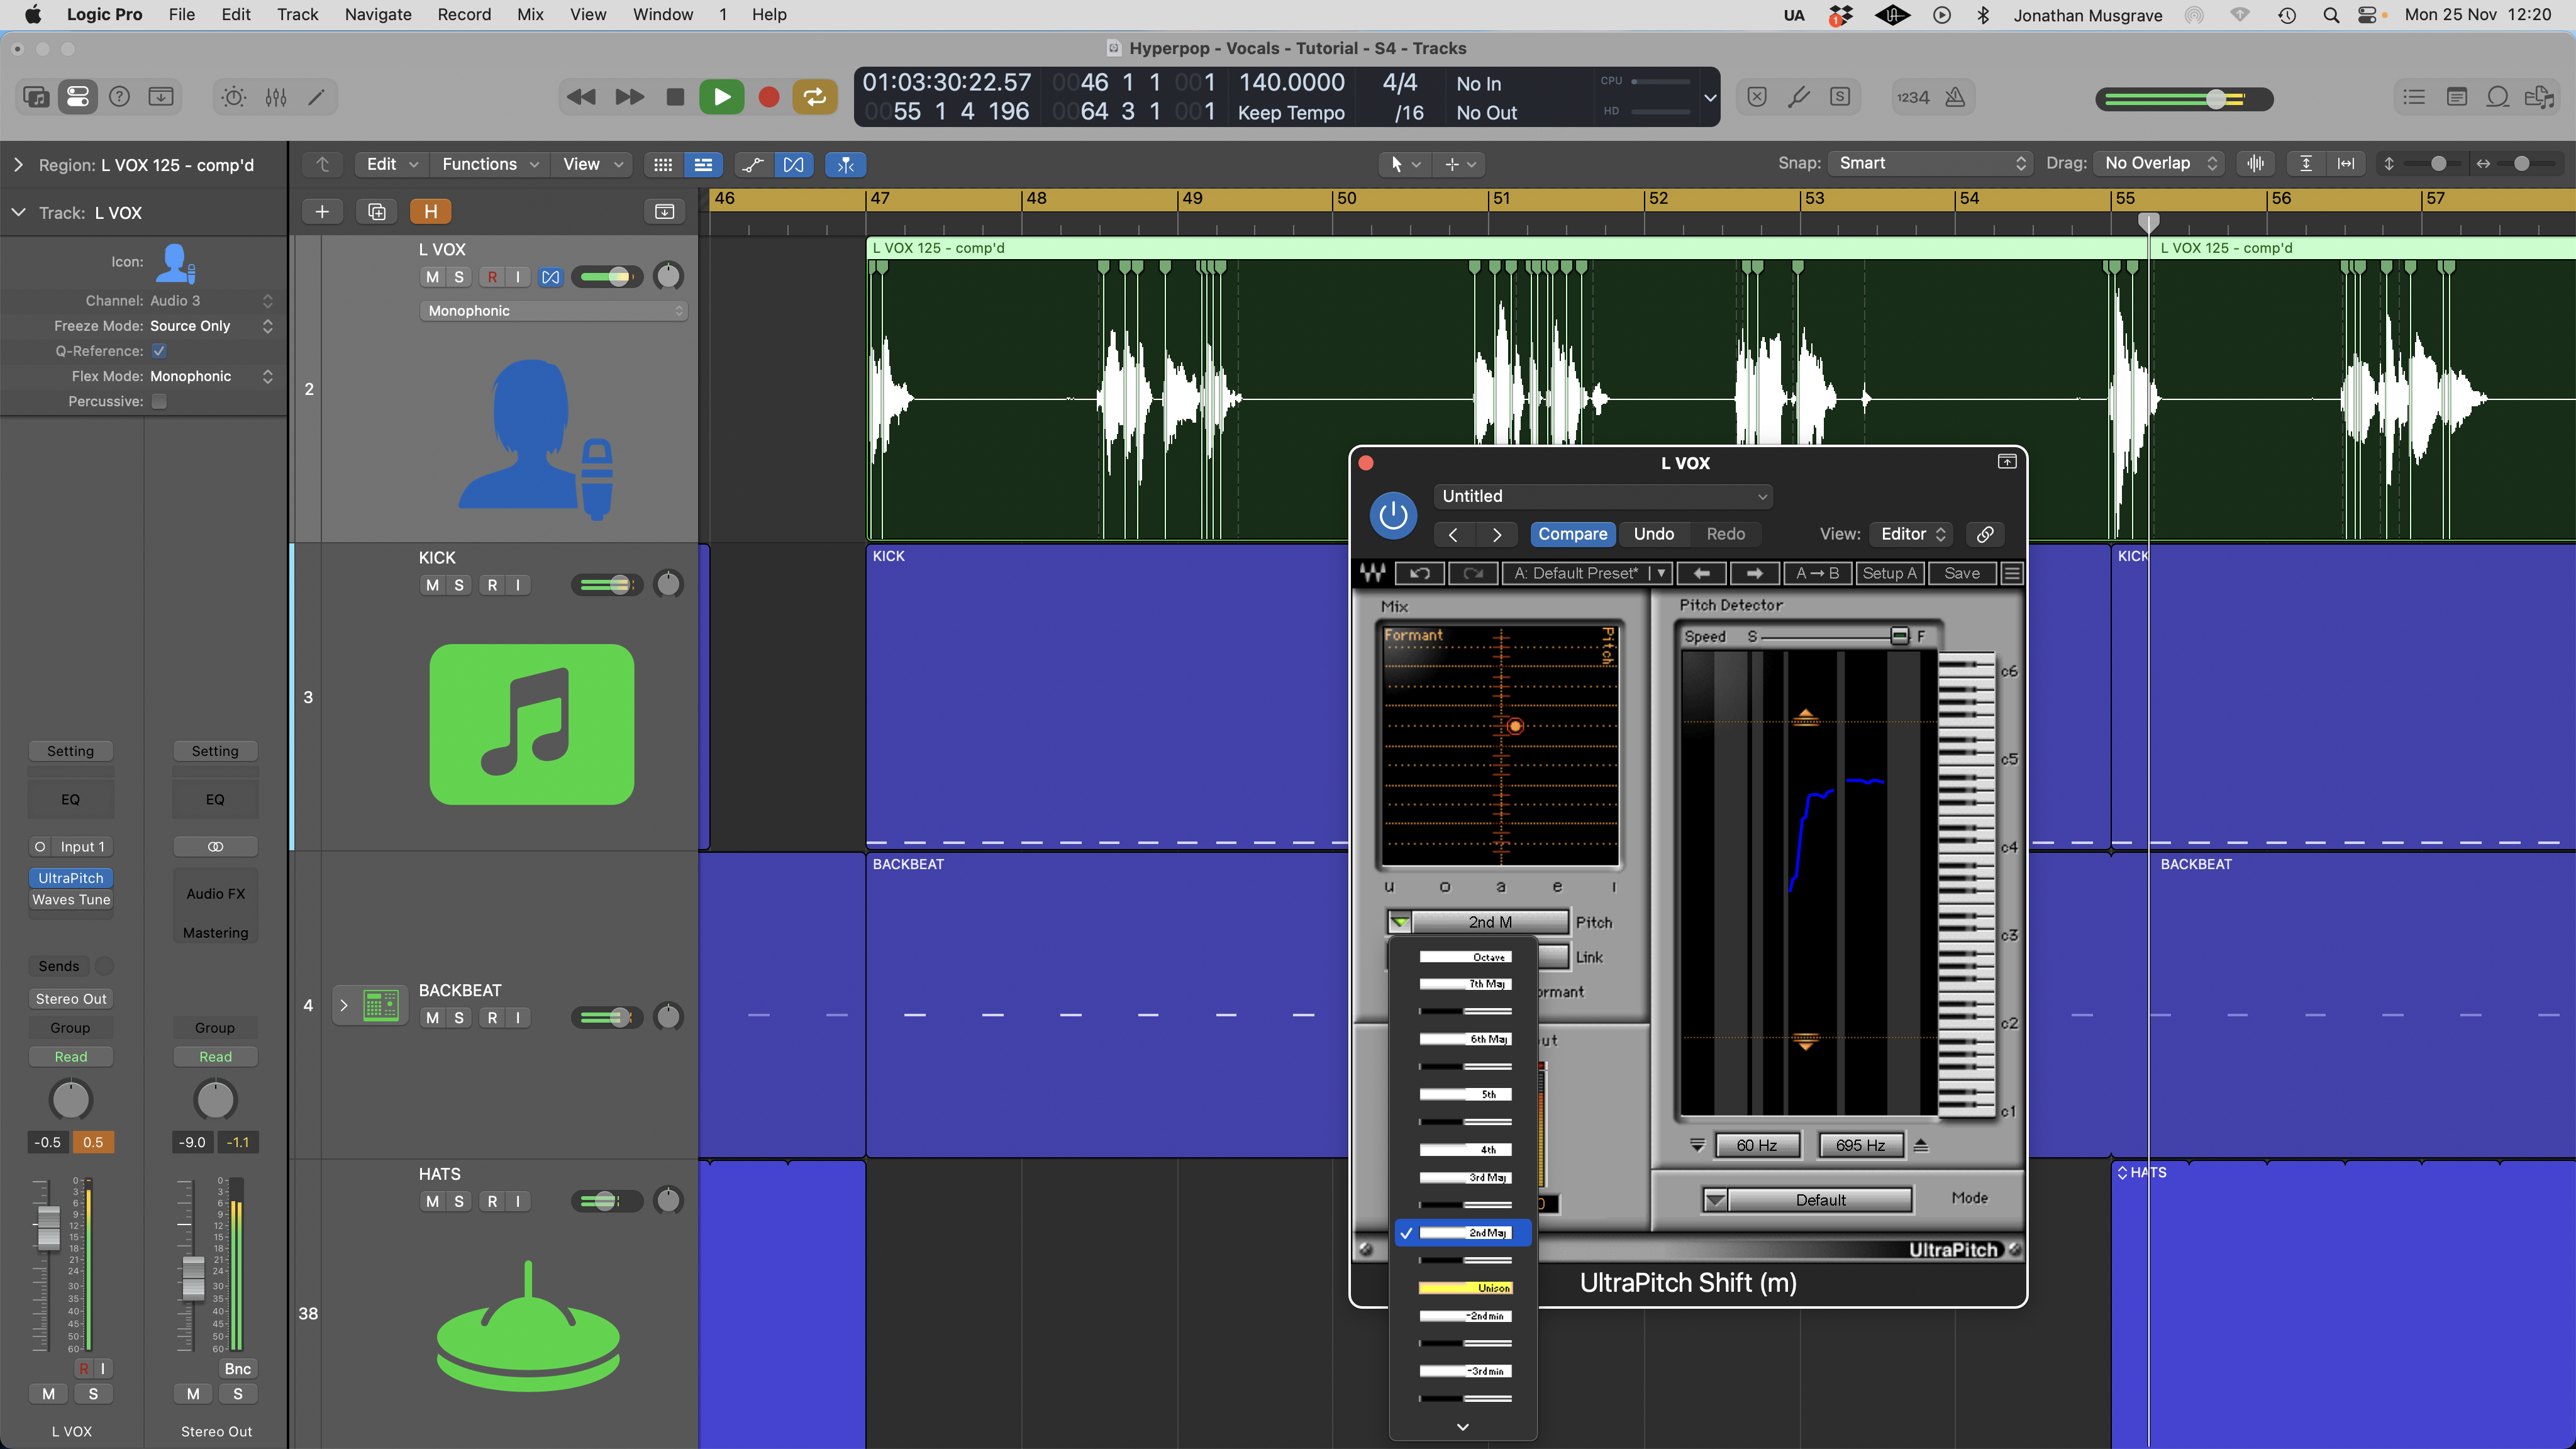
5. To minimise the artefacts we can combine a small amount of formant processing with pitch shifting. Here we’ve used the same real time plugin to shift our vocal up 2 semitones and apply a smaller amount of formant offset (+1.5). This is fine, but means our vocal is now 2 semitones higher than our original track production.
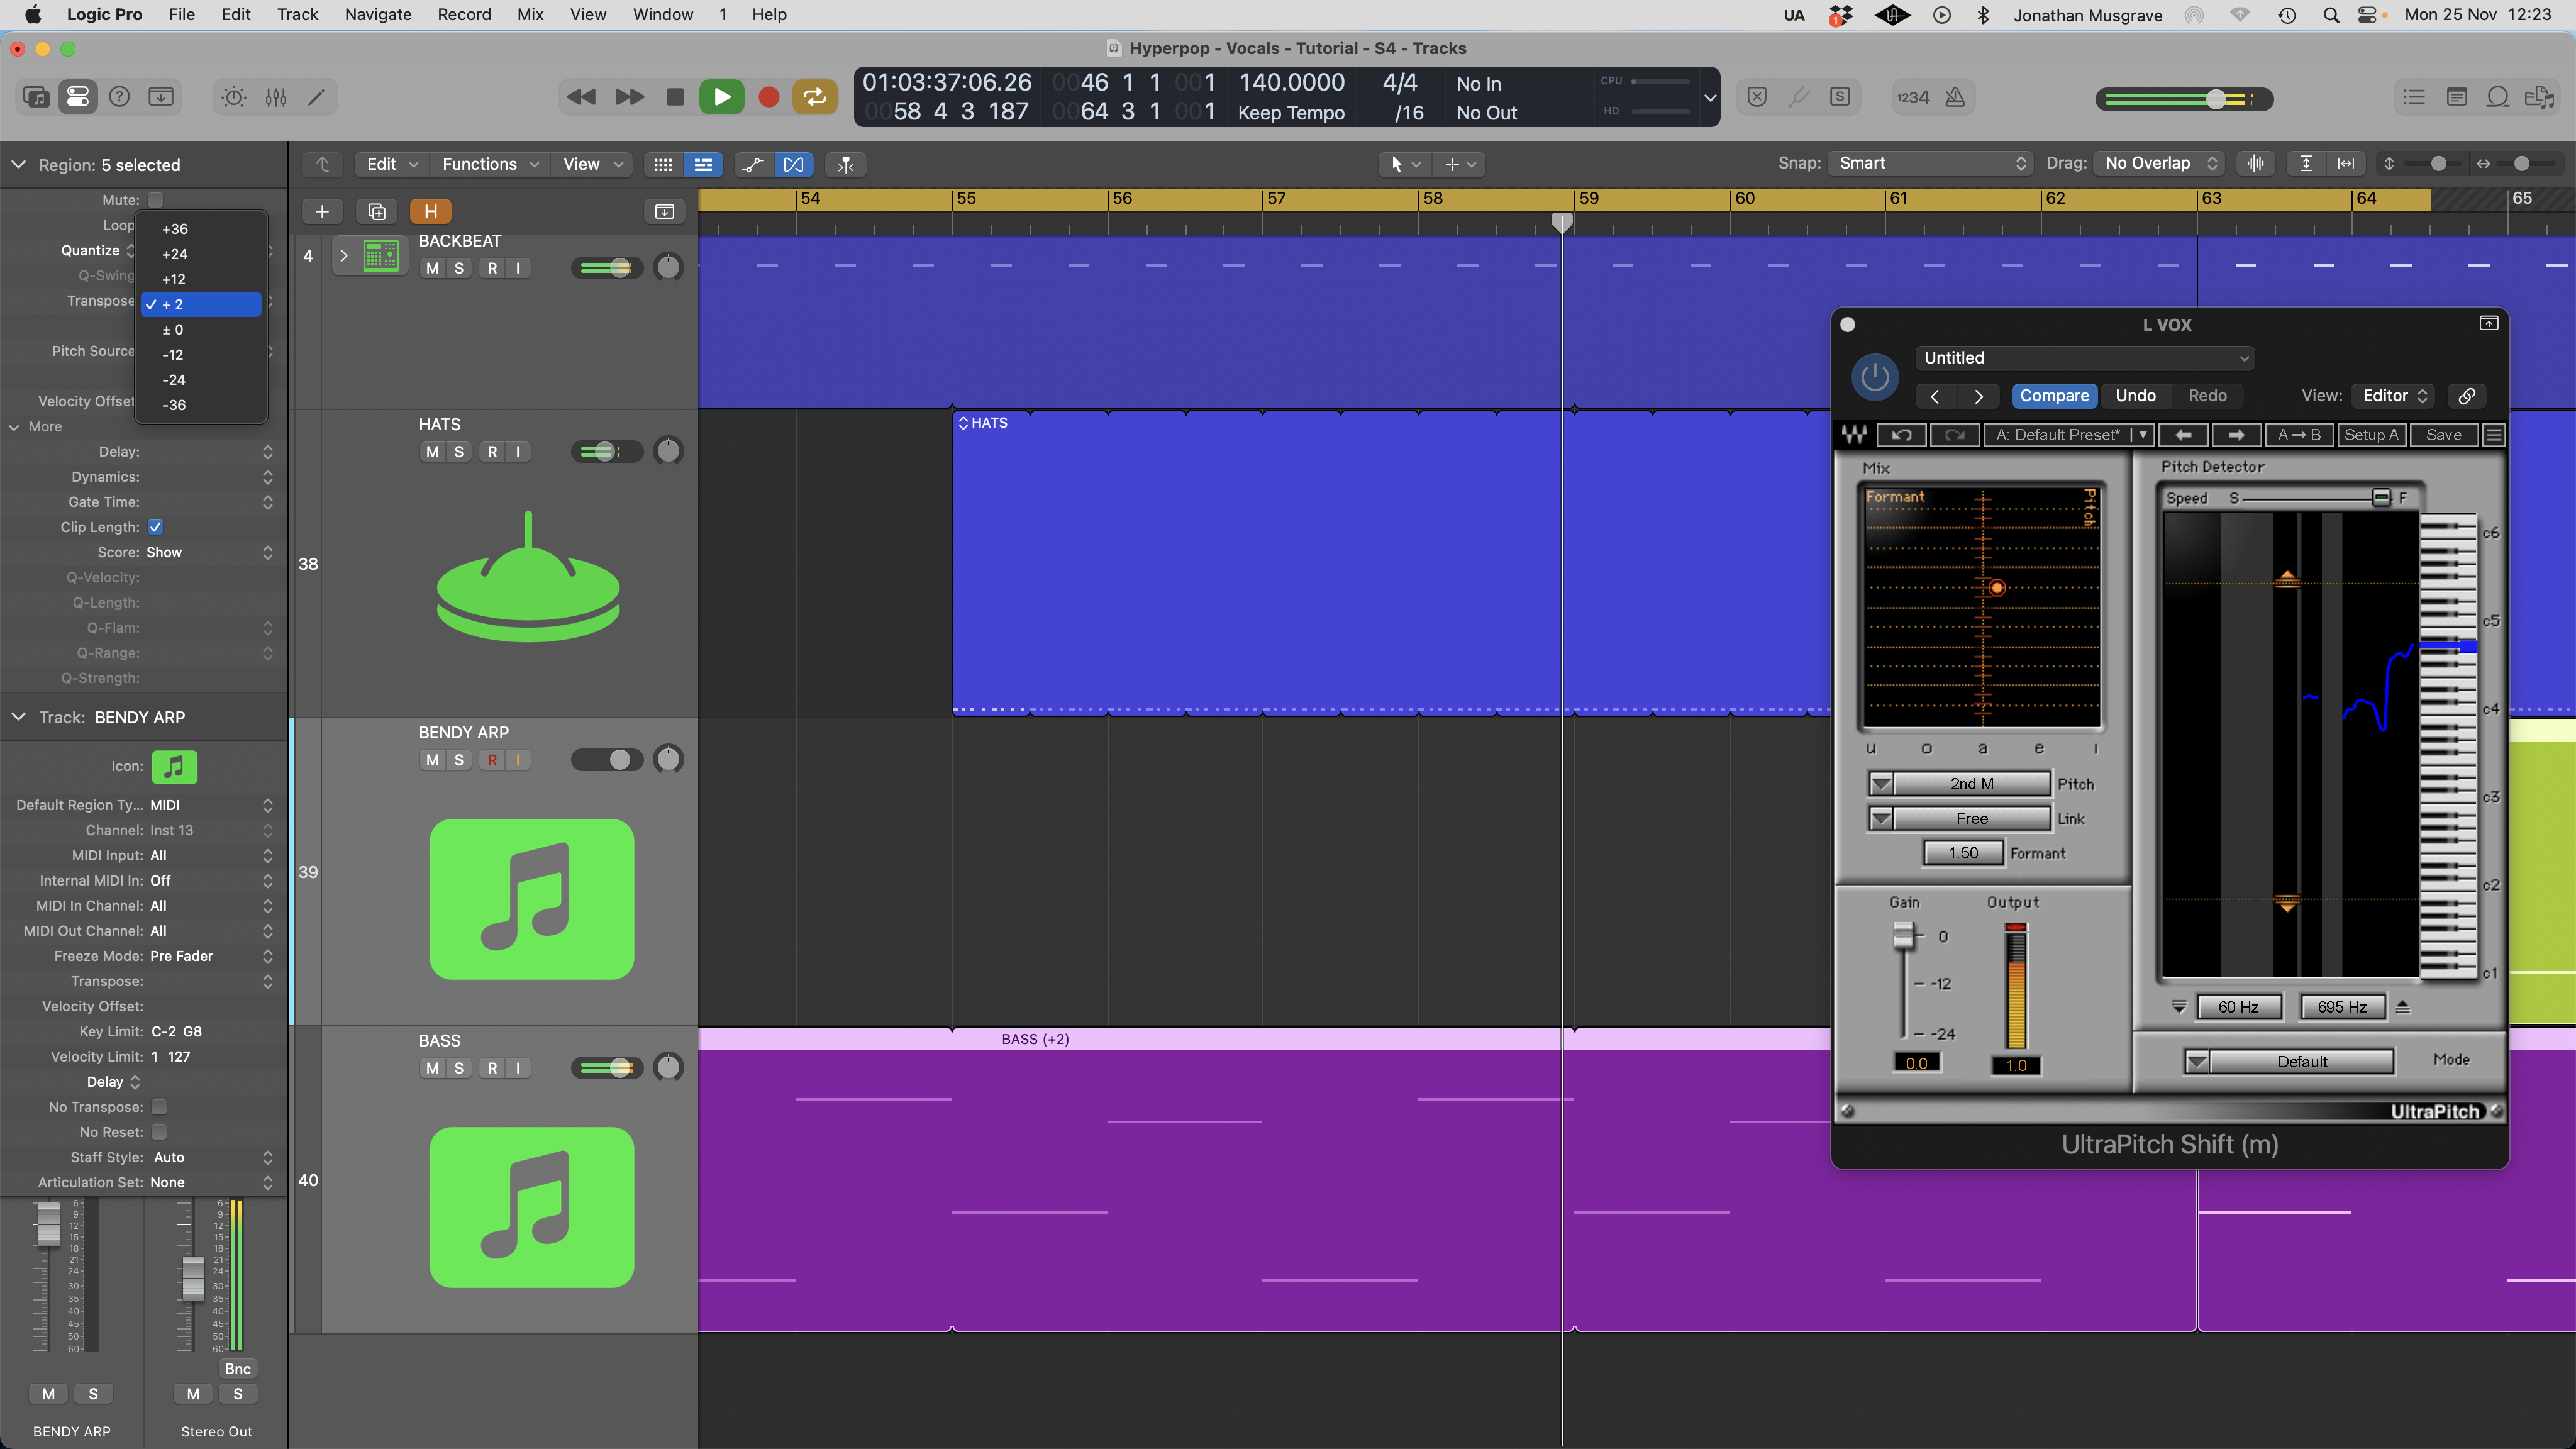
6. If the musical aspects of our track production are MIDI, and we don’t mind changing the track pitch, we could just pitch these up to match. Alternatively, if we know in advance we want to pitch up 2 semitones, we could allow for this at the recording stage, plan ahead and record the vocals 2 semitones lower in pitch.
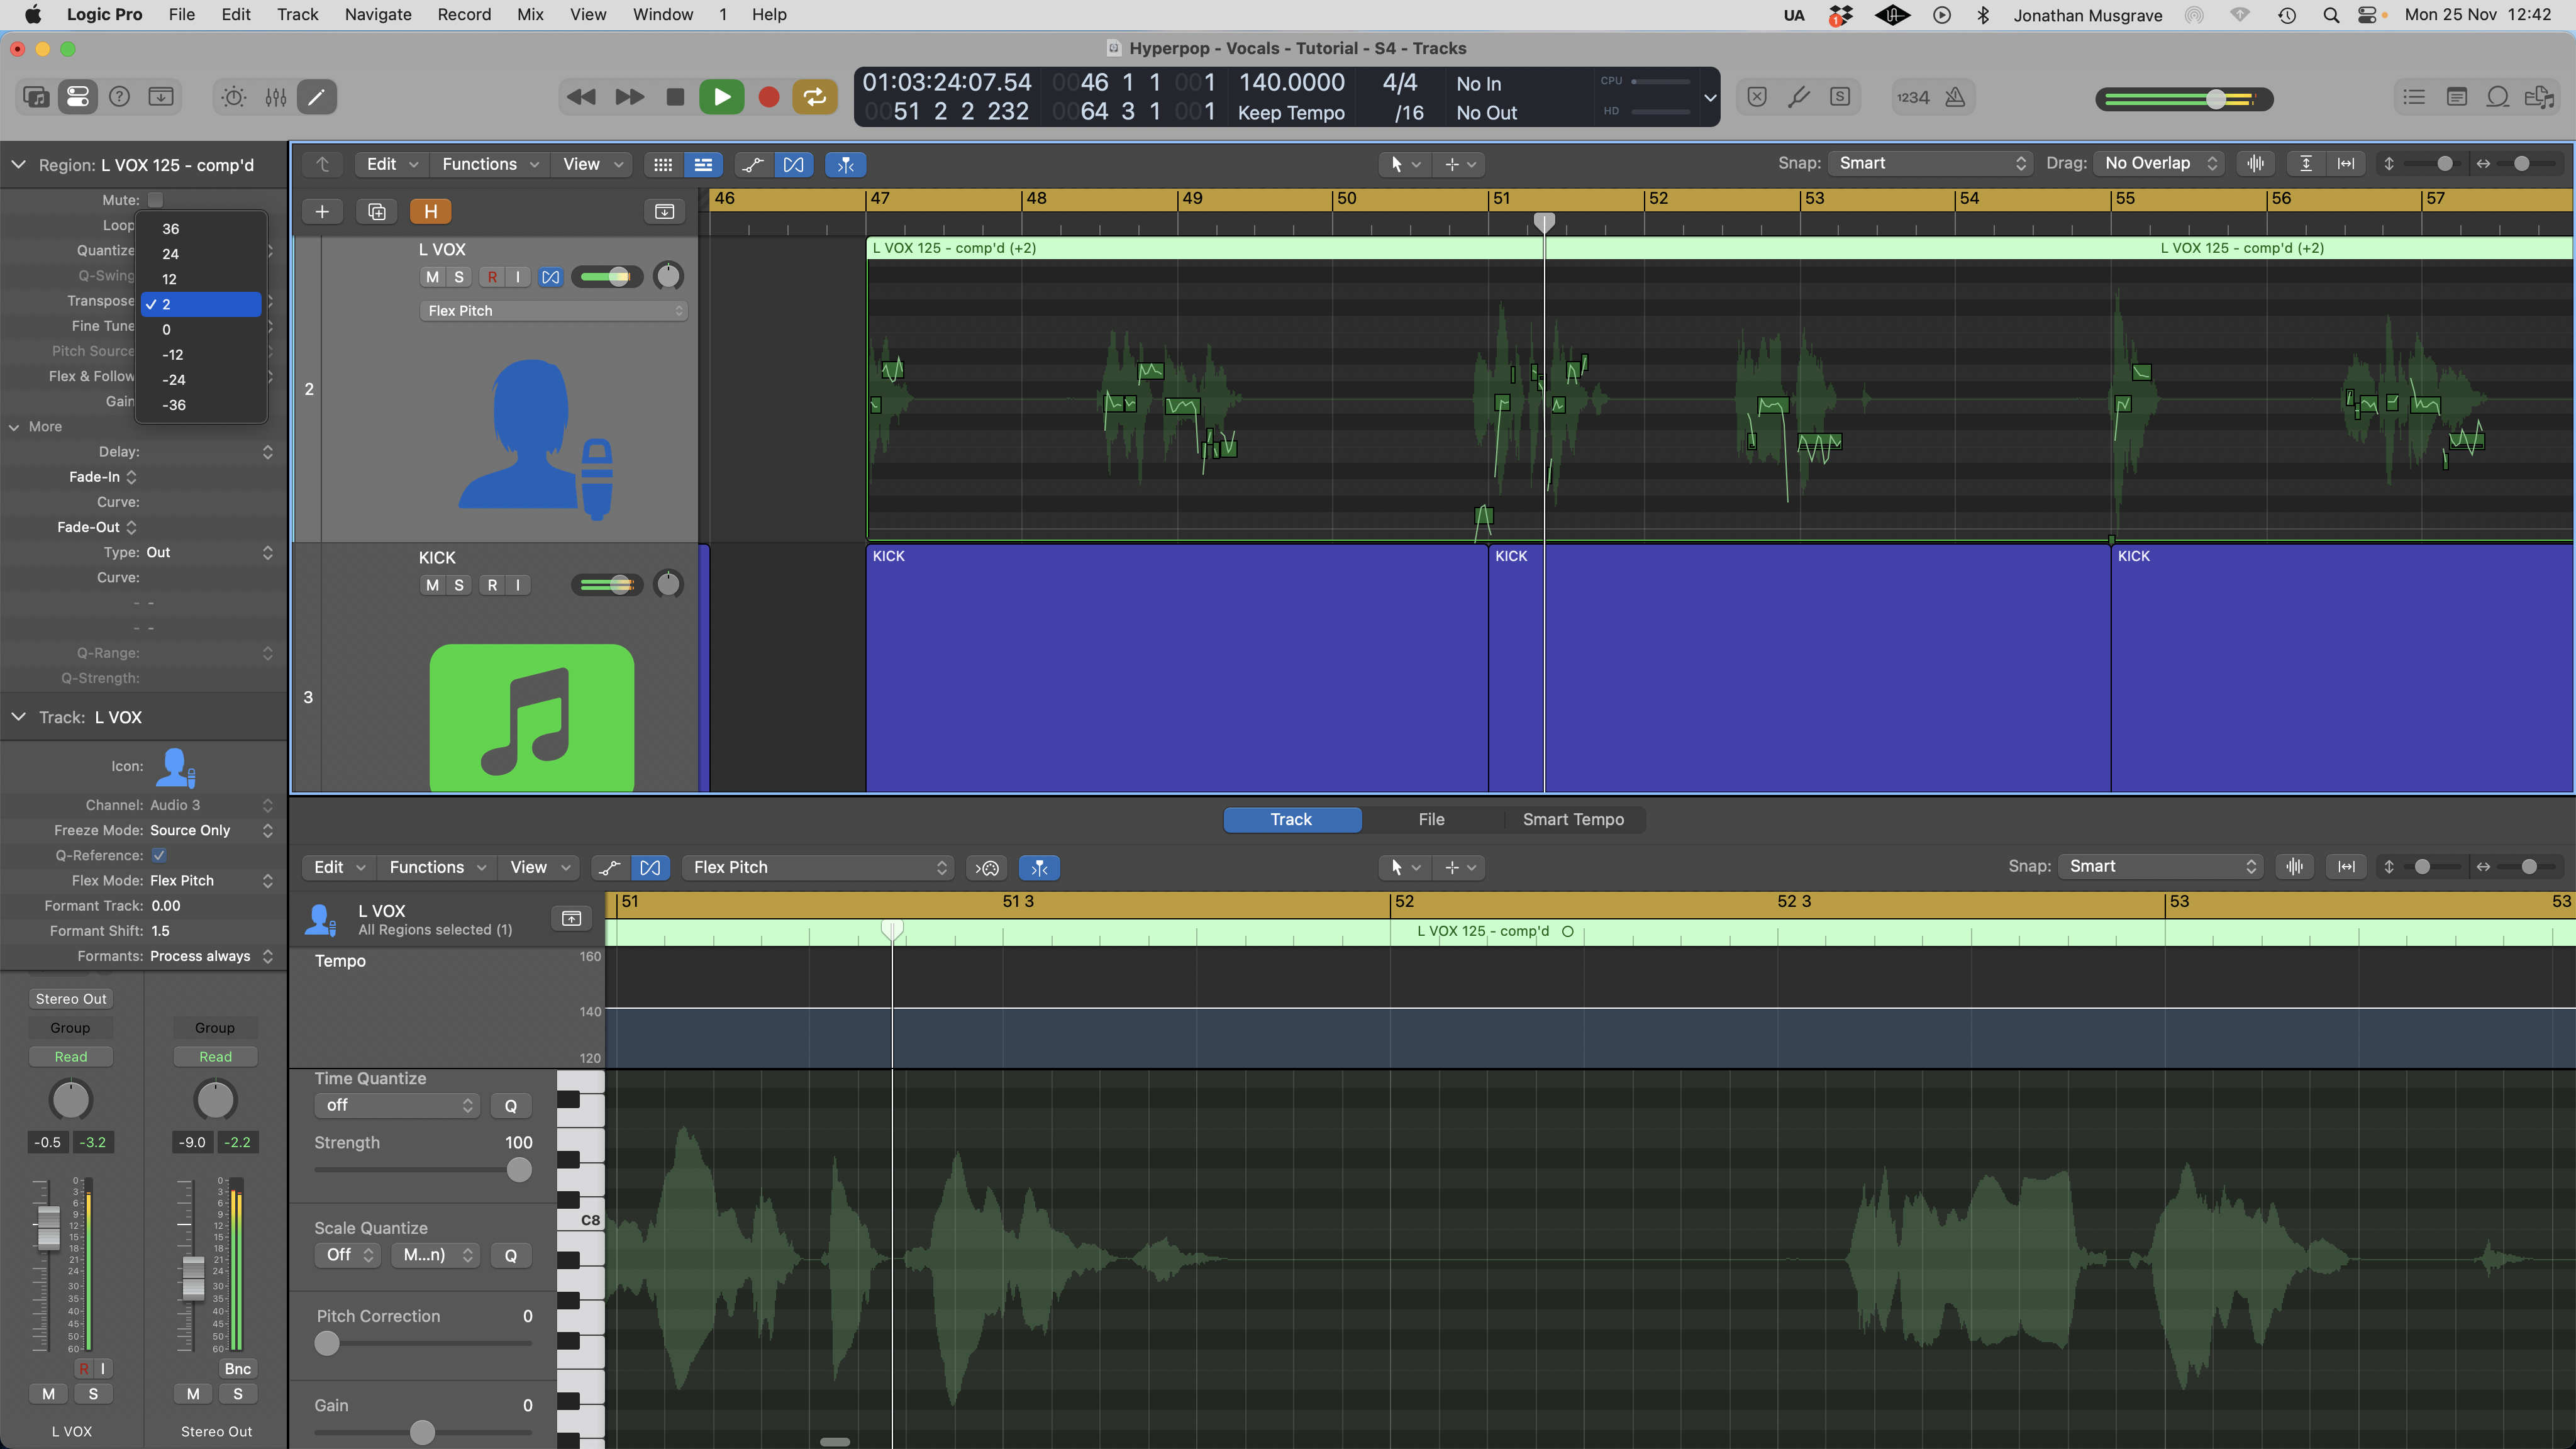
7. Real-time pitch and formant plugins can produce unpleasant artefacts, and if we want to get the cleanest pitch shifting outcome then offline processing or pre-analysed pitch adjustment (here we’re using Logic Pro’s Flex Pitch) can be the way to go. What’s more, they allow us to tackle pitch and tempo collectively.

8. One final option is to use a classic varispeed process to speed up and pitch up the vocal at the same time. Sonically this sounds excellent, but the relationship between tempo and pitch can be slightly confusing, and a musically useful change of say +3 semitones may result in a non-integer tempo change.
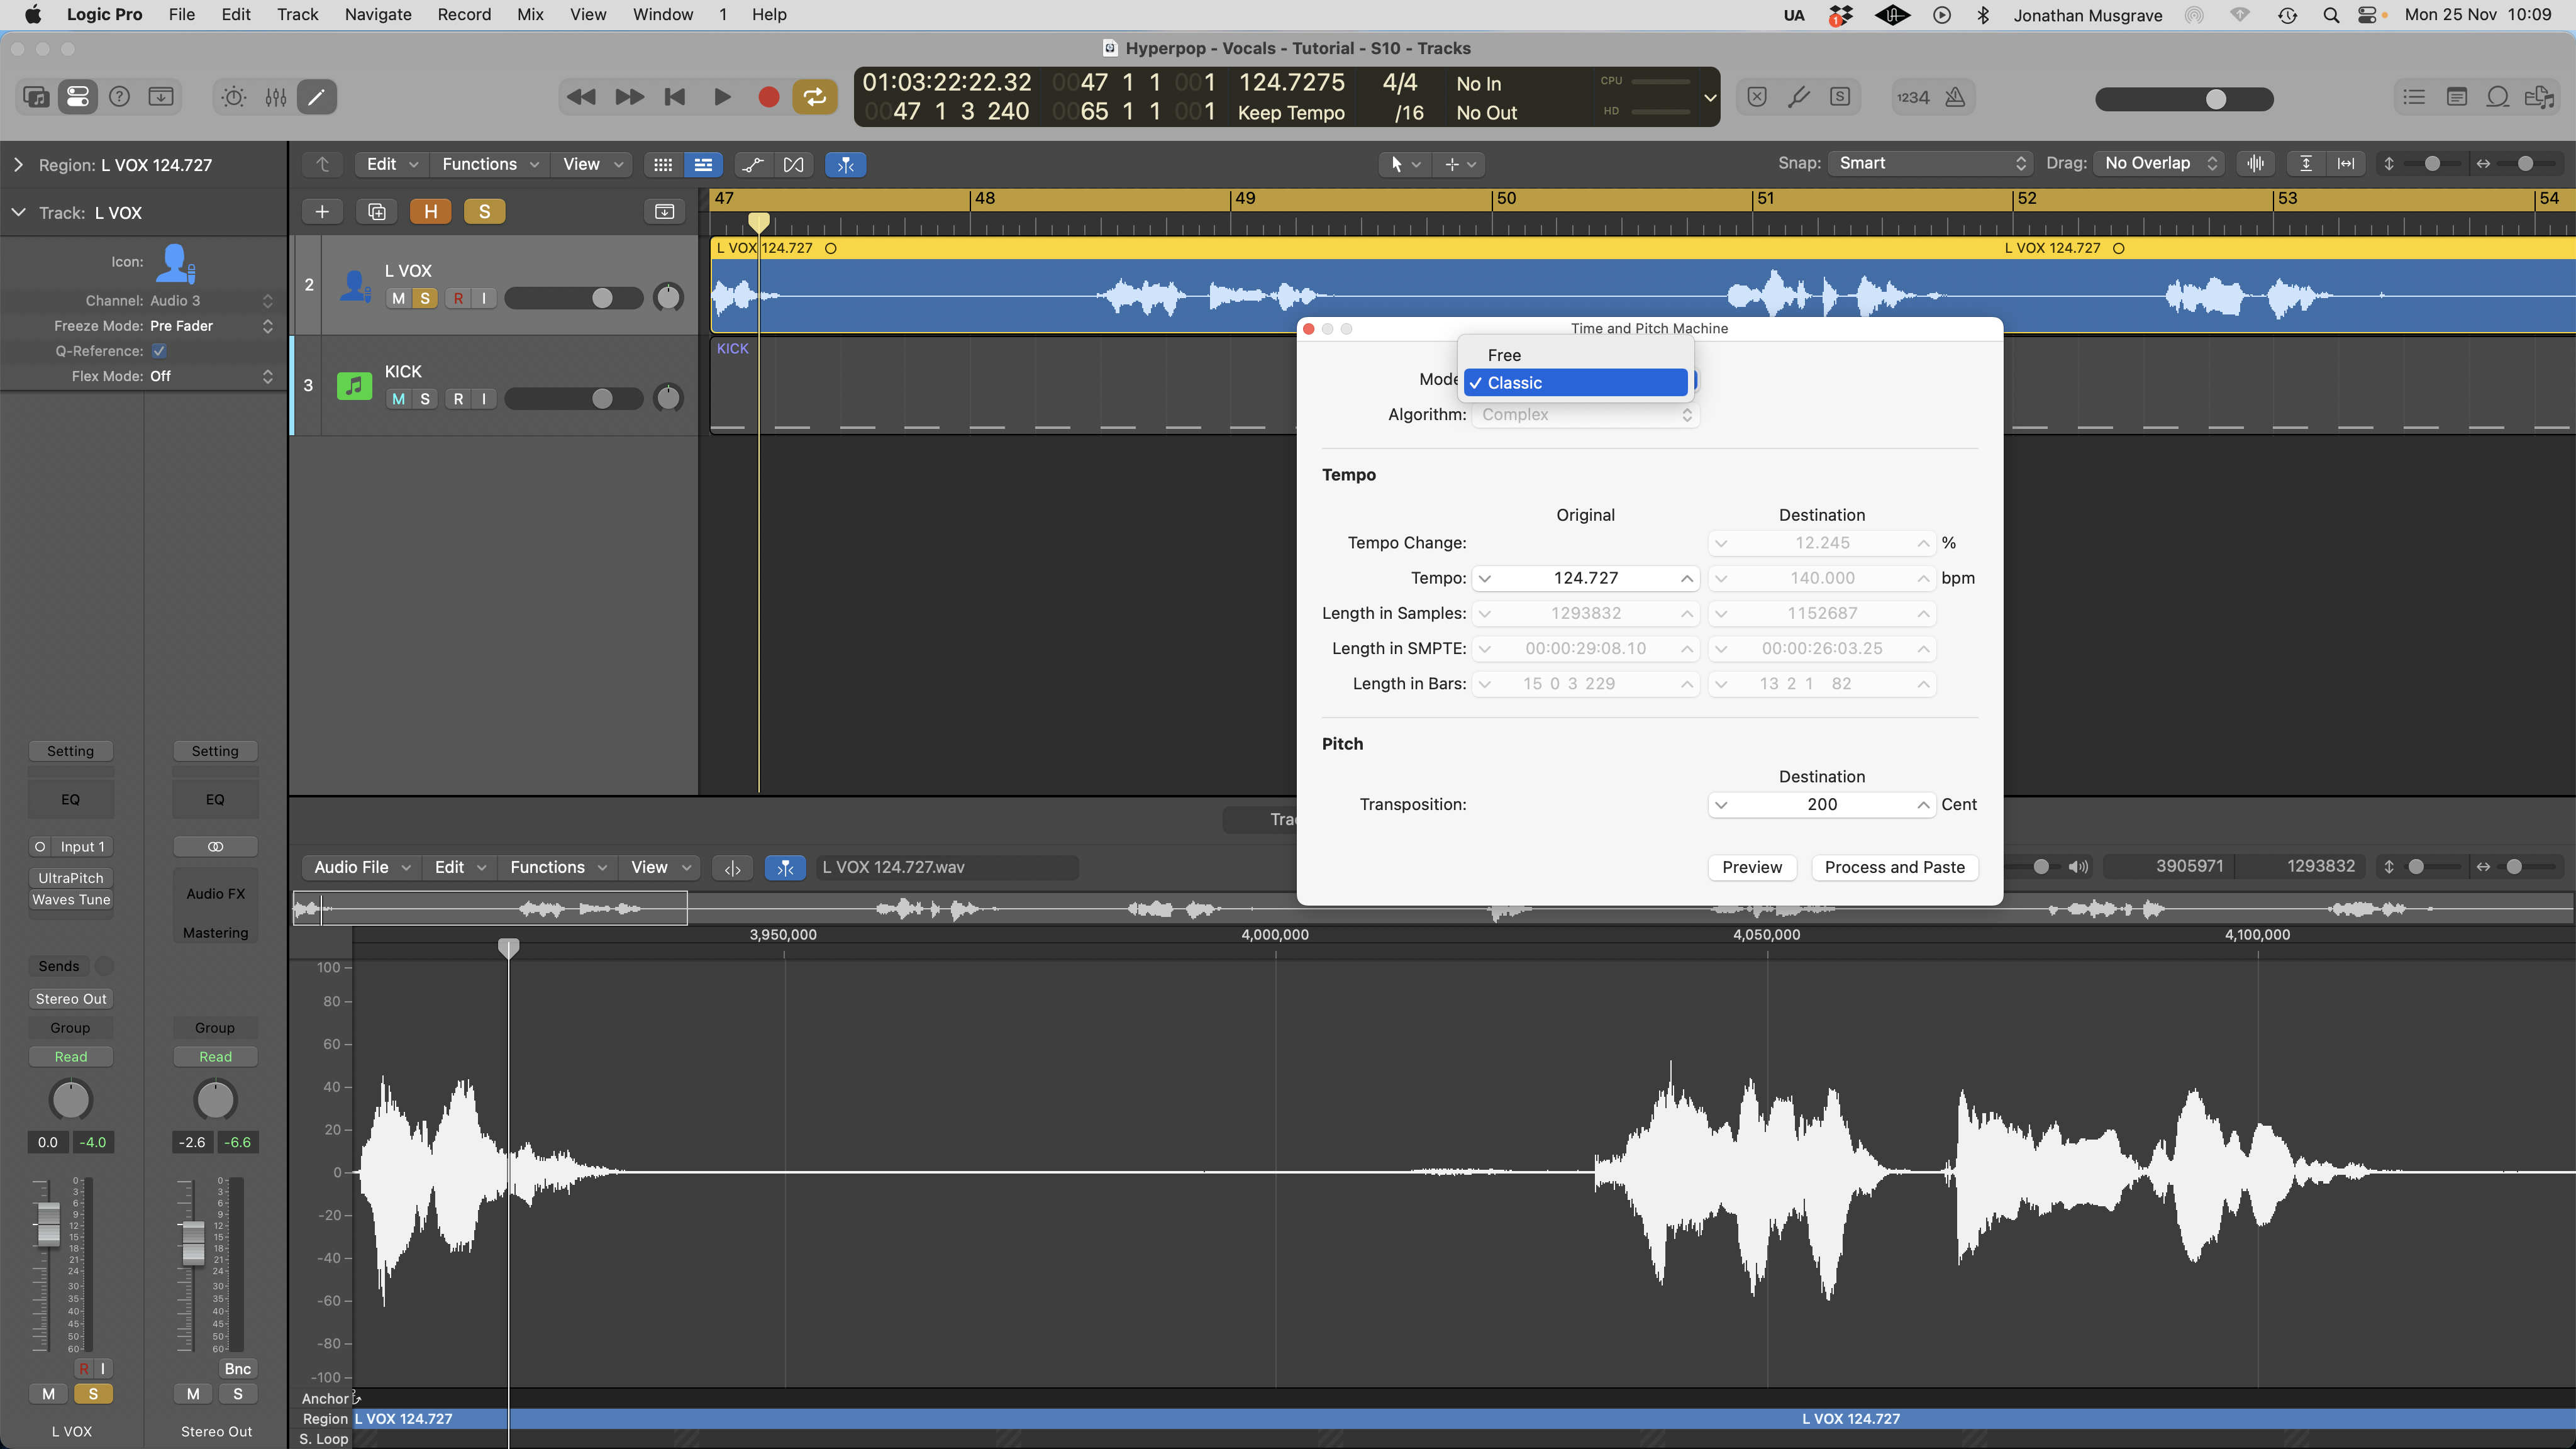
9. This method once again requires us to decide what final pitch and tempo we’d ideally like to achieve prior to recording the vocals. We can then modify our track pitch and tempo, recording at a slower tempo and lower pitch, and then varispeed the vocals back up to the desired tempo. Here we’ve done this to achieve a 2 semitone varispeed.
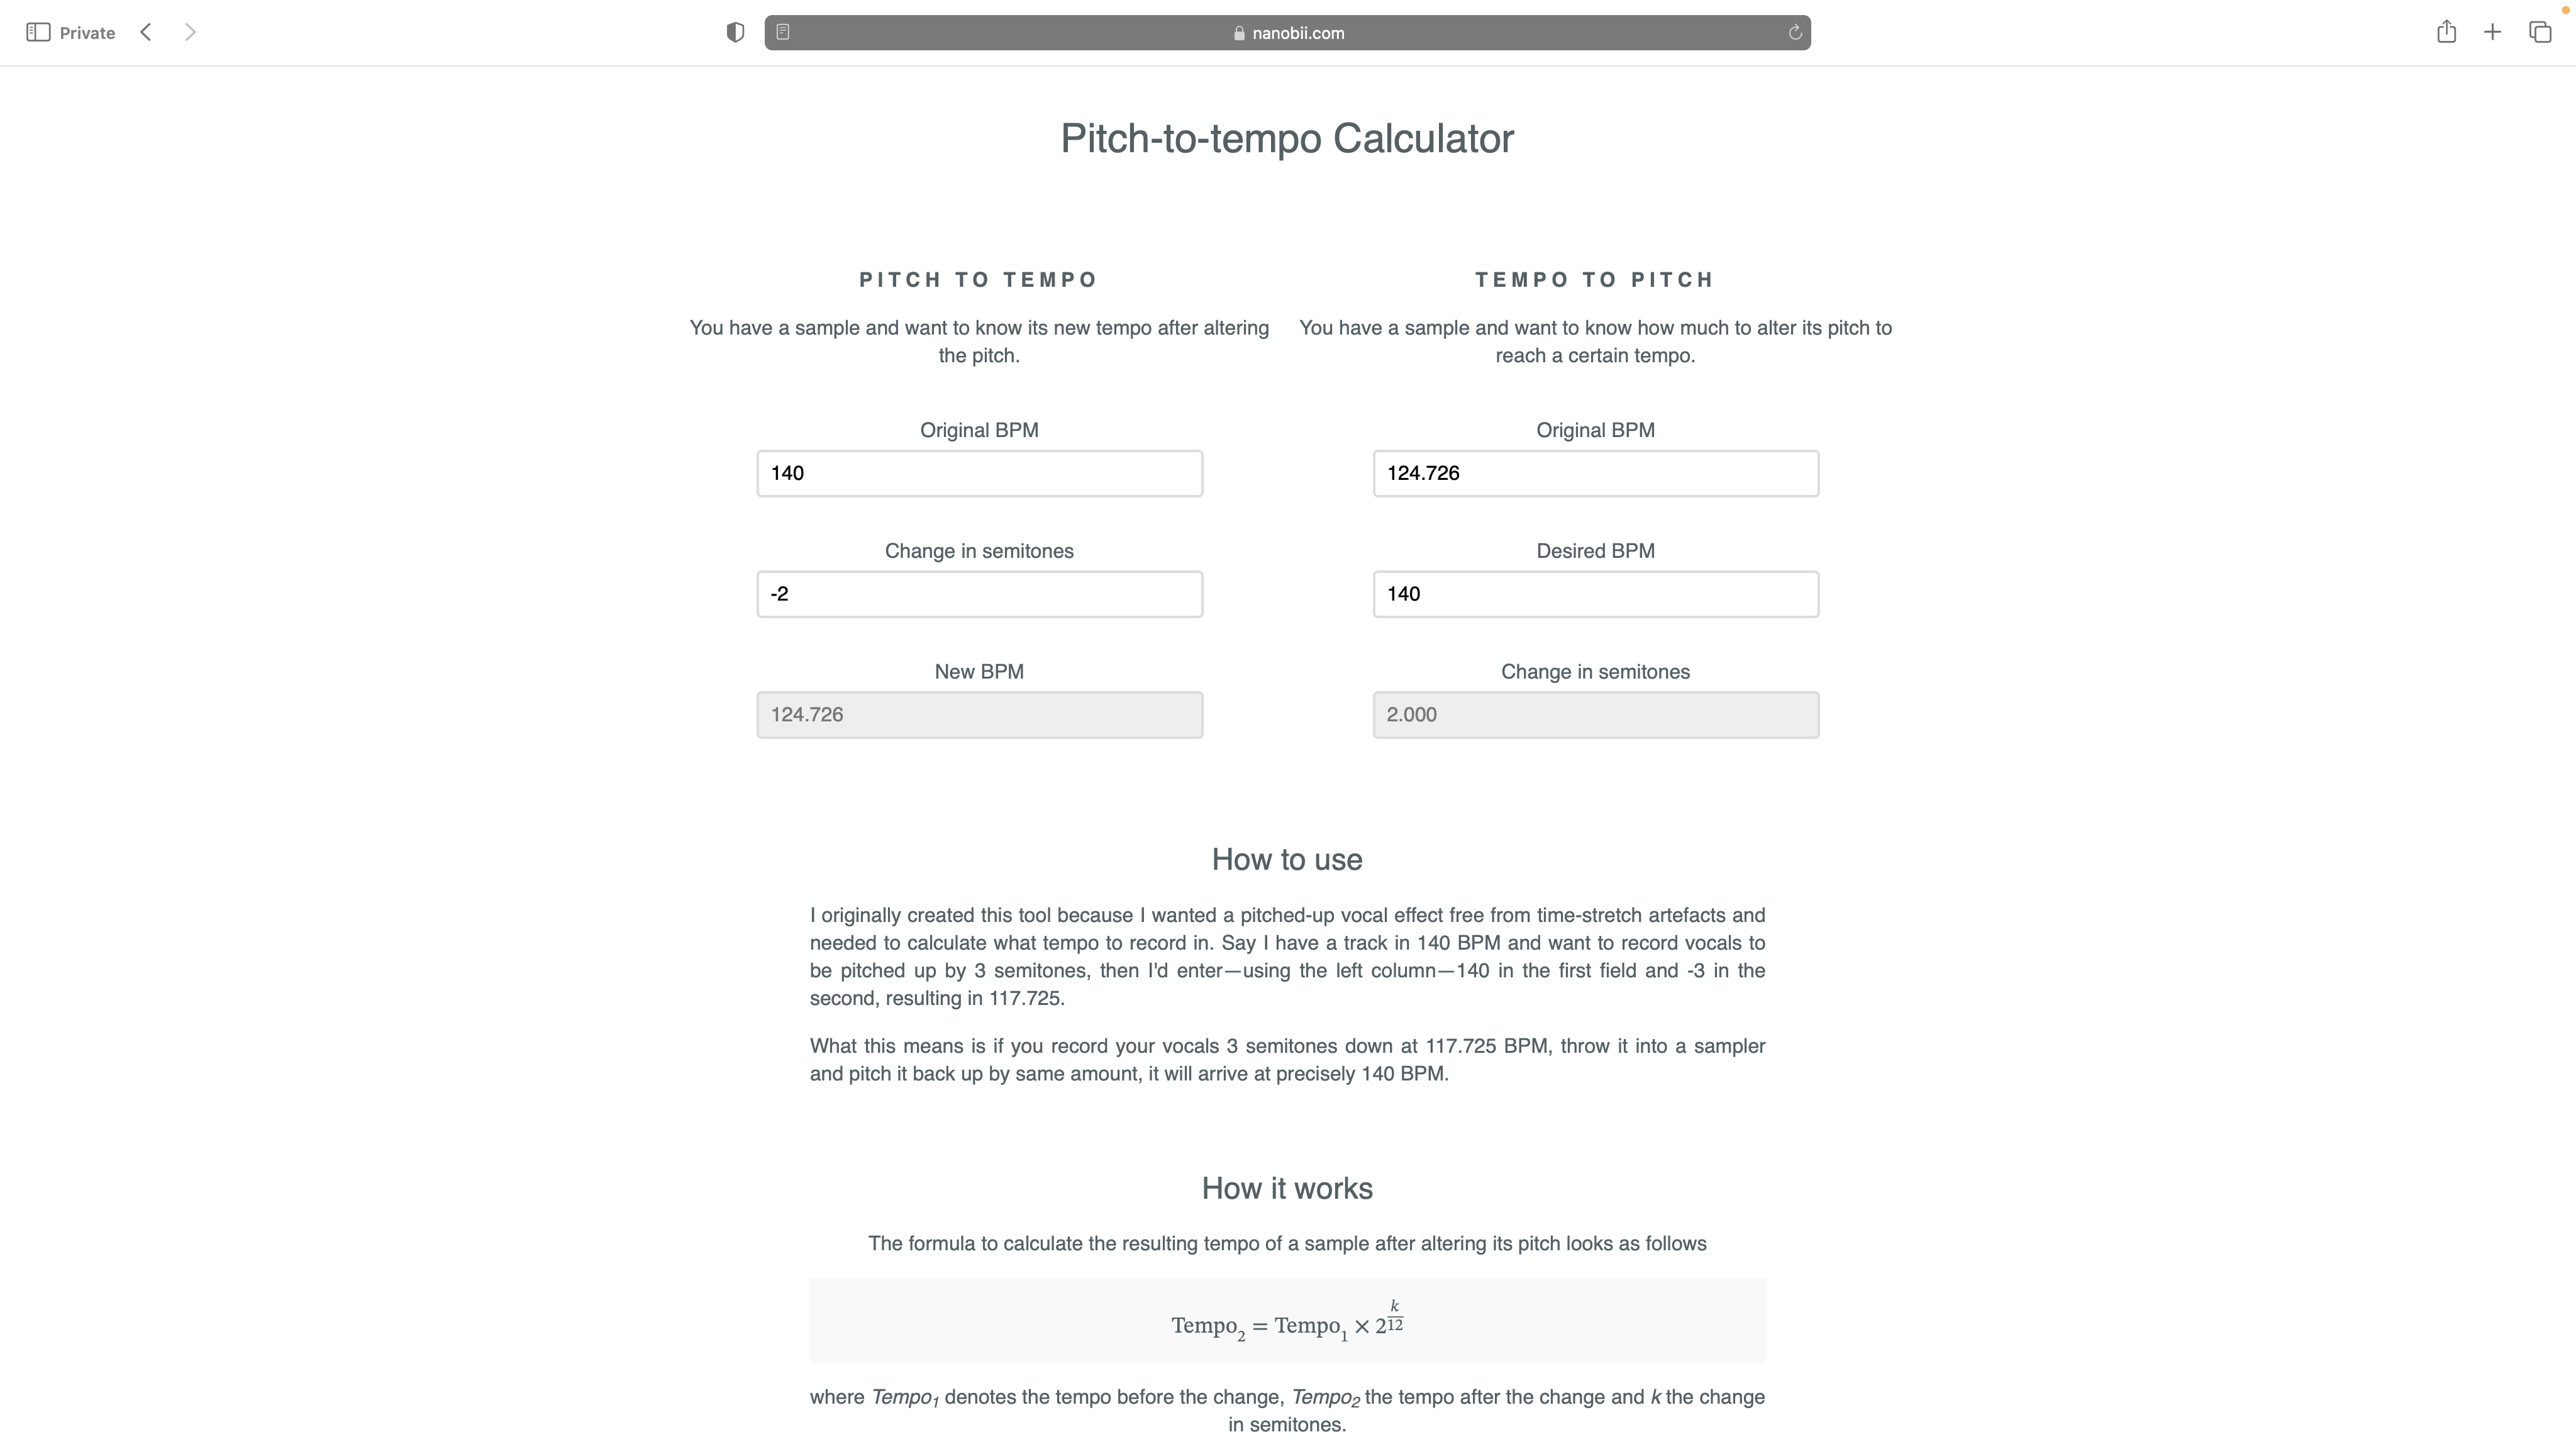
10. If you do decide to use this method you’ll need to check how pitch and tempo are related. Thankfully there are various online resources that can help calculate the tempo based on a specific pitch change. Use this to calculate the tempo you need to record at so when the vocals are varisped back up again they fit the final track.


