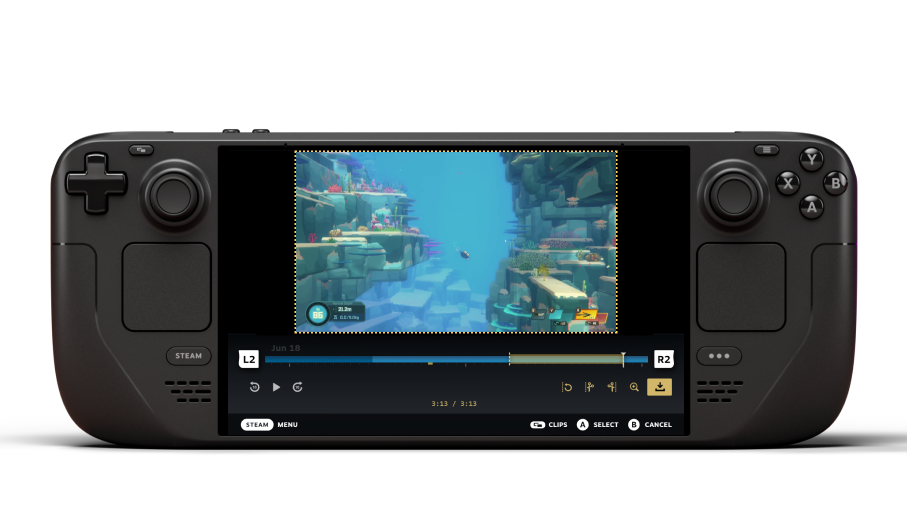
Game Recording is the latest feature to be added to Valve's Steam client, and while the solution is currently in beta, its features and Steam Deck compatibility make it seem quite promising. This is especially true compared to solutions like Nvidia Share and AMD ReLive, which also function as gameplay/desktop recorders using the built-in video encoders of modern GPUs. Let's discuss this feature in more depth and what makes it stand out compared to existing solutions before showing you how to set it up.
The new Steam Game Recording feature functions in one of three modes: No Recording/Disabled, Background Recording/Enabled, and Manual Recording. The first and the latter are self-explanatory, but that Background Recording feature is where things get interesting. If you've used AMD ReLive or Nvidia Share (formerly Shadowplay), you'll be familiar with this functionality as "Instant Replay," which lets you set a time span/storage buffer for constantly recording gameplay but only saving the last X amount of time when you feel like it.
So, why use this new Steam Game Recording feature if you already have access to ReLive or Share on desktop? There are a few different reasons. For one, you shouldn't lose much performance since Steam's solution will also use your modern GPU's built-in video encoder unless you disable it intentionally. More importantly, Steam's Game Recording works seamlessly into the Steam Overlay and includes a snappy, easy-to-use clip editor that lets you cut and trim your actual clips far quicker than is possible with Share or ReLive.
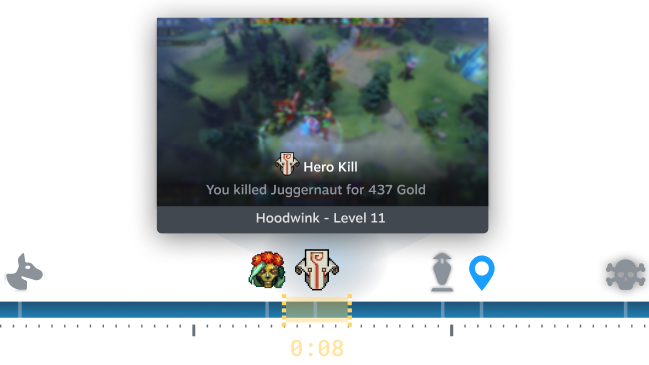
In terms of features and overall usability, Steam Game Recording would already be better than Nvidia Share and ReLive based on that alone, with the caveat that those solutions also support streaming to Twitch and such, not just streaming/sharing to Steam servers or exporting as MP4. Another exceptional feature of Steam Game Recording is actually found in developer/API support, which allows developers to have key game events like loading screens, player deaths, and so on marked in the editing timeline.
The greatest caveat of Steam Game Recording is that it will only work with games that properly support the Steam Overlay or don't break it with your favorite mods enabled. You'll still need to fall back on one of the vendor recording options or good 'ol OBS for those use cases.
How To Enable Game Recording on Steam (Beta)
- Opt into Steam Client Beta if you haven't already through Settings window -> Interface -> Client Beta Participation.
- Once opted in, Game Recording should appear as a selectable option in the Steam Settings window, as pictured below.
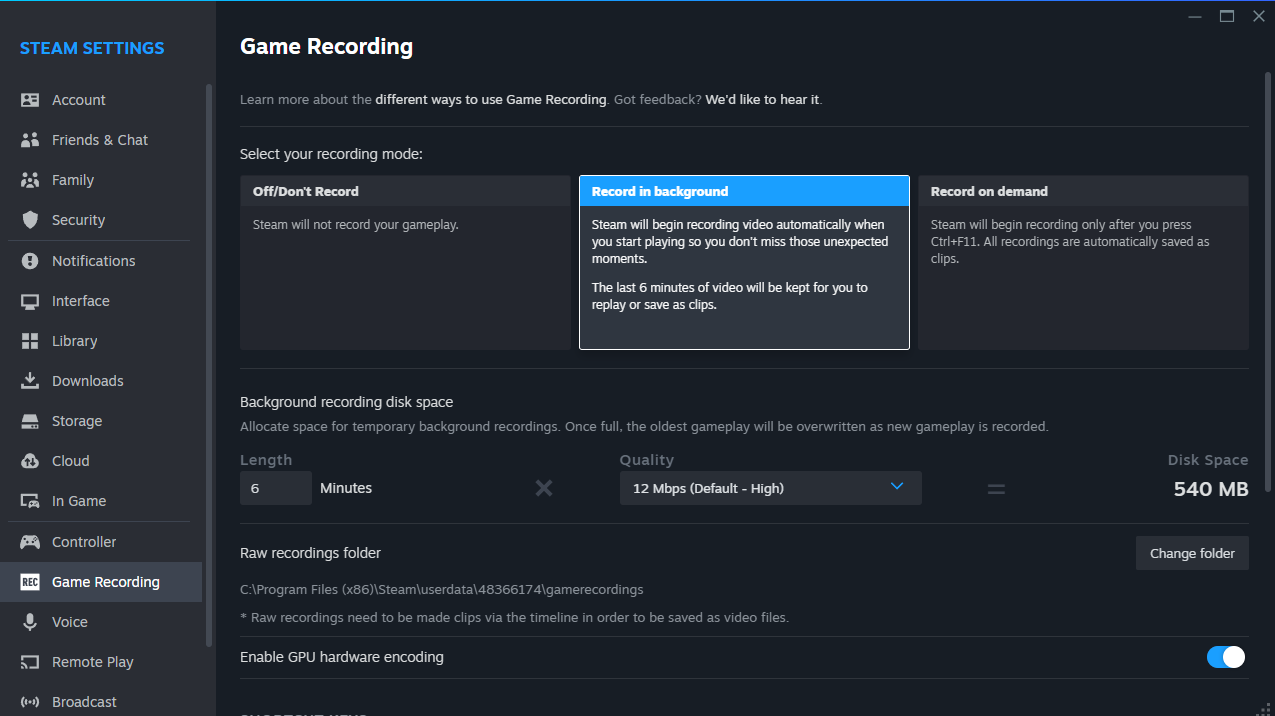
- You can now choose your desired Steam Game Recording mode and change the corresponding hotkeys as you please. You'll also be able to set maximum replay buffer time with a corresponding storage estimate.
How To Enable Game Recording on Steam Deck (Beta)
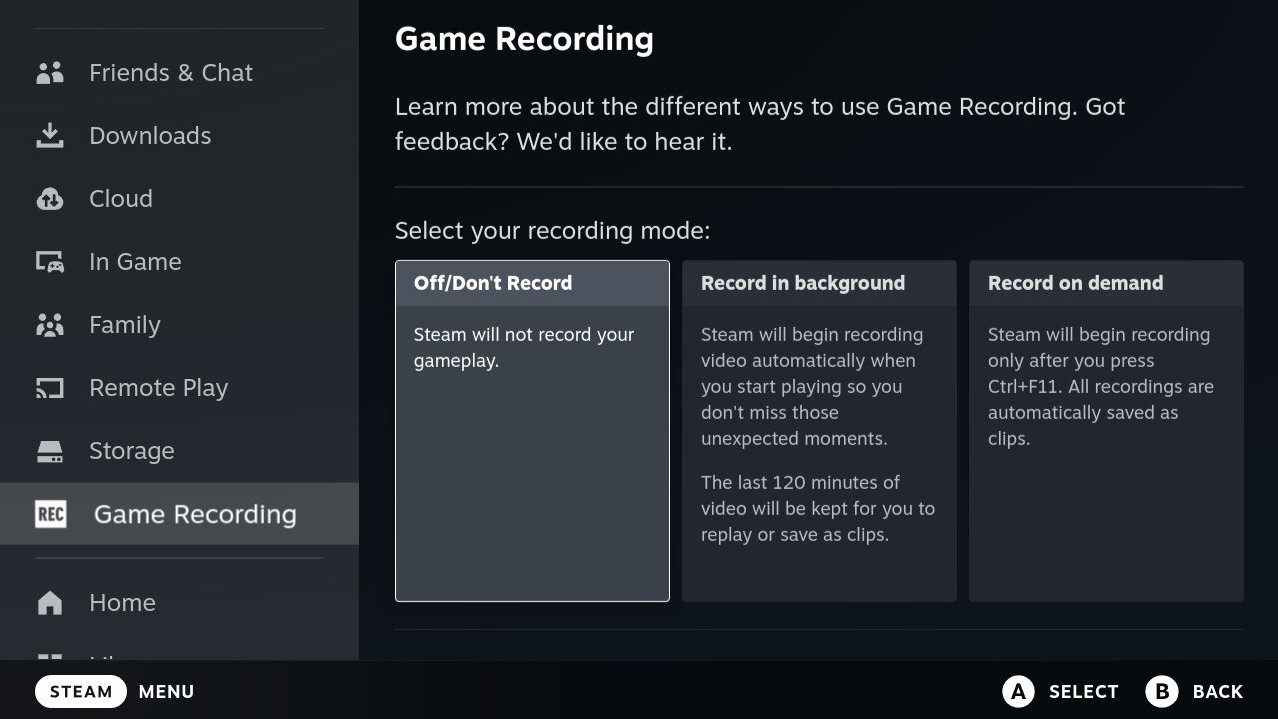
- Like with the Desktop version, you'll need to manually opt into a Beta to utilize Game Recording on Steam Deck. This means navigating through Steam Button -> Settings Menu -> System Menu and enabling "Beta" beside the System Update Channel option beneath "Beta Participation." You'll be prompted to restart your Deck after this.
- Once opted into Beta, pressing the Steam button and scrolling down the Settings Menu will reveal the presence of a new Game Recording sub-menu. It has the same configuration options as the Desktop version. Be mindful of your Deck storage when configuring your replay buffer.
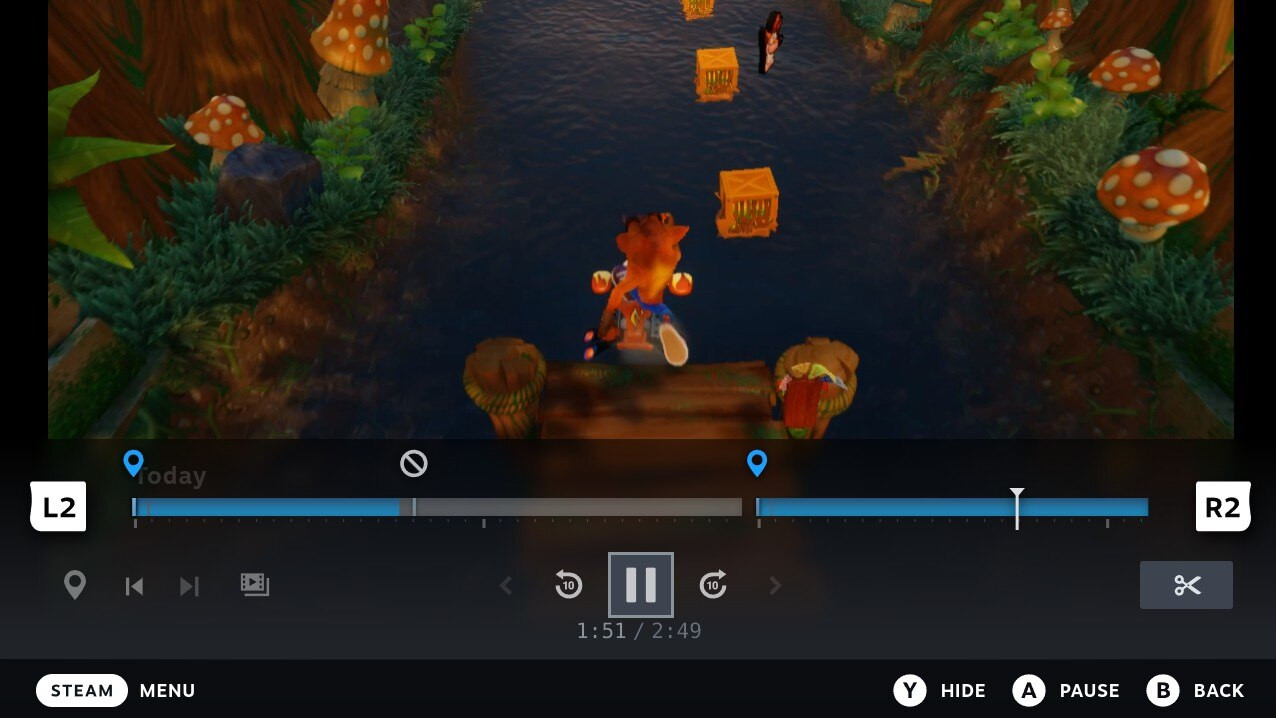
- You can now use Steam Deck's Game Recording and clip editing functionality. To prevent performance issues in-game, I recommended saving clip editing after you've exited or at least paused the title in the background. The visible gap you can see in my timeline screenshot below happened because I did not do this on my first try.


