Artificial intelligence is well and truly here, and even past naysayers must be finding it harder to deny its inevitable further symbiosis with human life across the board. AI has been with us for a while in music technology, with noise removal and restoration software being the most viable use case, and some compelling uses in mixing and mastering technology too.
More recently, as AI booms across disciplines, we’ve seen more powerful uses of AI in music tech, from the generating professional singers of Voice-Swap and the sample-interpolating powers of Synplant 2 to tools like Riffusion that will generate whole songs – or at least snippets – that sound pretty legit.
Perhaps one of the least expected areas of musical workflow to be impacted by AI is that of sample library management: a seemingly menial, overlooked part of our creative process that, on the surface, might not seem like it needs much attention. However, applications like Atlas 2, Cosmos, XO and Sononym have proven that this is an area of everyday work that can not only be enhanced but made fun and creative with the implementation of AI.
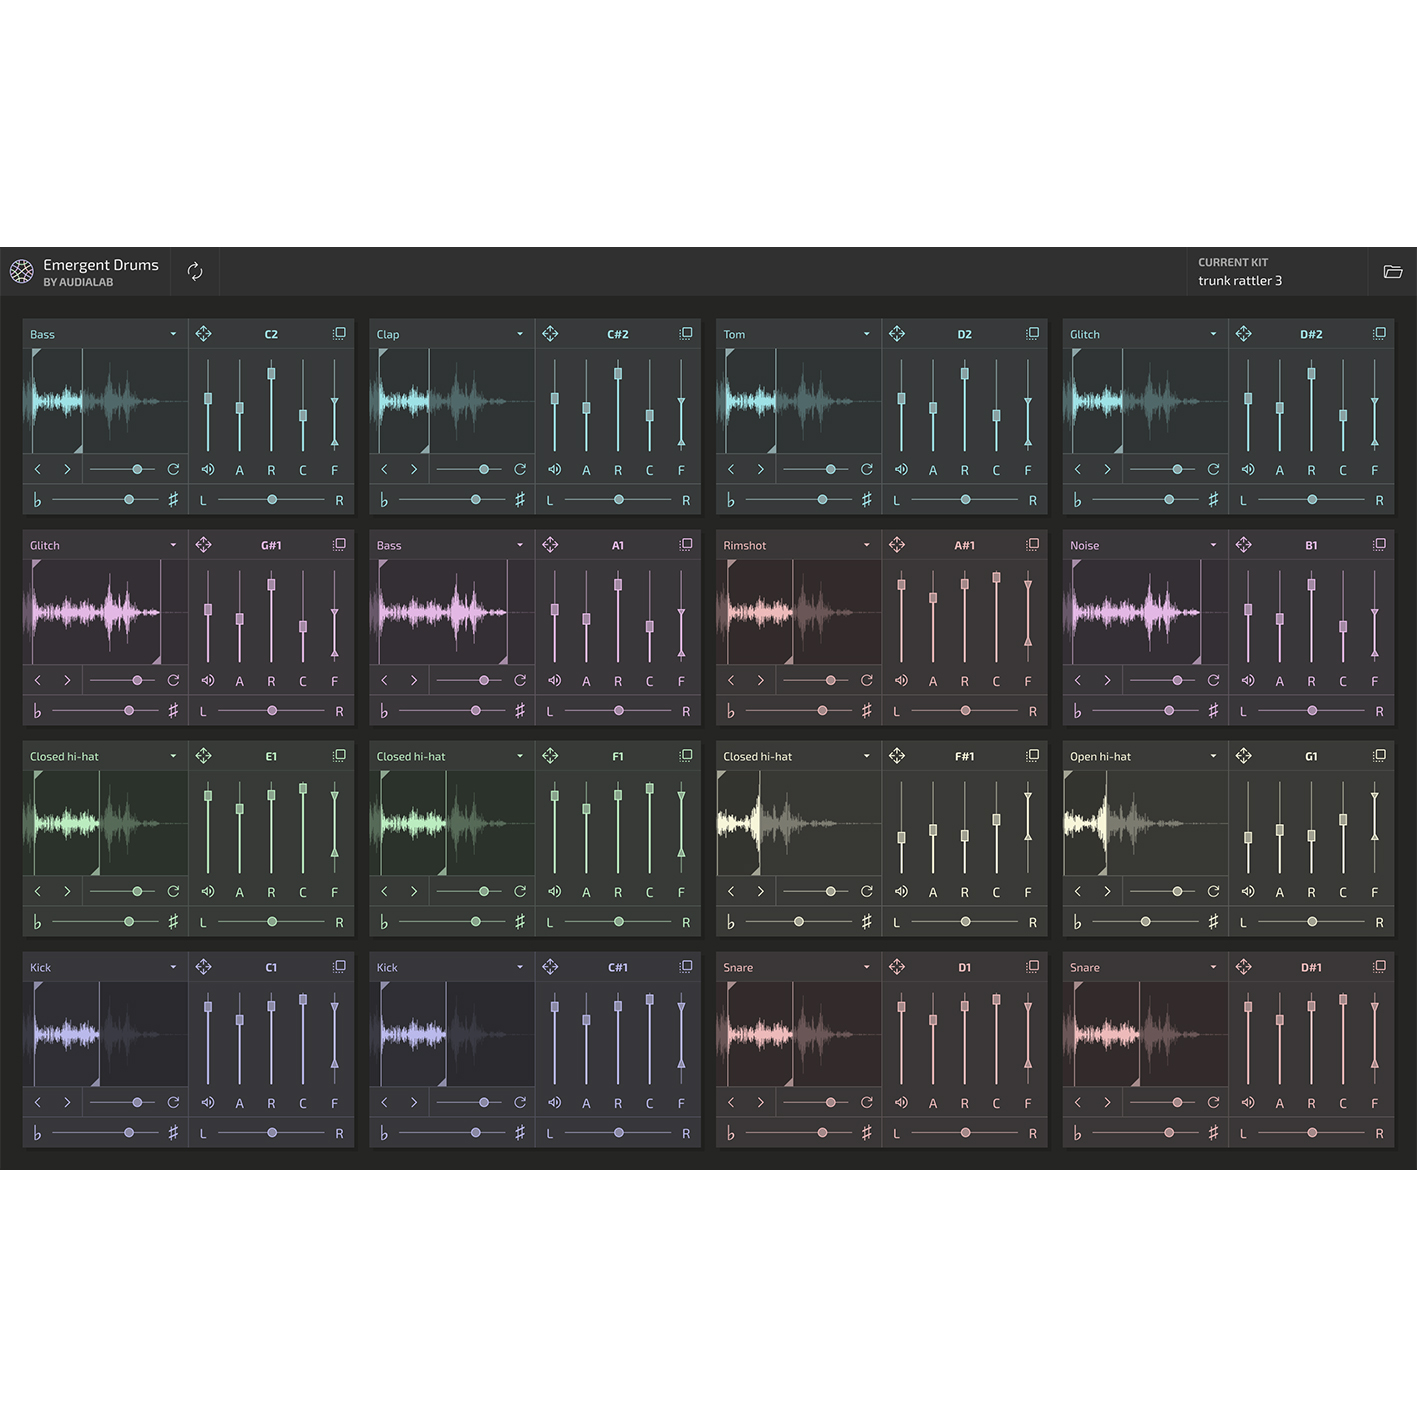
These sample management tools are built to change how we interact with and navigate our sample libraries, breathing life into a fairly tedious task. Using AI, they can accurately sort samples into advanced categories based on the audio’s characteristics. Applications like Atlas 2 go further, letting you build kits and sequences from your samples that can be imported directly into your DAW as MIDI data or raw audio, with great efficiency.
In this article, we’ll look at some of the leading AI sample management software/plugins and attempt to demonstrate the pros and cons of each, to better inform you of their potential applications. We also hope to show you just how effective these new AI-driven technologies are at enhancing our workflow as musicians. After all, if something simple like sample management can benefit so deeply from artificial intelligence, imagine the potential improvements in other areas of our creative process.

Maybe there’s a place for all of these sample managers in your digital toolkit. After all, they all have their strengths and weaknesses, proving efficient in different applications. There’s no reason why you couldn’t rely on Sononym to collate some truly similar samples, and then import them into Atlas 2 for an easy-to-navigate visual map of them grouped together.
The choice is yours, but we recommend jumping into each sample manager at your leisure to find a workflow that suits your needs. After all, you’re sure to find some benefit from the AI’s assistance in one form or another.
Generating whole sample packs from prompts with Output Co-Producer
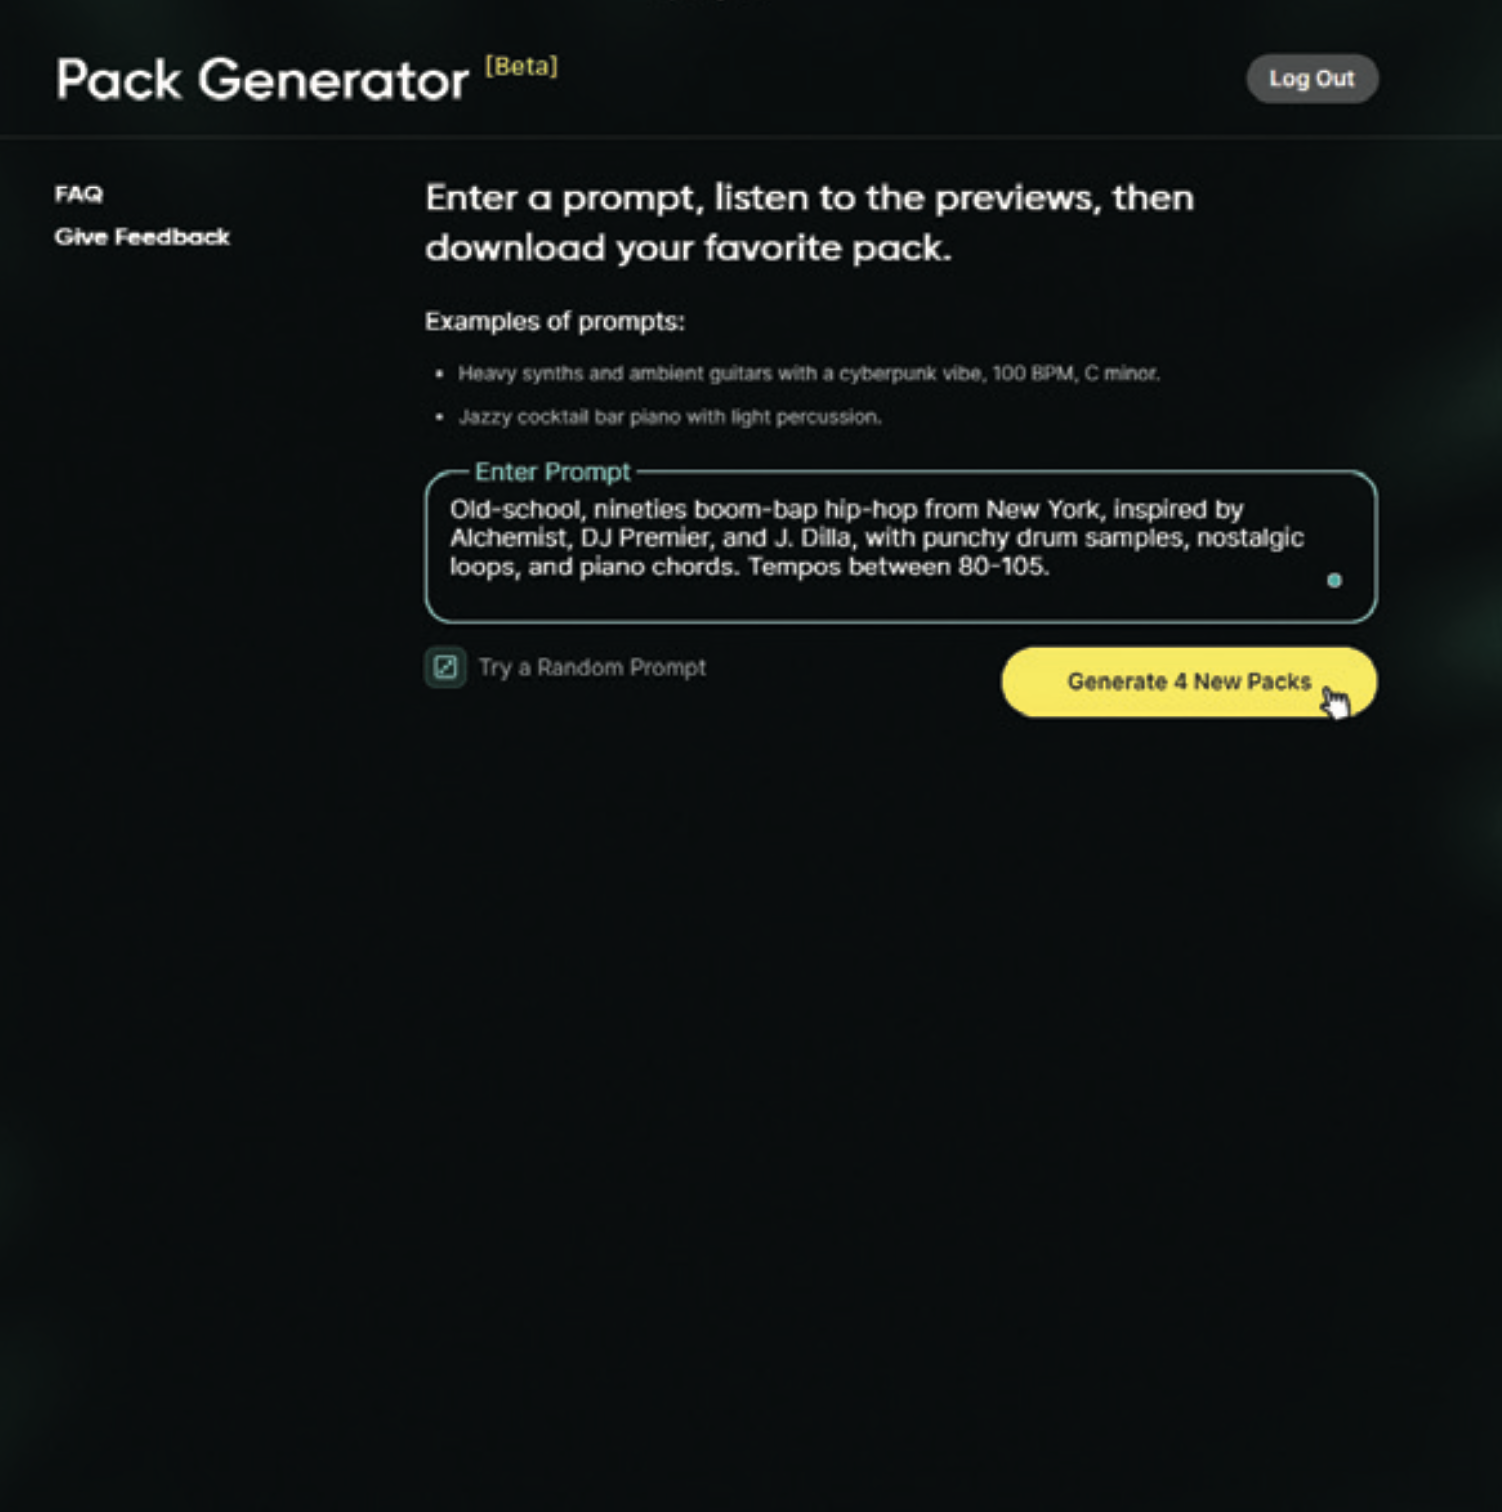
Let’s create our very own AI-generated sample pack. First, head over to the Co-Producer web page, sign into your account, and hit the ‘Start Creating’ button. Then fill out the text prompt to your choosing, and click Generate 4 New Packs.
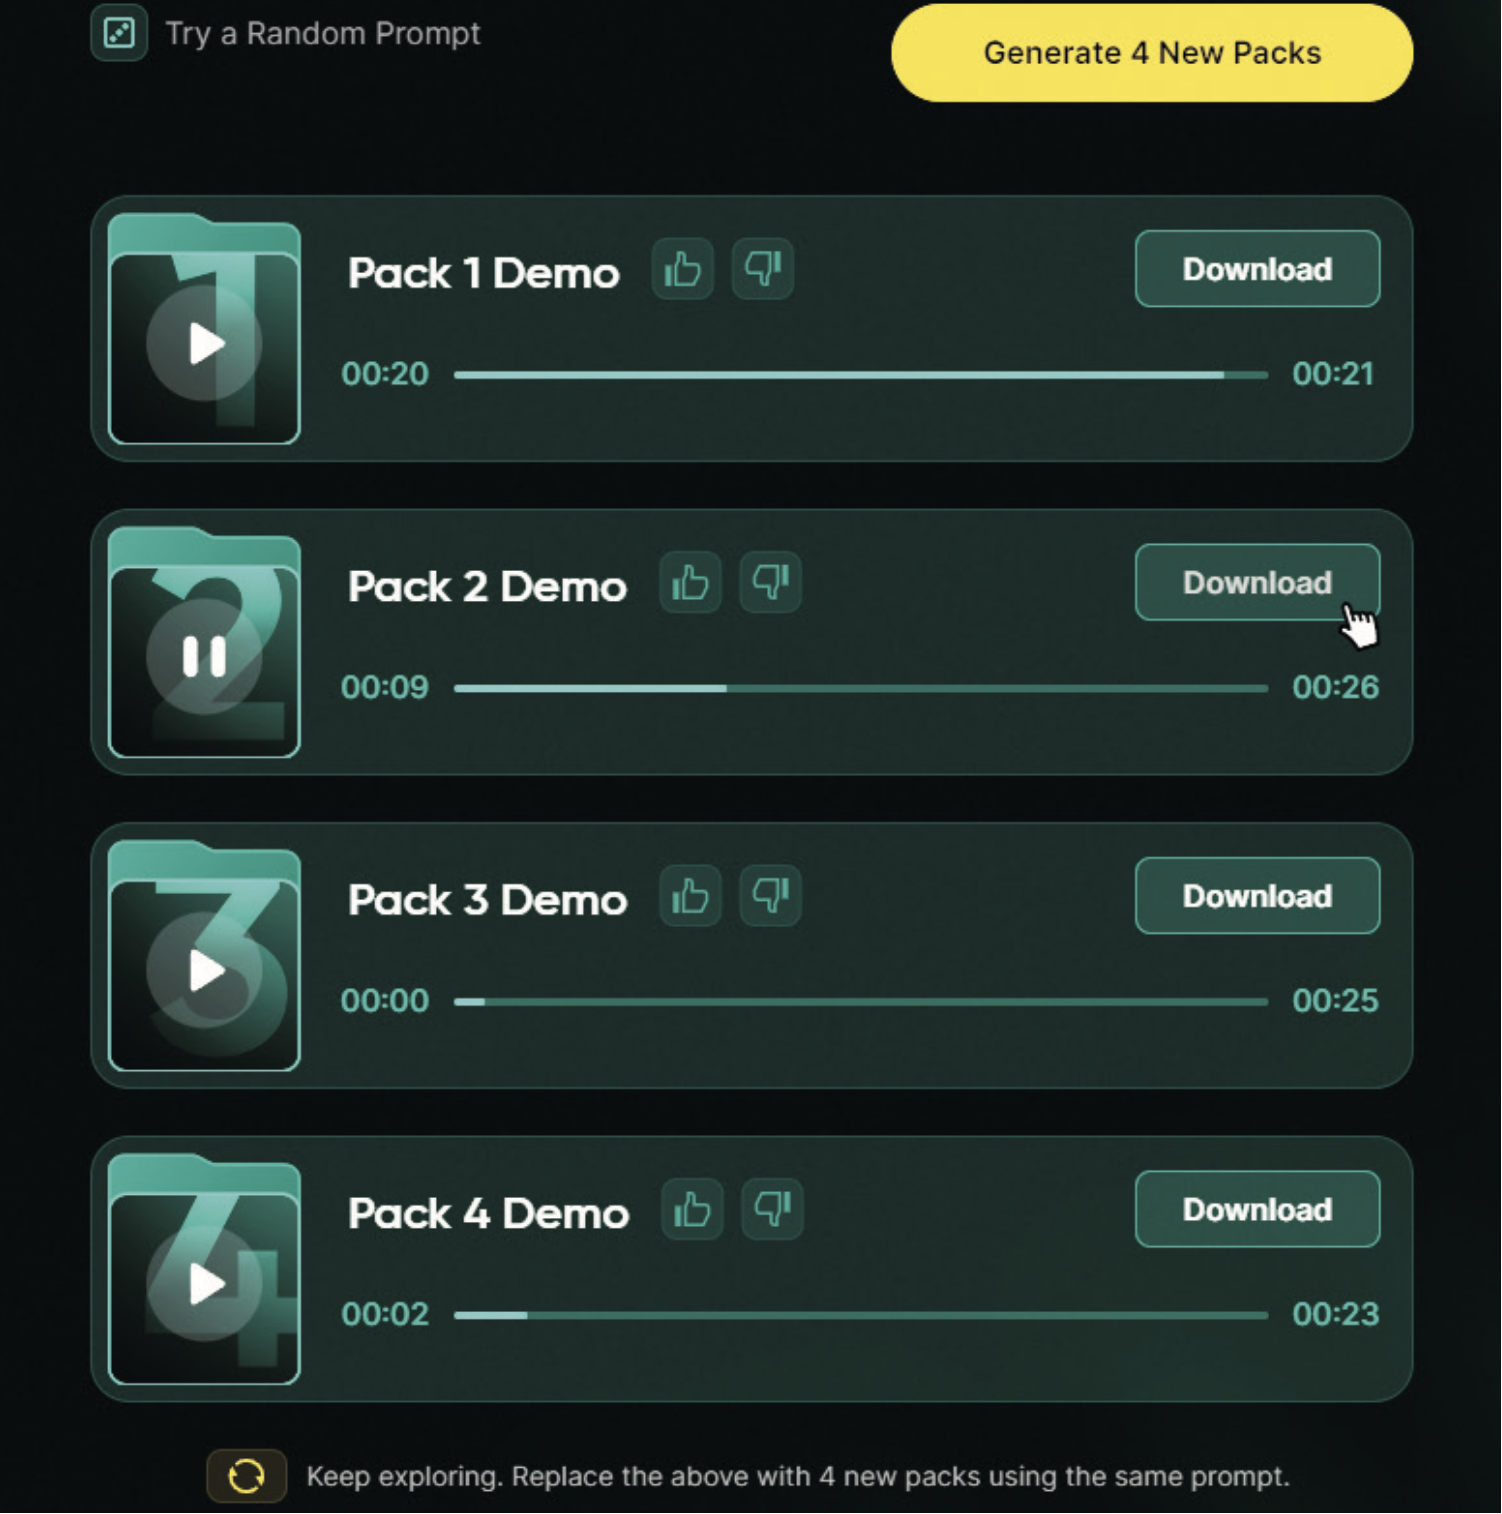
We went for a ’90s hip-hop style pack and even gave the AI three producers to reference. The more info you give, the better. Once you’ve generated four new packs, you can play through, and hit ‘Download’ on the one that resonates the most.
And, just like that, you have an entirely original sample pack tailored to you personally. You can repeat this process as many times as you like, and ask the AI to generate another four sample packs based on the same prompt if you wish.
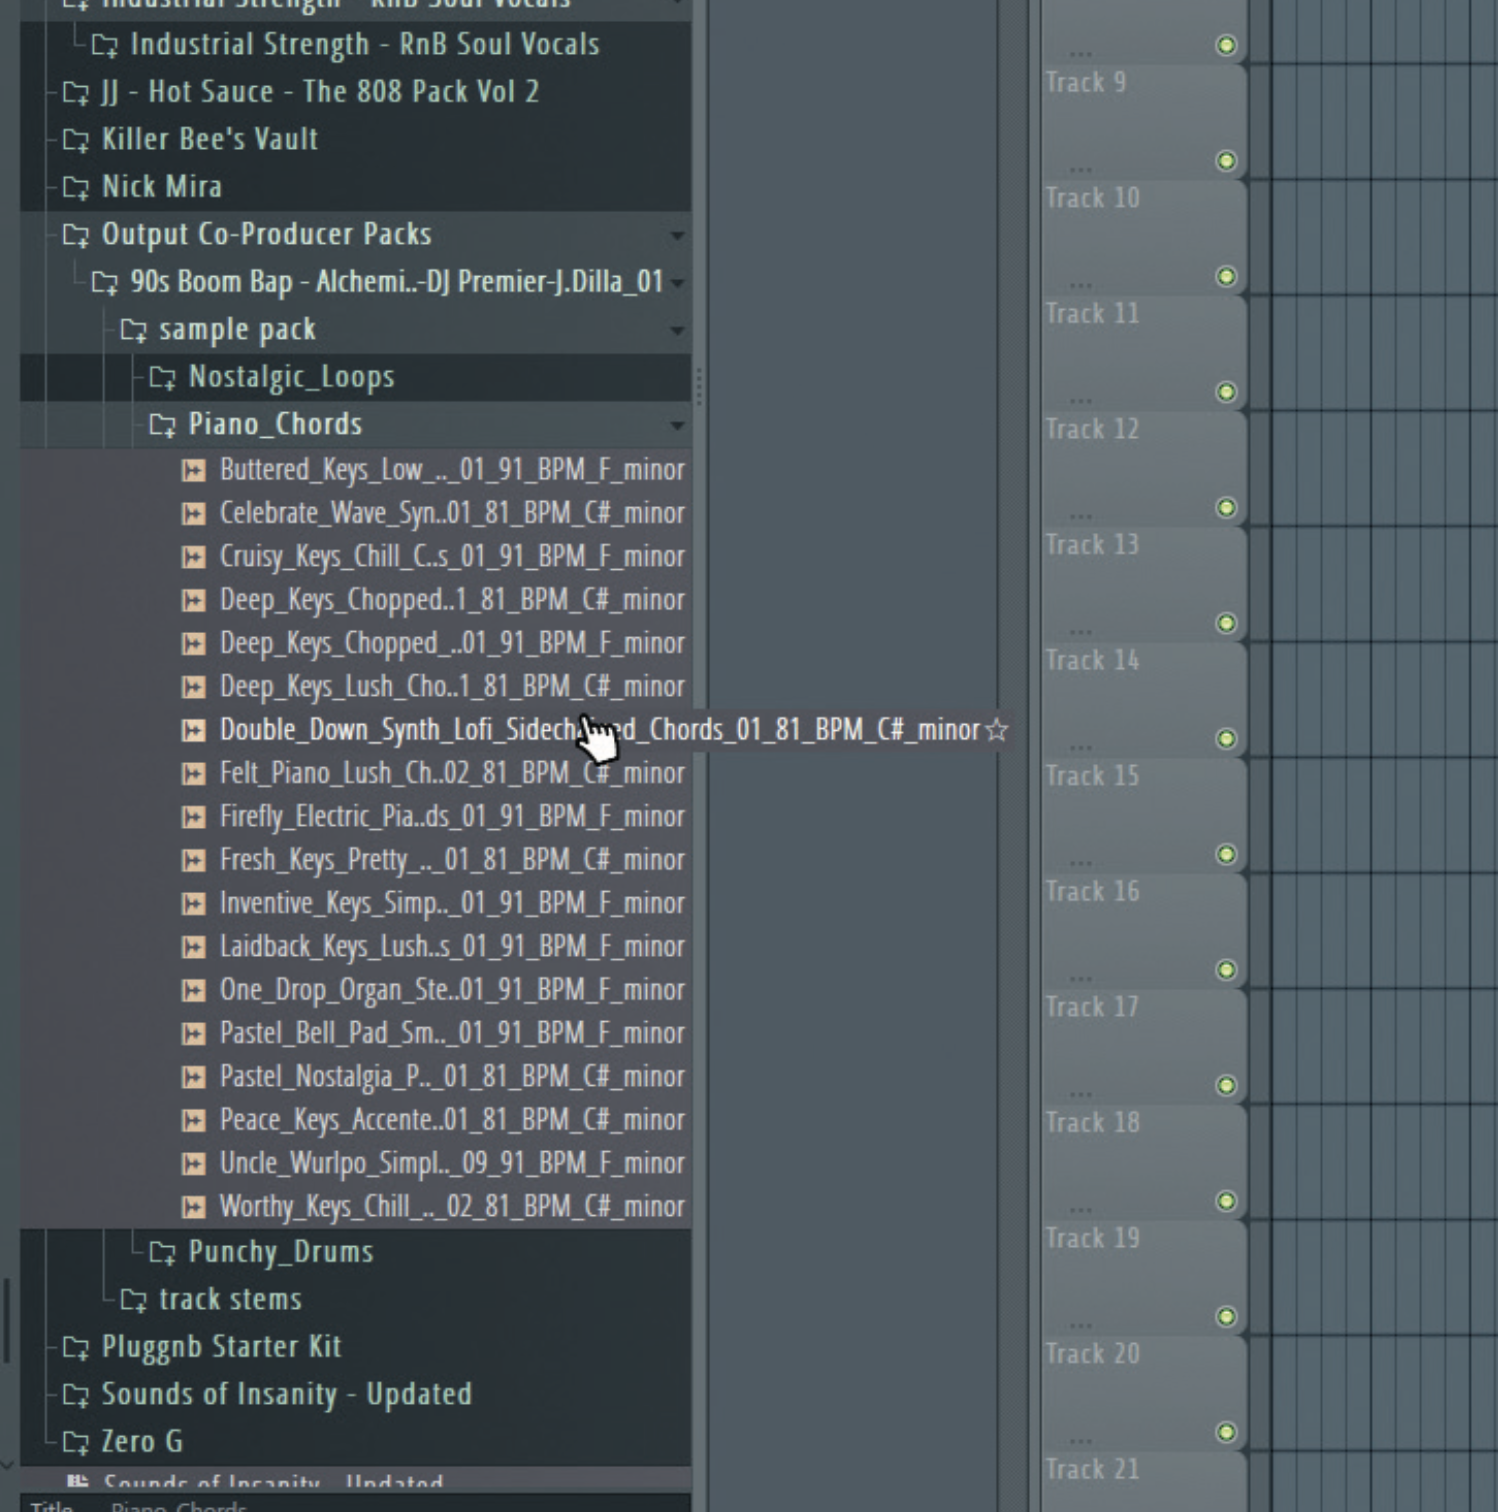
You can generate numerous packs and create one big custom pack. We’ve generated a few different packs, added them together, and imported the samples into FL Studio ready to start producing something.
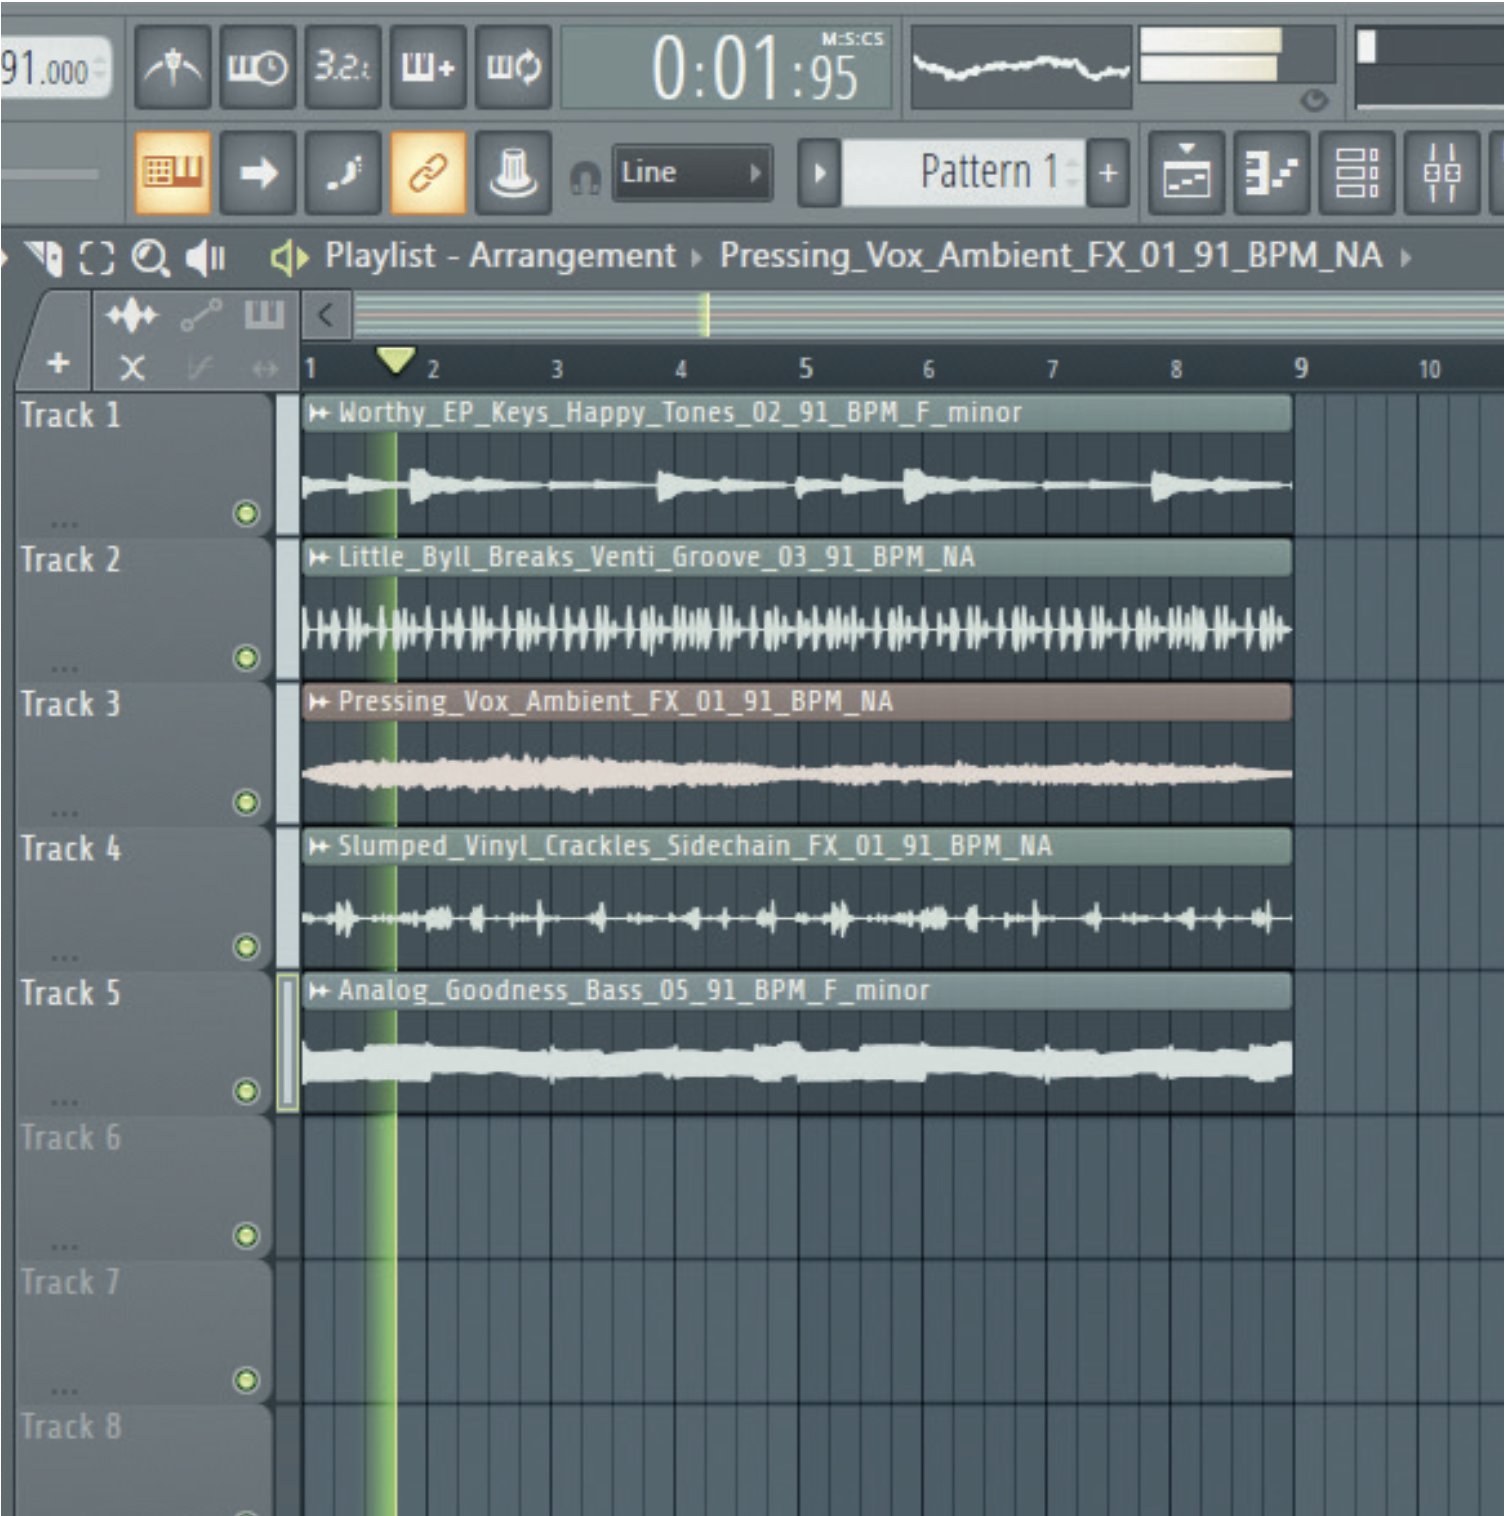
Let’s create a quick loop using our AI-generated samples. We’ve chucked together a bunch of 91bpm, eight-bar loops in the key of F minor. Co-Producer can also provide more loops of a specified tempo and key, for any missing elements.
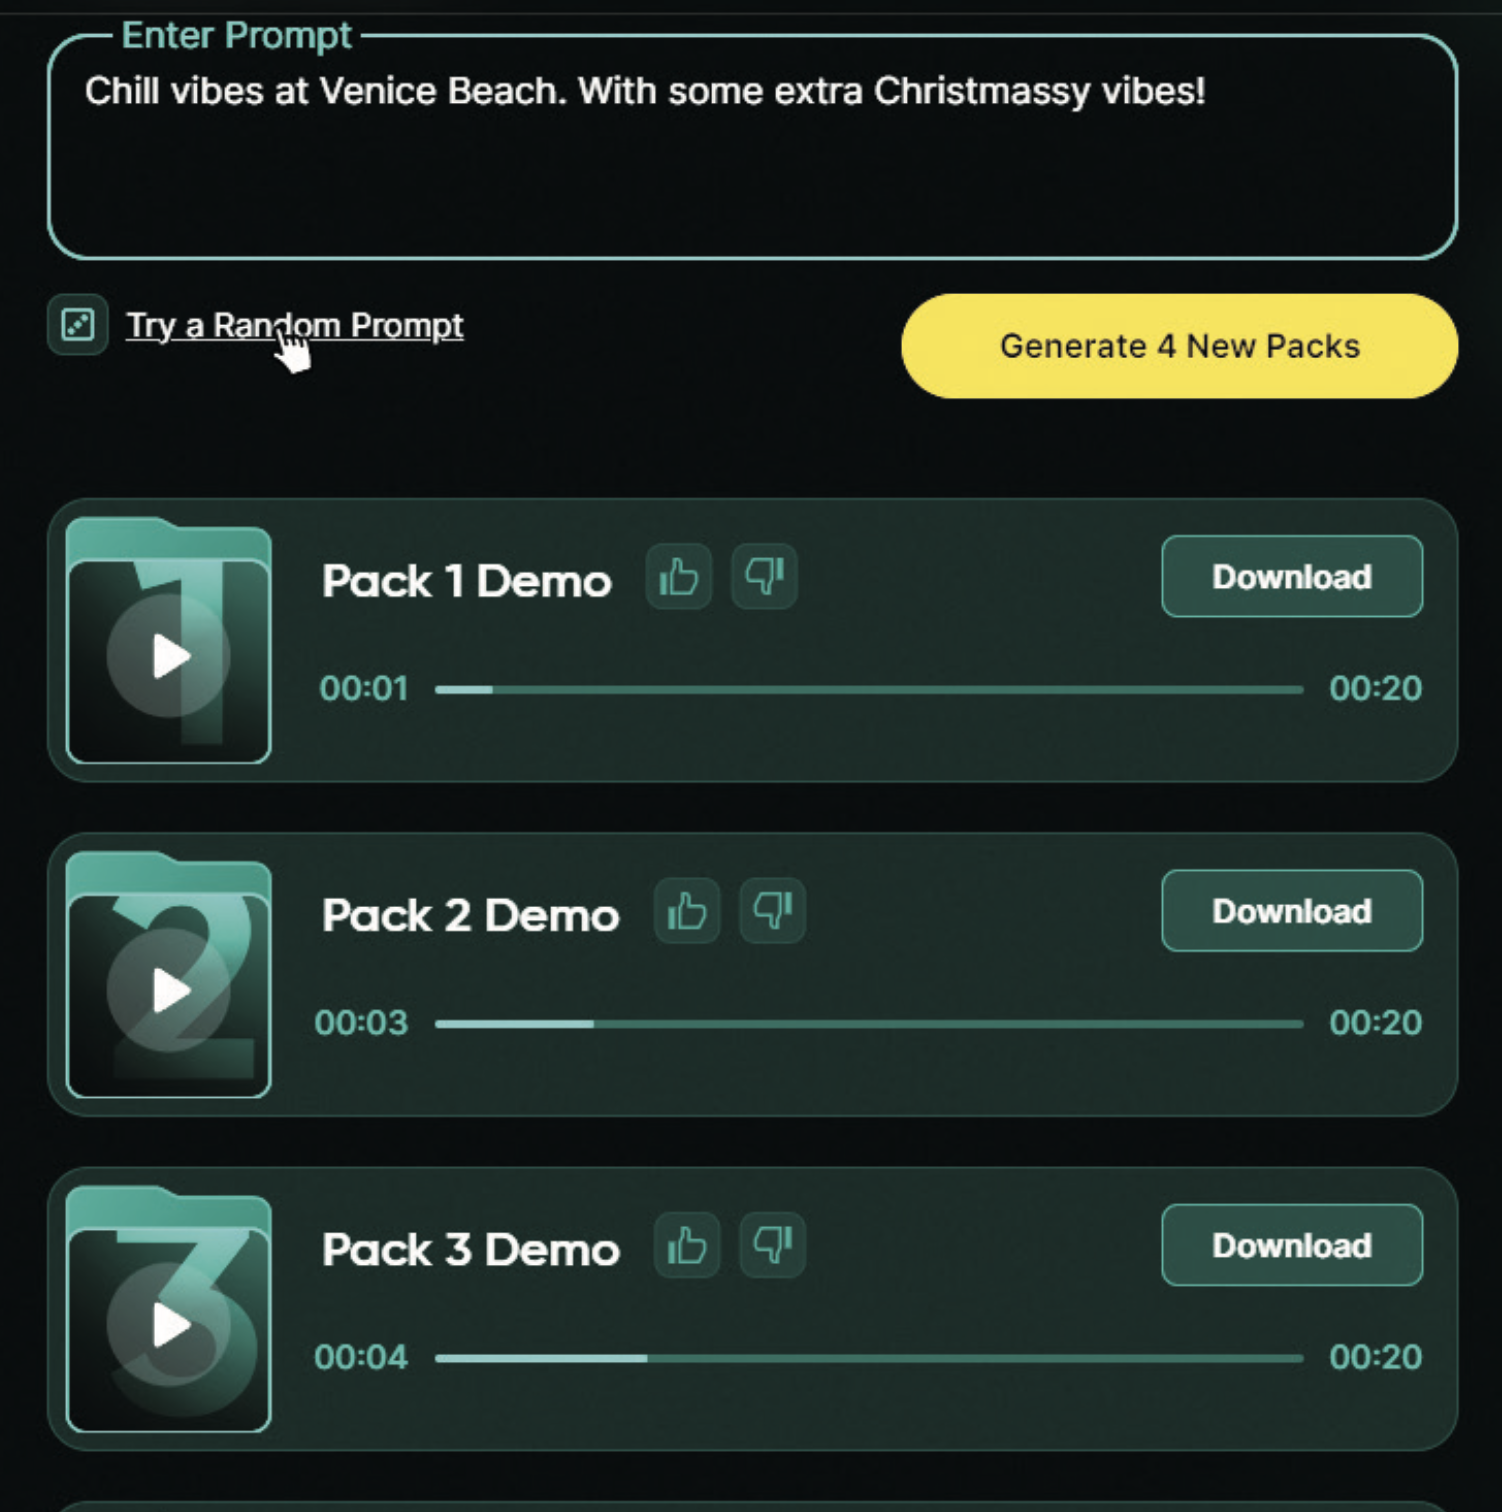
Lastly, let’s see what happens when we ask Co-Producer to give us a random text prompt. Head back online and click ‘Try Random Prompt’. You can then generate four packs, or add to the newly generated prompt beforehand.
Building an AI sample map in Atlas 2
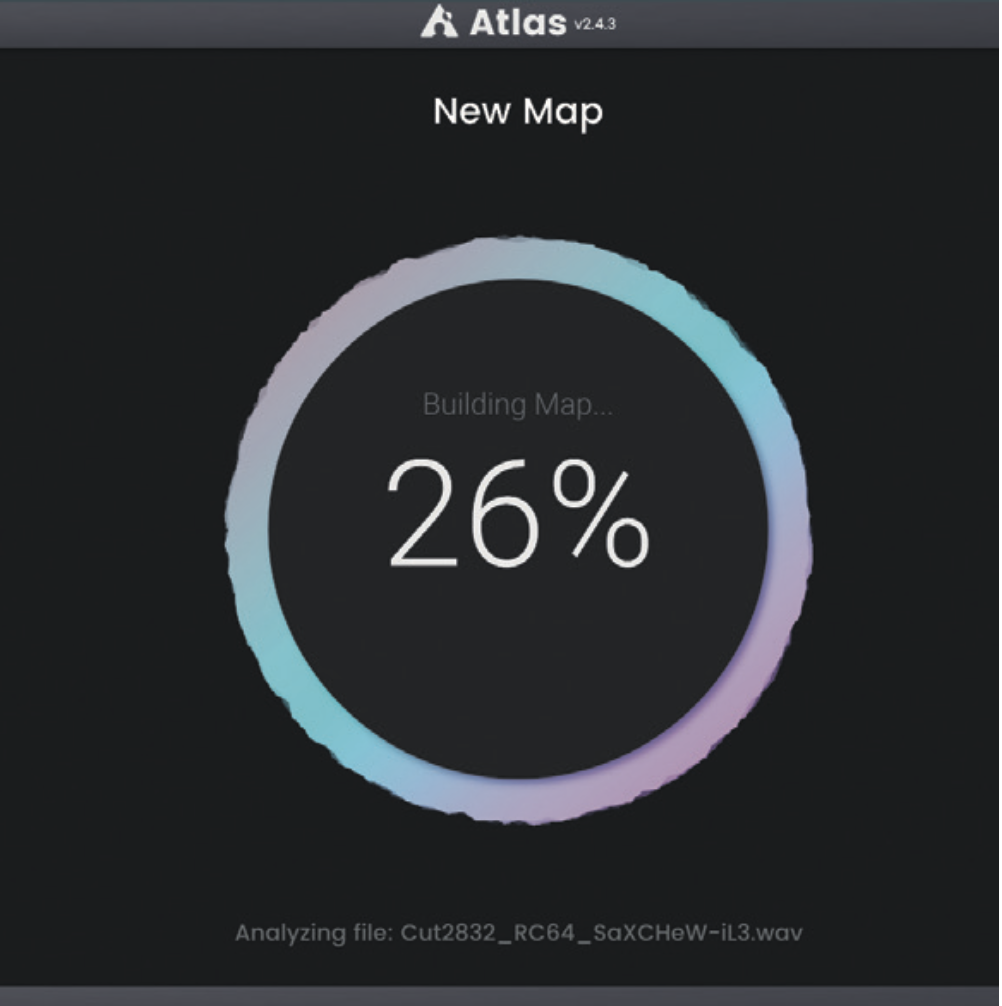
In Atlas 2, you can import samples or use the packs that come with the software. To build a map from your own library, head over to the Maps tab, and hit ‘Create New Map’. Then, select your library’s file directory and wait as the magic happens.
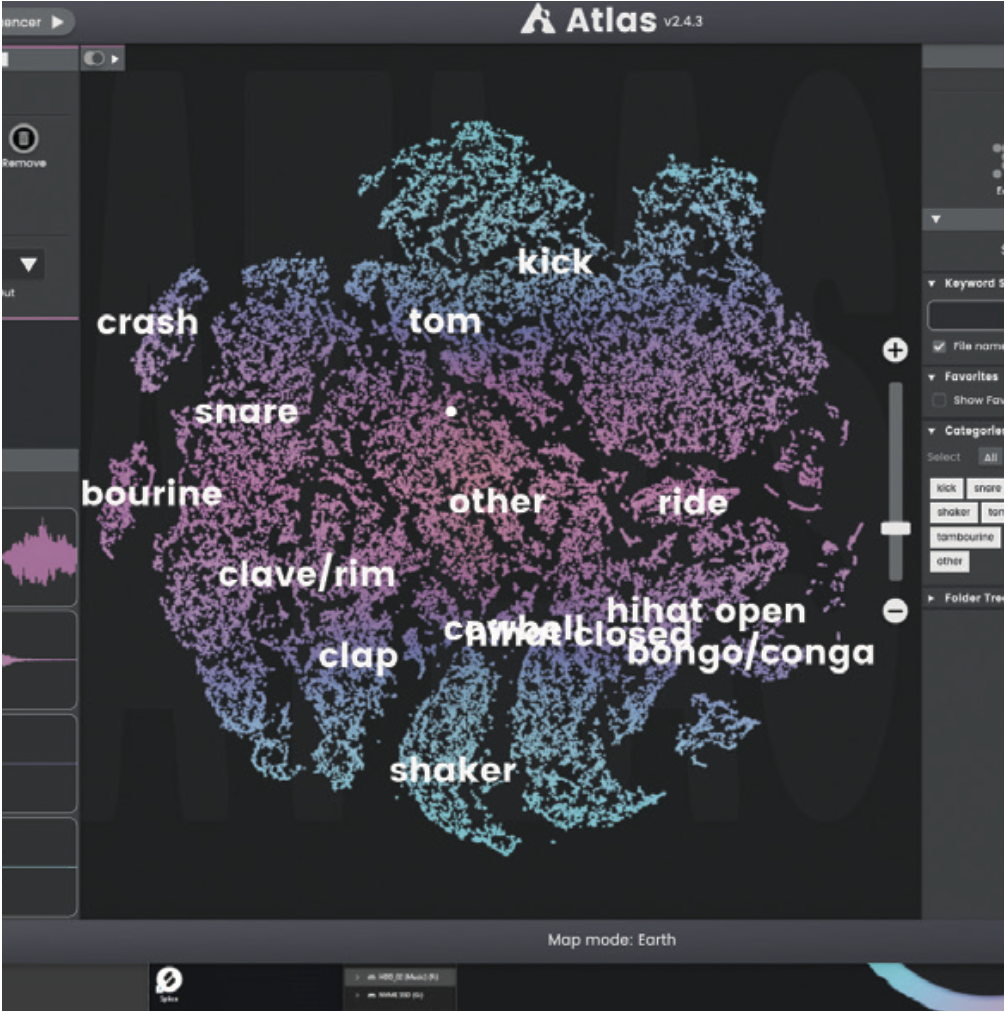
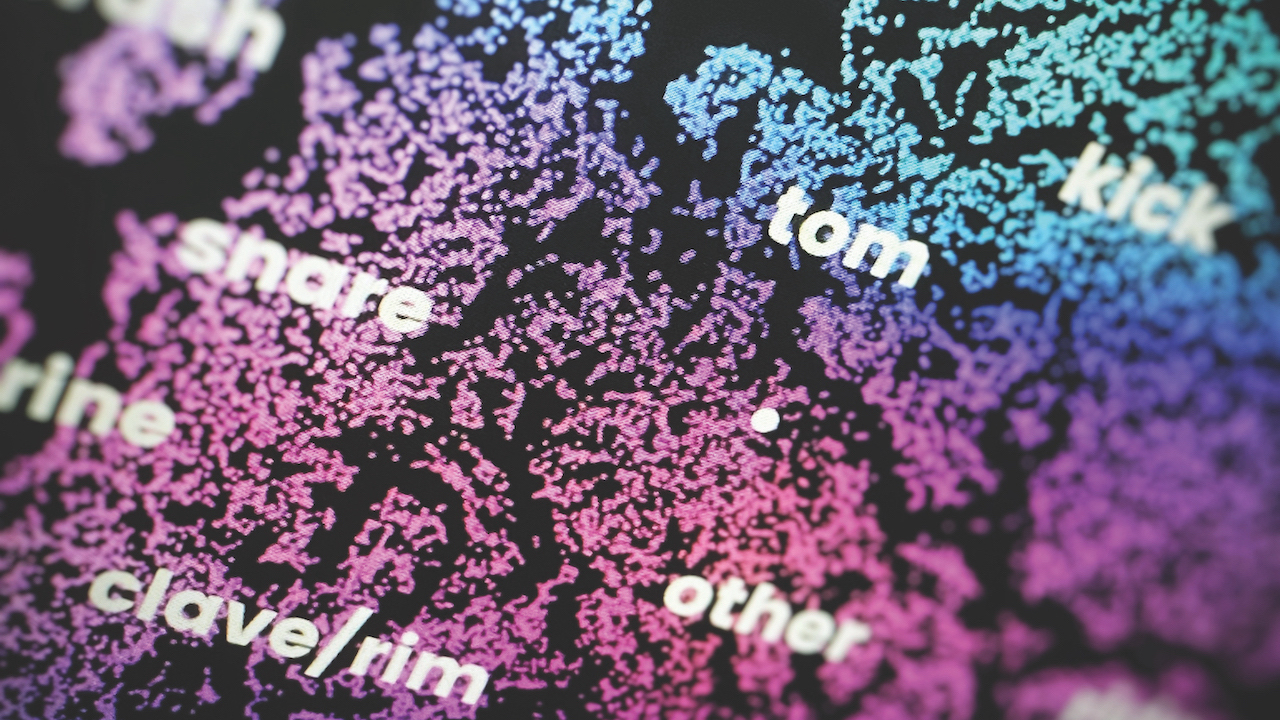
After Atlas has finished building your map, you’ll be able to navigate your samples in the Browser. You can change from Earth, Galaxy, and List view to your preference. The first two options let you view samples across a visual spectrum or ‘map’.
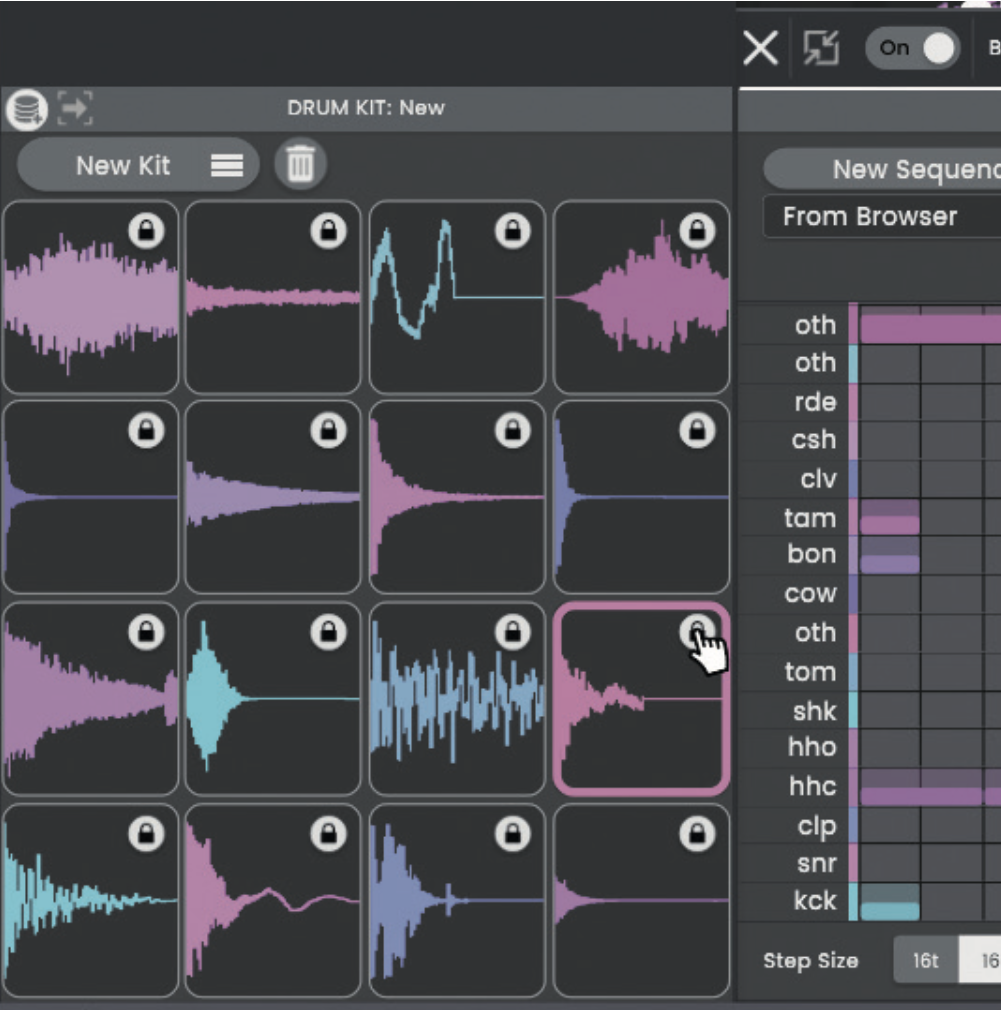
To create a custom kit, hit ‘New Kit’. The AI will randomly assign samples. To lock samples to keep, toggle their padlock icon. You can also generate a sequence using the Sequencer and save kits and sequence presets for future needs.
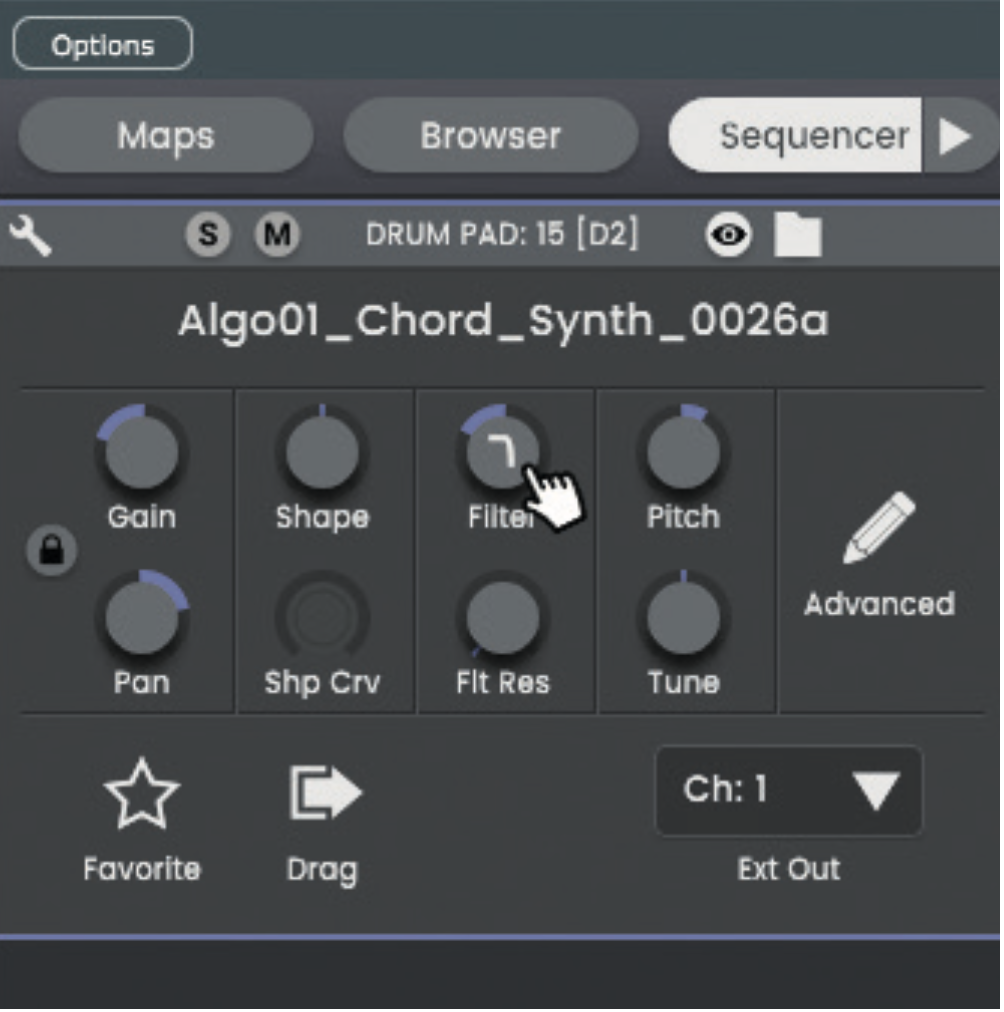
It also has many internal controls, letting you manipulate samples in the application. To playback/audition audio, click any of the samples on the map, or in the kit panel. In the kit, you also have access to macro controls per sample.
Your samples, on the map
Atlas 2, Cosmos and even XO, all follow a very similar model of displaying samples. But naturally, they all have distinct differences.
Cosmos is the most basic of the three, with the cheapest price point. However, it still serves as a handy addition to any toolkit and brings AI categorisation with Cosmos View.
Atlas 2 and XO include numerous additional features to help you compile kits of samples together in a never-before-seen speedy fashion. These two, in particular, also include controls to help you shape your samples before importing them into your DAW, going above and beyond expected roles of traditional sample management software.
When paired against Sononym (the next entry in our list), Atlas 2 and XO have more features and a larger potential for widespread use; however, Sononym stands in its own lane, with highly advanced AI categorisation and similarity readings.
Cosmos: A simple but efficient sample manager
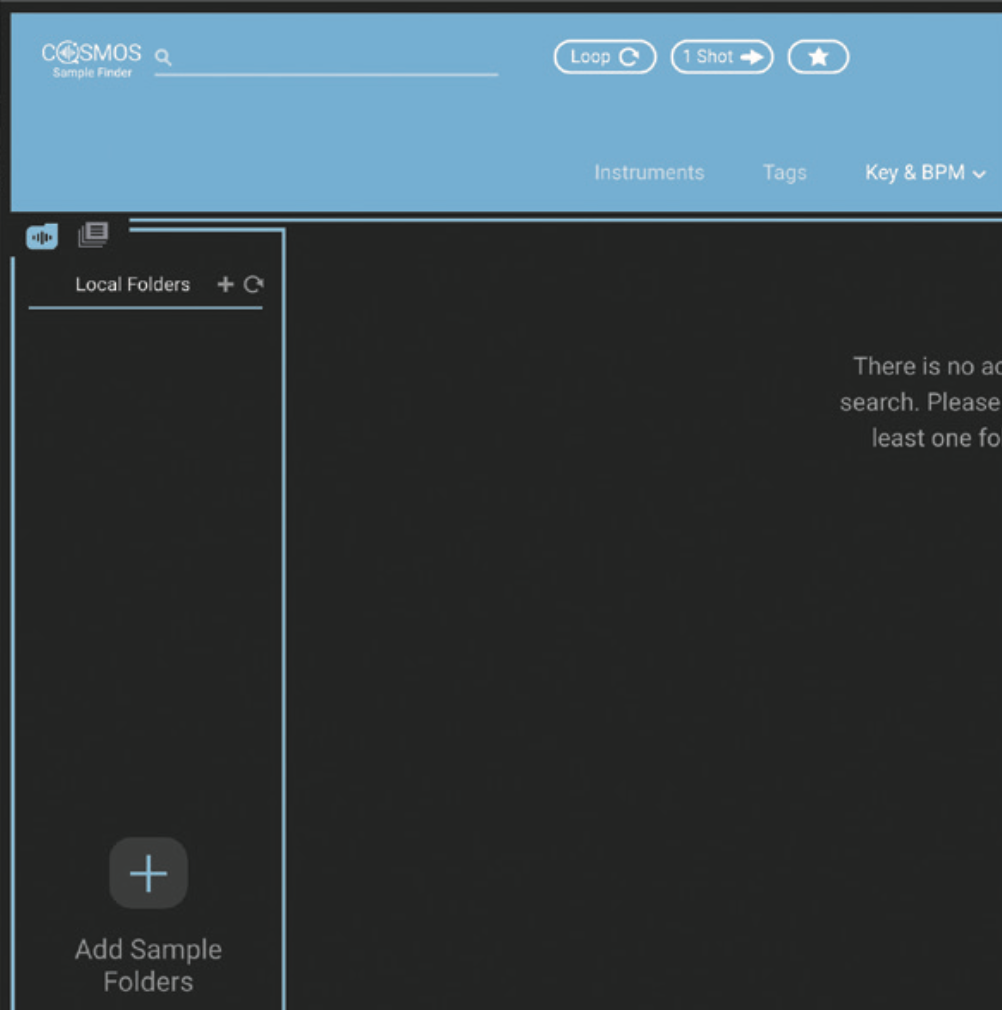
Let’s dive into Cosmos, Waves’ take on AI sample management, and explore some of its functions. First, activate Cosmos via the Waves Central app, open it up, and use the left-hand column to set a file directory for your sample library.
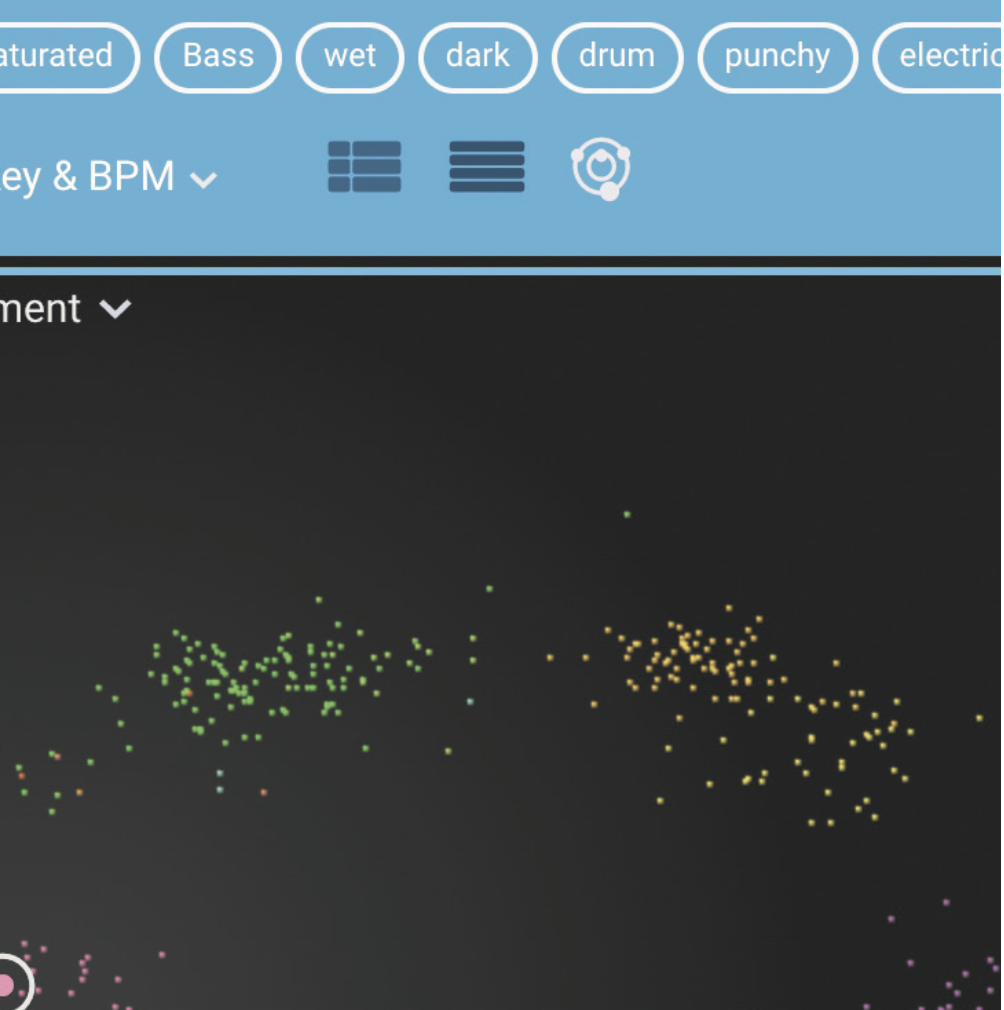
Once Cosmos has successfully scanned your file directory, you’ll be able to see all your samples in List view. You can switch between two list views and the Cosmos view using three icons just to the right of the Key and BPM dropdown menu.
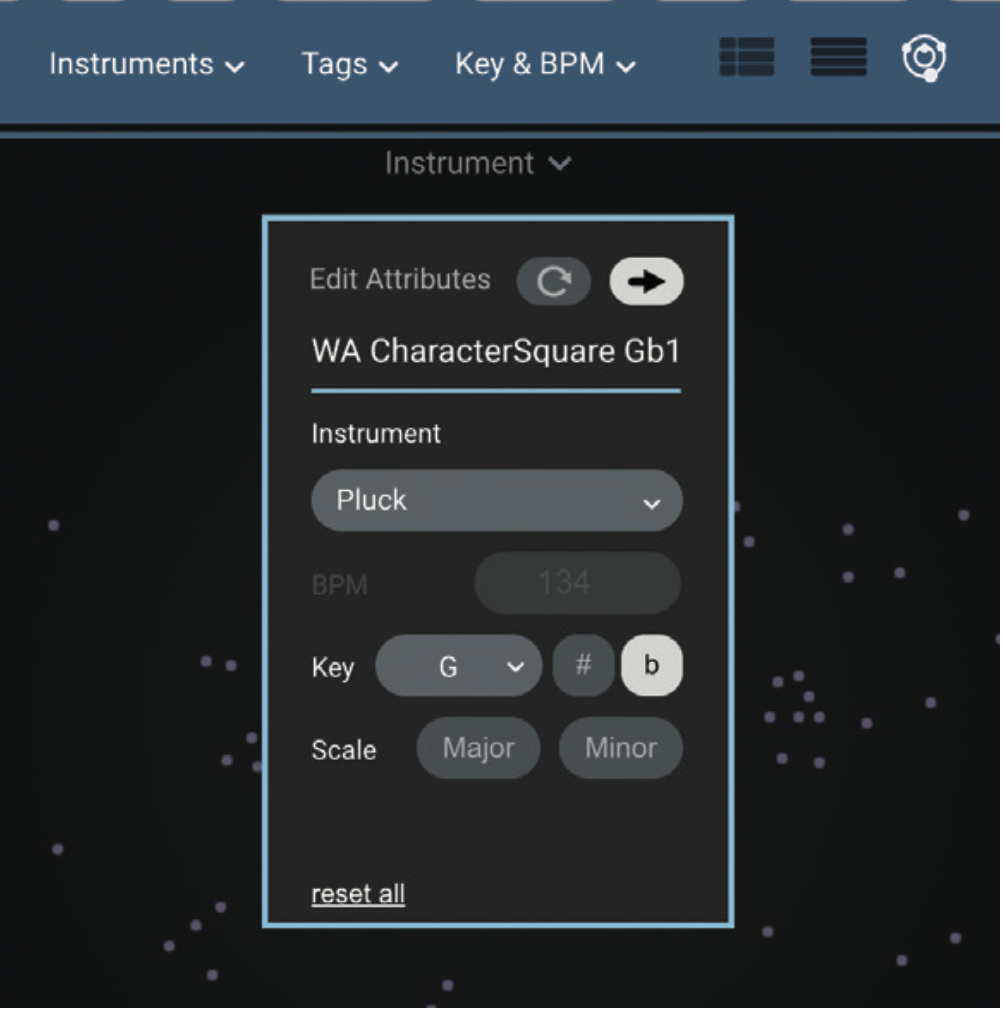
When a sample is selected, click the … button to see its details (sample rate, file size and file type). You can change its tags and attributes from here. You can use the filter buttons in the top bar of the interface to filter between sample types.
Sononym: A slightly different approach
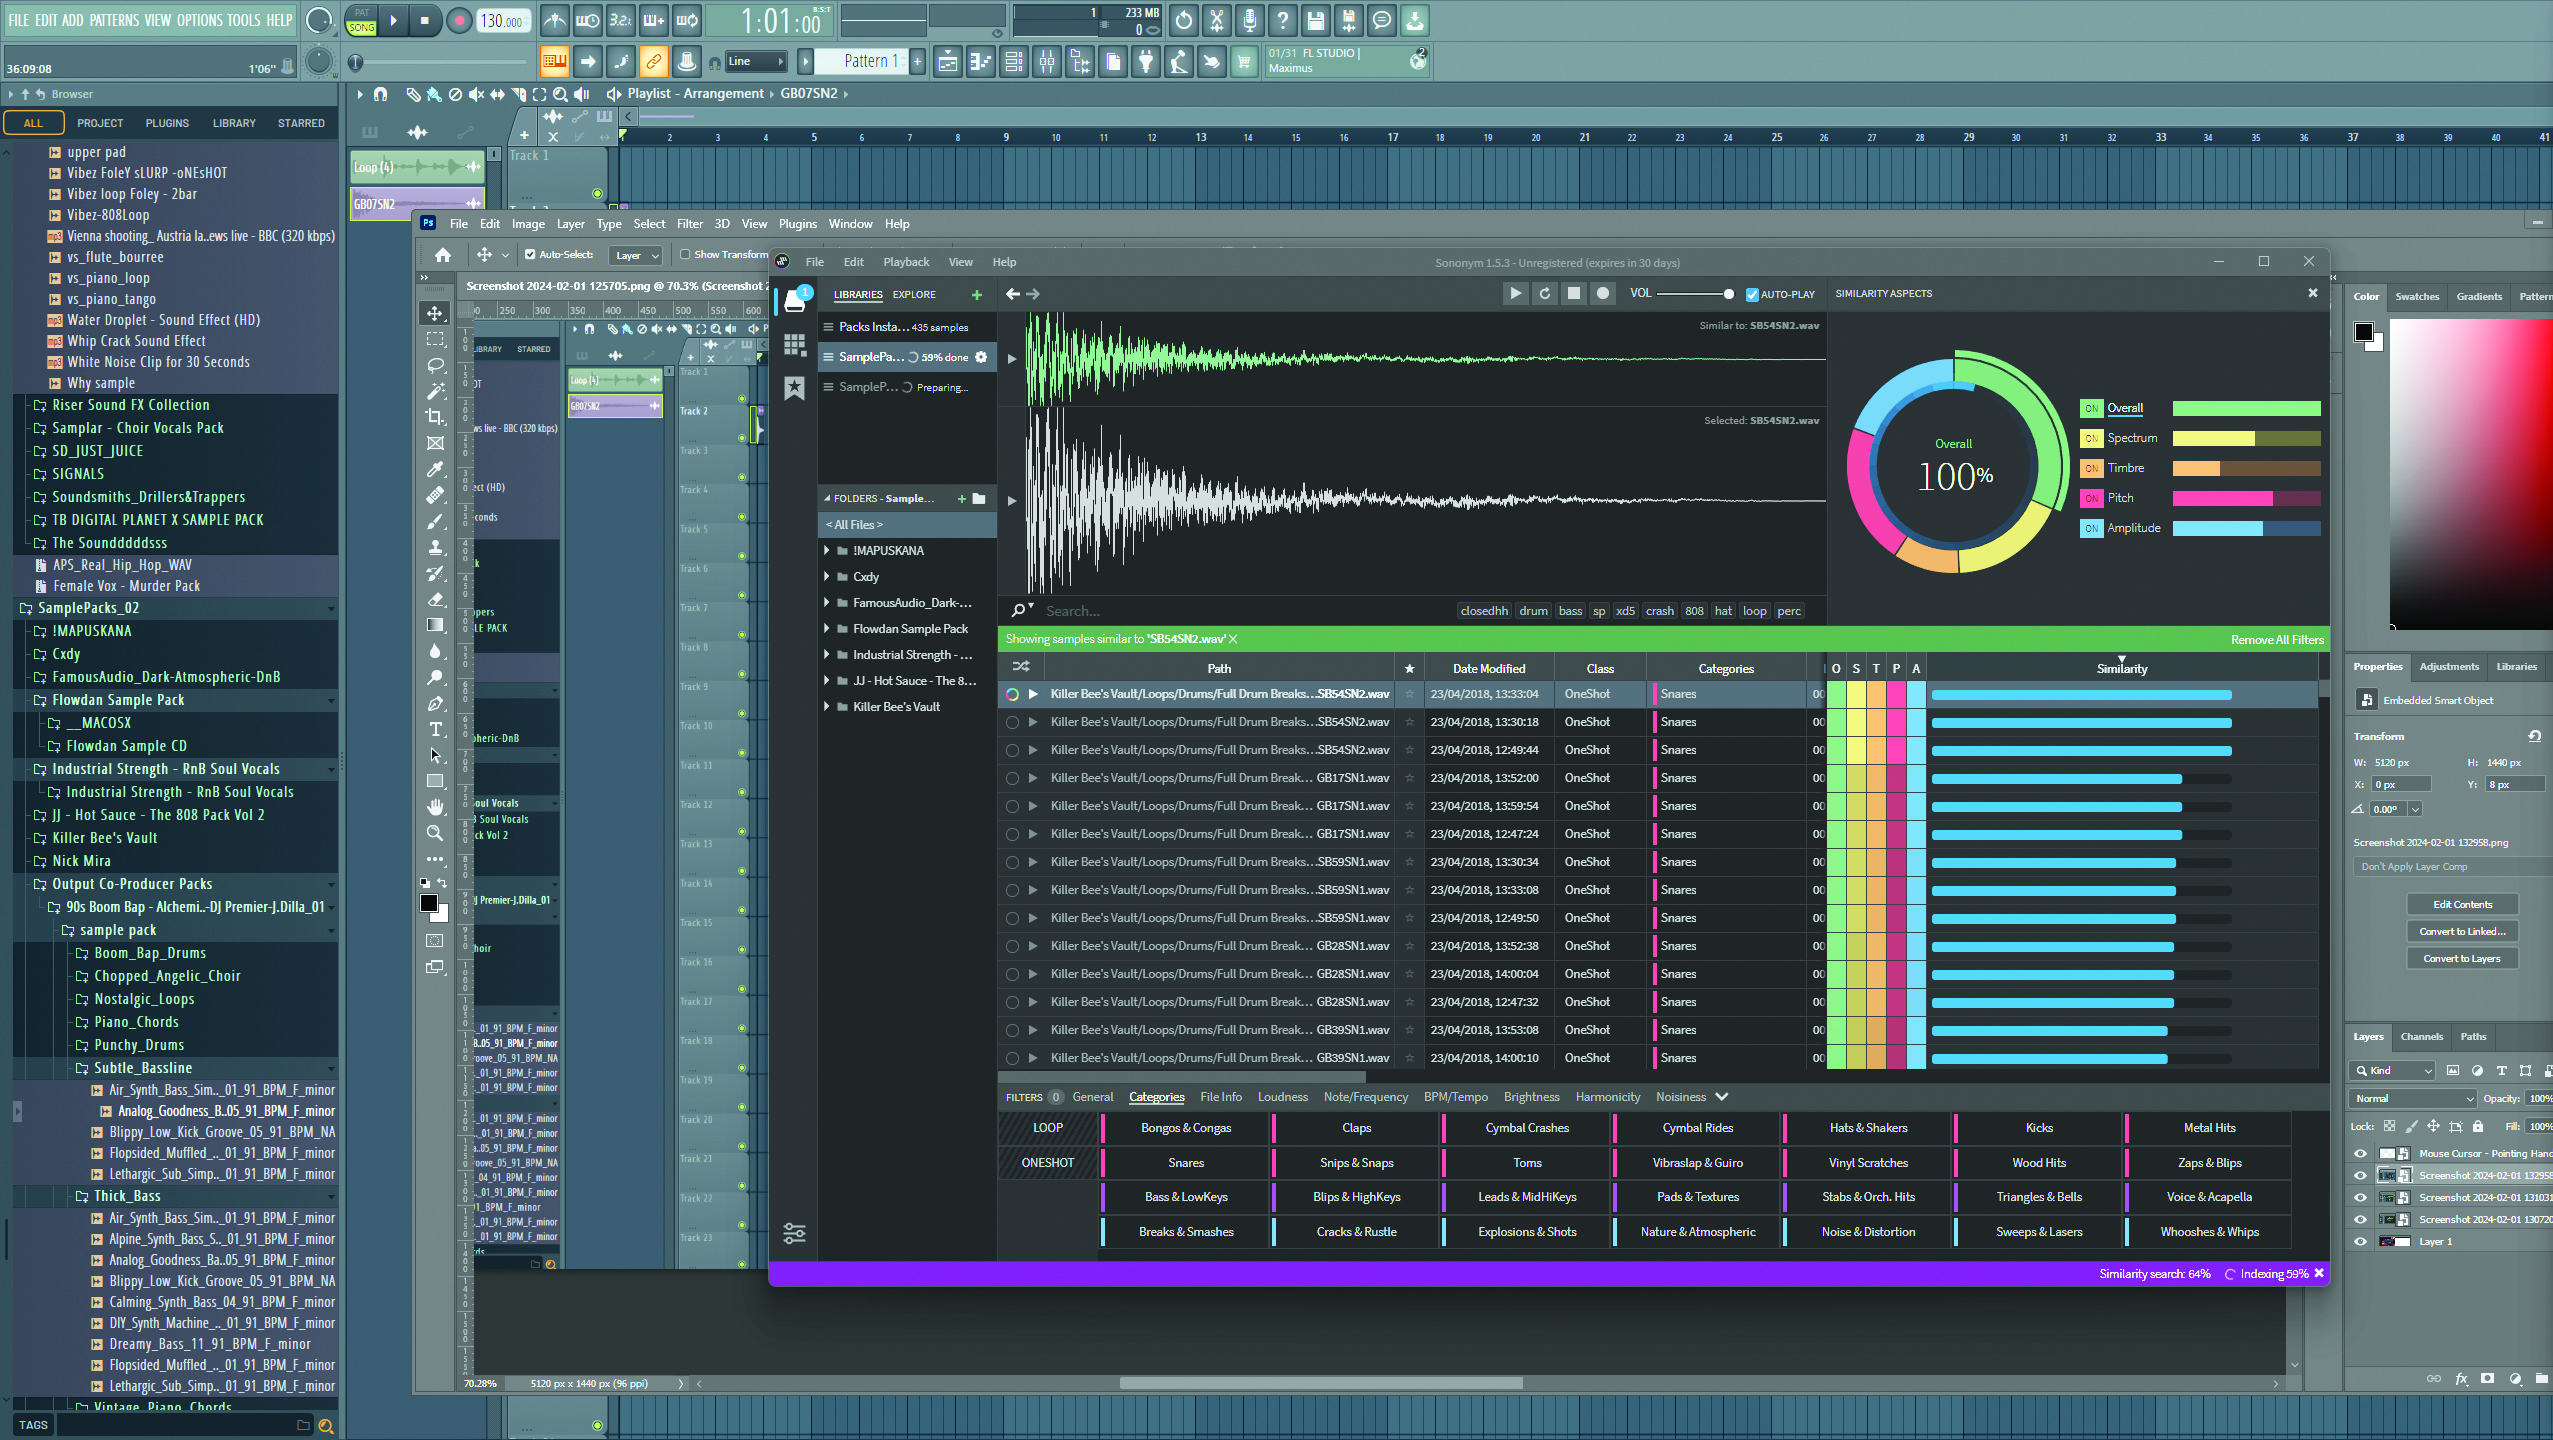
Sononym is unique in the AI sample manager field, as it measures similarities between samples based on more informative and practical metrics than some others.
It will analyse a chosen sample and then list a bunch of similar ones, giving readings based on a few similarity stats. The readings of similarity are: Overall, Spectrum, Timbre, Pitch, and Amplitude.
This is perhaps Sononym’s strongest feature, as it doesn’t have a visual spectrum to categorise samples. Compared to XO, Atlas 2, and Cosmos, however, you can see why attributing similarity statistics would be highly beneficial. Let’s say you like the sound of a certain kick drum and want to build a library based on that. Sononym can identify similar kick drums with extreme precision, unlike the other applications in this article, that rely more on general similarities like sample type, genre, tempo etc.
Sononym’s interface might not have the same visual flare or bonus features as other entries in this article, but it proves to be a highly effective sample manager that excels at what it’s designed to do. Its AI also groups samples into relatively ‘niche’ categories when compared to its competitors, dividing audio into ‘Whooshes & Whips’, ‘Cracks & Rustle’, ‘Zaps & Blips’, and many other fruity sound types.
There’s only one way to find out if Sononym is the right AI sample manager for you: by jumping straight into the action. Sononym comes with a free 30-day evaluation period for you to test it out.
Compare and contrast: using Sononym to analyse your samples
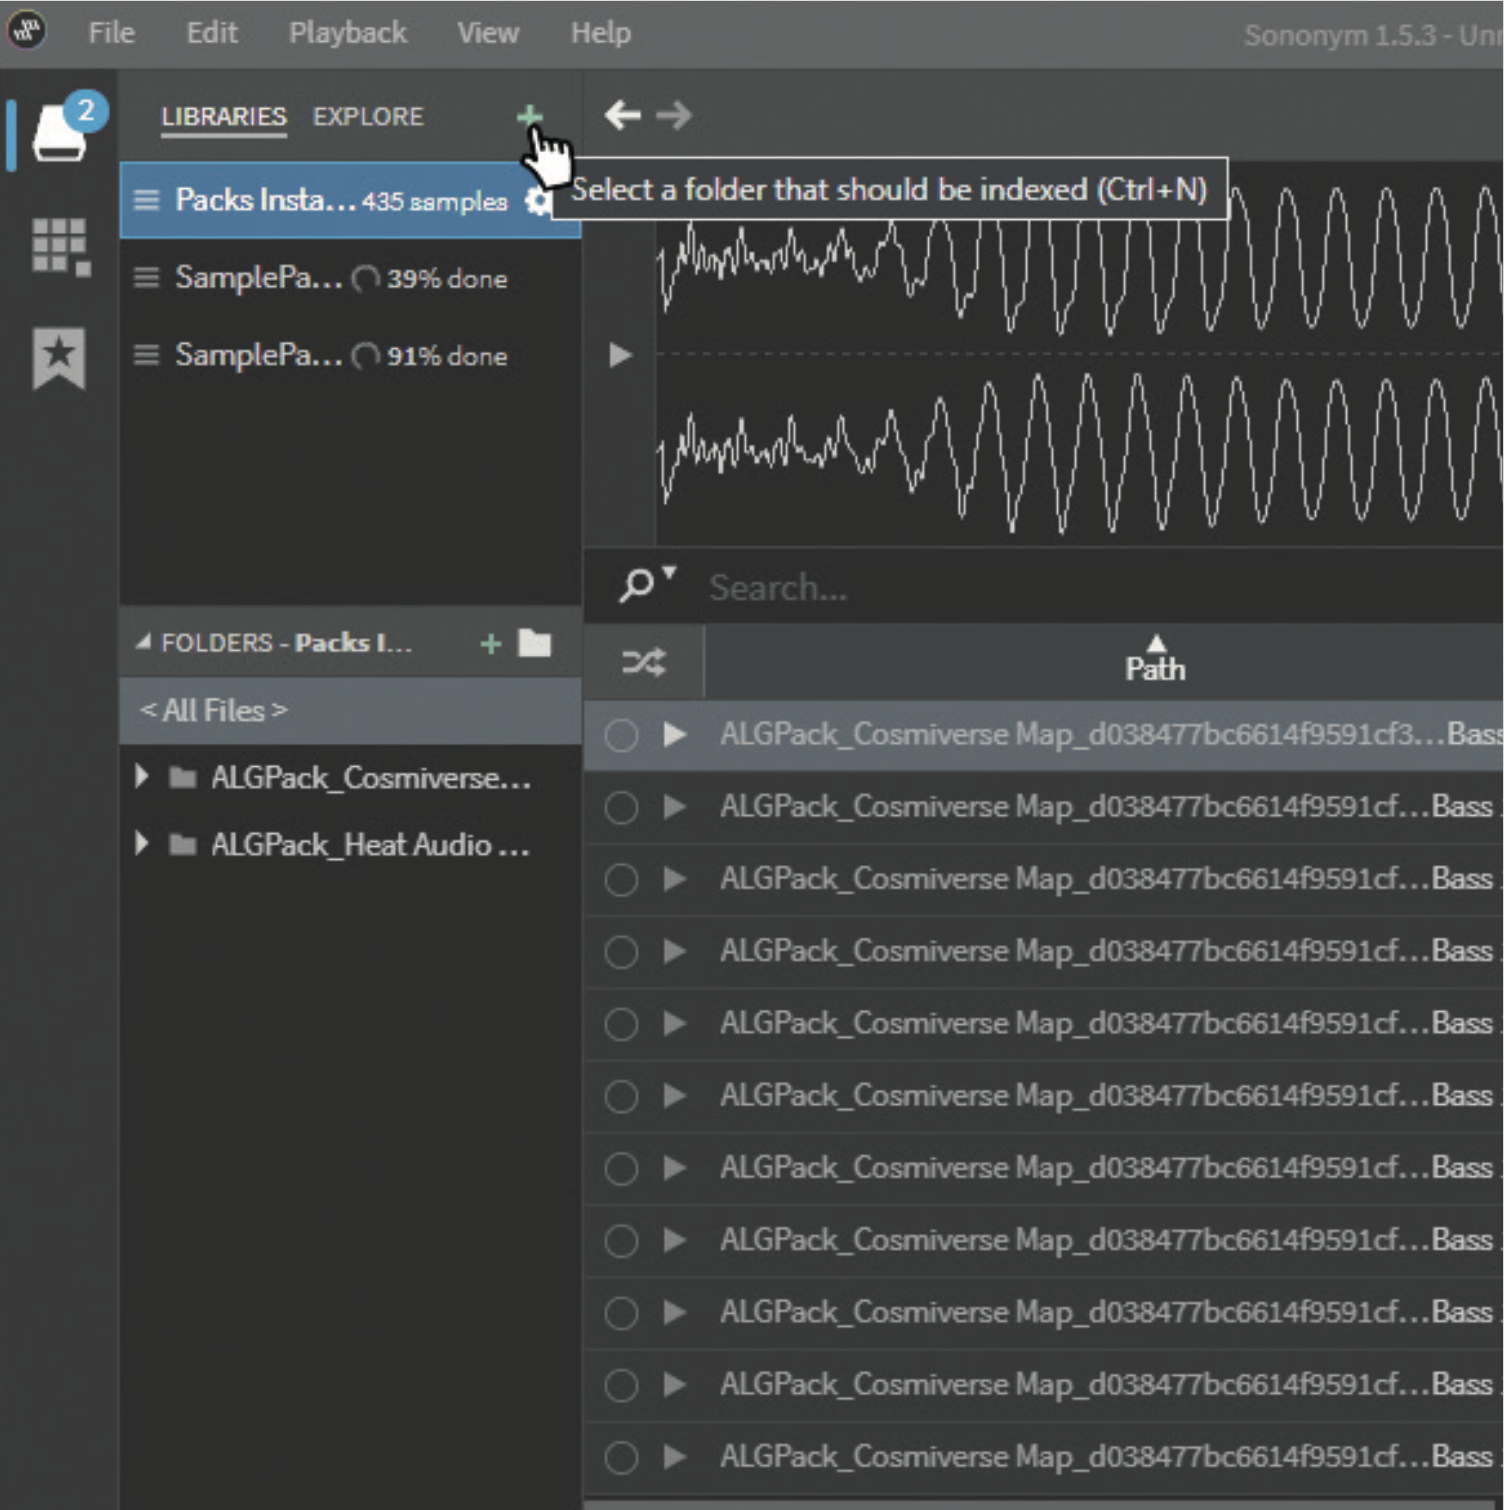
Let’s explore how effective Sononym is. Open the software, and click the + next to the top-left Libraries tab to index a chosen sample library. We recommend importing a library of a relatively large size so that the AI has more samples to go off.
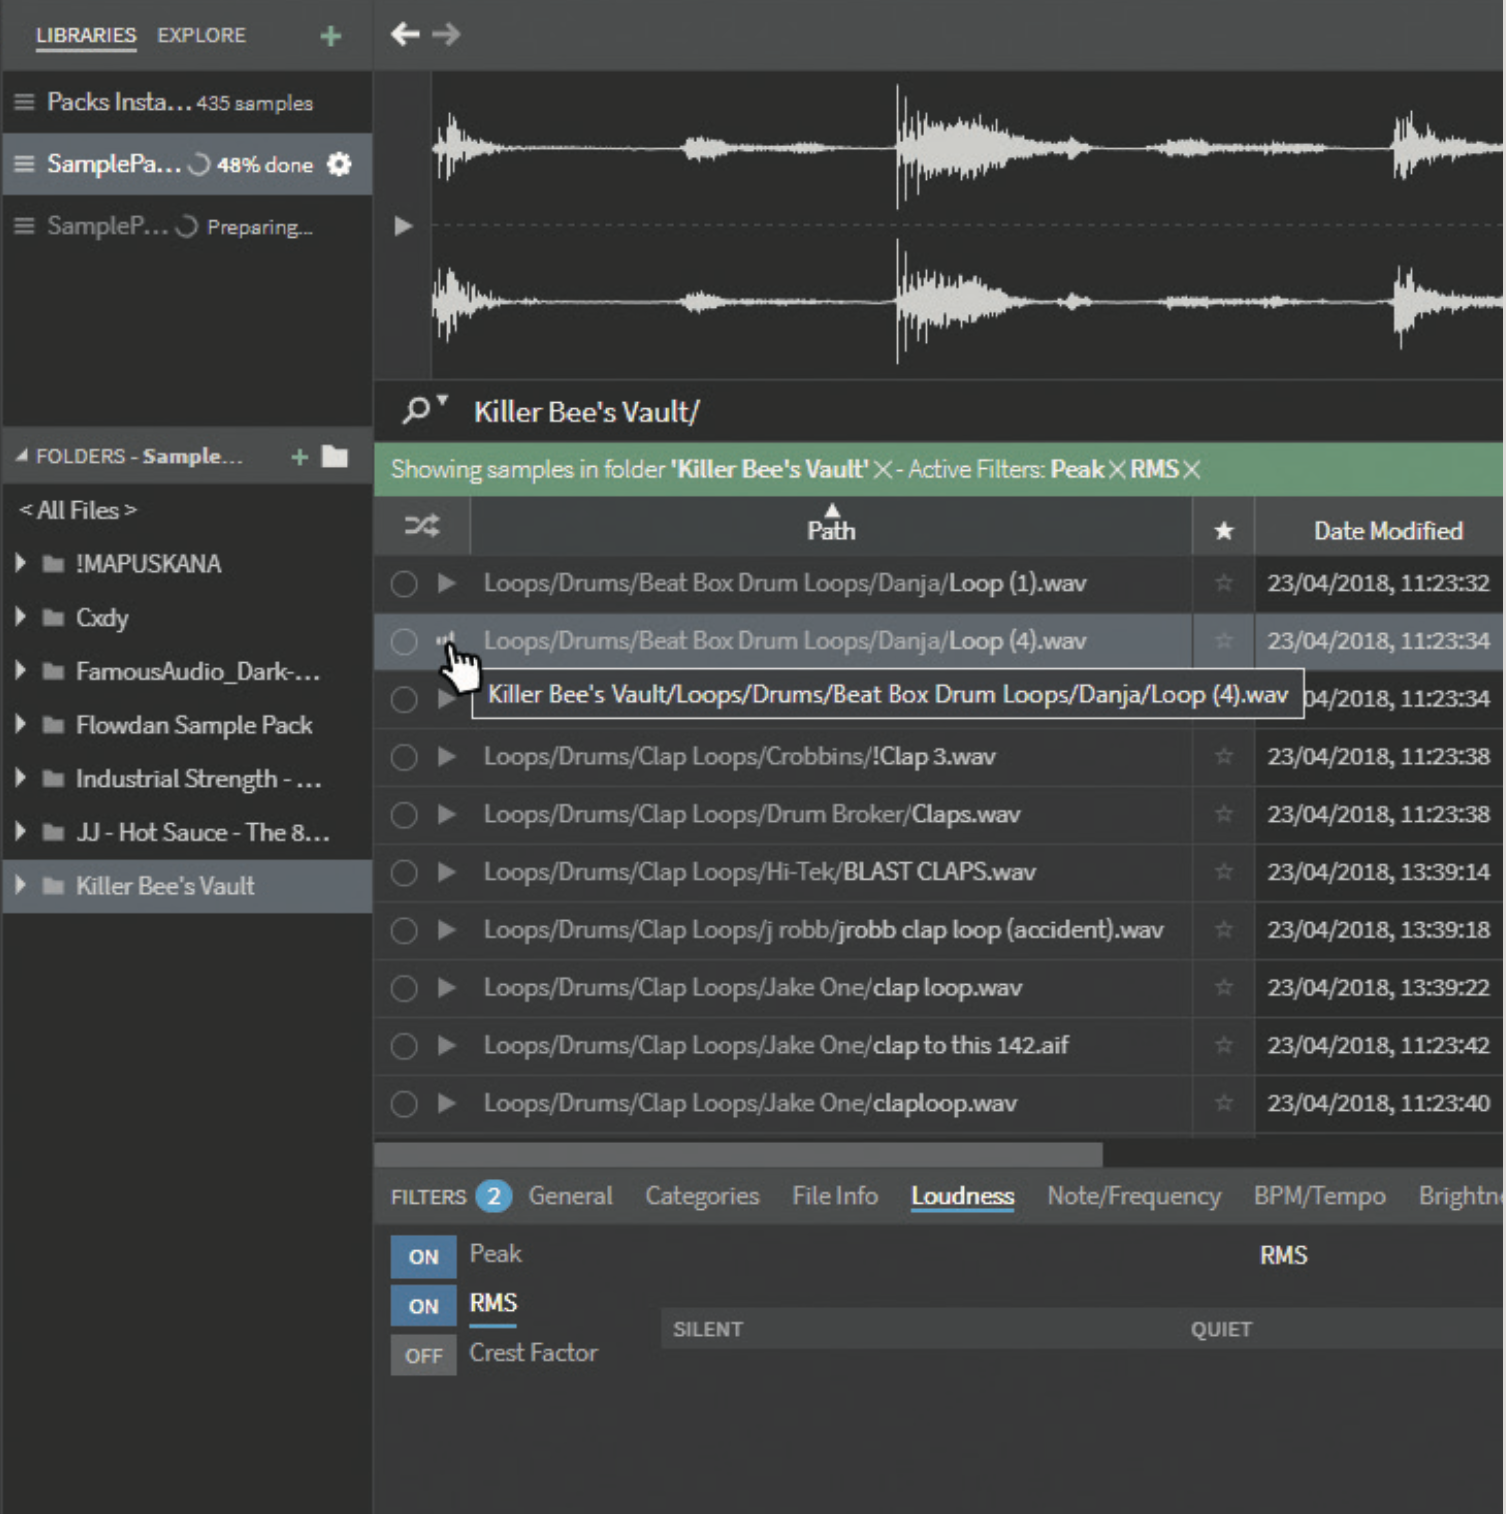
With your library now imported, you can navigate samples from the list. The top panel displays a selected sample’s waveform. The left-hand panel lets you switch sub-folders in your library, and the bottom panel lets you select filter types.
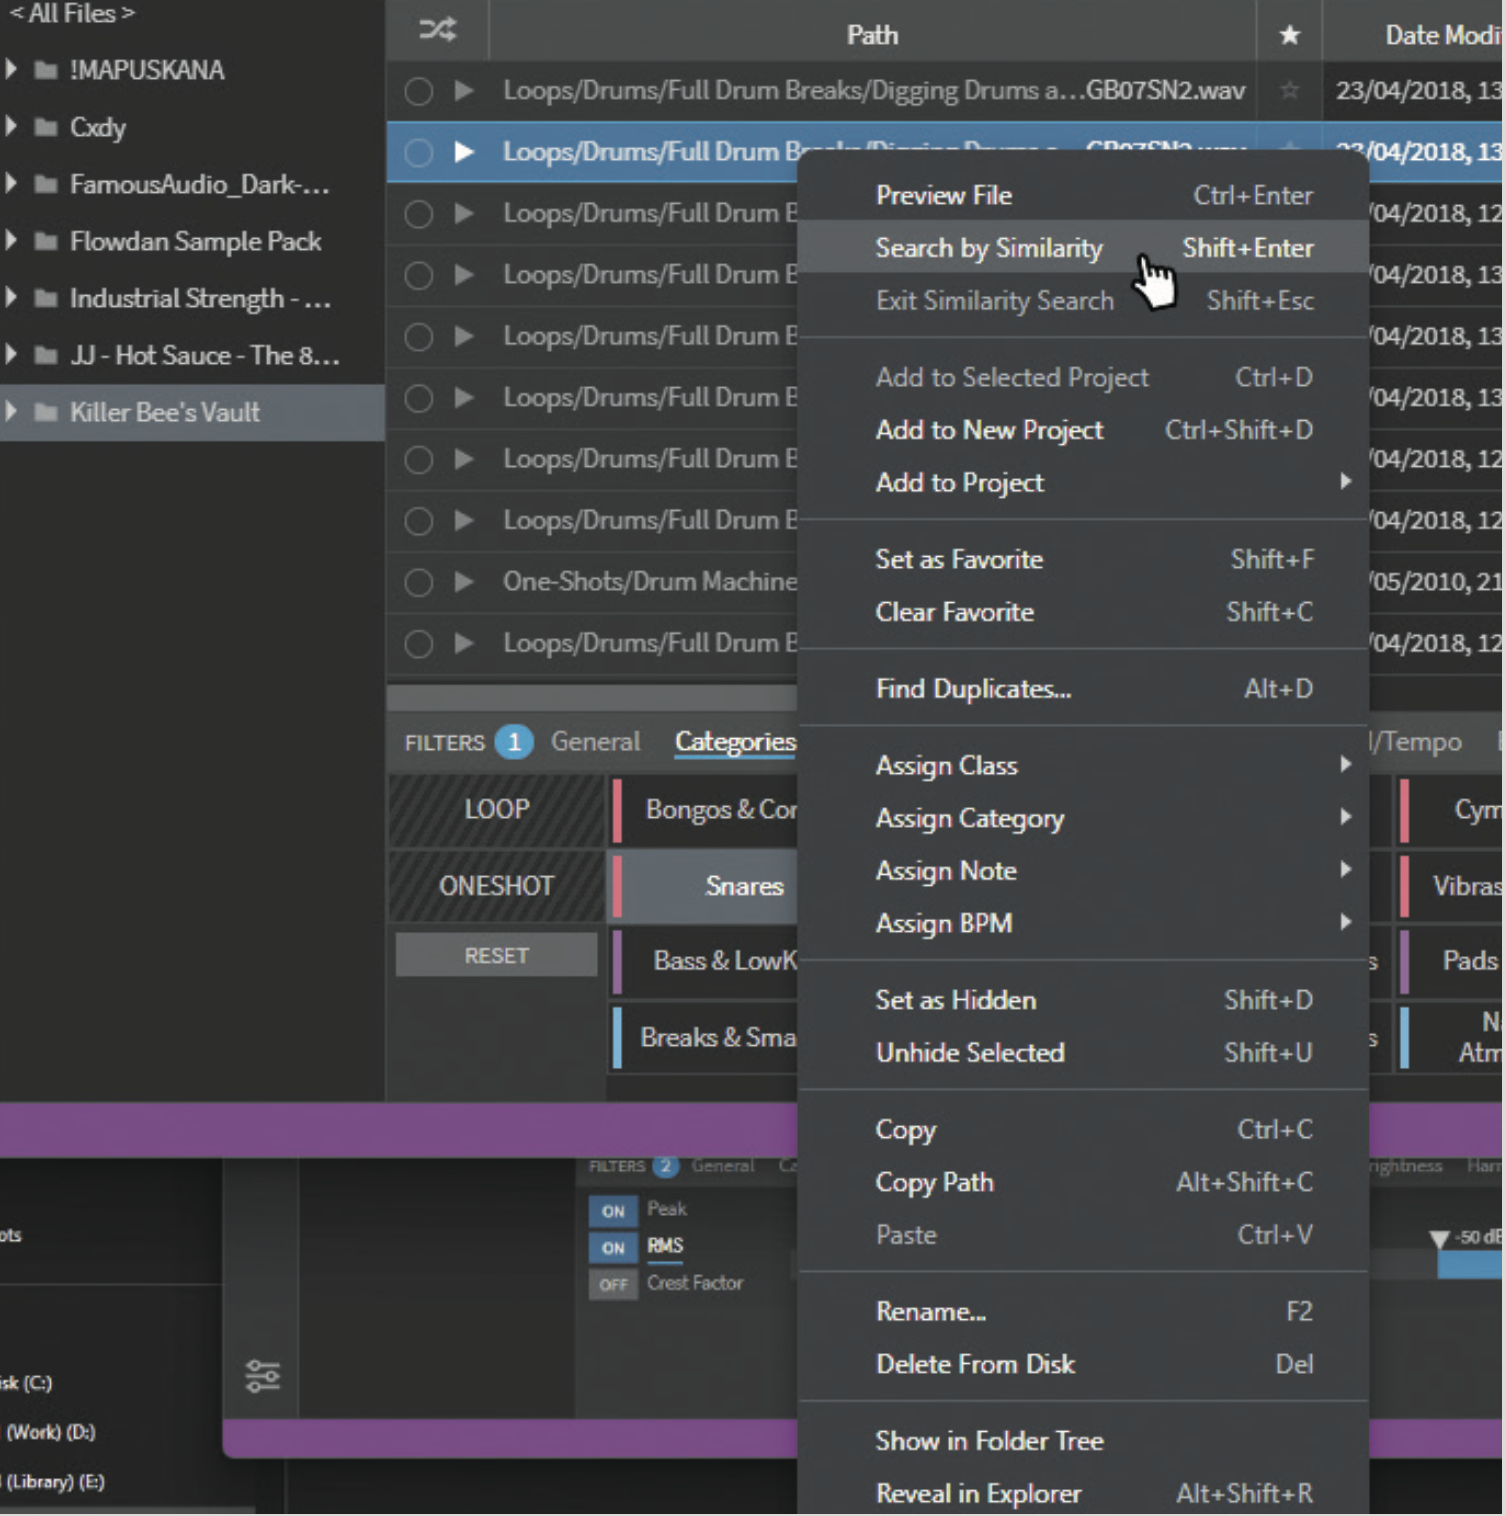
Open the ‘Categories’ filter tab in the bottom panel, and select ‘Snares’ so that only snare samples are displayed in our list. Then, we pick a snare, right-click it and select ‘Search by Similarity’ to prioritise our list by similarity.
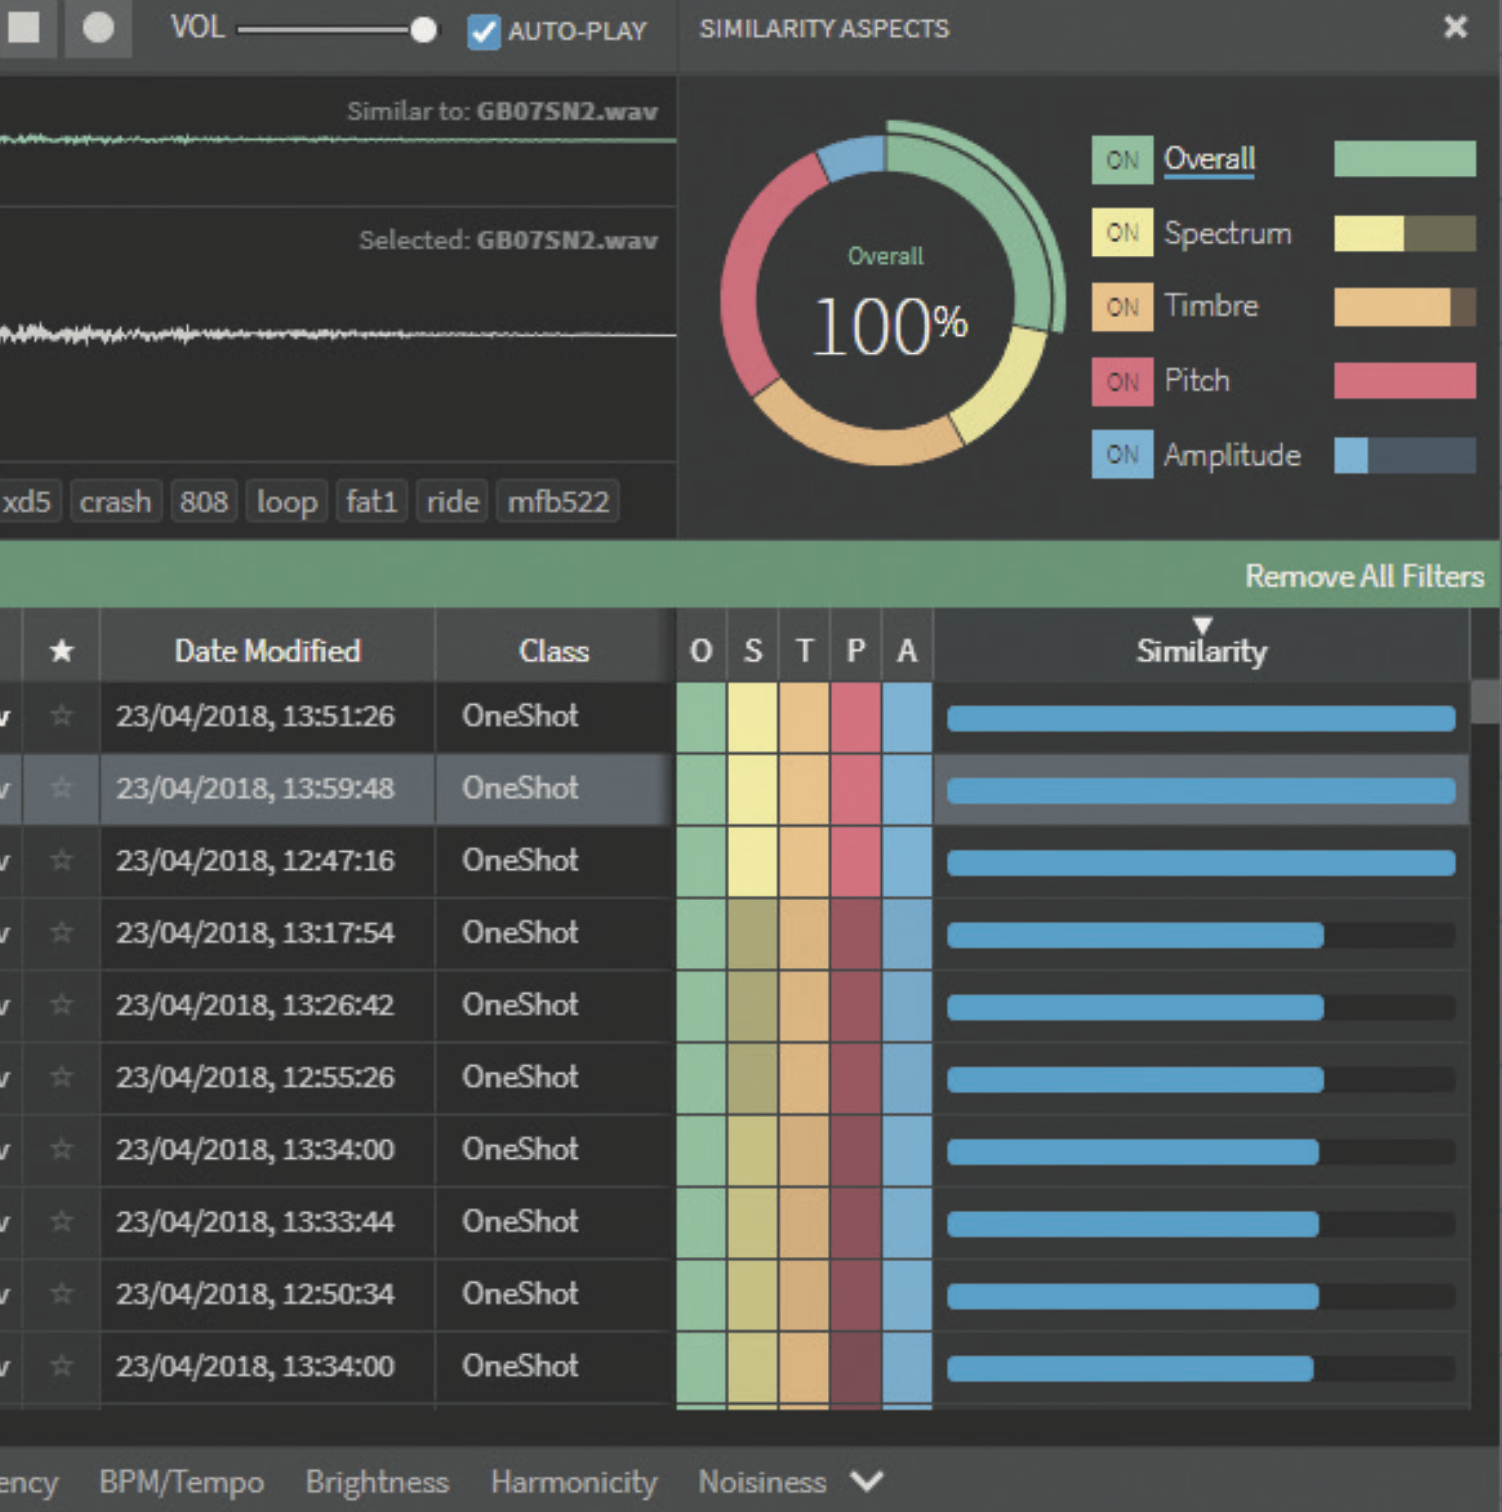
The list has changed. Now, the right column shows colour-coded readings of each similarity metric (Overall, Spectrum, Timbre, Pitch, and Amplitude) according to the base sample. A blue bar shows results from your similarity filtering.
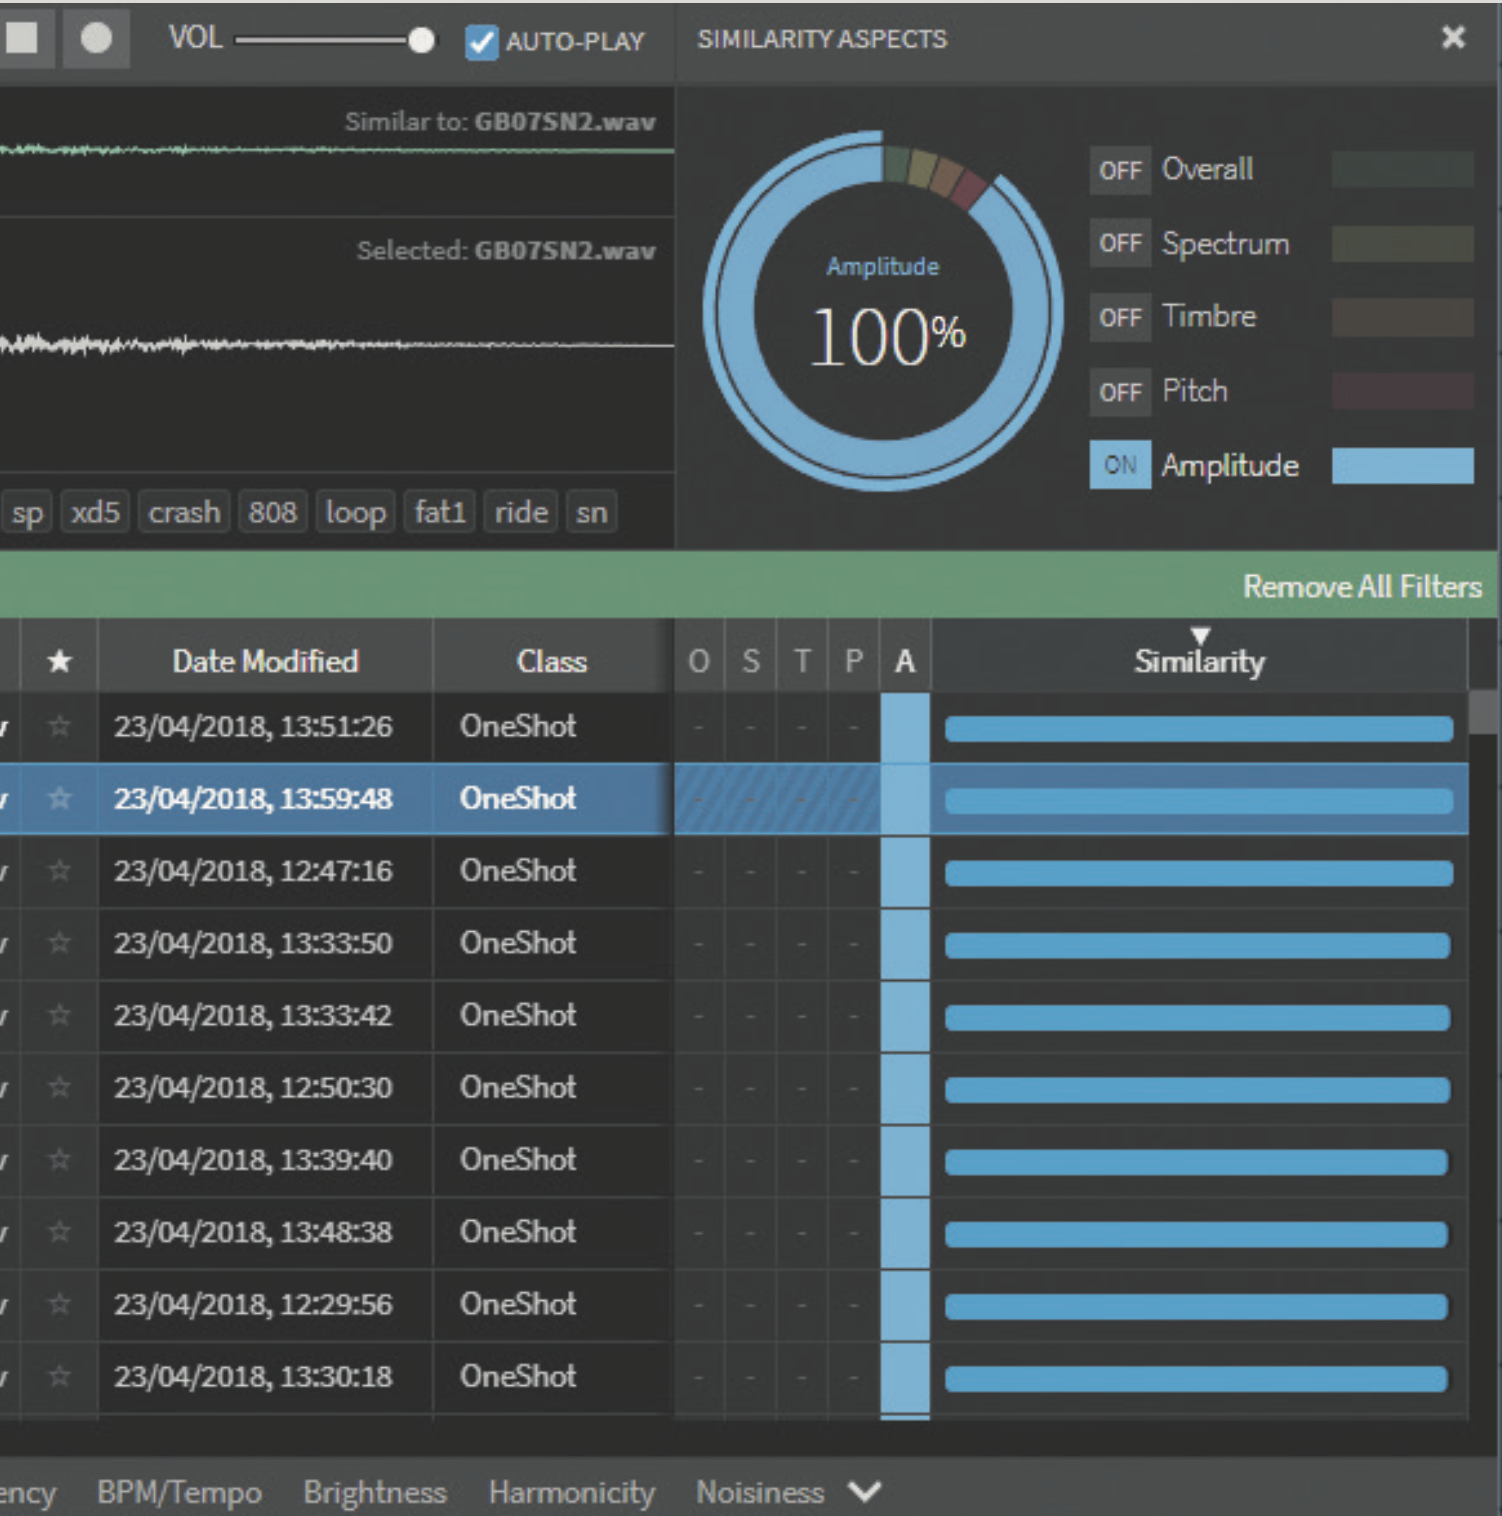
Adjust your similarity filtering by interacting with the Similarity Aspects panel, top-right. We can set our list to, say, prioritise similarity based on the Amplitude stat alone by disabling the other metrics, and setting Amplitude to 100%.
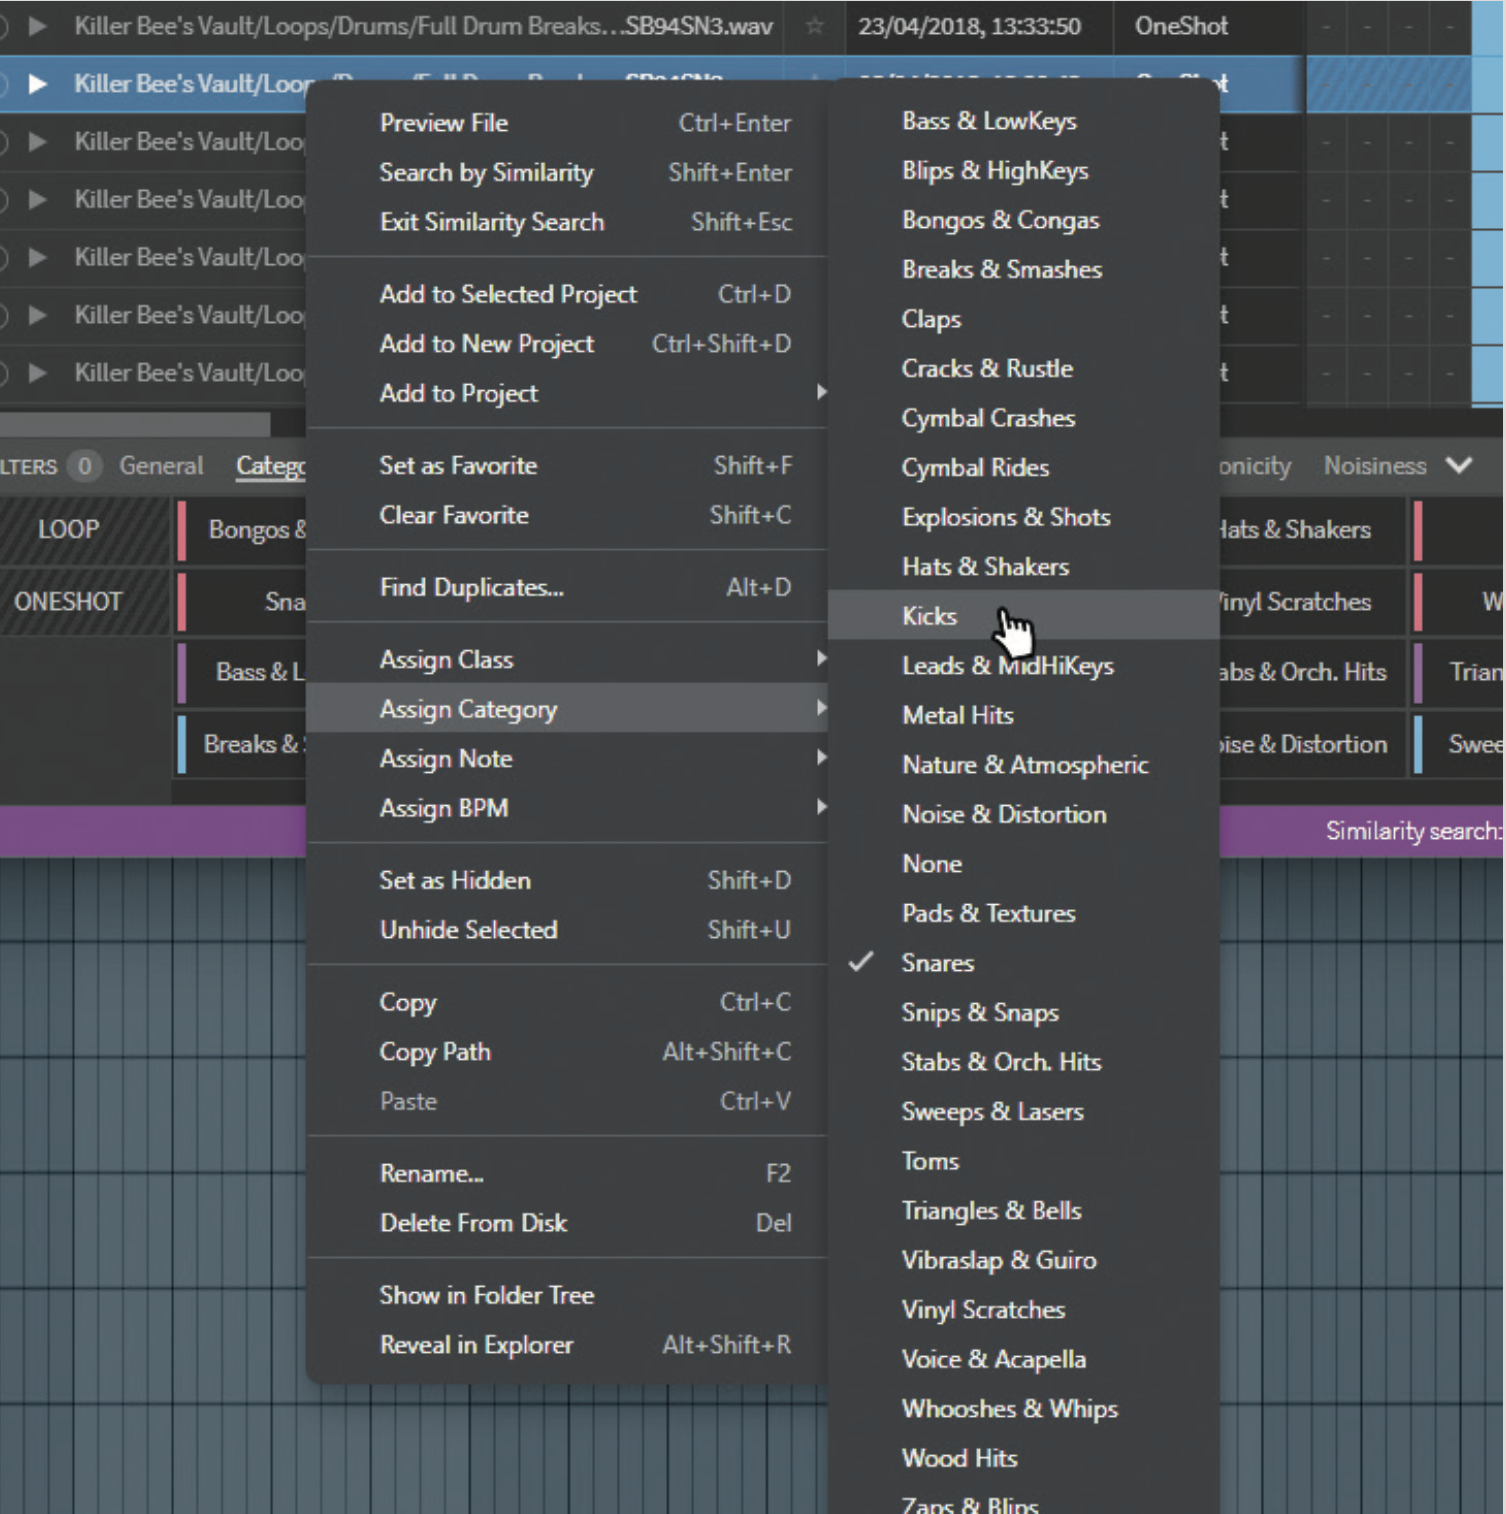
Finally, Sononym has many advanced categorisation features that you can customise by right-clicking on any given sample. For example, if the AI has wrongly recognised a kick as a snare, you can manually reassign its category.
Exploring Jamahook’s extensive feature set
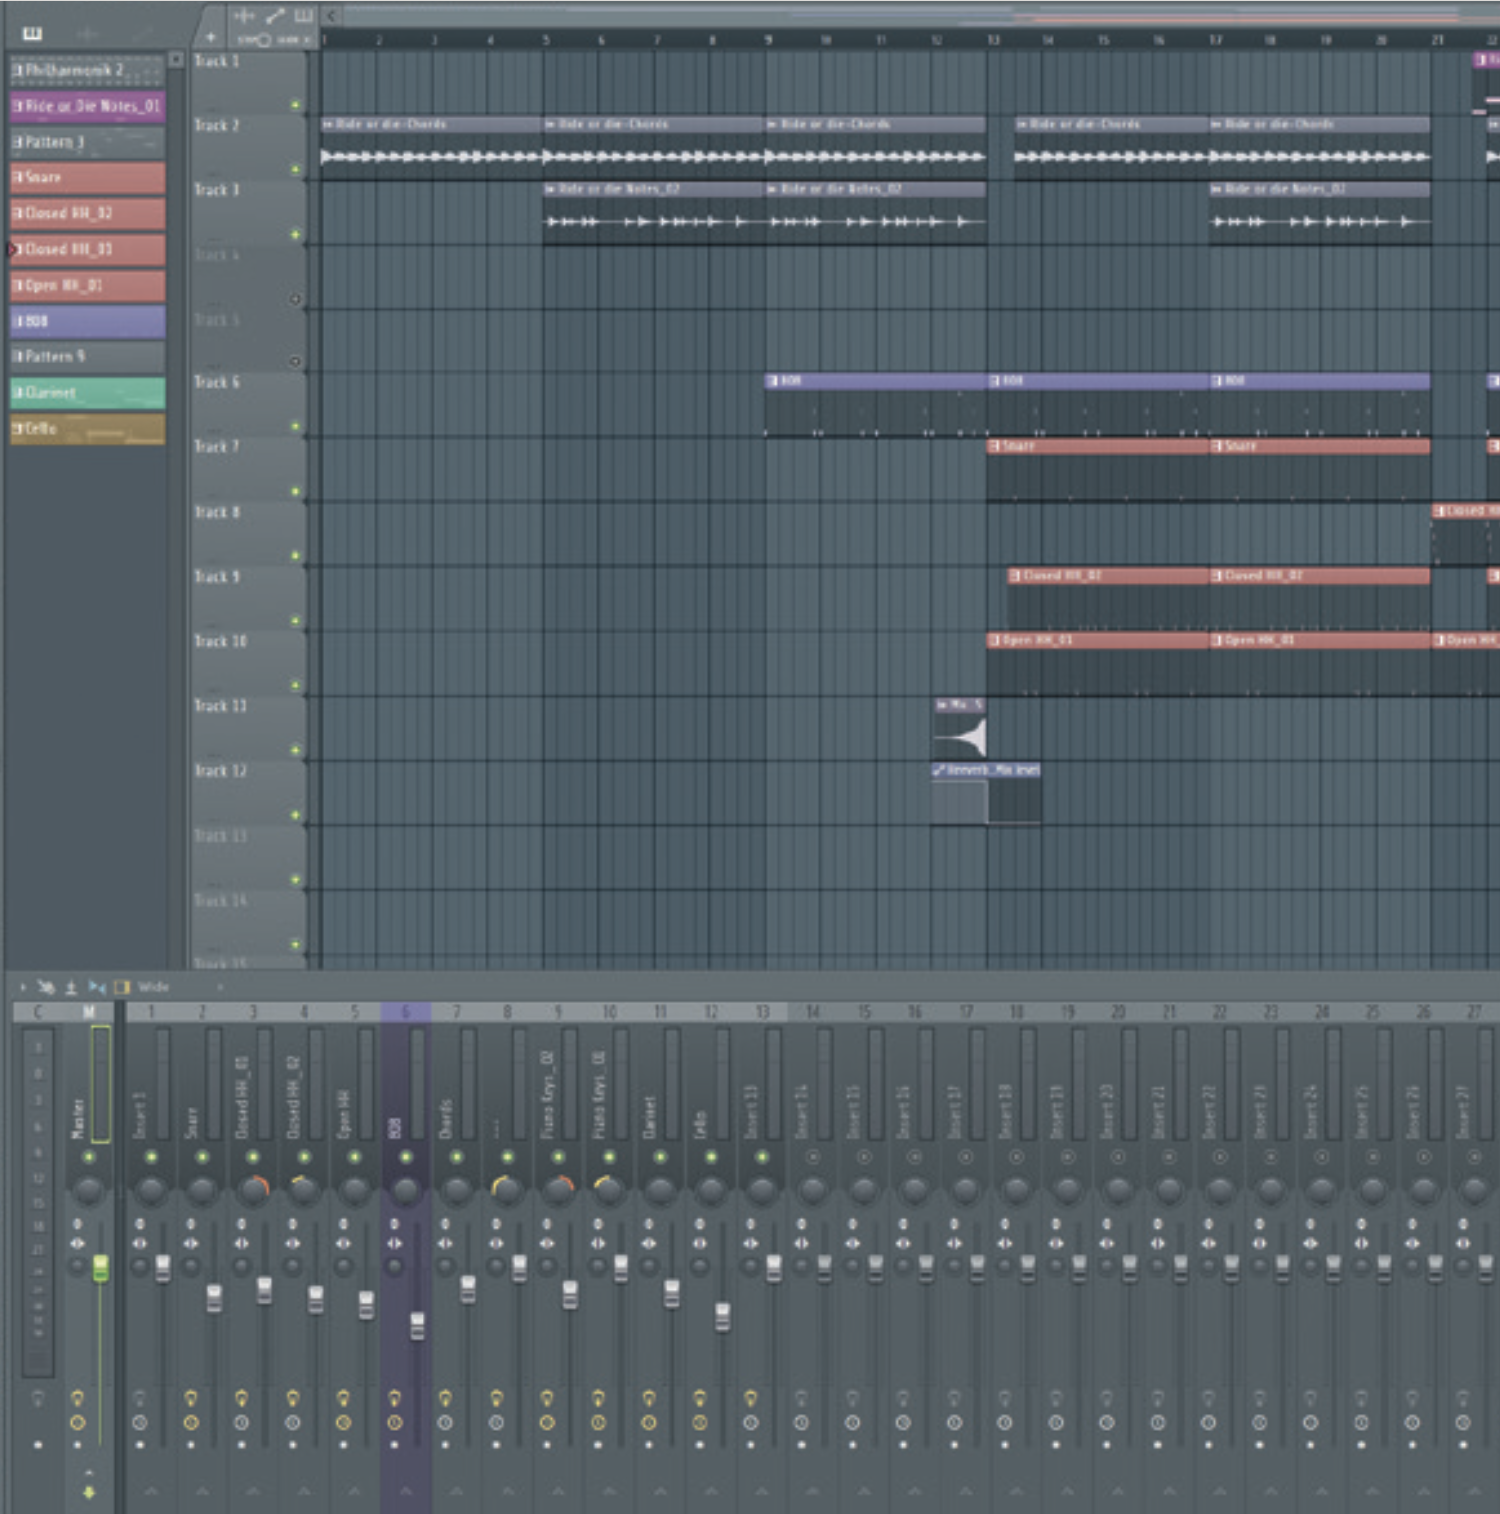
Jamahook’s AI allows us to scan existing audio and discover similar sounds that would complement it – giving us the ability to overhaul a current loop completely or find finishing touches. Let’s test it by loading a half-finished eight-bar project. We’ve opened an old project and looped the chorus section.
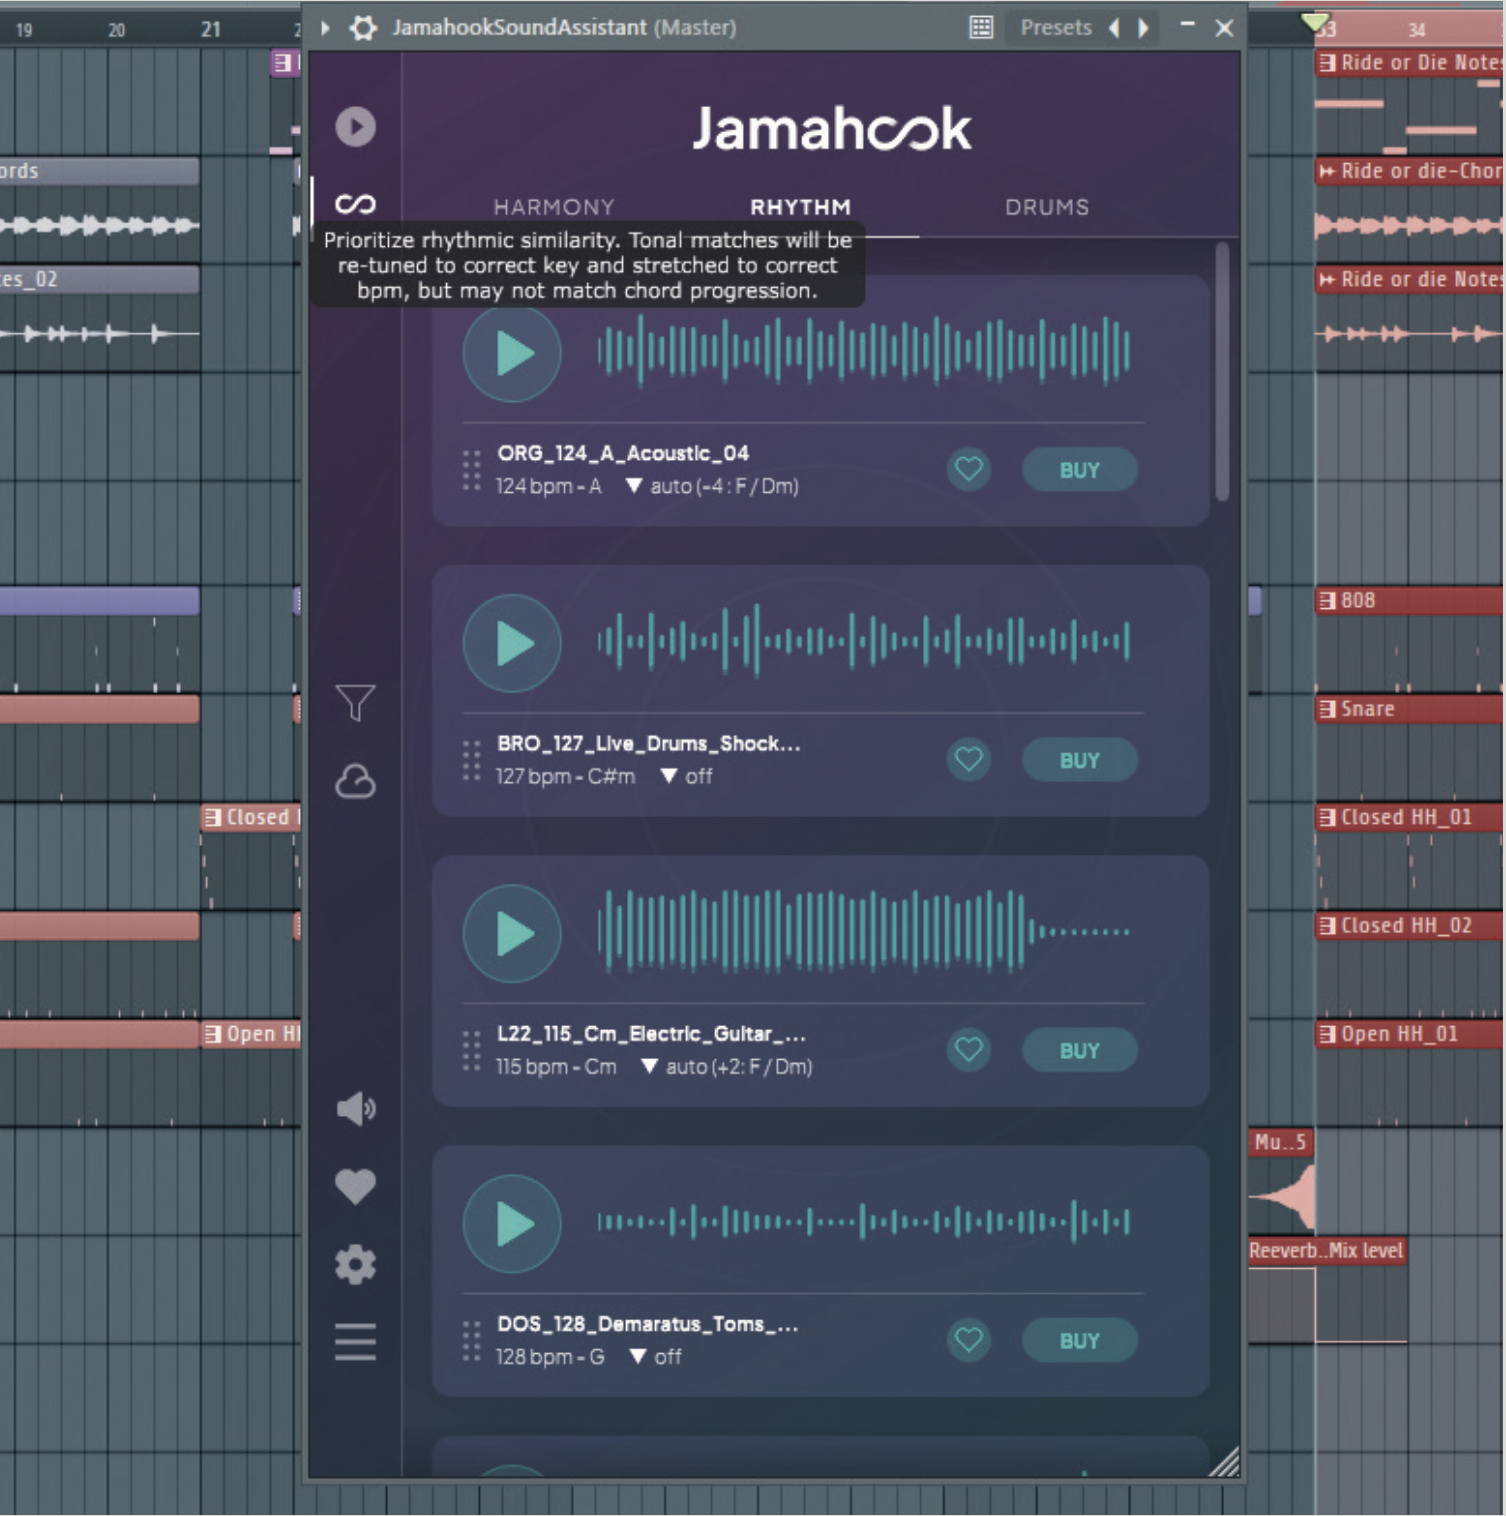
Let’s open Jamahook Sound Assistant on the Master output, click ‘Match’, and playback the project to let the AI analyse the current loop. Once finished, you’ll see a list of samples from the Jamahook cloud, similar in sonic characteristics. You can switch between ‘Harmony’, ‘Rhythm’, and ‘Drums’.
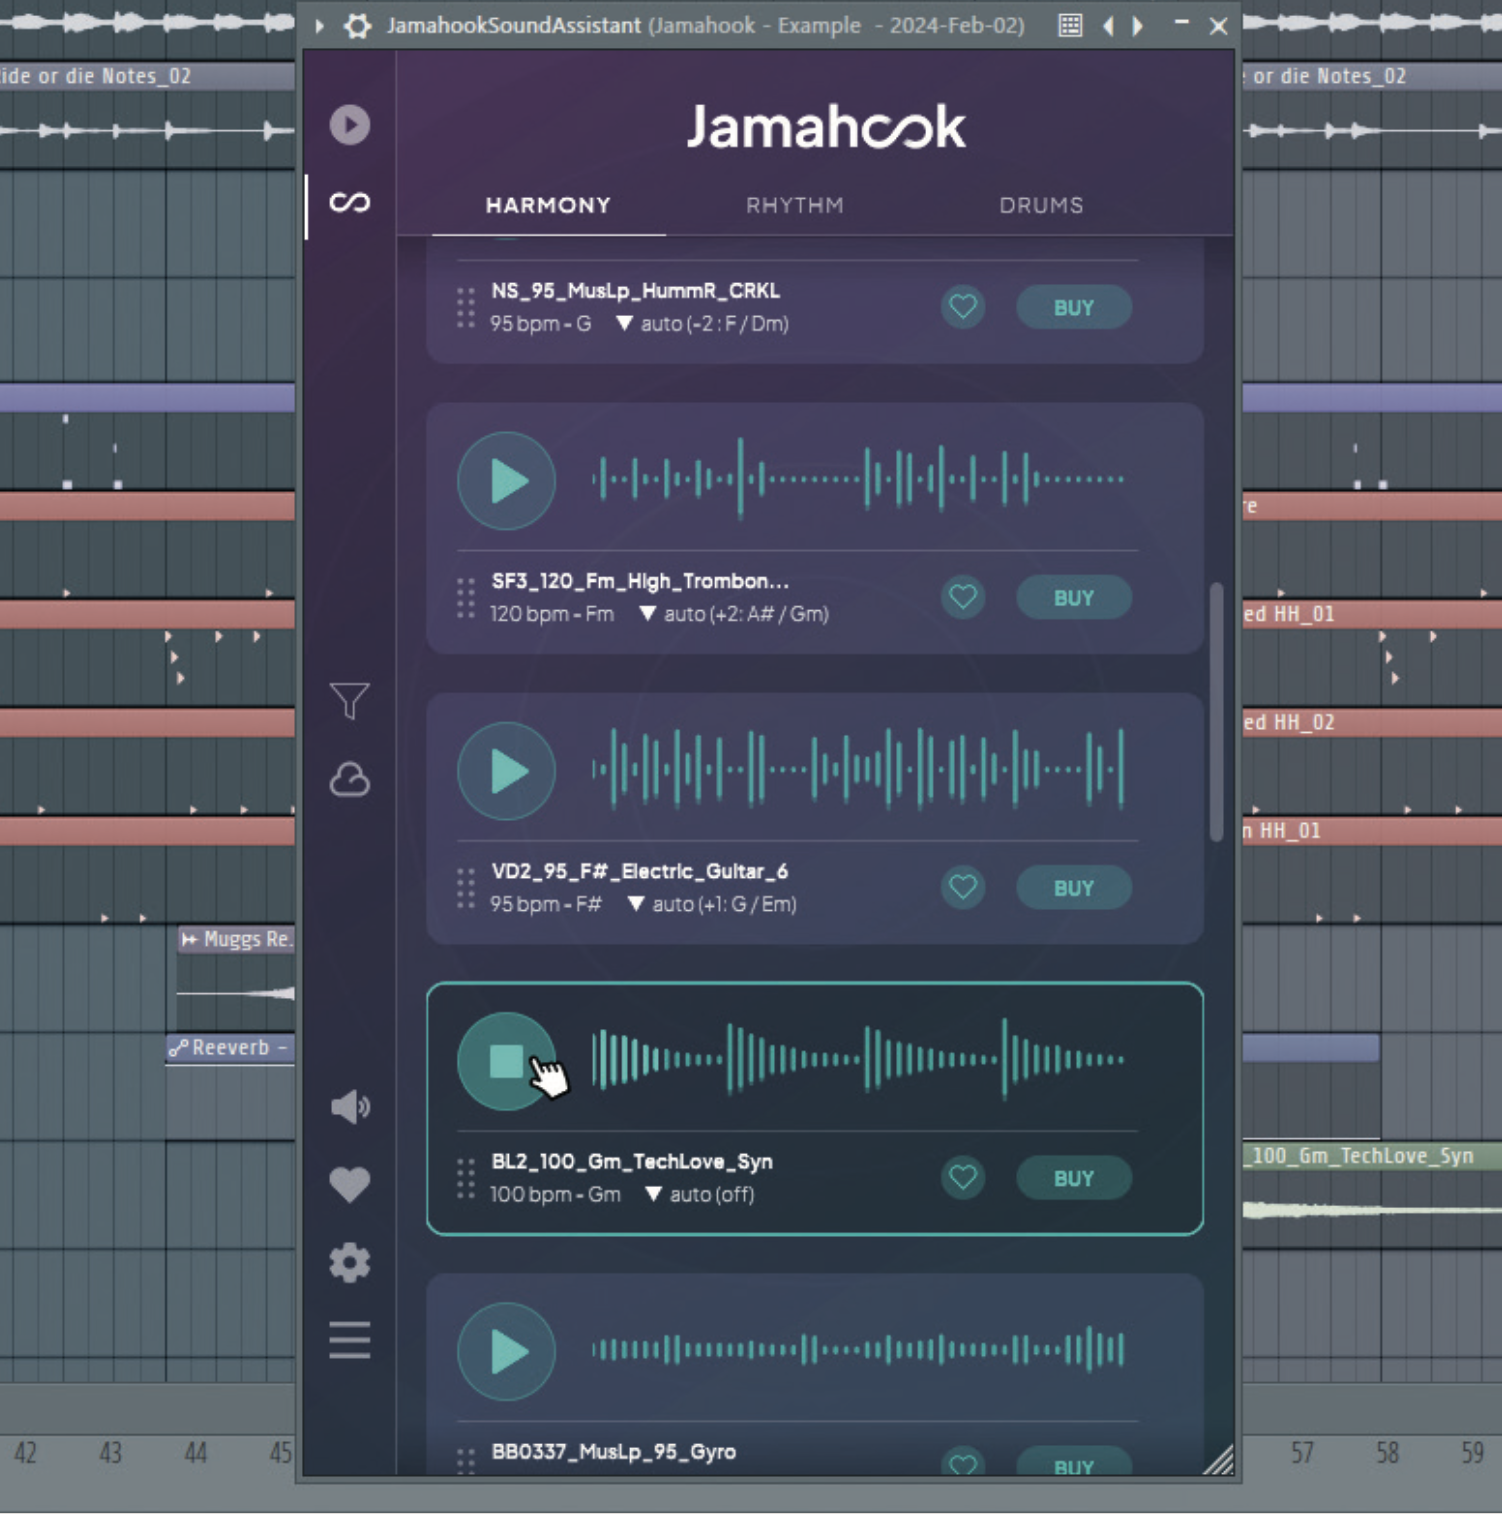
We’d like some more harmonious loops to spice up our composition, so we’ll search samples in the ‘Harmony’ tab. You’ll notice the AI automatically picks loops of similar tempos, keys, instruments, and genre types. Check out the neat synth loop we found and added to our project.
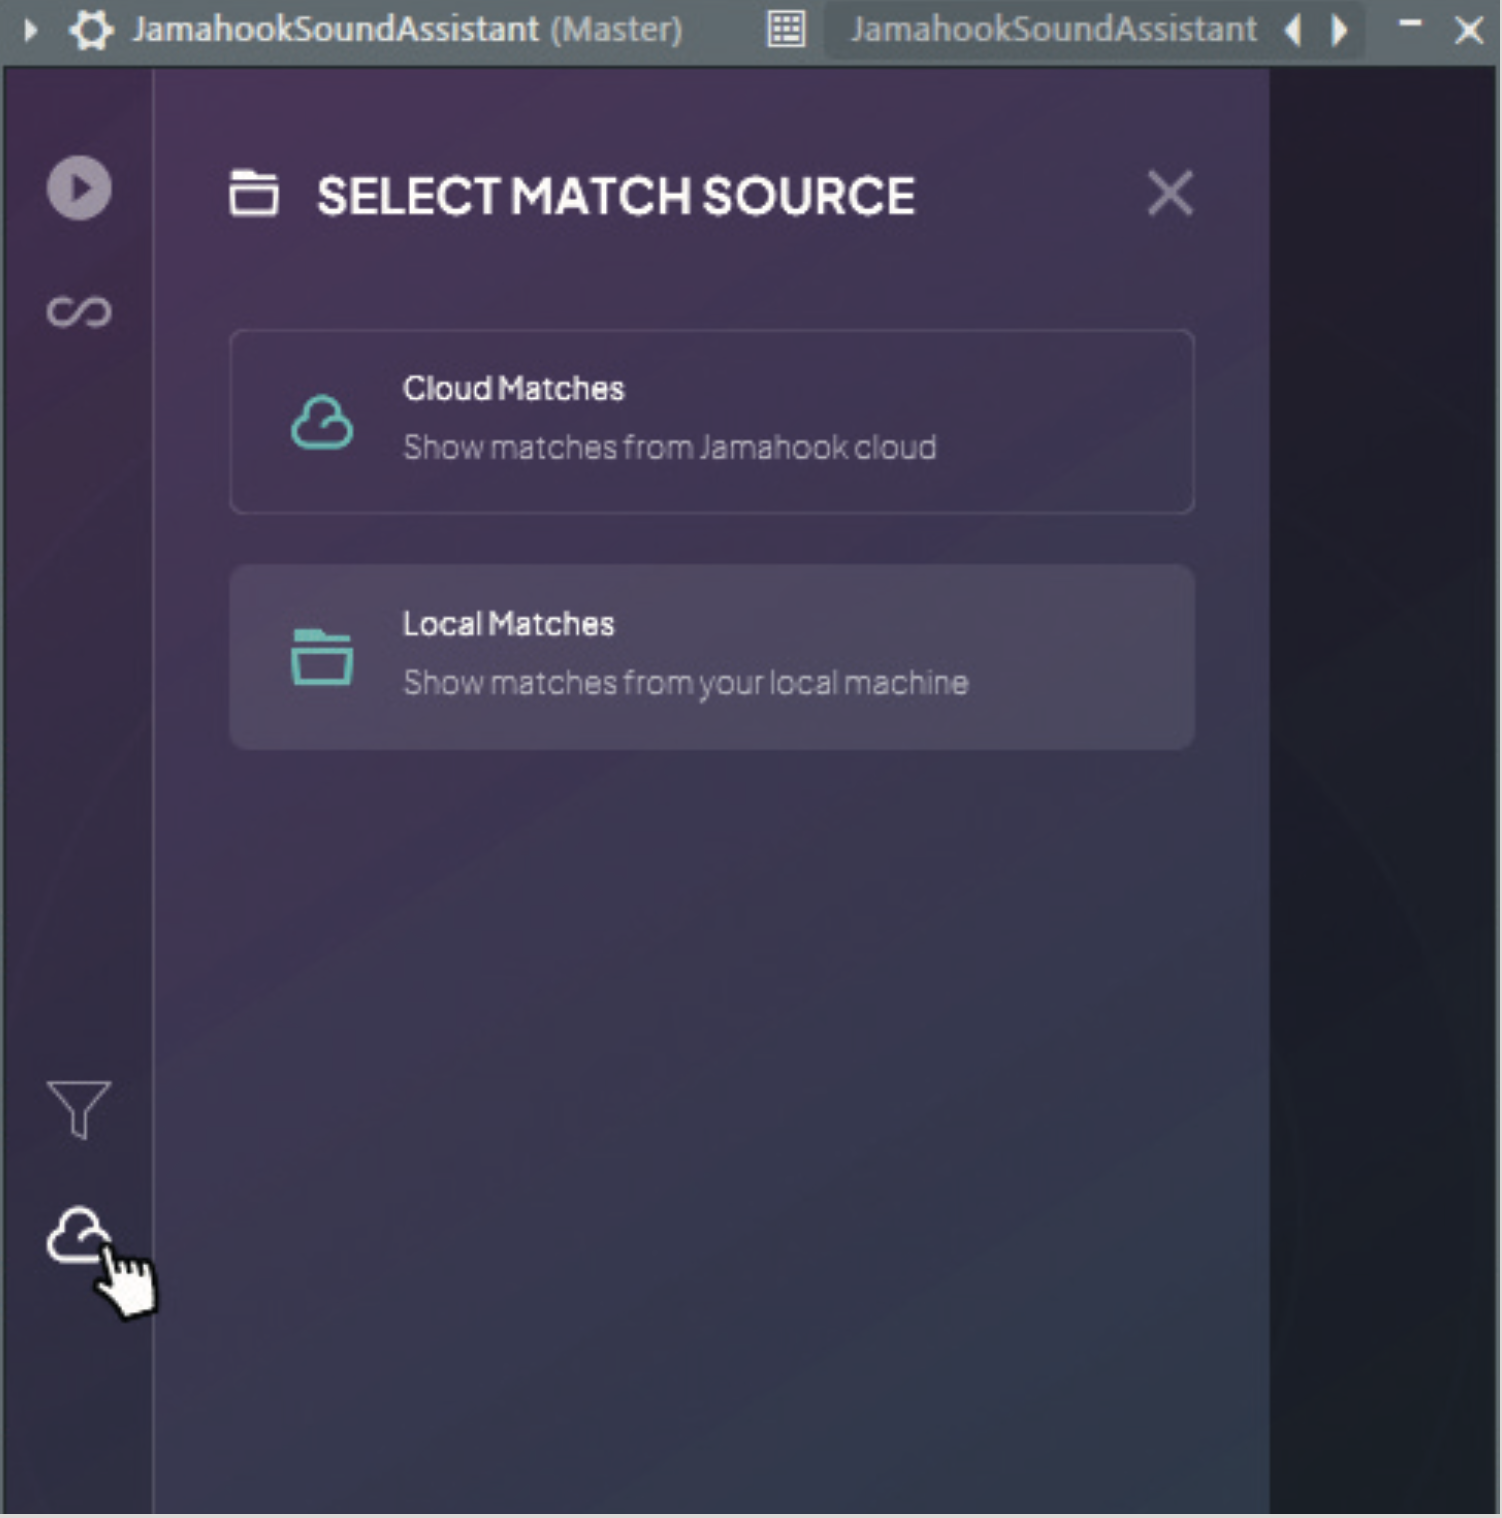
Note that you can also direct Jamahook Sound Assistant to search for similar sounds only located on your HDD by clicking the cloud icon on the left-hand menu. This is useful if you’ve already got a cohesive sample library but you’re not sure what’s missing from your project.
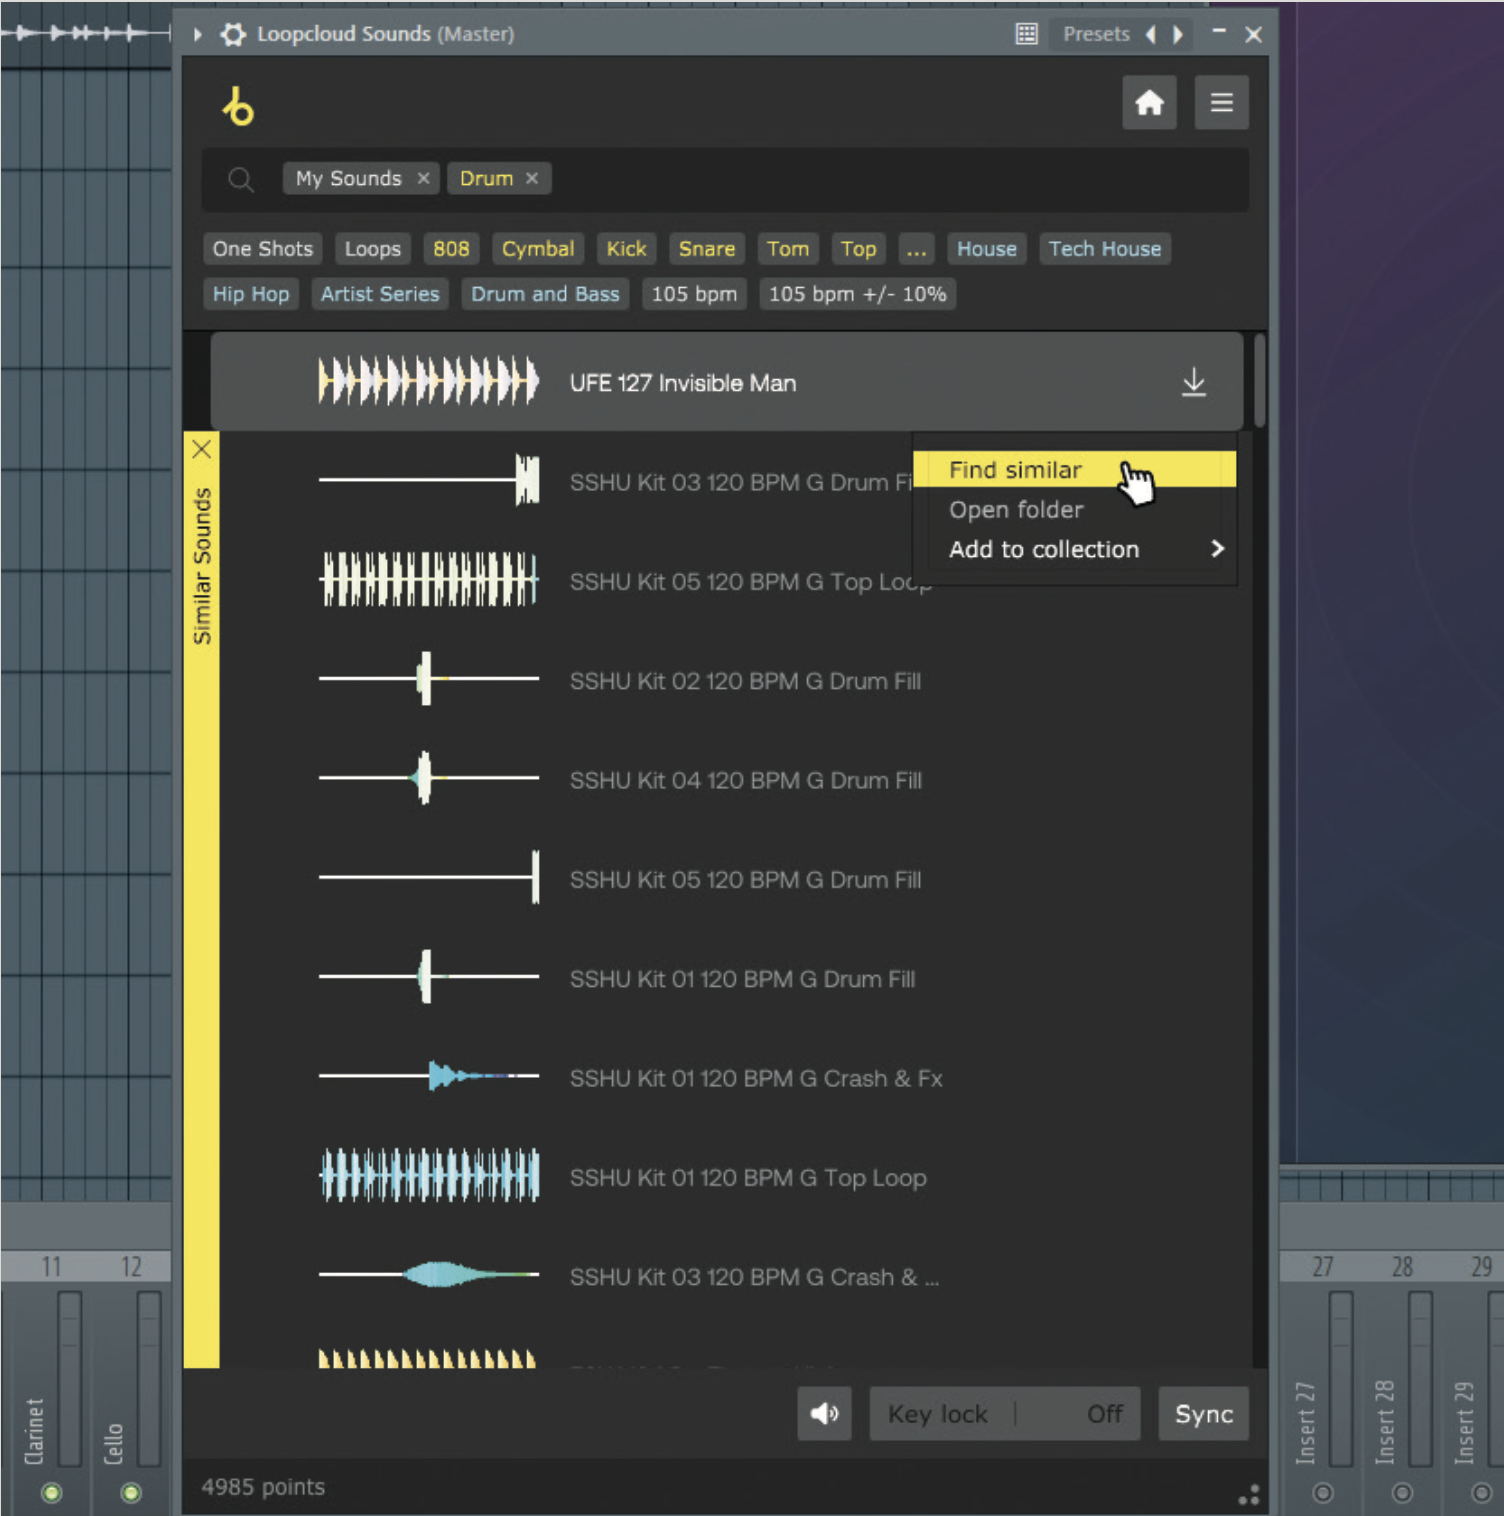
Also note that Loopcloud Sounds (Loopmasters’ internal DAW sample library plugin) also features Jamahook’s AI to help search for similar samples. Just open Loopcloud Sounds, find a sample you like, click ‘…’, and Find Similar. Useful if you like a sample, but it’s not quite perfect.
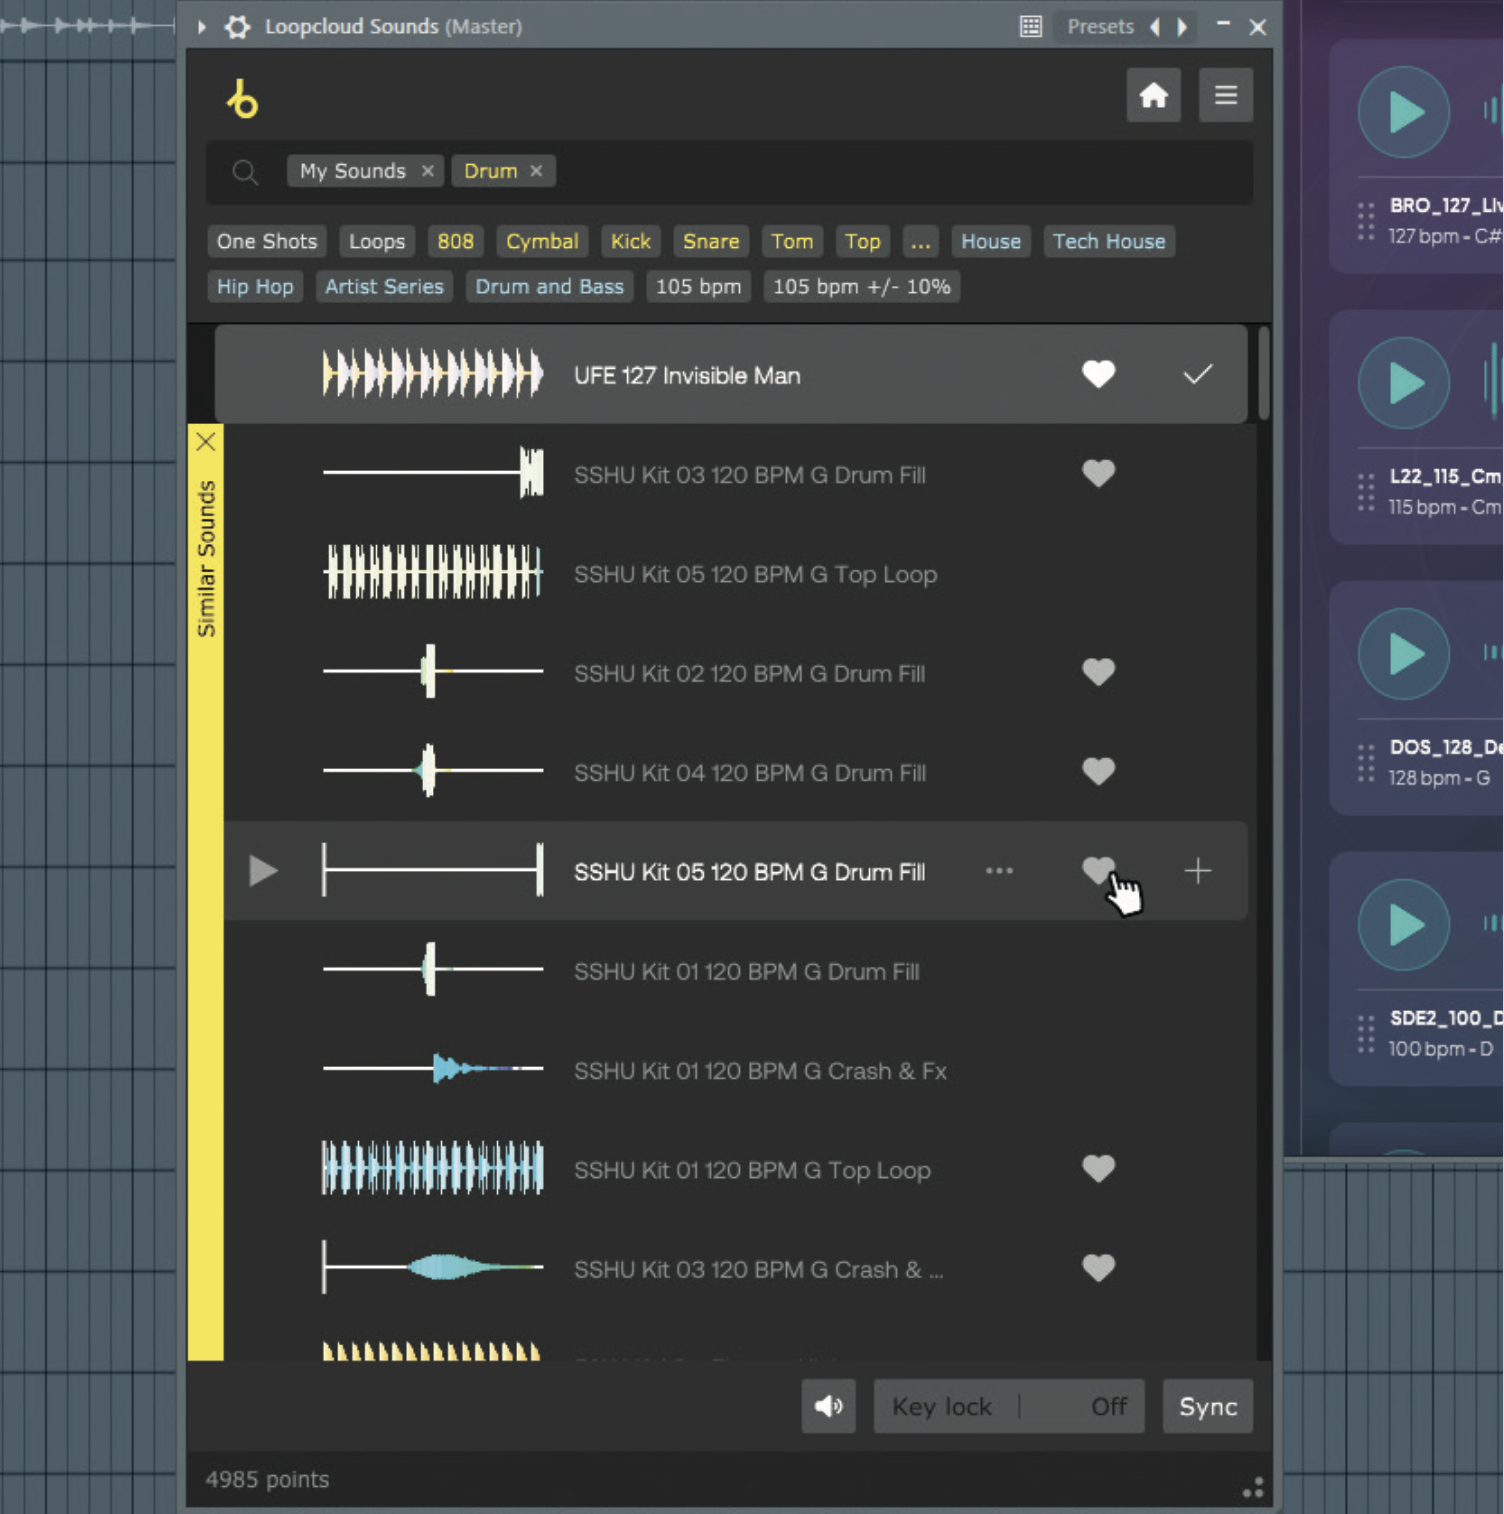
This is also especially useful if you want to collate a library of matching samples. You can select a base sample, like the drum loop in our previous step, and then add a bunch of similar sounds from the list to your Favourites by hitting the heart-shaped icon in the right-hand column.
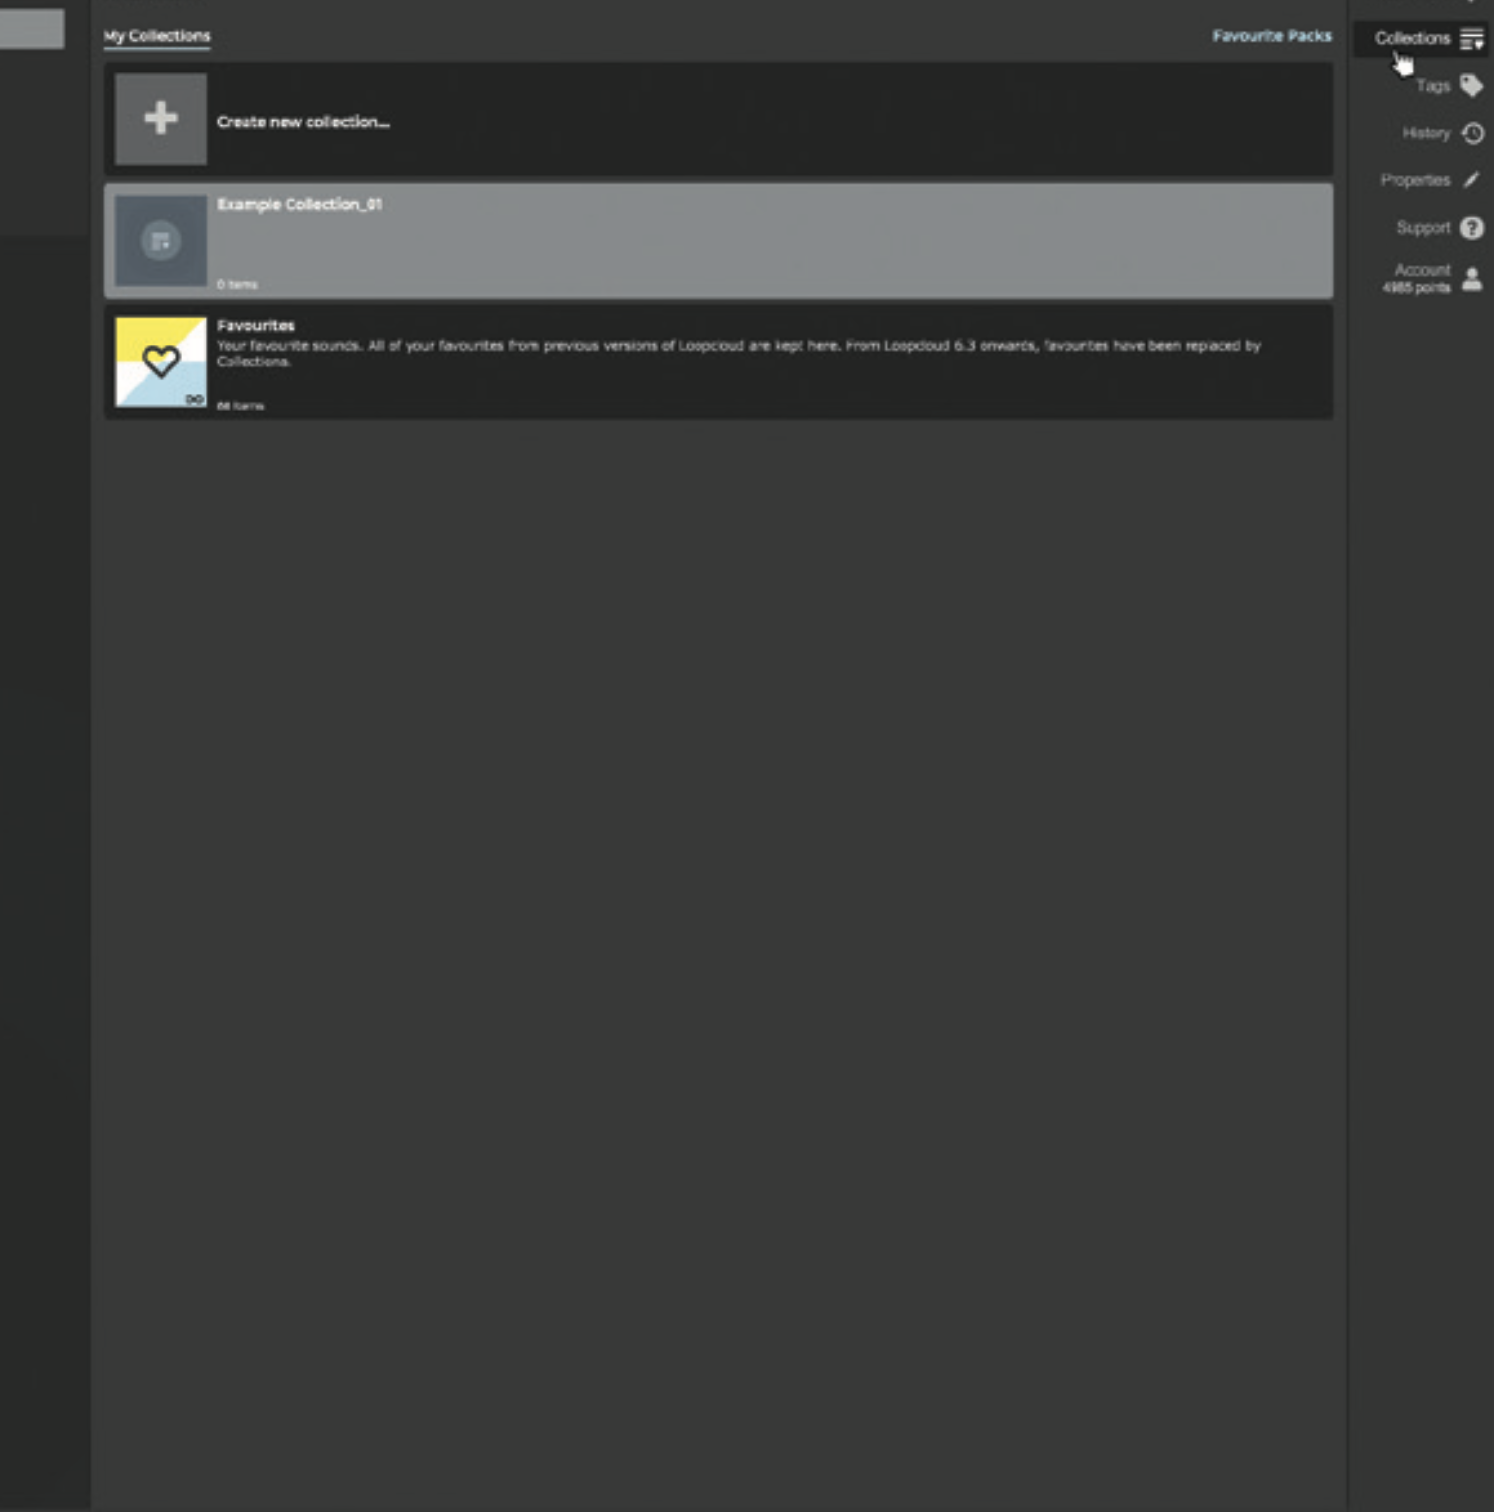
You can then easily locate sounds in future by heading to your Favourites collection. Or, create your own specific collection using the Loopcloud desktop app. Head over to the Loopcloud desktop app, open the ‘Collections’ panel, and click ‘Create new collection’. Rename it if you wish.
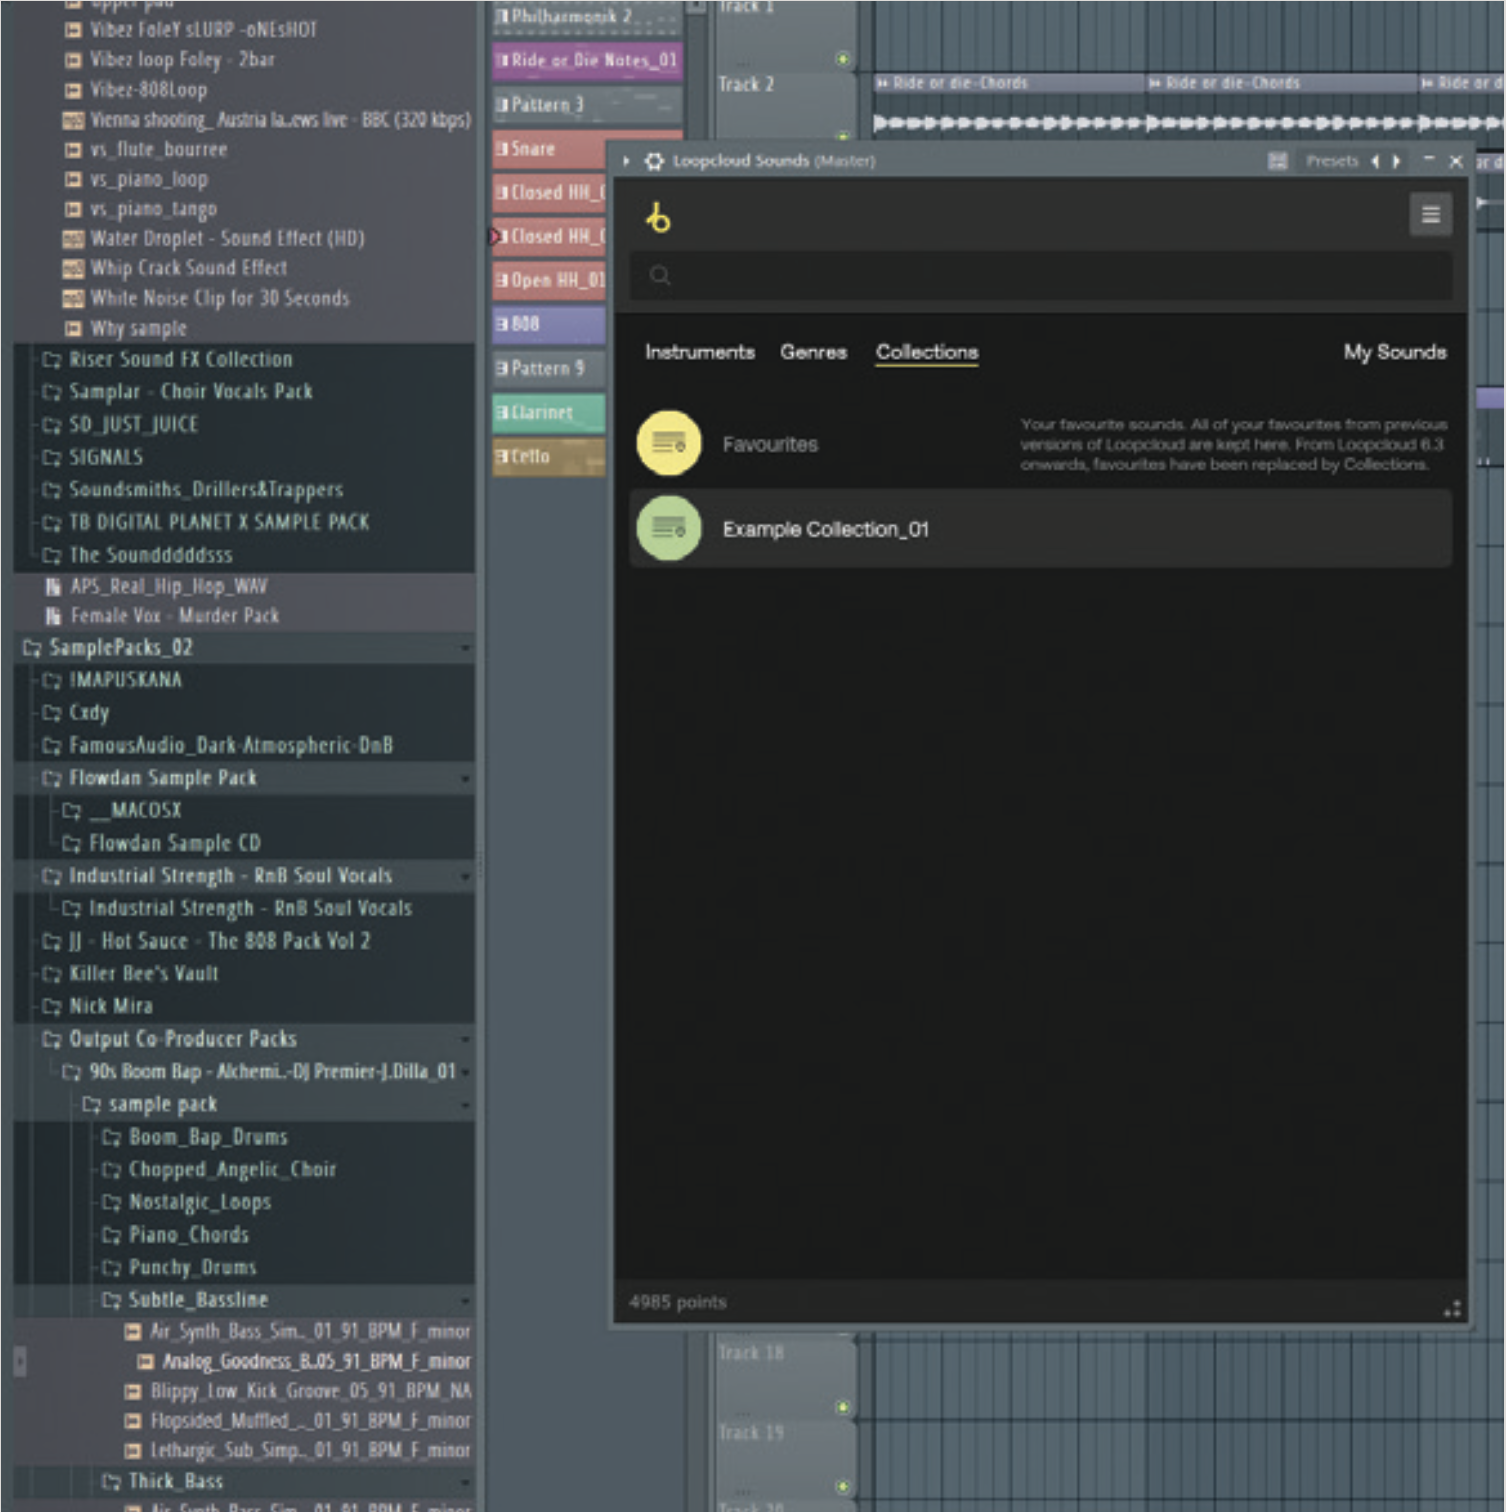
Repeat the process from step five: identify a base sample and click Find Similar. Instead of adding to your Favourites, click ‘...’ and Add to collection. Repeat the process to find samples of different types. Then you can access them all from your ‘Collections’ panel. Voilà! A library of similar sounds.
Power tip
It’s crucial to choose the right property to match samples by. In something like Jamahook or Loopcloud, matching by harmony (ie, by key) can work great, but won’t suit rhythmic material. For that, many AI tools let you find things with a similar groove, helping you know that they should fit with your music’s feel; an often overlooked aspect of production.
Ableton Live 12’s browser
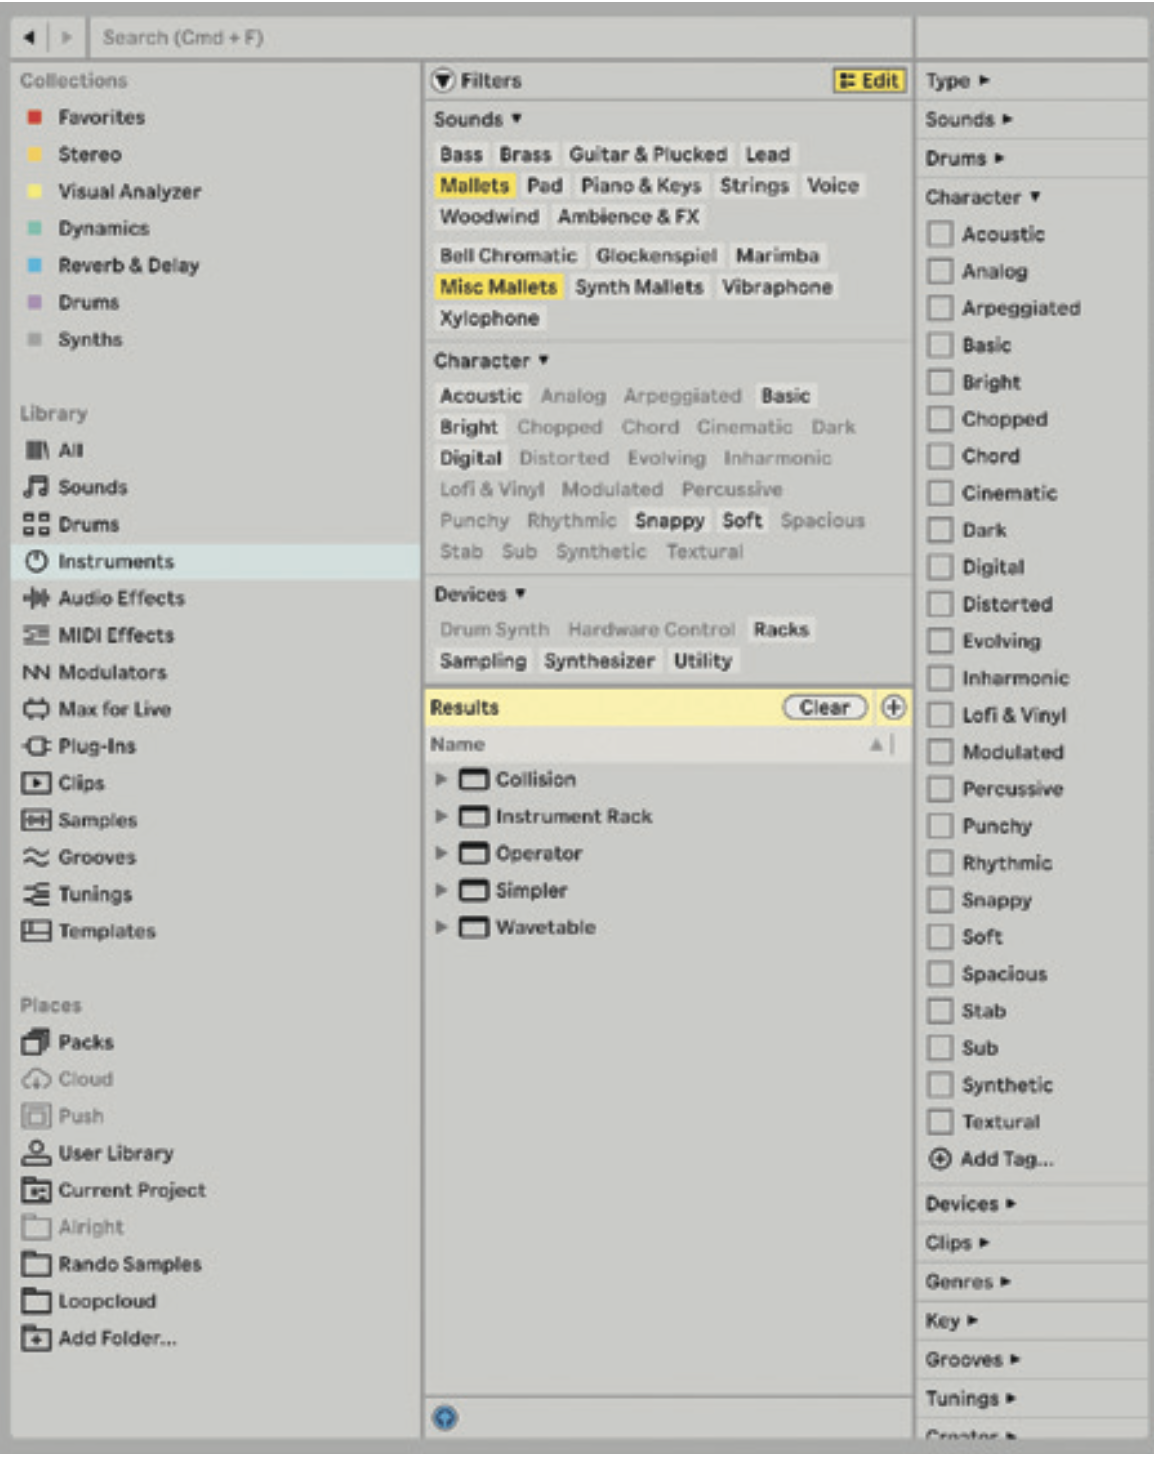
We’re deep behind enemy lines, reporting from the Ableton Live 12 Beta. Here, the new browser has been given some new sample-friendly features, giving you categorisation and tagging over the sounds that come with the DAW; something that’s also available for plugins, instruments and effects. This means that you can filter down to the sort of sound you’re looking for quite easily, and audition the resulting matches within your project.
Where the Live 12 browser lets things down a little is the lack of automatic tagging for your existing, non-Ableton sample content. While this may seem like a big ask, programs like Loopmasters’ Loopcloud, XO, Atlas and Mixed In Key have been offering analysis for third-party samples for several years, and recent tools like Sononym, have only made this trend more obvious. Hopefully automatic tagging can be added to Live in future, making the browser even better for sample users.
Samples in Ableton 12’s new browser
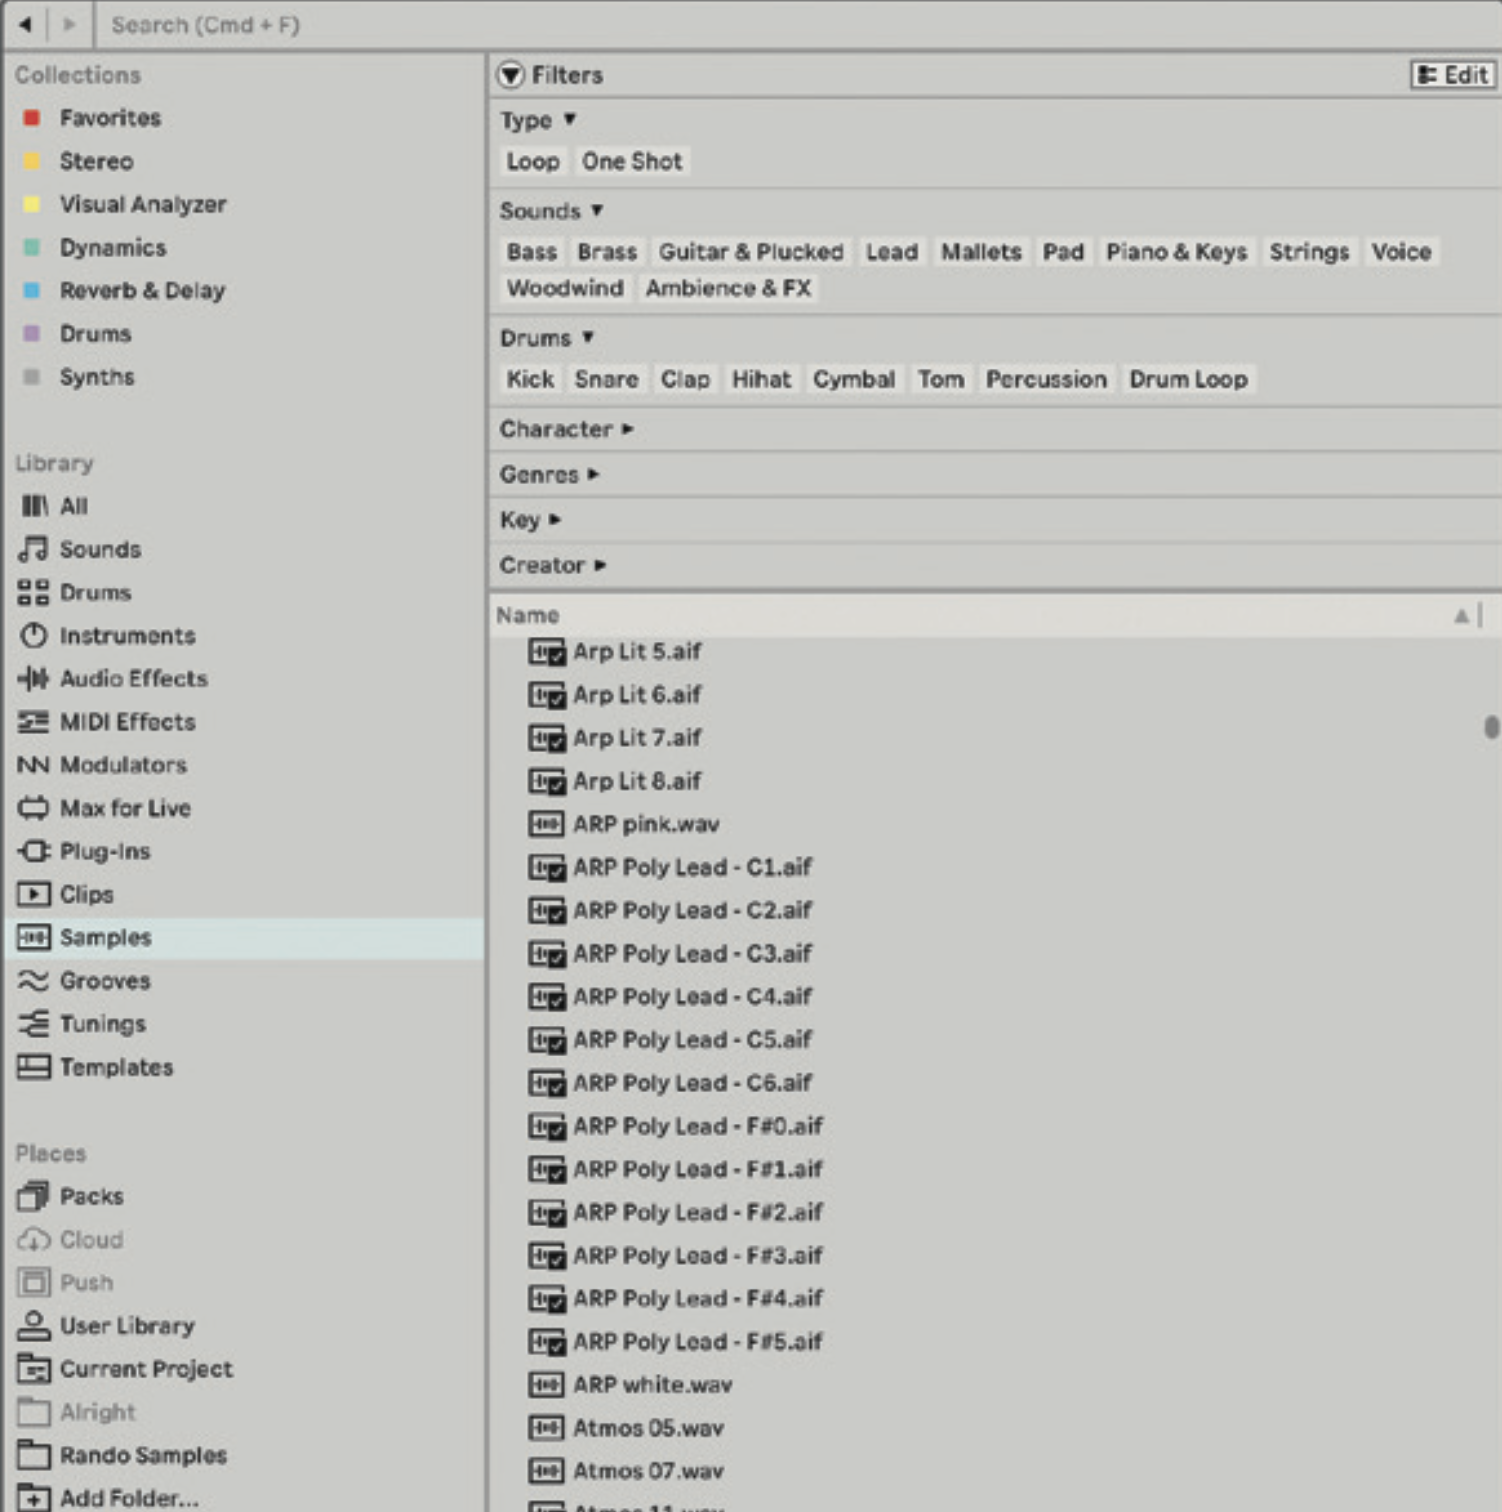
Here’s a fresh instance of the Live 12 browser, pointing at Samples. We can filter by Type (Loop/One-Shot), Sound (Bass, Pad, Mallets etc), Drums, Character, Genre, Key etc. You can add your own Samples via places, but they’re not automatically tagged.
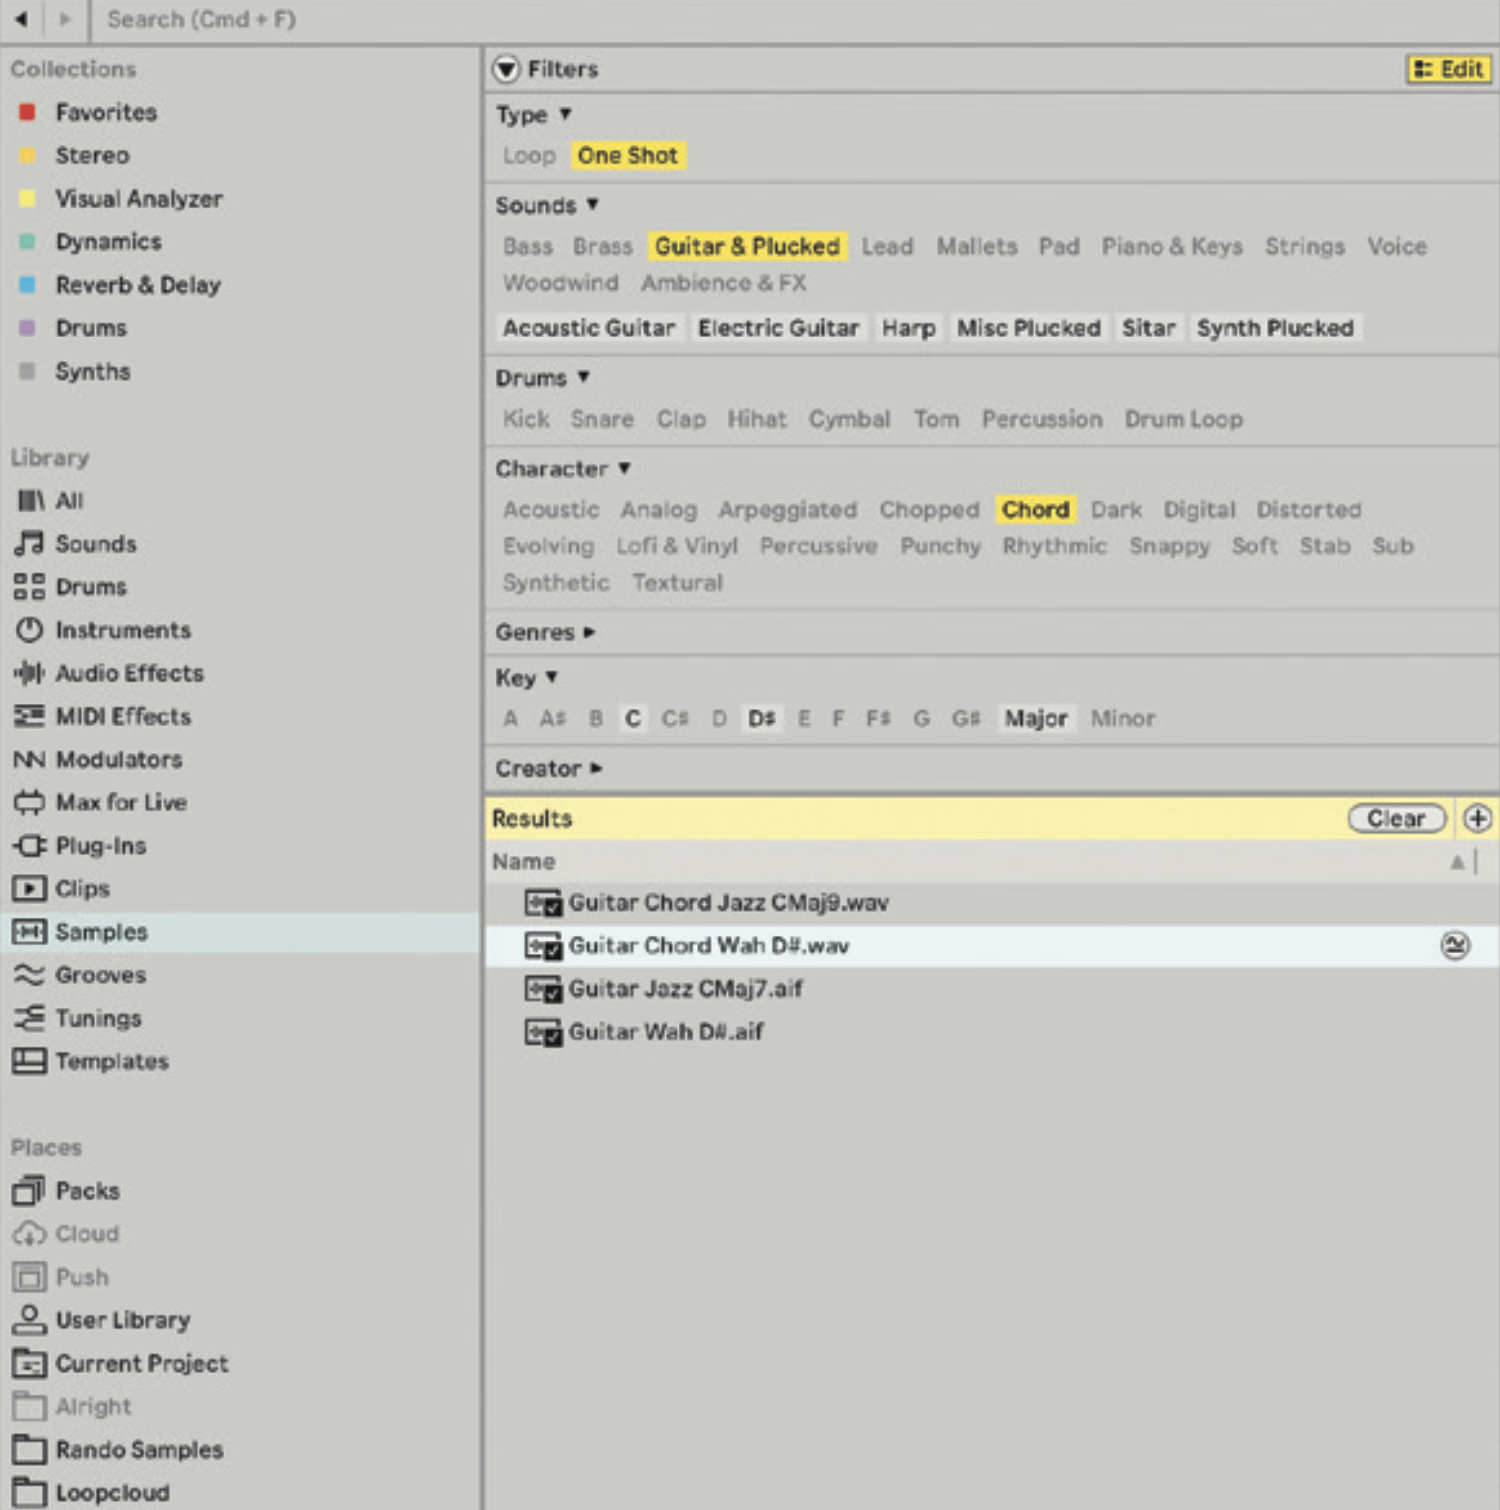
We can search for, in this instance, a One-Shot Guitar/Plucked sound that’s a Chord rather than a note. We get four results from this particular search. Hitting the Edit pane lets you tag a sample with the properties for being found in the browser.

To search across another dimension, we can ask Live to search for Similar Sounds to the one we have selected. In this case, we get a lot more options, and it’s not just limited to samples; we get offered a patch for the Ableton Collision synth too.
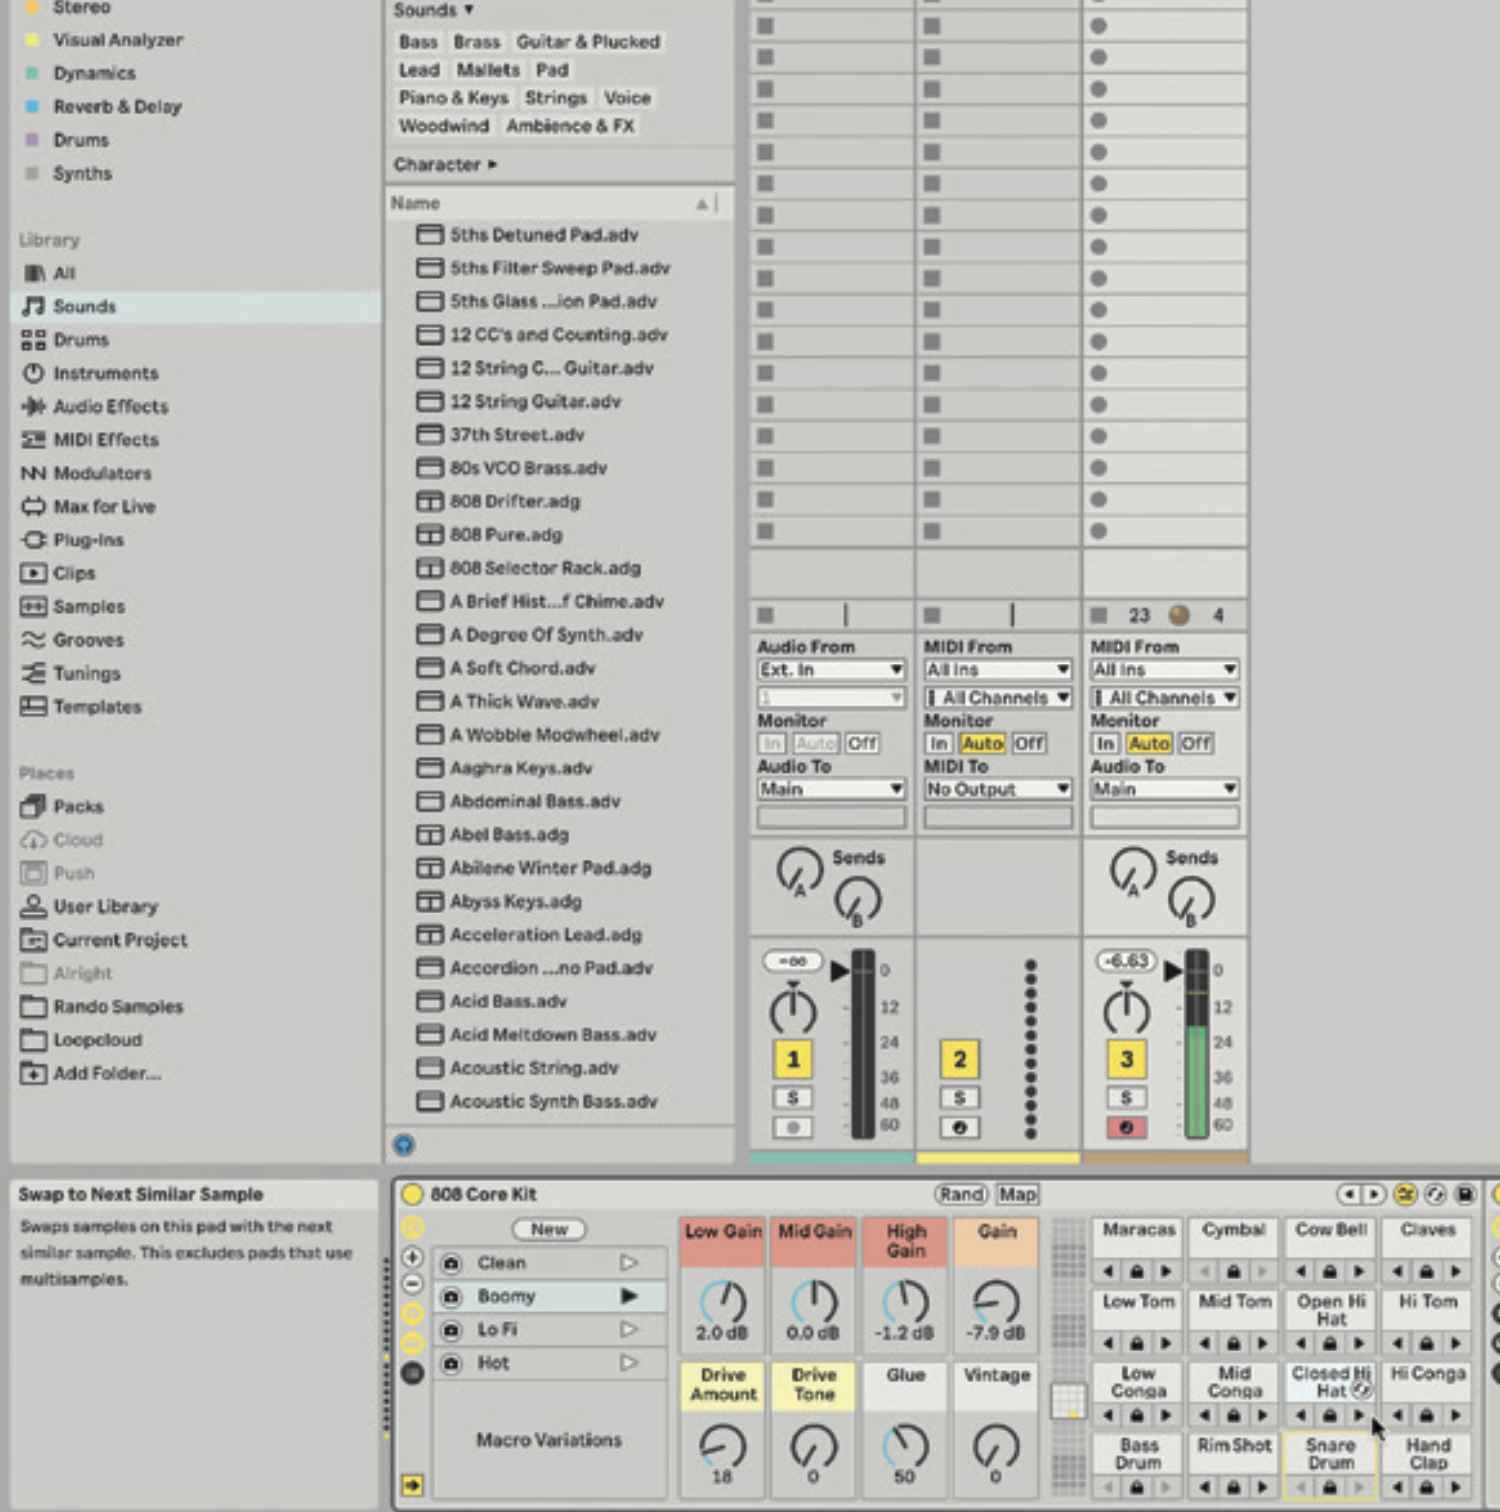
Similar Sounds really shines in the Drum Rack, letting you ‘hot swap’ a currently placed sample with more options that are close enough to keep things together, but different enough to change up what you’re building.
3 of the best...
1. XLN Audio XO
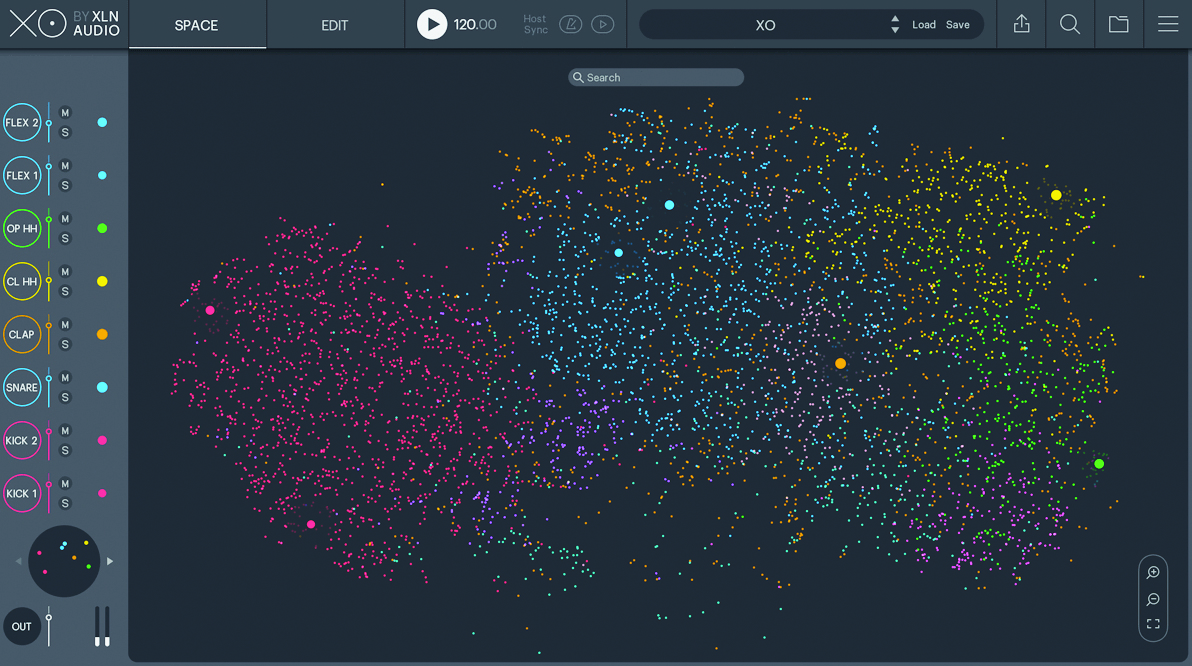
XO is up for the crown of top AI sample management tools. Combining some key features we see in other AI-driven sample managers, XO comes with a well-sculpted GUI and an easy-to-navigate design. Import your samples and go!
2. ADSR Sample Manager
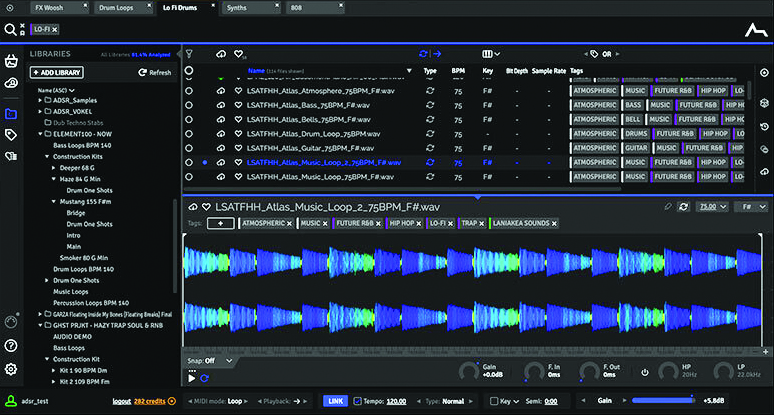
The best thing about this from ADSR: it’s completely free! This tool automatically labels samples on their sample type using its AI Smart tagging feature. Simpler than other entries in this article, but still a worthy, reliable tool.
3. Mixed In Key 10
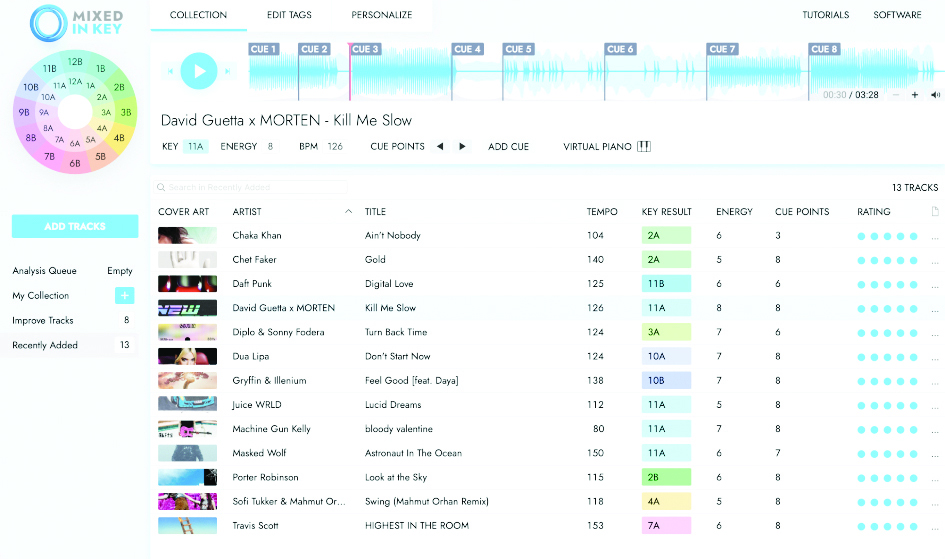
Boasts the most accurate key-reading algorithm currently available, stating that other sample-analysing algorithms often label samples with the wrong musical scale. With a long history in the field, MixedInKey still keeps with the times, competing with the other software on this list.
