Whether your hair is short or long, you've likely been in a situation when you've needed to pull it back in a pinch. It might be because you've just arrived at the gym, because it's getting in your way at work, or because you're in a rush in the morning, sometimes it's simply impossible to carve out the time for an elaborate updo or a masterfully done blowout. Therefore, we should all keep a couple of quick, easy hairstyles in our back pockets that can be achieved in a minute or less.
I have a couple of styles that I swear by, but to expand my repertoire, I polled hairstylists and my fellow editors to discover what other simple, chic updos are out there. Below, our favorites, along with detailed instructions on how to do them.
The Messy Ponytail

"When you’re short on time, a slick back hairstyle is often the easiest and a go-to for most," says celebrity hairstylist Dimitris GIanetos. "I like to add a little volume to a look to make it seem more exciting than it really is. A messy bun and/or ponytail is perfect— just add volume spray to your roots. I always grab Moroccanoil Dry Texture Spray and then lightly brush through, and secure with a hair tie. And if you have a few extra minutes, add some curls to the ends for a polished finish. My favorite curling iron, the GHD Soft Curl 1.25" Curling Iron, gives the perfect natural curl. It’s super easy but still manages to look put-together."
The Volumized Bow Tie Ponytail
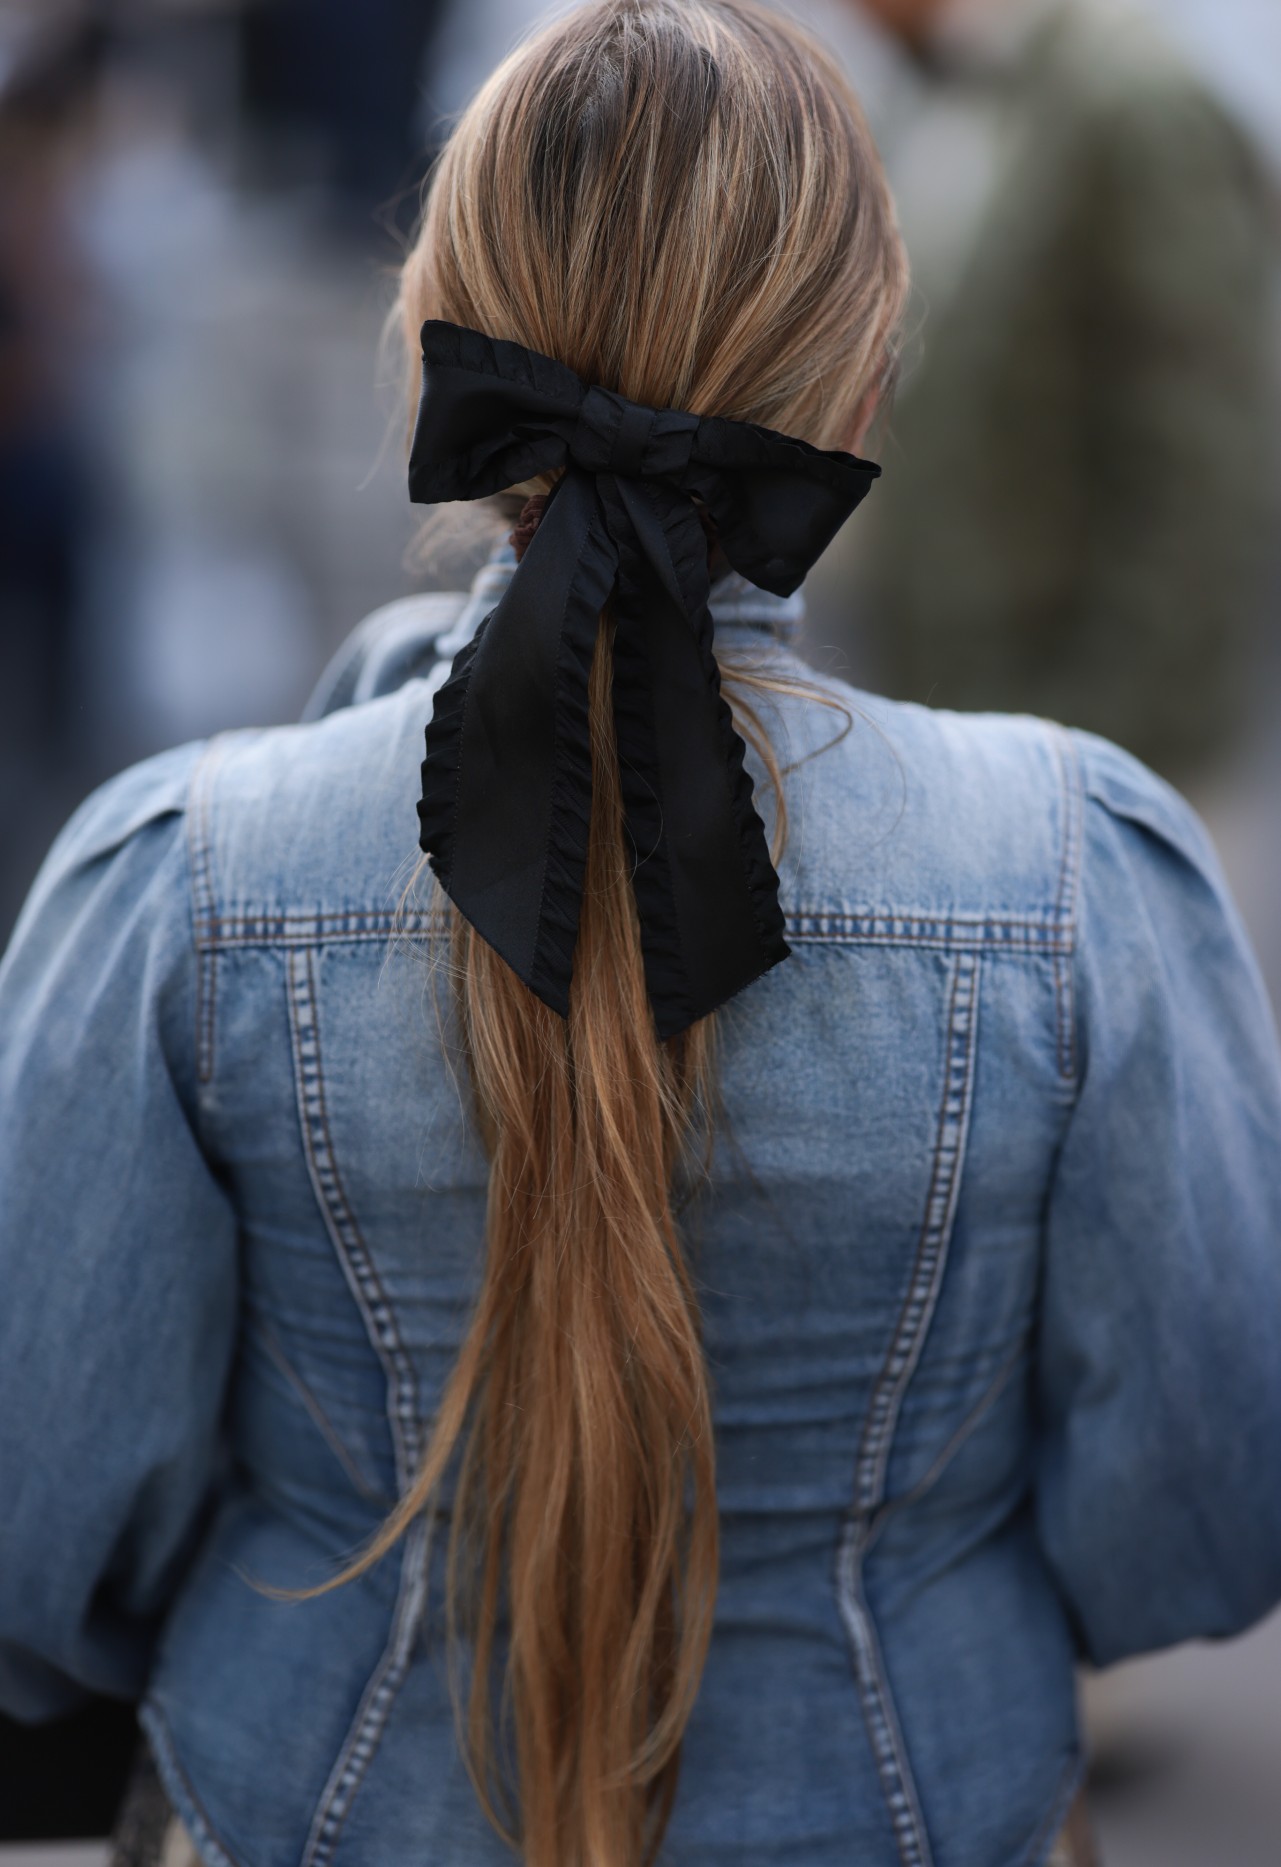
"There is nothing more perfect than a hair up sporting a bow if you really want to simply update your hair style," says Bea Watson, Artistic Director of styling at vegan haircare brand Aveda. "Follow these three main steps to make sure your bow is perfectly placed and secured for your day or evening out. This style will give you the volumized ponytail making your hair look longer and feel thicker. This style can be created on hair types 1A to 3C on medium length hair."
Below, she lays out the steps one needs to take in order to achieve this cute, quick look.
1. "After shampooing and conditioning towel dry your hair, or if working on dry hair you can apply the Invati Advanced Thickening Foam directly to your hair and dry in. For straight and wavy hair use a blow dryer and brush to smooth your hair while drying and then dry everything into the direction of where you would like to place your ponytail. On curly hair, use a diffuser to dry the product into your curls."
2. "Once the product is dried into your hair, apply a few drops of the Nutriplenish Multi-Use Hair Oil through your mid-lengths and ends to add a little shine. Now take a section from ear to ear separating your hair into two sections (you should have a front section that incorporates your crown and a back section). The tip of your front section should be slightly larger than your back section. "
3. "Let’s start with your front section, you can add a parting in or leave some hair around the face. Once you are happy with the parting, take the front section and put it in a ponytail at the top of your head below your crown in the back-center of your head and secure with a band. You will now have your first section of your ponytail and your back section will still be left down at this point."
4. "Now, let’s incorporate your back section. First, separate your back section into two sections by taking a parting down the back-center of your head. You will now have a back-right section and a back-left section. Brush these sections up and around your front ponytail and secure the band in front of your first ponytail so you have two ponytails- one in front of the other. Tip: your back section should be in front of your first ponytail, this will give you the extra volume and make your ponytail look longer and fuller."
5. "You are now ready to tie the ribbon around both banded ponytails covering your bands, this will look as though you have a really thick, full ponytail. Once your bow is tight and secure, trim the ends of the bow, so they are even. Finally, spray Air Control throughout your style to hold everything in place."
The Braid

"Another simple look for last-minute styles is a braid down the back with some face-framing bangs pulled out for added dimension," Giannetos tells us. "Add Garnier Fructis Style Mega Full Thickening Lotion for extra volume. You can experiment with different braid sizes and even take it out later in the day for a loose, wavy look. To achieve this style, apply some styling spray, braid the hair, and play around with the loose strands. It’s a messy yet romantic look perfect for any occasion and when you’re in a time crunch."
The Definite Part

"This style is perfect for that strong statement androgynous parting," says Watson, "especially if you have longer hair that doesn’t stay in place, this style is for all hair types and mid to long hair."
To get the ultra-modern take on the half-up, half-down look, follow these steps:
1. On damp hair add in the Botanical Repair Bond Building Styling Cream, then choose where your parting will be. For that 2024 Spring/Summer runway trend, place your parting on the side and keep it low by using the arch of your brow as a guide for positioning. Tip: use a comb to make the parting clean and definite. Now, dry your hair as you would normally but start by drying the parting in place first and then work on the rest of your hair trying not to disturb the parting you have created.
2. Once your hair is dry, take a section from the top of your head and place that one side of the parting behind your ear. Repeat this on the other side of your parting. You will now have created a front section and a back section separating your hair into two parts- the front section, which incorporates your parting, and the back section. Next, take the back section and create a ponytail just to clip it out of the way and clear of your nape area, secure with a band or clip.
3. Let’s now work on our front section and parting, using the Control Force Firm Hold Hairspray on hair types one, two, and three. Spray close to the head so the hair looks damp only do this around the parting and your scalp area, don’t spray down into the length of your hair. On type four hair, use Nutriplenish Multi-Use Hair Oil instead of the Hairspray, using your comb start to slick everything down and comb the sides clean from the parting down. Then, start to take this front slicked section and tuck behind your ear on both sides.
4. You are now going to join the sides together at the back of your neck with a band. Use a comb to keep everything slick and clean then secure the band at the nape. This will keep the sculpted defined look at the front emphasising your clean parting.
5. Now, you can let your back section down. This will cover the hair band at the nape so you can style your back section and define with a curling iron or you can simply leave your hair straight, wavy, curly, or coily. This completes your Definite Parting style keeping that sculpted look all day, no matter the weather.
The Messy Bun
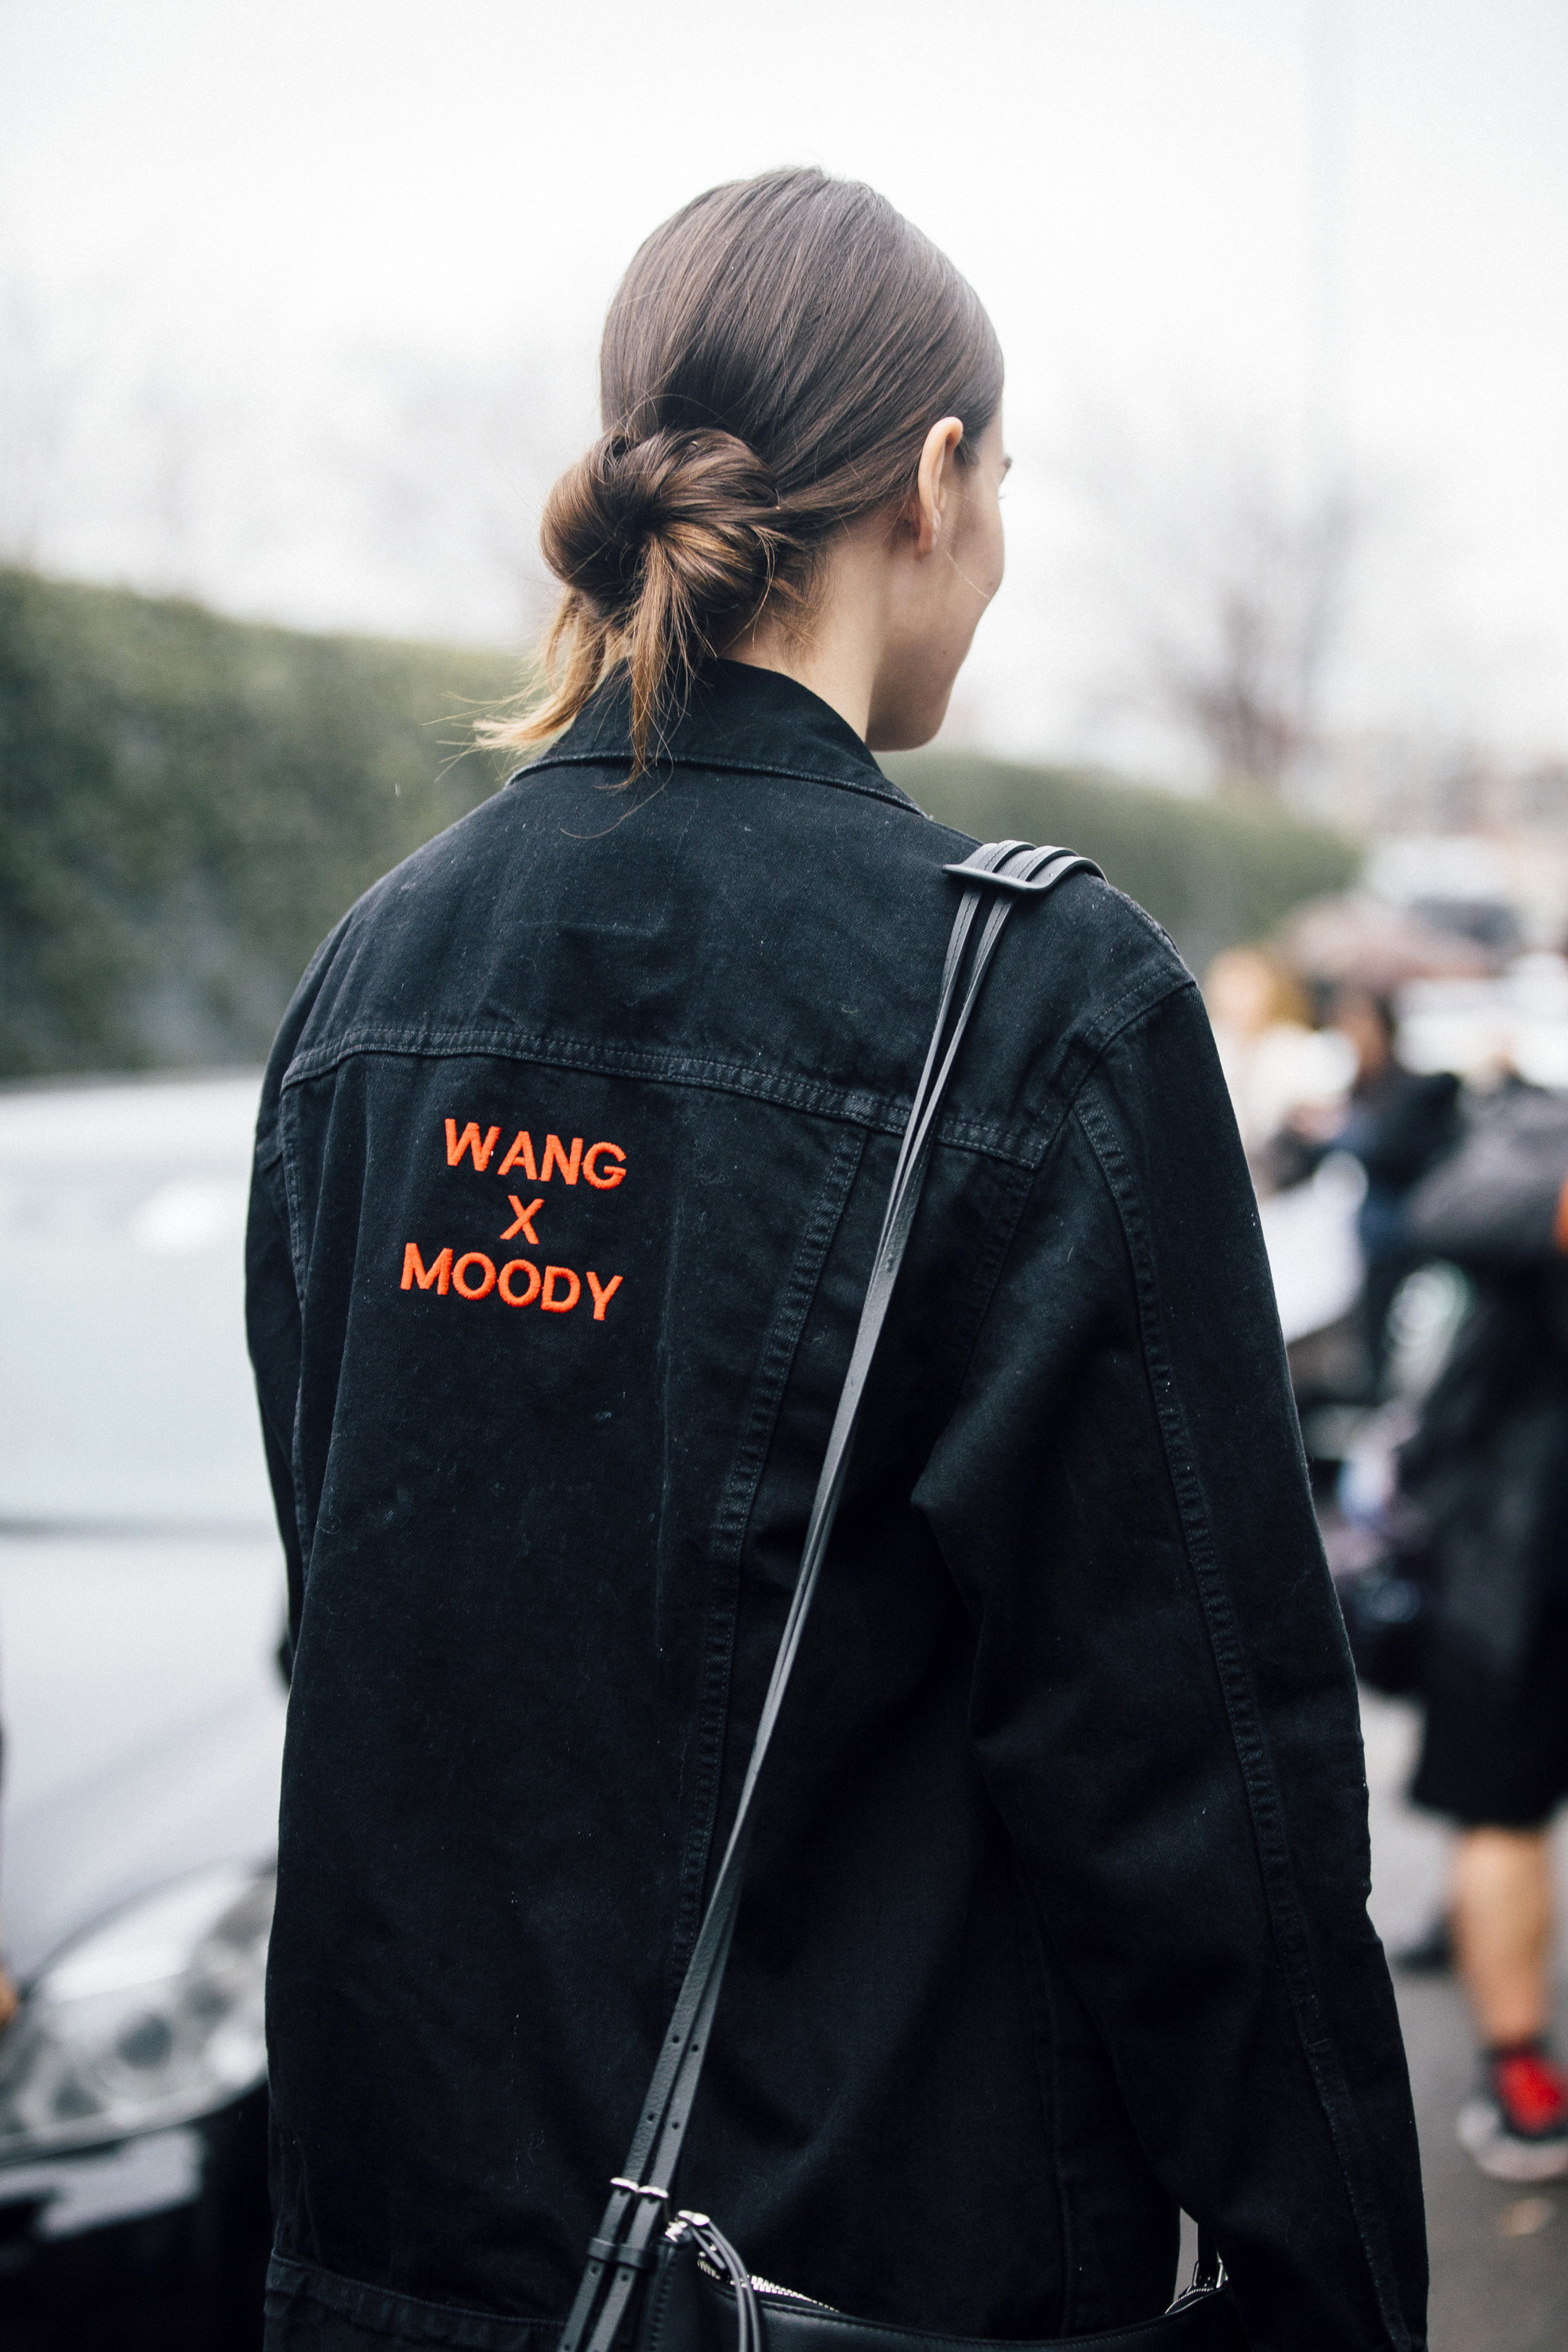
This look is one of my favorites because, for me, it's the fastest and the most comfortable. There are a few ways of achieving a messy bun, but my favorite way is this way: Put a hair tie around your wrist for easy access. Then, gather your hair up on top of your head. You can also wear your bun on the back of the head or at the nape of your neck—it all depends on your comfort level. Begin wrapping the hair tie around your hair as though to make a ponytail, but, at the end, instead of pulling your hair all the way through, pull it only halfway through the ponytail. E-Commerce Editor Julia Marzovilla explains, that this should "create a loop in your hand with a few inches of excess hair." Then, she says, "Using one of your hands, wrap the excess around the loop until a loose bun forms. Secure the bun with the ponytail holder."
To prevent my hair from looking too messy, I add a bit of leave-in to my hair before tying it up. I also always opt for a silk or satin scrunchie— it makes the style infinitely easier to remove later, and the silky fabric prevents breakage.
The Claw-Bun

If you don't have time to tie your hair up with a scrunchie or if you simply prefer a looser lip, try opting for a claw clip. You can create buns, ponytails, and half-up styles with this versatile, easy-to-use tool that always looks chic, no matter what you're wearing. Opt for a neutral clip for an elevated, simple look, or a statement clip to spice up an otherwise plain outfit.
The Ultra-High Half-Ponytail

This is my everyday hairstyle. It's simple, easy to do, and always looks like it involved more time and effort than it did. Plus, it offers the best of both worlds, allowing you to show off your hair length while also tying it up and out of your face. To style it, use a tail comb to separate a top section of your hair from the hair on the bottom half. Then, gather the top section into a ponytail, all the while smoothing down bumps and flyaways. To finish off, use a hair gel to keep baby hairs and flyaways at bay.
The Half-Bun

If you prefer buns over ponytails (they can be better for alleviating tension on your scalp, especially if you have really long hair), but you still want to show of your hair length, consider a half bun. Simply separate a top section of your hair as though you were going to create a half ponytail, but instead of creating the pony, make a messy bun. It's a chic, off duty model-like style that works for any occasion and is easy to pull together in a pinch. For best results, use a thin hair tie the same color as your hair.
