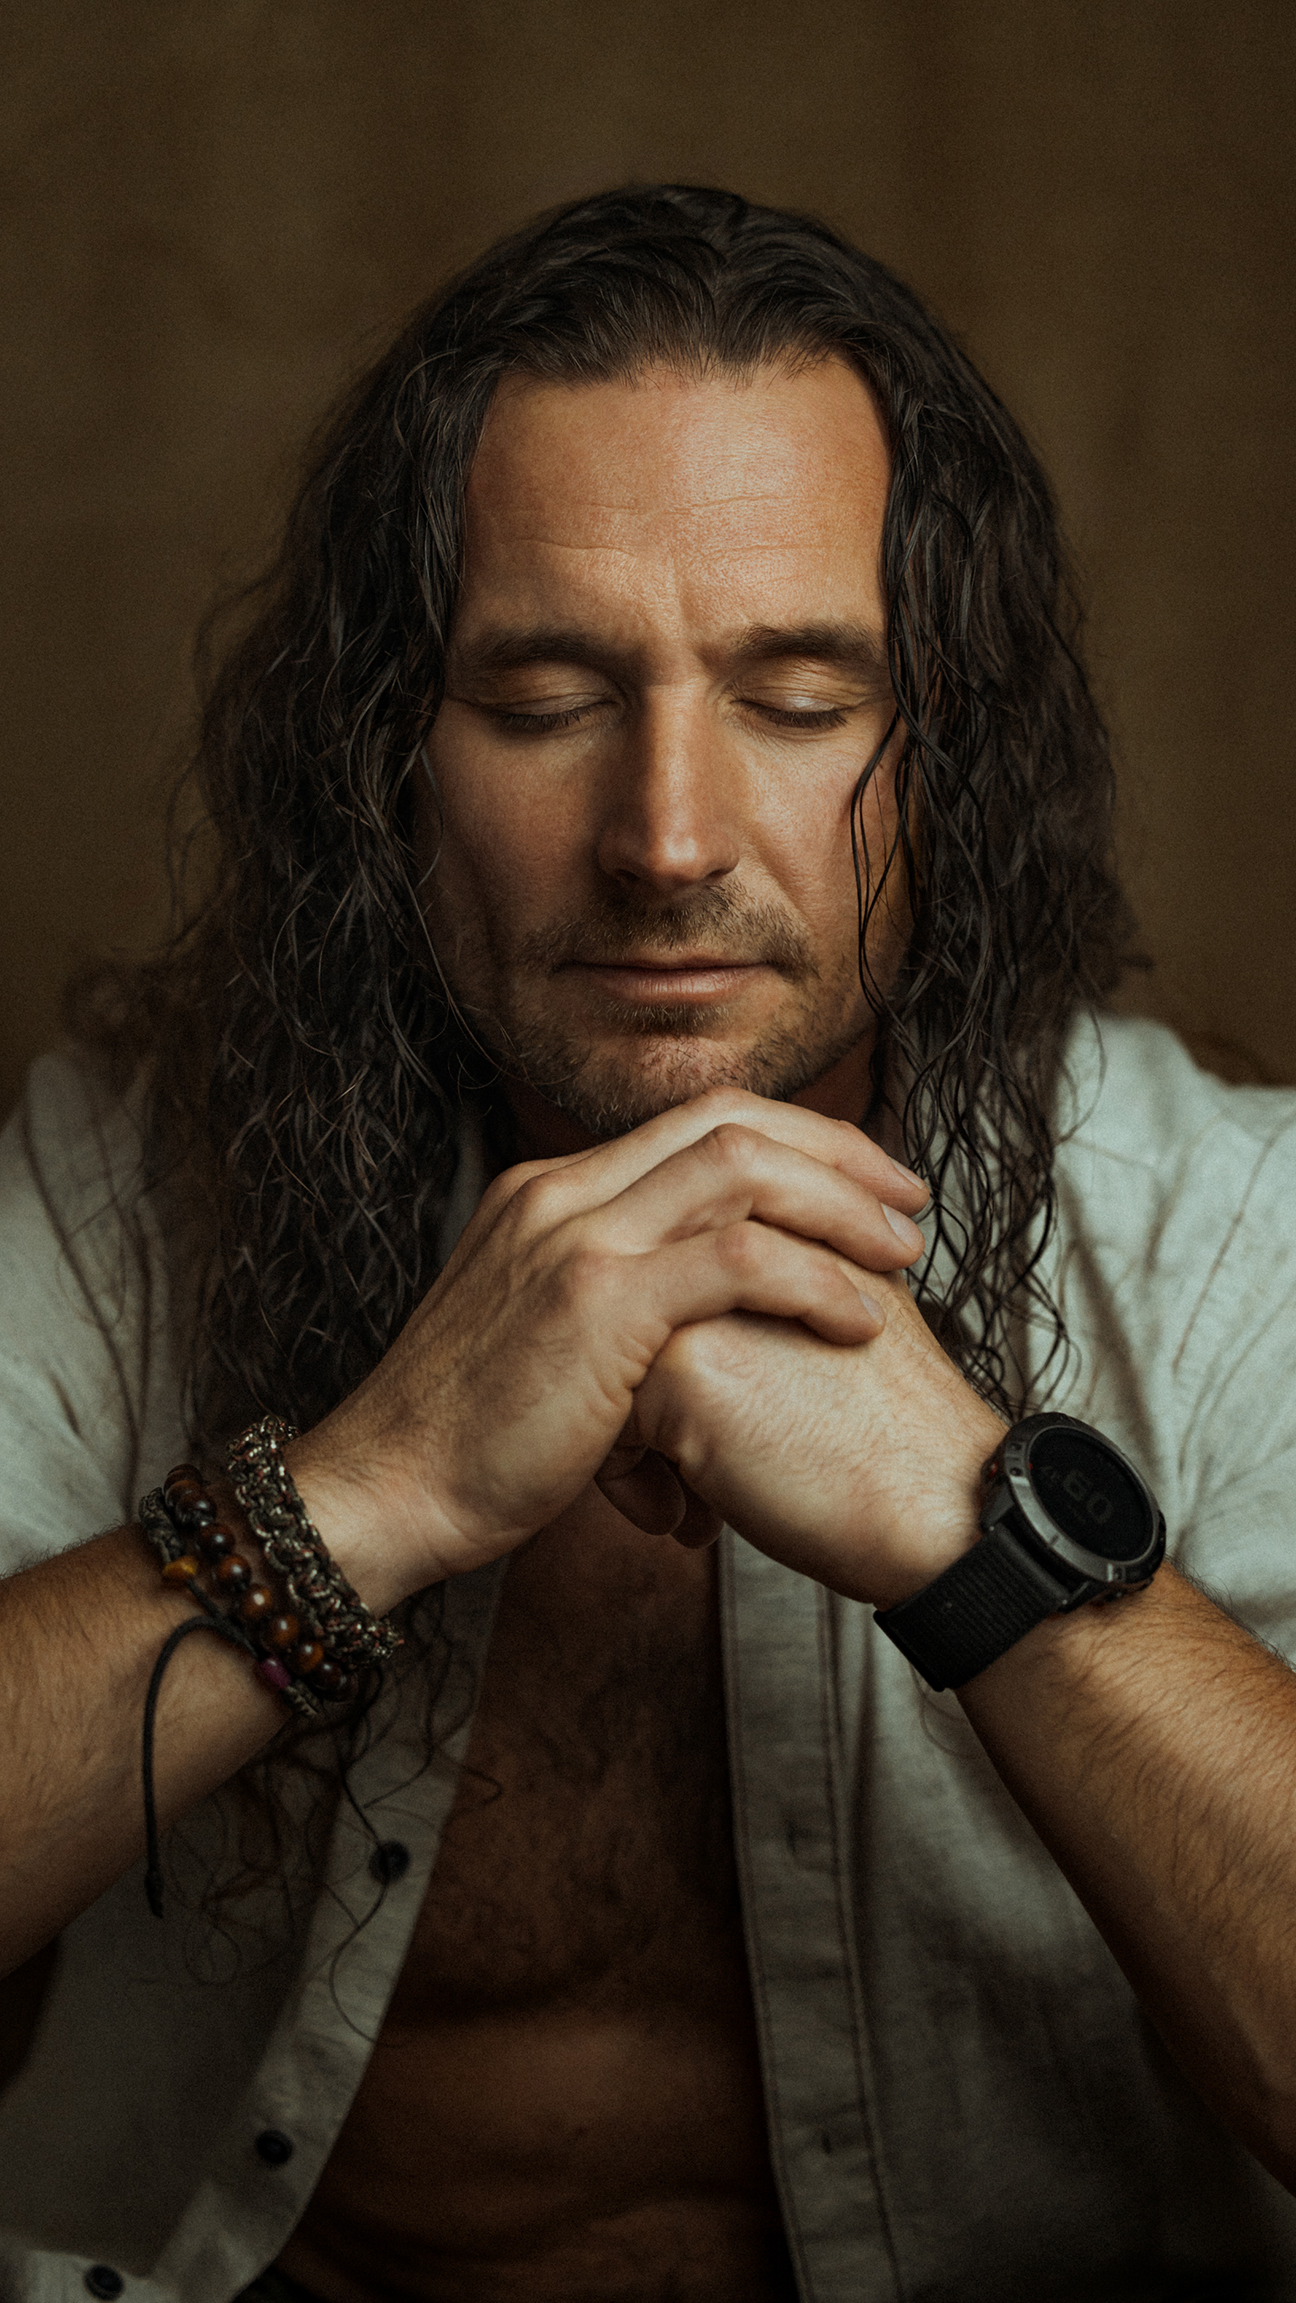
Skin retouching plays an important part in the editing process of portrait photography. It enhances the subject’s look and gets rid of any imperfections, such as blemishes or uneven skin tone. There are different retouching techniques we can use and they often vary among photographers, as each has its unique style and approach.
In this tutorial, we will focus on one of the techniques, frequency separation, using Photoshop. This method allows us to separate the image into high and low frequency layers so that we can retouch any imperfections while still preserving the natural texture and tone of the skin. It’s a great tool; however, it should be used cautiously. One common mistake is to overdo the retouching and smooth the skin out too much, which results in an unnatural, almost plastic-like appearance. Finding that sweet spot can be a challenge but with practice, it becomes intuitive. Our main goal is to preserve a natural appearance, so we’ll begin our tutorial by learning how to set up frequency separation layers and then carry out skin retouching using different tools.
Editing steps
Incorporate frequency separation into your skin retouching workflow
1. Create two copies
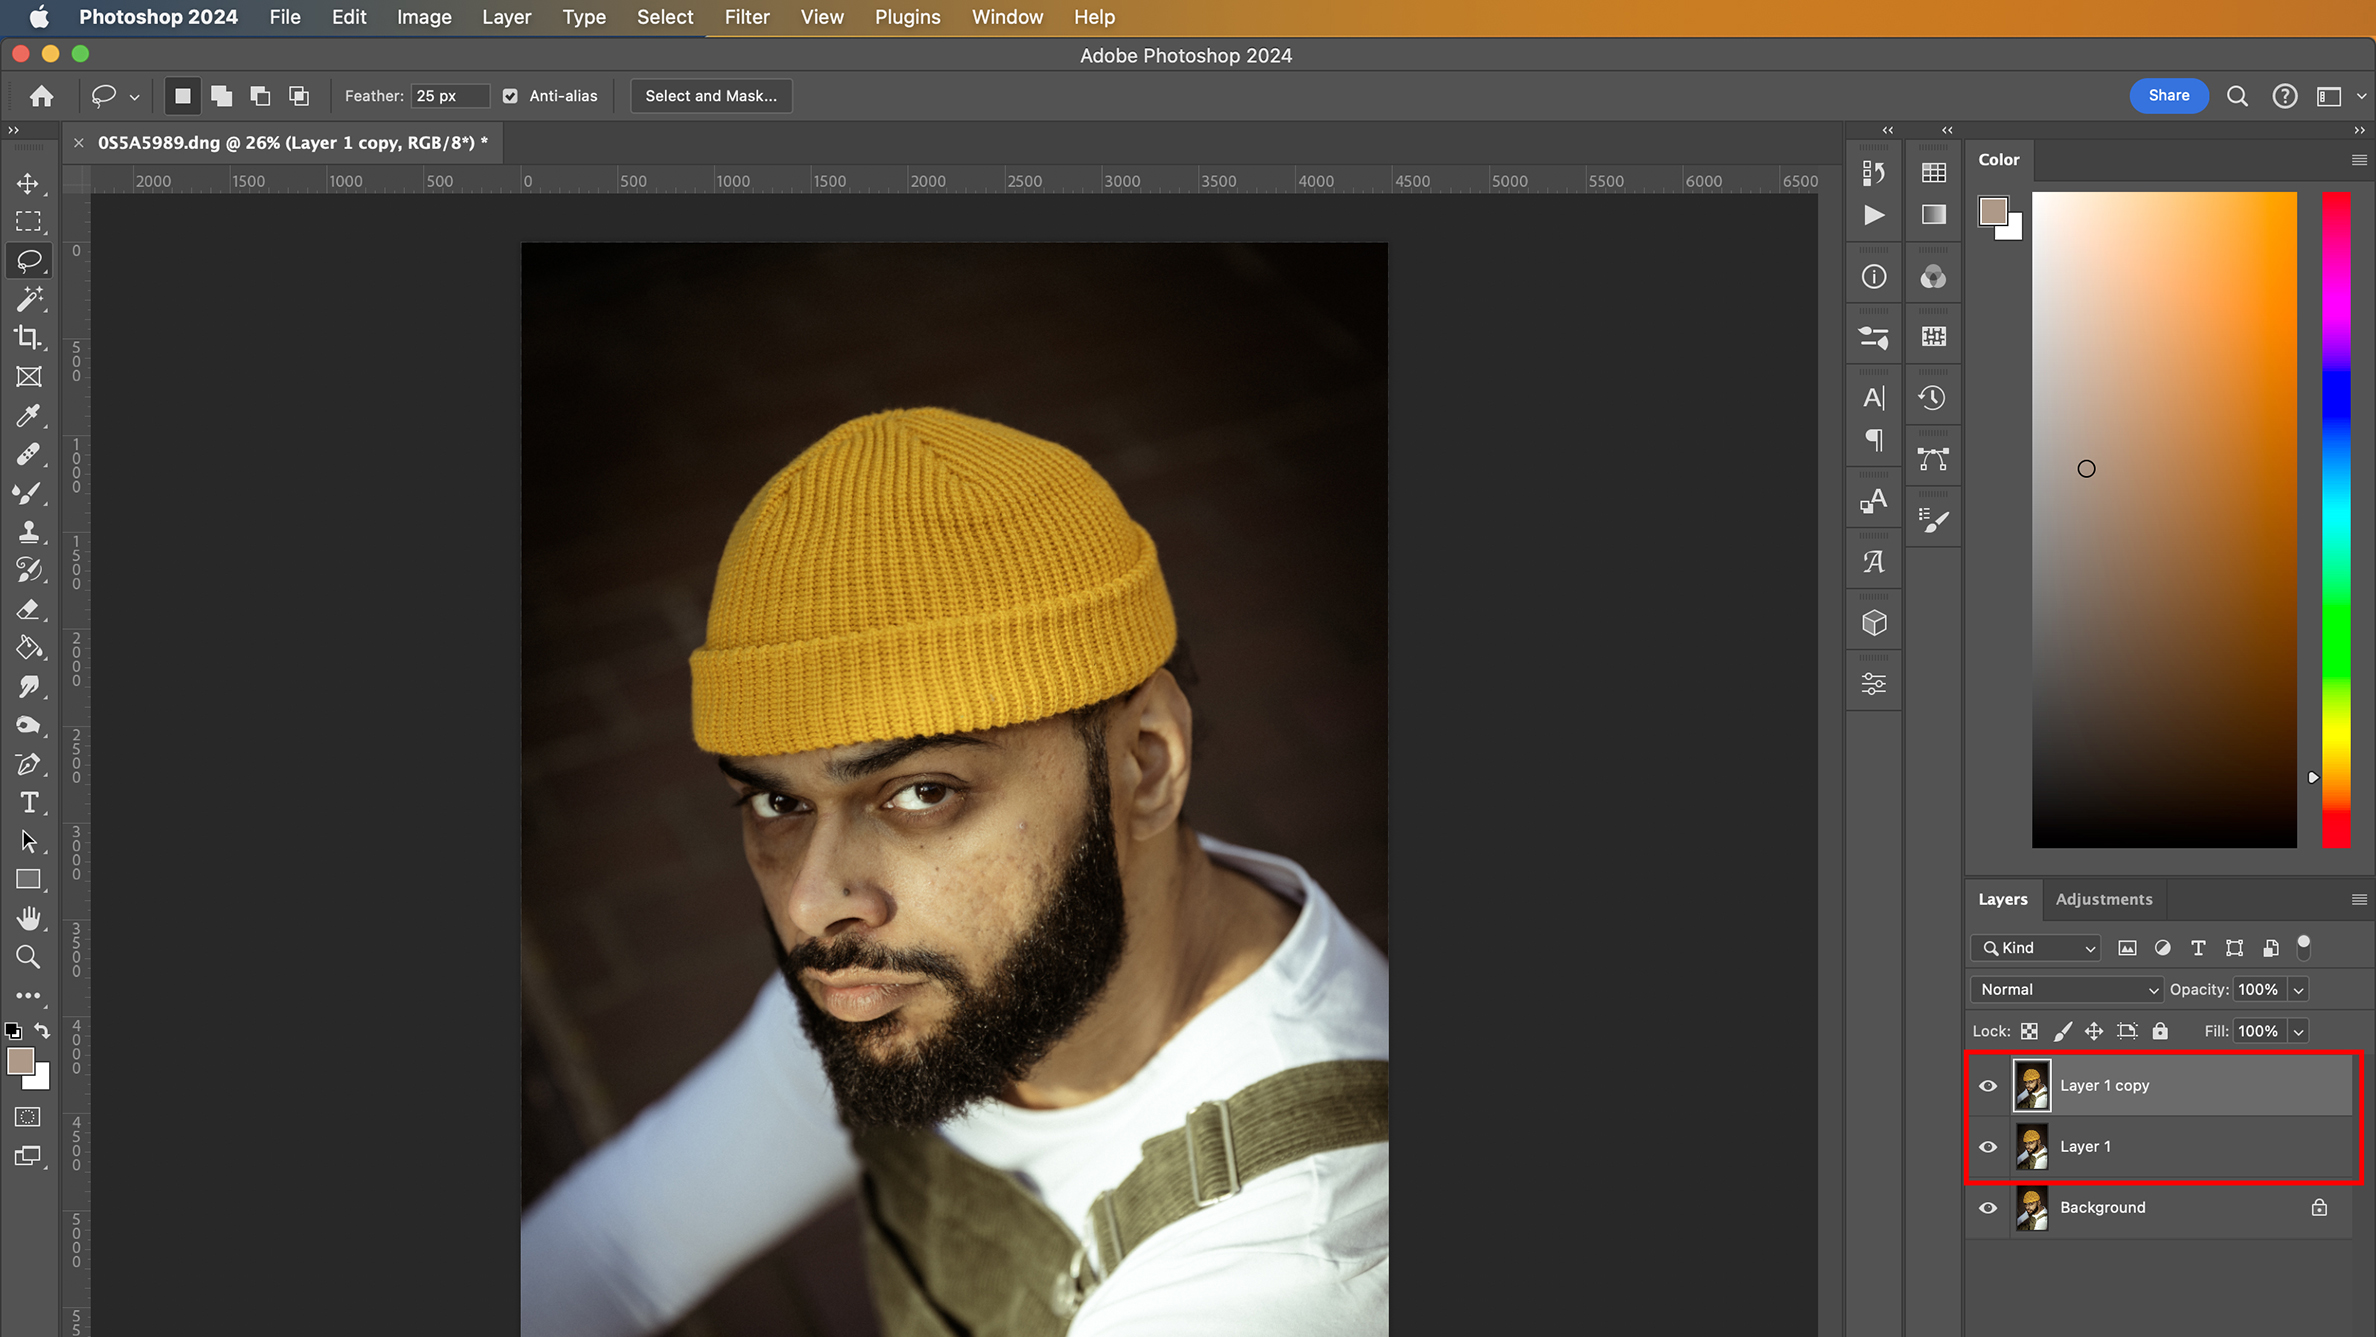
After loading your photo to Adobe Photoshop, duplicate the image twice. You can do that by using the keyboard shortcut Ctrl+J (or Cmd+J on a Mac) or by right-clicking on the background layer and selecting the Duplicate layer option.
2. Rename and Group
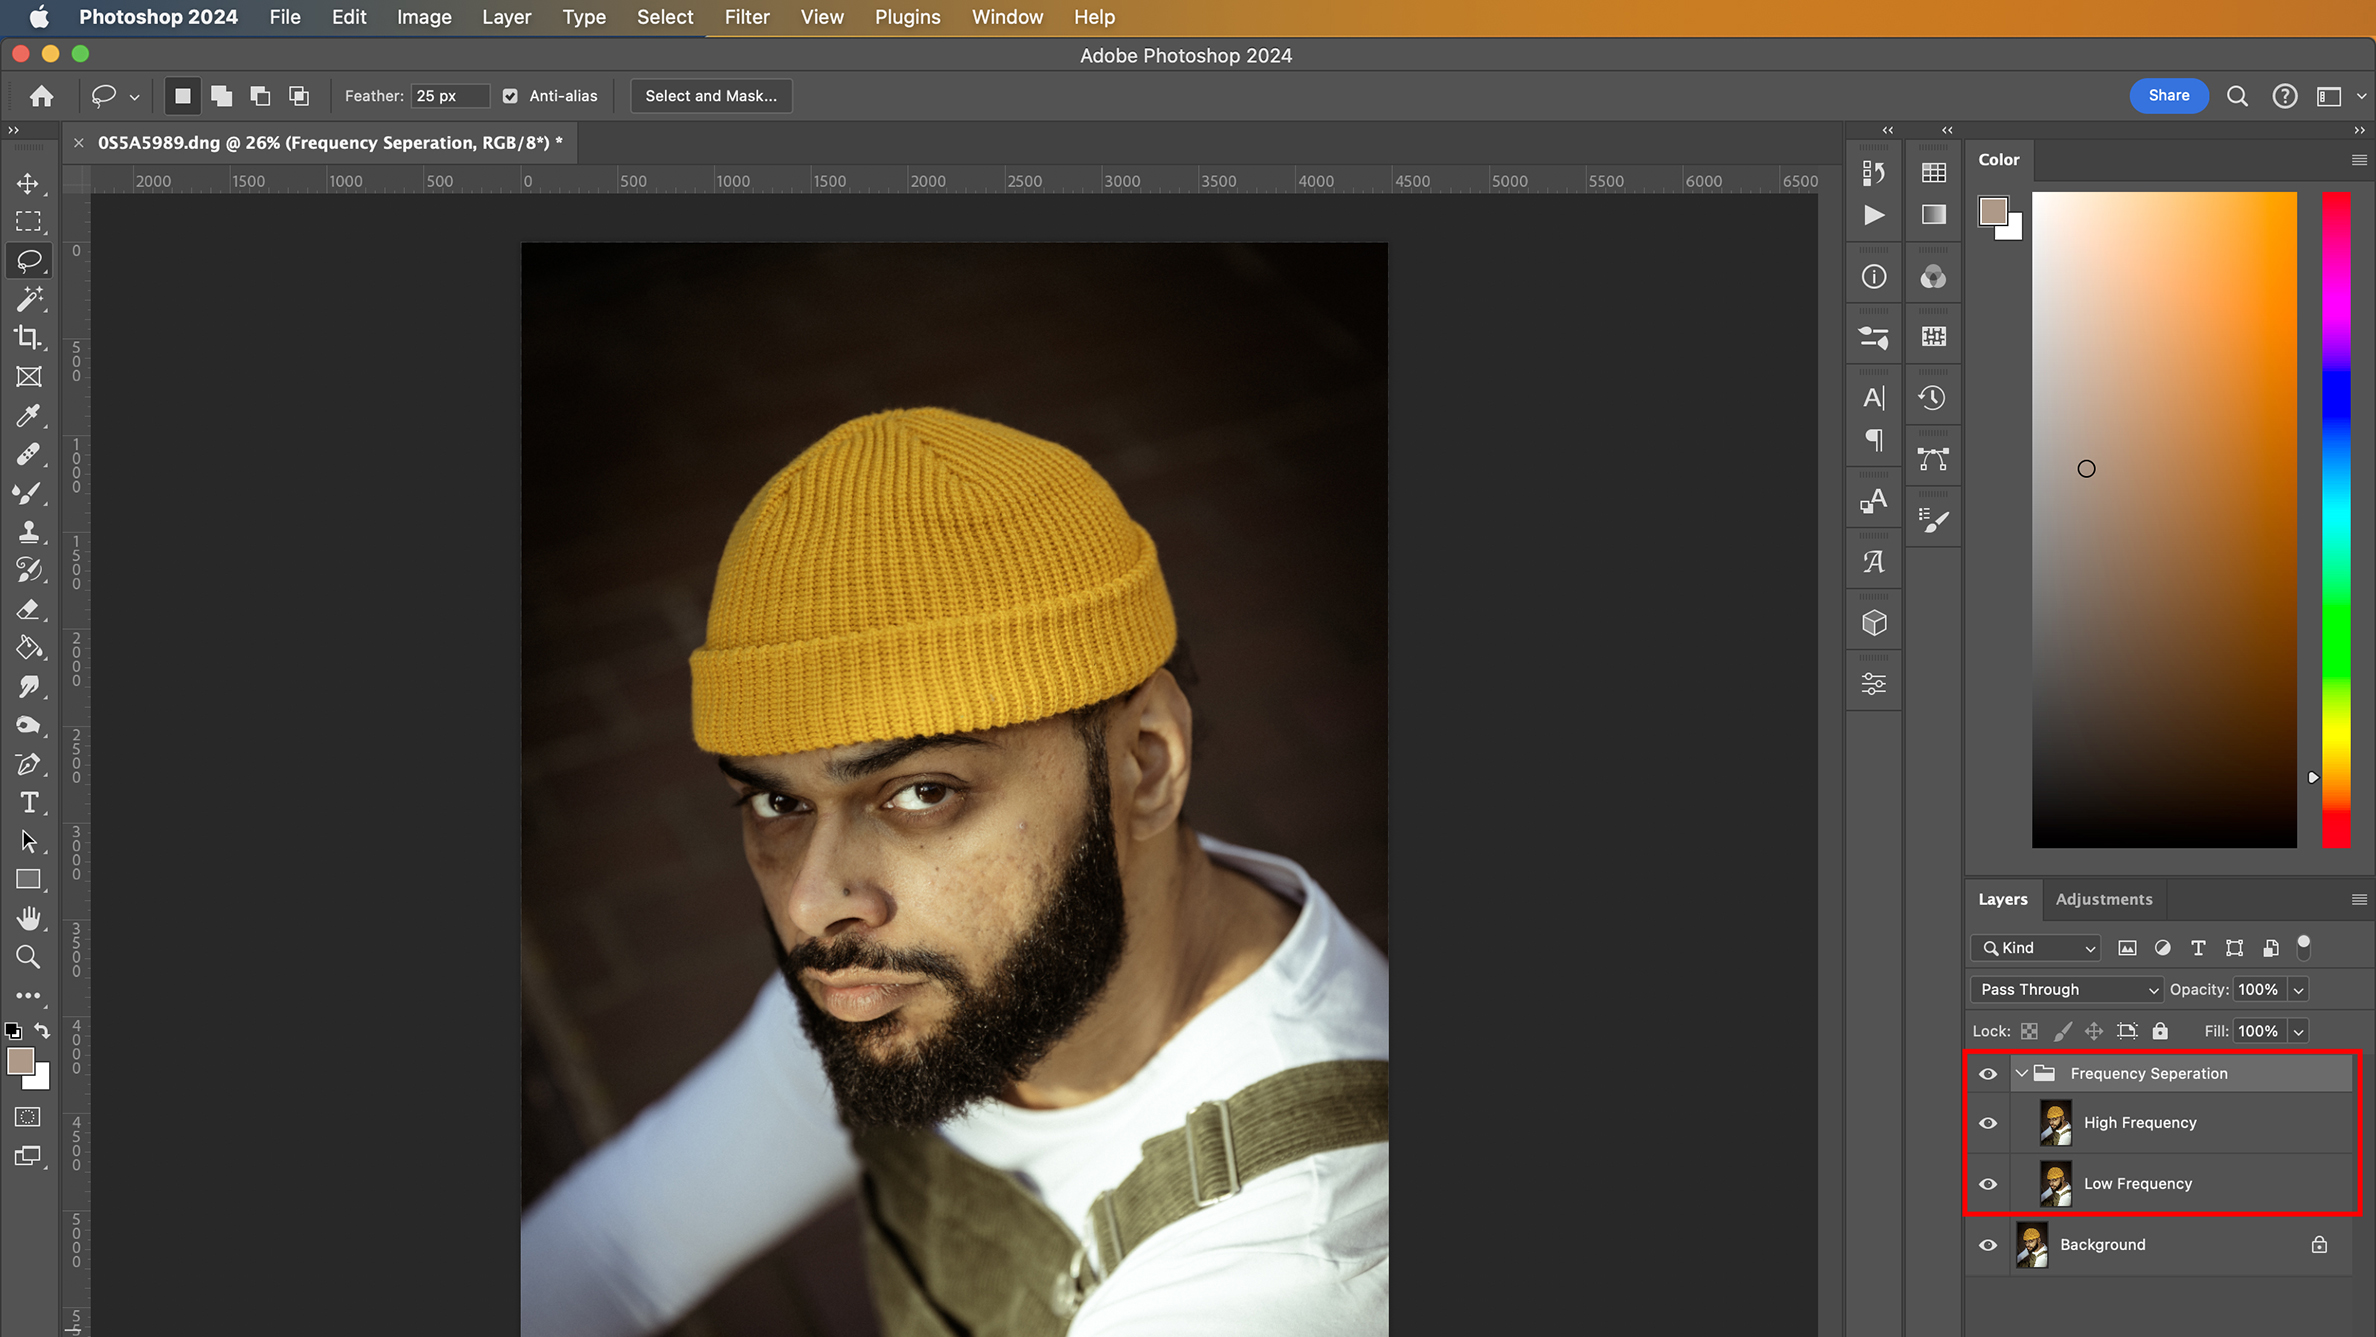
Change the top layer name to High Frequency (for texture details) and the middle to Low Frequency (colour and tone information). Group layers by selecting them and pressing Ctrl/Cmd+G. Now, name the folder Frequency Separation.
3. Set up Low-frequency
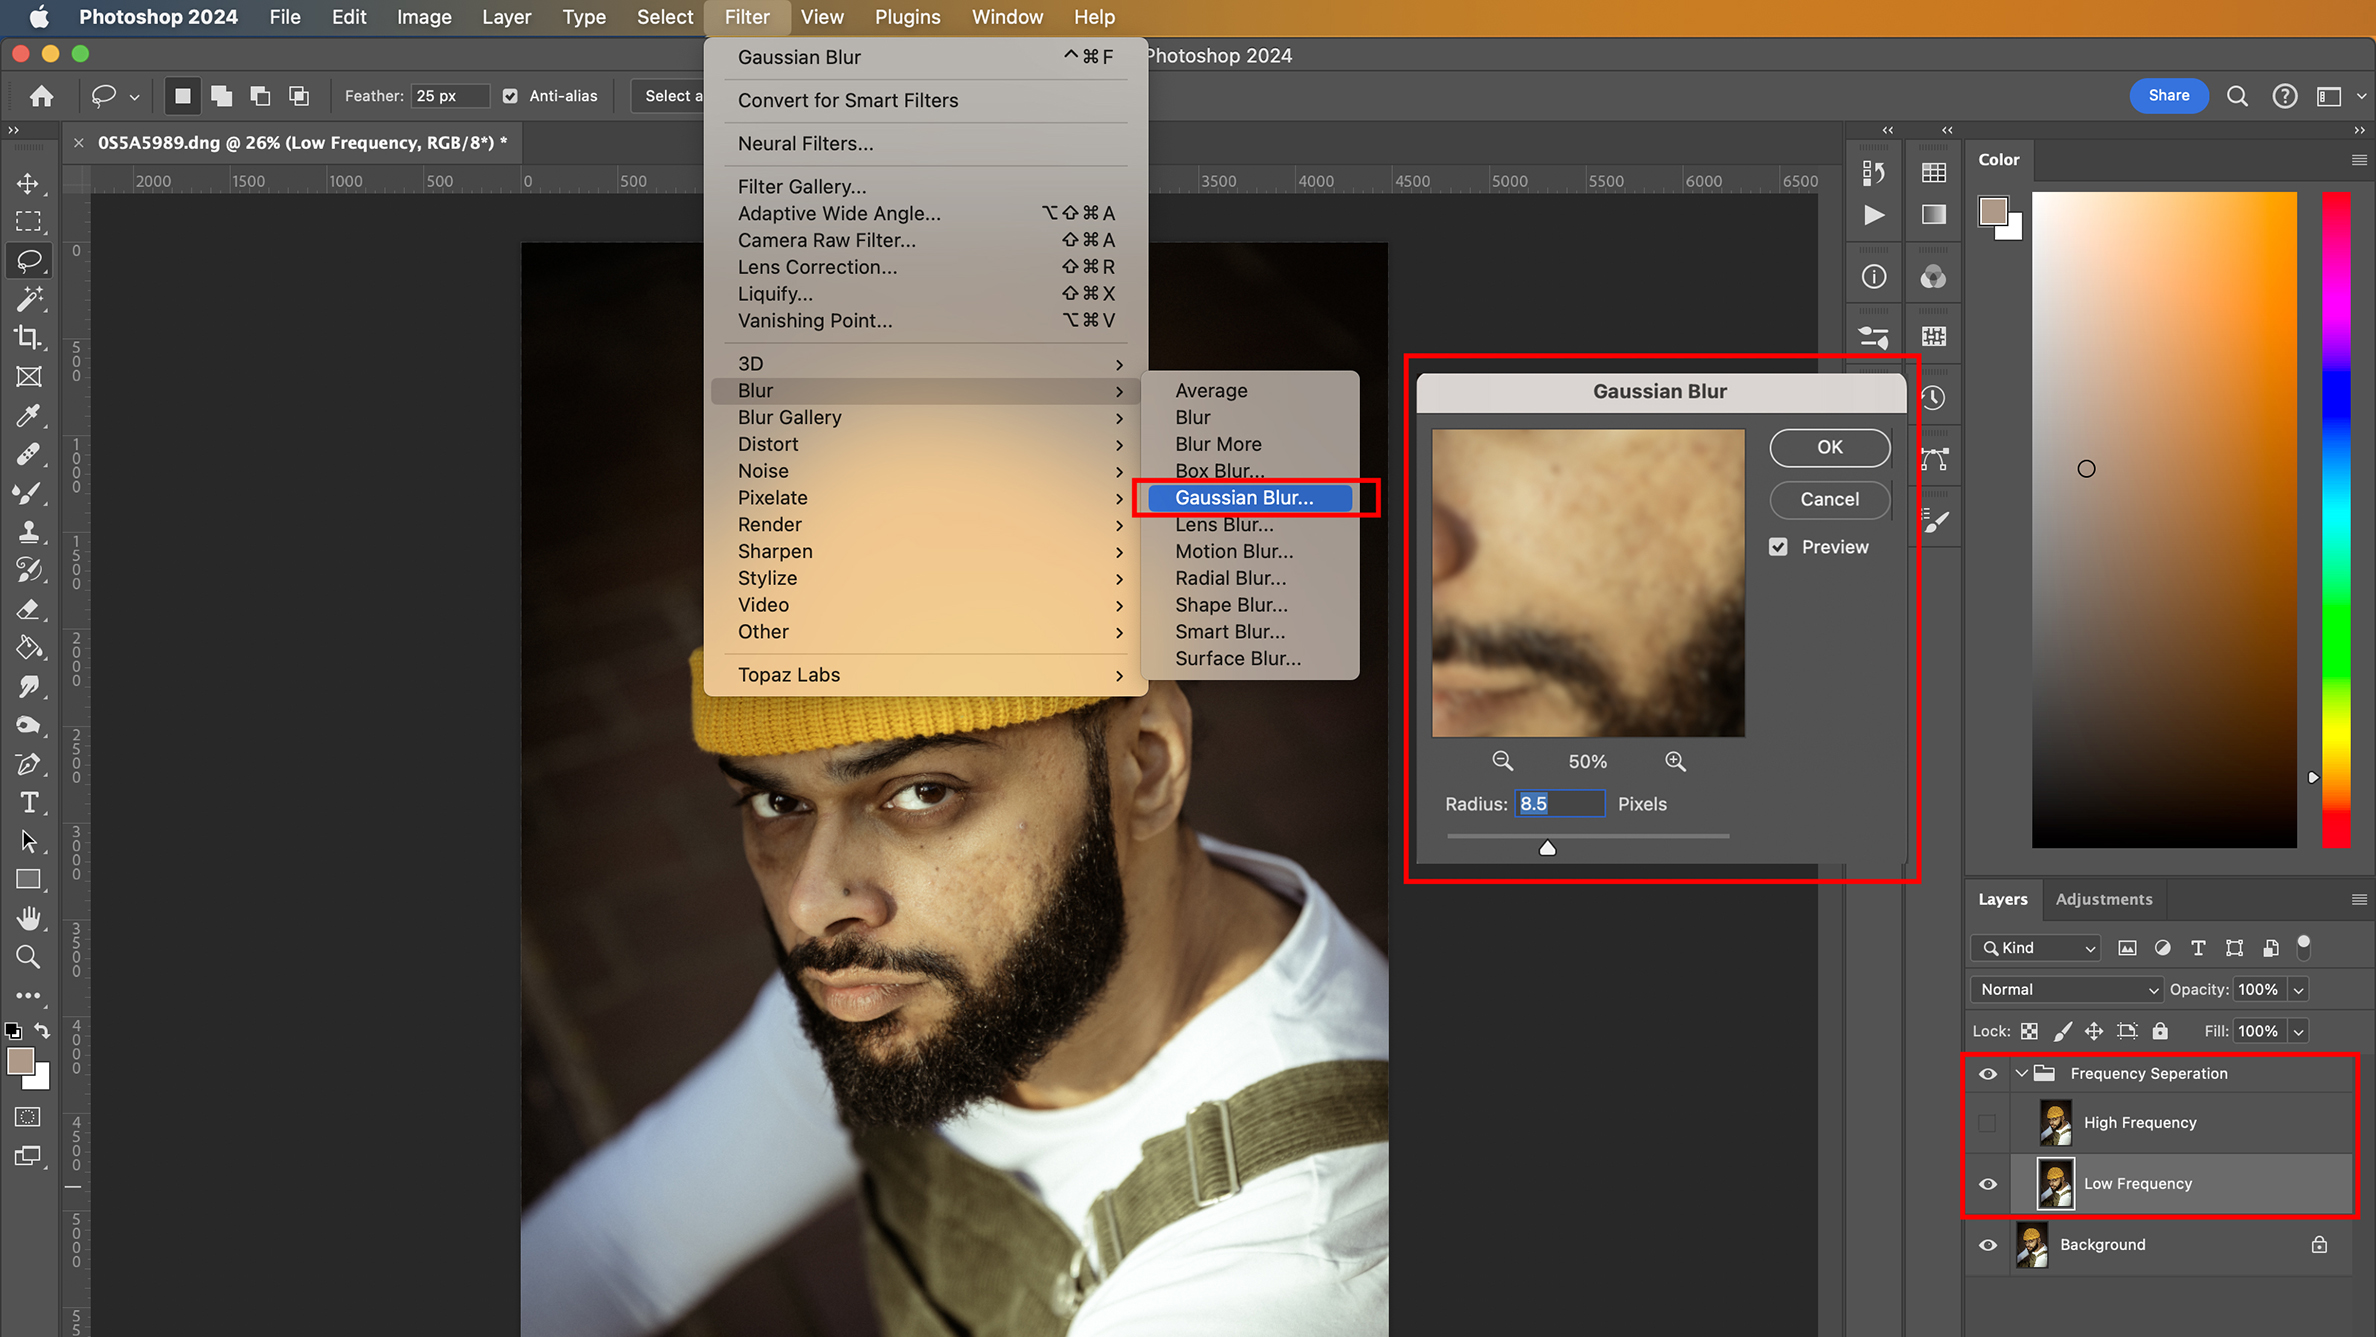
Layer Expand the group folder, turn off visibility for ‘High Frequency’ and select the ‘Low Frequency’ layer. Go to Filters > Blur > Gaussian Blur. In the box, adjust the radius to 5-10 pixels until the image looks blurred yet retains its shape.
4. Set up High-frequency
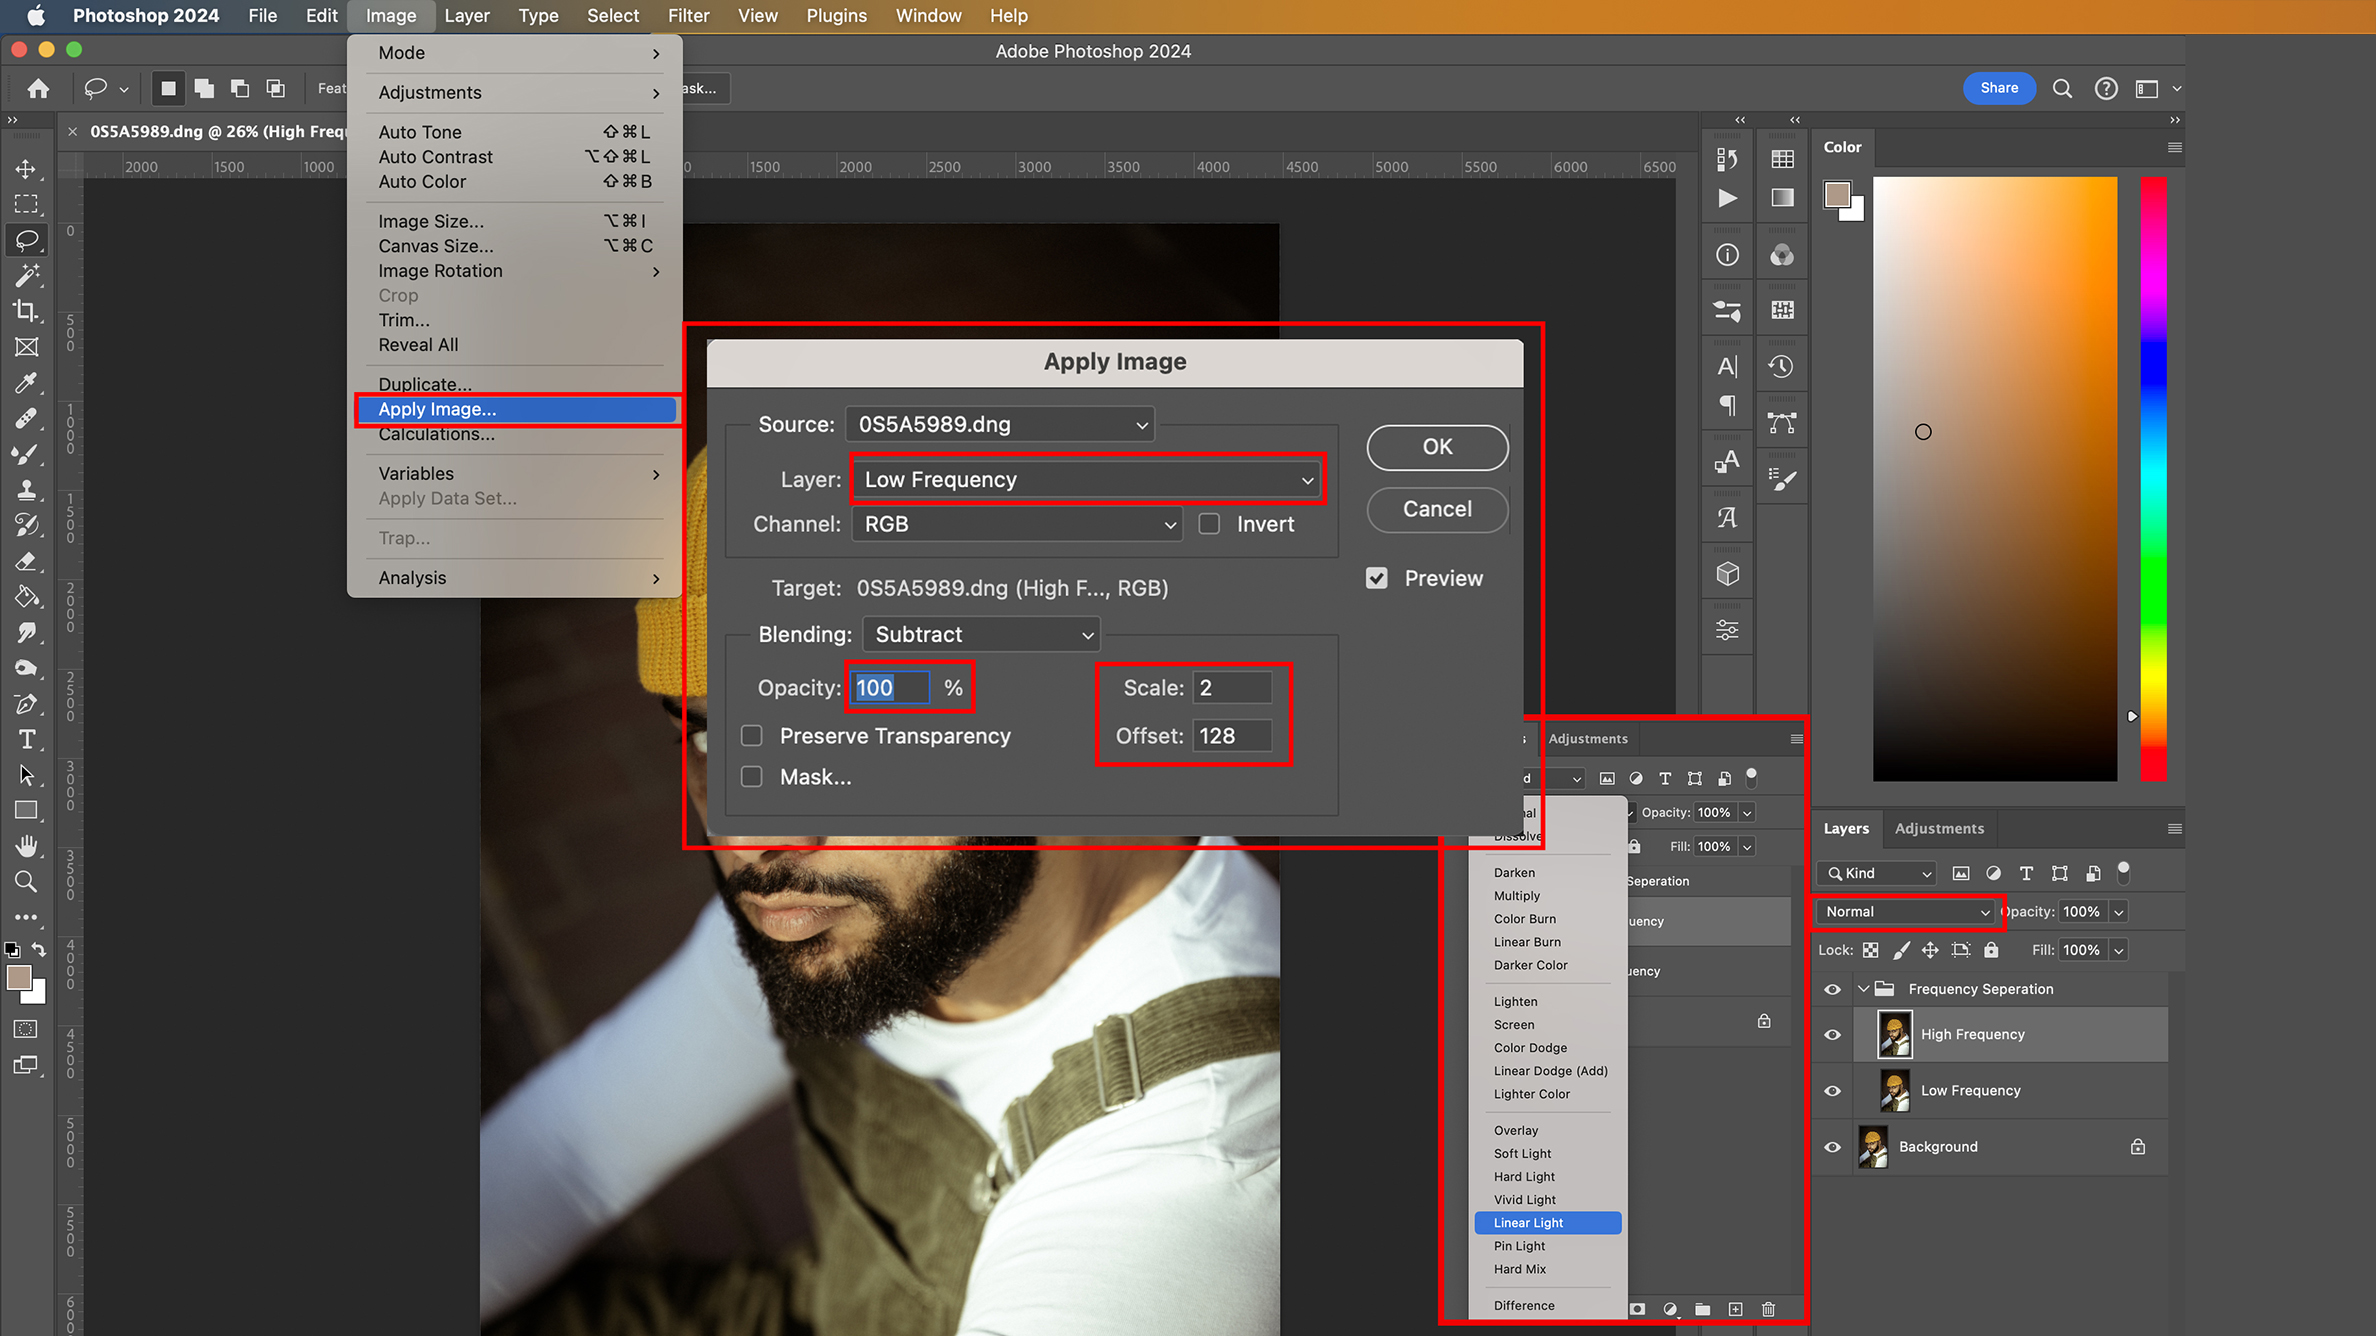
Turn the visibility on for the ‘High Frequency’ layer and select it. Go to Image > Apply Image and ensure your settings match those in the screenshot. Press, OK. Next, change the Layer Blending mode from Normal to Linear light.
5. Remove any imperfections
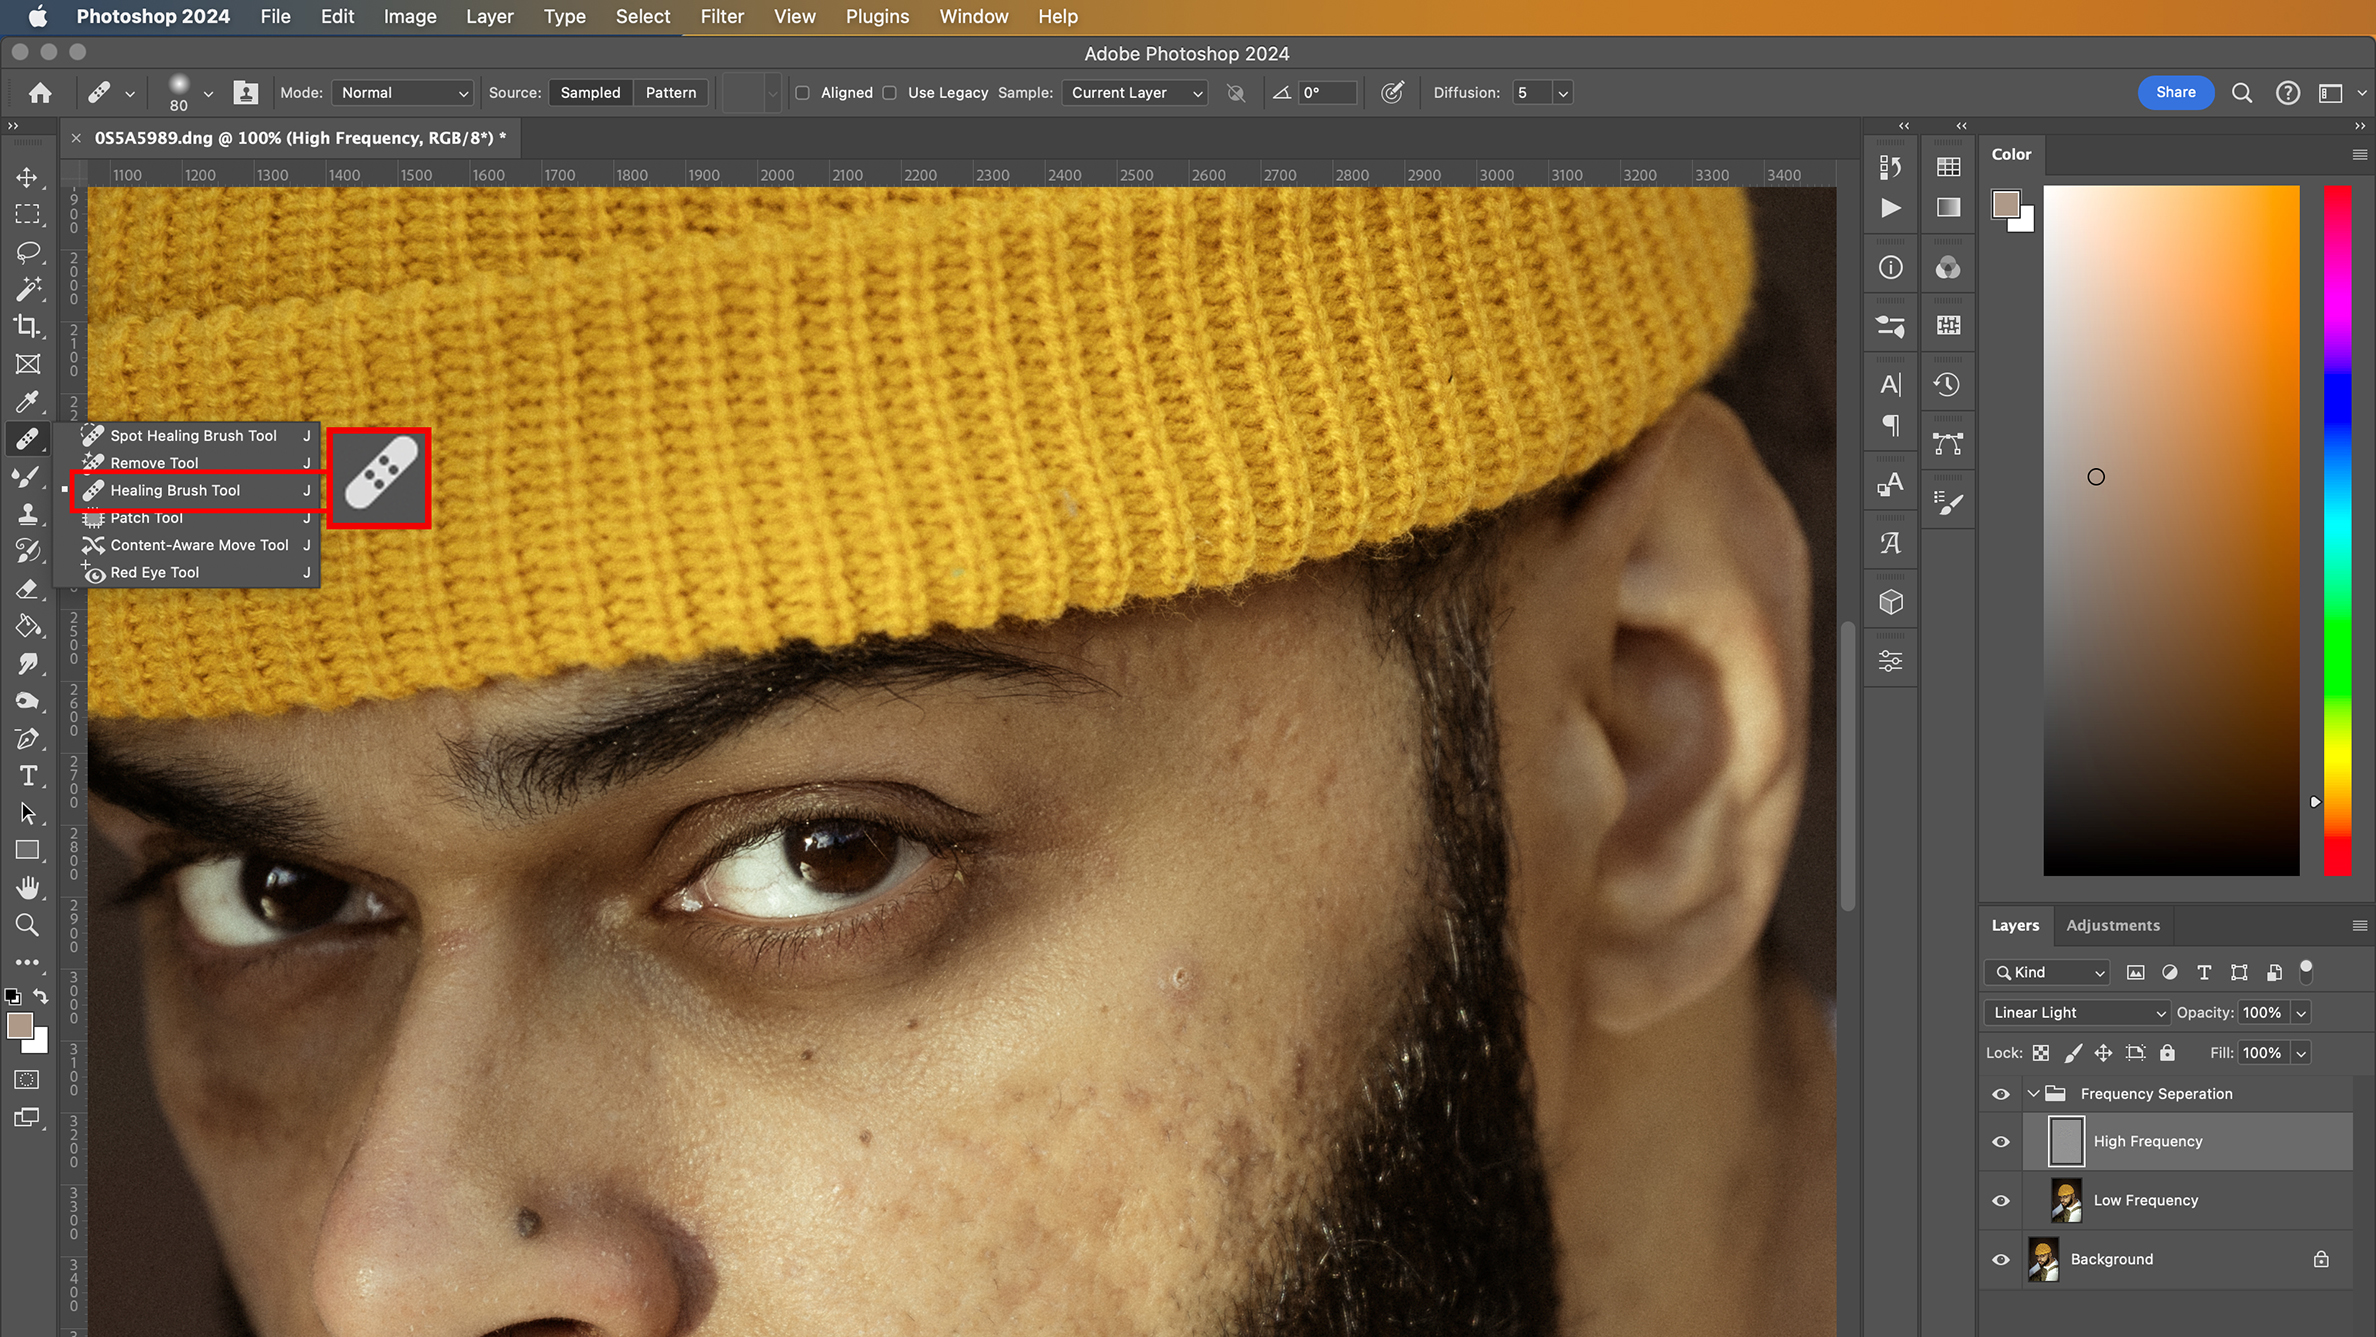
Starting with the High-Frequency layer, select the Healing Brush, hold down the Alt or Option key (Mac users) and click on the area close to the blemish. Then, simply brush over it. Adjust brush size and opacity for precision.
6. Smooth out the skin

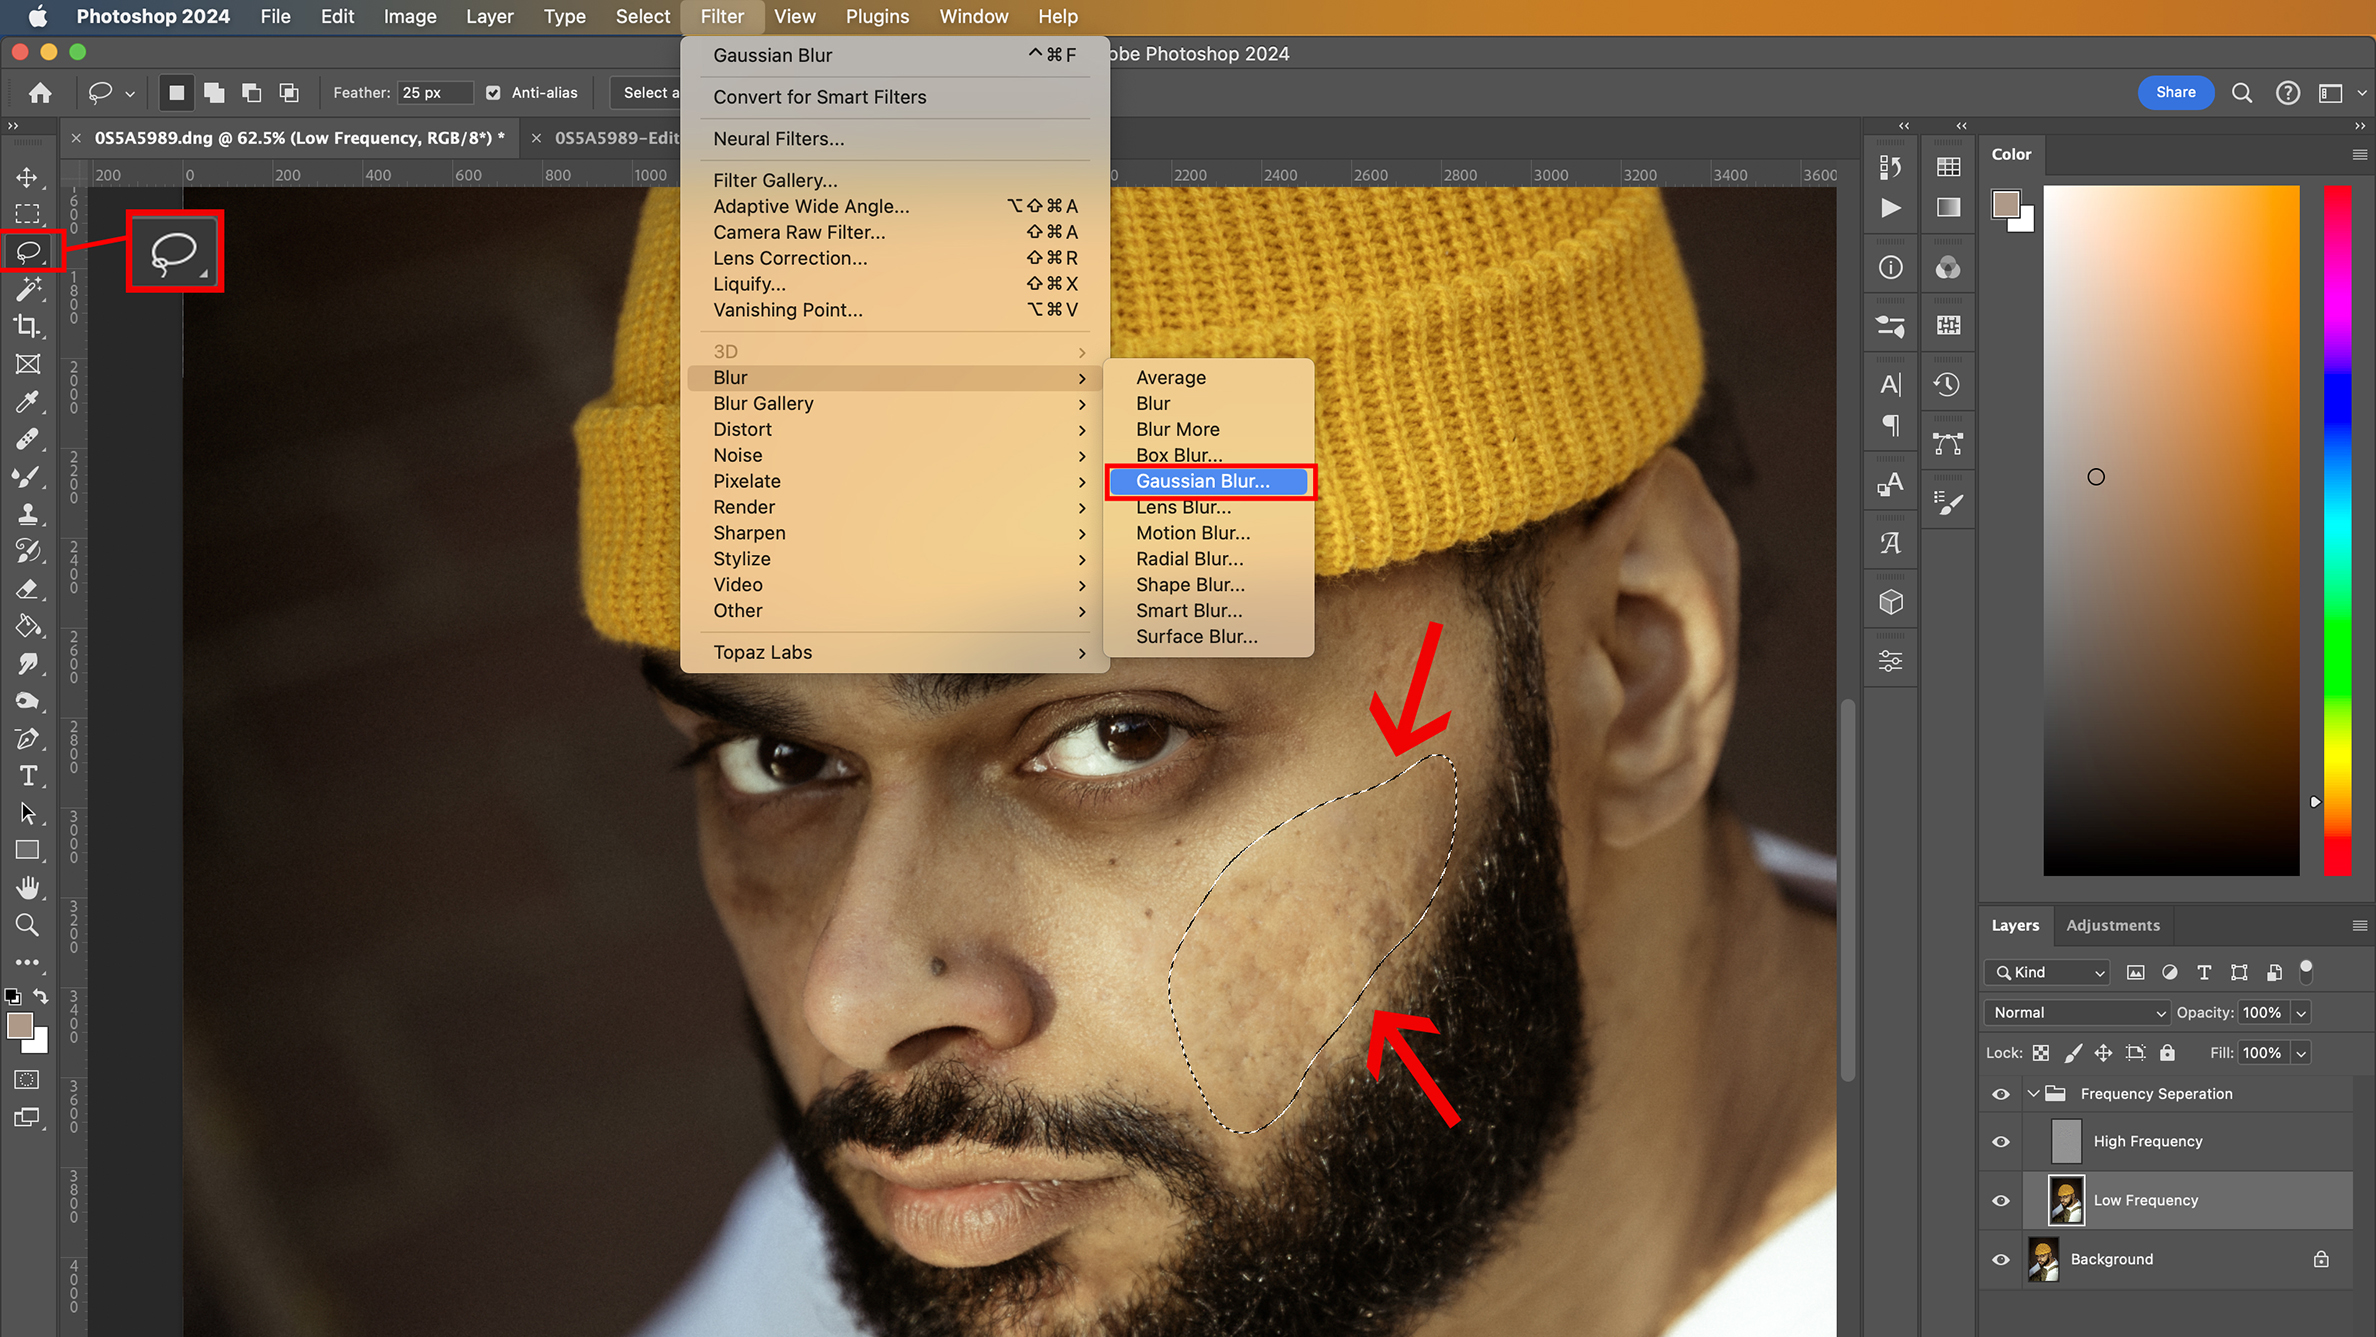
Select the Lasso Tool and set feathering to 22-25px. Select the Low-Frequency layer, then choose an area of skin to work on. Go to Filter > Blur > Gaussian Blur. Increase the blur until you get the desired smoothness but don’t overdo it.
7. Dodge and Burn
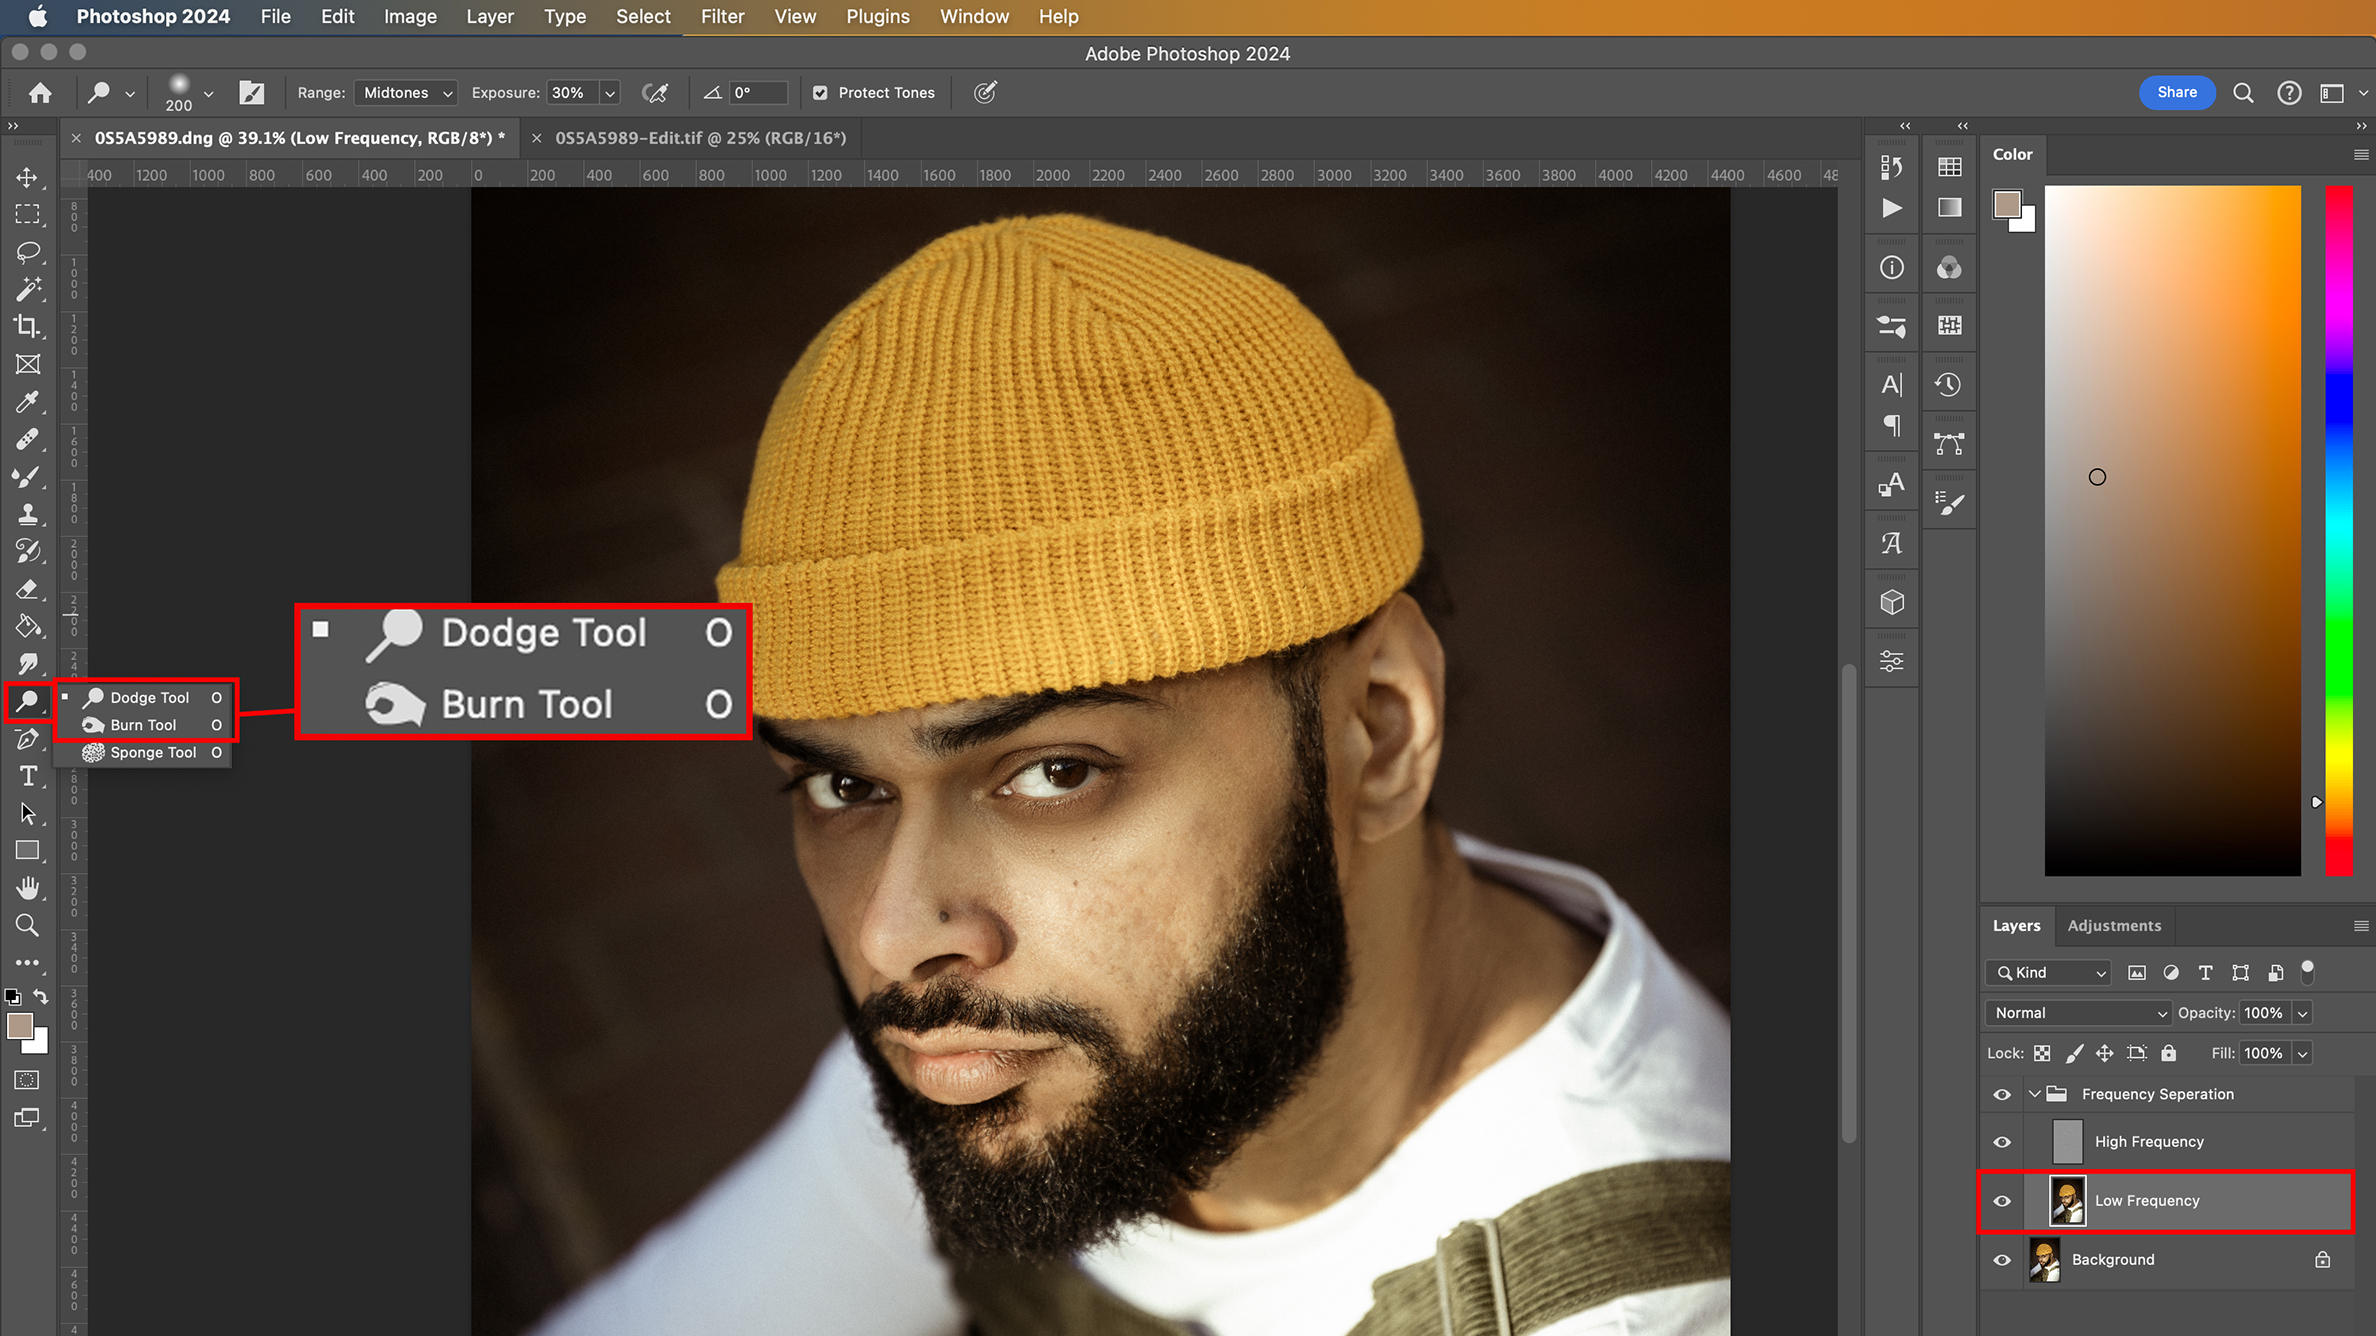
On the Low Frequency layer, select Dodge and Burn Tools. Adjust their exposure and apply gently to highlight areas such as the forehead with Dodge. Use the Burn Tool for shadows, such as on the nose. Both tools help shape the facial features.
8. Flatten the image
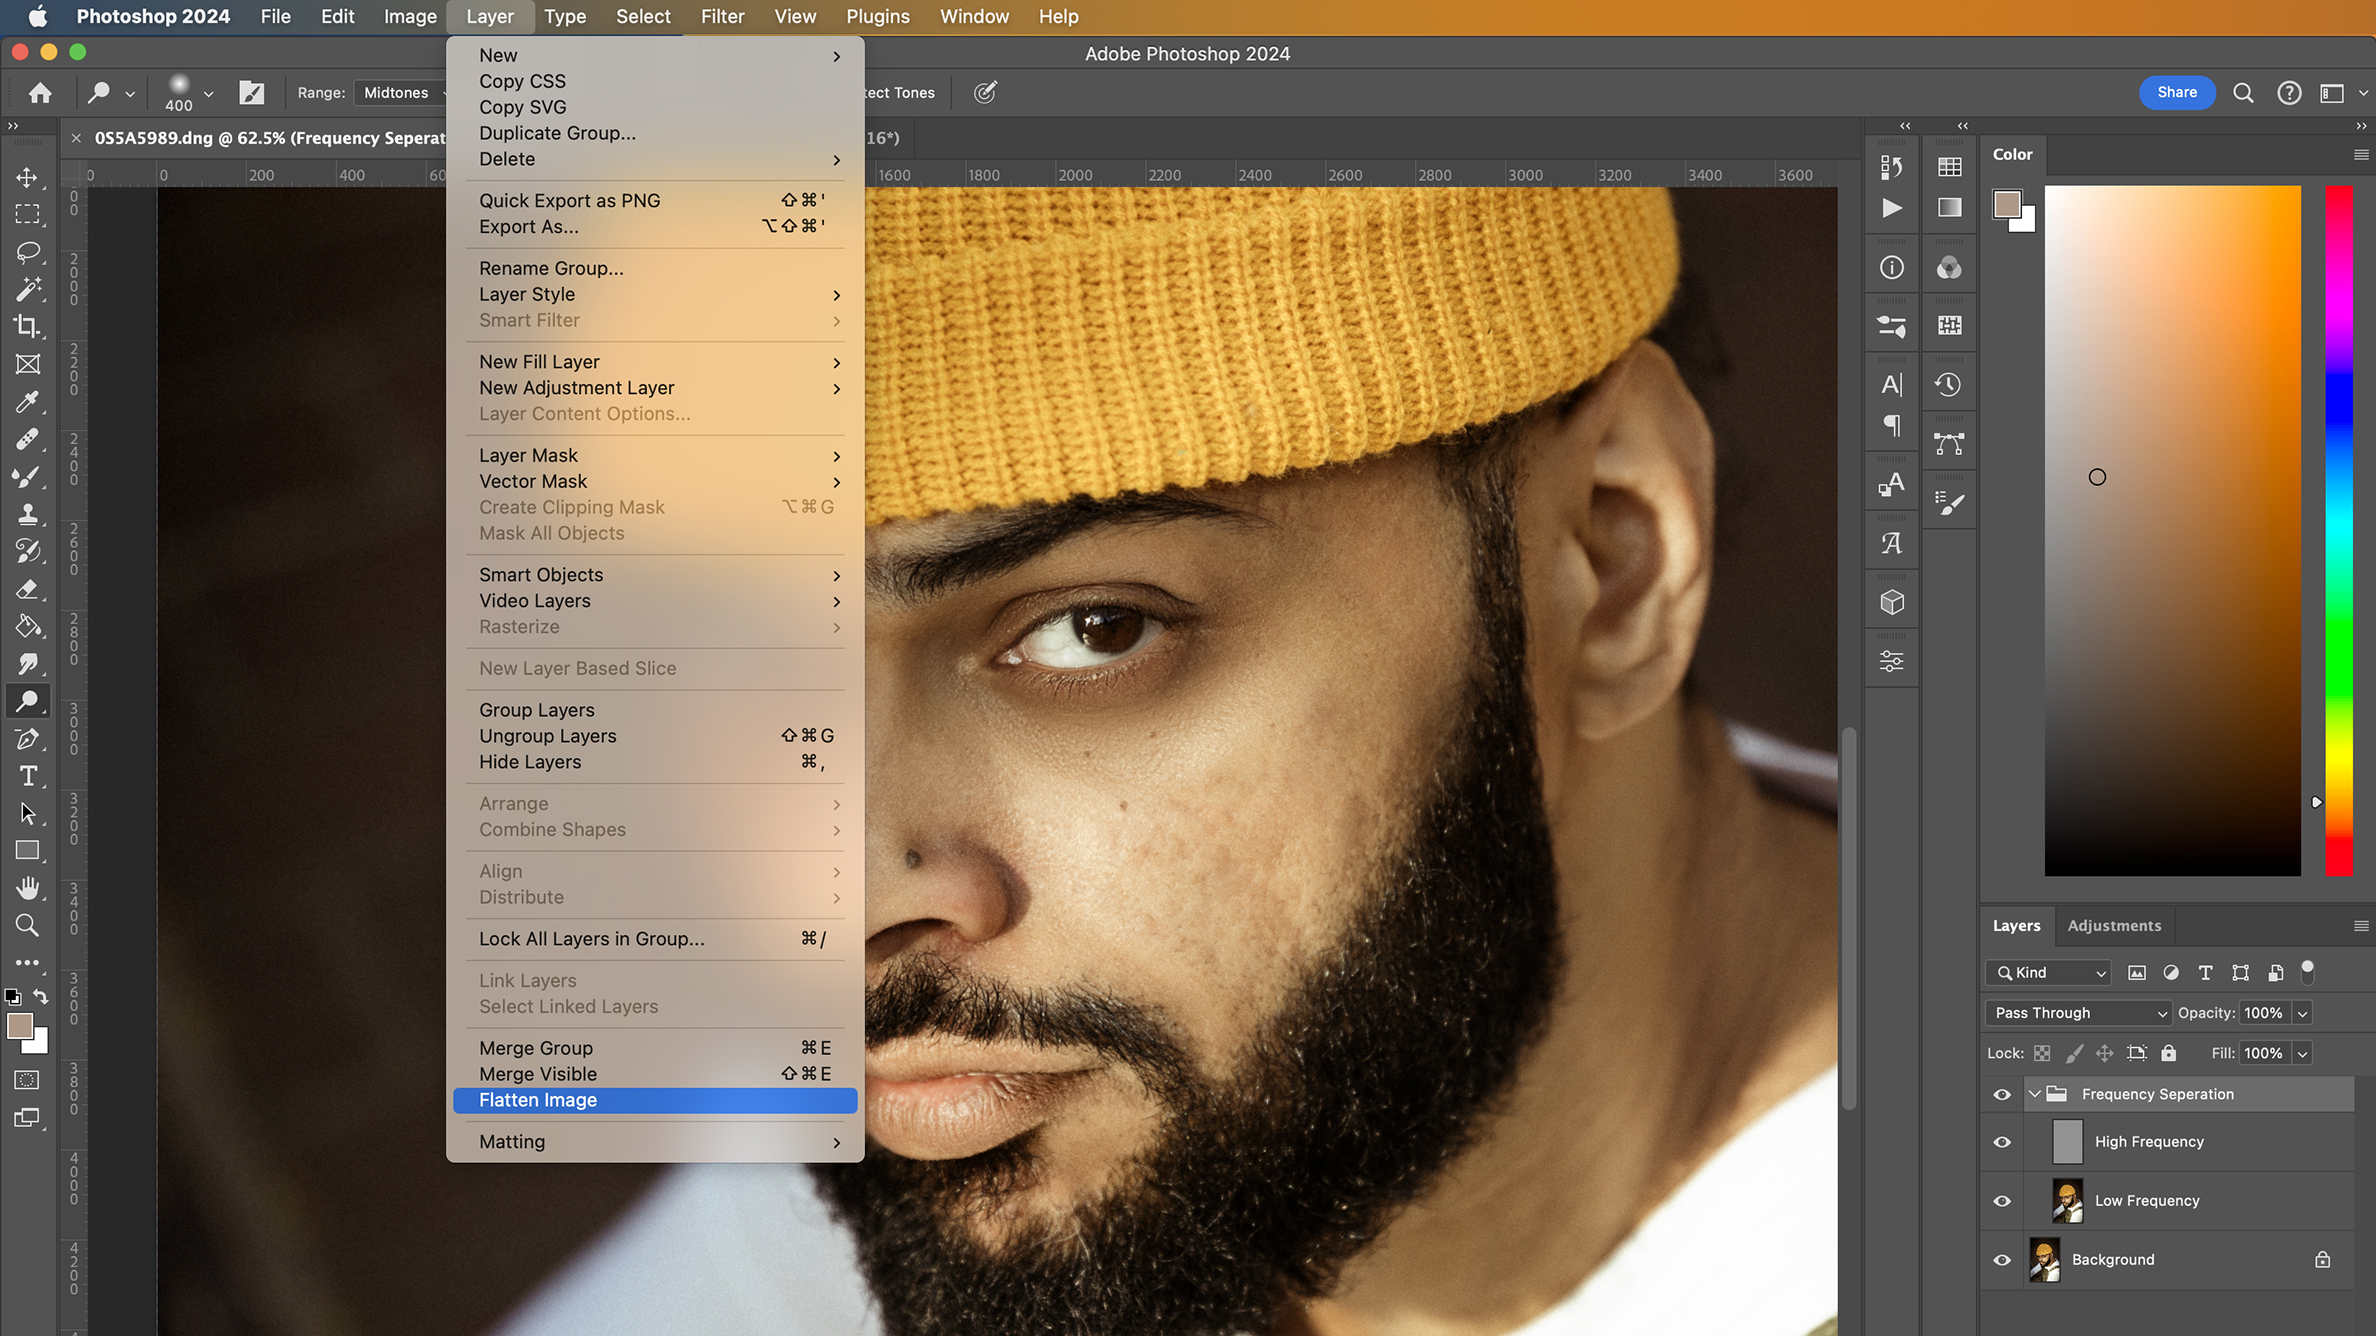
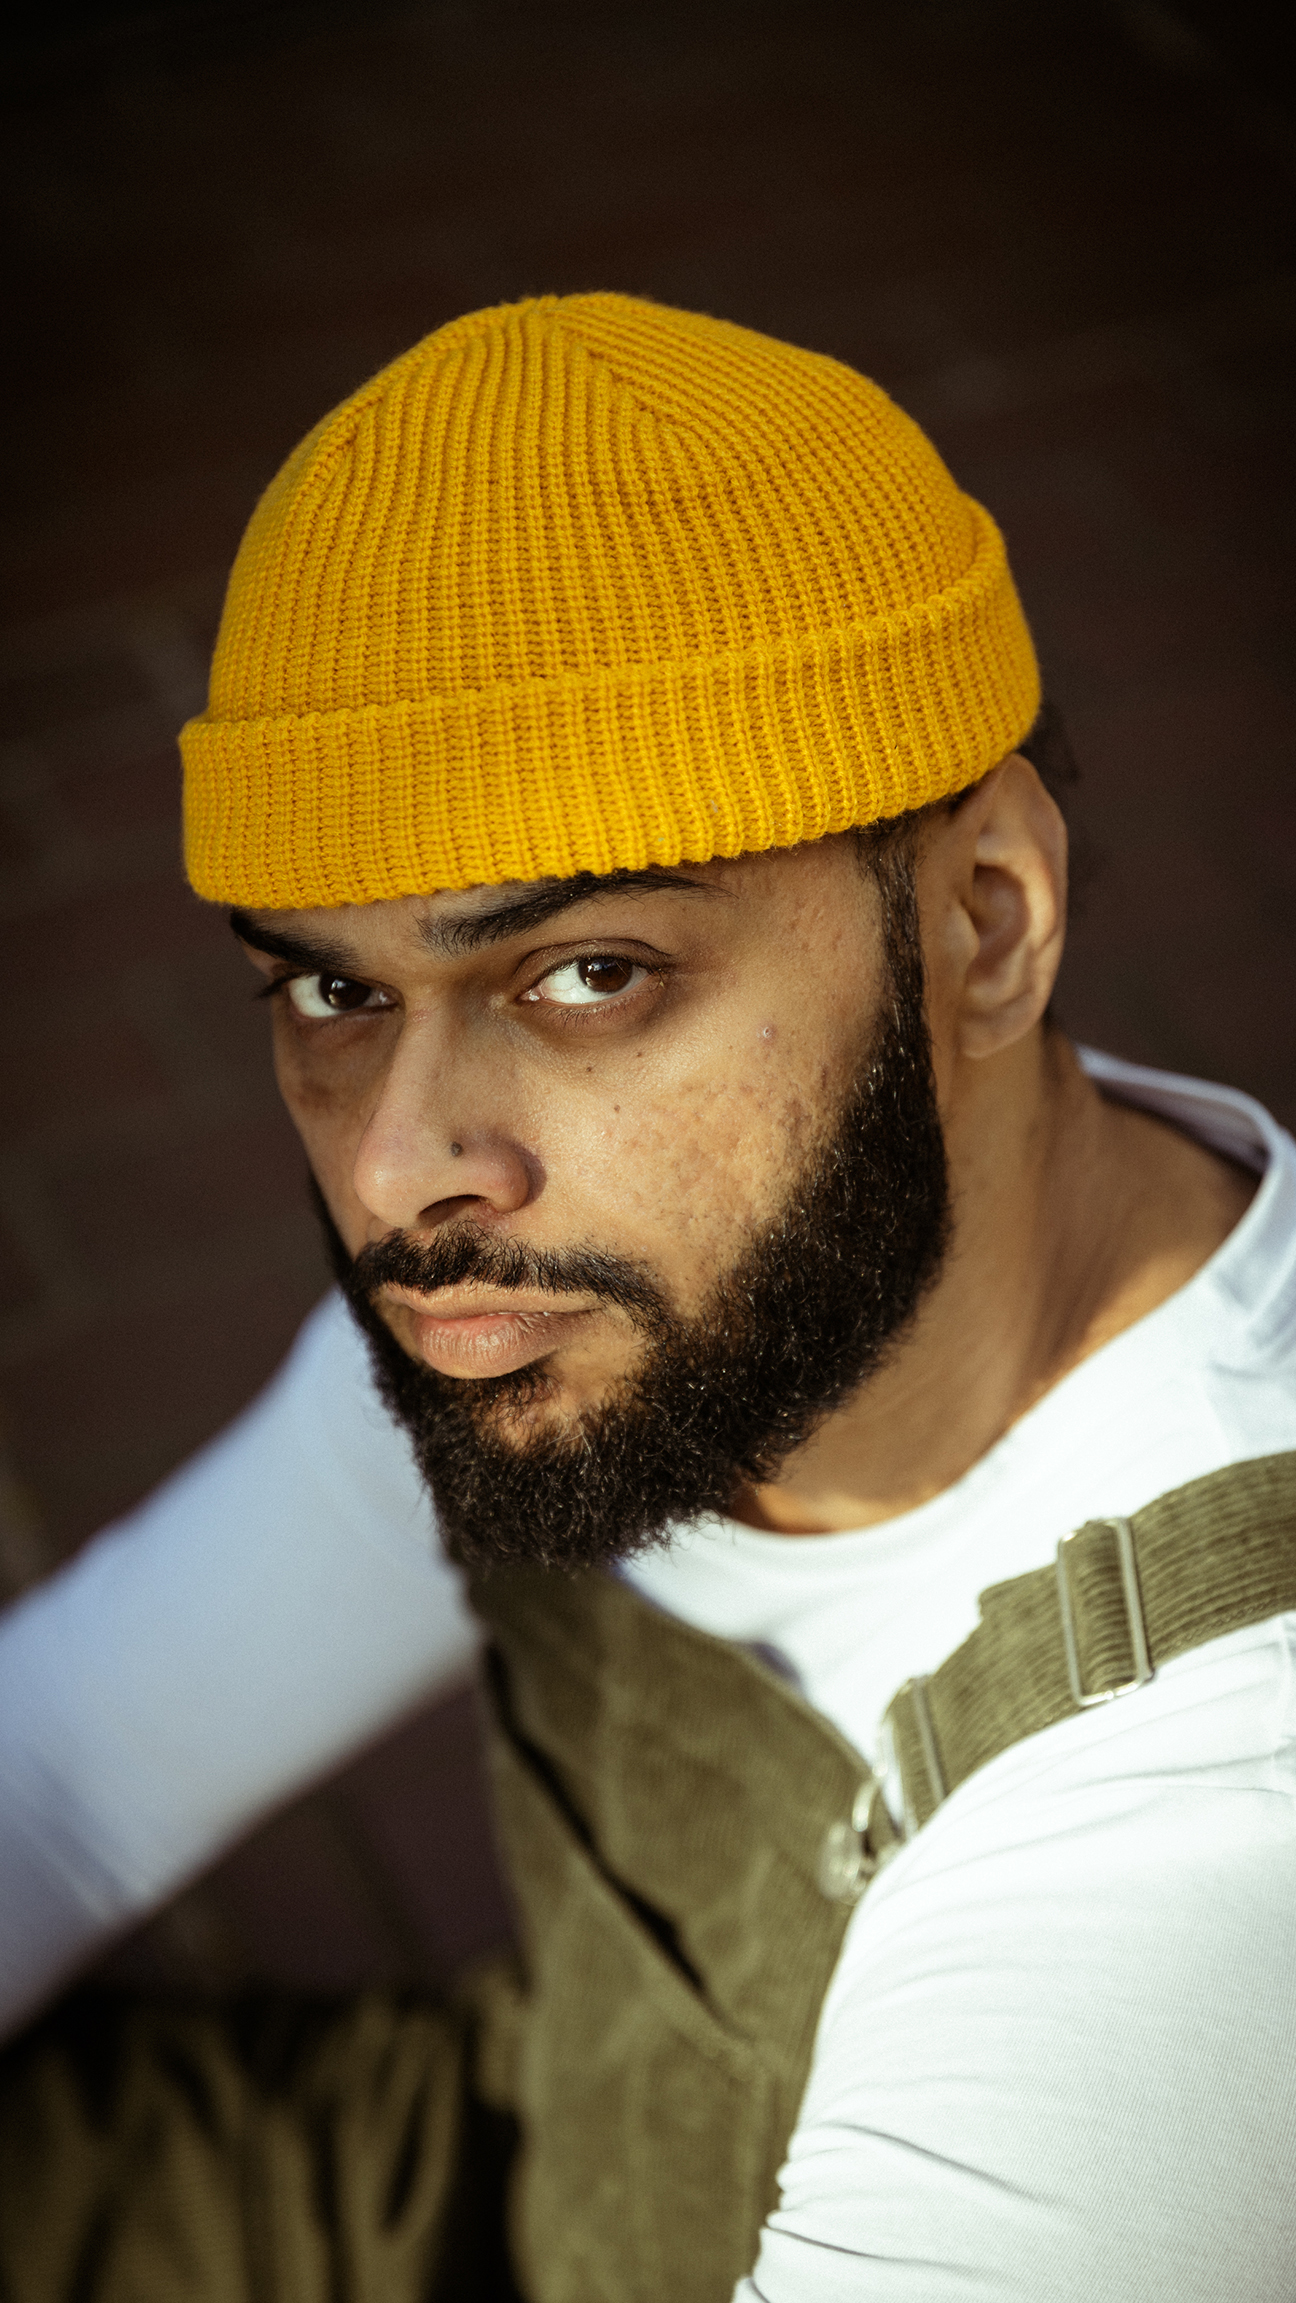
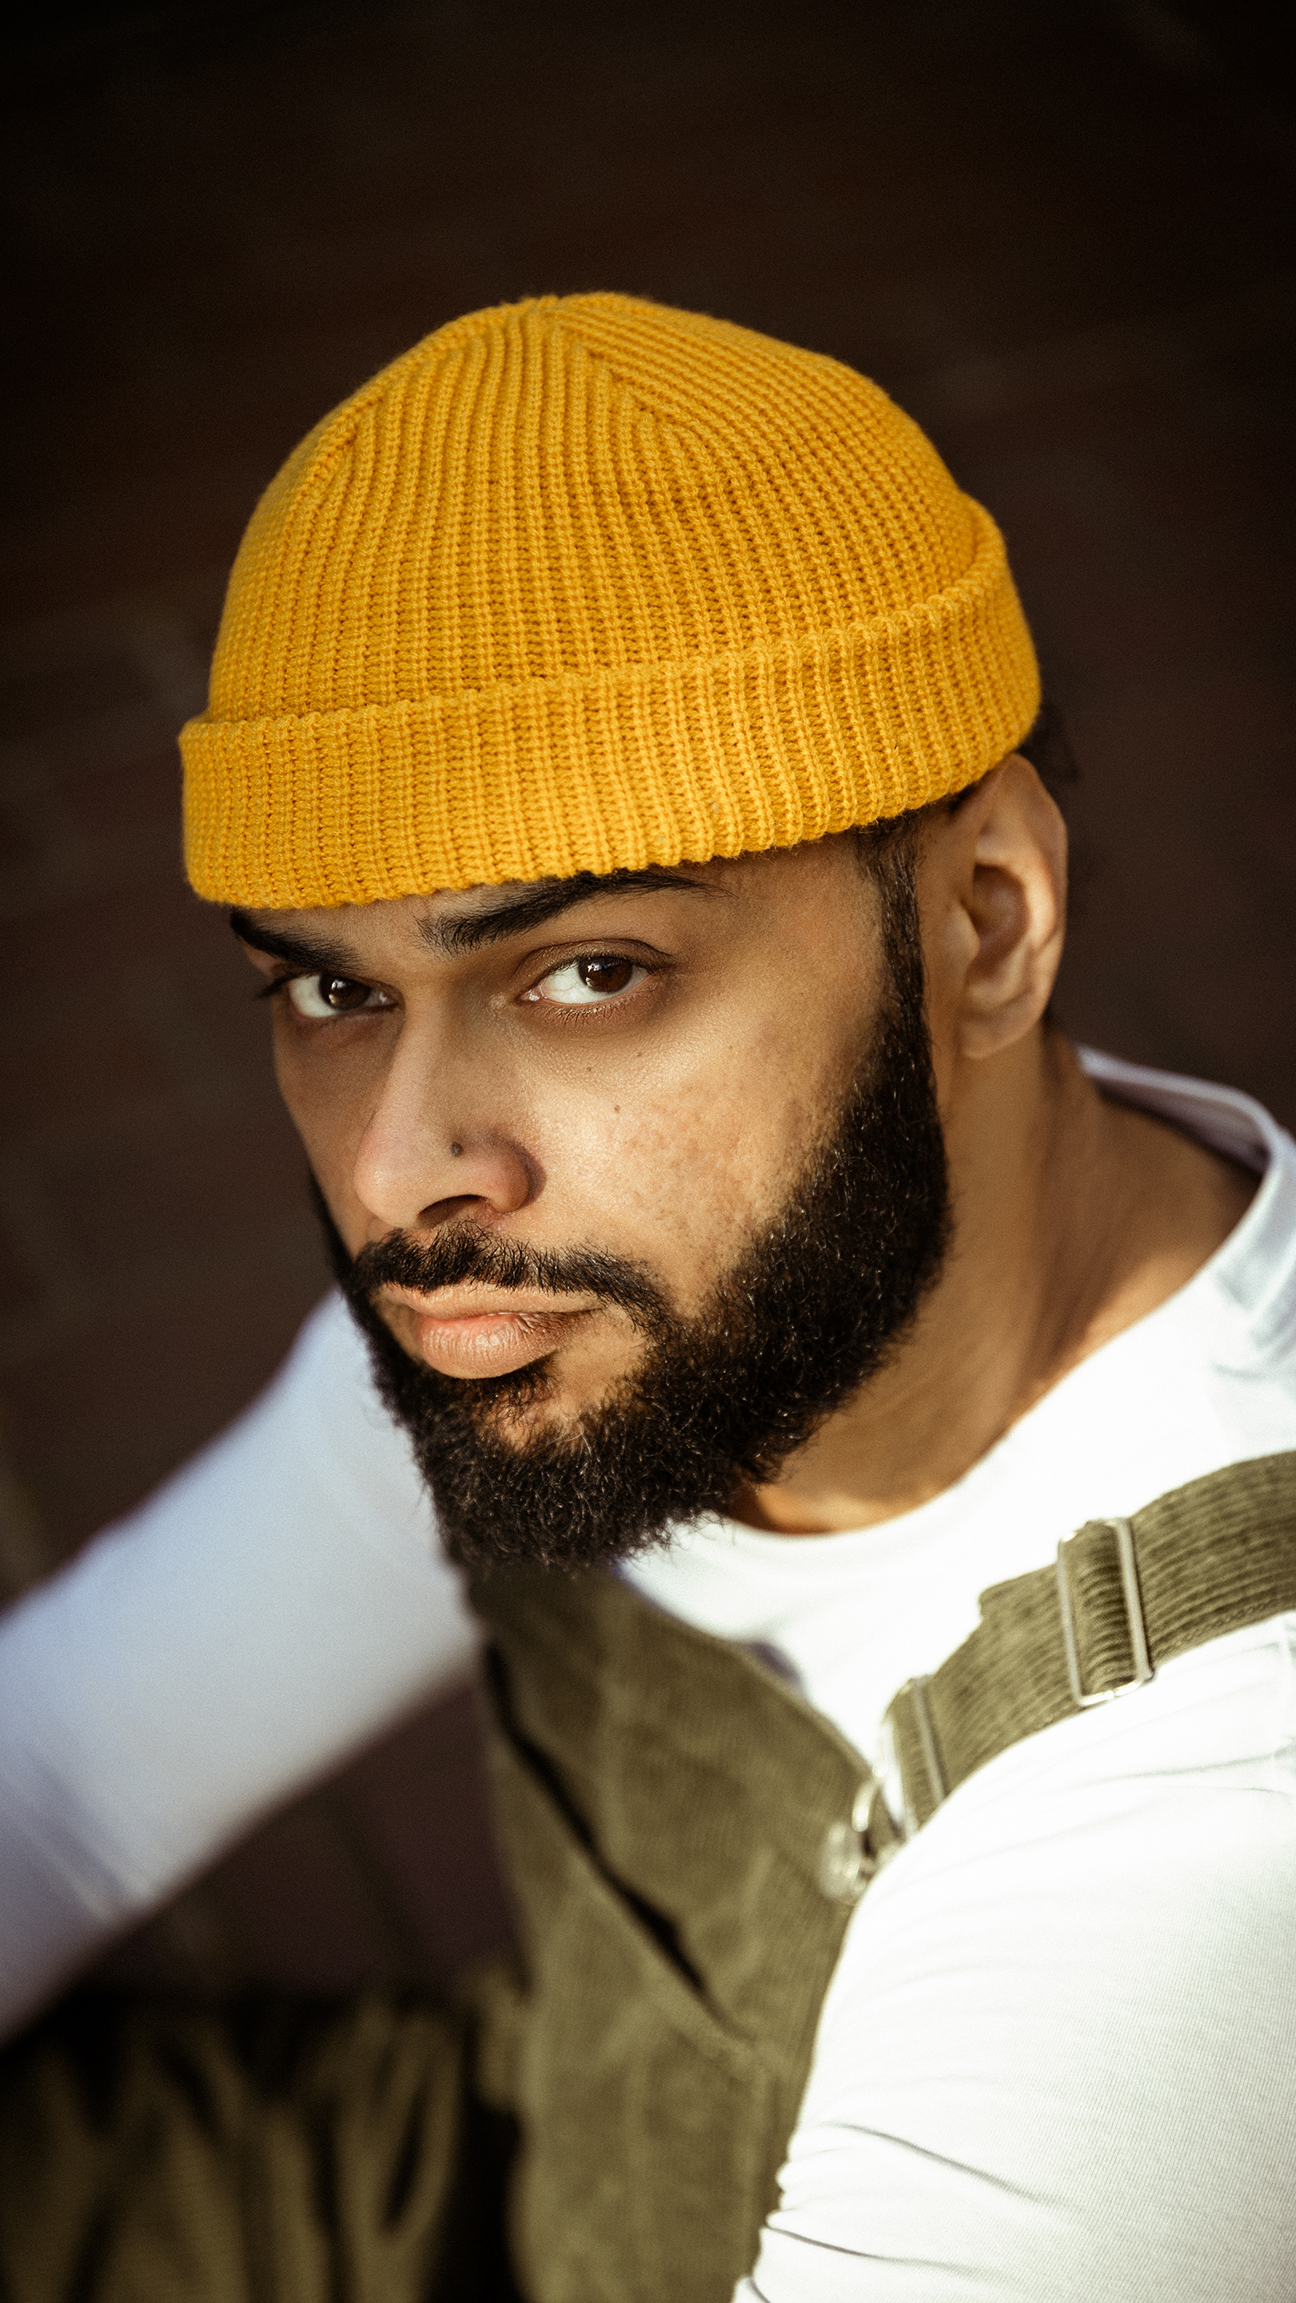
Once you’re satisfied with the depth and dimensions of the subject and that the retouch looks natural, you can flatten the layers. Go to Layer > Flatten Image and save your photo. Compare the edit with the original for context.
Before and After
Paula's Favourite Tool
Remove tool
This tool is a game changer for me. It uses AI technology to remove unwanted objects. It can speed up your editing process and save you a lot of time. It’s not perfect all the time and sometimes it fails, but it’s truly a lifesaver for those tiny spots, or remove flyaway hair from a model’s face.
More tutorials


