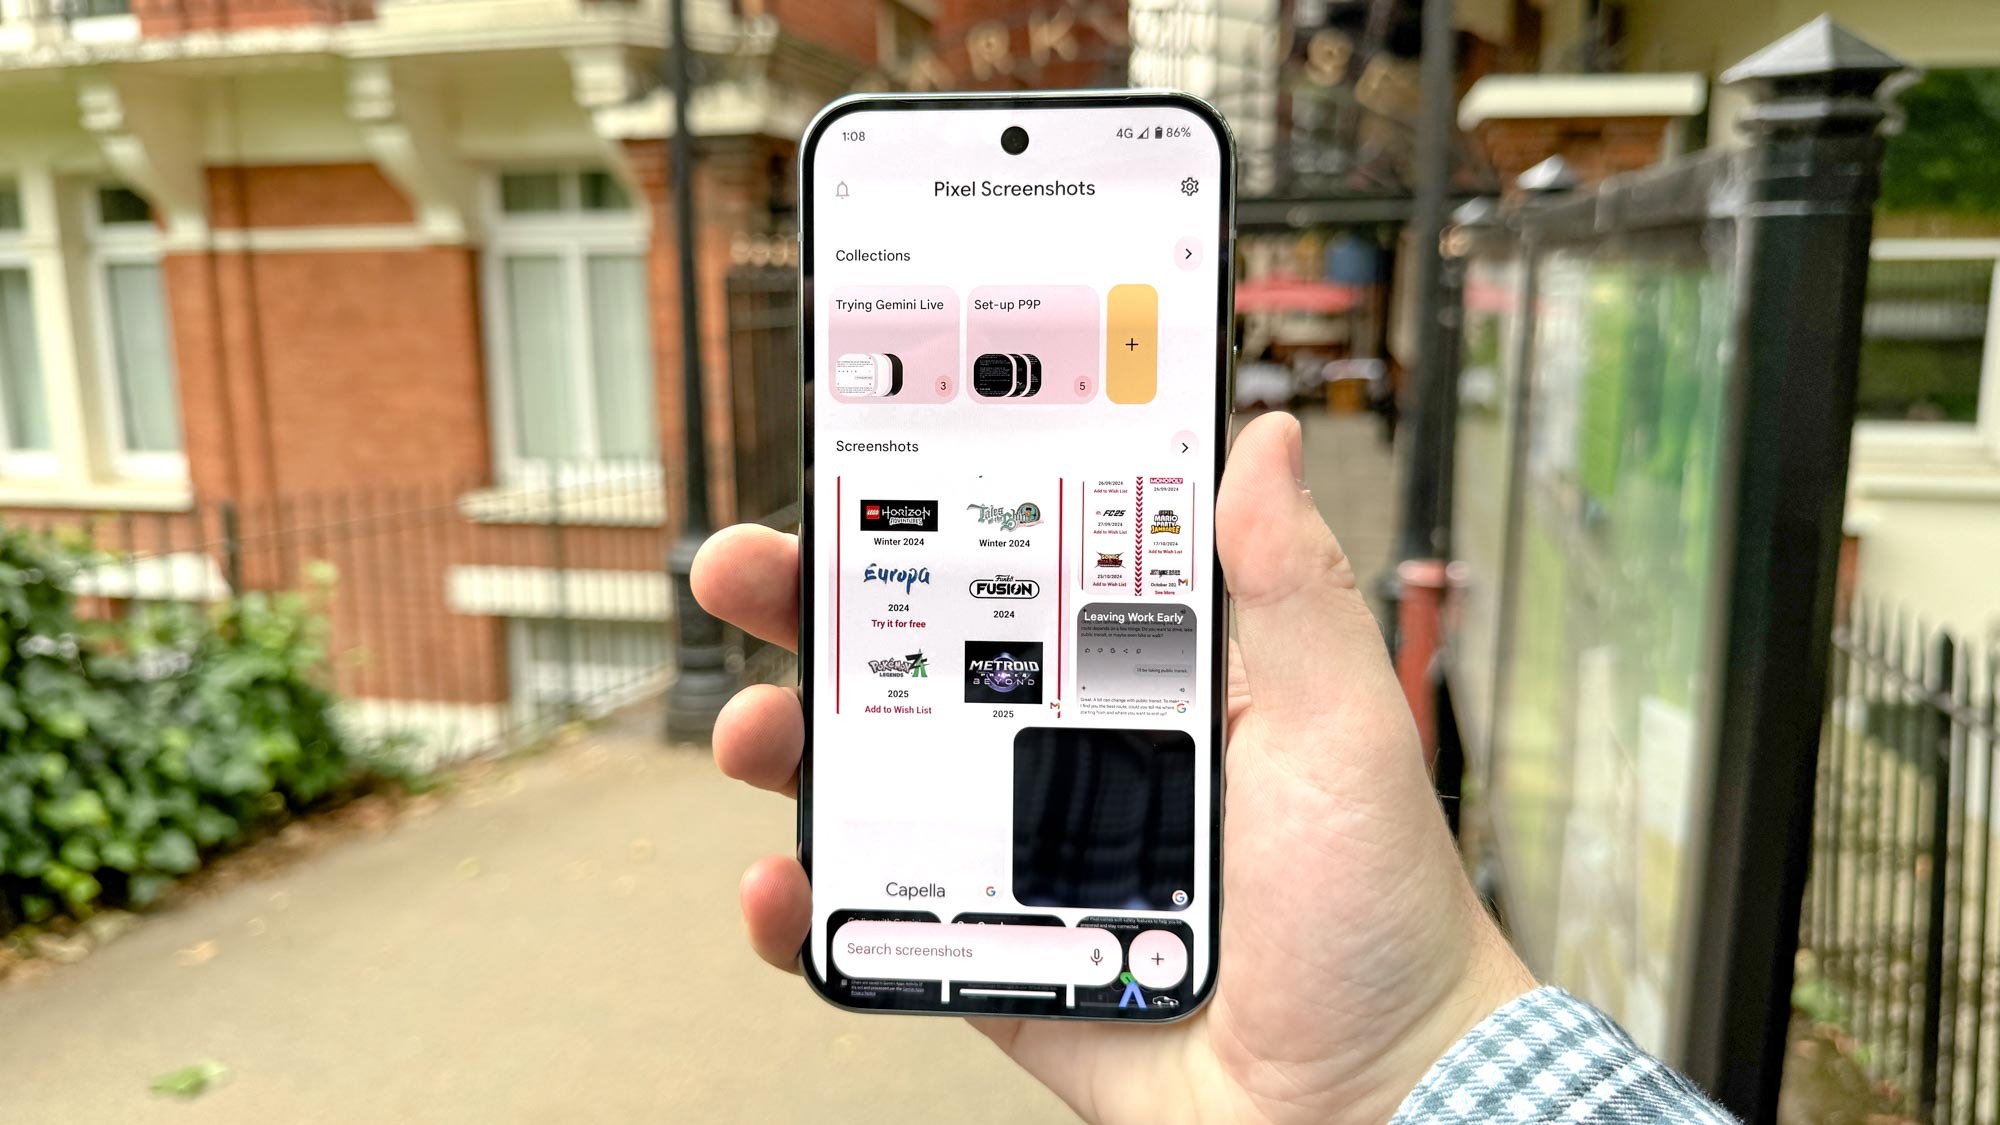
Pixel Screenshots on the Google Pixel 9 series is a one-stop shop to find everything you’ve captured. But more than that, it lets you index screenshots, search for them, annotate them and set reminders to take any necessary actions, with AI there to help you remember and rediscover everything that you've screen-grabbed.
Pixel Screenshots is exclusive to the Pixel 9 series, but we hope that it’ll be made backward compatible with older Pixel phones. And perhaps other phone makers will steal the idea for their own future devices.
If you need a quick reminder on how to take a screenshot on Android, we have a guide on that. But otherwise let’s press on with how to use Pixel Screenshots.
How to use Pixel Screenshots
1. Take a screenshot
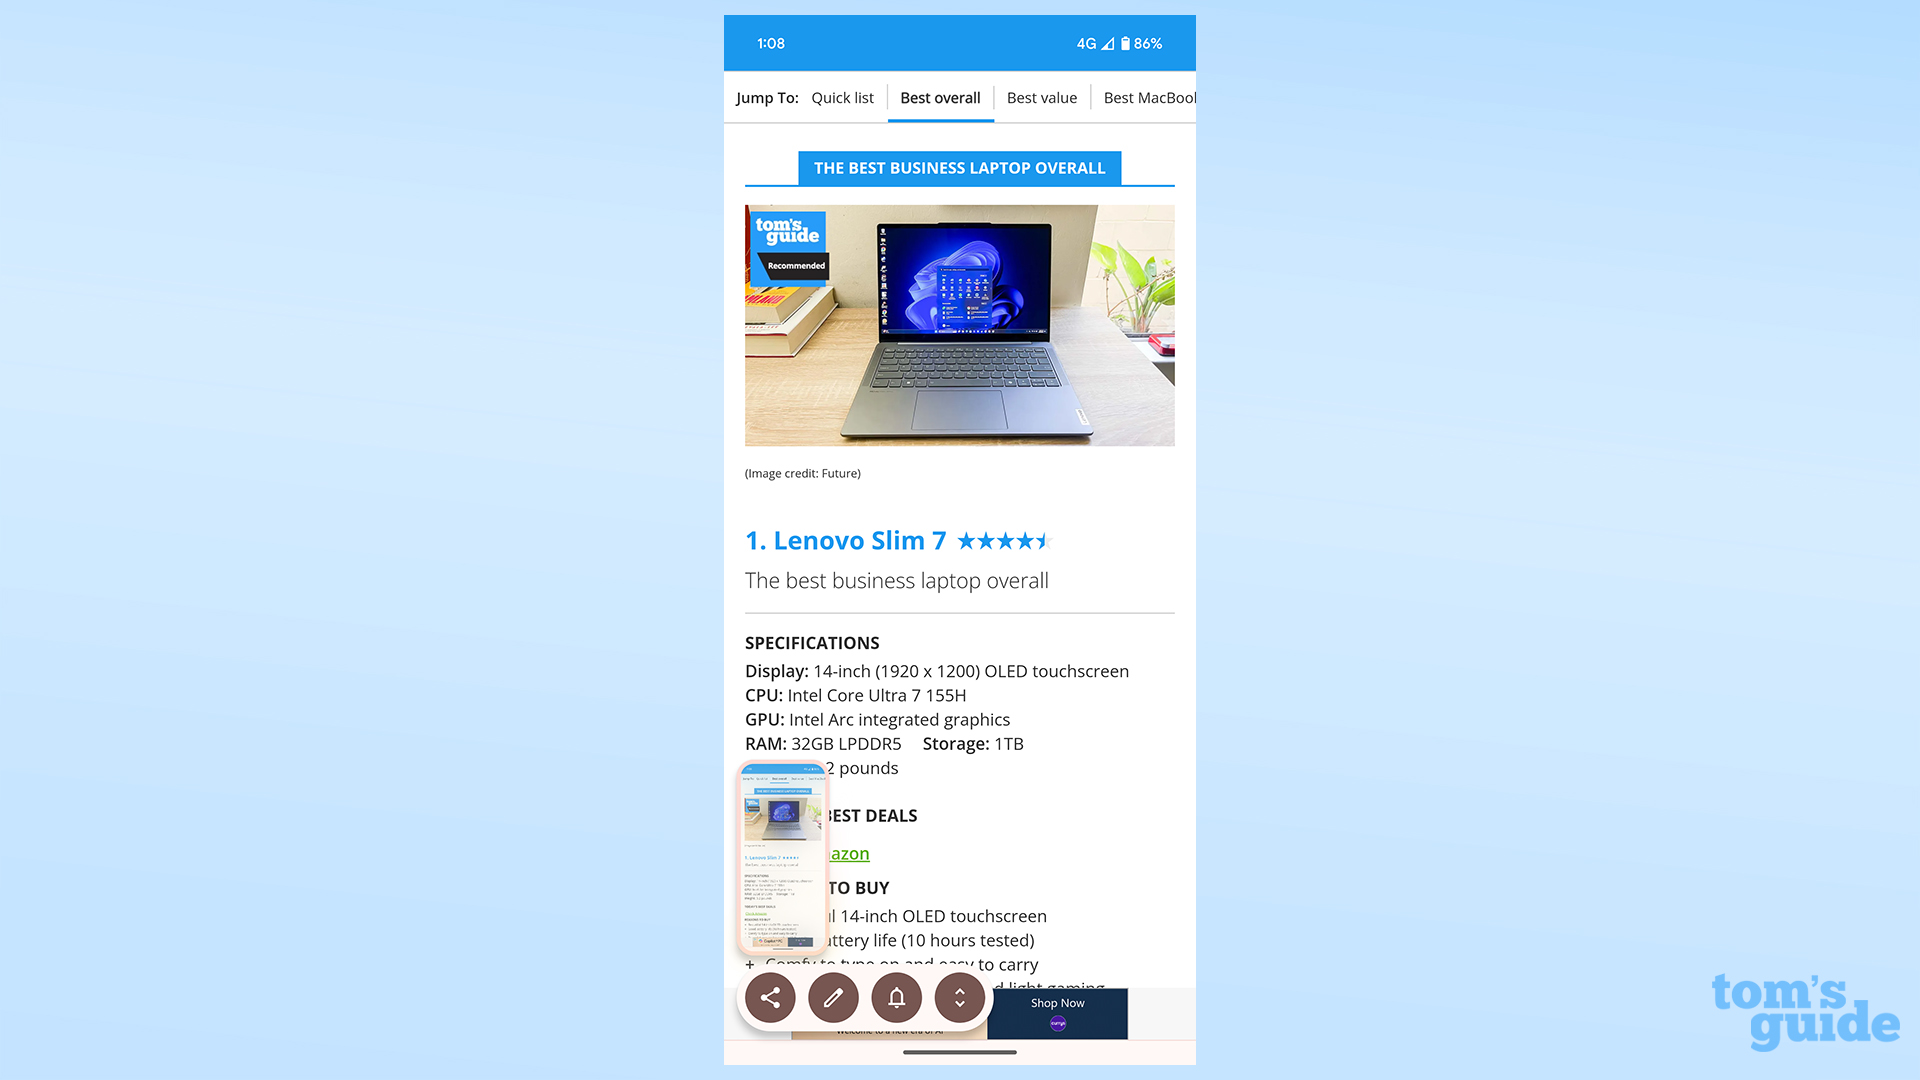
First off, you're going to need some screenshots for the app to gather and analyze. Do this by pressing the Pixel 9's power button and volume down button at the same time, or by swiping up from the button of the screen and holding to open recent apps, swiping to the app you want to screenshot and then tapping the Screenshot button on the bottom left (or the select button to capture a specific portion).
In this example, I'm screenshotting TG's no.1 recommended business laptop, since I've heard good things about these new Lenovo devices and may want to check back when it's time for an upgrade. That's a prime example of the sort of thing you may want to use the Pixel Screenshots app to keep track of.
2. Open Pixel Screenshots
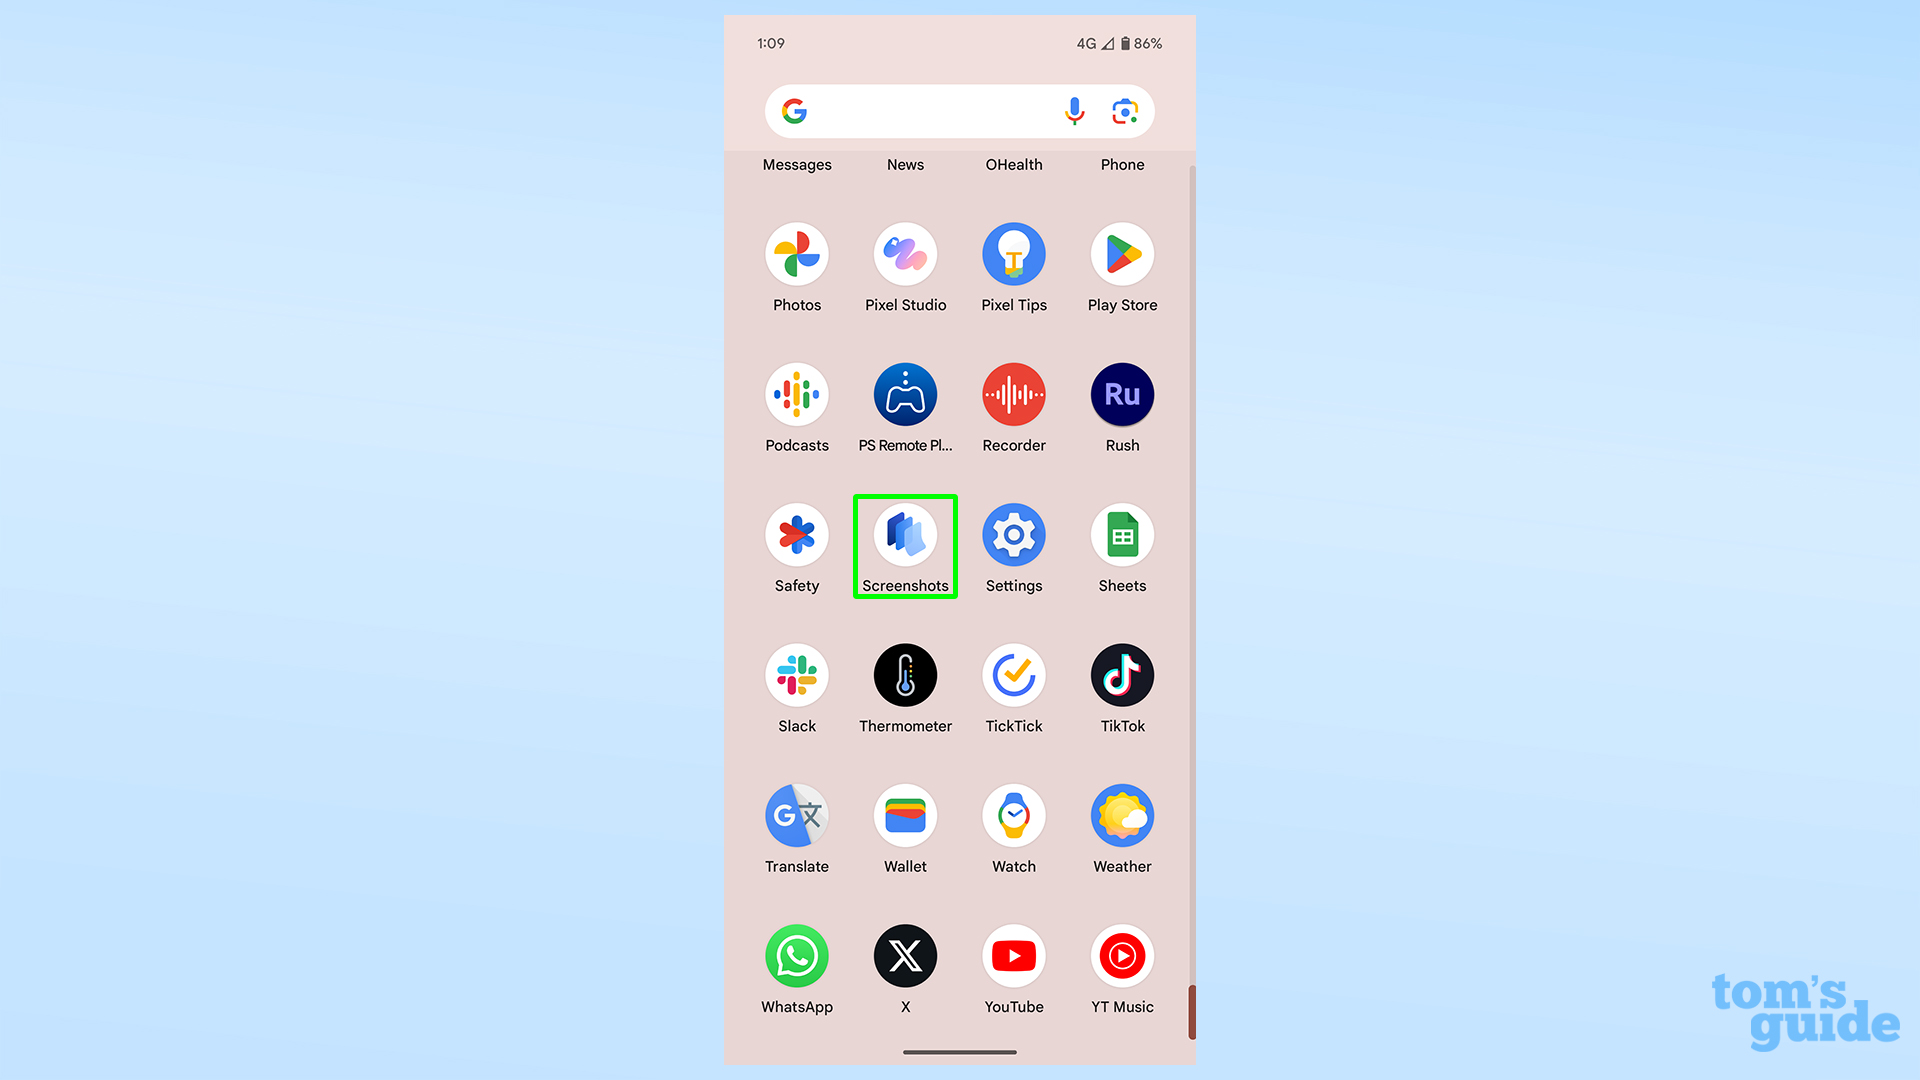
You can look at your screenshots in the folder in the Google Photos app, but that isn't any different from taking screenshots on any other Android phone. You need this particular app from your app library to try out the new smart way of doing things.
3. Add additional images from Photos or the camera
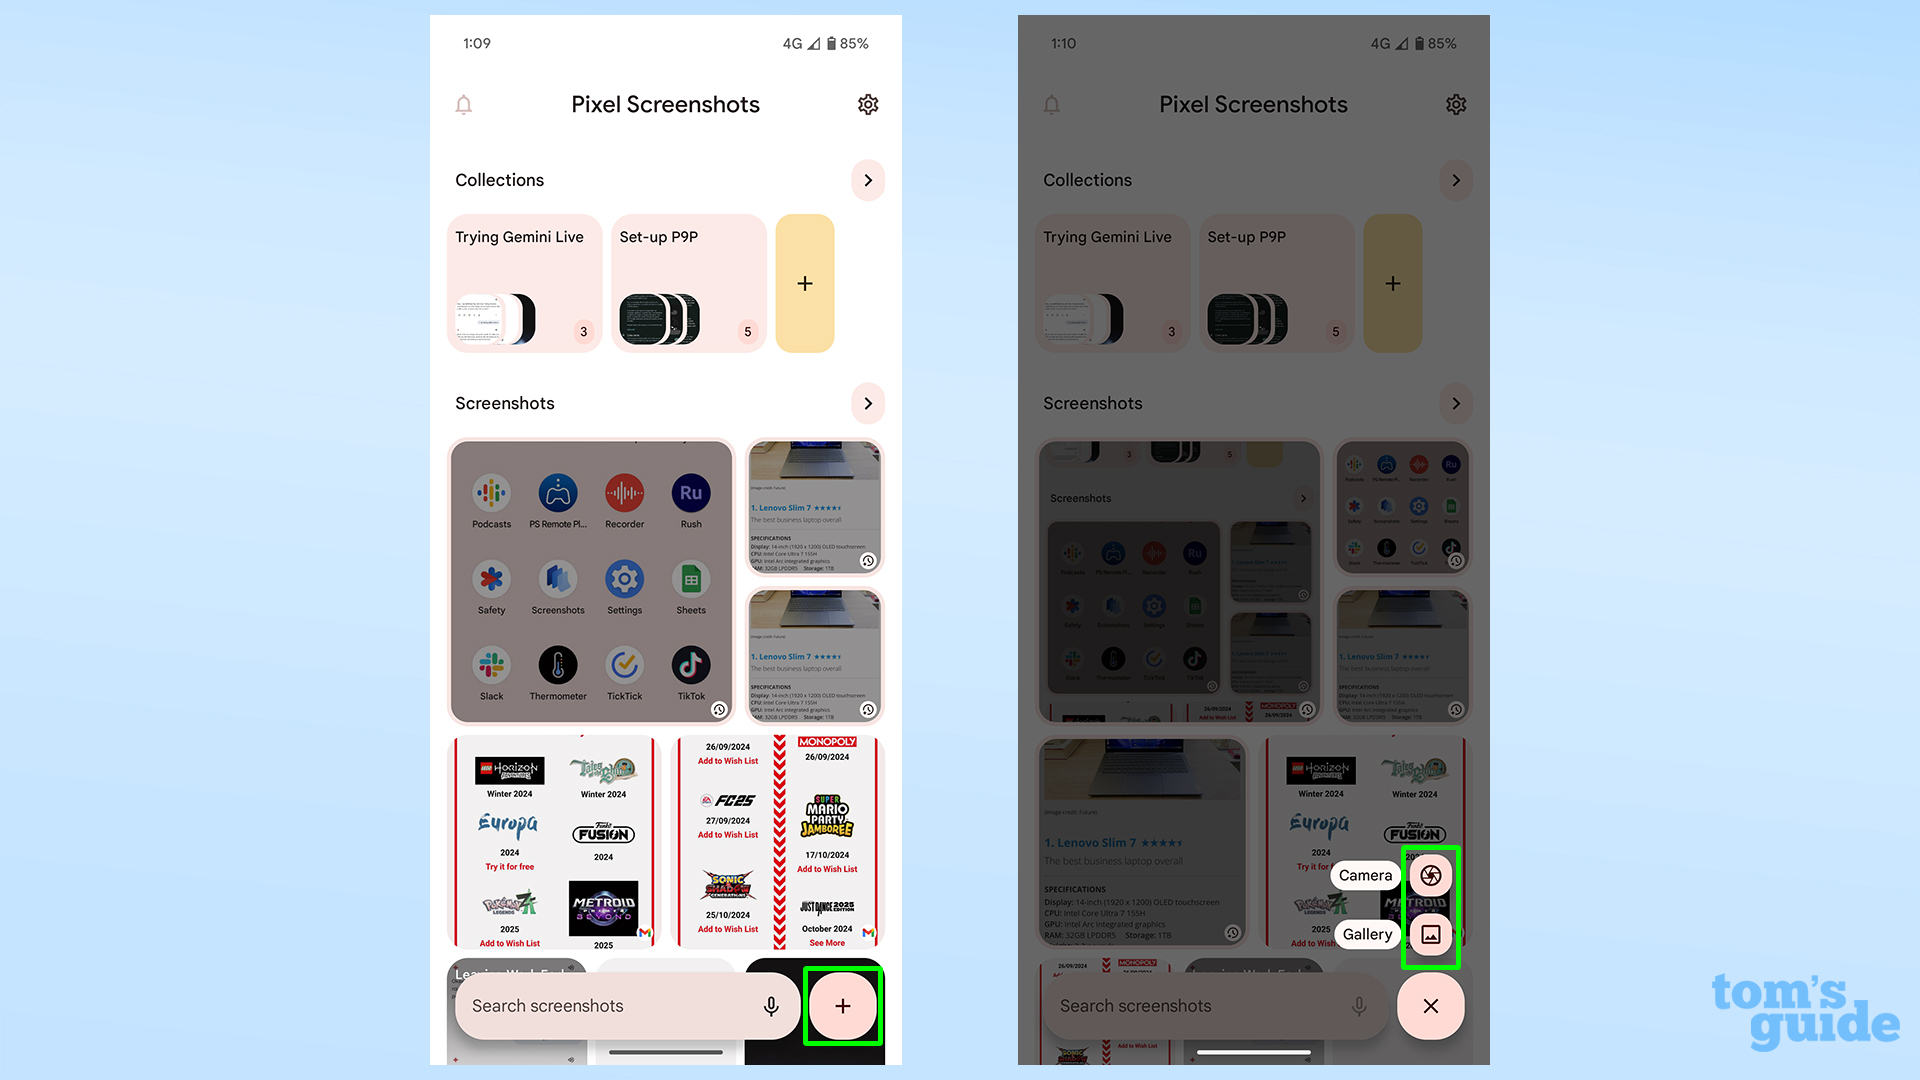
If you need to add something from your gallery, or take a photo for the Screenshots app to keep and analyze, use the plus button in the bottom right corner. By default, all your screenshots taken since you moved into the Pixel 9 will appear here.
4. Examine a screenshot and back it up if needed
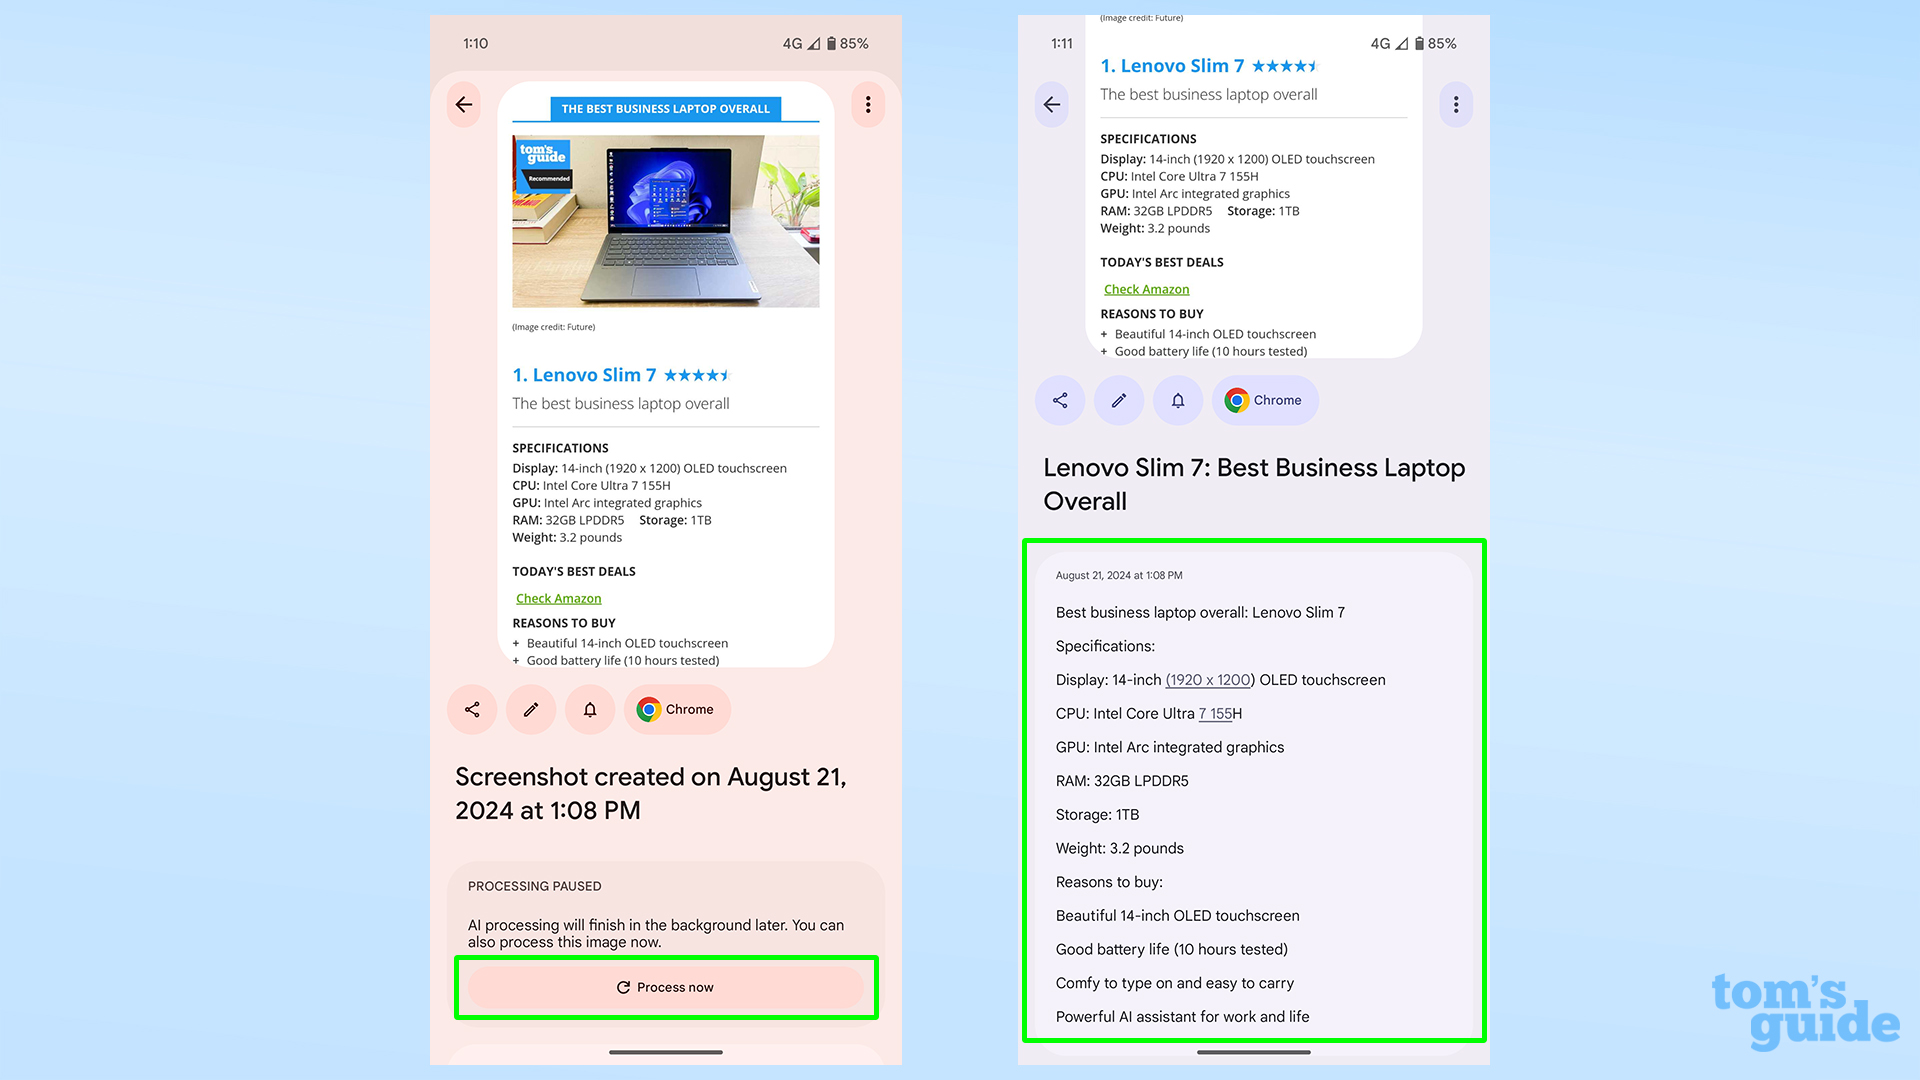
By tapping a screenshot, you open it up for a closer look. Here, you can also tap the Process screenshot button if the app hasn't done it already. By doing this, you enable all the advanced features for Pixel Screenshots. Note that processing requires a data connection, so think carefully if you need the processing done now, or if it can wait until you're on WiFi.
5. Set a reminder
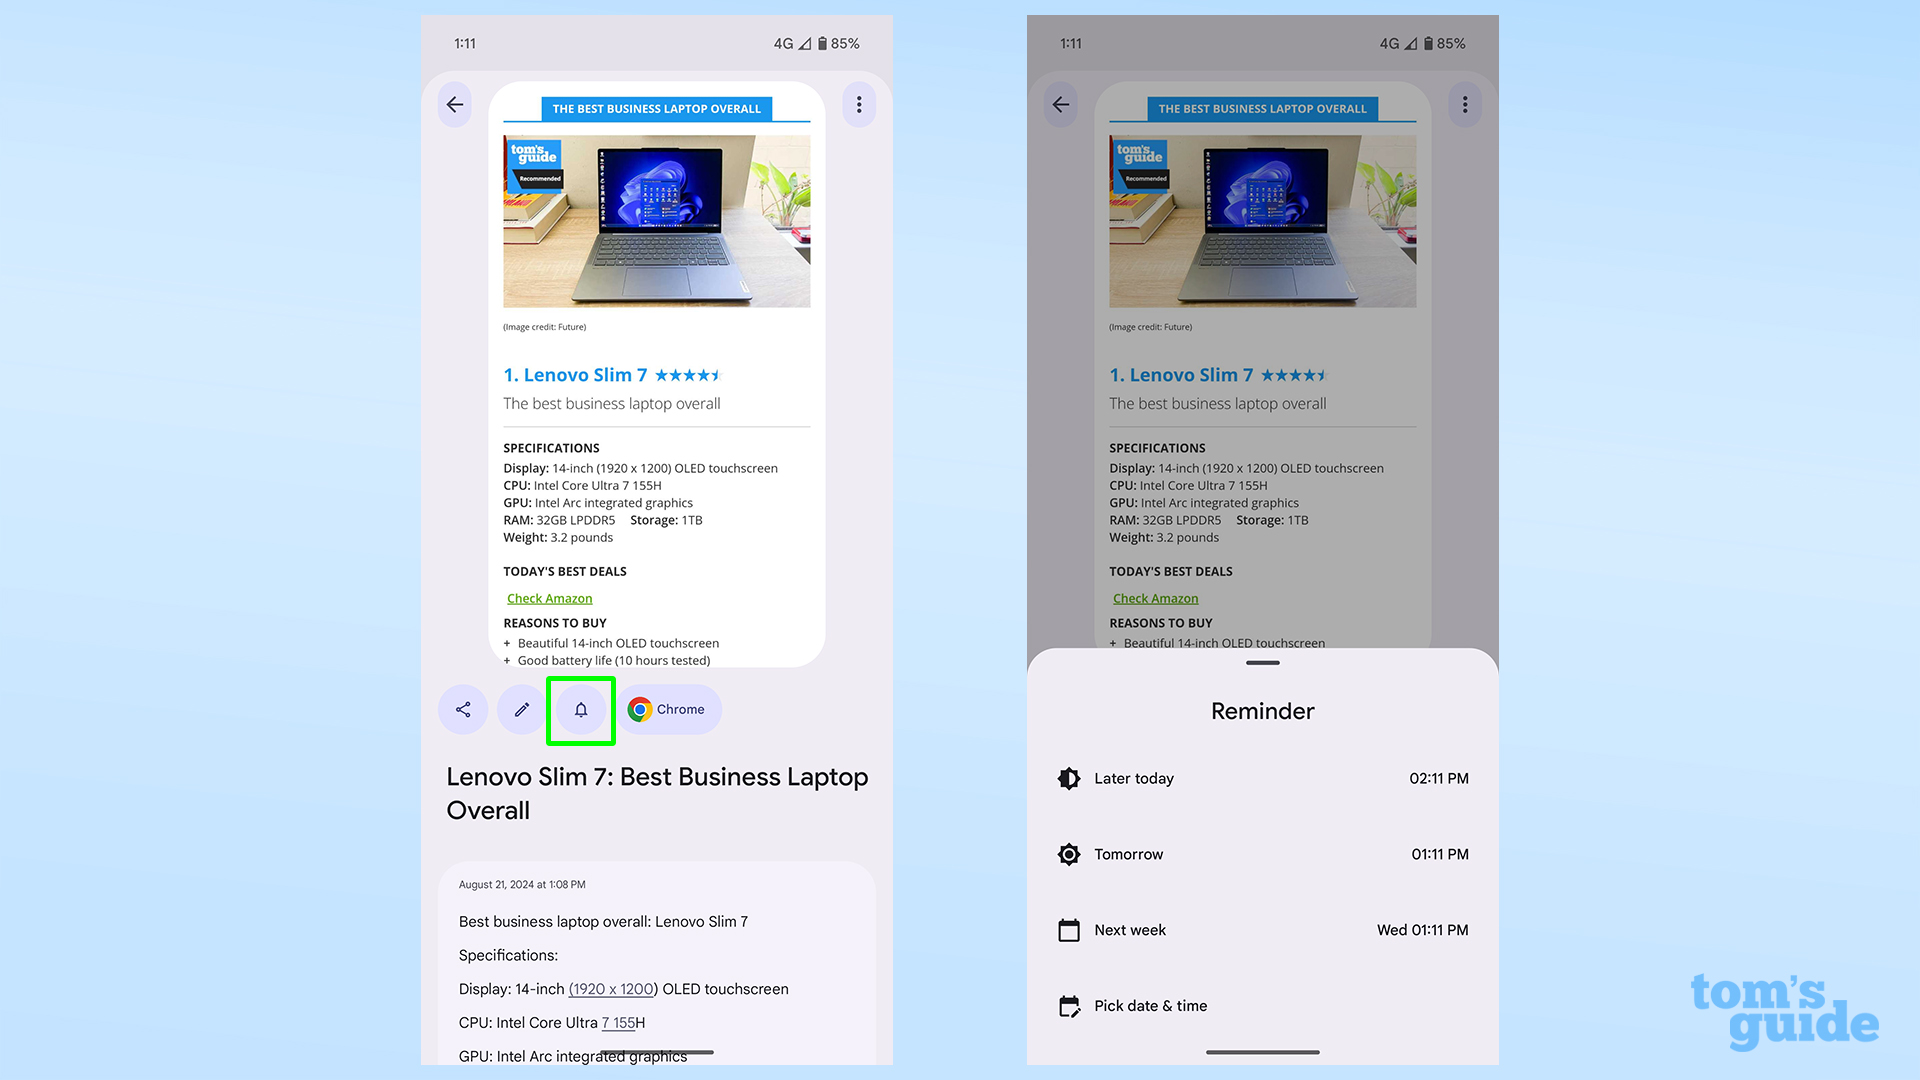
With a screenshot open, Tap the bell icon, then select a preset reminder or enter your own to have the app flag up a screenshot at a particular time. This can be handy if you've taken a screenshot with a date and a time and you don't want to miss the event. Or you want to remind yourself to share a screenshot with someone later on.
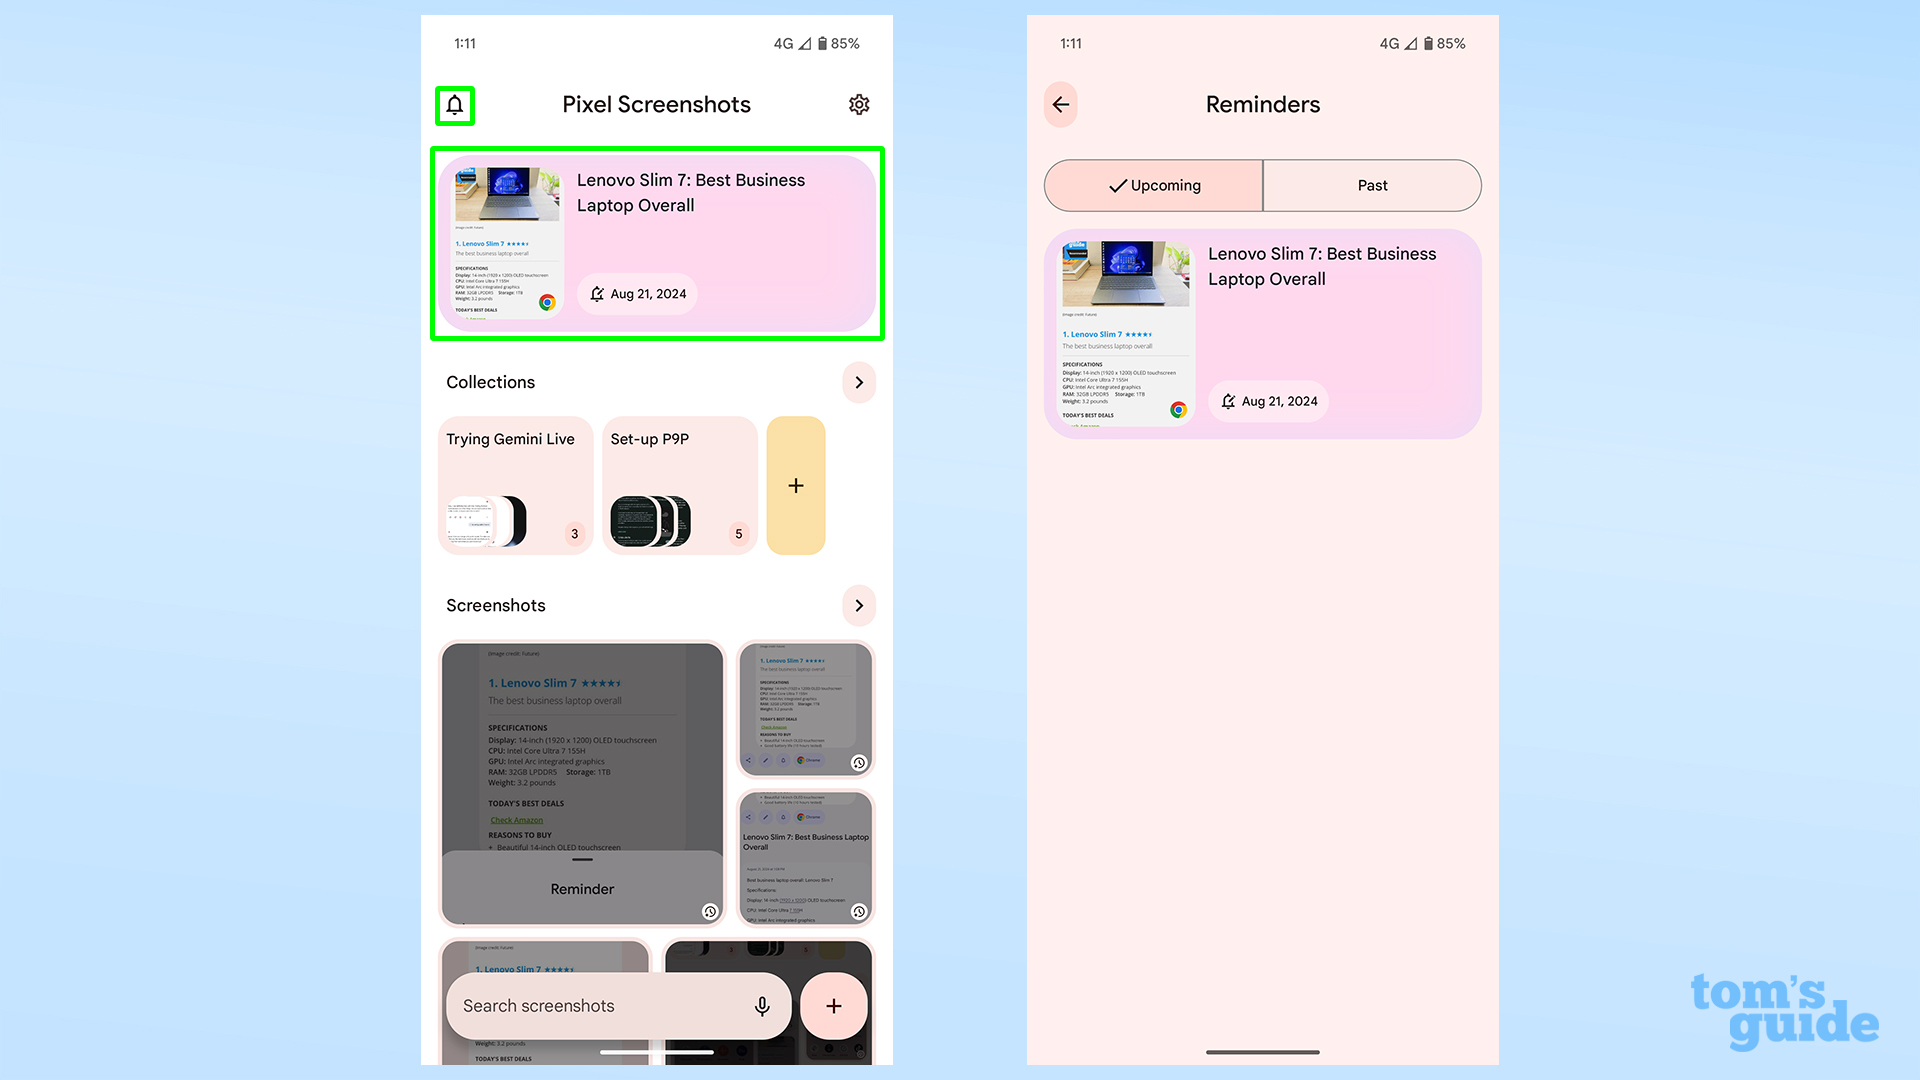
Once set, you can check your set reminders by tapping the bell icon in the top left corner of the main menu, or look through them at the top of the app's interface.
6. Annotate, edit, share or delete your screenshot
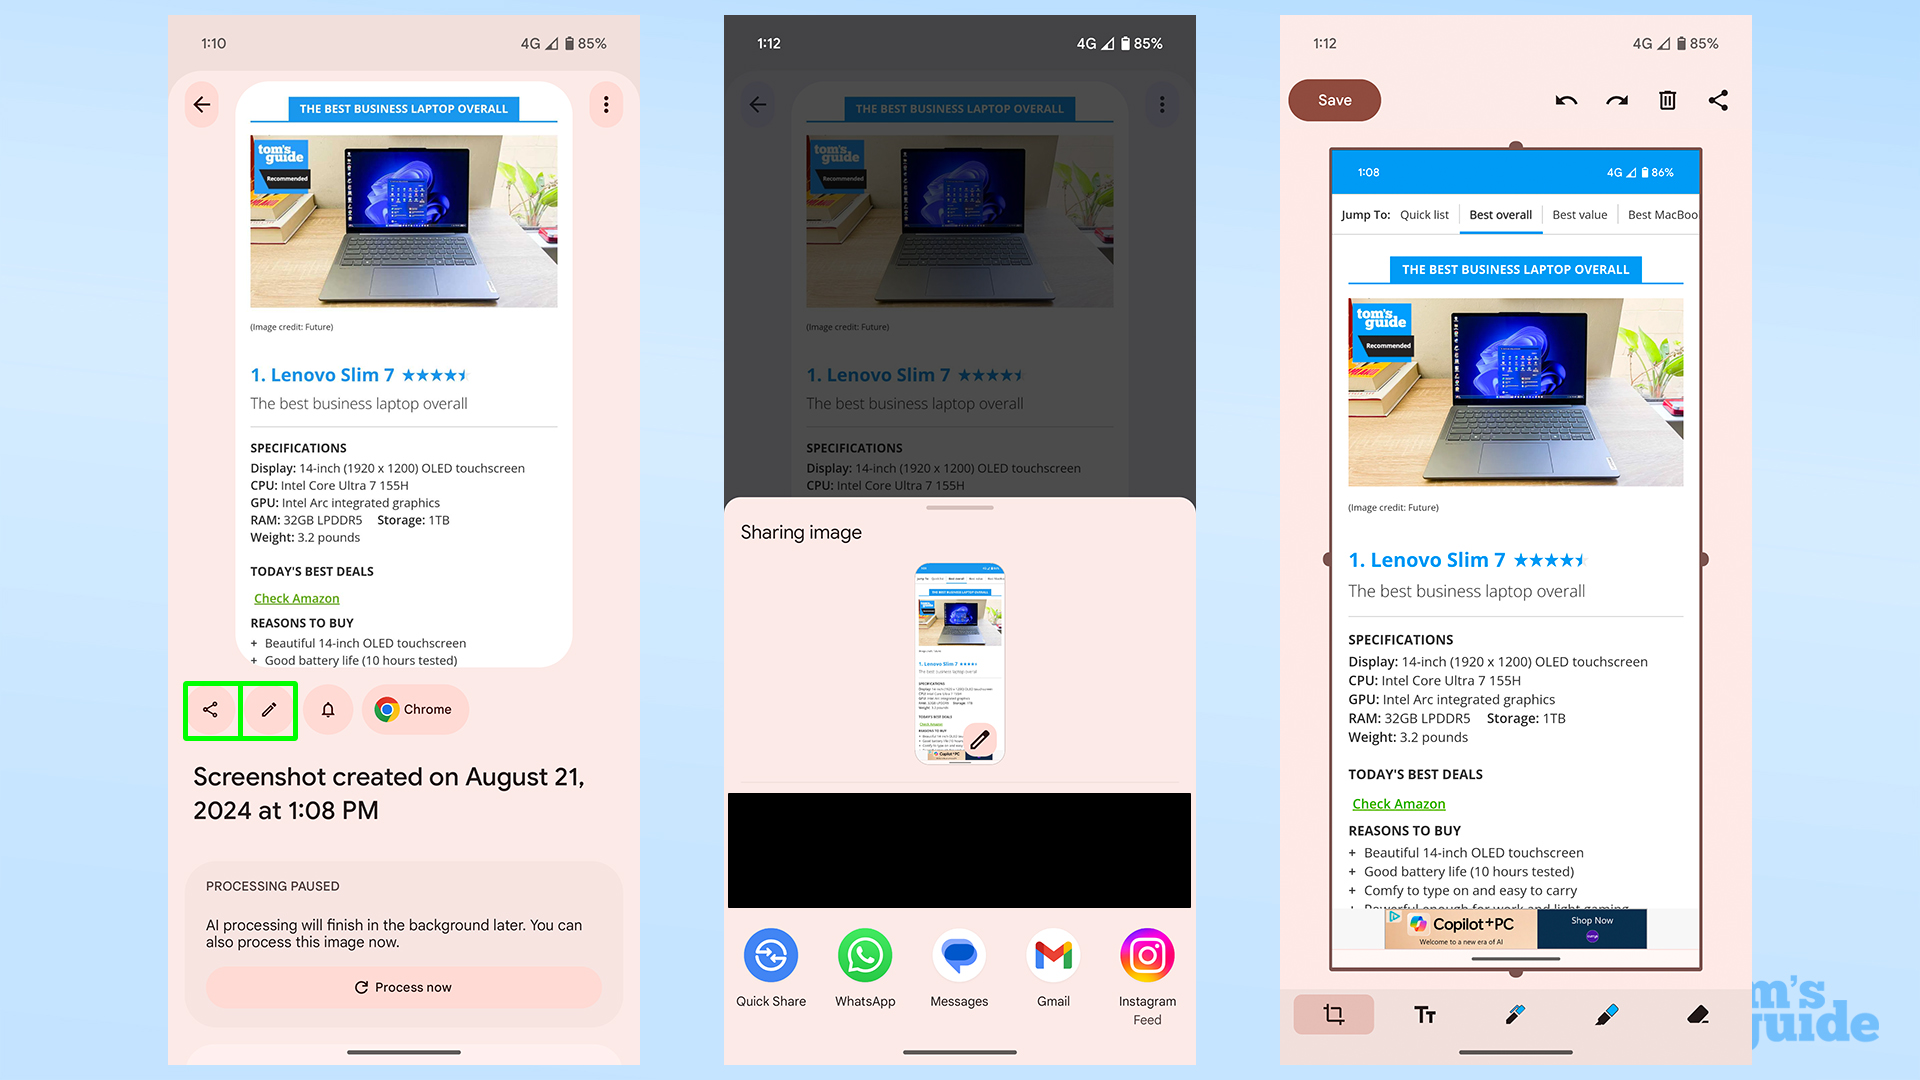
Again with an open screenshot, tapping the pencil opens your editing tools such as markup or cropping, while tapping the connected dots opens the share sheet.
You can also add notes by entering them in the text box below the image and its AI summary, if it has one.
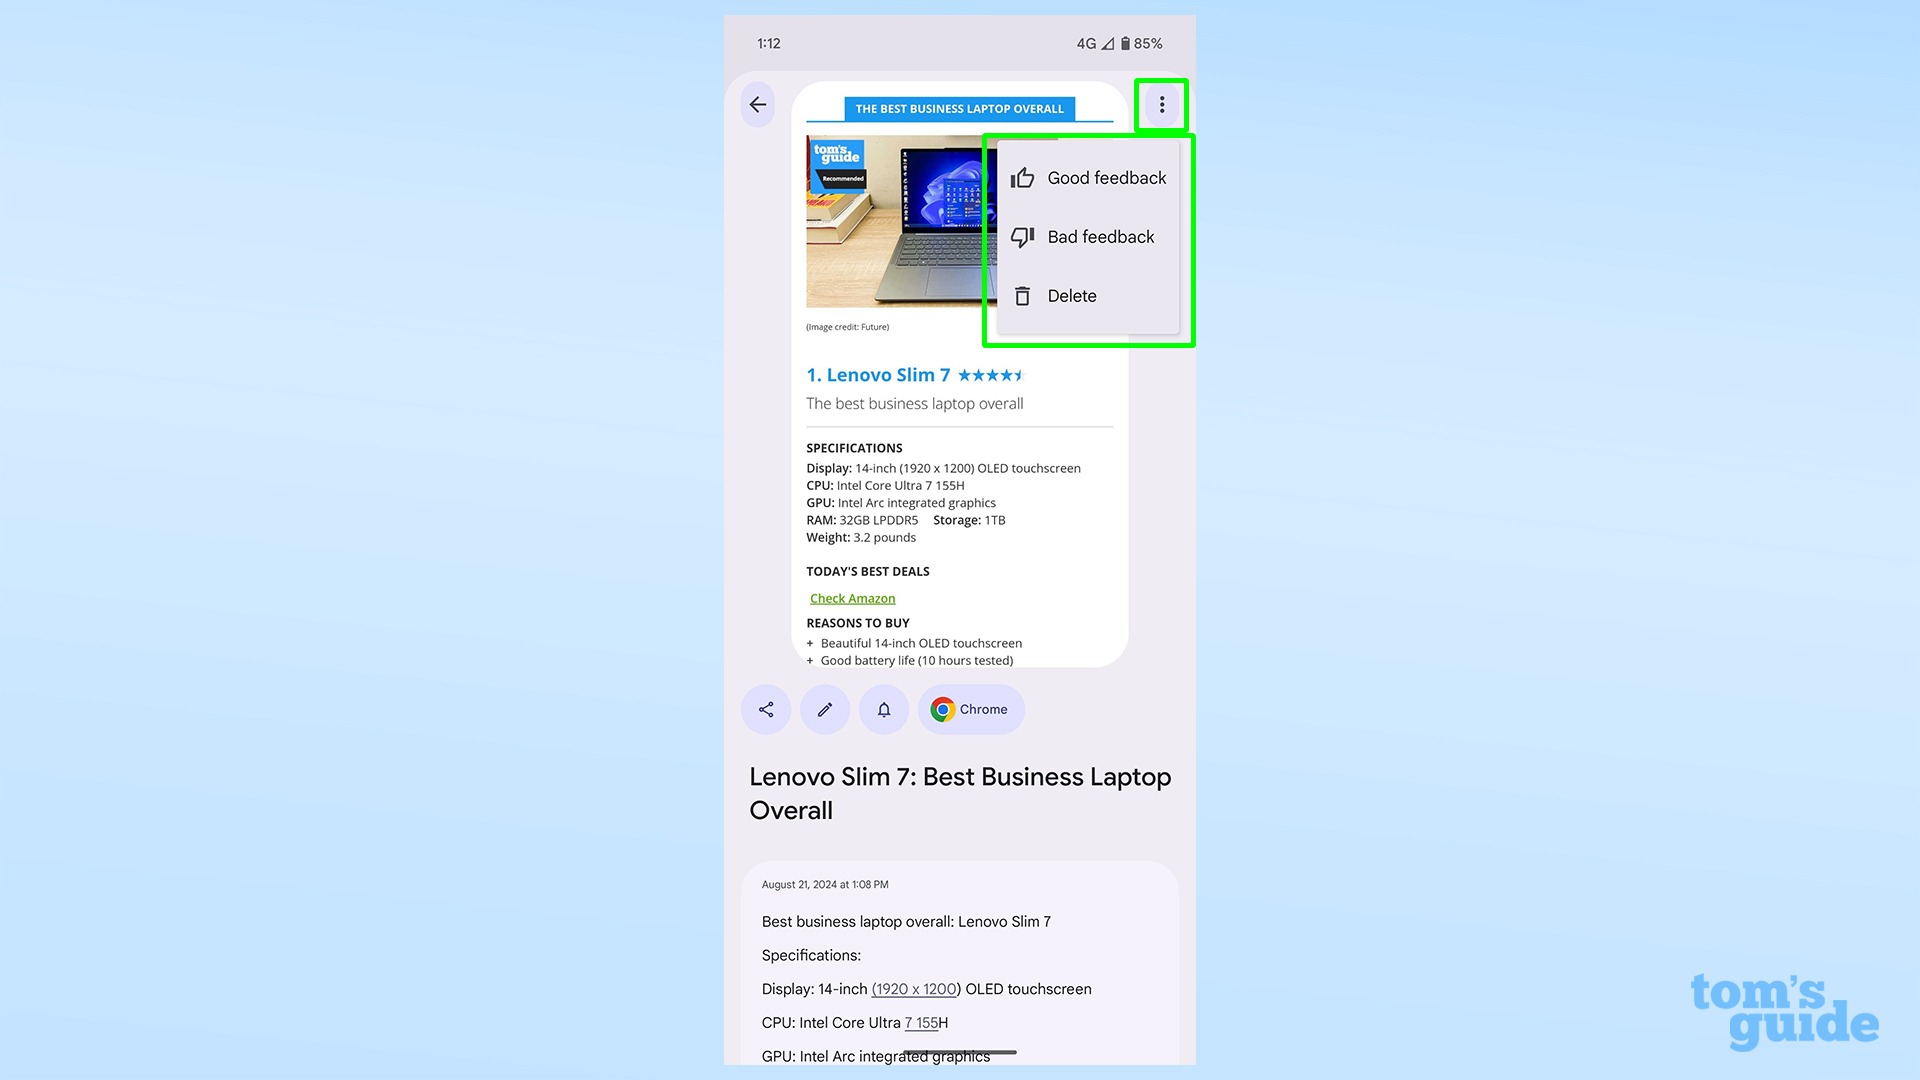
If you want to get rid of a screenshot, tap the three dots in the top right and select delete. This removes the screenshot from your phone completely, not just from the Pixel Screenshots app, so be careful.
7. Add screenshots to a collection
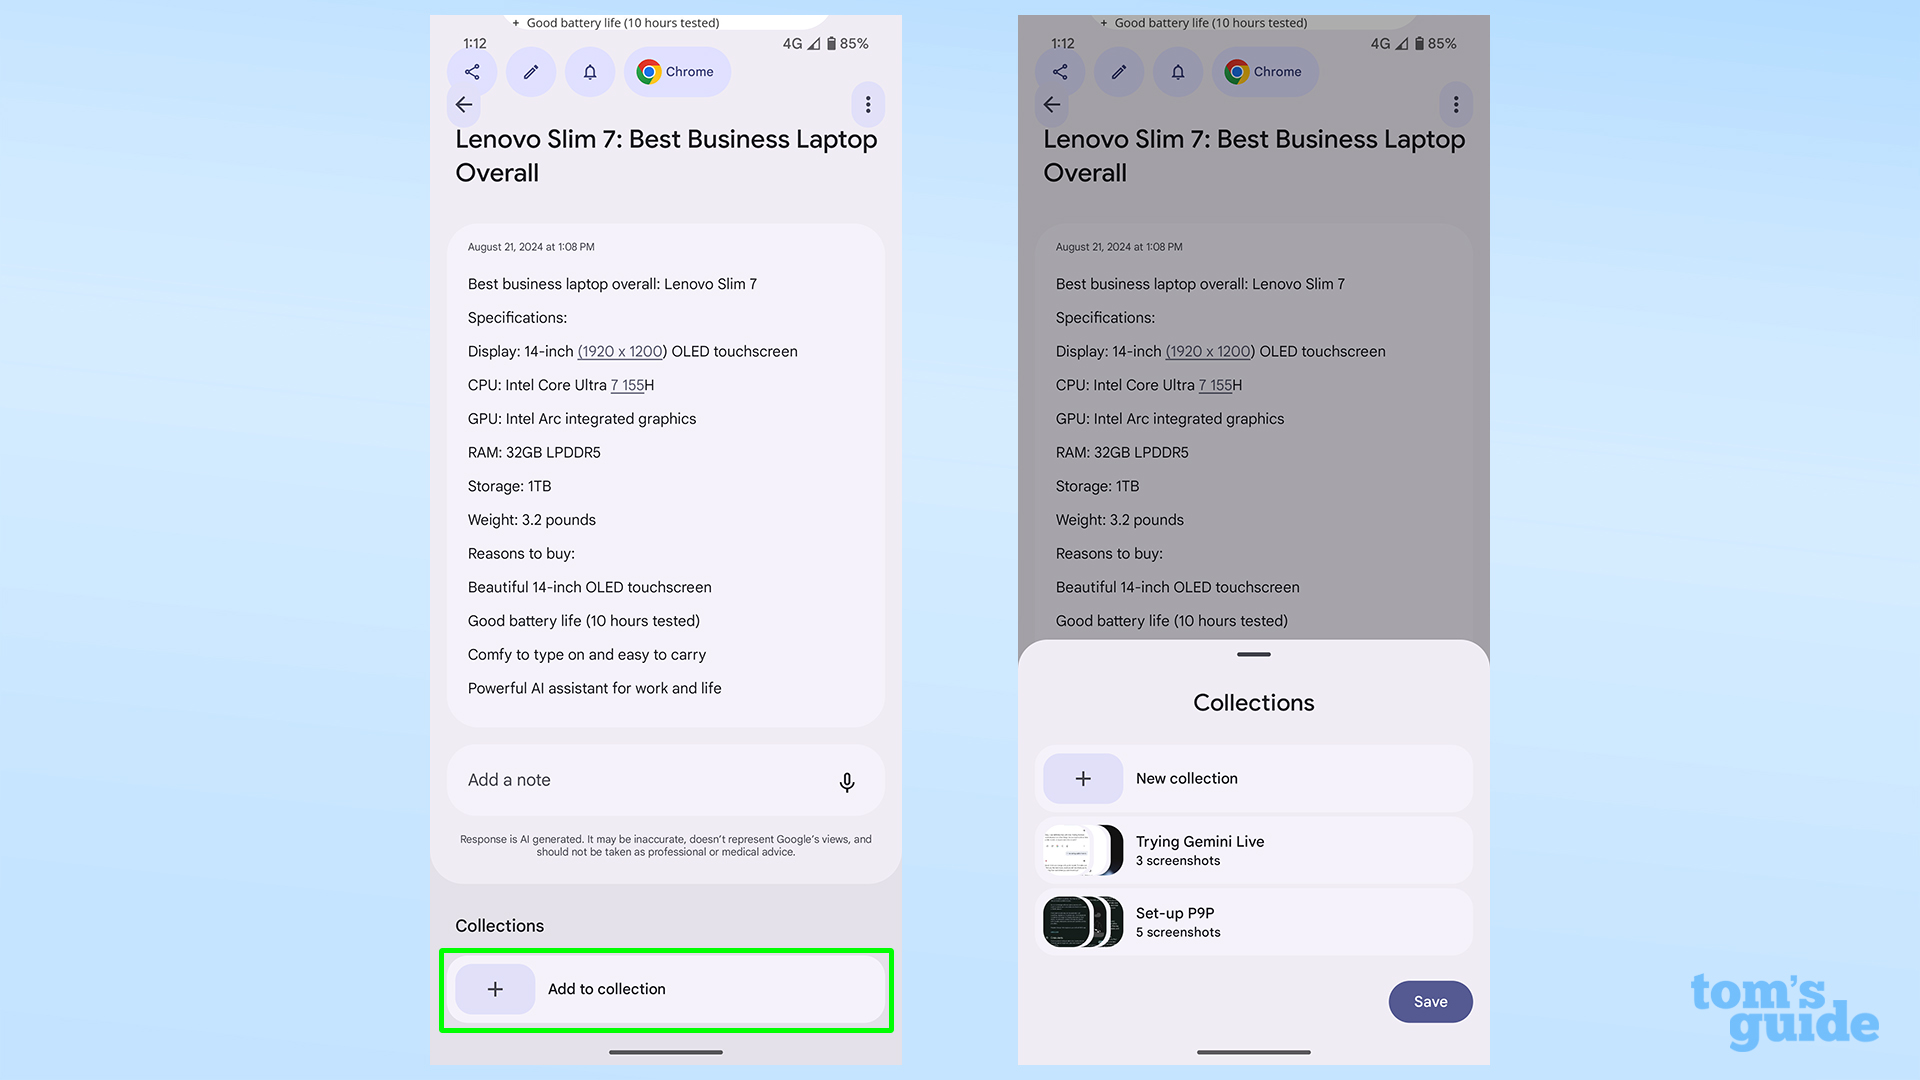
The Collections menu allows you to arrange your screenshots in a more orderly fashion. With a screenshot open, scroll to the bottom of the page and select Add to a collection, then pick a collection or make a new one.
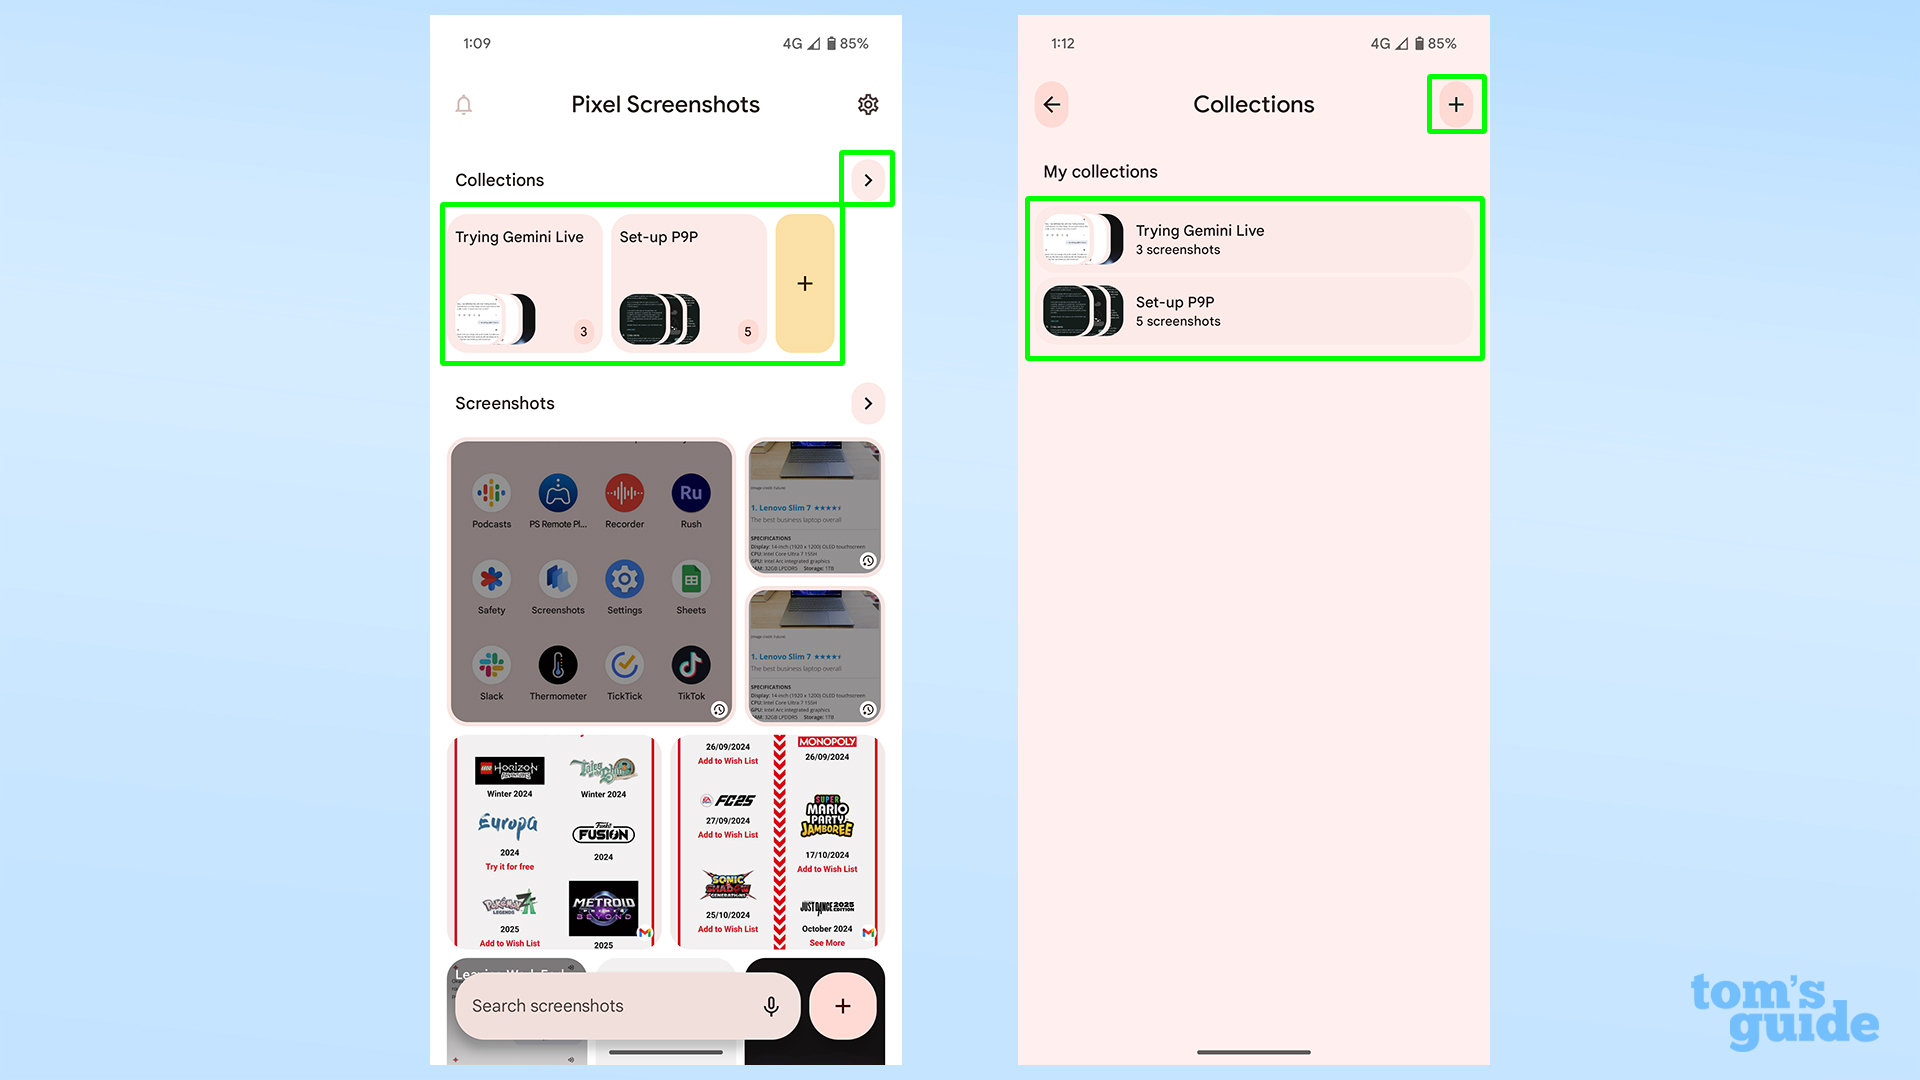
From the main menu, you can see your current Collections toward the top of the screen. Tap one to open it and view its images, or to add a new one. You can alternatively tap the arrow by the Collections heading to show all available collections.
8. Search your screenshots
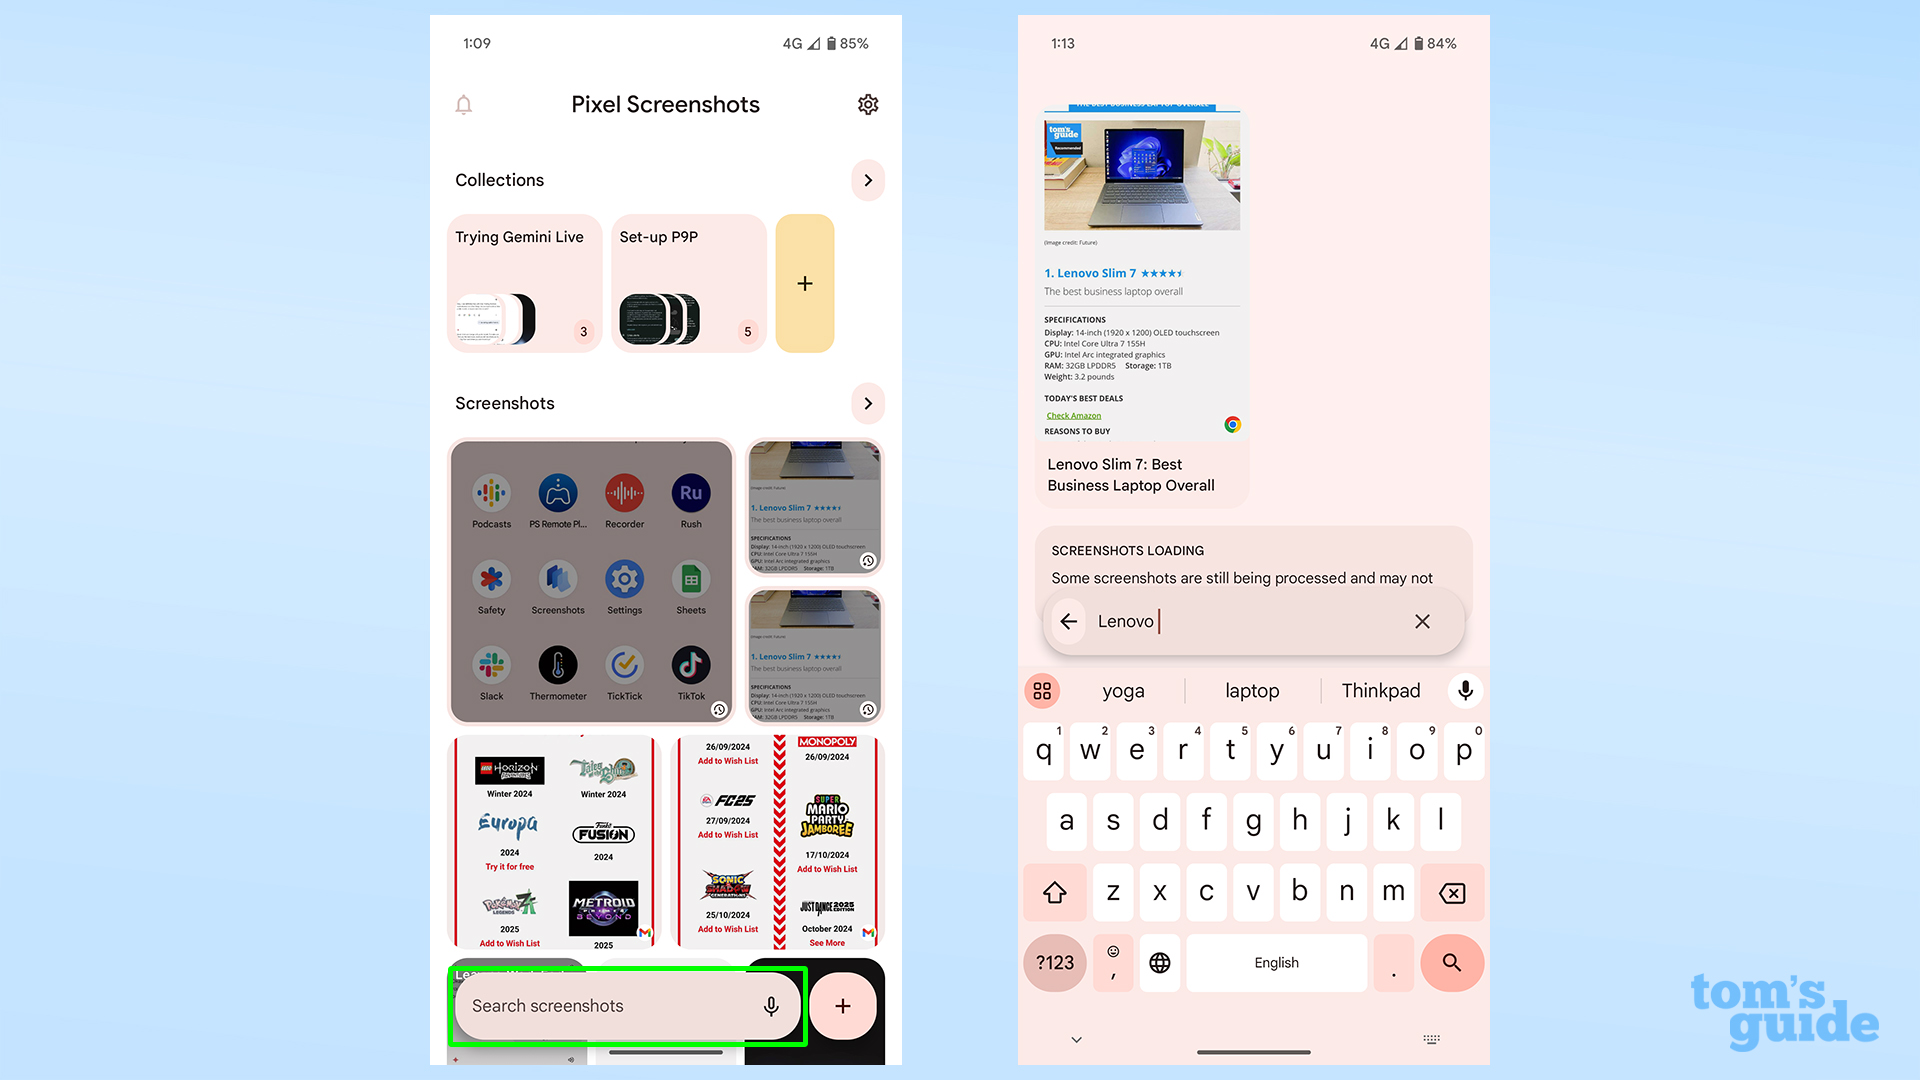
Use the search bar to look for text within the screenshots, either by typing or saying your query.
9. Enable on-device AI search
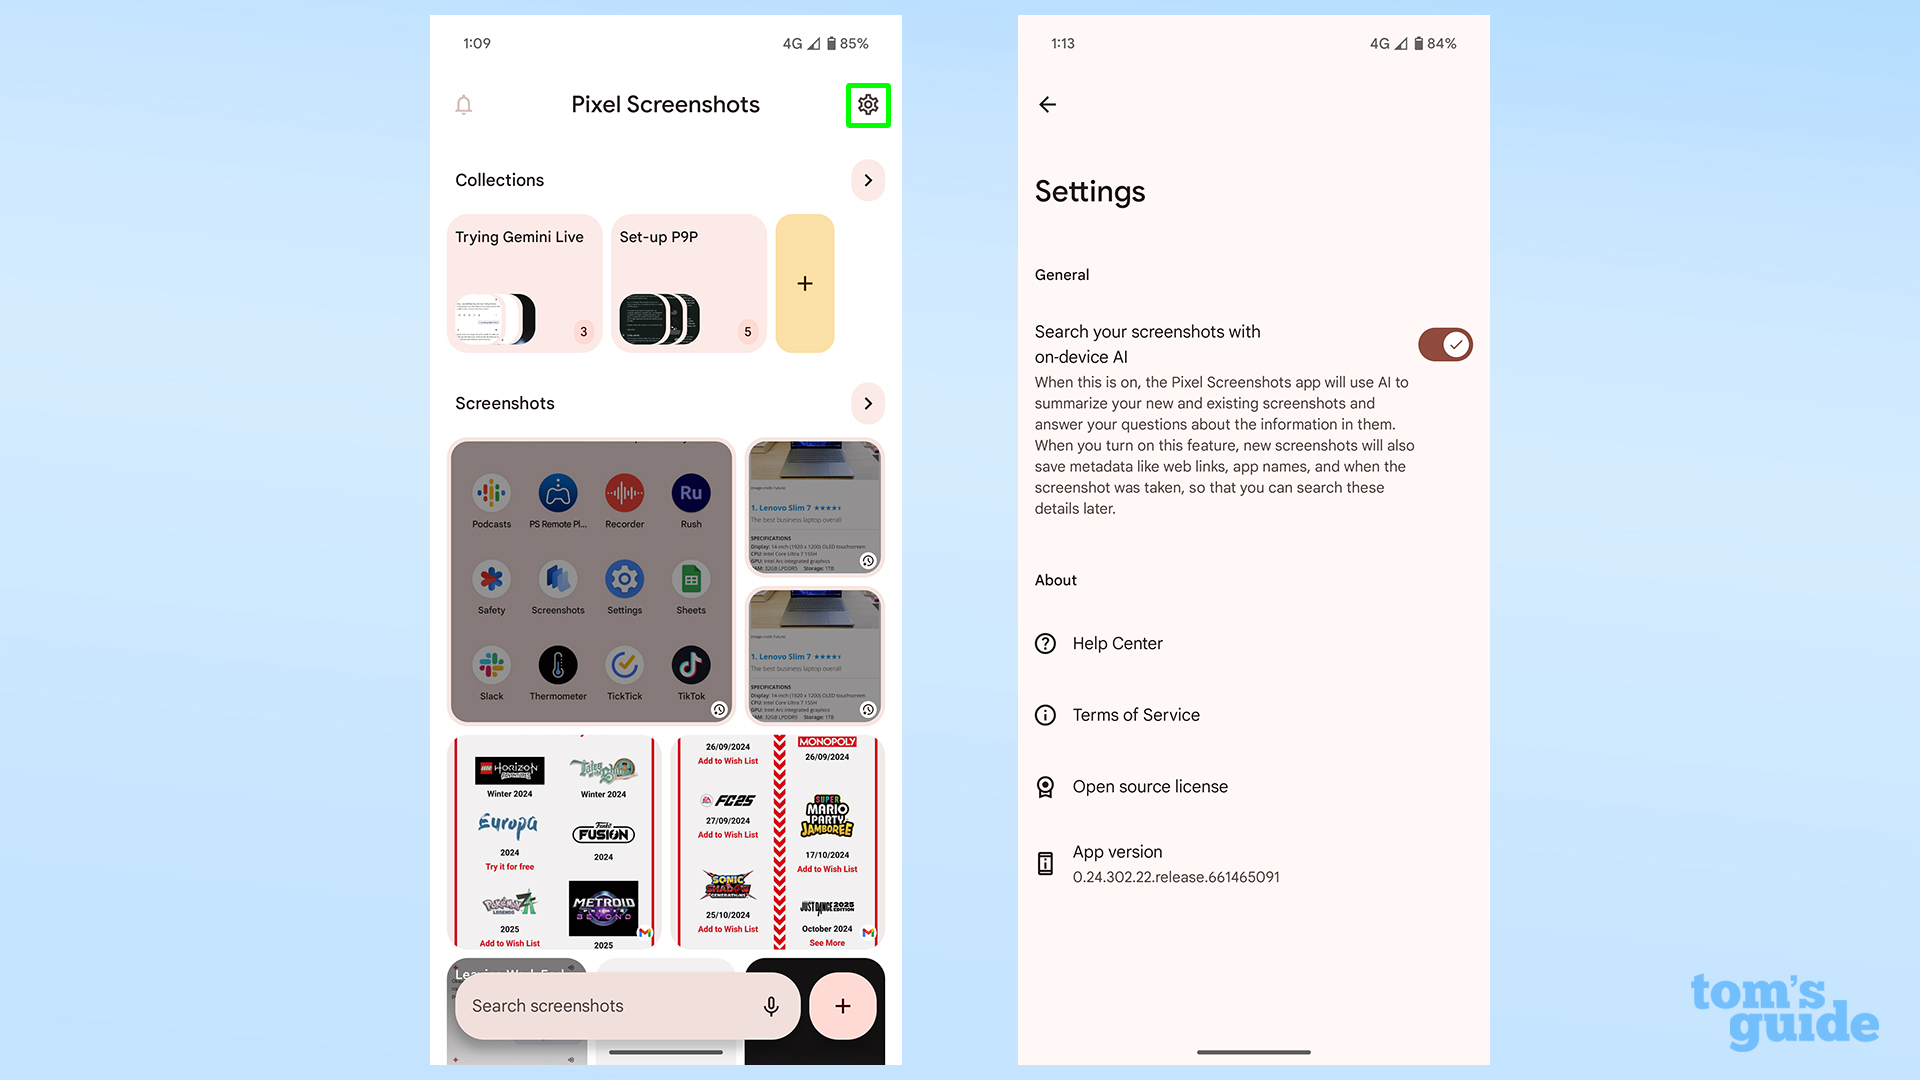
If you don't want your Pixel's on-device AI looking through your screenshots, or alternatively want to re-enable it, open the settings by tapping the cog in the top right and toggle it on.
10. Change your view
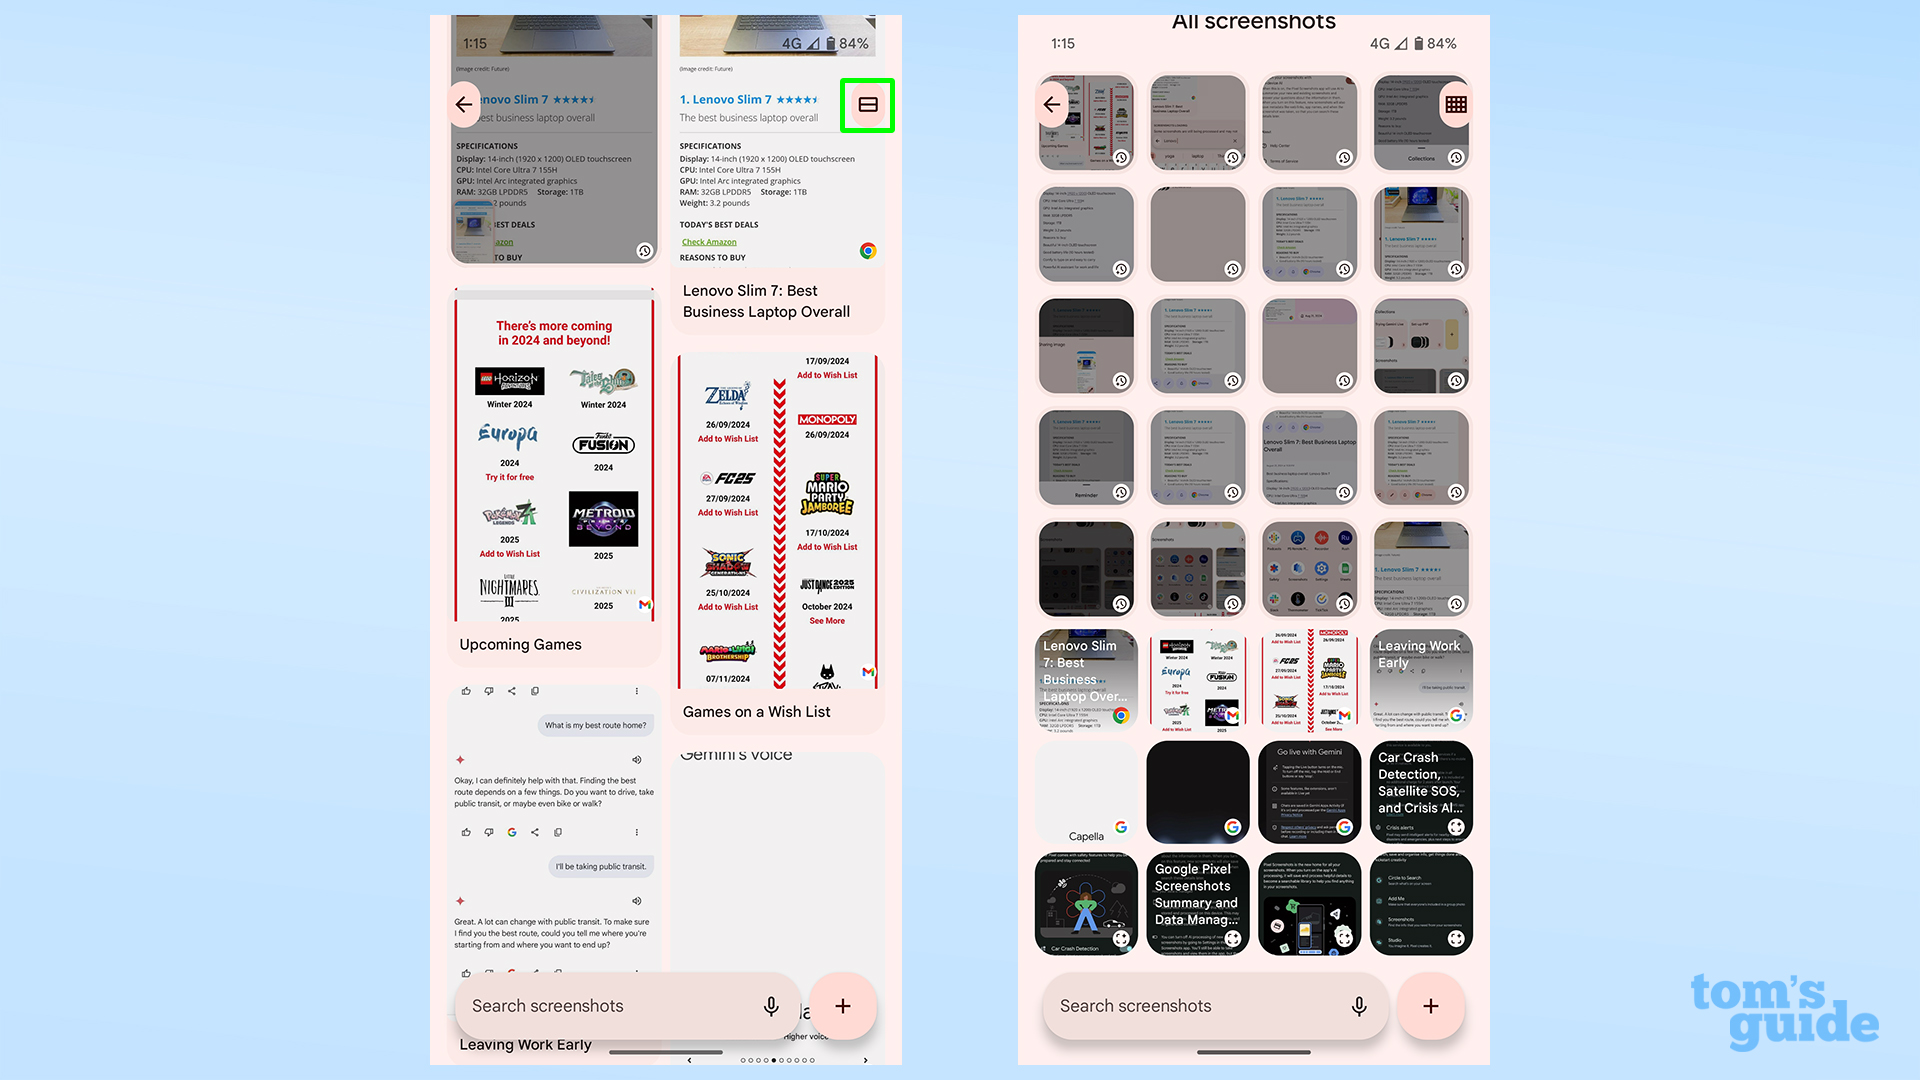
When viewing all screenshots by tapping the arrow next to the Screenshots heading on the main menu, you can choose how dense you want the images to appear. Pictured are the least and most dense options.
This is but one of the Google Pixel 9's unique tricks. And we can show you more if you like.
You can use our guide on how to use Reimagine on Pixel 9 to learn how to edit images with the help of generative AI, or use Pixel 9 Add Me to include yourself in photos you'd otherwise miss out on appearing in. And don't forget that the Pixel 9 Pro models feature a temperature sensor just like the Pixel 8 Pro did, so you can measure your body temperature with a Google Pixel with ease.


