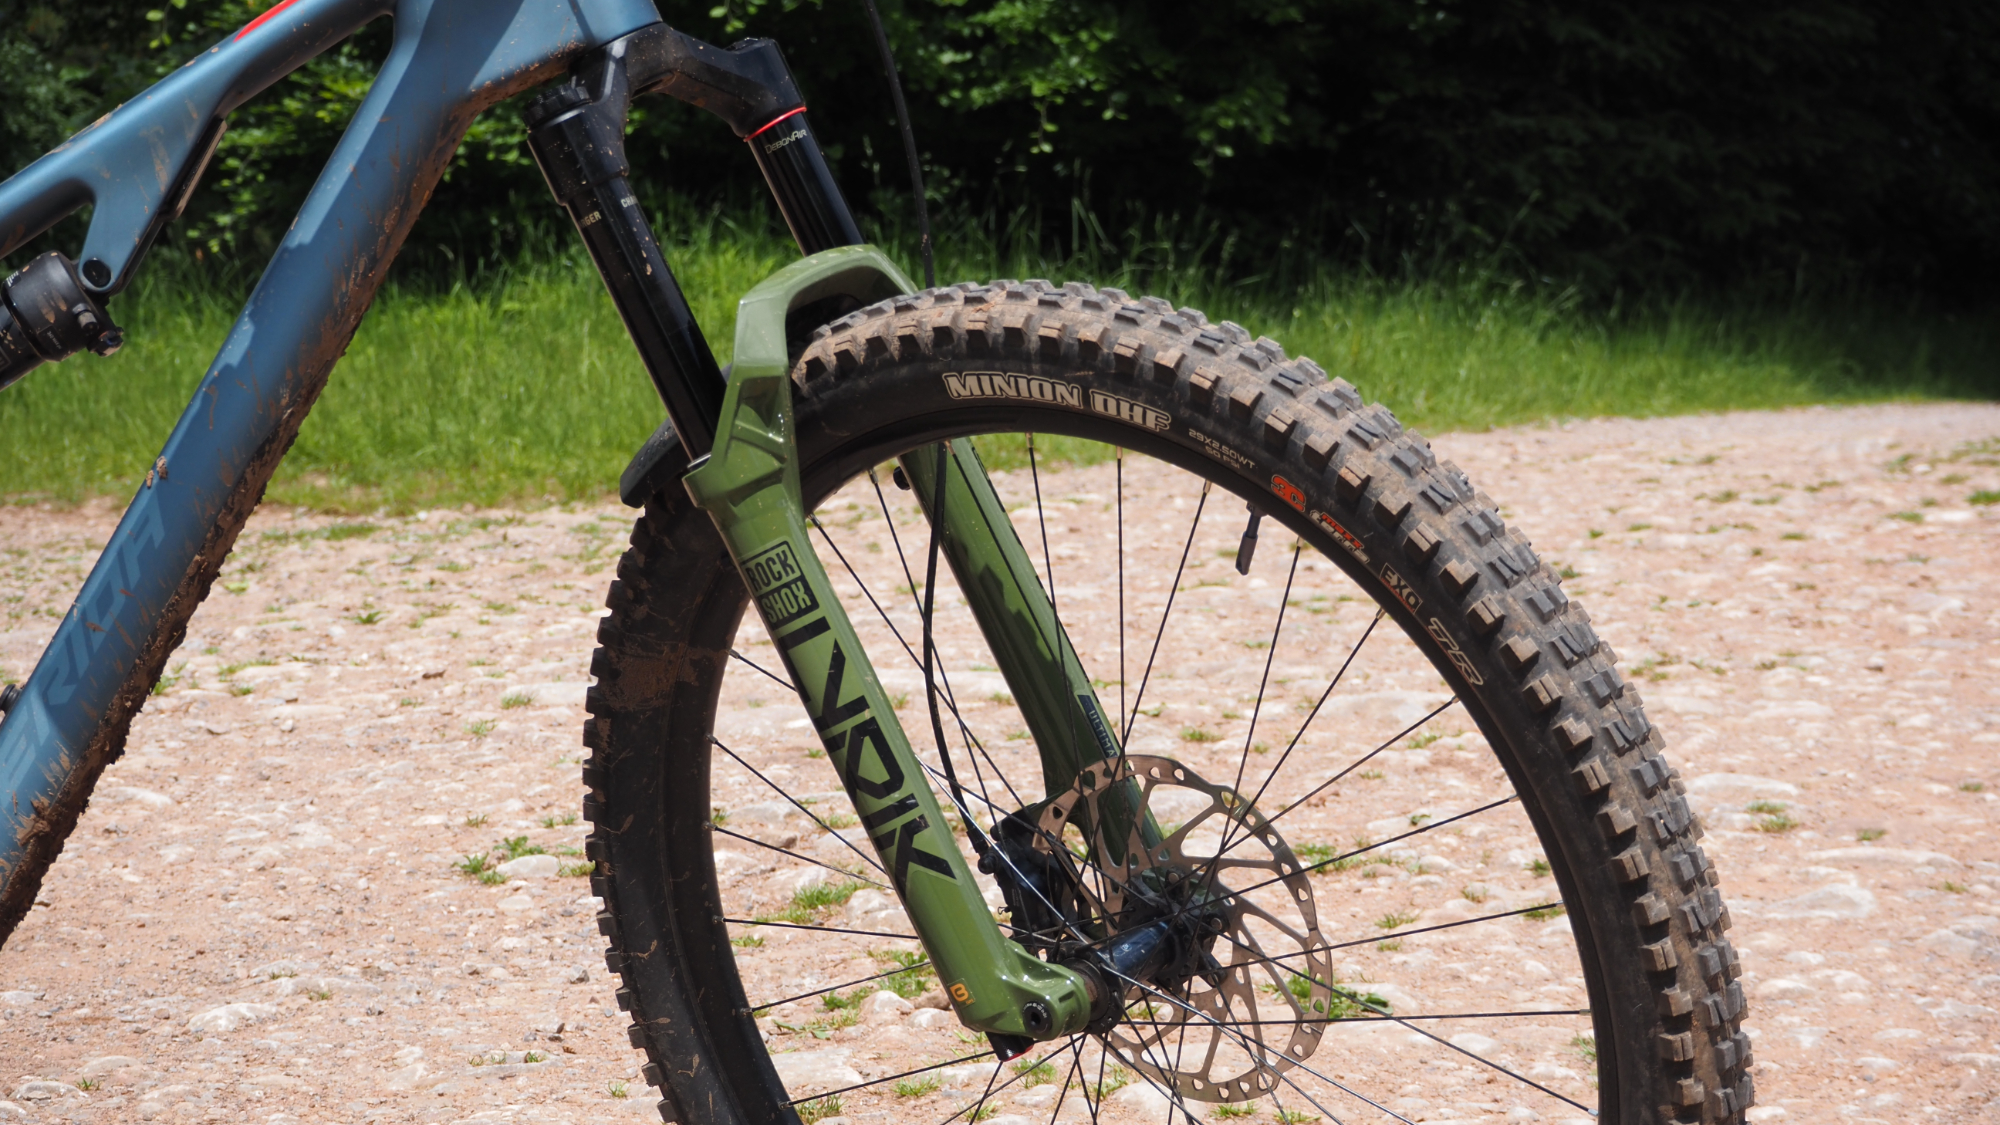
Mountain bike suspension has a whole language of its own, and some of it seems to make no sense at all. Learn how to talk fork with our experts though and you’ll know what everything in your front suspension is called and what it does. We’ve also included the common descriptors of fork performance and problems, complete with advice on how to adjust your fork so it rides perfectly for you.
You can navigate your way through the terms using the side navigation, we've also linked the explanations where relevant, so click on the hyperlinks for further info.
For more on forks, see our best mountain bike forks guide and A to Z of MTB suspension.
Air spring
Spring formed by a sealed air chamber. Lighter than a coil spring and can be easily adjusted by altering the air pressure. Will naturally ramp up in resistance deeper in the stroke though and can theoretically change spring rate if it gets really hot when working hard. If you want a basic idea how it works, stick your finger over the end of a pump and try and press it down.
Arch
The arch that joins the two lower legs together. Normally on the front of the fork, but Manitou arches have always been at the back (see the ‘WTF Manitou’ section later) and Fox copied that layout on their latest AI-designed superlight XC fork.
Axle to crown height
The overall length of the fork from the axle to where it connects to the bike. Not all forks of the same travel have the same axle to crown, so check the measurement if swapping forks in case it upsets your geometry. If you can get a bit more travel in for the same length, that’s a win though.
Bladder
Damper that uses a stretchy rubber bag (the bladder) to let the oil contract and expand as it flows through the system. Simple and effective but can split.
Bottomless Tokens
The RockShox name for volume spacers. AKA, internally fitted plastic cylinders that are used to adjust how progressive the spring rate of your fork is.

Bottom out
The behavior of the fork as it reaches full travel. On crude forks the fork can literally slam metal on metal at full stroke. Most forks now use at least a rubber bottom out bumper to soften the blow. You can reduce the likelihood of bottoming out by increasing the air spring pressure or adding more high speed compression damping.
Bottom out bumper
Rubber lump or coil spring that stops metal on metal contact at when your fork bottoms out – aka runs out of travel. See bottom out above for more.
Bottom race
Not really part of the fork but as it’s hammered onto the steerer, we’ve included it here. The bottom race sits below the lower headset bearing so it can turn smoothly on. Make sure it’s there, clean and straight when you put your bike together or you won’t be steering well.
Brake mount
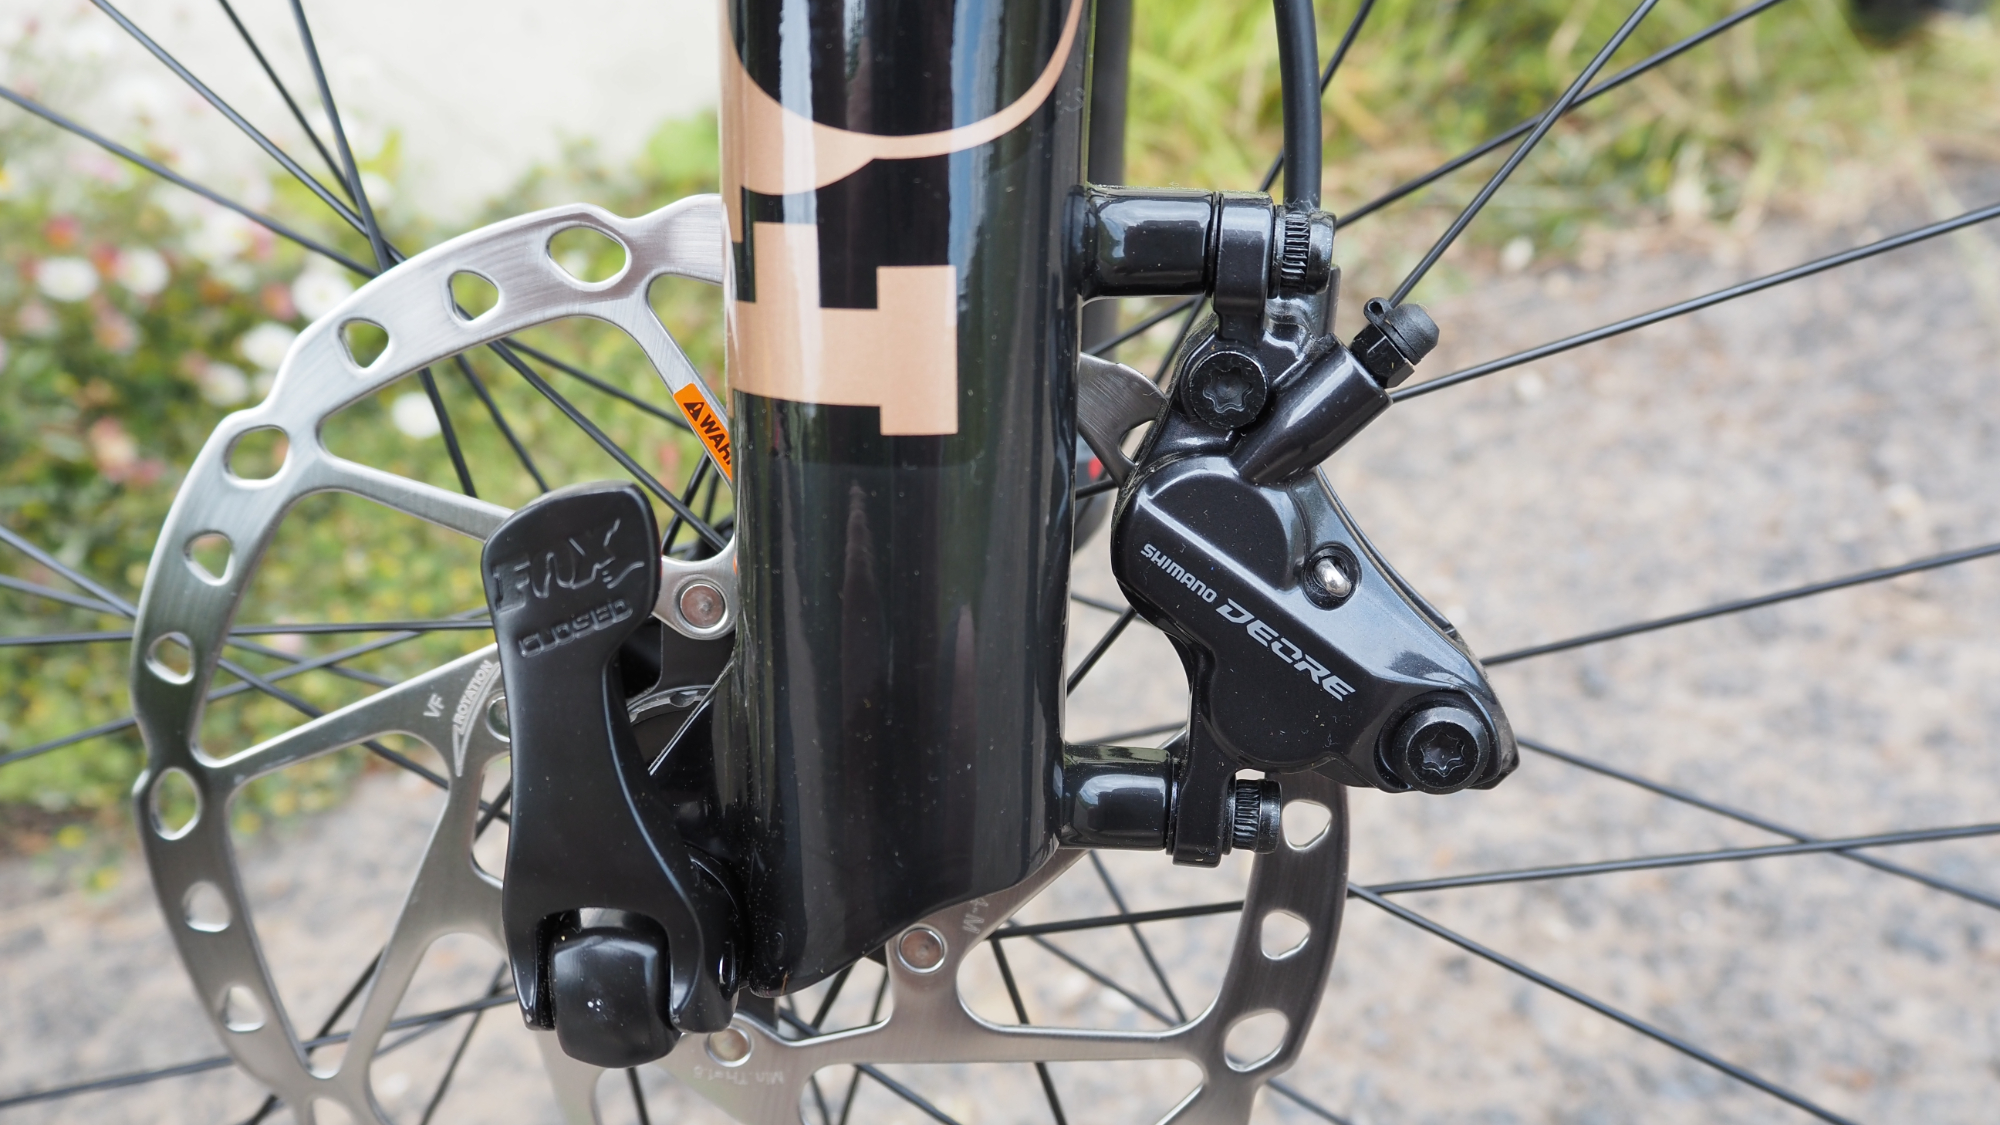
All forks worth having now use ‘post mount’ brakes with two bolted stubs sticking backwards out of the bottom of the left fork leg. Some big forks will only work with 180mm or bigger discs. Some lightweight XC forks are only safe with 180mm or smaller discs.
Brake spacer
Wiggly bar or little cylinder spacers that let you run a bigger rotor than the basic post mount position.
Breakaway force
The amount of load needed to overcome stiction and start the fork moving in its travel.
Bushings
Smooth rings (generally synthetic but sometimes steel on cheaper forks) in the lower legs that the stanchions slide through as the fork does its thing. Bushings that are too loose will make the fork wobble and potentially jam under braking or cornering. Bushing that are too tight will make the fork feel really sticky and stubborn.
ButterCups
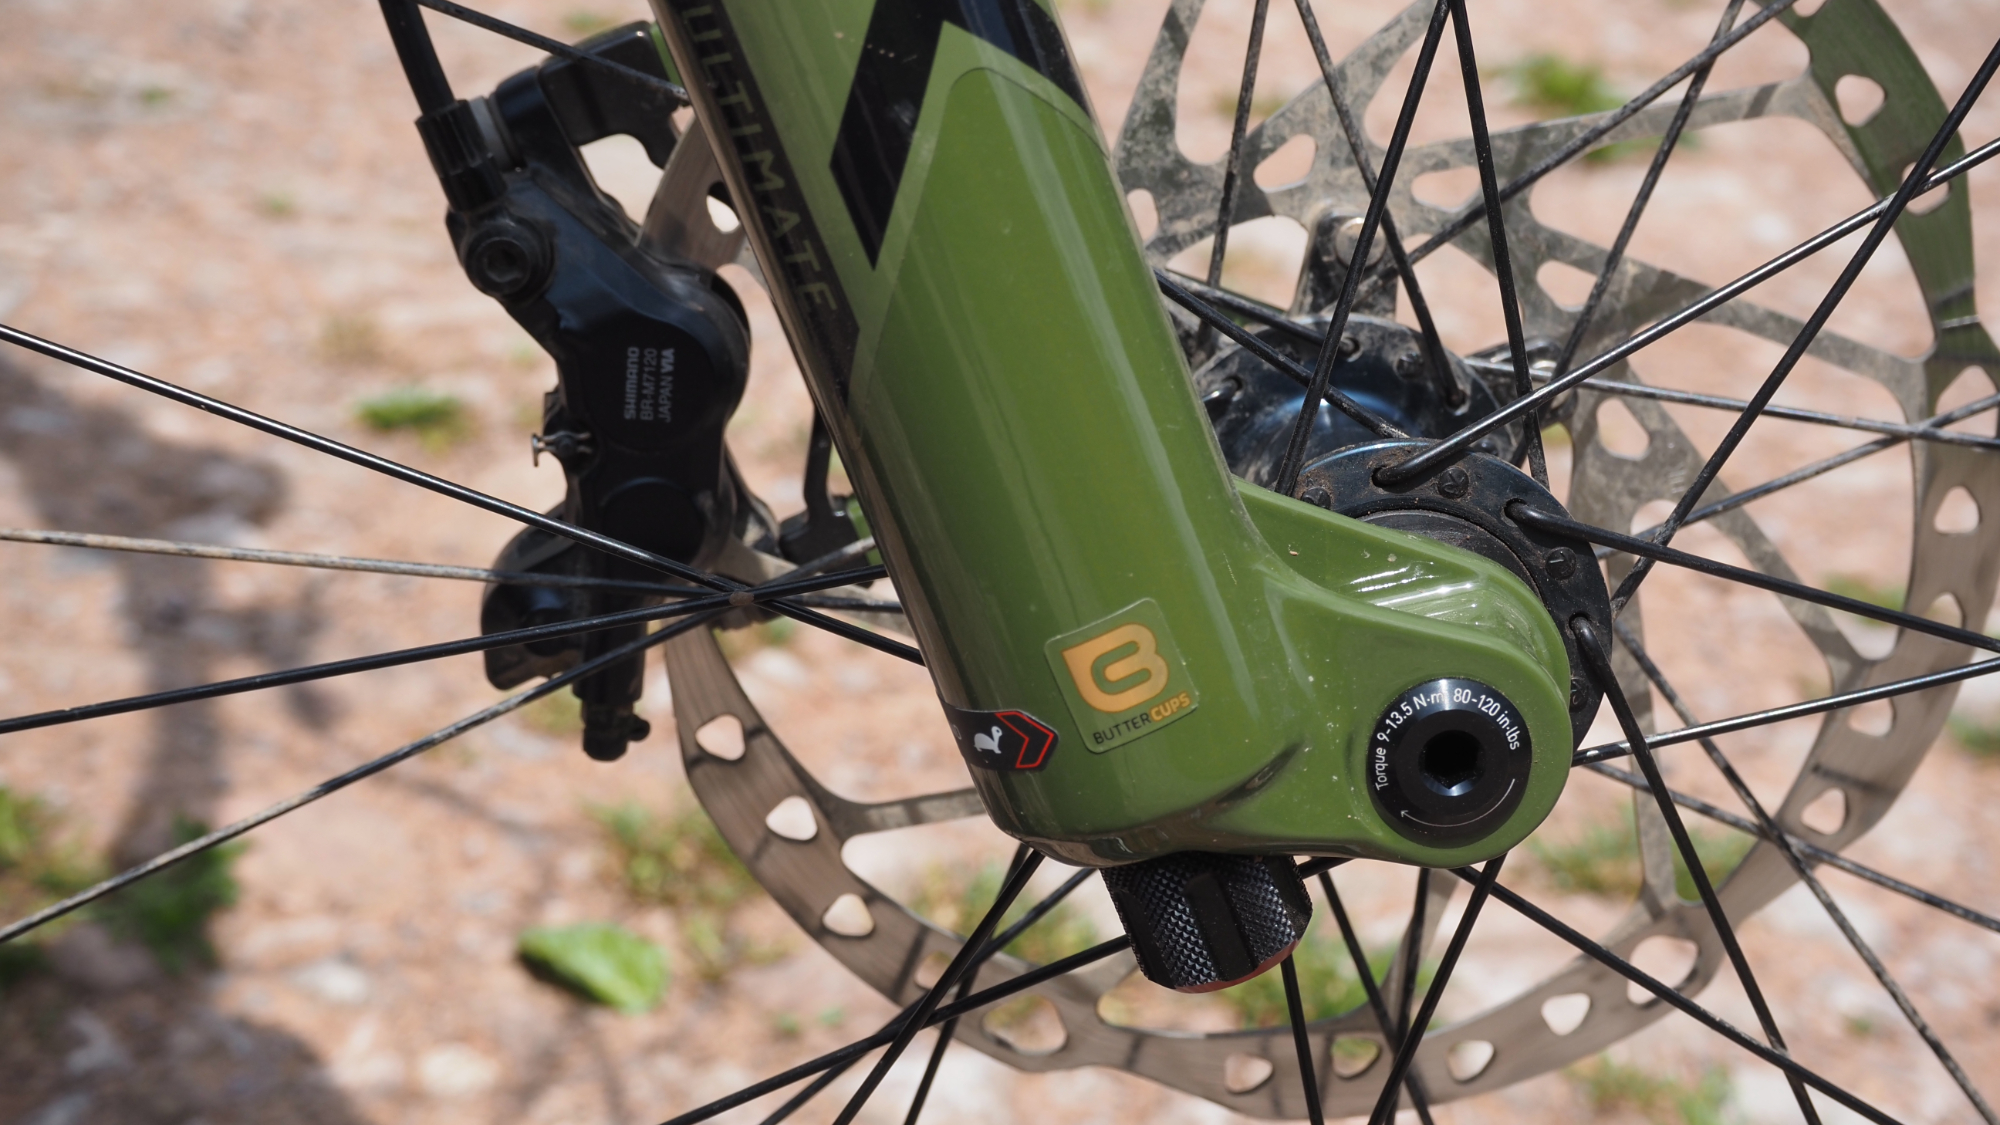
This is RockShox' name for small elastomer pucks at the bottom of the damper and spring shafts where they join the lower legs. The idea is that they reduce vibration and make the fork more comfortable and less tiring to ride.
Cartridge
Damper that’s self-contained in a sealed cartridge to stop air getting in and giving it indigestion. More complicated than a bladder but generally longer lived.
Cavitation
Sudden loss of damper control generally because the suspension is moving too quickly for the oil flow and it forms a vacuum behind the piston. It can also happen if air has got into the damping oil through a leak in the bladder or cartridge.
Coil spring
A steel (or very occasionally titanium) spring in your fork that gives it bounce. Generally gives a smoother, more linear feel than an air spring. Heavier than air though and resistance can’t be tuned (apart from preload adjustment), so you’ll need to swap to a lighter or heavier spring if the stock one doesn’t suit you.
Compression
The shortening of the suspension fork as it absorbs a load.
Crown
The bridge between the steerer and the stanchions. Trail and XC forks only have one, but DH forks have two – one above the head tube and one below – for extra stiffness. Crowns are generally trouble-free, but if there’s any creaking coming from your fork, it’s probably from here. Some brands occasionally try carbon crowns for their fanciest XC race forks but they generally go back to alloy as it’s way less hassle to work with and barely any heavier.
Crown offset
The forward offset between the alignment of the stanchions and the steerer. This affects steering feel by changing the amount of ‘trail’ of the fork. I won't get into a trail explanation (we have another feature on MTB geometry for that), though even I have to double-check what it means and I’ve been writing about this stuff for over a quarter of a century. All you really need to know is that shorter 42mm offset forks are now all the rage, though some bikes still use 51mm.
Damper
The actual physical damping system which pushes valved/shimmed/both piston/pistons through oil as the fork moves. This converts the movement energy into heat keeping the fork calm and controlled.
Damping
Controls the compression and rebound speed of the fork so it doesn’t just bounce up and down wildly.
Damper shaft
The rod that holds the fork together on the damper side and has all the valves, shims and pistons of the damper (or the damping cartridge) on it.
Damping dials
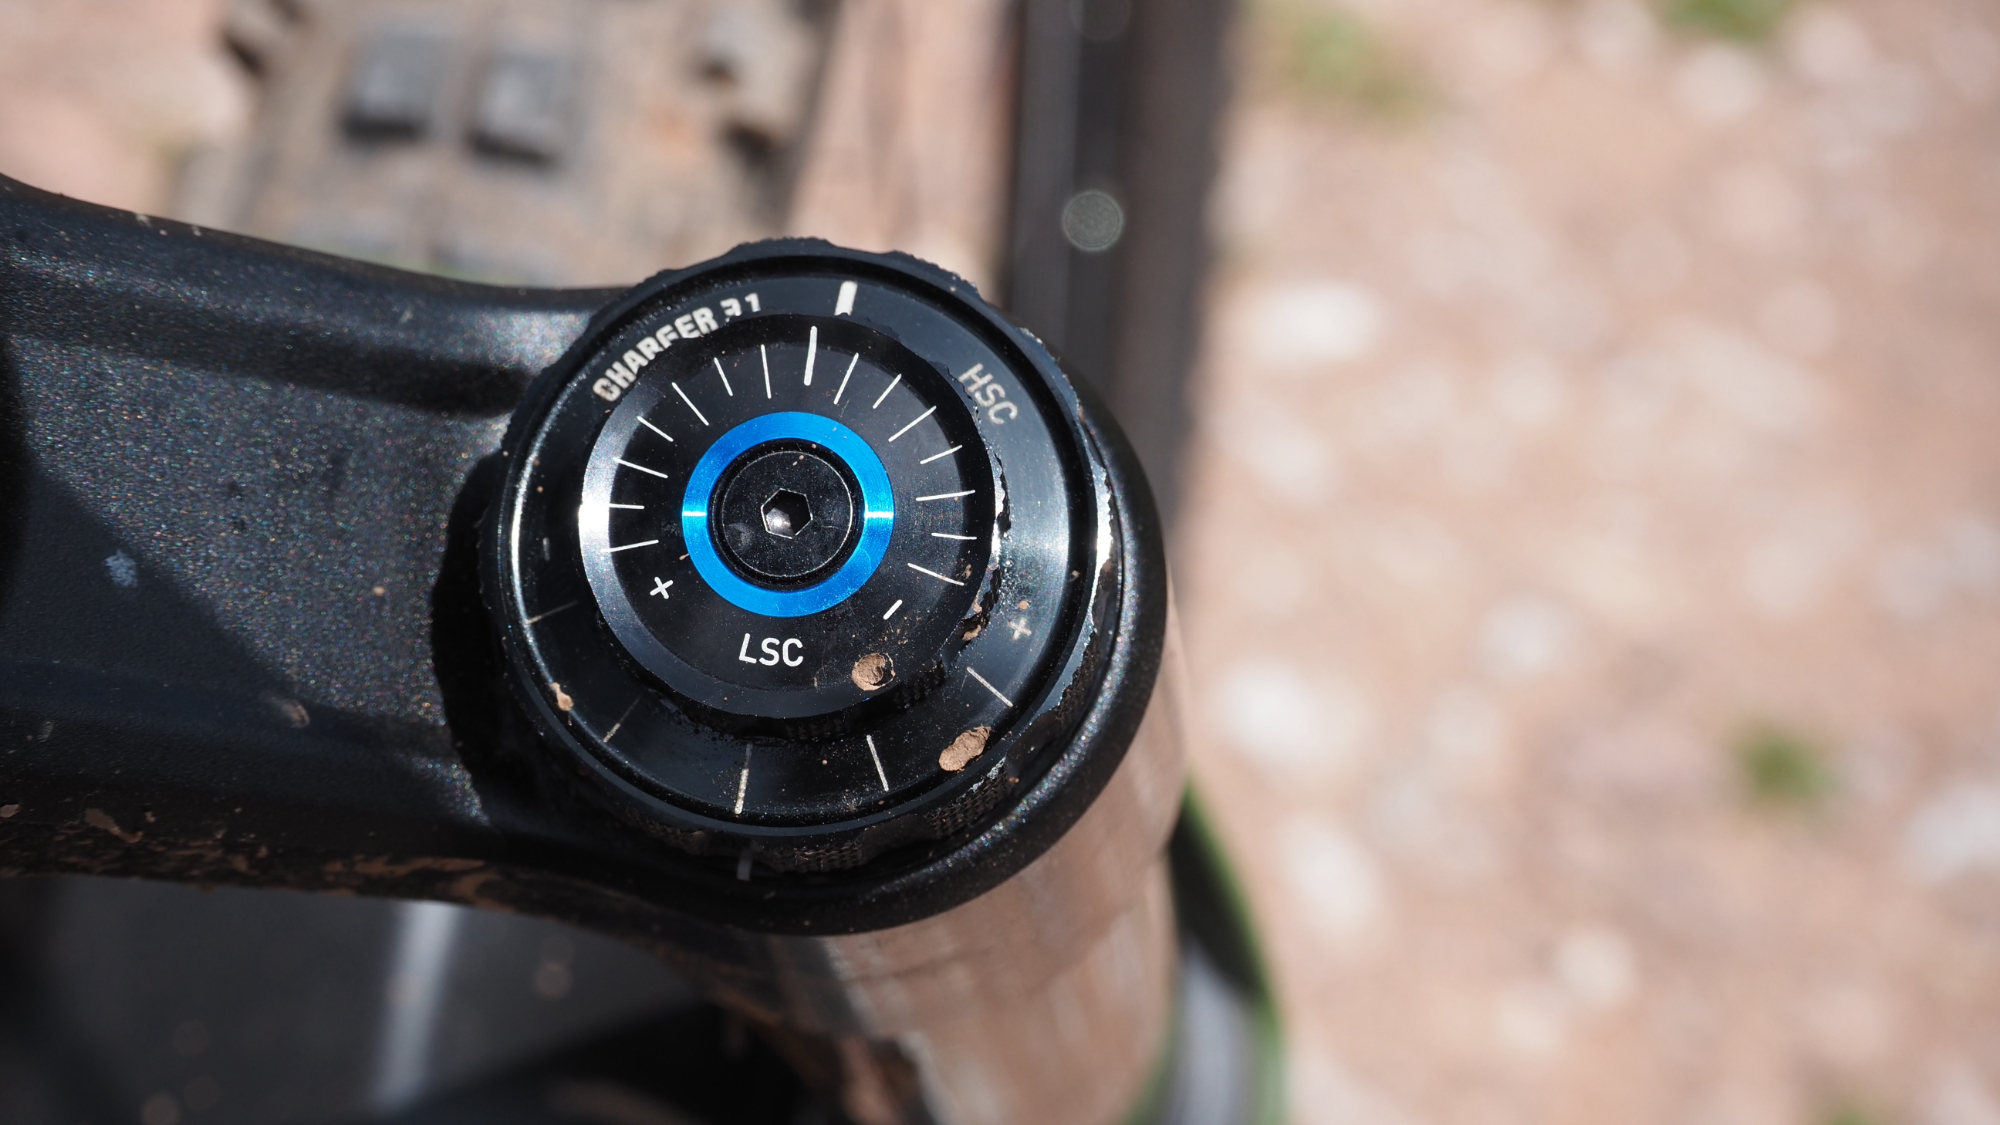
Little clicky dials, with lines and + or – signs on. Generally, blue and black ones are for changing the compression damping, while red ones take care of the rebound. If you’re reading set-up instructions ‘three clicks from closed’ means turn the dial three notches from fully shut.
Dive
Excessive compression for a given load, particularly in relation to braking loads. You can reduce dive by increasing pressure in the air spring or adding more low speed compression damping.
Dropouts
The ends of the fork legs that hold the front wheel in place. Most forks now use a ‘thru axle’ that slides into completely closed bore, but some cheaper forks still use an open slotted dropout for a QR skewer and hub. Fox complicate matters with a floating insert that you clamp into place after aligning the wheel and fork by squishing it up and down a few times. The idea is that it stops the forks being pulled inwards and out of alignment when you do up the axle, but TBH it’s hard to tell if it makes any difference.
Elastomer
Length of rubbery polyurethane used instead of an air spring or coil spring in early suspension fork models, or cheap ones later. It gets harder in winter and squishier in summer and feels like you’re choking on a sock compared to a proper spring. OK if just used as a top or bottom out bumper though.
Friction
Resistance to movement (drag) anywhere in the stroke that slows the fork movement down. Generally caused by seals and bushings.
High speed
The first important thing to understand is this has nothing to do with the speed you’re riding at. High speed compression is a load that arrives suddenly, compressing the fork very quickly. Think landing a drop or riding into a blunt object or like a dog running into your leg. High speed rebound is the sudden re-extension of the fork after a maximal load. Also see low speed.
HSC
Stands for High Speed Compression. You'll usually see it stamped on fork-top damping dials. See high speed above for more.
IFP
Internal Floating Pistons hang about behind the main damper piston in cartridge dampers. They stop the oil that’s gone through the damping piston mixing with air and getting bubbly and inconsistent. The spring behind the IFP also adds a degree of bottom out control and helps to push the oil back through the valve. Not all forks have them as they add complexity and cost, but most decent cartridge forks (and shocks) do.
Low Speed
Again this has nothing to do with the speed you’re riding at. Low speed compression is a load that arrives comparatively slowly, compressing the fork gradually. Think pushing the bike hard into a turn, or the suspension compressing as you brake. Low speed rebound is the gradual re-extension of the fork after a smaller load. Also see high speed.
LSC
Low Speed Compression. Like HSC (high speed compression), you'll find LSC stamped on the damping dials of higher end forks. See low speed above for more.
Linear
A fork that has a very consistent spring rate through its stroke and is therefore more likely to use more travel. This suits less aggressive uses like long distance or technical trail riding, where comfort and traction are key.
Lock out lever
A compression lever that goes all the way to a full lockout of the fork to stop it moving.
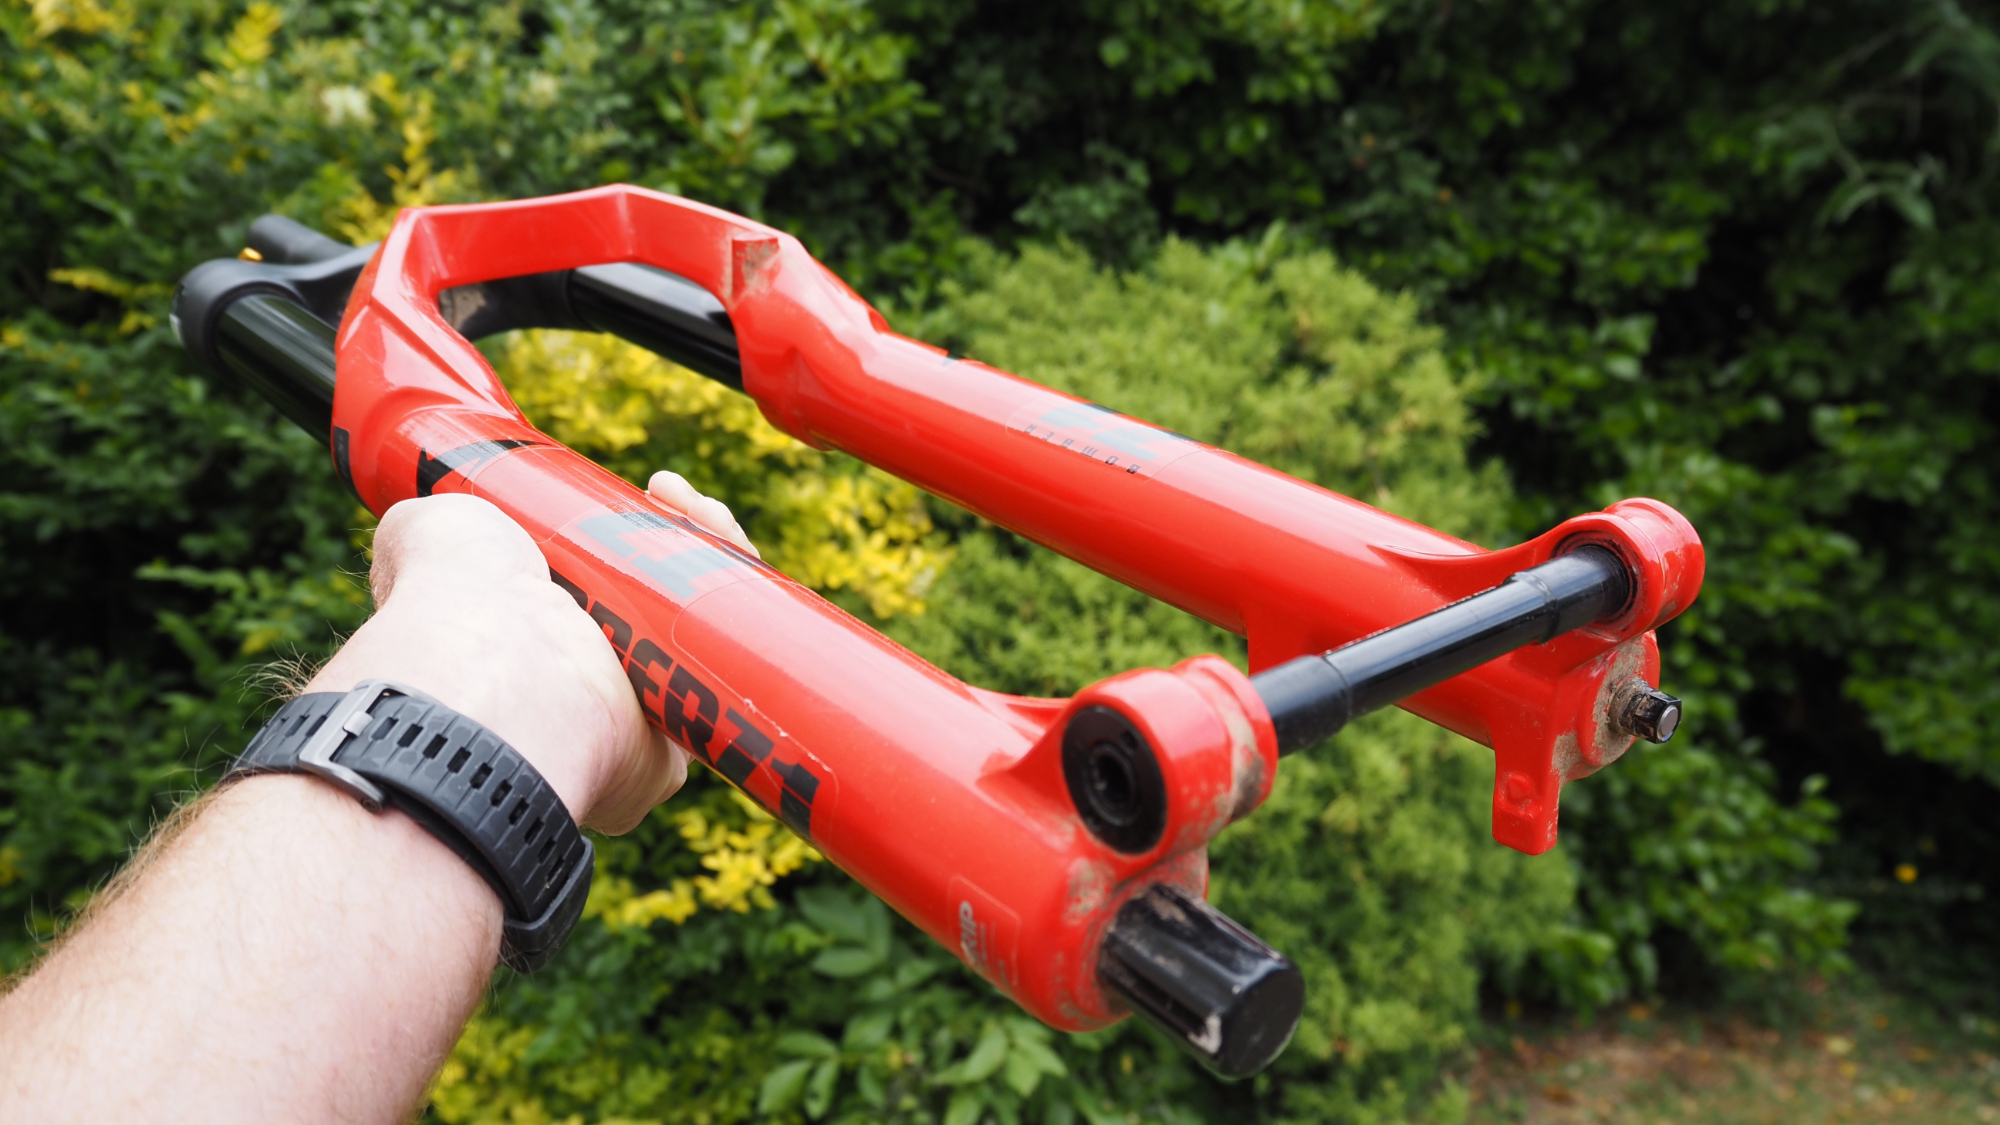
Lower legs
The bottom part of the fork, normally made from cast magnesium for minimum weight, though you’ll occasionally see some carbon wrapped ones.
Negative spring
Spring that opposes the positive spring and helps the fork start moving.
Open bath
Simple damper without a bladder or cartridge so the oil sloshes about all over the place inside the fork, lubricating it as well as calming it down. Famously used in early Marzocchi Bomber forks that were super fluid and reliable when everything else was uptight and exploded every few weeks. They get inconsistent when the oil mixes with the air though and they sound like an otter orgy.
Preload
Adding load to the spring to increase the force needed to start the fork compressing. A bit like increasing the spring rate at the start but in a really crude way. You’ll sometimes still find a ‘preload dial’ on old and/or cheap forks.
Positive spring
The main spring that supports your weight and re–extends your fork after a compression.
Pressure release valves
Fancy forks have release valves on the back of the lower legs so you can fart out air pressure that’s built up in the wrong part of the fork on long descents.
Progression
See ramp up.
QR skewer
The QR (quick release) skewer is an ancient design invented by Tullio Campagnolo in 1926. They use a spindly steel rod with a cam closure on one end and a threaded bolt on the other. They loosen to slide in and out of open dropouts so they’re faster to fit and remove. They’re nowhere near as secure or stiff as a connection as a thru axle though, so you’ll only find them on older or cheaper bikes.
Remote lockout spool
Cable clamp ‘winch’ that takes the place of a manual lever to turn the low speed compression damper to the locked position on forks with a handlebar remote control. This makes the fork less sensitive which can be useful as it gives more support when climbing, sprinting, etc.
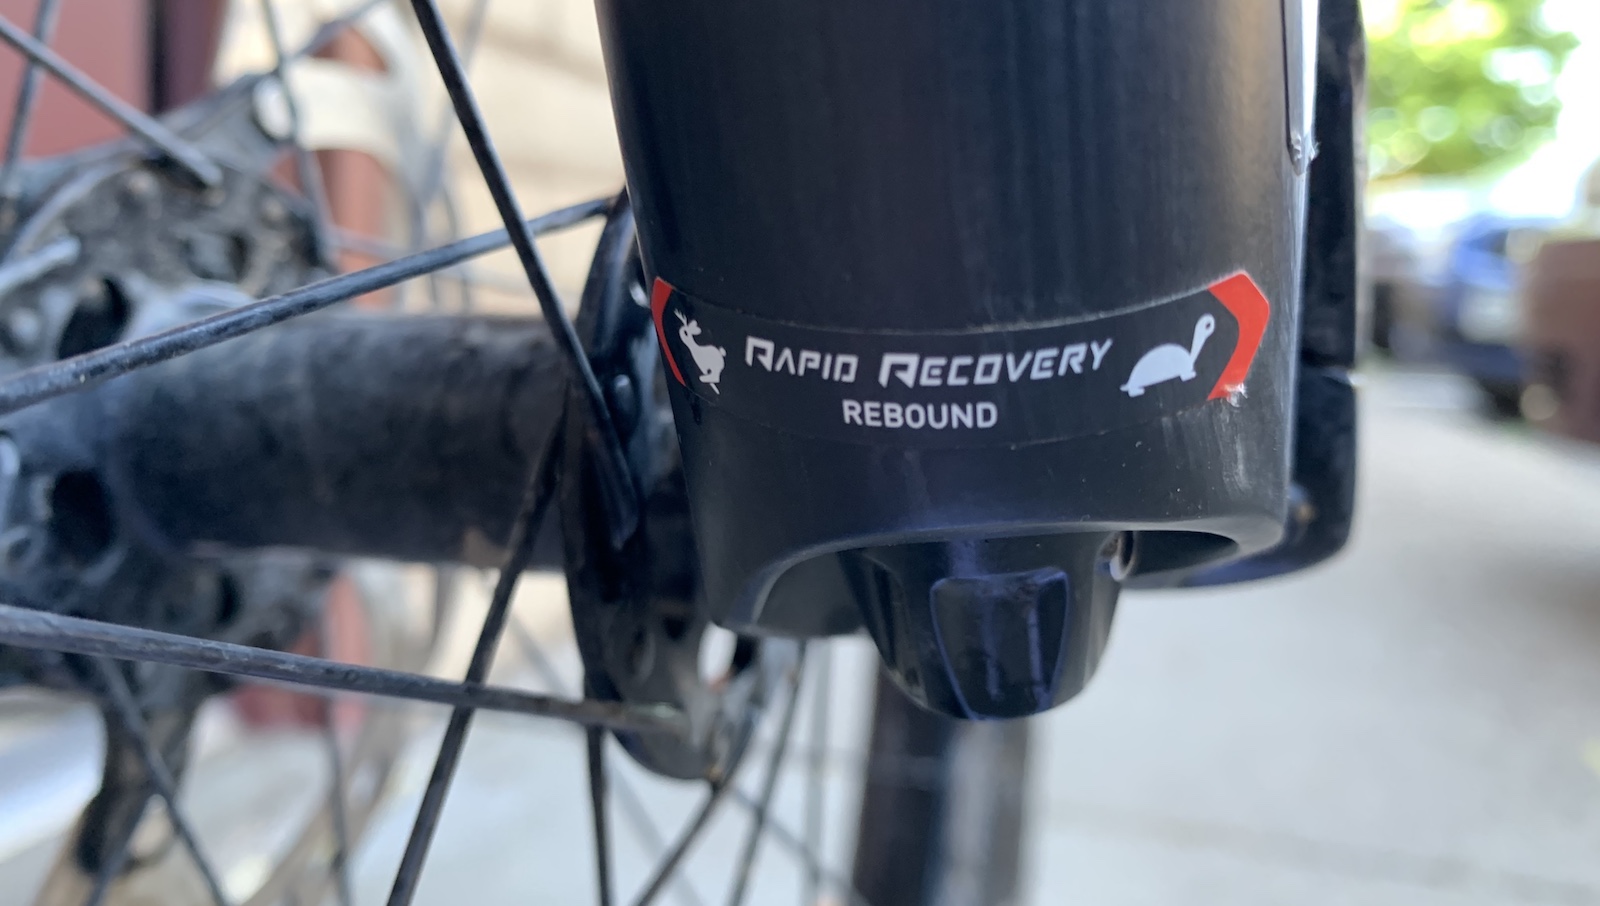
Rebound adjusters
Rebound adjusters are often at the bottom end of the fork. Fox hide them under a threaded cover on its forks, while RockShox hides its adjusters up inside the fork leg on their lightweight designs. SID XC race forks use a removable Allen wrench that can also be used to adjust the rebound on the SID rear shock and then left in the pits while you’re racing to minimize weight.
Rebound
The extension of the fork as the spring pushes it back after absorbing a load.
Ramp up
Increase in spring rate as an air fork compresses towards the end of its stroke. The more ramp up a fork has, the harder it is to get full travel. This suits high impact uses like enduro and DH racing or bike park / jump riding.
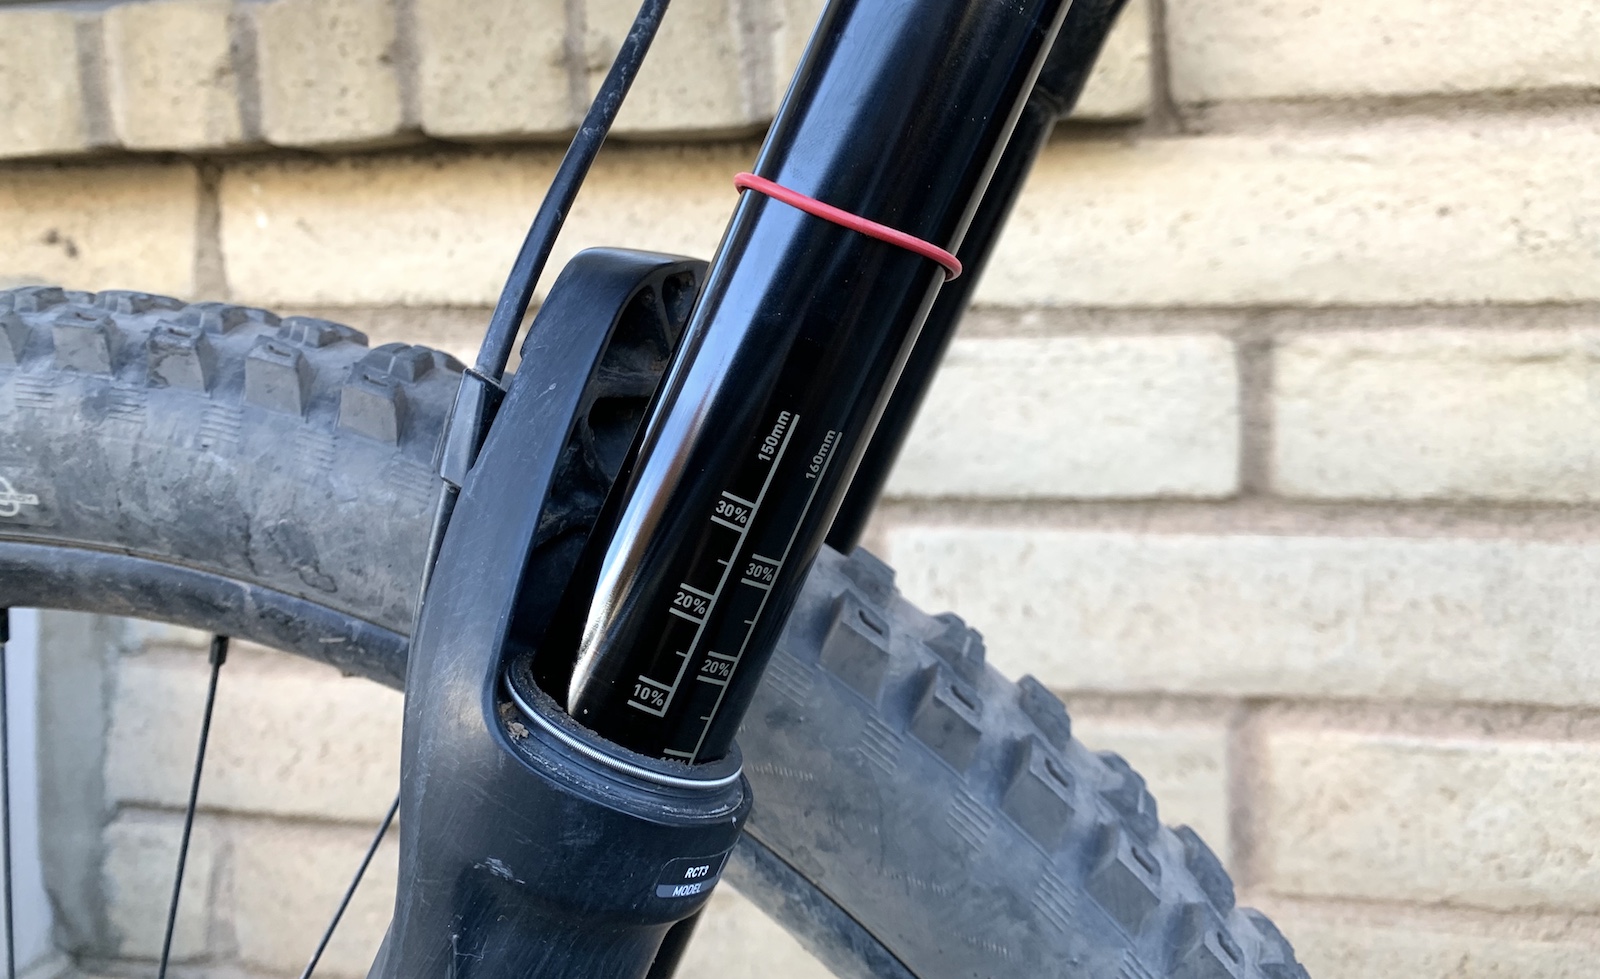
Sag
The amount the fork compresses when you get on the bike. General advice is to set the fork up so it sags by 20 percent of its travel and then tweak from there as you get more time on it. If using air suspension (most forks do), you'll need a shock pump to set up your sag.
Seal head
The bulge just below the crown where the inner bushings and sometimes extra seals sit.
Seals
The rubber ringpieces that stop dirt getting into your fork’s internals. Thankfully most fork seals are pretty sorted now, but worth cleaning regularly and servicing if they’re looking scuffed or split.
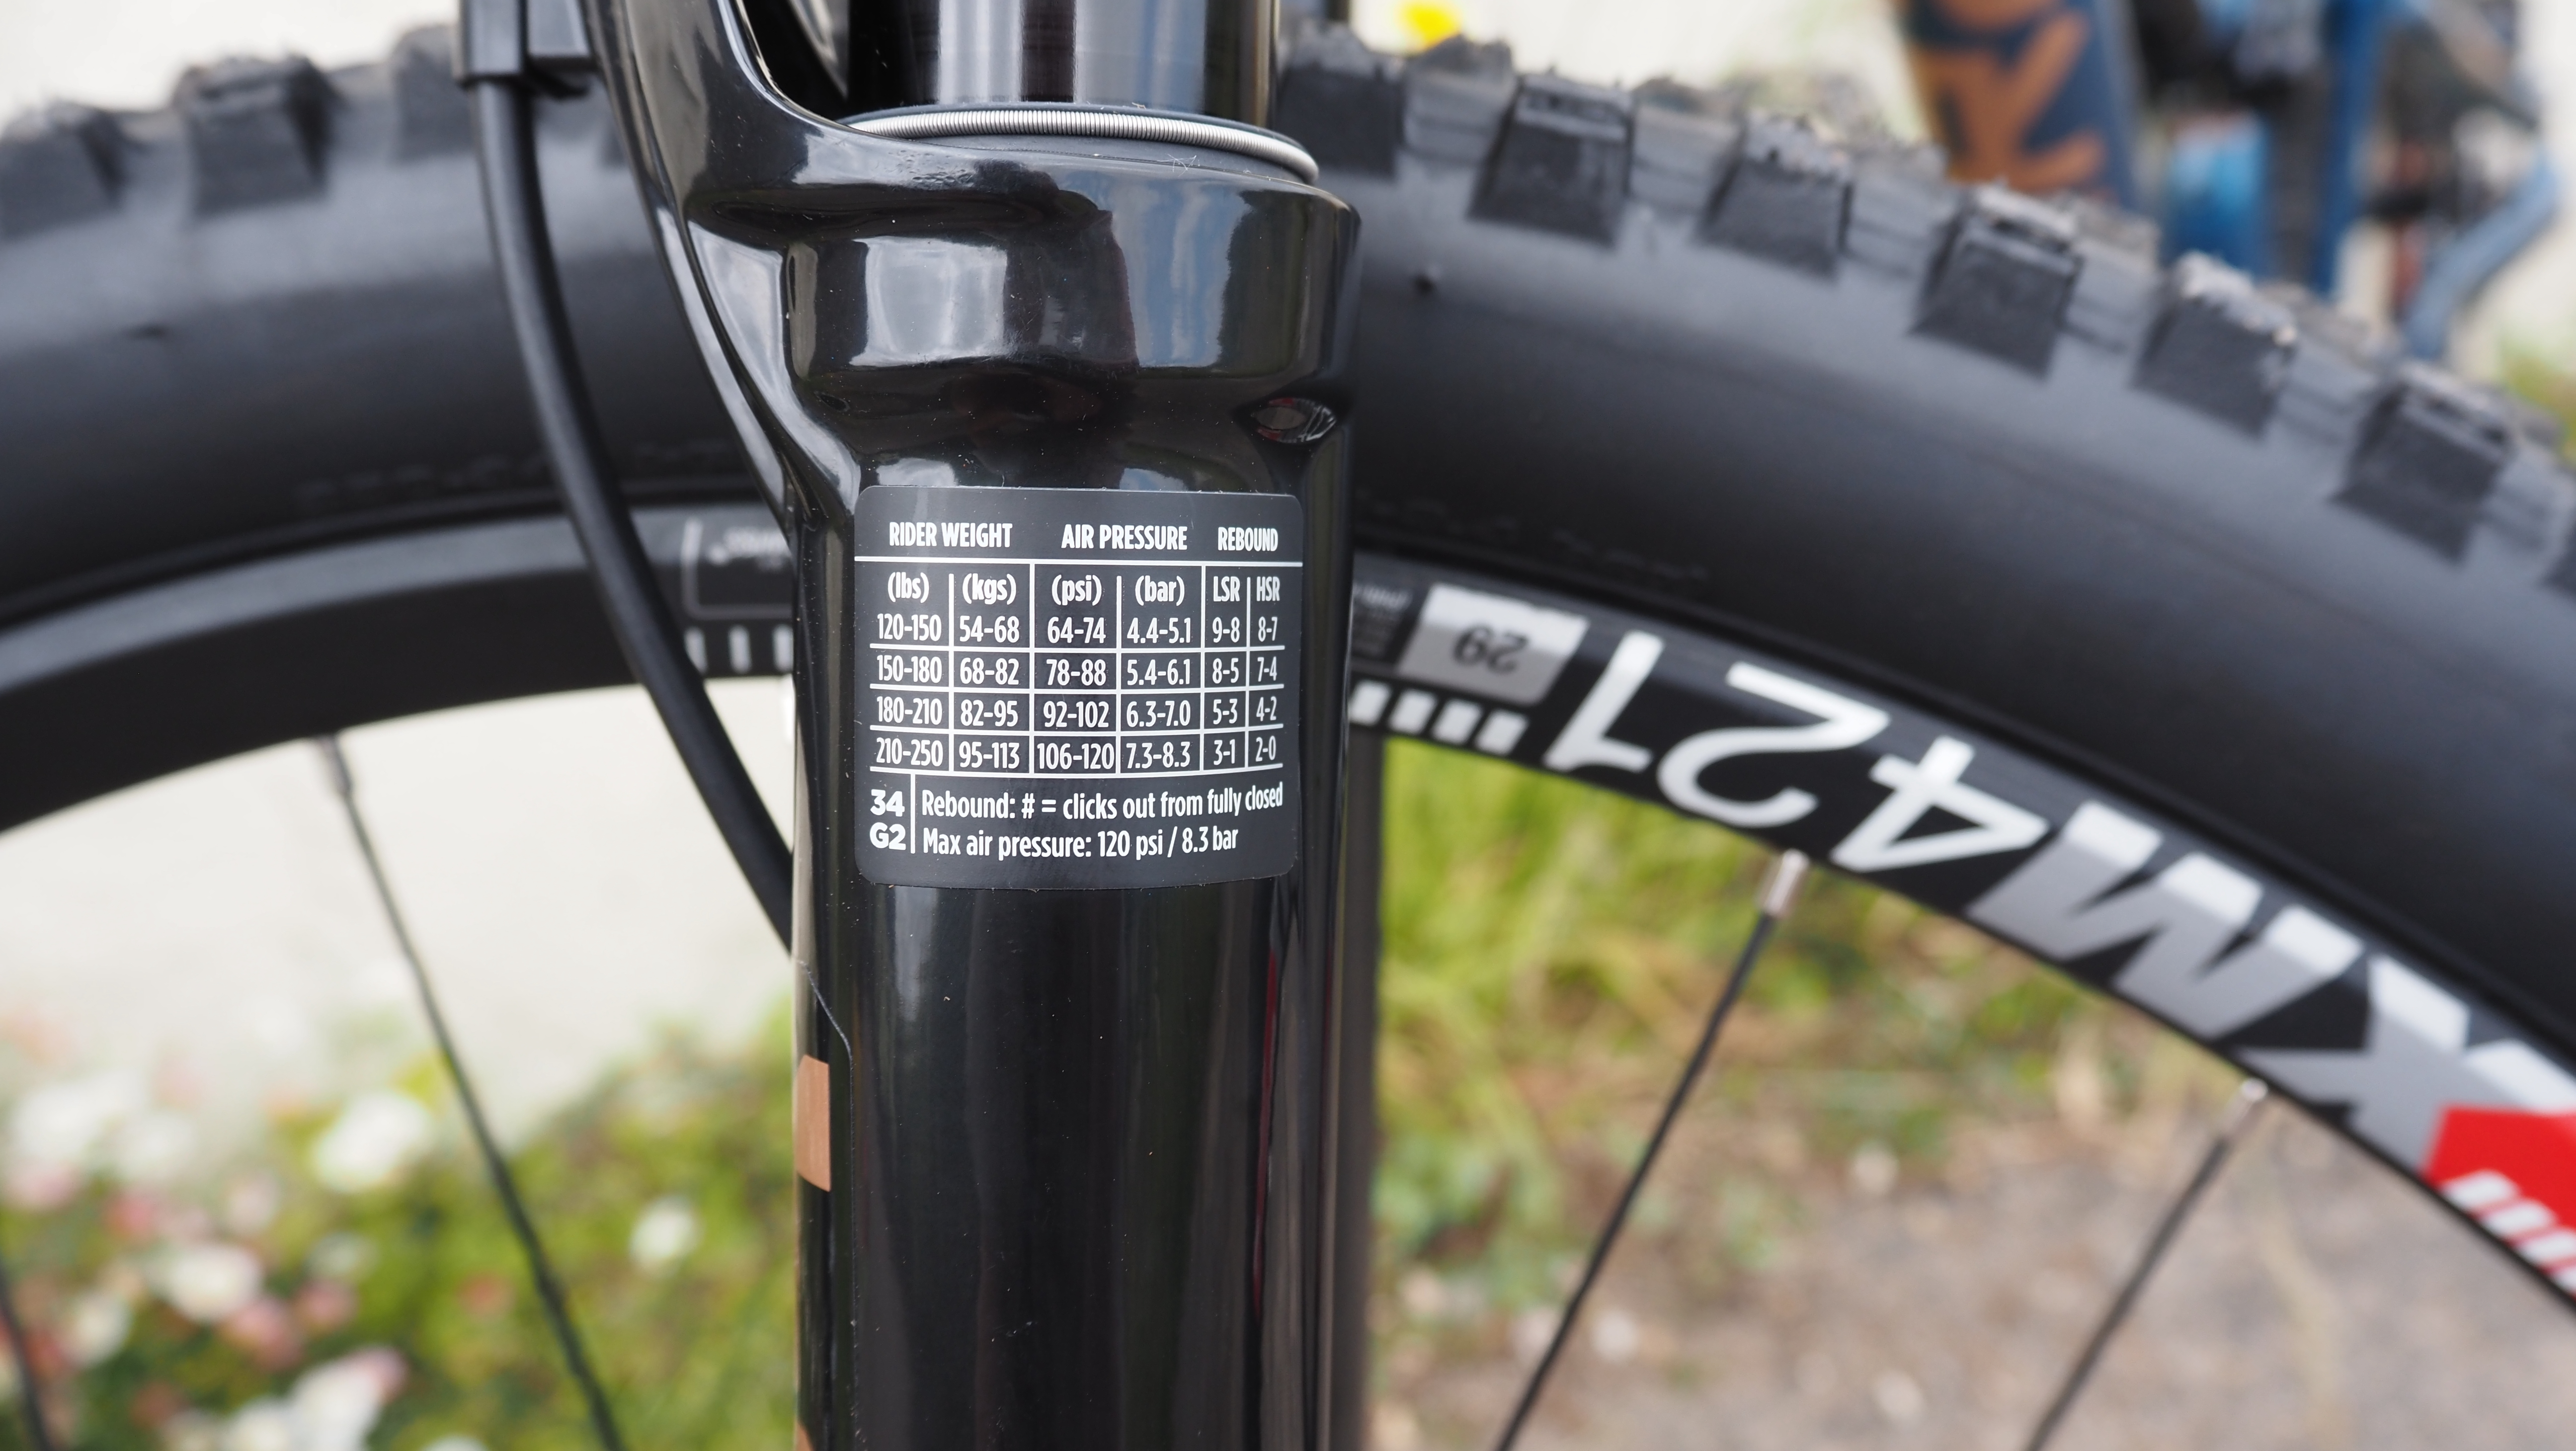
Set up chart
Recommended air pressure figures on a sticker that's usually in a really awkward to read place on the fork that will help with initial setup. I always find RockShox and Fox pressures are about 20 percent too soft for me though.
Shaft bolts
The bolts at the bottom of the fork that hold the uppers and lowers together. They also stop the lubricating oil pouring out, so if you undo them, have something ready to catch the oil.
Shim stack
A stack of sprung washers with a slight gap between them (like a Lego Christmas tree) that control oil flow. As the fork compresses the oil is pushed against the shims. The larger the compression force, the more the shims flex back, pressing against the shims behind them and therefore stiffening up the resistance to the oil flow. Changing the size, stiffness or number of shims in the stack changes the damping range.
Shock oil
This is the oil that flows back and forth through the damping circuits. It’s designed to handle very high heat loads without changing viscosity so that the fork performance stays consistent on long descents. Shock oil also comes in different ‘weights’ (viscosities) so that you can make the damper faster or slower flowing without altering the physical circuitry.
Shock pump
A small, high pressure pump designed for adding air to air sprung forks and shocks. An essential tool if you are running air suspension on your bike.
Spiking
Sudden, jarring resistance to compression. Can be caused by too much high speed compression damping or by binding across loose bushings.
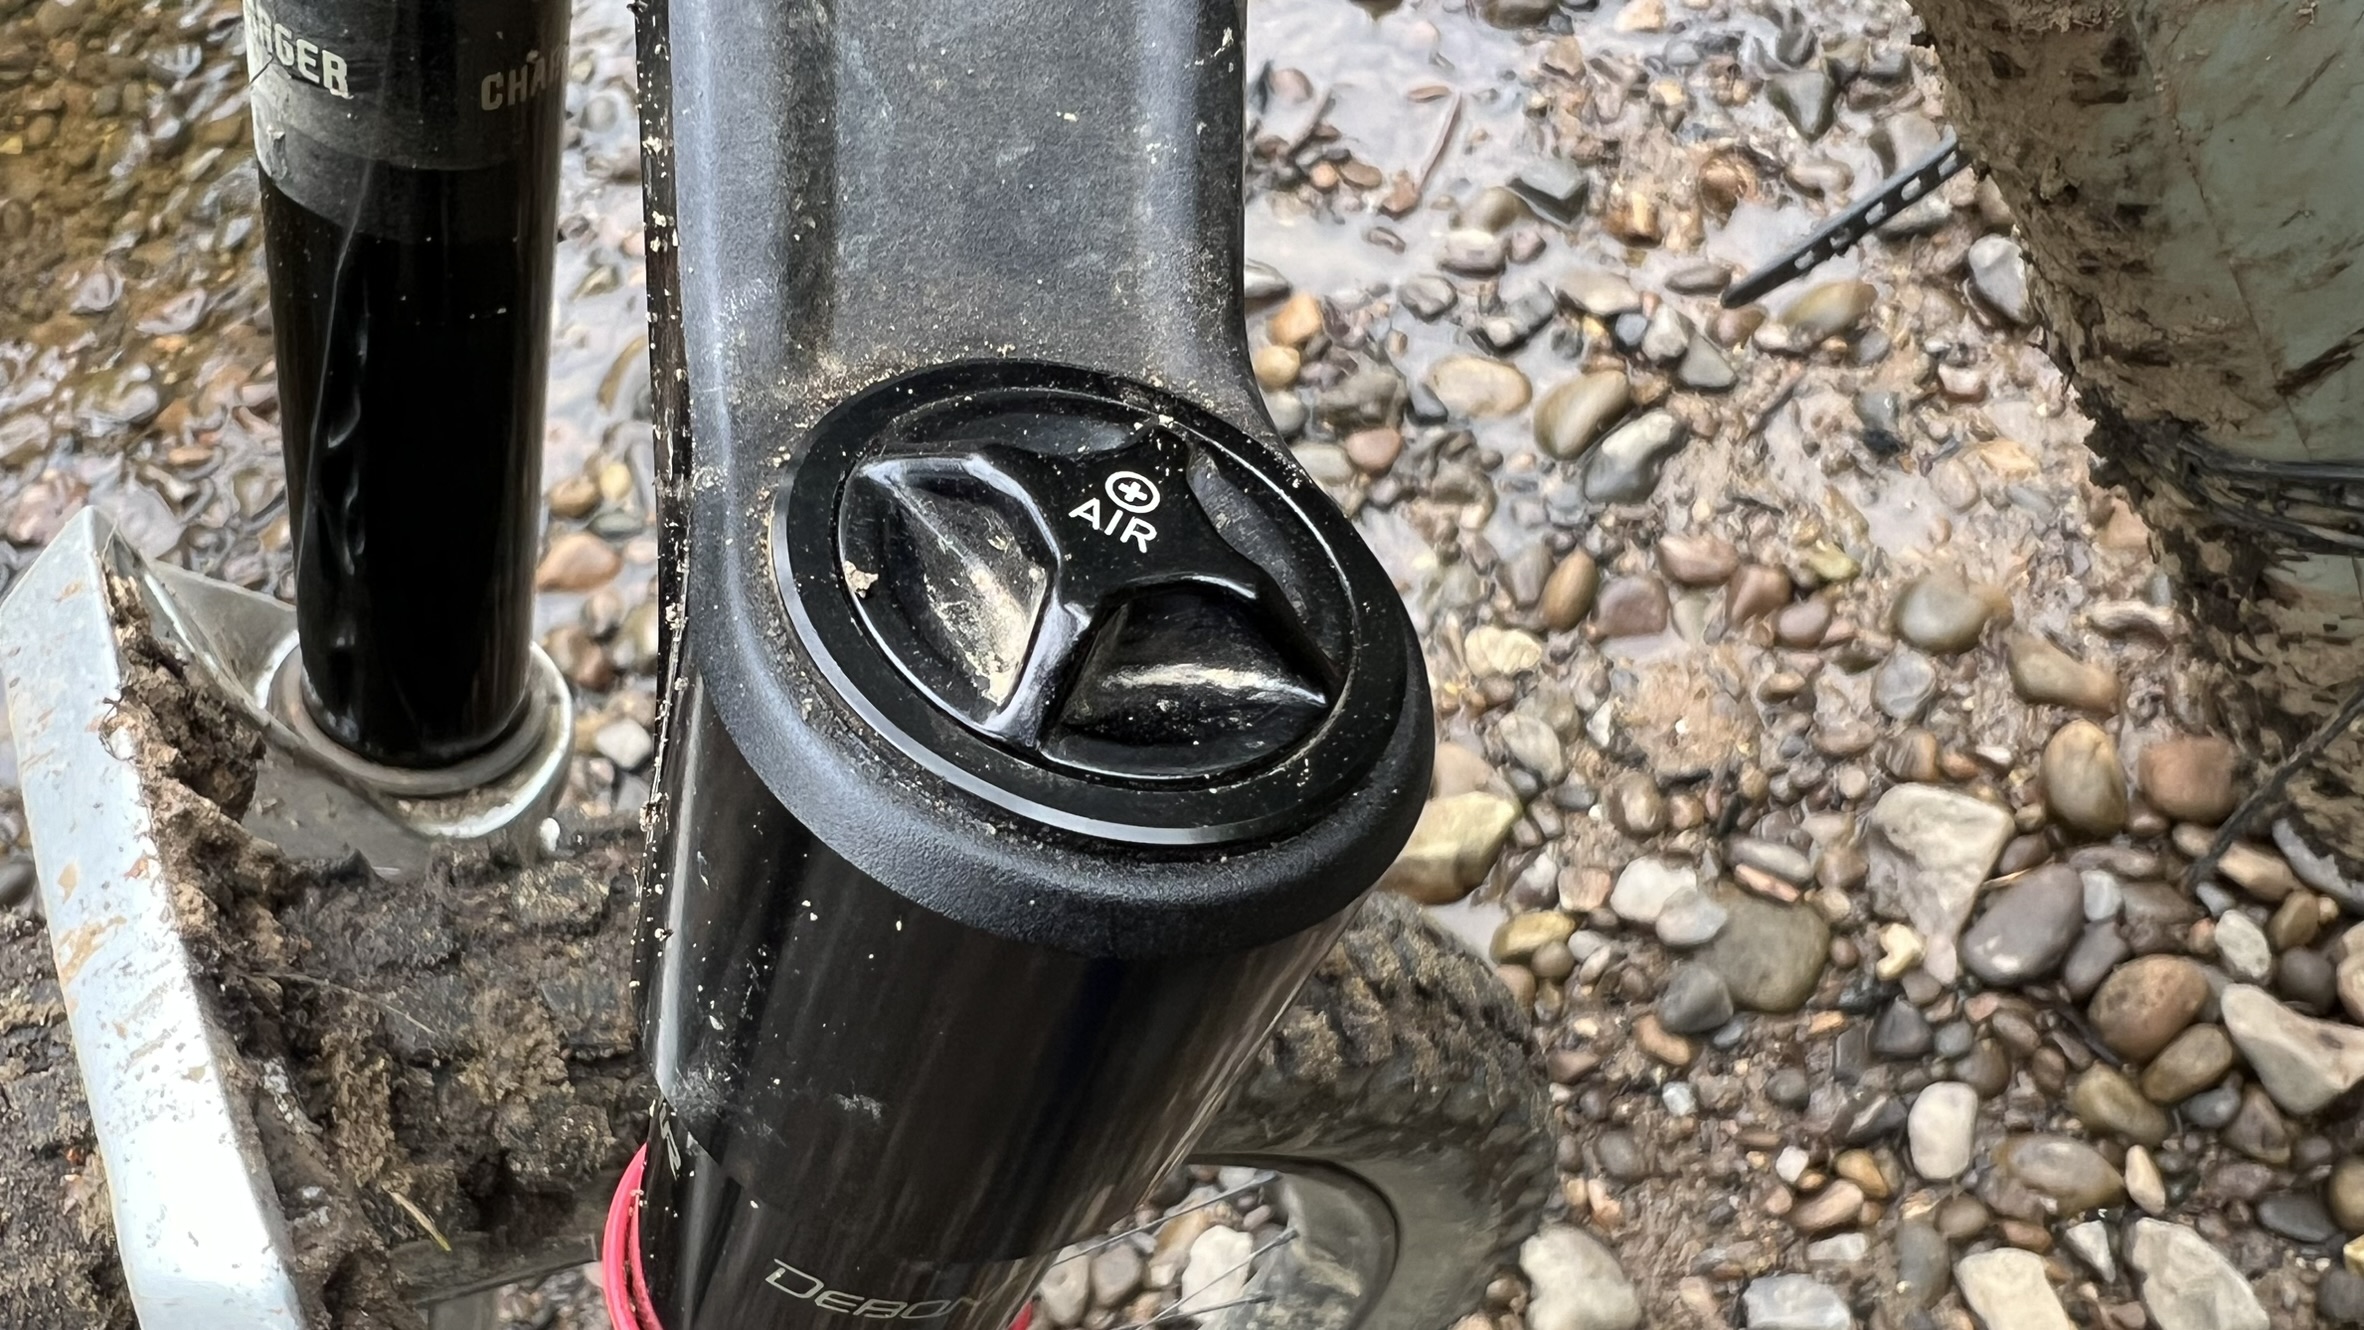
Spring cap
The cap that screws into the fork top on the spring side. Can be hollowed out on some forks to increase negative spring volume. Volume spacers generally screw into the underside too. They can also have a preload adjuster on coil or elastomer sprung forks. Always depressurize the air spring before unscrewing the top cap though or it’ll take your face off.
Spring shaft
The rod that holds the fork together on the spring side and has the air piston for the air spring or the coil base for the coil spring on it.
Spring rate
The amount of weight / pressure needed to compress a coil spring one inch (25mm). Heavier, more aggressive riders will need a heavier spring weight and vice versa.
Stanchions
The upper tubes that the lower legs slide up and down on. The skinniest forks use 28mm diameter tubes while the biggest are 40mm. Most are in the 32mm (XC) to 38mm (enduro) range though as that’s a good compromise between stiffness, strength and weight.
Fox go fancy with gold Kashima coatings on their Factory forks, but most alloy forks use black. If the legs look chromed they’re probably cheap, steel and very heavy. Whatever they’re made of, look out for scratches and wear marks as they can affect consistent performance by damaging seals or letting oil leak out.
Star fangled nut
The little steel sphincter-looking thing that you hammer into the steerer so the headset tightening bolt has something to screw into. Make sure you use a proper fitting tool though as trying to fit it freehand with a hammer is asking for a world of ‘it’s slipped sideways’ pain.
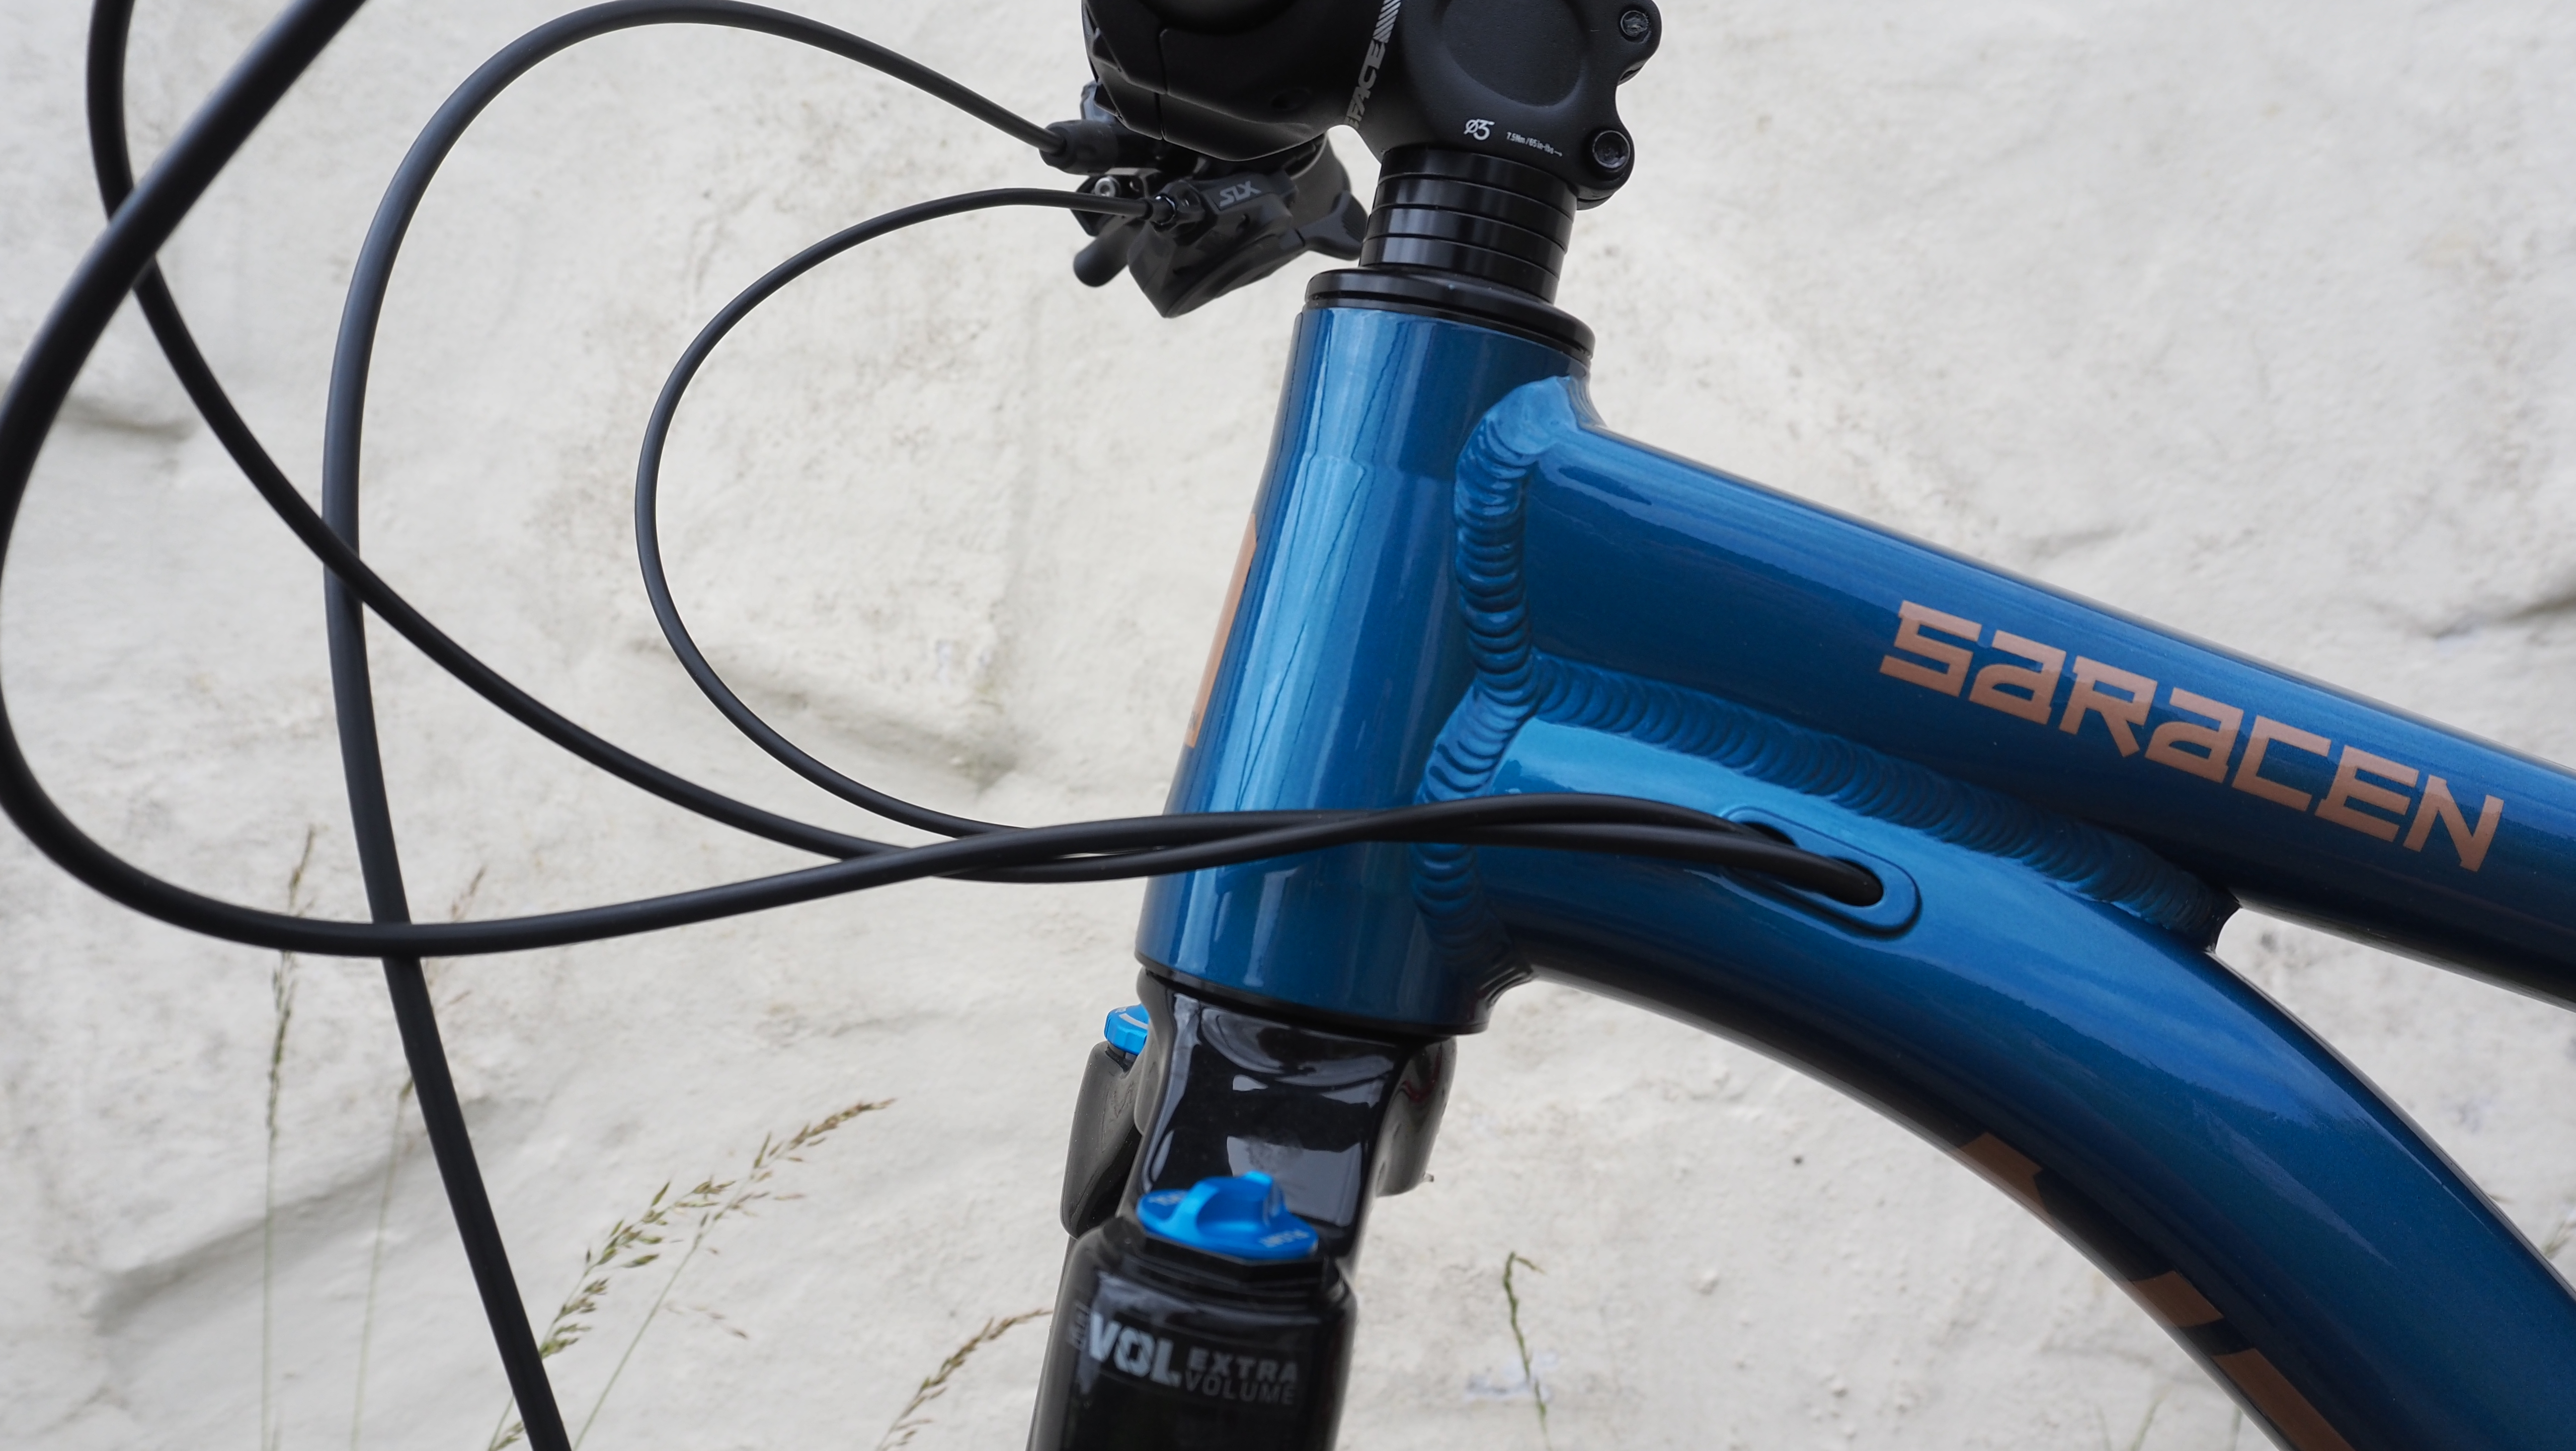
Steerer
The steerer is the tube that sticks into your frame. Really cheap bikes have skinny straight 1.125-inch steerers, but most bikes use a tapered 1.5 – 1.125-in setup for extra stiffness with little extra weight. There are a few e-MTBs using even bigger 1.8in steerers but they’ve not really caught on yet. Some brands occasionally try carbon steerers for their fanciest XC race forks but they generally go back to alloy as it’s way less hassle to work with and barely any heavier.
Step
A cut out on the inside of the lower legs of Fox ‘Step Cast’ XC race forks lets them use a narrower stance – and therefore narrower, lighter crown and arch – without catching the brake rotor.
Stiction
Friction at the start of the stroke that stops the initial movement of the fork. The effect of this can be reduced by the negative spring.
Stroke
The telescopic movement of the suspension through it’s travel.
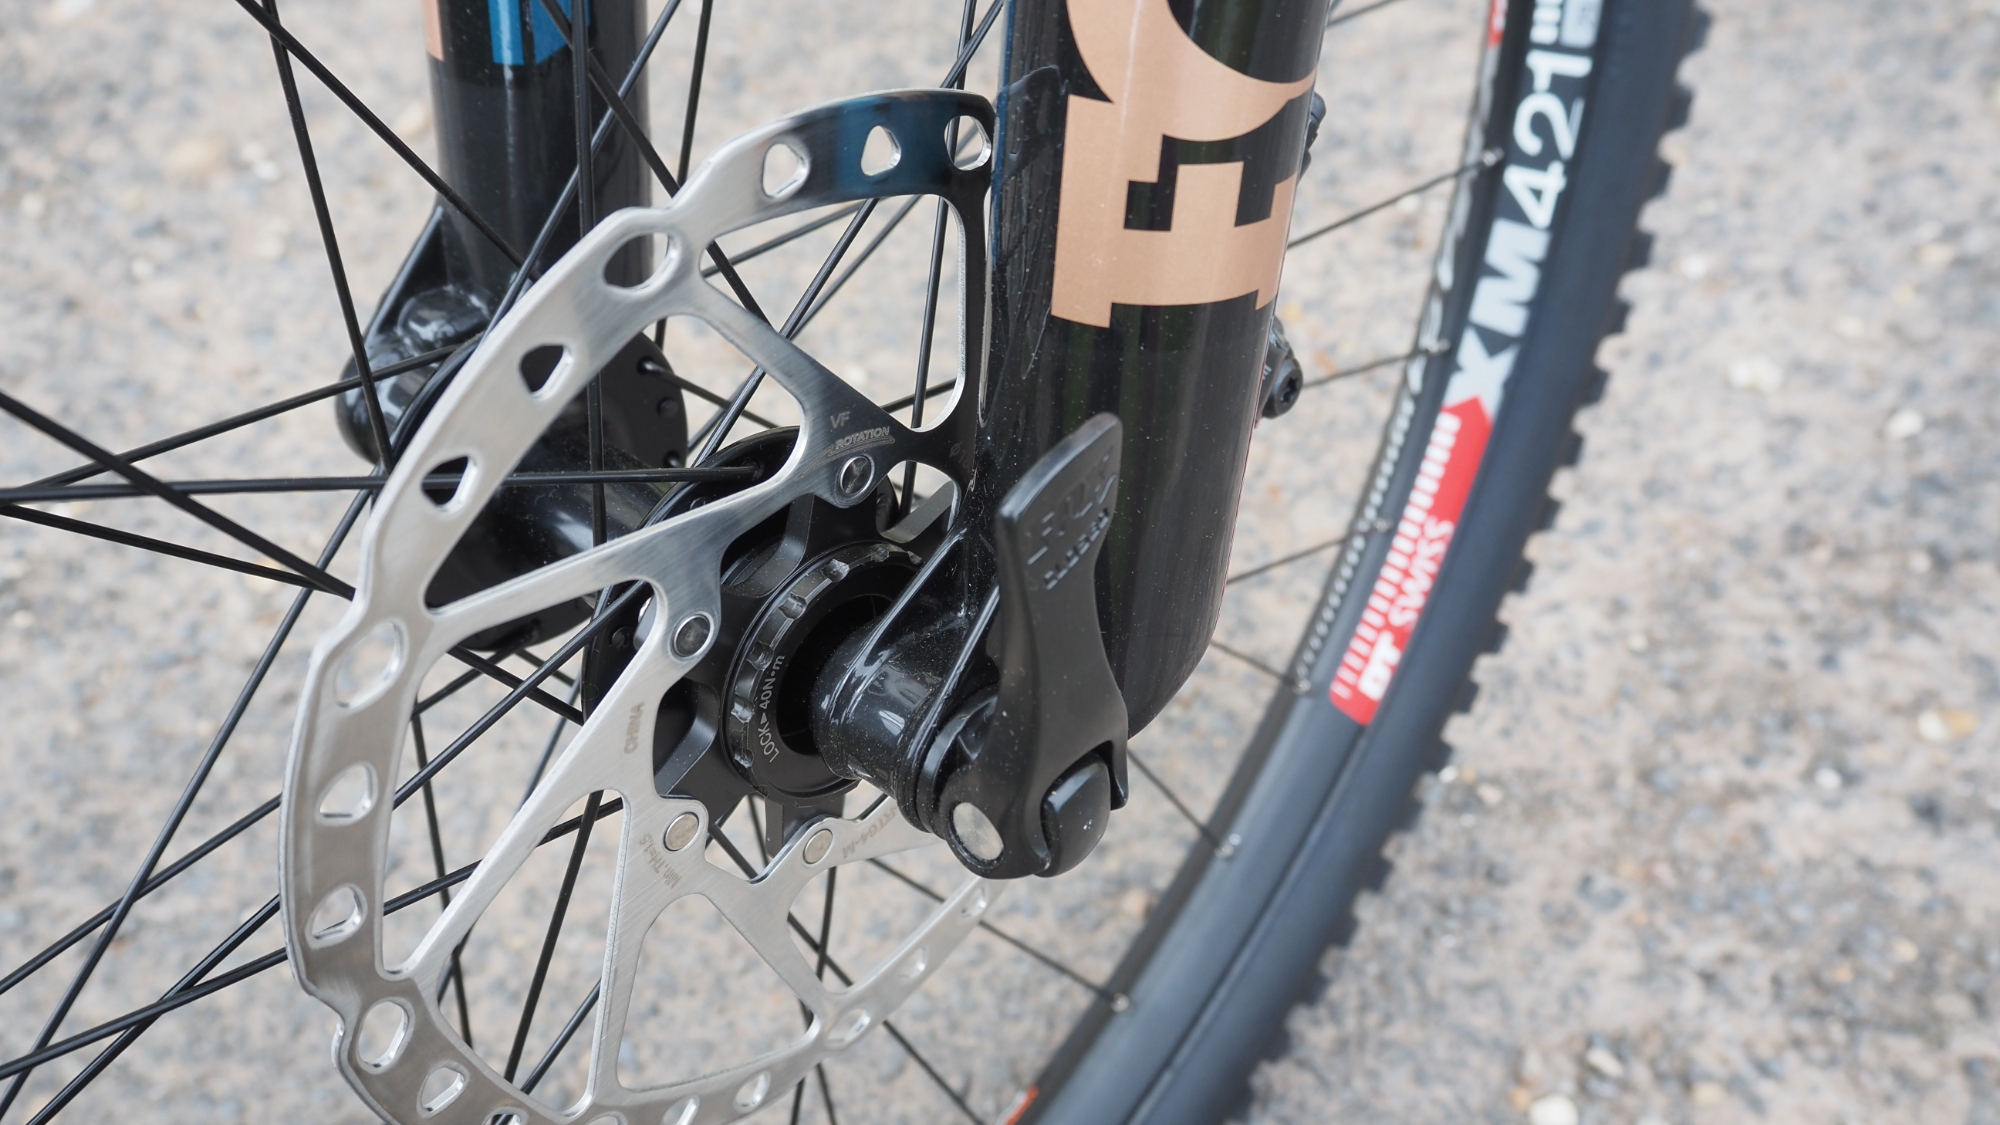
Thru axle
Hollow axle for the front hub in either 15mm (XC, trail, enduro forks) or 20mm (DH, bike park forks) diameter. Most designs simply screw into the fork and come in simple bolted or cam axle formats. Suntour’s Q-Loc uses an expanding rose joint to secure the axle whichever side you slide it in. This is really clever until it gets dirty and then it’s not clever at all. Not sure why anybody shortened through axle to thru axle, but it’s kind of stuck and I hope they got the ‘o’ and ‘g’ keys fixed on their keyboard eventually.
Top out
The behavior of the fork as it reaches full extension. It’s rarely an issue on more expensive forks but some cheap forks can give a real clunk or clang if they rebound as you launch a jump or pull the front of the bike up in a wheelie or manual. Unfortunately, they’re unlikely to have the rebound damping adjustment to solve it.
Top out bumper
Rubber lump or coil spring that stops metal on metal contact at top out (see above).
Transfer port
Small blip on the side of the air spring that farts air from the positive to the negative spring as the piston passes it, automatically balancing the pressures. Not all forks have them but if they do, then you need to compress the fork past the transfer port regularly when setting them up. Otherwise, they’ll feel super stiff to start and then too soft when you hit the first bump and everything equalizes.
Travel
The maximum vertical movement of the fork. Longer travel means your fork can eat up bigger hits without barfing control or breaking your wrists, but that also means more weight. That’s why downhill forks run 200-220mm of travel, but lightweight cross-country forks run 100-120mm.
Travel adjust
The ability to change the travel of the fork. Externally adjustable travel (normally with a windy knob) used to be a common feature on forks, but now adjustment normally involves internal fettling. Sometimes simple, sometimes needing a whole new spring shaft. Check the manual to check the misery level involved before you start plotting.
Travel ring
Rubber ‘O’ ring on the stanchion that gets pushed up towards the crown as the fork moves, letting you know how much travel you’ve used.
Valve head
The piston head on the damper shaft the damping oil flows through. Flow rates can be changed by altering the size of the holes (orifices if you’re being fancy) the oil travels through as the piston is pushed through the oil.
Volume
The capacity of a damper chamber or air spring. The larger the volume of the air spring, the more linear the fork is likely to feel. The smaller the volume the more progressive it will feel.
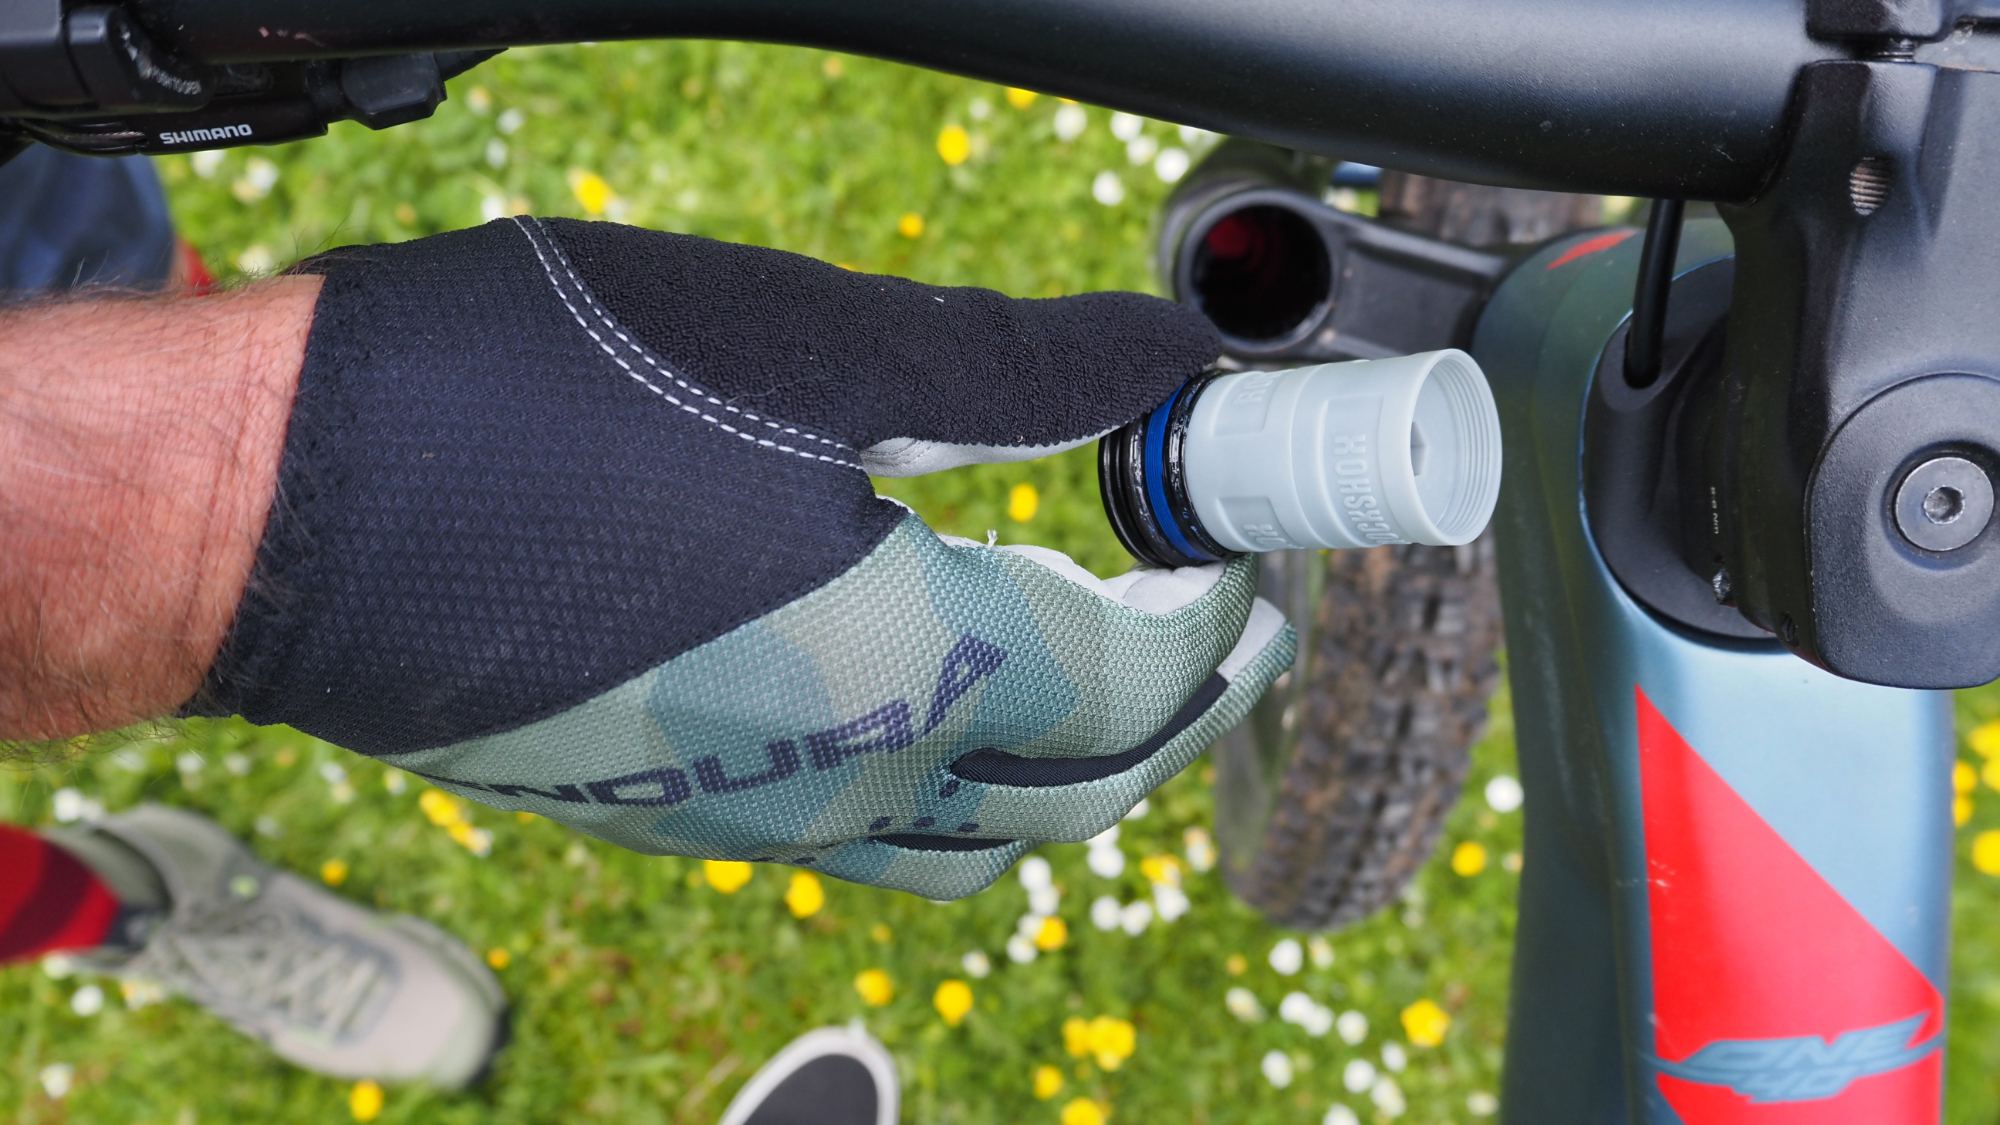
Volume spacers
Plastic cylinders that take up space in the air spring. By reducing the volume of the spring it becomes more progressive, so the fork uses less stroke for a given impact force. So if your fork is feeling good but bottoming out too easily add more spacers. If it’s not using all it’s travel at least once per ride then check how many spacers are already installed and take them out.
WTF Manitou
Manitou was one of the original MTB suspension brands, releasing their first fork in 1990 and they’ve done things differently ever since. This includes coloring their compression dampers red and their rebound dials blue and using reverse arches for most of their history. They also stuck doggedly to post mount brake fixtures for decades while everyone else went to ‘International Standard’ mounts. Everyone is back on post mount though so they won that one in the end.


