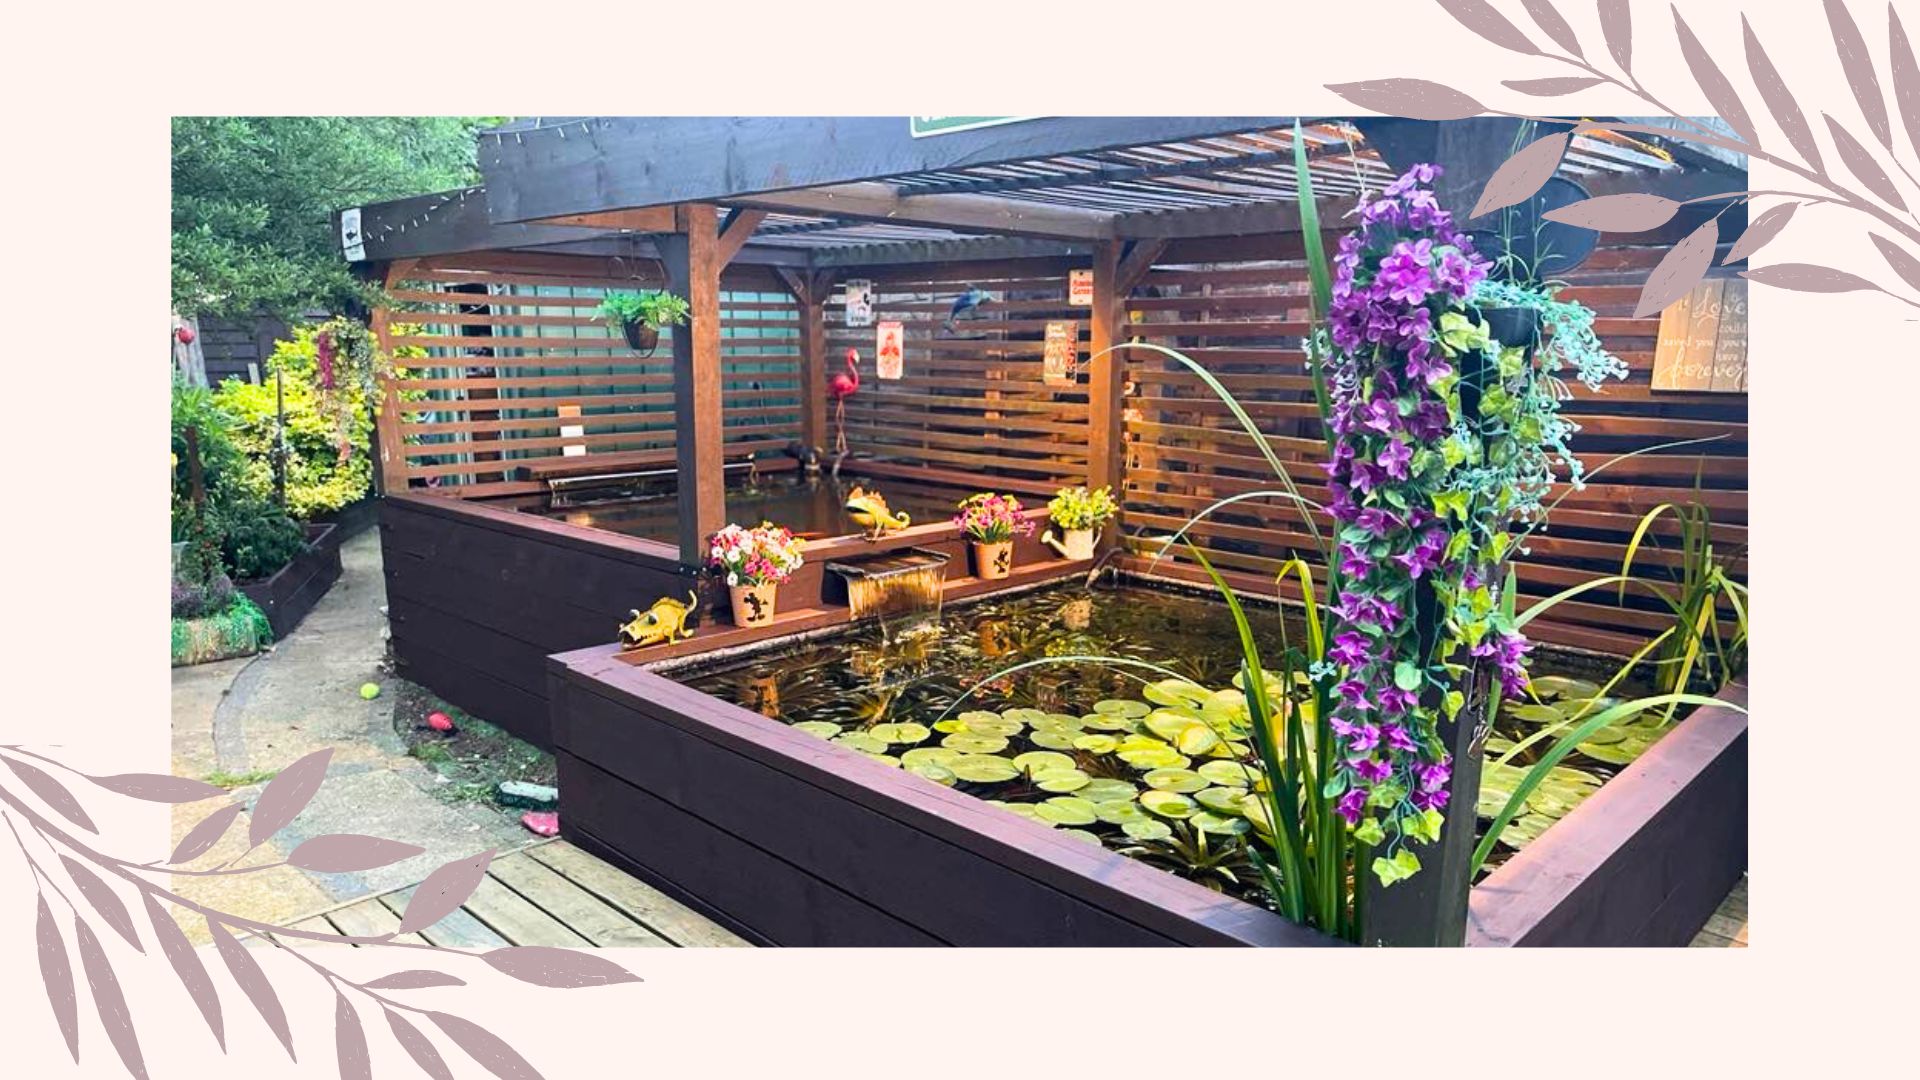
How do you keep your garden lush and wildlife-friendly without breaking the bank? This homeowner has created a luxurious double-stacked pond and they did it on a budget.
No matter what garden trends you're participating in, building a pond in your garden is one of the best ways to welcome the rewilding trend into your space. It looks chic and adds a relaxing ambience to any space. It looks like hard work, but homeowner Clare Davis has tips for making life easy.
Claire and her husband completed the premium double-stacked pond together. "It was a labour of love," they said, "but it was worth it". I agree. Affordable luxury has never looked so good.
How did they do it?
We've all thought about adding a pond to the back garden. It comes with all sorts of benefits; ornamental ponds can add value to your property, enhance the biodiversity in your garden, and they'll provide some soothing white noise for when you're relaxing outside. The reason that stops most people is price and maintenance: how do you build an attractive pond in your garden? And how do you stop it from going green?
In the process of looking for some pond inspiration, I came across Claire Davis' double-stacked pond. It looks impressive, so when she told me it was a project completed by her and her husband, I had to hear more.
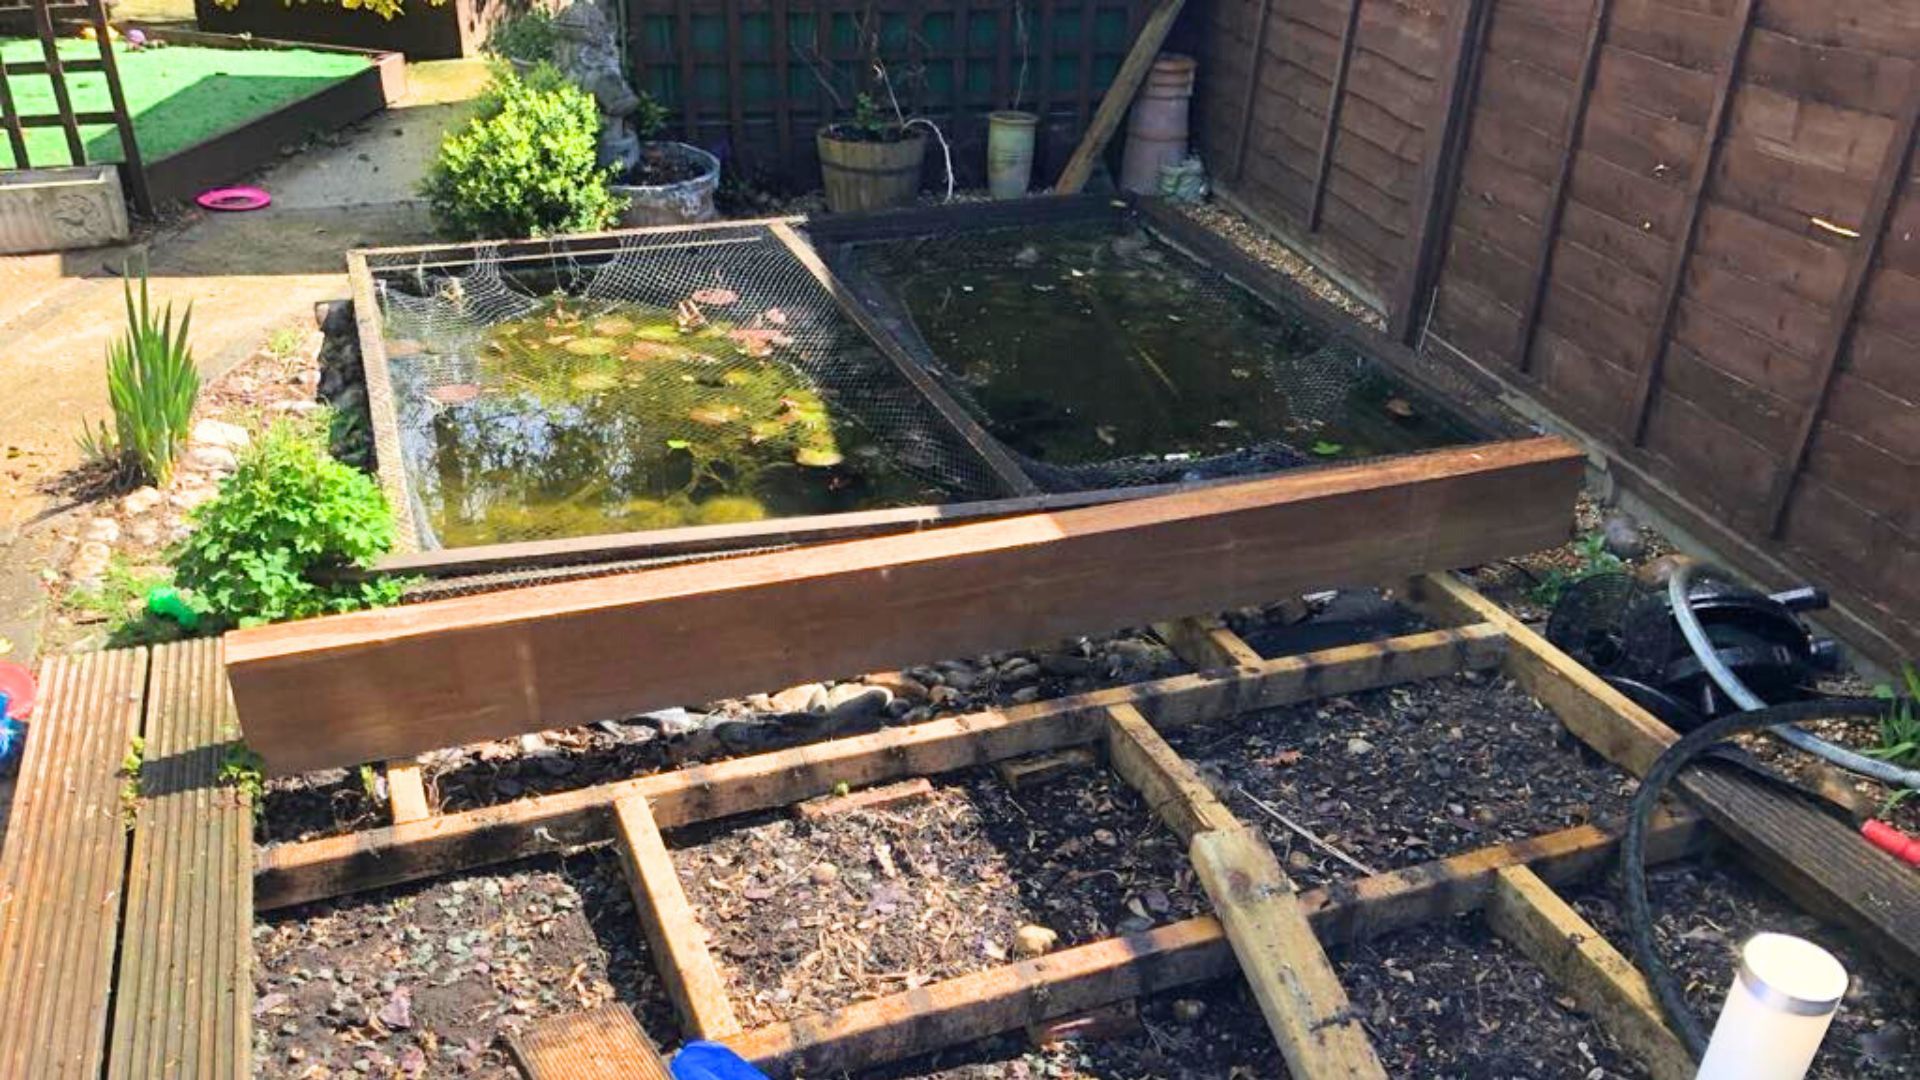
The pond project had a charming start. "We decided to do the raised pond as our German Shepherd, Masson, had decided that our ground level pond was his personal swimming pool," says Clare, "even though the fish didn’t mind my living room floor did!"
They did some research and decided the best thing to do was to build a raised pond, but the couple wanted to keep costs down. "The 'cheapest option' seemed to be railway sleepers, we knew we couldn’t use reclaimed ones as they’re obviously treated so that could potentially contaminate the water so I rung around and luckily we had a timber yard that had them for a decent price," explains Clare.
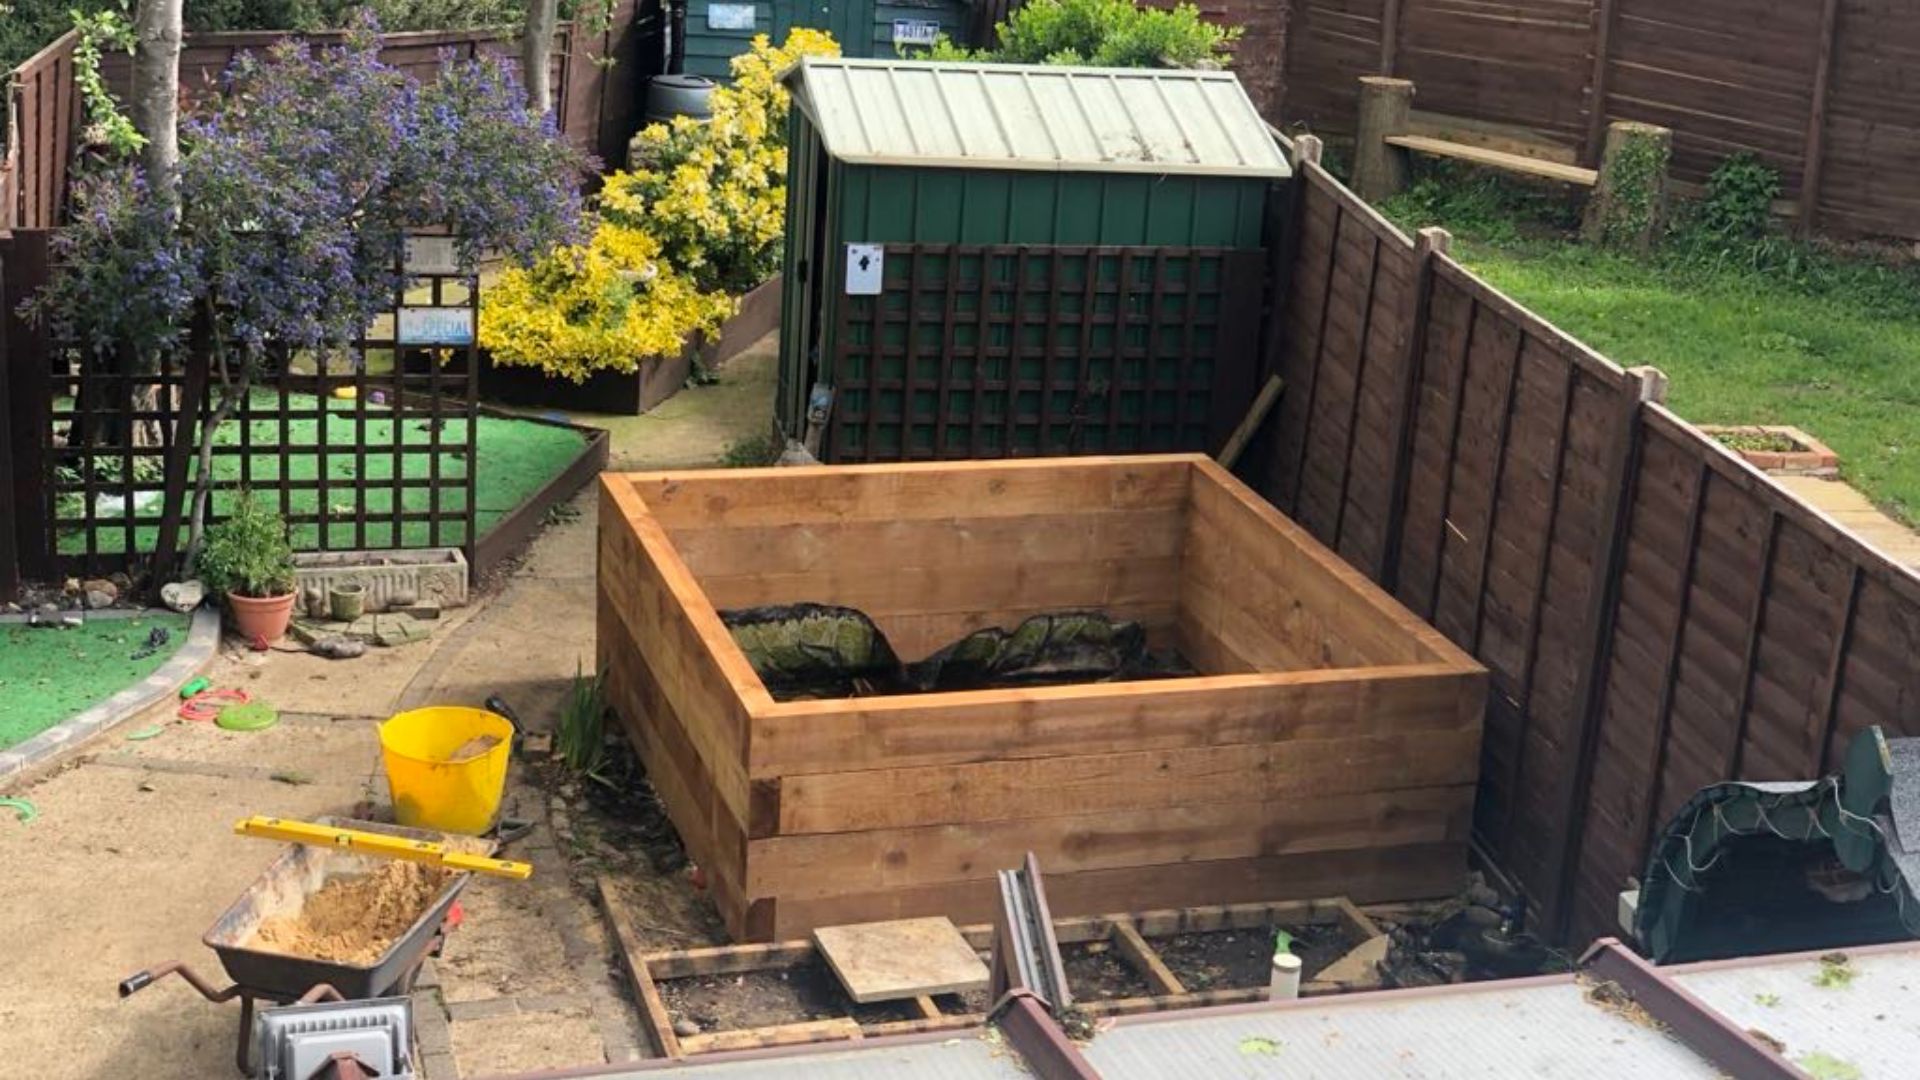
Once they'd secured the timber, the couple shopped around for other materials. They collected materials from Gaz's work, scrap metal places, and pond supply stores online. Pretty soon, they were ready to start the build.
"The actual putting together of the sleepers was relatively easy considering Gaz had never done anything like this before. The real challenge was getting it level because we were putting them around our original pond. There was a fair bit of sweating, swearing and rowing," says Clare.
"To keep the liner in place we had some wood cut at our local timber suppliers that was painted with two coats of normal fence paint and then two coats of Cuprinol shades as we knew that had a danger of getting wet so would need protecting," she continues.
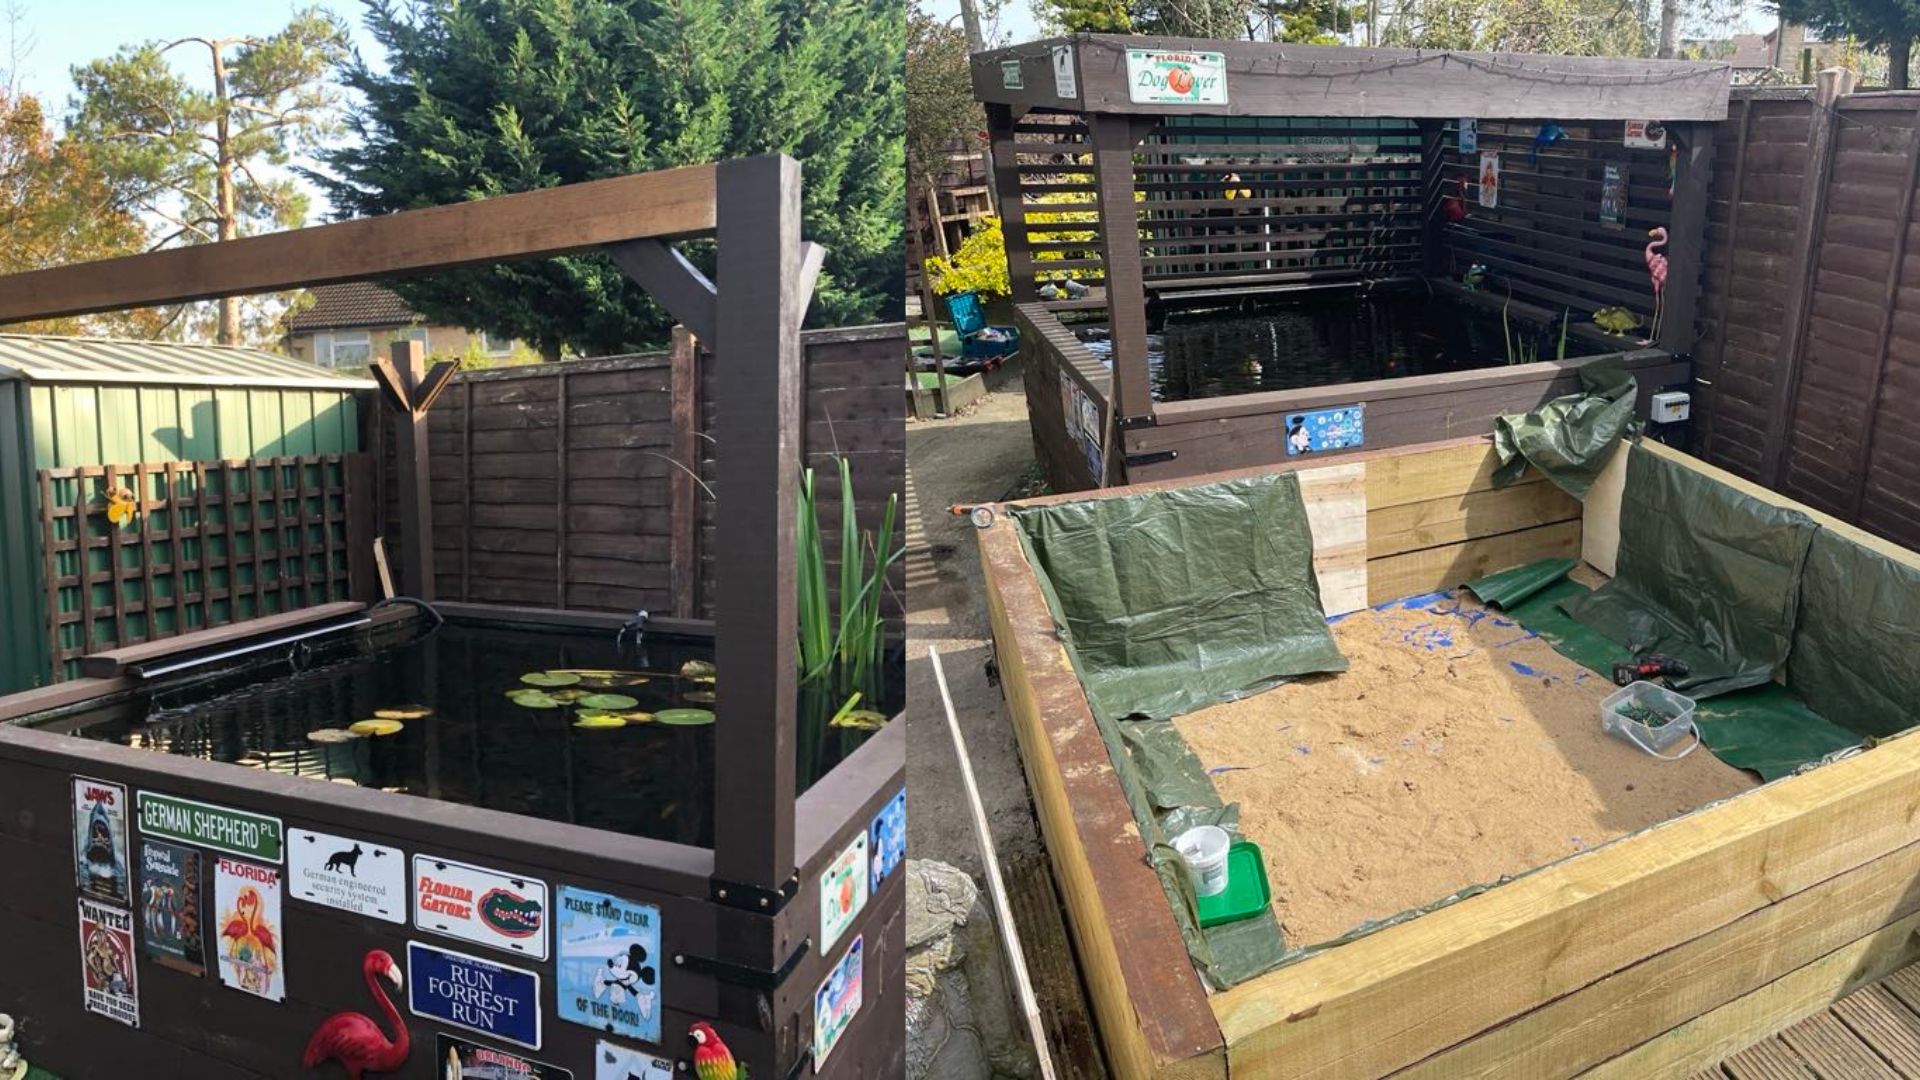
Clare says that they didn't actually add the roof on until a year after the first pond was built. The second pond came around because the pair received an email from the timber company stating they had a sale — and who can resist that?
"We still had the liner in the loft, so saved on that. We had some batons left over from the original project and a couple of scaffold boards too. The brackets were our most expensive part for what they were, but again, it’s a lot of weight so we needed it secure," she explains.
As for budget, the homeowners didn't have a particular budget but managed to keep the costs down by opting for the cheapest route whenever they could.
"We didn’t start with a budget — we never do — we just try to find the cheapest way of doing things and we buy things in stages. We usually try and cut back other ways when we do weekly food shops or we sell things on Facebook Marketplace. Some of the pond project was funded by selling the pond lilies that had grown like mad," Clare states.
When asked if there were any crazy challenges or surprise issues, Clare said that they did all their learning with the first pond, so the second one was really smooth.
"For example, we learnt with the first pond that water pressure can be a real issue," says Claire, "we were away on holiday one summer and our then dog sitter had popped around to water our plants and the pressure of the water had caused one of the sleepers to move. We had to drain the pond and make it much more secure, especially when we built the second pond. You just can't underestimate water!"
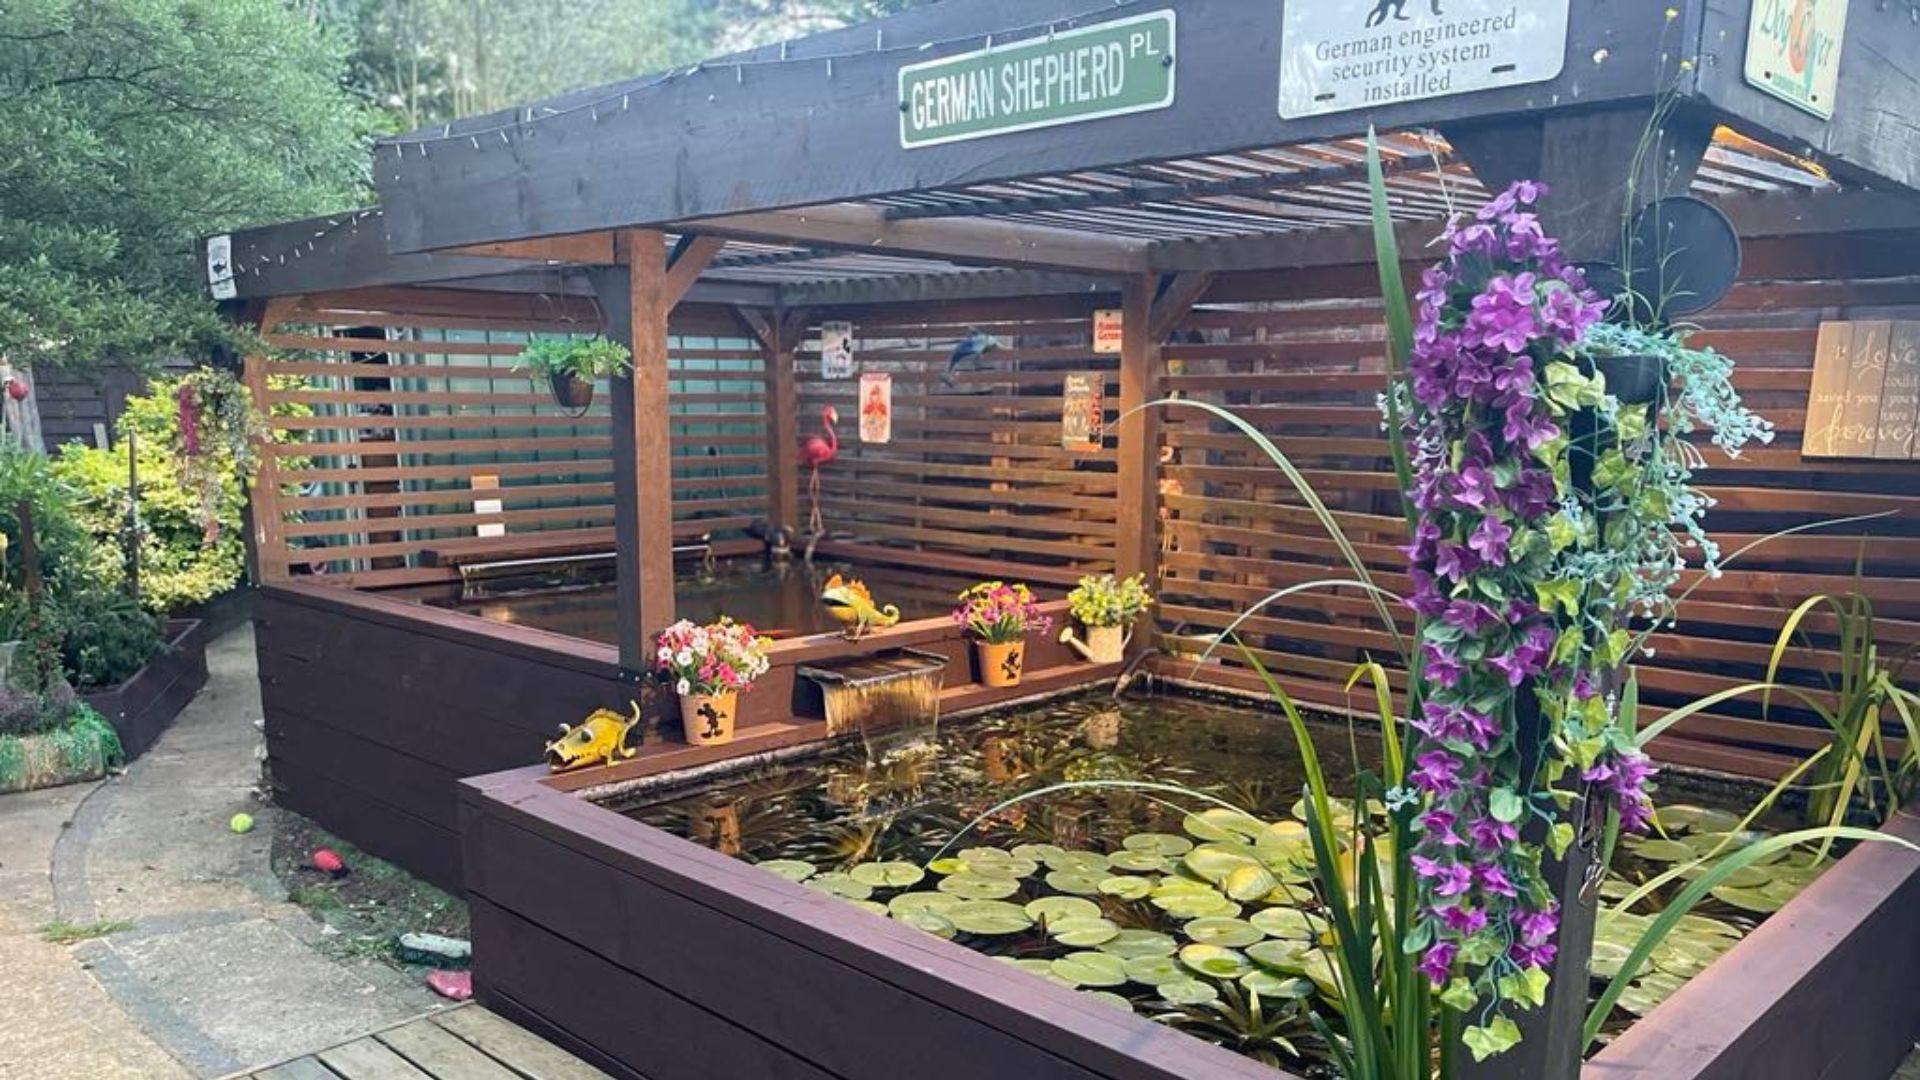
Whilst Clare wasn't all that struck on having ponds in the first place, she says they're now her favourite part in the garden.
"Our pup thinks the lower pond is his personal water bowl so the ponds still attract the dogs! But really, they're something that everyone comments on when they come around to the house. To see the sun on a nice bright day, when the sun is glistening through the water, the garden feels like a sanctuary," says Clare.
"I honestly never thought we’d be able to afford something so spectacular and “fancy” in my garden. And yes, they were a lot of hard work, but I'm immensely proud of them". So, if you need a sign to build a pond in your garden, here it is.
Want to get started? Here are our pond essentials
And if you're already brainstorming how you can recreate Clare's impressive pond set up then there why not start with some small pond ideas and work your way up to large raised ponds?
Here's what we've got saved ready for our very own pond projects:
The best way to invite plants into the garden is with some pre-existing ones. This kit from B&Q costs just £15. It's simple and easy to use, plus your pond will look amazing.
If you're not yet ready to do the digging for yourself, you can shop garden water features which offer all the relaxing water sounds for your garden, without the sweat and effort. They can be up to £500, but this is just £67.99
If you're getting a little more elaborate, it's worth adding a waterfall spout to your pond. This is available in a range of weights and designs, perfect for any kind of pond and water feature.
Feeling inspired? There's no time quite like the present for getting started on your latest garden water feature. And now you know you can do it whilst being thrifty, there's no excuse.


