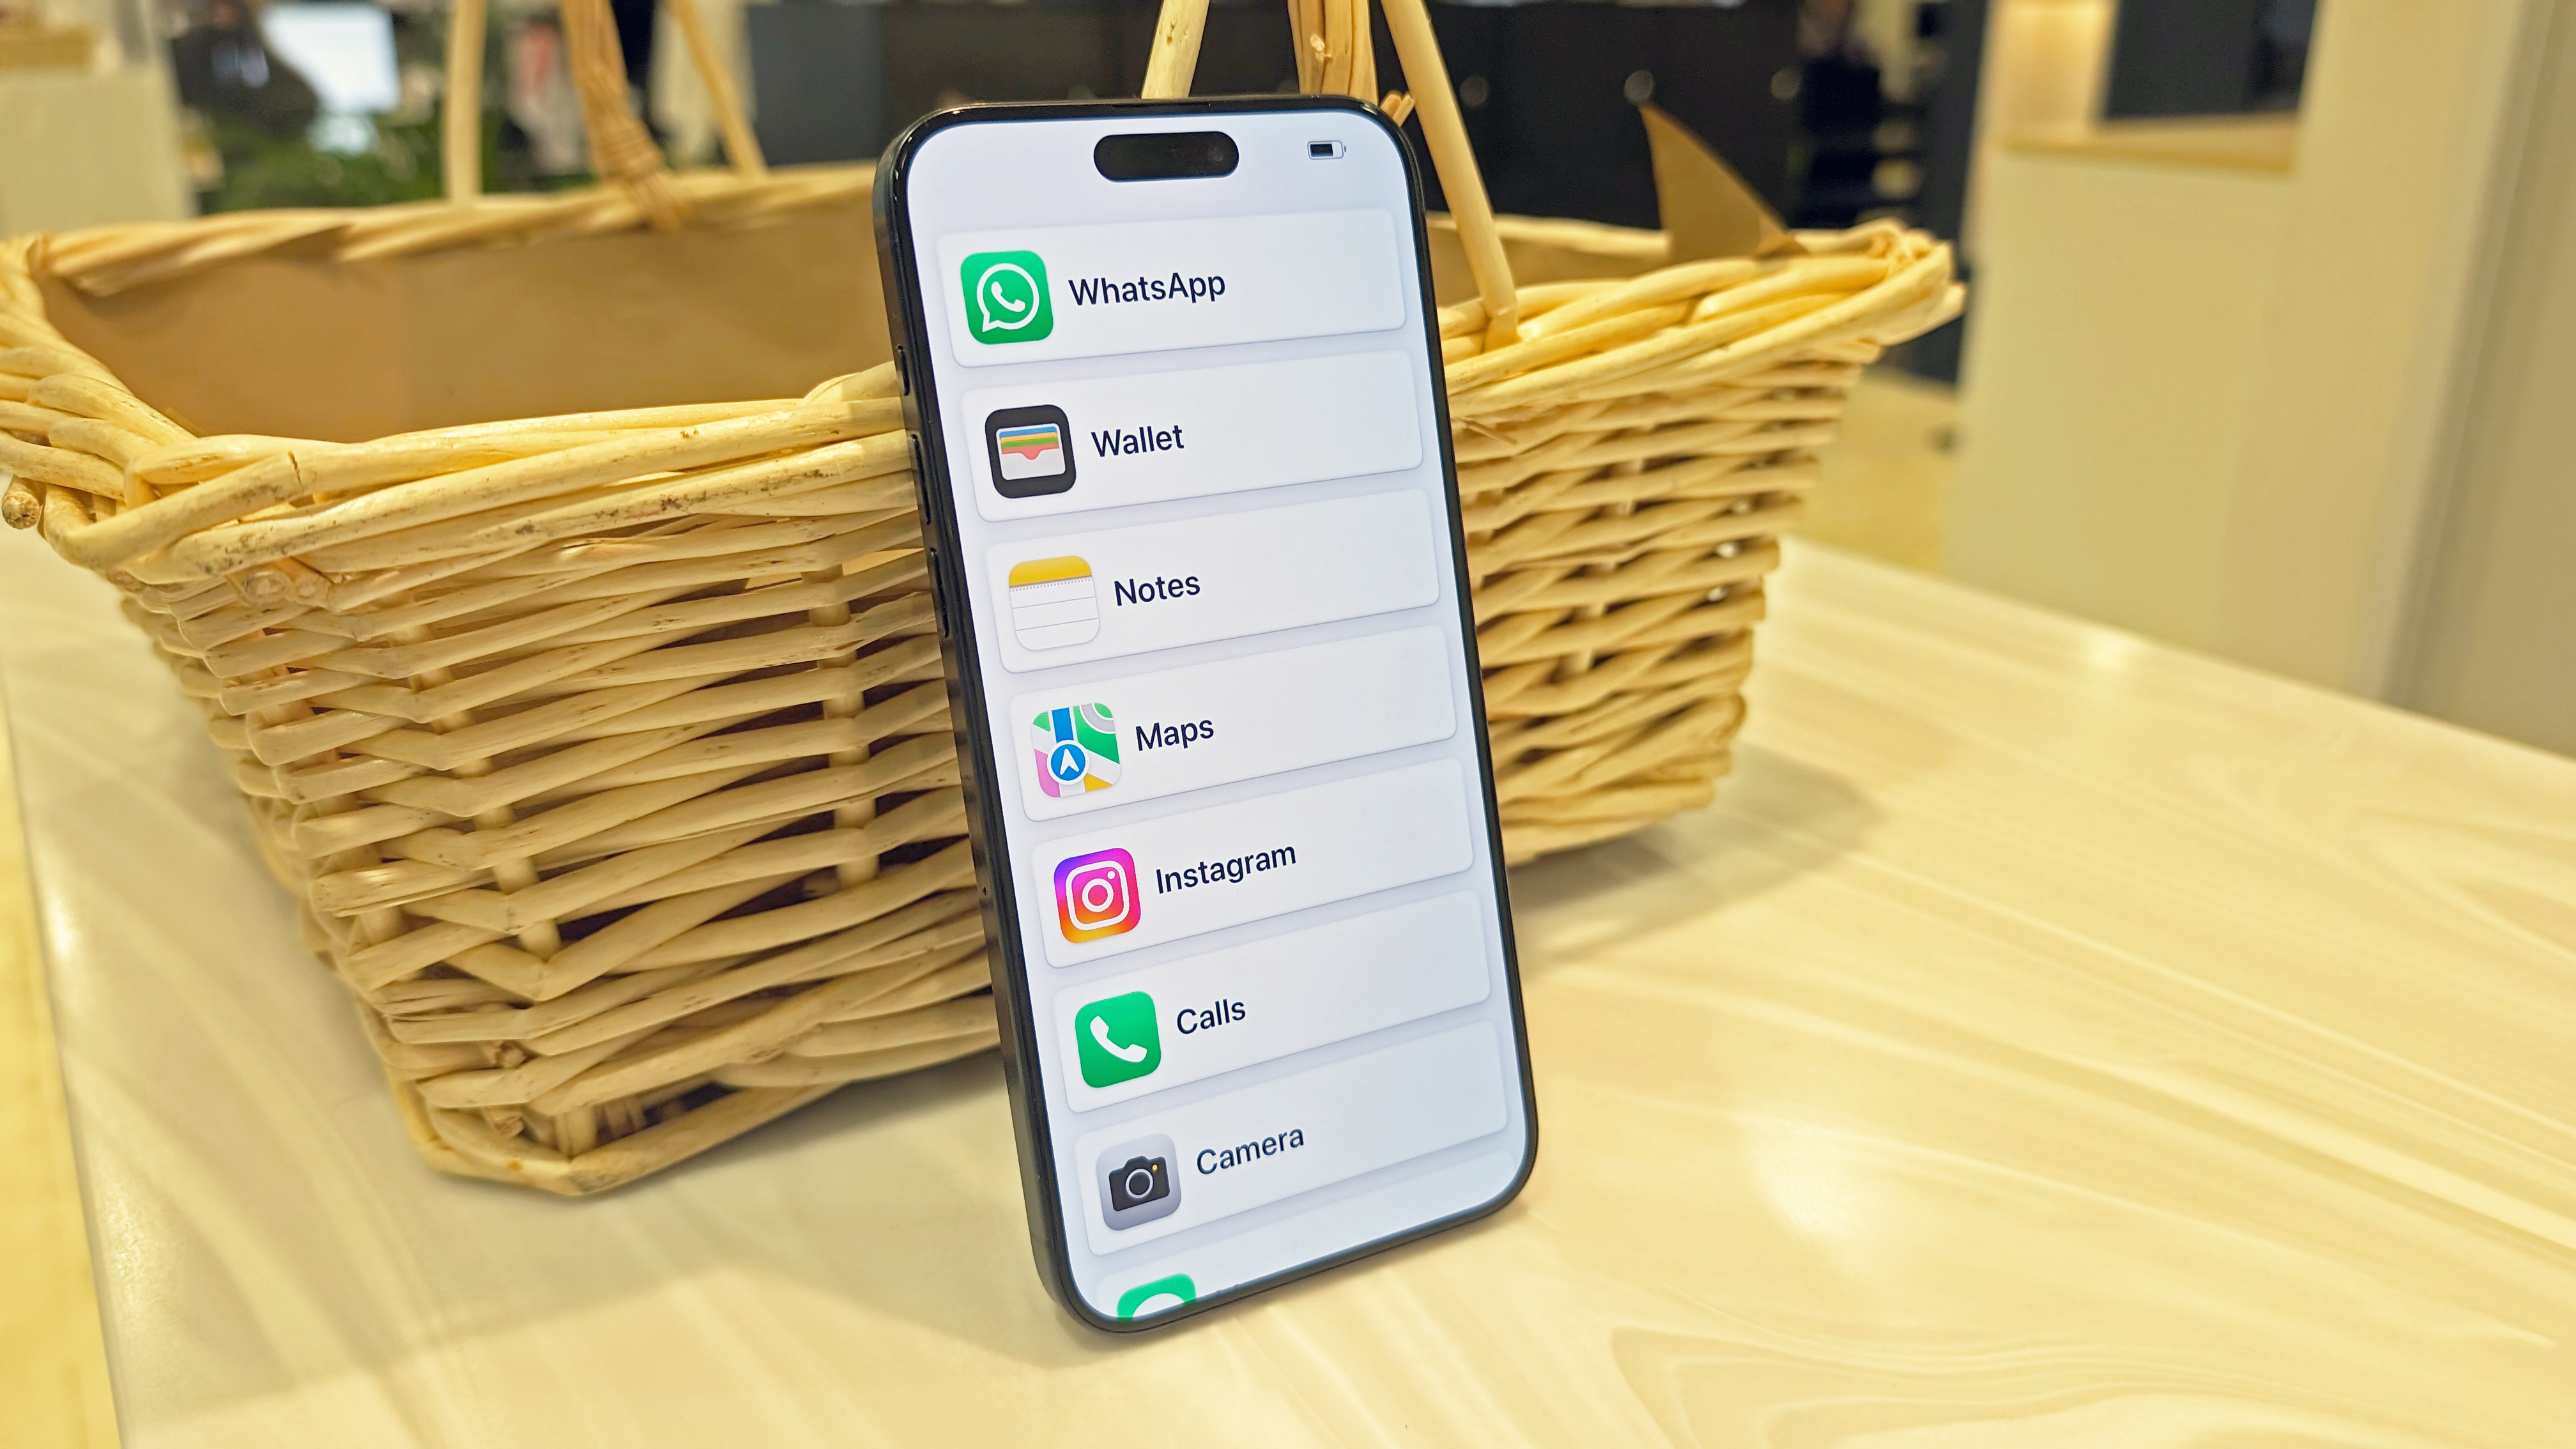
iOS 17 Assistive Access is a potentially powerful tool that can help you make a more comfortable iPhone experience for less confident or cognitively impaired user, or perhaps for users who fancy taking a break from all the smarts of their smartphone.
Depending on how you set it up, Assistive Access can make almost everything much simpler to navigate and use on your iPhone. Not everything's necessarily optimized for use with the larger on-screen text and navigation buttons but you can certainly still use your favorite apps in this new interface.
Before you try out Assistive Access, though, you'll have to set it all up from scratch. So scroll down and let us help you set up Assistive Access on iPhone.
How to set up Assistive Access on iPhone
1.Open Assistive Access in Settings
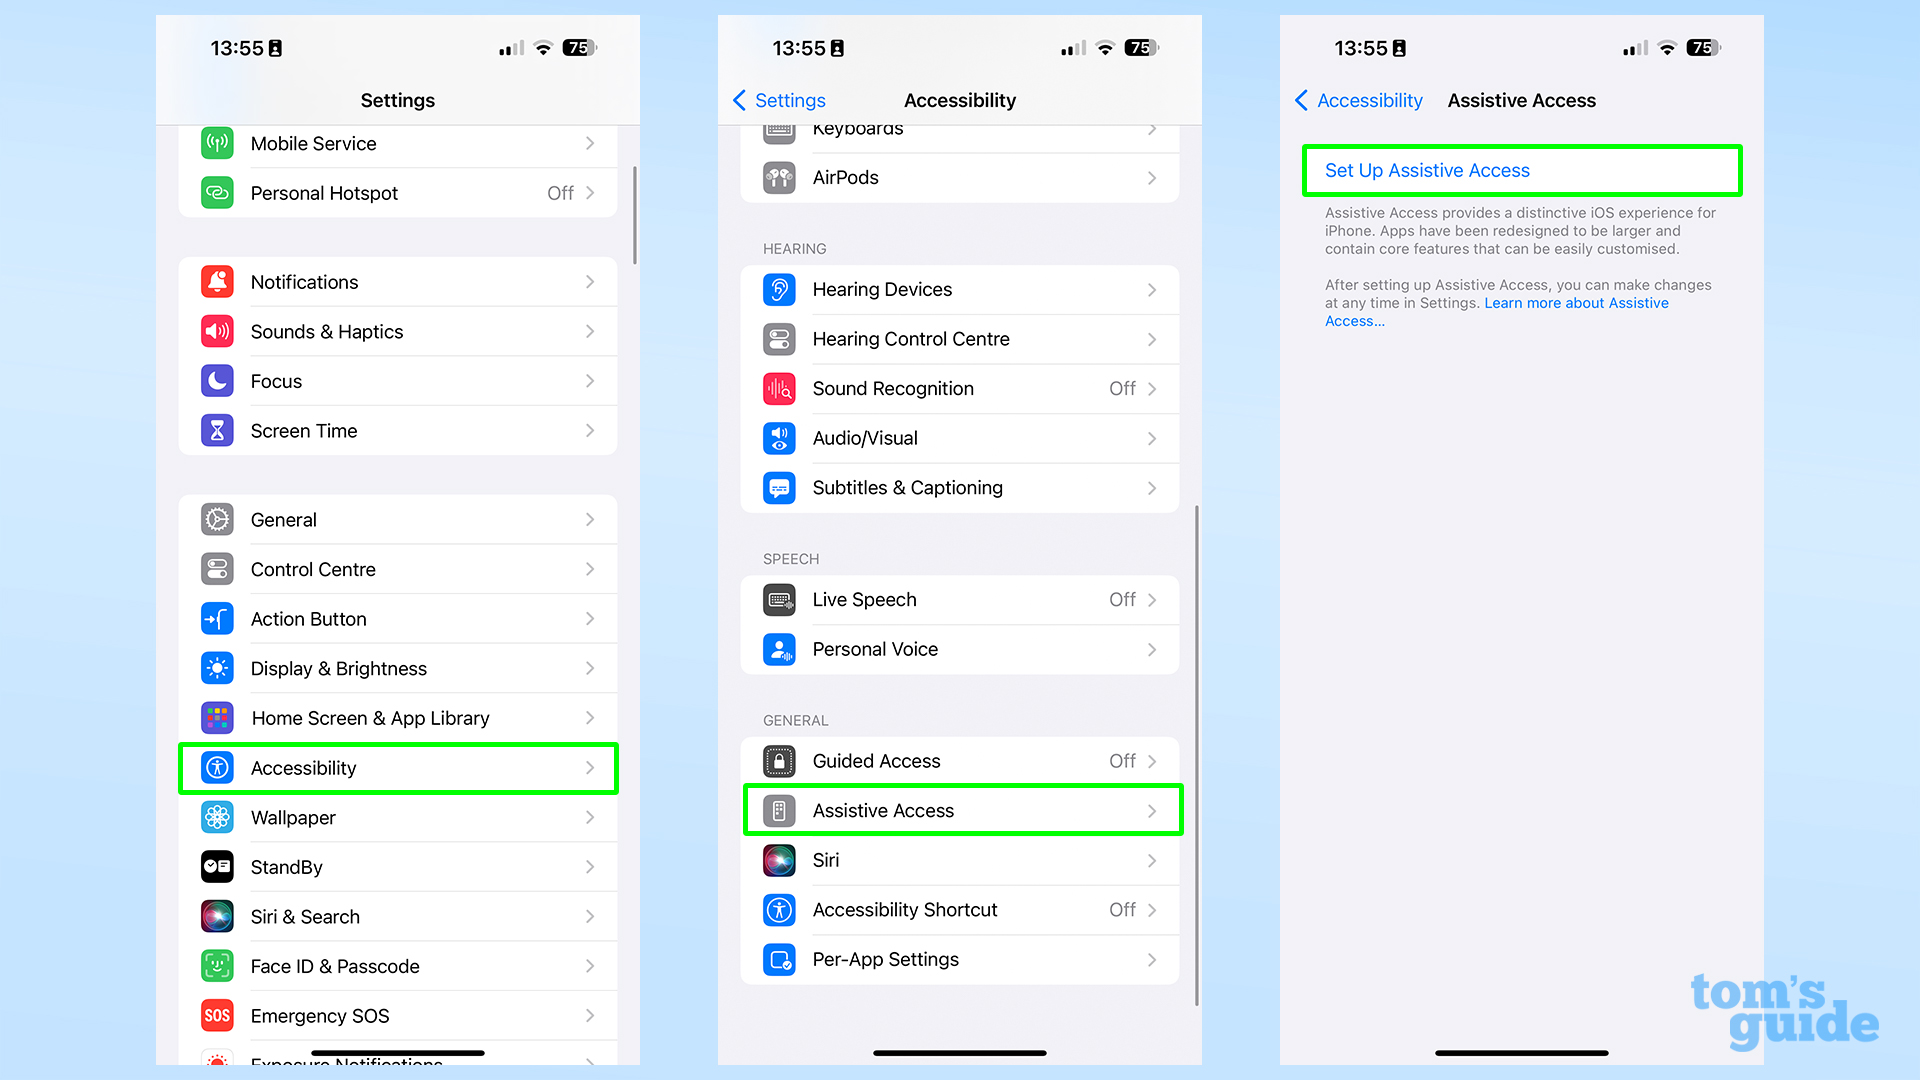
Assistive Access can be found in the Settings app, under the Accessibility section in its own sub-section.
2. Choose the user's account
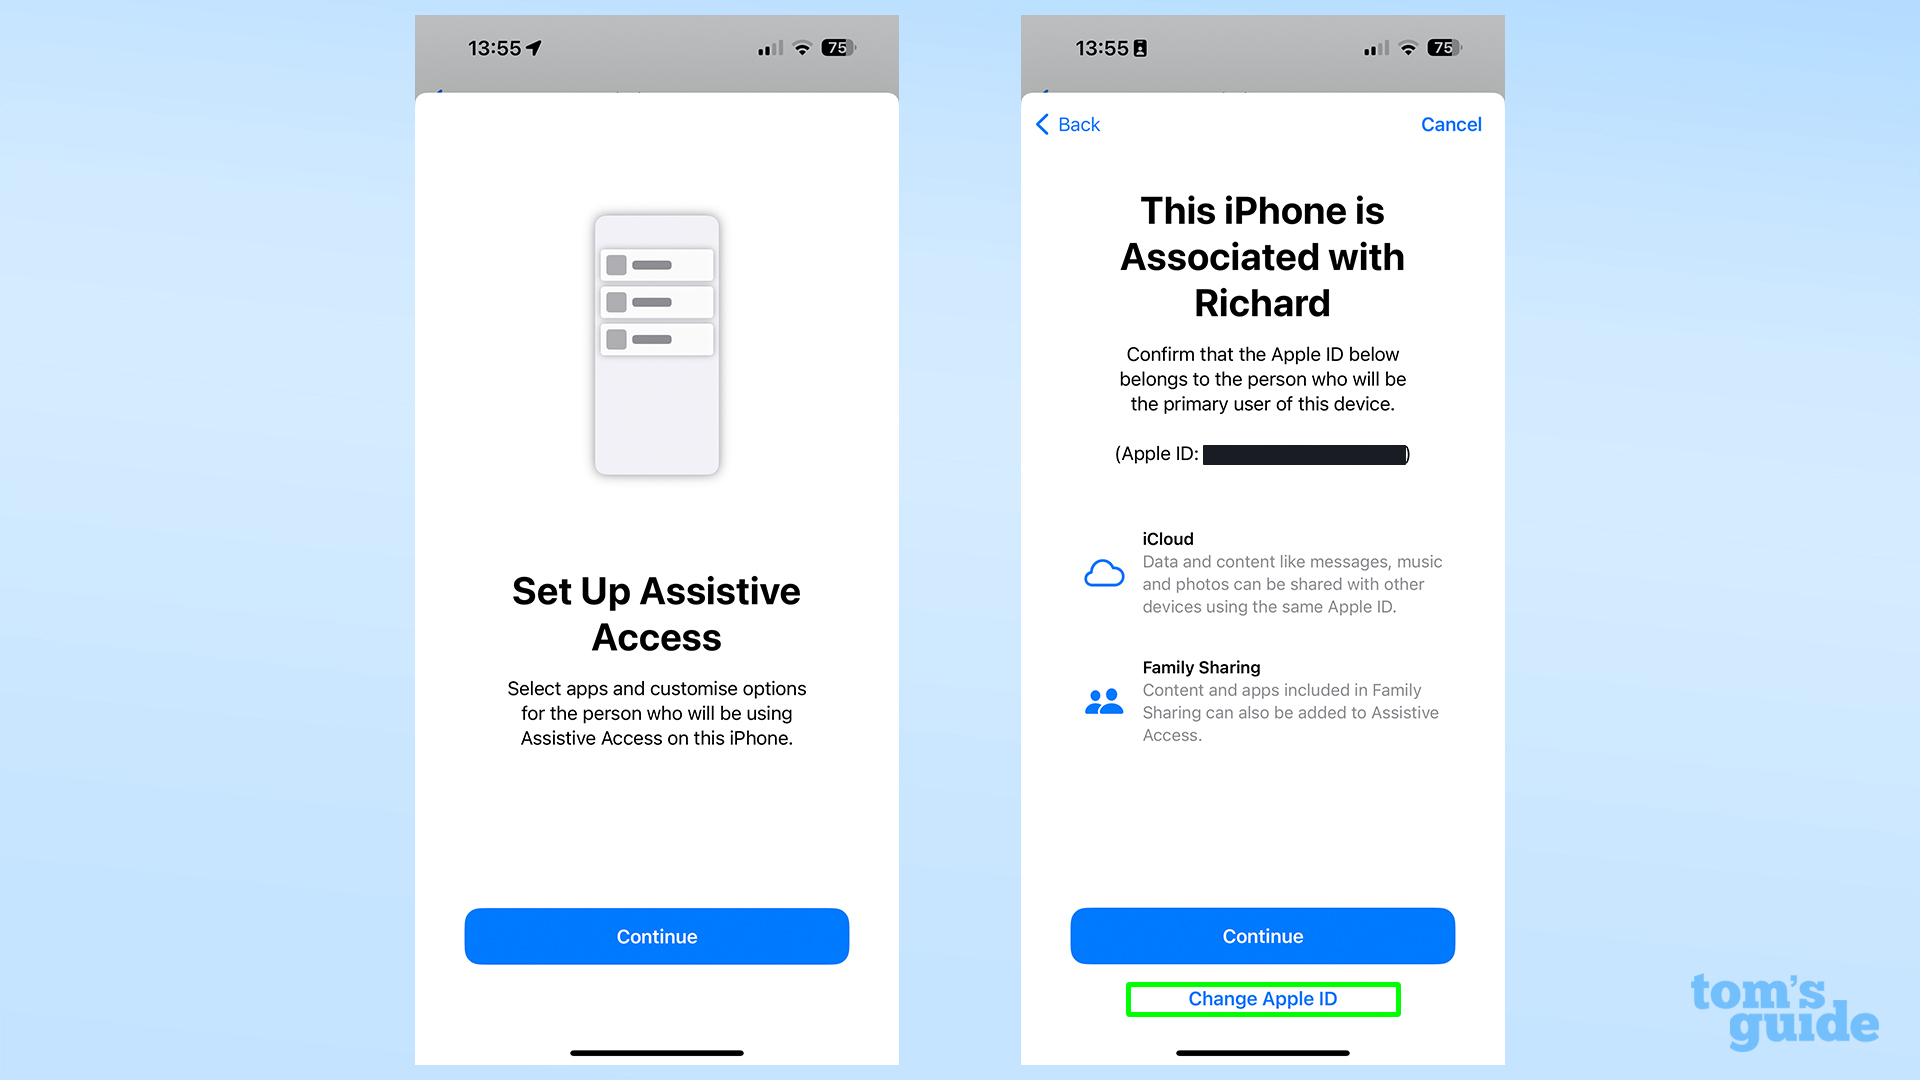
If you're setting up Assistive Access for yourself, you can go straight ahead and hit continue. If, however, you need to set it up for another user, you'll have to tap Change Apple ID and set up an account for the phone's intended user.
3. Choose a row or grid-based layout
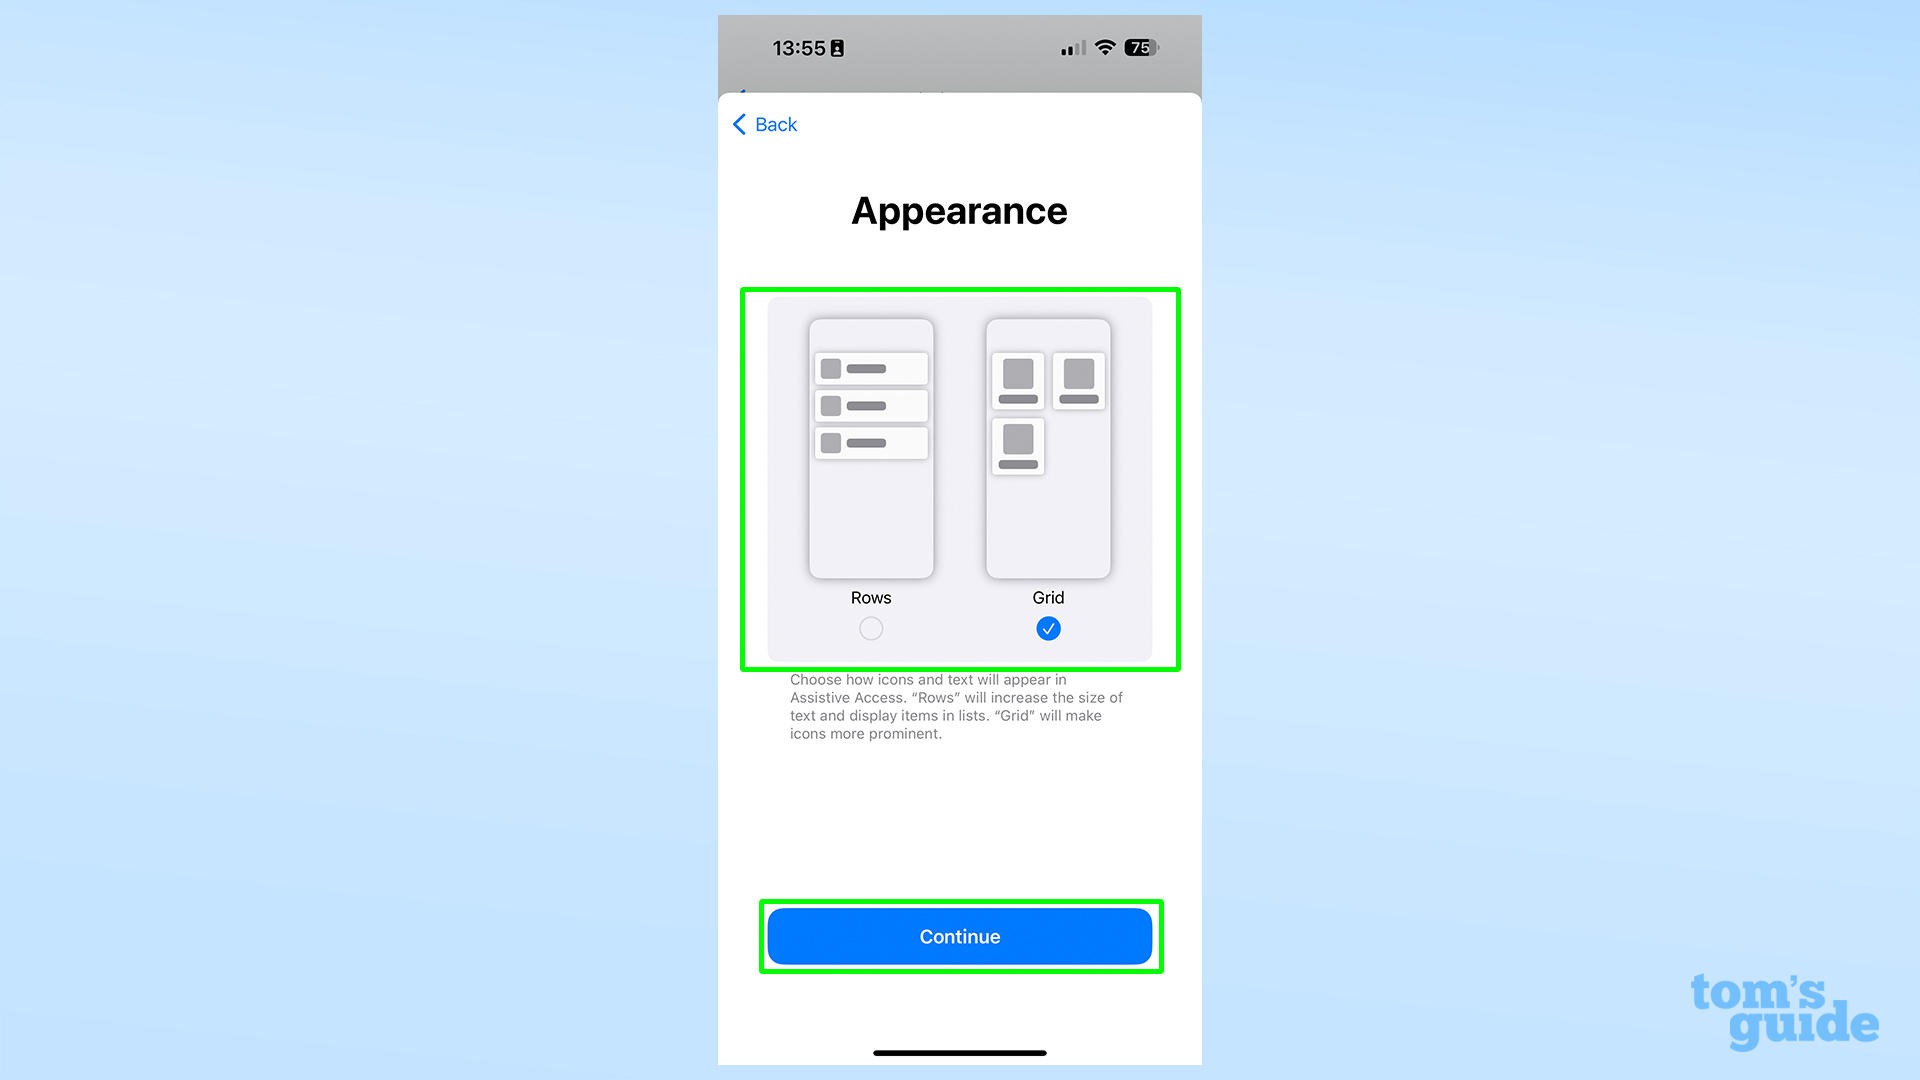
This choice is entirely up to your preference. Grid lets you fit two columns of apps on-screen and makes the icons larger. Rows features a single column of apps where the text is more visible.
4. Choose your apps
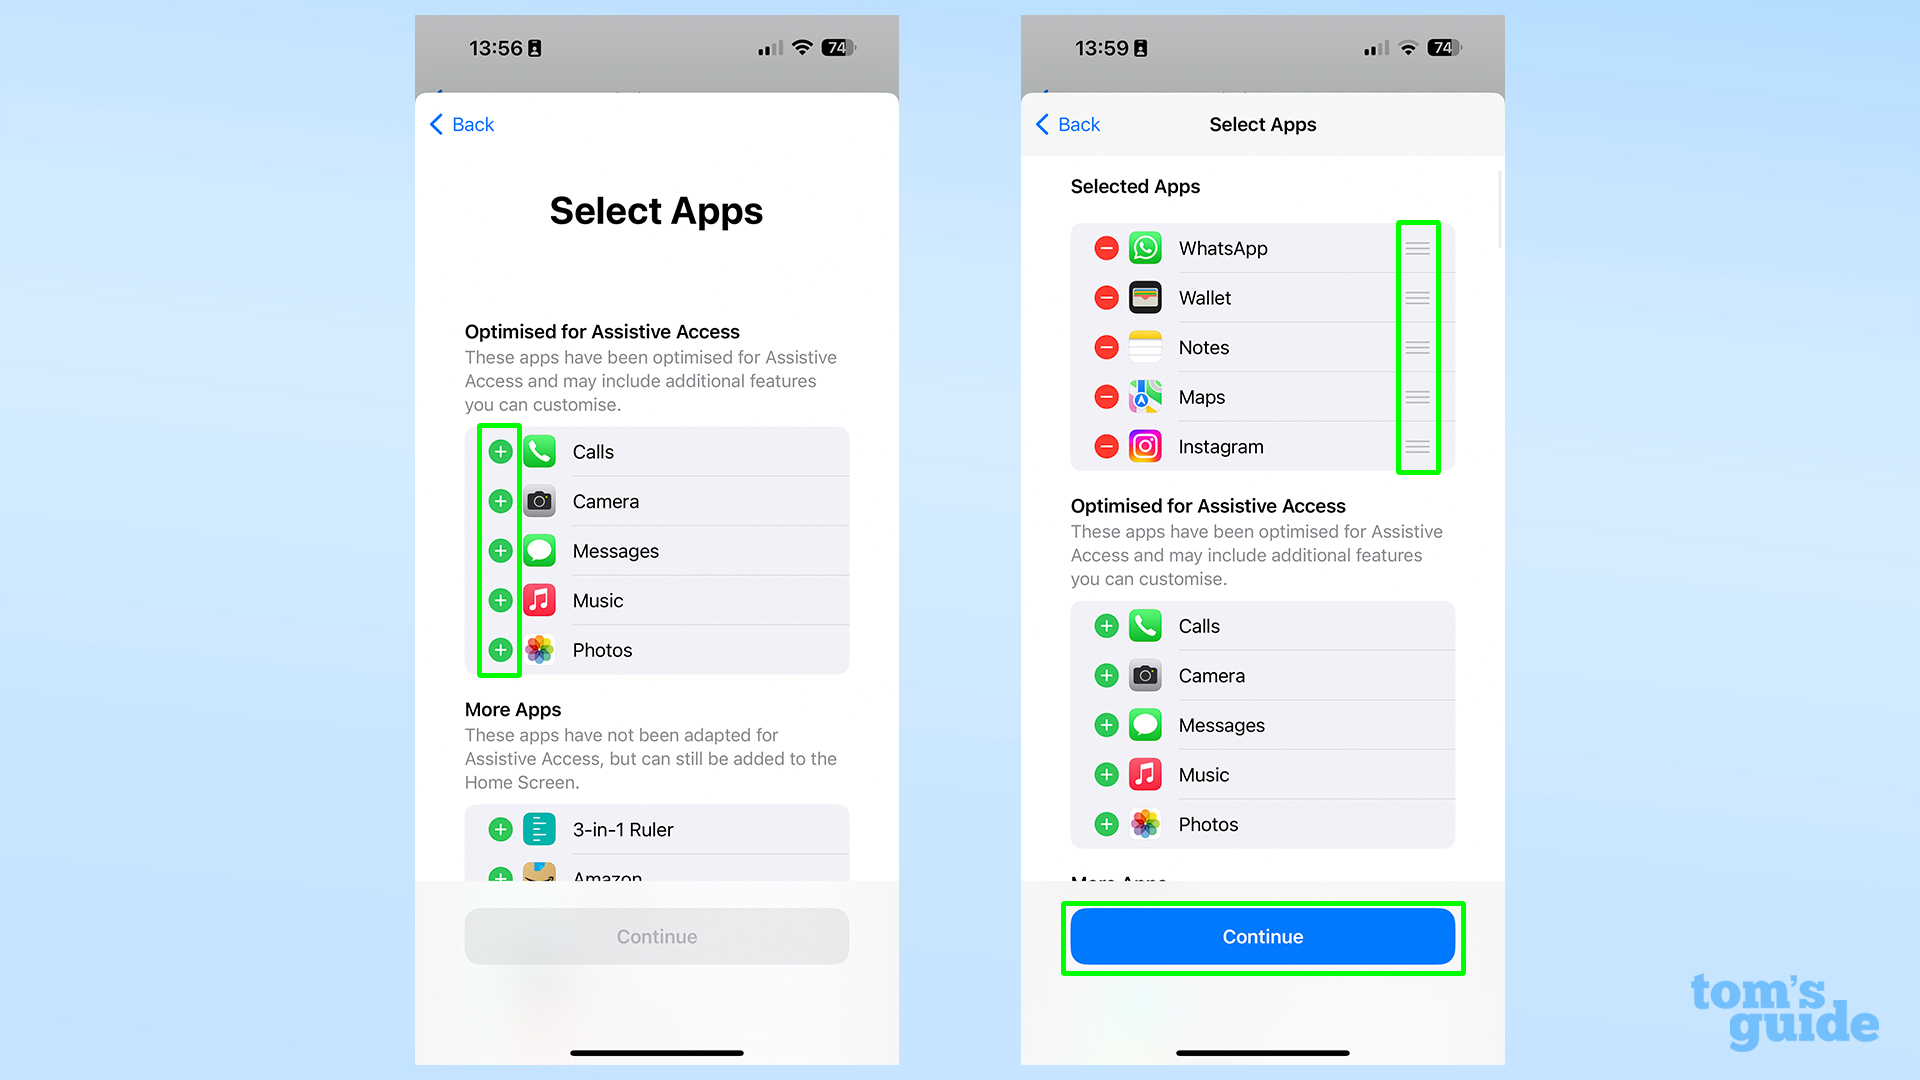
Tap the green plus icons to add apps to the Assistive Access home screen. There's no App Library with Assistive Access enabled, so you'll need to add everything you might need to your home screen.
When you've added your apps, use the drag handles to move them around. Once you're happy, hit Continue
You'll see that the apps are divided into two groups. Optimized apps are those made to work well with assistive access and have redesigned interfaces to make them easier to use. More Apps contains every other compatible app, but these run in a kind of windowed mode rather than having a new look.
5. Set up your security
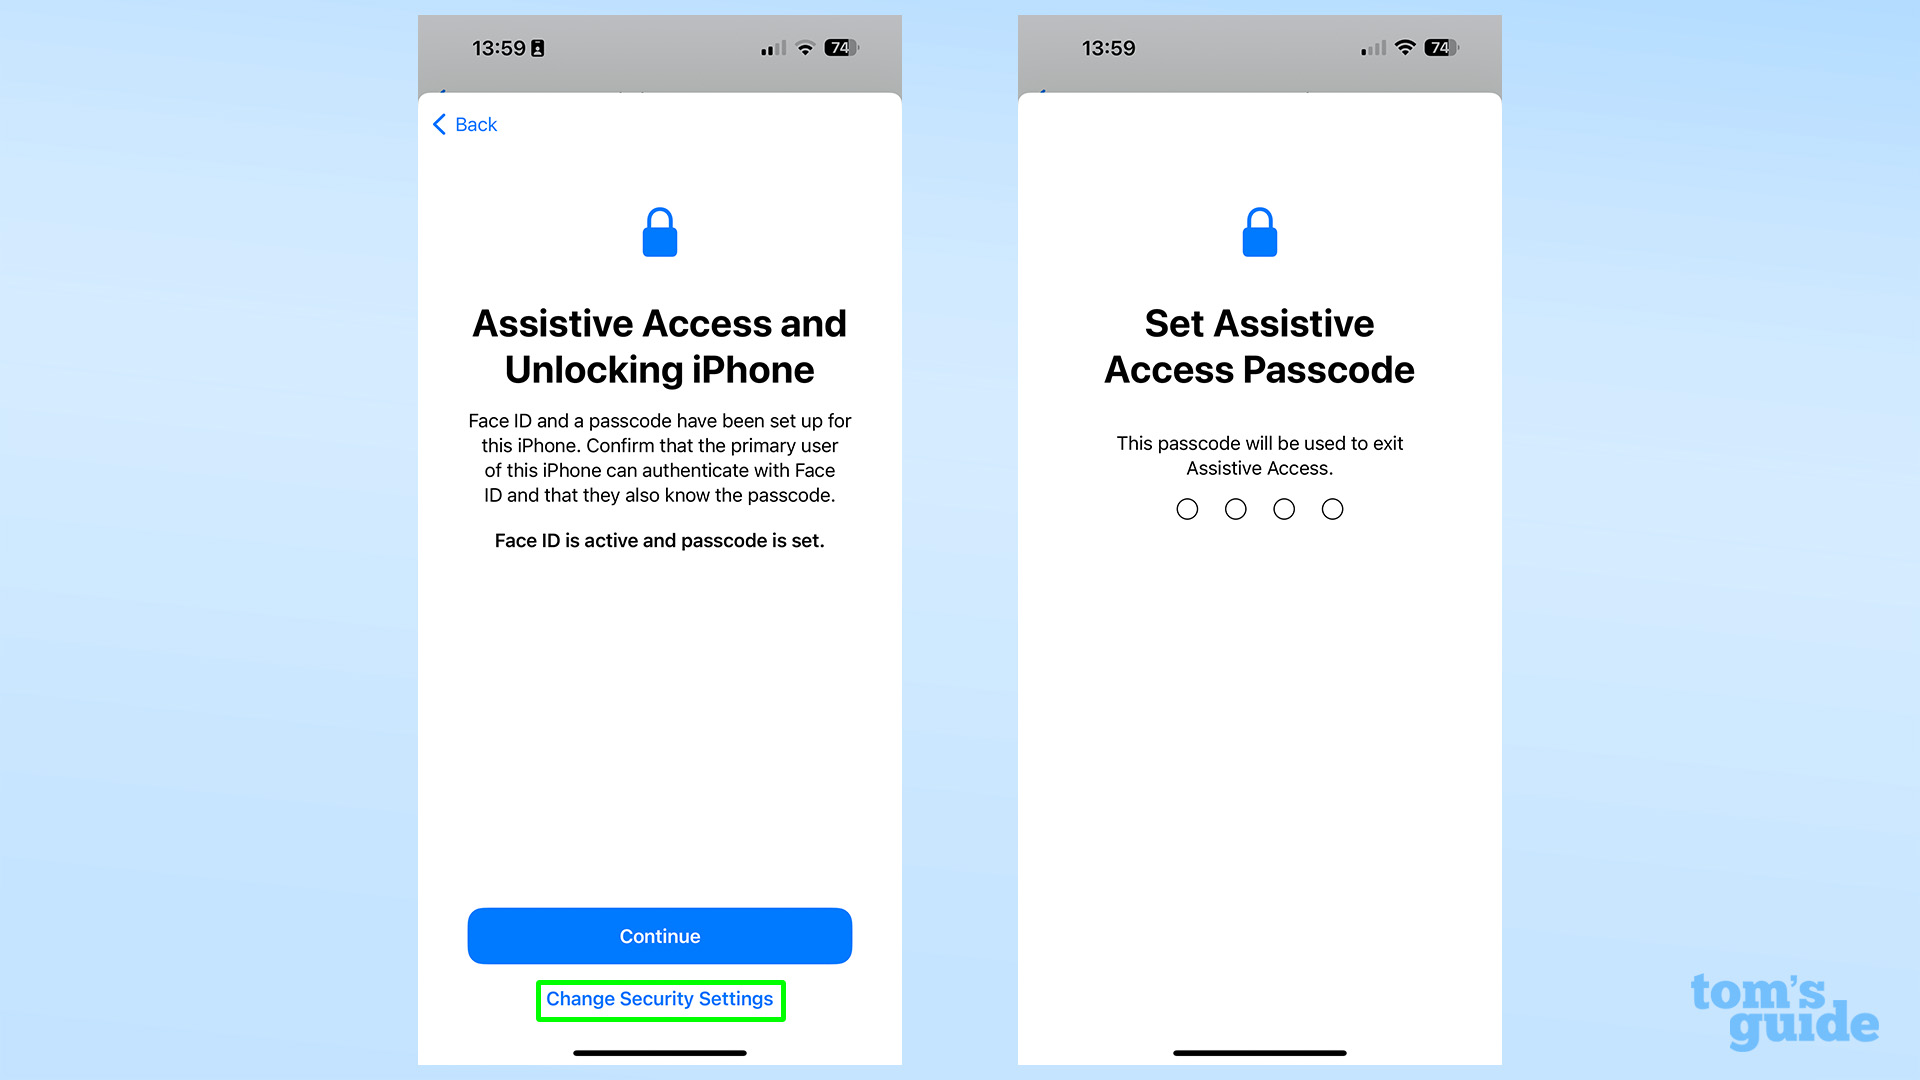
First, you'll be prompted to ensure you want to use your iPhone's existing security PIN and Touch ID or Face ID for securing the phone. If you need to set new ones, you can tap the Change Security Settings button and do so, but you'll have to start your Assistive Access set-up all over again.
After that, you'll need to set a PIN to enable and disable Assistive Access. You can pick the same code as you use for your security PIN, but you can also use a separate one if you want to avoid the intended user from leaving Assistive Access by themselves.
6. Set up app functions
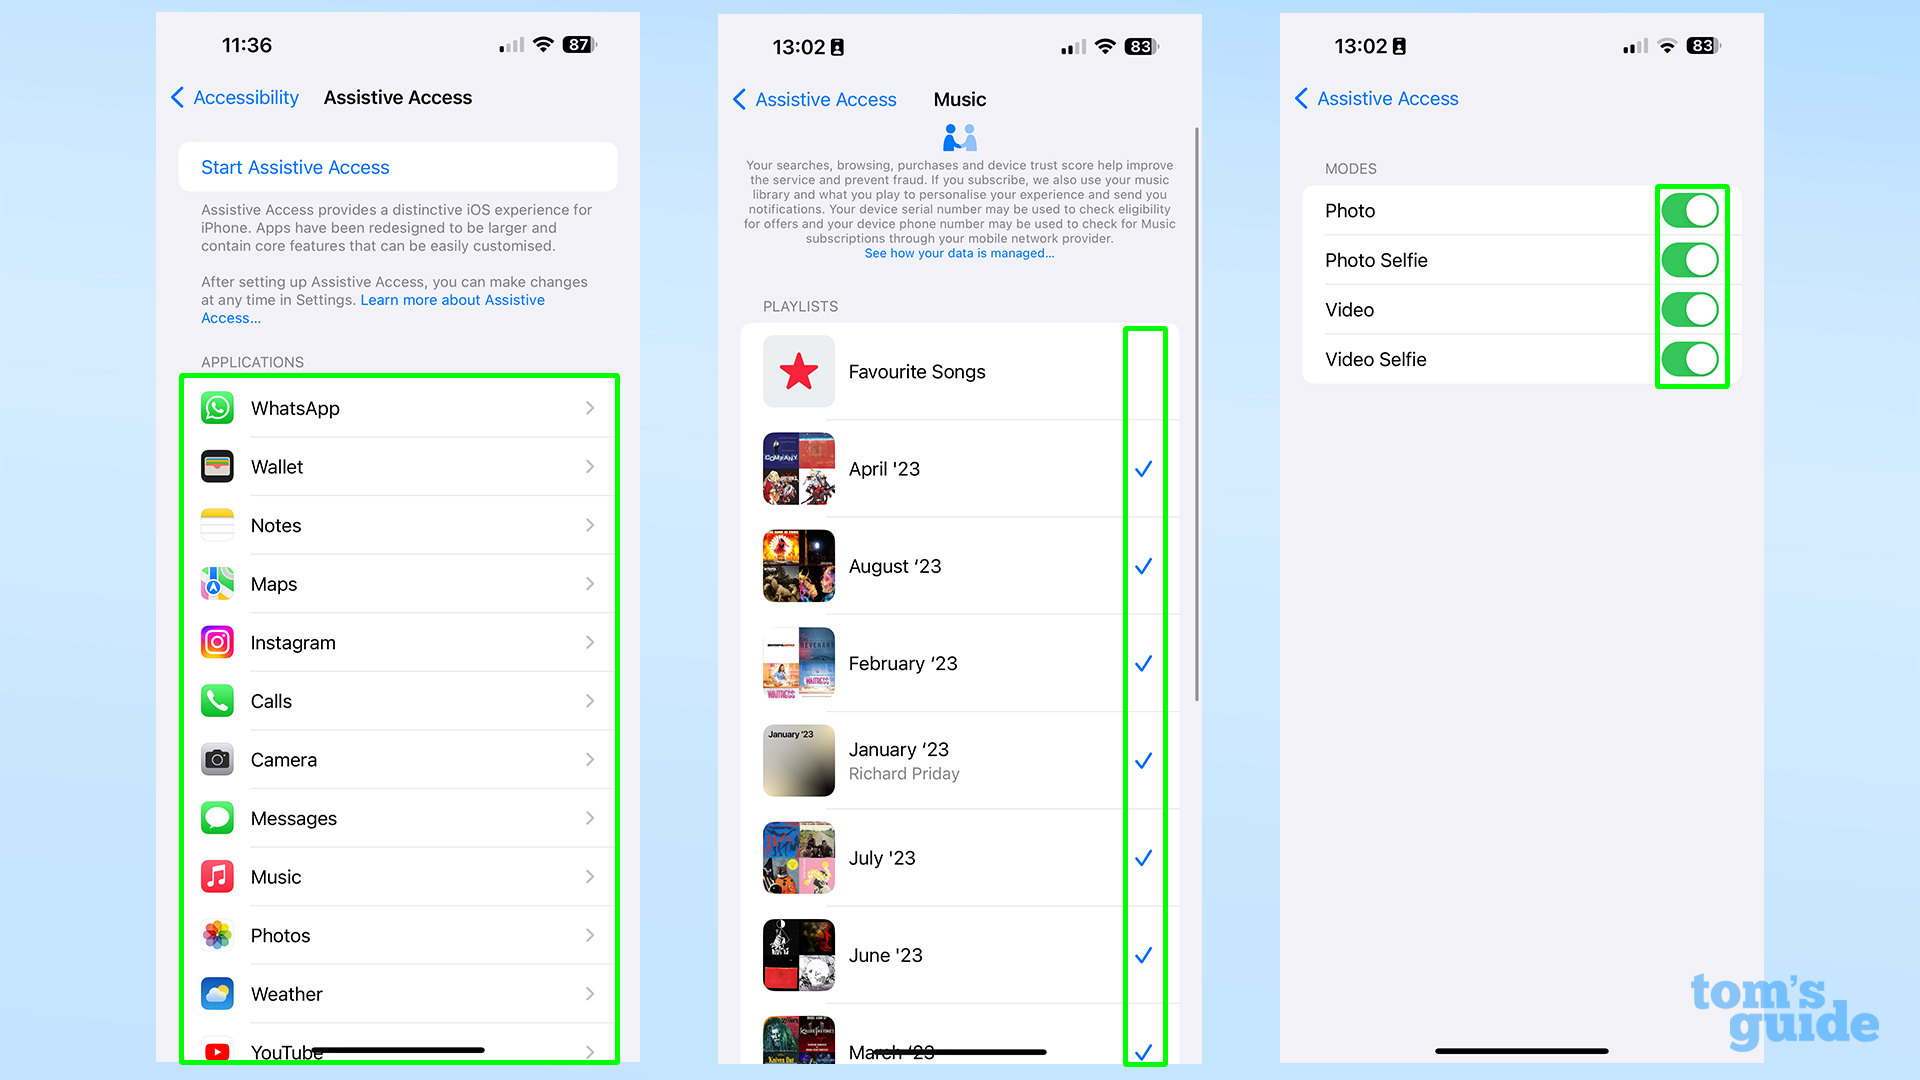
Now you've got the basics set-up, but there's probably more you need to do before you'll be happy to use Assistive Access. Check through your selected apps to ensure they have the functions you need them to, enabling them as necessary.
For instance, for Apple Music, you need to specify which playlists you can use in Assistive Access, and in the Camera app, you can pick which cameras can be used for photo and video.
7. Turn on Assistive Access when ready
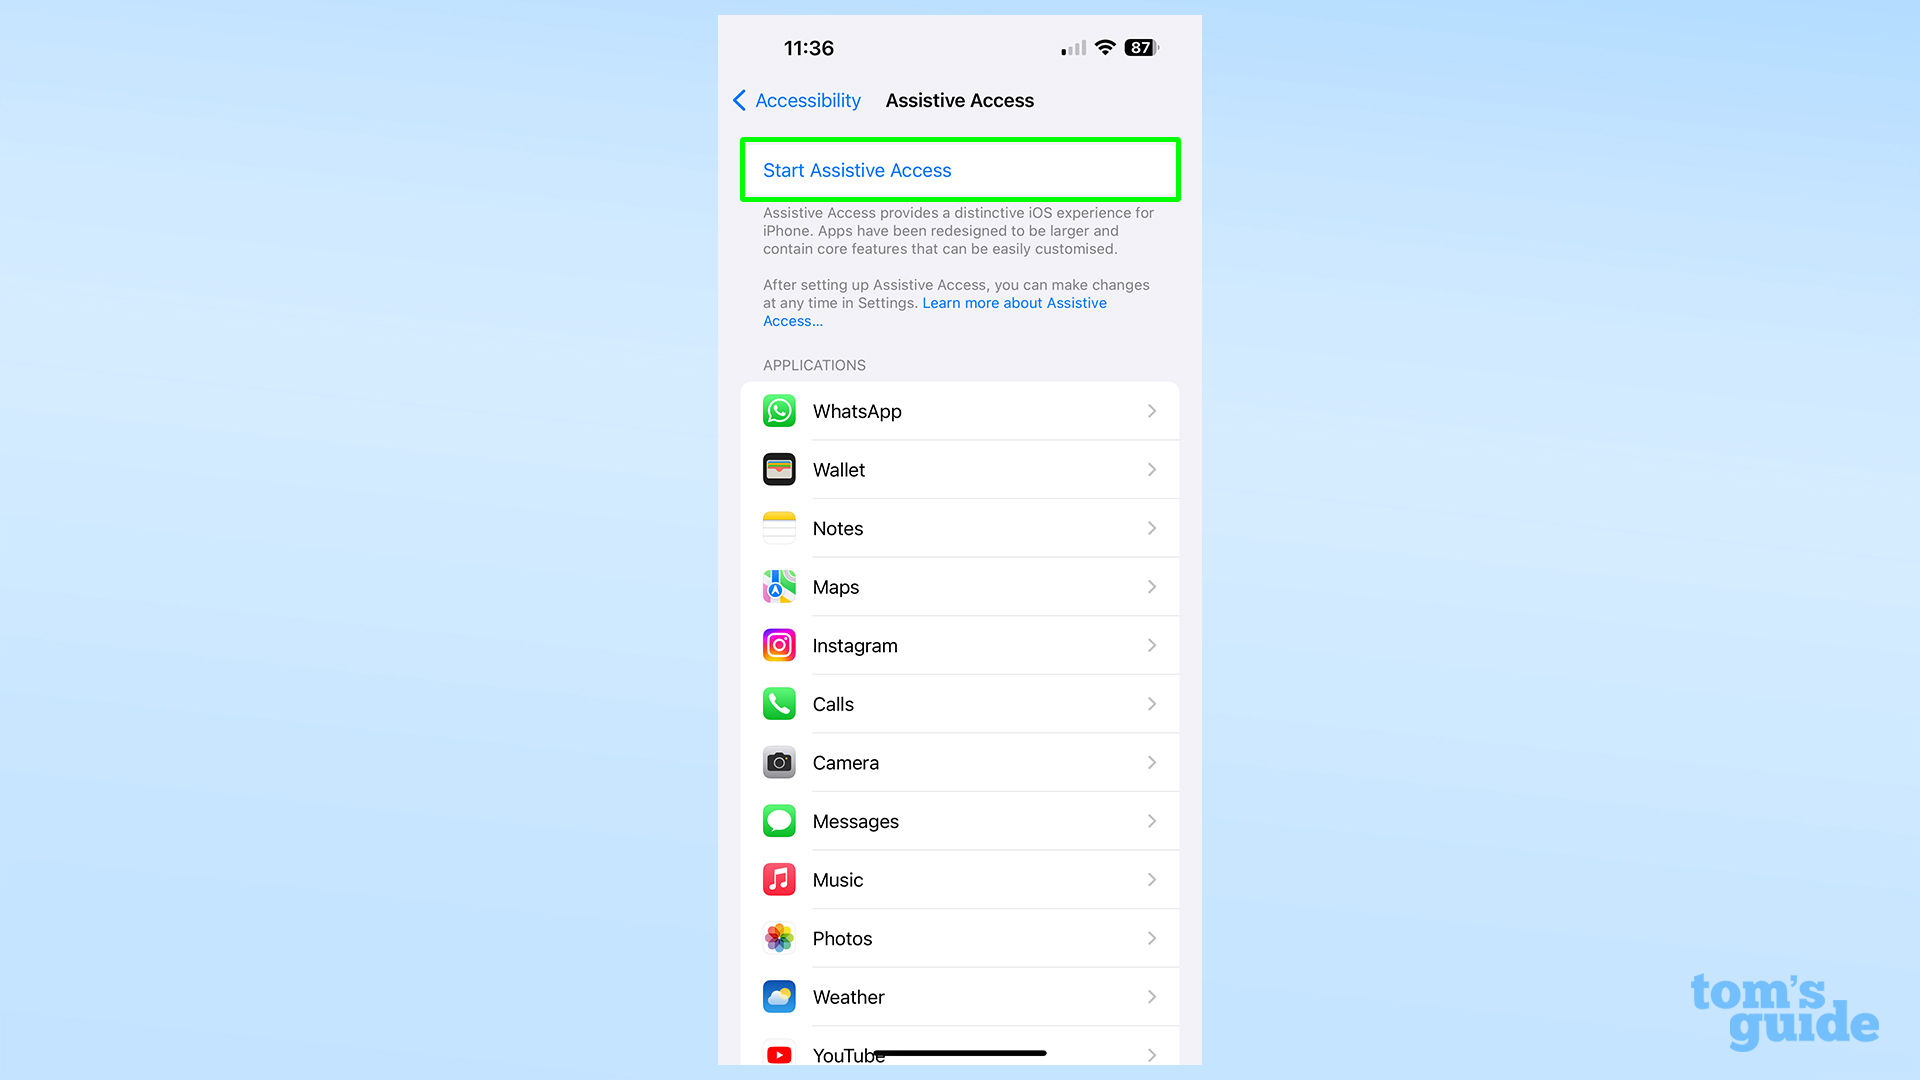
Tap the Start Assistive Access and input your on/off PIN to restart the iPhone and open up the new interface. To turn it off, triple-press the power button, select Exit and then input your PIN.
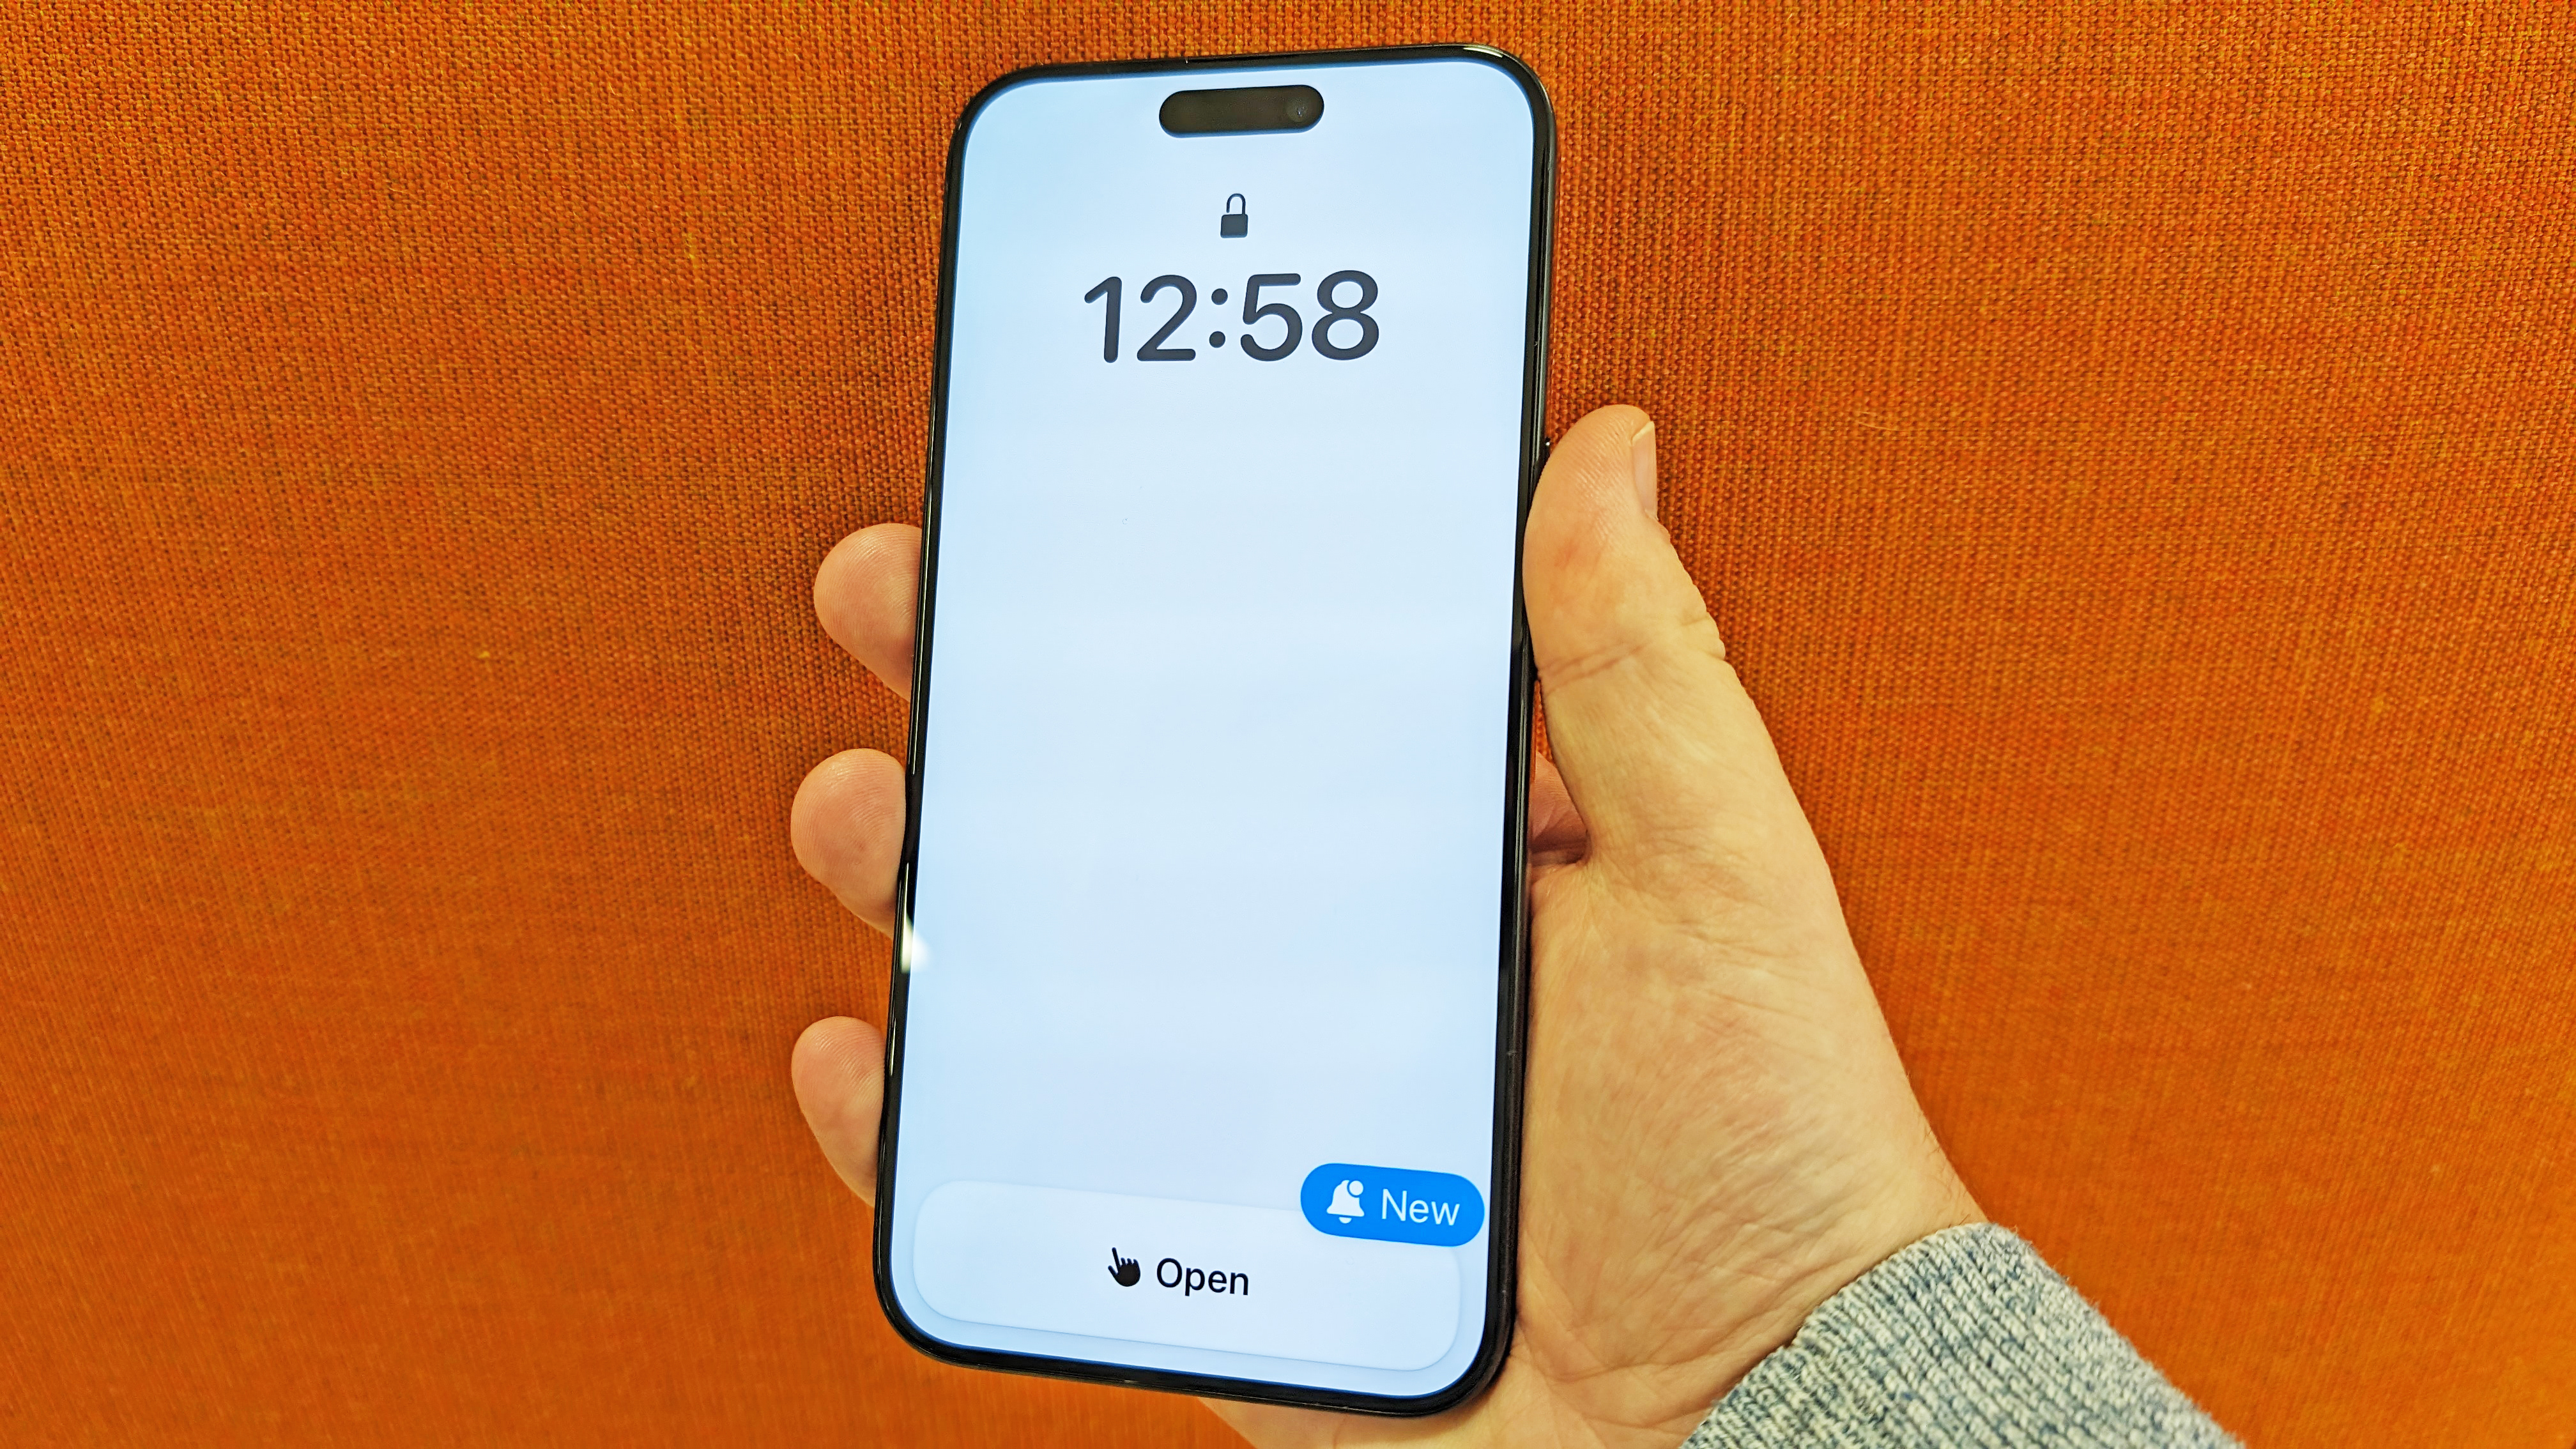
For more detail on using Assistive Access, you can check out this feature on my time using it.
We have a lot more we can help you with when it comes to your iPhone and its features. Take a look at our set up parental controls on an iPhone guide if you want to secure your iPhone for a younger user, or if you want to exchange files between devices easily, have a read of how to use an external storage device with iPhone. And should you need to easily swap Apple Wallet passes, you can see how to do that in our how to share tickets on iPhone with AirDrop guide.


