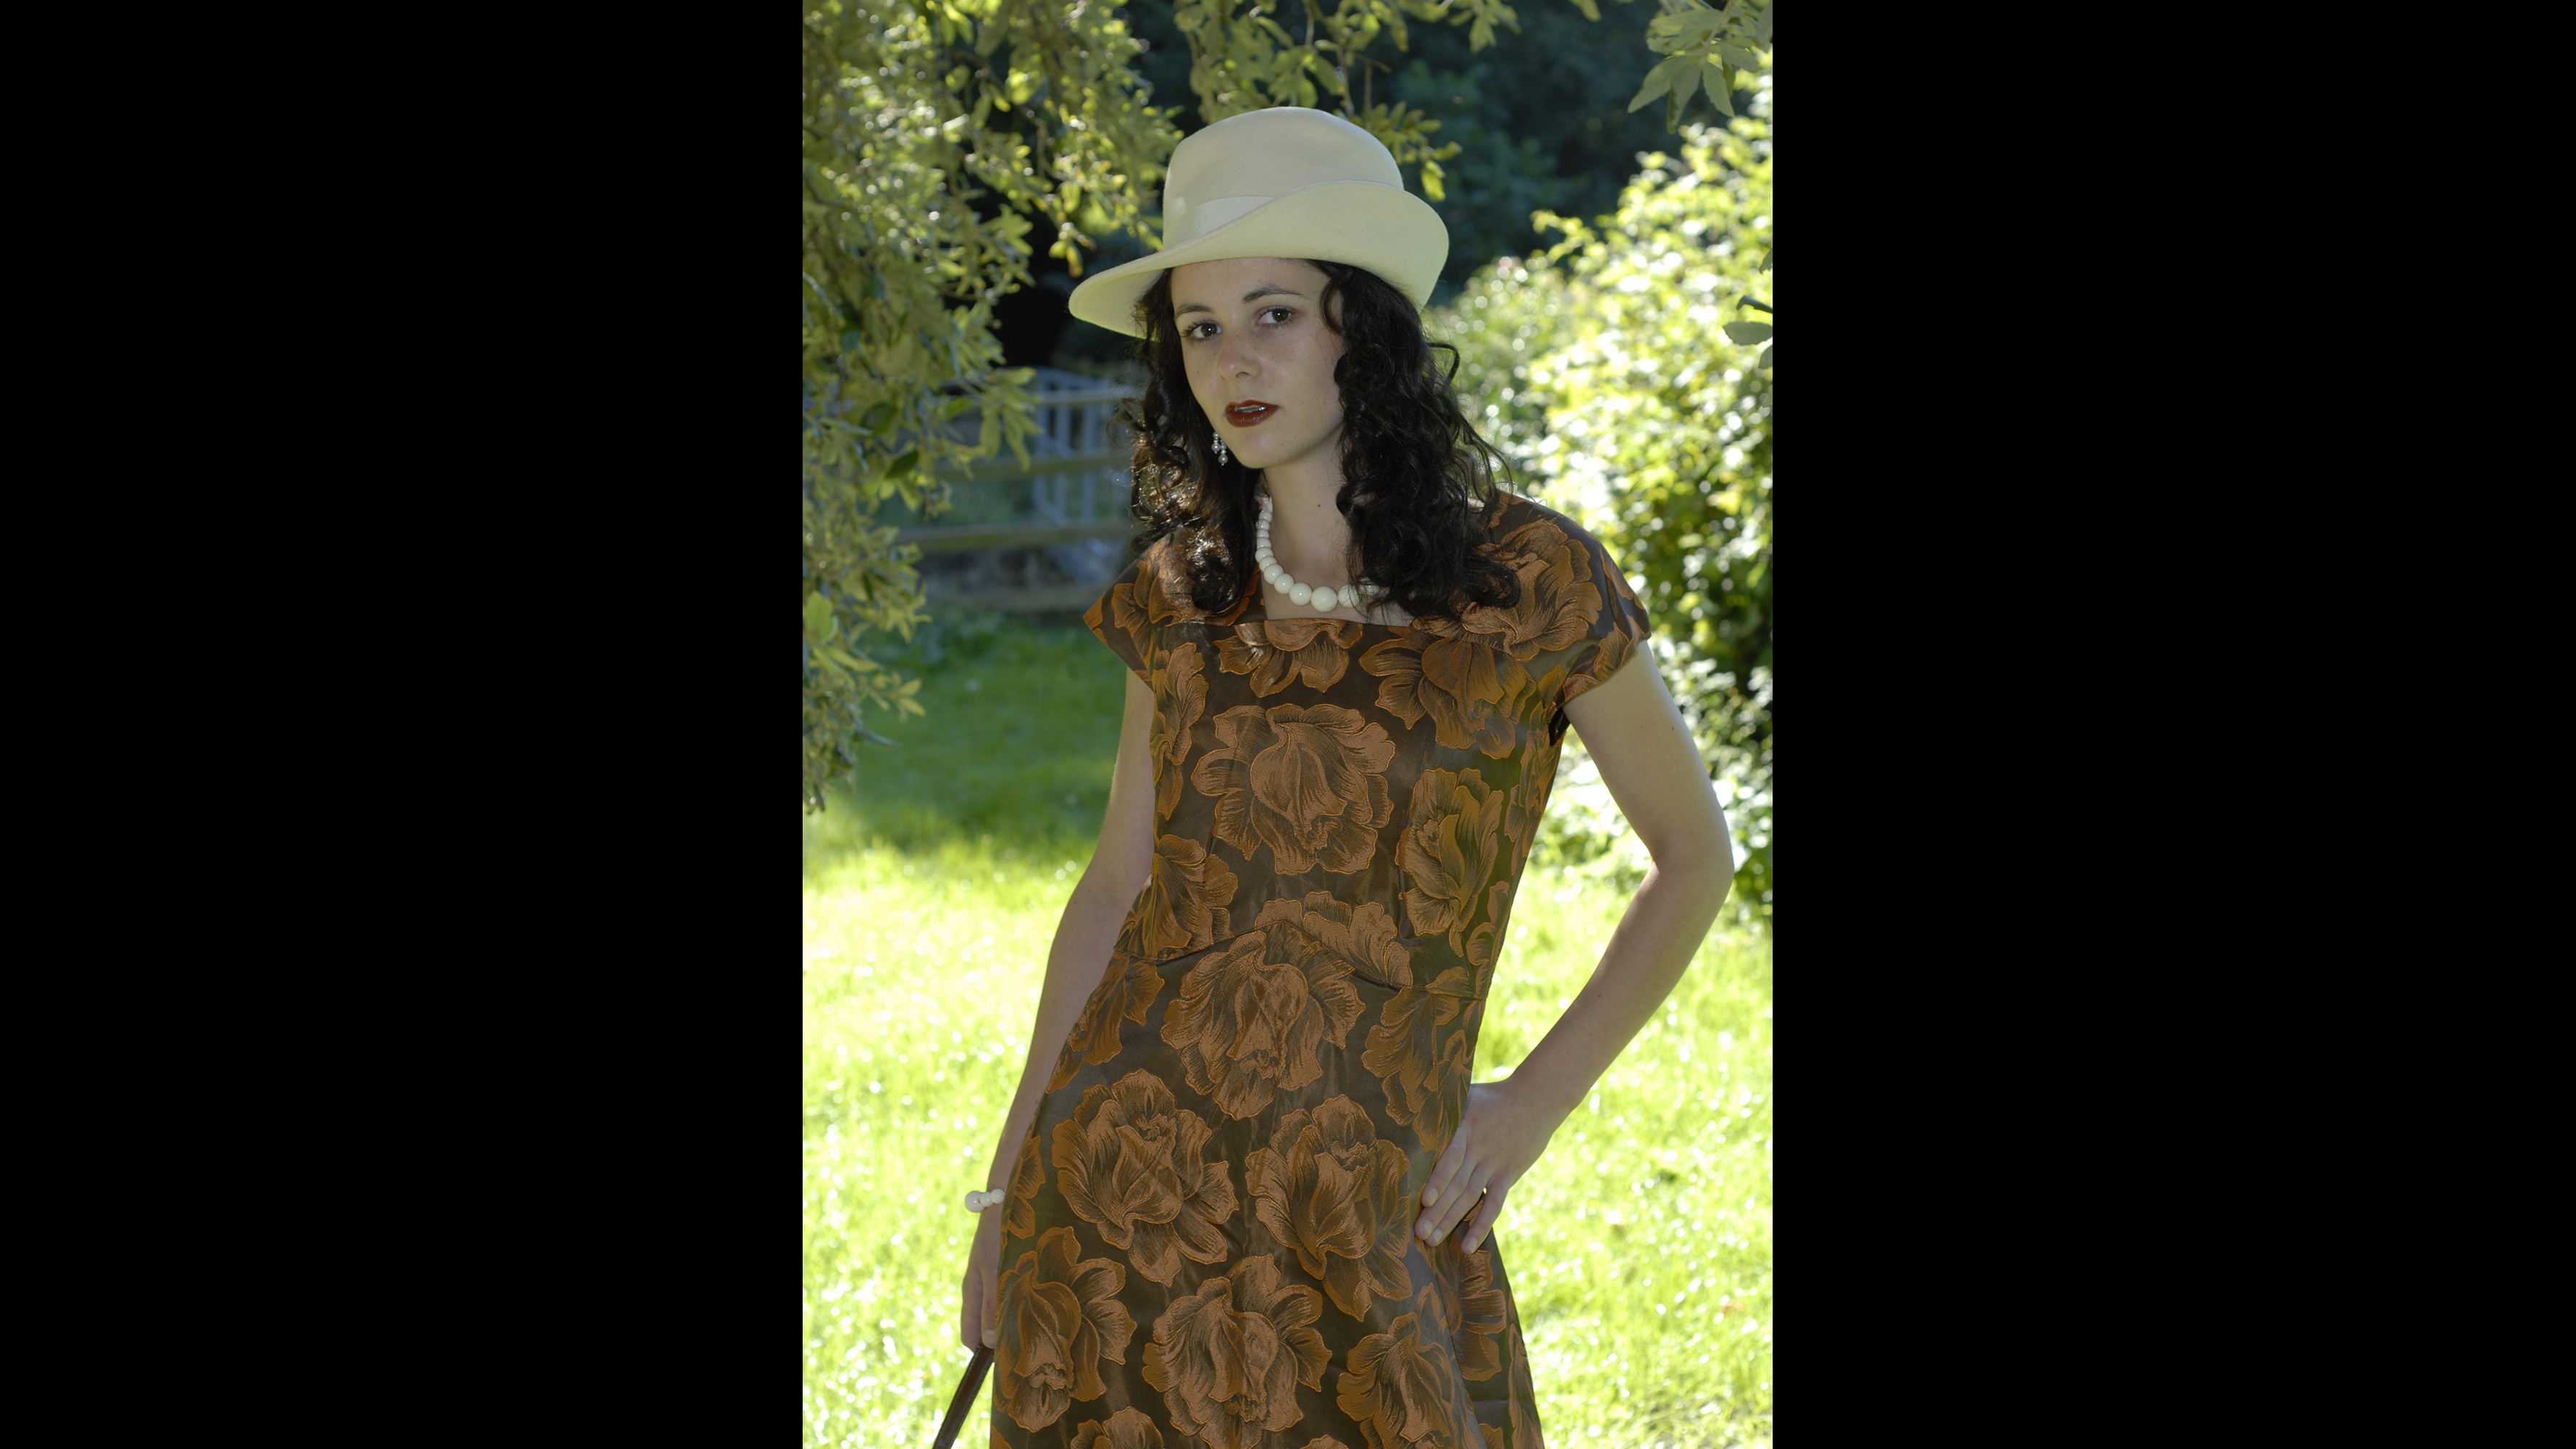
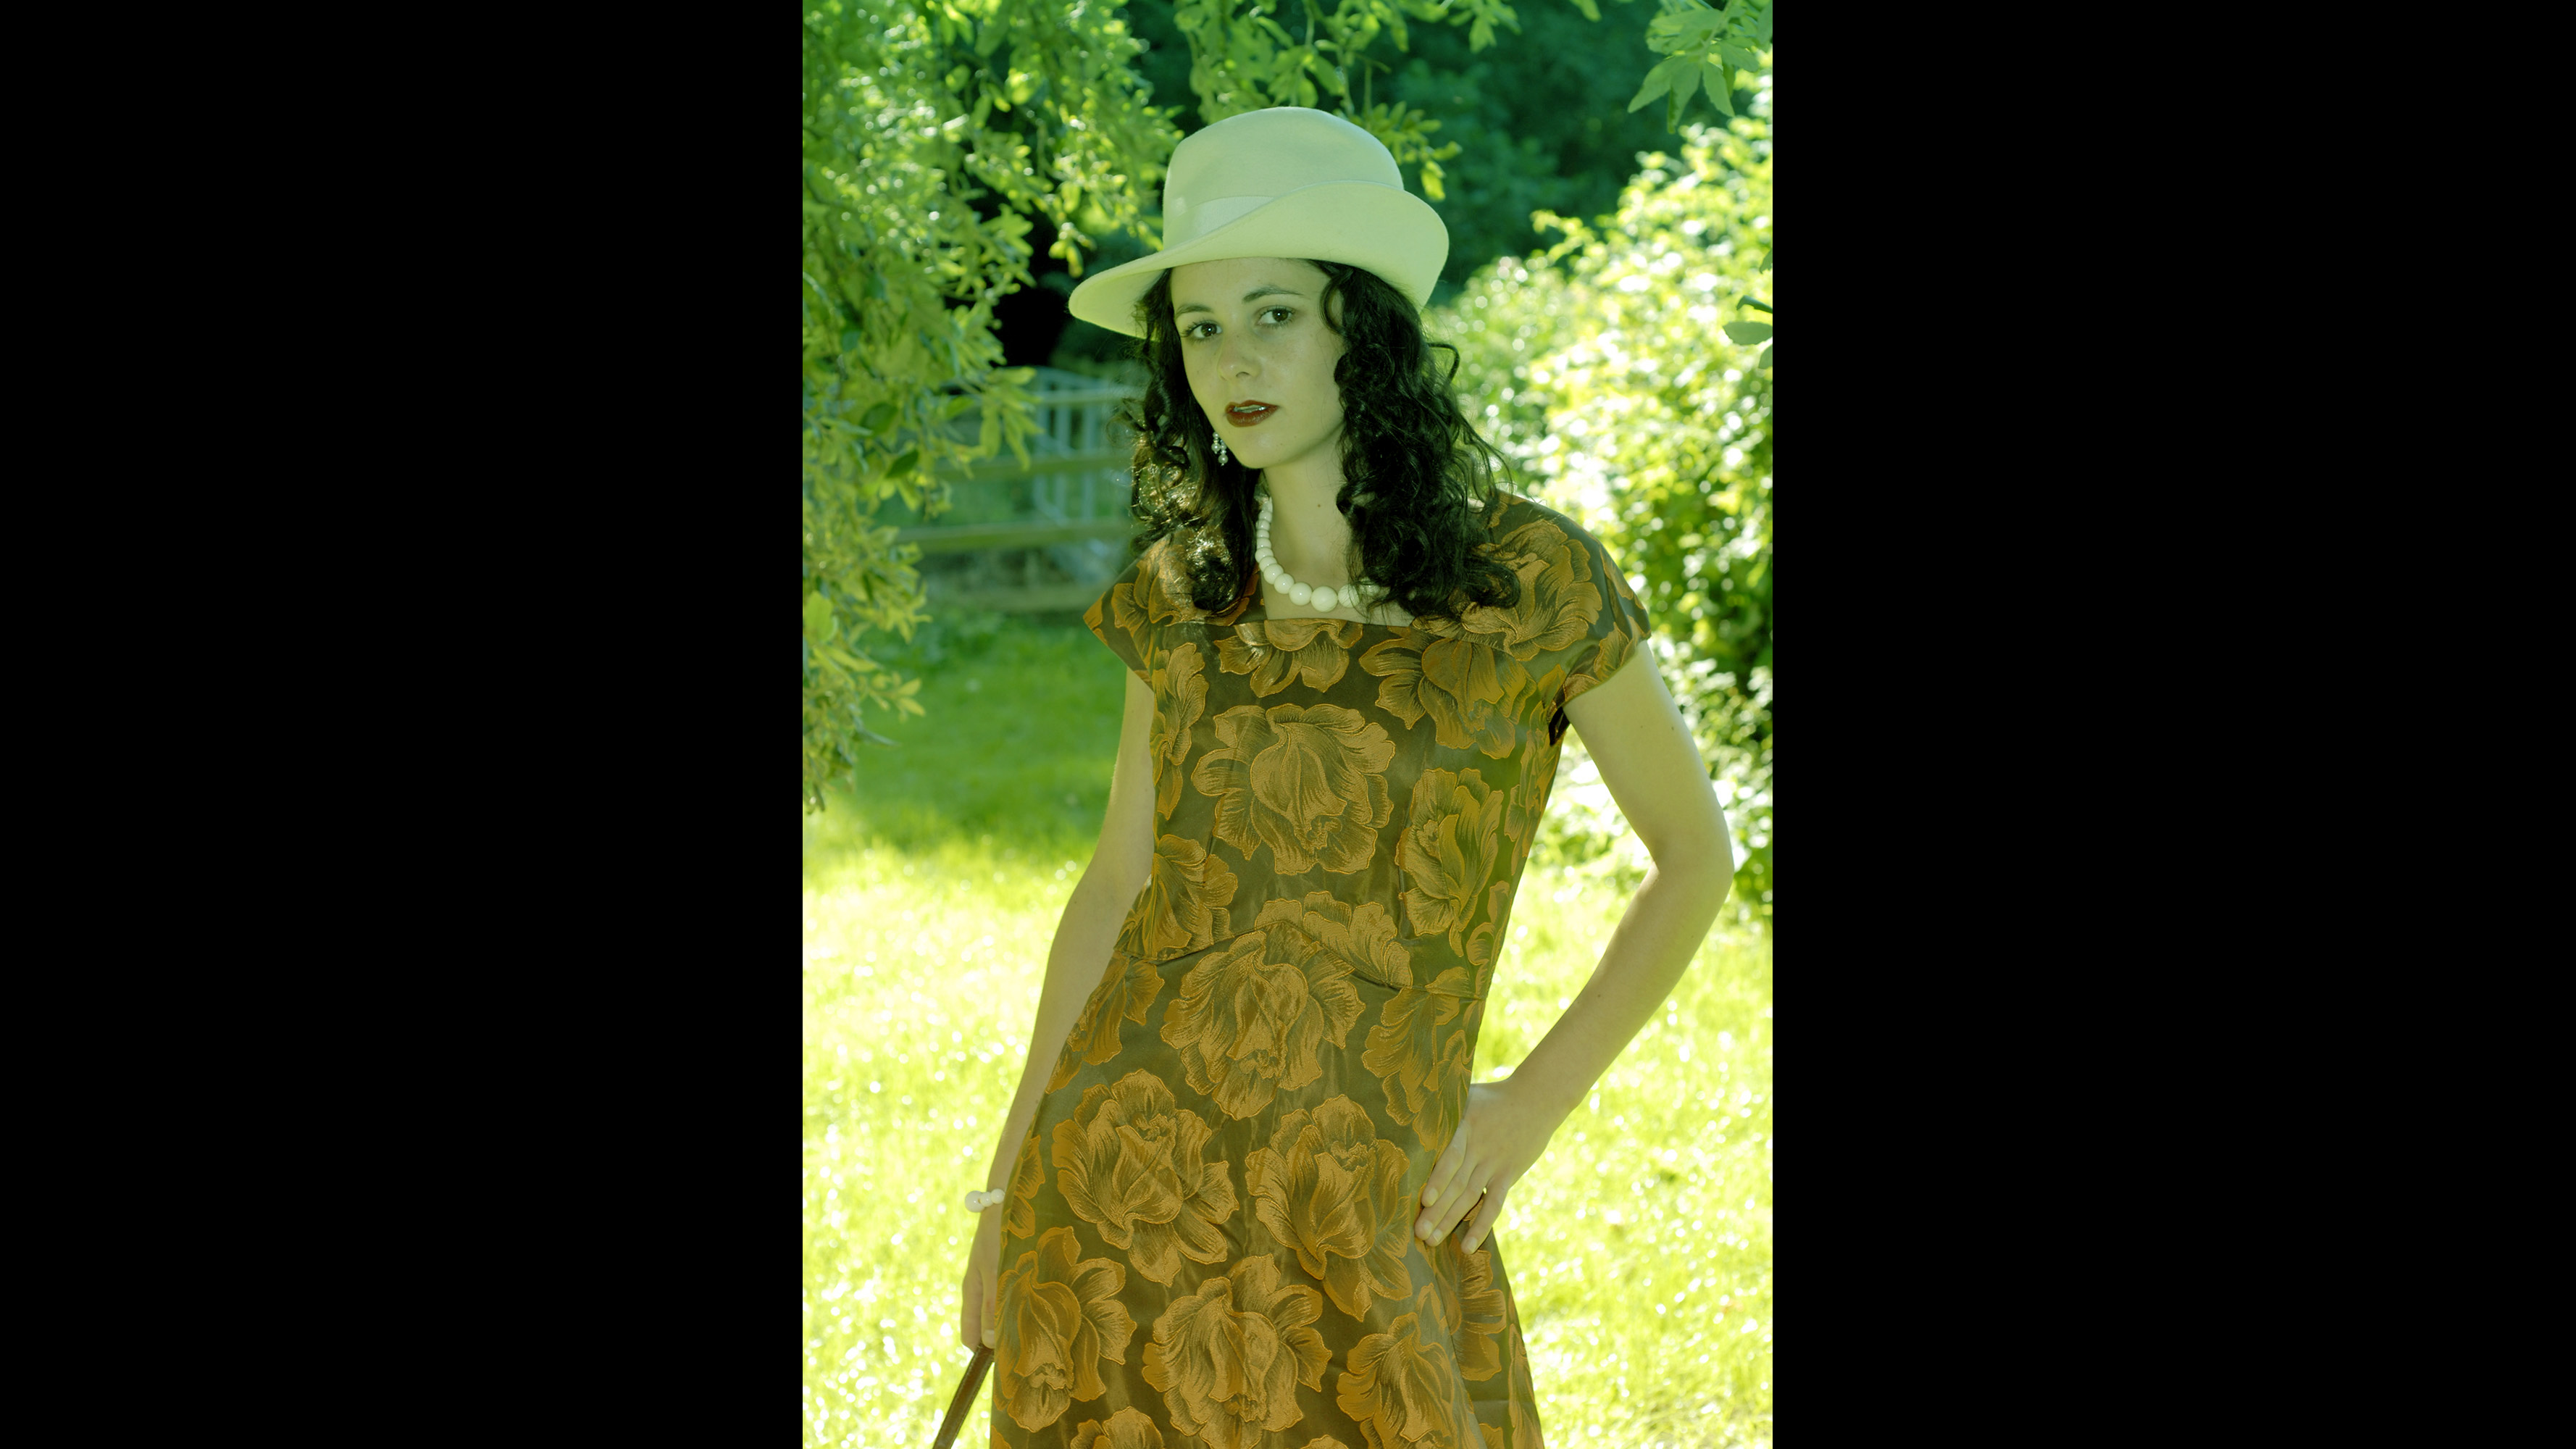
Summer is over, which means an end to the lovely warm weather and vibrant lighting conditions, but what if you’re working on a project that requires a summery look? Well, I’m going to show you how you can inject some mid-June vibes back into your outdoor portraits. In fact, with the right gradients in Affinity Photo, you can theme your portraits for any season you like.
One of the problems with shooting outside is that you don’t want the subject squinting in the light. You can remedy this by backlighting them, but then you have the problem of the subject looking dull. Don’t worry, though, I’ll also show you how to fix that with lighting effects to go with the color gradients.
How to use gradients in Affinity Photo to fake seasonal lighting
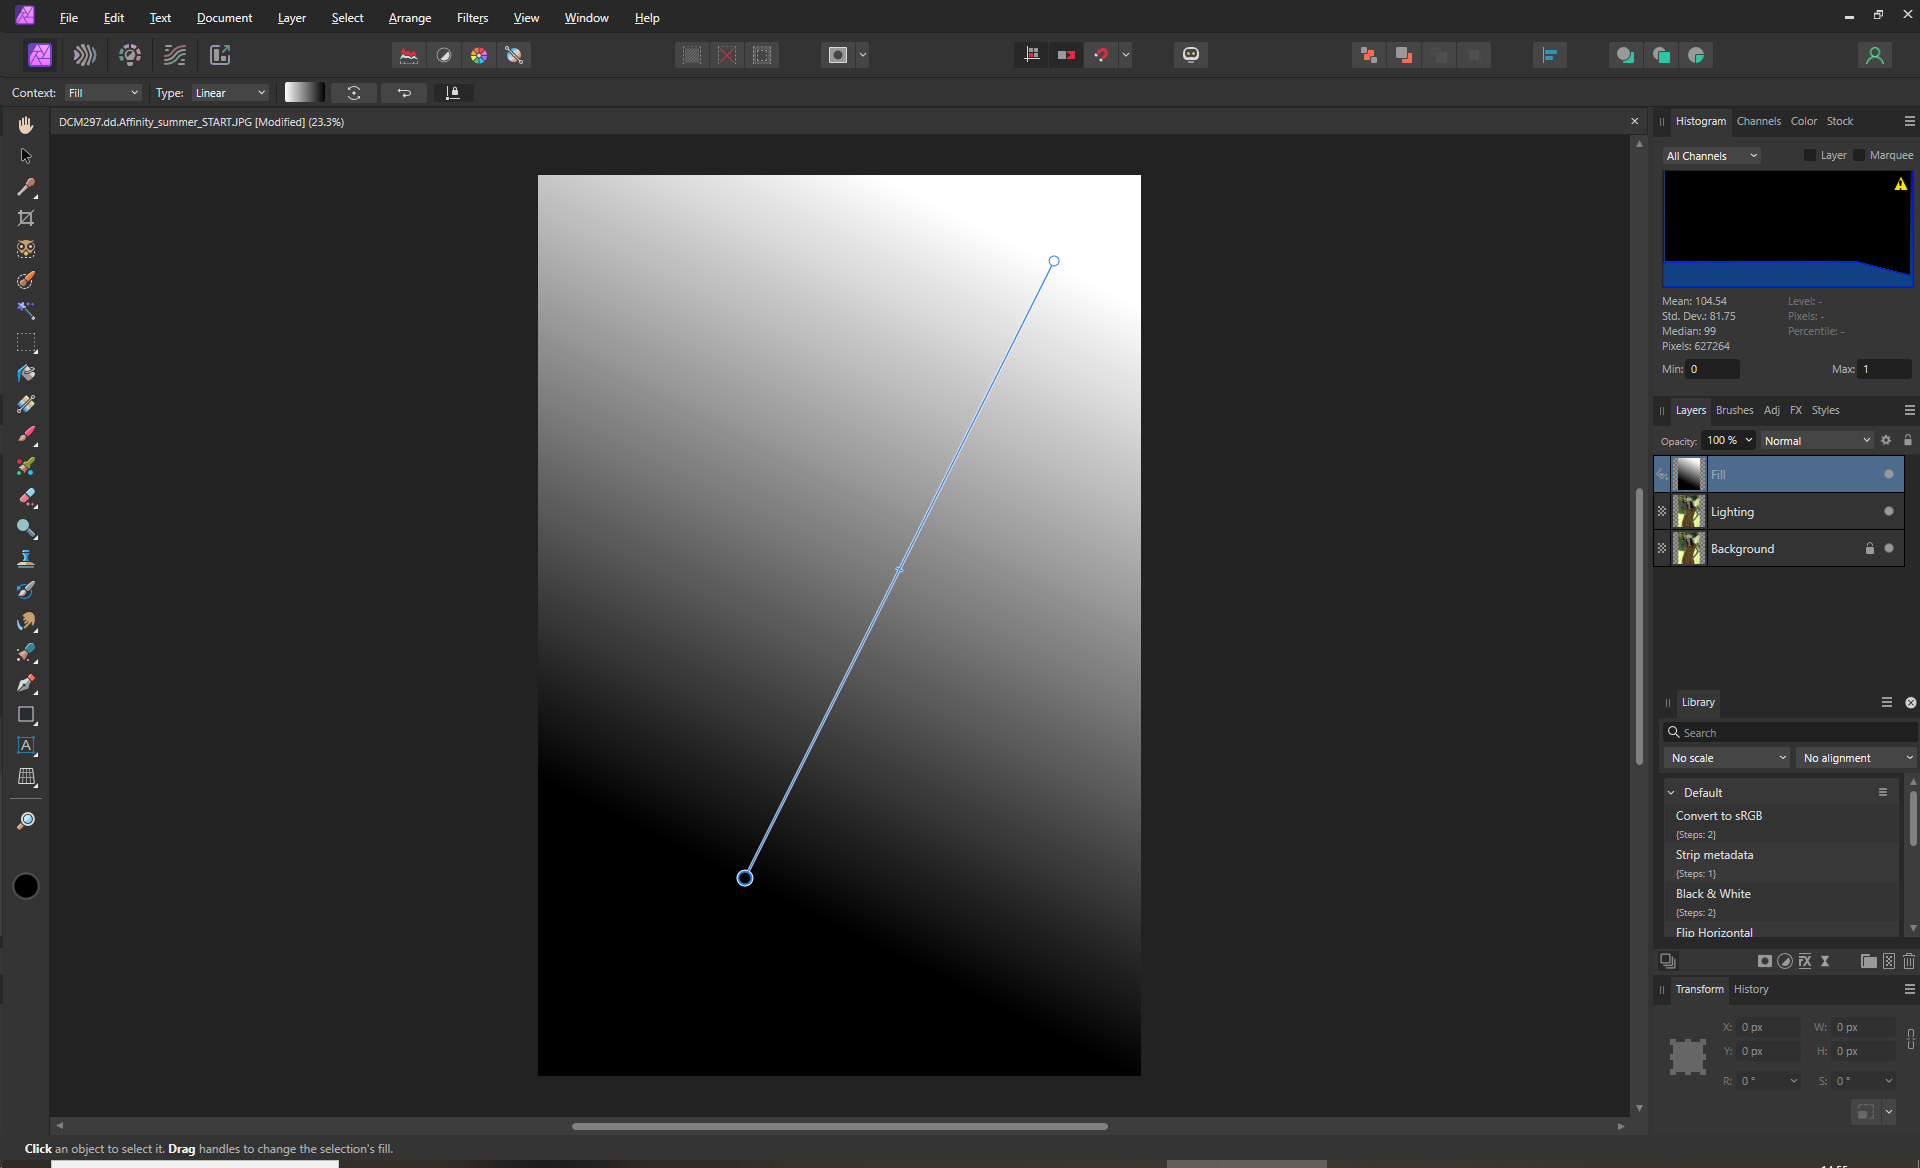
1. Make a gradient
Load the image you want to make summery and then duplicate that layer, calling the new one ‘Lighting’. Then go to Layer > New Fill Layer and click and hold in the top-left corner of the image. Drag and release near the bottom corner. You will now have a new layer called ‘Fill’ that’s a black-and-white gradient.
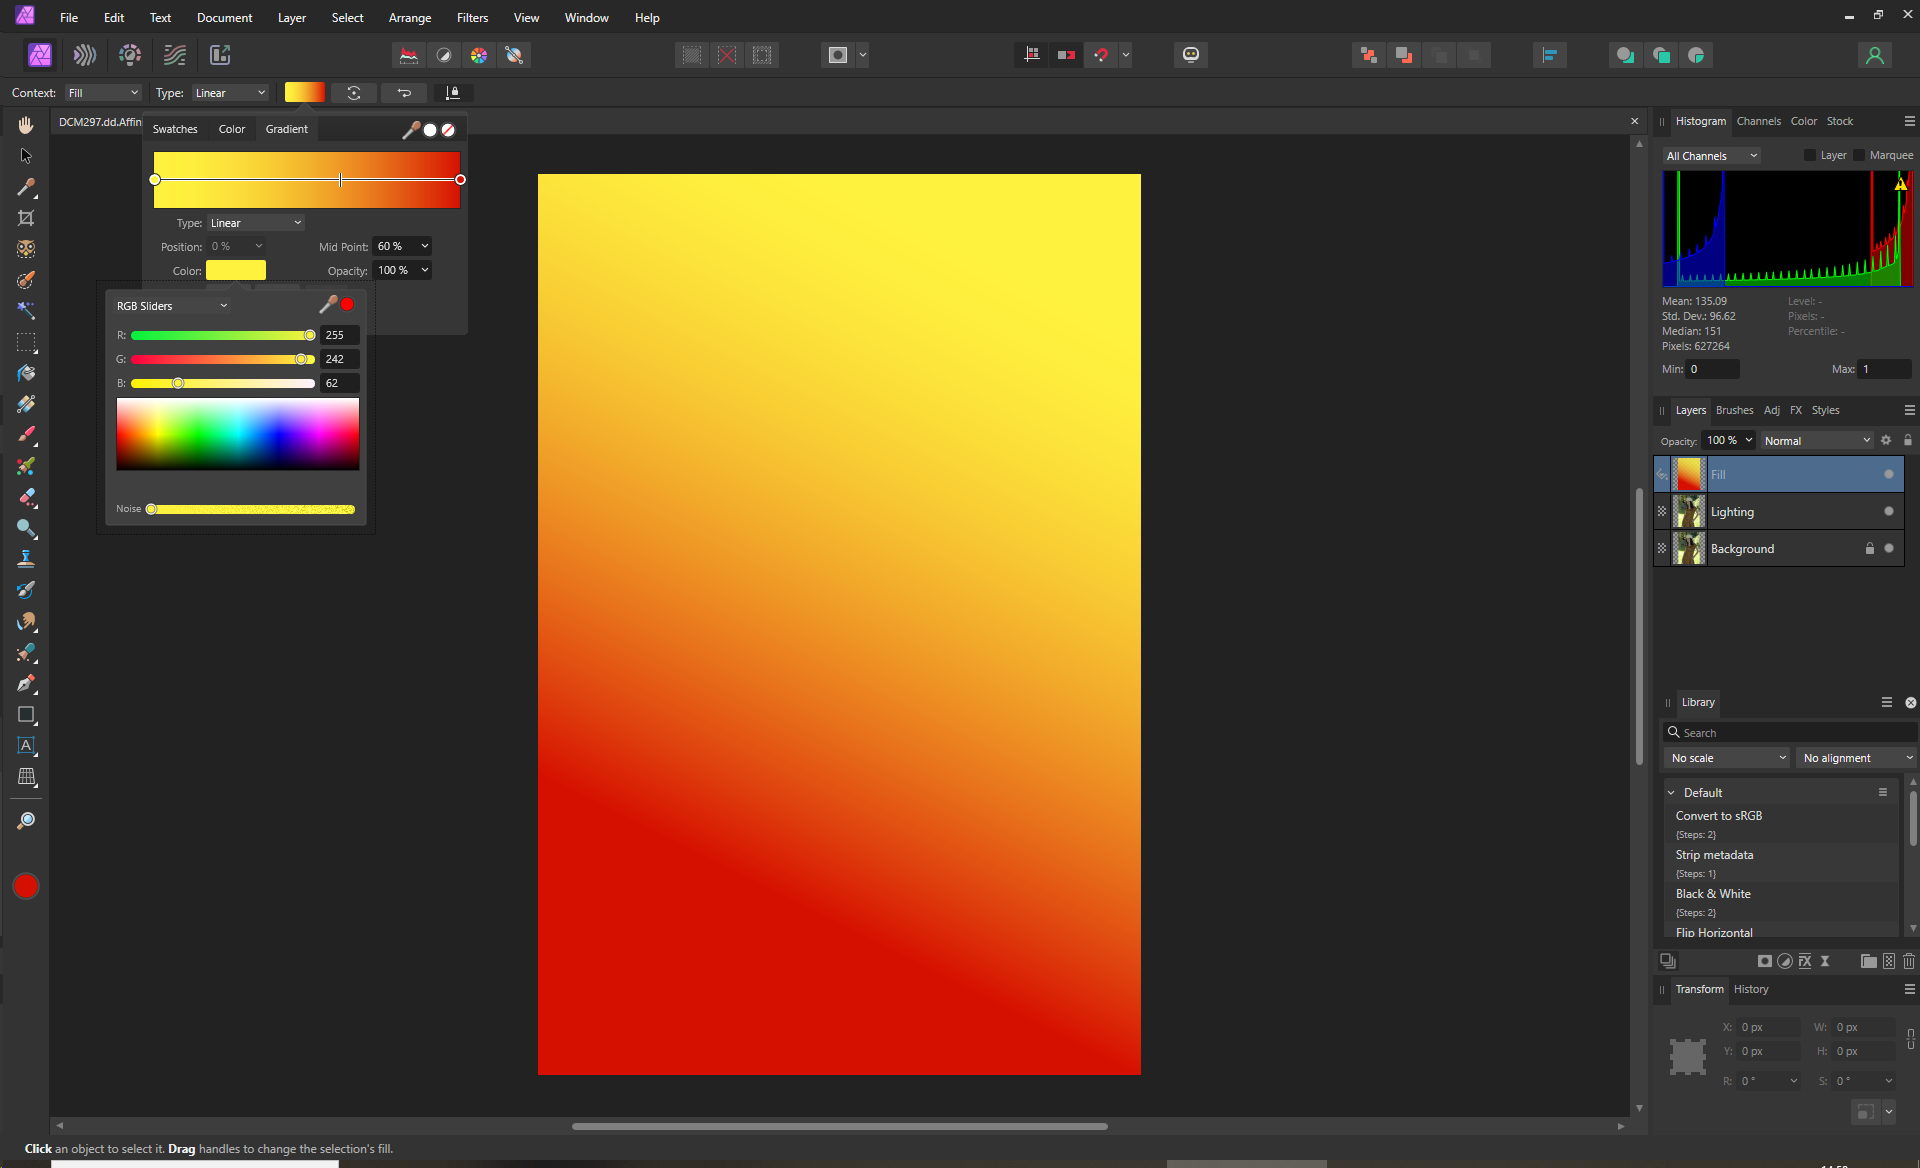
2. Add some color
On the top-left are the details for the gradient. Click on the mono gradient patch and then click on the control point at the white end to select it. Then click on the Color box and select a nice yellow, which will go in the sky area. Repeat the process for the black control point and use a warm red colour.
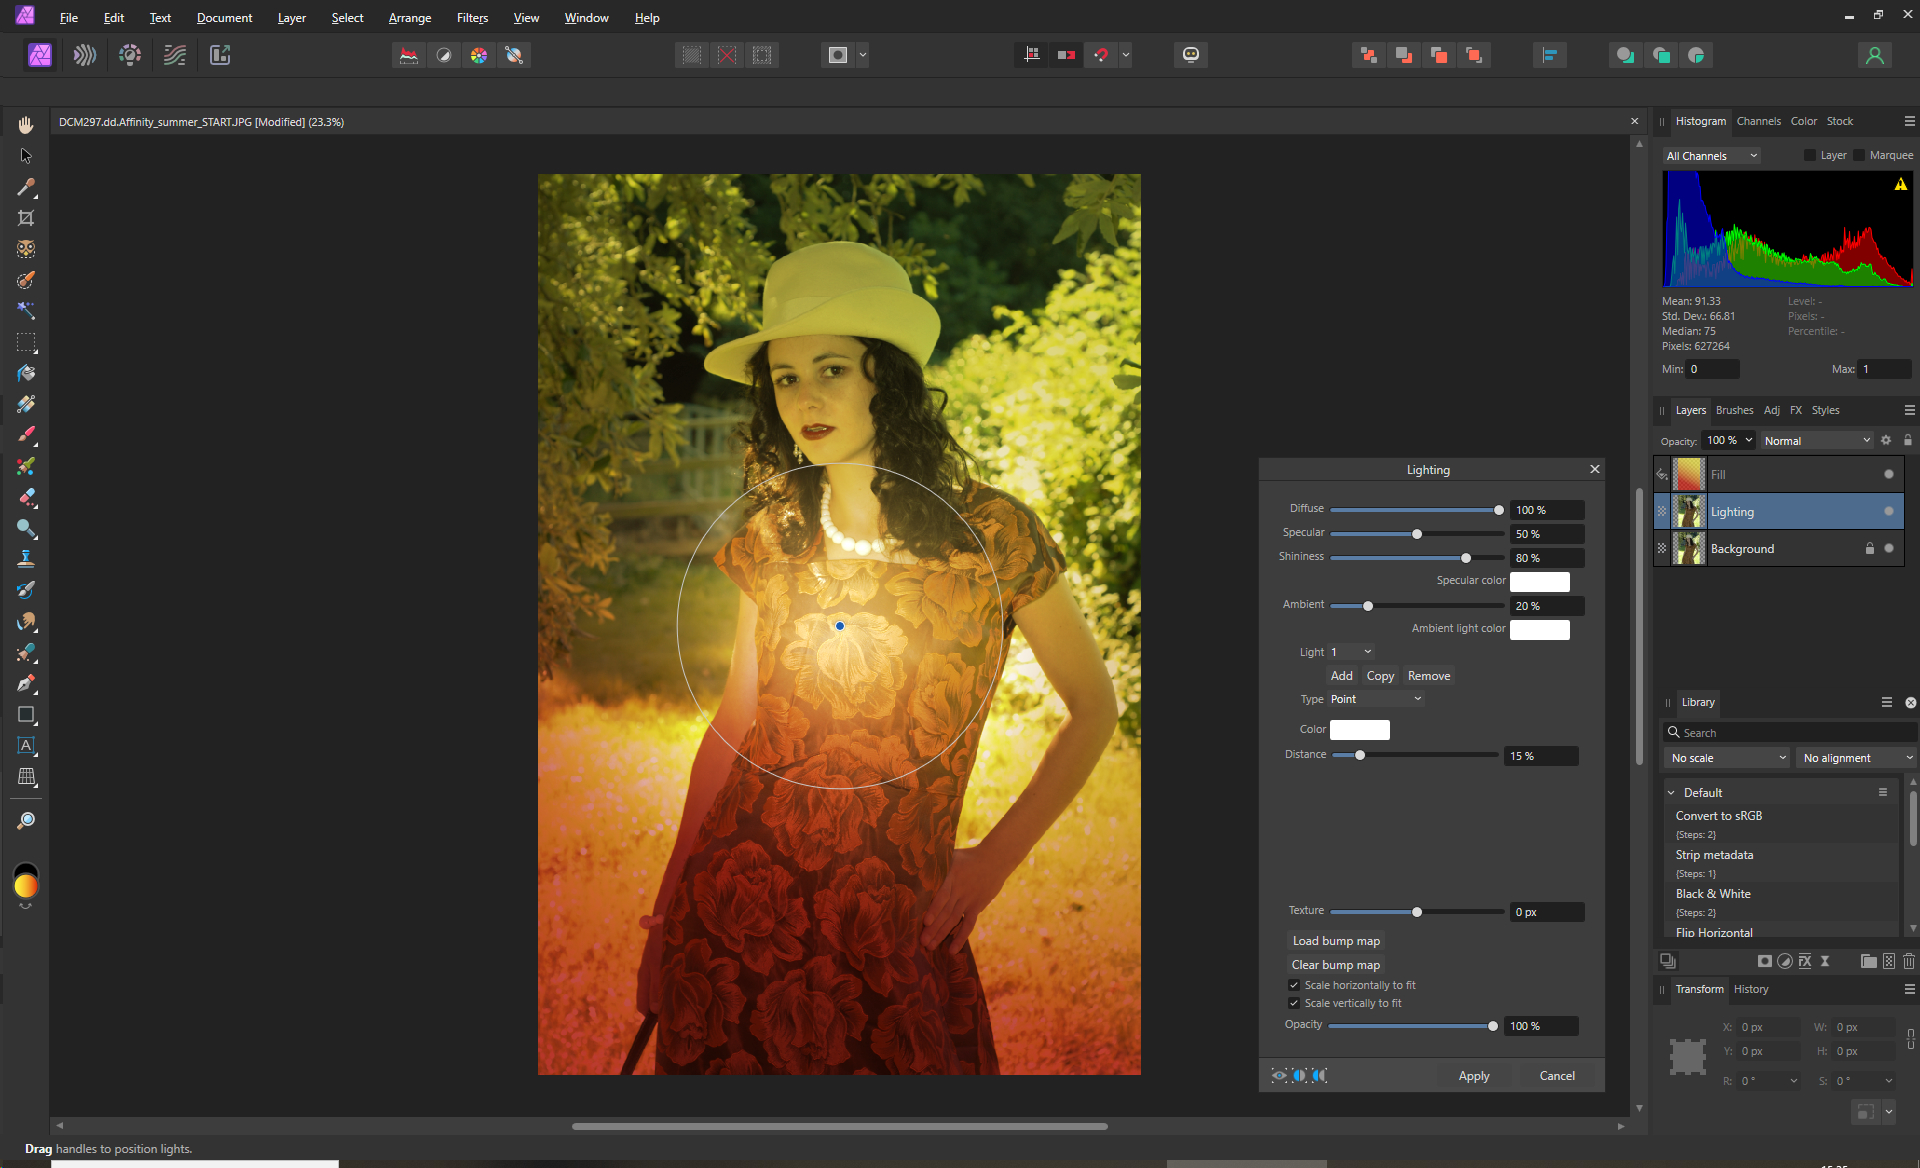
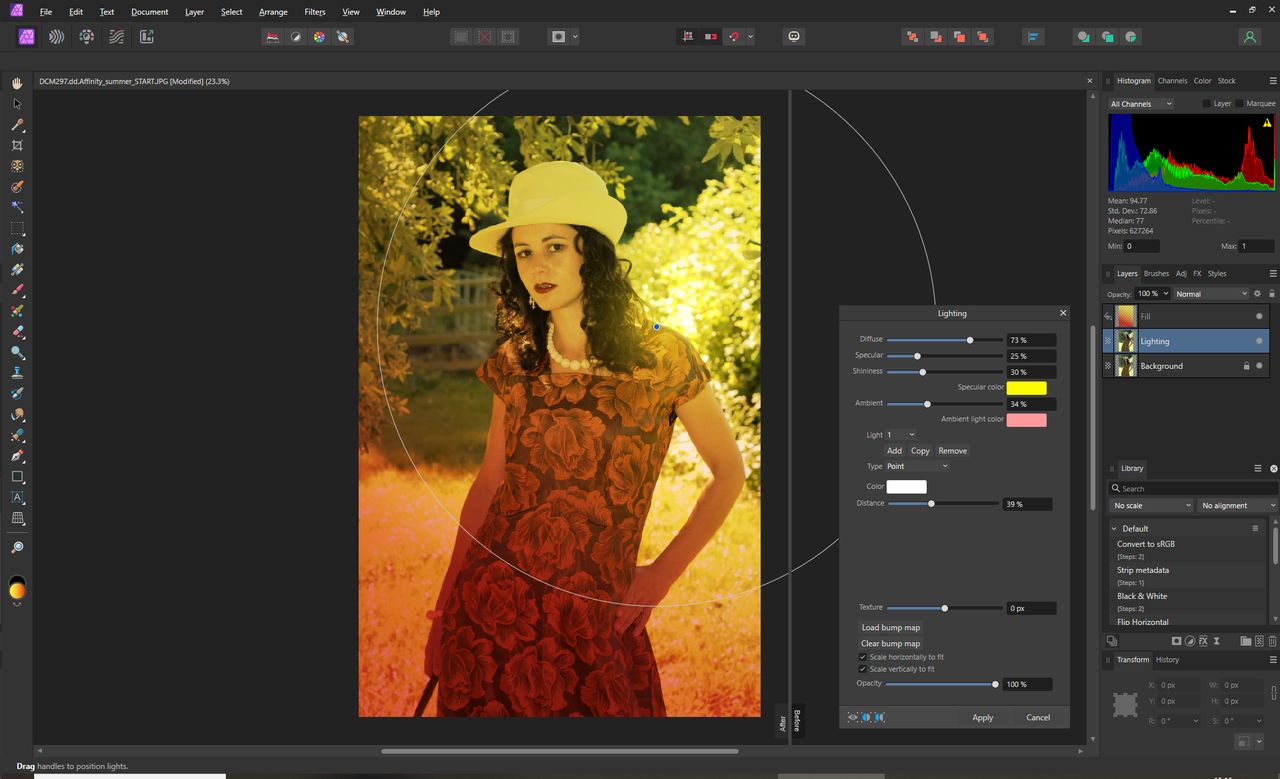
3. Blend and Lighten
Change the blend mode of the ‘Fill’ layer to Overlay and reduce the opacity to 50%-75%, depending on how much of an effect you want. Then select the ‘Lighting’ layer and go to Filters > Lighting. Change the Type to Point and place it just on the shoulder of the subject – in your images, either put it on the brightest point or on the subject.

4. Tweak the settings
There are a lot of parameters to play with here; the important thing is to overexpose the light. Also, add yellow as the Specular color and a reddish-pink as the Ambient light. Keep the main light color as white. Use the Distance slider to increase the coverage over most of the subject. Click Apply and reduce the layer opacity if required.
5. Finish up and try a different season
Merge your layers and save to finish. Now, as mentioned, this is fine for bringing back summer, but how about adding a green-yellow gradient for spring, or a brown-orange one for fall and a blue one for winter? Just change the gradient to give a seasonal feel to your outdoor portraits.
You might also like...
Thinking of upgrading your editing suite? Check out the best photo editing software and the best photo organizing software. If you want more portrait ideas, I broke ALL the rules to photograph this classic film noir portrait.