I'm the sort of person who goes into a kitchen designer with a good idea of what I want, and for my last kitchen, it became pretty clear during my design session that they weren't going to be able to turn one of my ideas into a reality.
Now, bear in mind, this was a high street kitchen chain, not a bespoke kitchen design brand (who I'm sure would have created what I wanted, but even better), but I had a design in mind for a built-in extractor hood idea that just didn't meld with what they could offer. So, while I opted in for new appliances, cabinets, storage, and countertops from the kitchen company, I left without a way to bring my cooker hood to life.
However, I'm an enterprising sort of decorator and not afraid of a bit of DIY, so I started scanning Amazon for an integrated extractor hood to bring my design to life. To my surprise, I actually found lots of them, and they're not very expensive. I ended up buying this Cookology extractor from Amazon, based on the reviews and how well I thought it would integrate with how I'd build the hood casing.
Here's how it turned out.
For this DIY to work, I needed to work around my kitchen renovation timeline — before I could consider starting to build my cooker hood, I needed the builders to install the new venting to the exterior of my home, as the previous cooker hood was a recirculation unit, and ensure the electrical supply was still in place for the extractor.
Once this was in place, I could then start to engineer the frame to hold the extractor. I used simple timber battens to build out the shape, and I belts-and-braces the construction with brackets as well as fixing through the timber battens, too. With the Cookology cooker hood, I could push it into the frame, then pull out the grips to hold it in place. I then fixed it in place on the wall and ceiling, making sure the extraction vent duct fit through the frame.
Then, I needed to wait for the electrician to come back and connect it up.
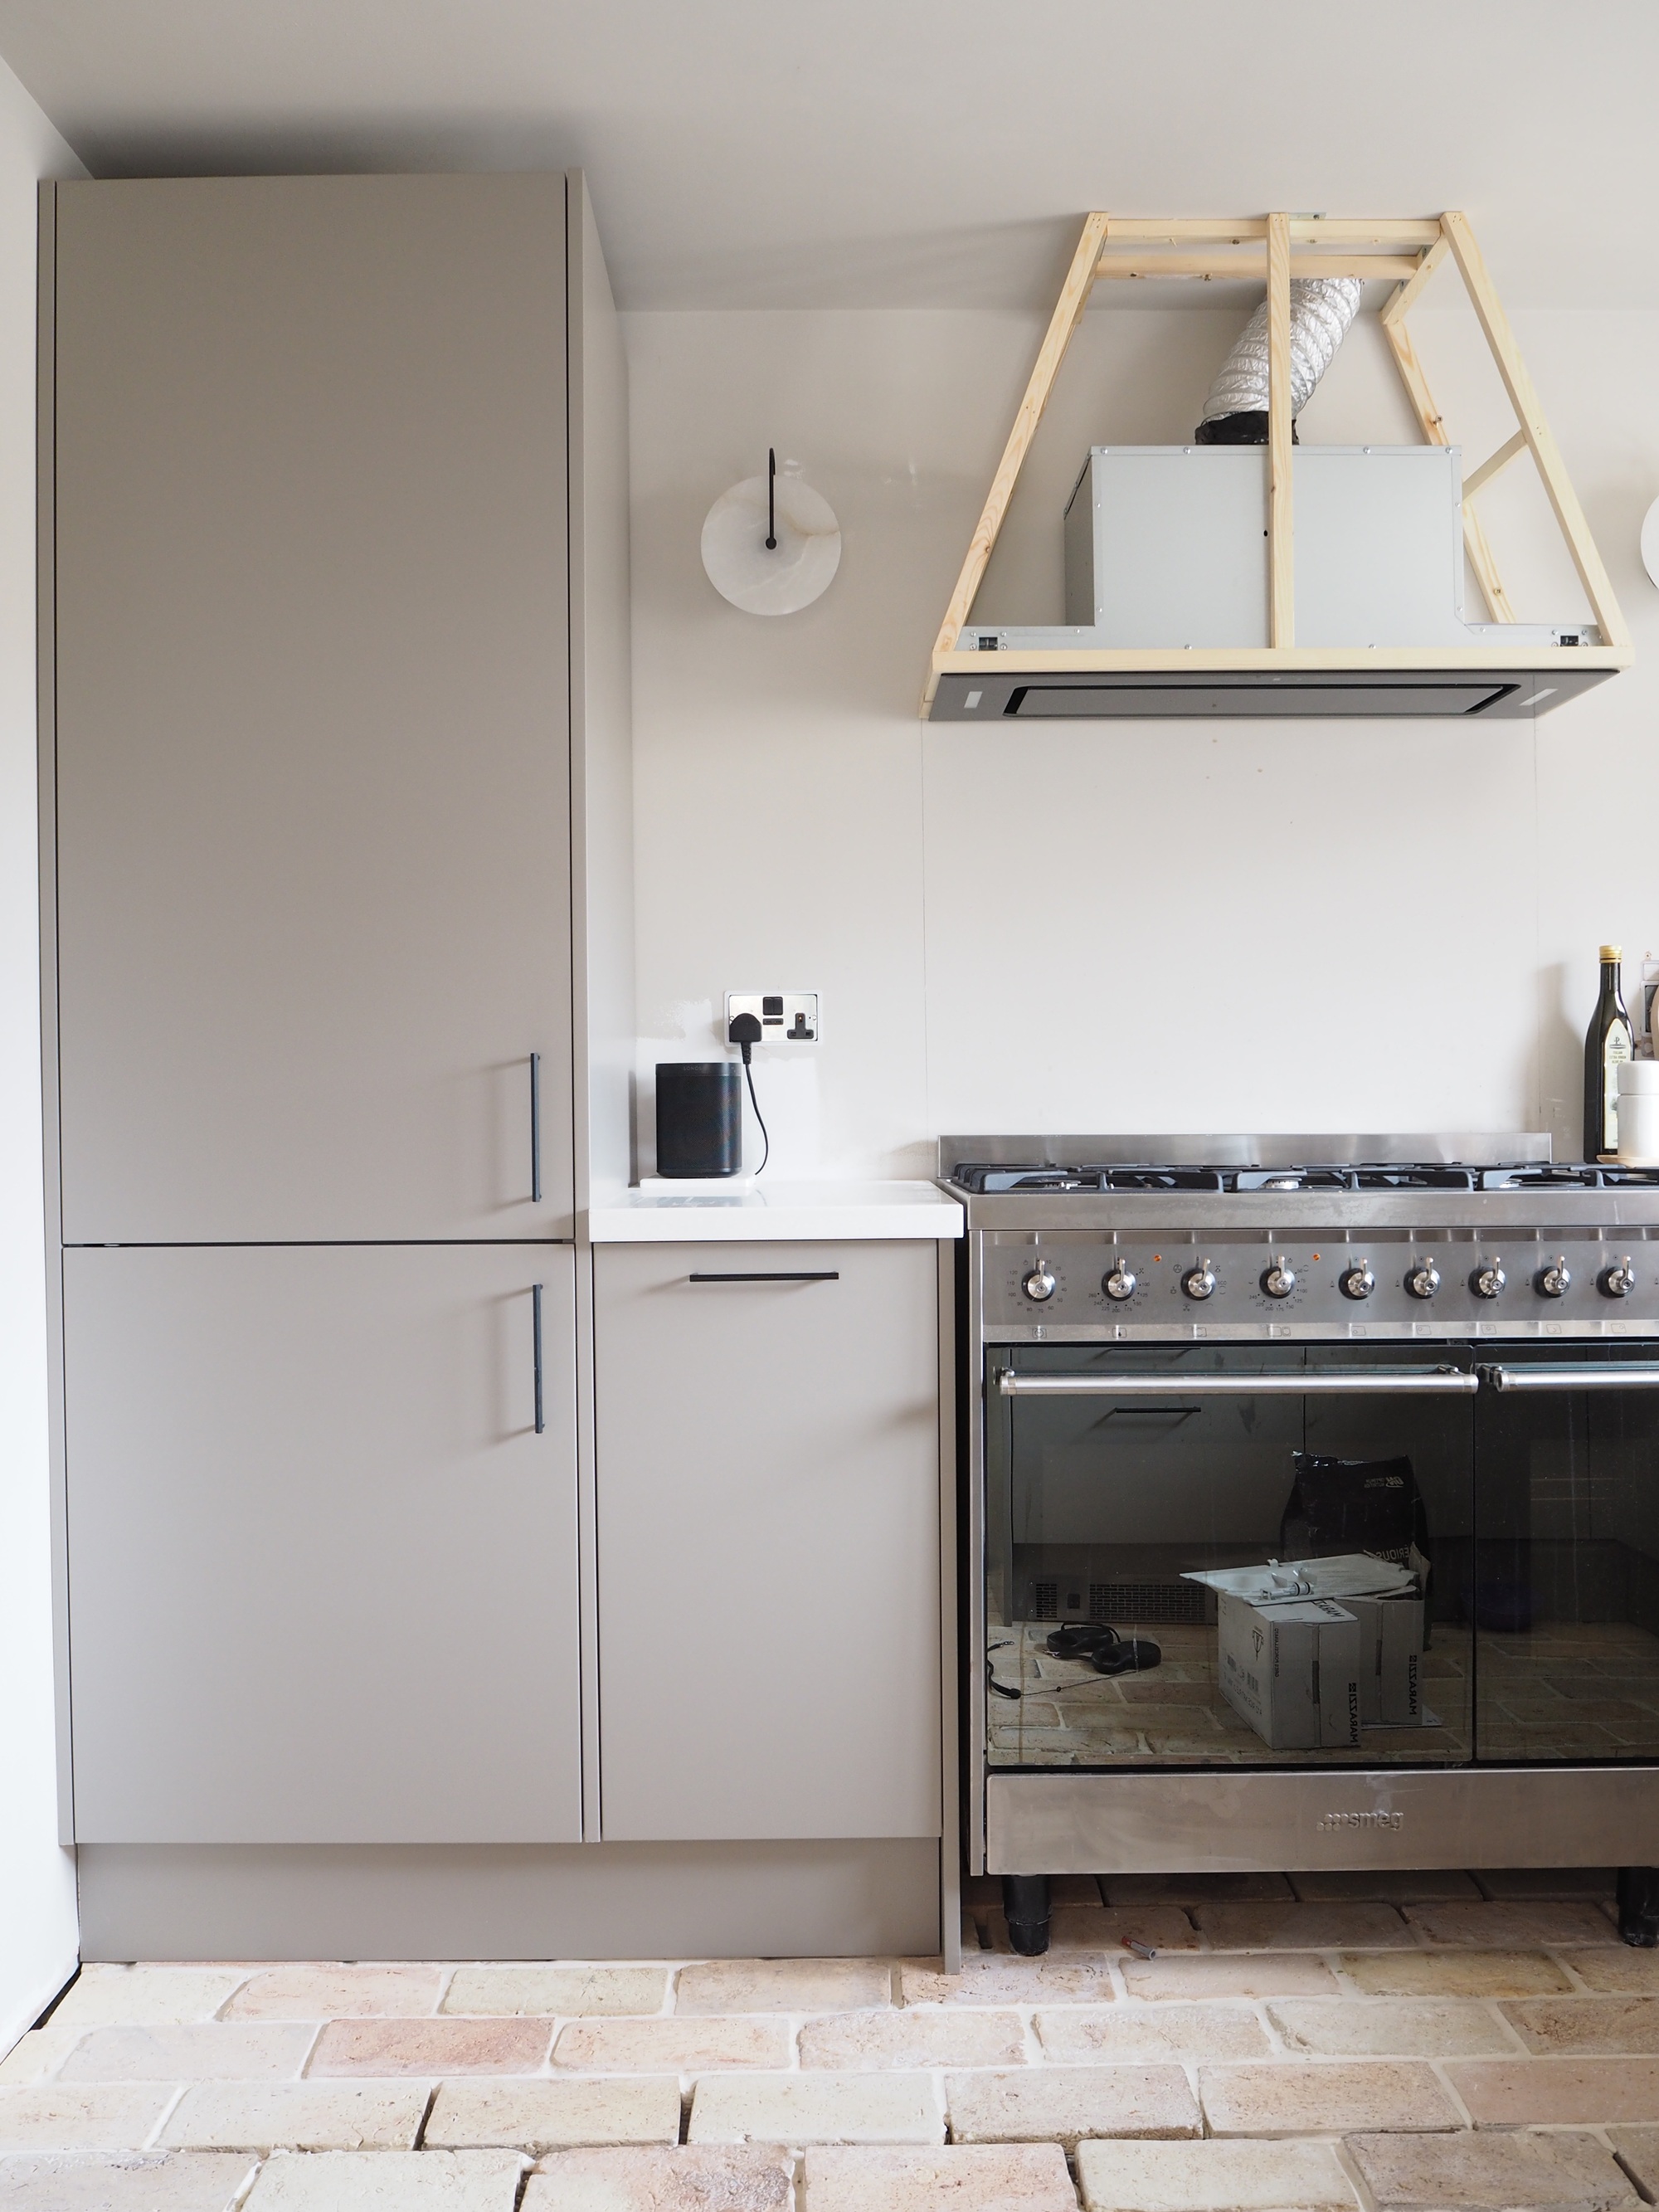
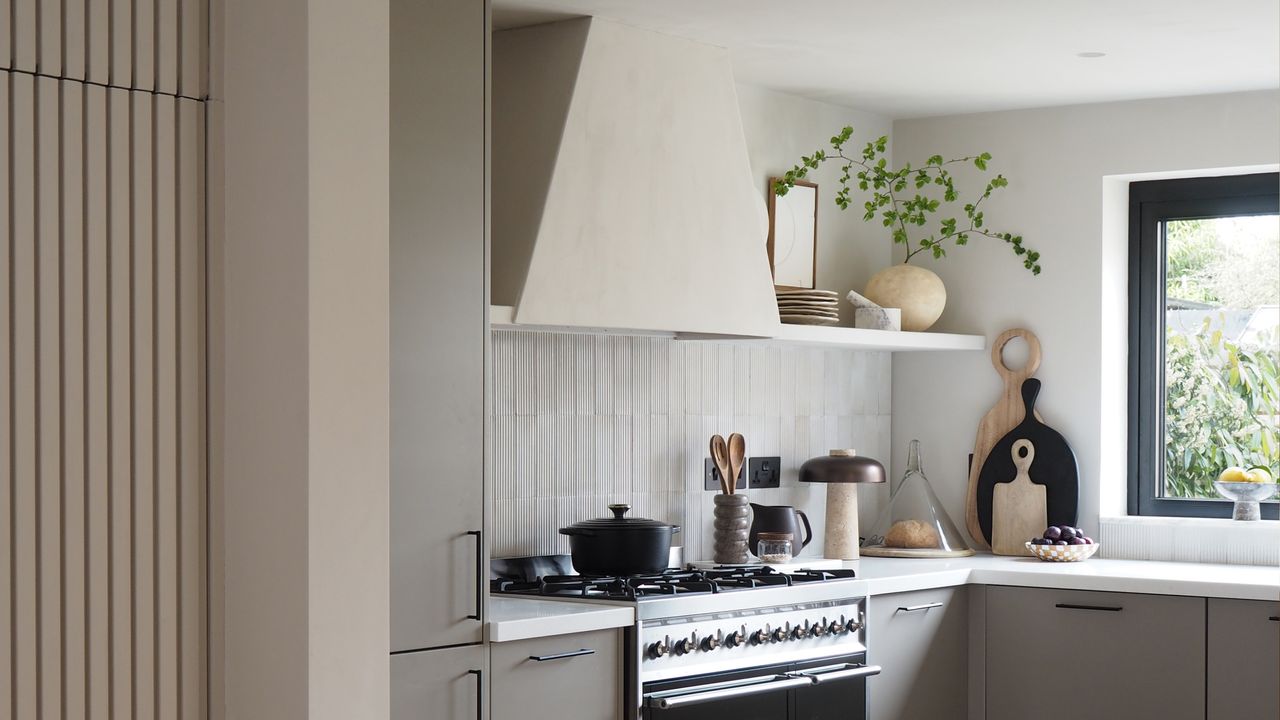
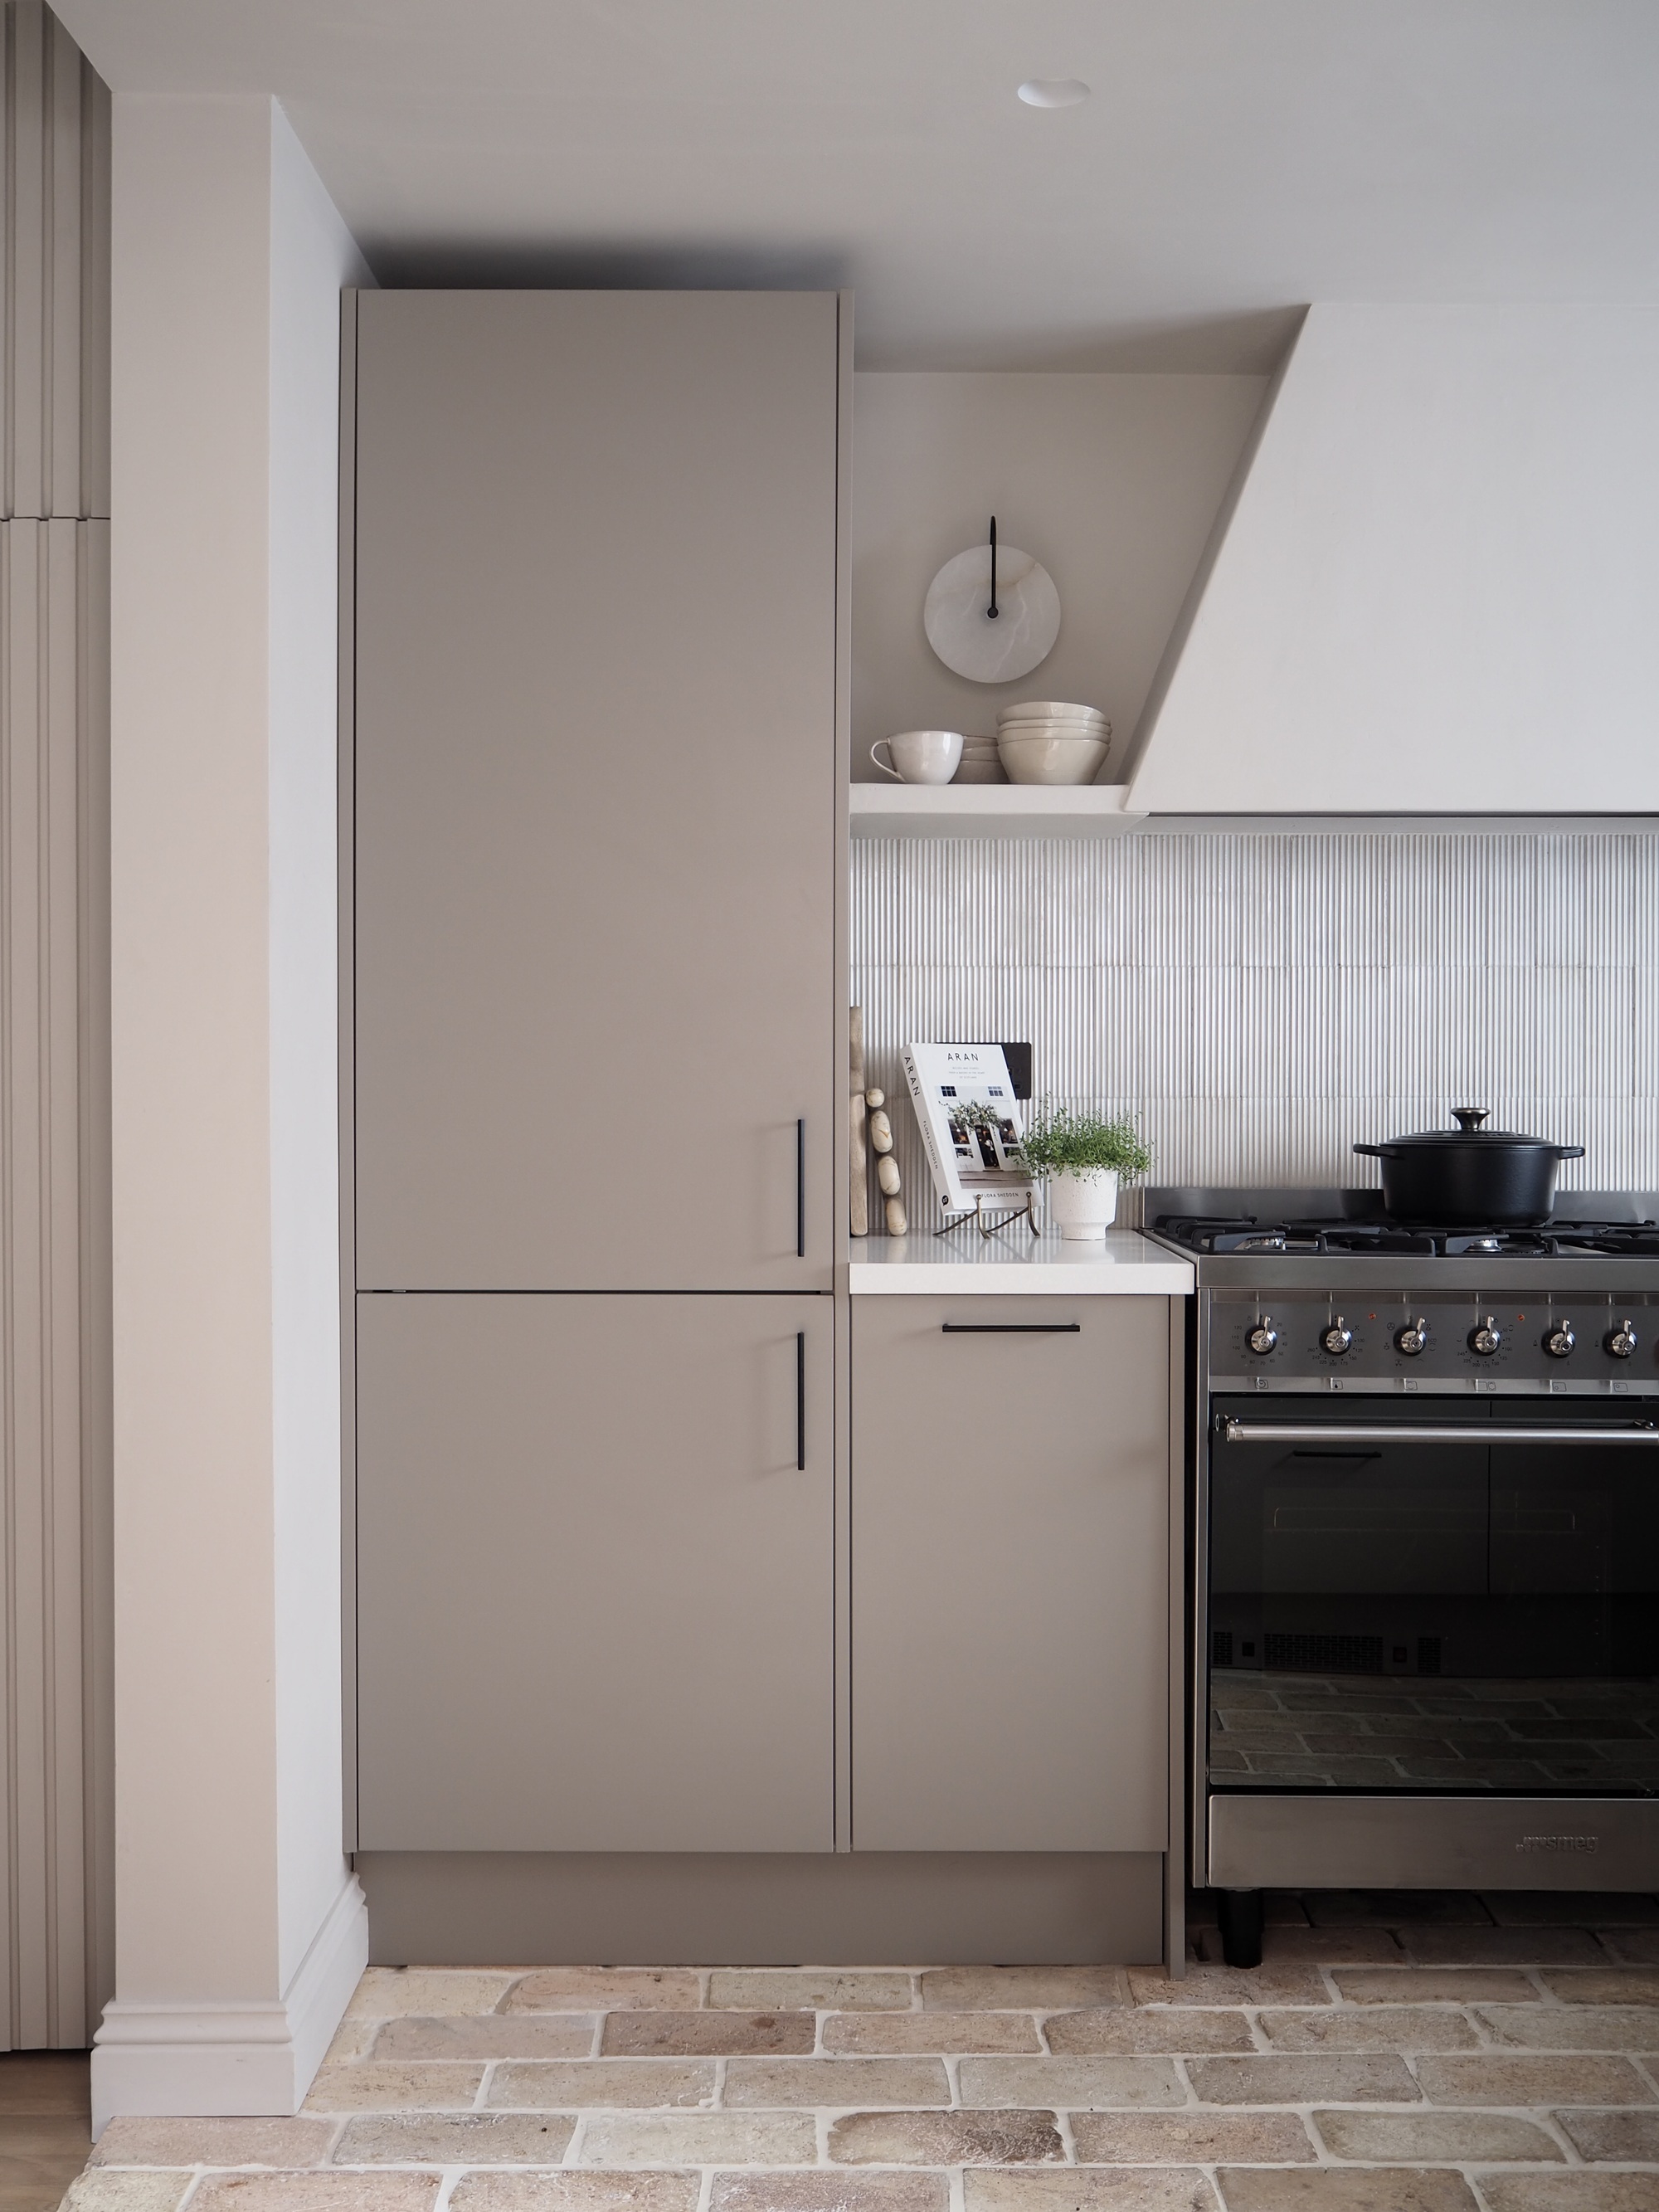
Once that was completed, I could start to clad the timber frame with MDF (or you could use other sheet timber). In my design, I incorporated floating shelves into the design, so I built these out at the same time in the same way as the hood, and clad them all together, making sure the MDF was long enough to inset the extractor unit.
Using an electric mouse sander (I have this Ryobi one from Amazon in my toolkit), I sanded the edges of the MDF for a softer, more organic finish, before plastering the entirety of it with skimming plaster (something like this Plaster Skim also from Amazon). This part, along with the sanding to get a nice smooth finish, is the messy part of the job.
My cooker hood unit has all the functions you'd need — including multiple extraction levels and lighting, and while I do wish I'd got one with a 'waving' turn on function, so I didn't have to awkwardly fiddle to find the buttons in the recess of the cooker hood casing, it's one of my favorite design features of the kitchen.
I styled my open shelving with lots of Japanese-style kitchen decor and plates — here are a few things to shop to get the look.
I spent a lot of time looking at minimalist kitchen inspiration before deciding on my design, and a few years on, not only has the finish held up to the everyday wear and tear of my kitchen, but I'm just as pleased with it now as I was then.