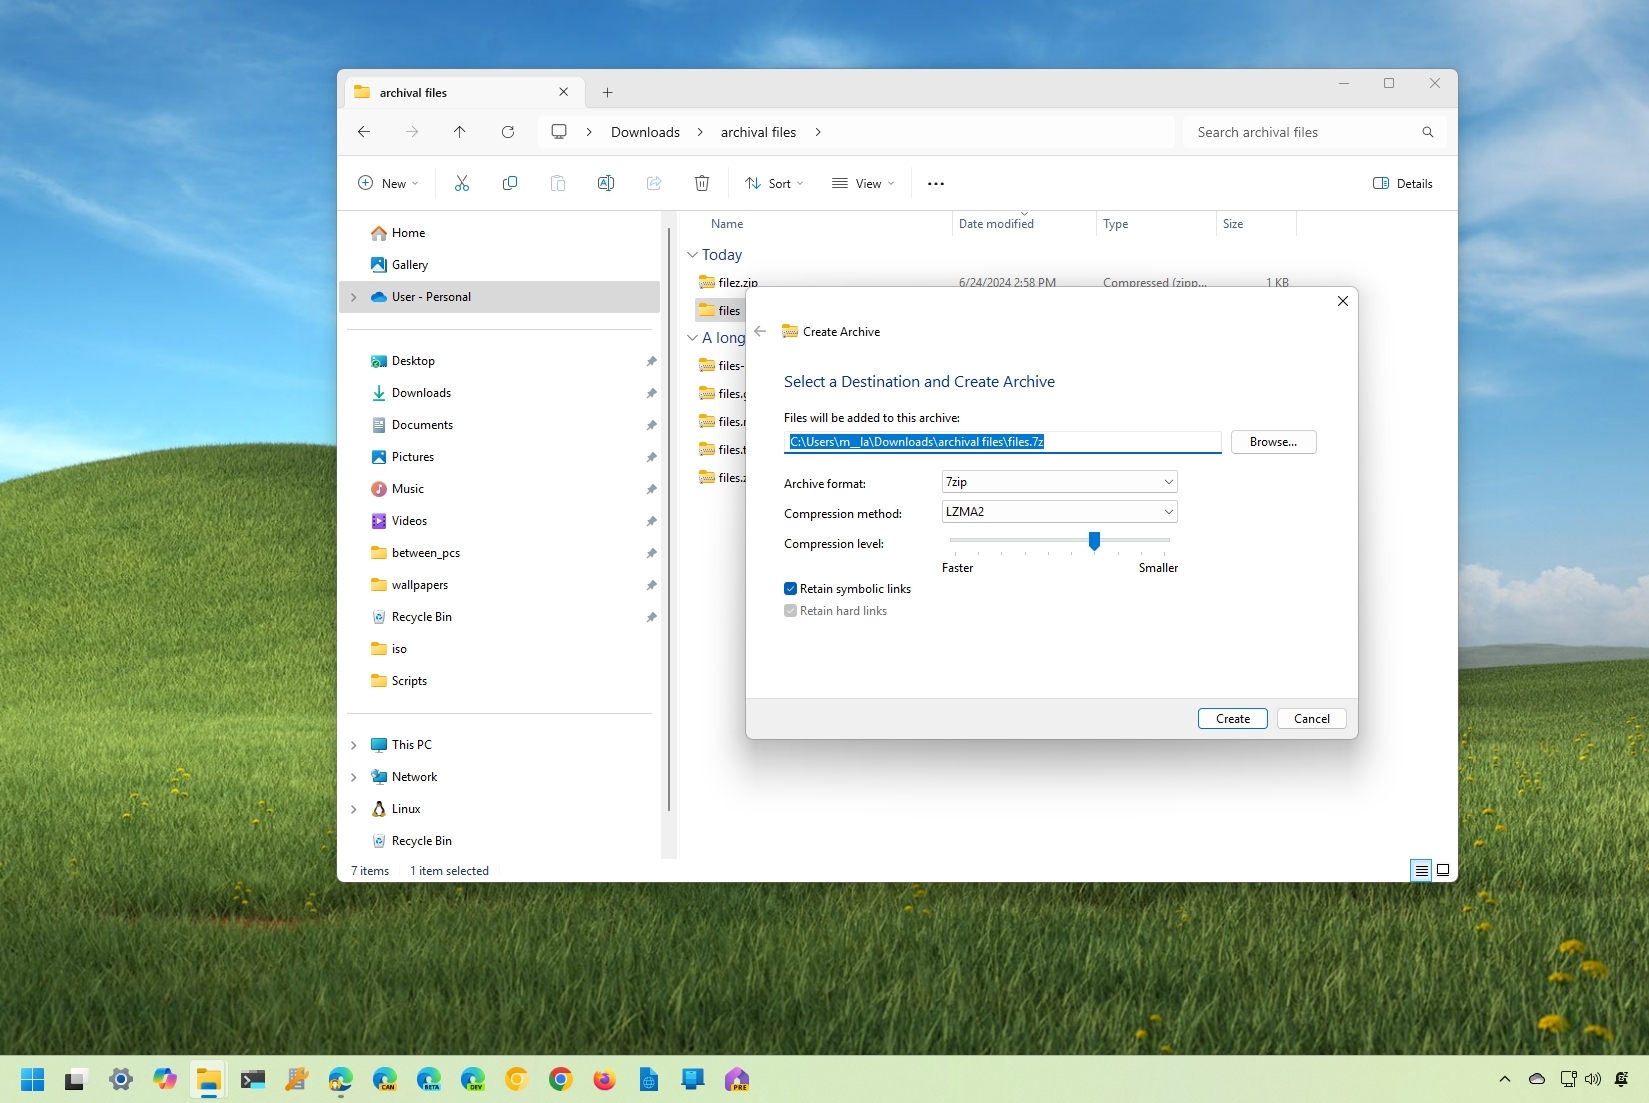
On Windows 11 and other platforms, "zip" is perhaps one of the most common containers to compress files. Usually, you would use zip support to archive non-essential files, compress files to save space on the hard drive or send pictures and documents over the internet through an email service. This file format is also typically the container of choice to share files (such as applications and documents) on the web or through File Transfer Protocol (FTP) servers.
Although you can always rely on third-party tools, Windows 11 ships with native support for zip and unzip files quickly. Also, starting with version 24H2, File Explorer includes a new wizard for creating zip files using different types of compression. Furthermore, since the operating system now supports the “libarchive” open-source project, in addition to "zip," you can also use the wizard to create RAR and 7z files with different compression levels and methods.
In this how-to guide, I'll explain how to use your computer's native compression support to zip and unzip files.
How to zip files on Windows 11
Although the ability to zip and unzip is available on virtually every release of WIndows 11, depending on the version, the steps to compress a group of files will be slightly different.
Zip on version 24H2 and later
To create a Zip file on Windows 11 version 24H2 and later releases, use these steps:
- Open File Explorer.
- Open the folder location with the files to compress.
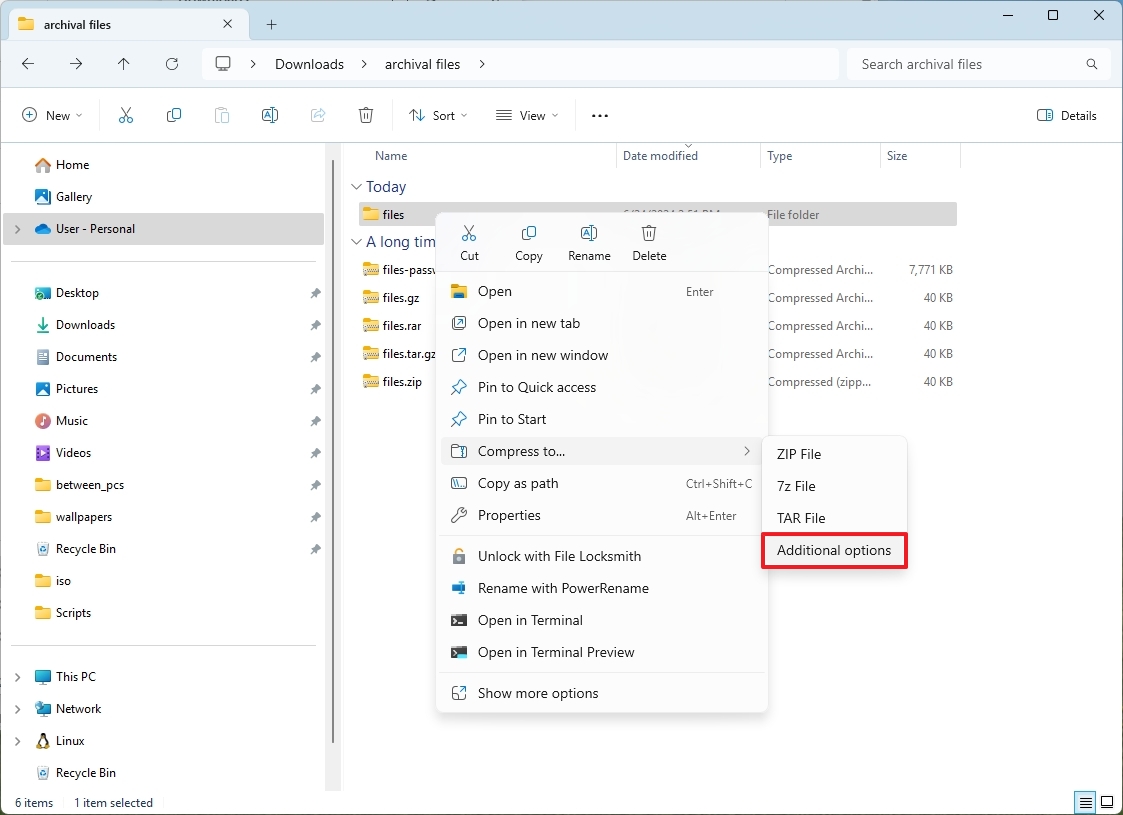
- Right-click the folder (or a selection of files), choose the Compress to, and click on Additional options.
- Choose the Zip option from the "Archive format" setting.
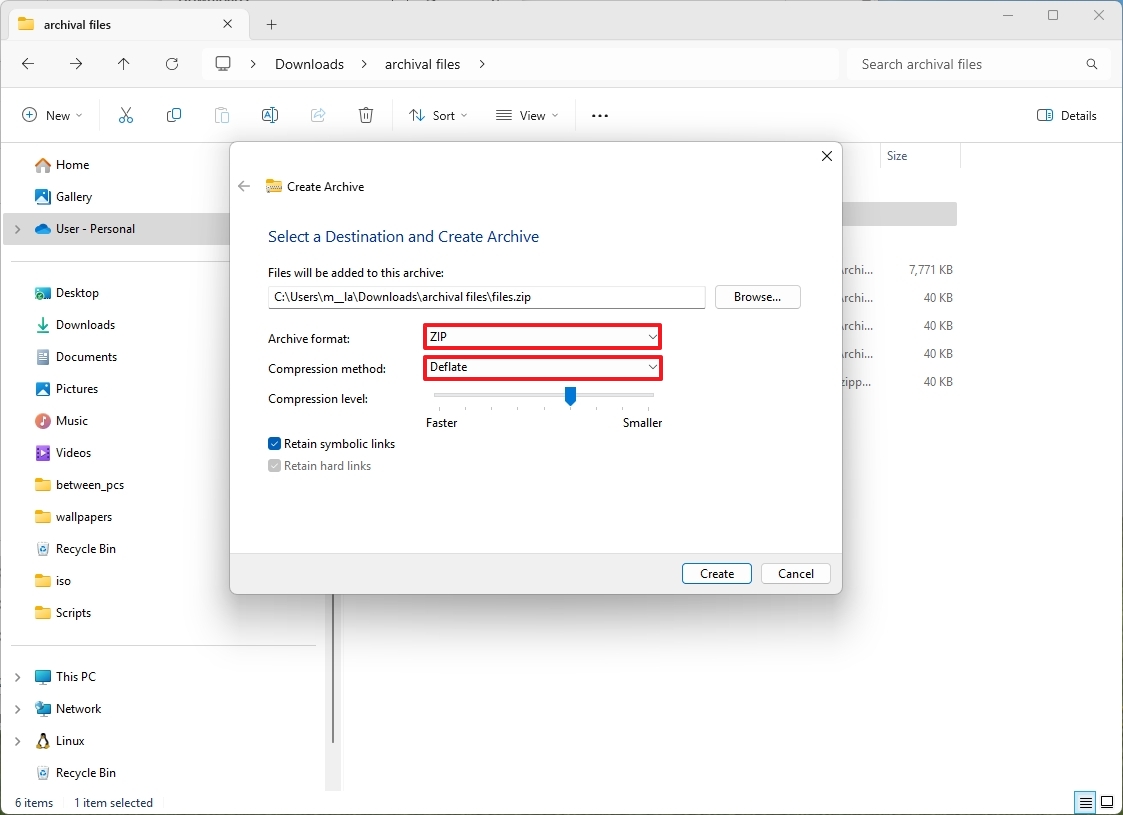
- Quick note: You can also use the "Zip File" option to zip the contents without additional configuration.
- Choose the Deflate option for the compression method.
- Quick tip: The "Store" option allows you to create a Zip file without compression.
- Select the compression level with the slider.
- Quick tip: The smaller the compression, the more time the system will take to compress.
- (Optional) Check the "Retain symbolic links" option.
- Click the Create button.
After you complete the steps, the system will create the Zip file using the compression level you specified.
Zip on version 23H2 and earlier
To zip files on all versions of Windows 11 (including 24H2, 23H2, 22H2, and 21H2), use these steps:
- Open File Explorer.
- Open the folder location with the files to compress.
- Click the New menu button from the command bar and select the "Compressed (zipped) Folder" option.
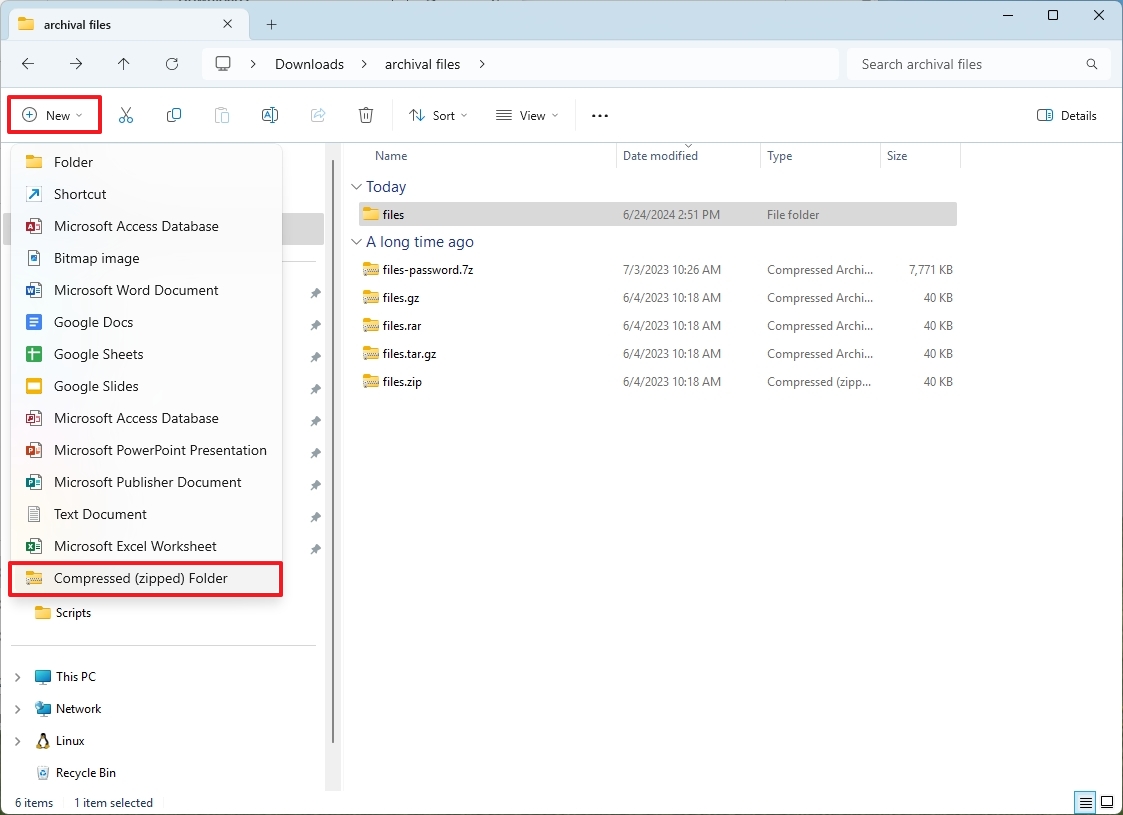
- Create a name for the zip file and press Enter.
- Select the files and folders to zip.
- Right-click the selection and choose the Cut option.
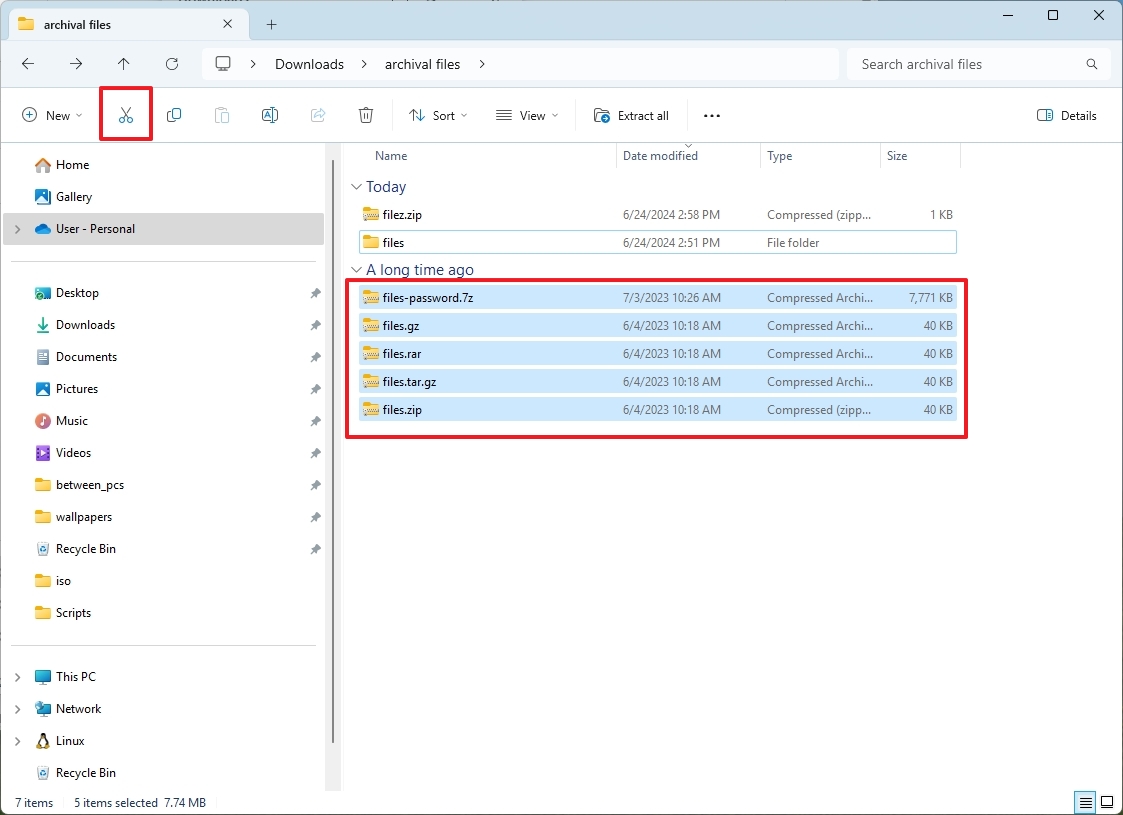
- Double-click the newly created zip file.
- Click the Paste button from the command bar.
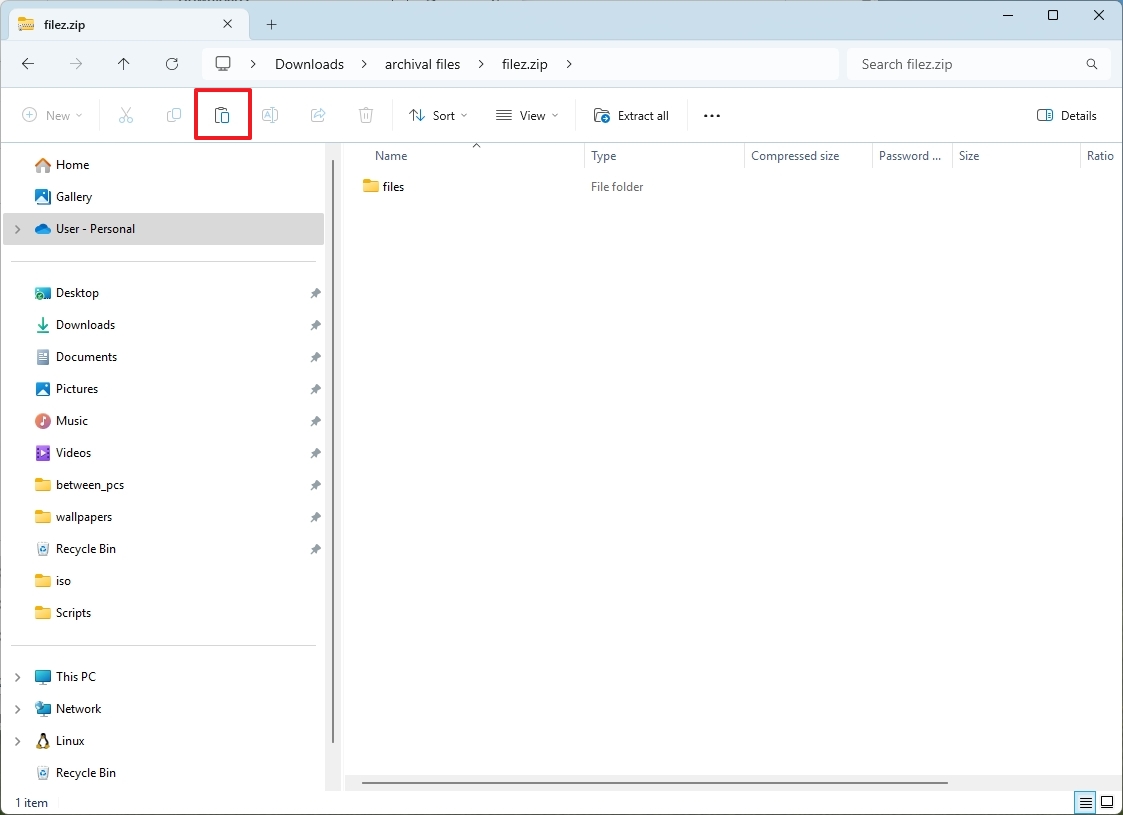
- Quick tip: You can also select items and click the "Delete" button in the command bar to remove from the compressed folder.
Once you complete the steps, you will end up in the ".zip" file, which includes all the compressed files. You can keep this on your computer or share it with others.
Alternatively, you can select the files and folders, right-click the selection, and choose the "Compress to ZIP file" option. You can also drag and drop the items into the zip file to compress them.
Share zipped folder
After compressing the files, you can share the contents with nearby devices or by email, and here's how:
- Open File Explorer.
- Open the folder with the zipped folder.
- Select the .zip file and click the Share button from the command bar.
- (Option 1) Select the device to share the file with Nearby sharing.
- (Option 2) Select the contact or the email client application to send the zipped folder by email.
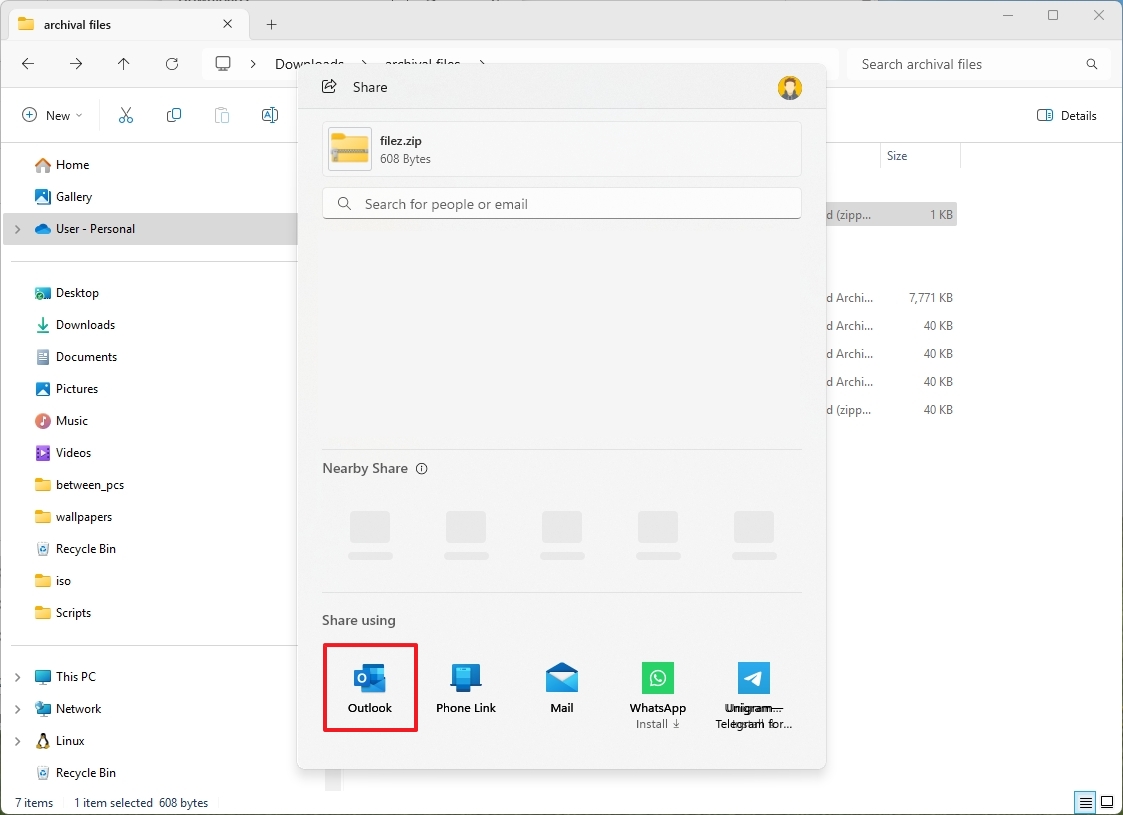
- Continue with the on-screen directions to send the zipped folder.
Once you complete the steps, the recipient will be able to use the steps below to extract the files.
How to unzip files on Windows 11
Windows 11 includes native support for zipping, which means you can double-click the zipped folder to access its content. However, you will need to extract the files if you want to modify their contents or if it's an application you wish to install.
The instructions for unzipping files are identical on every version of the operating system, which means that you can use them on versions 24H2, 23H2, and older releases.
You can use two ways to unzip files. You can extract all the contents or unzip only the files you need.
Extract all wizard
To extract all the files from the ."zip" file, use these steps:
- Open File Explorer.
- Open the folder with the zipped folder.
- Select the .zip file.
- Click the Extract all button from the command bar.
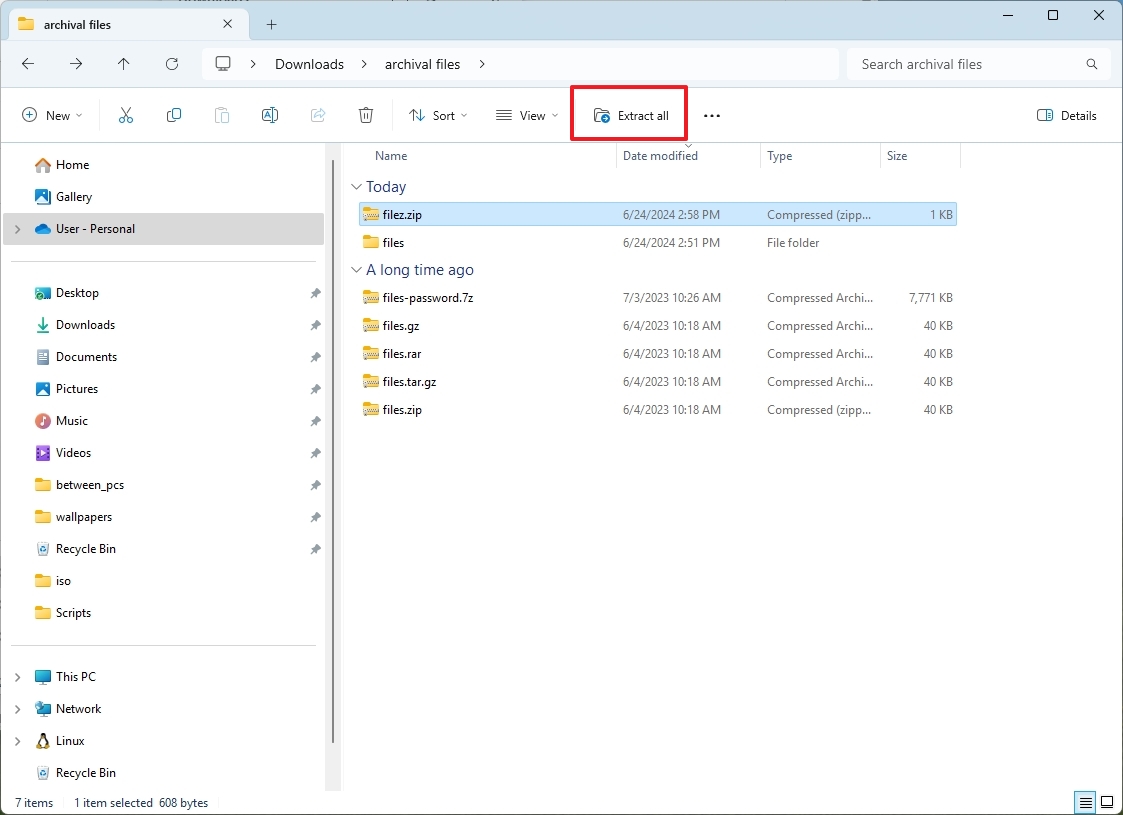
- (Optional) Click the Browse button to select the location where the extracted files will be stored.
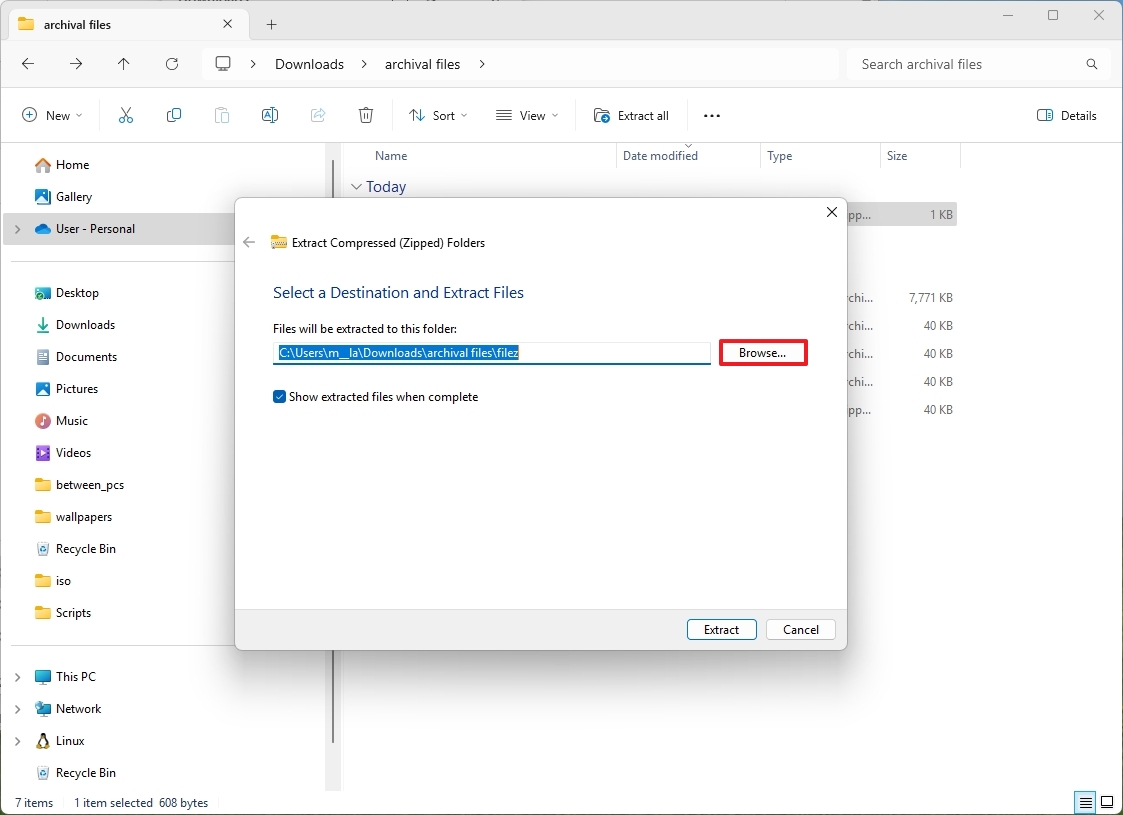
- Quick note: By default, the wizard will extract the files in the same location as the ".zip" file.
- Check the "Show extracted files when complete" option.
- Click the Extract button.
After you complete the steps, the folder with all the extracted files should open automatically on the screen.
Extract files individually
To unzip individual files on Windows 11, use these steps:
- Open File Explorer.
- Open the folder with the zipped file.
- Double-click the ".zip" file.
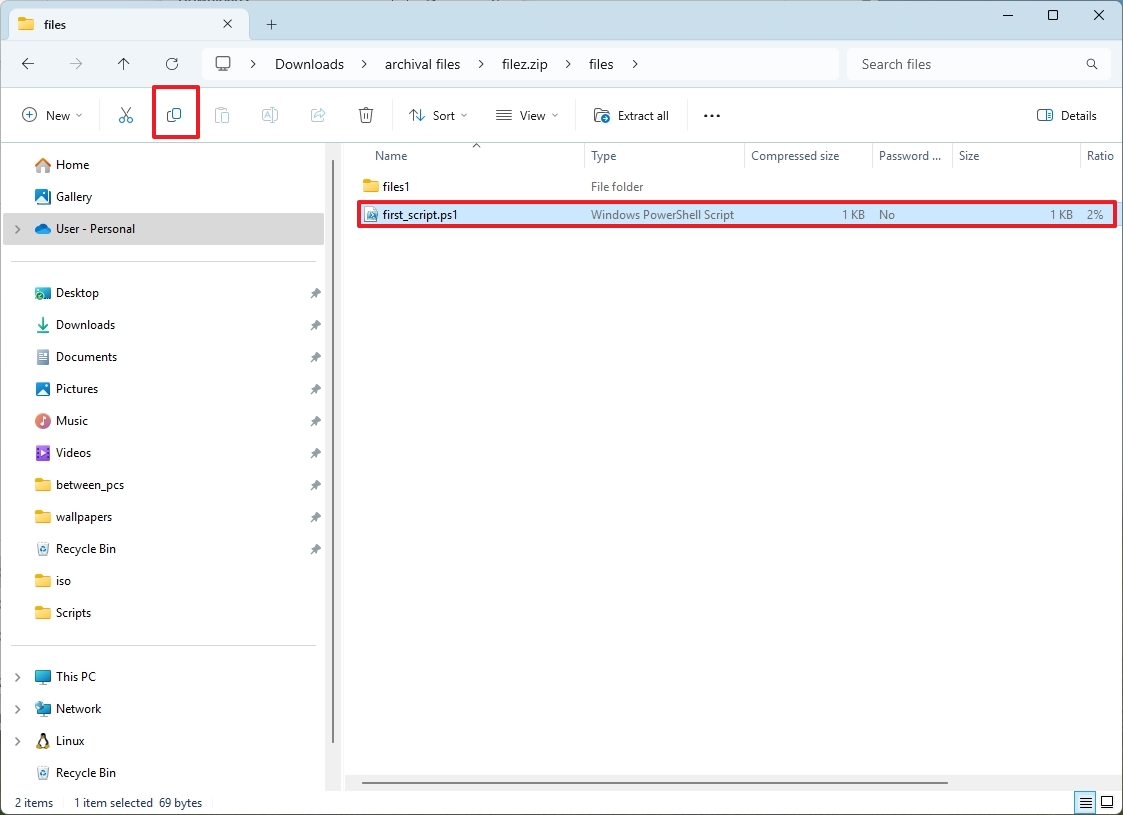
- Select the files to extract.
- Click the Copy option from the command bar.
- Open the location to extract the files.
- Click the Paste option from the command bar.
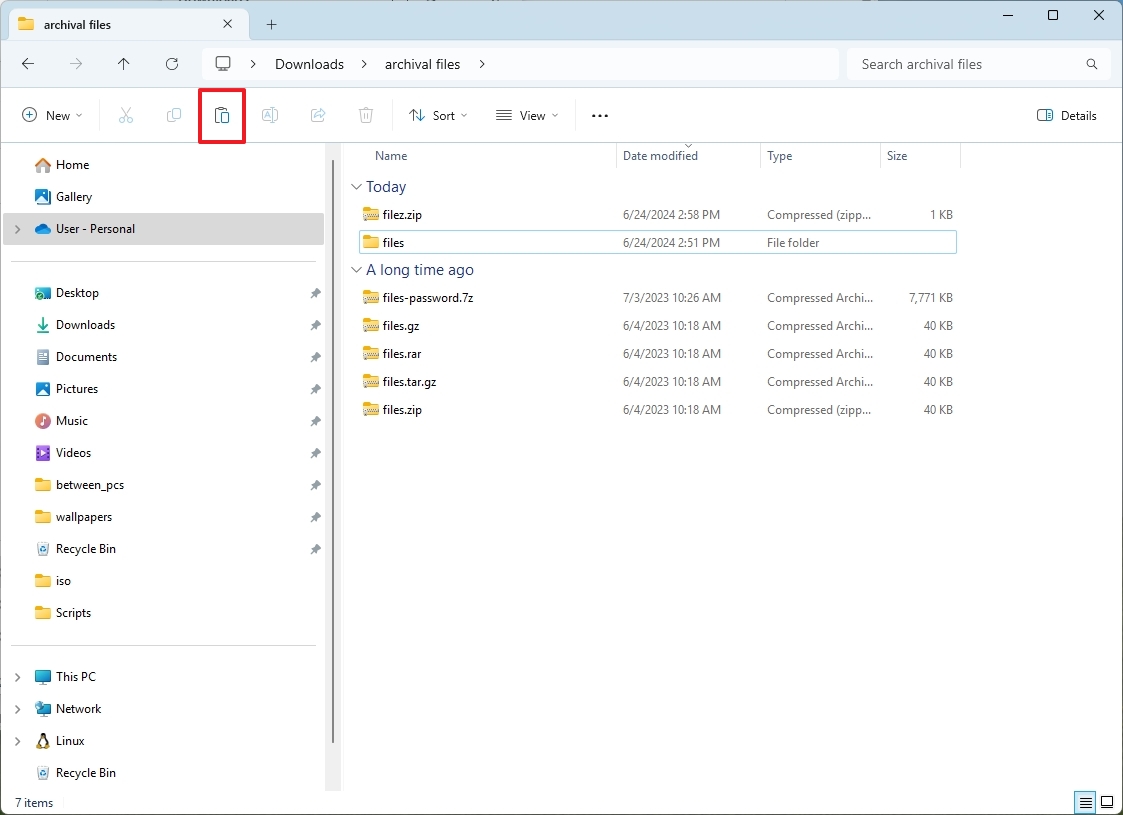
Once you complete the steps, you may need to repeat the steps to extract other files.
More resources
For more helpful articles, coverage, and answers to common questions about Windows 10 and Windows 11, visit the following resources:


