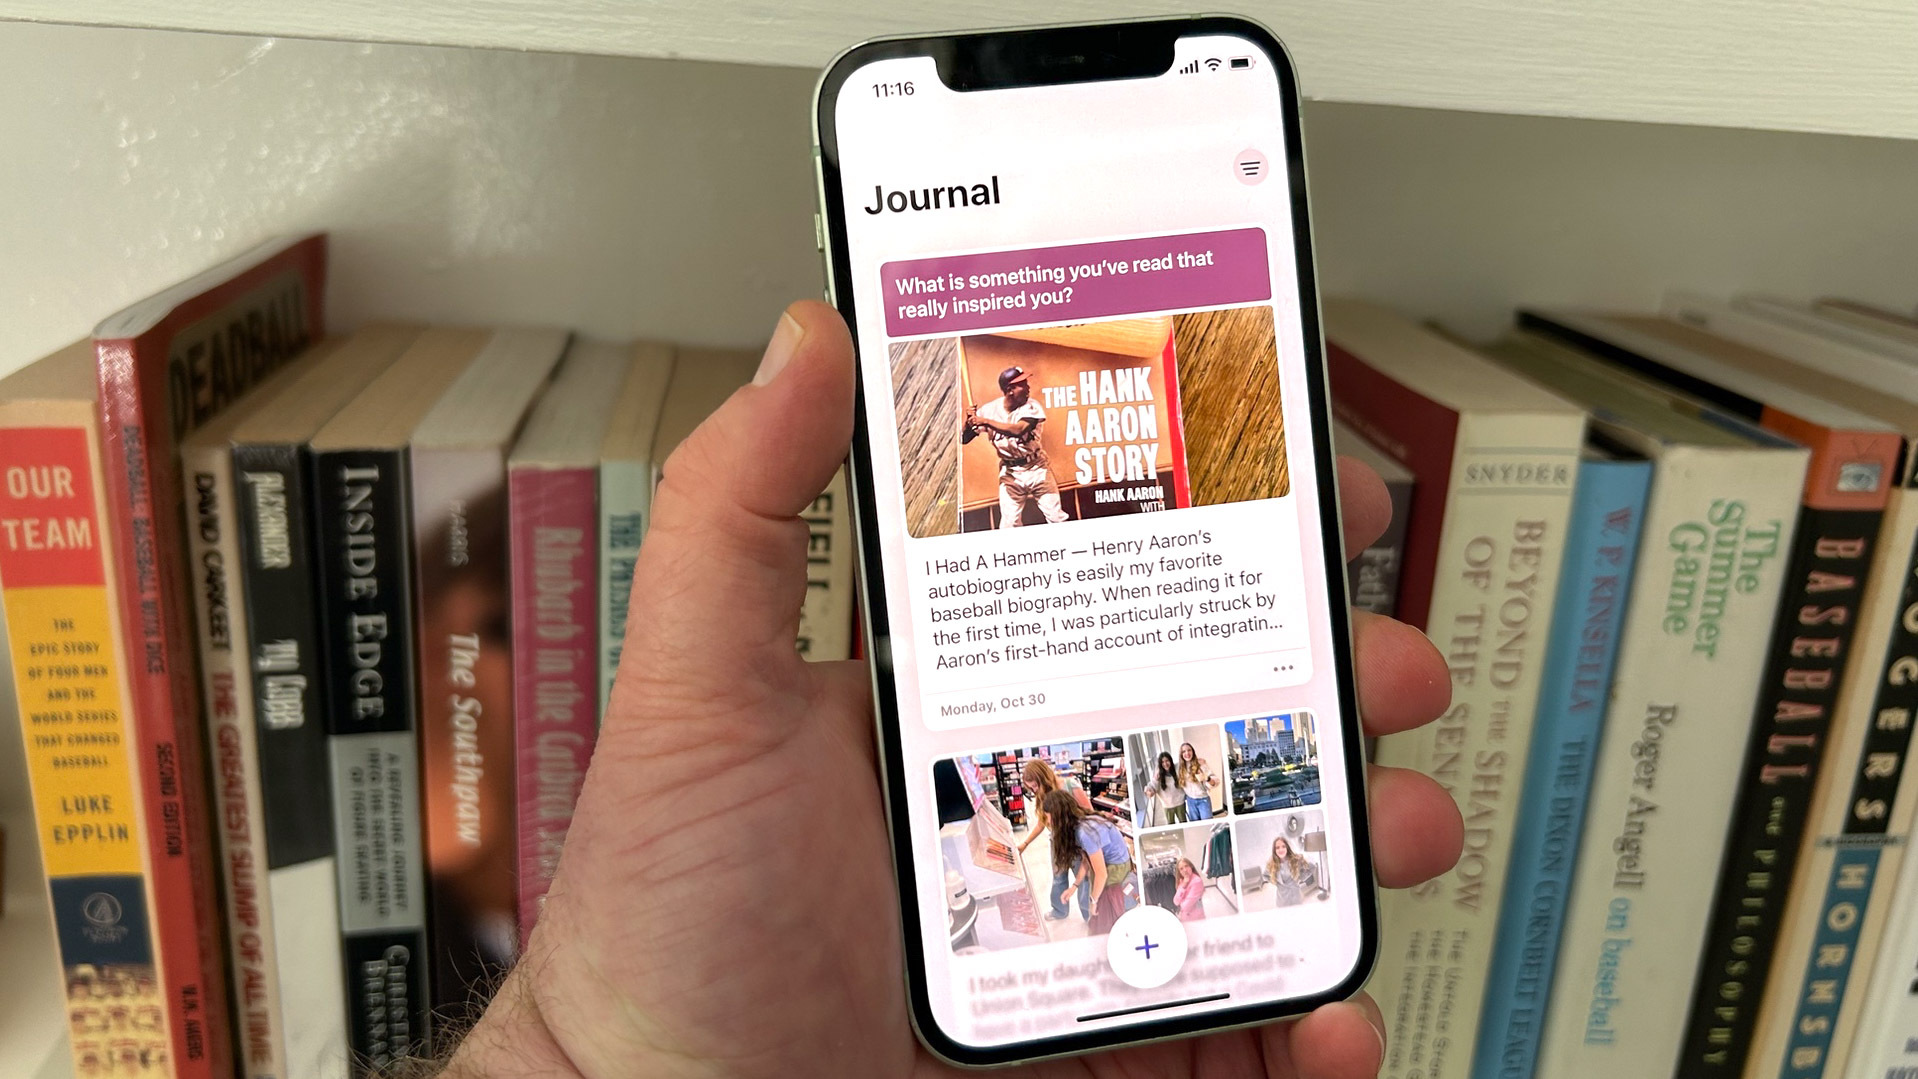
Knowing how to use the iOS 17.2 Journal app allows you to keep a diary of your daily activities. By pulling information together in one place, it lets you focus on special moments or events in your life, allowing for greater reflection.
Doing so can have many benefits. Keeping a diary is a proven way to boost your mental health, letting you gather your thoughts and make better sense of your days. Journals also allow you to look back and refresh important memories.
Where the iOS Journal app excels, however, is in the way it aggregates content from your iPhone and suggests some entries for you. It’ll analyse certain experiences such as the photos you take and people you communicate with and prompt you to create a journal entry. The aim, Apple says, is to build a journaling habit.
Apple has also addressed potential privacy concerns. As well as allowing you to lock your entries behind Face ID and Touch ID, Journal makes use of on-device processing and end-to-end encryption so that nobody can hack in and access your data remotely.
So let’s take a look at how to use the iOS 17.2 Journal app. There are a few facets to this app which you'll want to know — such as creating different types of entries and also locking your journal (nobody wants their diary read, after all) — so this complete guide has broken everything down into a few different sections. We'd advise reading the setup section first, but after that feel free to skip to the section that you're most interested in.
How to use the iOS Journal app: a complete guide
You'll need to be running iOS 17.2 or later to use this app — we can show you how to update your iPhone if you need some help. At the time of writing, iOS 17.2 is in beta — check out our guide on how to enable beta updates on iPhone for more info.
How to set up the Journal app
First, let's look at setting up the Journal app for the first time.
1. Launch the Journal app and tap the Plus button
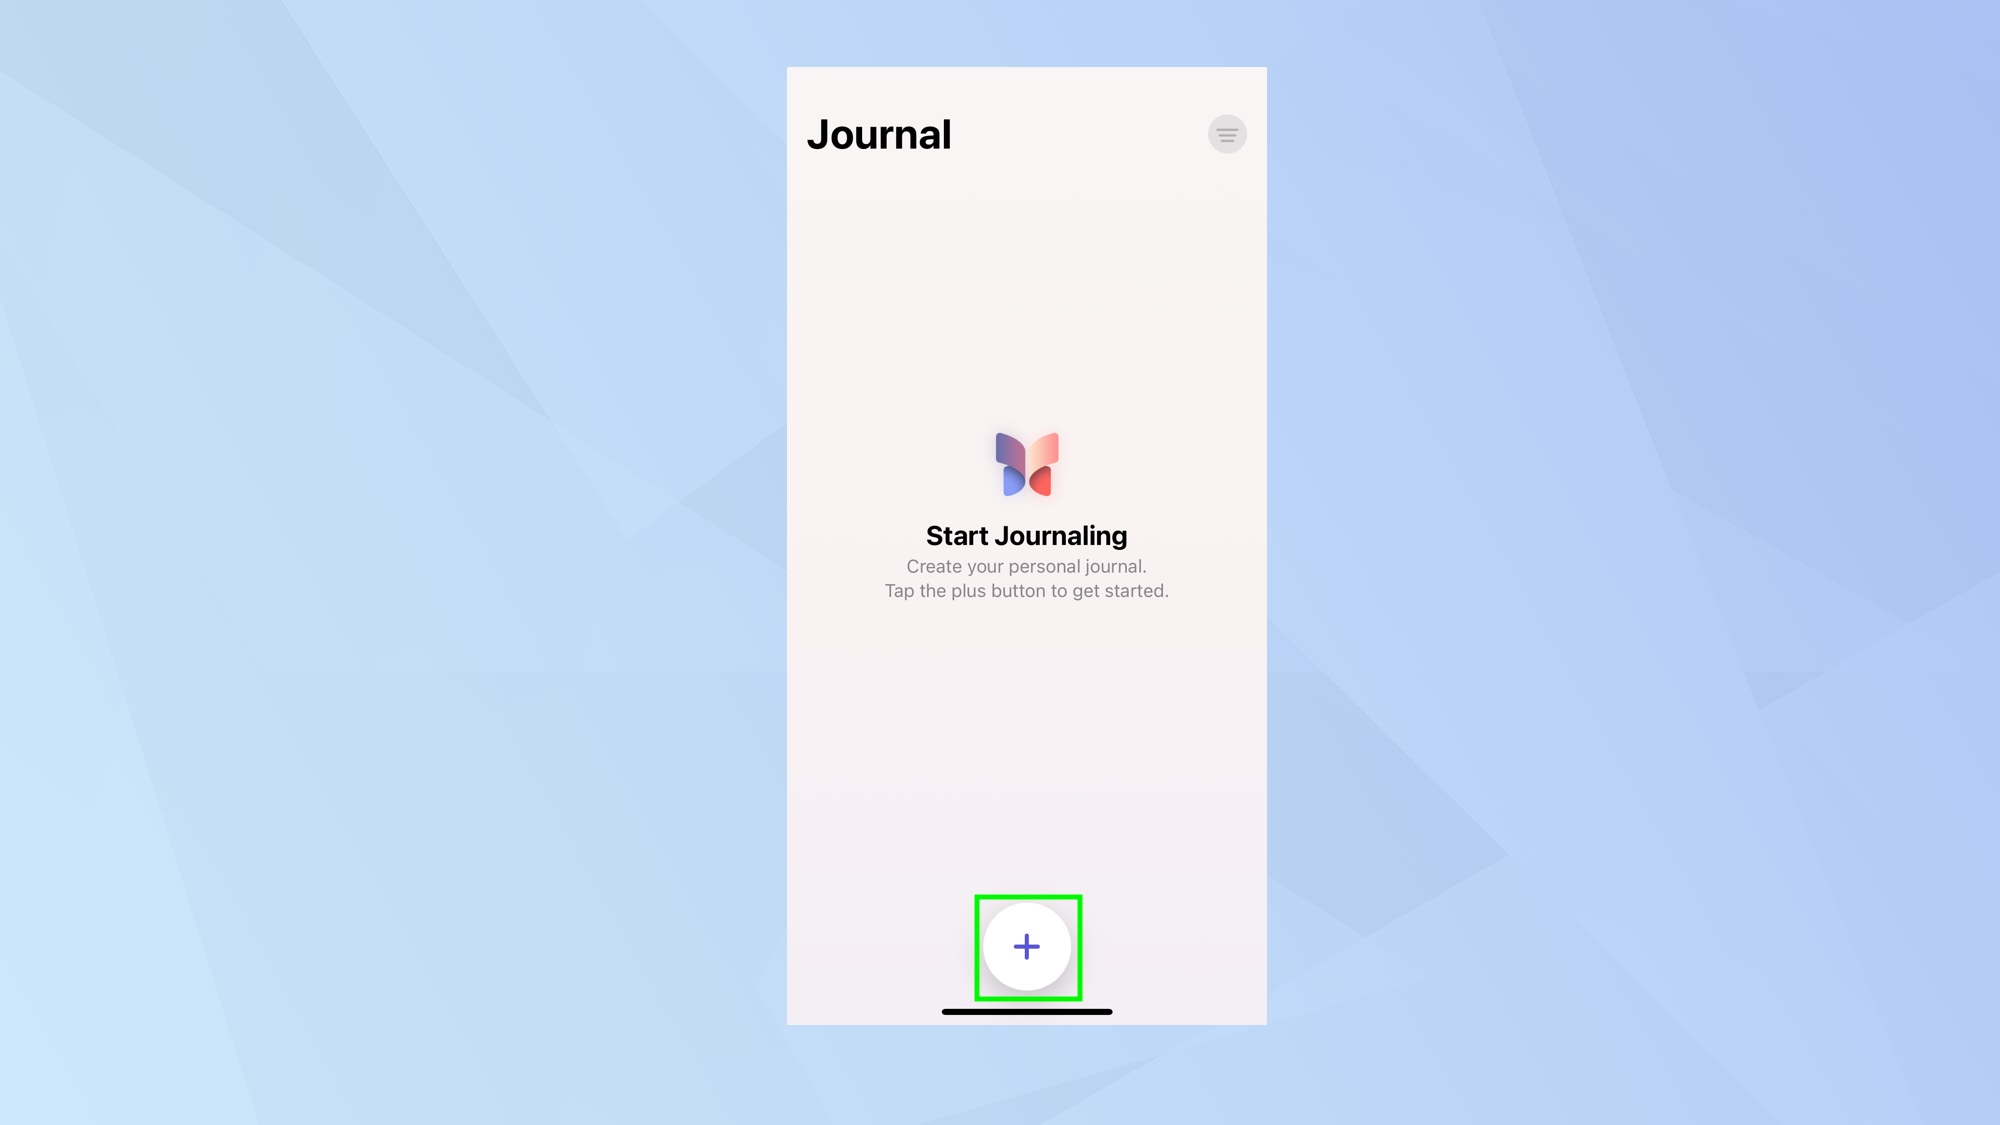
First of all, launch the Journal app and tap the Plus button at the bottom of the screen.
2. Activate Journaling suggestions
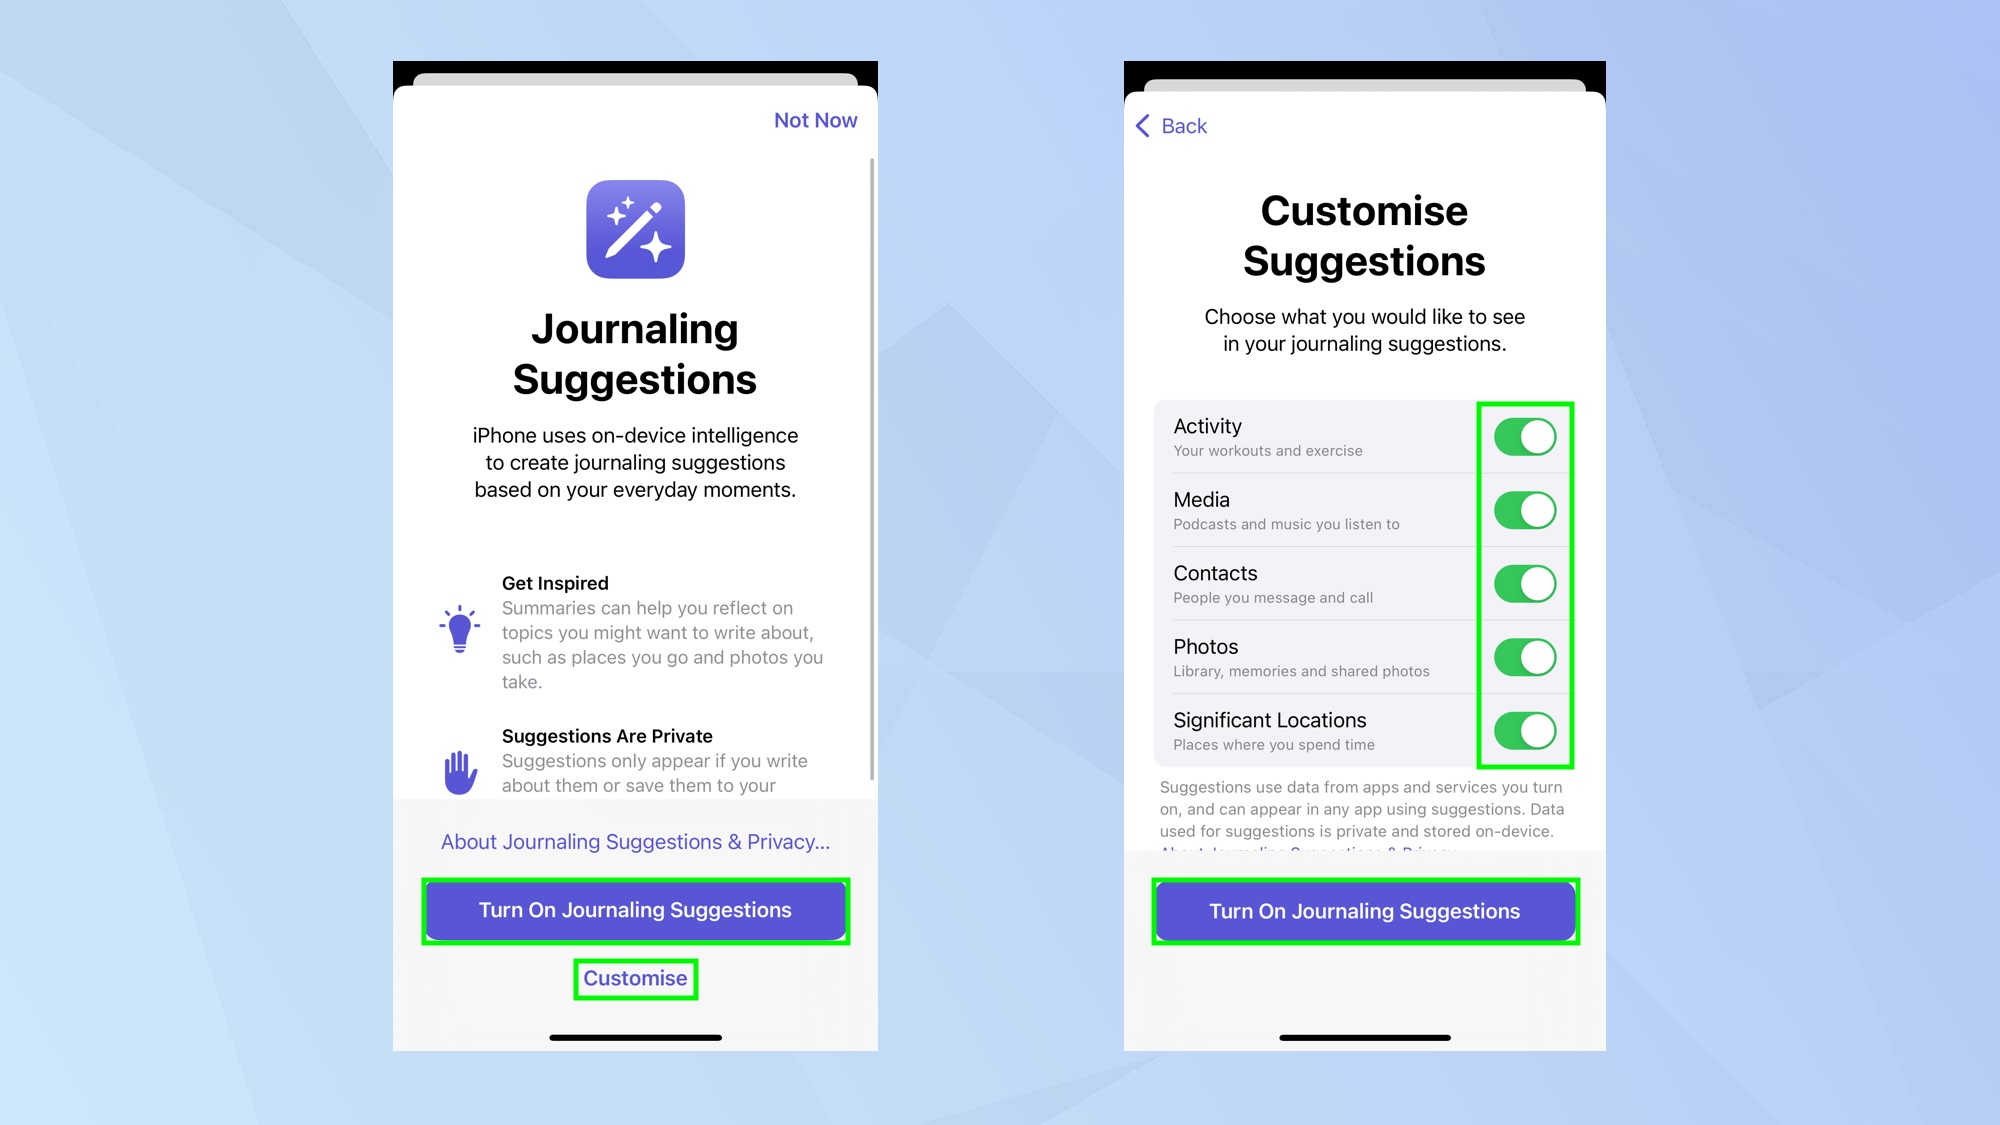
If this is the first time you have used the Journal app, you will now be able to tap Turn On Journaling suggestions. This will allow you to automatically add details of your day-to-day activities — for example, it will include journal entries about the places you visit, anyone you call or message, any photos you’ve taken, or any exercise routines, music or podcasts you’ve engaged with.
You can exert control over what the Journal app uses if you tap Customize. You can then go toggle the buttons to include or exclude workouts and exercise, media, contacts, photos and significant locations. Make your decision and tap Turn On Journaling Suggestions.
3. Allow/disallow Notifications
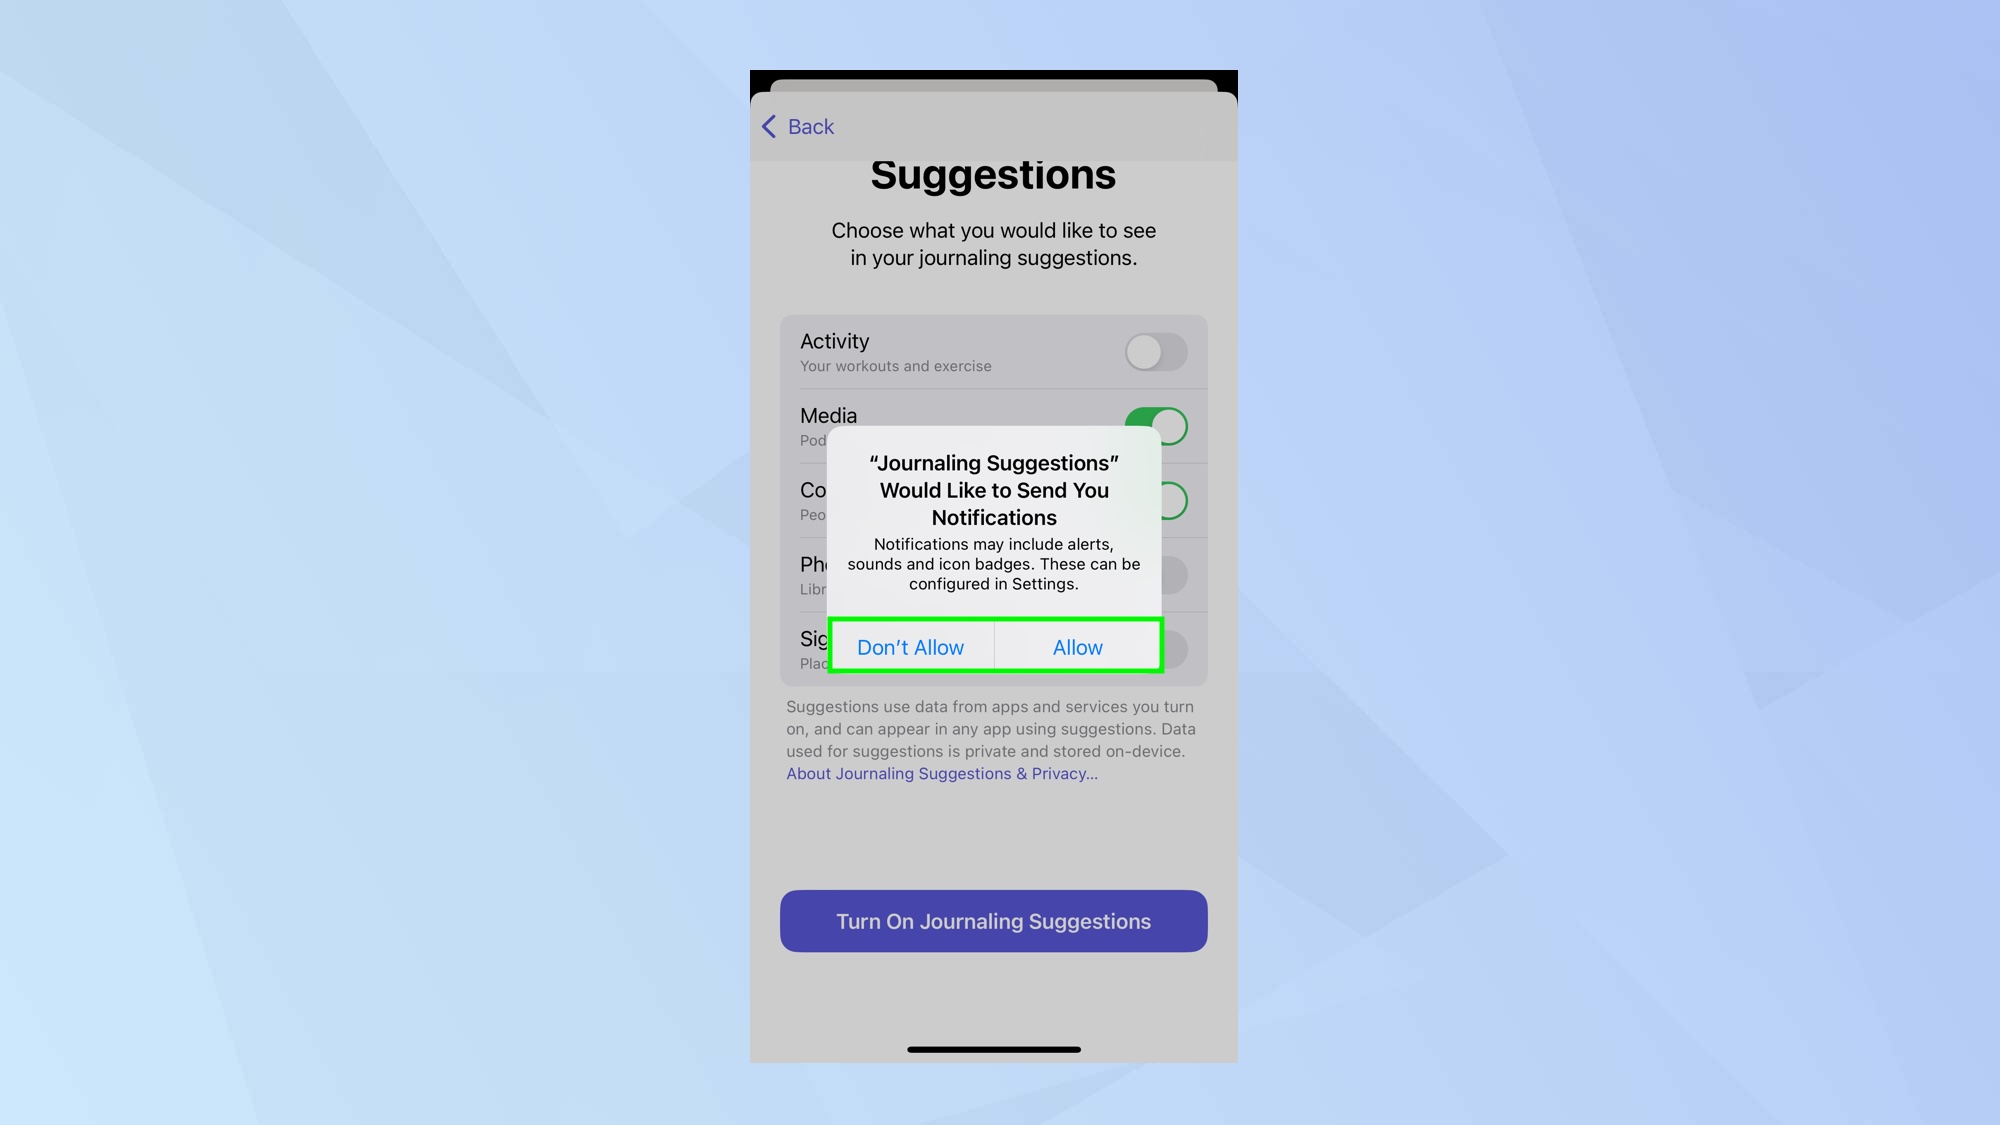
You will be asked if you would like Journaling Suggestions to send you notifications. Tap Don’t Allow or tap Allow depending on your preference.
How to add entries in the Journal app
Once you’re set up, you can get on with the task of creating entries.
1. Tap the Plus button
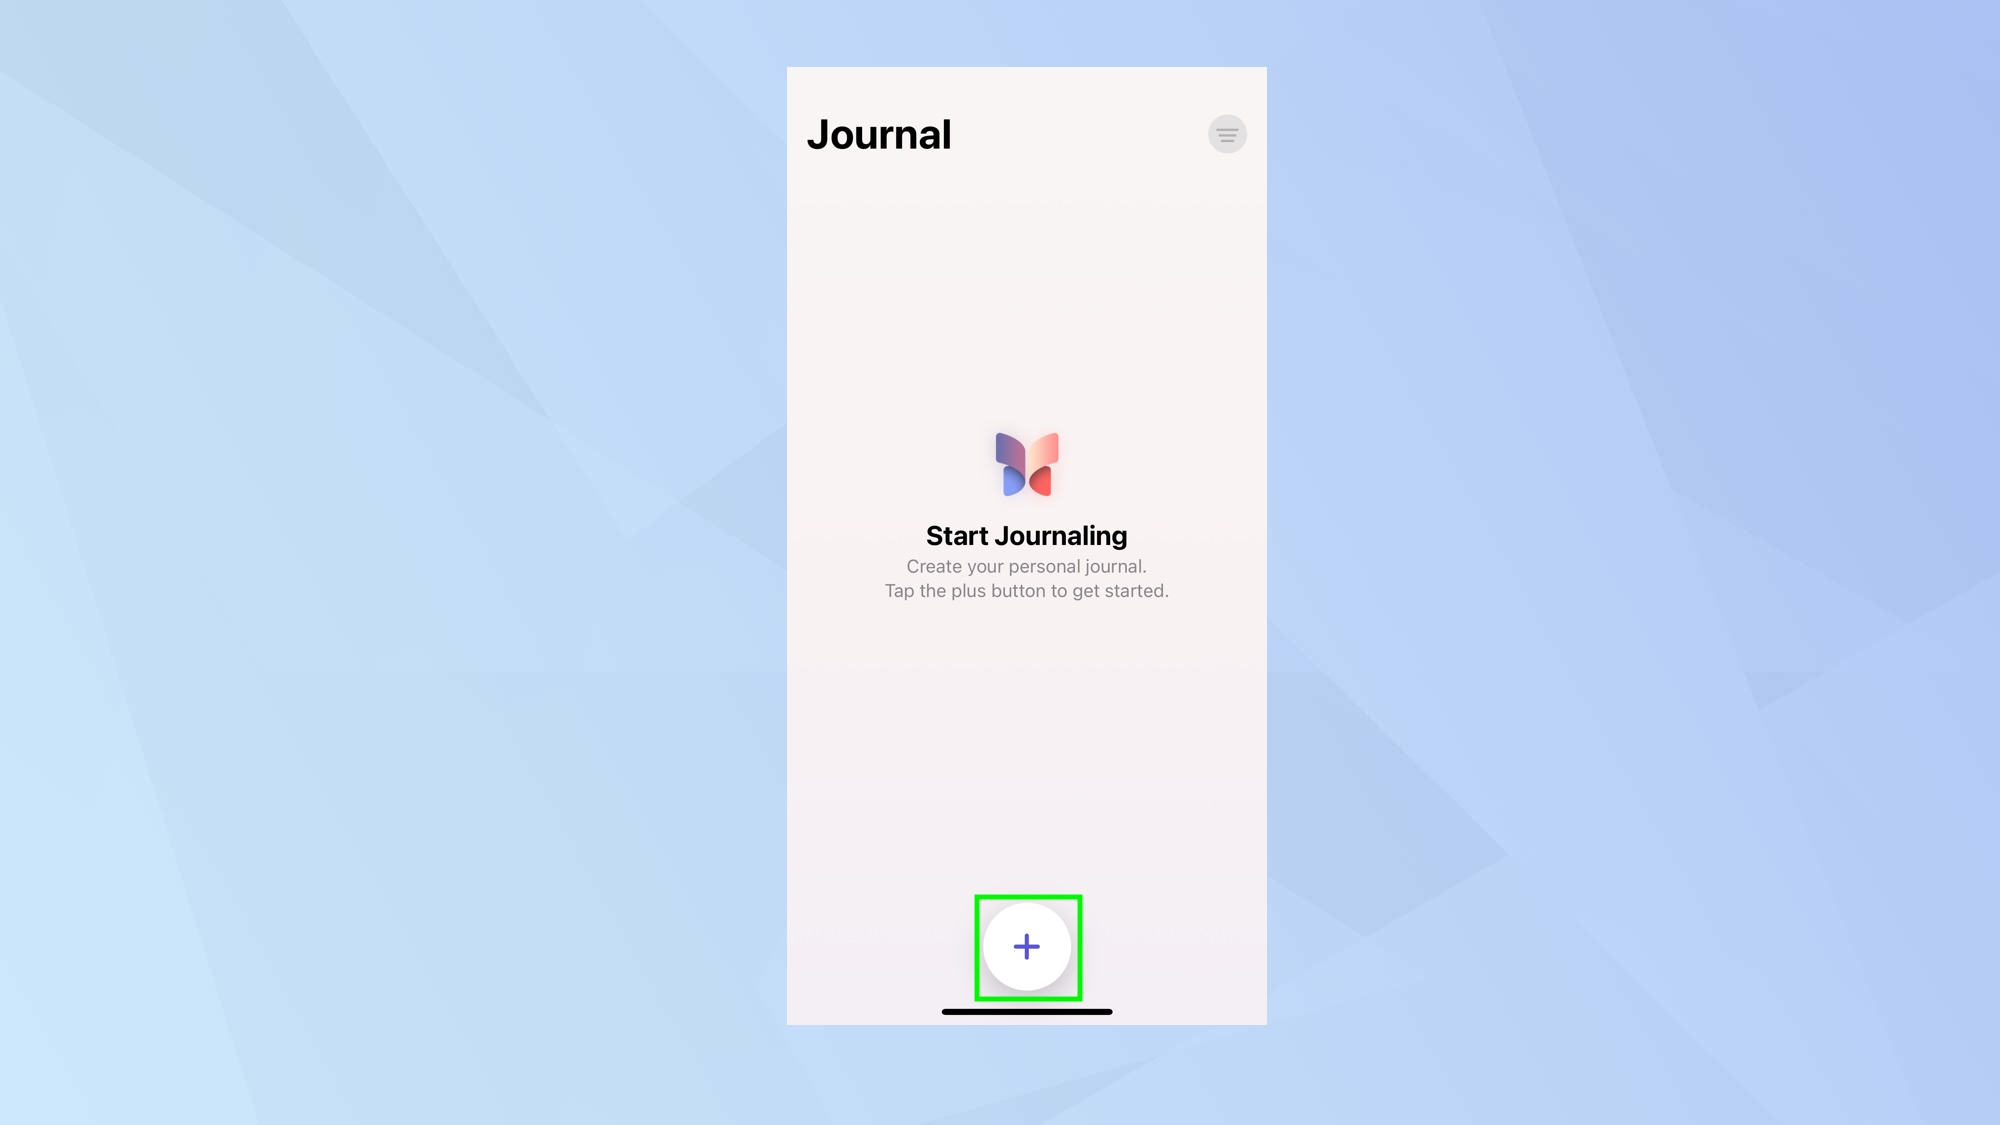
When you are ready to add a Journal entry, launch the Journal app and tap the Plus button at the bottom of the screen.
2. Select New Entry
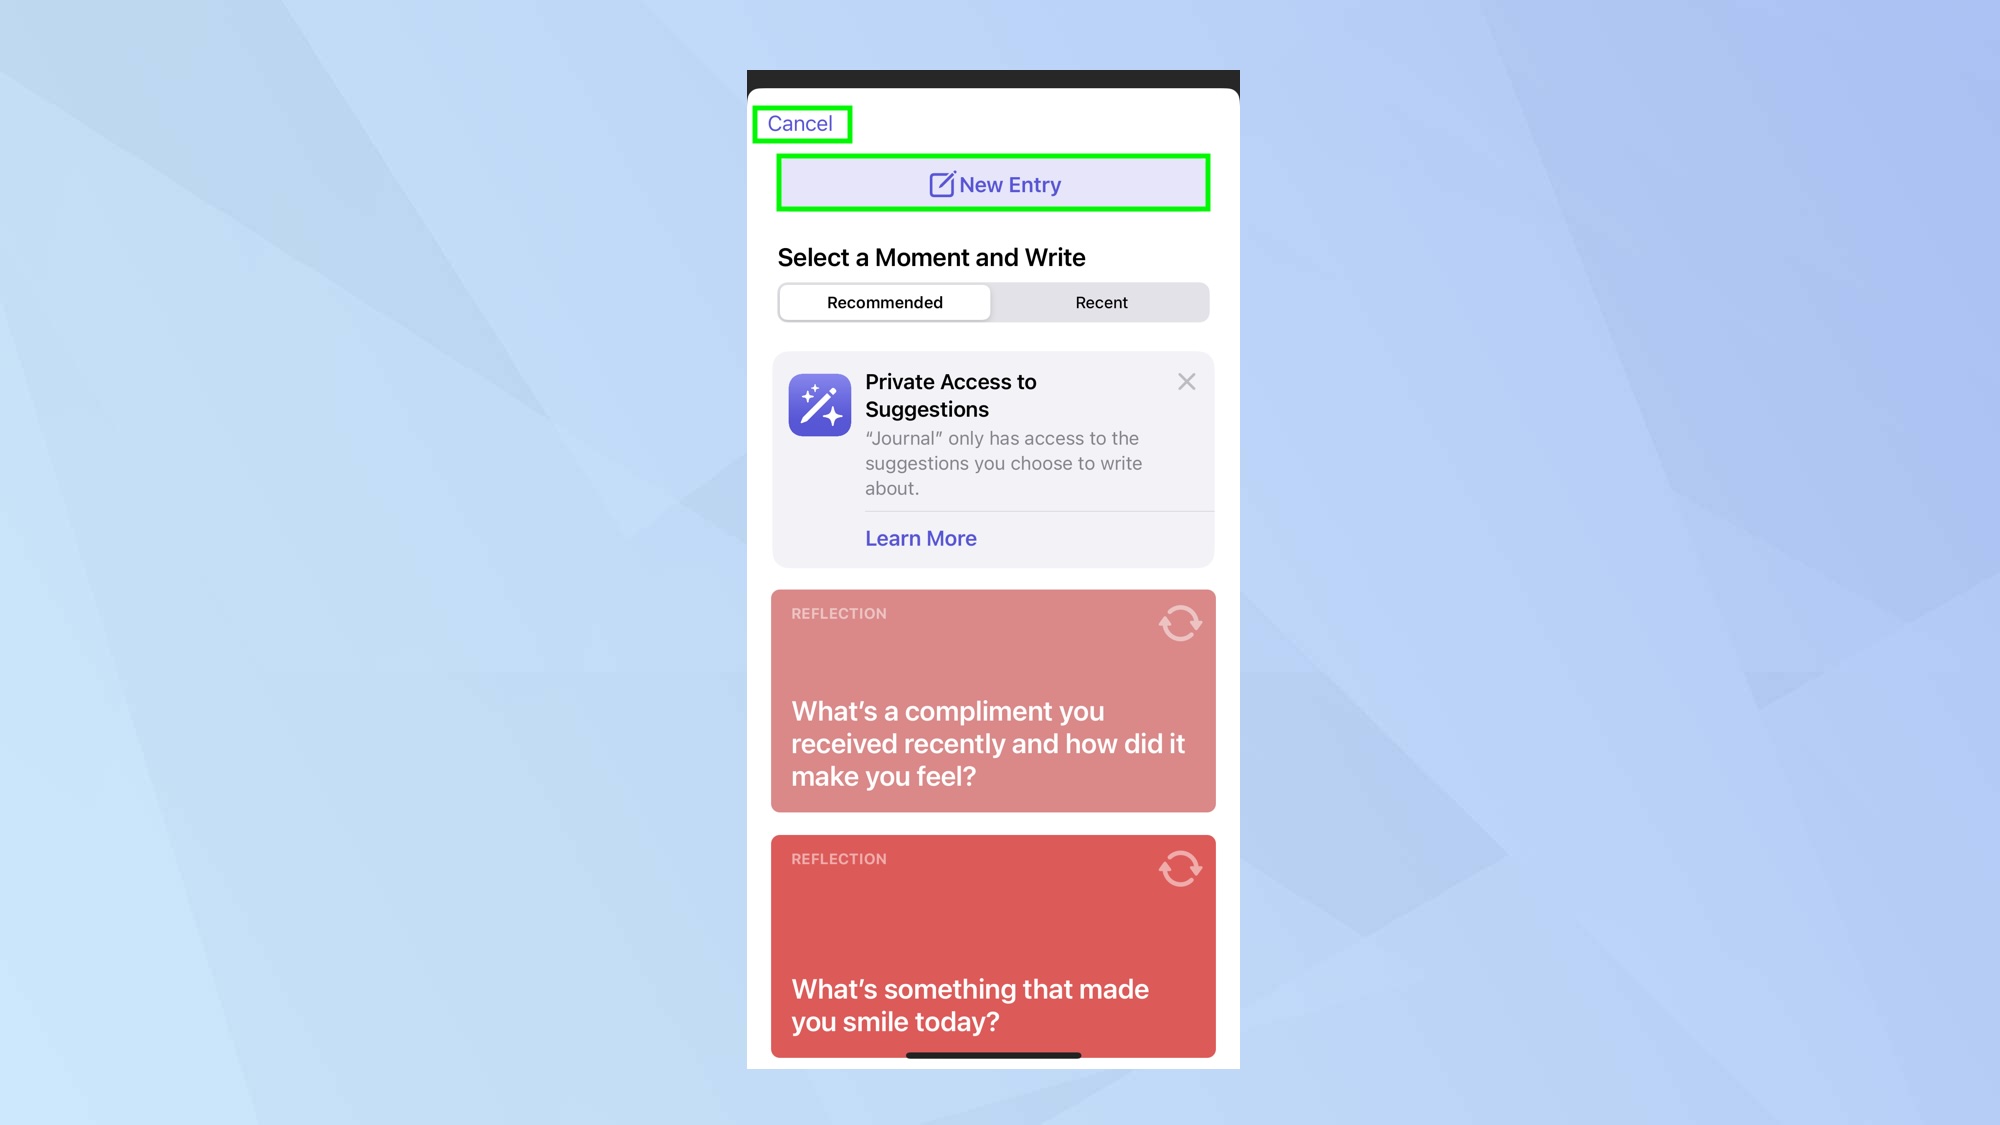
Now tap New Entry, the button that appears at the top of the screen. If you change your mind at this point, tap Cancel.
3. Start journaling
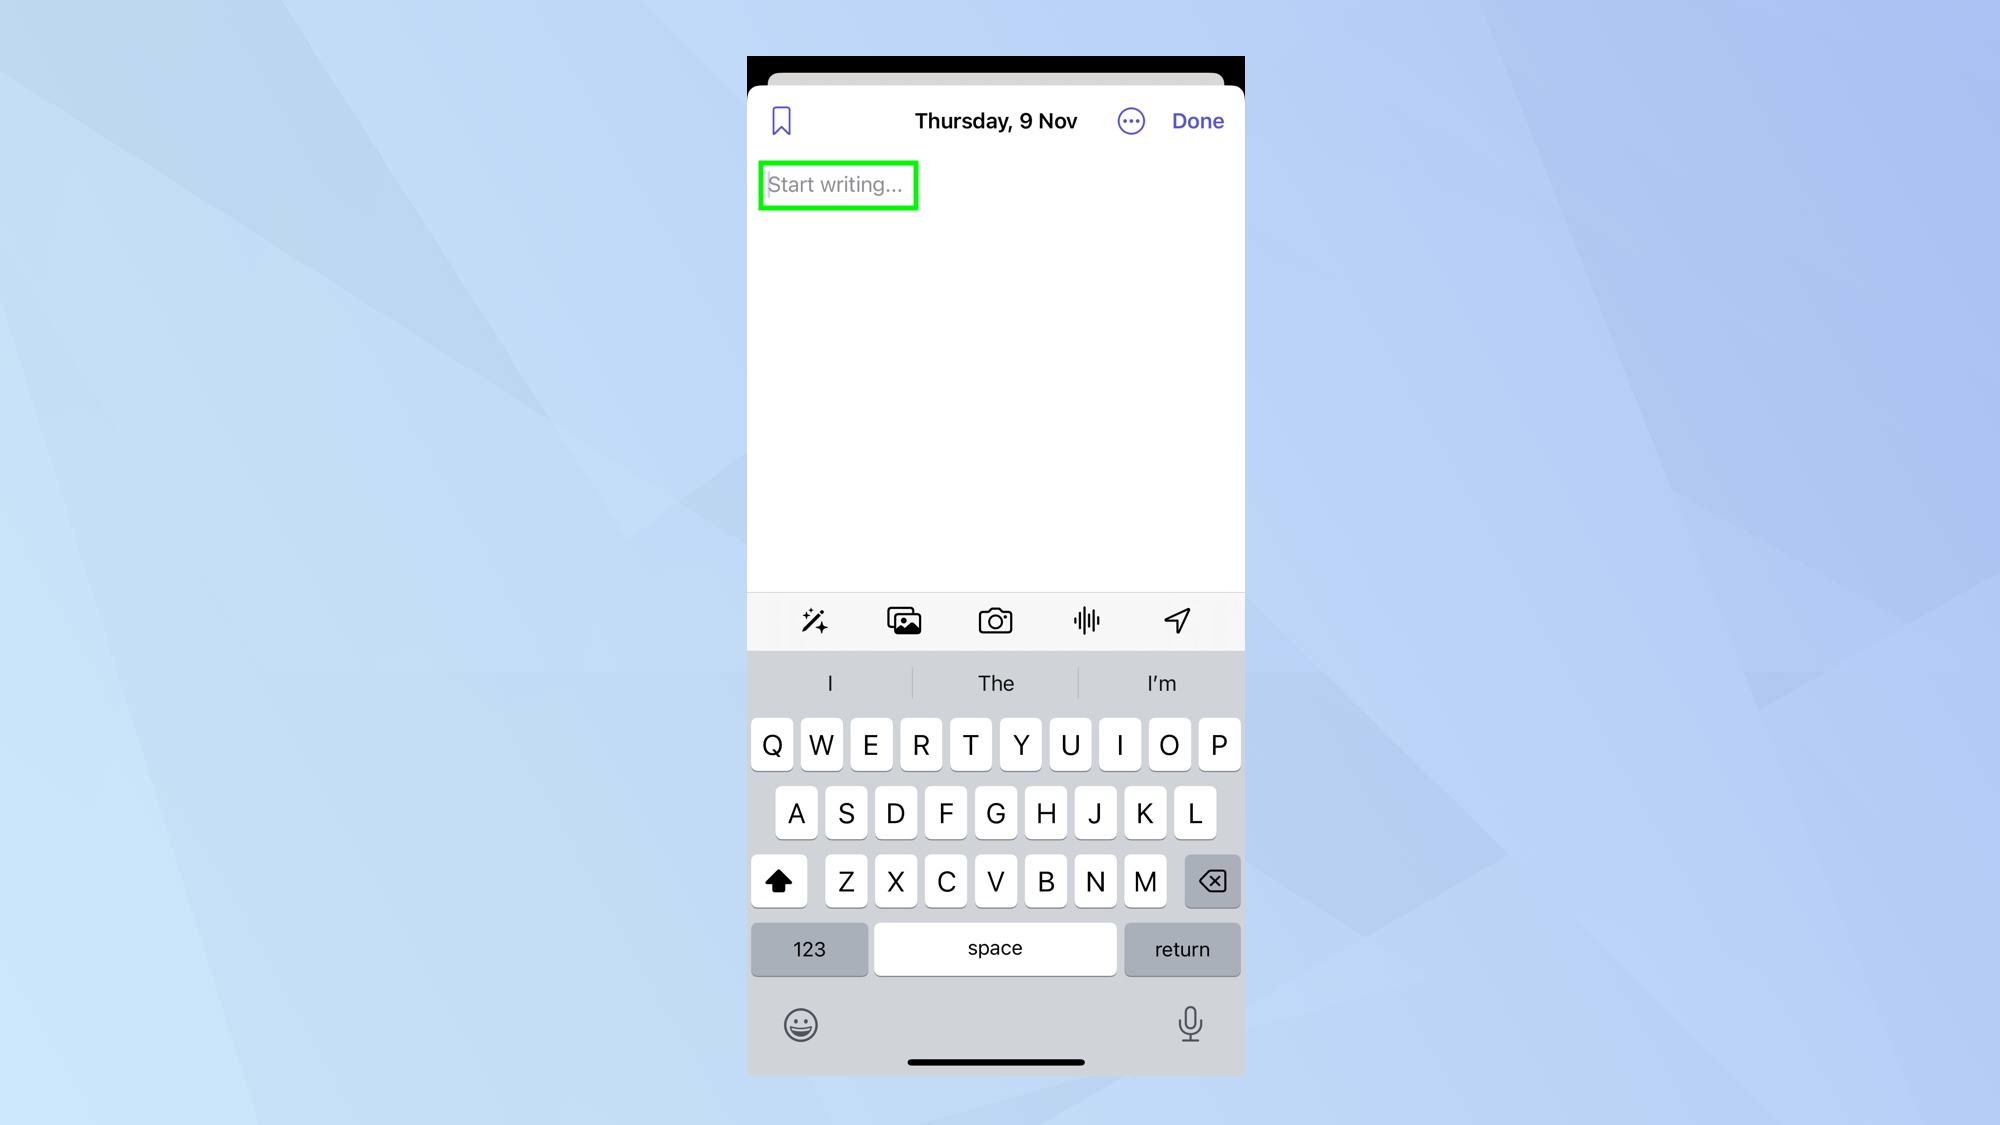
You can now write a journal entry using the on-screen keyboard. It’s up to you what you write and your entries will be date-stamped.
4. Change the date
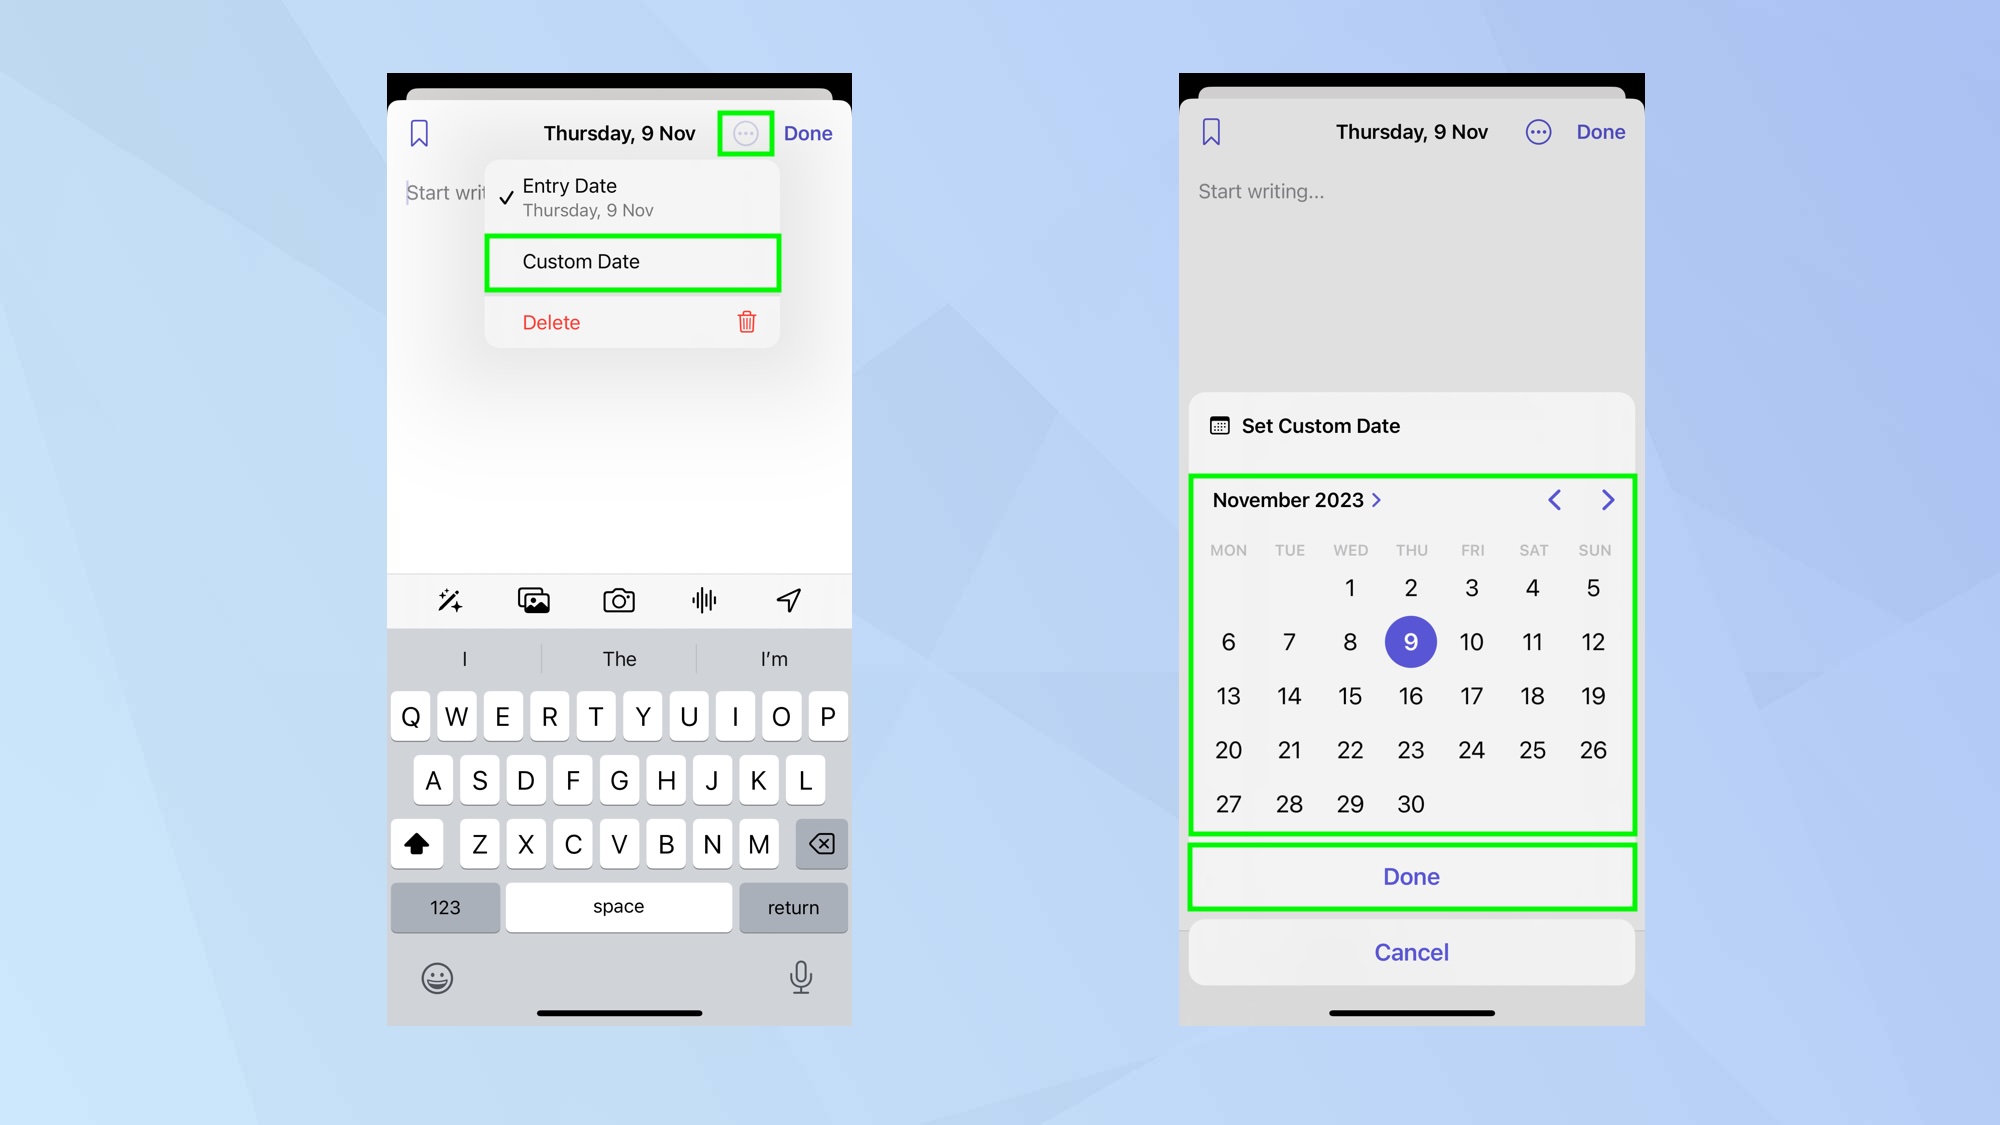
If you tap the three-dot menu, you can tap custom date — this lets you use the calendar to select another date after which you tap Done.
5. Add extras
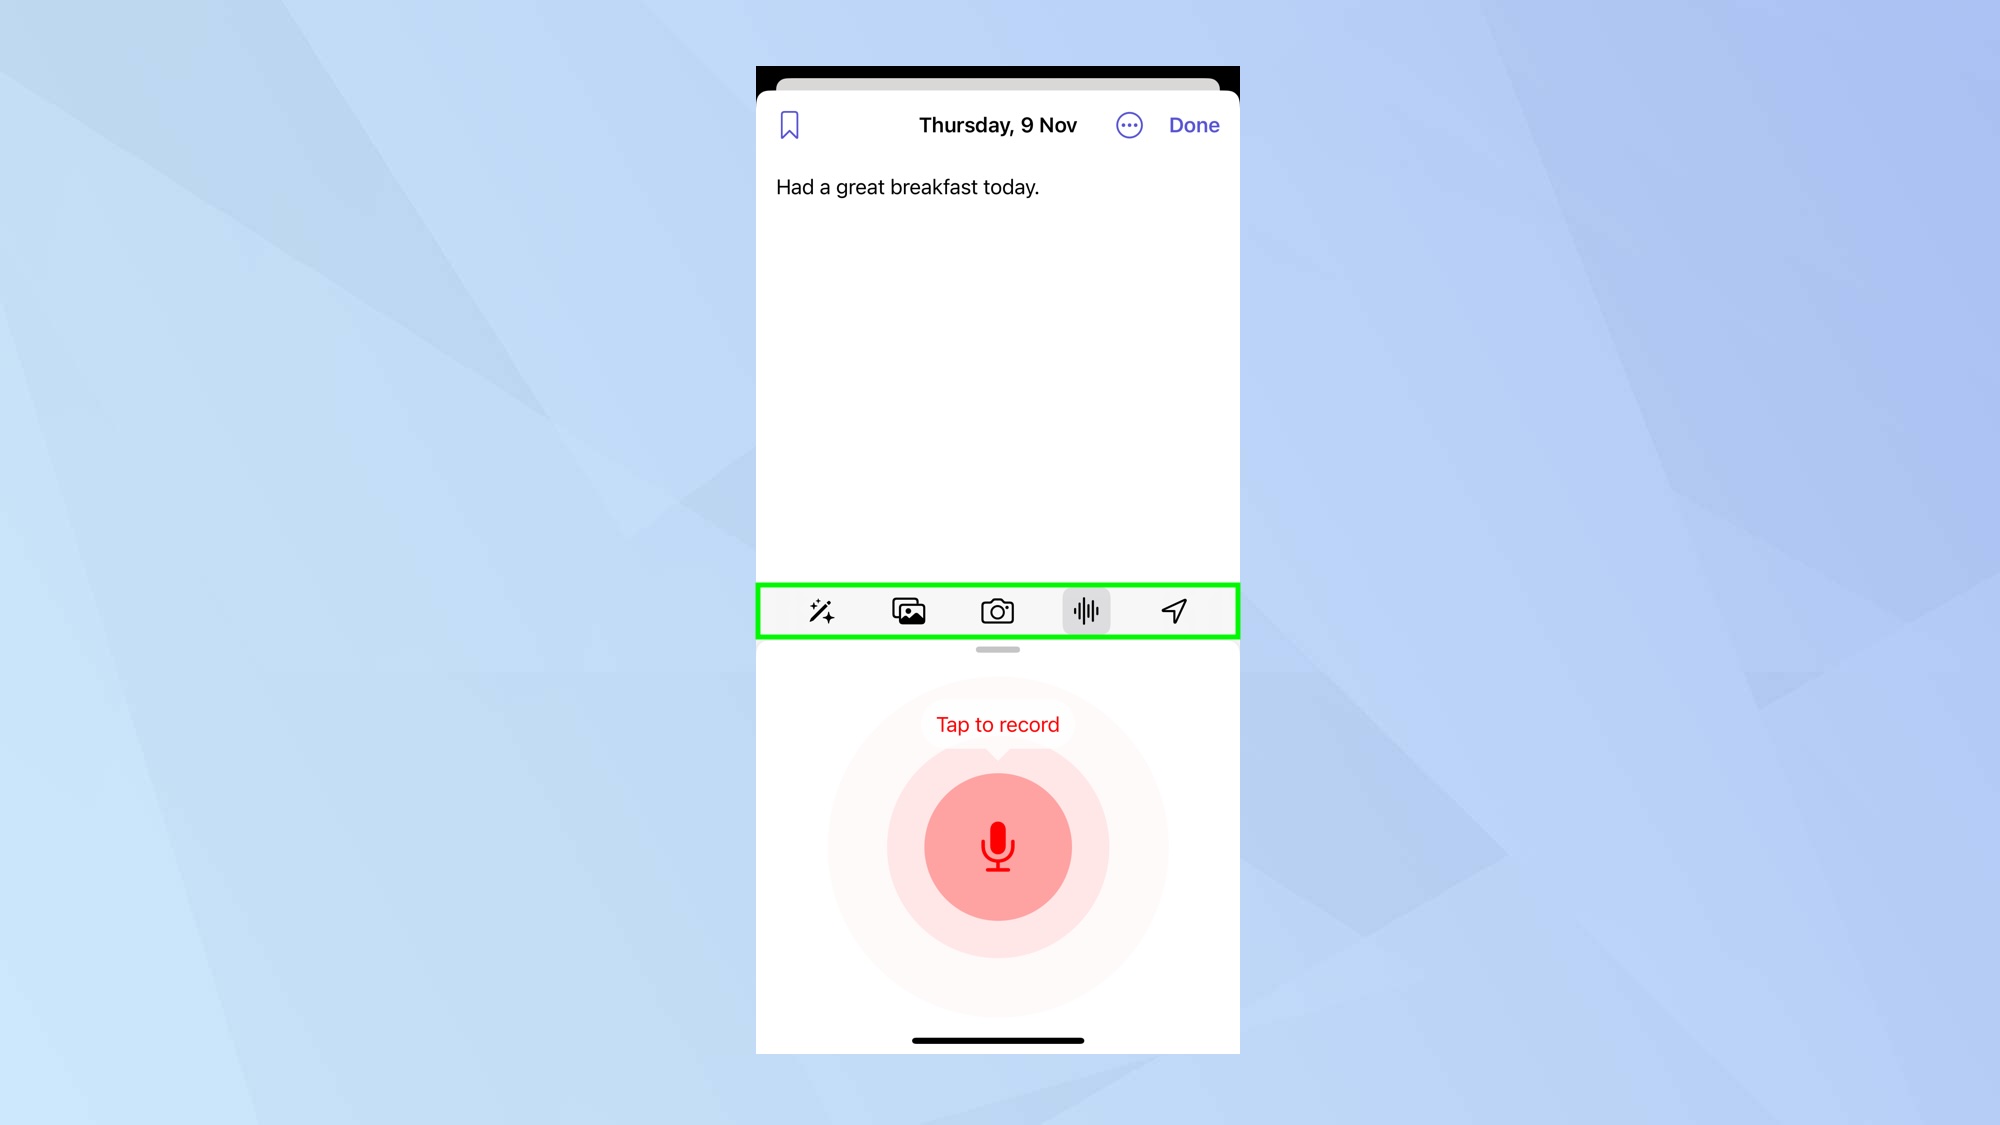
Above the keyboard are five icons. These allow you to add extra content. For example, tap the Journal icon and you will be able to select a Journal suggestion — a bit of inspiration. You can also tap Photo to add an image or to take a fresh image, tap the Audio icon to record a sound entry or tap the Arrow icon to include a location.
6. Tap Done
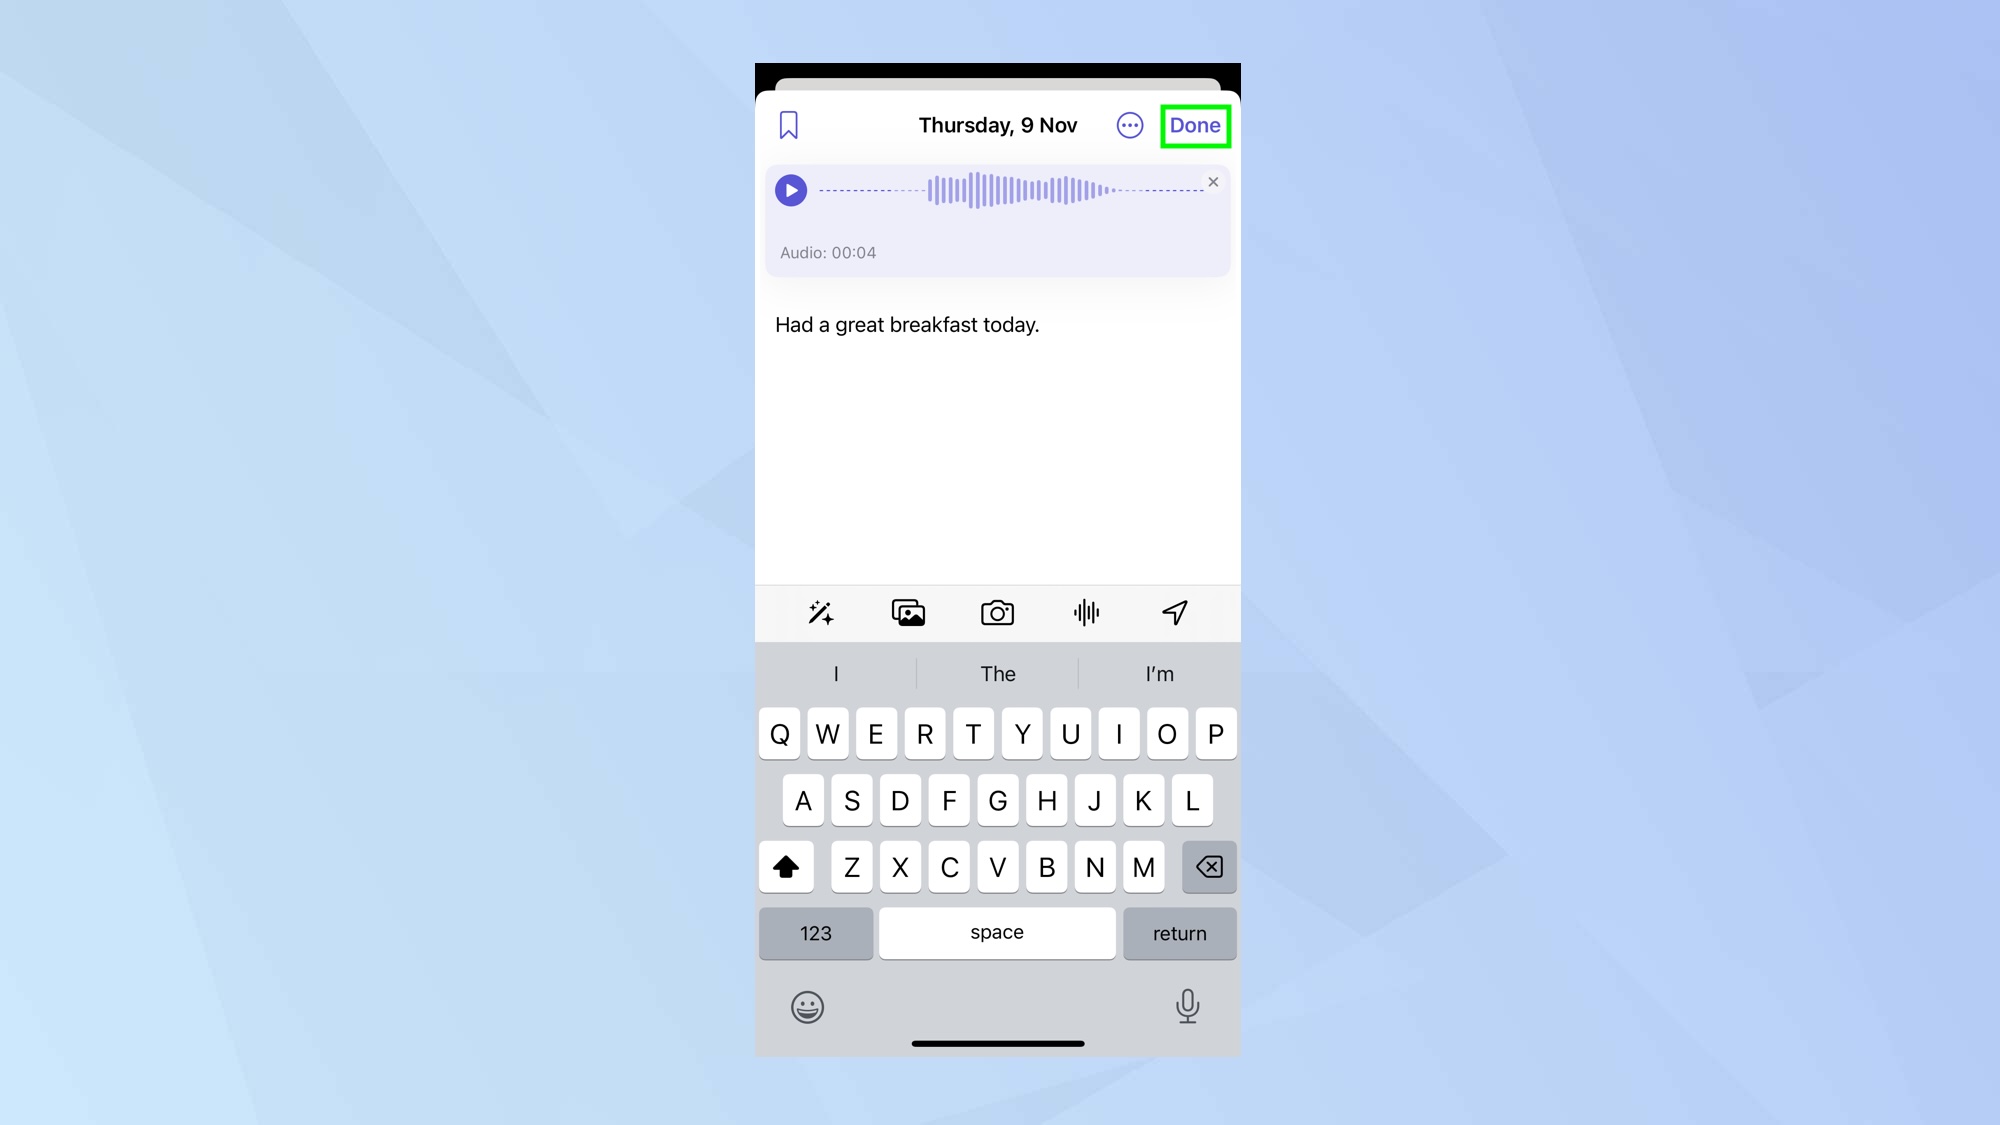
When you have finished creating a Journal entry, tap Done. You can also pin an entry if you tap the bookmark icon in the top-left corner.
How to view and edit Journal entries
Once you have created entries, you need to know how to view them.
1. Launch the app and tap your posts
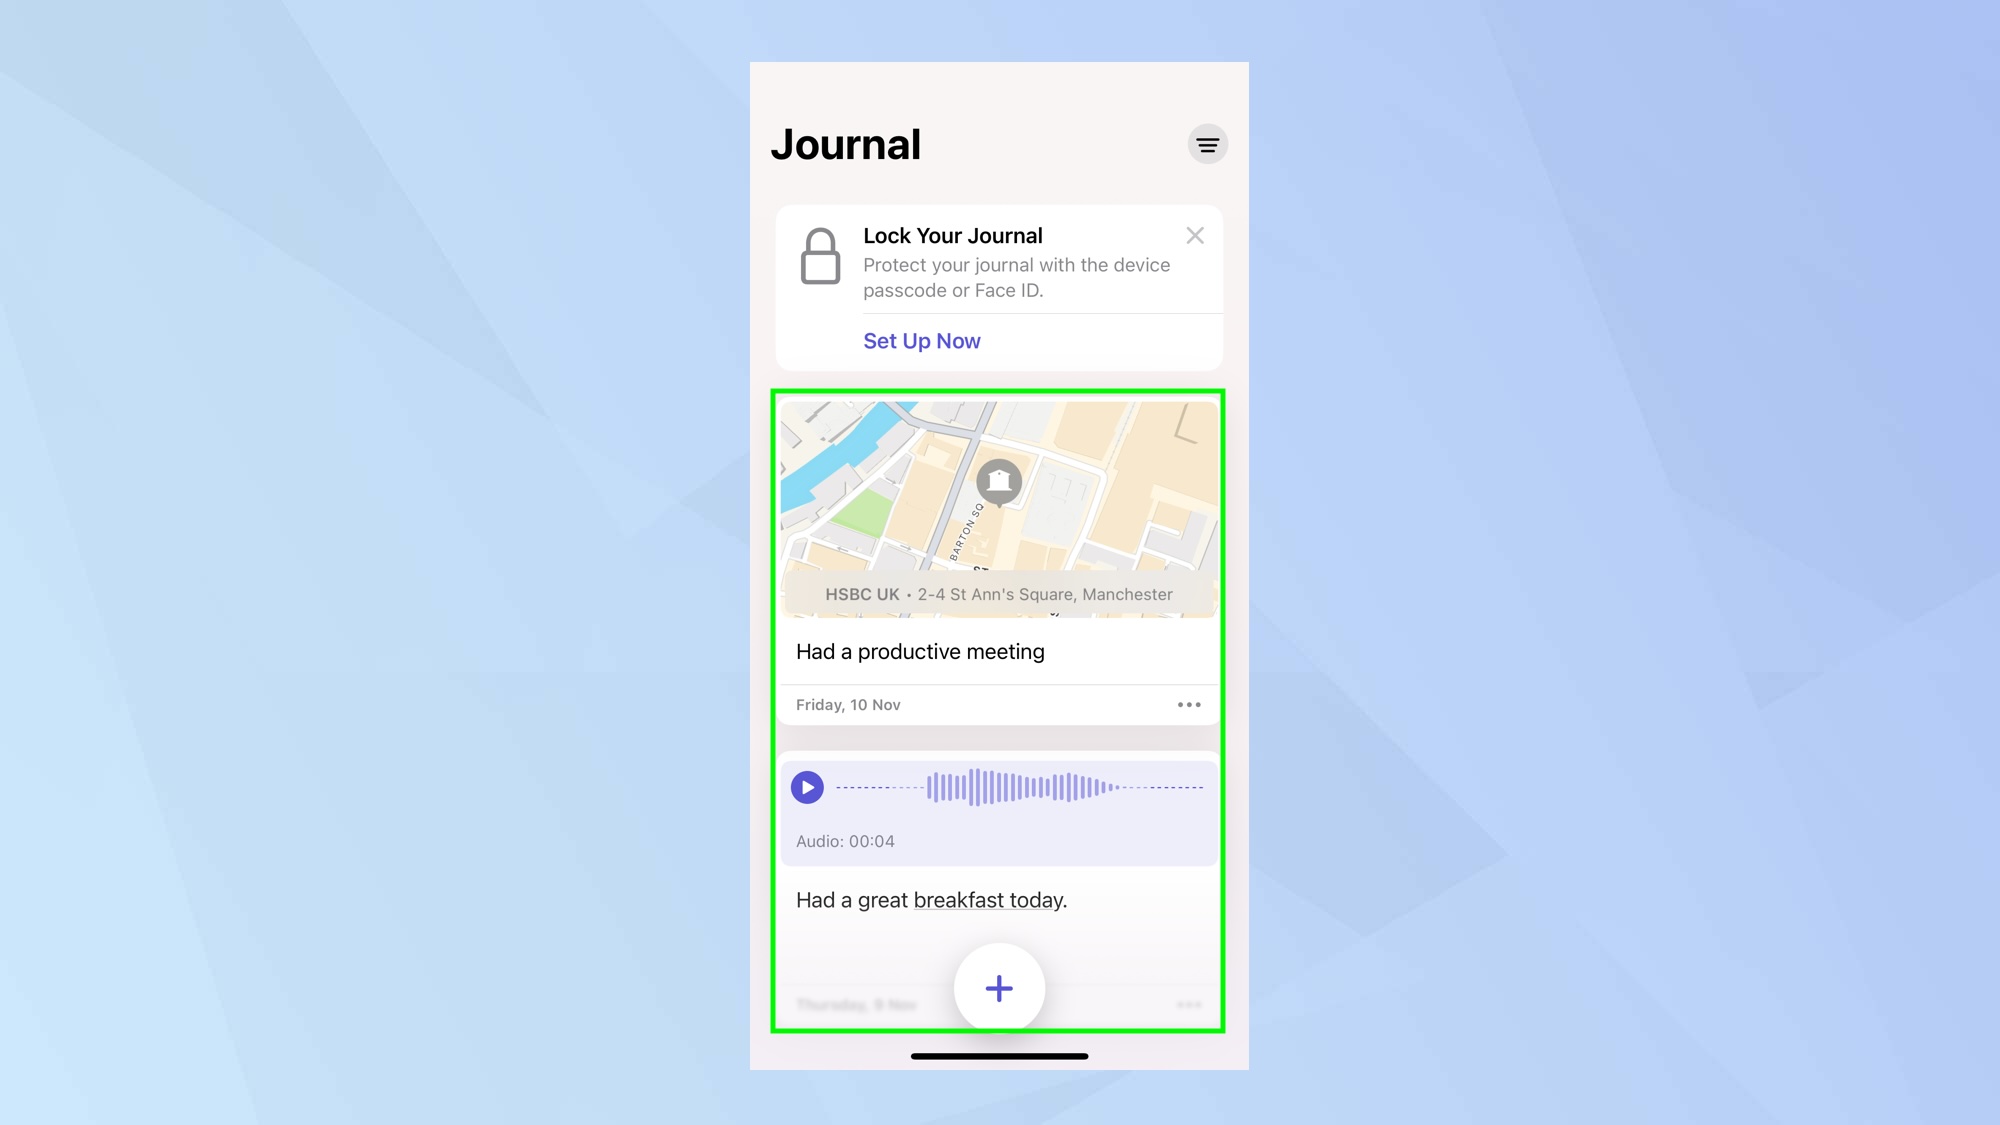
When you launch the Journal app after creating an entry, you will immediately see your posts on the main screen. Tap to view them.
2. Filter to find specific entries
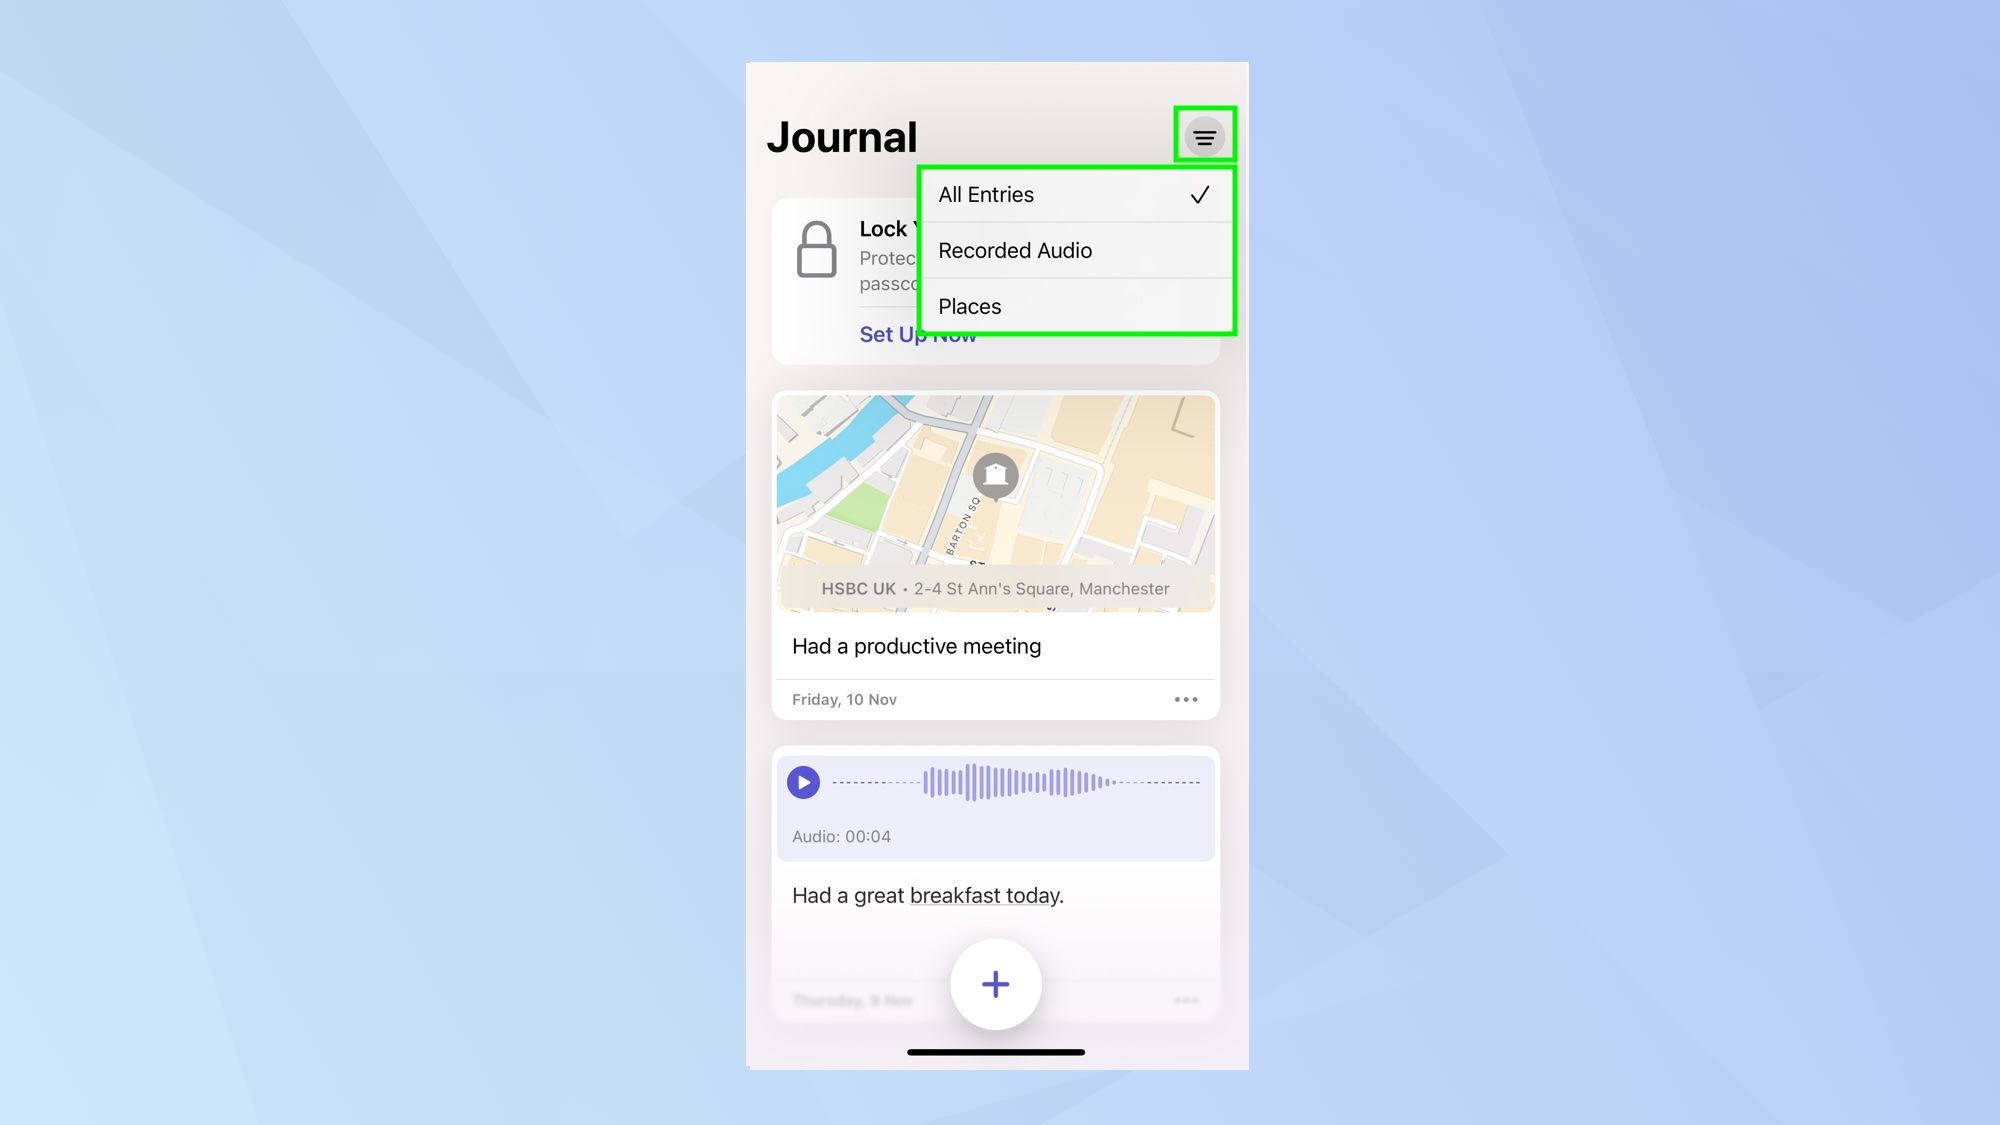
Tap the filter icon in the top-right of the screen and you can search through your entries according to the type of media you have included in them. For example, tap Places if you only want to view entries that include a location.
3. Edit an entry
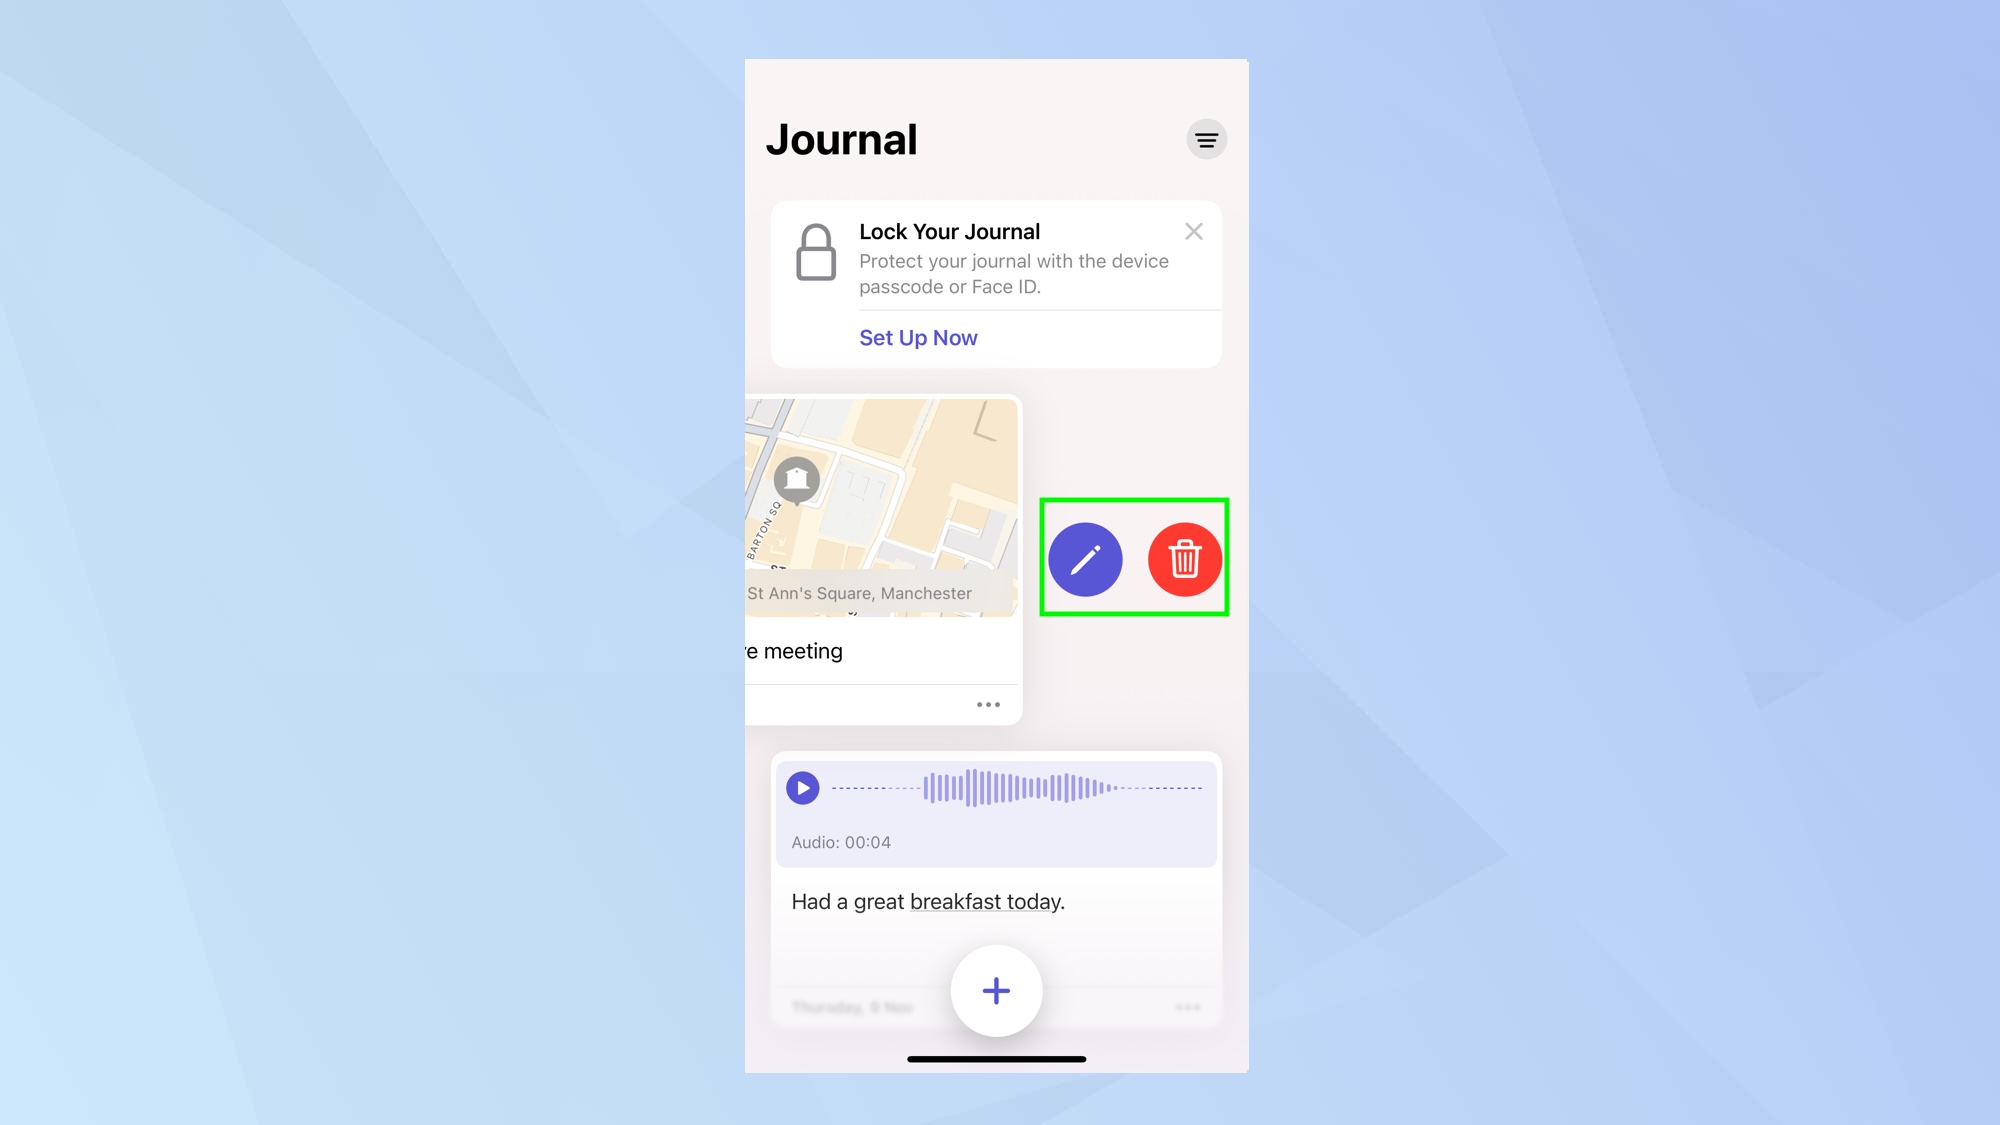
If you want to make changes, swipe left on a Journal entry. You can then tap the Edit button. You can also select Delete to remove an entry.
How to lock your Journal
It is possible to lock your Journal so that prying eyes can’t take a look.
1. Select Set Up Now
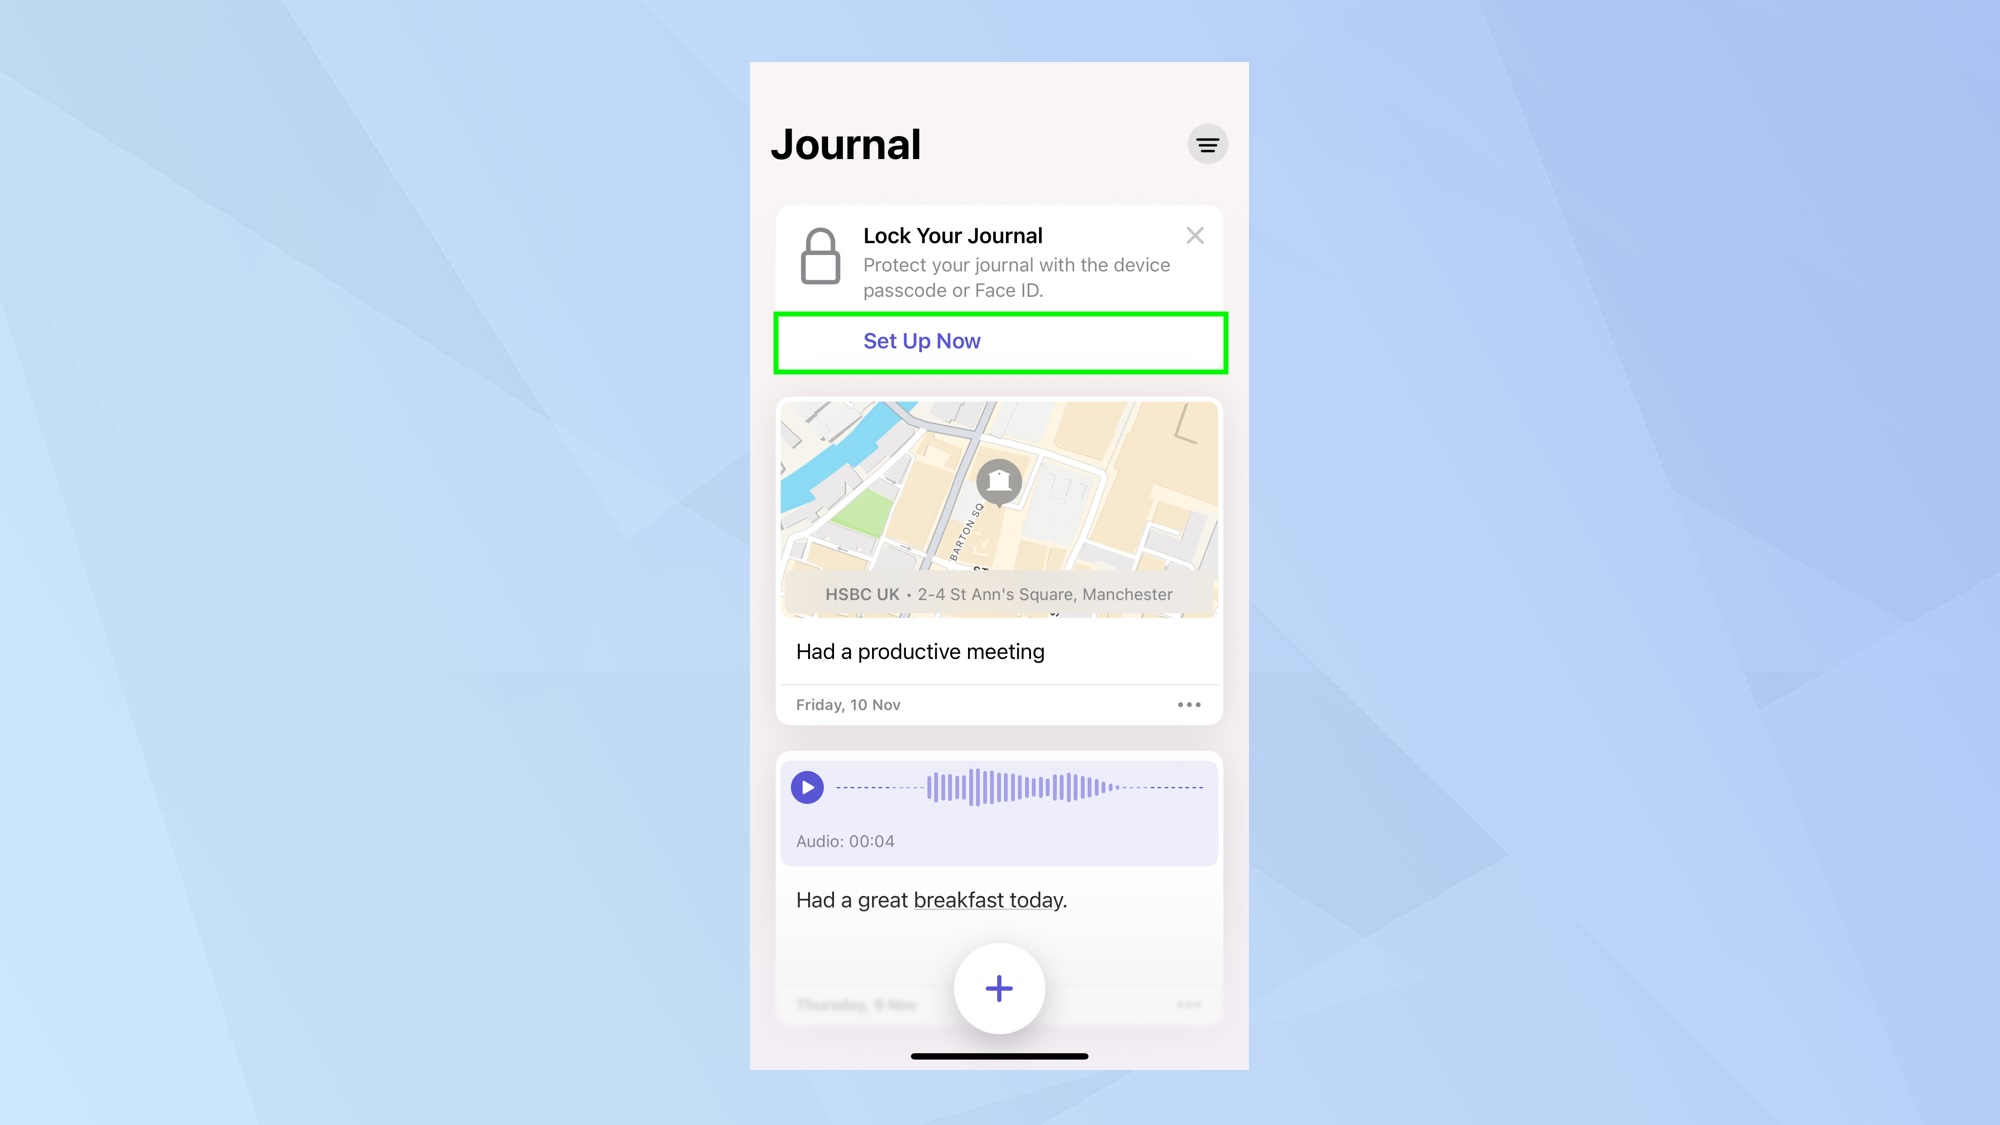
If you haven’t already locked your Journal, you will see an entry that prompts you to tap Set Up Now.
2. Tap Turn On
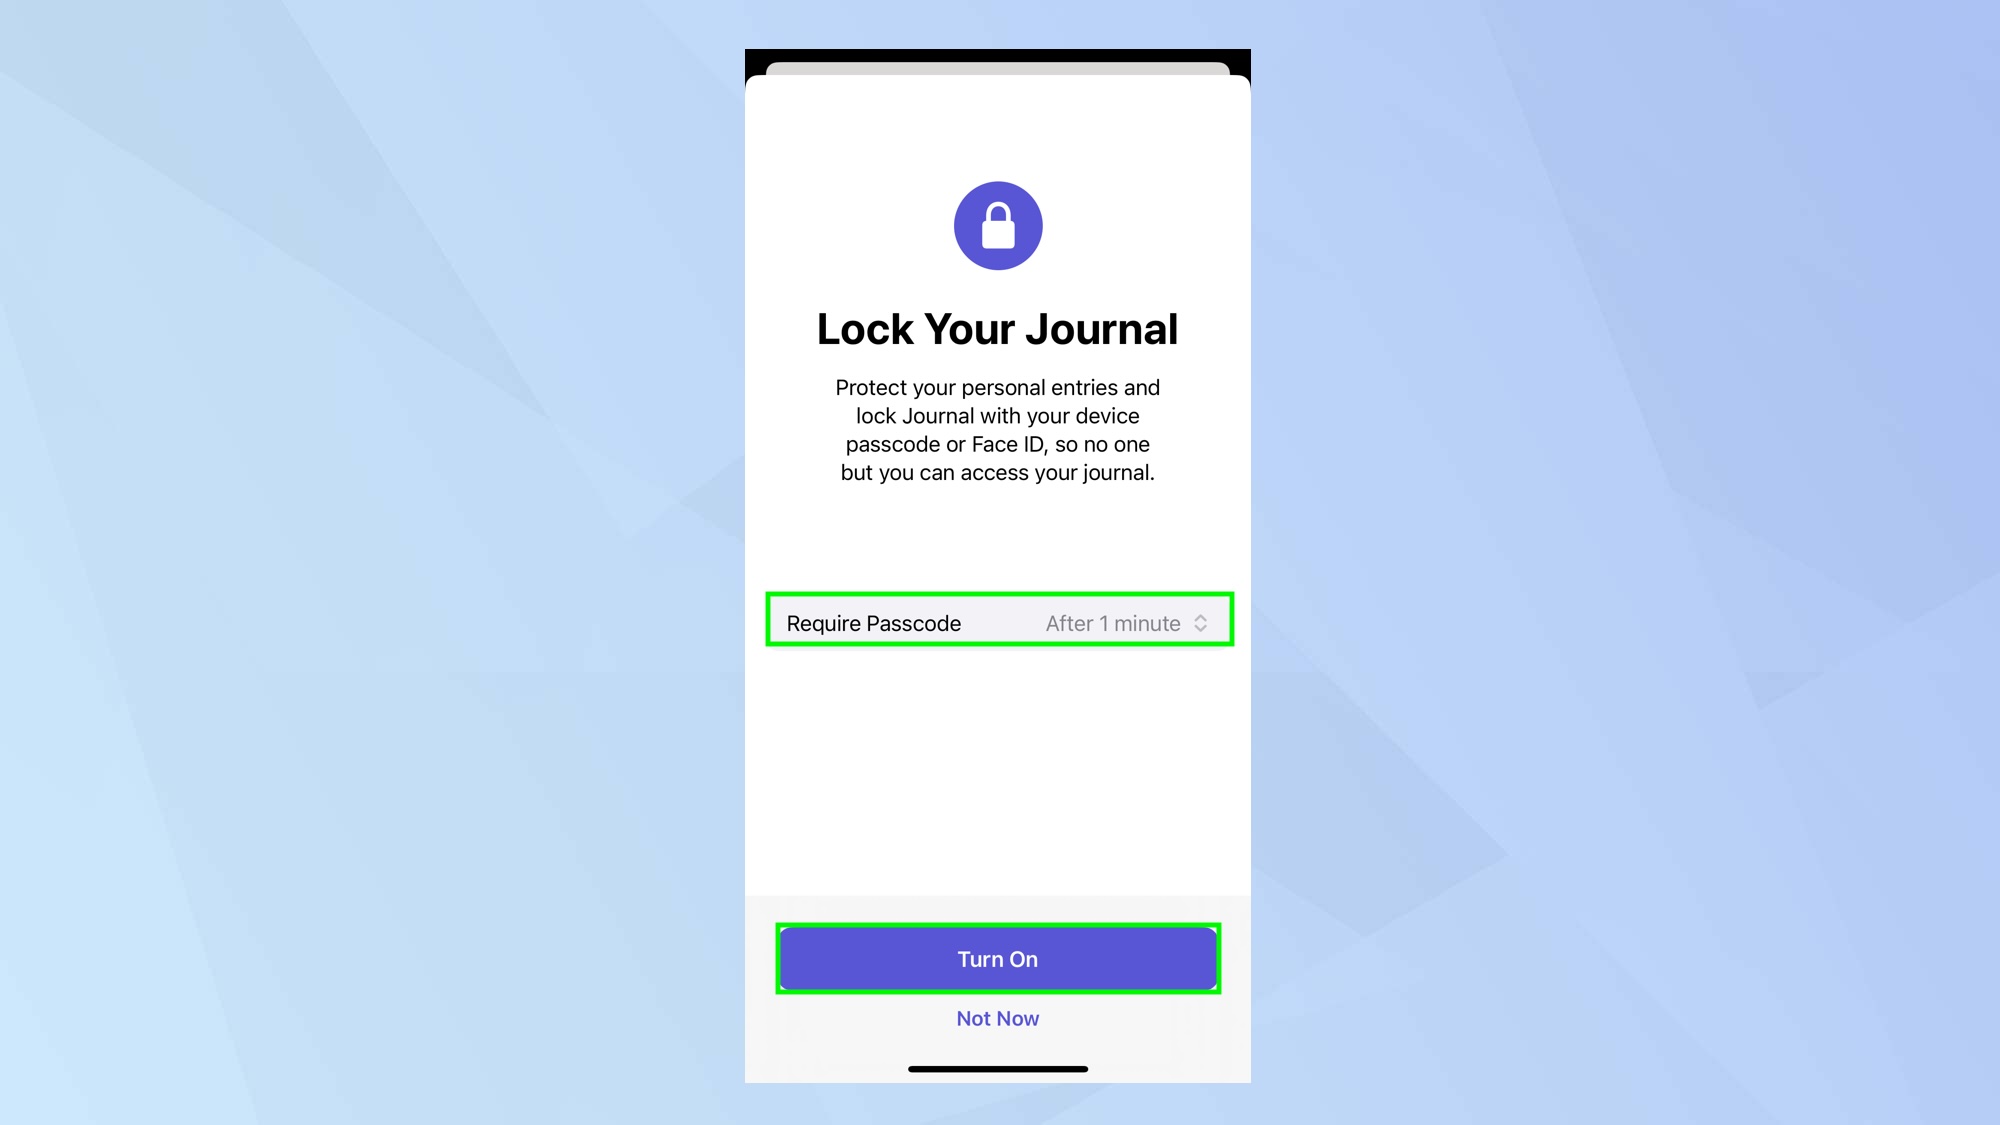
You can now indicate how much time should pass before a password needs to be entered. Tap Require passcode and choose from Immediately, After 1 minute, After 5 minutes or After 15 minutes. The shorter the timeframe, the more secure your Journal will be.
Now, tap Turn On.
And there you go. You now know how to use the iOS Journal app. You can also jot down personal information about your life in other ways. Check out the best note taking apps, for example, or log your mood with the latest addition to iOS Health. The best workout apps can also keep an eye on your physical activities.


