In dance music vocabulary, the ubiquitous ‘drop’ refers to the section of a track where the main melody is introduced, and you can recognise it instantly for the fact that it has the highest energy level in the track. The drop is preceded by a build-up section and break that has contrasting elements to create tension.
After this section plays out, heavy drums, bass and and the main melodic elements kick in. The drop needs to land as powerfully as it possibly can, and emphasise the theme of the song to its full potential. In order to have maximum impact, a drop needs the right combination of sounds and contrasting elements for it to deliver the goods.
When you first set about composing a new track it can be a good idea to start out by writing the drop section first, and then use this idea as a basis in order to write the other parts of the track fluidly.
Once you’ve completed the drop using the following detailed approach, you may well find that you’ll be able to write the rest of the track in an efficient manner. In this guide, we’ll look at some of my own tips for creating a powerful drop and some of the most current techniques that I find helpful for layering sounds.
Creating the drop elements
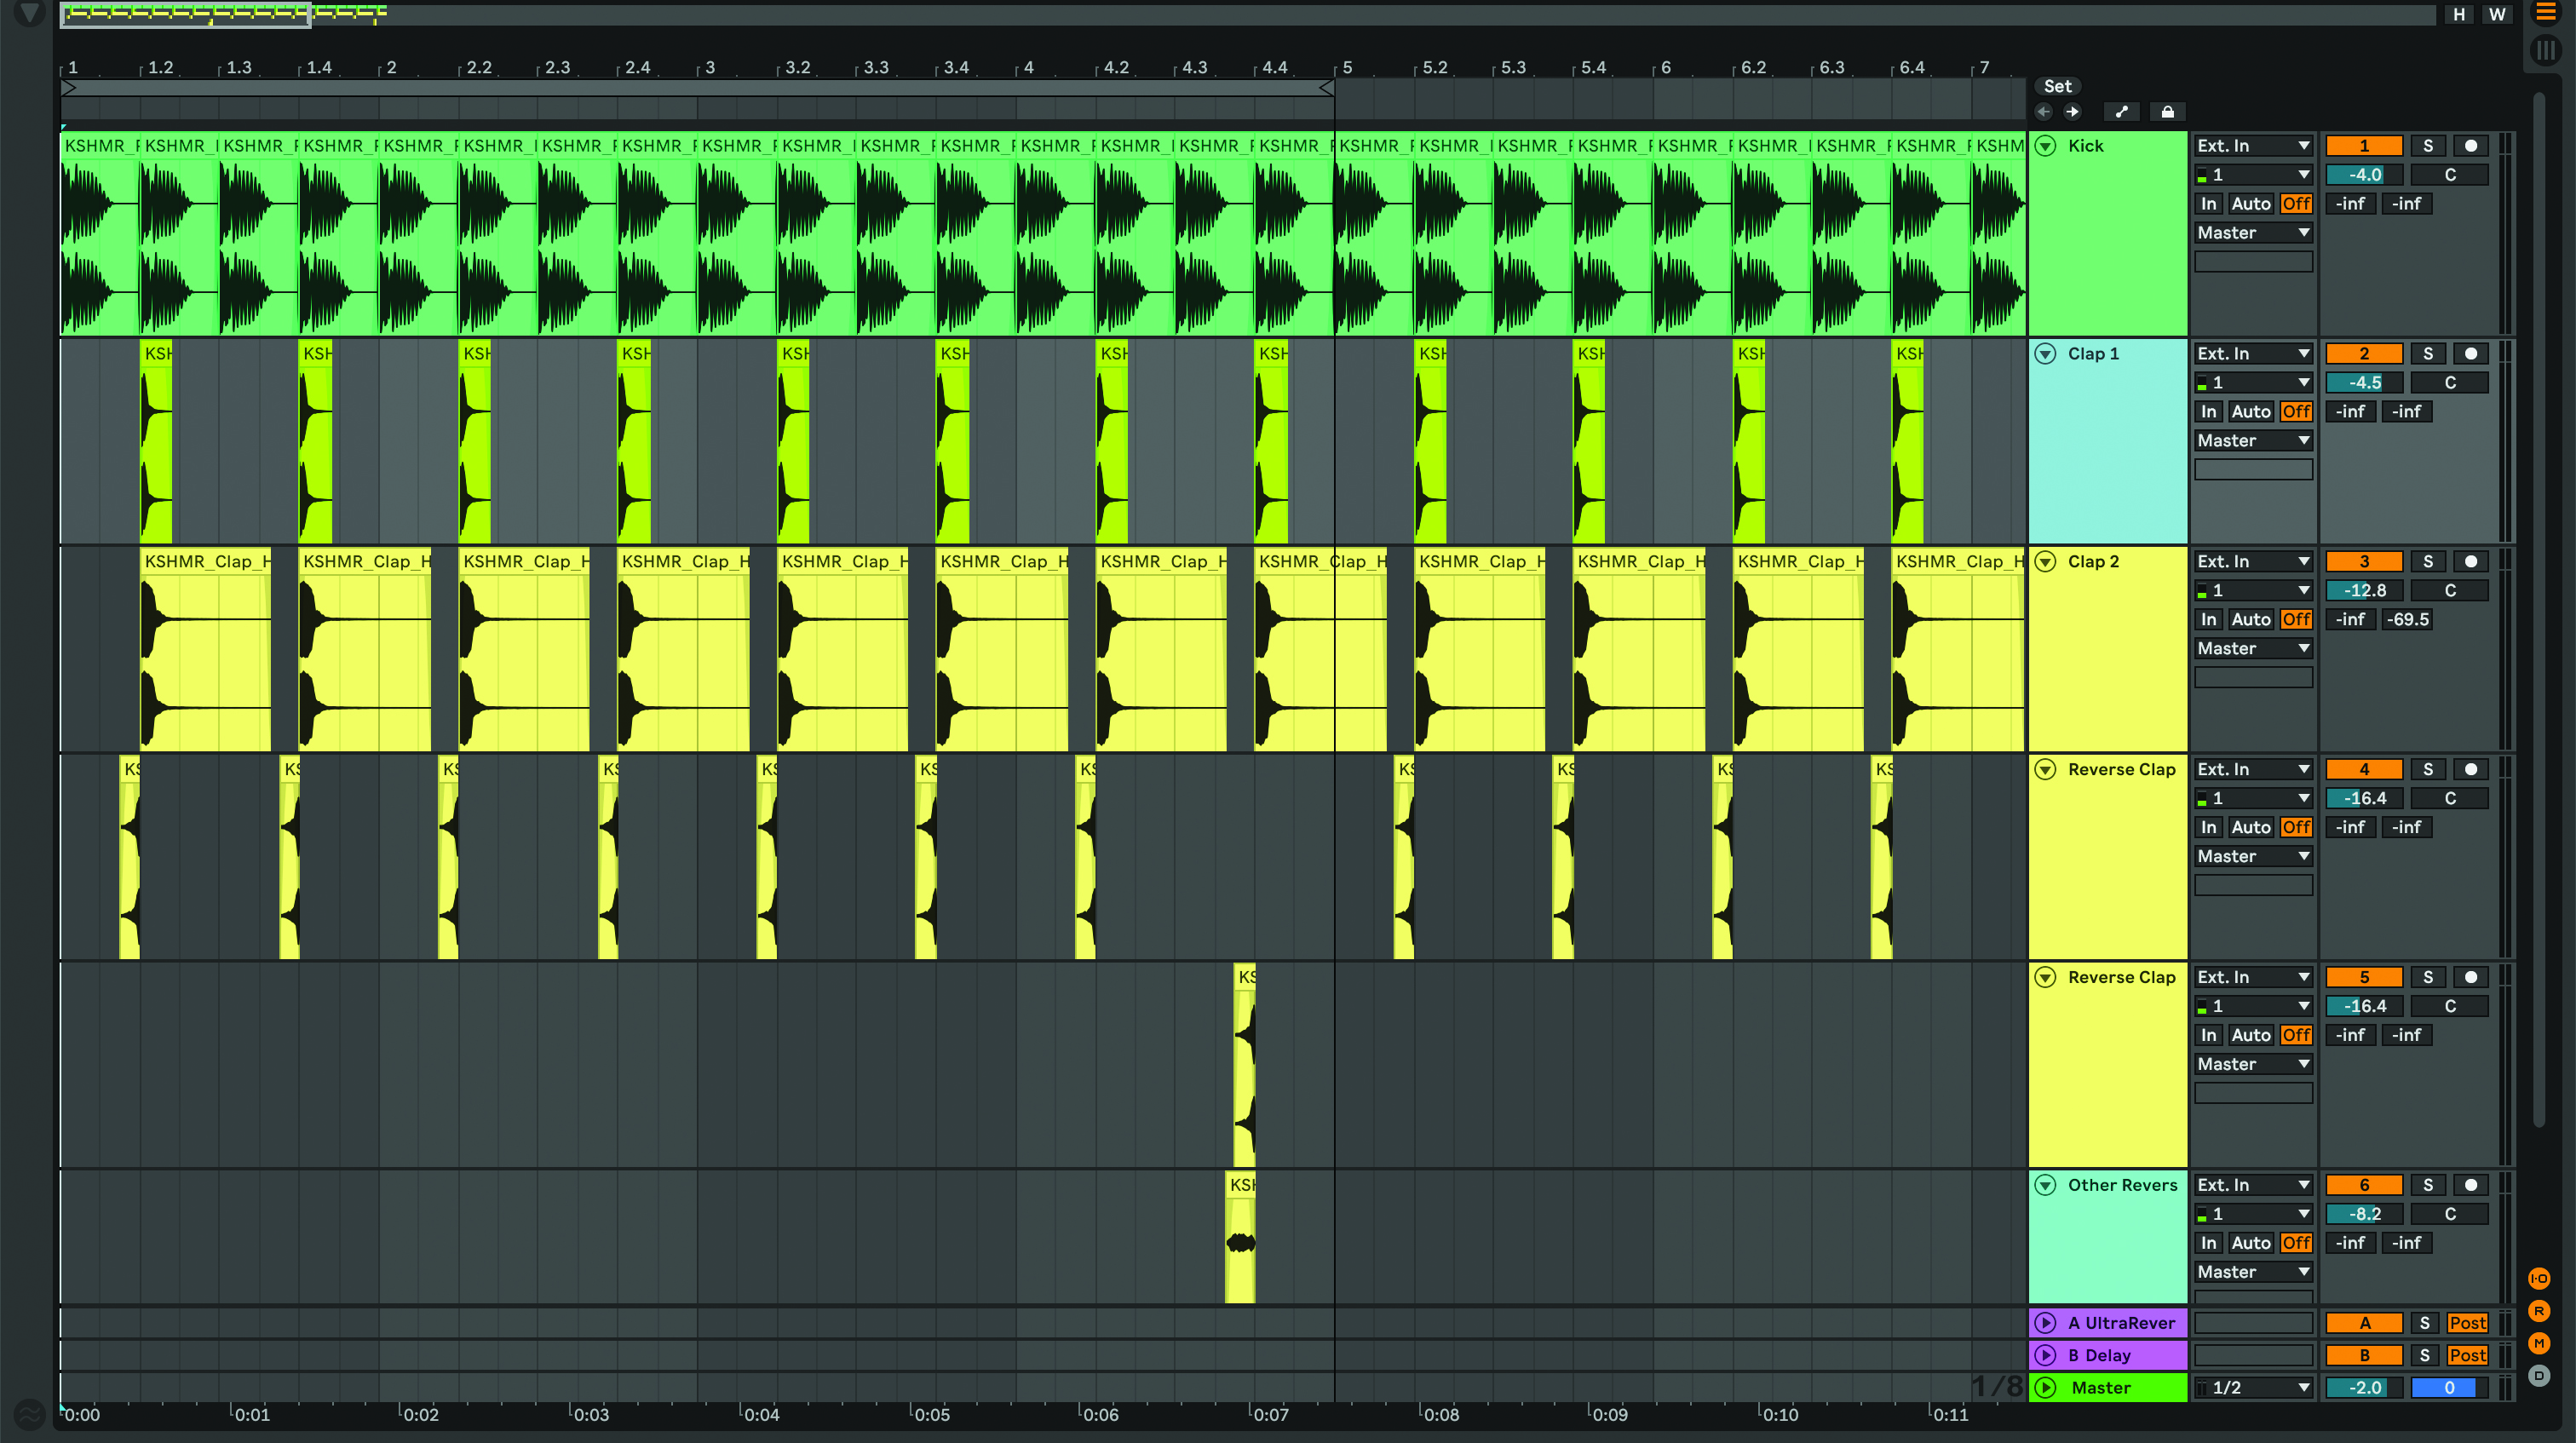
Choose a kick drum in the key of your track and program it on beats one, two, three and four. The kick should suit the style you’re writing in, and have a strong transient. Add a clap or snare on beats two and four. Copy the clap to a new track, reverse it and use a small piece of the reverse clap before the main clap hits.
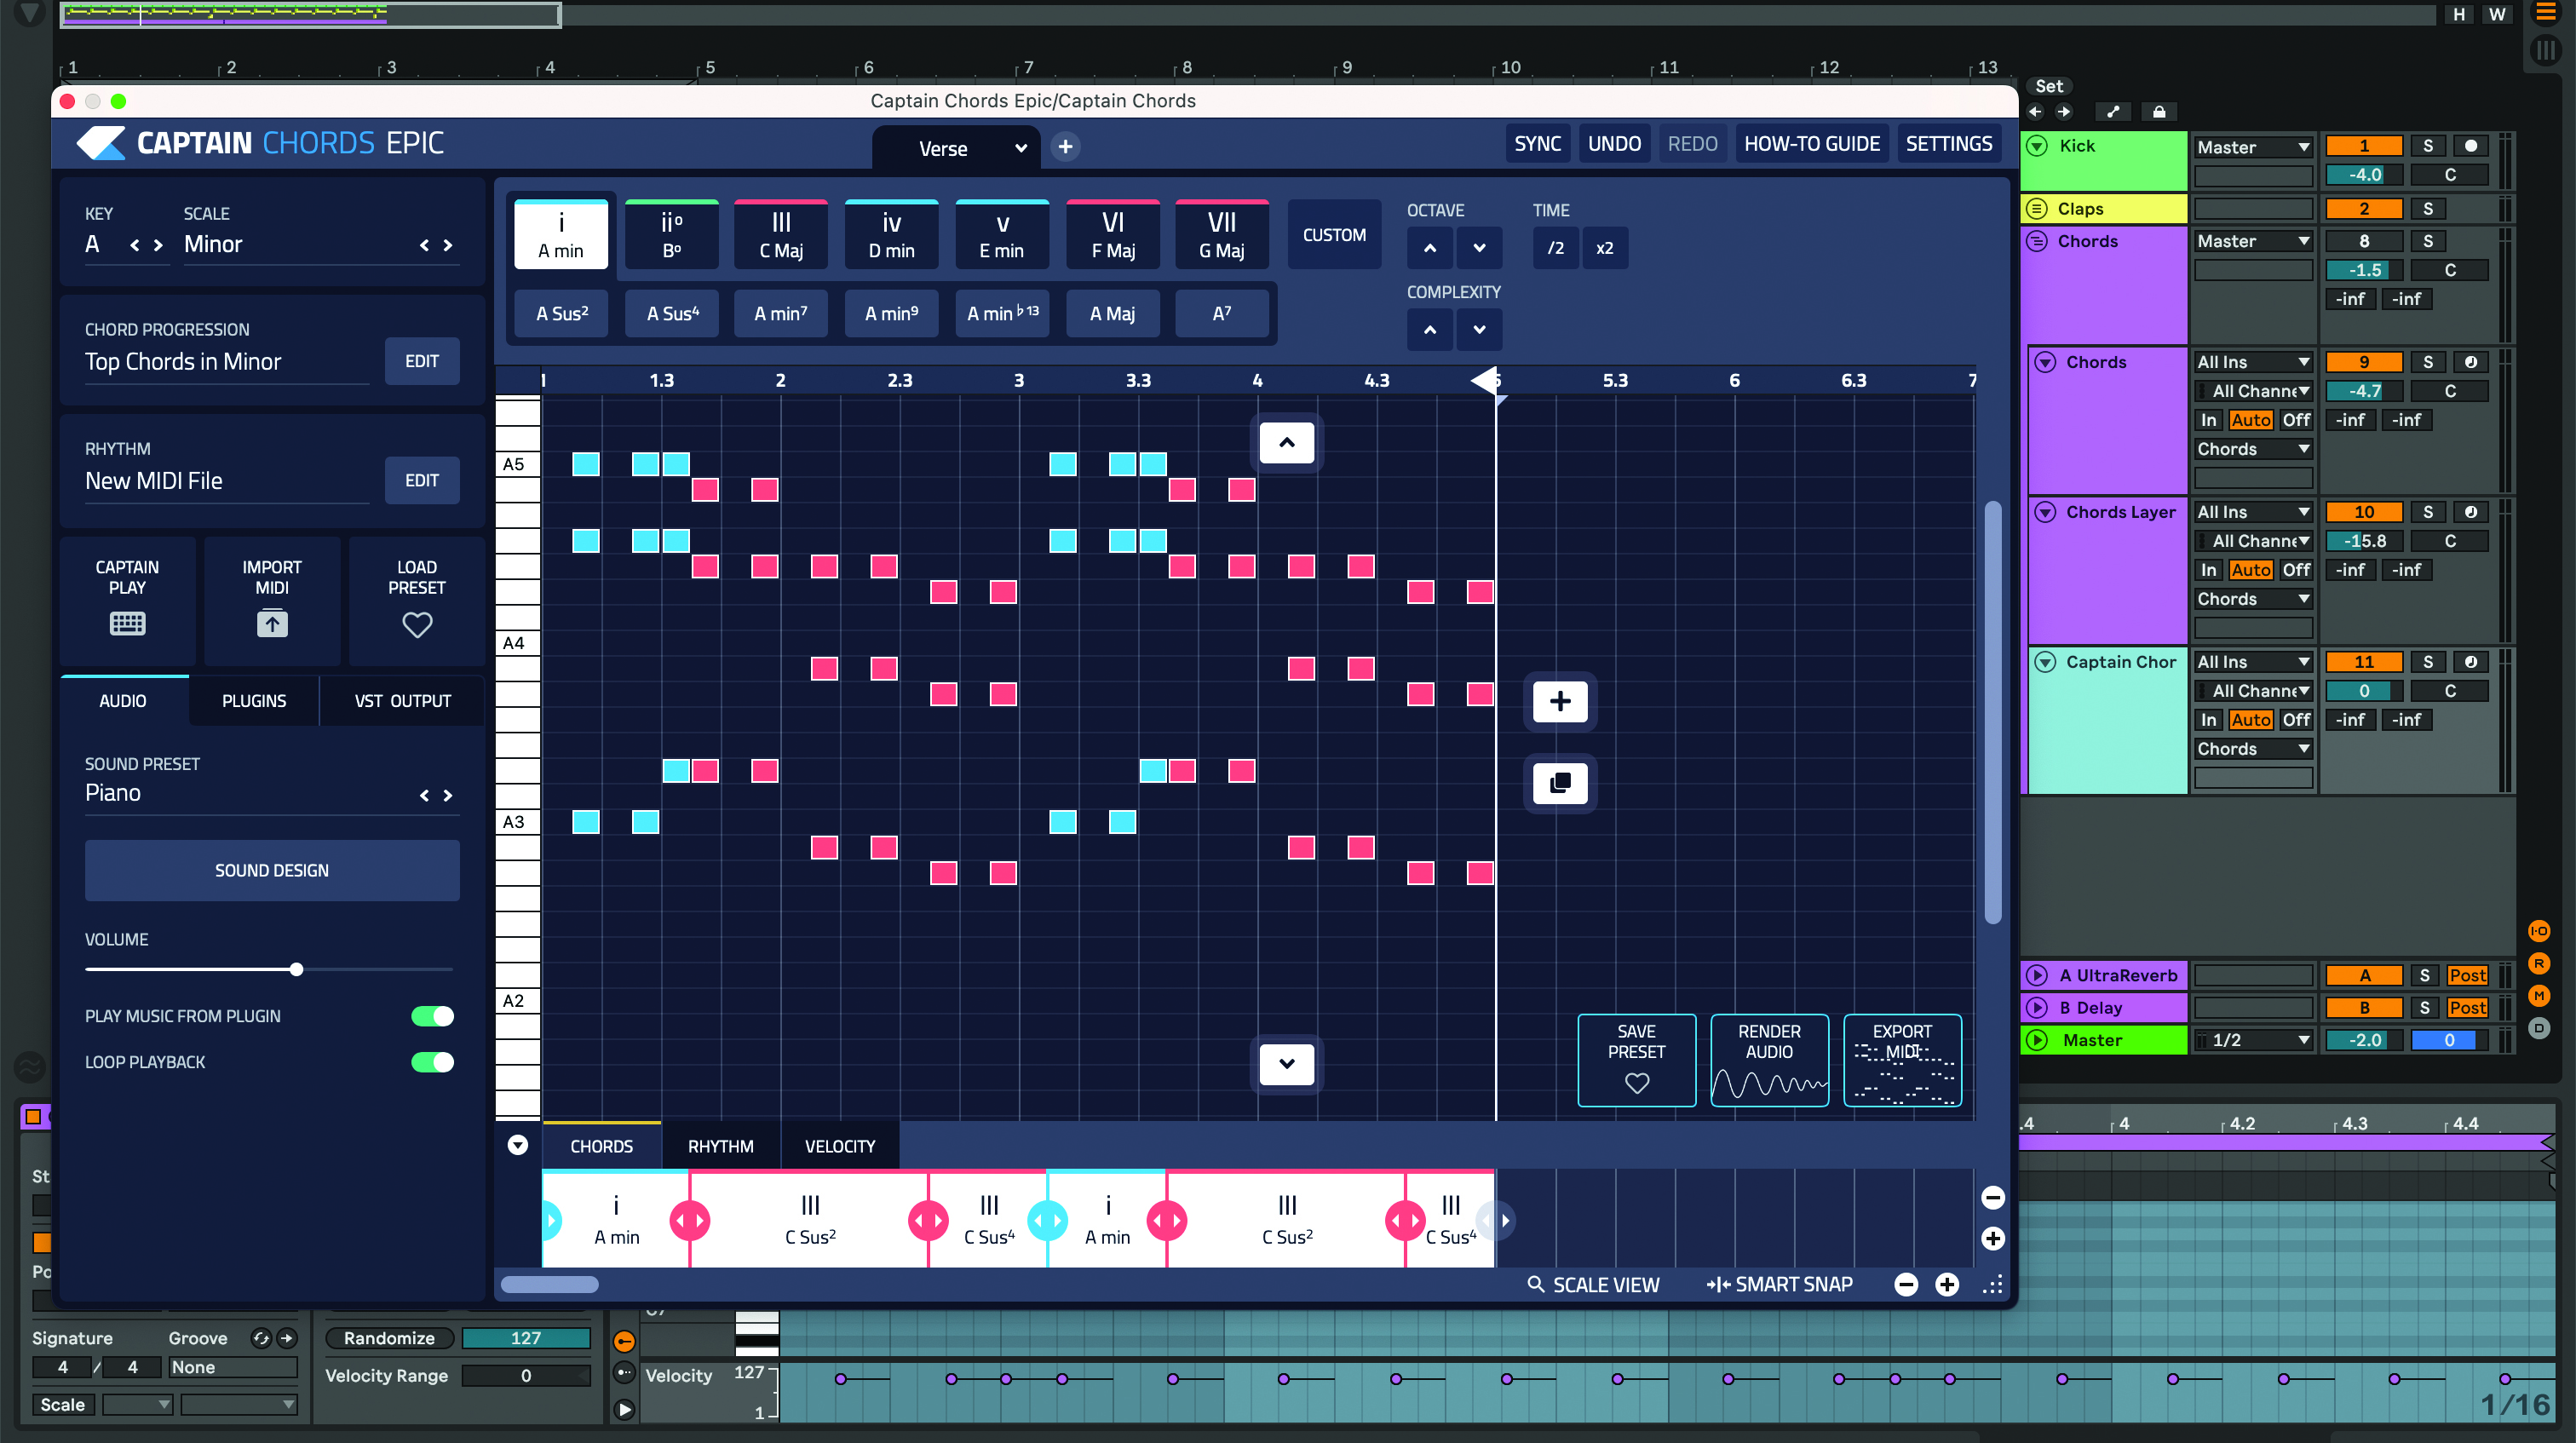
Add a chord progression using a piano or pads in the key of your track as the backbone of your drop. If you aren’t familiar with how to create a chord progression, try using a chord generating plugin like Captain Chords Epic. The progression can be layered with another instrument that has a strong attack to help it stand out in the mix.
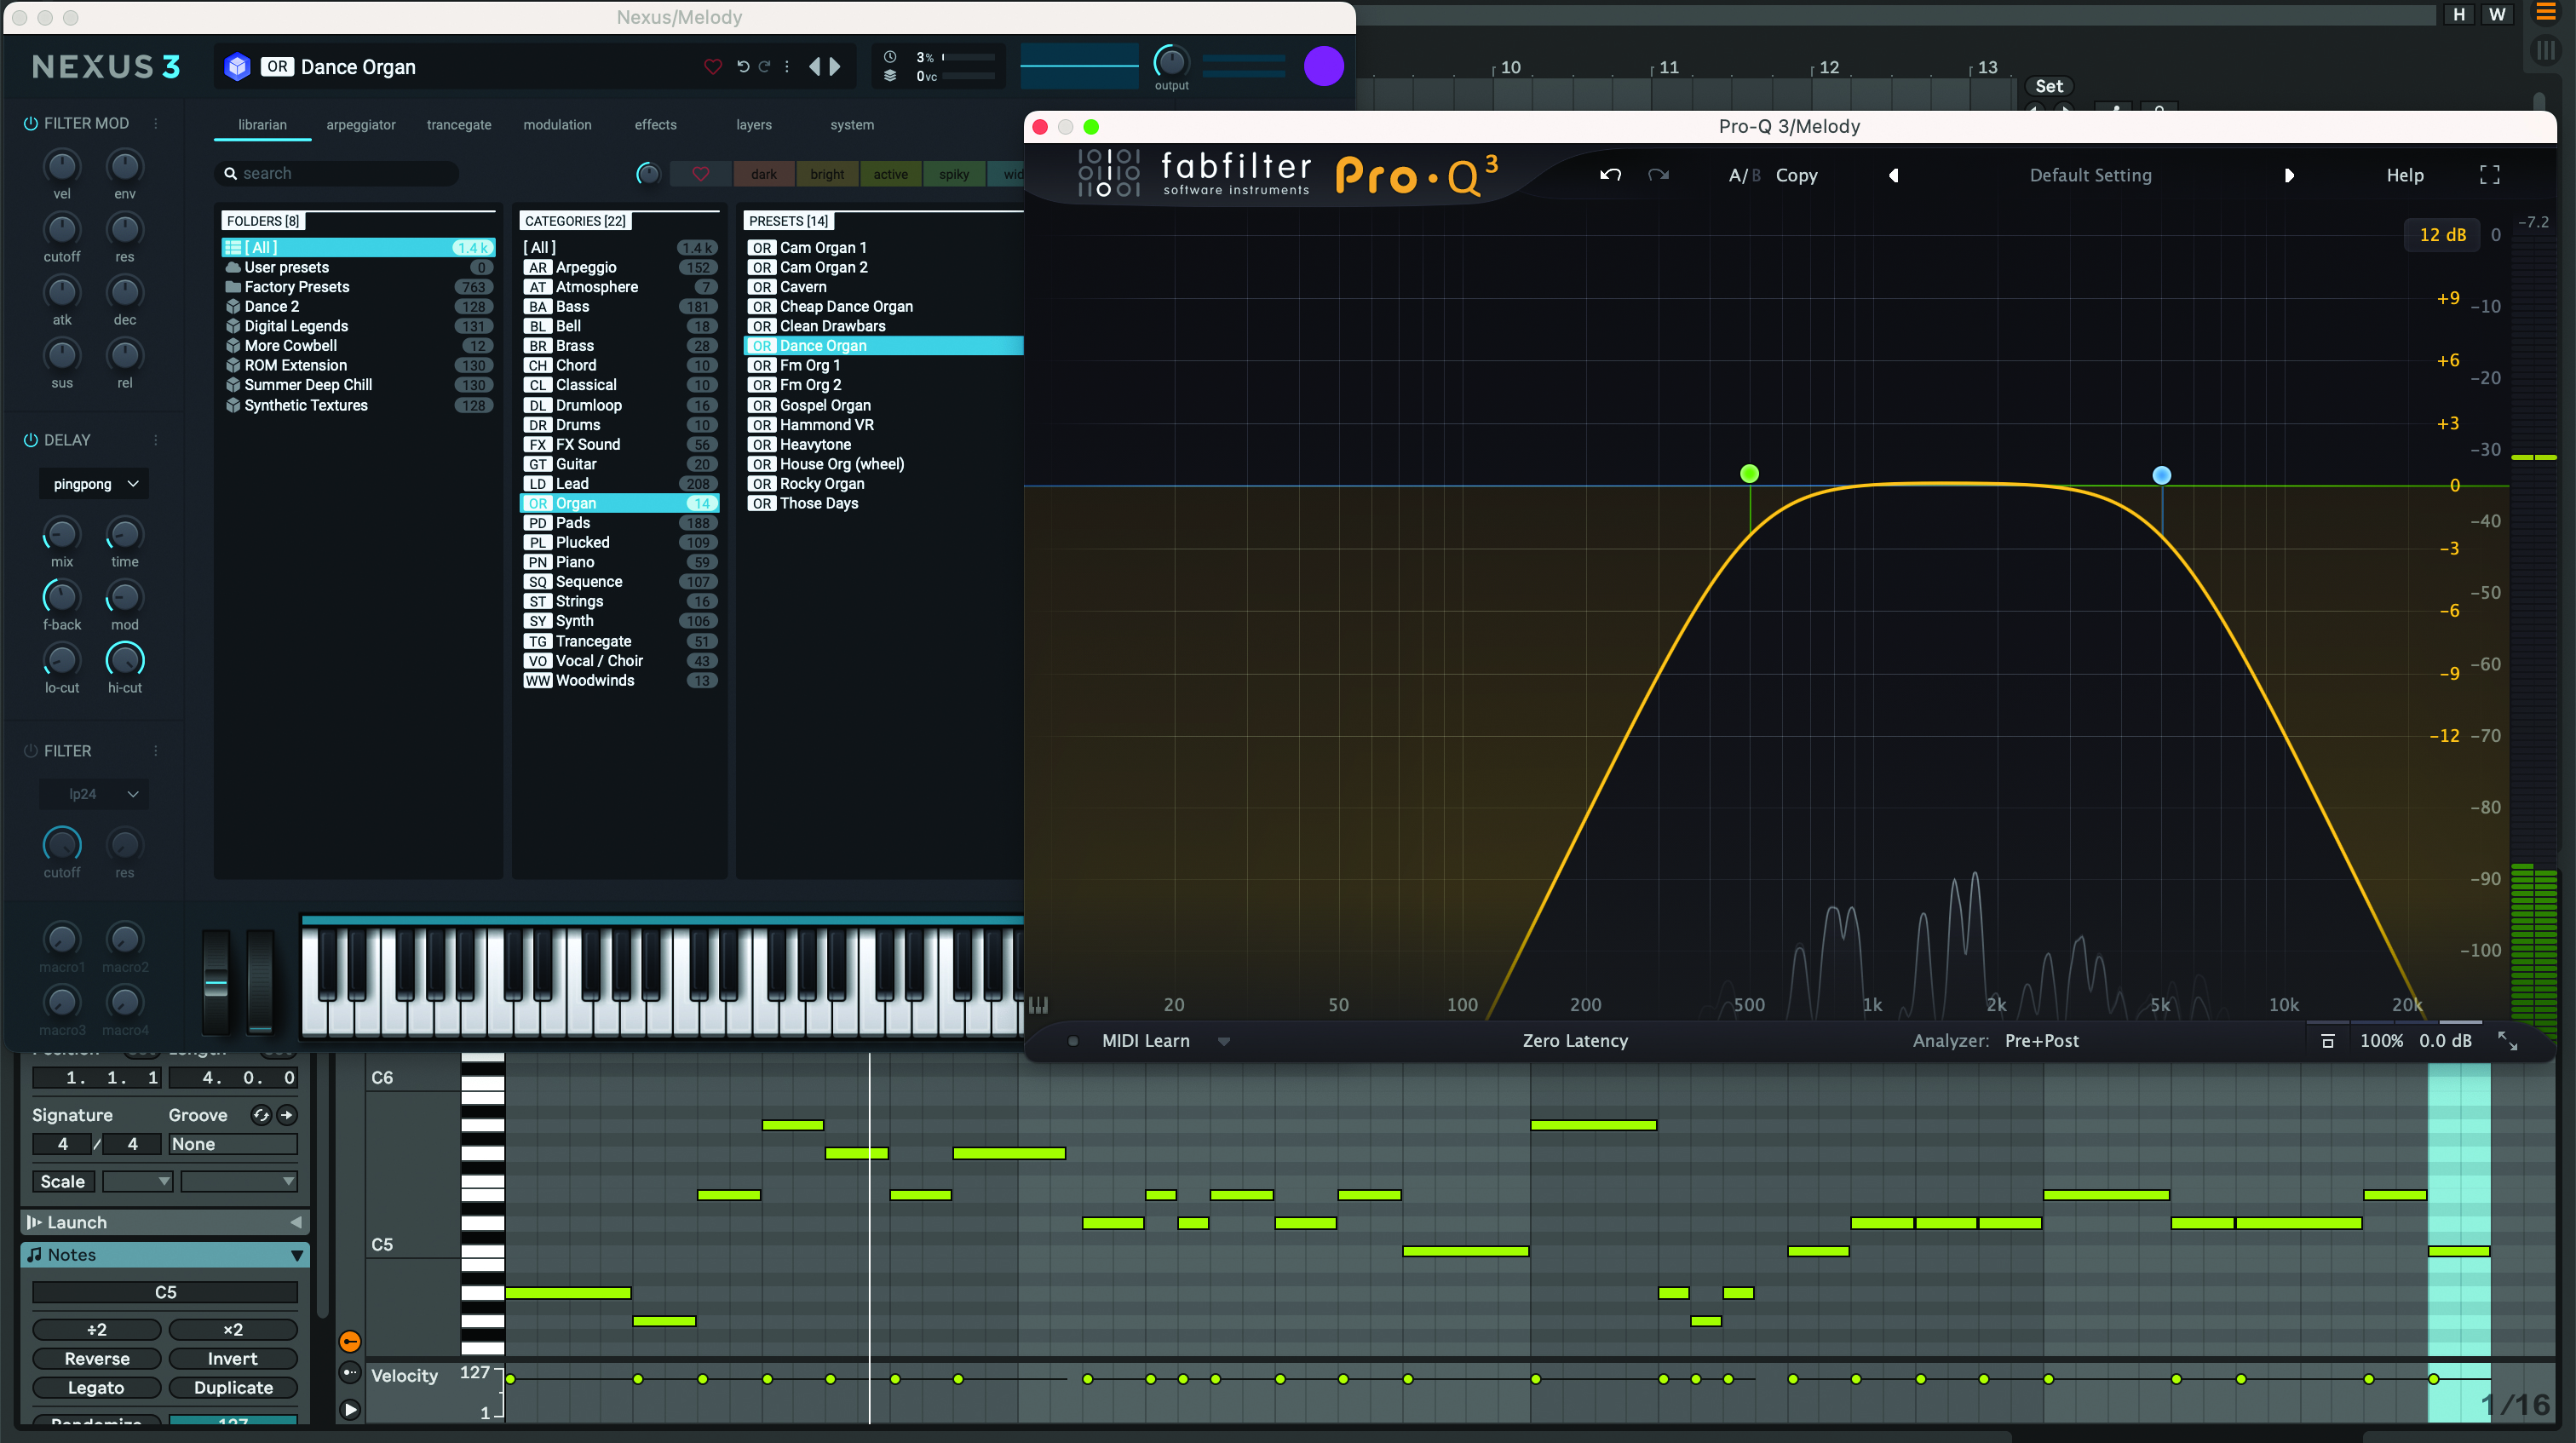
Create the main lead sound for your drop. Pick one sound that you want to be more in the front and use this to create the main melodic line. Design your own sound, or use a preset. Keep the melody simple, yet memorable. Use an EQ to roll off the high and low end and focus on the frequencies between 500Hz and 5kHz.
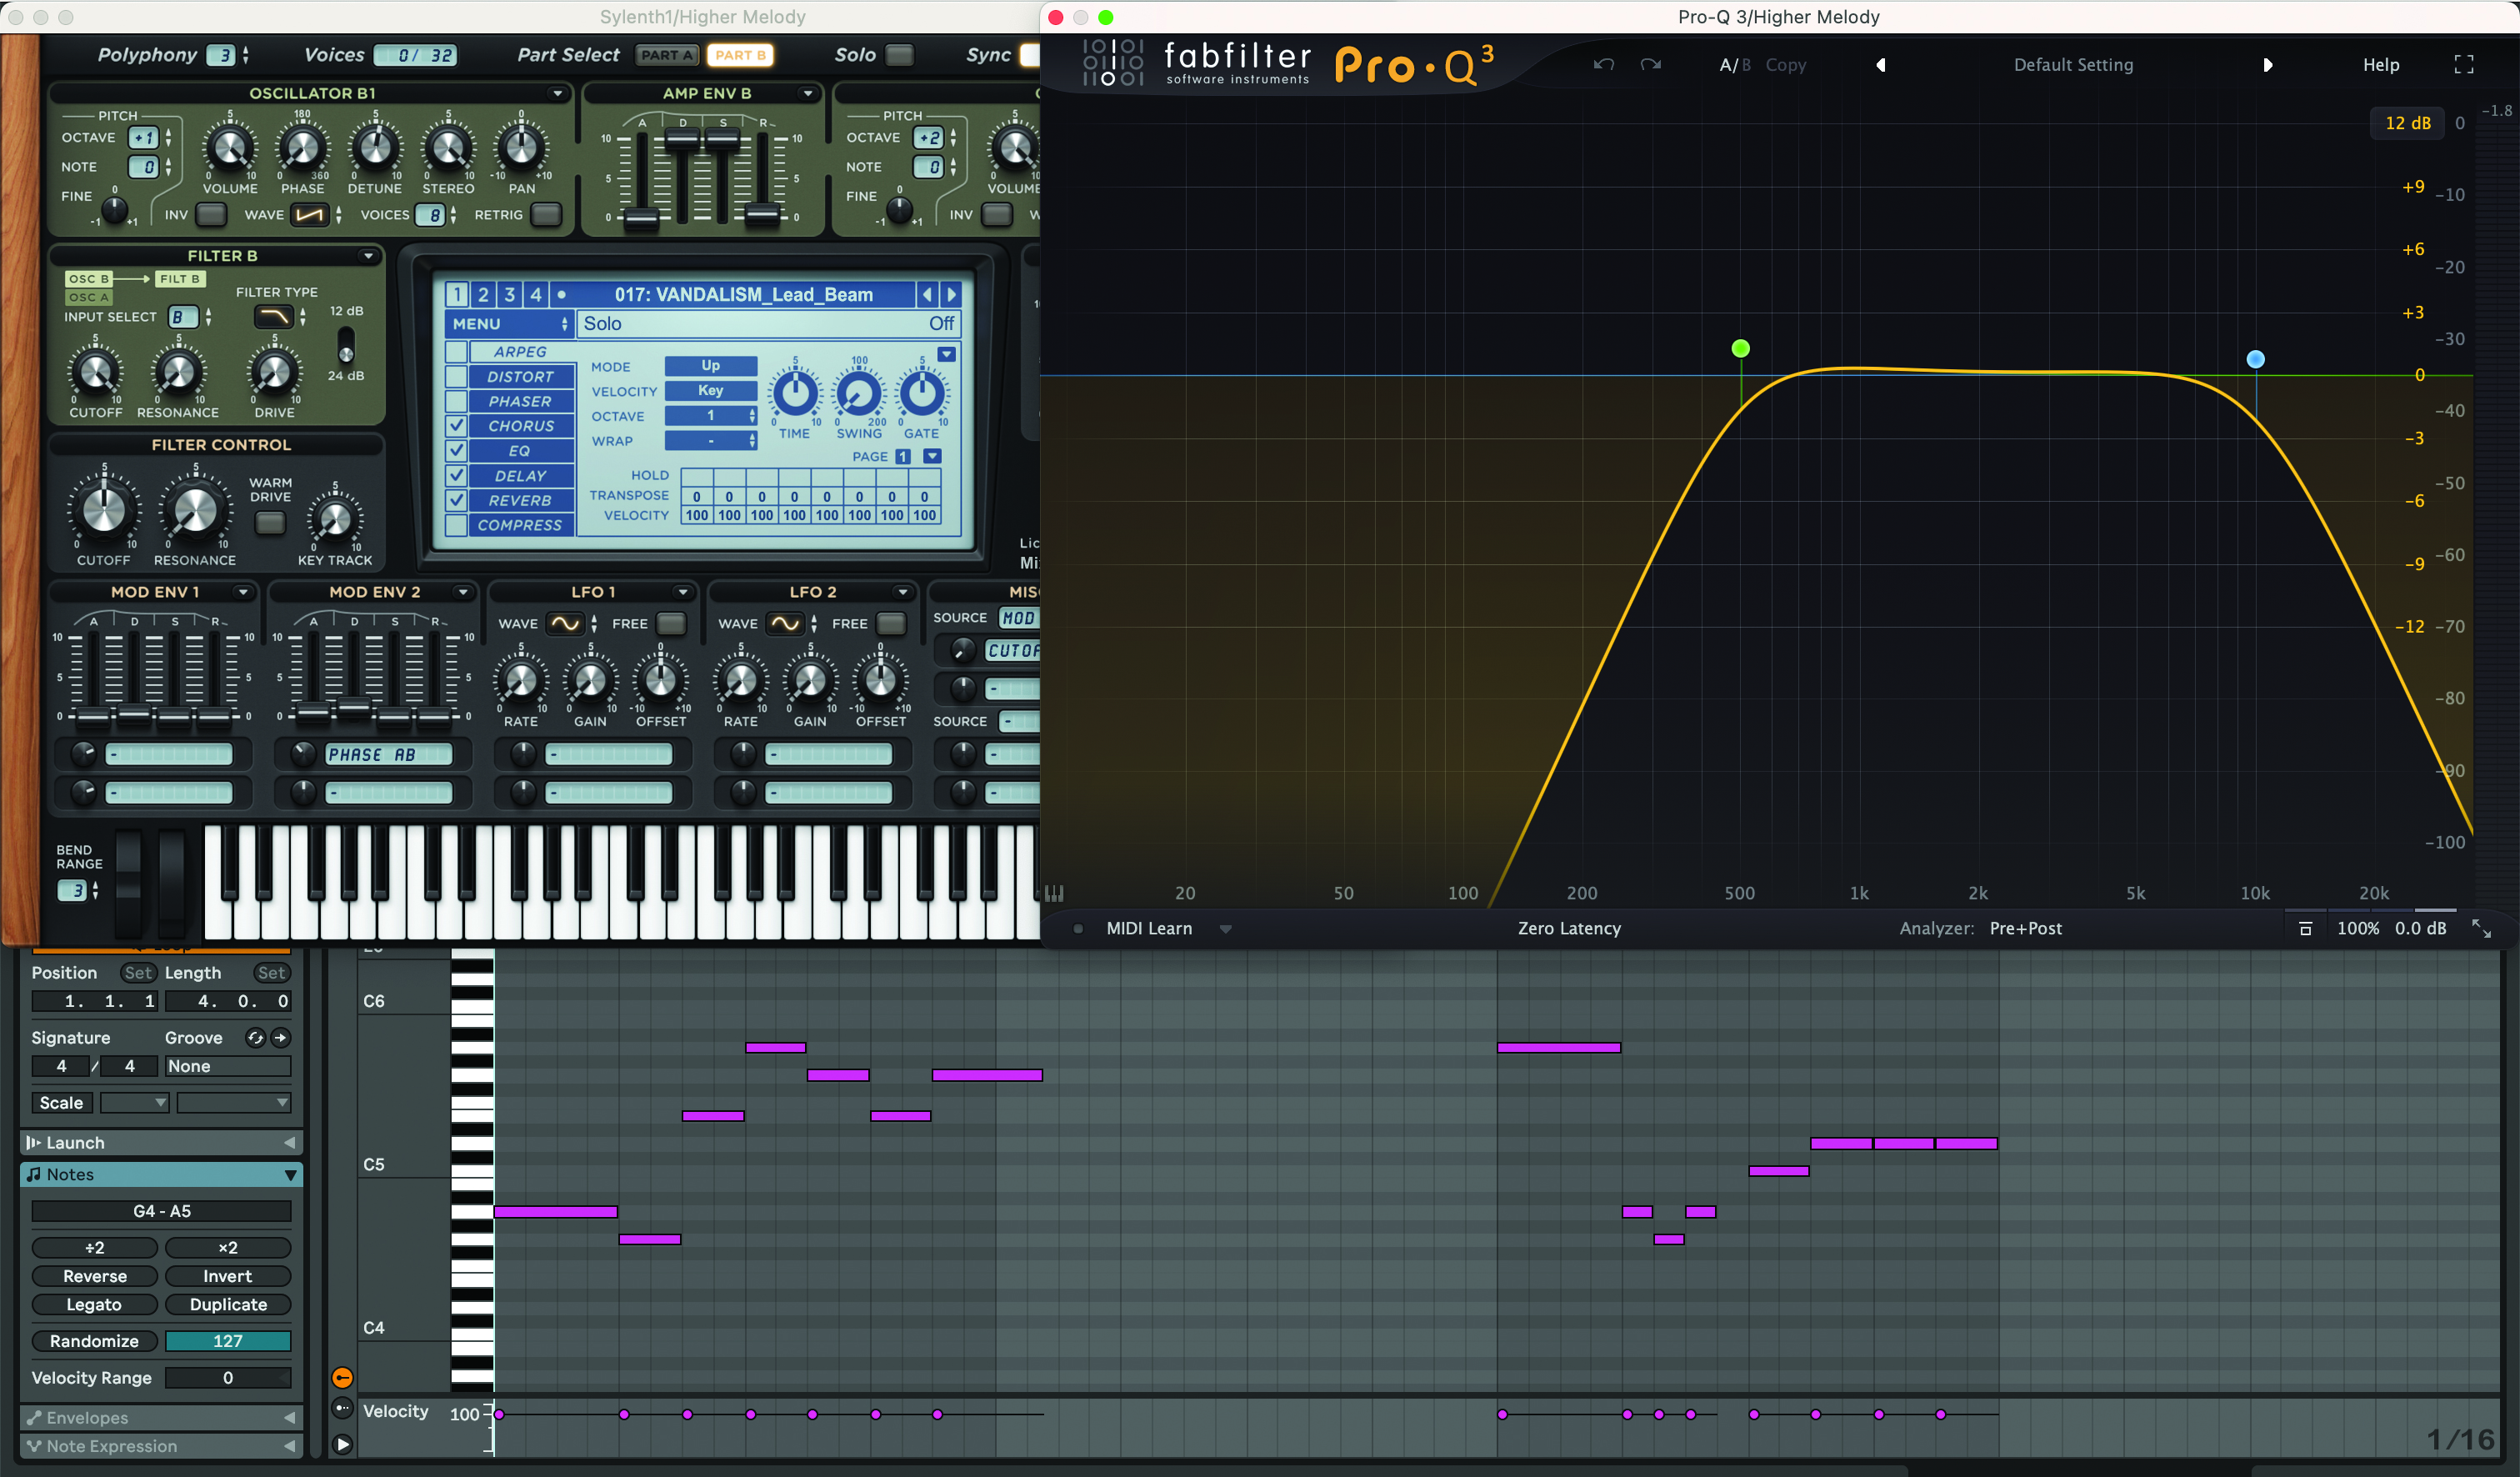
Duplicate the MIDI pattern for the top layer. This will be a sound in a higher frequency range that will complement the main synths. Use the melody from the main lead as a starting point, but leave some gaps to create a call and response type melody. Sculpt the sound with EQ so it’s focused on 500Hz – 8,000Hz or higher.
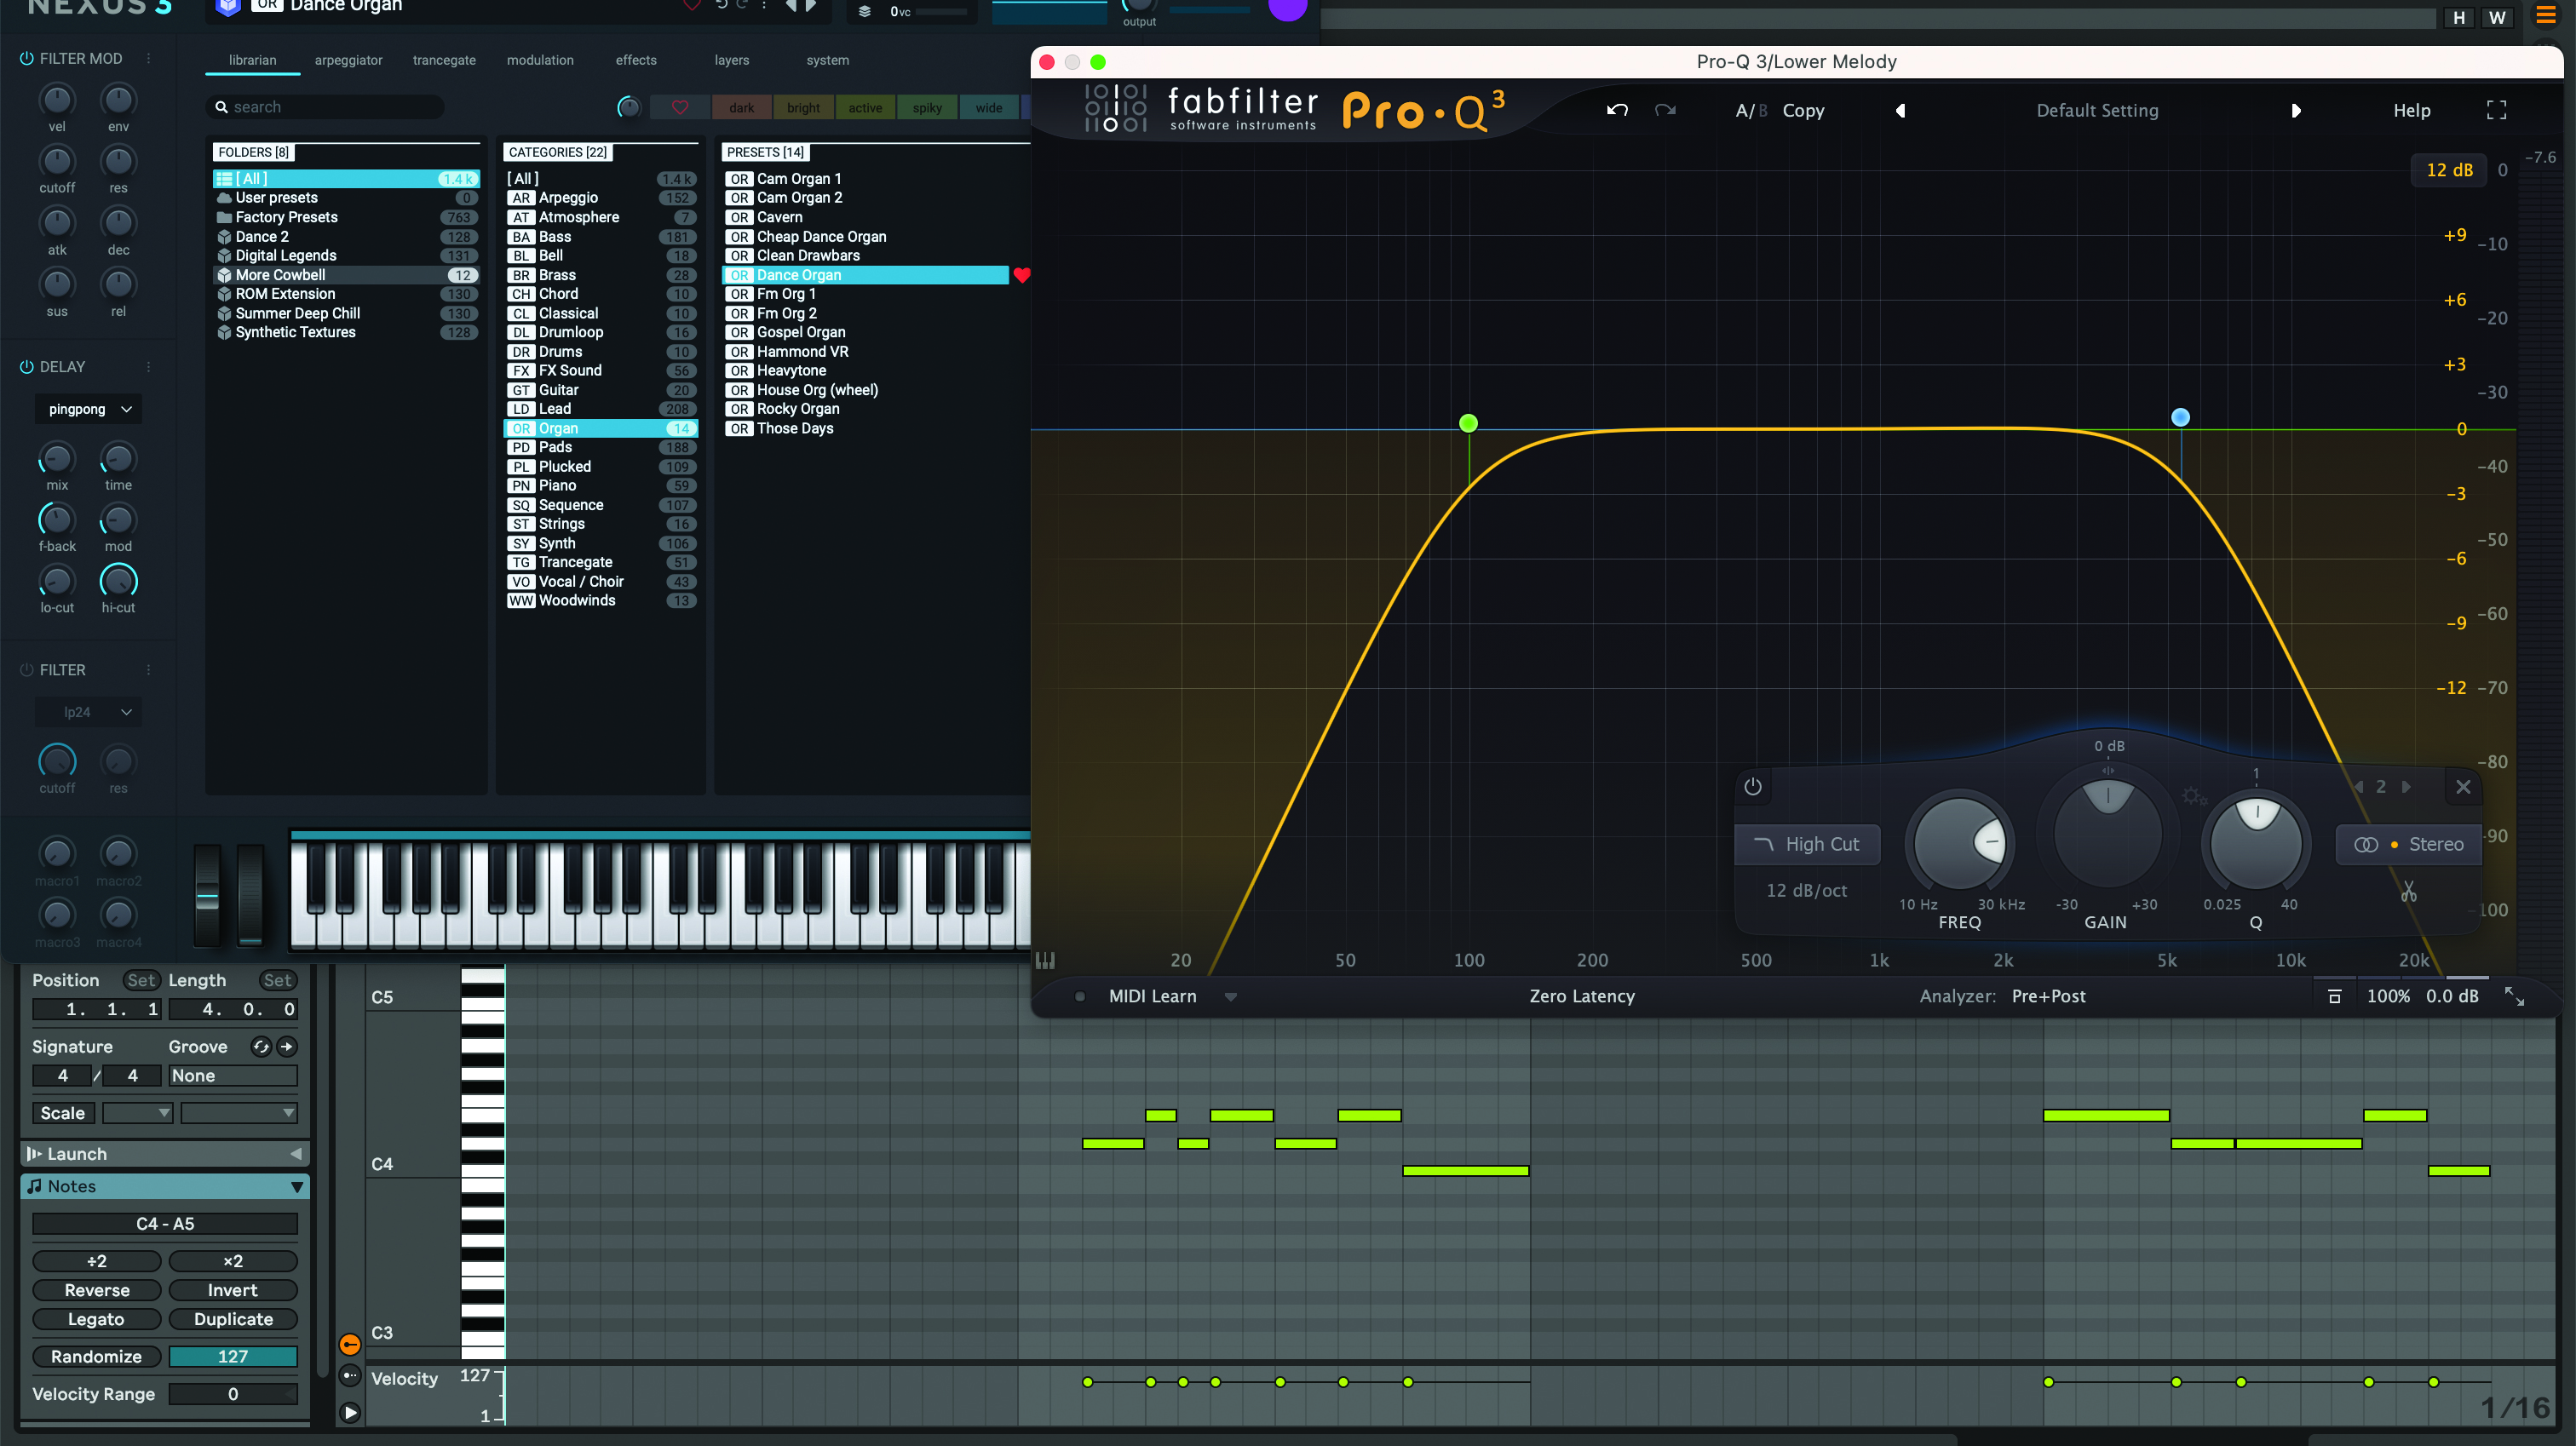
Duplicate the main melody in a lower octave. Try having this melody playing fewer notes to create space; it could play the ‘response’, so the sound mainly plays in the second half of each bar. The ADSR on each synth layer can be set to the same values for a more cohesive sound. Group synth layers and adjust their balances.
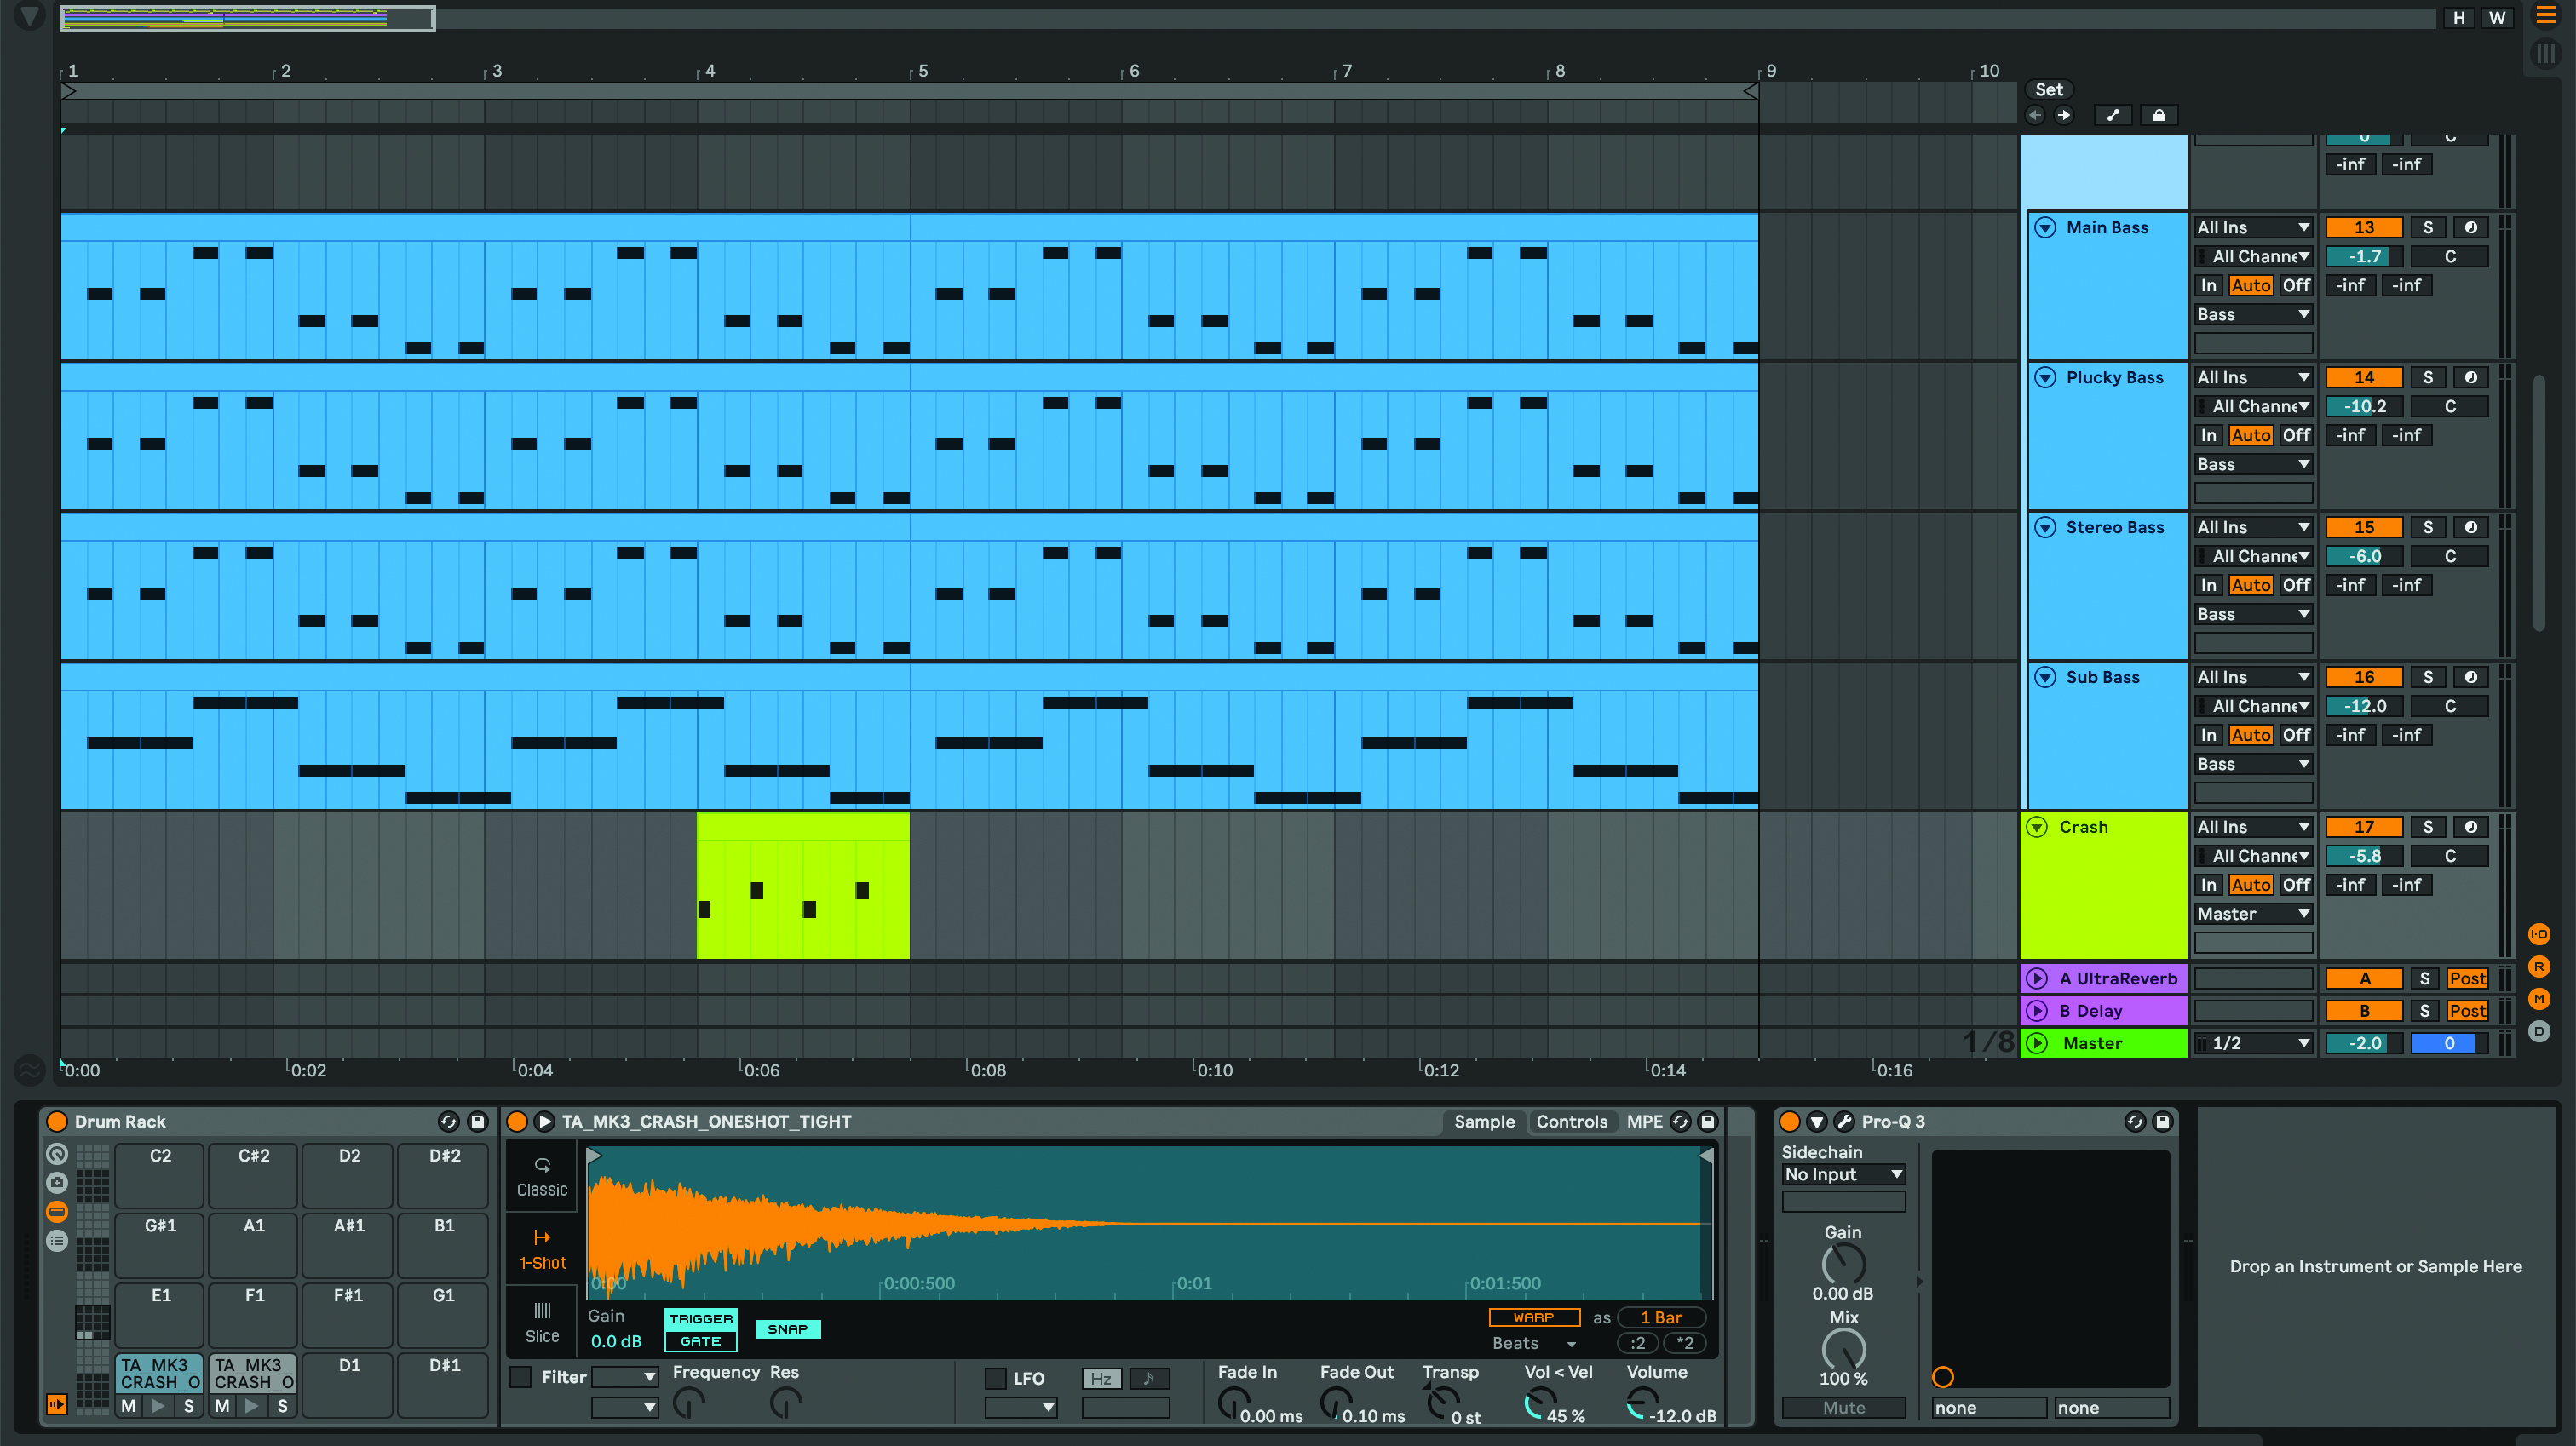
Create your bass using the root of each chord as a starting point. Add a crash by creating an instrument rack, and adding the same crash sample twice. Pan one crash to the left, and one to the right, or EQ each one a little differently. Alternate the crashes, and add four crashes after four bars, or at the end of the drop.
Layering your bass
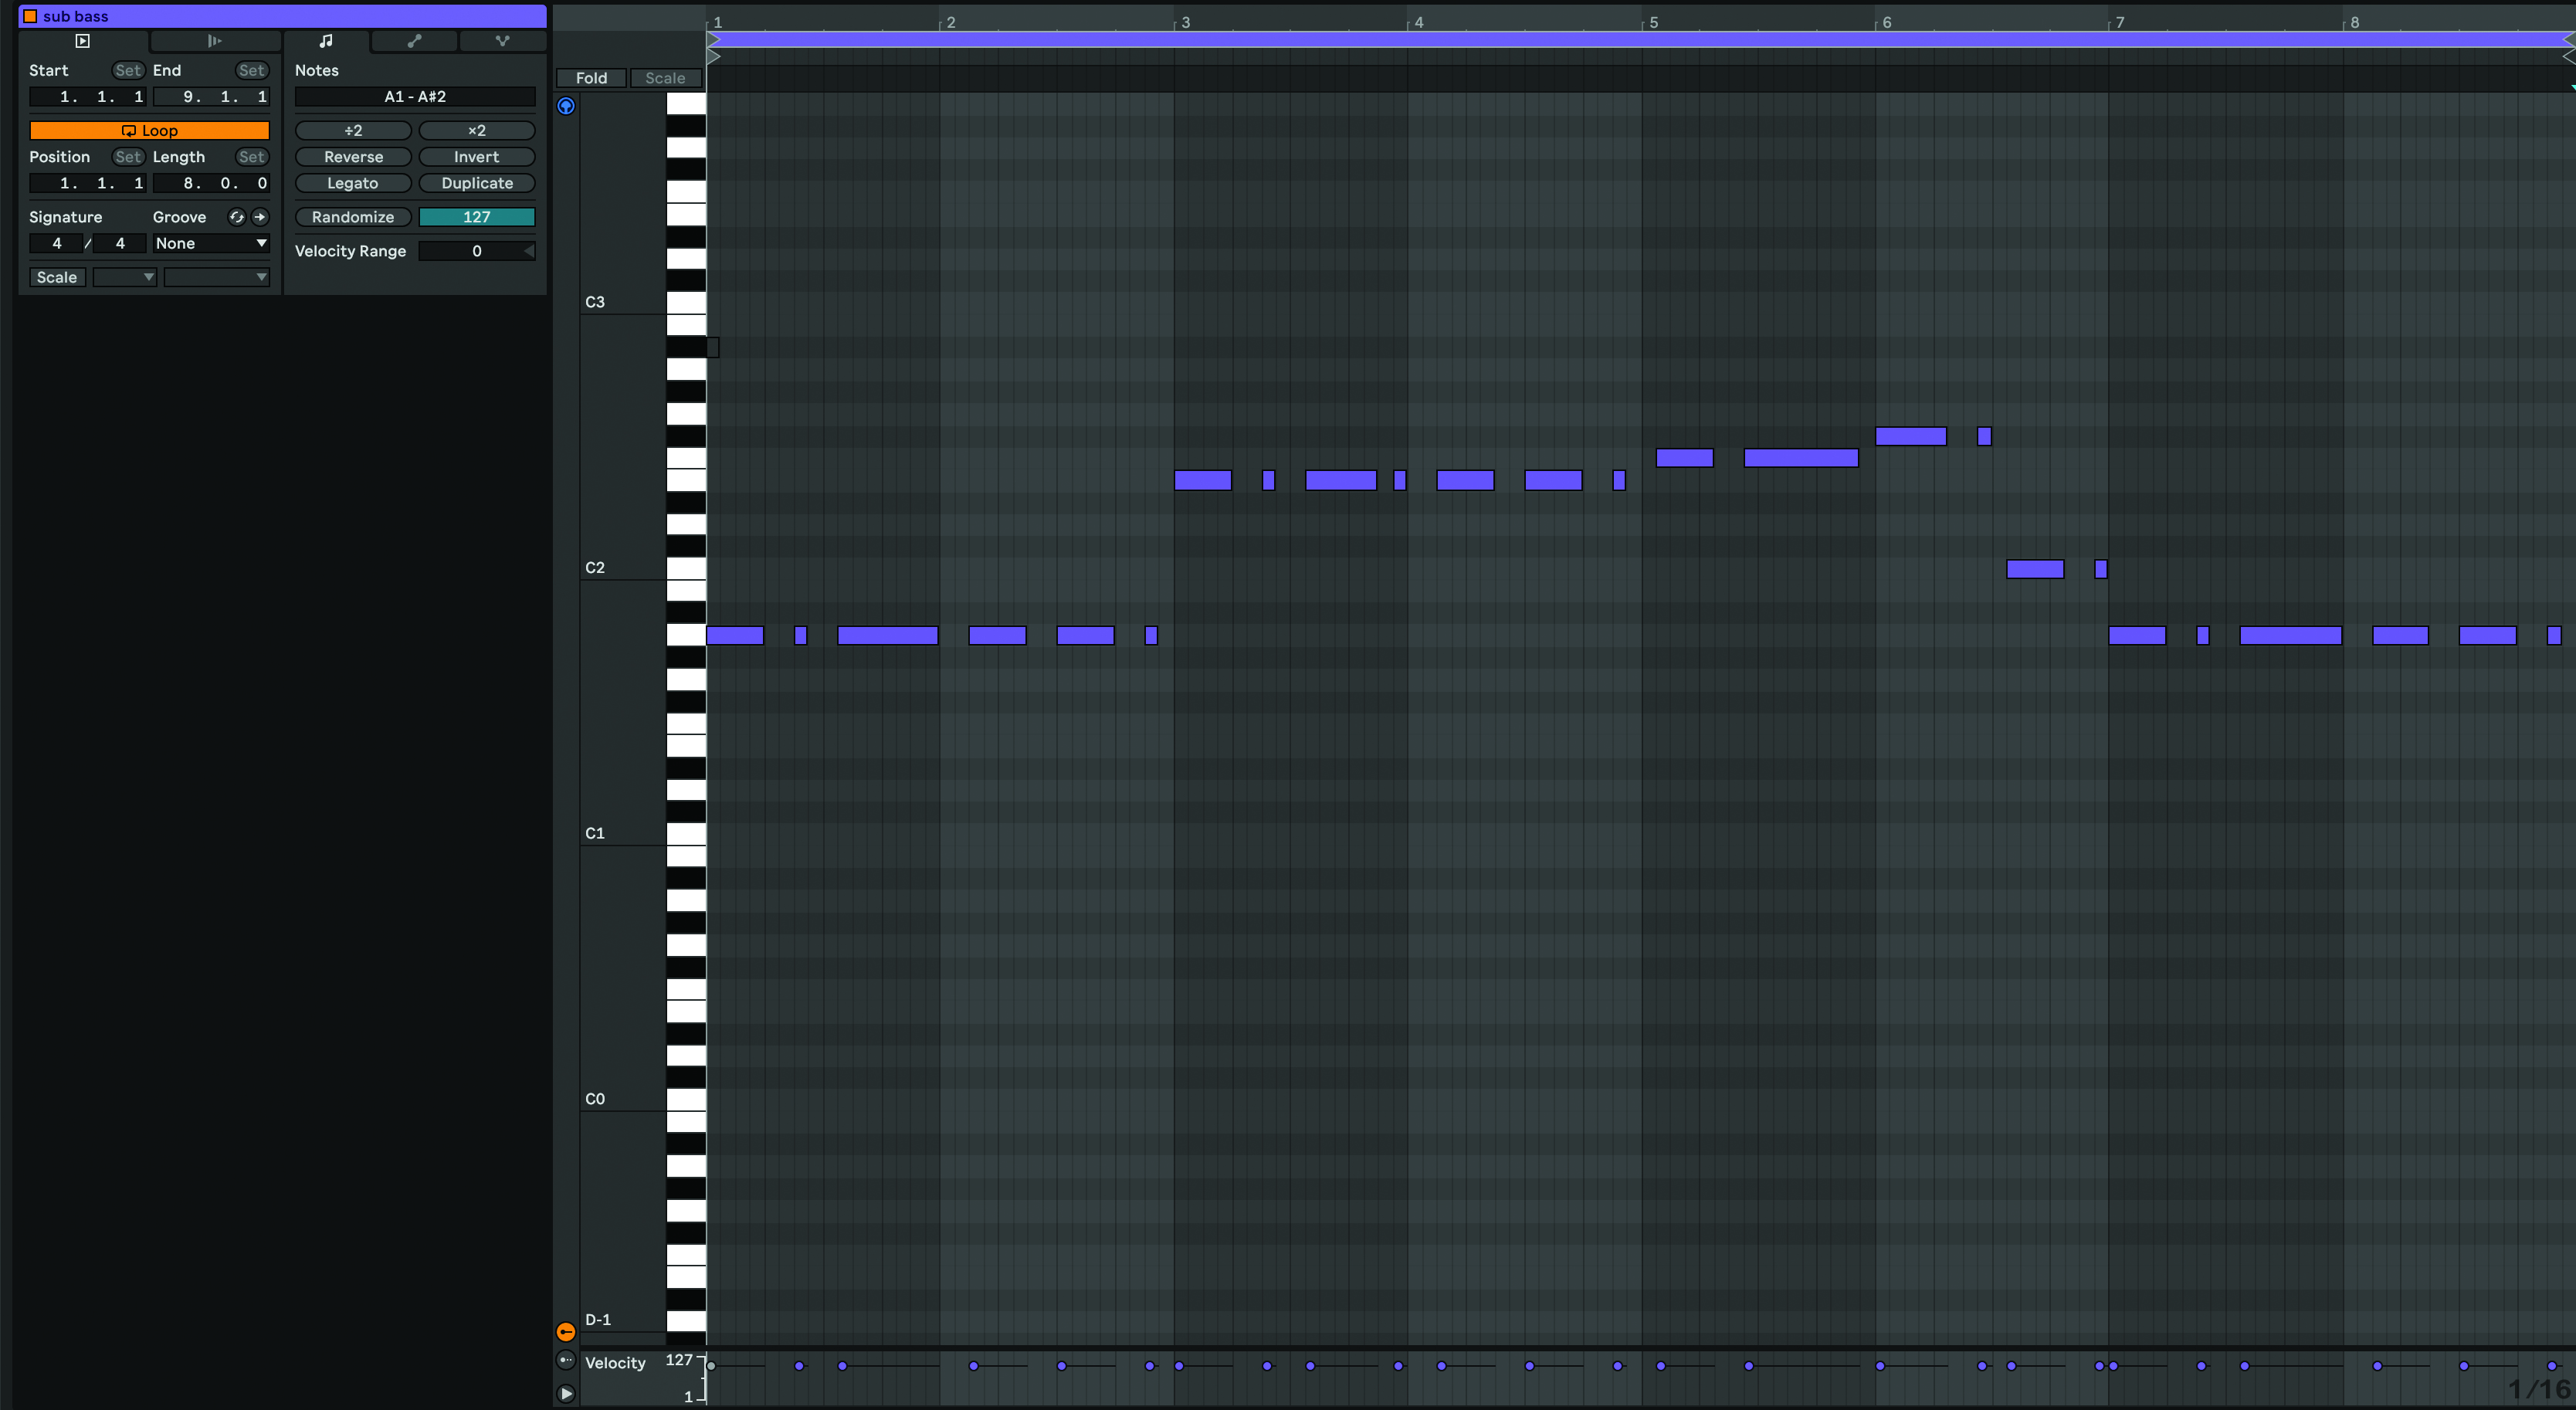
Create a sub bass for your track by using a VST synth. We’re using Serum; start with an Init patch and turn the oscillators off. Use a Sine wave and set the octave to -1. In the key of your track, program in a pattern using one octave. you could try using the melody you created in the first section as the rhythmic pattern for the sub bass.
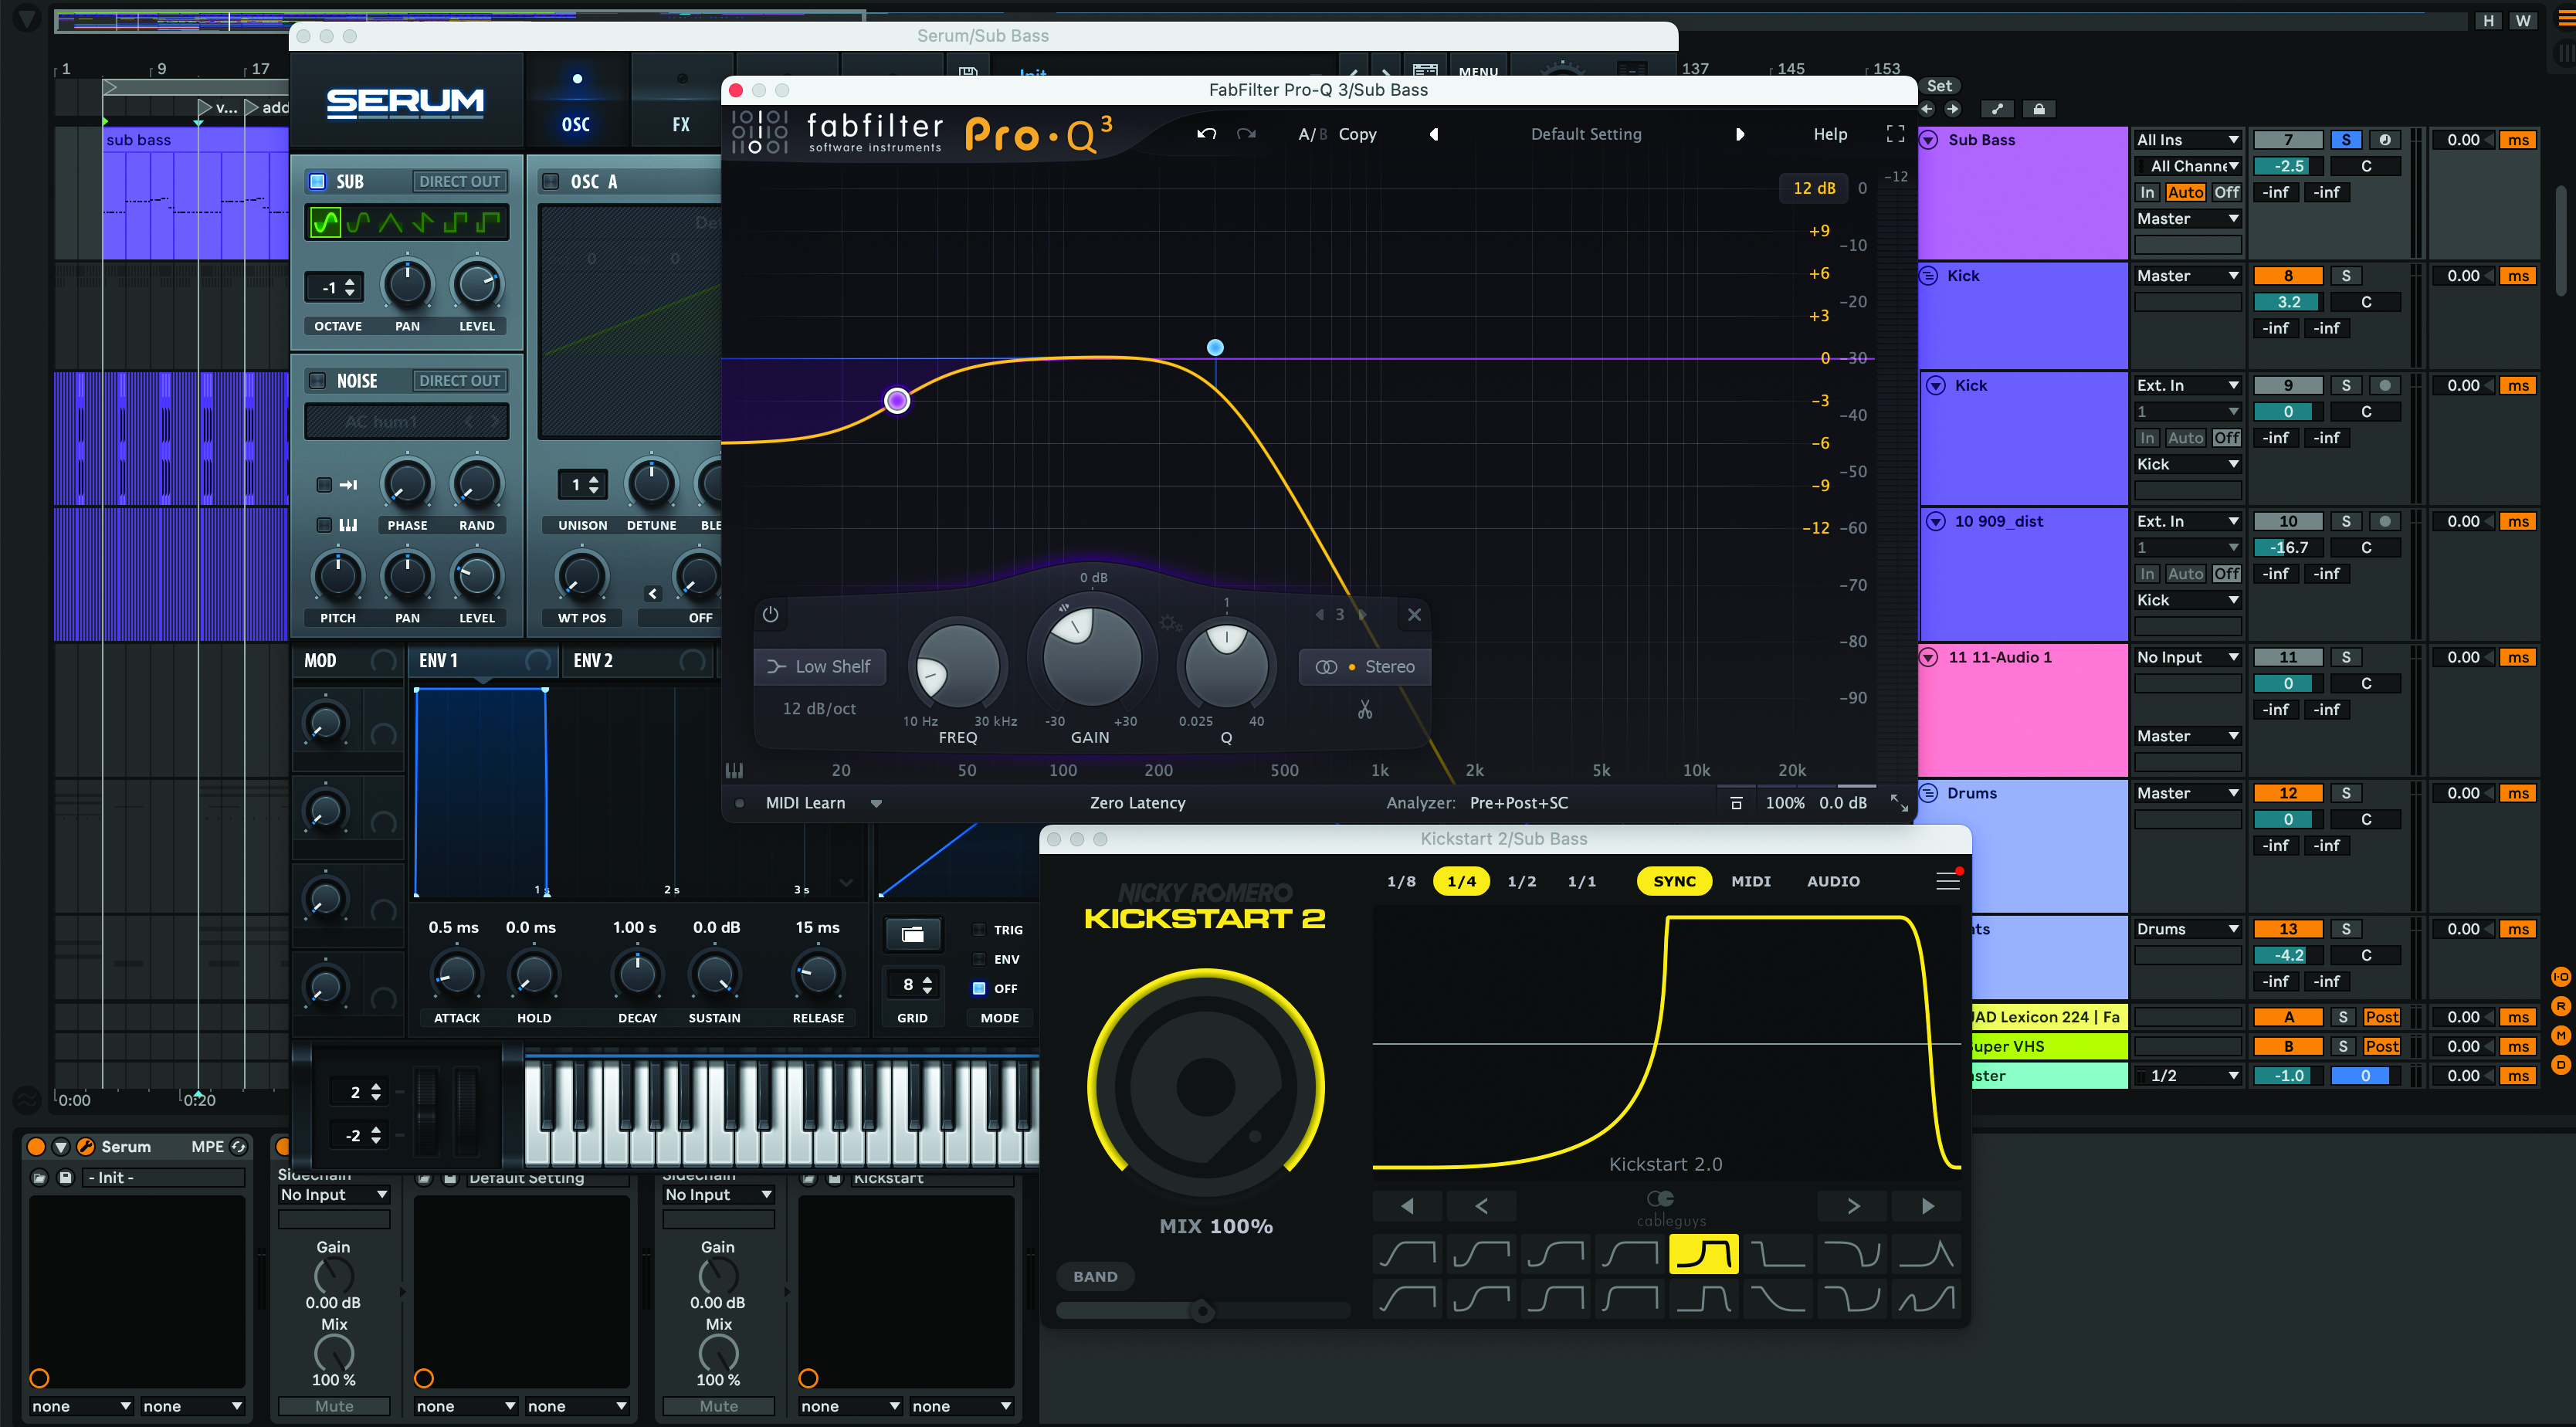
Add an EQ like FabFilter Pro-Q 3 and use a low-shelf EQ to roll off frequencies below 30Hz. Use a low-pass filter and cut off all frequencies above 300Hz. Next use Kickstart 2 (or a compressor that’s sidechained to the kick) to roll off the transients of the sub bass, so the kick drum will cut through the mix.
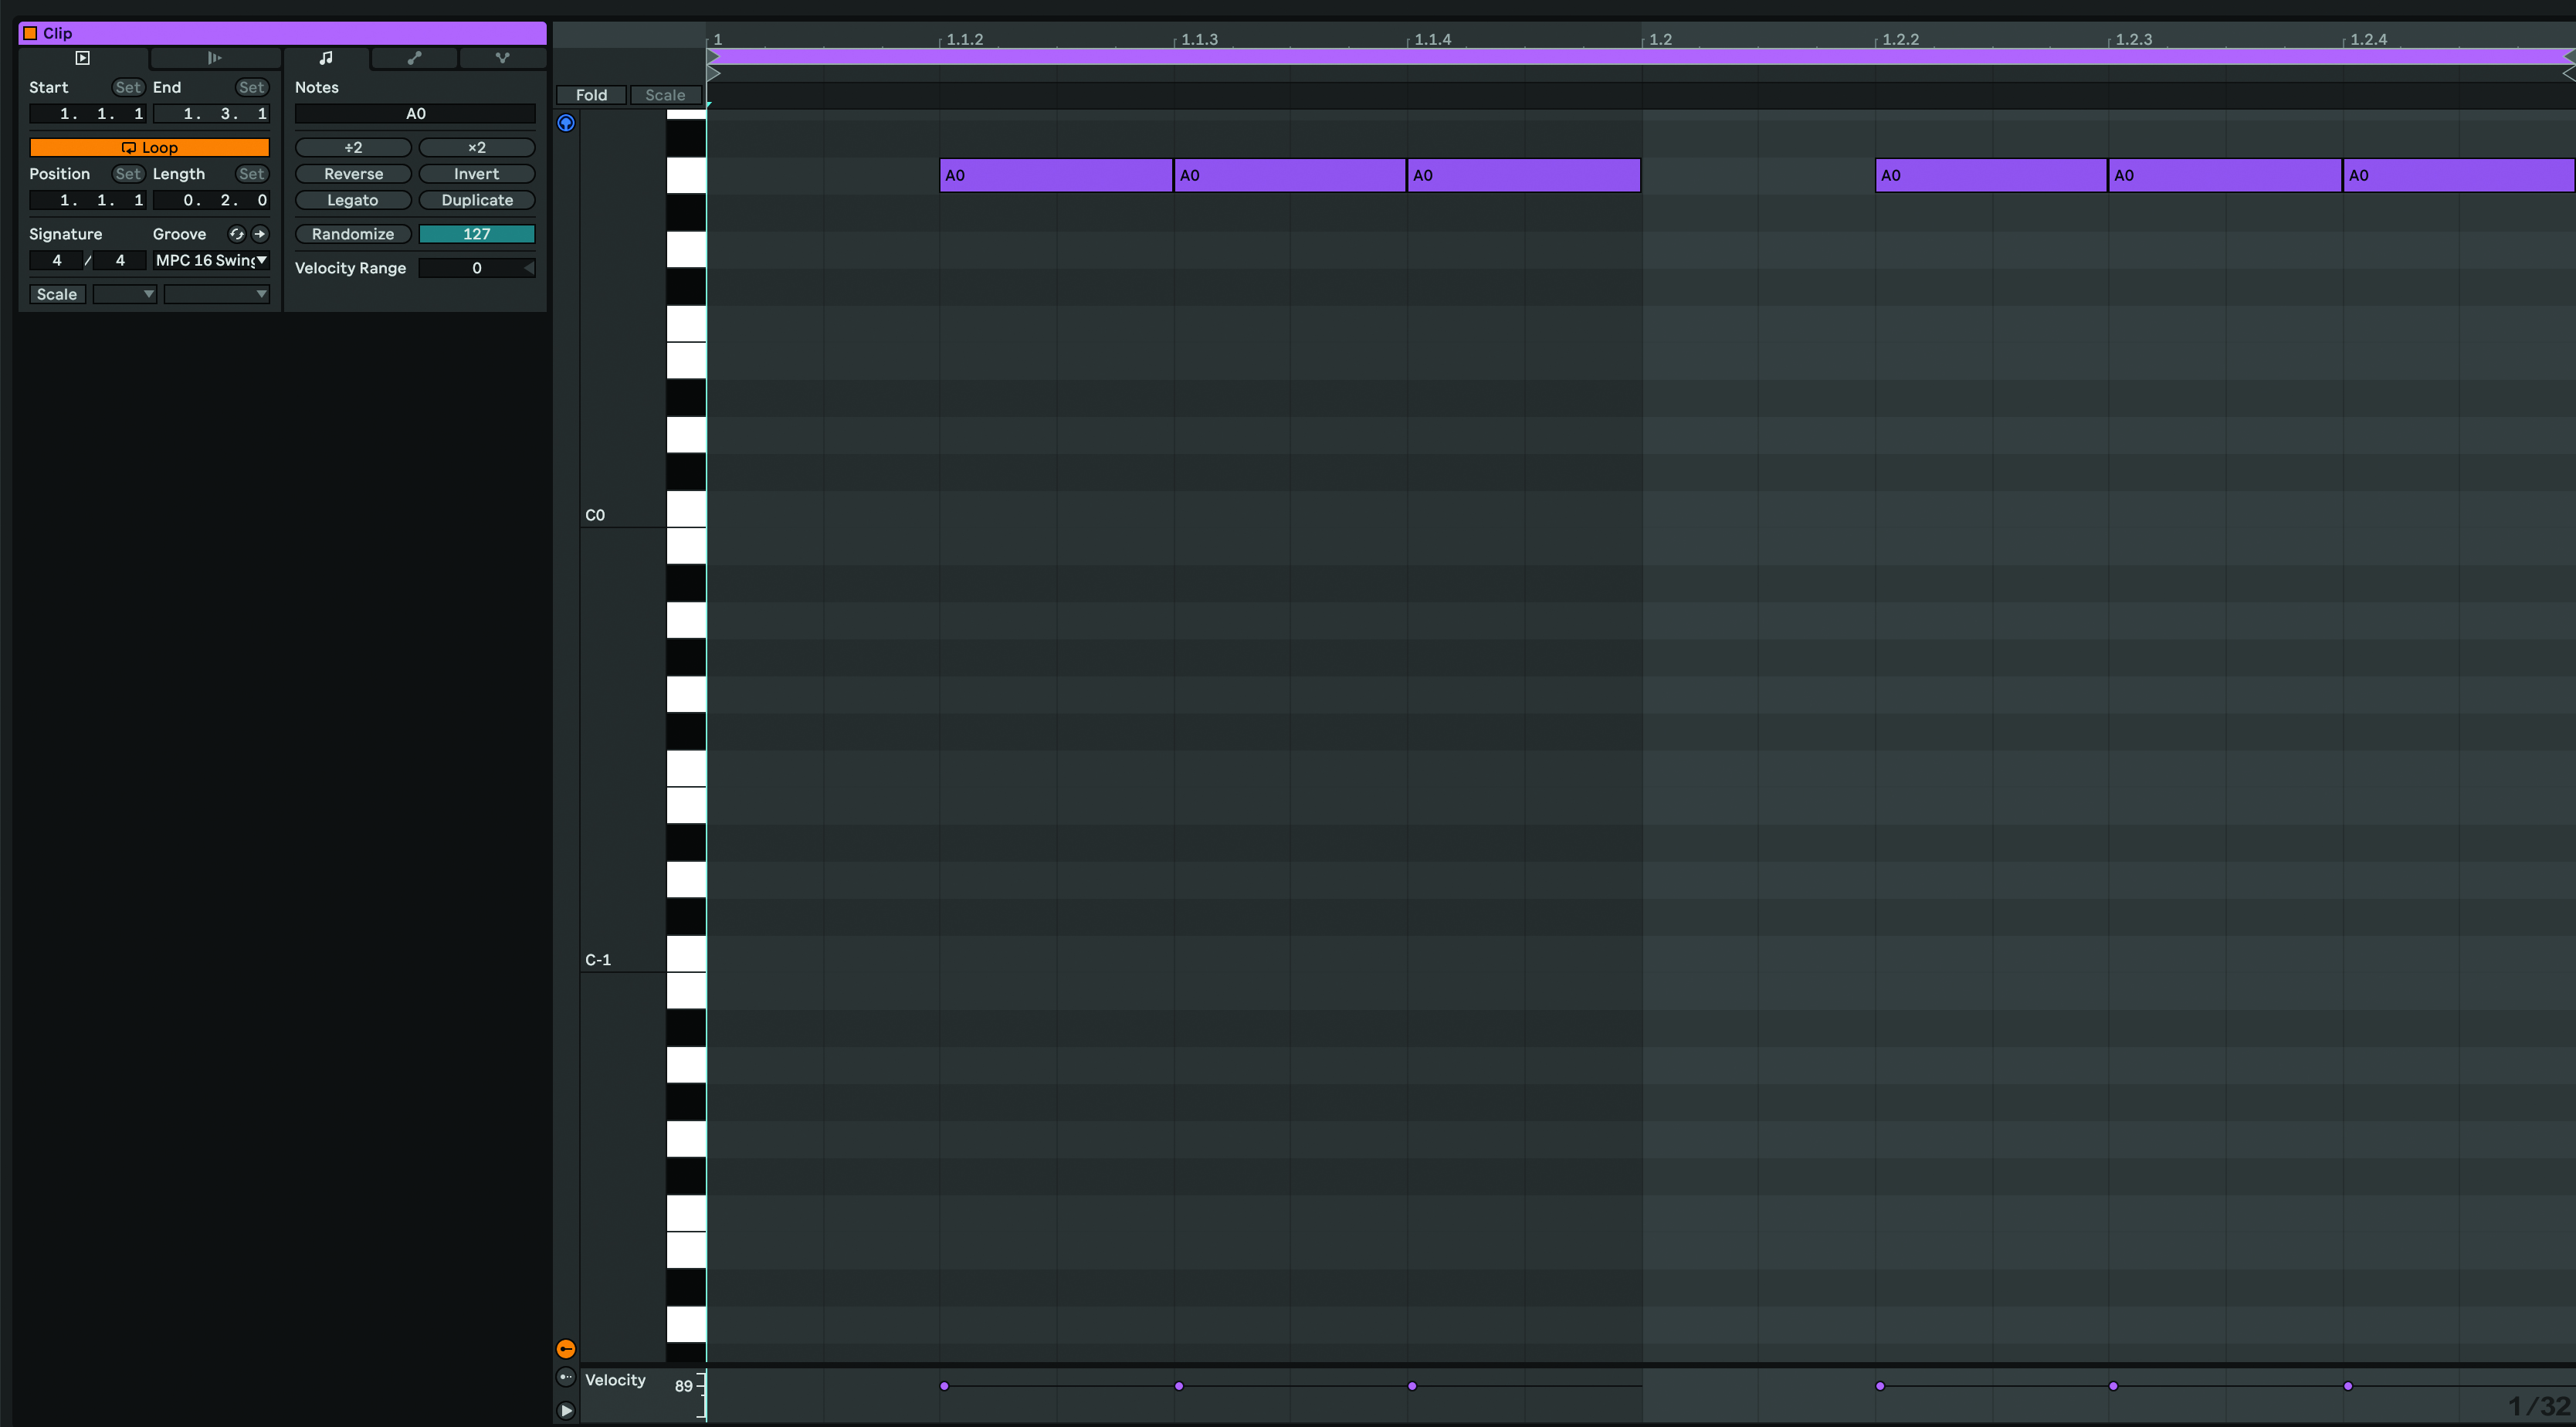
Create a bassline with more movement in a higher octave. Choose the sound for the bass based upon the genre you’re creating. If you want to make a rolling bassline, load up a synth like Serum, Sylenth1 or Ableton’s Operator and program in a 16-note pattern, leaving space on the first 16th note of every beat for the kick.
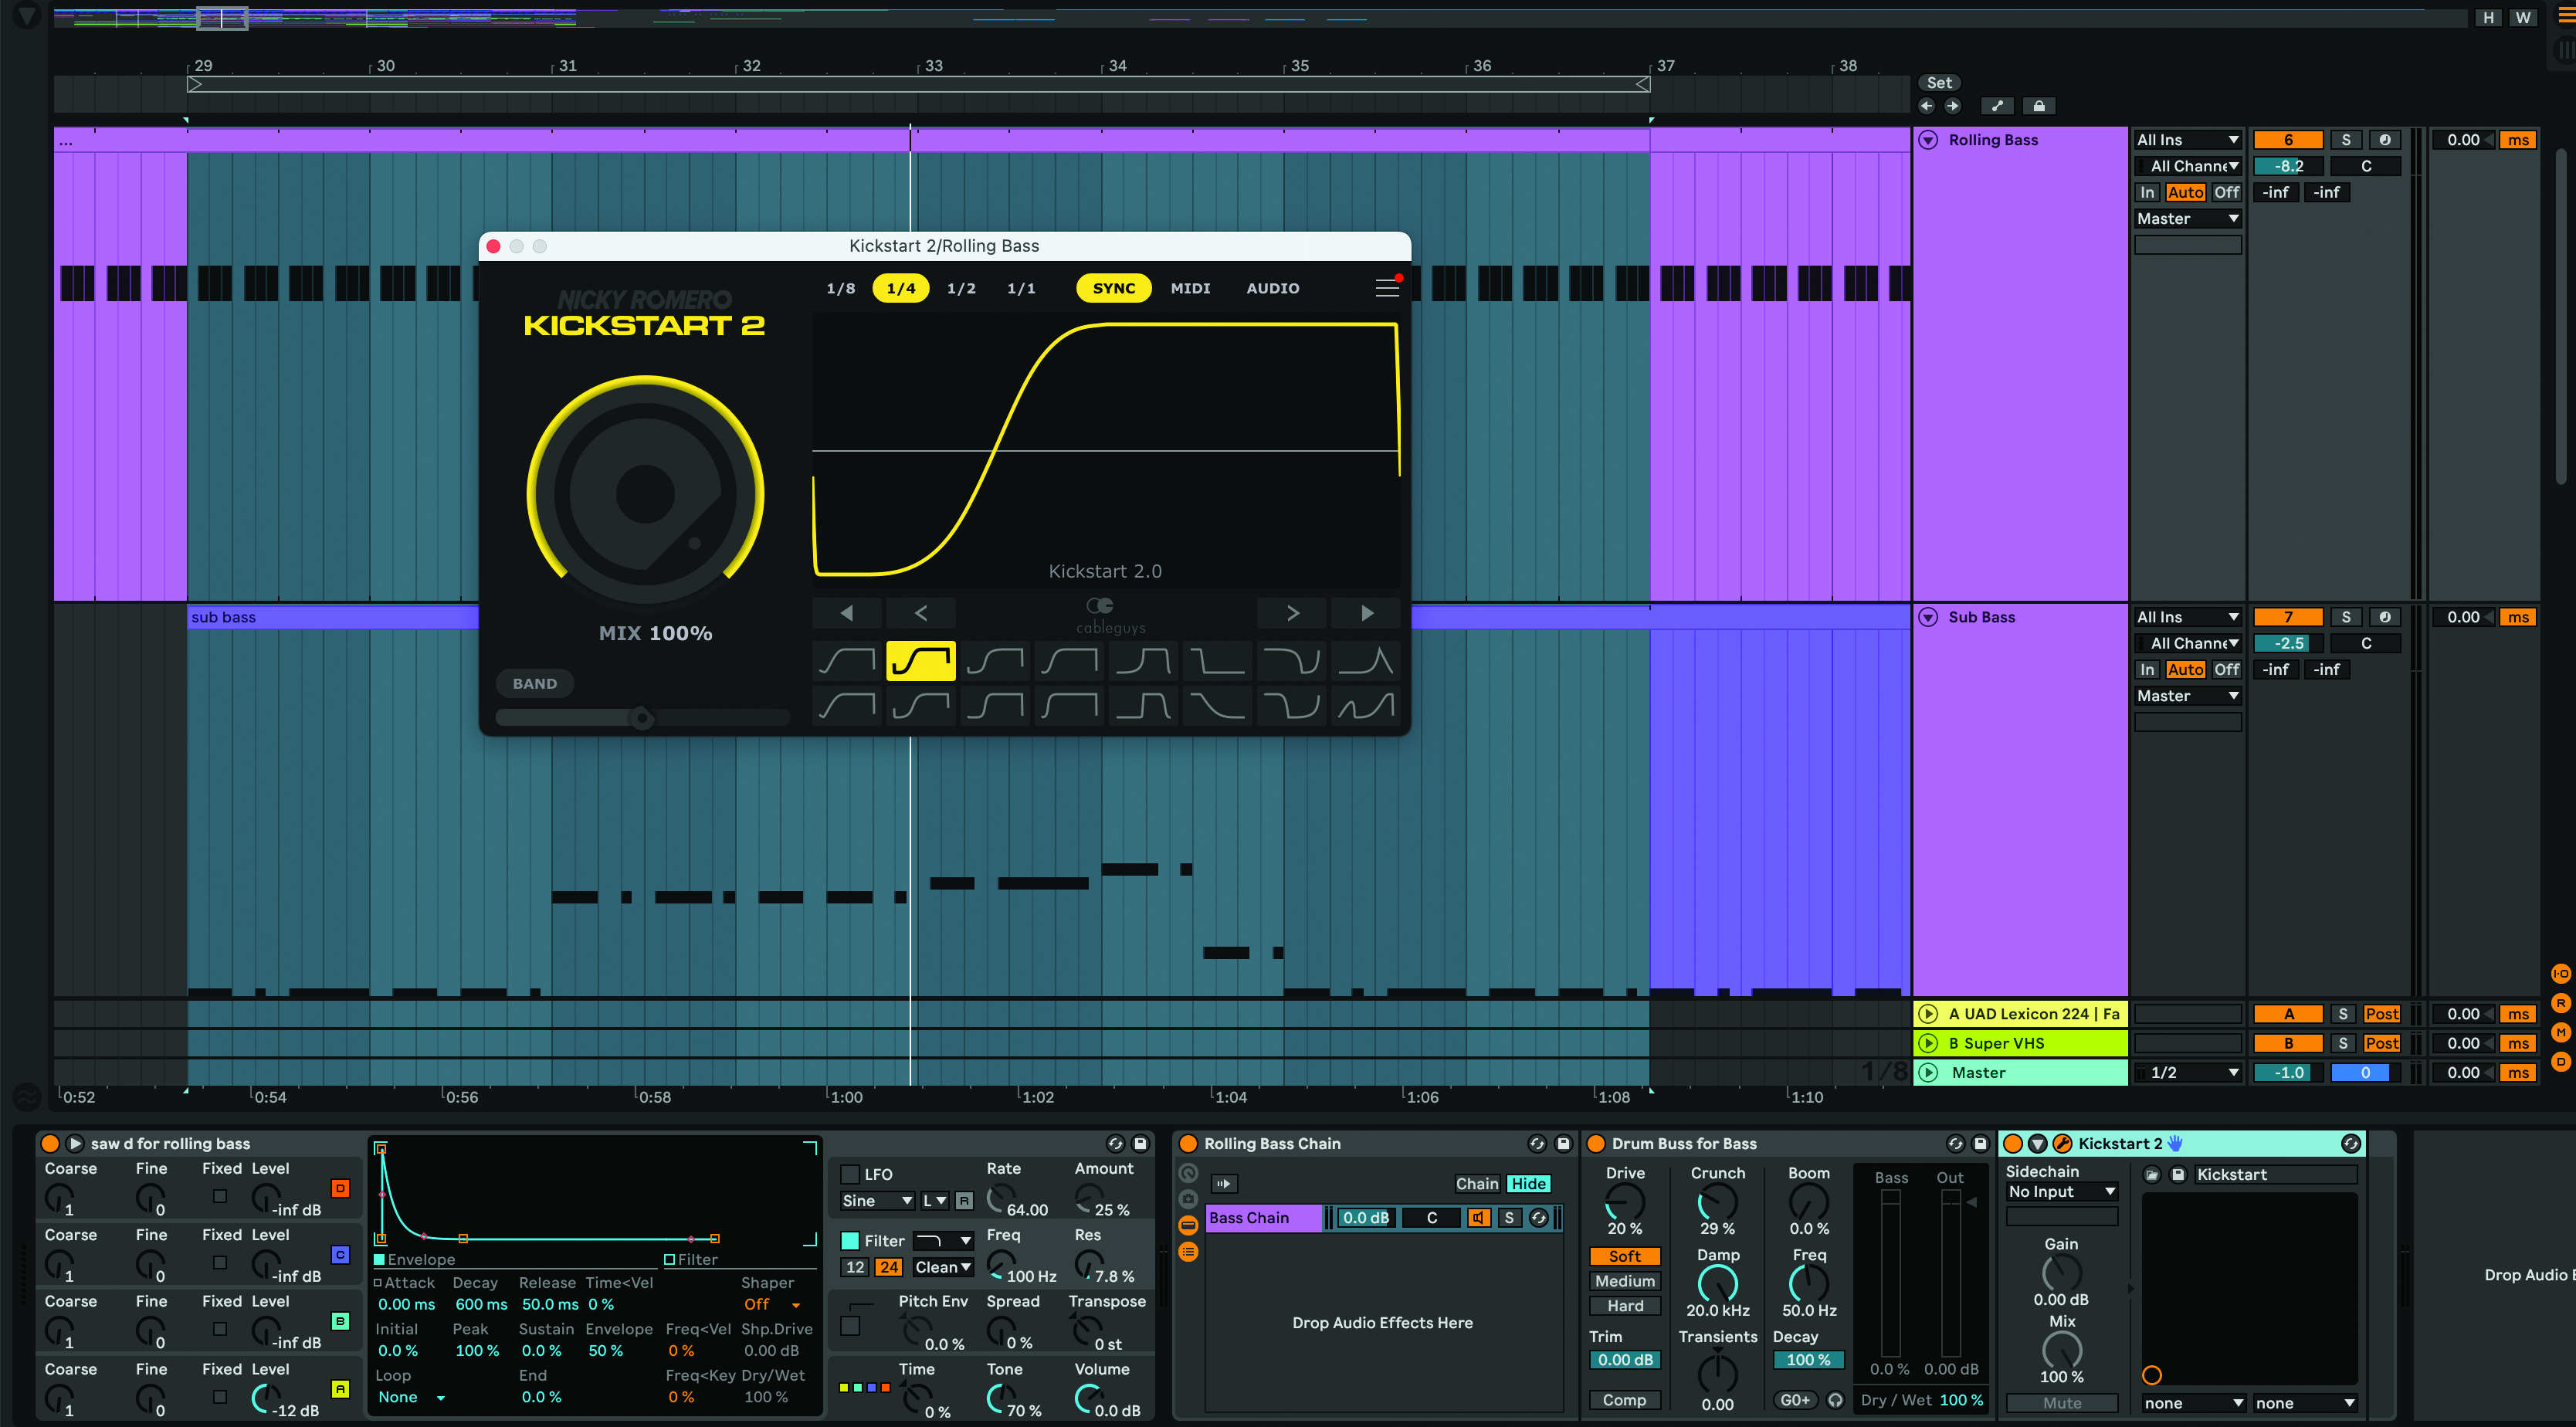
If you use Operator, use one oscillator with the waveform set to Saw D. Set the Decay to 600 and Release to 50. Use the low-pass filter to cut off the high end. To make the sound grittier, add Ableton’s Drum Bus and set the drive to 20%, and crunch to around 30%. Lastly, use Kickstart 2 to roll off the transients on the rolling bass.
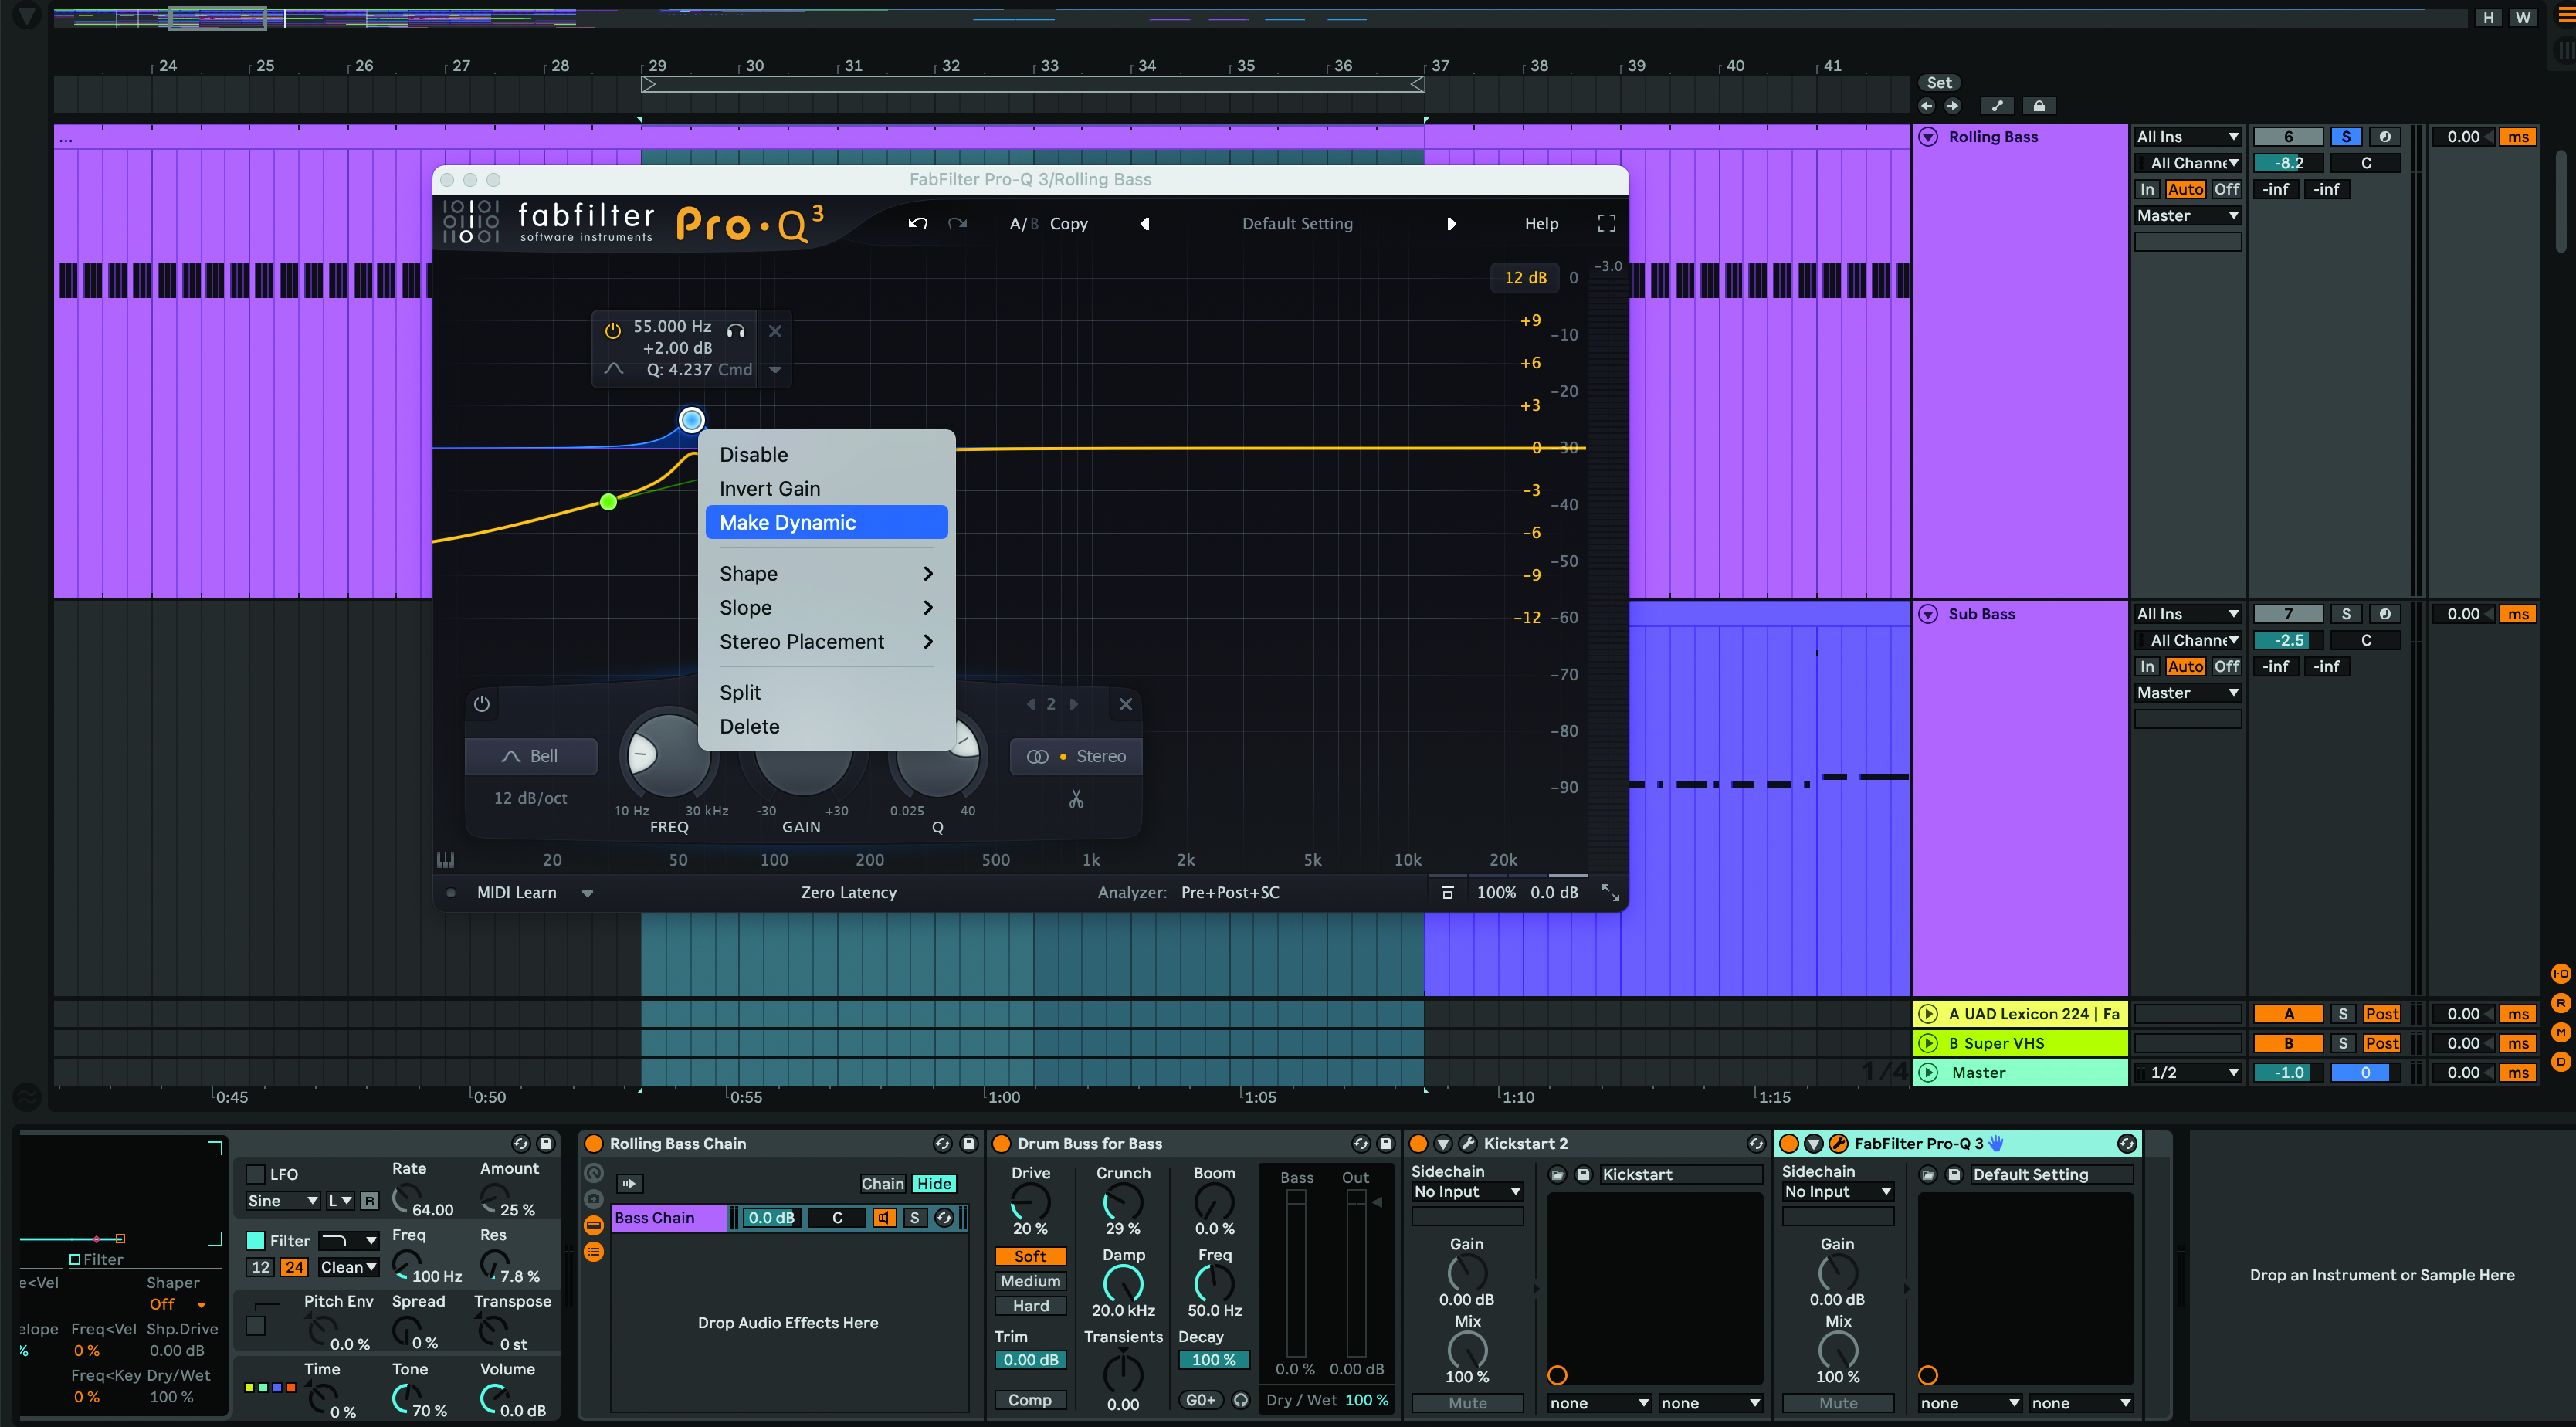
Open your EQ and use a shelf EQ to roll off frequencies below 30Hz. Use a Notes to Frequency chart to boost the first fundamental frequency in a track’s key. Cut the second to leave room for the kick. For the key of A, say, boost at 55Hz and cut at 110Hz. Enable the EQ’s Dynamic mode on both nodes, adding movement.
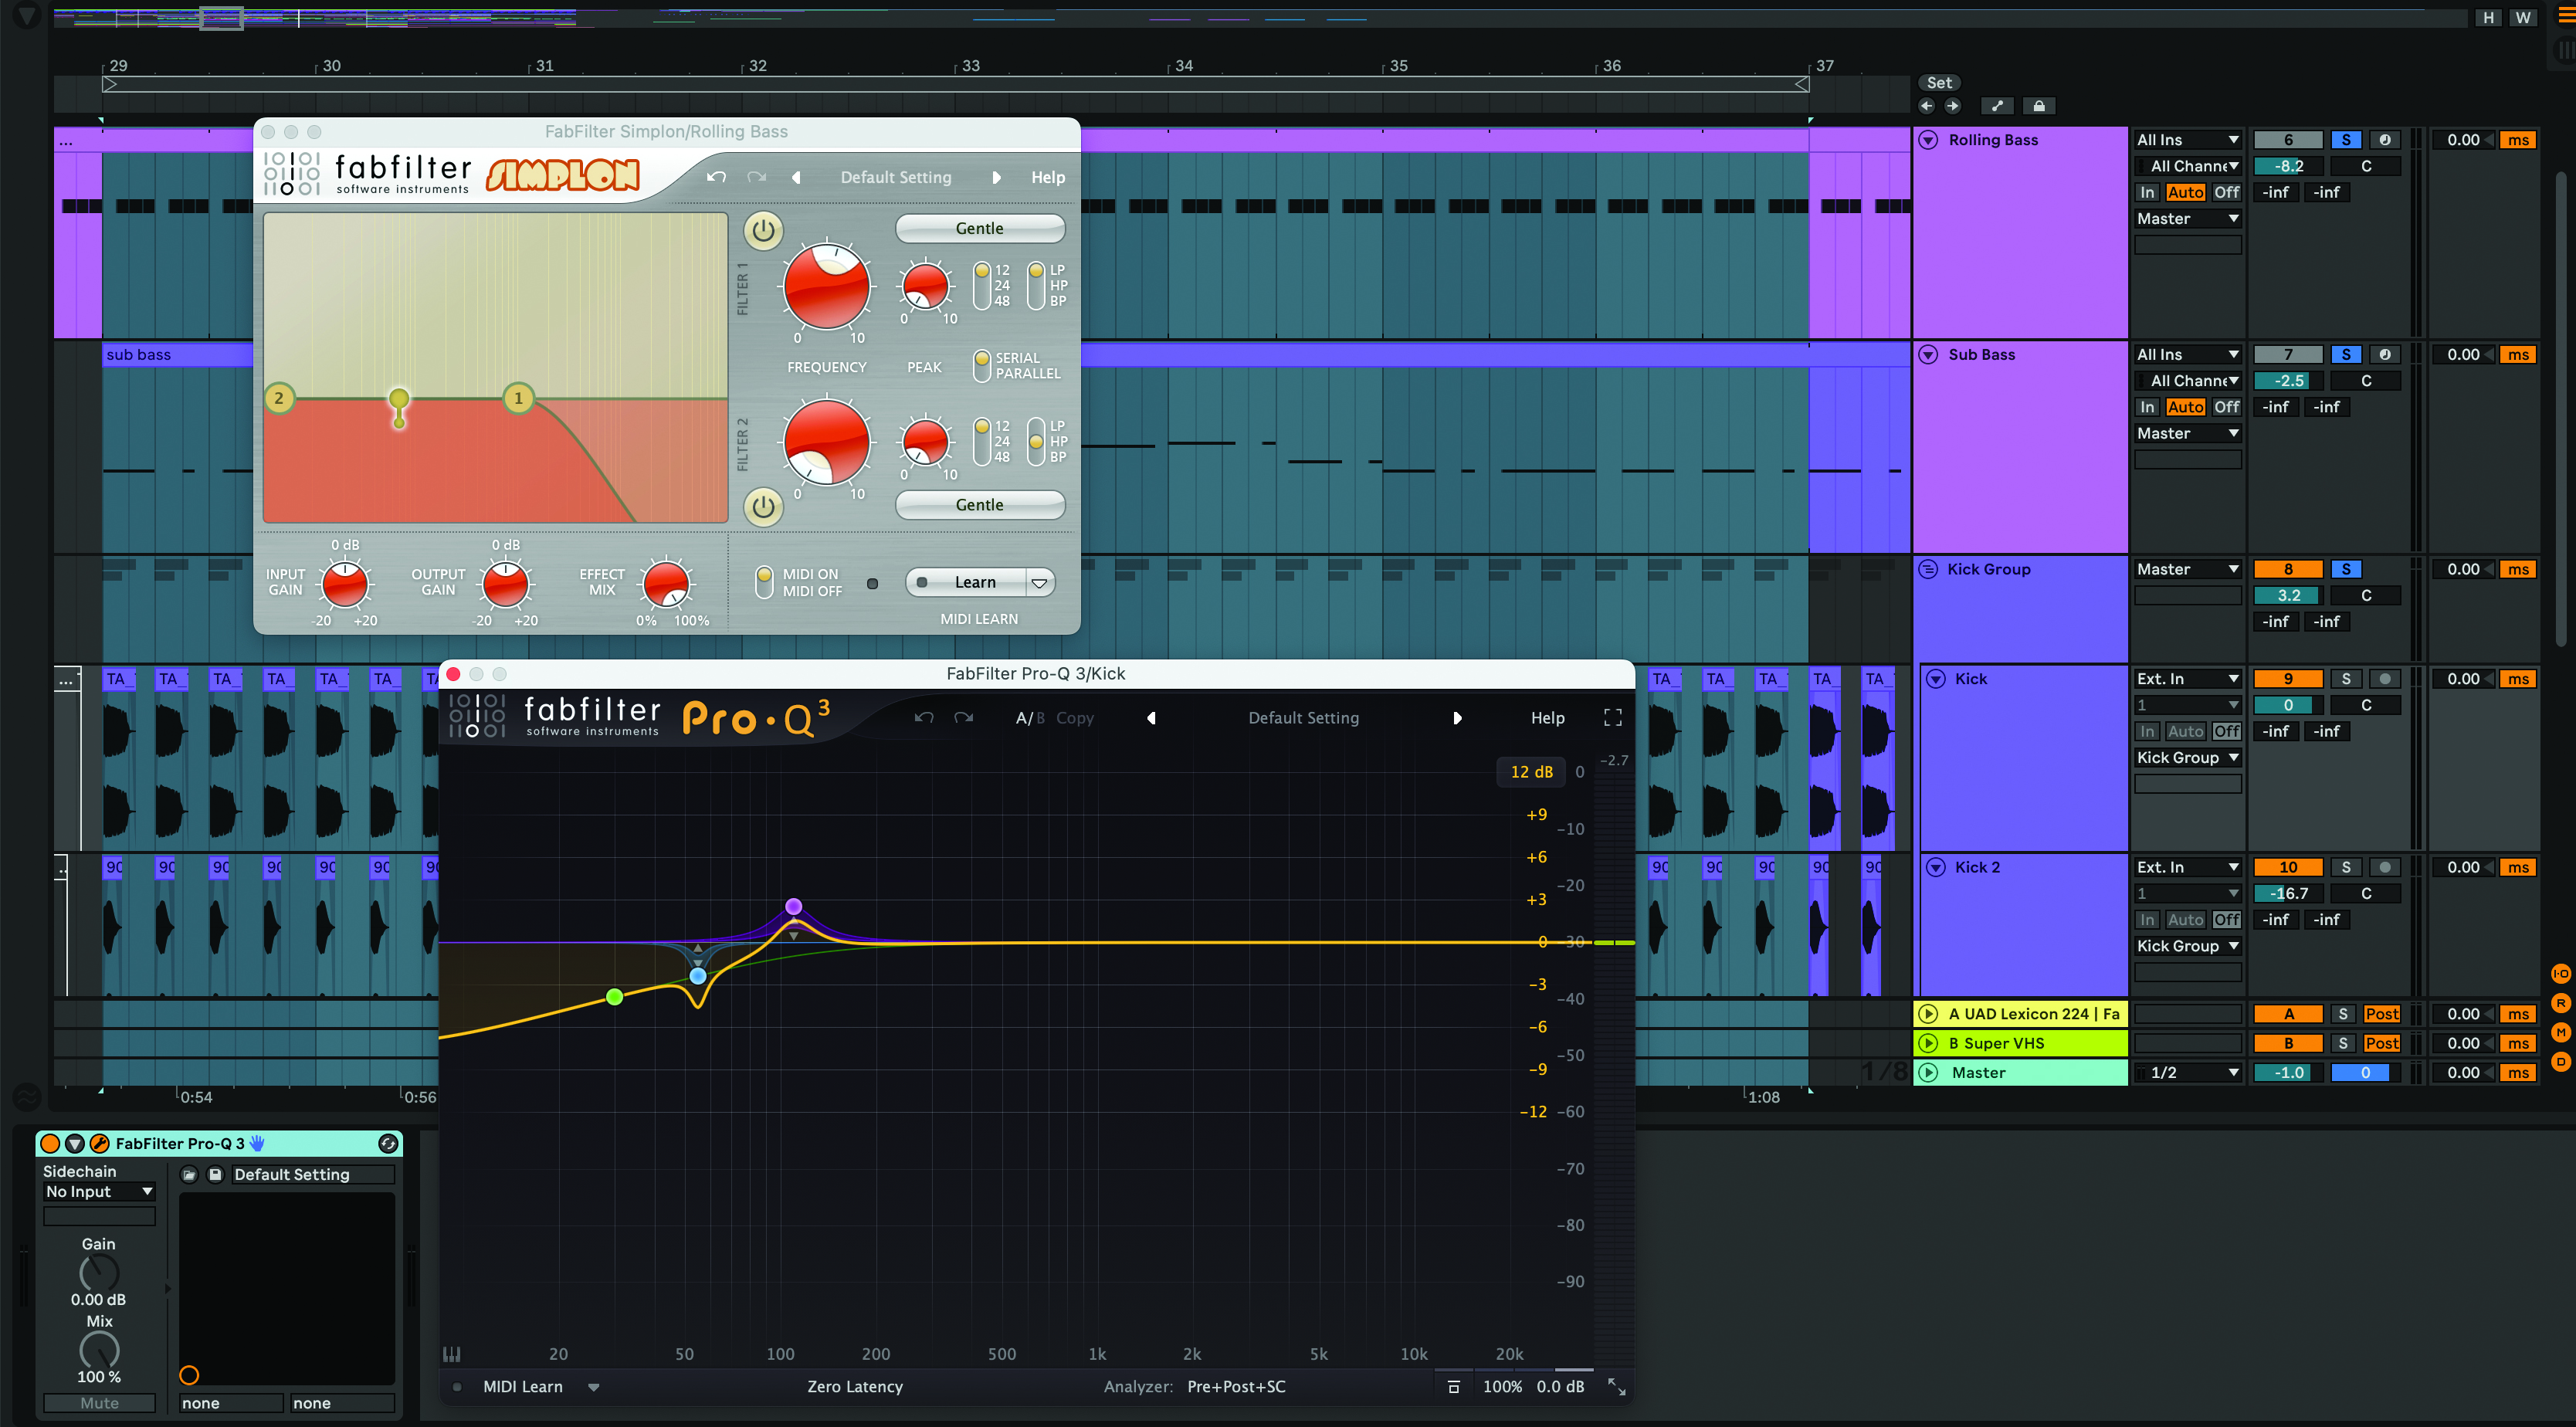
Add a filter like FabFilter Simplon and roll off below 1,000Hz. You could automate the filter’s frequency for interest. Add your kick into the mix and use your EQ to position the kick in the opposite way of the EQ on the bass. On the kick, boost the second fundamental frequency of the track’s key, and cut the first fundamental frequency.
Pro tip
When creating melodic parts in your drop, there should be aspects that repeat. You could write a bass part that has a repeating melodic or rhythmic phrase for the first three bars, and switches in the fourth bar. This is called an AAAB pattern.
Subtle details like reverse effects help to add tension and excitement
Alternatively, try an AABA pattern, which is the same melodic or rhythmic pattern twice, then a variation, and back to the first idea. For the main lead, an AABC pattern could be an idea for the melodic structure. This pattern repeats twice, then moves on to different ideas.
For the final drop details, add an extra layer to your synths that’s the same melody as the main lead and has reverb on it. Add a utility gain and automate the volume up after the melody plays, so that the reverb increases in volume after the notes finish playing. To add variation to the end of your drop, add a drum fill.
For the effects, add white noise as the drop starts to create a crash. Subtle details like reverse effects help to add tension and excitement. Short effects like a reverse crash towards the end of the drop can help to glue it all together. All of the sounds and drums you create should work together to reinforce the rhythm of the melody.
Recommended listening
1. Eli Brown - Be The One
This is a great example of a drop where the vocals are similar in melody and rhythm to the main lead.
2. Avicii - Silhouettes
This classic track by the much-missed Swedish producer features an AAAB melodic lead line in the drop.


